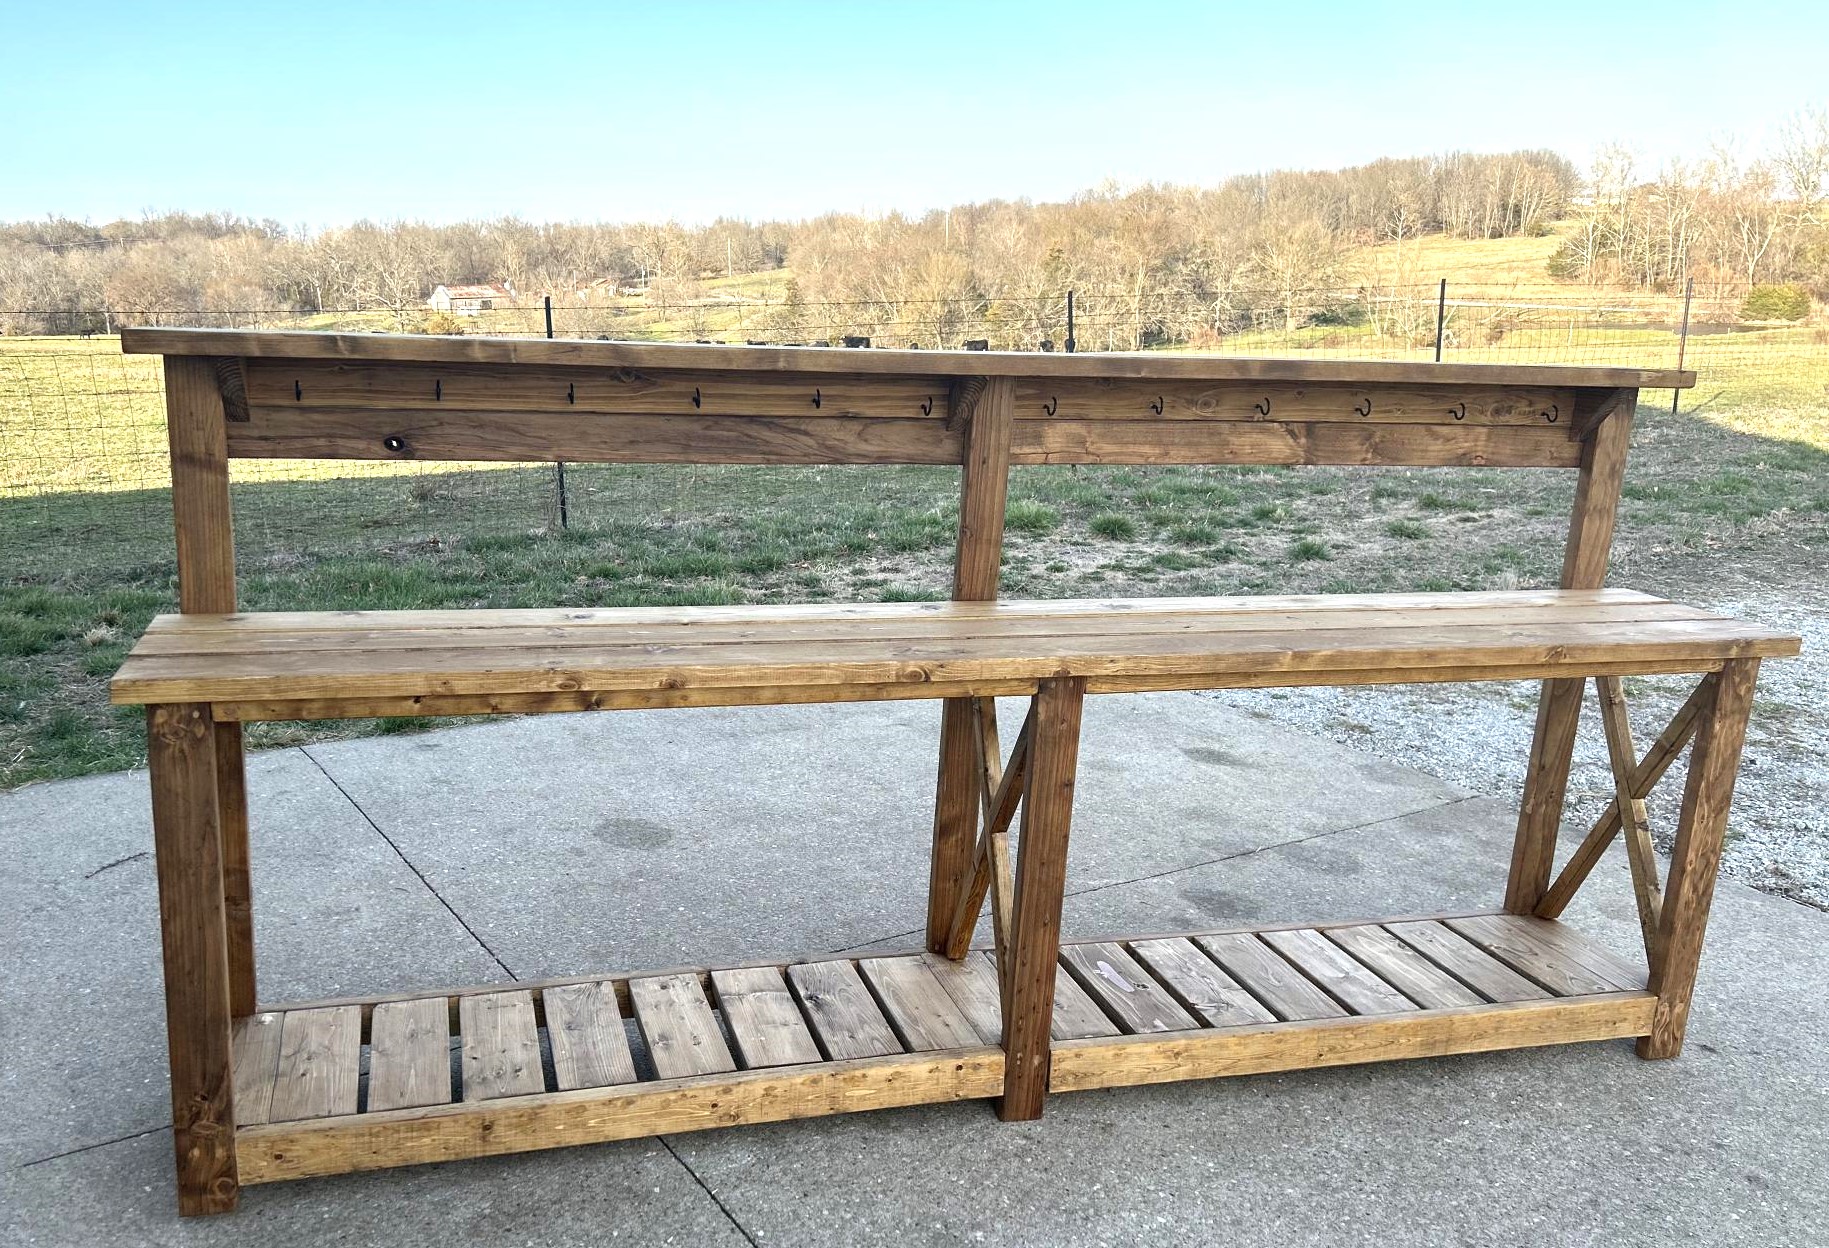
Community Brag Posts

Wine Glass Rack

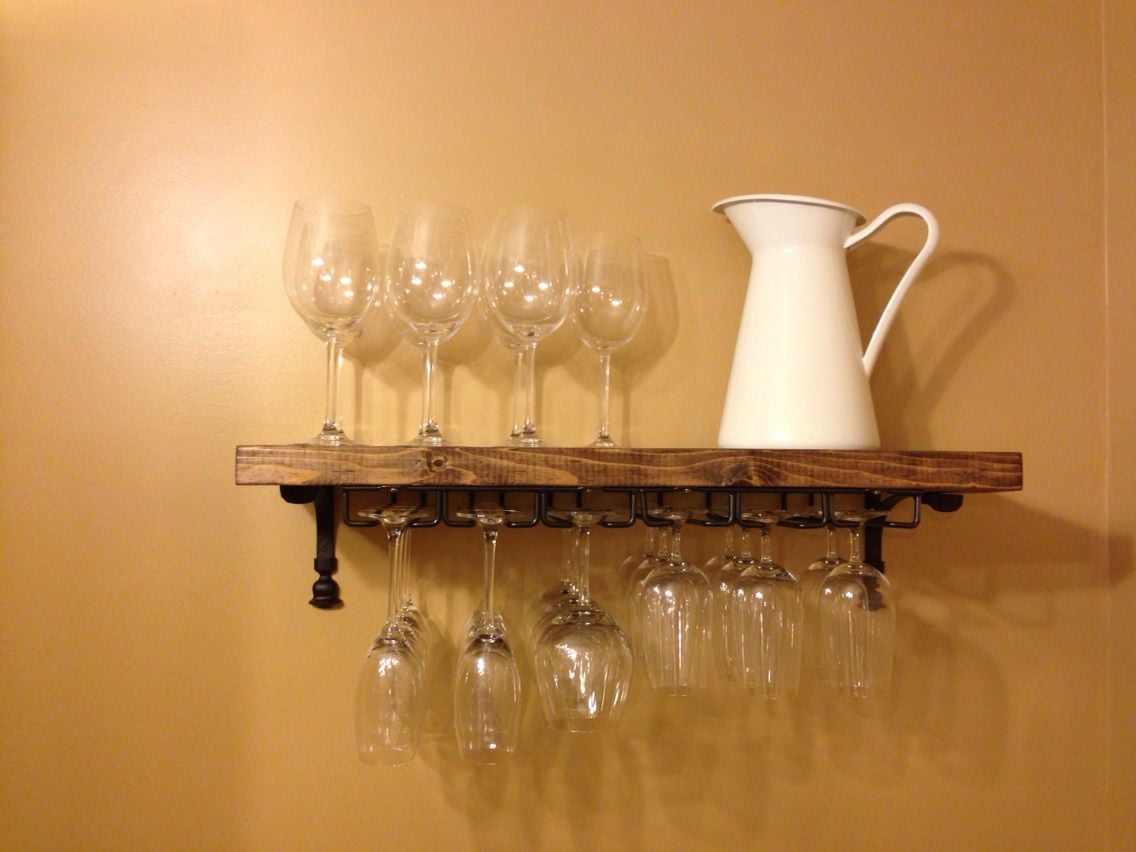
I made this after seeing the Rustic Wood Entertaining Shelves on the Pottery Barn website. I fell in LOVE with the wine glass rack, but $80 was way too much for me. I had some leftover 2x6s in the garage, so I Kreg jigged them together to make the shelf. I found some under cabinet mount wine glass racks at Bed Bath & Beyond for $10, so I bought them and spray painted them with Rustoleum oil rubbed bronze, and attached them to the bottom of my shelf. I found some shelving brackets at Home Depot and used those to hang the shelf on the wall. I could not be more proud of my wine glass rack/shelf!

Estimated Time Investment
An Hour or Two (0-2 Hours)
Finish Used
Rustoleum Stain in Kona & Rustoleum spray paint in Oil Rubbed Bronze
Recommended Skill Level
Starter Project

Backyard seating

Submitted by Anonymous (not verified) on Mon, 06/06/2022 - 13:17

We needed some additional seating in the backyard so I built 6 Adirondack chairs for the fire pit and the bench using the plans that you have shared on Facebook. They turned out really nice and so far they have been a big hit!!

Thanks!!

Comments

Loft bed with bookcase and desk

Submitted by abc1234 on Mon, 12/26/2022 - 08:01

I built this for my daughter and more or less followed the plan without changes. I wasn't able to get hold of 1x3 so had to rip 1x4s which was a little time consuming. In hindsight I would probably increase the depth of the desk as it's a little shallow but not a huge problem.
I primed with two coats of BIN Primer as there were a lot if knots in the wood and I heard this is the best to cover then. It was a lot more expensive but hopefully worth it. Finished with latex semigloss.

Comments

Flip Top Storage Bench

This bench was so easy to build! It's the first project that I've built completely with the nail gun. Wow does that speed up the process! Thanks again for the great plans, Ana!

Estimated Cost
About $40
Estimated Time Investment
Afternoon Project (3-6 Hours)
Finish Used
One coat CIL Anywhere Primer and one coat CIL Trim and Door Paint in Semi-Gloss
Recommended Skill Level
Beginner

LOVE our new hall tree!

Submitted by bgen10 on Sat, 01/28/2023 - 17:46

This was incredibly easy to build for a semi-newbie! The shopping list and cut list were a huge help! We love Ana-White.com!!!

Built from Plan(s)

Comments

72 inch vanity

Submitted by Anonymous (not verified) on Thu, 03/21/2019 - 19:25

We needed an inexpensive alternative for our master bathroom remodel. After looking at Ana-White.com, I decided I should build a vanity myself. 

I had been gifted some newel posts, which I thought would work great for legs. The aprons and shelf slats were made with "choice" pine that I purchased from a big box store. I had two drawers leftover from a piece of furniture that was repurposed and I added new fronts from a piece of wood left from that same piece of furniture. I also had some leftover 1/4 inch plywood that I used to partition the drawers. 

The overall length once the counter is installed will be 72 1/2 inches by 23 inches wide. Because we are using vessel sinks (sitting on the countertop) I choose to make the base of the vanity 32 inches high. 


Estimated Cost
Under $100
Estimated Time Investment
Weekend Project (10-20 Hours)
Finish Used
Wood stain, custom color.
3 coats of poly acrylic in matte
Recommended Skill Level
Intermediate

Farmhouse Table by hubby, kids and I

Submitted by nicoletims on Fri, 10/28/2011 - 05:03

We used Ana's farmhouse table plans. Everyone compliments us on it; even thought that we purchased it at Restoration Hardware.

Estimated Time Investment
Weekend Project (10-20 Hours)
Recommended Skill Level
Intermediate

Comments

[email protected]

Fri, 10/28/2011 - 06:20

I like the table, but how do you attach the breadboard ends to allow for expansion and contraction of the wood? How did you flatten such a large tabletop with all those knots? Did you use a super-industrial flatbed sander or did you just use hand planes?

Cindy from Indiana (not verified)

Fri, 10/28/2011 - 10:36

Gorgeous table!

It turned out really nice. I have some of the same questions as above (for all types of projects large expanses of joined up wood).

Does wood expansion and contraction cause any problems with wood attached with the Kreg Jig?

How do you get things smooth when joining up several pieces of wood? Are you using a belt sander? Just letting things end up where they may? Hand planes?

A big industrial planer is out for us. We don't have the room and I don't have the expertise. I'm hoping the planing/sanding is simple and easy, since I am way new to all this!

I'm not sure, but I *think* there is going to be a Kreg Jig and some wood coming my way for my birthday next month! I am so excited I could just scream (but I'll still act surprised LOL).

OK, sorry to just go crazy with a long post here. Your table looks wonderful! You guys did a great job!

claydowling

Fri, 10/28/2011 - 18:48

There are no wood movement problems along the long pieces, Those will expand and contract together. You can get problems with the cross piece on the ends.

As far as leveling the pieces, it's generally not done with this kind of furniture. But if you decided that it did need to be level, hand planes are the only good solution. I just did a table top, and it was moderately strenuous, but it didn't kill me, and it's very nice now.

If you want to learn how to do it, there are good books and videos on hand tools that discuss it. I grabbed Hand Tool Essentials as well as looking at a couple of good online videos from Chris Schwarz.

Cindy from Indiana (not verified)

Fri, 10/28/2011 - 19:38

Hey Clay,

Thanks for the information. I will go do some research to see what I can learn about hand planing for when the project demands it. I'll also go look for some Chris Schwarz vids, too.

I appreciate the input!

nicoletims

Sun, 10/30/2011 - 13:52

Thank you for the kudos!

To answer some of the questions - there is a small gap at each end where the breadboards are attached that should allow for some expanding and contracting. As for finishing the top, we did not use a planer, just a palm sander. We were going for the rustic look, so the small imperfections give it some of that character we were trying for. After sanding we just put a couple coats of poly - the color of the natural wood with poly perfectly matched the chairs we had, which made it easy!

Cindy from Indiana (not verified)

Sun, 10/30/2011 - 14:54

Thanks, Nicole!

Your table really turned out beautifully. I love a bit of a rustic/cottage-y vibe, so I'm glad to hear that a palm sander did the trick. I'm not too intimidated by a palm sander, so that's another bonus.

You guys did a great job!

In reply to by Cindy from Indiana (not verified)

Jake

Tue, 06/19/2012 - 20:01

I was recently diagnosed with Vibration Induced White Finger (yes it is a real malady) caused by over use of vibrating tools. I think the culprit was the palm sander. If you are concerned choose a rotating sander that has vibration control. I got one for Father's Day and it is great. I have not had any problems sanding surfaces down to smooth and level with 60 grit paper even with knots. Then I just go to 100 grit and then 150 grit and the surface is great.

TommyHawk

Fri, 12/20/2013 - 07:20

First of all, this looks great! I am going to attempt to build one. Two questions at least for now....
1) How long is your table? Unless you have narrow chairs, I don't see how 4 chairs would fit comfortably on the sides.

2) Where did you get your chairs? They also look great with the table.

Again, Great Job!!

TC

Rustic Farm Potting Bench

Submitted by Anonymous (not verified) on Fri, 03/10/2023 - 06:24

I built this 10’ long potting bench to fit into a 12’ barn stall. It fills the need to have a work surface plus room for storage on top and underneath. The hooks provide a place to hang my many hand tools and my Bluetooth speaker.

Built from Plan(s)

Comments

Diamond Tufted Headboard with Nailhead Trim and Matching Bed Frame

I used Ana's chunky leg bed frame plan with a few modifications for the bed and tutorials found online for the headboard. For more info visit my blog.

Estimated Cost
$300 (could have been cheaper but my fabric was expensive)
Estimated Time Investment
Day Project (6-9 Hours)
Finish Used
upholstery
Recommended Skill Level
Intermediate

Comments

spiceylg

Tue, 01/10/2012 - 18:21

The whole thing is beautiful, but love that headboard, especially. I can't get into your blog. It won't work. It tells me page not found.

Guest (not verified)

Wed, 01/11/2012 - 13:51

You are very talented!

Janelle Kay (not verified)

Sat, 07/28/2012 - 18:20

Beautiful!!! You did a fantastic job on this bed!!! I am wondering how far apart you spaced the buttons?

Thanks,

Janelle

Simple Play Kitchen

Submitted by Anonymous (not verified) on Sun, 06/04/2023 - 13:03

I made this play kitchen as a Christmas present for my kids, and it’s been a big hit! It’s built mostly from leftover hardwood plywood, and a couple of 1x12 pine boards. The oven knobs and faucet were cut from redwood scraps and attached with 1/2” dowels to freely rotate. The vertical surfaces were painted with leftover house paint and sealed with water-based polycrylic. It was a fun build, and I learned some new skills (like installing hinges)! Thanks for the plans!

Comments

my daughters big girl bed

Submitted by Anonymous (not verified) on Mon, 02/22/2016 - 10:10

I was looking for a bed for my daughters room. She does not have much storage or room so this plan worked perfect. Took about two days so a great weekend project. Built with love unlike from a store.

Estimated Cost
Around $250 for all the material
Estimated Time Investment
Weekend Project (10-20 Hours)
Finish Used
Poly clear gloss
Recommended Skill Level
Intermediate

Simple jig to save time and increase accuracy

Submitted by Anonymous (not verified) on Thu, 06/15/2023 - 12:13

I downloaded the plans for the octagonal table. I have made several and used a few different woods, made a few minor design changes as well as creating a routine and using a jig or two. This jig fits in between the two boards that form the seat support frame. I used a large paint stick and a scrap piece of 2 x 4. Using a table saw, I cut a groove in the 2" edge, approximately 1/2" deep, this took two passes (pass it through, turn it and pass again), a slight adjustment and another two passes. Insert the paint stick and seat all the way down. Place jig between seat support frame, might be a little snug or use a clamp to hold in place. Adjust so just the paint stick sticks up enough to separate seat boards. With seat boards against the jig, it forms the perfect angle/guide to match cuts. I also used 1/2" spacers to create consistent spacing. Love the various plans you make available as well as your videos.

Comments

Modified fancy x

Beetle kill table. I chose to mortise the support and use pegs for effect. As such used 4x4 for leg uprights. Made the top removable because it's heavy!

Built from Plan(s)
Estimated Time Investment
Weekend Project (10-20 Hours)
Finish Used
Oil based gloss plolyurathane
Recommended Skill Level
Intermediate

Comments

Josh-Adam

Wed, 08/03/2016 - 09:59

That table looks awesome ! I am in the process of making one similar i went to a local mill and they had ambrosia maple to make the table topper and i am making the base. I was wondering how you went about making the table top removable did you use threaded inserts ? also how did you get the cross support cut out done? Last question i have is where did you find the 4x4 material i am in eastern north carolina and it seems it doesnt exist around here. thank you for sharing

DIY Potting Bench

Submitted by Anonymous (not verified) on Sun, 07/02/2023 - 11:37

Such an easy build with a little woodworking experience. I am in love with this project and am so excited to have done it myself!

Amy

Built from Plan(s)

OLD ENGLISH FARMHOUSE WRITING DESK

Submitted by kwildman on Mon, 10/21/2019 - 11:59

I modified the Small Old English Style Farmhouse Dining Table plan to build a writing desk.   

I used five 1x6 boards for the top for a width of 27.5 inches.   I made my desk 56 inches in length.  I put the drawer on the long side like a pencil drawer.   I did use the legs that Ana recommended in the plan.   

I watched the video Ana posted on how to make the drawers for this table and it was so helpful.  I just made it like Ana did in the video but on the long side instead of the short ends.

I love how it turned out.  I used Watco dark walnut danish oil and Minwax dark wax for the finish.  

Estimated Cost
225
Estimated Time Investment
Day Project (6-9 Hours)
Finish Used
Watco dark walnut danish oil and Minwax dark wax for the finish.  
Recommended Skill Level
Intermediate

The Entertainment Center

Submitted by a.mcdaniel on Mon, 03/19/2012 - 00:34

It took 2 1/2 months and a LOT of wood, but my husband created this masterpeice. Thank you to the inspiration provided by Ana White and Kristen Lotz, we have finally done our biggest project yet!

Estimated Cost
1000.00
Estimated Time Investment
Week Long Project (20 Hours or More)
Recommended Skill Level
Advanced

Comments

a.mcdaniel

Wed, 03/21/2012 - 10:22

Thank you so much, Ana! That comment means a lot to my husband and I! He is so amazing at building things now and your website has been a major inspiration for him - THANK YOU! THANK YOU! THANK YOU! Now our new home is becoming more "ours."

Christie (not verified)

Thu, 07/26/2012 - 20:44

Both yours and Ana's centers are beautiful! I am a little more drawn to yours with the lighting and architectural touches you've added. Did you have a formal plan drawn for it? I would like to make an exact replica of it if possible. It is just stunning and exactly what I am looking for. GREAT JOB!!!

kristenlotz

Wed, 12/19/2012 - 15:58

I love it. I am so glad our project inspired you to build this! You incorporated a lot of the things we considered during the build such as fluted stiles on the bookcases, downlights, and faux raised panel doors. Now, we just need to see pictures with it all decorated.

kristenlotz

Mon, 12/31/2012 - 14:42

I finally got around to making the plans for our entertainment center (well, actually my husband did it). It is very similar to yours with a few exceptions. Hopefully that helps those looking for plans for this beautiful entertainment center. I love finding brag posts of similar entertainment centers because they are absolutely beautiful at a fraction of the cost of buying one. And we love telling people that we built it!

http://www.jrlwoodworking.com/2012/12/furniture-plans-custom-entertainm…

Thanks,

Closet Makeover

I hated the way my bi pass closet doors wasted so much precious space, as well as only having a single rod for hanging. I can't even post my before photo because of the embarrassing mess billowing out. On the both sides there are two bars based on the height of our own clothing and space needs. On the left side I made the bottom bar about 18 inches shorter than the top so that dresses can hang in that space. I also attached spare 1x12's to the rod brackets and am using them for shoes.

Another great thing about this closet system is my dirty laundry sorter! Before we just had random baskets in another part of the room for this job. Now we have a nice tidy spot and it really helps be keep up on our laundry.

Estimated Cost
Under $50
Estimated Time Investment
Weekend Project (10-20 Hours)
Finish Used
Sand smooth, prime, 2 coats of white semi-gloss paint.
Recommended Skill Level
Intermediate

Comments

Jaymee (not verified)

Sat, 03/31/2012 - 14:40

Closet makeovers on our to-do list as well, and I was wanting to incorporate the laundry dresser in them as well. Glad to see this done !

Back