Community Brag Posts

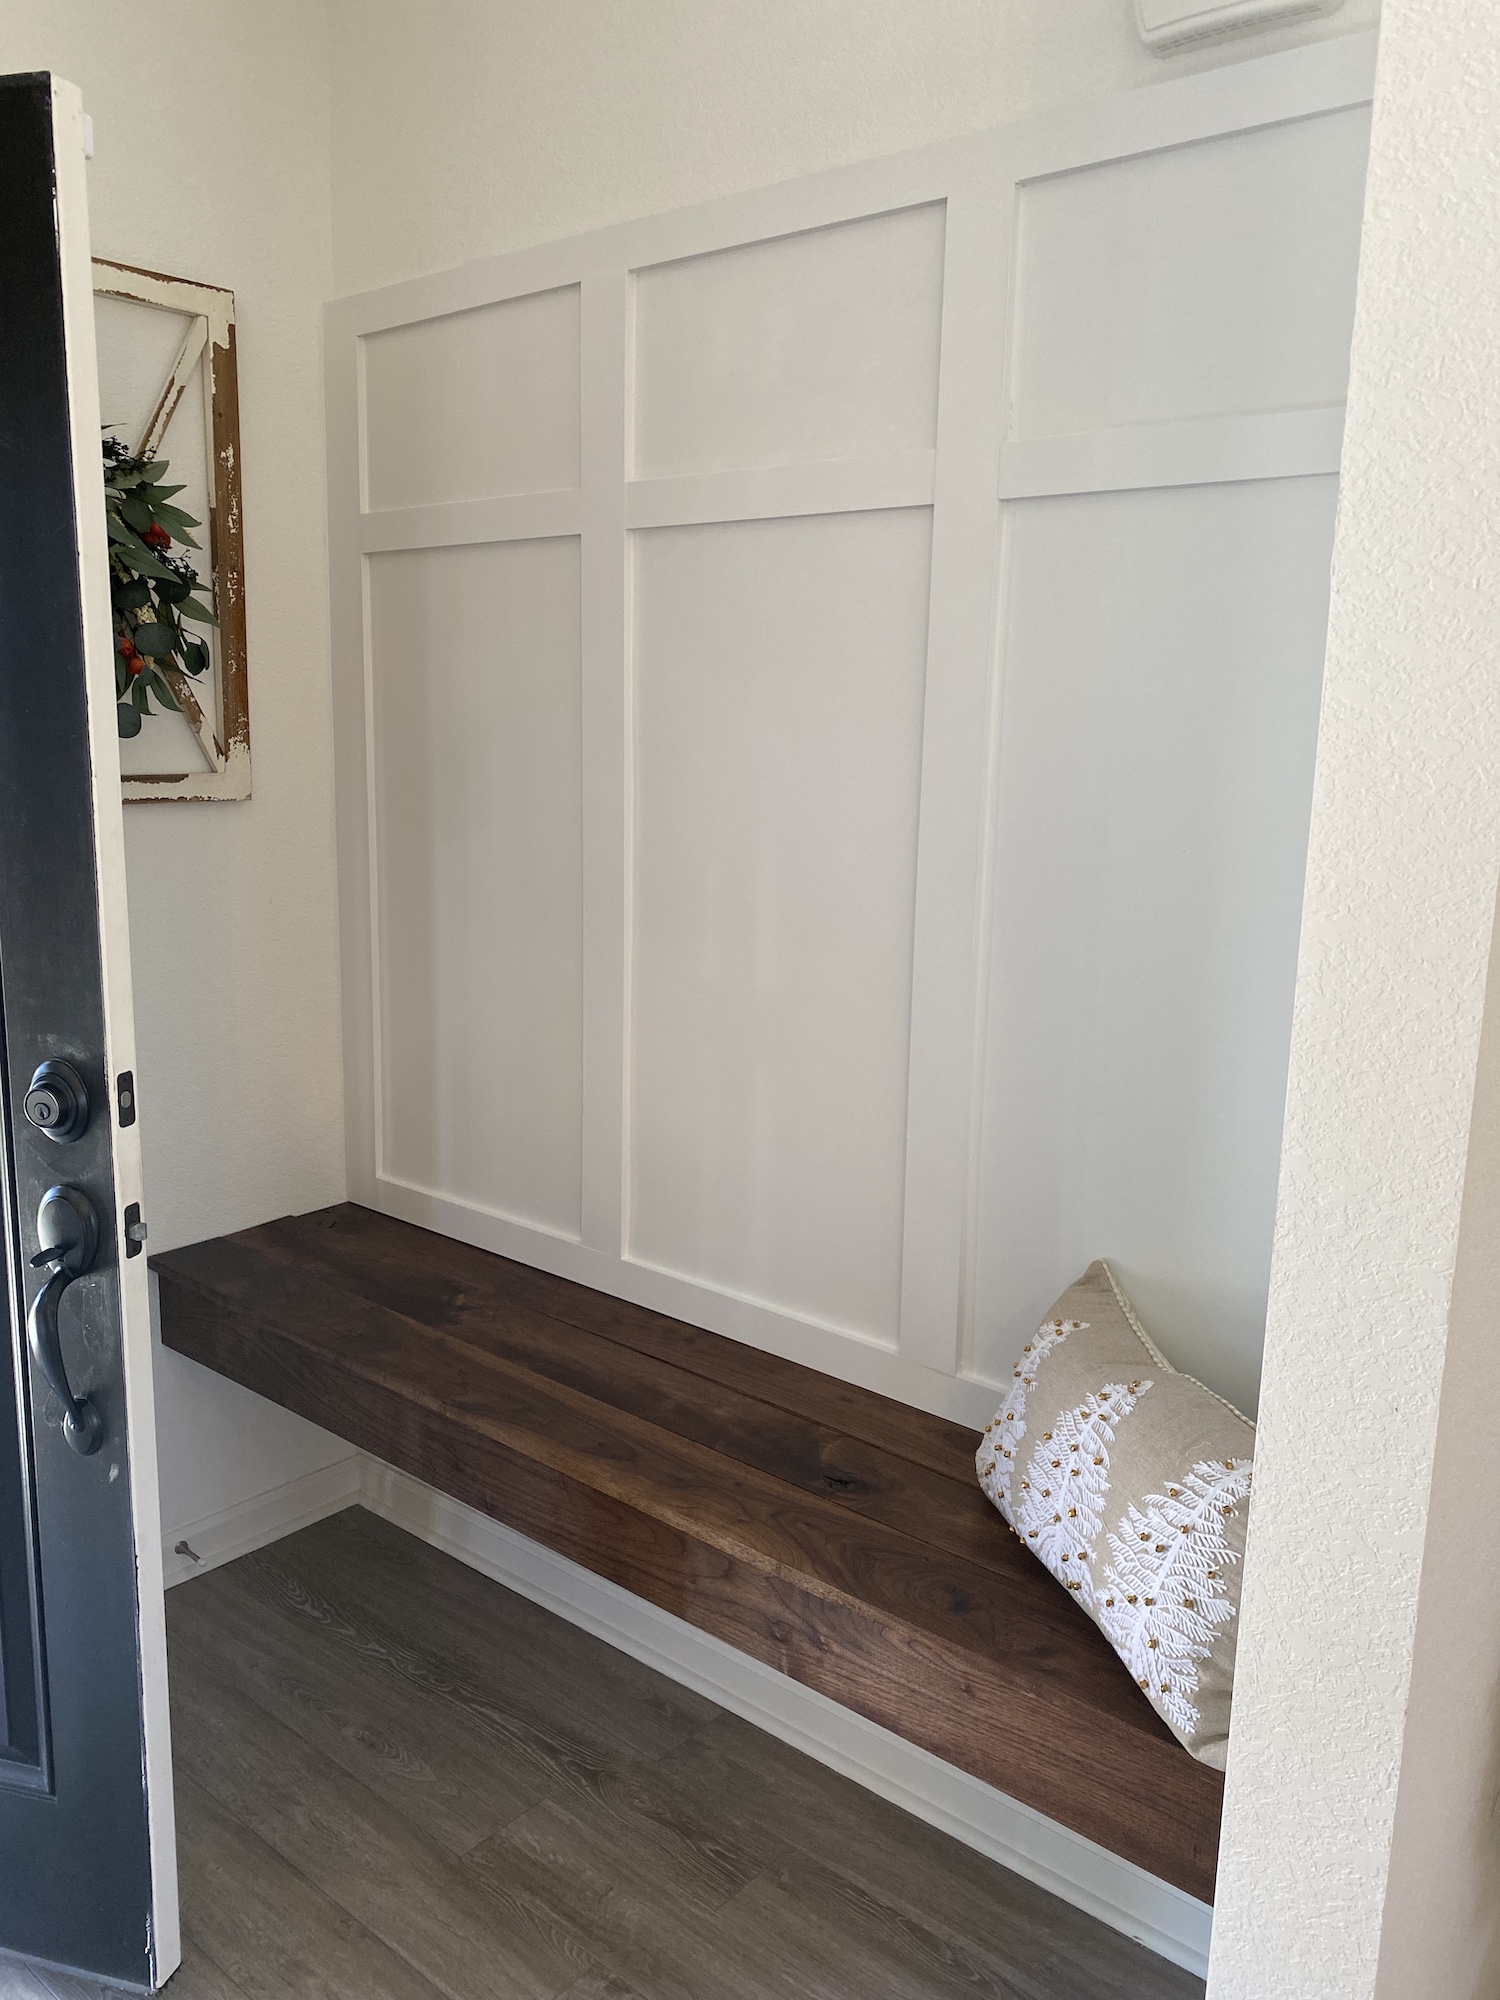
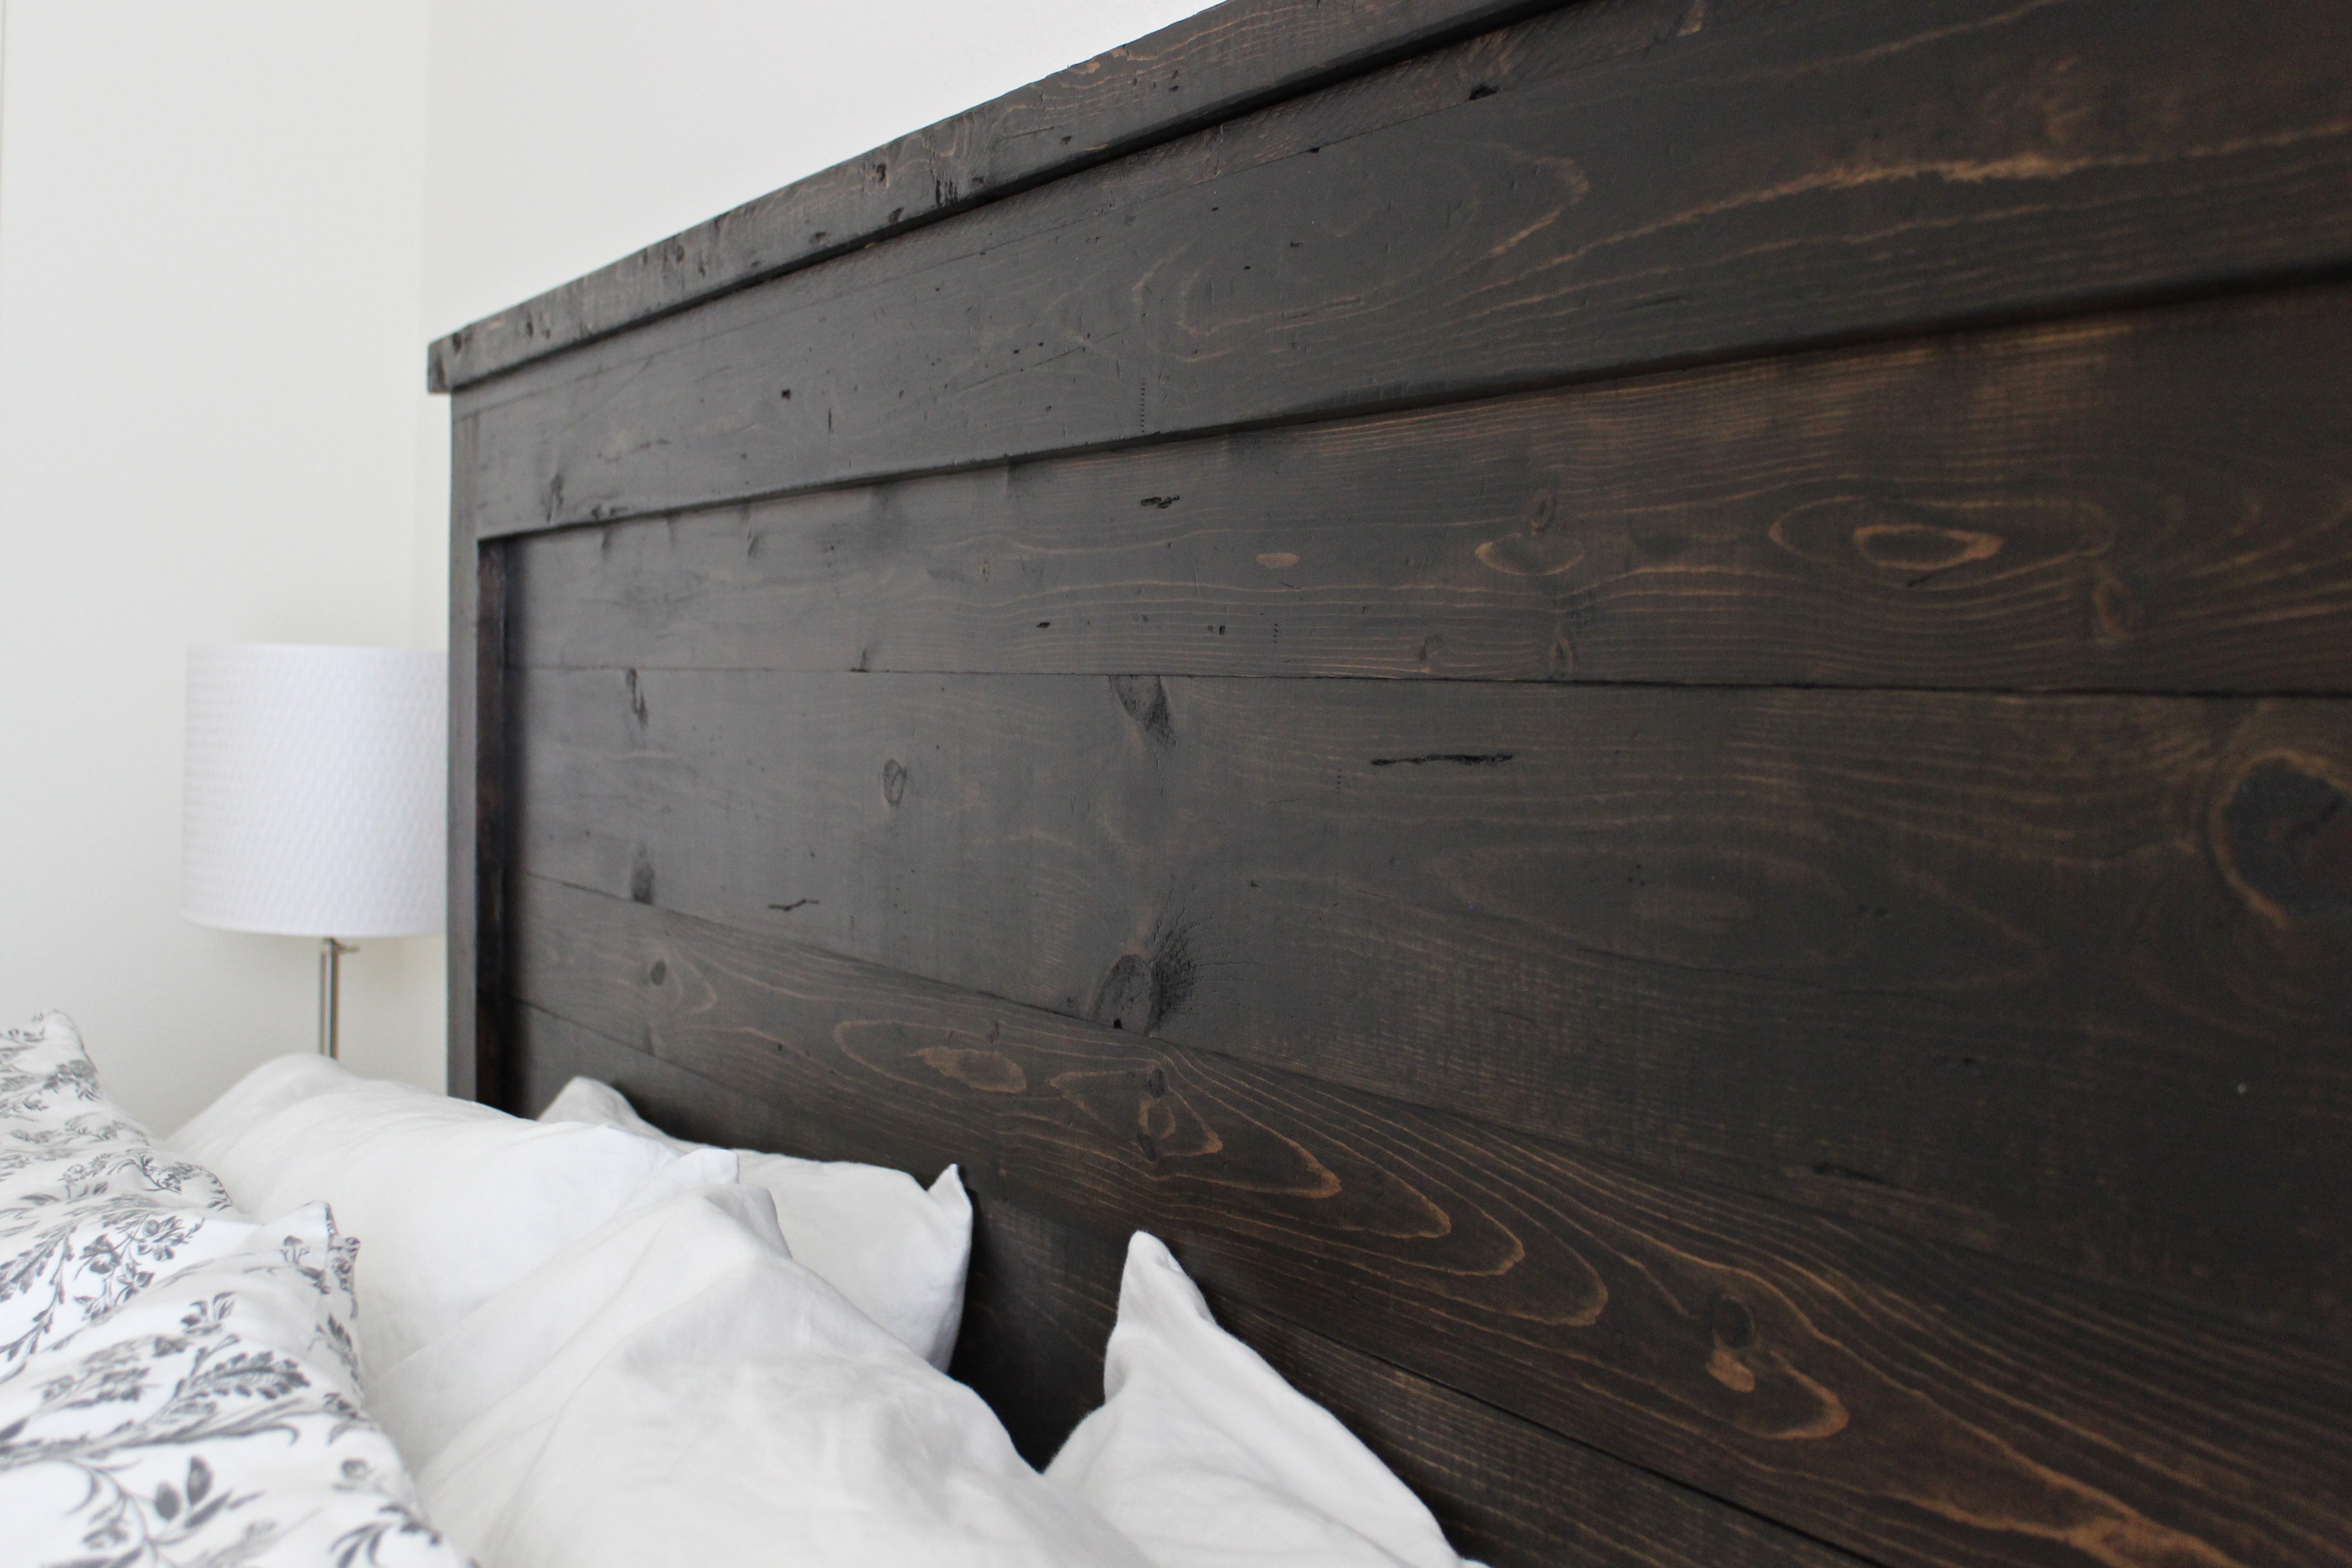
Floating Bench (Walnut bench Board and Batten Wall)

Submitted by Anonymous (not verified) on Thu, 12/30/2021 - 06:25

Followed the instructions in the original blog. I would like to thank Ana for the blog. It was the inspiration I needed. This project was challenging for a rookie like myself. The plan is basically the same as the original post from Ana.

Materials:
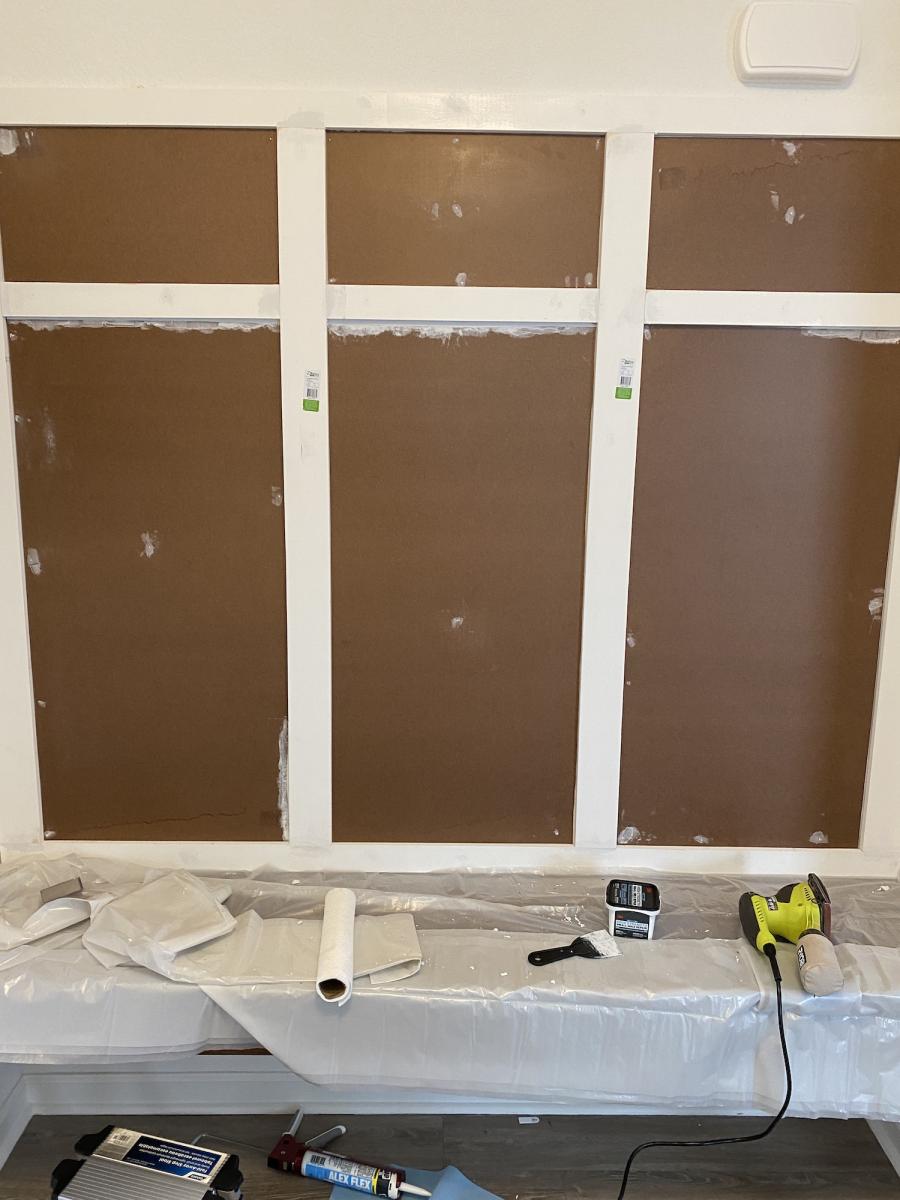
4" Vertical MDF primed boards
3" Horizontal MDF primed boards
Our wall has texture so we had to use tempered board to make it nice and smooth.
Half inch plywood for under the bench seat.
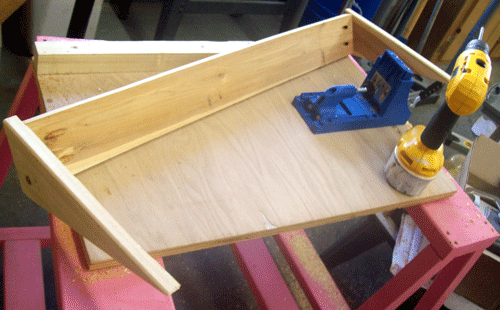
2x4 for the bench frame
I ordered furniture quality Black American Walnut from a sawmill for the floating bench (not cheap but worth it). I stained it with one coat of Watco Black Walnut just for protection (took 10 minutes to do super easy) let it dry for 24 hours at least.

Challenges:
1. The wall on the right side of the bench did not have a stud just a corner stud, I was not going to risk this bench support so I put the bench support on the one corner stud and installed a hidden strong tie: https://www.homedepot.com/p/Simpson-Strong-Tie-CF-4-15-16-in-x-6-in-Con…
This provided the support that the missing stud would've. Now the bench is structurally sound.
2. Walnut uneven cuts from the sawmill, I had to use a plane to bring the planks closer together didn't want huge gaps.
3. Outlet in the way. City code mandates to remove outlet leaving access to it. We decided to build above the outlet making the bench a bit higher than we wanted it but still worked out, now we still have an accessible outlet under the bench.

Comments

Leaning Ladder Wall Bookshelf

Submitted by Liz Miller on Thu, 01/25/2018 - 07:02

My dining room has no storage and I've been trying to find a place to store all of my bowls, serving dishes, etc; for some time now. I saw a leaning ladder shelf system at Crate and Barrel that I fell in love with but it was $500 which was out of the question. Last summer I built Ana's outdoor couches with absolutely zero experience and they came out great, so I decided to take a chance and try something else. This was my first time using a circular saw, and also my first time using a Kreg Jig! Honestly, halfway through this project I was concerned I bit of more than I could chew but I stayed calm and just kept following the plans. I'm so thrilled with how they came out! I ened up using a scrap piece of the 1 X 12 board for the "desk" piece to make the center a little bigger since I wanted it to serve as a serving board of sorts. I reenforced it with a support board since it was a little longer than the original plan called for.  I am beyond thrilled with how this came out, I honestly like it better than the one I saw at C&B since it's custom to my space! This was so easy if I could do it, anyone can. My total cost came to about $130. Not too shabby for a knock off! I'm already on to my next project. I don't think I can buy "factory" furniture again now how much better cost and quality I can get doing it myself! Thanks Ana!

Built from Plan(s)
Estimated Cost
$130
Estimated Time Investment
Weekend Project (10-20 Hours)
Finish Used
I used Minewax Charcoal, at first I thought it was too dark but I've come to like the dark color with the grain showing through. I only did one coat.
Recommended Skill Level
Beginner

Homemade Home Office with Peninsula Desk

Thank you Ana for so many amazing plans and shelf help that helped me get this monster built! Now my husband has a nice office where he can work from home. I was so impressed with how easy it was to make the plans in shelf help and how quickly it all arrived. (I can’t link the drawer slide trick plans, but they were key and I based the middle table off of the foldable farmhouse idea)

Comments

Kitchen Tower Cabinet

This is our first Ana White project and we're pretty happy with the results. We modified the plans a bit to use 1/4" plywood for the sides instead of the heavy 3/4" ply. Specifically built for our kitchen since we couldn't find one that we really liked or could afford. Pottery Barn seriously sells this for $1200?!?! Score!

Estimated Cost
$70 + finishing
Estimated Time Investment
Weekend Project (10-20 Hours)
Finish Used
DIY chalk paint and wax - distressed.
Recommended Skill Level
Intermediate

Garden/Storage Shed

Submitted by Smokeydog on Mon, 08/03/2015 - 06:48

Building a storage shed was quite a jump for me but because of the confidence and experience I gained from Ana's  site I decided to give it a shot.  I acquired the plans online. It has 8 foot high walls and 3 feet of "attic space".  The shed is 8'x12'.  I used cement board lap siding.  It took about seven weeks to finish working a few hours here and there.  I really like it.  Even has a little window flower box.

Estimated Cost
2100.00
Estimated Time Investment
Week Long Project (20 Hours or More)
Finish Used
Benjamin Moore Paint
Recommended Skill Level
Intermediate

Comments

Rustic X Kitchen Island

Submitted by Anonymous (not verified) on Thu, 04/21/2022 - 12:06

Used Ana's plans with a little modification.
I built 2 different sizes and donated to our church for their fellowship hall.

Comments

Kentwood Bookshelf

Submitted by worrow on Tue, 08/11/2015 - 17:33

I loved this from Ana's site so much we tacked one. Please note I glued, screwed and dowel ed the holes. I hate kreg jigs. We also made ours taller to add an extra shelf.

Estimated Cost
$90.

Provincial stain and triple coat poly
Estimated Time Investment
Weekend Project (10-20 Hours)
Finish Used
3m triple coat in 1 semi gloss not pictured. My image is stain at this point
Recommended Skill Level
Beginner

Comments

Fancy x farmhouse table... my version!

My version is a 7' table. I made the distance between legs 60" with a 8" overhang on each side. The stain is Olympic Driftwood. I also added 1 x 2 pcs on the ends for a more finished look & to secure the 2 x10's. One last thing, I used a router to round out all the outer edges of the table top and the legs.

Highly recommend....

I used some T braces/plates on the bottom of the table to connect legs with 60" pcs. Otherwise there is nothing to keep the legs square with the table.

Love the look...thanks so much for the plan!

Other notes: I used treated lumber so it's VERY heavy.

Built from Plan(s)
Estimated Cost
$130 ($100 lumber, $30 stain)
Estimated Time Investment
Day Project (6-9 Hours)
Finish Used
Olympic Driftwood
Recommended Skill Level
Intermediate

Comments

stepdiva

Sat, 08/30/2014 - 19:33

hi there..your table is great! can i ask if u think there is enough room at ends of table for a chair with the 8 inch overhangs that u did? i would like to do the same. thanks so much!!!
Tanya

Just one of many Honey to Do projects

Submitted by Anonymous (not verified) on Tue, 04/26/2022 - 04:53

My wife wanted a patio set and I initially made a set using pallets but I knew I could make a better one so after seeing one Ana made on Pinterest I went to work. I have now painted it white and my wife will be make the cushions for it as I made it a little wider than the actual plans called for.

Comments

Easy Build Wood Headboard, Cal King

Submitted by carlynoel on Sun, 08/11/2013 - 18:05

This was my first project and I loved every second of it. I did the whole thing by myself (with the "help" of my two-year-old) and I'm 5 months pregnant! THAT is how easy it is.

Estimated Cost
80 bucks
Estimated Time Investment
Weekend Project (10-20 Hours)
Finish Used
I distressed it a little before staining so it didn't look too brand new. I filled a sock with bolts and screws and beat it up and scratched it with a steak knife to make fake cracks.I did one coat of Minwax Jacobean and it was really blotchy. I should've conditioned my wood, so I lightly sanded the whole thing and added a second coat and it evened out the blotchiness a lot, but it did turn out darker than I wanted. I added only one coat of Minwax Polycrylic Finish in satin because I wanted it to look rustic and not glossy. The cutting and assembly only took about 4-6 hours. The staining and sanding and distressing and finishing took a couple days.
Recommended Skill Level
Starter Project

Comments

yurra-bazain

Sun, 08/11/2013 - 20:41

How awesome is that? =D It looks gorgeous, and I applaud you for tackling it with your 2 year old and baby on the way. =D When I was pregnant, the only thing I considered doing was putting furniture together. Now that I've built furniture, I now realize how much harder it was to follow the assembly directions than it is to make your own assembly directions. Keep it up!

Pallet laundry bin

Submitted by LARMO on Fri, 07/20/2018 - 18:09

Built for our laundry room with pallets radiator cover  and casters attached to bottom all purchase from a local thrift store, with matching recycle bin.

Estimated Cost
$20
Finish Used
Natural
Recommended Skill Level
Beginner

Modified Rustic X Coffee Table

Submitted by PamC03 on Sun, 10/18/2015 - 22:28

As a beginner at woodwork, this table was pretty easy to make. The instructions were easy to follow. I modified the table by adding 2x6 planks on the bottom and changing up the "X" design. The angles are tricky to get right, but i used scrap wood until i got the perfect angles then used my 2x2's for the final cuts. I also changed the finished dimensions of the table to fit in the room I was making it for, so this table was quite a bit wider than the original. It took me about a day and a half/two days to fully build and then I finished slowly over the rest of the week by staining and using a satin poly finish (I gave the top 4 coats so it took a little longer than normal). I'm so happy with the finished table I've already bought the wood to make another smaller one!

Built from Plan(s)
Estimated Cost
$70 for wood and hardware
Estimated Time Investment
Weekend Project (10-20 Hours)
Finish Used
Varathane Early American w/ Satin Poly
Recommended Skill Level
Beginner

Comments

Audrey Wright

Thu, 10/22/2015 - 05:02

For a beginner, you'd done a great job. I'm a beginner too and I can hardly do this in two days.. 

Farmhouse Bed

I built this bed as a modified farmhouse bed. I chose to have a solid wood headboard instead of having a slotted look as it fit better in the decor of our home. I purchased a bed rail kit from Rockler so that I could remove the rails without removing any screws. (http://www.rockler.com/product.cfm?page=5783) It was a relatively easy project considering my skill set was very low when starting! http://www.lifewithfingerprints.com/2010/09/labor-of-love.html

Built from Plan(s)
Estimated Cost
$110
Estimated Time Investment
Weekend Project (10-20 Hours)
Finish Used
I used a satin black paint finish with a polyacrylic coating.
Recommended Skill Level
Beginner

Comments

Farmhouse Table with Reclaimed Lumber Top

We found this beautifully chippy lumber on the side of the road and snagged it knowing it would make a perfect table top someday.  When I decided to build a table for our back patio makeover, I knew exactly what I had to make the top out of.  

This was my very first build and the pocket hole plans made it so much easier than I thought it would be!  I built the top first then modified the cut list dimensions based on the top.  I also flipped the ends around so the braces would show on the inside instead of the outside.  

I seriously can't get enough of the top, it's so pretty and I don't have to worry about it at all since it's already wonderfully rustic.  The table fits six chairs perfectly.  We are looking forward to having many evenings around this table with family and friends!

Estimated Cost
$100
Estimated Time Investment
Weekend Project (10-20 Hours)
Finish Used
On the base, I applied two coats of Sherwin-Williams' SuperDeck solid stain in "Caribou" then sealed it with Minwax Spar Urethane clear satin with a sprayer.

For the top, I sealed the underside with Thompson's Water Seal clear waterproofer, and have plans to seal the top with Miss Mustard Seed's Tough Coat Sealer (http://missmustardseed.com/2015/09/cleaning-sealing-chipping-antique-pieces/)
Recommended Skill Level
Beginner

Comments

Craft and Homework Table

Submitted by Anonymous (not verified) on Fri, 11/18/2022 - 13:31

I used the plans for the modern craft table for this build and I had some curly cherry laying around begging to be use so I used that for the top.

Built from Plan(s)

Comments

Braden Entryway Mail Sorter/Locker/Shoe drawer

Submitted by Megbech on Fri, 09/02/2011 - 21:20

This is the greatest website ever! Thank you so much Ana White! Anyway, this was my first project. Our family room was a mess - shoes everywhere, coats strewn, you name it. We don't have a mud room - you just walk in from the garage to BAM, the family room. So the mess needs to be contained and organized and the Braden Shoe Drawer, Locker and Mail Sorter/Phone Charger was our answer! I would have loved to have done the locker-mail sorter-locker layout but space is limited in the room so I was only able to make one locker. I did make a 3rd drawer, per Ana's awesome wood cutting instructions and that drawer is in a storage closet. So, pay attention to her cutting instructions - she knows what she's talking about! I had some left over wood (1x10) and used that as a divider in the shoe drawer to keep each kids' shoes separate.

Estimated Cost
$250 (for hutch/locker, mail sorter, three drawers)
Estimated Time Investment
Weekend Project (10-20 Hours)
Finish Used
Kilz Primer, Olympic High-Gloss Antique White paint. Two coats put on very sparingly (dryly). I painted the small mail slots and inner side panels of the mail sorter prior to building after reading previous posters' tips - totally worth it.
Recommended Skill Level
Beginner

Comments

StacieM

Sat, 09/03/2011 - 12:59

This looks great for a first build! The drawers are great for hiding the shoes and I love the mail sorter. Awesome job!

4TheInnocent

Thu, 12/01/2011 - 13:26

I'm new to Ana's site & I desperately need to find a Mud Room Locker System & since I don't have an office downstairs I either need a desk put in my kitchen or a mail sorter system of some kind! You did a fabulous job but I have to admit that I'm terrified to even start this project!!!!! I'm afraid that I'll make a huge mess of it!!!! Any suggestions for a newbie???? Thanks a million!

Plane Old Shelf

This is a shelf based on the fighter planes from the pre-WWII era. I built it for my son's nursery. I stumbled onto Ana White's plan "Plane Old Shelf", got inspired, and it evolved into what it is. If you have any questions, feel free to contact me.

Built from Plan(s)
Estimated Time Investment
Week Long Project (20 Hours or More)
Recommended Skill Level
Beginner

Comments

Mathew Bounville

Thu, 09/08/2011 - 13:46

Thanks! The fuselage is made out of bender board. I don't remember the exact thickness but it was the thinnest they had at Michael's. You would think I would remember. I had to do the fuselage twice. My daughter stepped on it and put a hole through it.

The wings were actually one long wing. I build a frame around the wing and then wrapped the bender board around it. It may not be the best way, but it is all I could think of.

jhworley

Thu, 10/30/2014 - 17:07

I undersand the shelf and the landing gear.  I can make the canopy and propeller, no problem.  I don't understand how the main fusulage was made with the curved edge.  I tried searching for the bender board that was mentioned above with no luck.  Could you point me in the right direction?

Thanks,

Jordan