Community Brag Posts

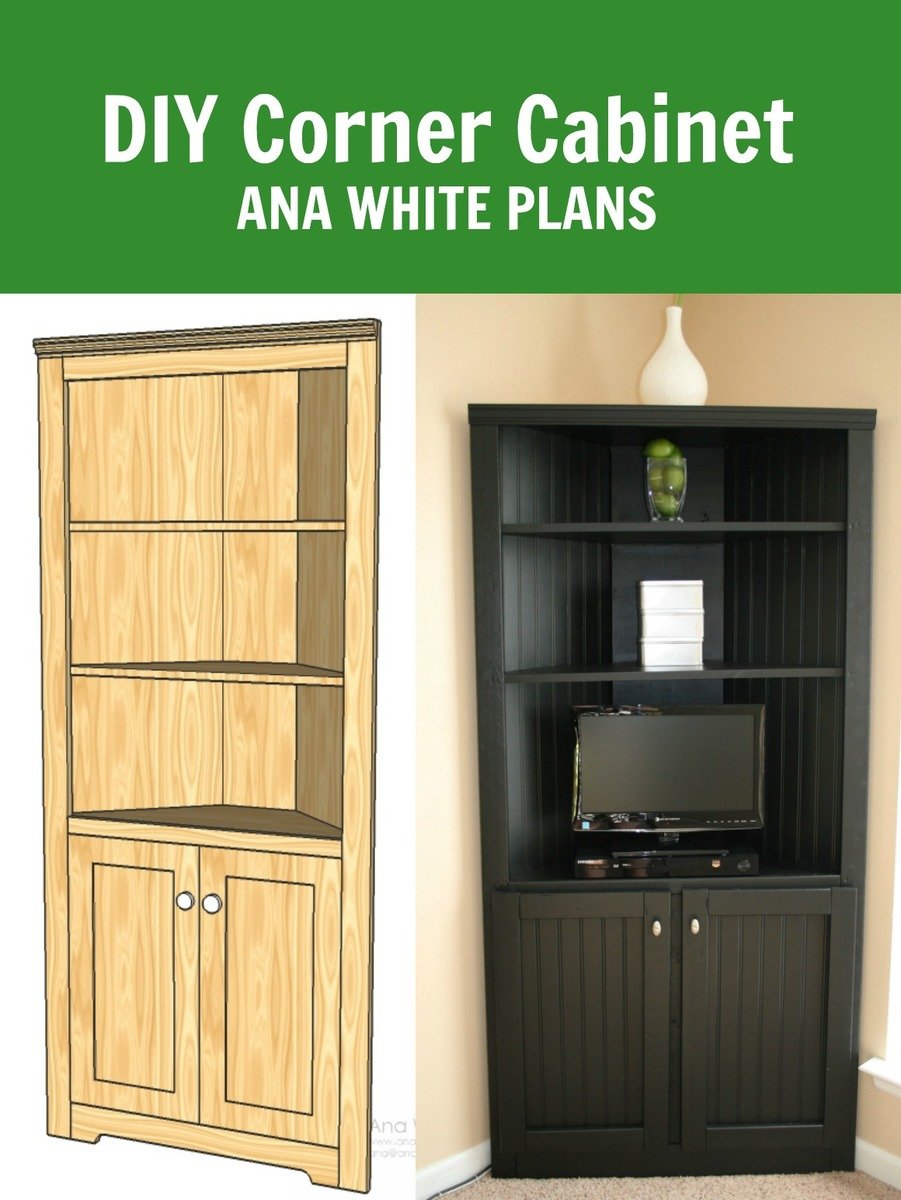
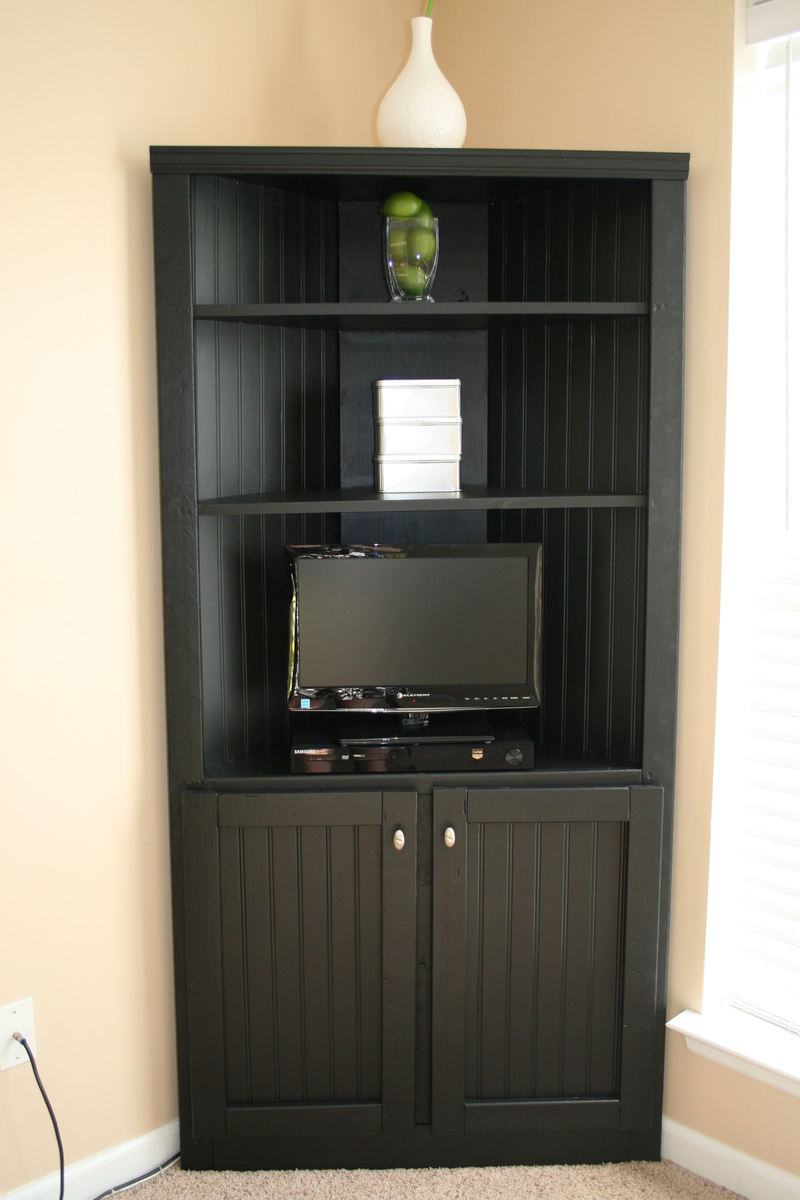
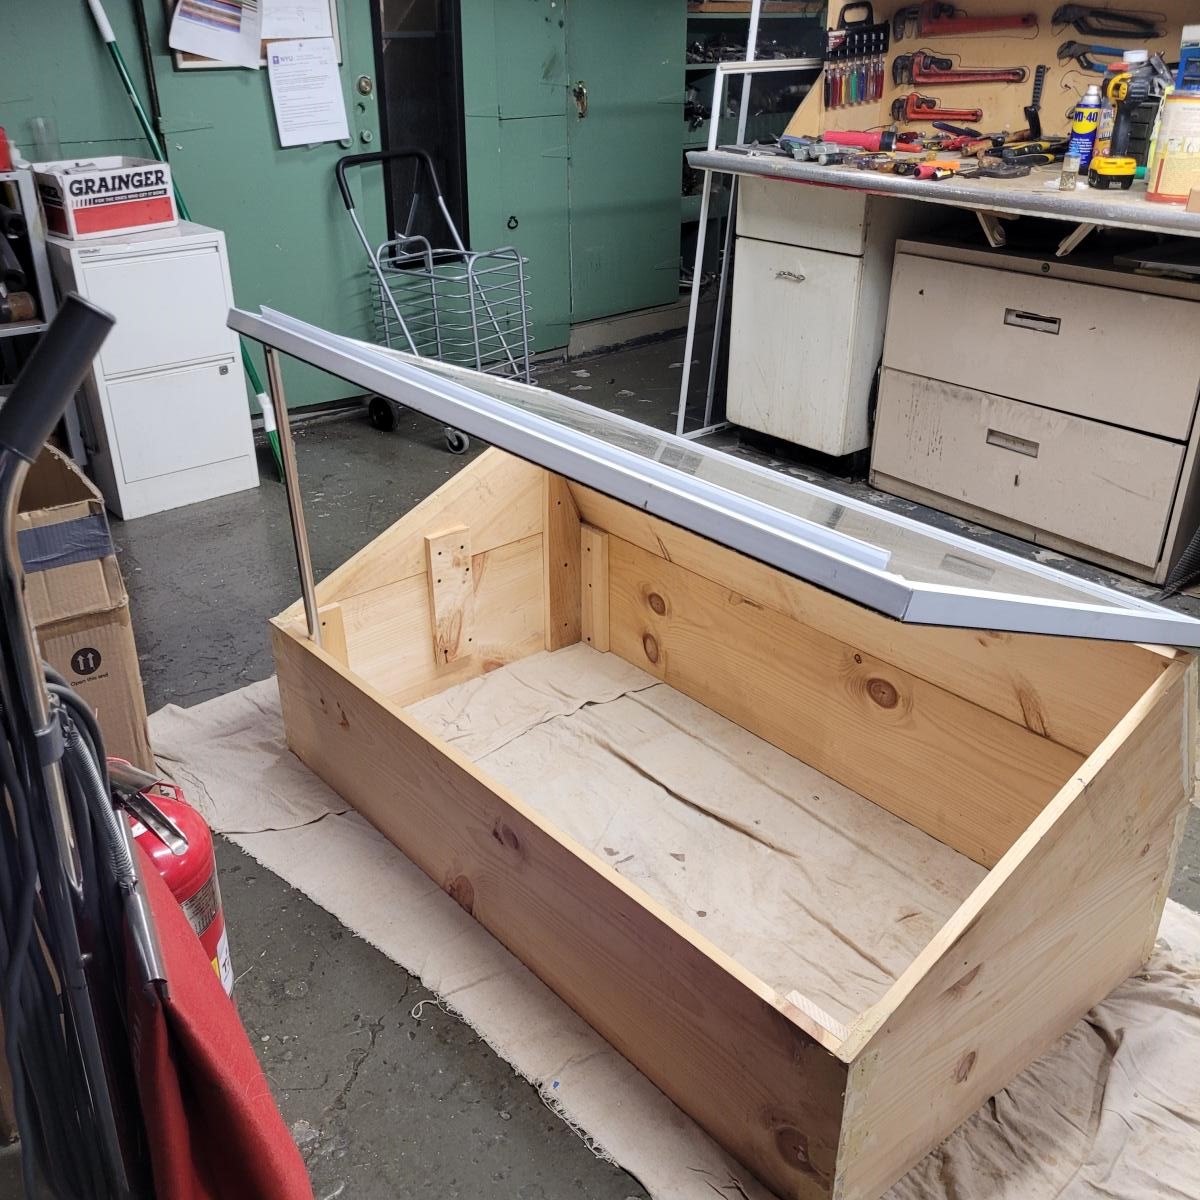
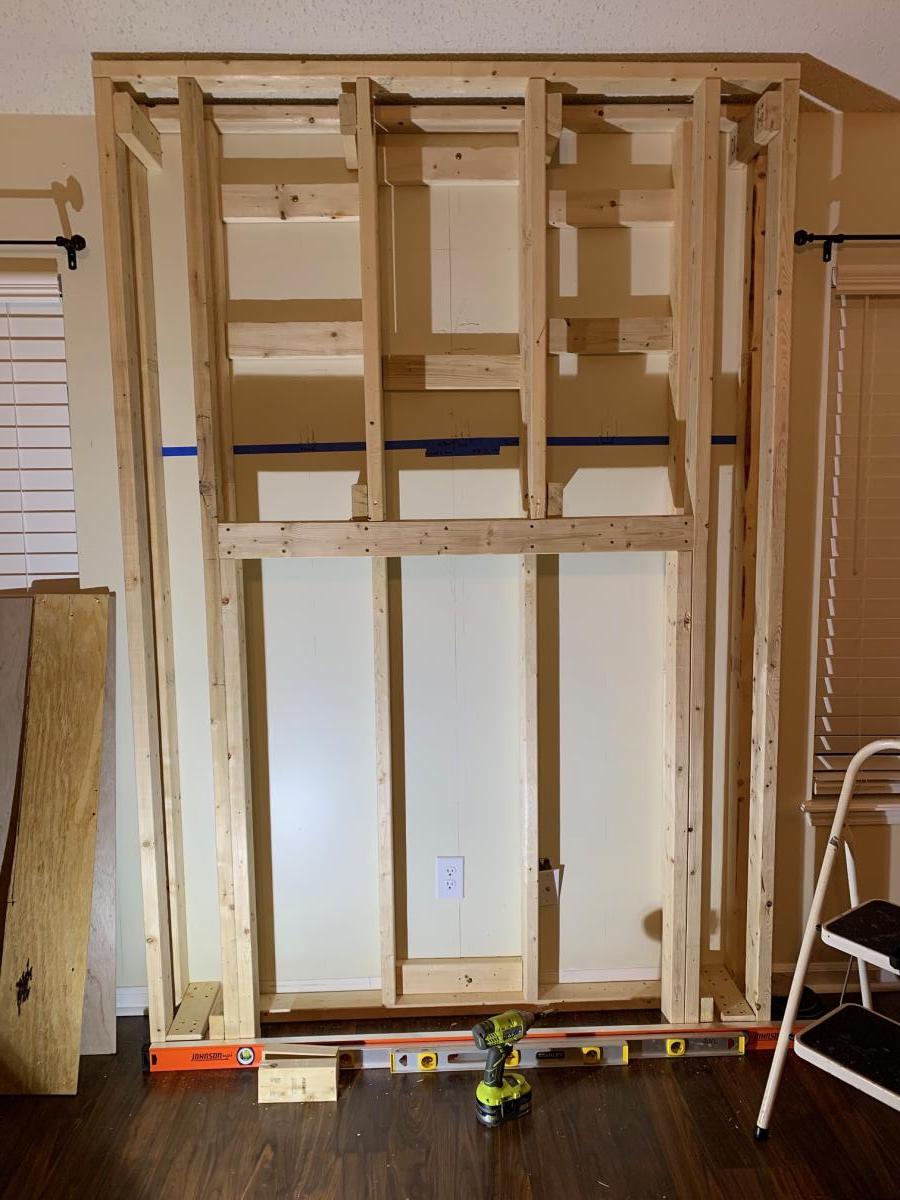
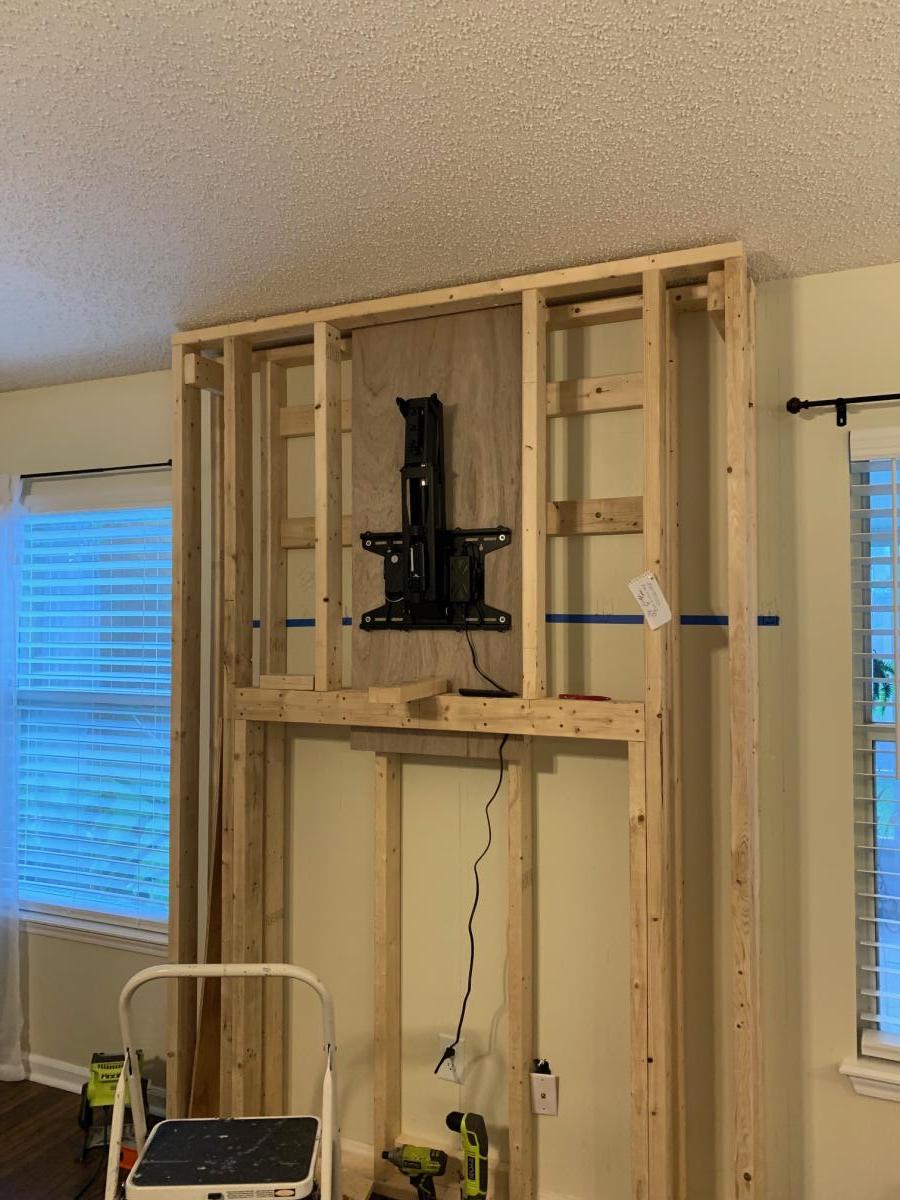
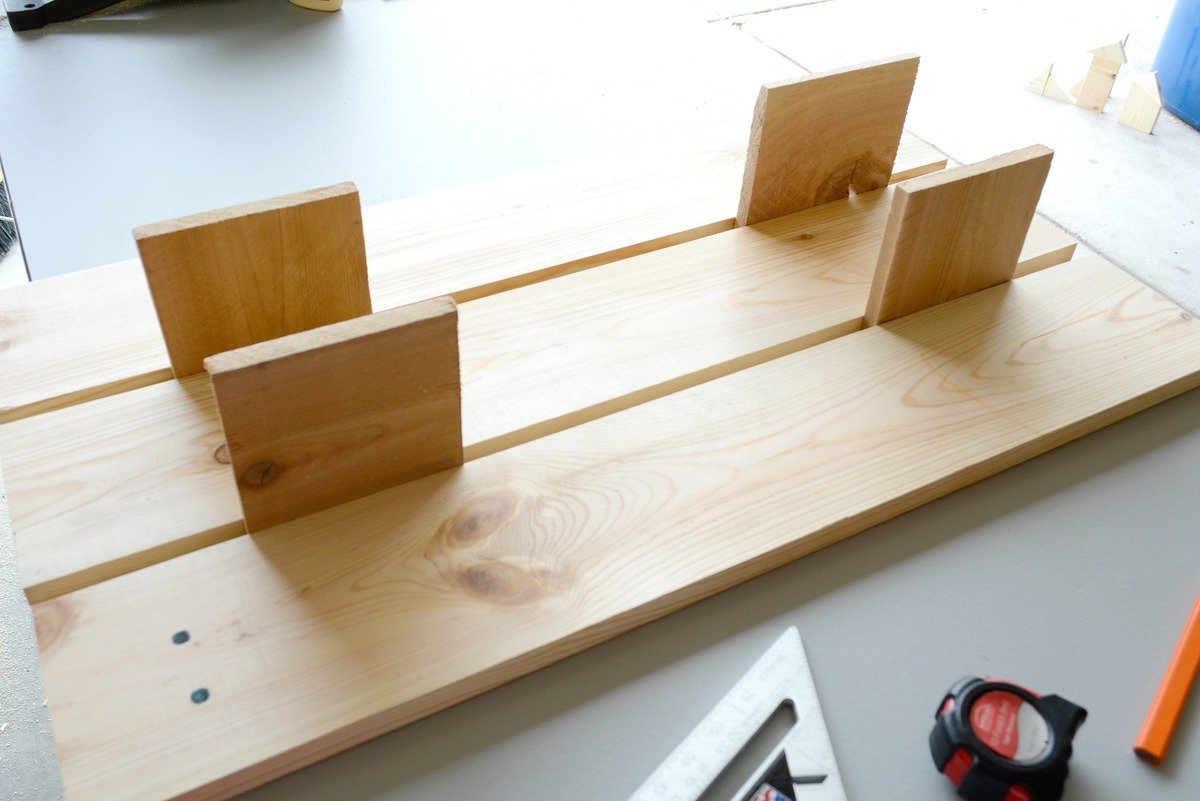
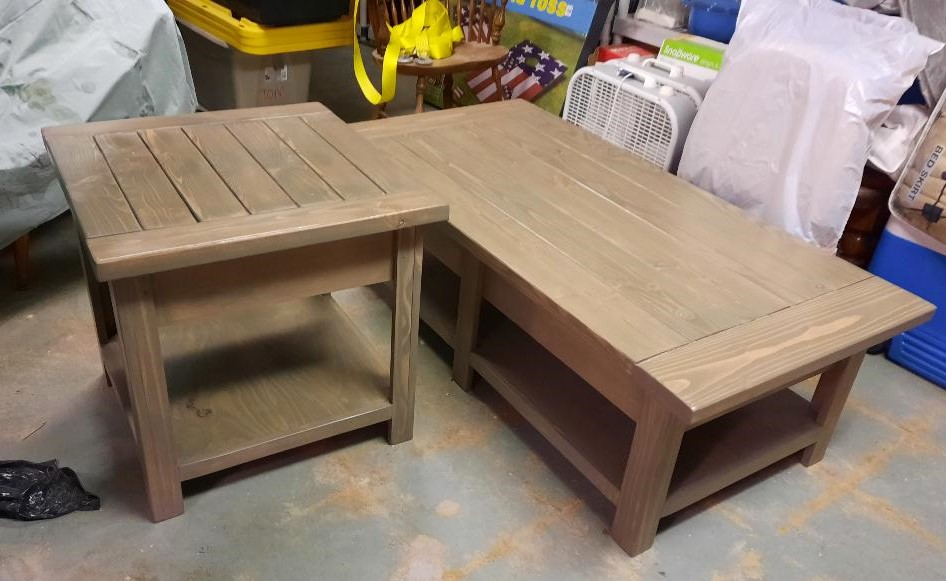
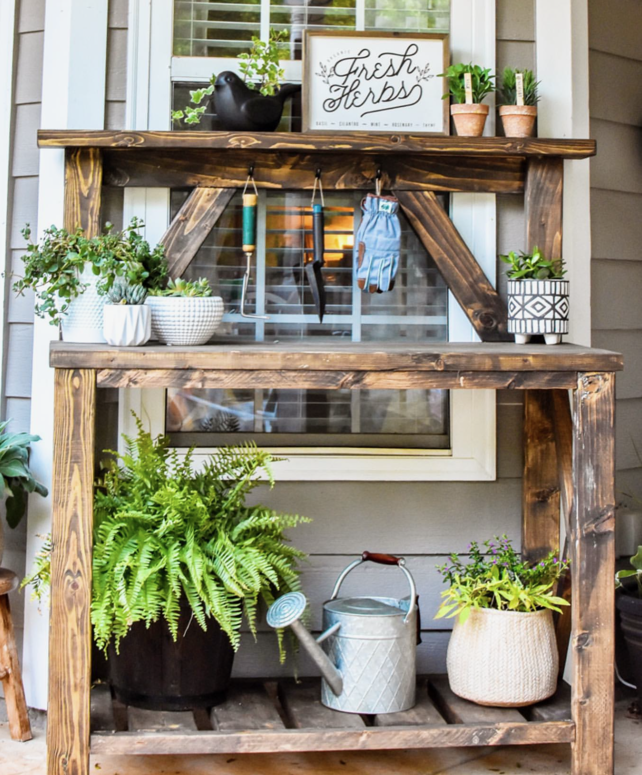
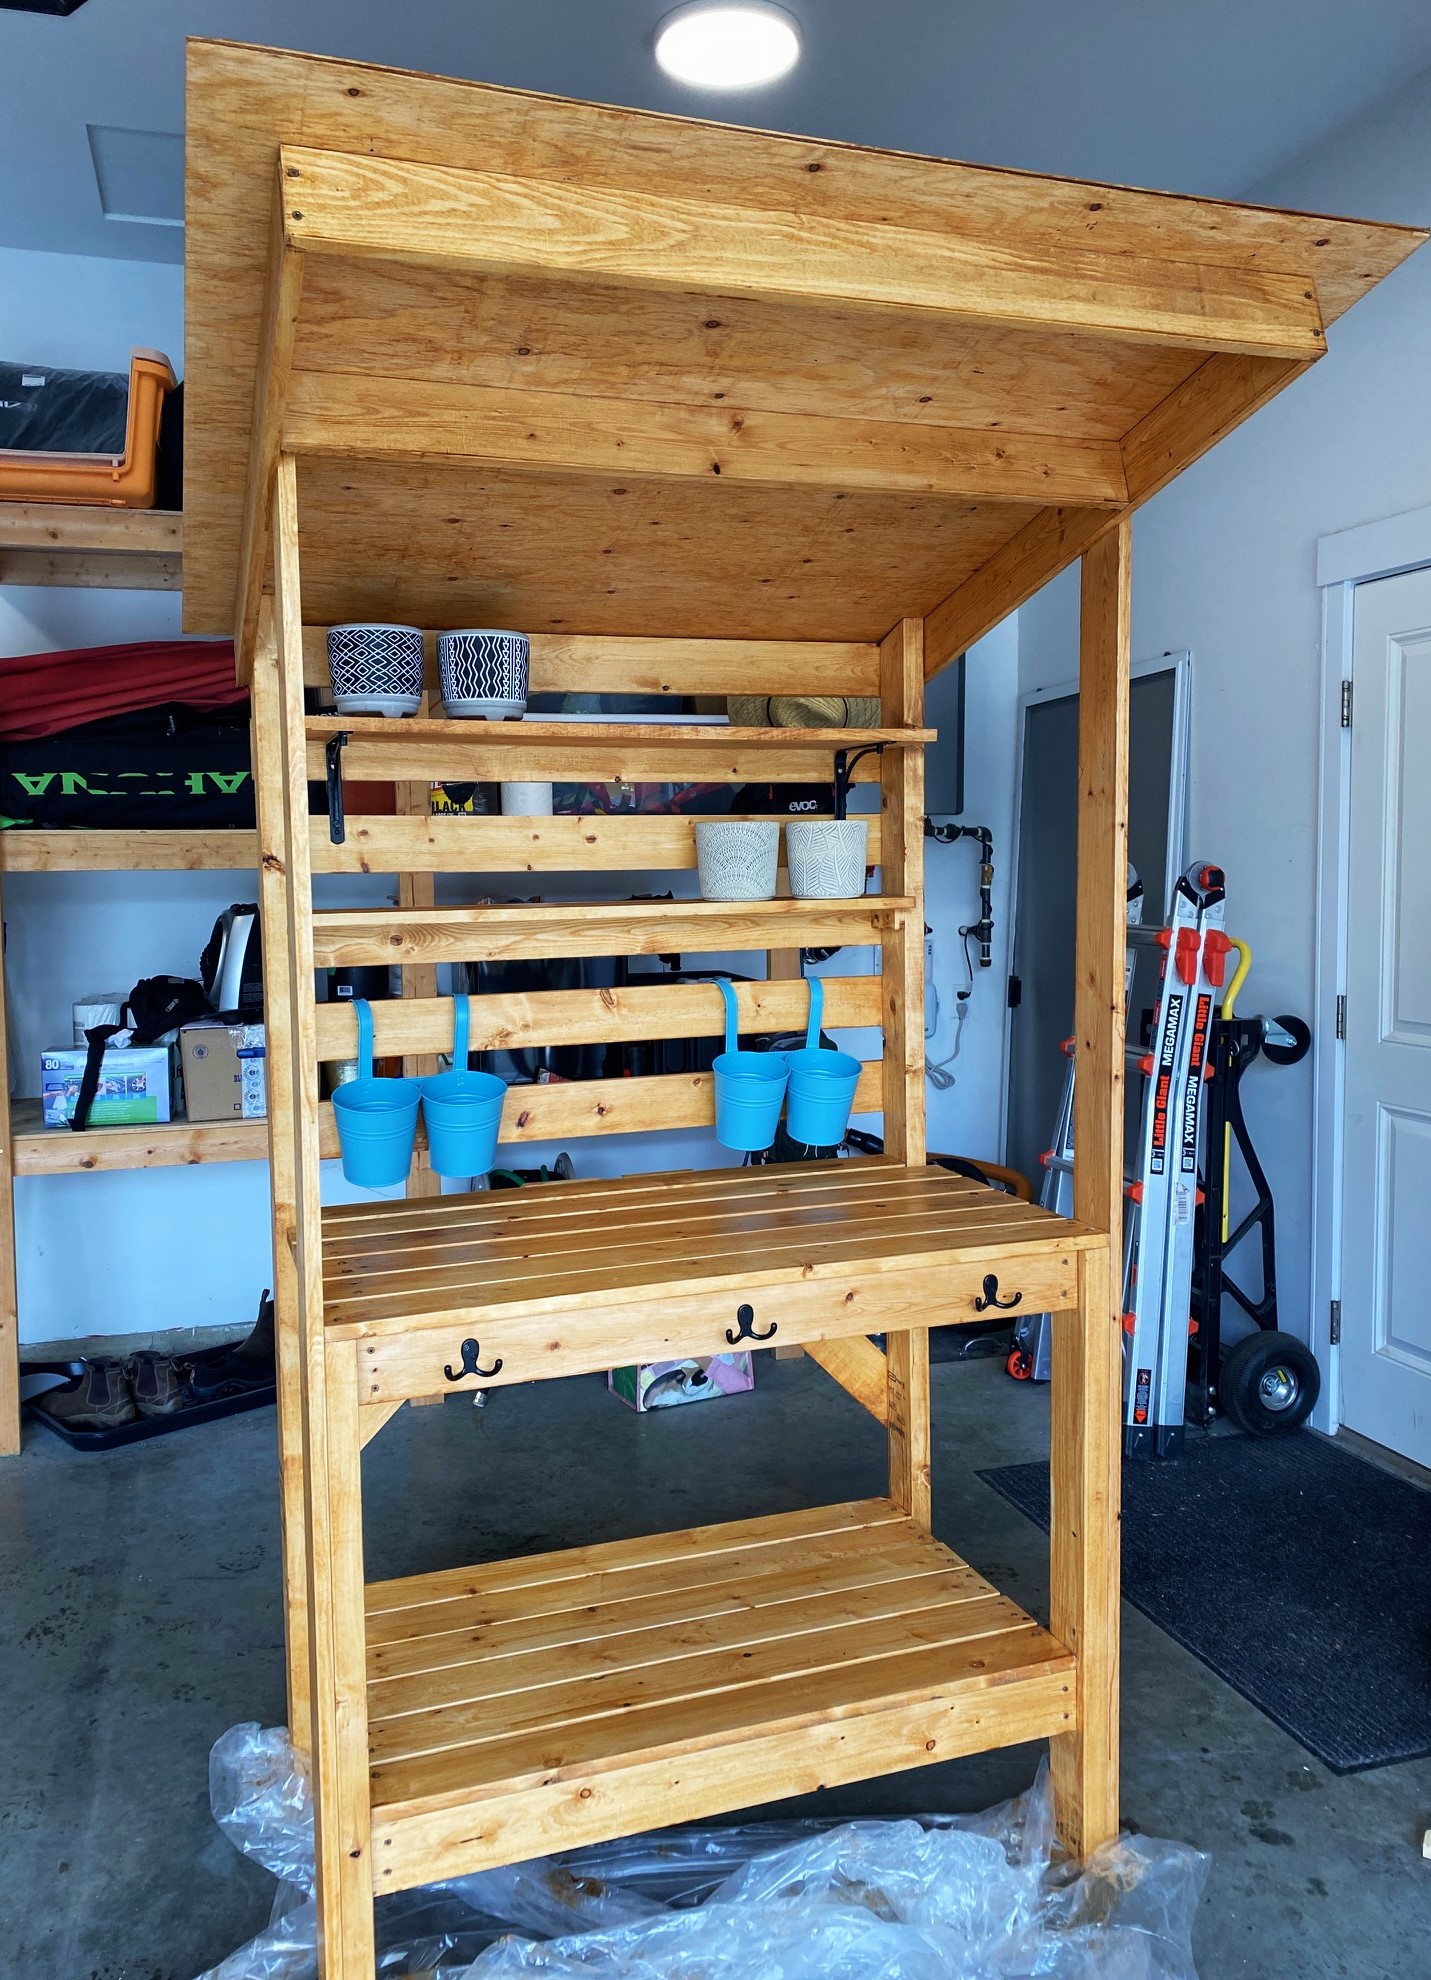
Corner Cabinet Storage Shelf

Submitted by sssmile14 on Sun, 07/24/2011 - 19:32

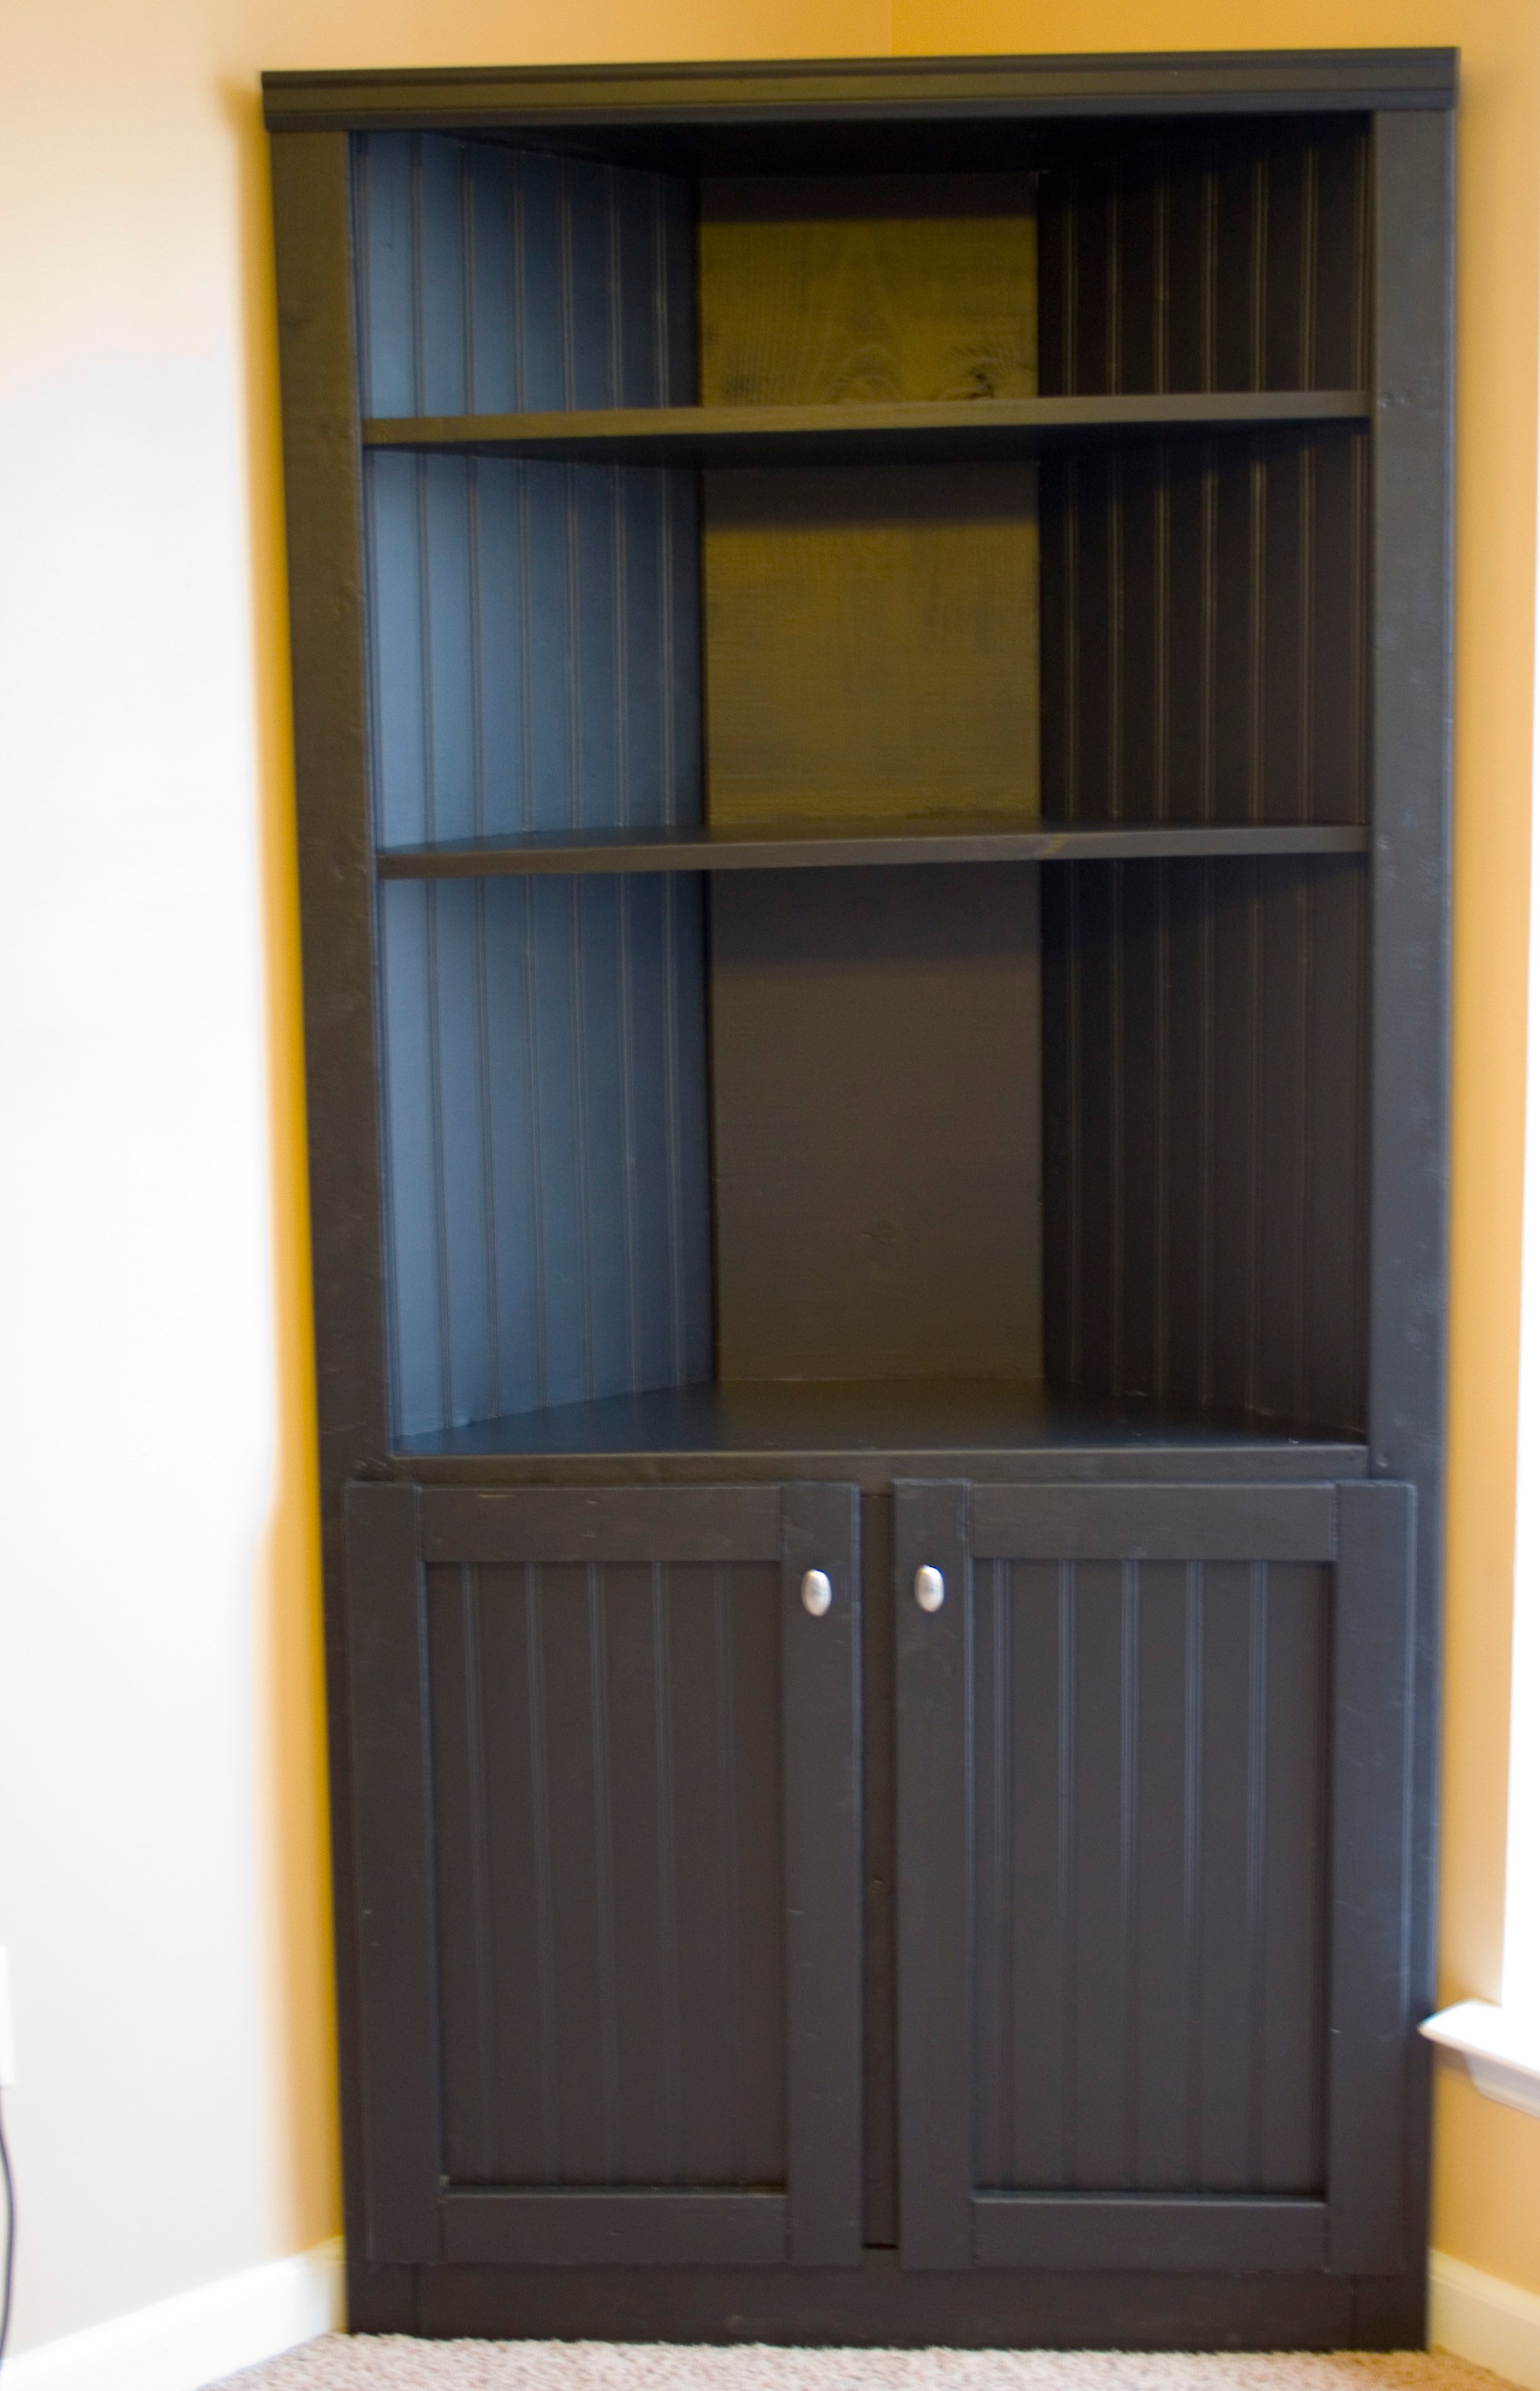
We built this corner cabinet shelf in three days (only because it is over 100 degrees here, so we had to wait until 9:00 at night to work on it) for our office space. We love, love, love it and can't believe how nice my corner cabinet turned out. Only our second building project ever. :)


Built from Plan(s)
Estimated Cost
80.00
Estimated Time Investment
Afternoon Project (3-6 Hours)
Finish Used
Kilz Satin Paint- Black
Recommended Skill Level
Starter Project

Comments

kellerkb

Mon, 06/03/2013 - 21:20

Hello, I would appreciate help finding the plans for this project! Thanks!

cerberus456

Tue, 08/02/2016 - 14:54

I do cedar. Thank you very much for the drawings. This site is to become one of my favorites.

Greetings from Xalapa Veracruz Mexico


My rendition of a "Cold Frame"

Submitted by Anonymous (not verified) on Mon, 08/29/2022 - 11:17

Hi, Ana.
I am loving your spot! I have not even delved into your recipes yet! I plan on making more than a few projects from your plans!

Comments

Kids table and chairs

Great little project. Finished just in time for Thanksgiving.

Andy

Estimated Cost
50
Estimated Time Investment
Day Project (6-9 Hours)
Finish Used
Mirrowax, polyurethane semi gloss
Recommended Skill Level
Beginner

Comments

JoanneS

Thu, 11/26/2015 - 07:14

You did a super job!  These are absolutely adorable!  Happy Thanksgiving!

Cedar Slat Top Bench

Submitted by Anonymous (not verified) on Tue, 01/15/2019 - 21:48

I really enjoy making this bench. I build them out of cedar and vary from 4’-6’. My customers love them. Simple prep work consisting of planing all boards to same dimensions can save a lot of time in sanding. Building 3 more this week. 

Estimated Time Investment
An Hour or Two (0-2 Hours)
Recommended Skill Level
Beginner

Comments

Marshall's Crib Grandad's First

Submitted by pondrider on Thu, 12/03/2015 - 14:57

Delivered the nursury Furniture and have a very satisfied daughter preparing to bring our Grandchild into the world.

From Ariel "My sweet baby boy has the most beautiful nursery I've ever seen! I am so thankful for my father who hand built this furniture. It is definitely made with love and it's everything I dreamed of. I'm also thankful for my husband and brother in law who set up this entire nursery for me this morning. Thank you" 
I started with plans and inspiration and then added some creativity. For the legs on this crib I laminated three 1x4 poplar and used threaded inserts. #anawhite

Estimated Cost
between special hardware, screws and lumber $400. The picture that my daughter gave me a disired end product had a retail of $975.
Estimated Time Investment
Week Long Project (20 Hours or More)
Finish Used
Actually used Sherwin Williams exterior Stain custom
Recommended Skill Level
Intermediate

Comments

light02

Sat, 02/06/2016 - 03:53

Can you tell me the color stain you used its beautiful!! I can't seem to get this color quite right and I've tried many times.

Ckendall

Fri, 03/11/2016 - 09:20

My husband would like to build our son a crib and I love this one! Is there a way to get the plans?? 

daf3000

Mon, 11/07/2016 - 19:14

I like your husband really like and want to build this crib. However pondrider hasn't replied so i was wondering if he/she sent them to you by chance. 

niter

Thu, 06/30/2016 - 16:33

I love this crib and was wondering if there is plans for this.  I would love to build it for my sister!

pondrider

Tue, 10/18/2016 - 18:51

Folks I am going to tell you to suggest you get the frame and hardware at place called products america .They have a link to plans that were on a magazine web site for sale.  I got the plans but the crib you see only used those plans to get started. If you look at each side independently you will notice that you can build this with Free and better written plans for Ana-White farmhouse bed.  yes, you'll do a little modifying for the sides but as we build that is beauty of everything we build in that we build for the size we need.   The plans from build America will help with dimensions. The other key with a crib safety and the fact that it must be assembled and disassembled in the room.   The plans from build america will attempt to show how to install threaded inserts.  I found Youtube and other instructions to be much better. My build has fixed sides meaning the front and the back do not come down. And I did not set it up to be convertable.

Fireplace with recessed TV mount

Submitted by medicscott on Thu, 02/16/2023 - 07:46

This is a very custom fireplace that I built for my wife as a 40th wedding anniversary gift. It is built around a Samsung 55” Frame TV and a Vivo motorized mount. The motorized mount allows the TV to be lowered to a better viewing height than the standard above mantle position which is usually too high for comfortable viewing.

In order to maintain the flush mount effect with the TV in art mode, I recessed the mount into the fireplace. That required building a “back” frame for the TV mount then the outer frame for the surround. I covered the outer frame with ½” OSB then ship lap. The mantle and hearth is made from Poplar with walnut stain and Polyurethane satin top coat. The hearth opens for storage.

This was sourced from several different plan sets with a lot of customization and input from the Technical Support Staff at Vizo-US.

Comments

Ana White

Thu, 02/16/2023 - 09:46

Happy Anniversary!
This is a beautiful, well thought out project.
I was hoping someone would do the recessed mount, and you nailed it! It's so much better with the tv flush like yours.
Also love the motorized mount.
Thank you very much for sharing photos.
Ana

Outdoor hangout using 2x4 and fence boards

Submitted by sylvialh on Sun, 06/16/2019 - 18:13

Bought enough lumber for one sofa but ended up using old fence boards for the  decking so had enough lumber to make the sectional and a shortened coffee table. 

Great way to save some cash even if u have to buy the fence posts. 

Added a reinforcing piece to the one armed sofa between the legs using a kreg jig to stabilize the legs a bit more. 

Waiting on my foam from Amazon to finish off this project!

Used inspiration from the beer/wine cooler patio table and made the middle of the table removable to add a buck underneath later. 

Note the 5 year old patio set, also an ana white project from back in the day!

Super quick build!

I did find that the measurements for customizing it for your cushion size seemed about 1.5 inches too big for all the depth pieces so I sized down but I haven't received my foam yet so maybe I'm wrong but Smth to think about. I didn't want my cushions to slide around so I took that into consideration when building. 

Estimated Cost
60$ CAD for the high density foam for each sofa (3x24x72) plus throw cushions for the back.

11 2x4x10 - cost varies depending on cedar or PT
Fence boards were reused

Outdoor Fabric to cover the foam
Estimated Time Investment
Afternoon Project (3-6 Hours)
Finish Used
None yet
Recommended Skill Level
Beginner

Claras Table and $4 stackable chairs sized for 18" Dolls.

Submitted by pjhaan on Mon, 12/26/2011 - 07:48

I decided to make the Clara table and the $4 stackable chairs for my daughters for Christmas. They were not for them though but rather for their American Girl dolls. I had to modify the plans to work for standard 18" dolls.

The Table:
It is a little taller than it should be but it allows the doll to fit under the table/apron while sitting in an appropriately sized chair (5" seat).

I also changed the length from 18" to 15 1/2" so the cuts could be made from a 4ft board.

3 - 1 x 6 @ 15 1/2" (Top) (1 @ 4ft)
4 - 2 x 2 @ 10" (Legs) (1 @ 4ft)
2 - 1 x 3 @ 10 1/2" (End Apron) (1 @ 4ft)
2 - 1 x 3 @ 9" (Side Aprons)

The apron is 1 1/2 inches. a 1x2 would probably work for the aprons too. You could then shorten the table legs by about an inch.

The Chairs:
The over all dimensions are now 12" H (back), 5 1/2" H (seat) X 6" W X 6 1/2" D

Cut List:
2 - 1×2 @ 4 1/4" (Side Aprons)
2 - 1×2 @ 5" (Side Supports)
3 - 1×2 @ 4 1/2" (Front Legs and Front Apron)
7 - 1×2 @ 6" (4 Seat Slats, 2 Back Slats and Back Apron)
2 - 1×2 @ 12" (Back Legs)

Built from Plan(s)
Estimated Time Investment
Week Long Project (20 Hours or More)
Finish Used
White paint. I used some Valspar paint on the table and one chair then decided it would take too long to get all the cracks and crevices. On the other three chairs, I used Krylon Spray paint. I put two coats of the spray paint on the first chair for better coverage.
Recommended Skill Level
Beginner

Comments

KAD050209 (not verified)

Tue, 10/09/2012 - 17:19

For the dimensions you have for the chairs... Is that to make one chair only? I so0o0o wanna make this for my DD! She'll love it!

Beginner Farm coffee table

Submitted by Anonymous (not verified) on Fri, 05/05/2023 - 05:27

I haven't done much wood working but I found Ana White's plan and followed along with her video. Was able to easily assemble this beautiful table in one afternoon. Next step, sanding and finishing. I'm definitely going to try more projects.

Comments

Backyard Retreat Daybed

Submitted by Anonymous (not verified) on Fri, 12/08/2023 - 08:43

We fell in love with this daybed plan right out of the gate but had to modify the plan somewhat due to the rain and crazy weather we are experiencing during the warmer seasons. Rather than use a twin mattress we purchased the largest size outdoor cushion we could. We covered it in Dacron wrap and used an olefin material for the huge cover which maxed out at 54x96. It was one heck of a big zipper to sew! The material is mould and mildew resistant and has proven to be really resilient and I vacuum to keep it clean. It feels luxurious to slide into. We added a polycarbonate roof with a 6% slant, that projects 8-10 inches from the front and back, for rain and snow and because it sits under a crabapple tree which provides shade but will drop small projectiles on your head. We wanted to be able to manage the snow efficiently if we received a heavy fall. We hung the curtains using a chain link fence rail and are able to spend afternoons resting catching the breeze and reading so comfortably. It is situated in a southwest exposure so they are necessary to provide a little protection. The curtains are closed and secured with clamps for heavy rainfalls and so far so good! Everything has stayed dry despite high winds.
 

As you can see from the little ramp, we have four buddies that love the bed as much as we do! It is our little retreat. We love our magic space and the relaxation we experience the minute we slide in. Thanks for such great plans. It was so straightforward that modifications were simple and easy!

Built from Plan(s)
Seasonal And Holiday

DIY Children's Picnic Table

My first truly functional build! I love how it turned out, but even more importantly my kids are loving it - we are literally using it for every possible meal and snack right now. Perfect summer project, and bonus - we get to keep all the eating messes outside! 


Built from Plan(s)
Estimated Cost
$22.50
Estimated Time Investment
Afternoon Project (3-6 Hours)
Finish Used
For the first table I sued a combination of stains.. Minwax Jacobean and Weathered Grey with a white latex paint wash. White semi gloss Behr for the legs and bottom half of table.
Second table I used Varathane's Vintage Aqua and I sealed both tables with 4 coats of Varathane's SPAR- Urethane.
Recommended Skill Level
Beginner

Red Chicken Coop

Submitted by Anonymous (not verified) on Tue, 12/19/2023 - 16:59

Ana, I want to say how inspirational you have been to me over some years. I think my first project found on your website was a chicken coop. More recently I have built the large garage workbench system with 2 rollout workbench/storage units (still in progress). In the past few weeks I have built the Adirondack chairs. The Adirondack chairs spurred me to continue building a “park like” setting in my small backyard. This includes a park bench (to match the Adirondack chairs), a park style grill, and a water fall. The waterfall is fairly simple (now that I have done it once - ha).

Ken Moody - Babcock Ranch, Florida

DIY storage shed with mower ramp and steps

Submitted by lookitsash on Thu, 07/28/2016 - 15:29

I used ideas on your site for inspiration for my current back yard shed.  I did a lot of research before choosing one.  If you've never built a shed before from scratch, it can be a little daunting, especially if its a larger shed.  I also documented my whole process from the laying the foundation to putting the last nail on the shingles.  Here's the link for you to my blog post:

http://www.justmeasuringup.com/blog/the-shed-project-phase-1

It was a lot of fun for me, and a huge wow factor to impress my friends ;)  I store everything in there from my riding mower to all my patio furniture in the wintertime.  It's such a useful thing to have.

I spent around $1500 and it took about 2 months to complete (working on it while having a full time job - otherwise would have finished a lot faster)

Estimated Cost
$1500
Estimated Time Investment
Week Long Project (20 Hours or More)
Finish Used
Used T-11 siding with several coats of exterior primer and paint
Recommended Skill Level
Intermediate

Comments

lookitsash

Sun, 07/31/2016 - 17:44

Thanks!   I looked at a bunch of different door trims online and found this pattern that I liked.  The mitre saw made quick work out of it, and it only took about 10 minutes to cut and install.

Outhouse

Submitted by kraftdan on Sun, 05/31/2020 - 10:54

Added shingles and a 3" vent in the back. Also made it a 2-seater to prolong time between dig-outs and extended the roof overhang. Two inch T&G siding seemed like overkill. I used regular 1x8. Painted it to blend in with the woods.

Built from Plan(s)
Finish Used
Exterior paint
Recommended Skill Level
Intermediate

Benchright Farmhouse Bench

Submitted by Huthbert on Thu, 09/06/2012 - 05:09

Our first Ana white project! My husband and I are both really excited with the results. We plan on making the table too. I followed the plan and added comments/details/changes we made on my blog http://thehuth.blogspot.com/2012/09/diy-pottery-barn-bench.html I added pictures to follow along the steps from the tutorial.

Estimated Time Investment
Weekend Project (10-20 Hours)
Finish Used
2 coats- Minwax Oil-Based Dark Walnut Wood Stain
2 coats- Minwax Polyurethane
Recommended Skill Level
Beginner

Easy small space side table

Submitted by Dedavies3 on Mon, 07/07/2014 - 17:57

This was my first project. It was relatively easy but I did make some mistakes that are now design features

Estimated Cost
Reclaimed wood
Estimated Time Investment
Afternoon Project (3-6 Hours)
Finish Used
Minwax English chestnut
Recommended Skill Level
Beginner
Back