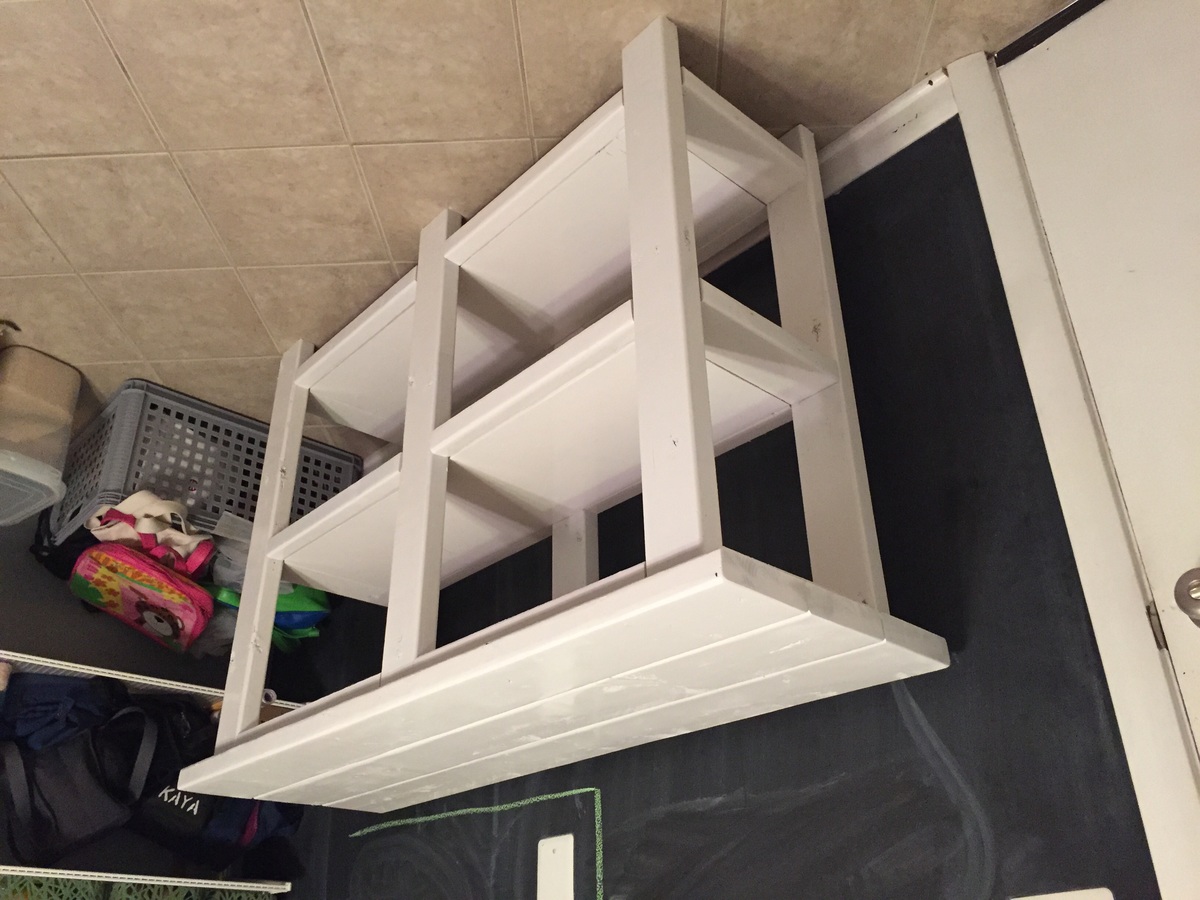
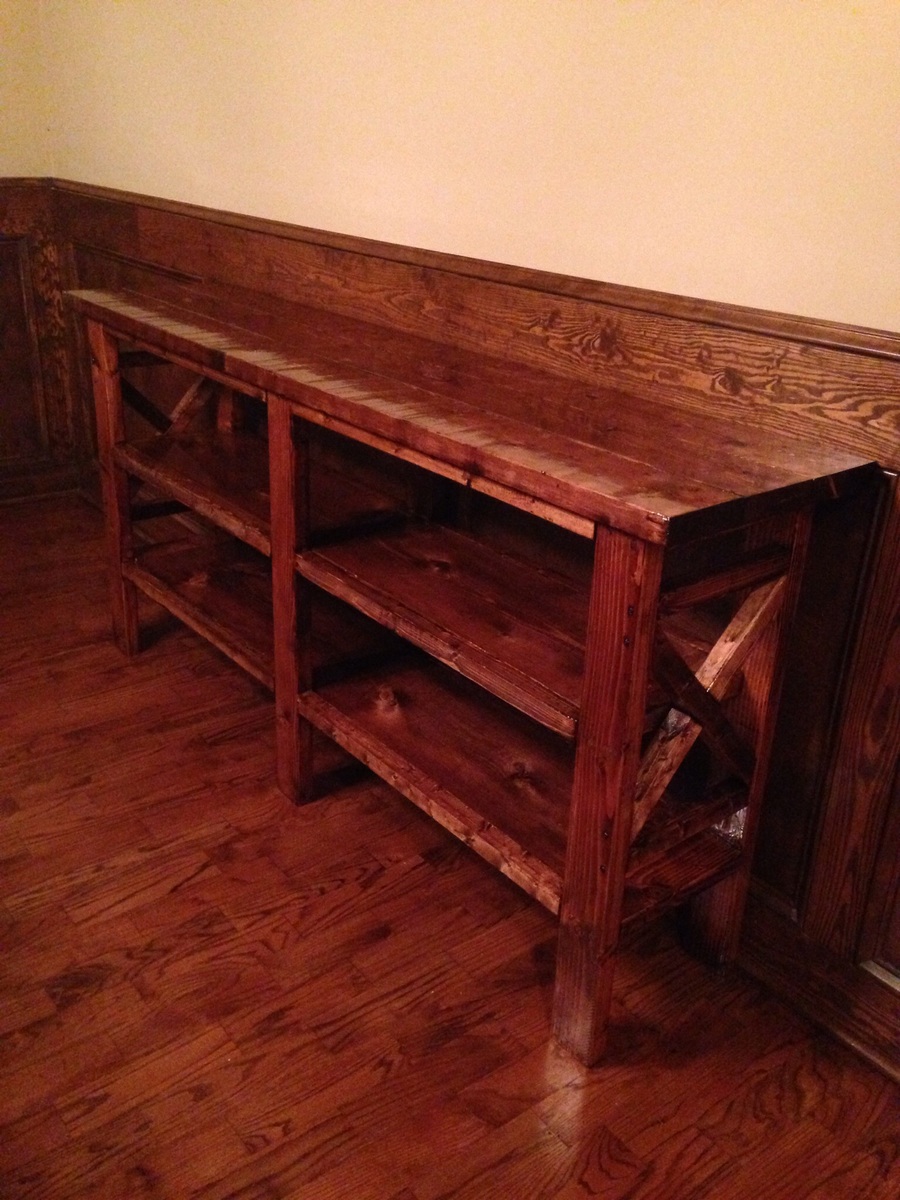
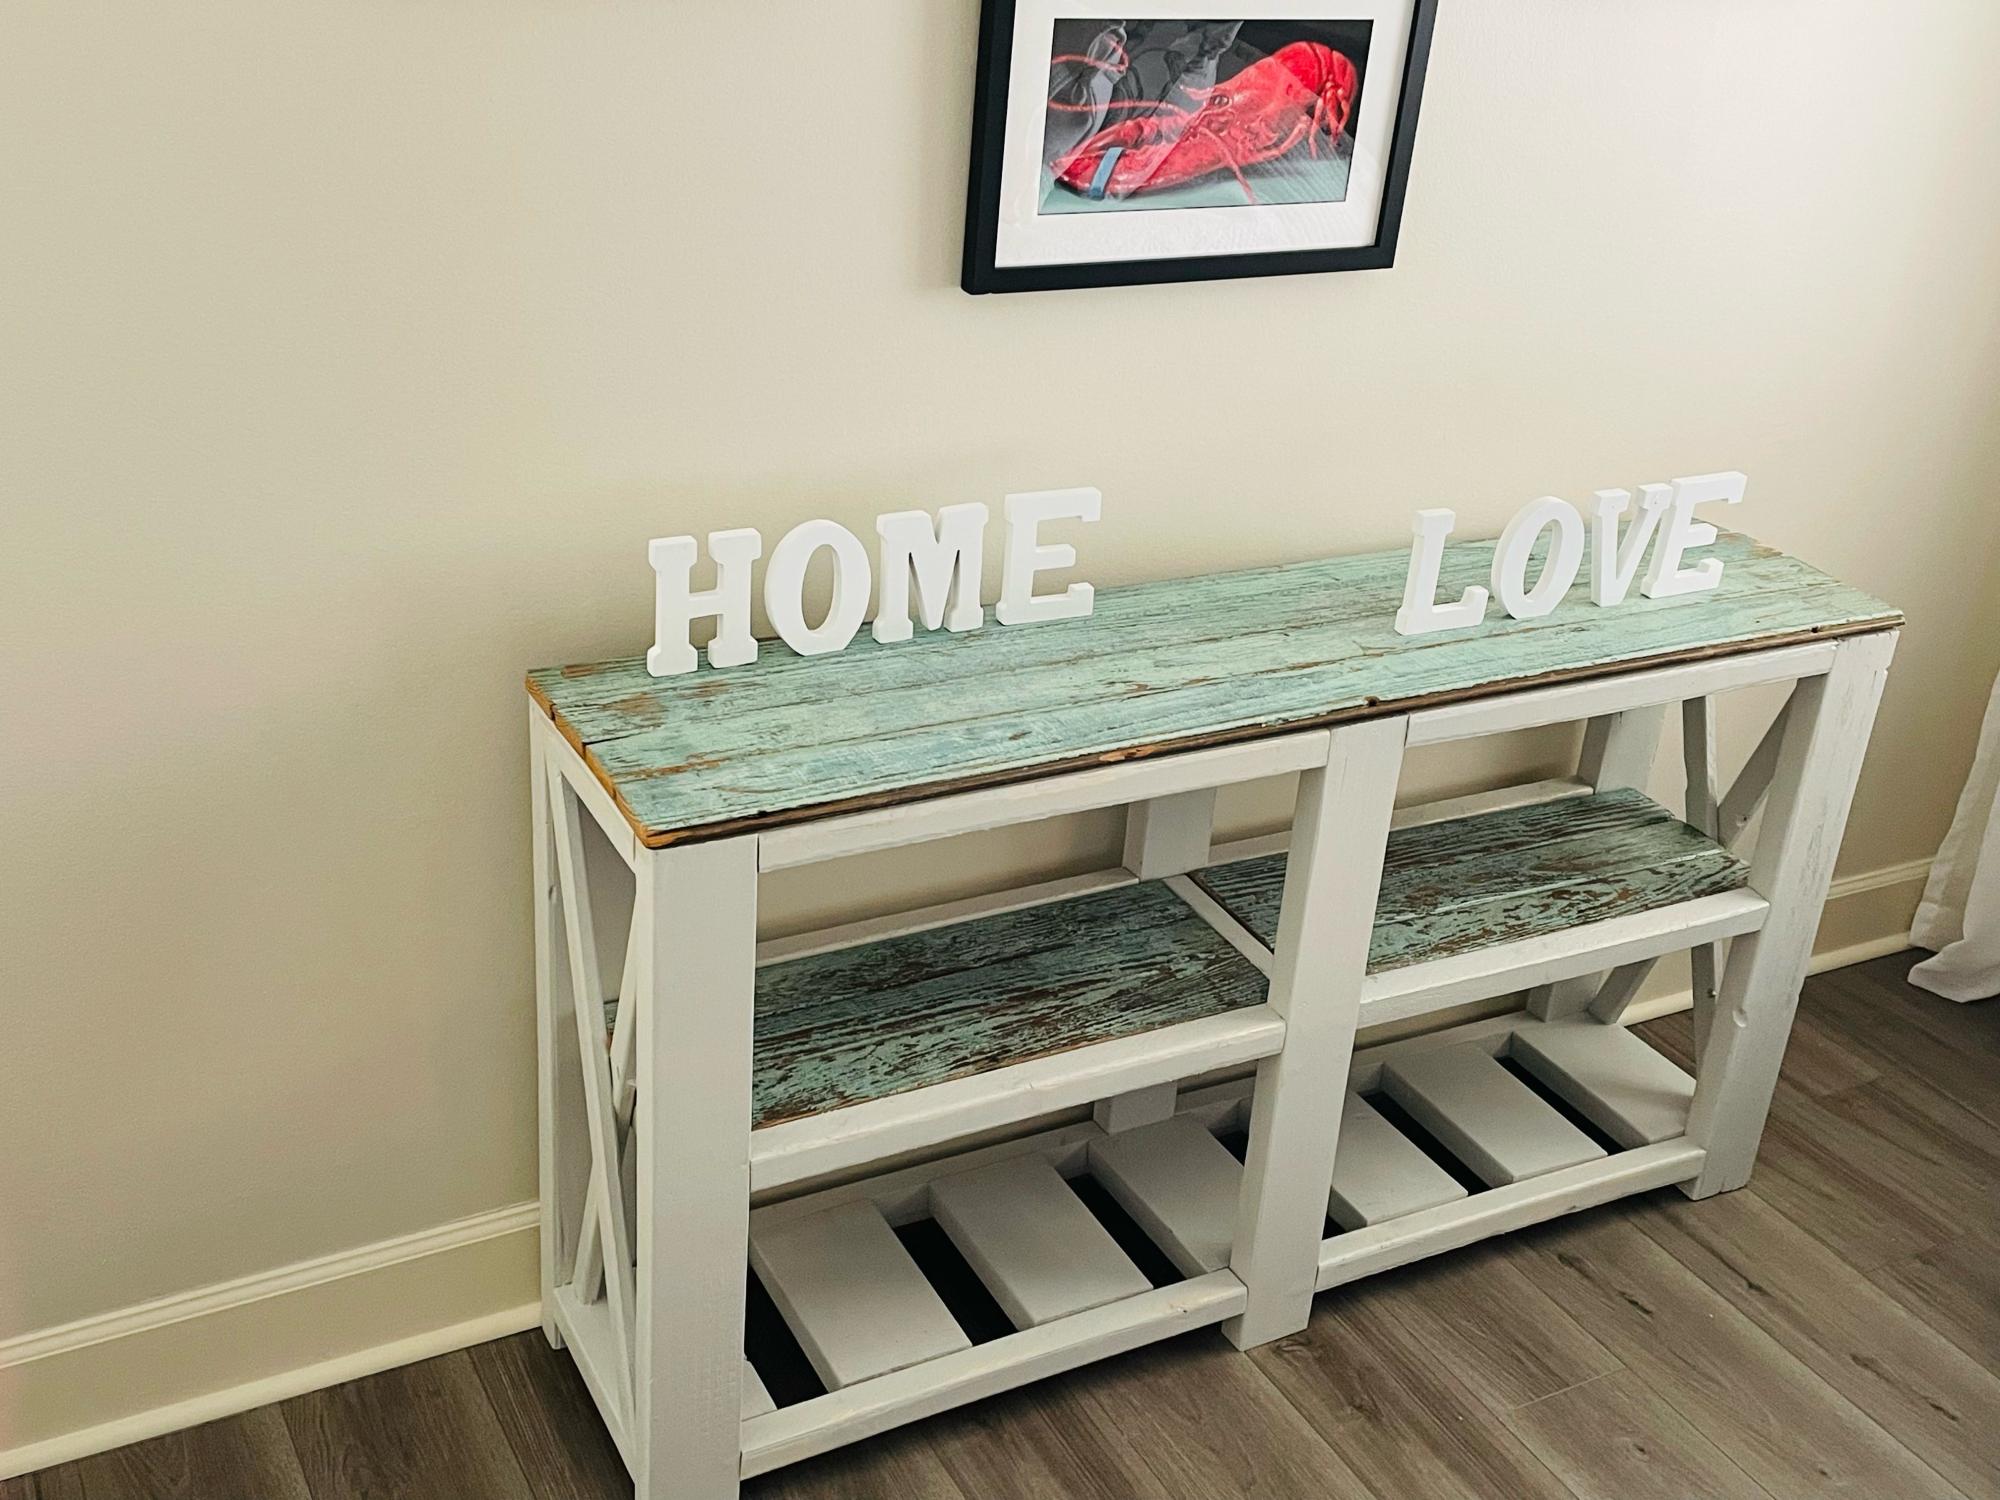
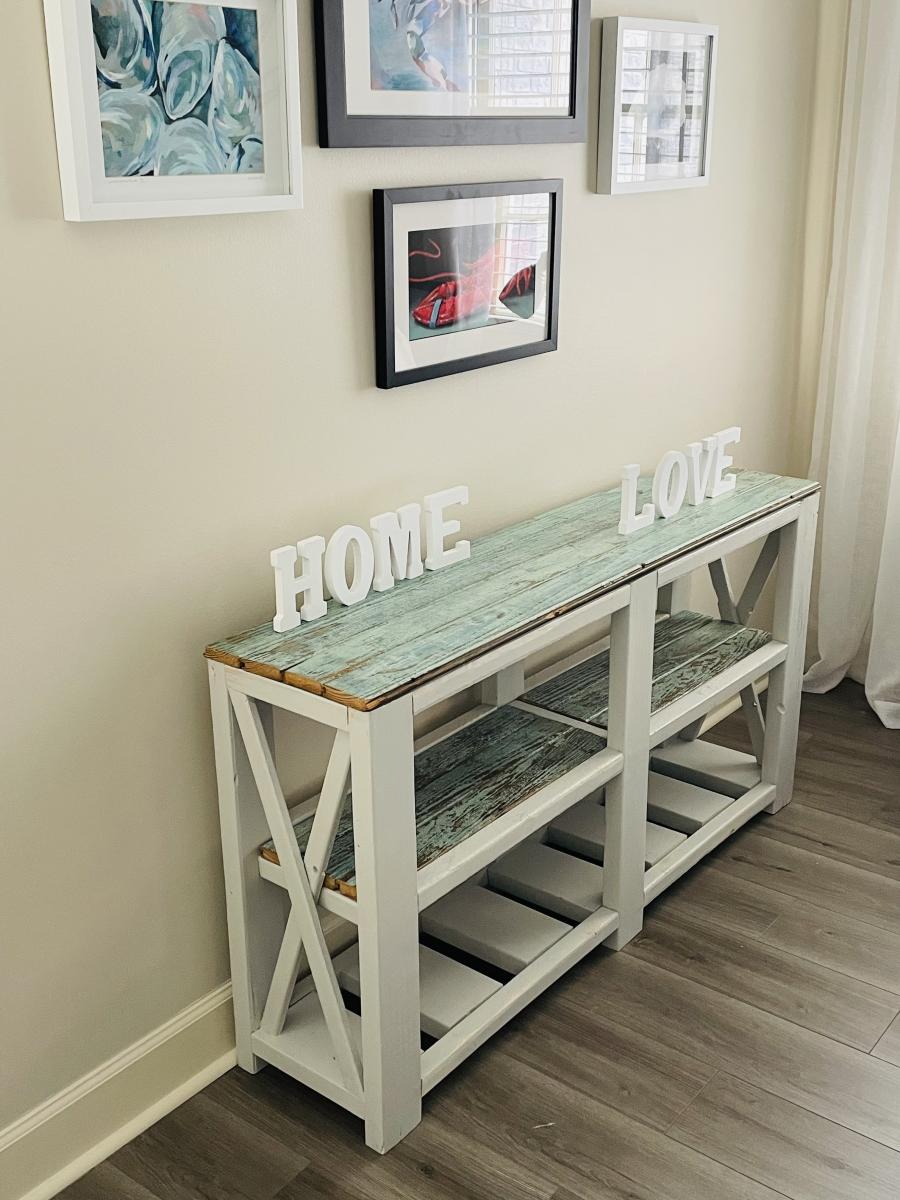
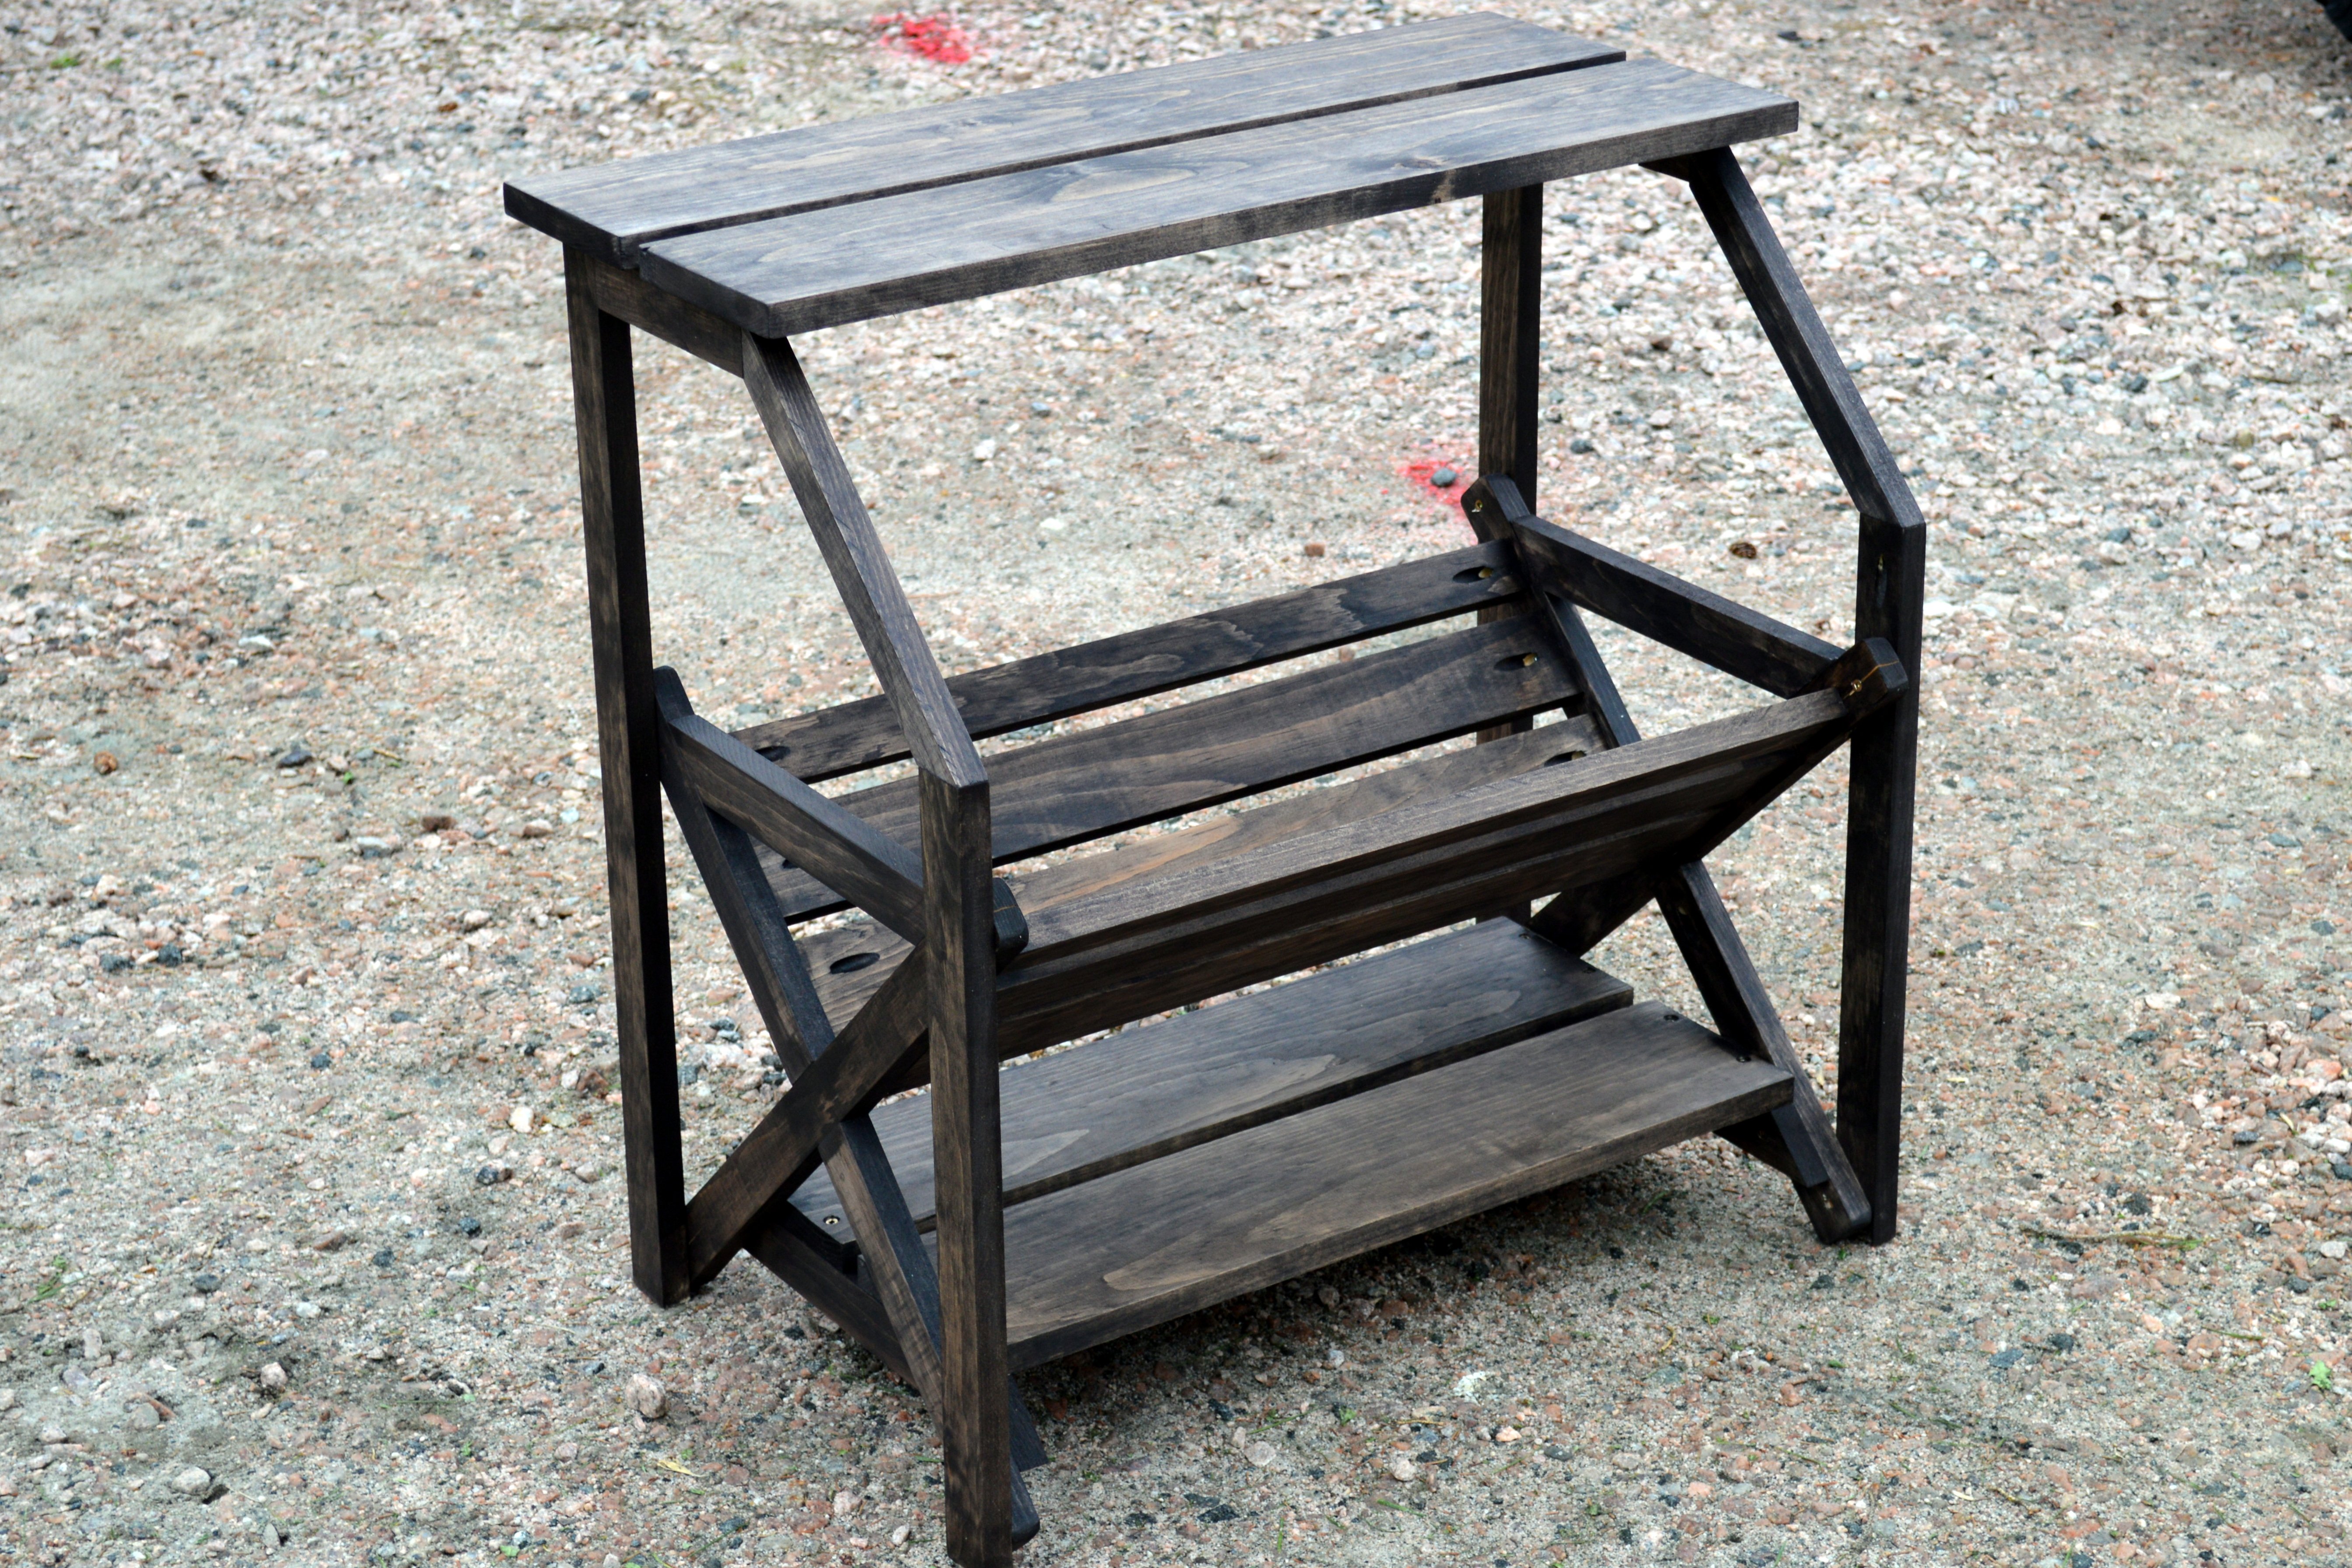
Barn Door Console Table
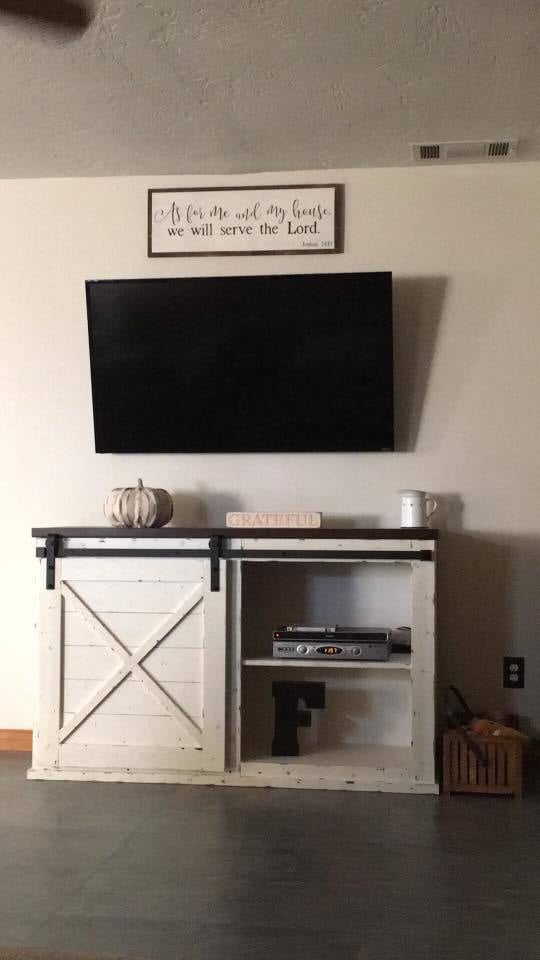
Submitted by Joanna Franke
Built from Plan(s)
Recommended Skill Level
Intermediate
Submitted by Joanna Franke
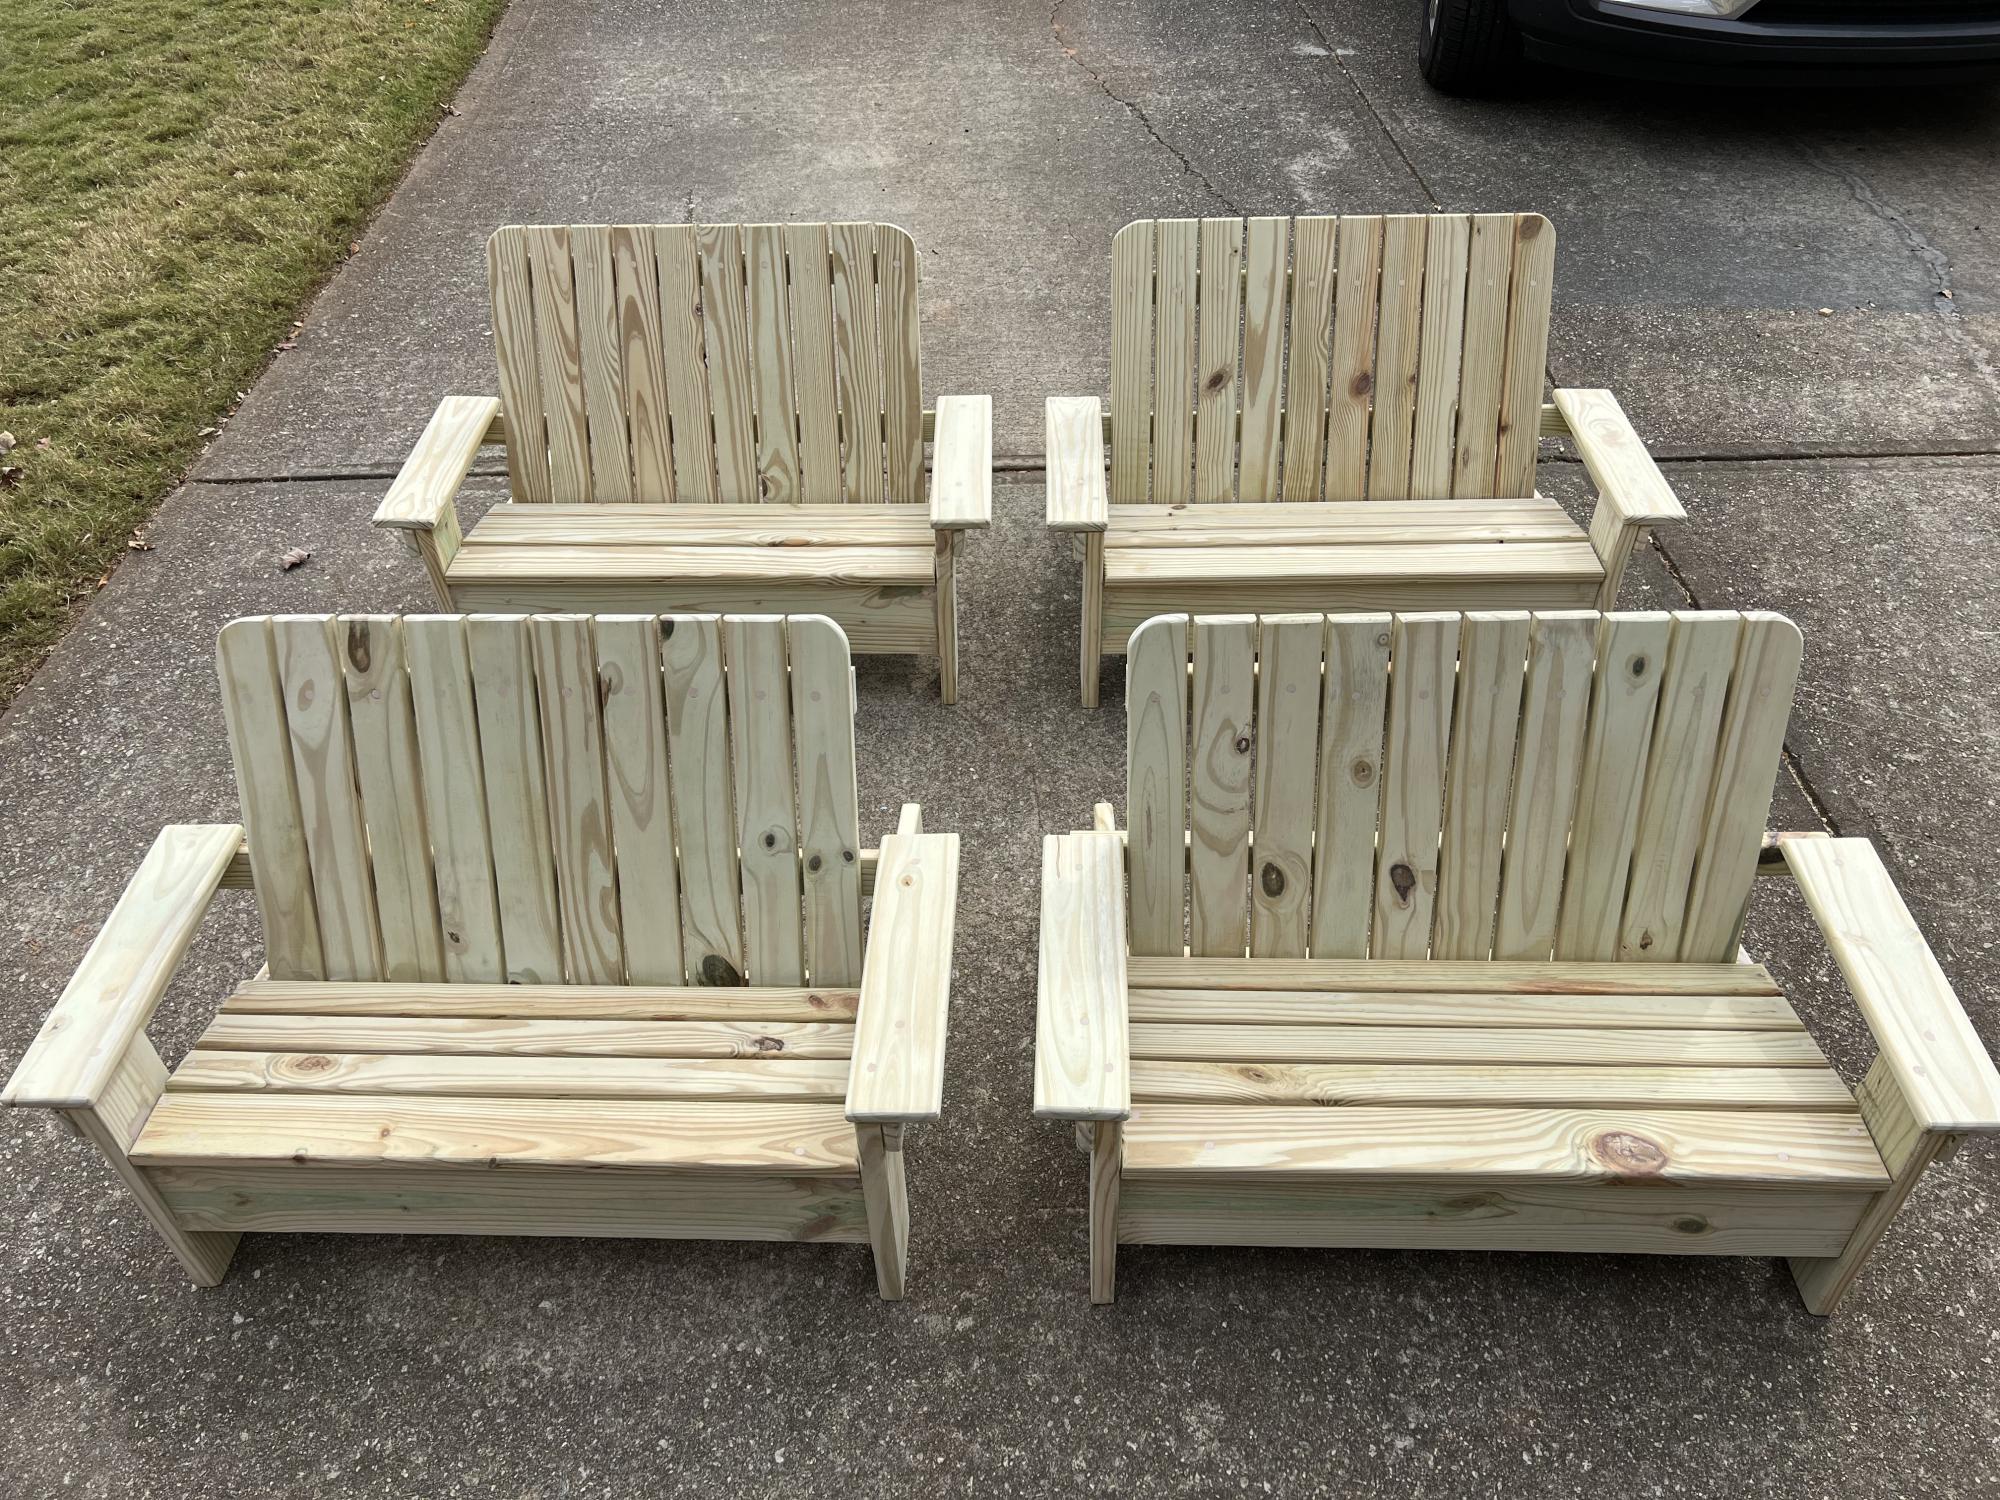
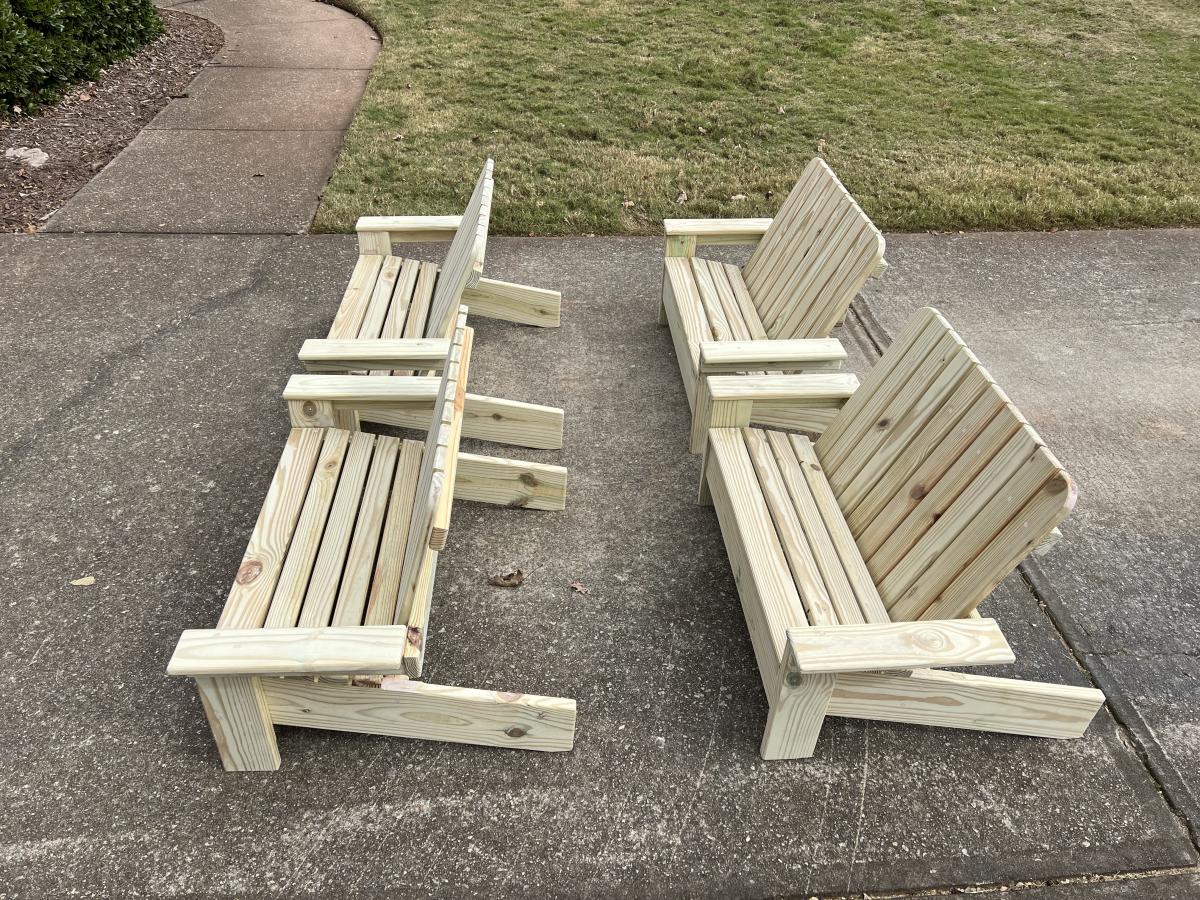
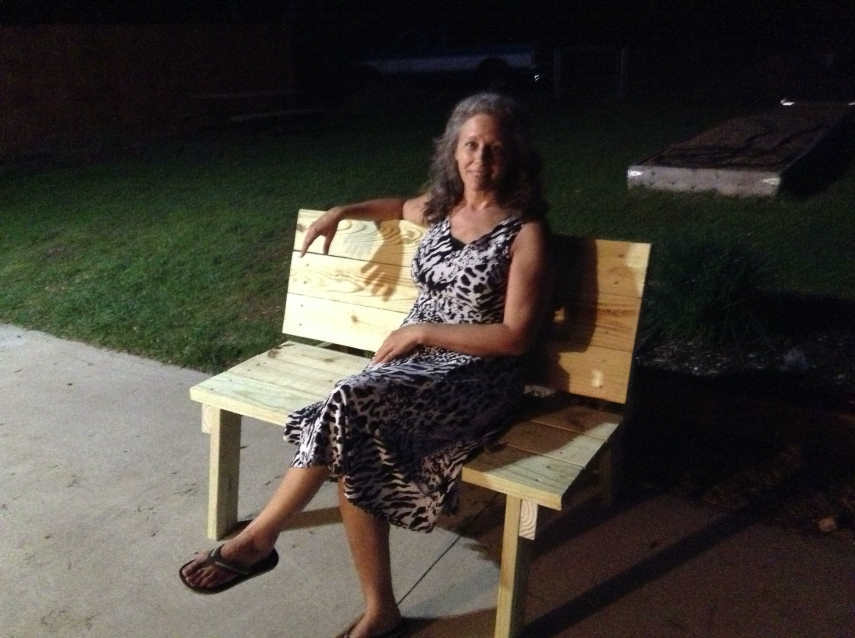
I built these benches for my son’s school. Their current ones were very rotted and falling apart. These will be outside and uncovered so pressure treated stock was used and I filled the screw holes with epoxy.
Sat, 11/06/2021 - 17:44
Those are awesome and look super comfortable, thanks for sharing!
This was a fun easy build...I took the toy box plans and used 1X4s instead of solid sides and bottom. I cut the legs short and put finals on.


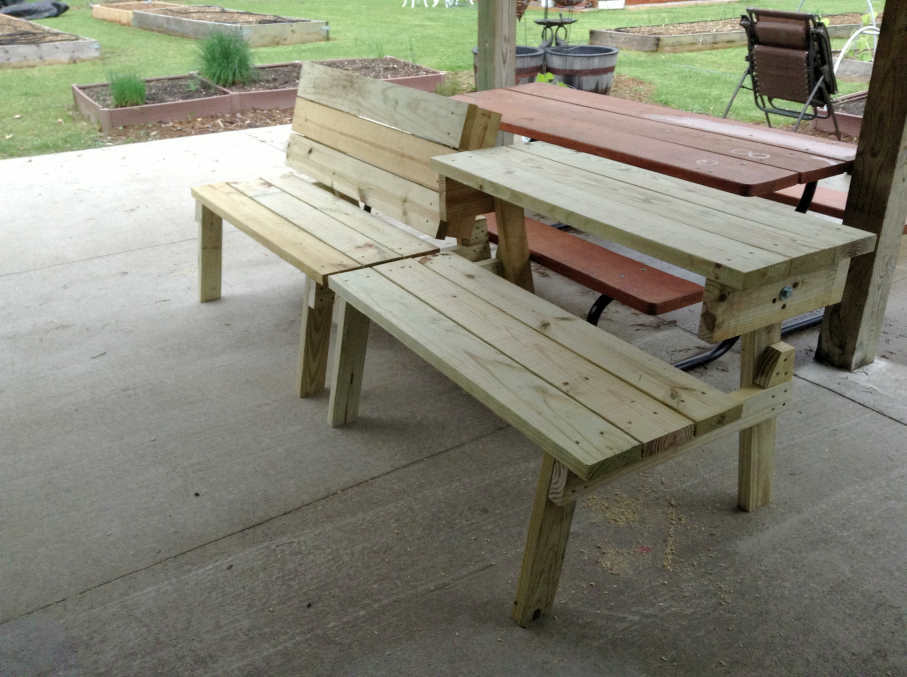
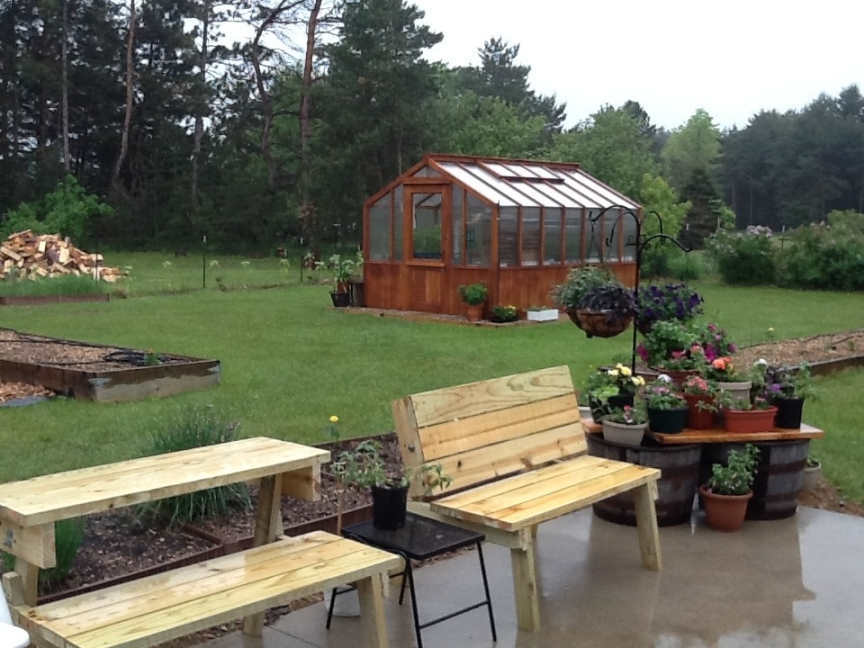
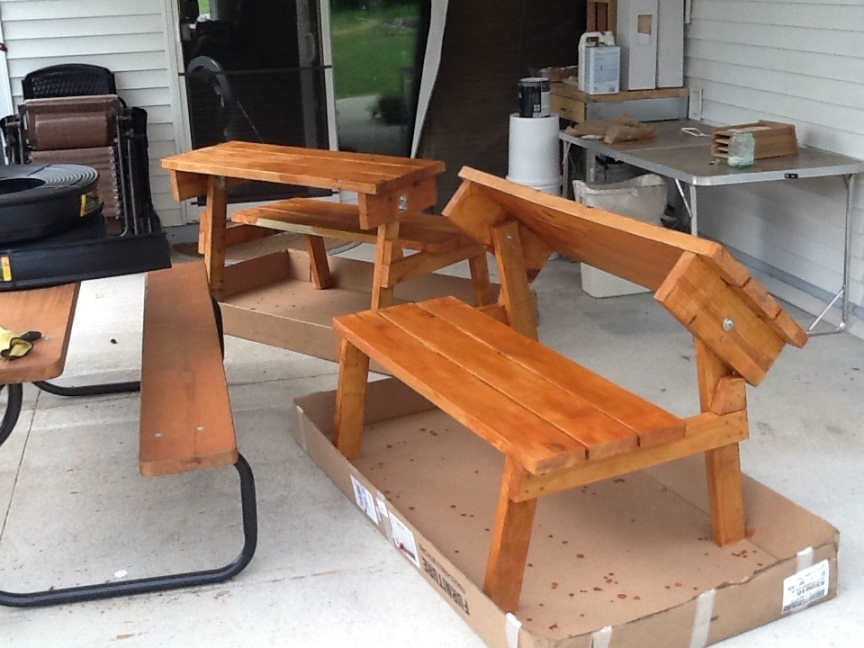
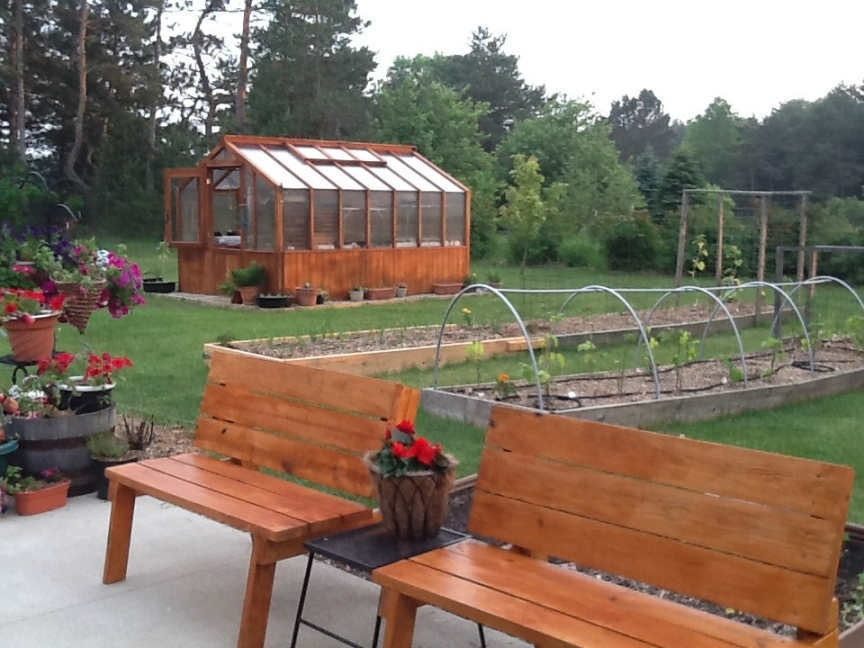
I saw a type of this for sale at Costco for $109 (for just ONE bench, not a pair). It' looked nice, and I almost bought it, but it had metal legs and trim and I wanted more of a natural look to go with my Cedar theme that I have going in my back yard garden/patio/greenhouse area. After seeing it in the store, I did an online search to see if I could find something a little more organic in nature... imagine my surprise when Ana's version of the bench/table came up! I looked over the plans and thought... well, I made the modified Farmhouse Table via her excellent instructions, I can surely do this! I did make a small change, I cut small pieces of wood to use as stops for the backs of the benches, instead of using holes and bolts to hold the backs at an angle that is comfortable. You can see this in the pictures, they are just beyond the back of the seat boards, on the leg supports. Thank you Ana! It was easy, quick, and they look SO good on my patio. I will be making more, maybe even selling a few because so many have asked me if I might :) I figure the cost was about $65 for both benches. A great deal and a fun project! Patrick really has to refrain himself from wanting to "help" me, but I am determined to do it myself... and low and behold! With Ana's generous free plans and inspiration, no problem!
Wed, 07/17/2013 - 13:11
Oh, great job!! I love it. The back stops for the bench is a great idea because those bolts are expensive! I'm going to do the same. Thank you for the idea!
Built to go with my farm house table. It looks amazing.
very easy
My husband and I just recently moved to Savannah from Annapolis.
I got my hands on some beautiful wood from an old house in Savannah. The console table for the bedroom came to mind immediately. Great project, thank you for the plans, Ana!
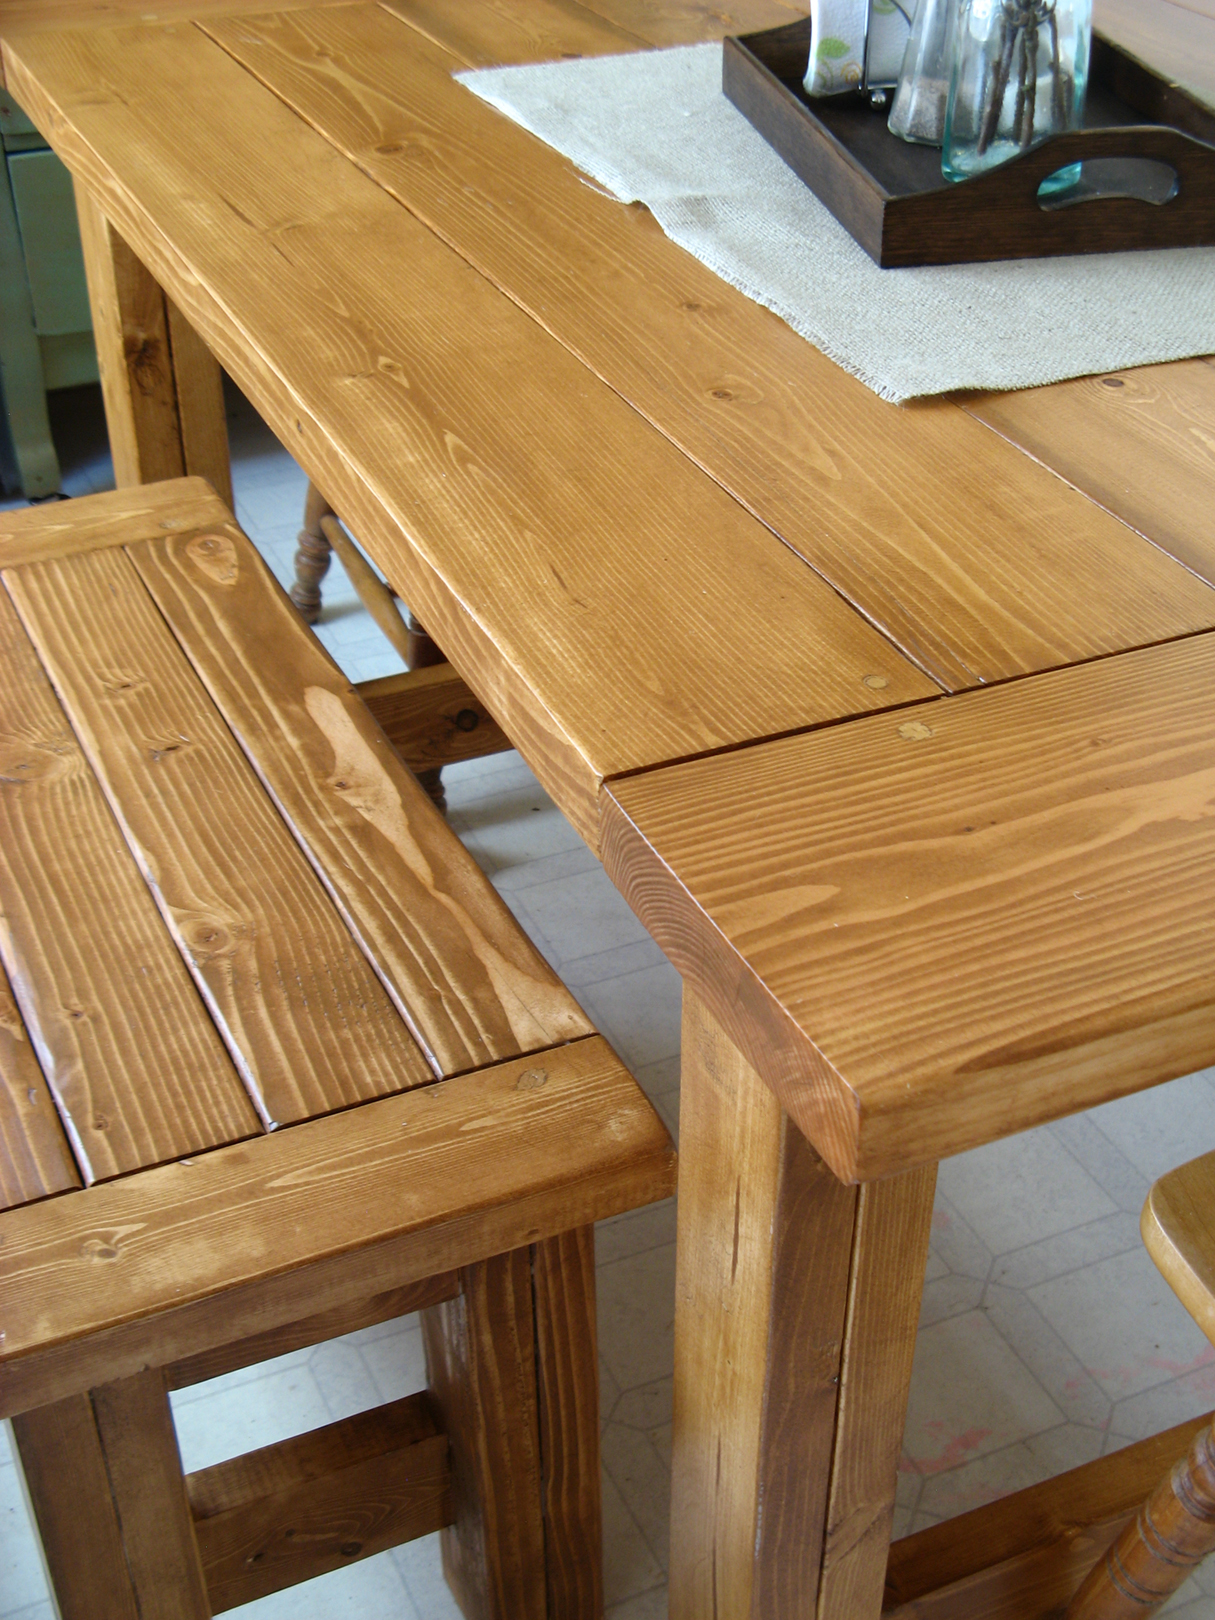
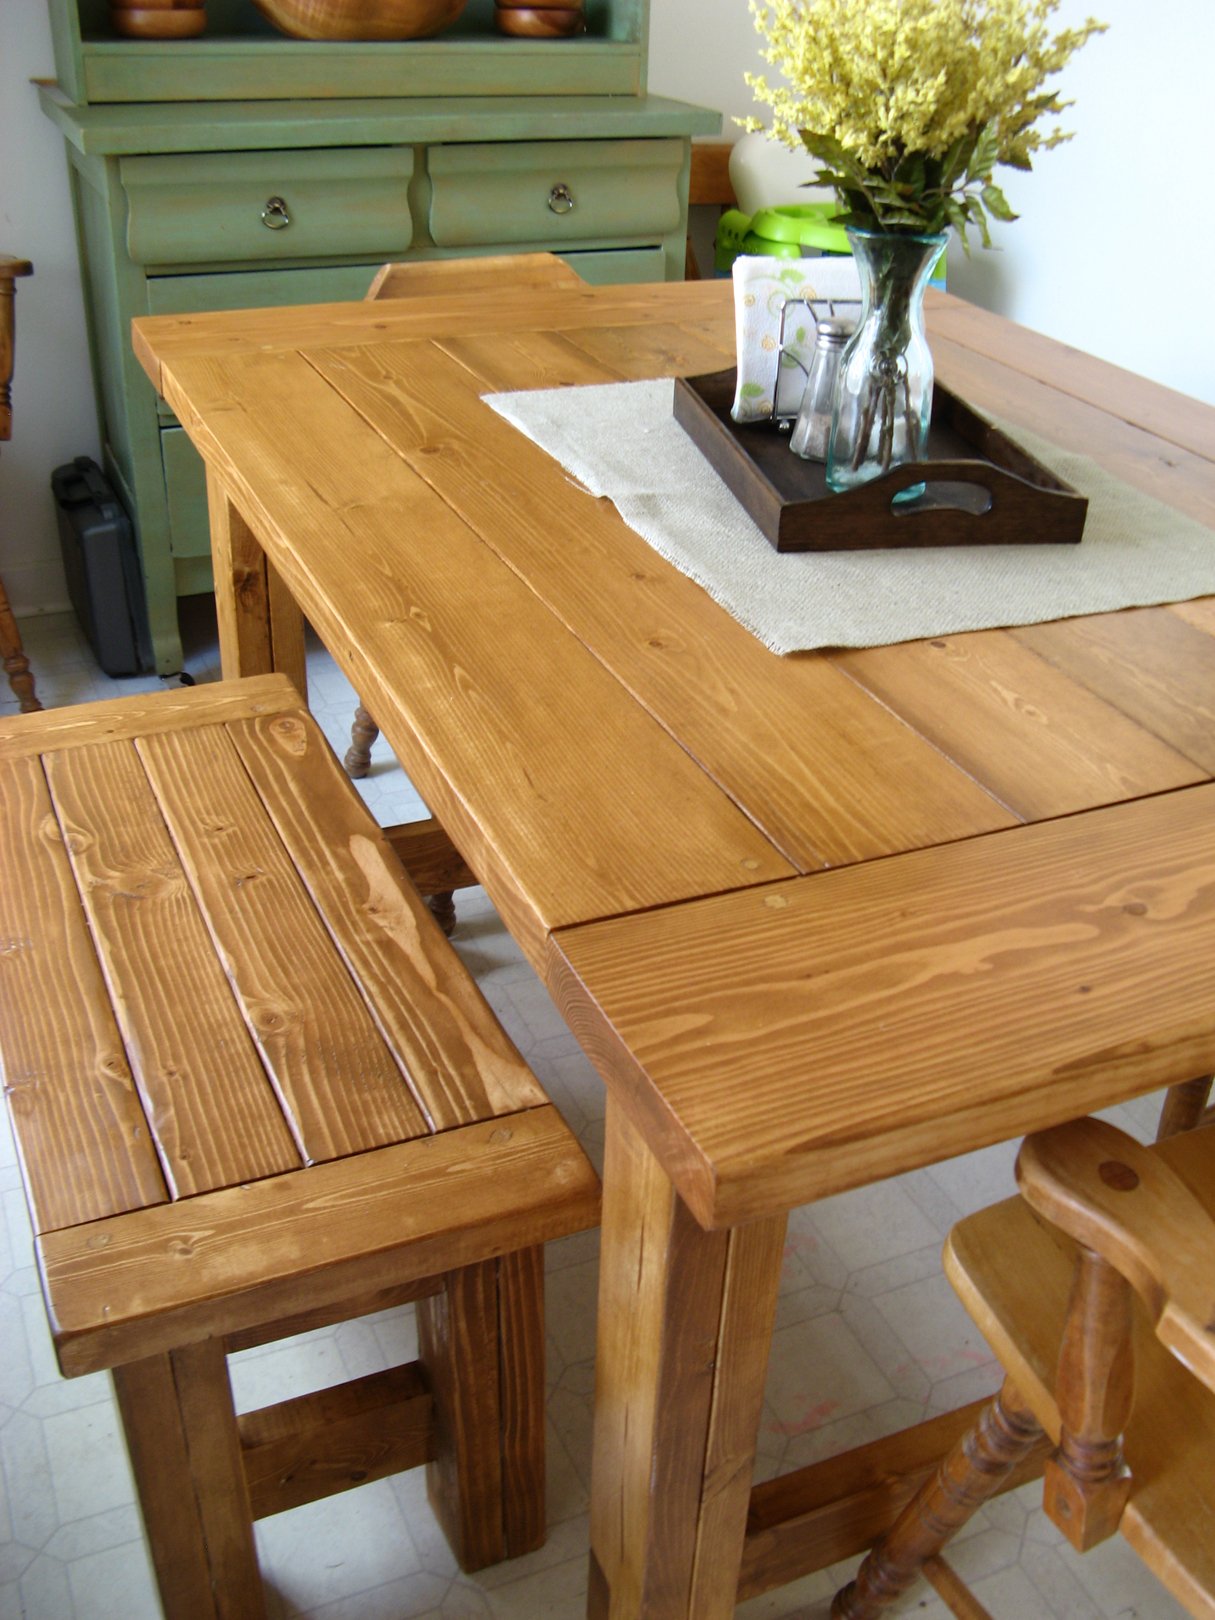
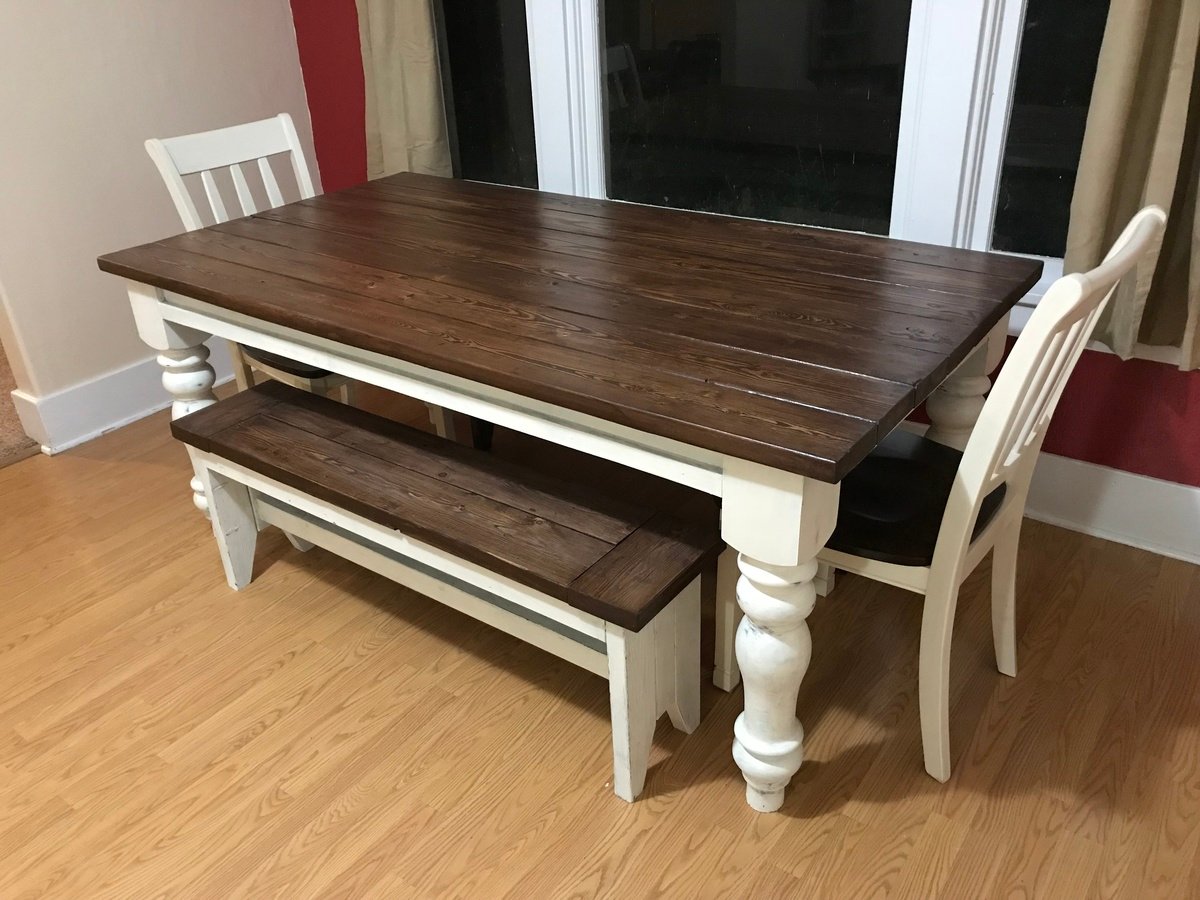
This was quite the project- took us several weekends to finish (we don't have a garage or really any good working area- we rent. Oh and we also have a toddler). We assembled the table in the living room, stained it on our front sidewalk, did a couple coats of poly in the backyard, and finished the last coat of poly in the dining room! (we know how heavy this table is, that's for sure! We modified the original farmhouse table dimensions so that this table would fit in our oh-so-tiny dining room. As you can tell, we also decided to build a bench to go with it. We are extremely pleased with the results!

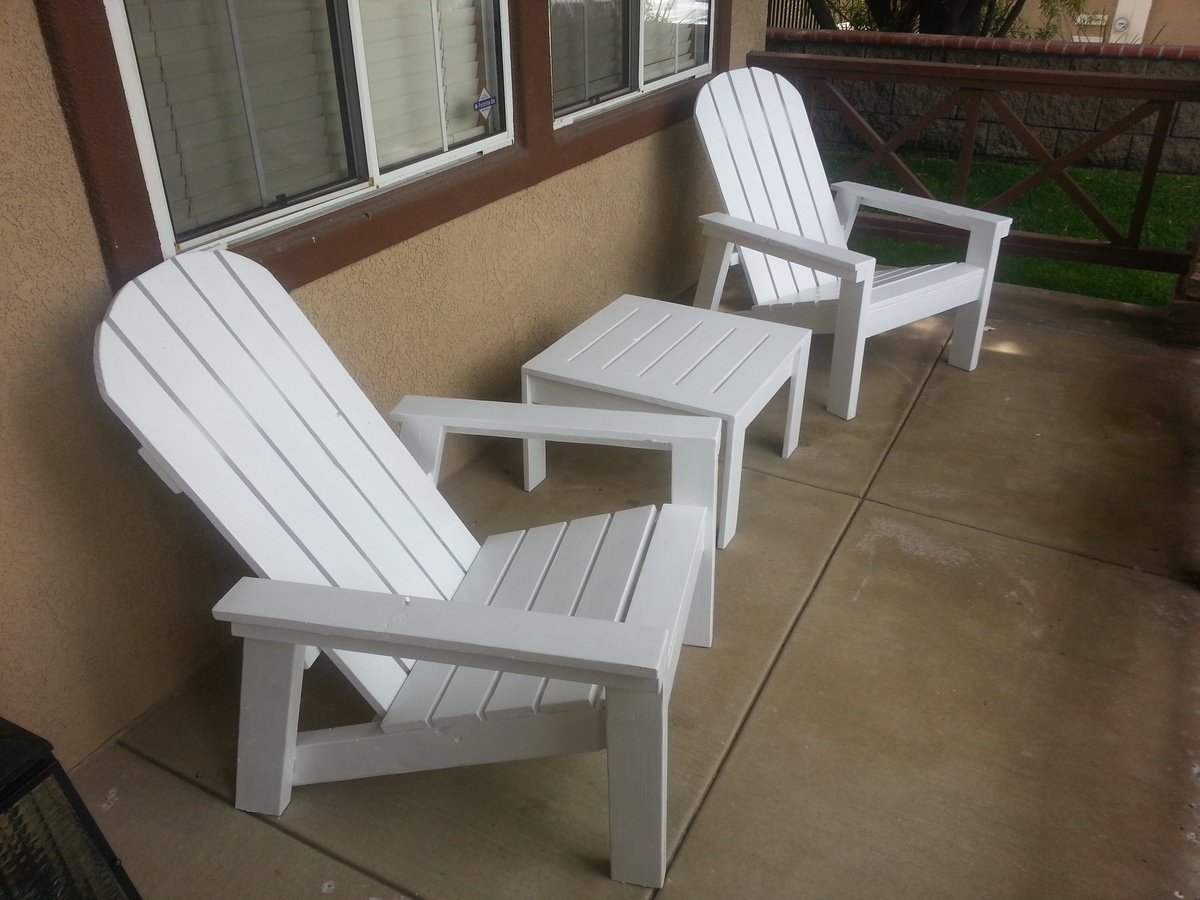
A few weeks ago my wife said she needs a footstool for our rocking chair while she rocks the baby to sleep. Being a sneaky husband, I quickly began planning to build her one because I knew I wasn't going to be able to find anything commercially sold that matched our baby room colors. A week later I have 2 Adirondack chairs, a table, a bunch of tools I didn't have before, and no footstool.... So about the chairs...The plans were super easy and well thought out. I learned a few things about cutting angles, which if you look closely you can see the seat portion does not extend to the front legs. Instead of wasting more wood, I simply adapted the plans. This makes the backs of the chairs sit upright more, but I actually like it because I have a bad back. We sanded it with 150 grit sand paper, and should have done a second sanding with a finer paper, but we didn't. I primed the wood with a basic multi purpose primer and then painted with BEHR outdoor white semi-gloss. I wanted to seal it with a poly, but Home Depot did not recommend sealing with with Poly, and I could not find a Poly in Home Depot that did not warn AGAINST using it on painted surfaces. Oh, and make sure you wear eye protection! Dust in the eyes is brutal. Fortunately I have a kind wife who washed them out for me. :) Now I have a nice pair of clear glasses.
In reply to Love it! by Ana White Admin
Fri, 06/14/2013 - 22:03
We just finished a modified version of the sturdy workbench. Footstool is next I suppose :)
Great project plans from Ana and of course, LadyGoats. Thank You!
Wood: Pine (similar cut list to what was in the plans)
Time to complete: Approx 4 hours.
Joints: 3/4 inch pocket holes with 1 1/4 inch pocket hole screws and glue. Love my Kreg Jig.
Stain: Varathane Espresso color, two applications.
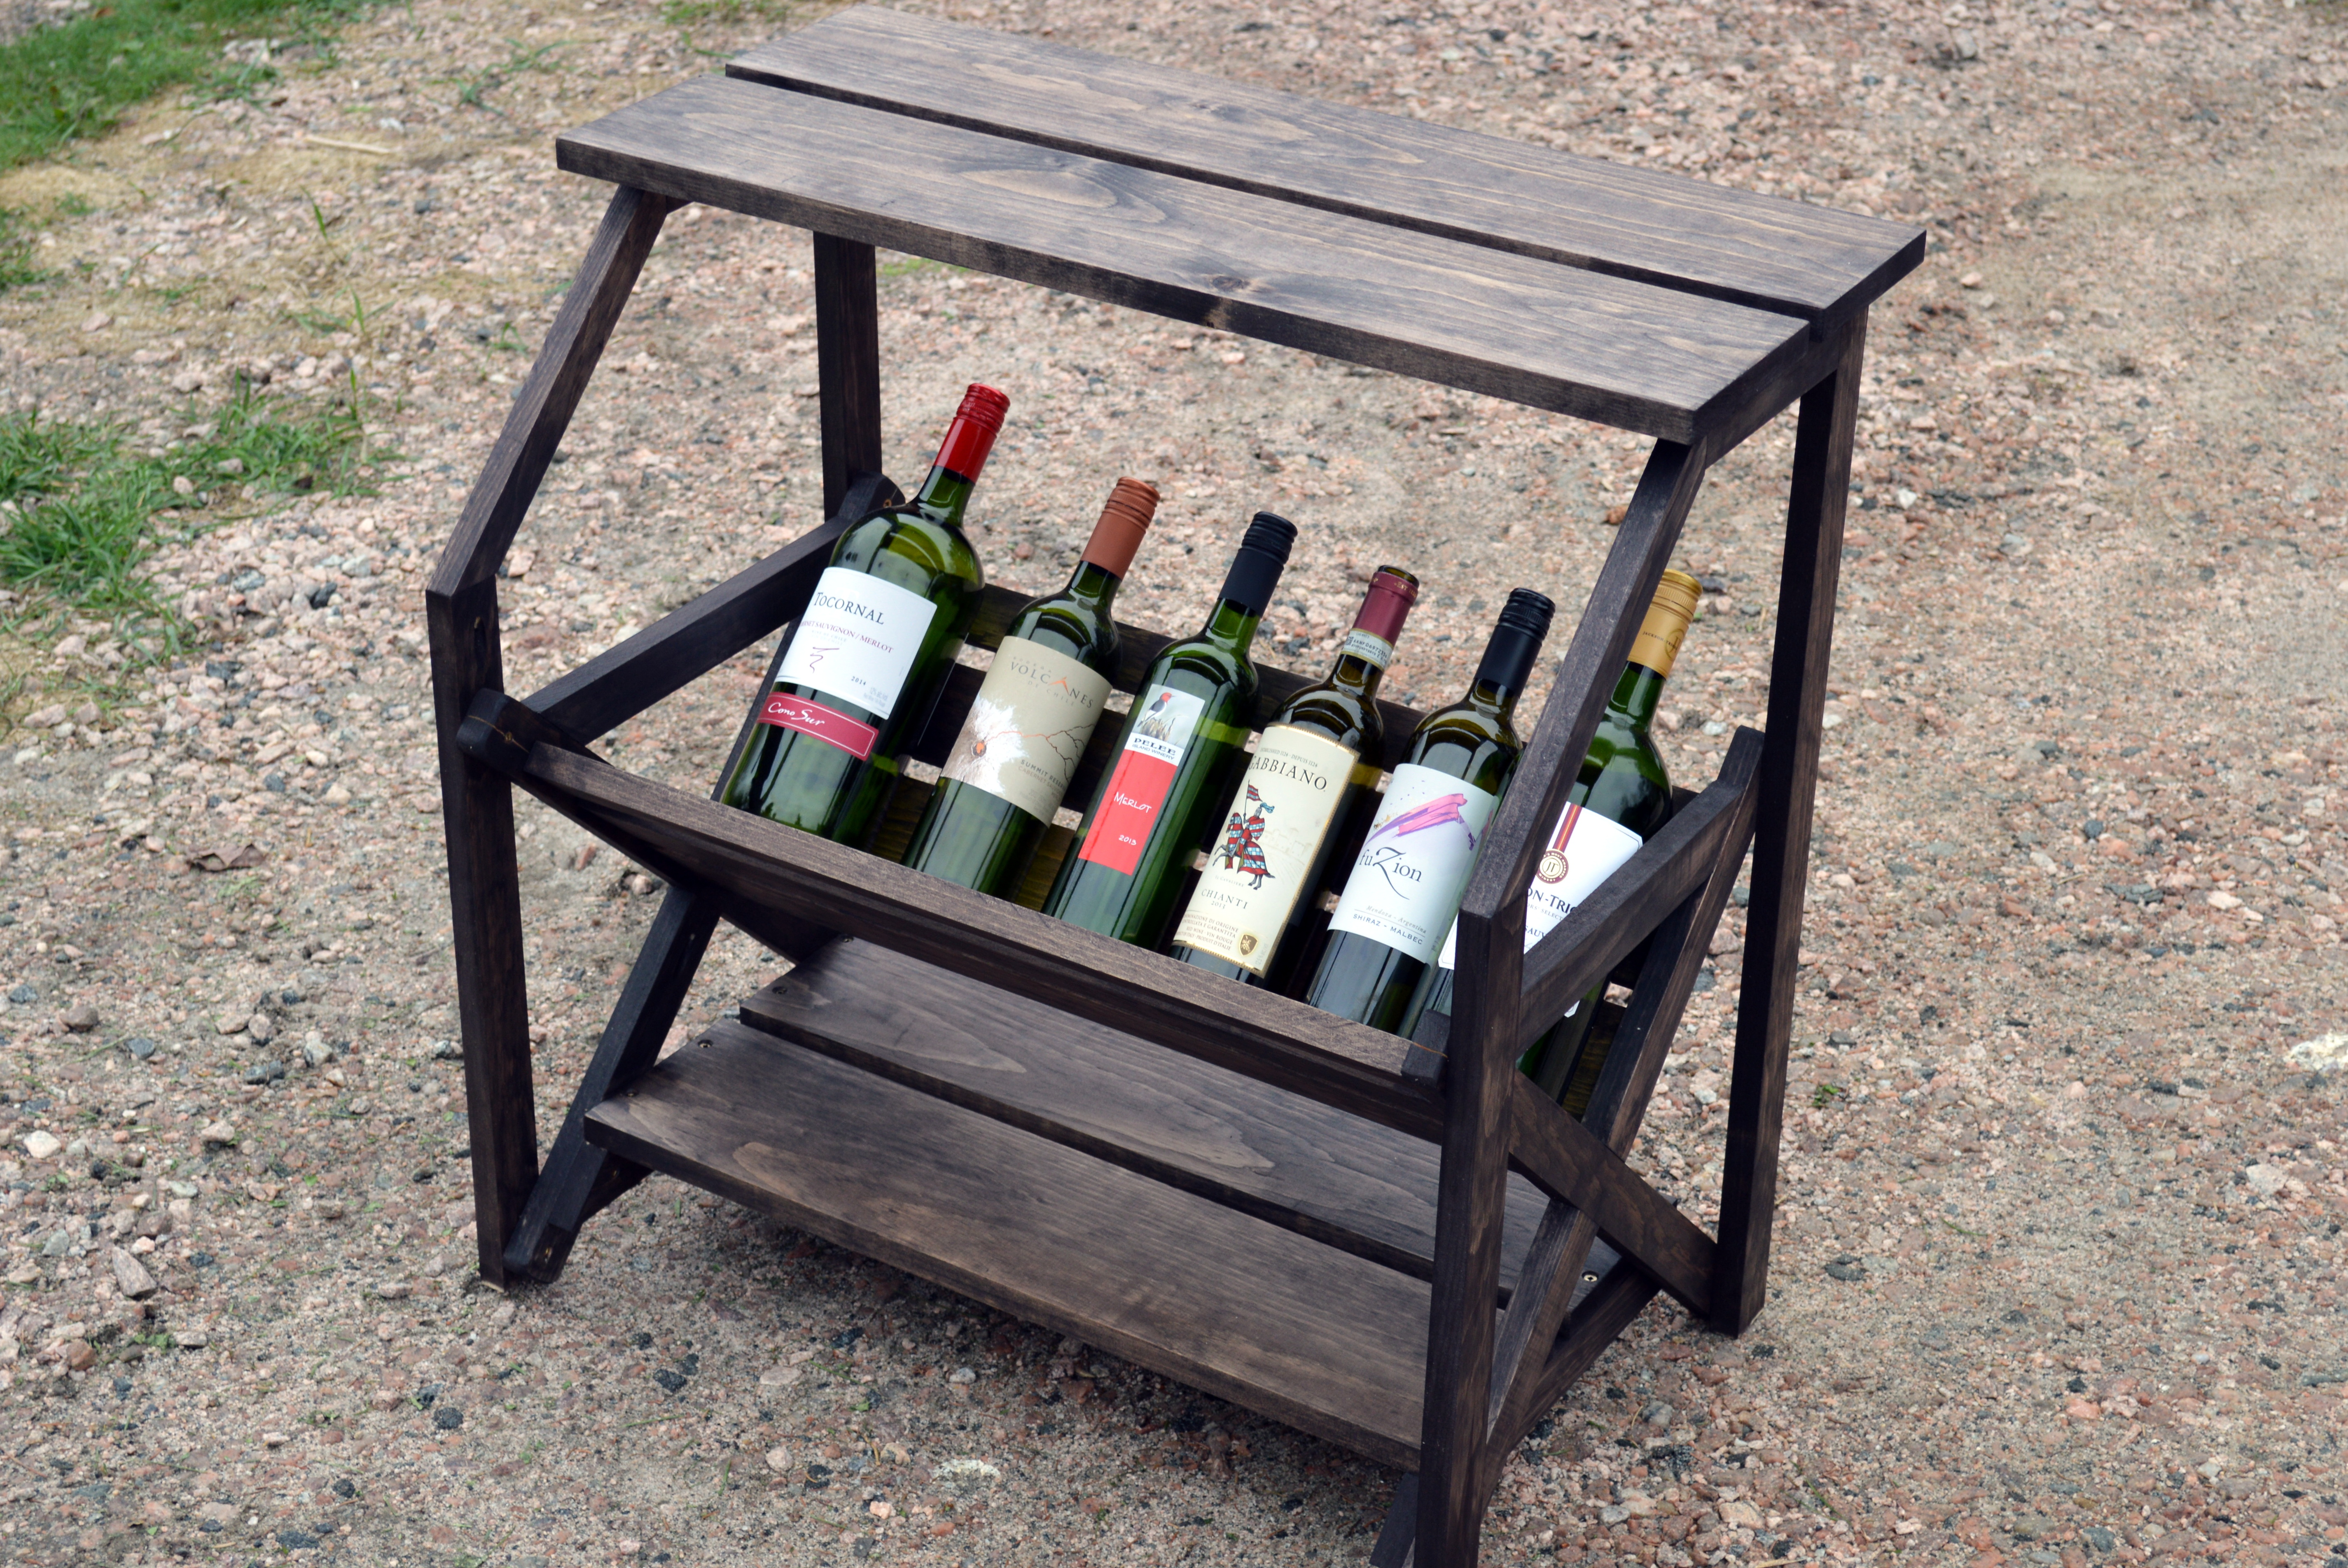
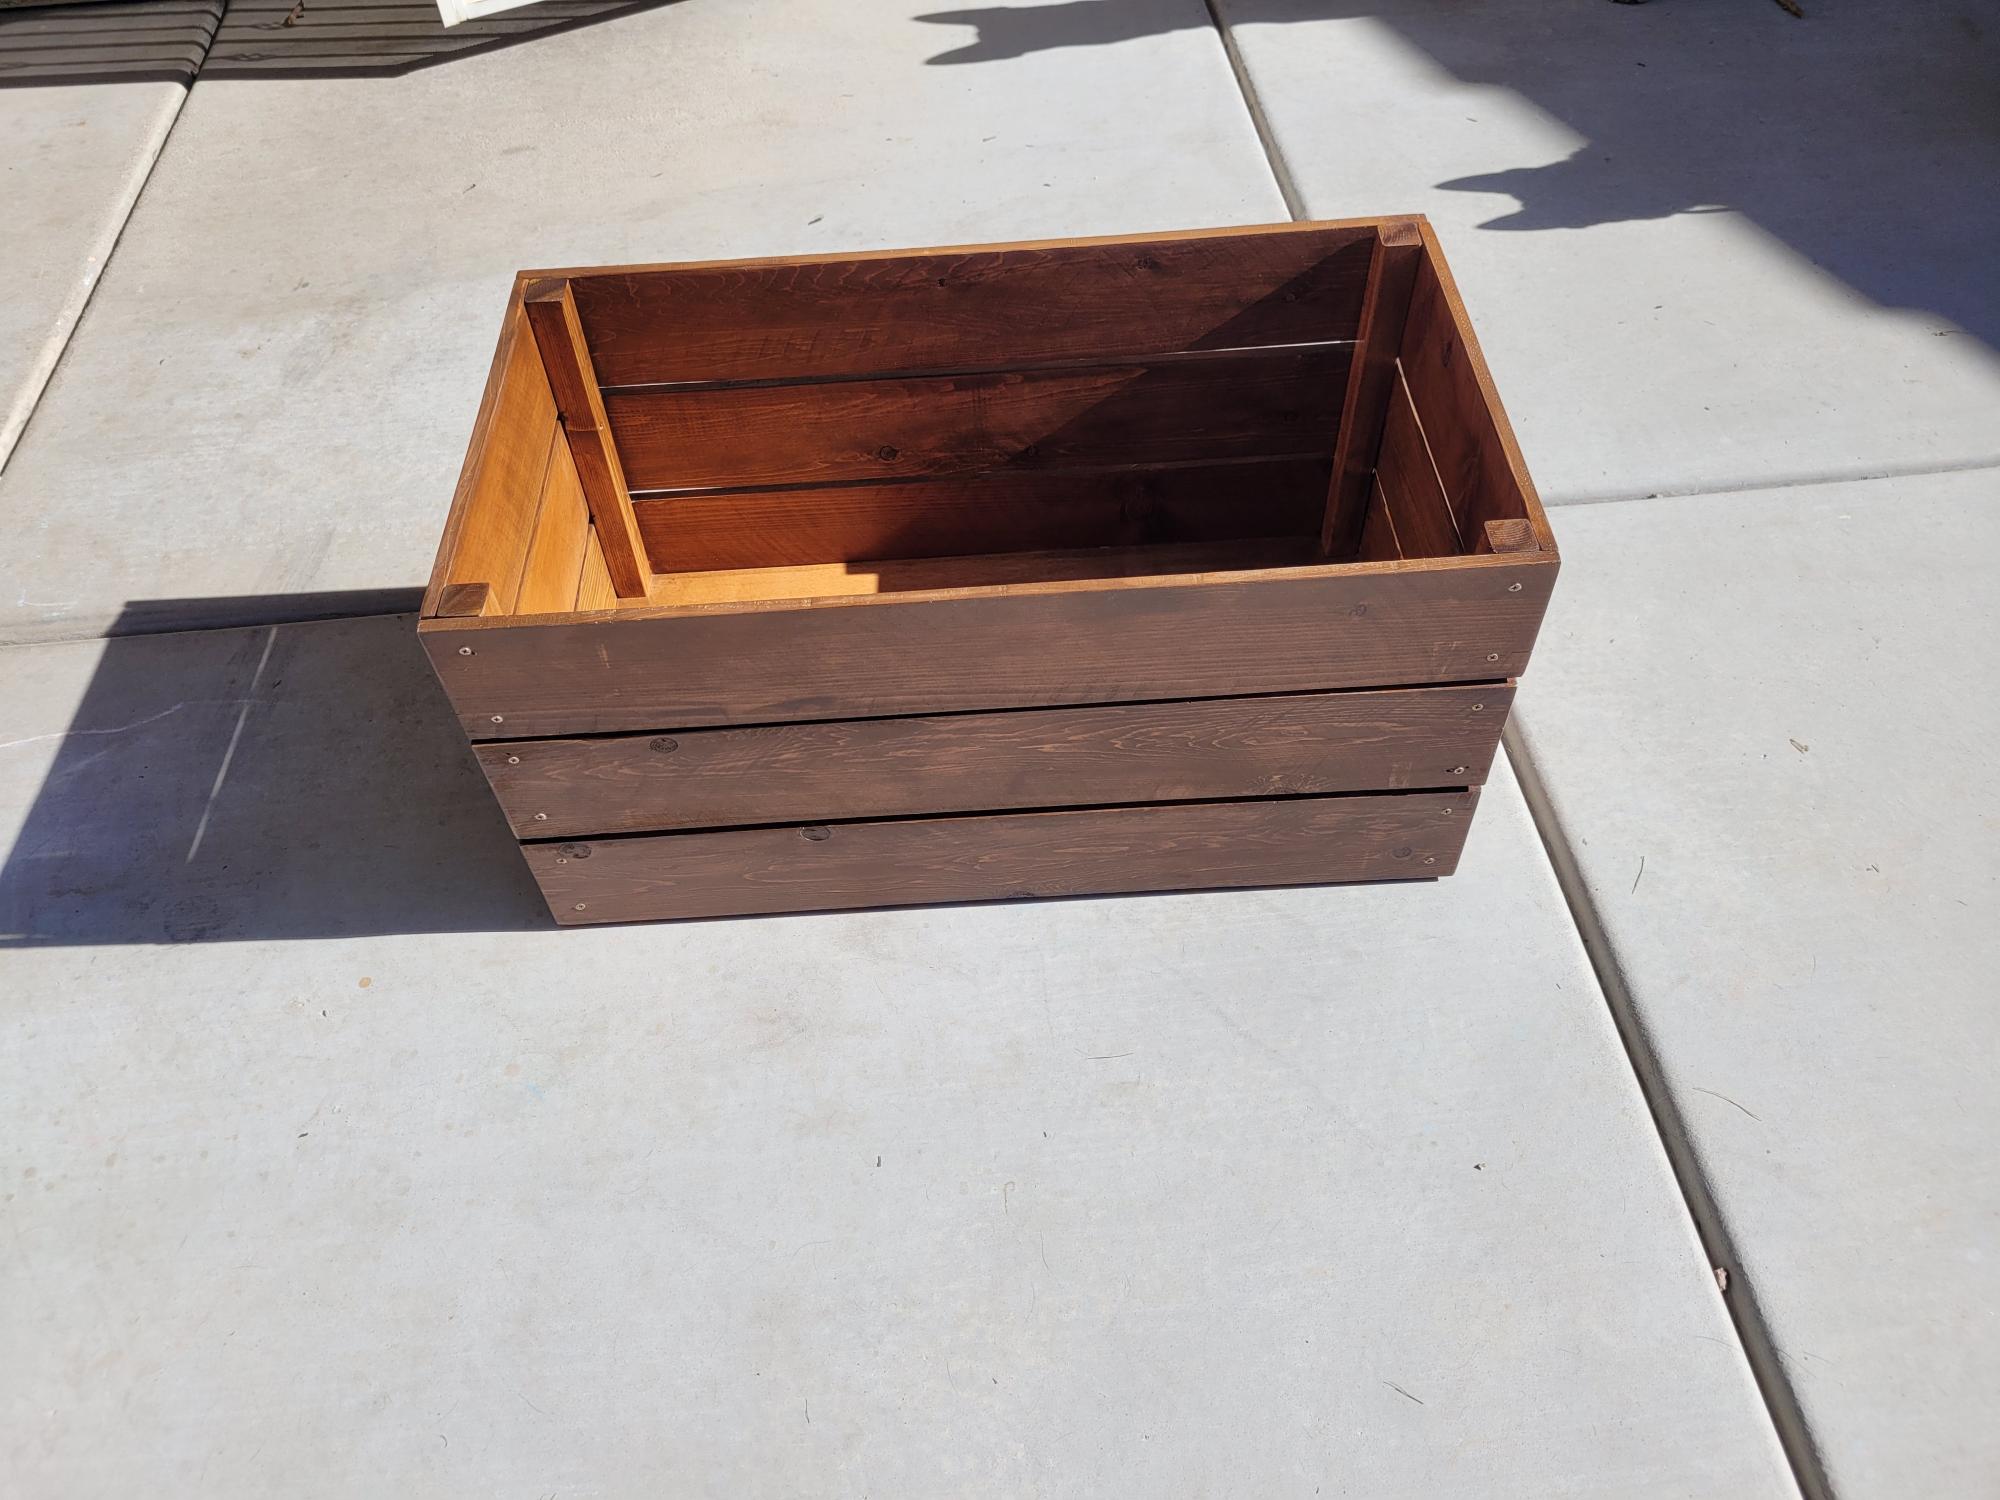
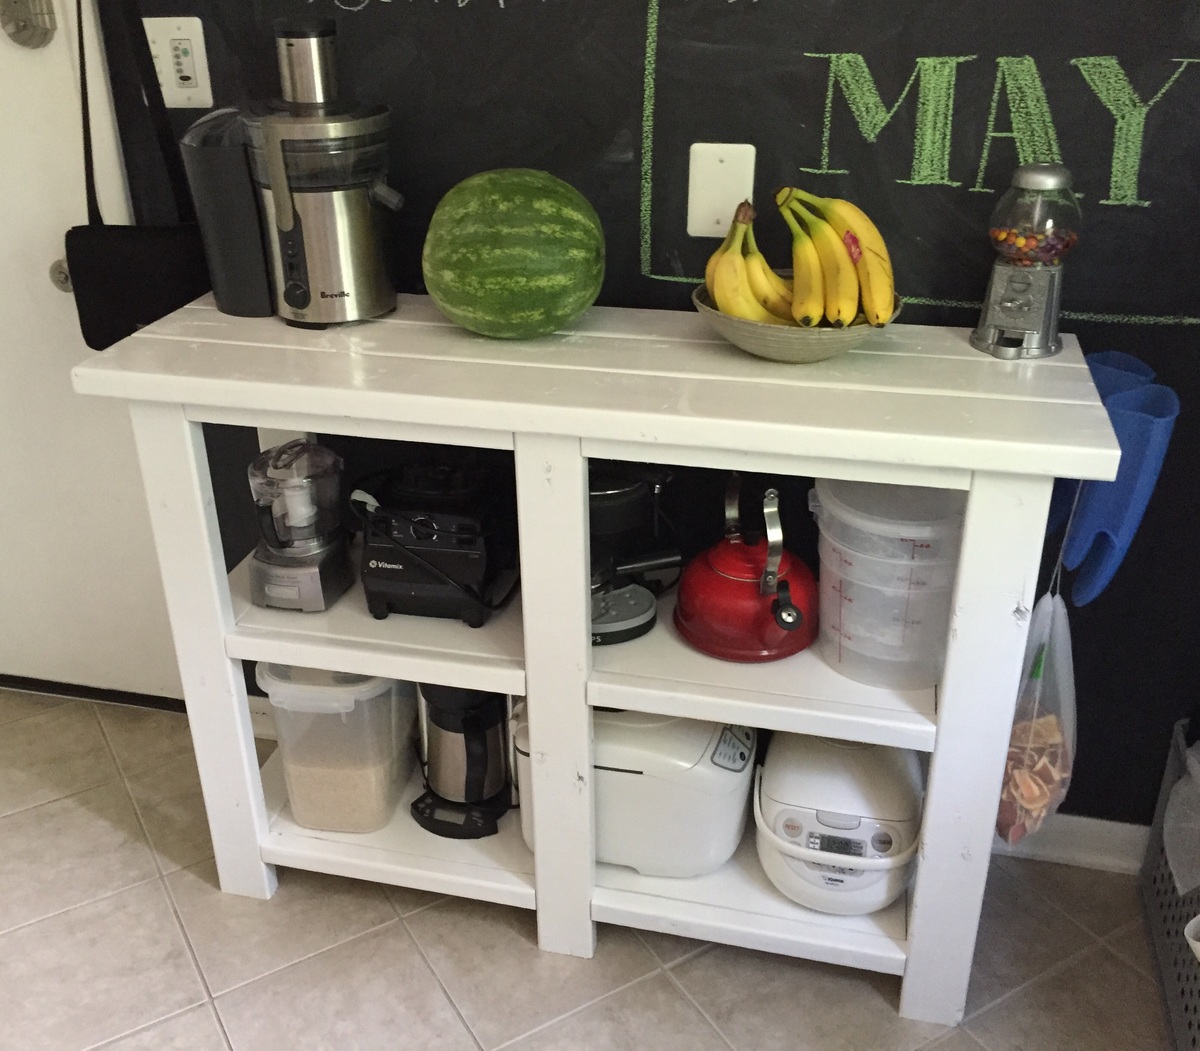
Fun morning project! This table/shelf can be used for so many things. Once the two pieces are secured together it is very solid. The bottom was made from Ana's x book caddy plan and the shelf was modified from LadyGoats booksellers plan.
Hope you all like it!
Don

Sun, 05/17/2015 - 08:57
This turned out great!!! Love the idea to use it as a wine rack! xoxo

Shared on Facebook by Jenna Schultz
My husband built your Rustic bathroom vanities into 3 drawer dressers to hide our children's toys on each side of the fireplace. They turned out amazing!!!
My first project, I've never done any kind of wood working at all. I made and noticed several mistakes however, I'm still very pleased with how it turned out. I learned from all my mistakes and now know the best ways to avoid them in the future. Super excited to begin my next project!
Sat, 11/20/2021 - 09:23
It looks great and even better, its functional! Thanks for sharing:)
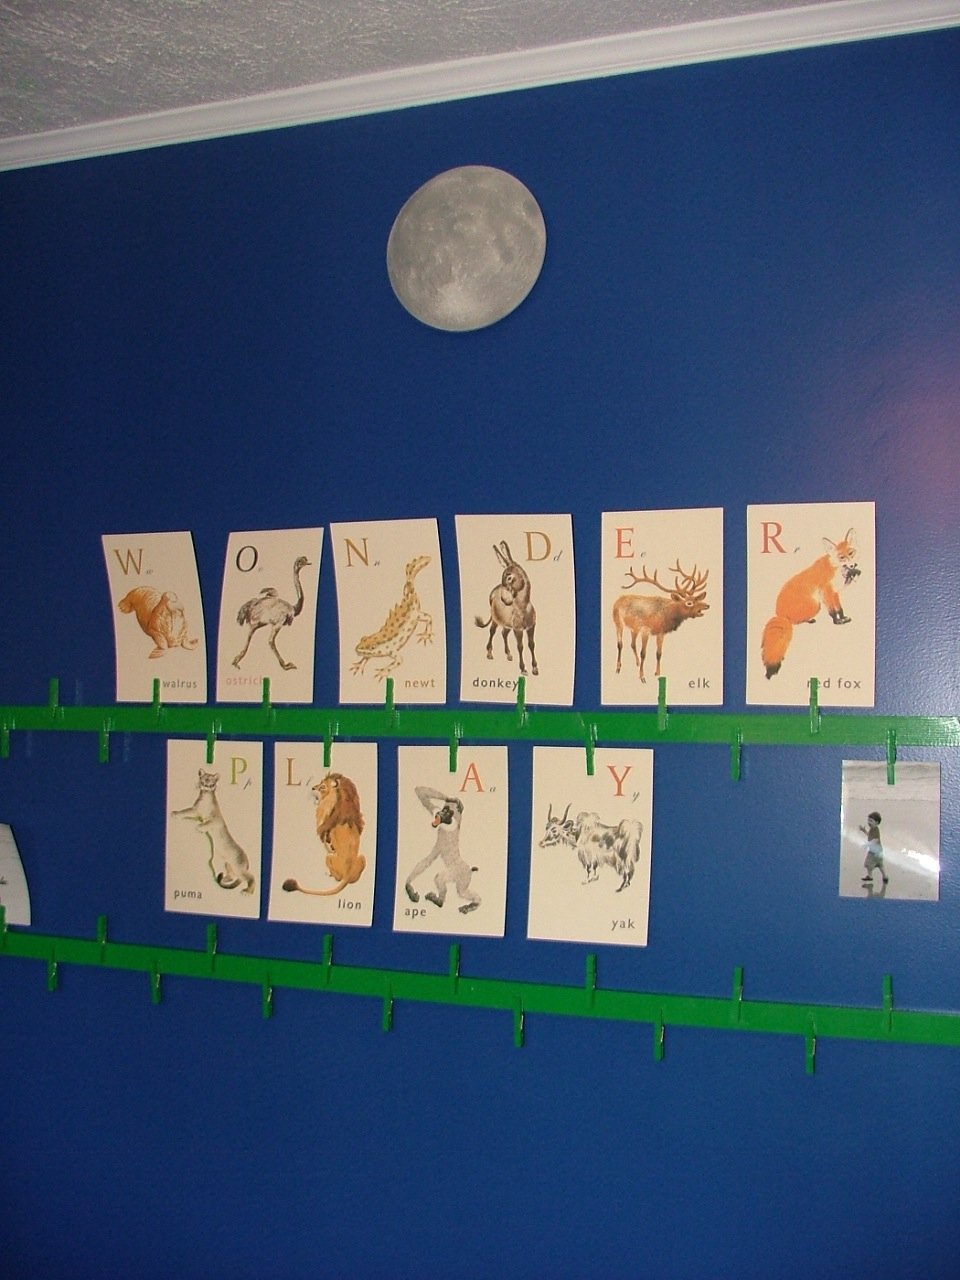
I had been holding onto some Martha Stewart Alphabet Cards since my, now 3 year old, son was a baby. Some of them had been drawn on : ) so I couldn't hang up the alphabet, but I got creative with spelling some words out instead. I am so thankful for Anna's plans, I finally found a way to hang these without buying a lot of picture frames! My son loves them, and hangs his paintings and photos often.

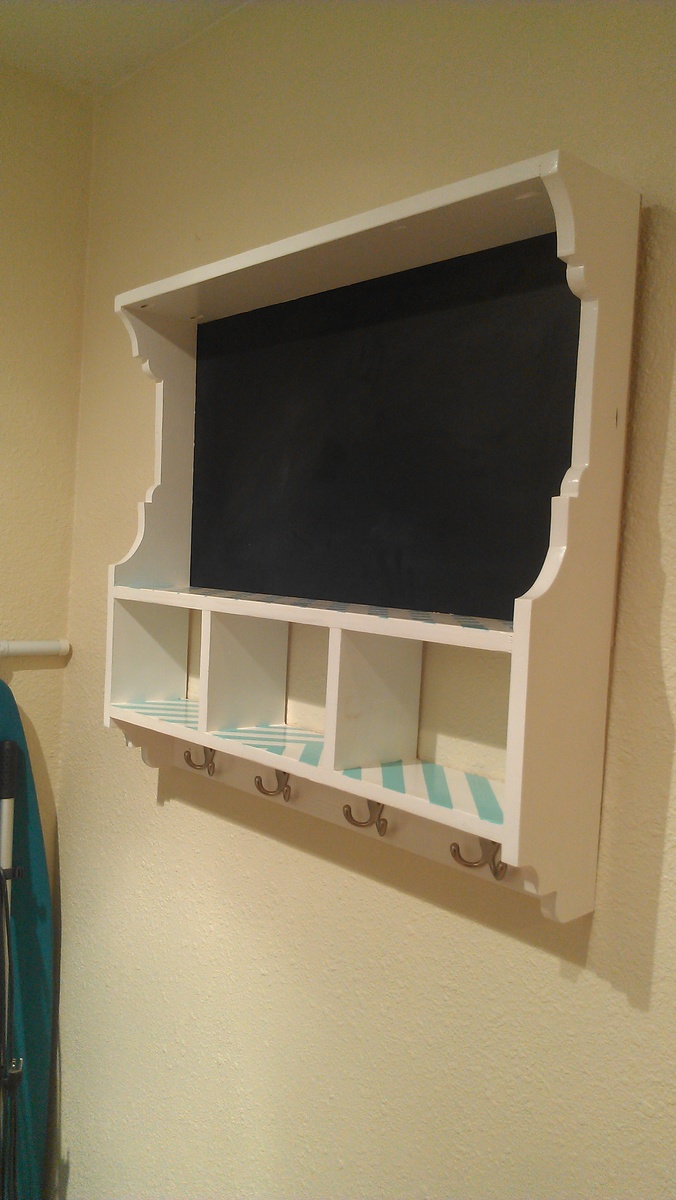
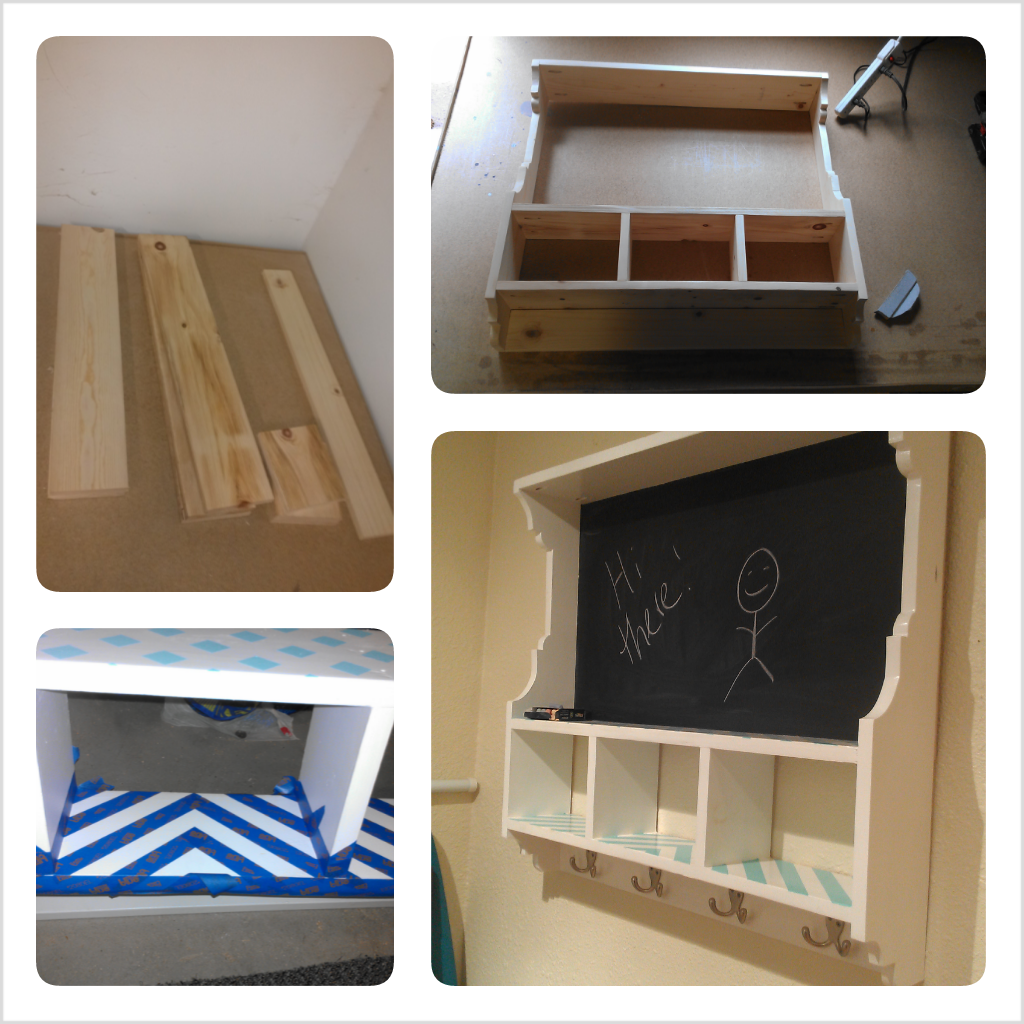
This cubby was my very first project! I just finished remodeling my kitchen, all that was missing was a place for my keys, dog leashes etc. My little house doesn't have a proper entryway so I created a "welcome station" with this cubby. The trickiest part was definitely cutting the sides, but I was able to get those tight circles with a little forethought and a lot of sanding :) I used leftover paint and samples from choosing colors for the kitchen, so it automatically coordinated with the rest of the decor.
As a beginner I found this very easy to build. I took my time to make sure everything was measured and cut just right. I substituted longer screws for the brackets. The ones that came with the brackets seemed a little short. There's a trick to getting the screws in the brackets. The angled bar swings back to make it easy to attach the screws. Very happy with the finished product.
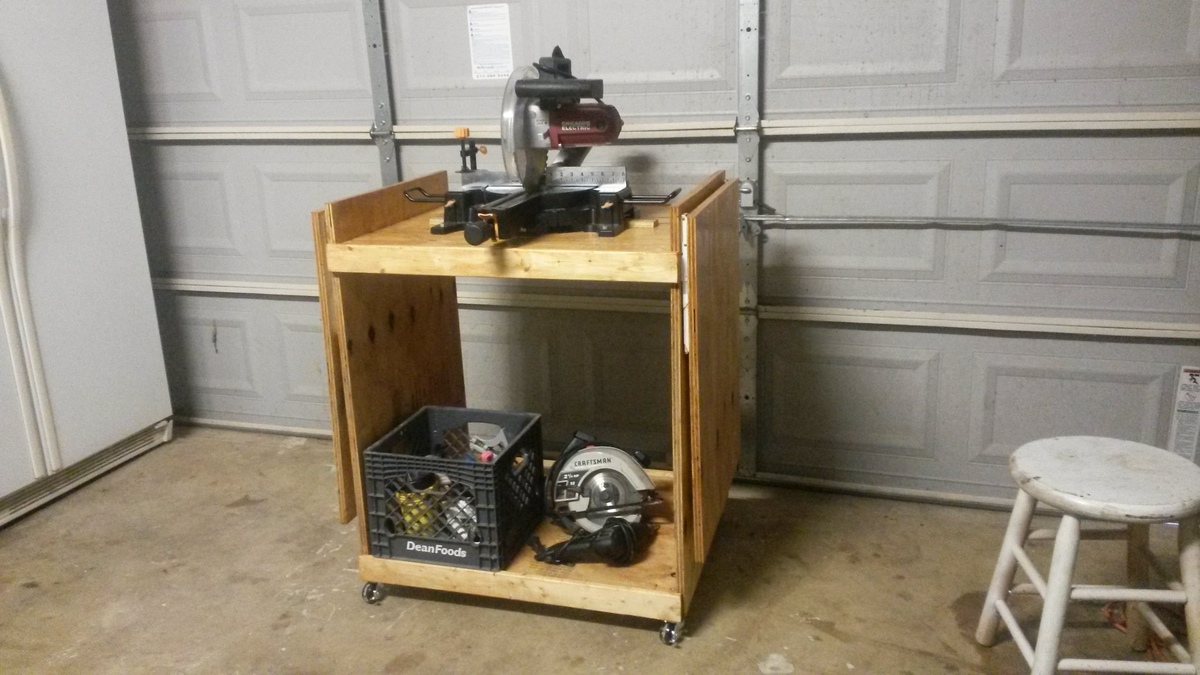

Wed, 05/20/2015 - 08:43
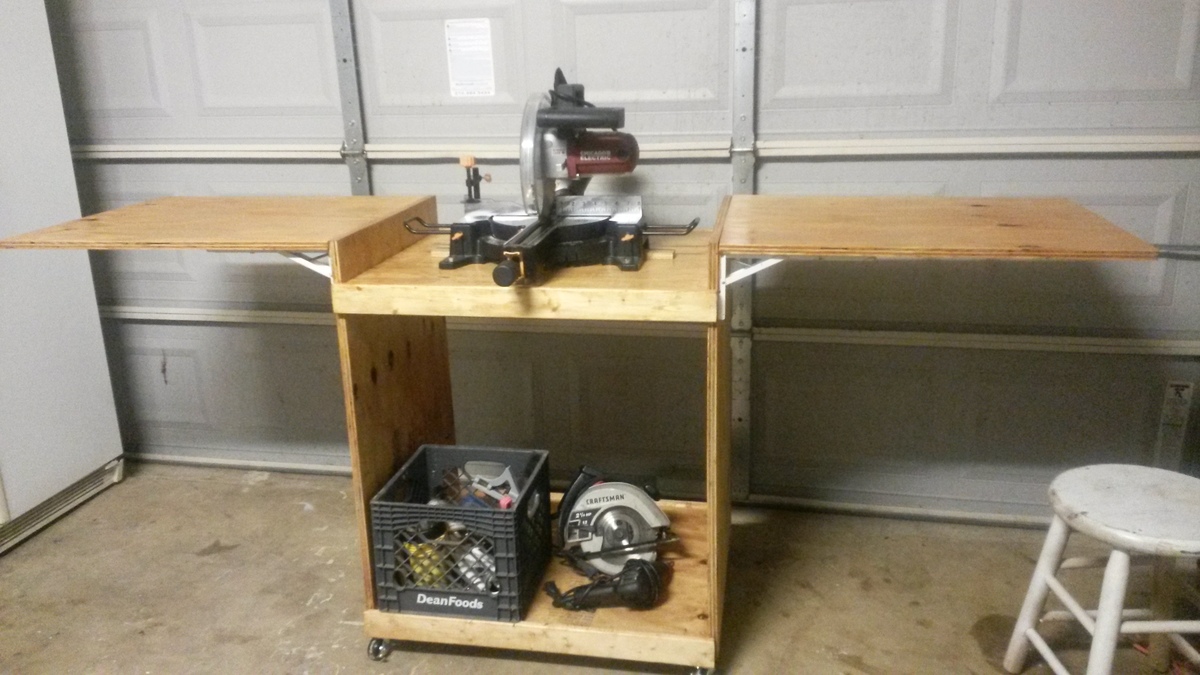
I went over a year without a miter saw stand/cart. Looking back it now that I have one, I kick myself for not getting one sooner. I have limited space for storage so I went with a store bought so that I can fold it up when not in use, but I really wish I had something that's always set up like yours. I also like the extensions that can fold down when not in use. Good job!
My husband & I built this version of the Husky Farmhouse Table. We also built two benches & bought chairs to match the colors as closely as we could. We. LOVE. It! I found the legs on Etsy for a little cheaper than the place Ana reccomends in the plans. The milk paint didn't crackle as much as I wanted, but I think that was because I put the first coat on WAY too thin since I was afraid of running out. And I ended up doing 3 coats. We were able to sand the edges & some spots down a bit to get the effect we wanted though. Super excited to have Christmas dinner at this baby!
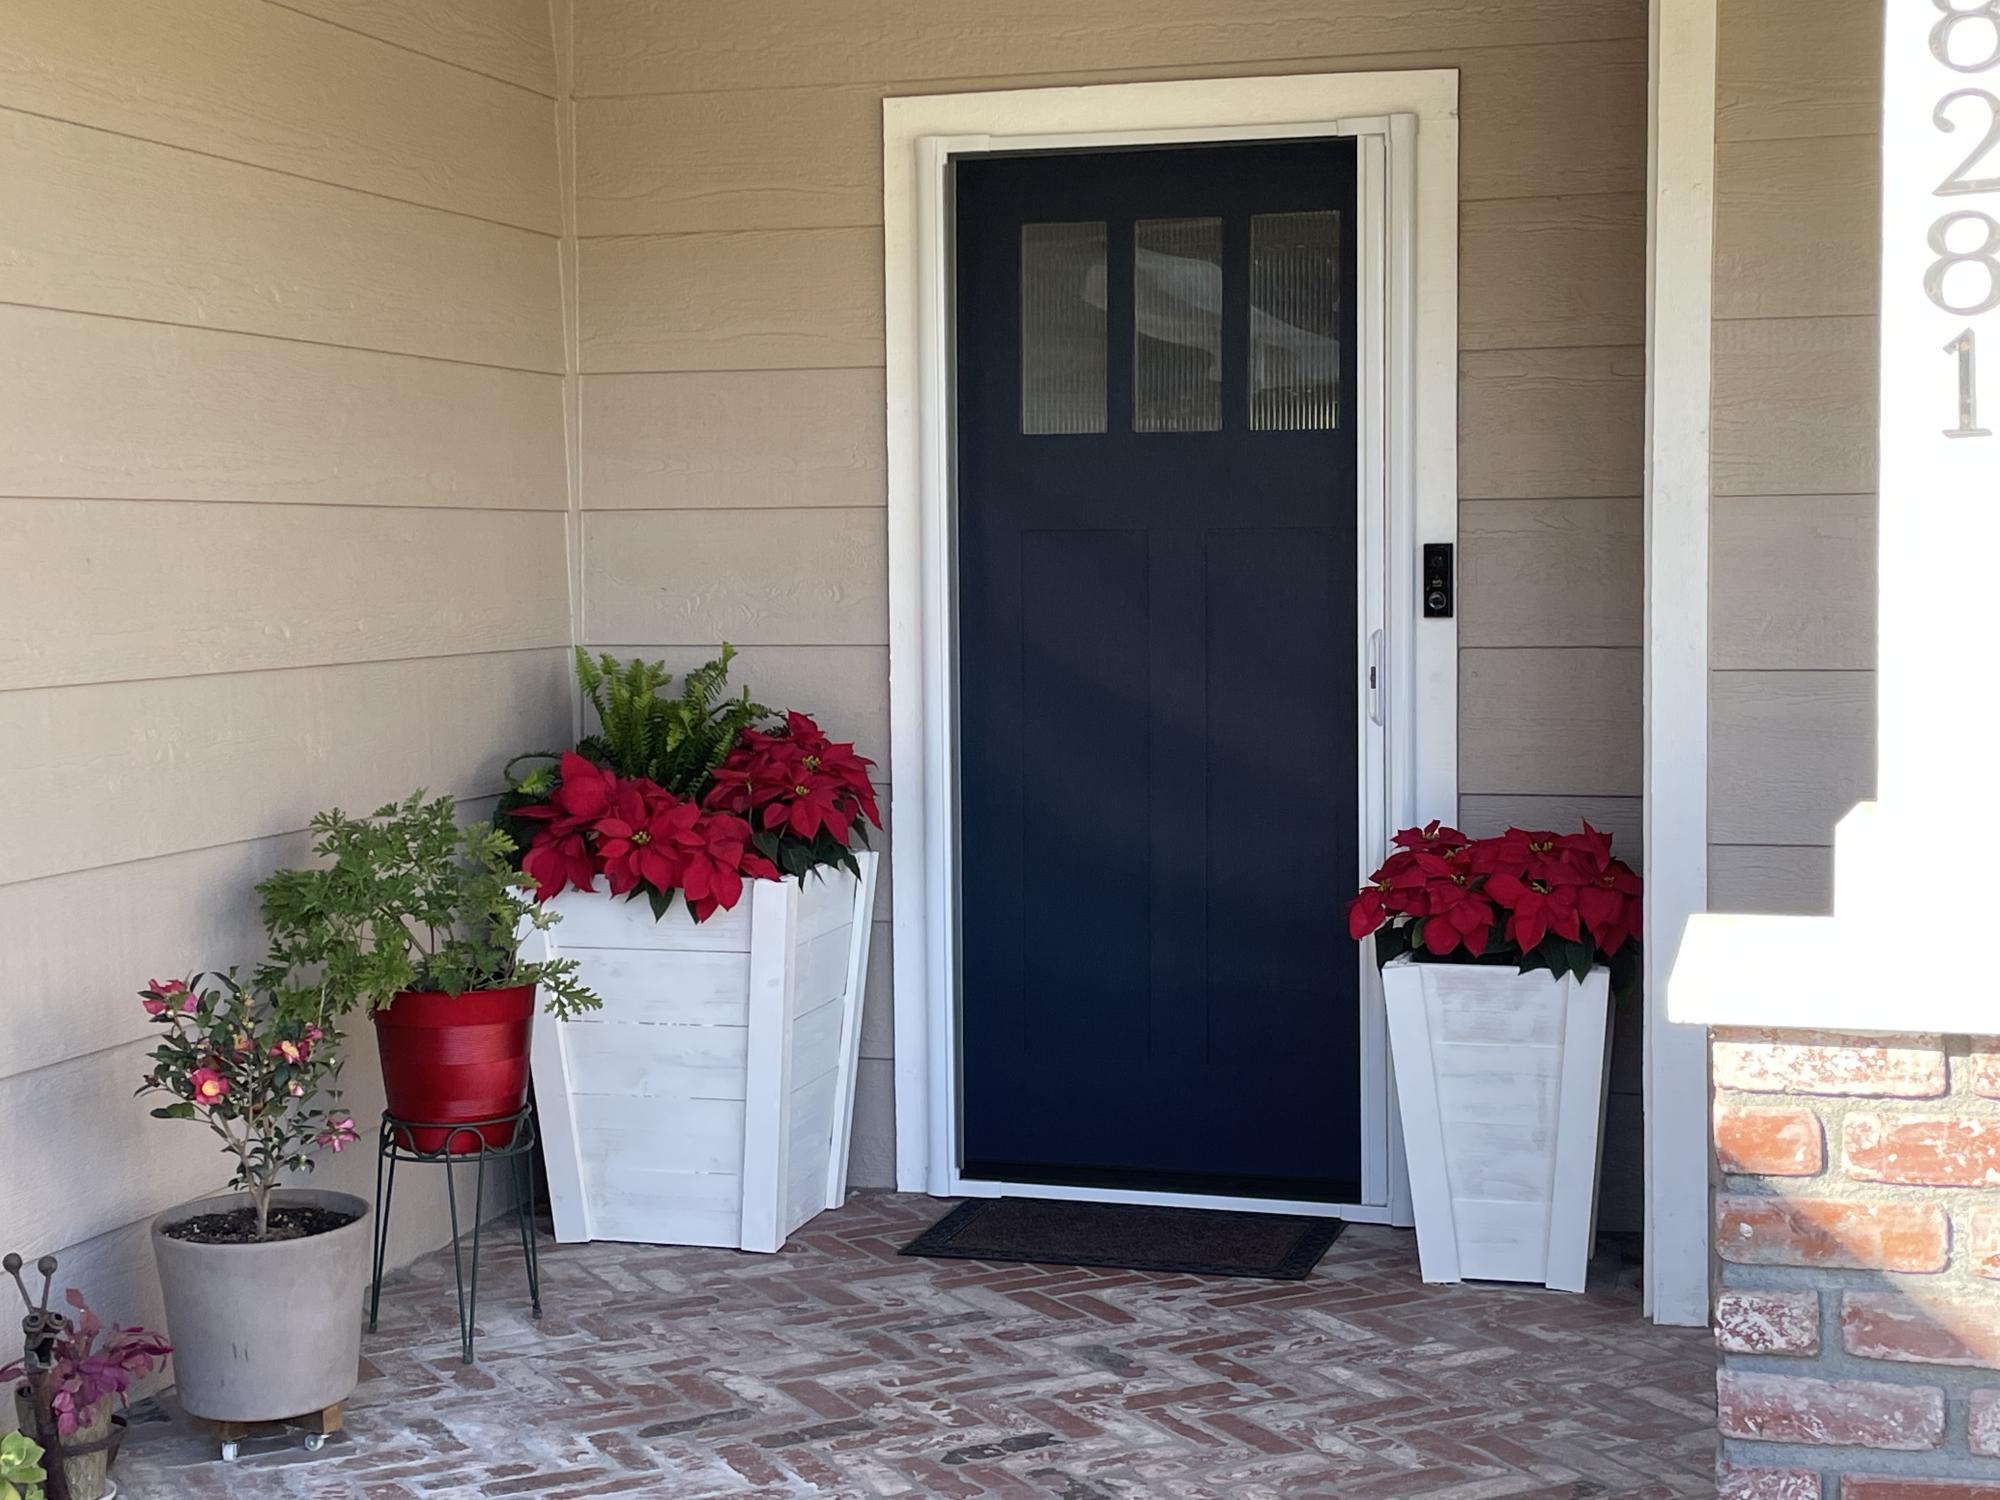
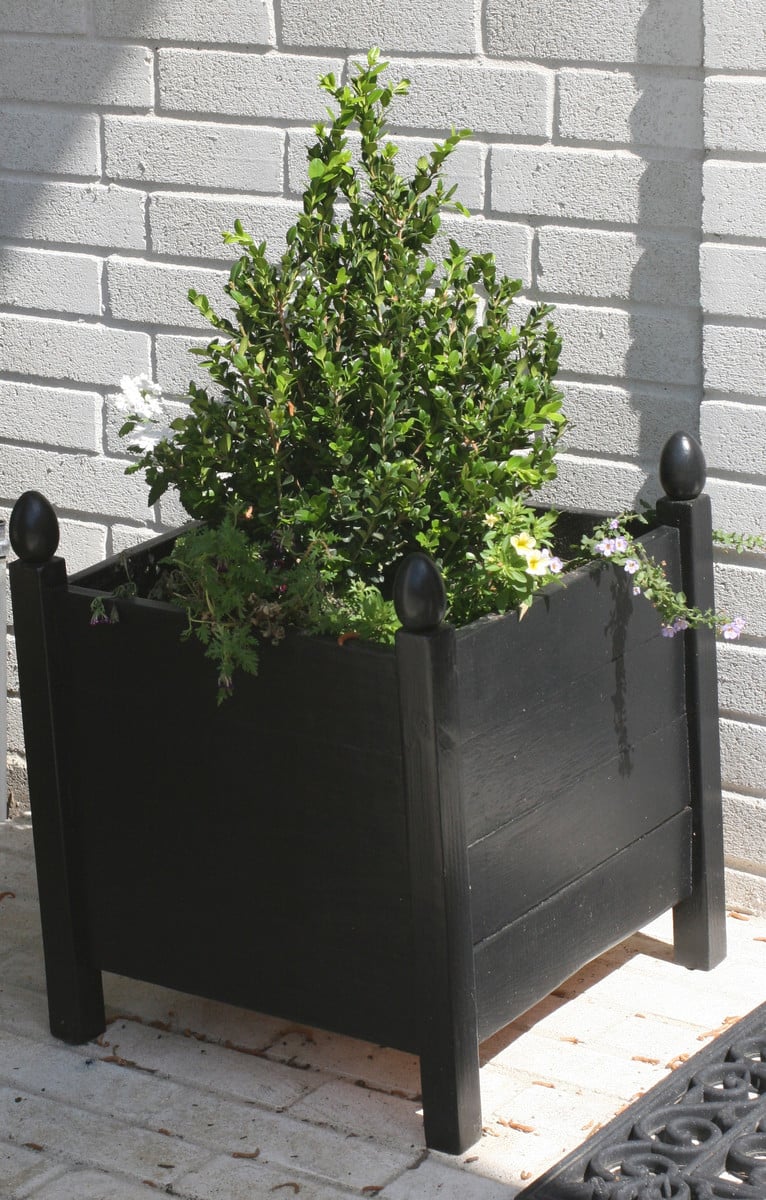
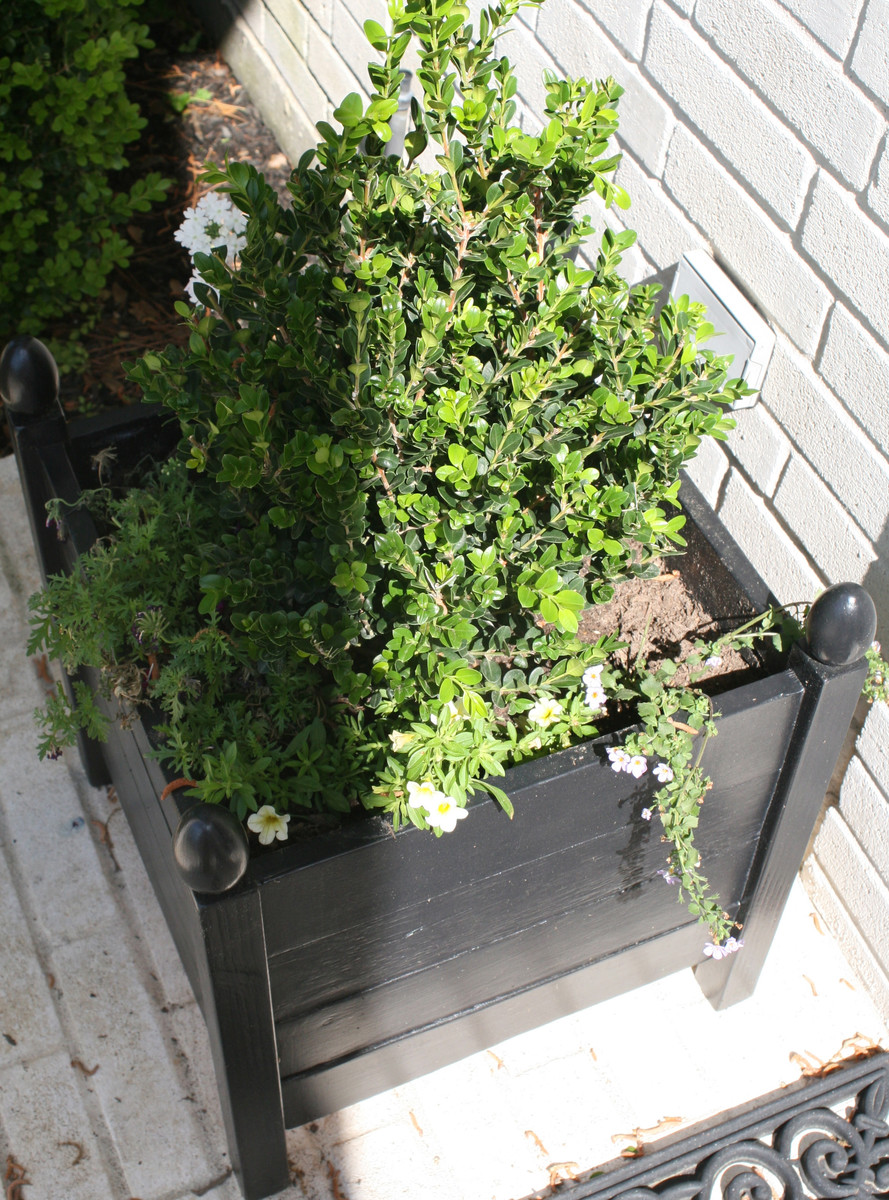
Love these planters! I made the large one first with the circular saw and struggled. The smaller one was super easy by using my miter saw with the 5 degree setting. Thanks , Ana. 😀
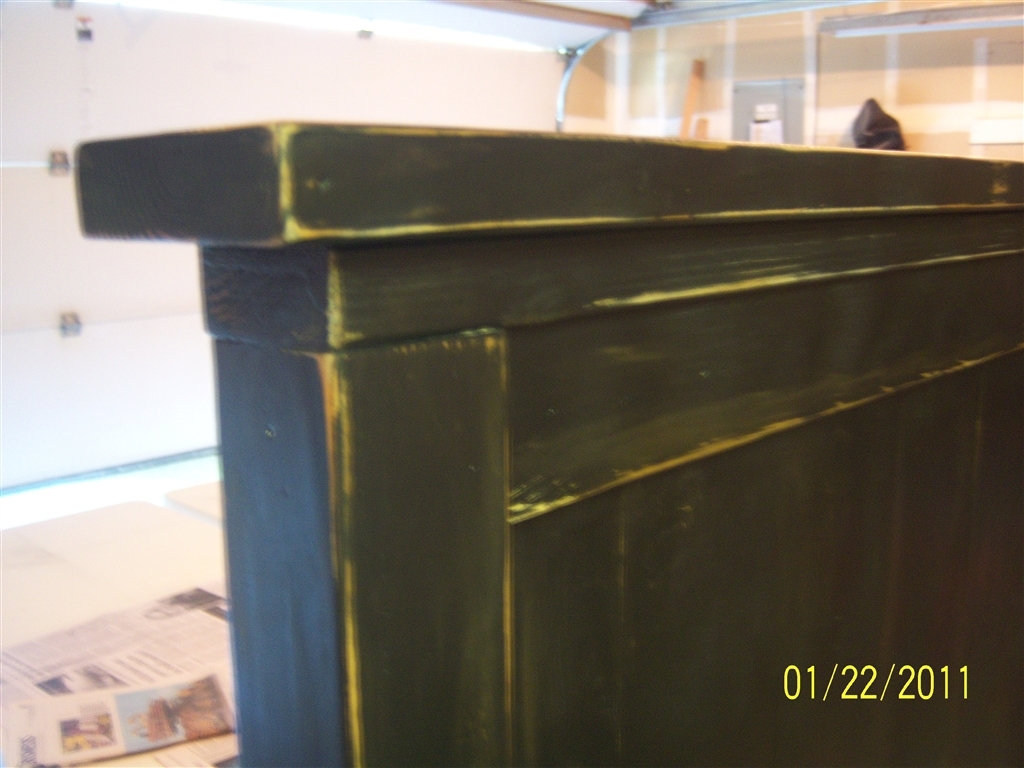
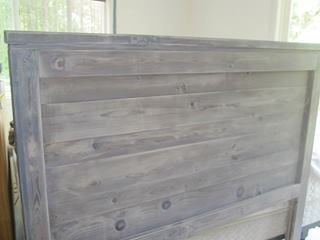
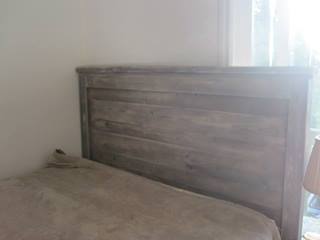
I have been looking for a new bed for our master bedroom for a long time. I just could not find one that actually fit ME.. the look and size. Then I found Ana's website, wow I feel in love with it as soon as I saw it.
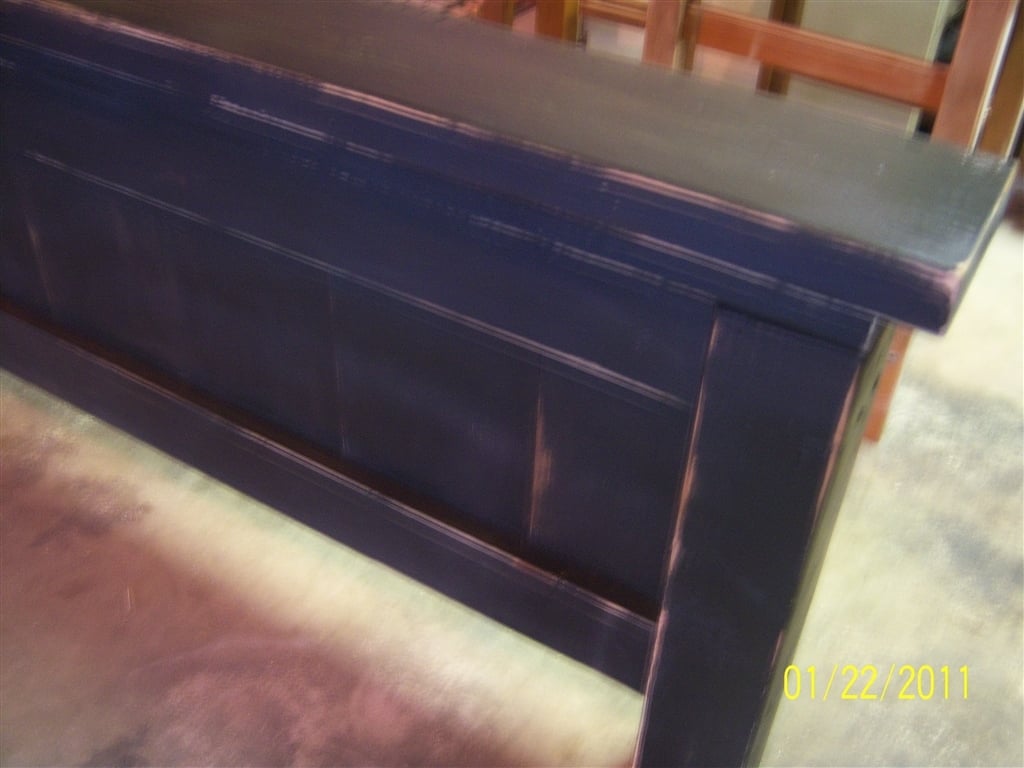
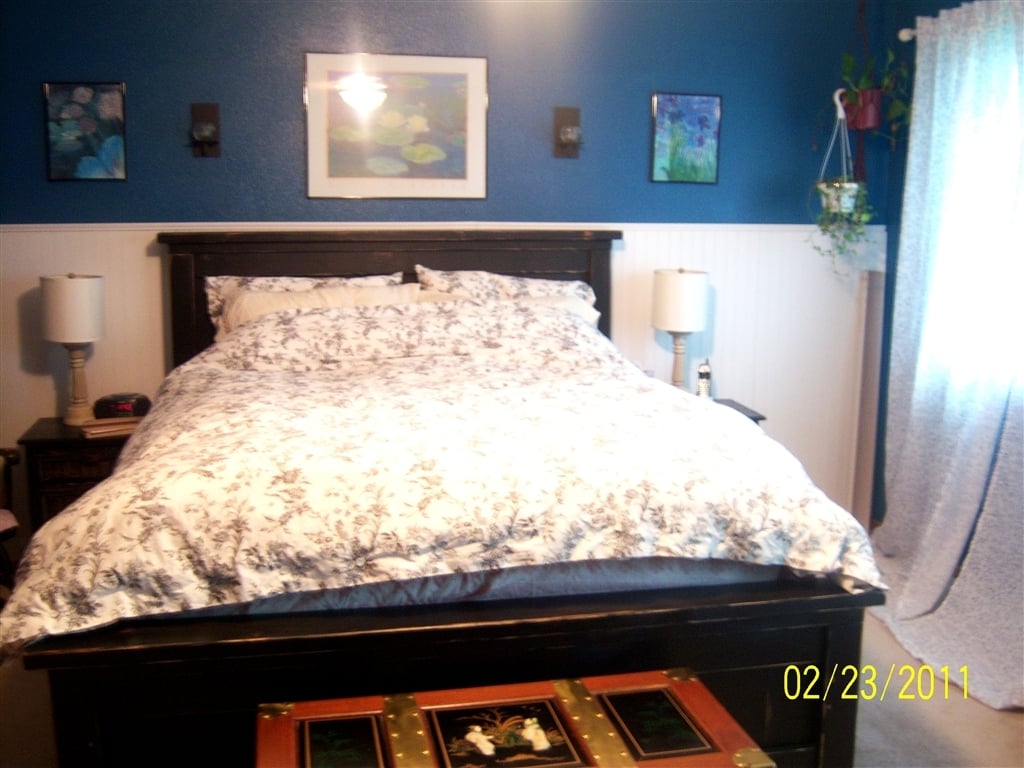
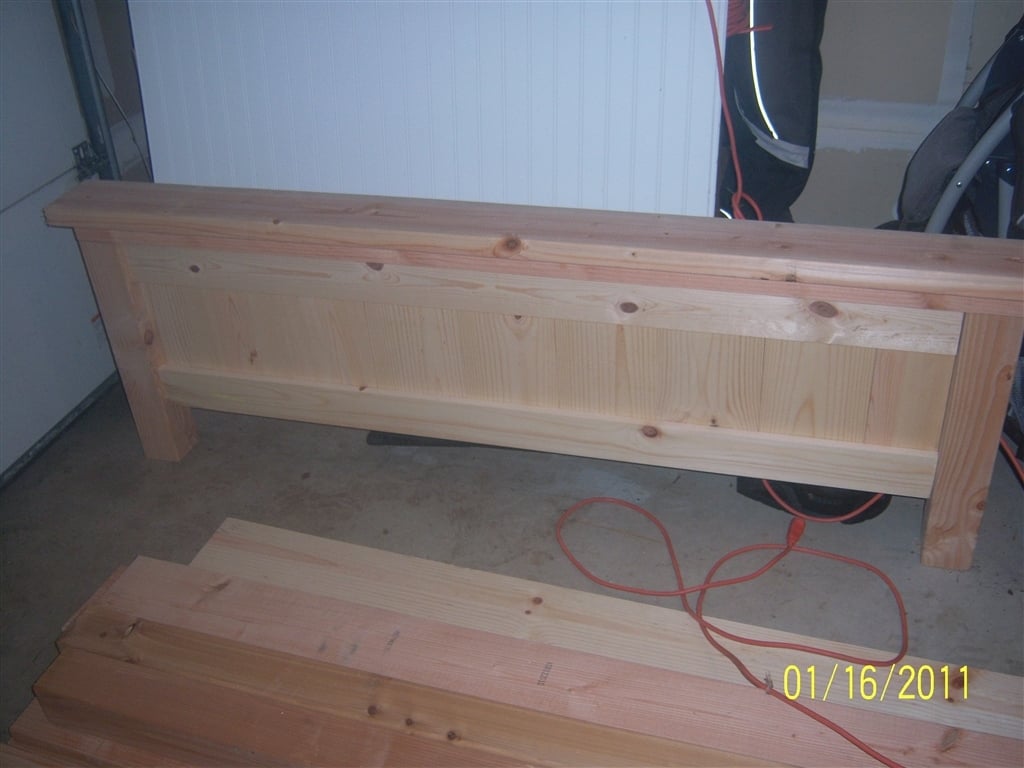
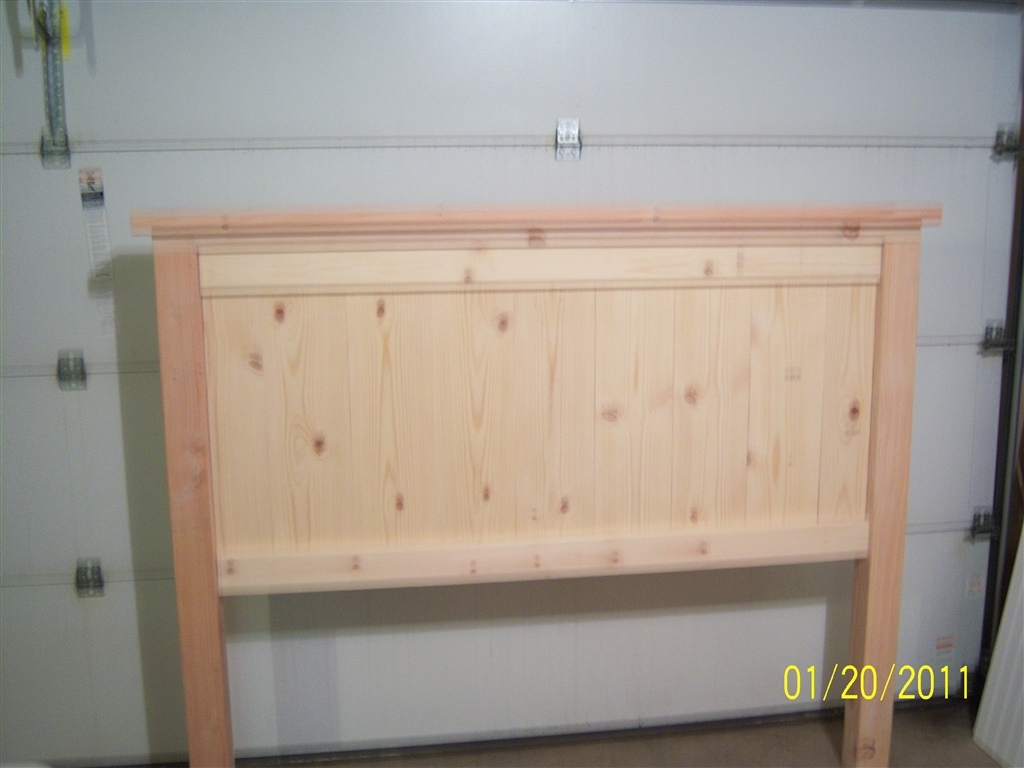
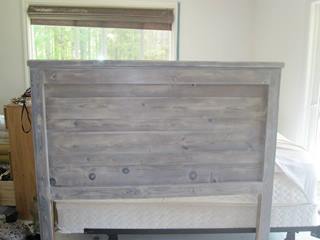
So this was my first project. It's not perfect, but I LOVED how it turned out!! A few lessons learned....
1) I know common sense would tell you to get the straightest boards, which I thought I did. When I went to put them together, a few were bowed. I tried to put those at the bottom.
2) I did end up putting a brace vertically in the middle on the back with left over 1x6. It just added a little more support.
3) Since I'm a beginner, I didn't know better, but go easy on the wood filler, especially if you are going to use any kind of opaque finish.
4) The only other thing I can think of, is unless you have someone to help you out, build this close to where you plan on putting it. I am in the middle of a remodel, so was able to build this in my bedroom. This sucker is heavy and awkward for one person to move when it's finished!!!
5) I built this with my finish nailer (2" nails) and wood glue. (Light on the glue...it expands quite a bit!)
My first pocket hole project! Adjusted plans to make table 50 inches long.