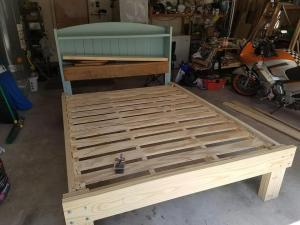
Bunk beds
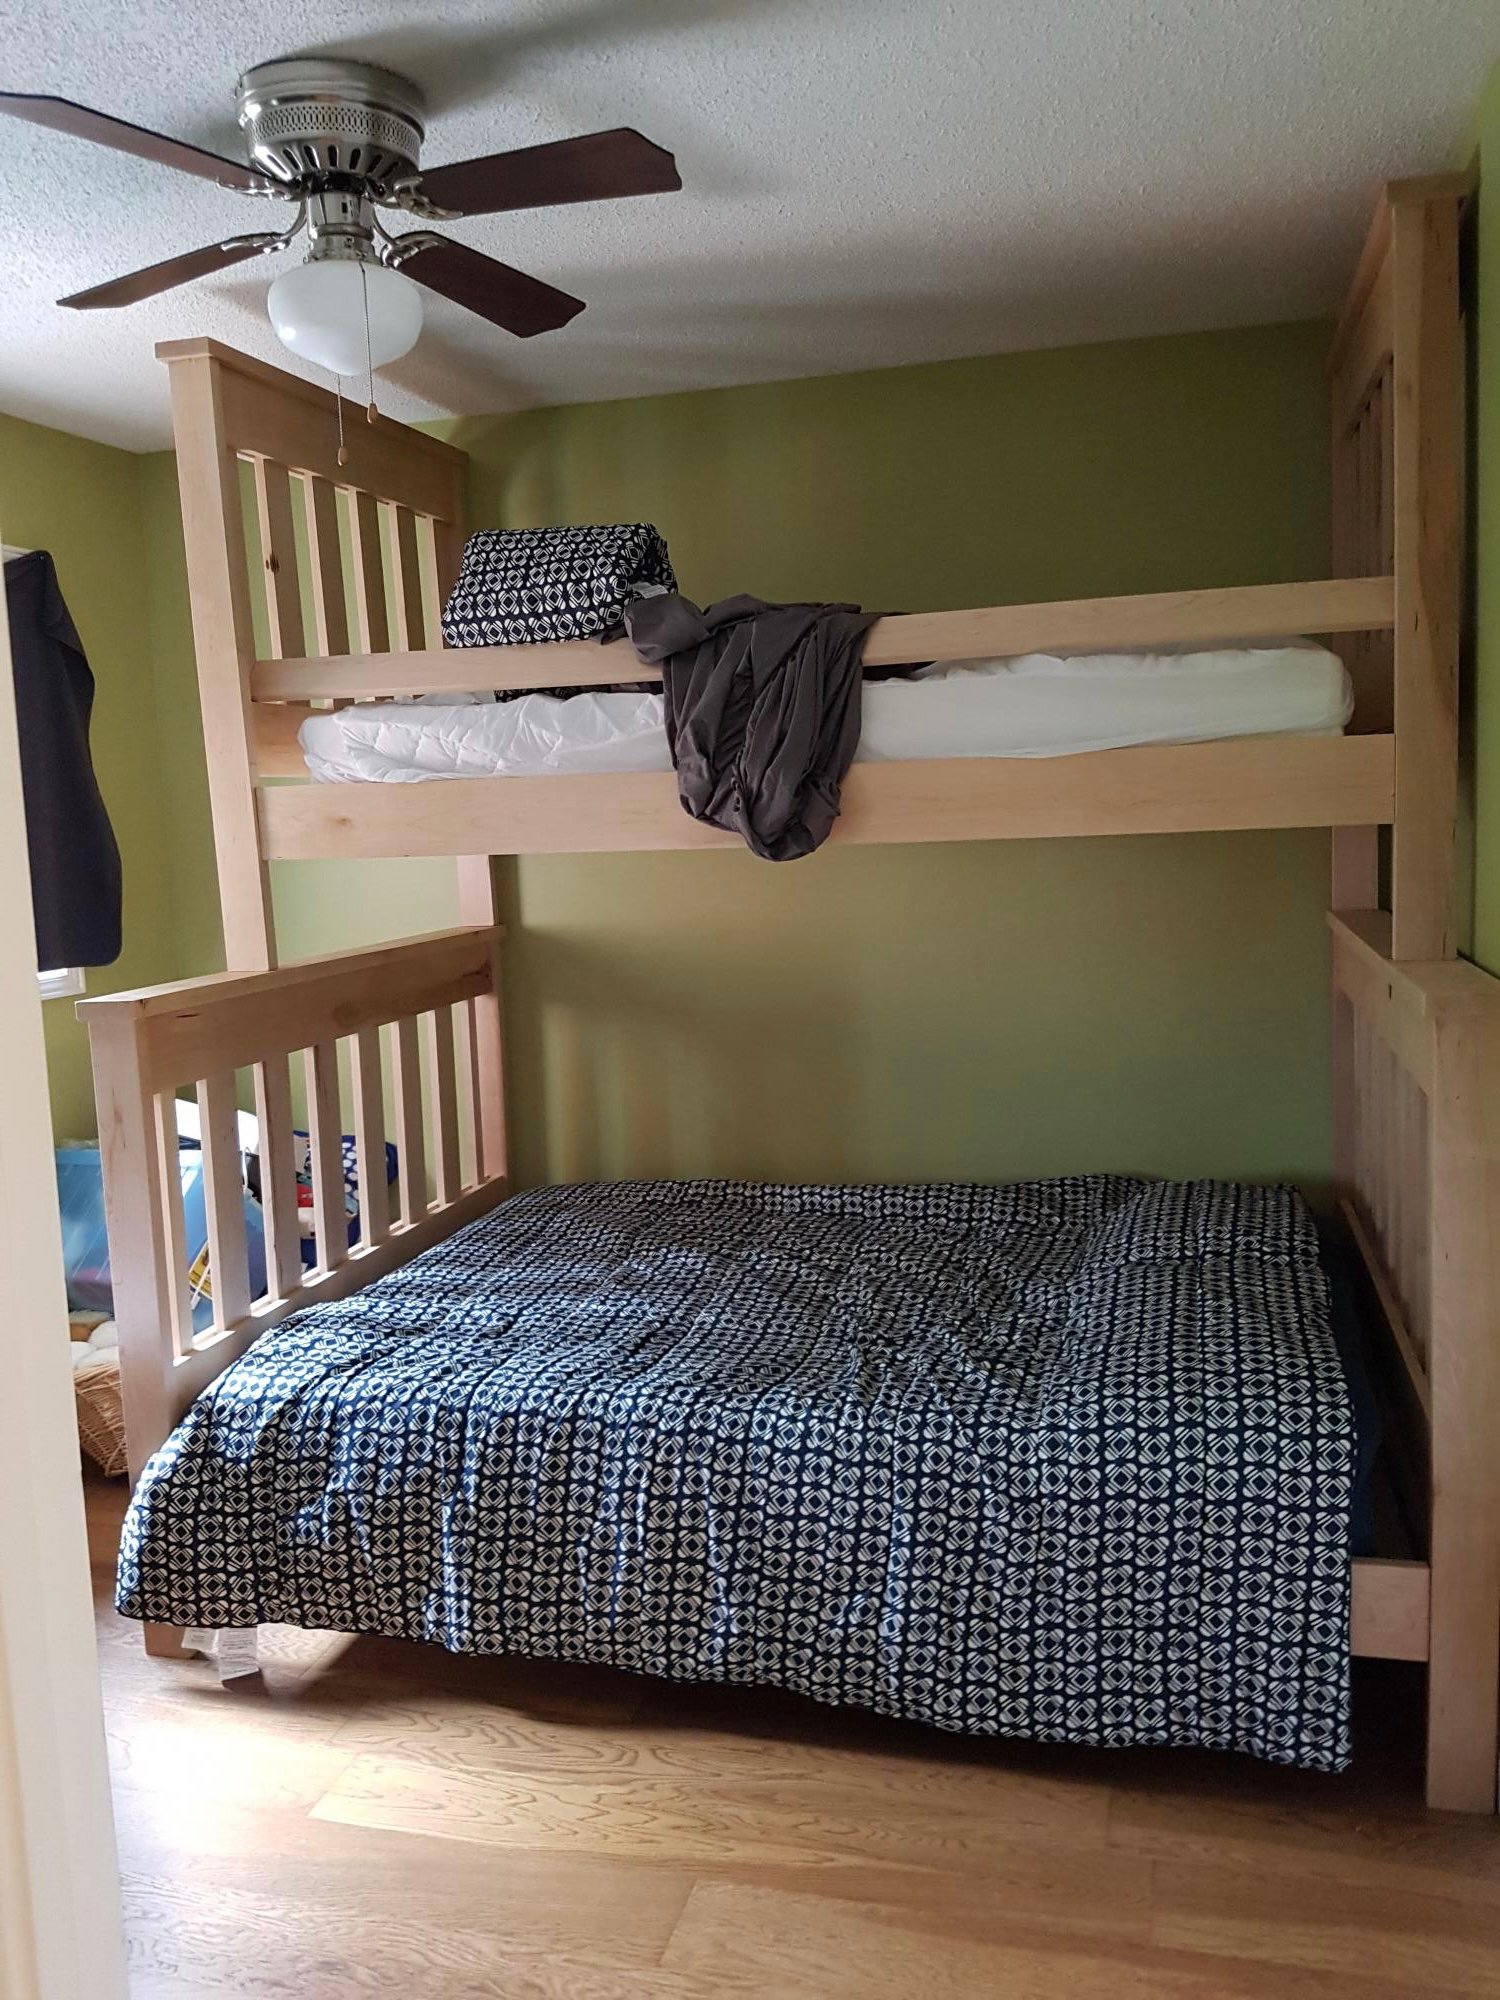
Double bed at bottom, twin at top, still have to make the ladder
Built from Plan(s)
Double bed at bottom, twin at top, still have to make the ladder
Hello Fellow Ana White Fans!
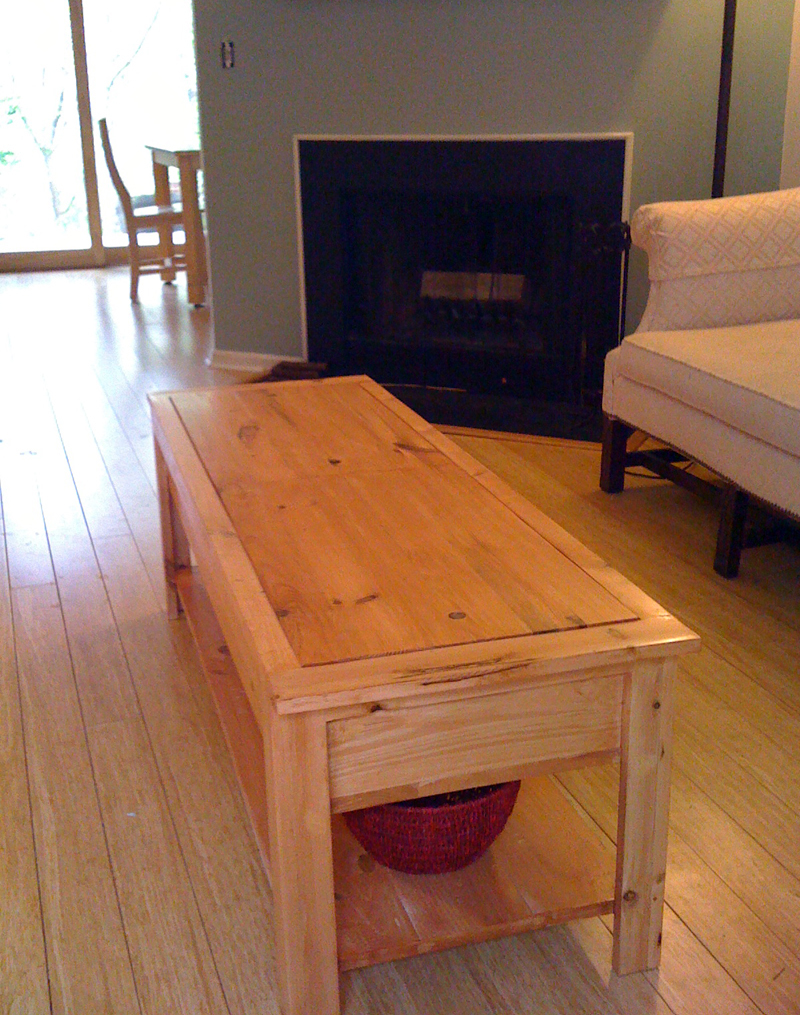
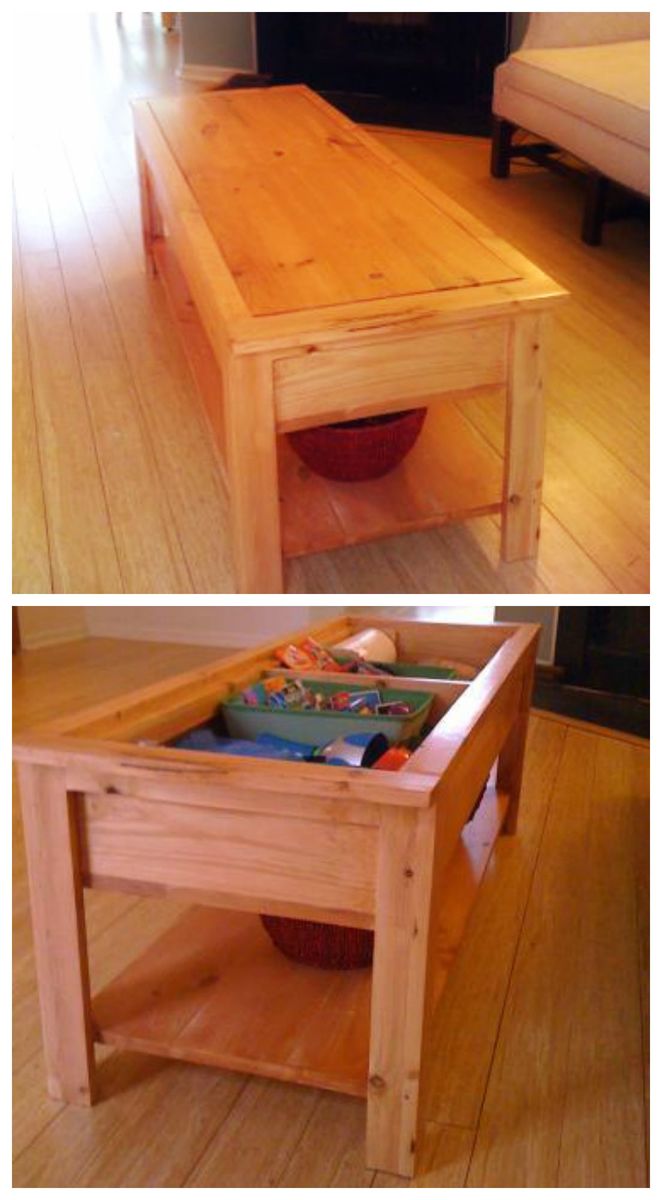
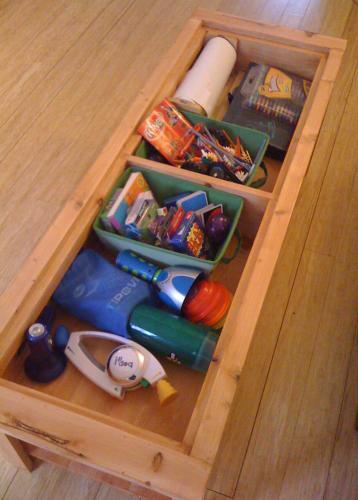
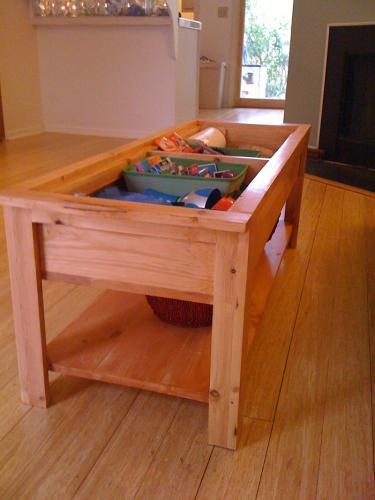
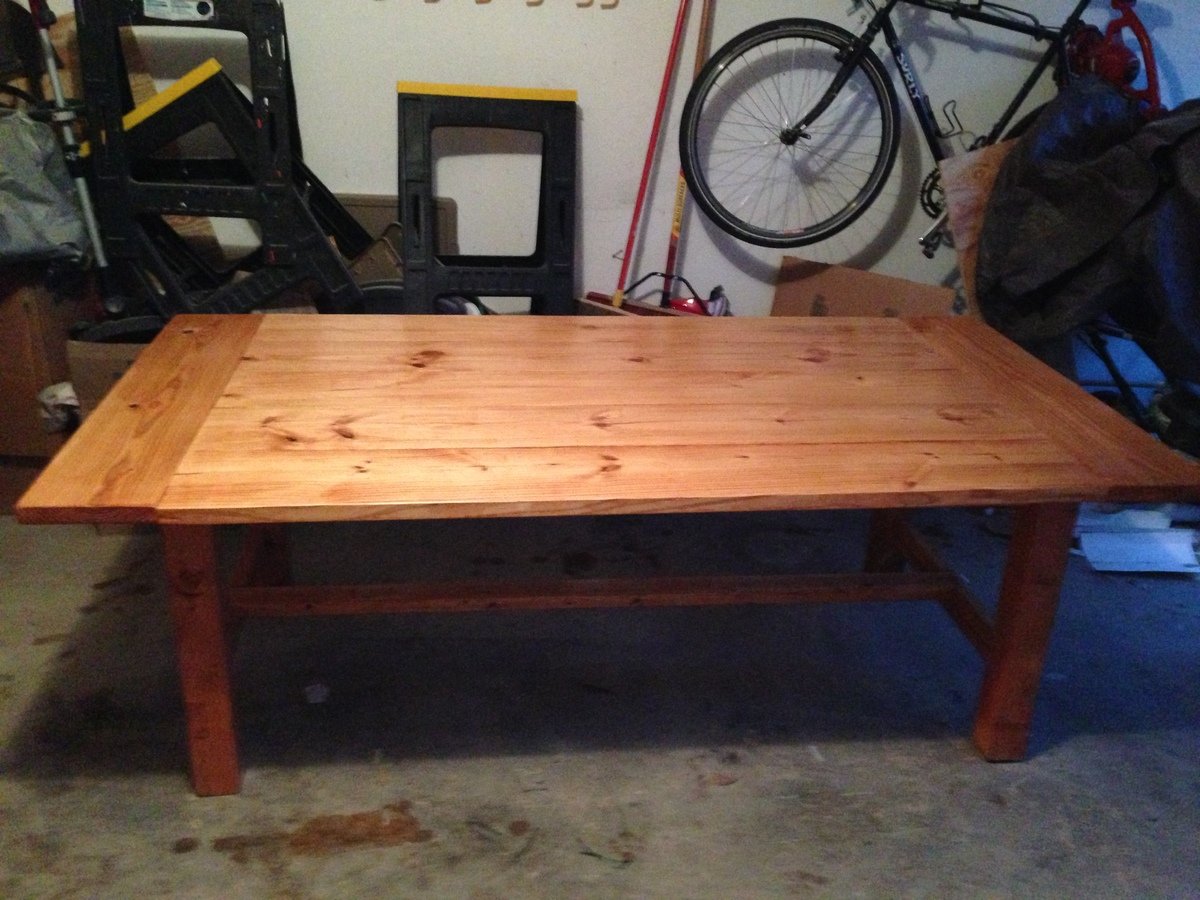
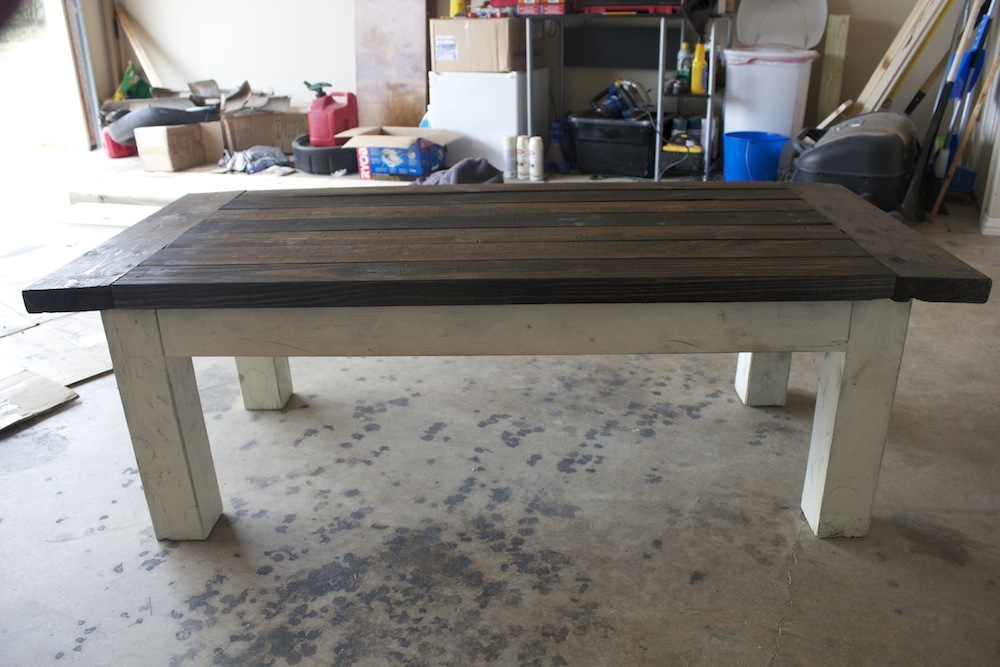
This is from Ana White's lego coffee table plan, but my daughter is not a huge fan of legos, so we’re just calling this project the Coffee Table of Fun! Indeed it was a fun build. This project gave me the excuse I was looking for to buy a kreg jig. Certainly a kreg jig was not required, as the plan calls for a plywood top and bottom, but Ana revealed in the comments that she made her table by planking 1x6 boards with the kreg jig. I was nervous at first with the kreg jig (it comes with a whopping big bit), but now I see a world of new possibilities in building with this awesome tool.
This table came together very quickly. In fact, perhaps it was too quick, because I made a substantial mistake during the build. In step 8 of the plan, adding the top sides, I missed the fact that the top side was supposed to be flush with the top support, not with the box itself, so that there would be a ledge for the top to rest on. I didn’t realize my mistake until I added the top ends (correctly), and then measured for the top piece. Then I scratched my head after realizing that the 3 planked 1x6 boards were not going to fit at all. Oops!
I was disheartened at first, because I didn’t know what to do. By the way, Ana has included a “How-To’s” section on this new site for fellow builders to submit tips. I’d love it if someone could give some pointers about fixing mistakes. Is there any recourse once a board is glued and screwed? Anyway, I took some quiet time to think about the project and had an “Aha!” moment. I ended up attaching 1x2 pieces around the inner edges of the two compartments to create the ledge for the top to rest on. Then, instead of the three planked 1x6 boards that I’d planned on, I used 6 1x3’s planked together to make the top. Yes, there was an unexpected detour from the plan, but it all worked out just fine. I’d rather not make mistakes, but at my current level of experience, I think that mistakes are inevitable, and the mistakes actually give the piece a story and a little extra personality.
Looking forward to the next project!
Cheers!
This was my first project to build although I cut wood for another project a year ago. The plans were simple and easy to follow. Now I want to build more! Thank you Ana!
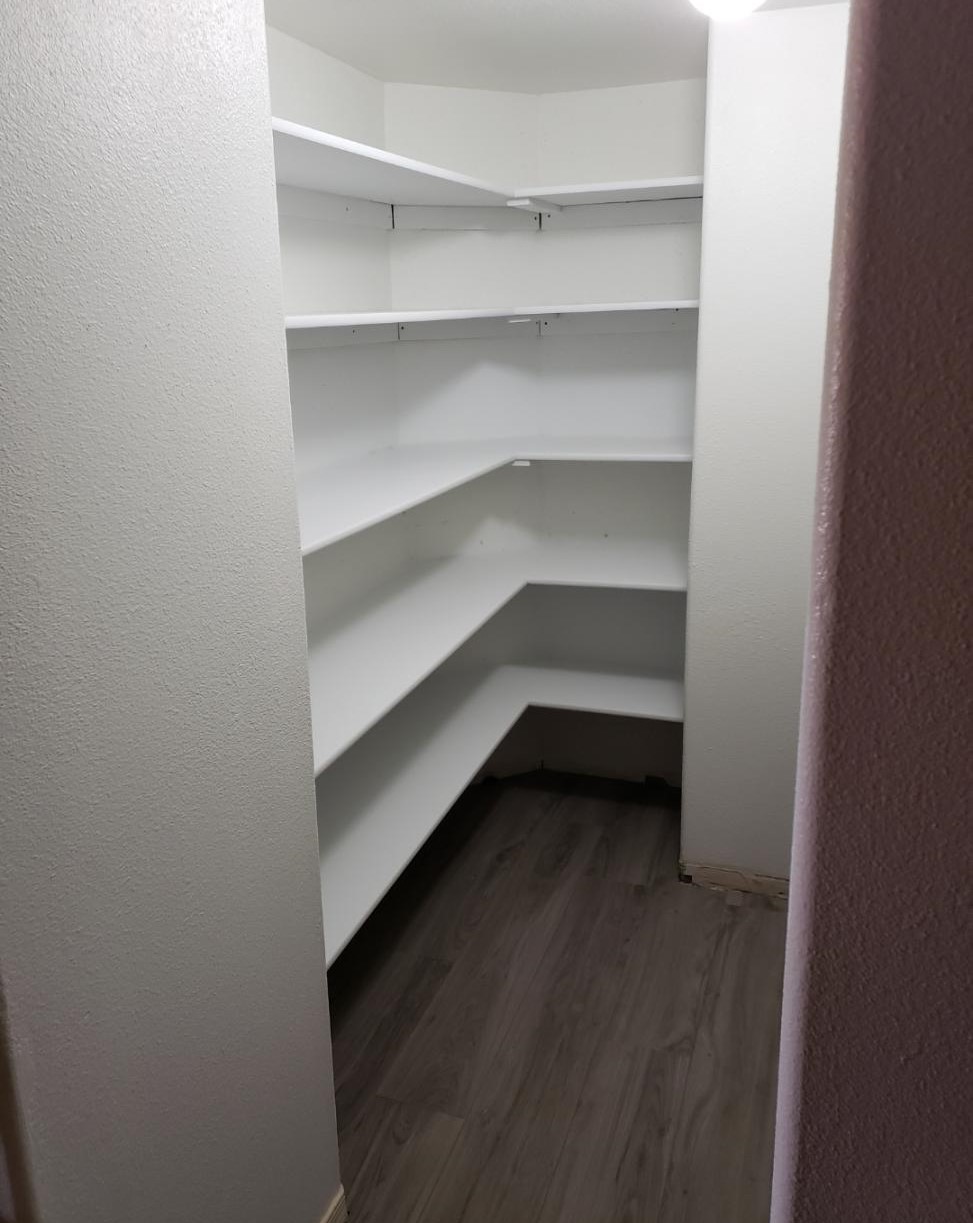
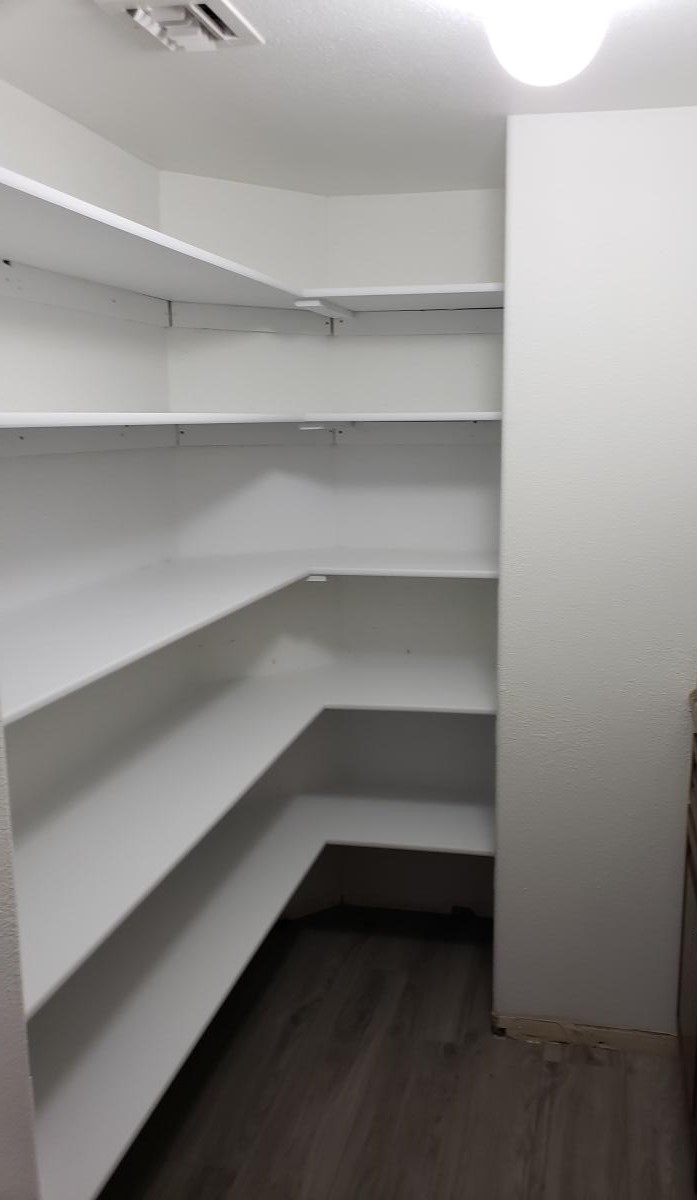
We enclosed an unused wet bar and then I built the shelves to make it into a pantry.
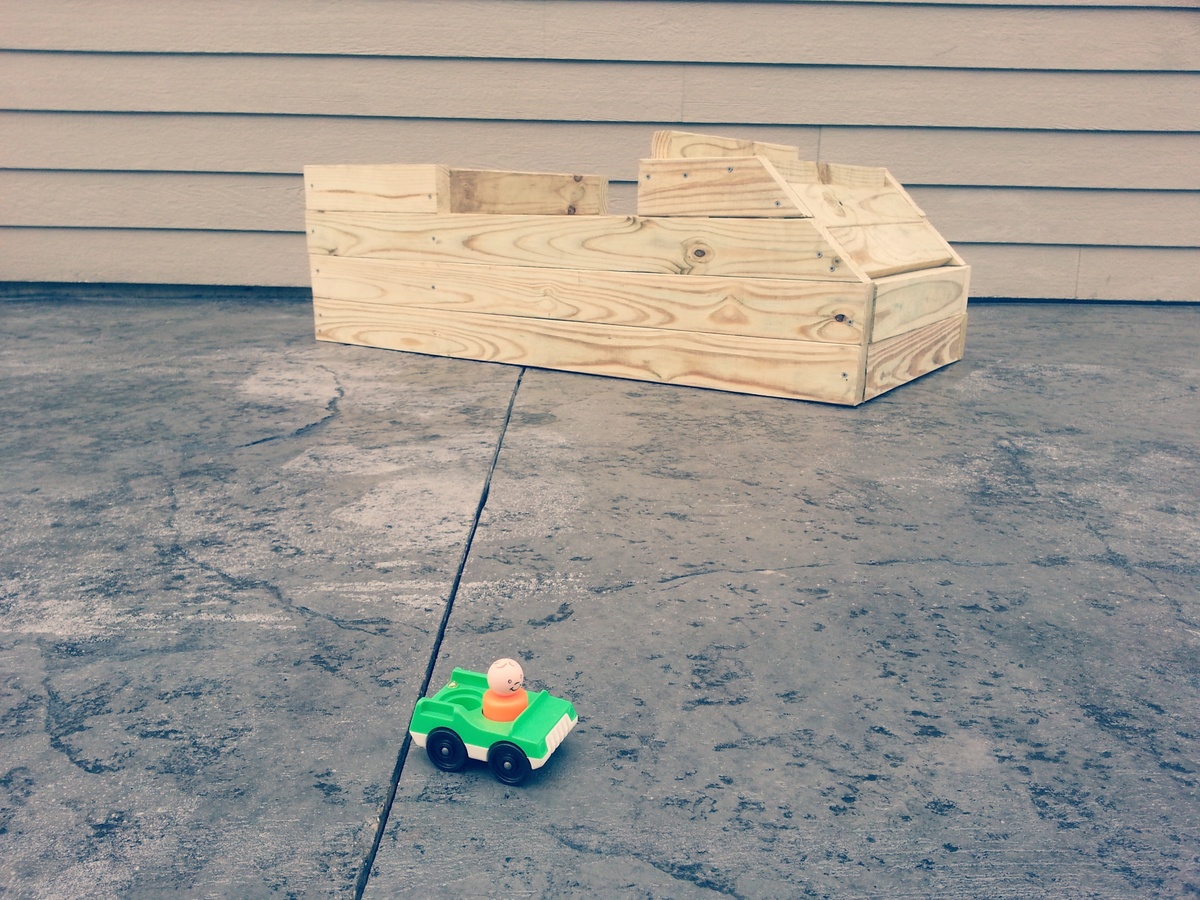
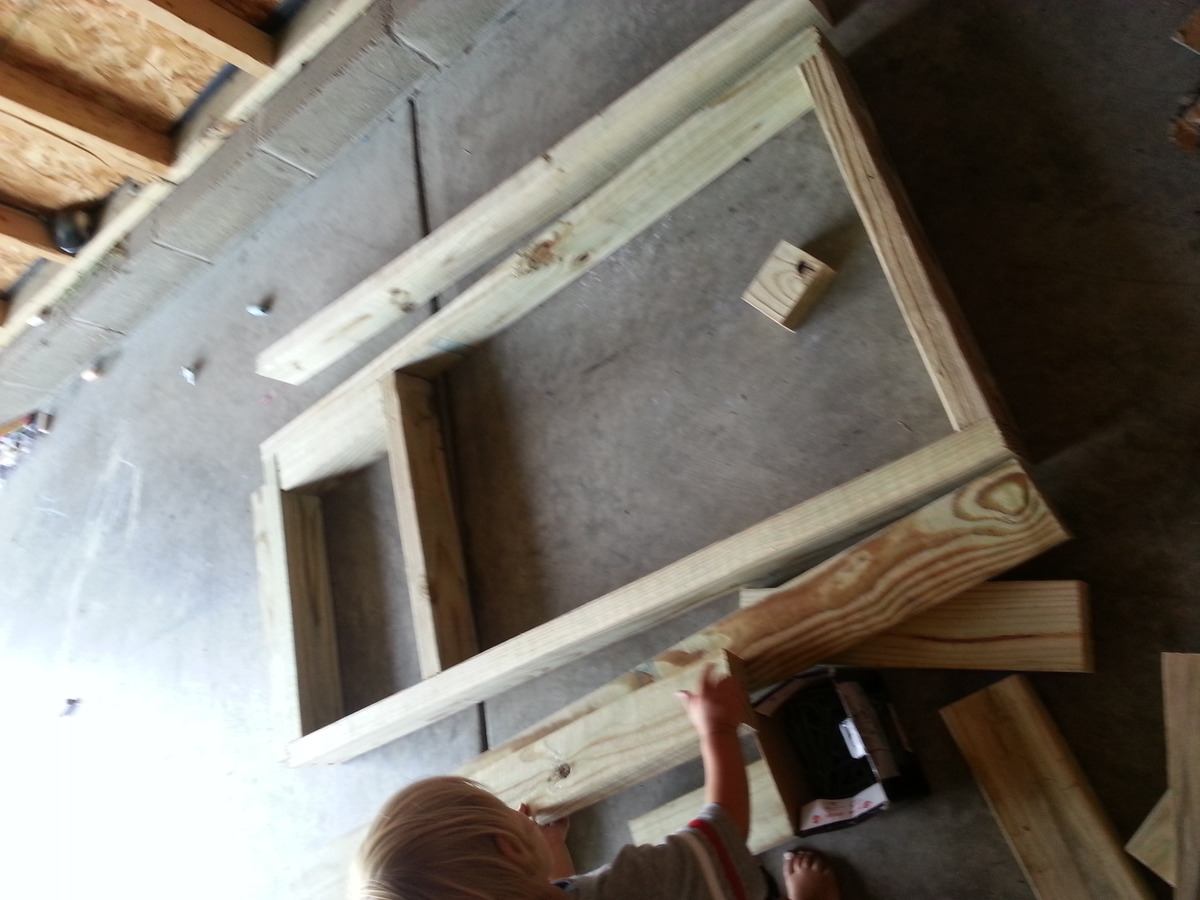
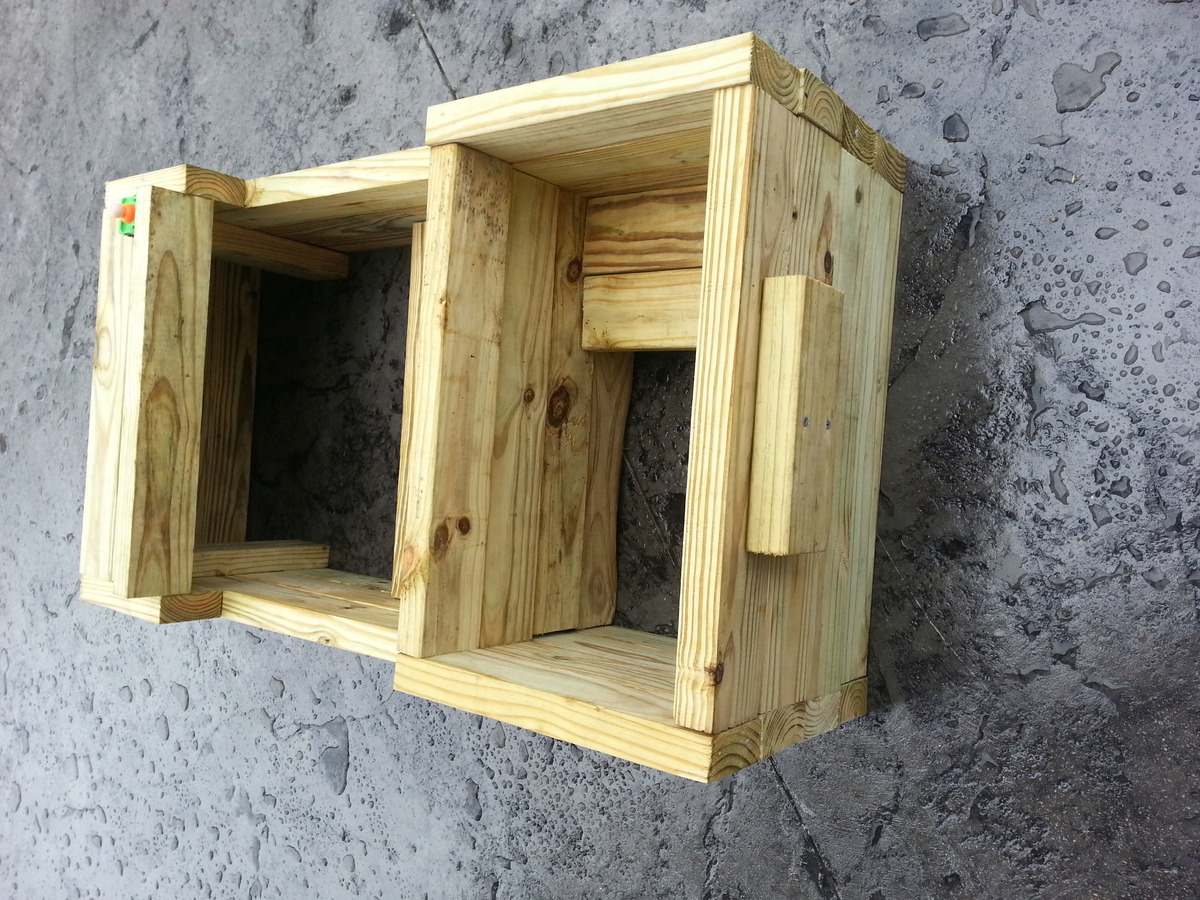
I think I'm the first one to use this plan. I am a newbie so maybe I made it harder on myself but I diverted a little bit. I did not have 4 inch screws that would work with the treated lumber, and they were going to cost me a very pretty penny to get. I did have a box of 3 inch treated wood screws leftover from when we made the floating bunk beds » {LOVE THOSE} so instead of building each side, I had to build it level by level,attach them all together inside once I was finished. I use some leftover pieces to add a little seat in the trunk and a license plate. you also might have a few scrap pieces that you could use for rear view mirrors and headlights, but I would like to keep this simple and chic. I have a small wood slat piece that I will use for a grill on the front { from an old wooden toddler bed rail} so his car will look just like the tiny Fisher Price one he plays with! I'm still searching for a free steering wheel off an old toy or perhaps I will use my husband's 2.5lb free weight. I think it is perfect if I can figure out how to attach it... and how to get away from my husband ;)
Wed, 07/10/2013 - 14:01
this is my first solo project. I had the store do most of the major cuts so that was a definite time saver. I only had to do my angle cuts and kept on my leftover pieces to do my modifications. this will sit outdoors so I had to spring for the treated lumber. since I built it level by level I had to secure it inside. all except the last trunk level were secured under the hood out of the way. securing the final level of the trunk gave me the idea to use a "license plate" instead of just a random piece of wood.I can't wait to put it in the play driveway to add to his big outdoor play house! thank you for an excellent easy to follow plan. maybe now I can get a plan for a matching gas pump?? :-)
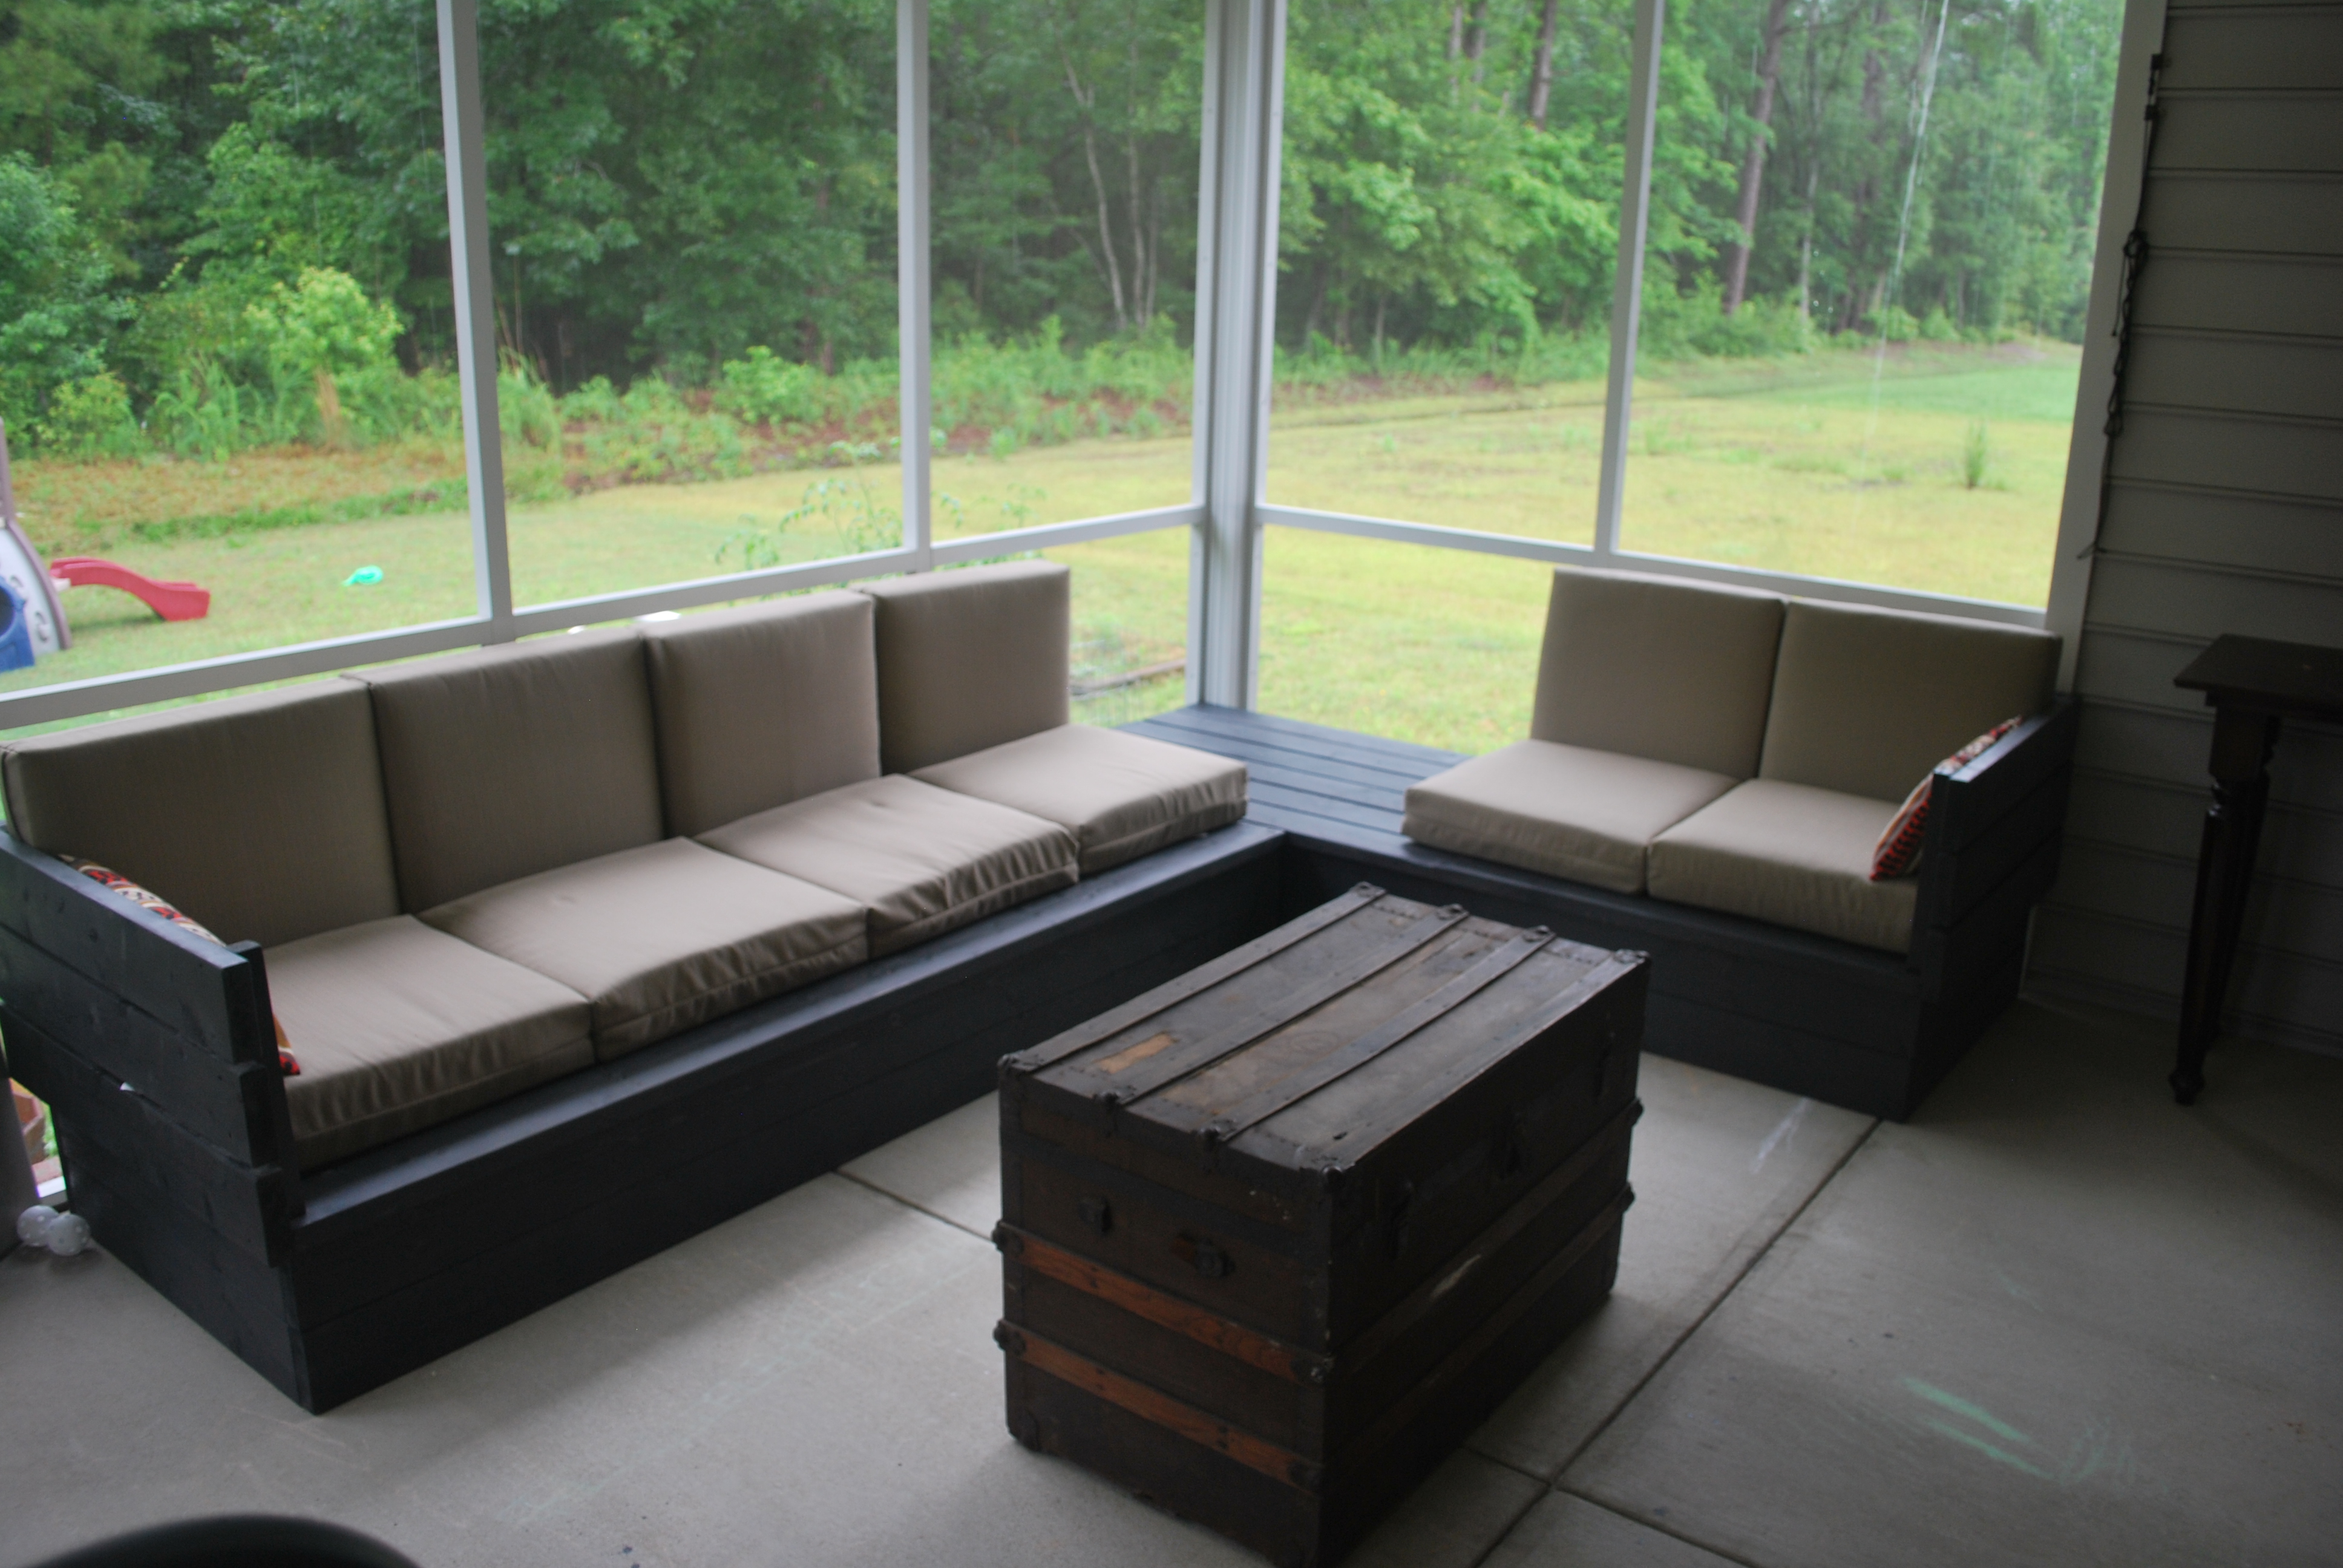
We made our sectional higher off of the ground than the original plan by replacing the single 2x4 base with stacked 2x6s, stained it black and used cushions from Target that we managed to get at 50% off. It fits beautifully in our screen porch and has made what was a waste of space into an outdoor living room. Thanks for the great plans!

Sat, 07/13/2013 - 11:10
Thank you for bragging! I am so excited to see your sectional and love the added height! Glad you found the plans useful! Ana
Sun, 07/14/2013 - 08:21
I love what you did with the plan. When we do our Pergola on our patio - we are going to change to this type of furniture or a new farm house table. I love the paint color ideas and the adjustments all for such a great price! Great job!
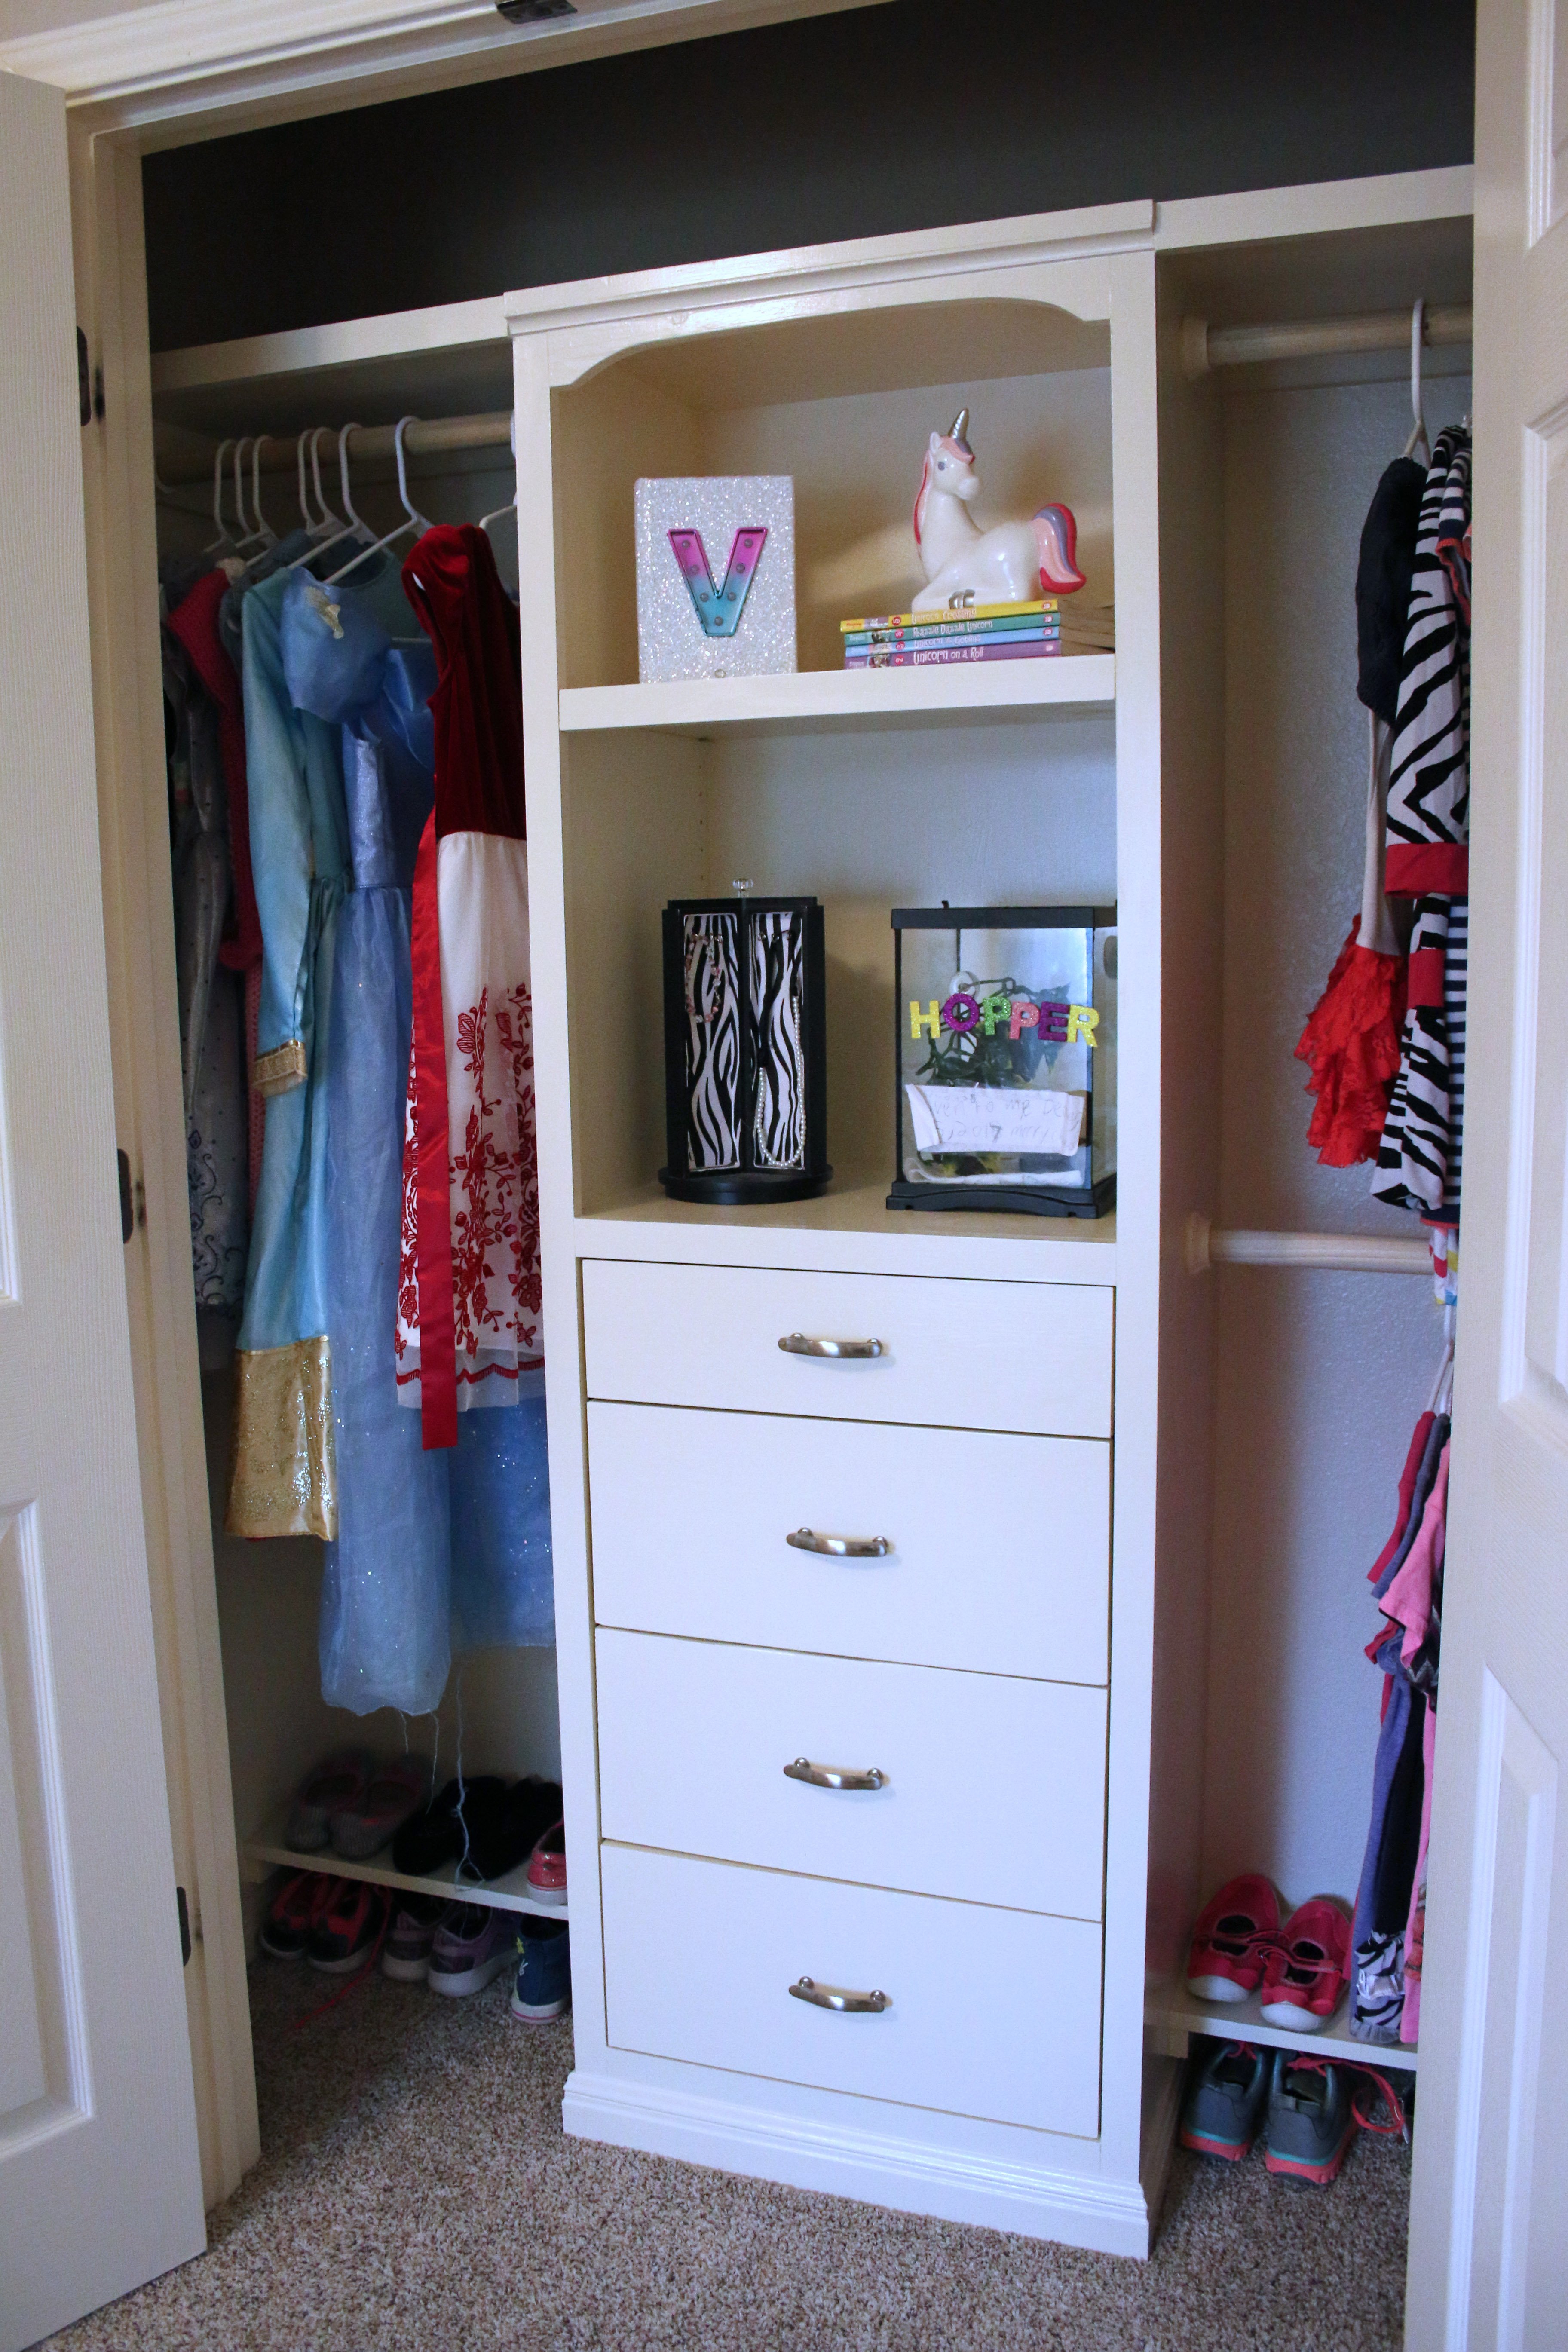
My daughter's room needed more storage and the closet was the perfect place to add some! Visit the blog link for more pictures.
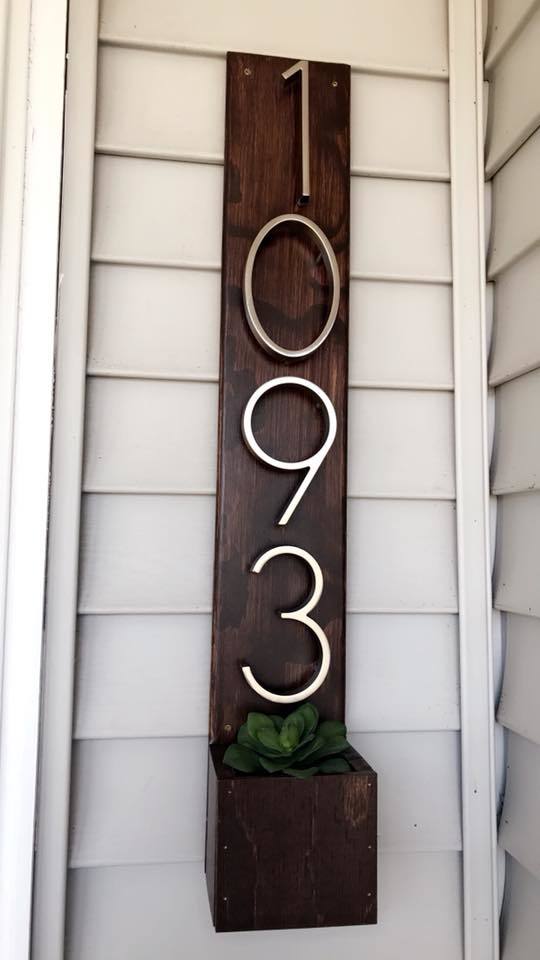
Address Sign
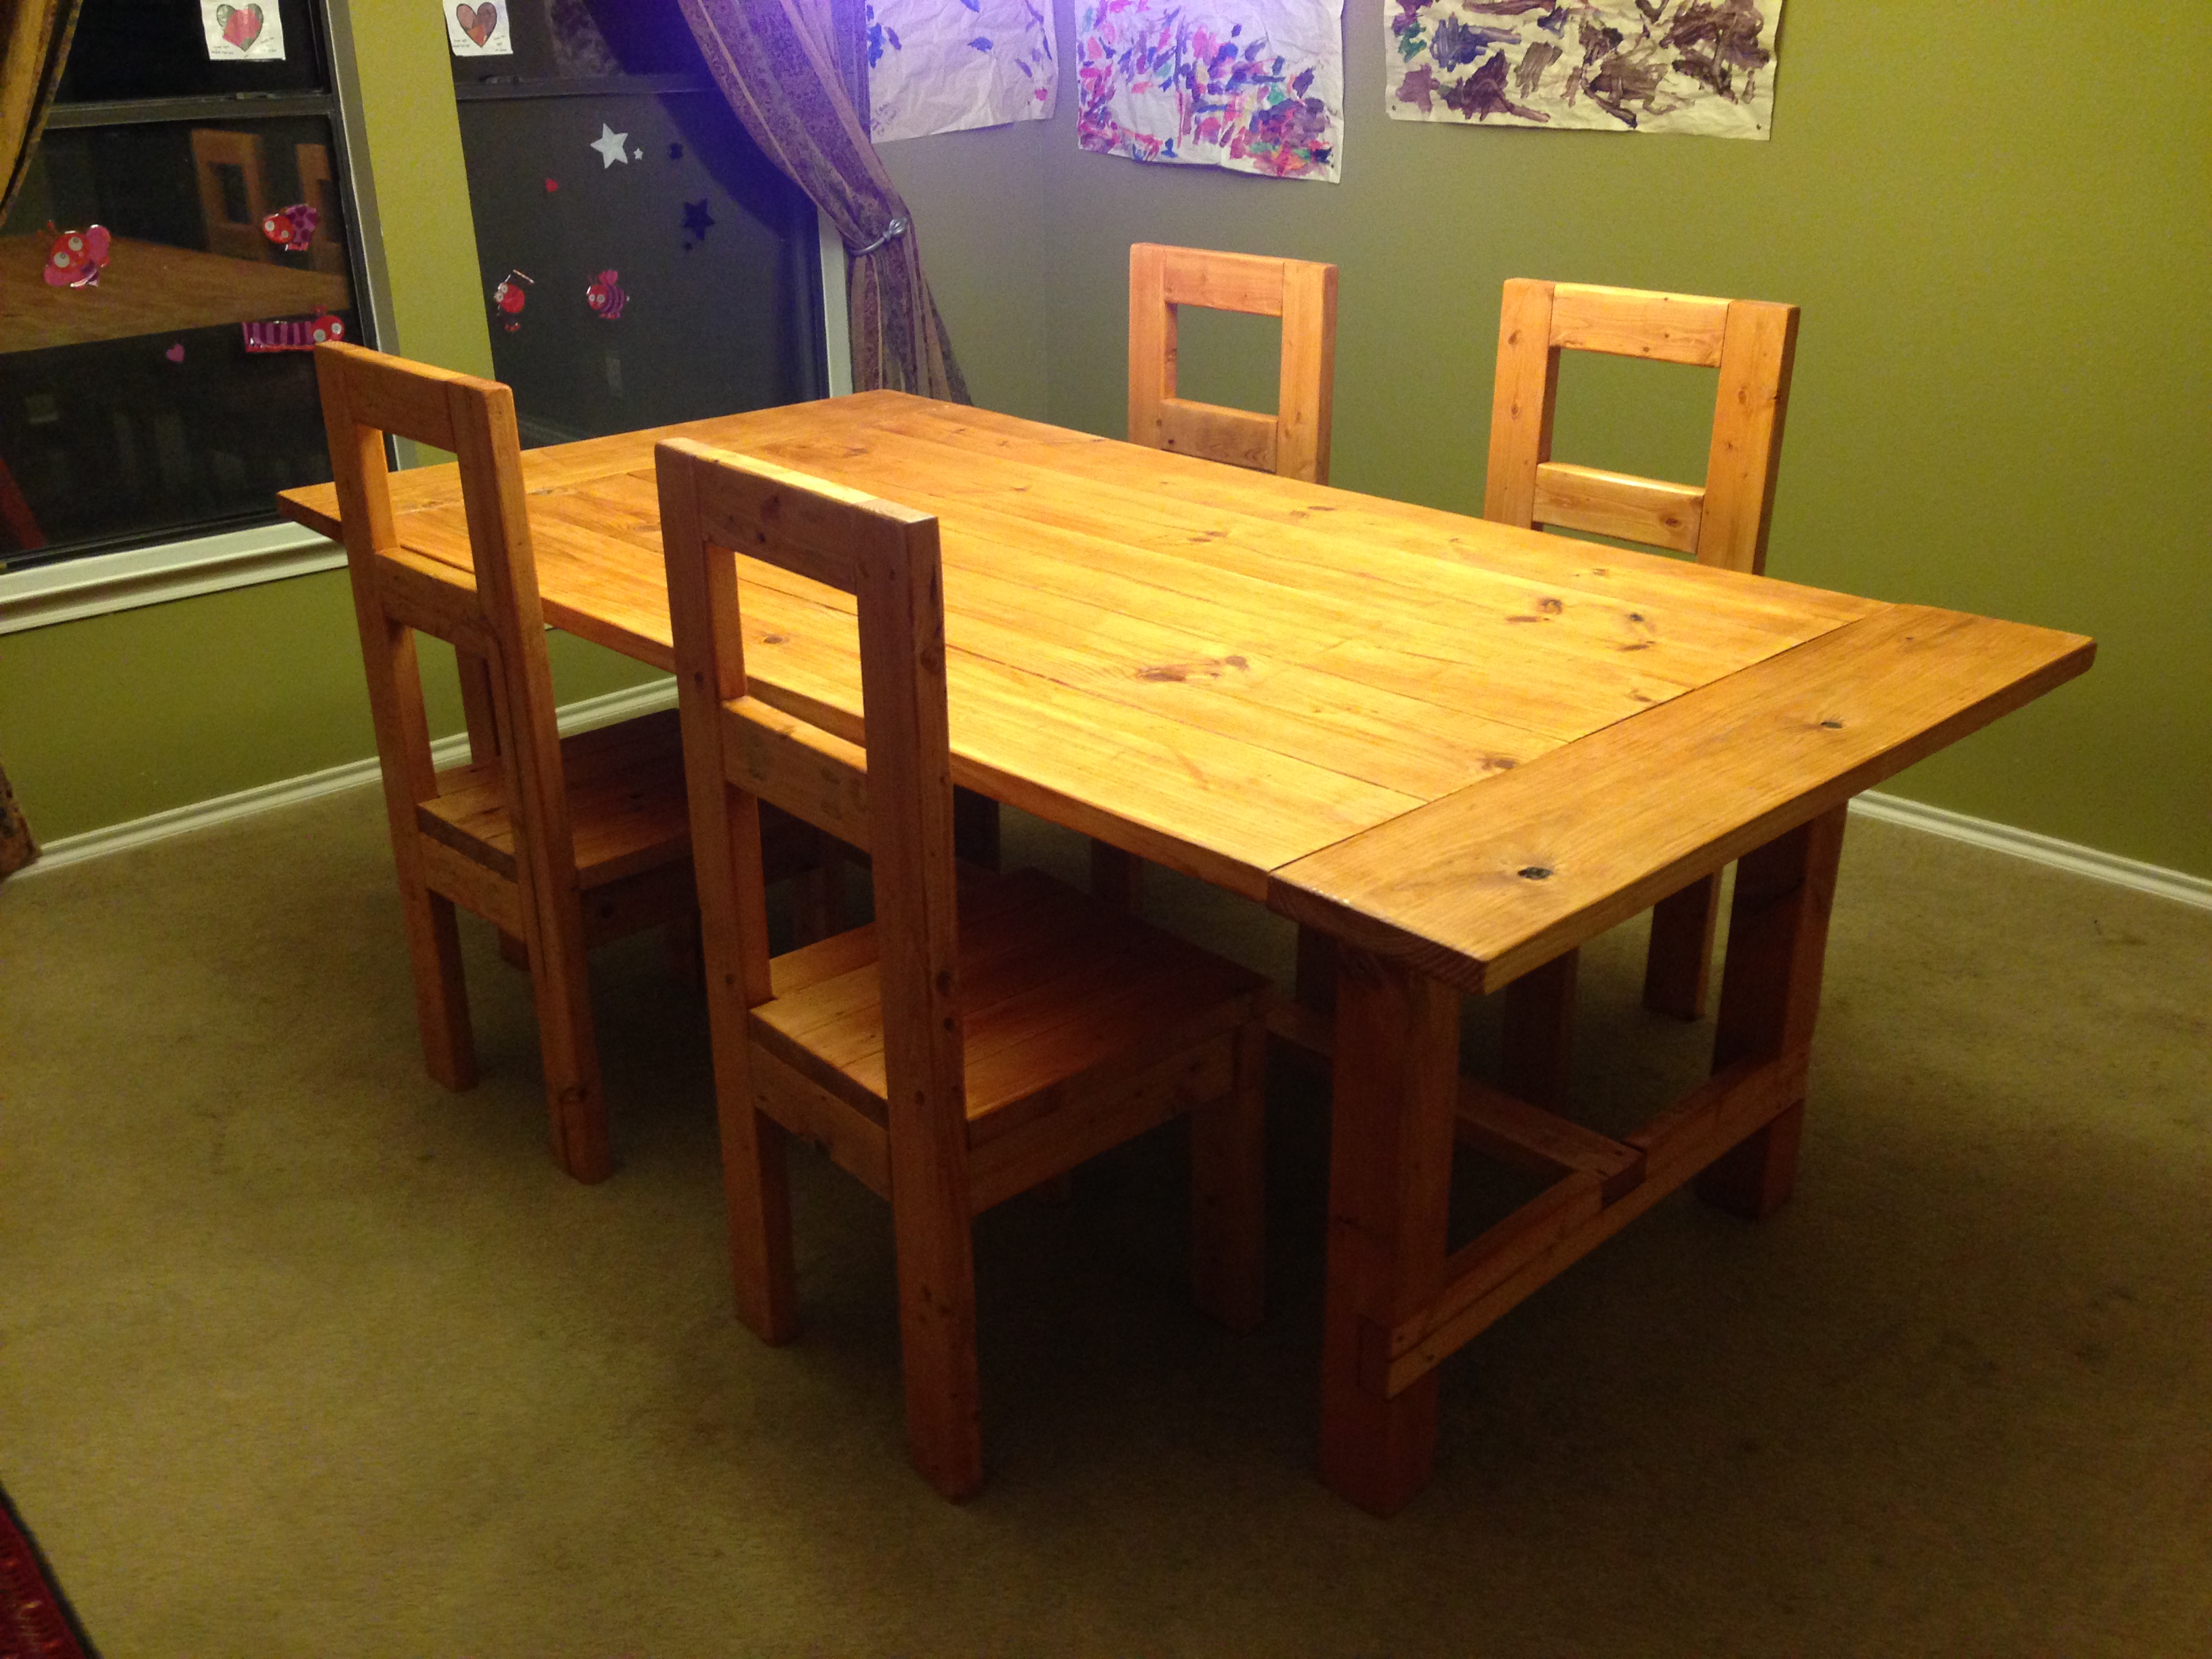
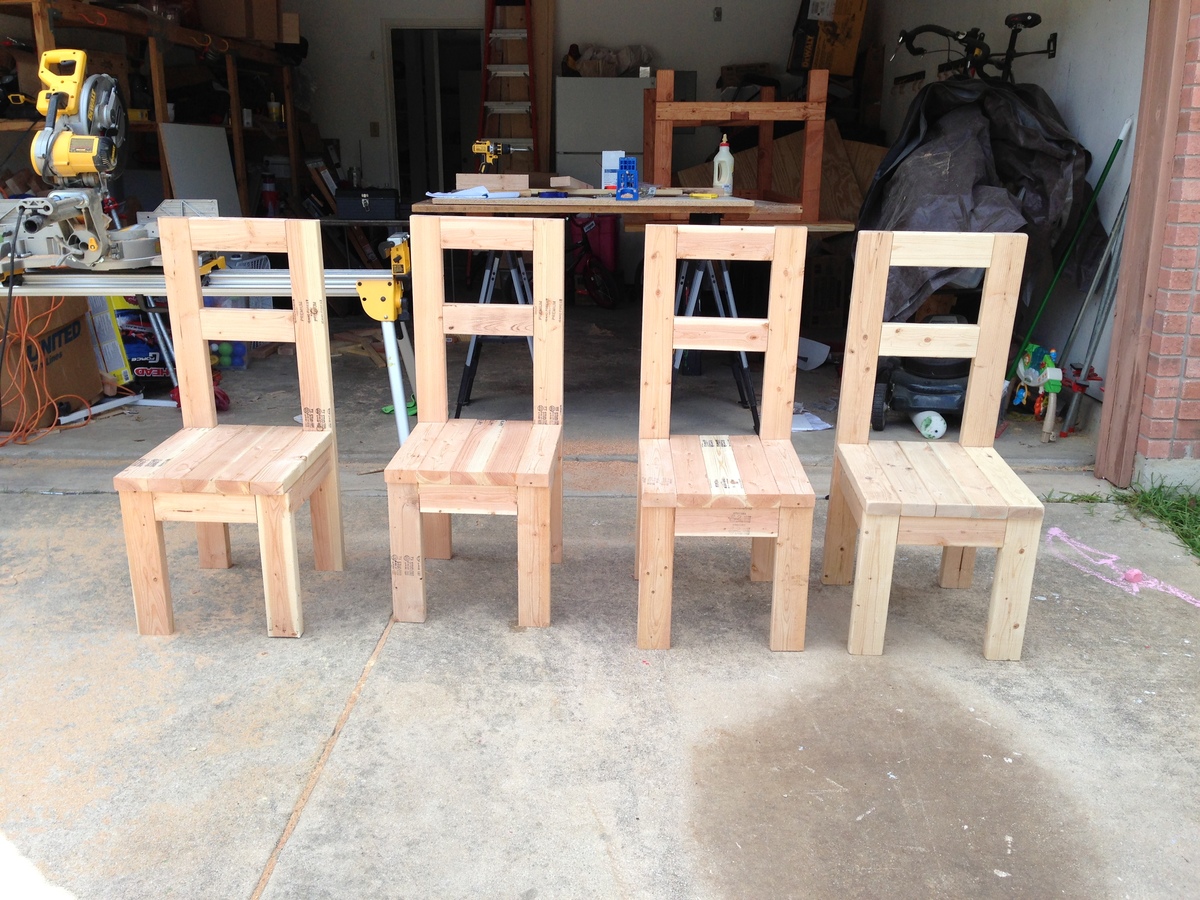
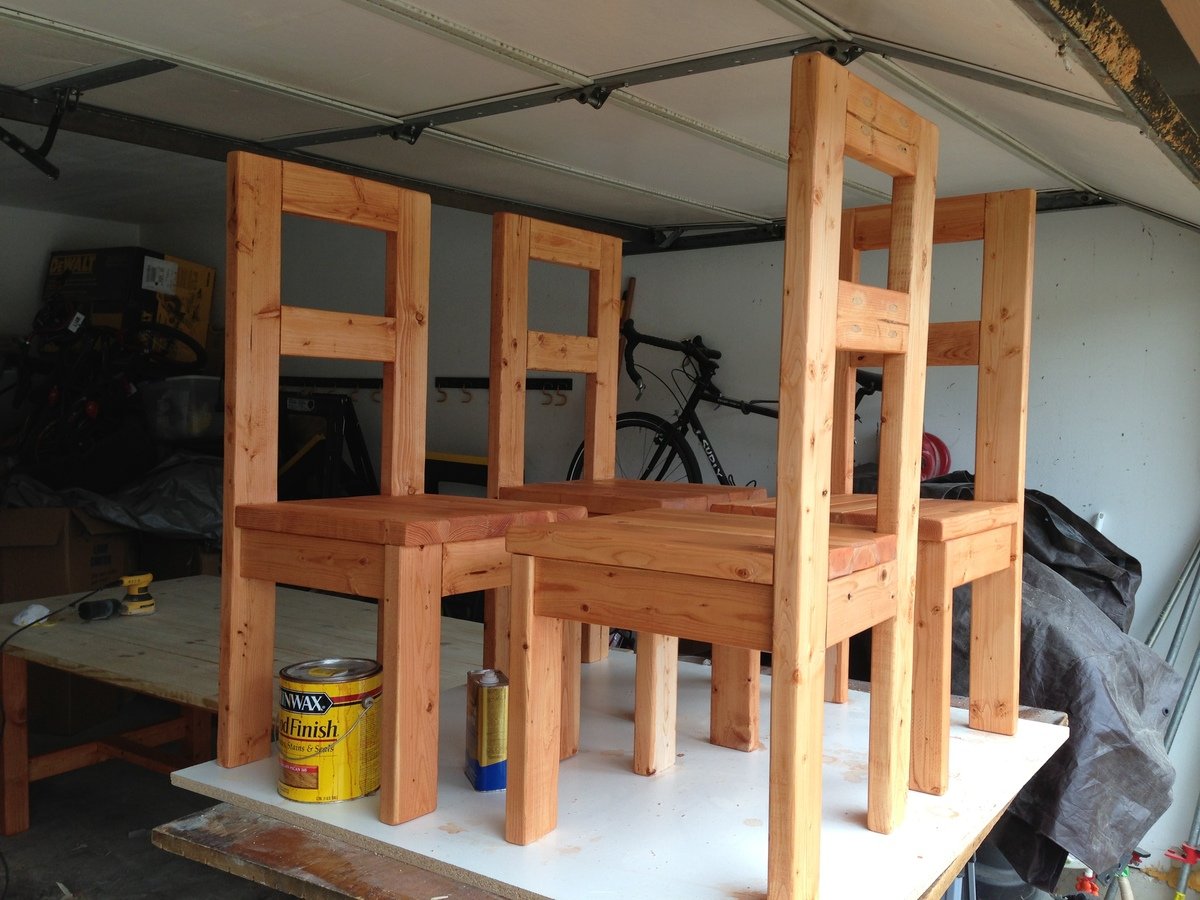
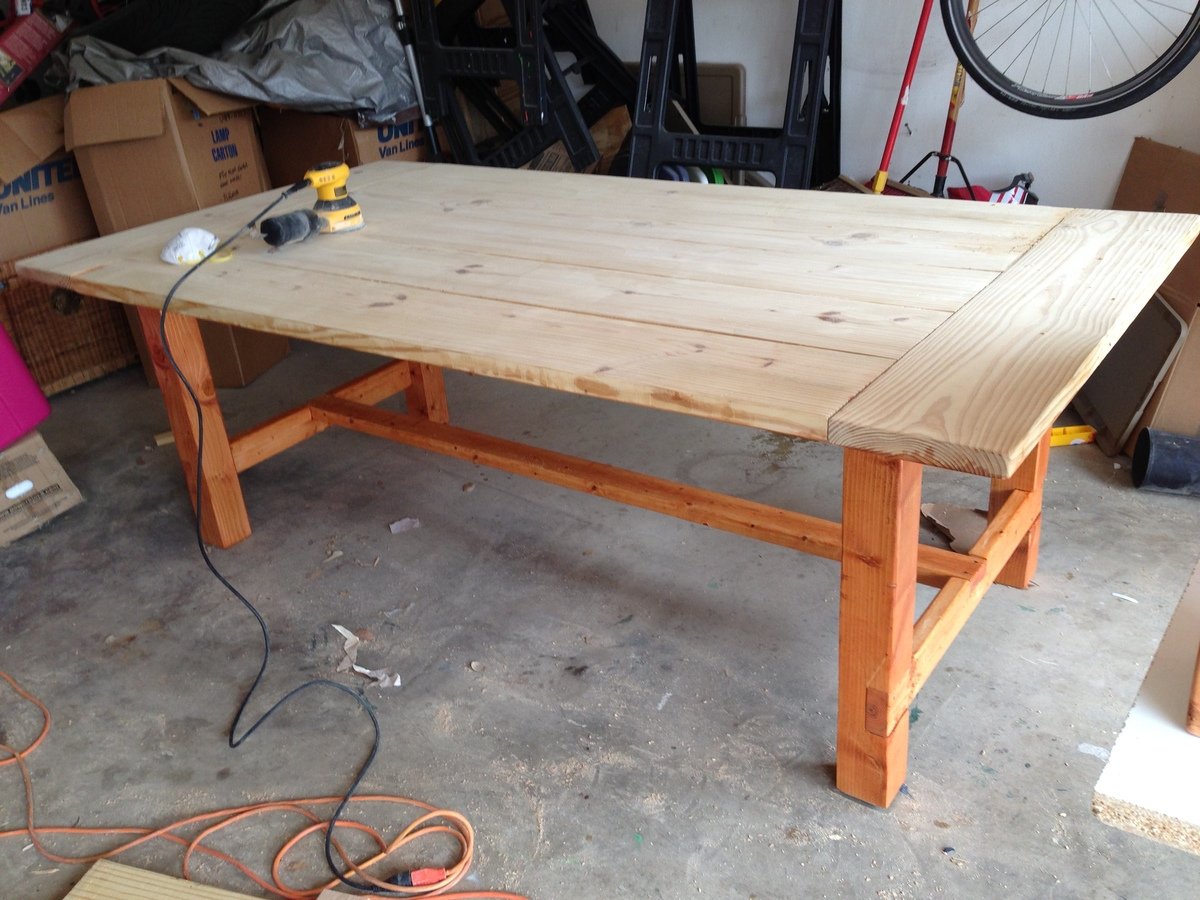
Modern Farmhouse Dining Room Table (with pocket hole) and 2x4 chairs with plans reposted from morelikehome.net.
Surfed the site for the right plans and dove right in. Thank you for the inspiration all!
Mon, 09/10/2018 - 11:05
I have clicked on the link the plans are not there.
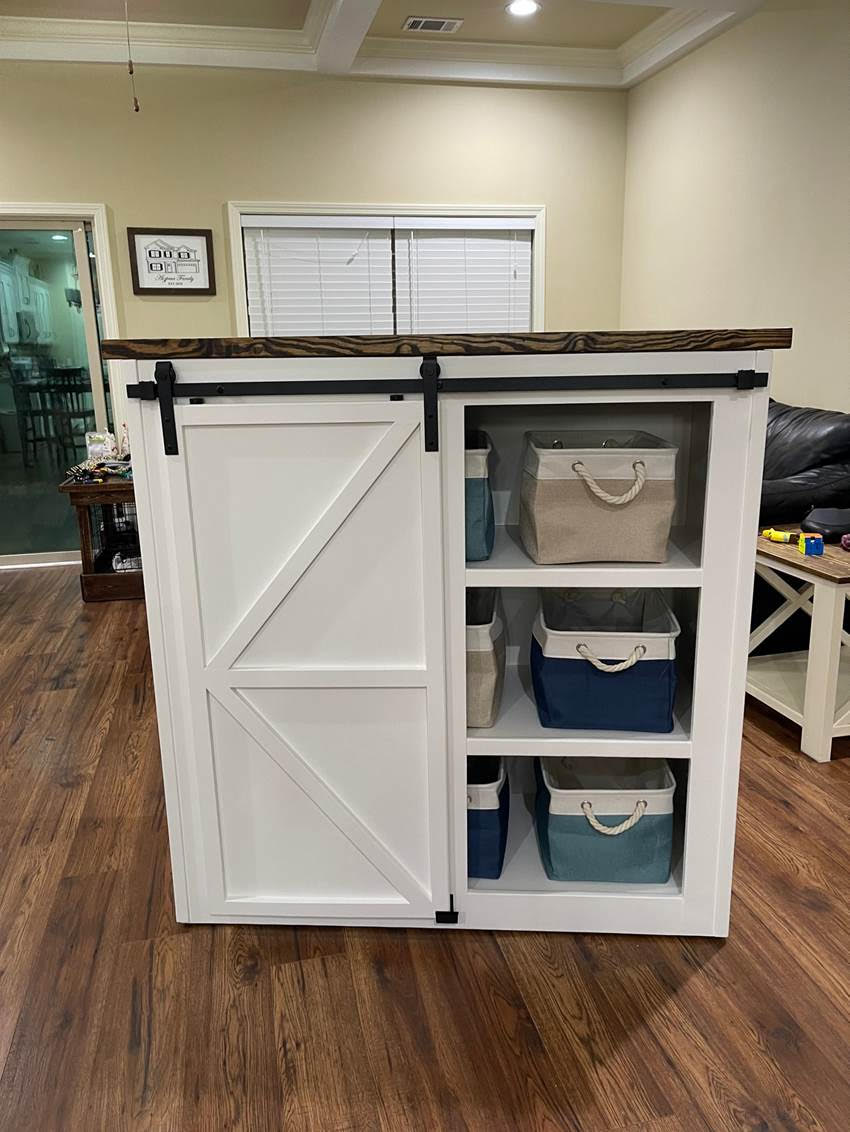
Barn door storage cabinet by Greg!
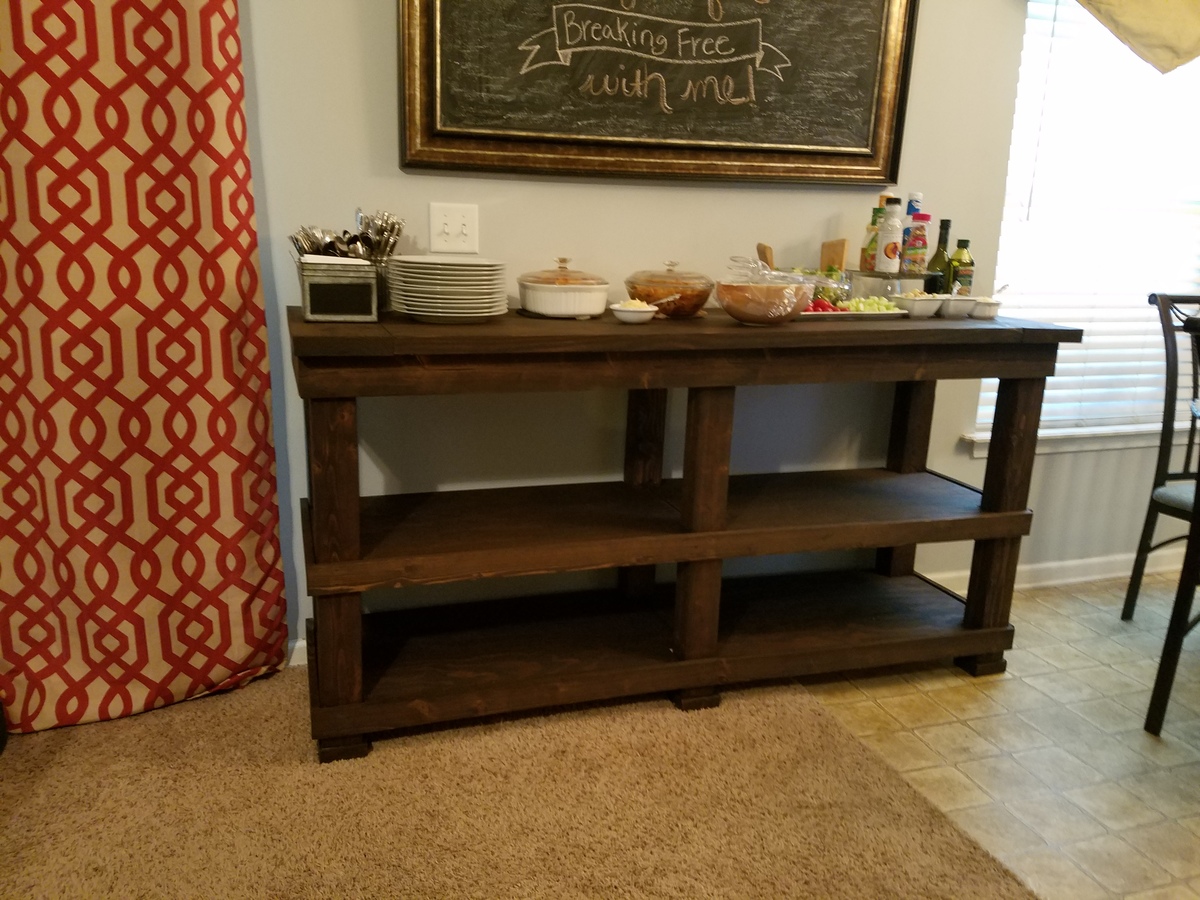
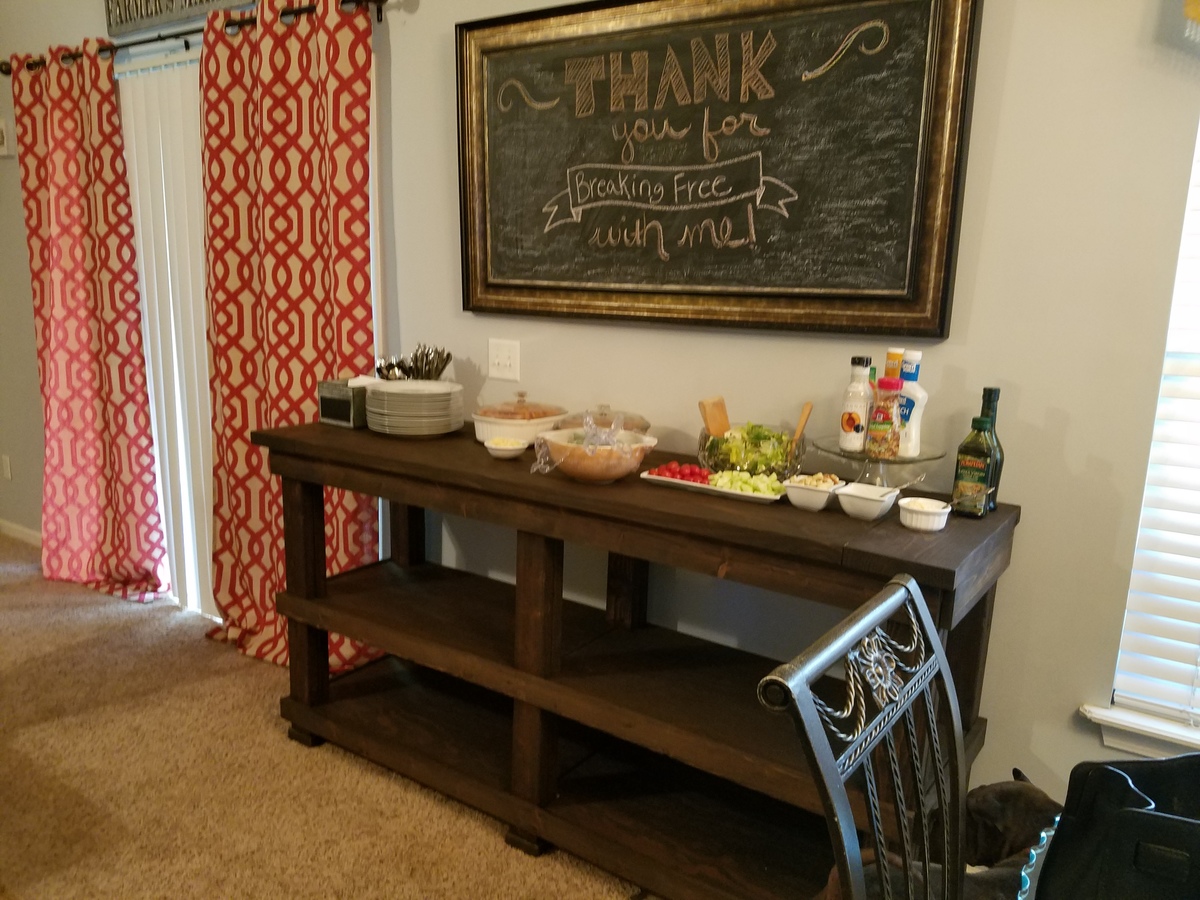
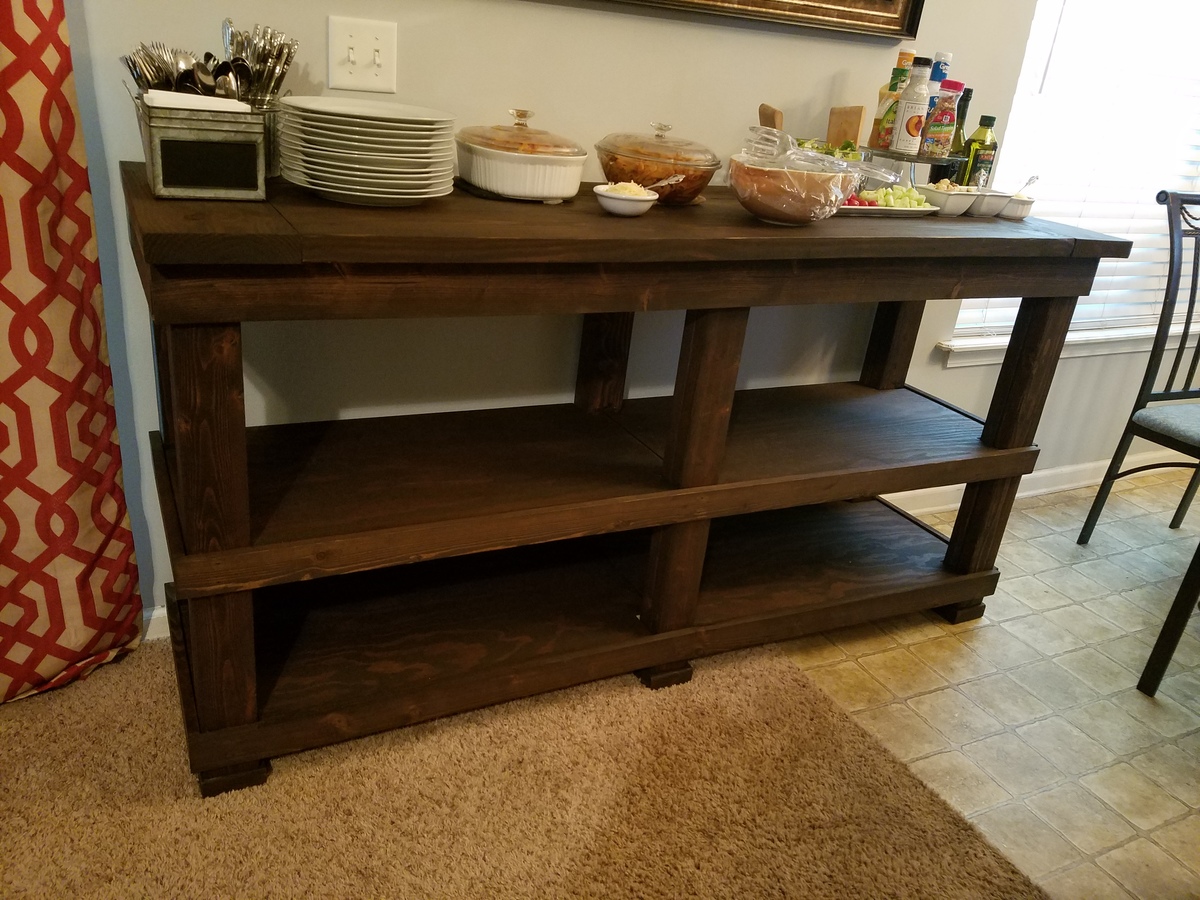
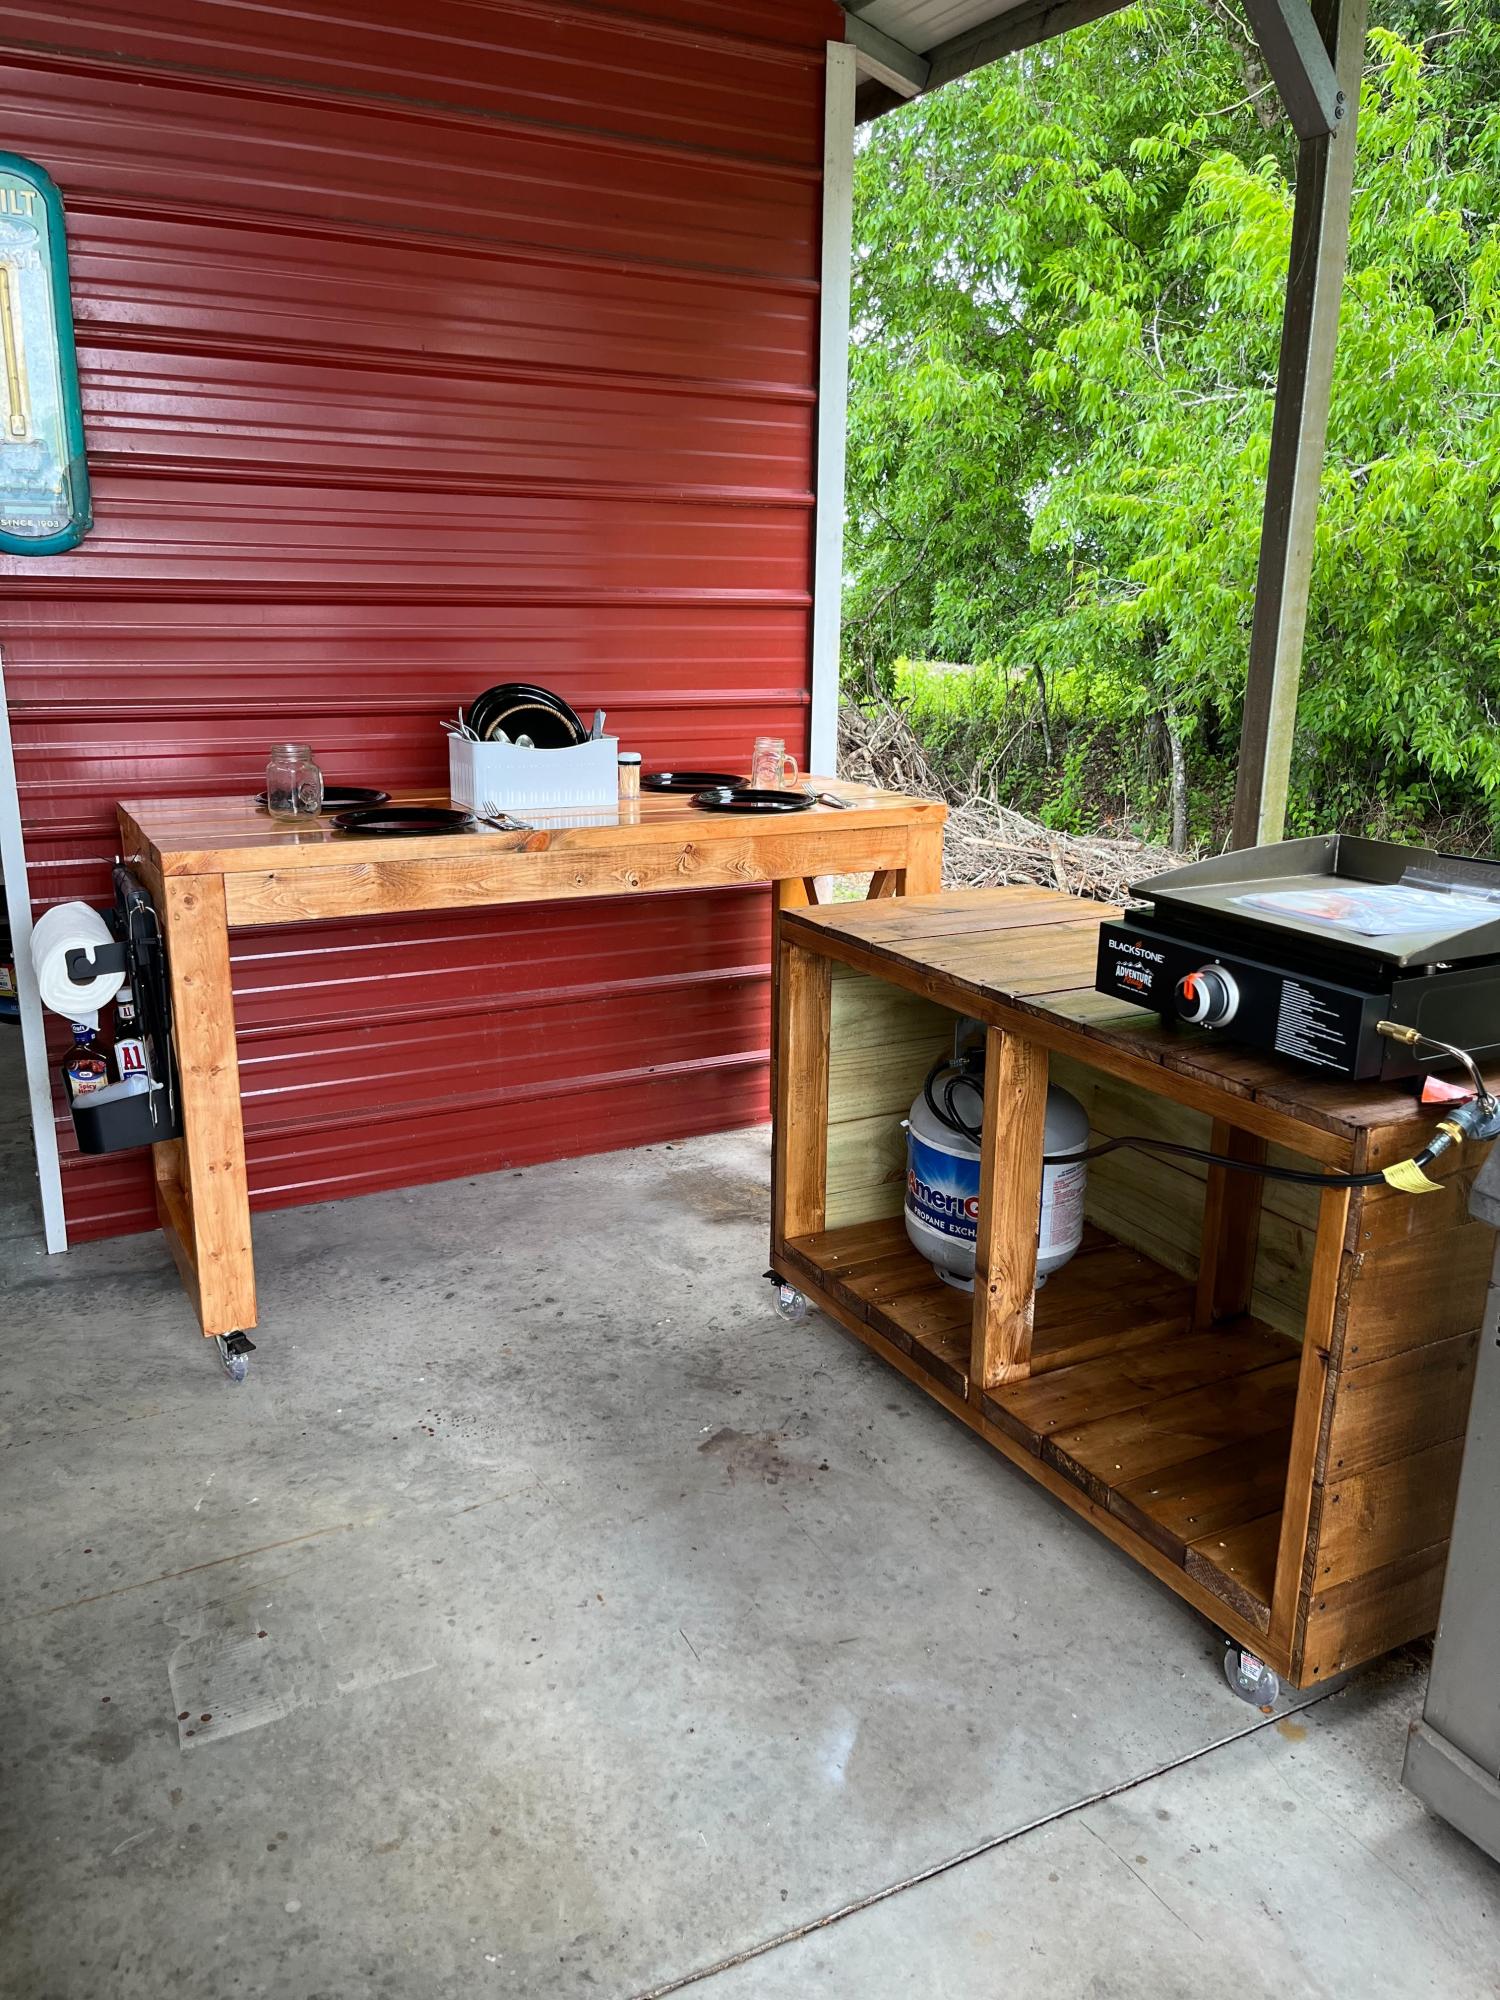
I made this buffet, serving table to go with a large gathering farmhouse table I made. I loosely used the farmhouse table plans but did some designing of my own based on a picture my friends had of what she wanted.
Lot's of fun projects!
by Rob

I recently built this for a fundraiser for a friend, who suffered from a stroke, people loved it.
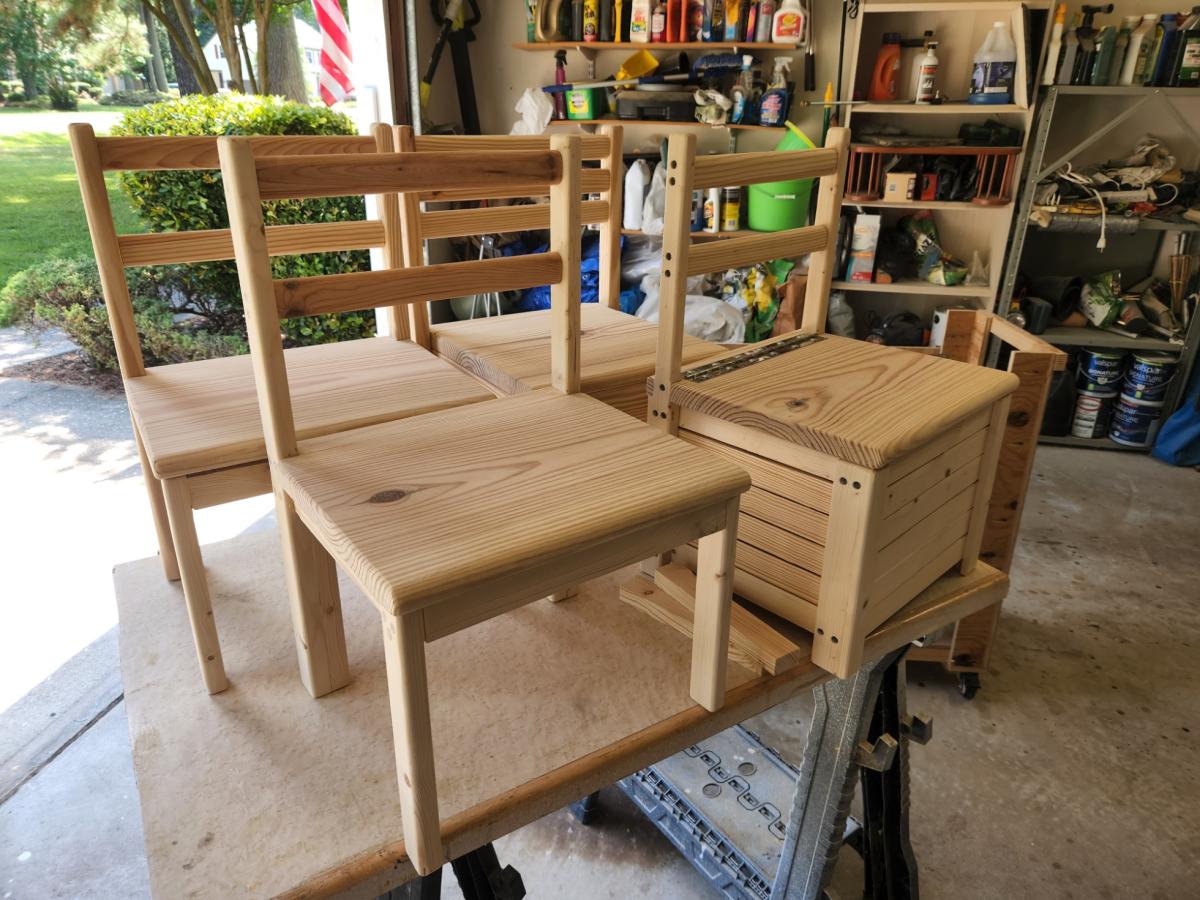
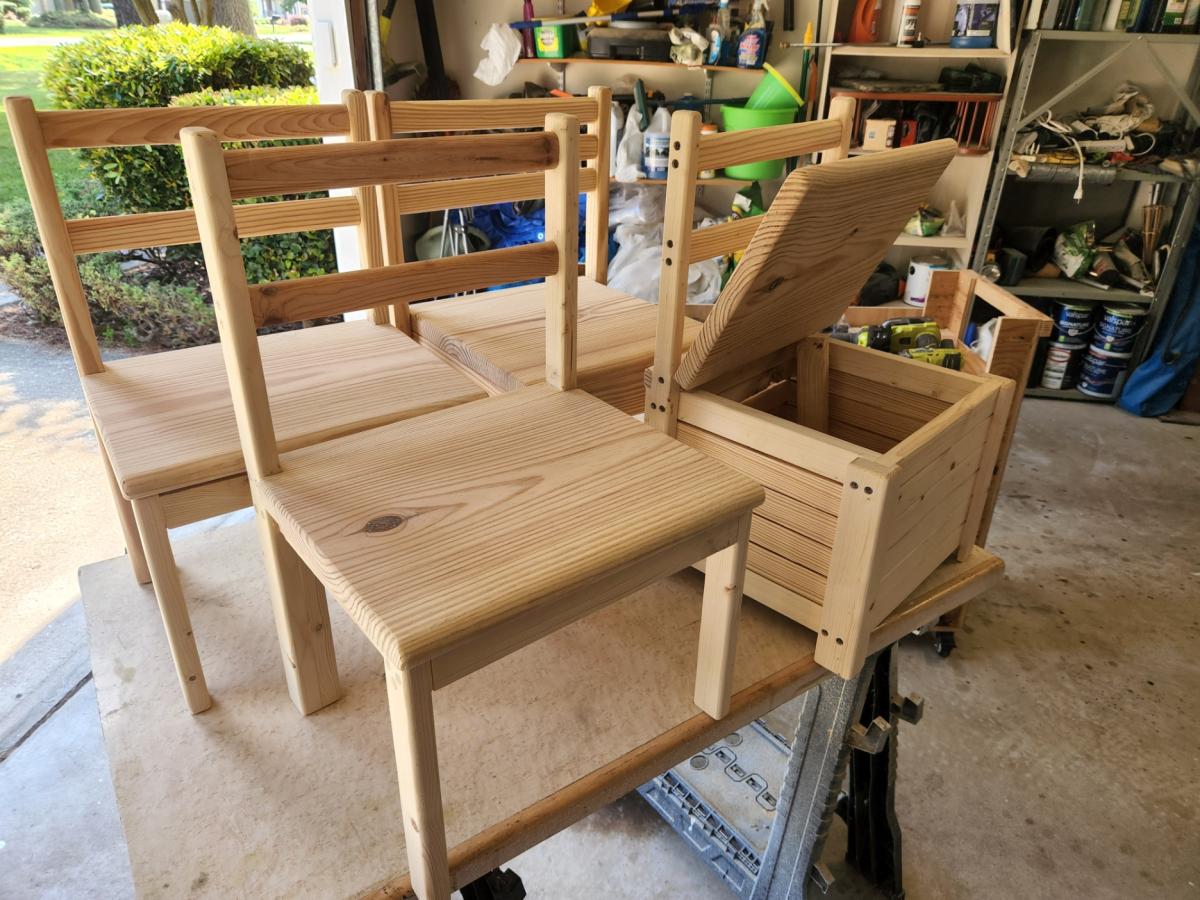
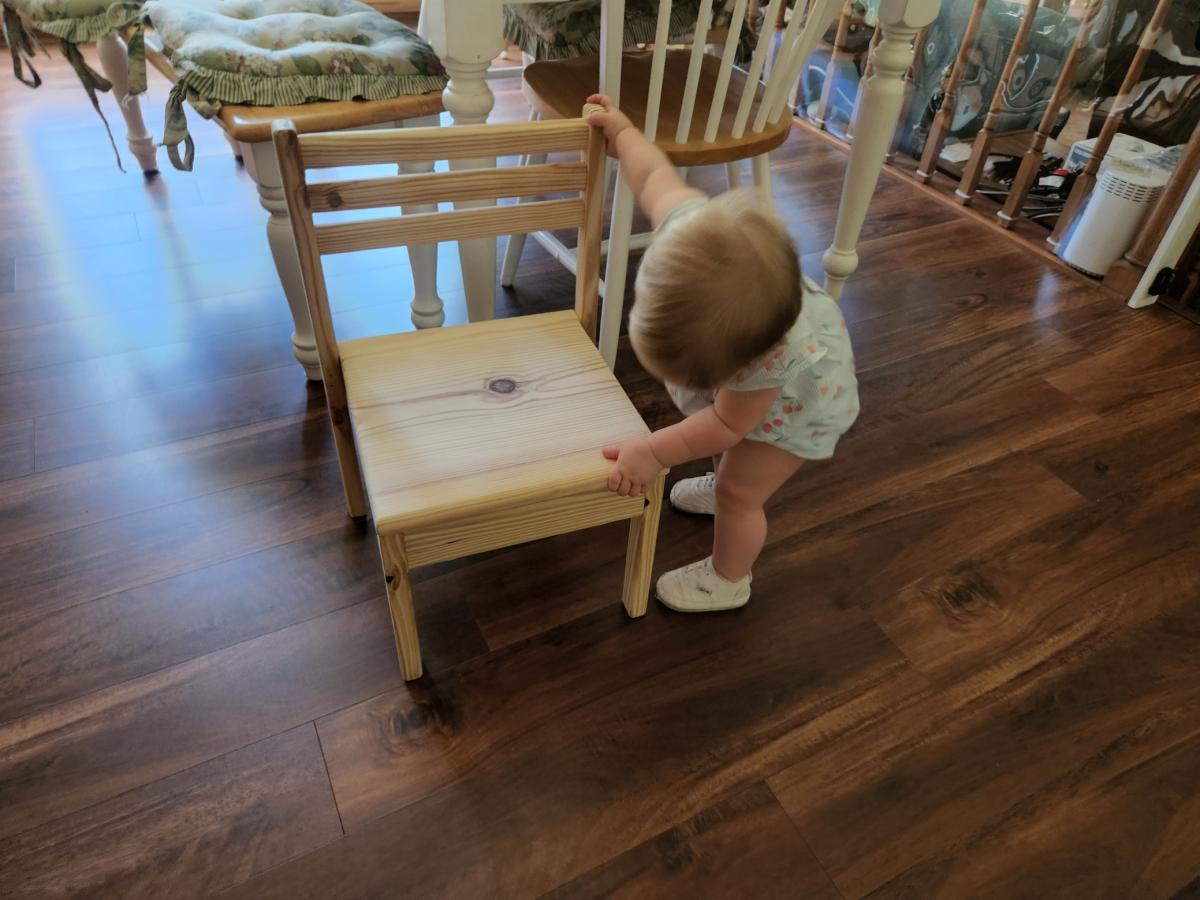
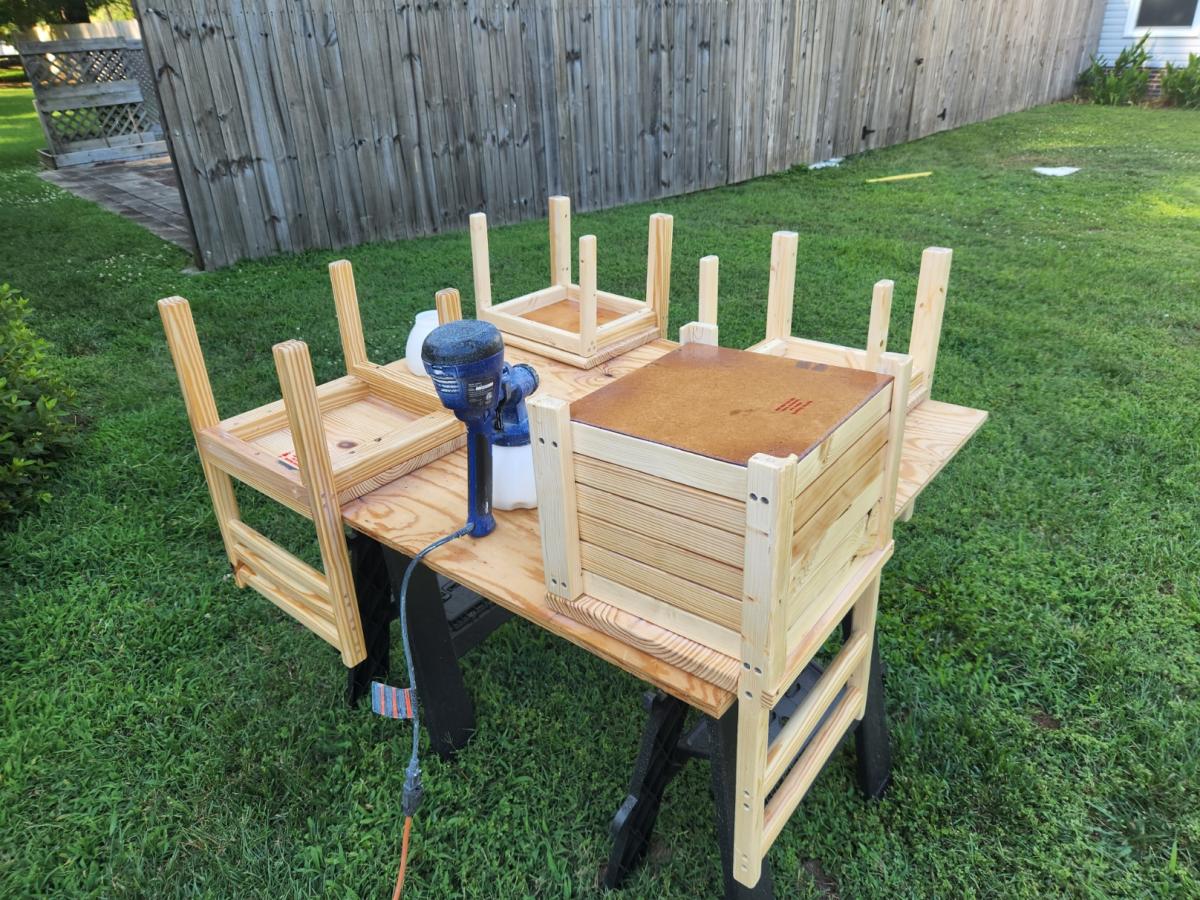
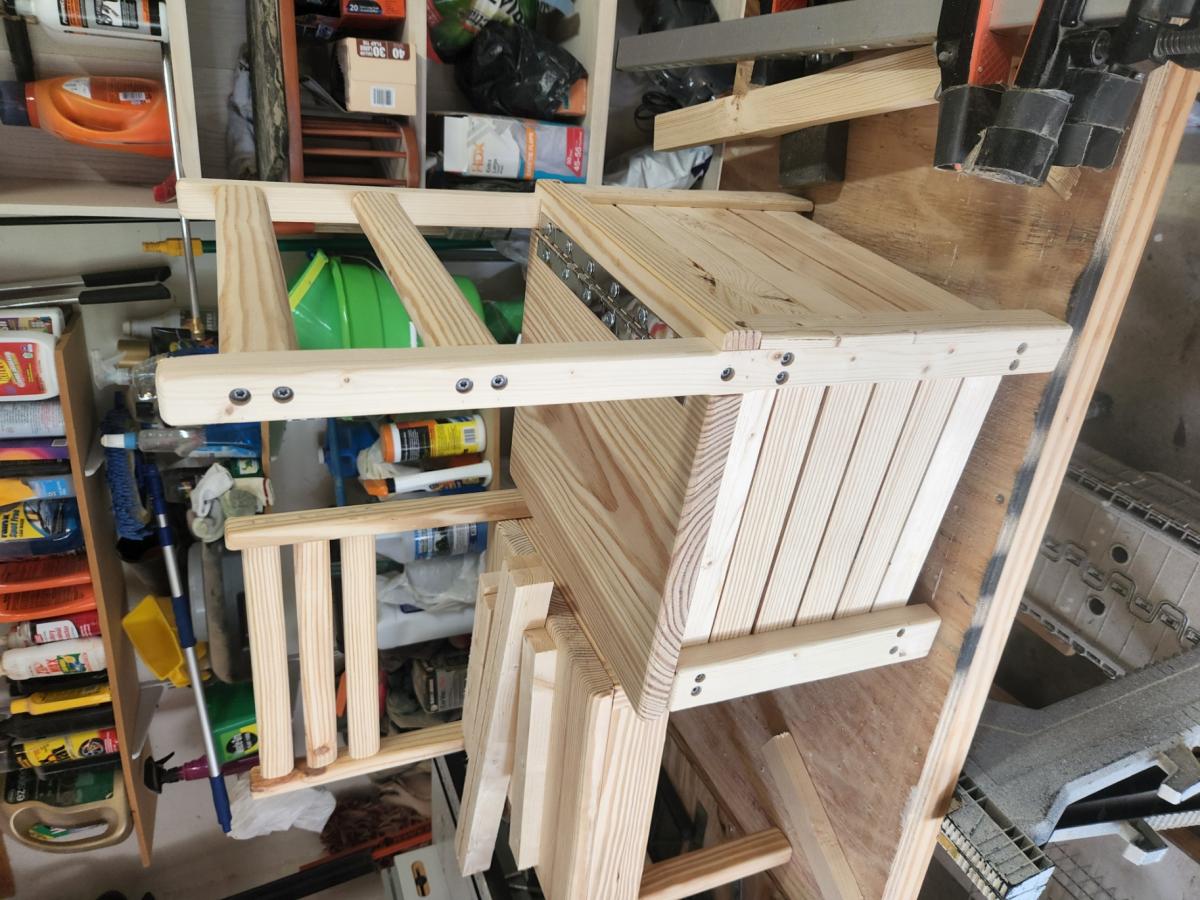
Made from Ana's Kids Chair with Storage. Love these little chairs. I riped up some 2x4's to 7/8th and used a 1 x 12 stair tread for the seats. glued with screws, then removed the screws and replaced with glue and dowels. Made for kids, strong enough for adults.
Mon, 07/04/2022 - 18:26
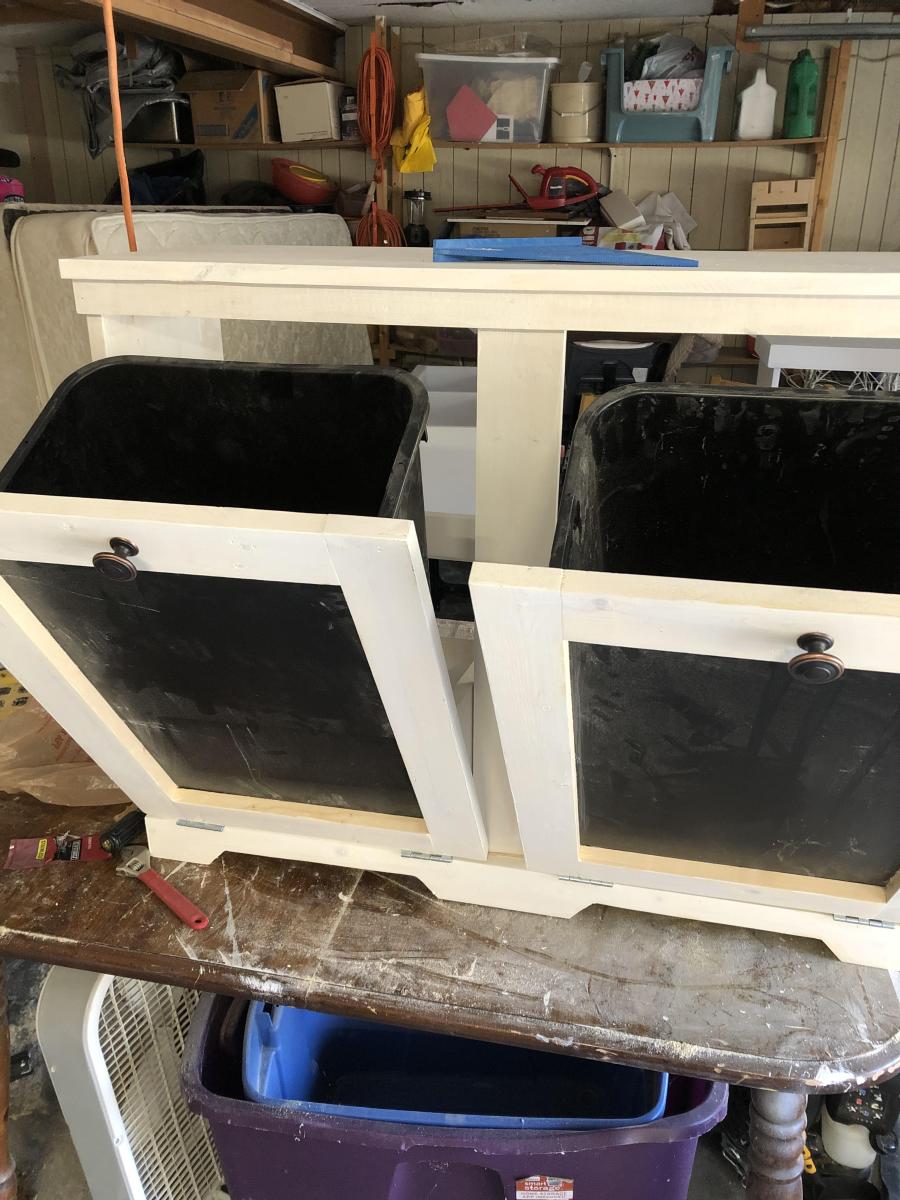
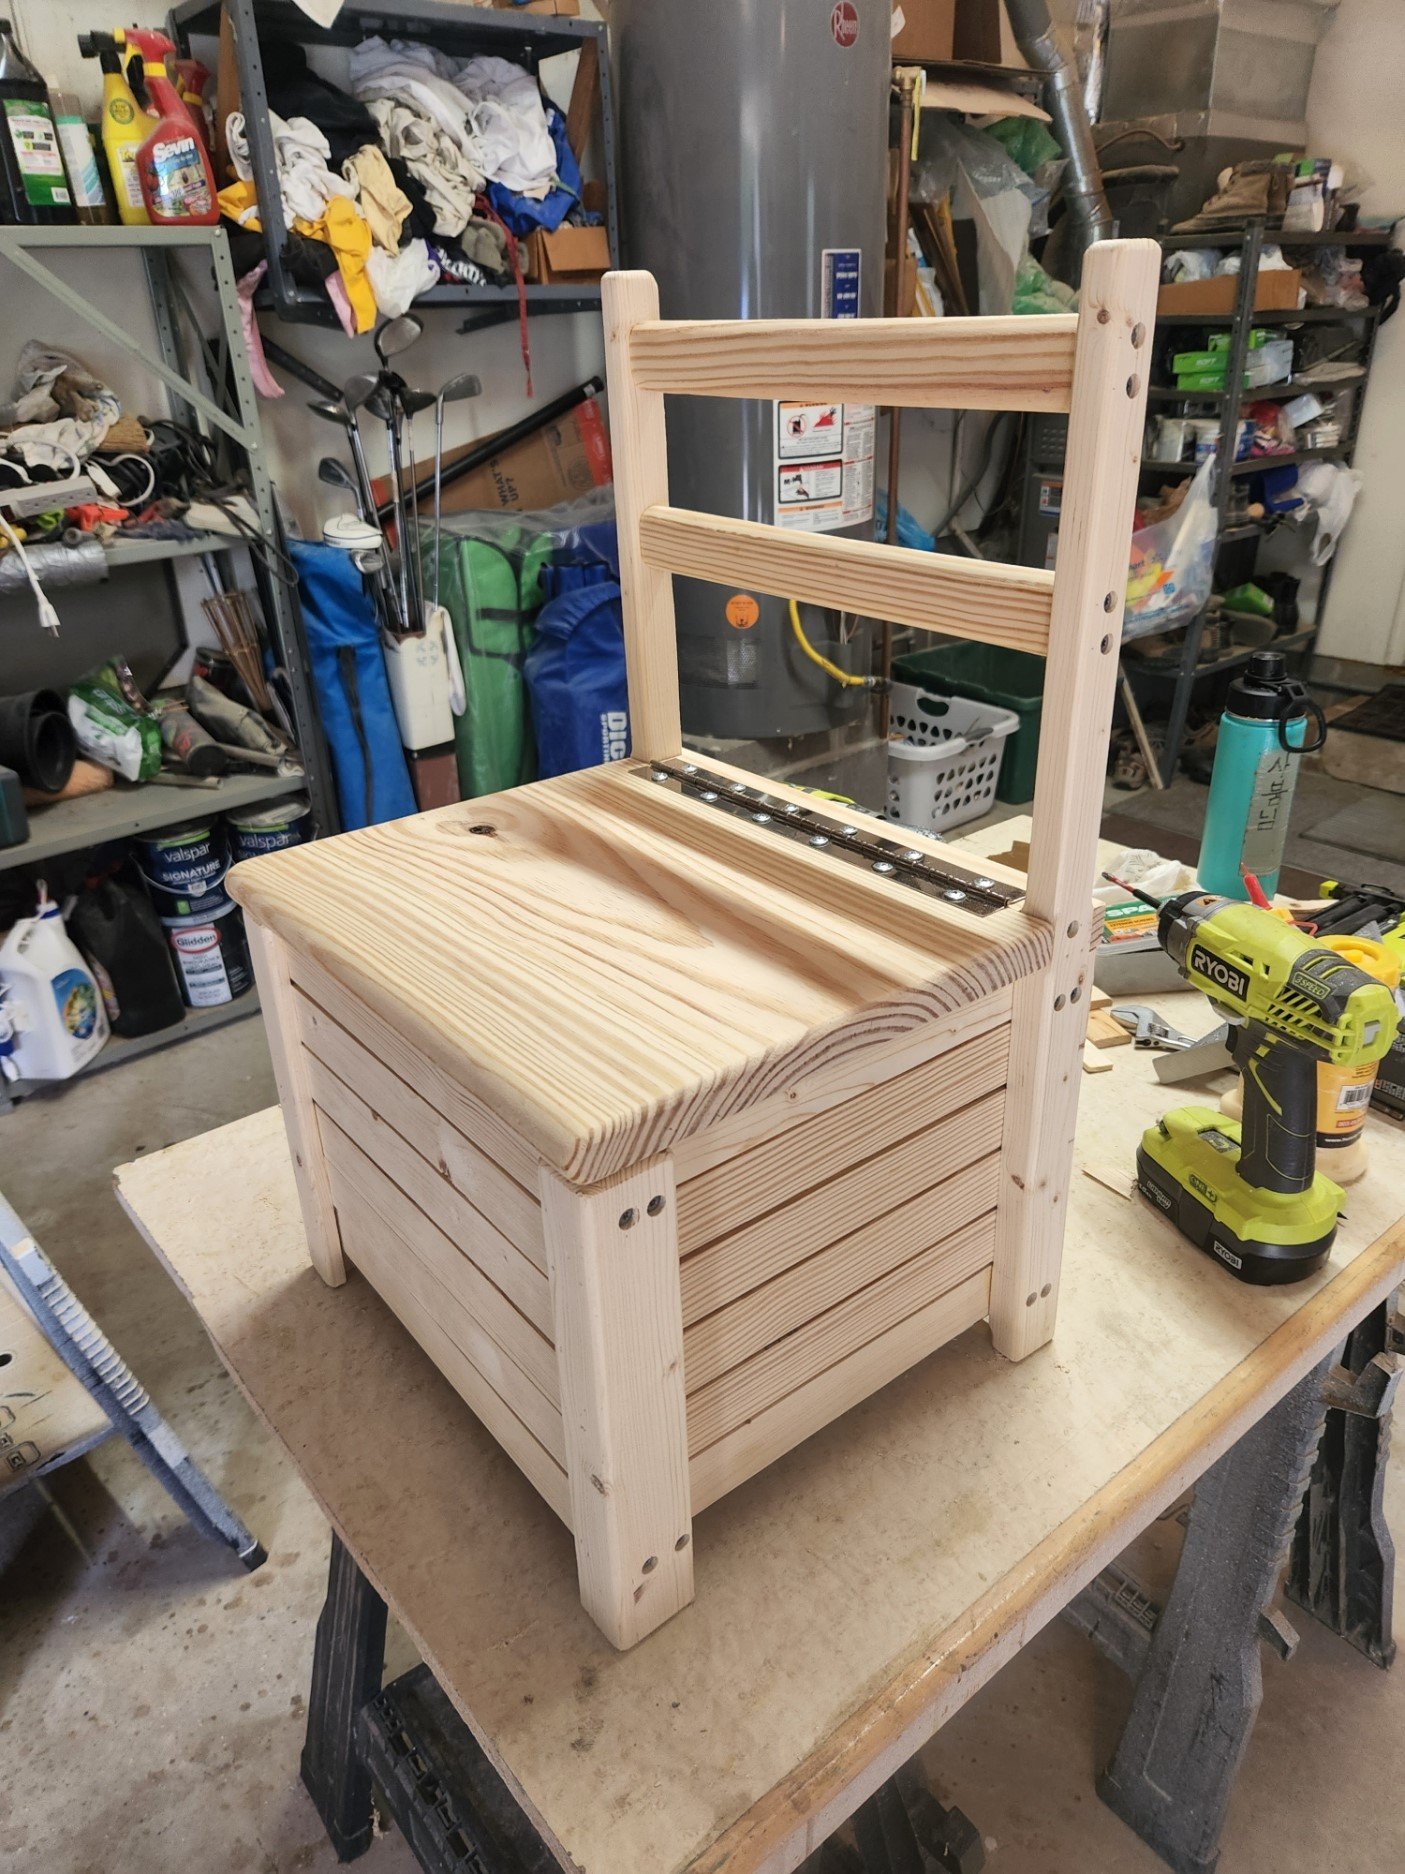
Built up the storage shelf with some laths and added a piano hinge to the seat. Nice little toy box.
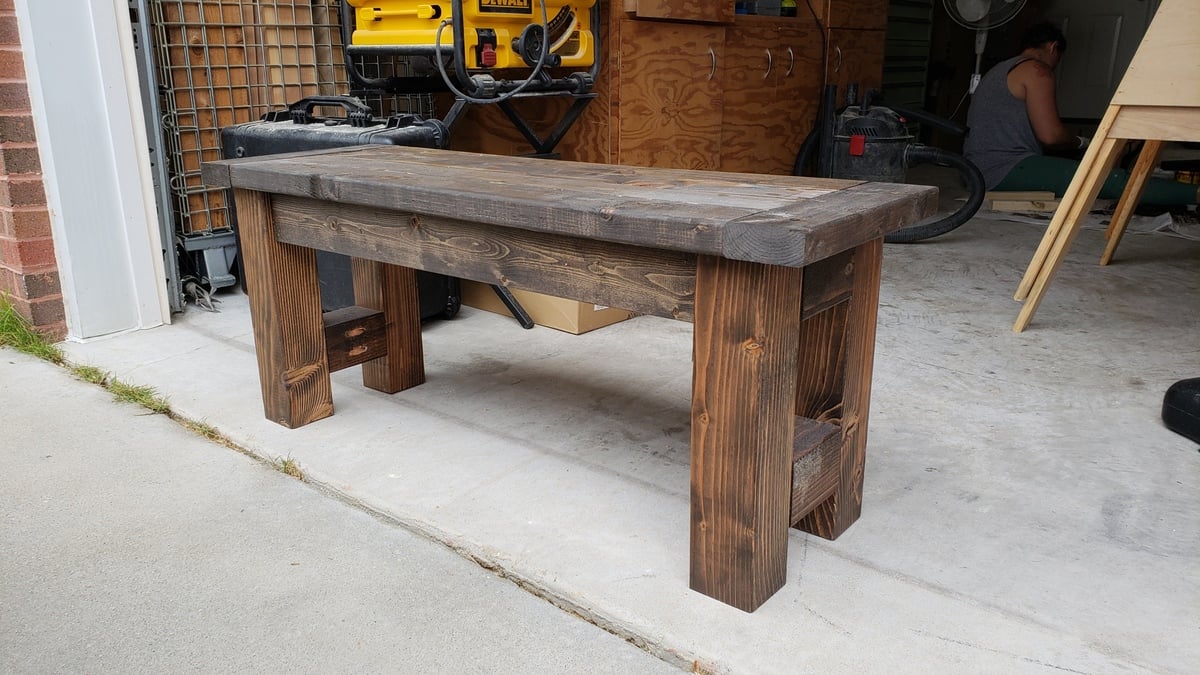
Made a 4 foot version of the farmhouse bench. I also used 4x4s for the legs instead of 2x4s. They work great, just makes the bench a little heavy.

Thanks for the plans!
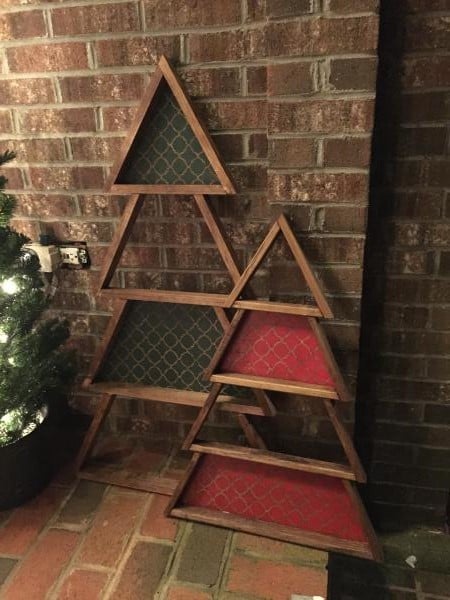
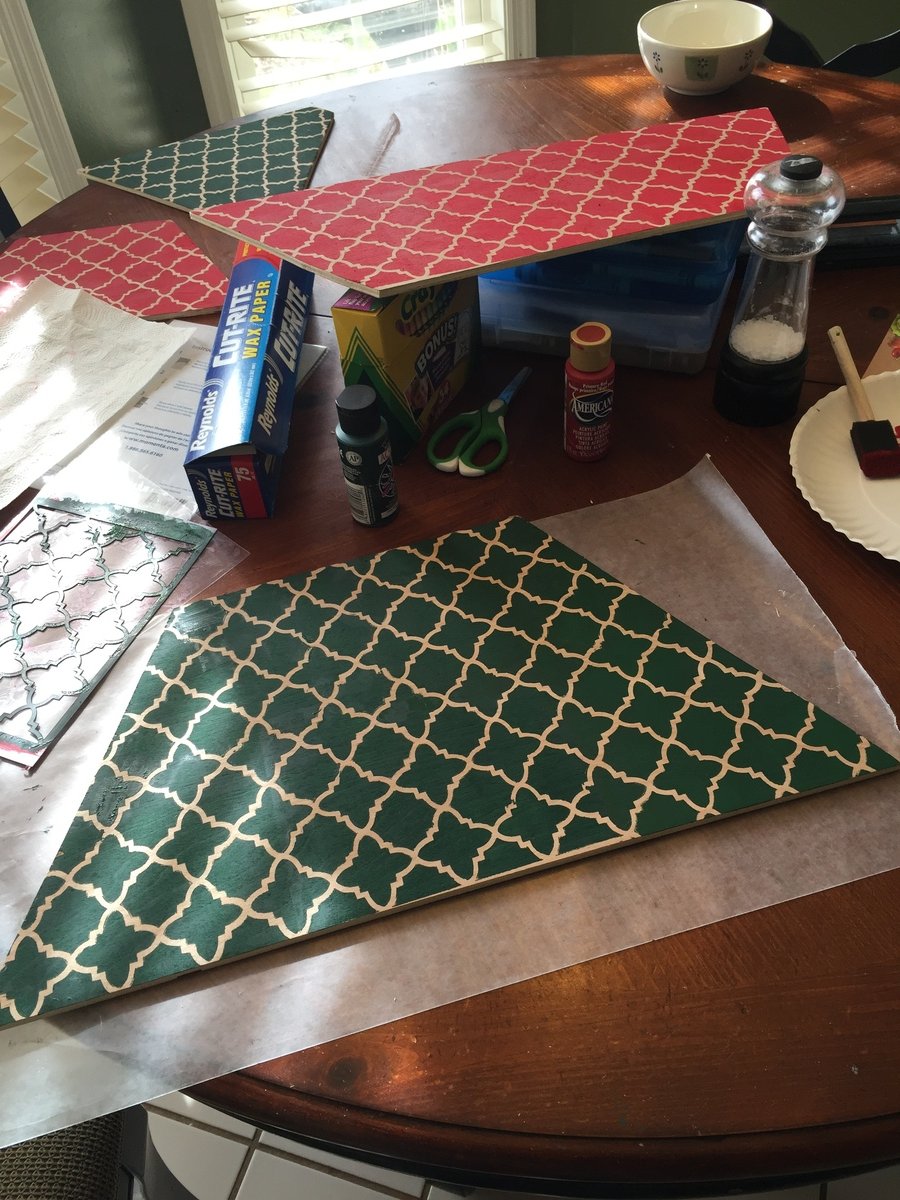
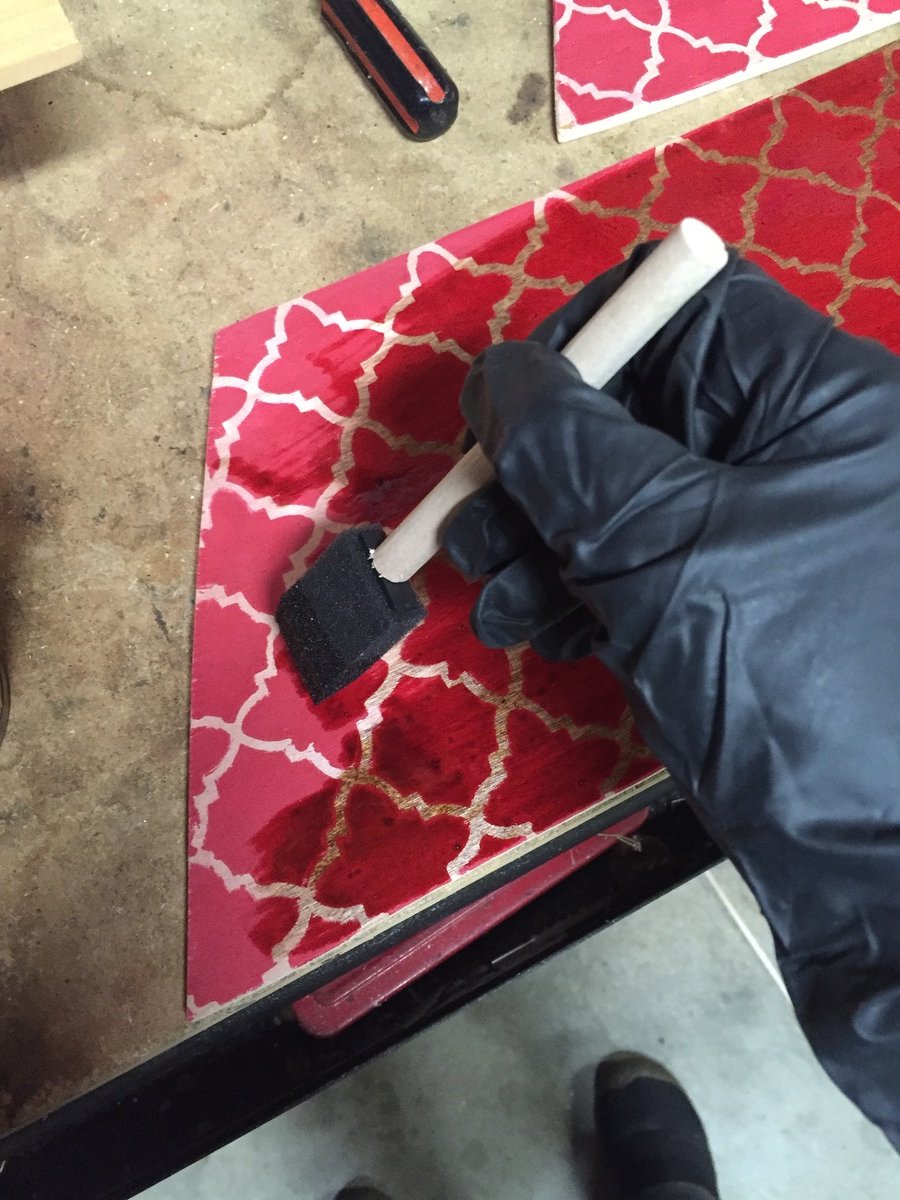
I used 1x2 boards for this project. The smaller tree is the size according to plans (minus the coat rack). For the larger tree, I added 3.5 inches to each piece. 1/4 plywood on the back and used a stencil for the design. I love the way it turned out.

I used my router and router Ed the edges. Love this!!
My Tryde coffe table. Fun to build and looks great! Thanks Ana!
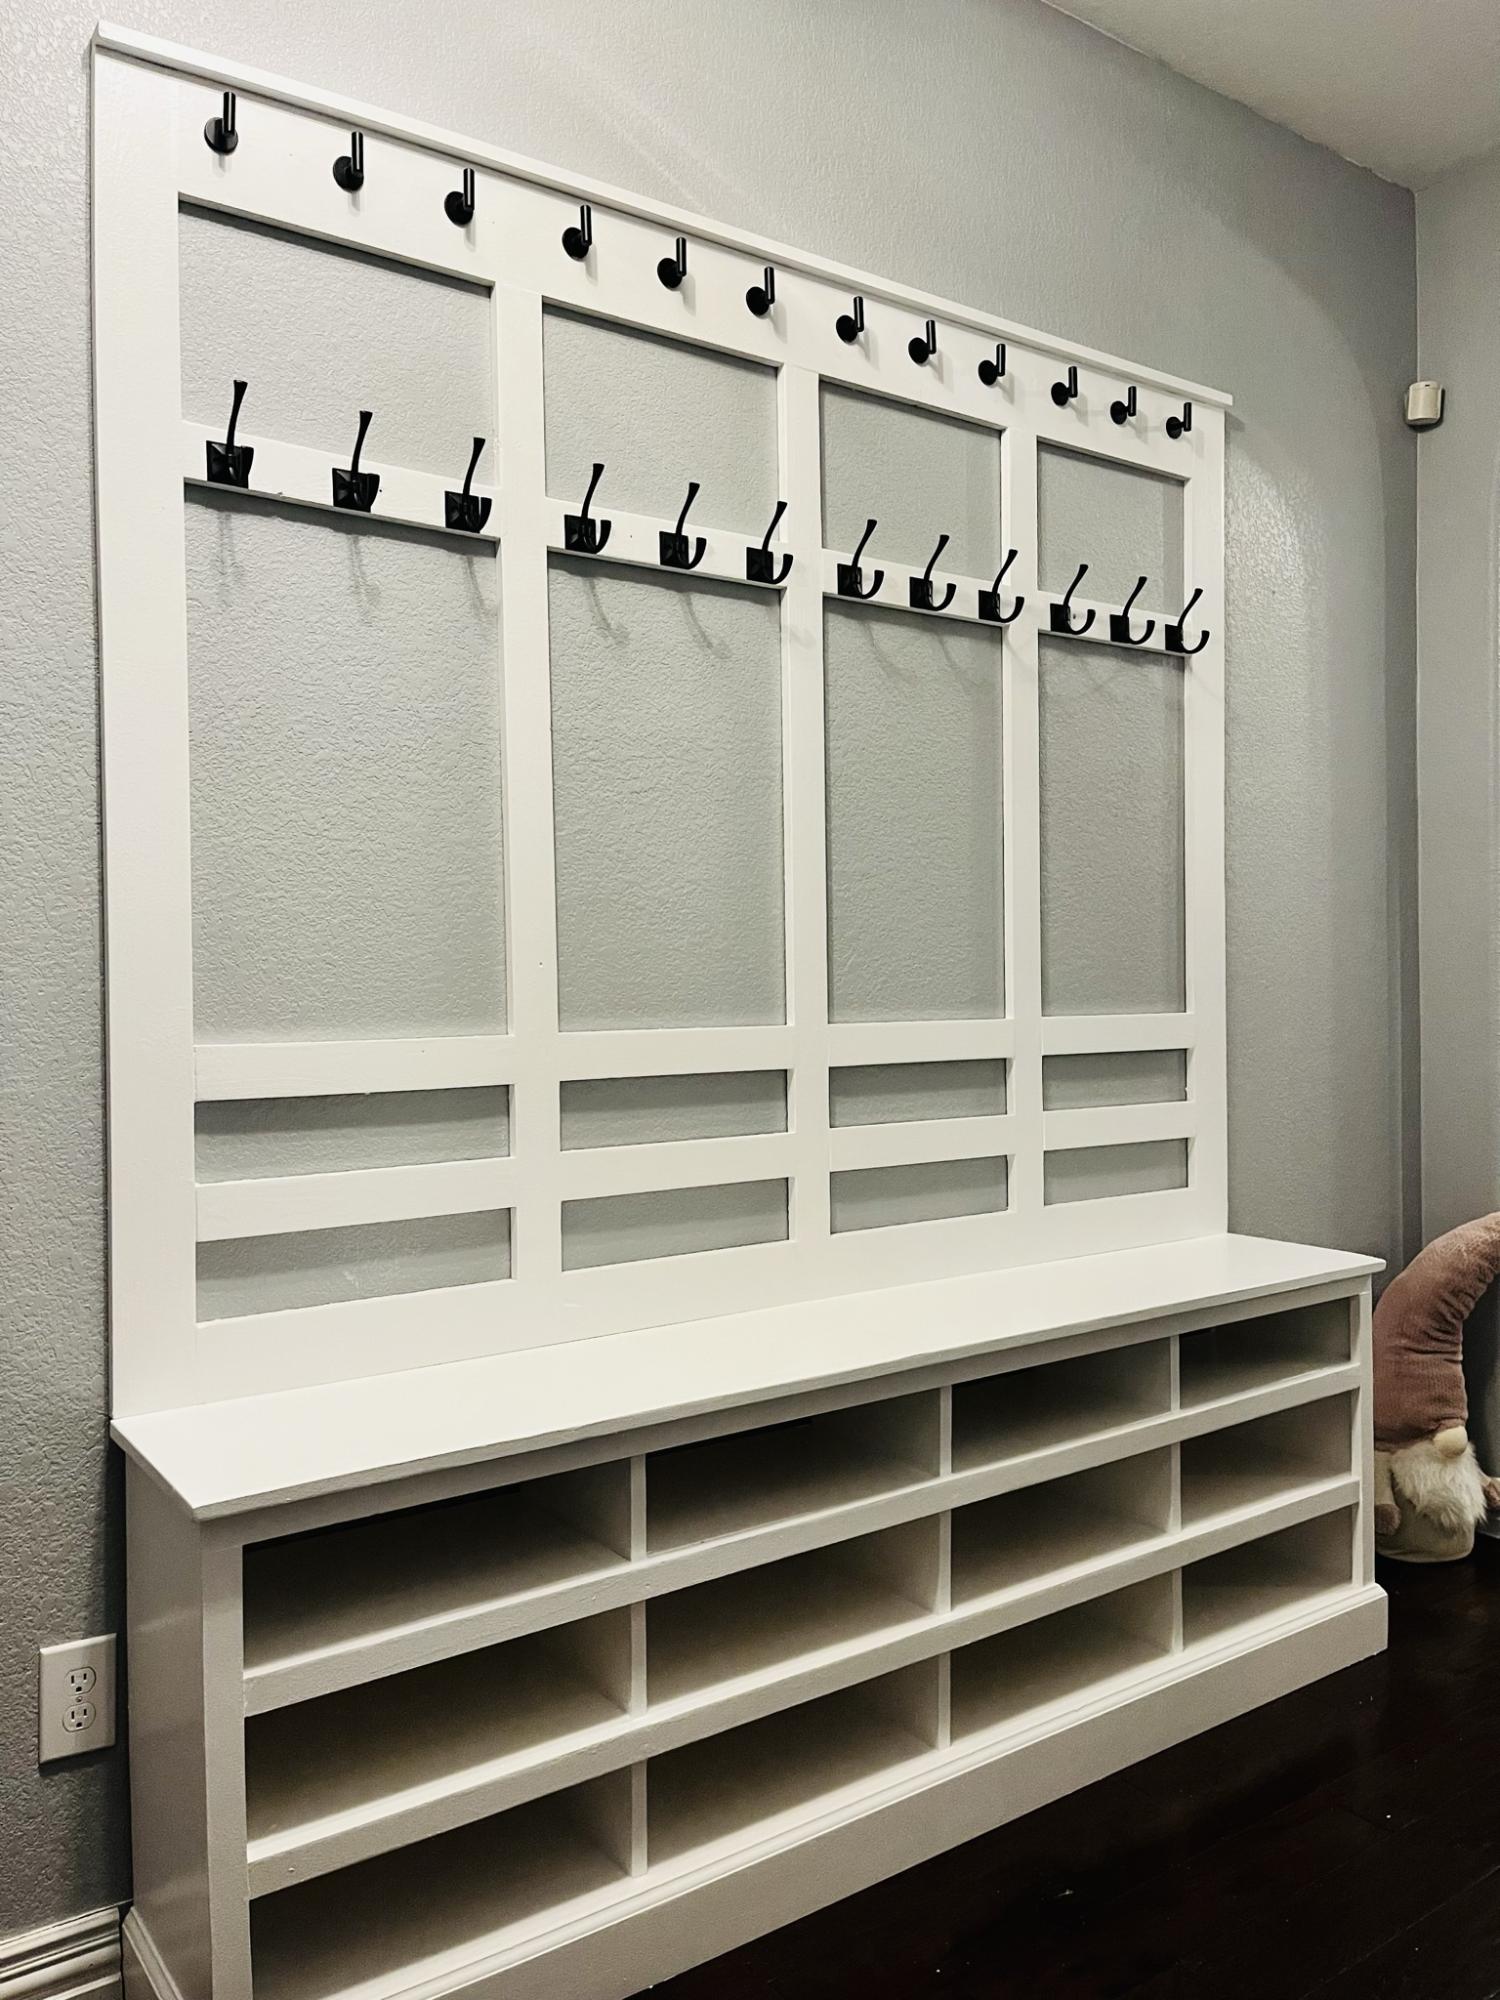
I modified the plans for the farmhouse hall tree to build this for our entryway. The farmhouse hall tree was a perfect base plan for this project! We went from a mess of jammed in jackets and piles of shoes to a clean and organized entrance! Thank you so much for providing the original plans! We love this!
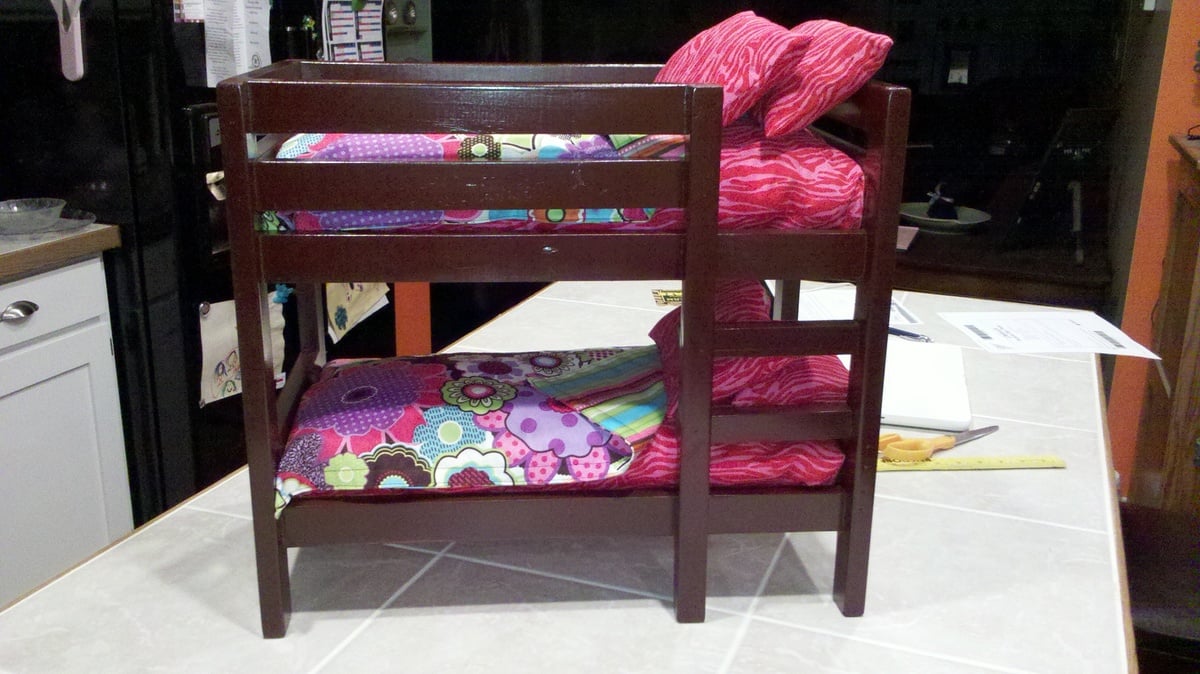
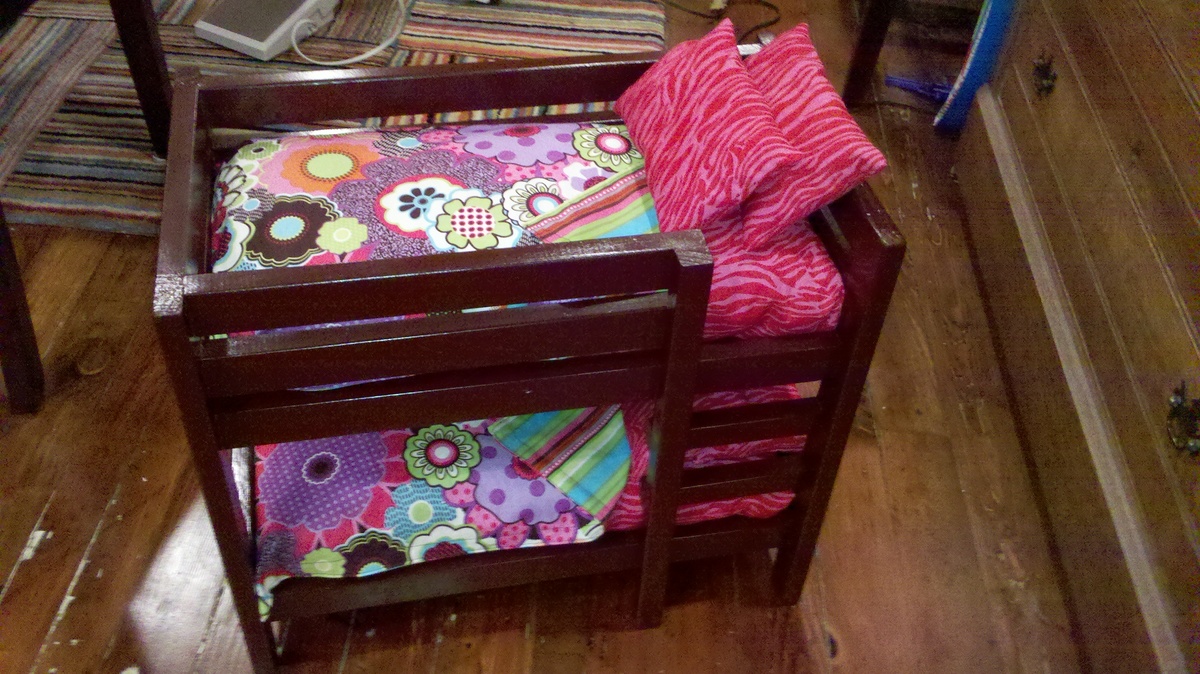
My daughter has really been getting into American Girl Dolls so I went on the official website to see if I could find some accessories for them for her birthday and YIKES - that stuff is expensive! So I went on Ana's site and found plans to make bunk beds. My daughter has four dolls so I figured we could build two sets at a fraction of the cost we could buy them at.
This was our first furniture project so we had to buy everything, which makes the project more expensive than if you have scraps laying around, but still totally worth it. My husband and I built two of these in about 3 hours. Sewing four of everything probably took another 2-3 hours.
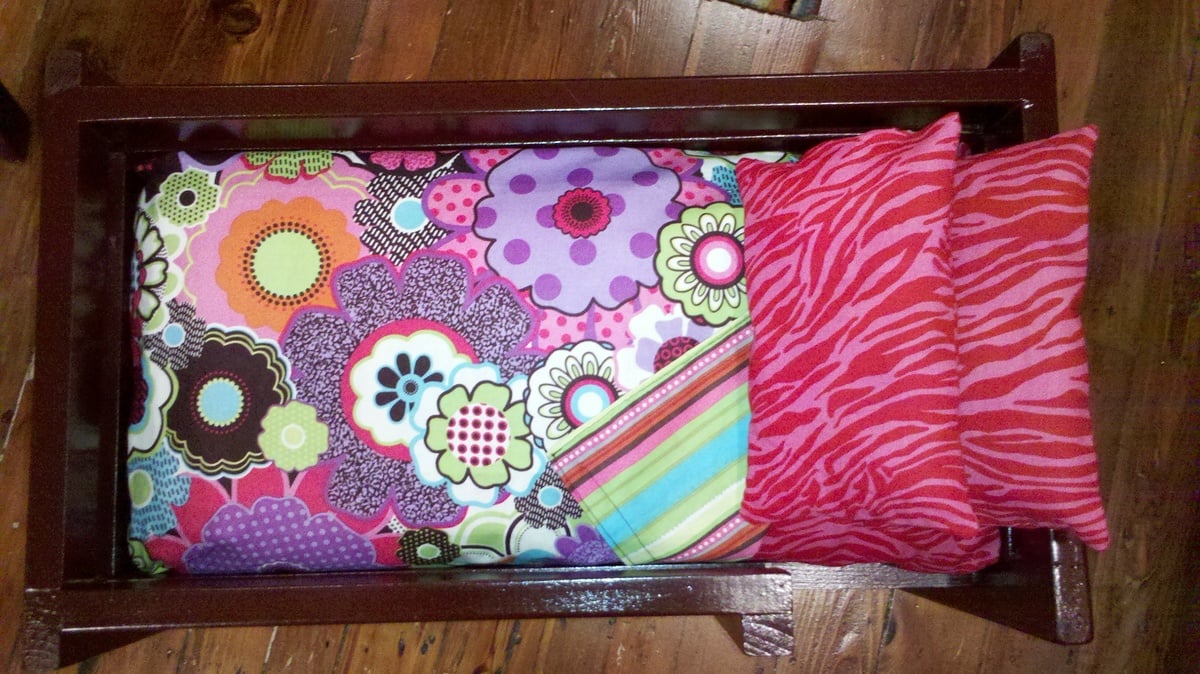
I made the blankets reversable - flowers on one side, strips on the other so she could mix and match as she liked. I think I am going to make a reversable pillow for each bed with the blanket fabric, but I haven't gotten that far yet. I totally misunderstood how much fabric to buy - I thought it was 1/2 yard for mattress and then another 1/2 yard for the blanket, but it's not, it's 1/2 yard for both so needless to say I have a TON of fabric left over. Since this project went so well we are going to build a doll table and chairs for Christmas so I figure I can use the left overs for placemats, etc. and carry the theme through the set.
I love the way they turned out and I can't wait to give them to her for her birthday!!!
Comments
Ana White Admin
Mon, 10/11/2021 - 11:21
Wonderful bunk!
Looks great, thanks for sharing!