Community Brag Posts

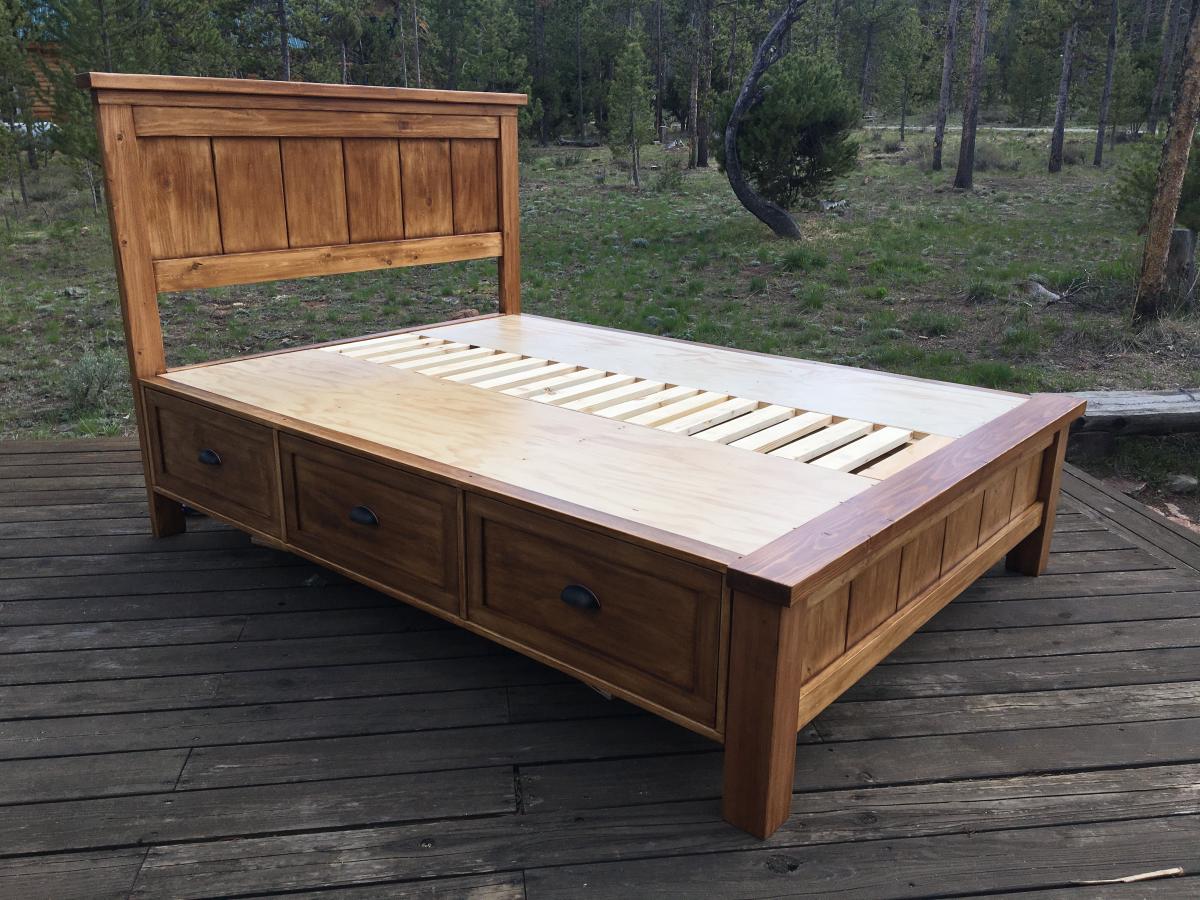
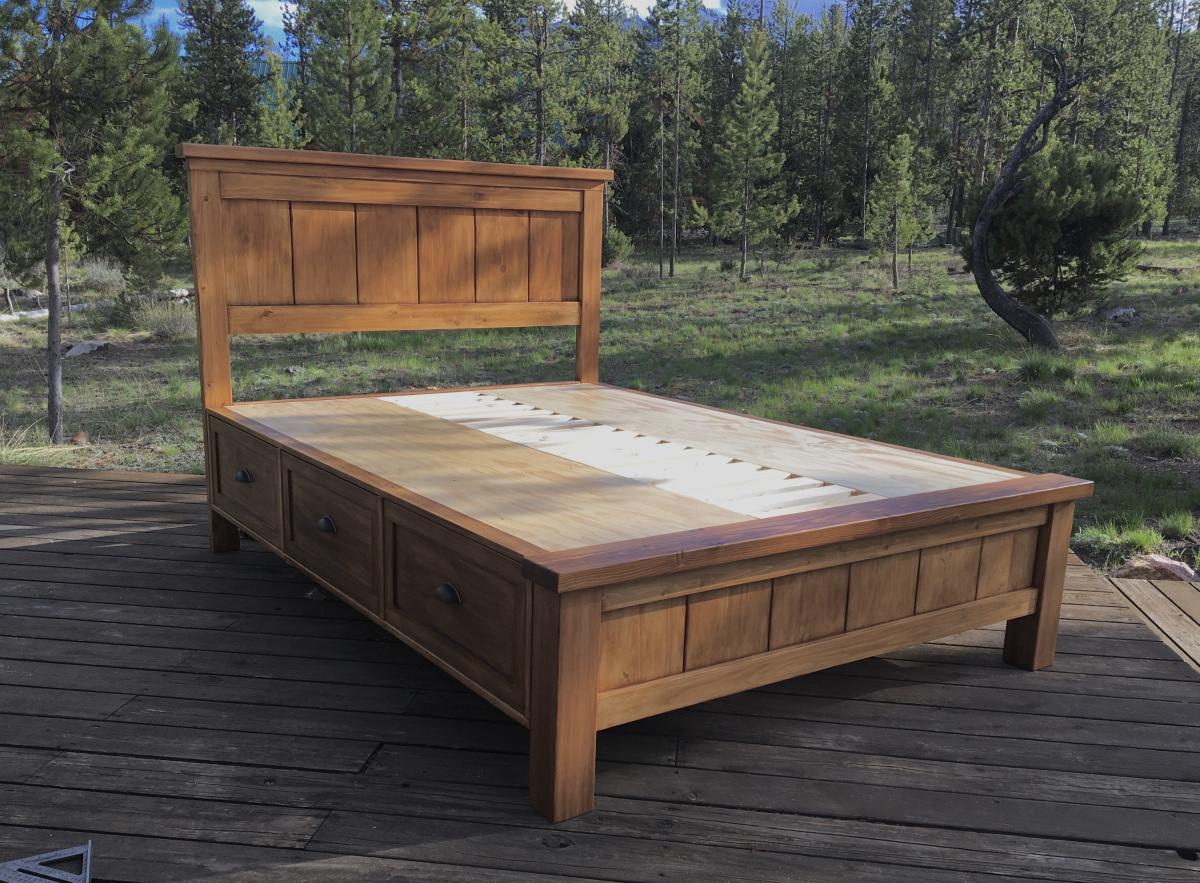
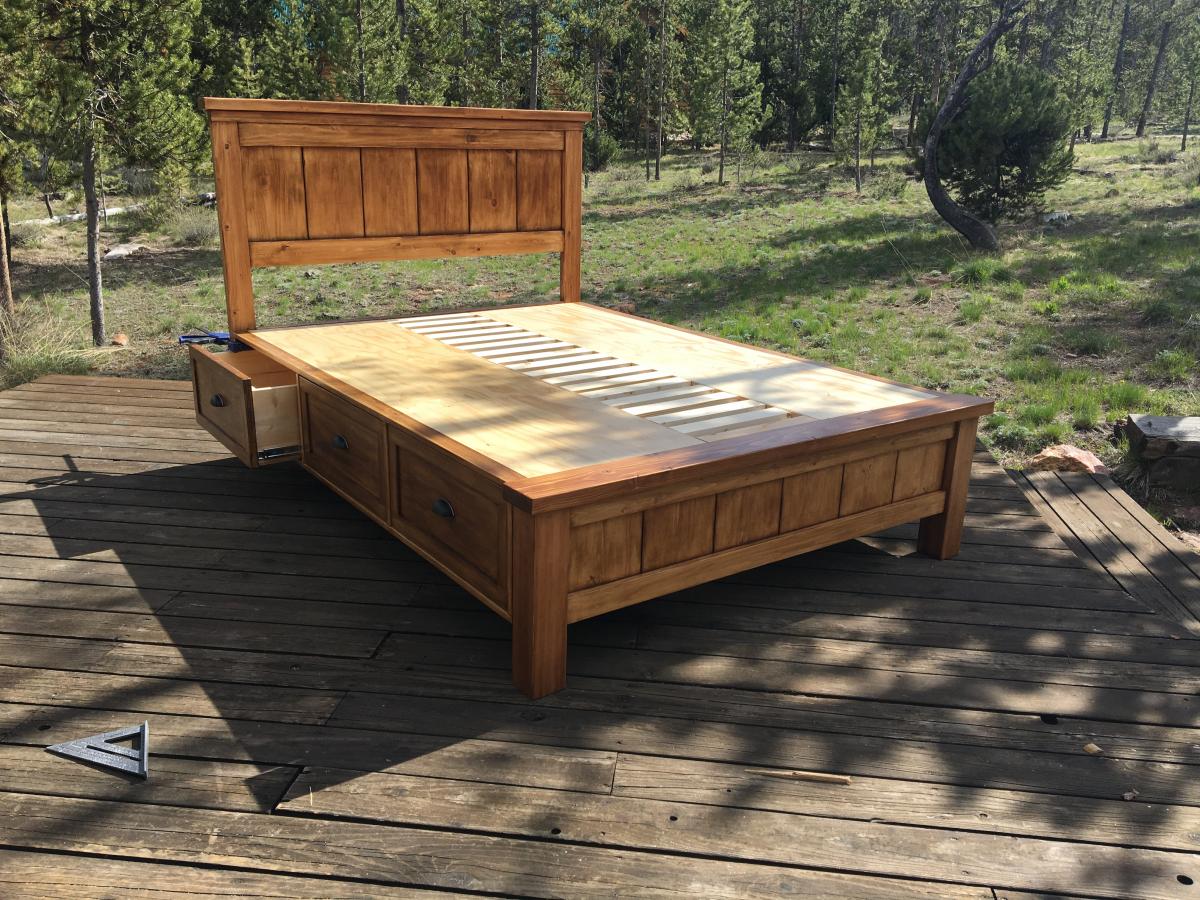
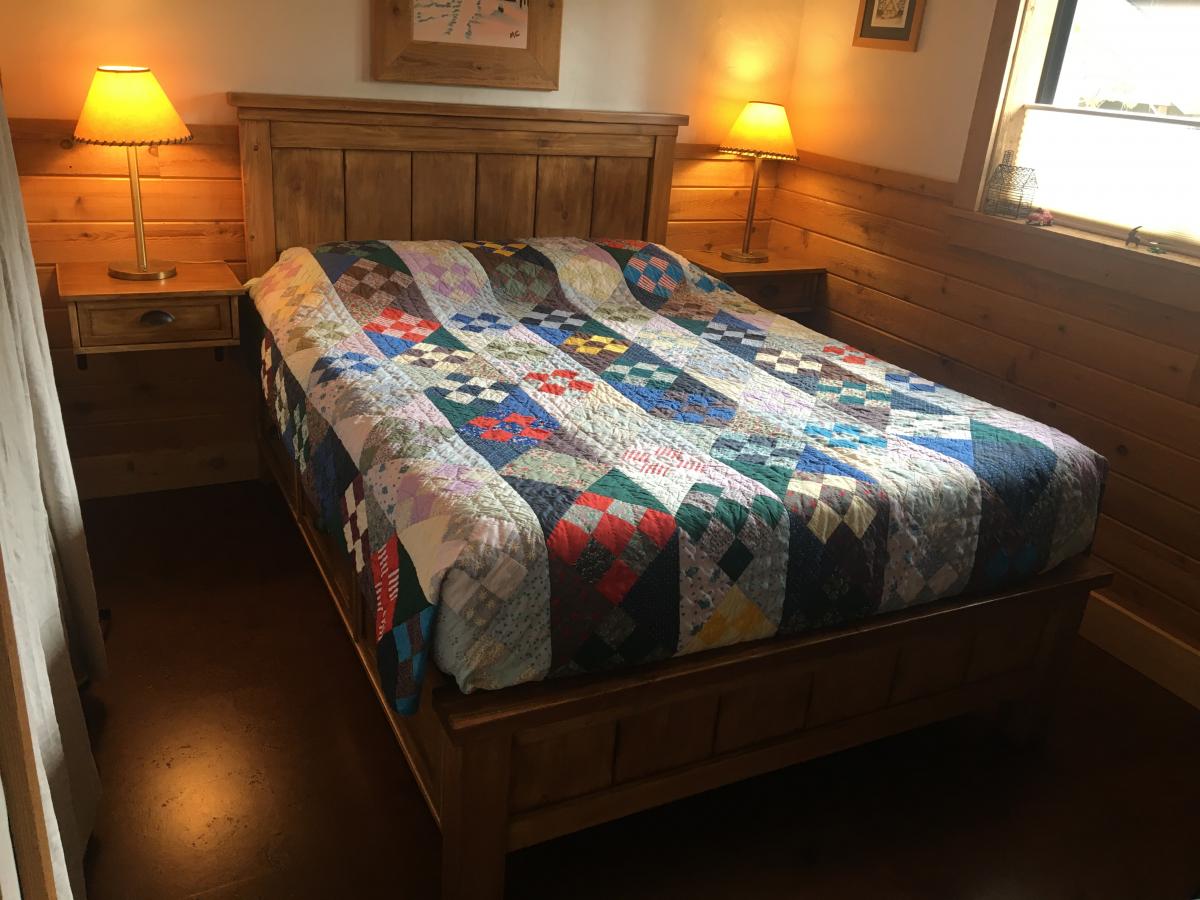
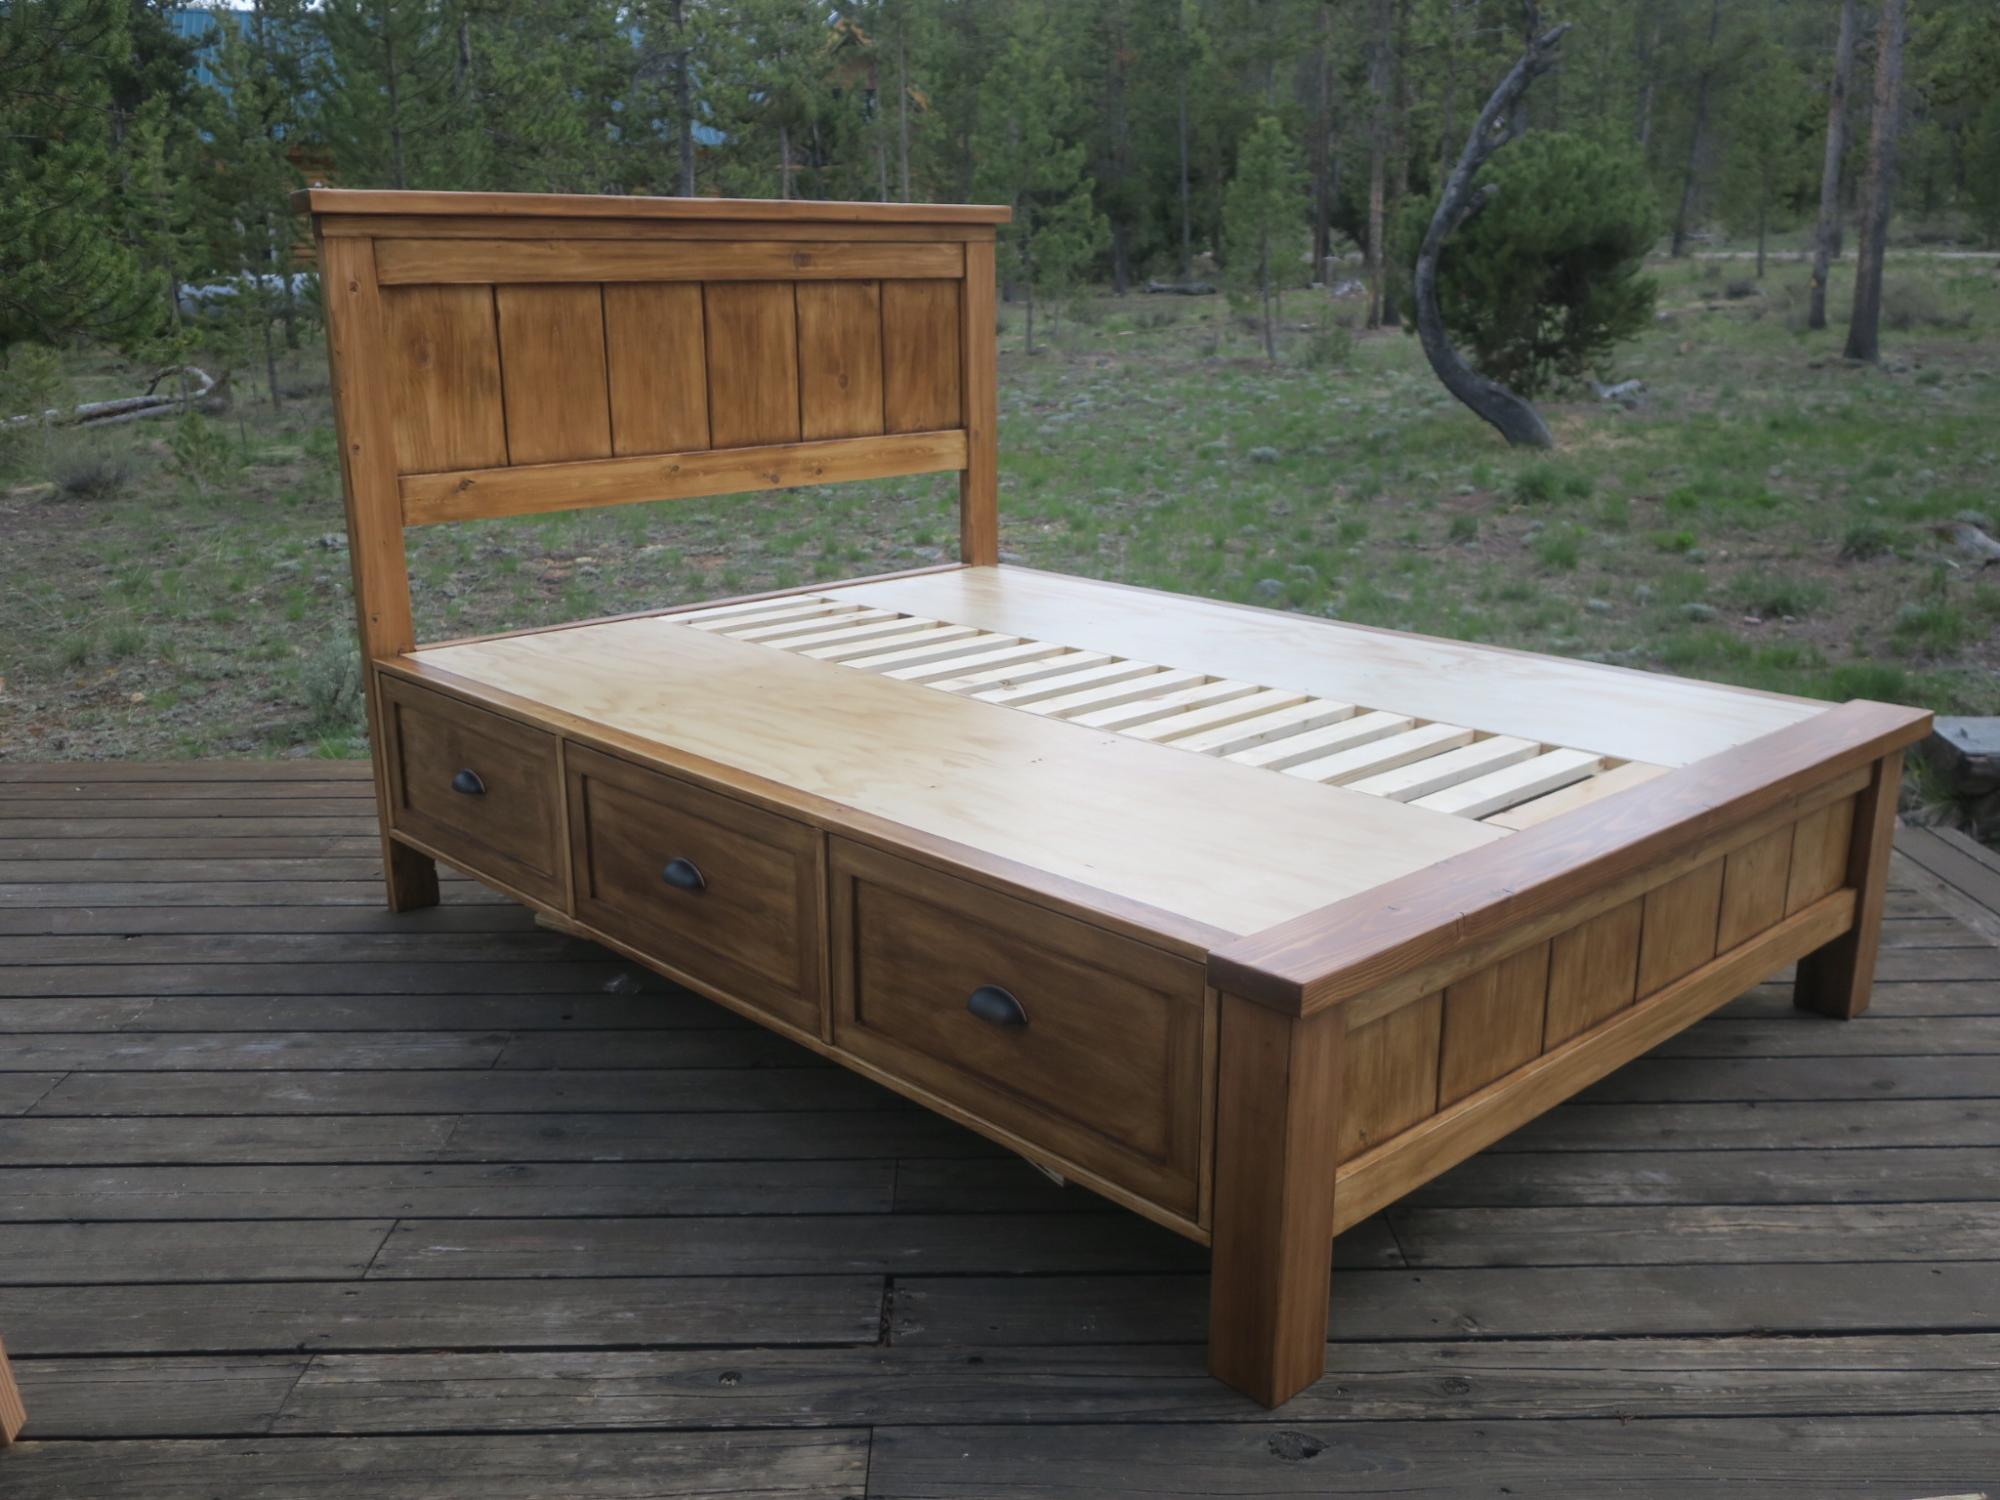
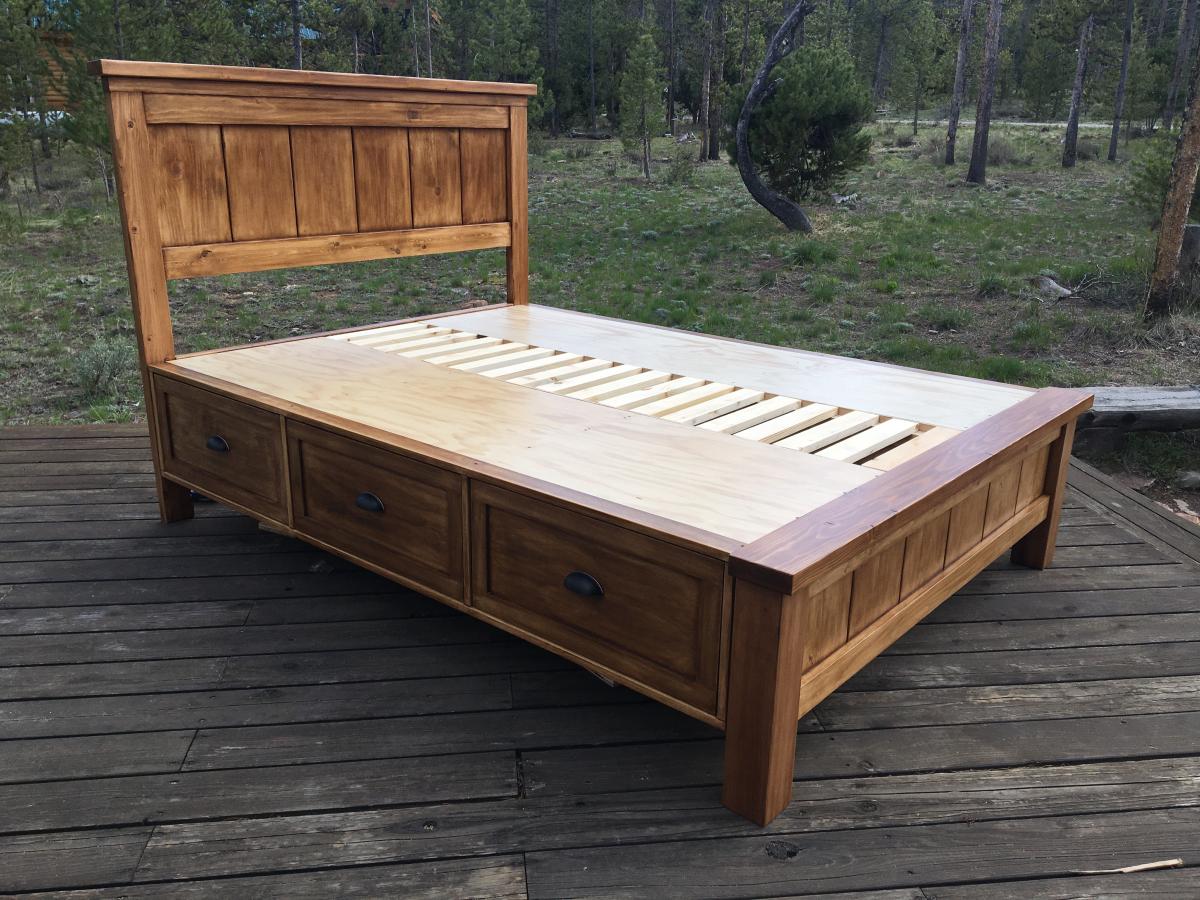
Farmhouse Storage bed with platform modification

Submitted by Anonymous (not verified) on Mon, 10/04/2021 - 13:06

Hi, I’m Joe and love working on my cabin in Stanley Idaho. I needed a queen size bed on the ground floor but the room is small so I incorporated the footboard into into the platform to gain 6 inches of space in the room. It took a couple months working off and on but all fun. I also made the drawers deeper front to back to maximize storage. I did this at the peak of lumber prices and spent like $900 on lumber. It came out great, my Airbnb guests love it!

Comments

Shoe Rack for Mother's Day

Submitted by AleksClark on Thu, 05/16/2013 - 07:48

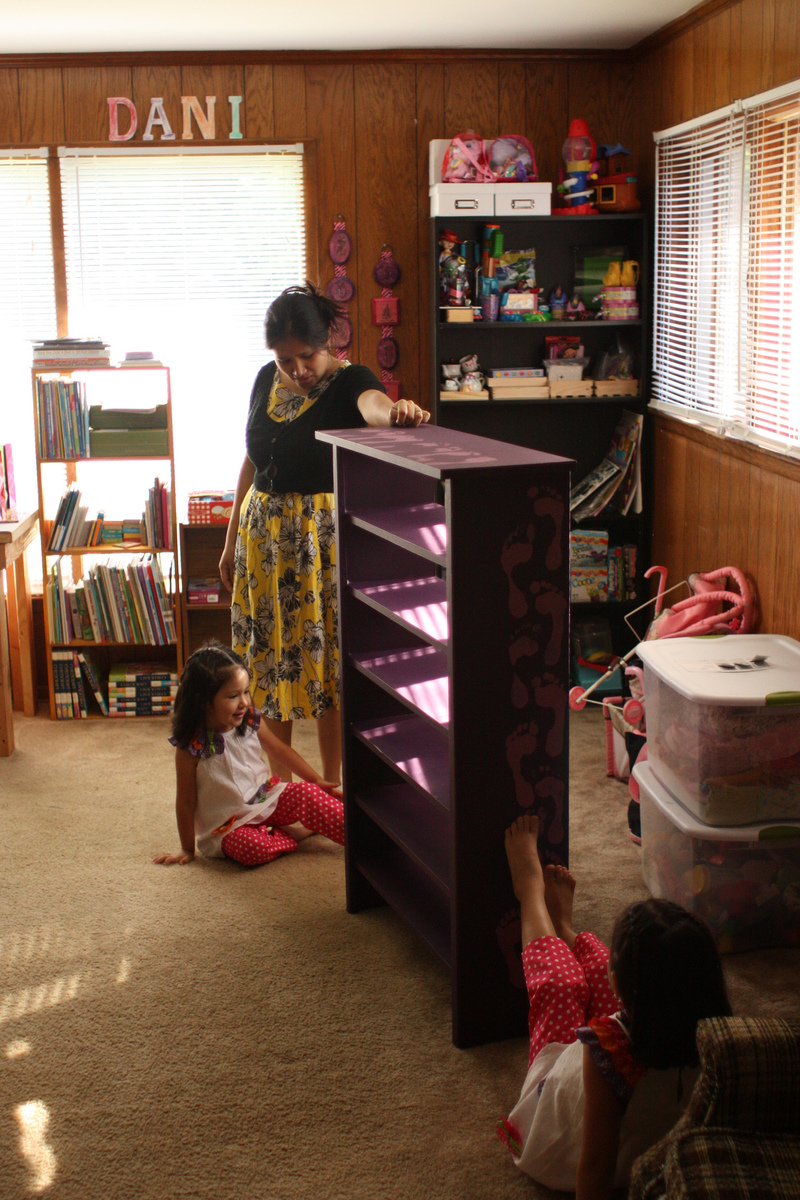
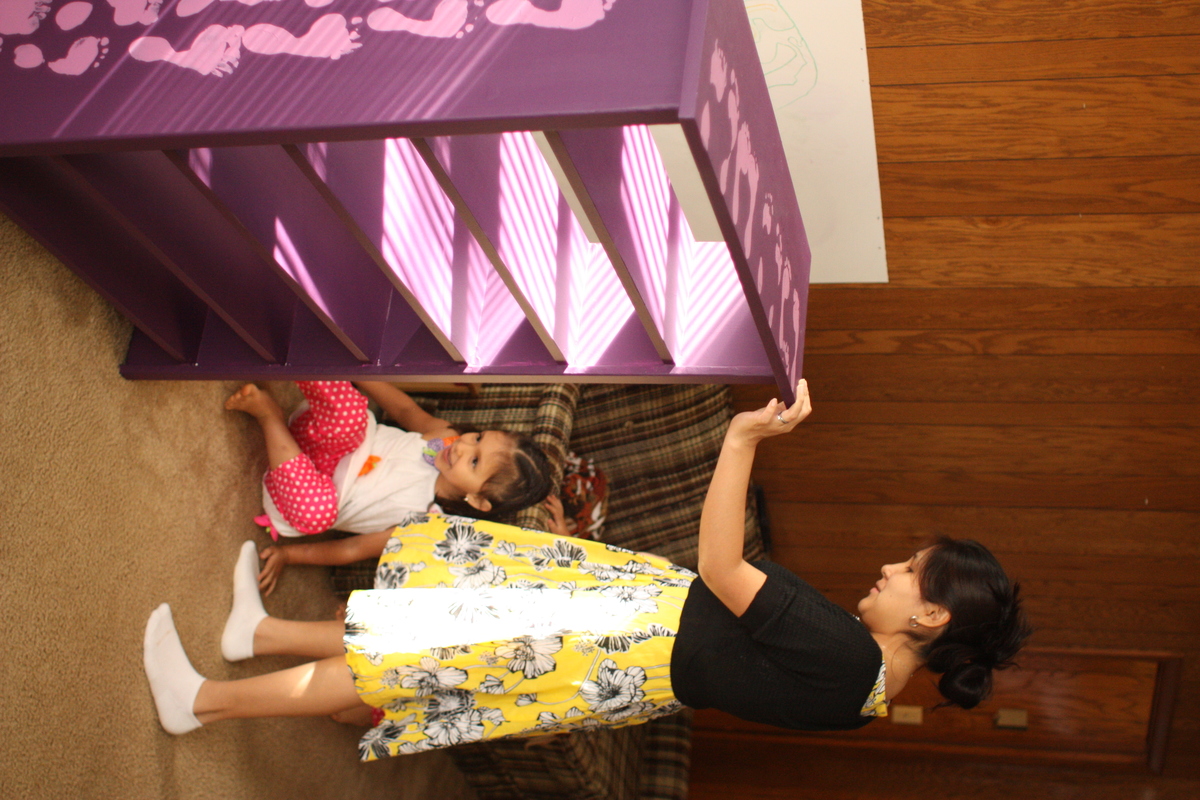
A pretty simple shoe rack. My wife wanted something to hold a LOT of shoes that could go in our garage by the door to the kitchen. Girls helped with the painting :)

Estimated Cost
$60
Estimated Time Investment
Weekend Project (10-20 Hours)
Finish Used
Baer Indoor/Outdoor Latex on top of primer. Needed two coats to cover up the wood primer.
Recommended Skill Level
Beginner

Comments

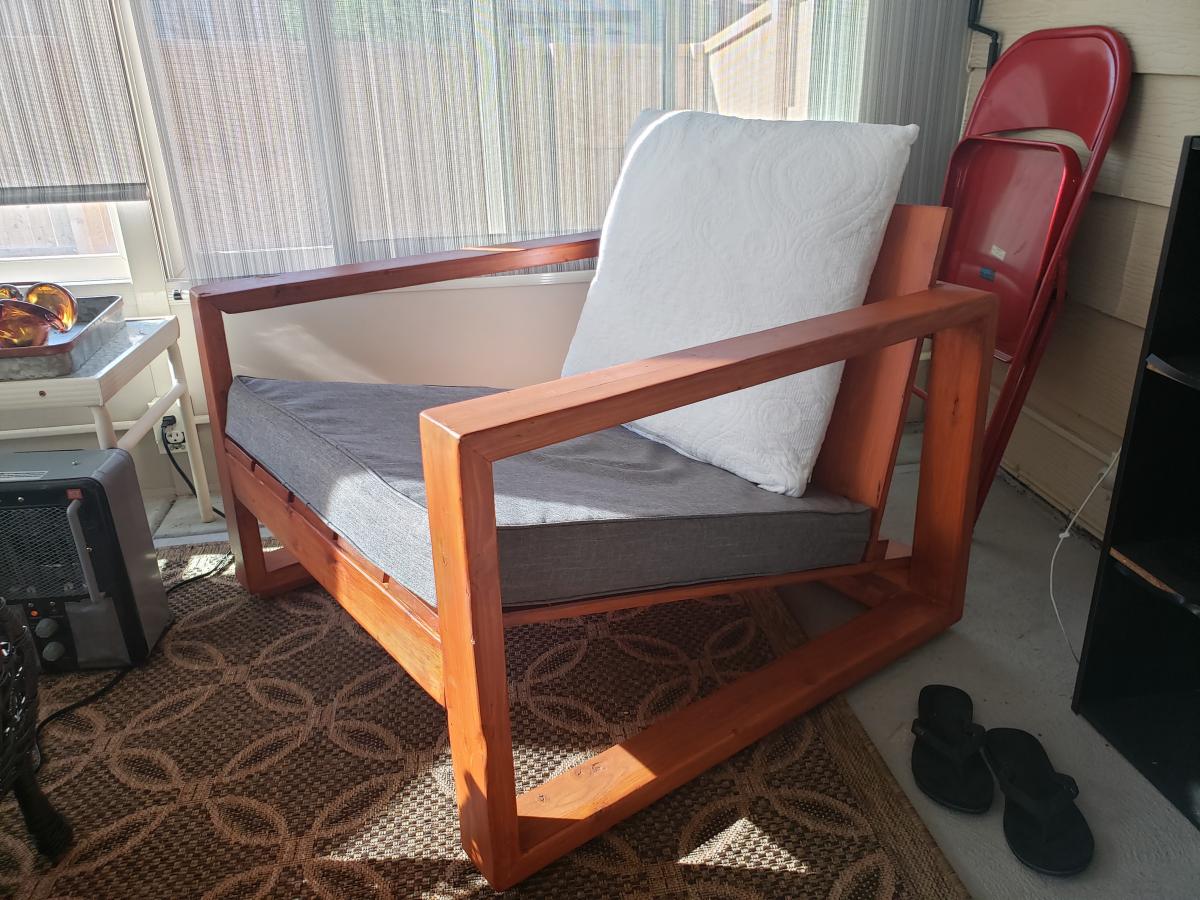
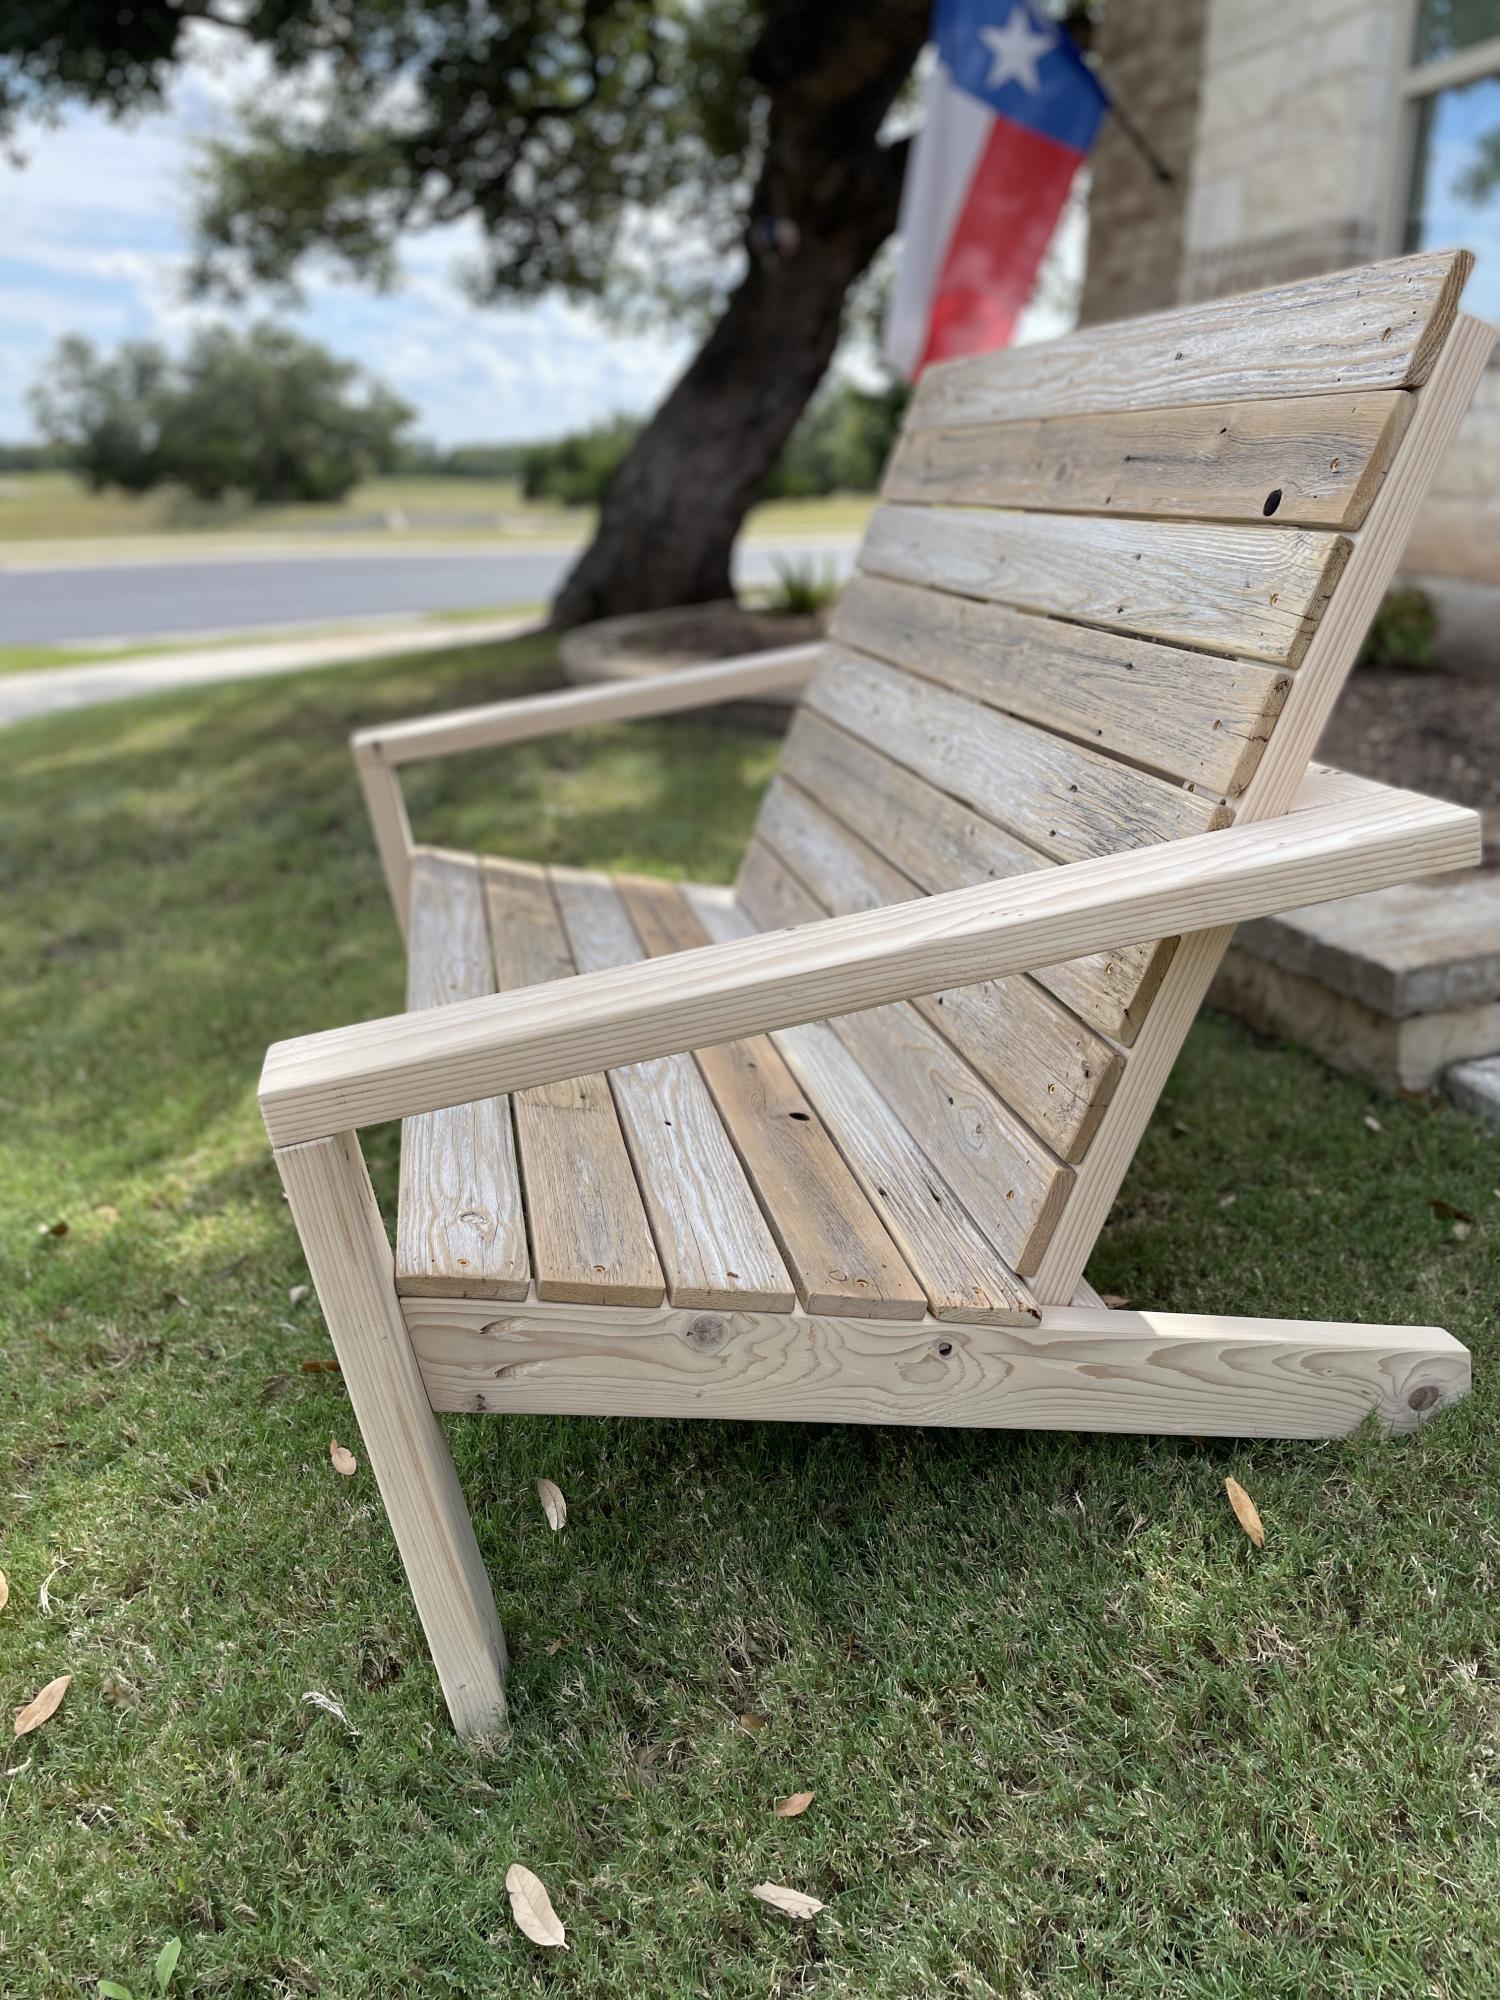
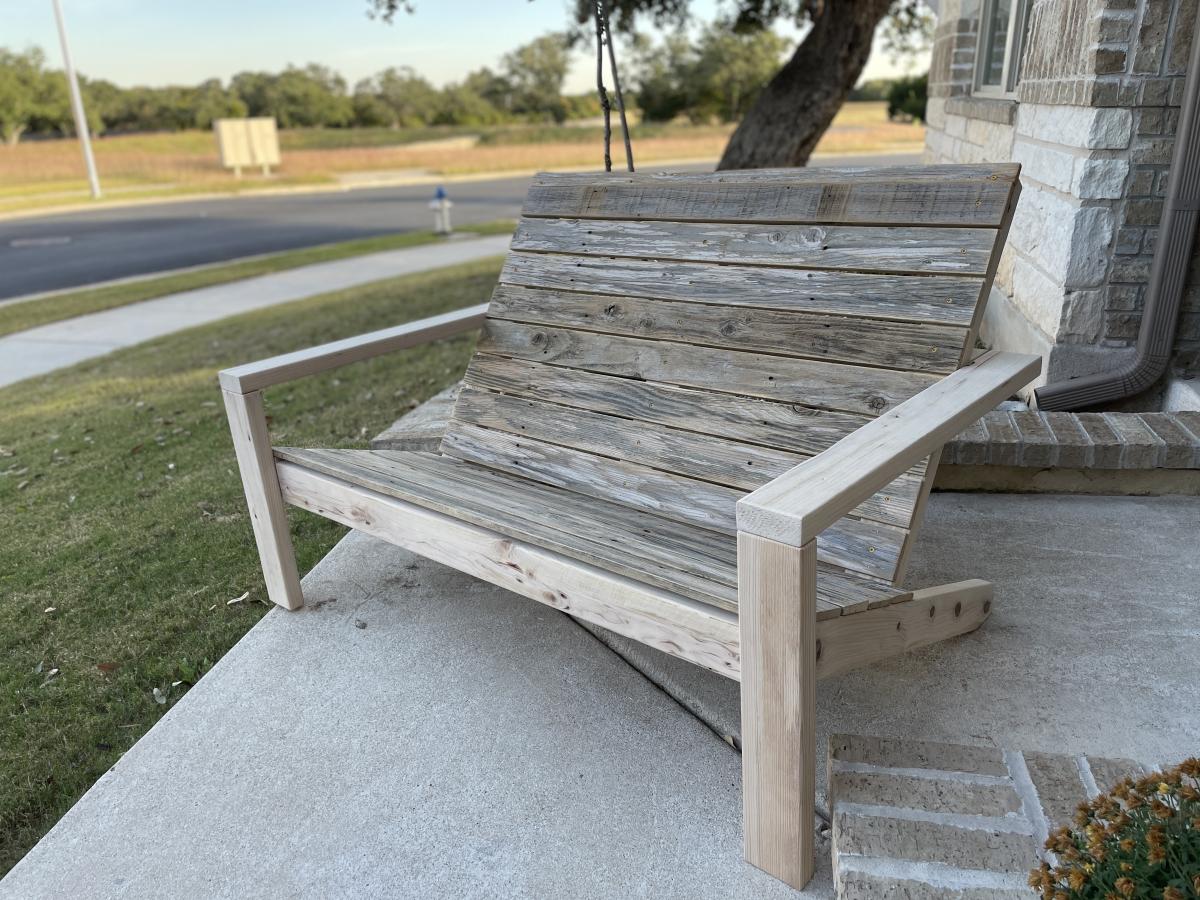
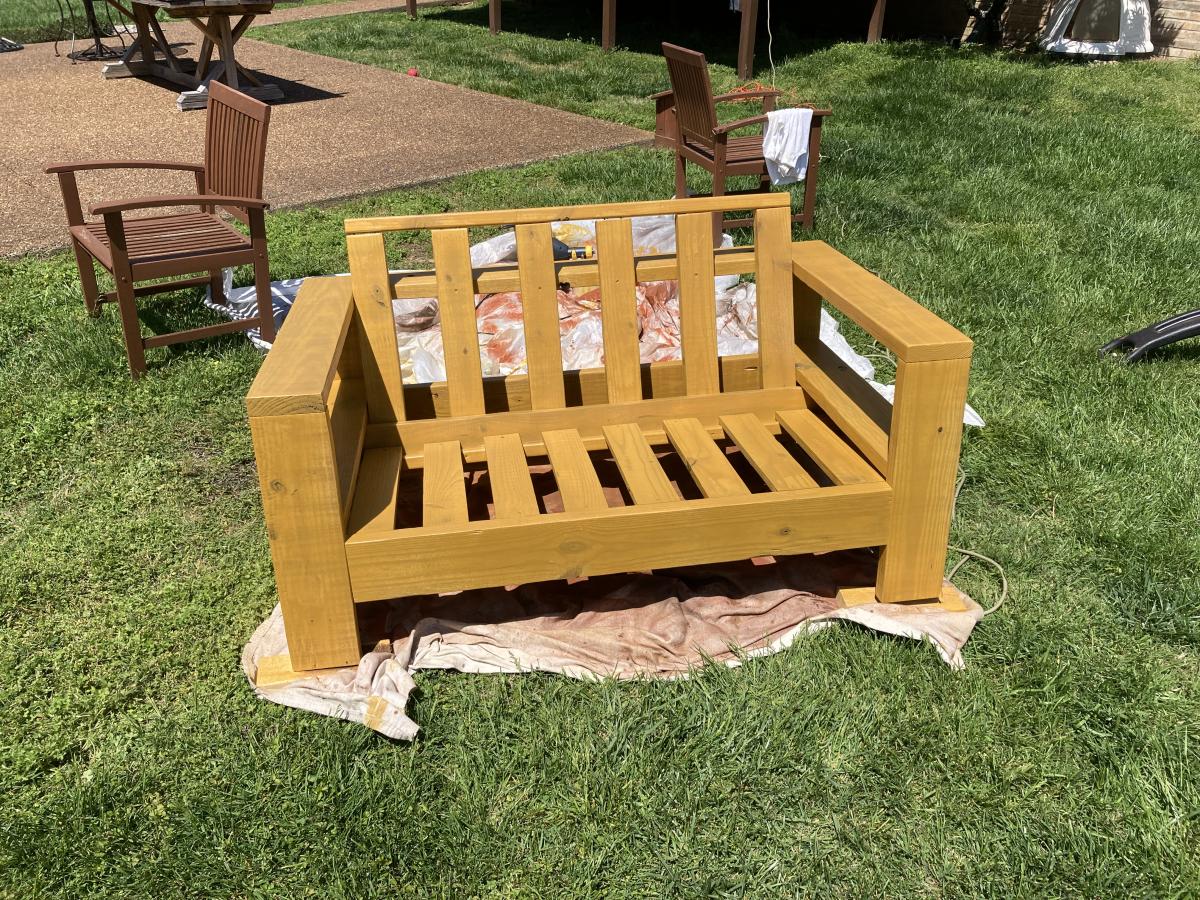
2x4 sofa and chairs

Submitted by Anonymous (not verified) on Mon, 10/04/2021 - 15:08

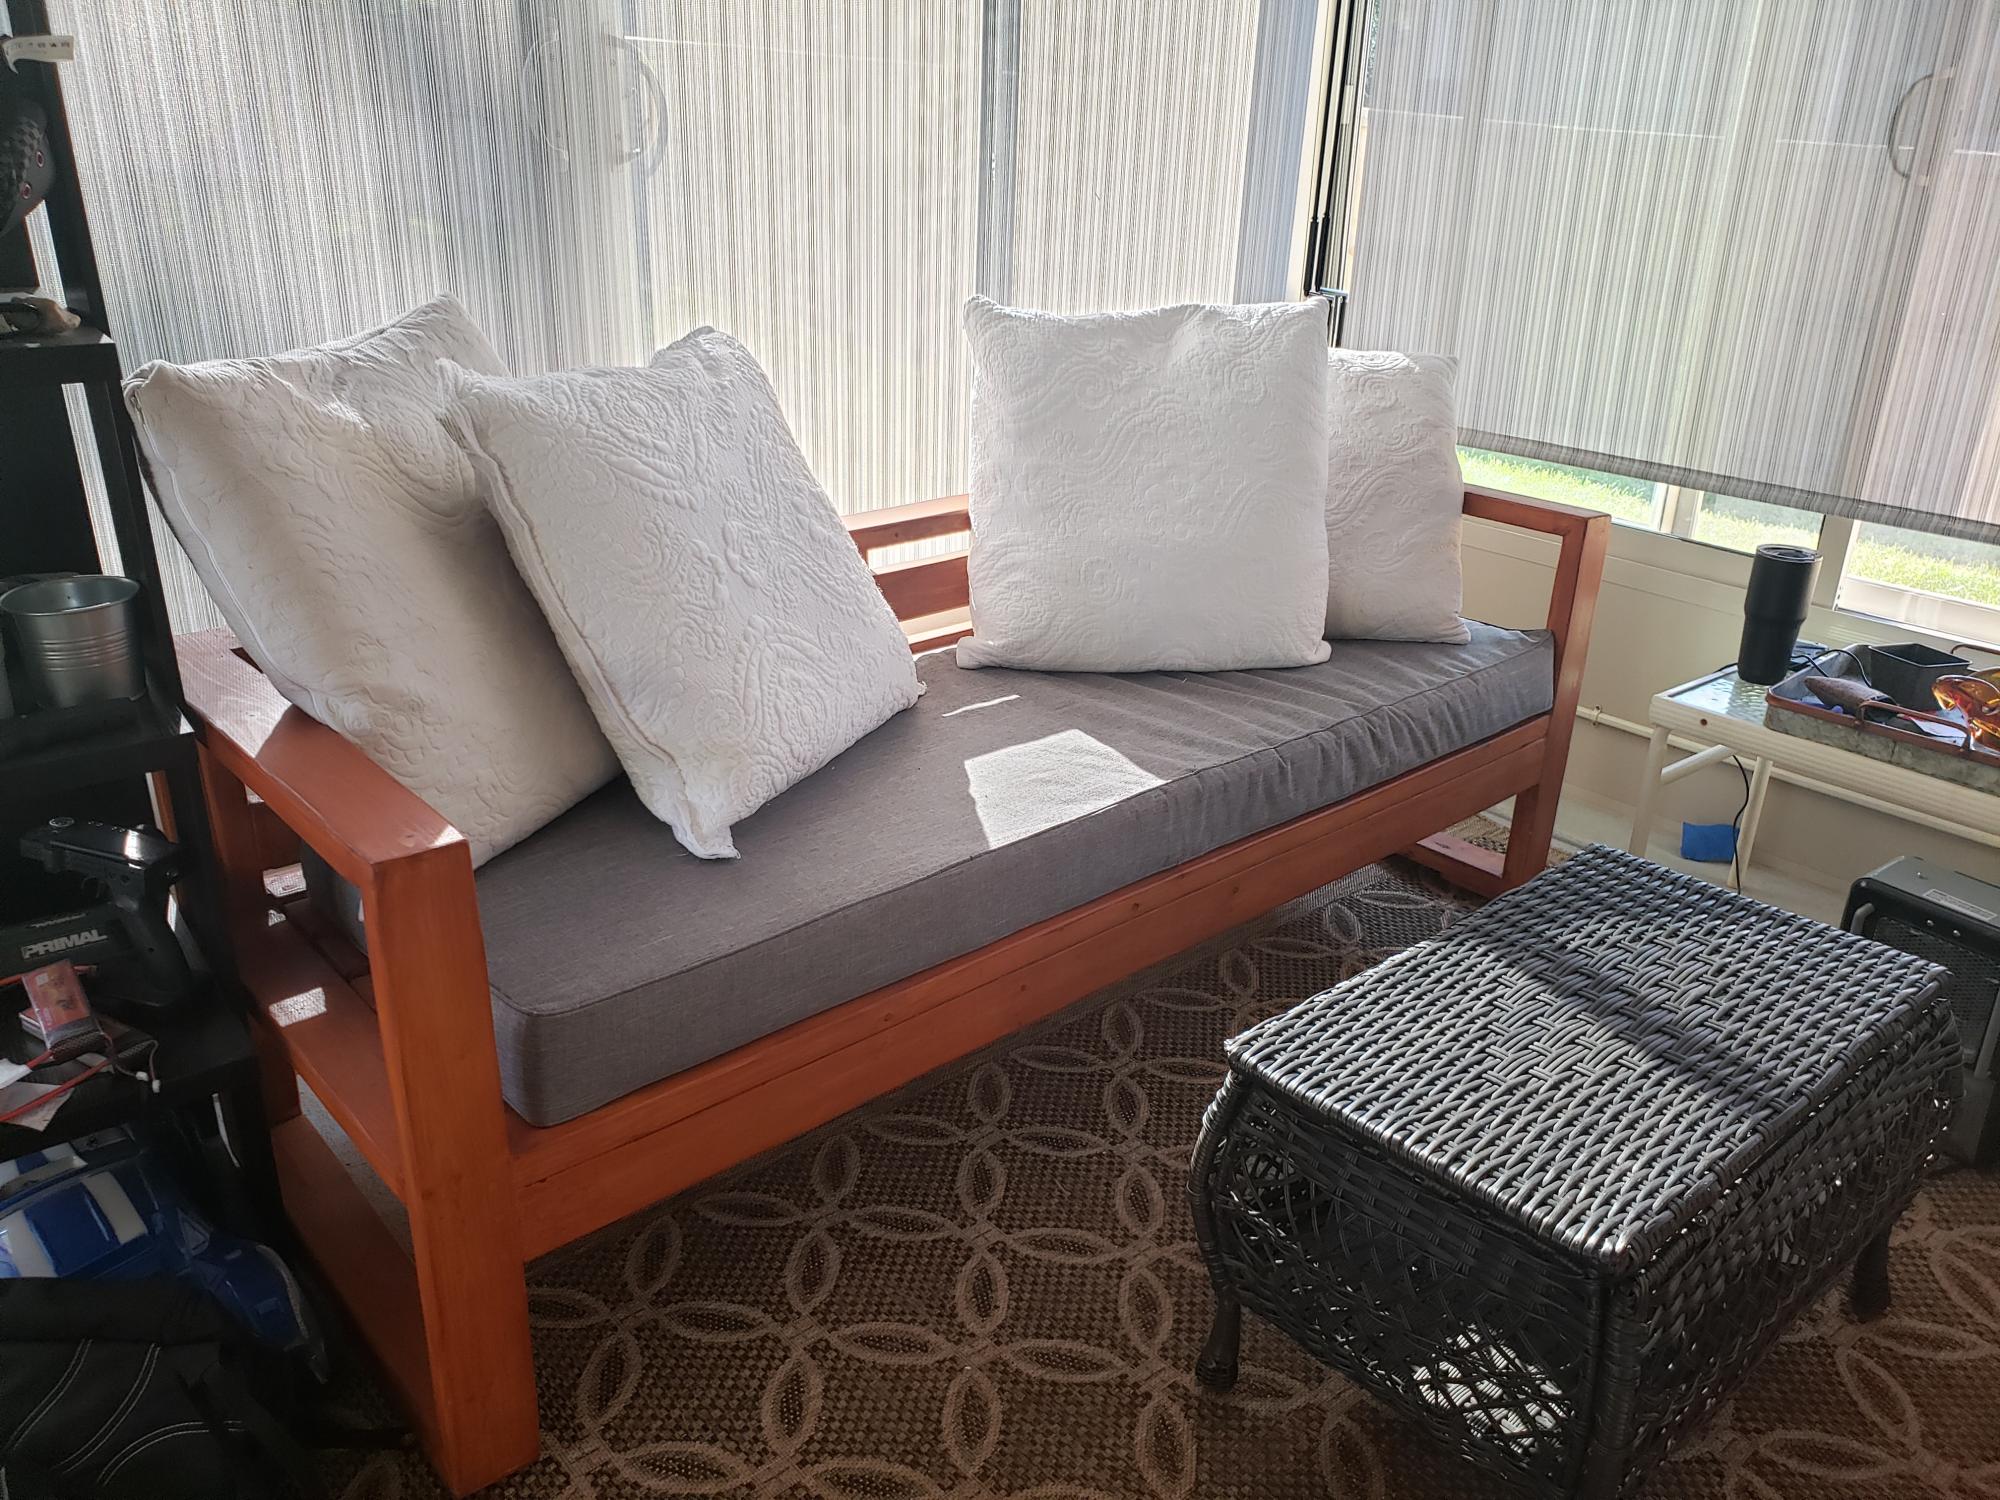
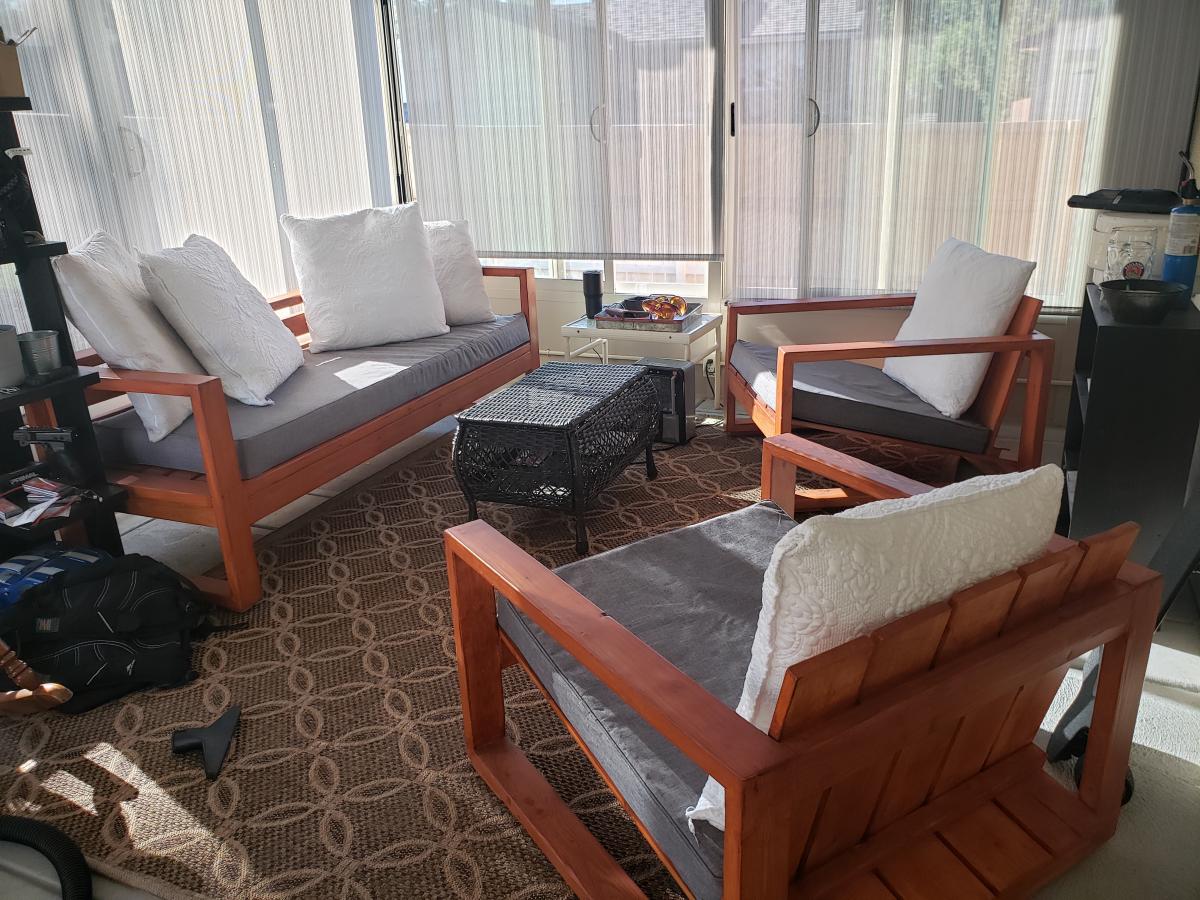
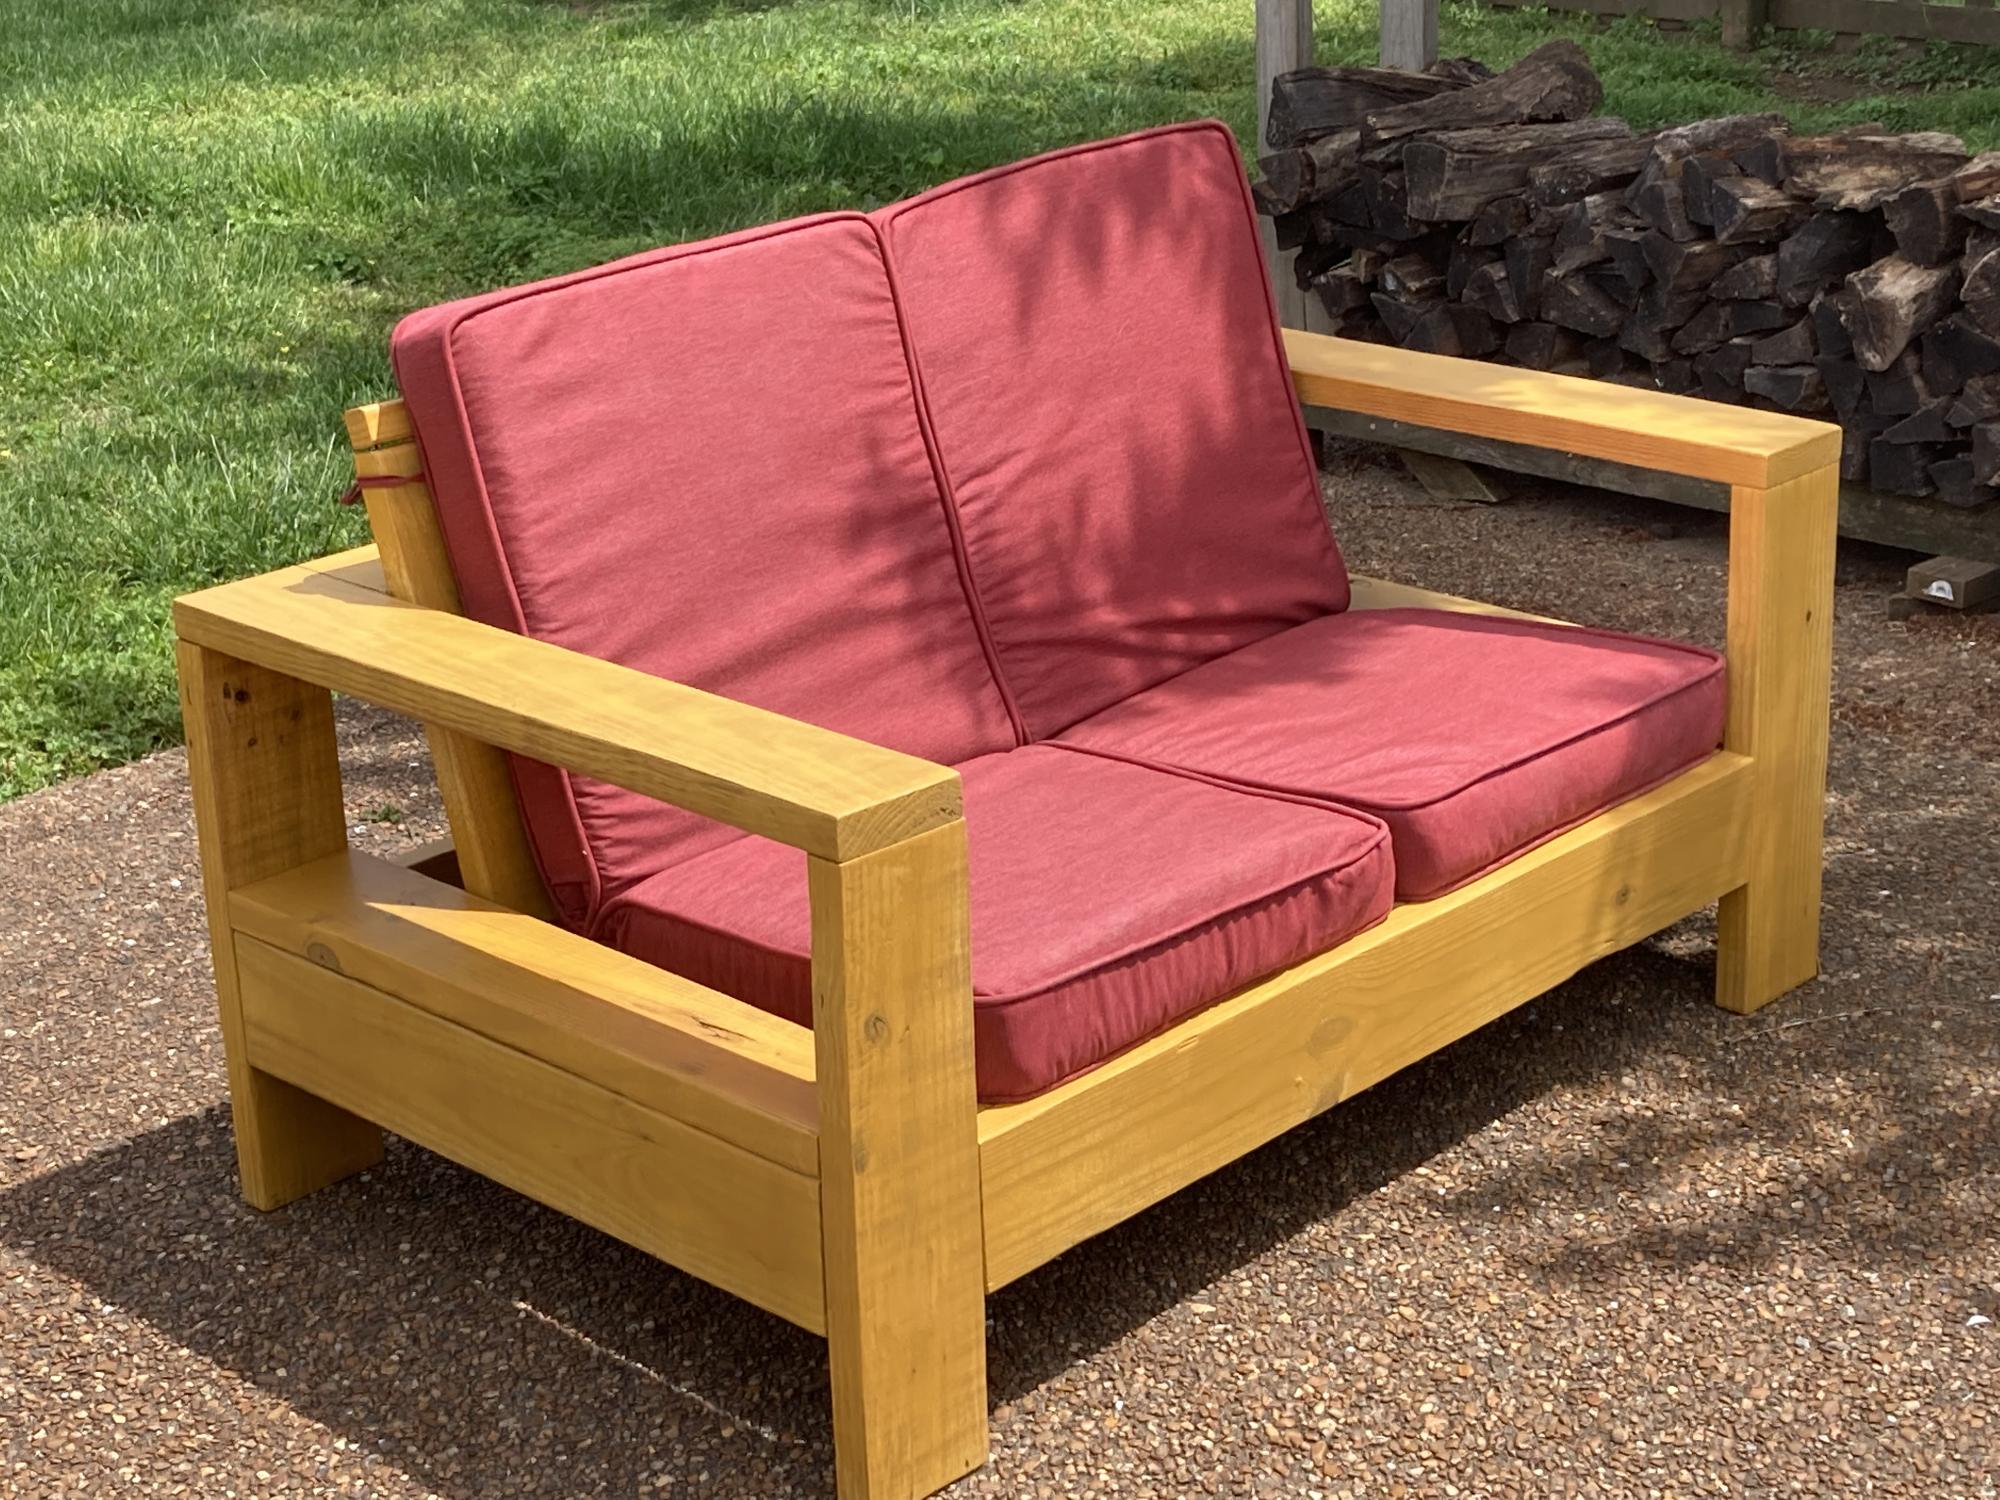
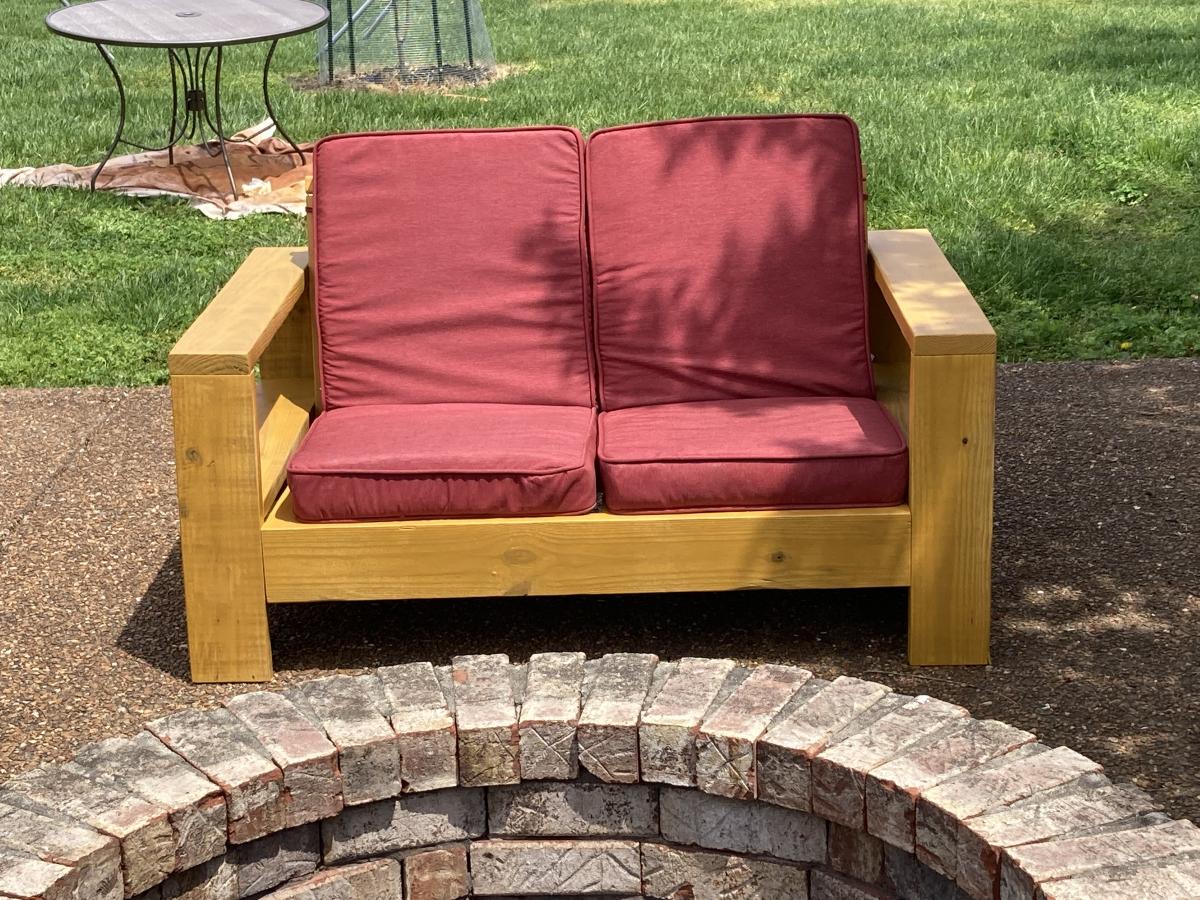
Well, I had just bought a house. We had no furniture for our sunroom, so I took it upon myself to build some while materials were still cheap.
Hindsight, the chairs rear end should have been a level seat instead of trying to build an Adirondack style club chair. I modified the ends to match the modern style so they would match the chairs.
The sofa turned out great, all are solid and built with pocket screws. Sealed with redwood deck sealer, should last forever!
For the covers, we had them made from covers and all, and went to the local Joann and bought 4" thick foam.and wrapped it with with polyfill. Can't tell that they were made in a backyard, but they've been great for 18 months so far!

Comments

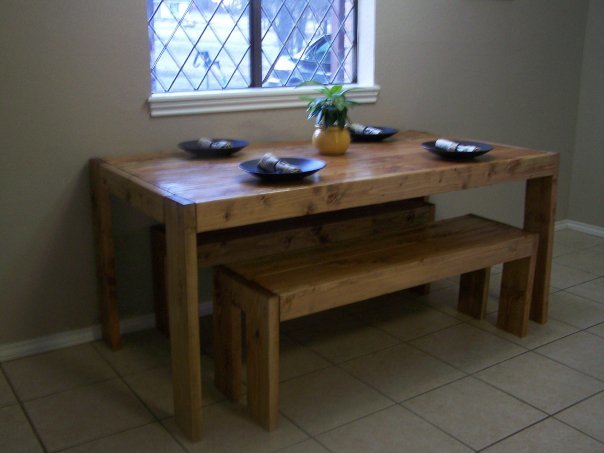
Modern Farmhouse Table

Submitted by seesaw on Wed, 03/09/2011 - 18:10

This was our first project. We followed Ana's directions basically word for word. It turned out beautifully! We like the look and easy care of the benches.

Built from Plan(s)
Estimated Cost
$50
Estimated Time Investment
Afternoon Project (3-6 Hours)
Finish Used
A mix of Golden Oak and Early American Minwax stain
Recommended Skill Level
Beginner

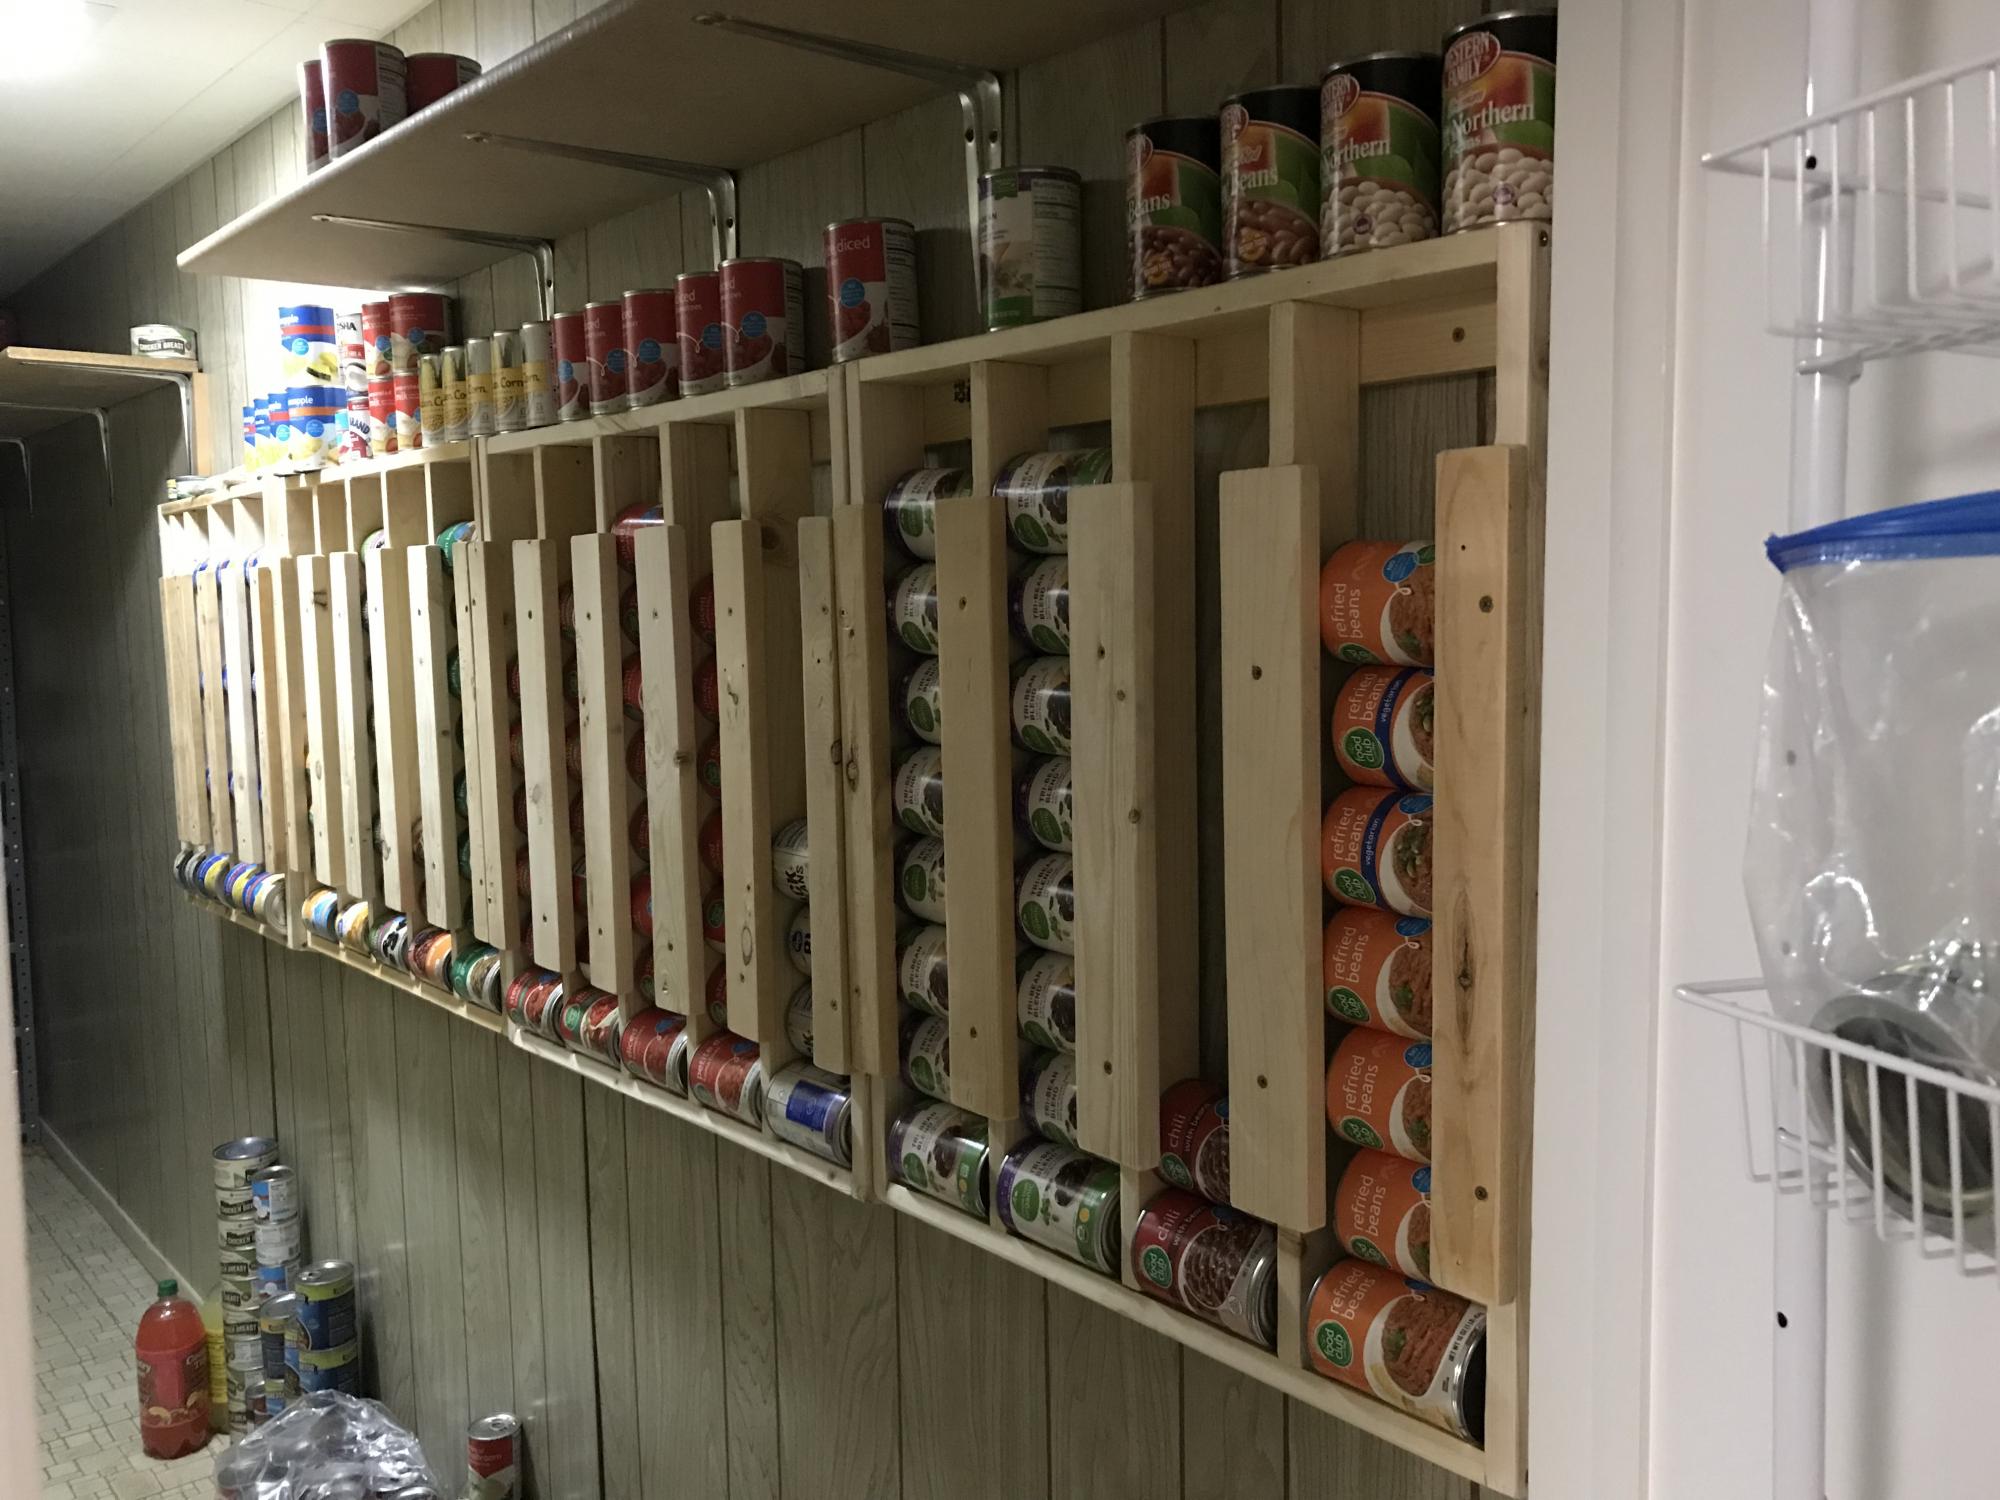
Walk mounted can organizer

Submitted by Anonymous (not verified) on Tue, 10/05/2021 - 20:13

Love this! My husband used this project to help boys learn to use power tools and work with wood. They made one and he did the others. THANK YOU!

Built from Plan(s)

Comments

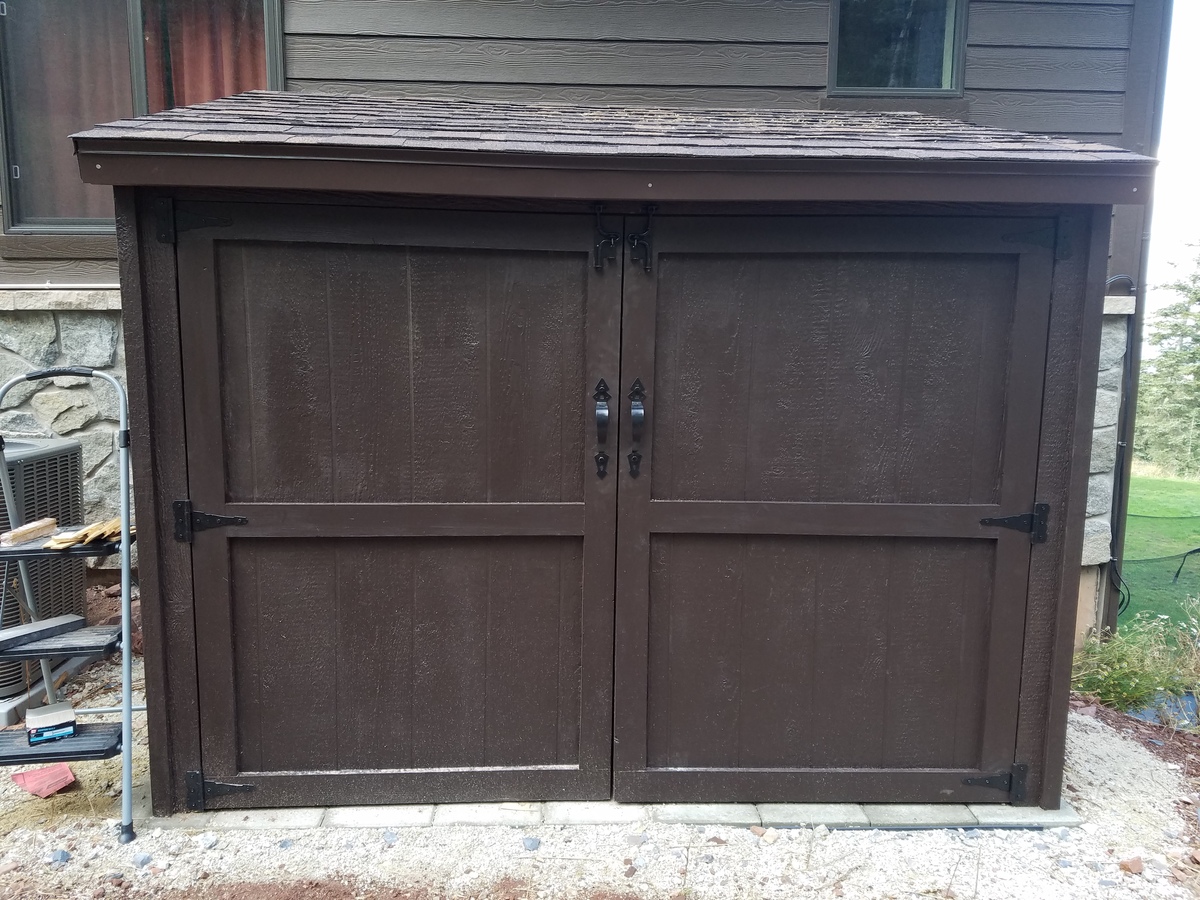
Thanks for helping me build this shed!

Submitted by cnllusher on Sun, 09/17/2017 - 16:33

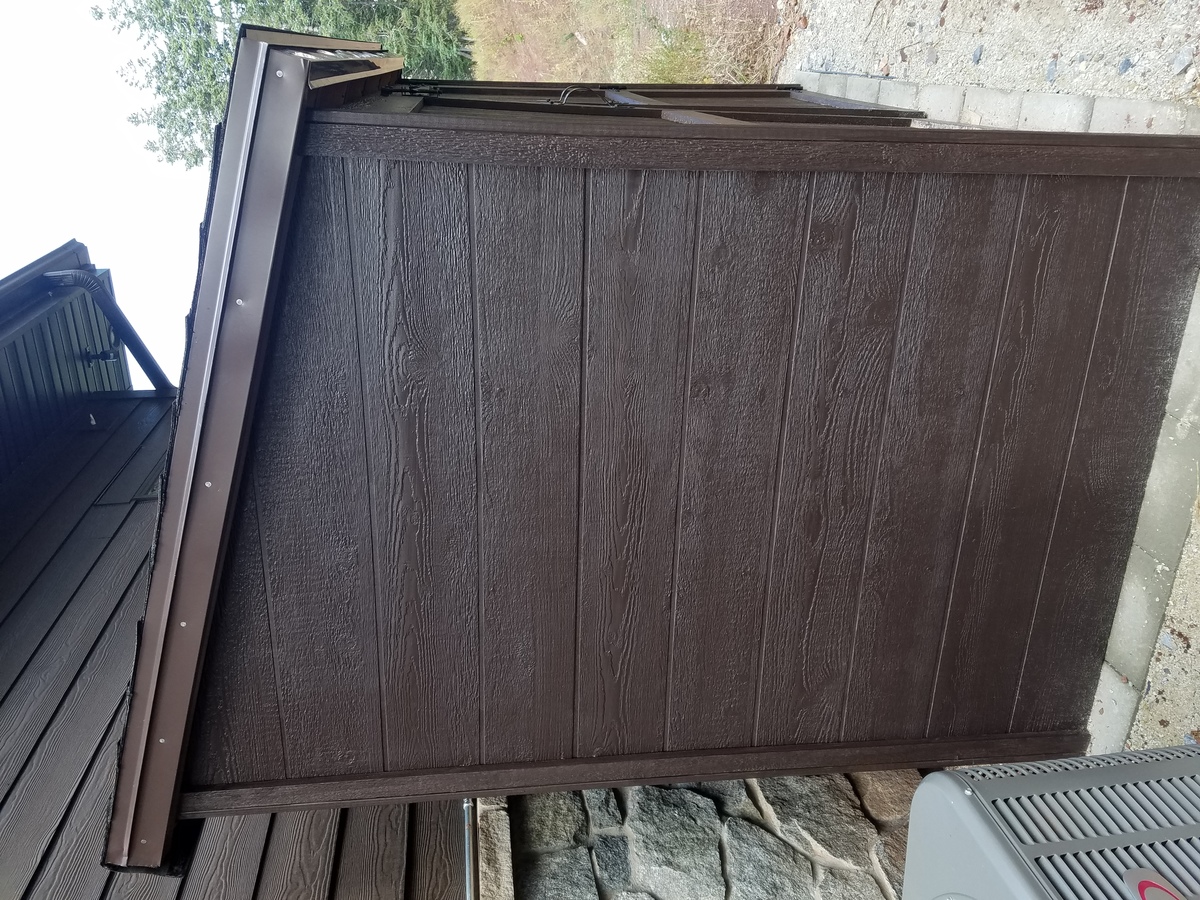
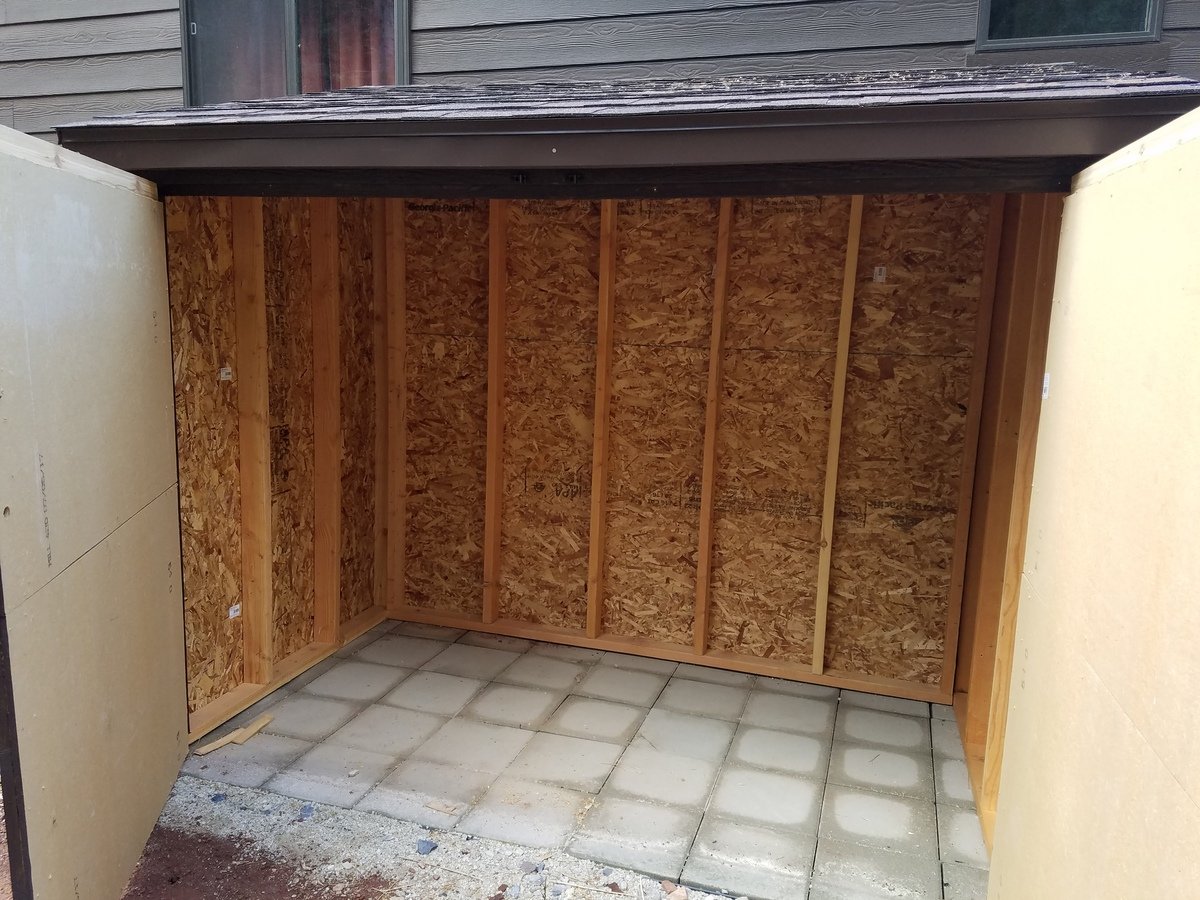
Using your shed plans, modified to use the 2x4s I already had on hand, I designed this 4'x8'x7' shed to match my house.  I replaced the ceder fence boards with a hardiboard, but the construction was pretty much the same.  My husband and I are so happy with this shed,which looks very similar to the $4000+ sheds we have seen, and it cost us less than $400 to make and matches our house perfectly.  Your instructions were great, and I know you saved me a lot of time and trouble.  Can't wait to load it up with our snow and gardening equipment!  Thank you!

Built from Plan(s)
Estimated Cost
$400
Estimated Time Investment
Weekend Project (10-20 Hours)
Finish Used
paint
Recommended Skill Level
Intermediate

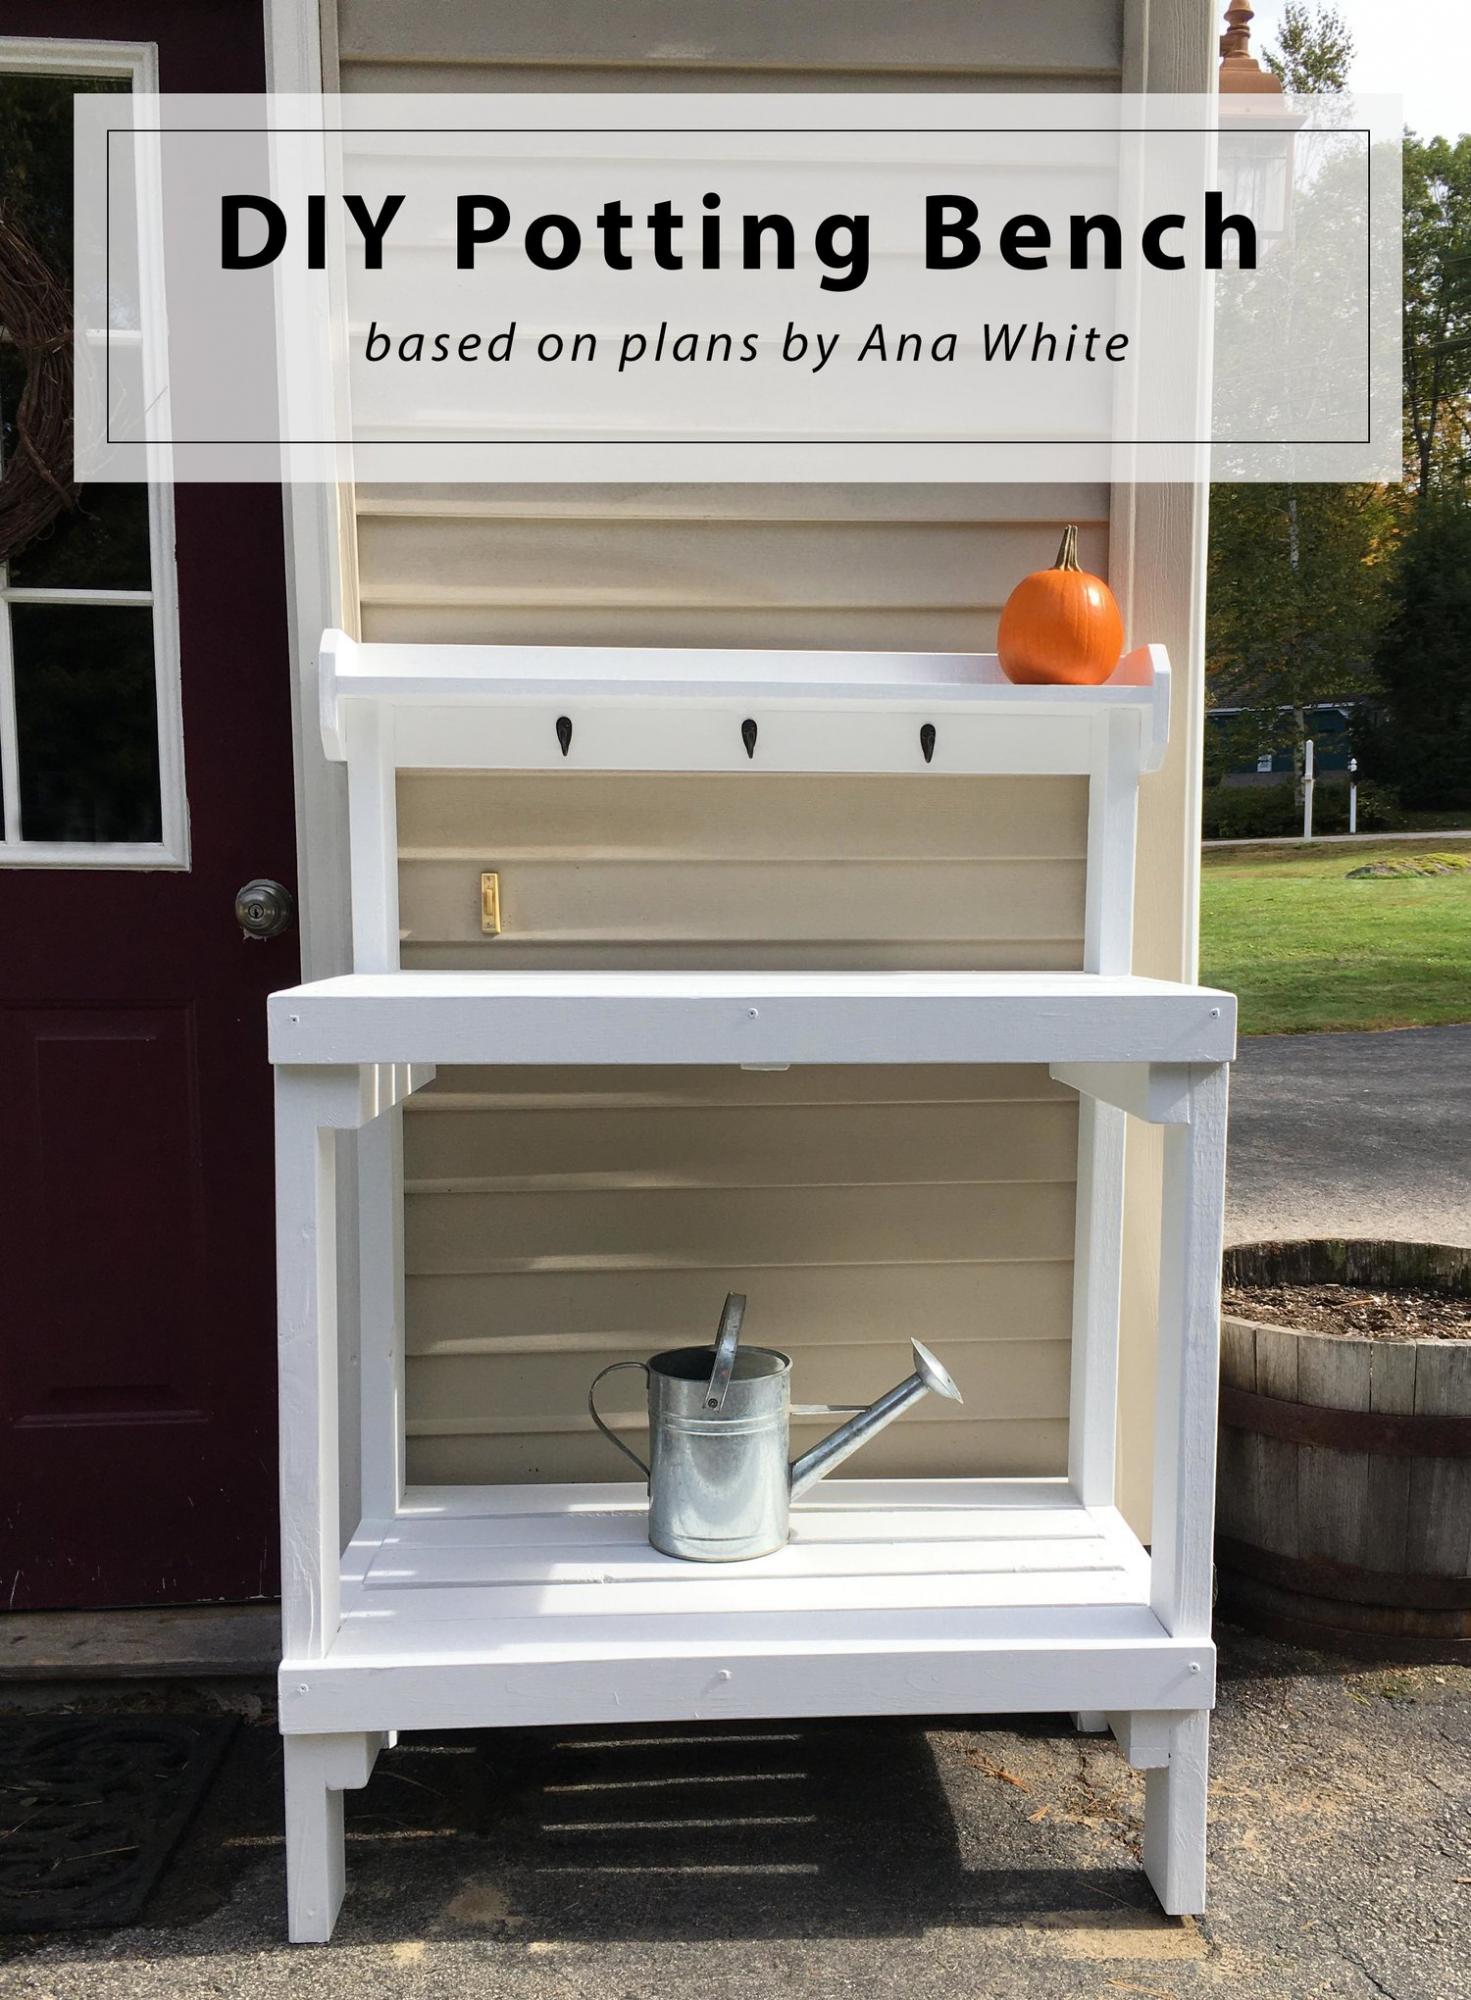
DIY Potting Bench

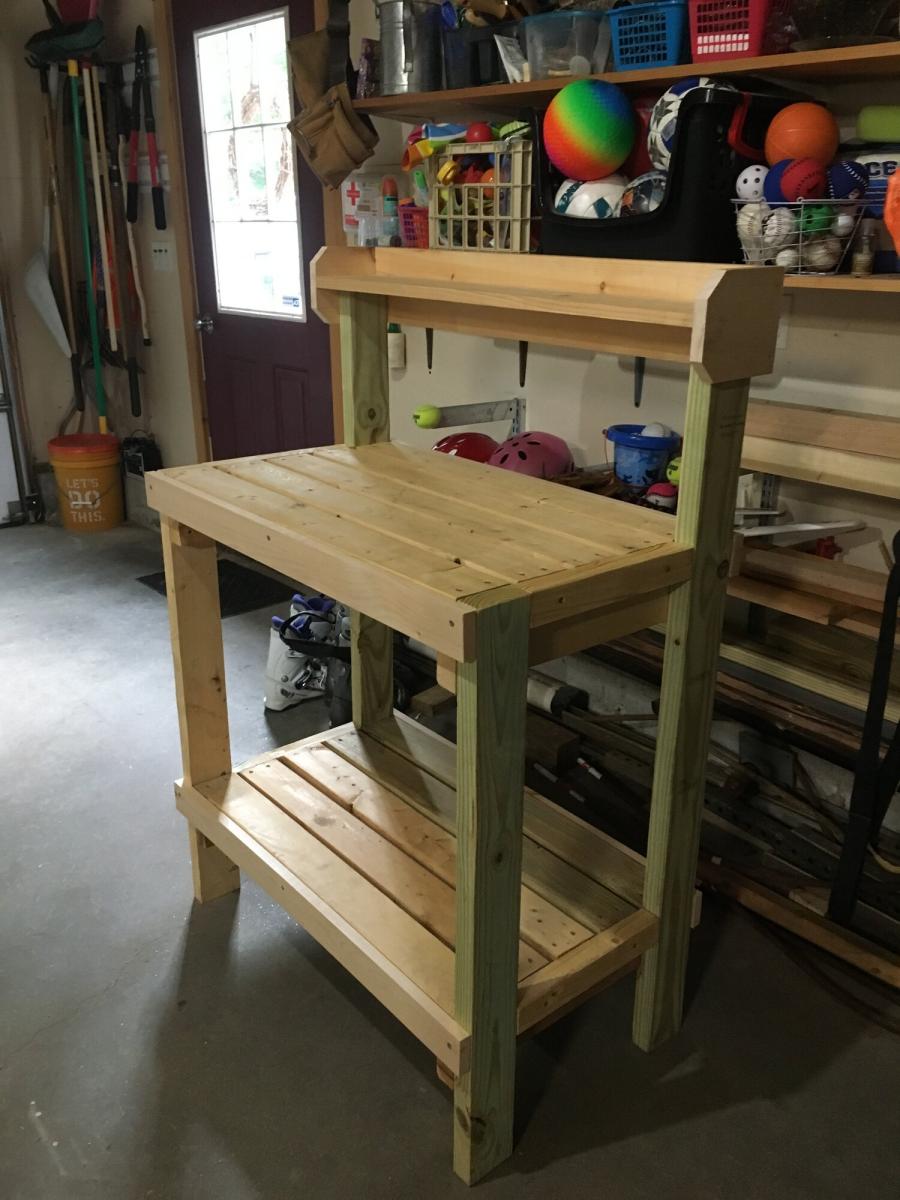
I’ve been wanting a potting bench for a while now - something by the back door to display some decor, use as an outdoor work station, and double as a place for UPS to leave packages. After looking around online and at local stores, I couldn’t find anything that I liked that fit the narrow space - so I did what any #woodworkingmom would do, I decided to build it myself. Please see my blog post for additional photos and lessons learned during this project.

Built from Plan(s)

Comments

Seasonal And Holiday

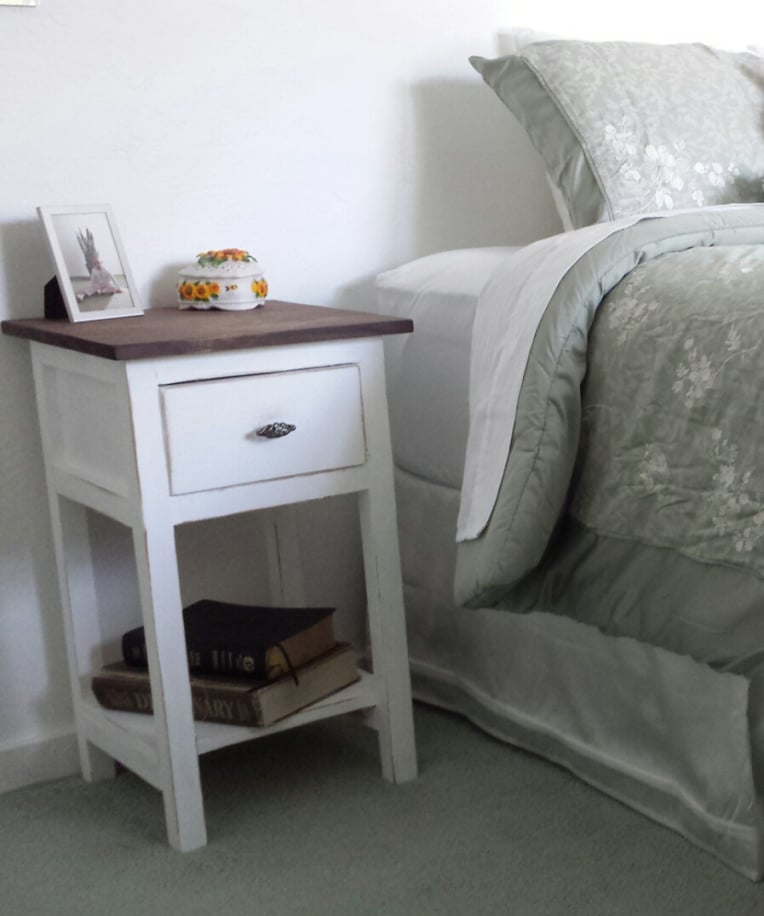
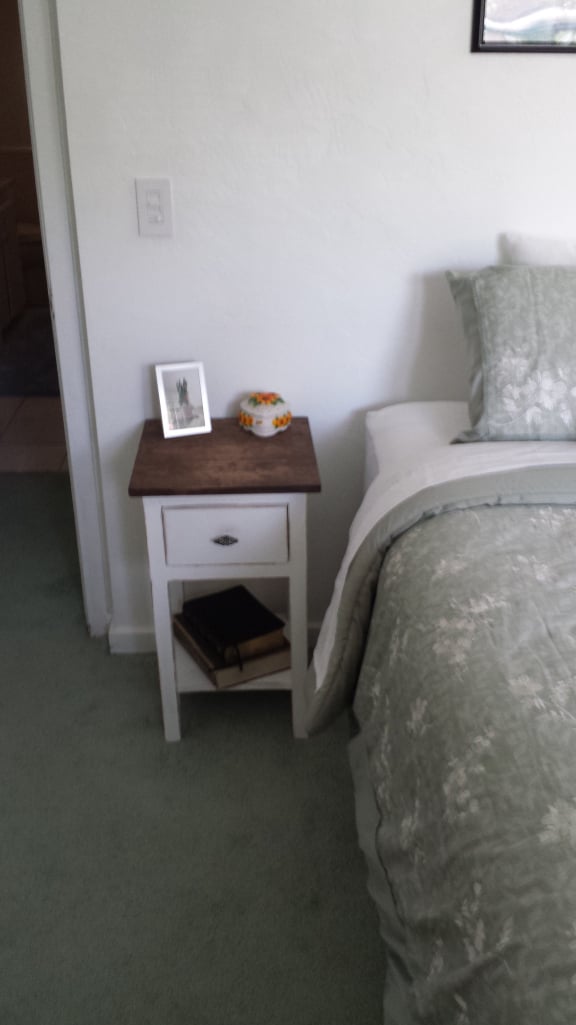
Farmhouse Nightstand

Submitted by RenoRustic on Tue, 05/12/2015 - 10:17

I built this nightstand when my wife and I purchased a new bed. We had to rearrange the bedroom and as such, I no longer had a desk or table on my side of the bed. I wanted something "country" style and after searching through several different plans I found a brag post that fit exactly what I was looking for. Well, technically, I found the original Farmhouse Bedside Table plans and modified them to fit what I needed. It wasn't until after I completed the project that I realized there was a "Mini" version as well. What can I say, I'm not that great as using search. I actually built this over a year ago at this point, and it was the second project I ever built. I learned quite a bit on this project, including the fact your project will only come out as good as your lumber selection! This build actually created my addiction for DIY and woodworking. Thank you Ana!

Estimated Cost
$40
Estimated Time Investment
Day Project (6-9 Hours)
Finish Used
I used Minwax Special Walnut for the entire project, then painted the base and drawer Behr white (their basic white off the shelf, I didn't have the paint mixed) in semi-gloss. I antiqued everything for a more rustic look.
Recommended Skill Level
Beginner

Comments

PICNIC TABLE THAT CONVERTS TO BENCHES ~ Cedar Finish

Submitted by Tonya P on Mon, 06/10/2013 - 19:50

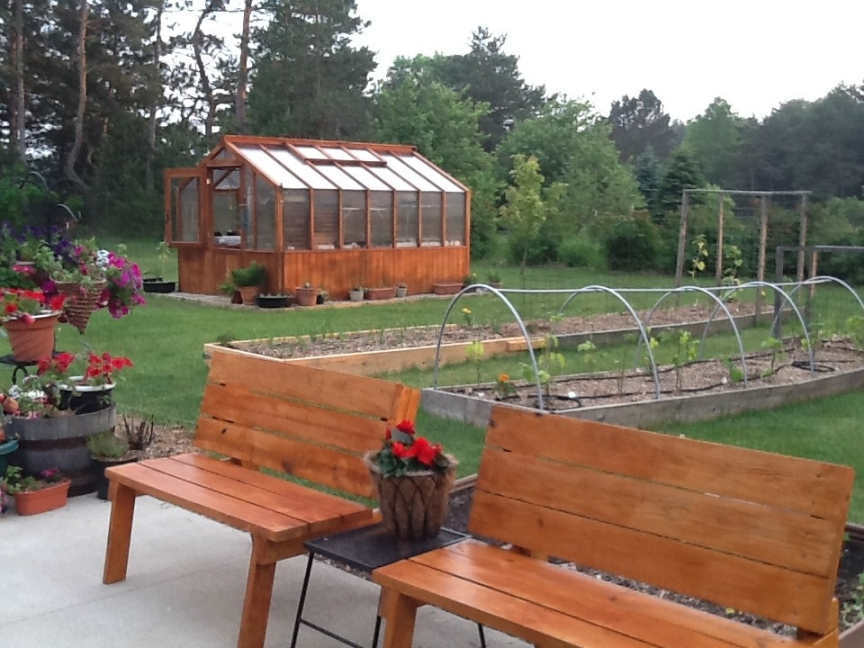
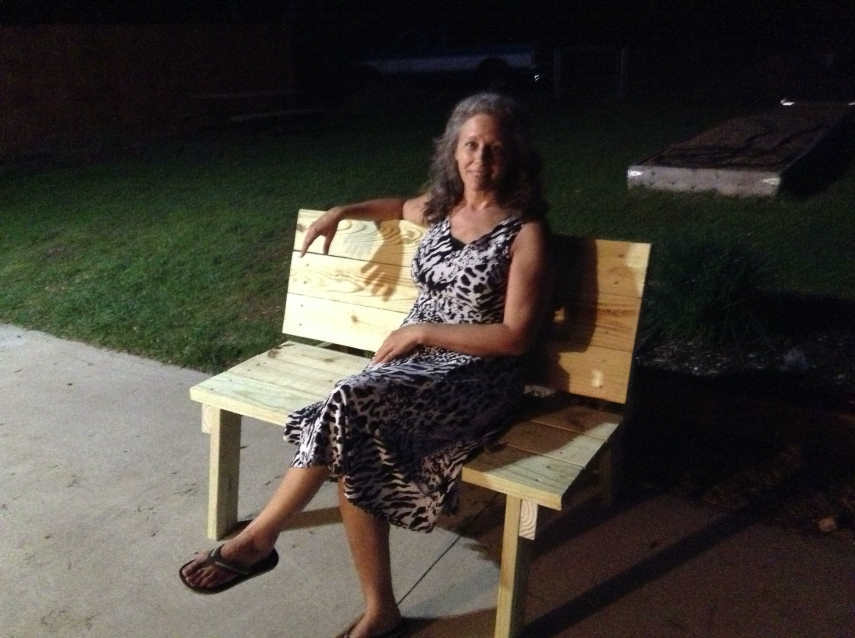
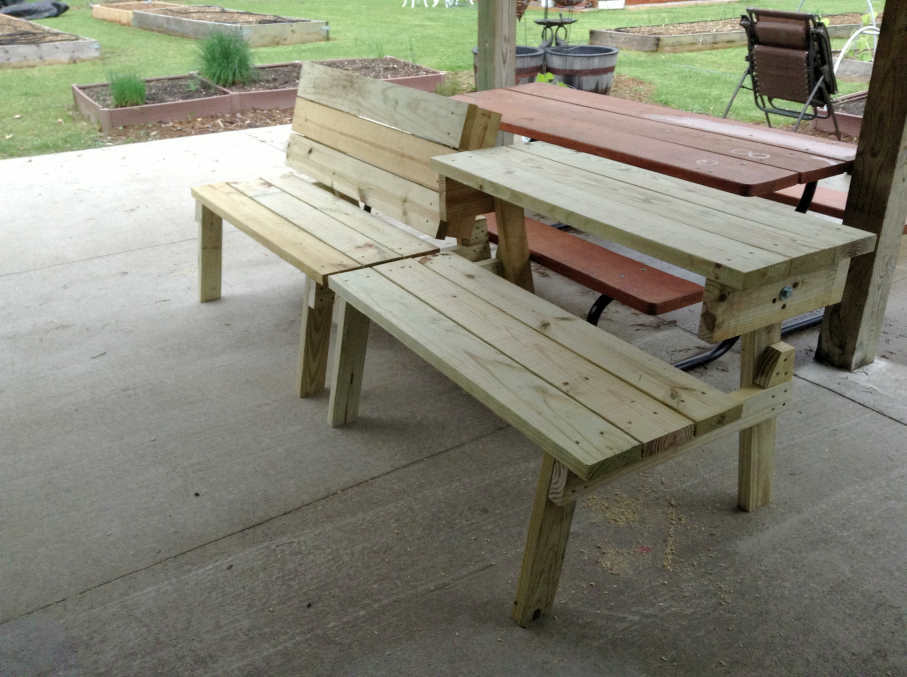
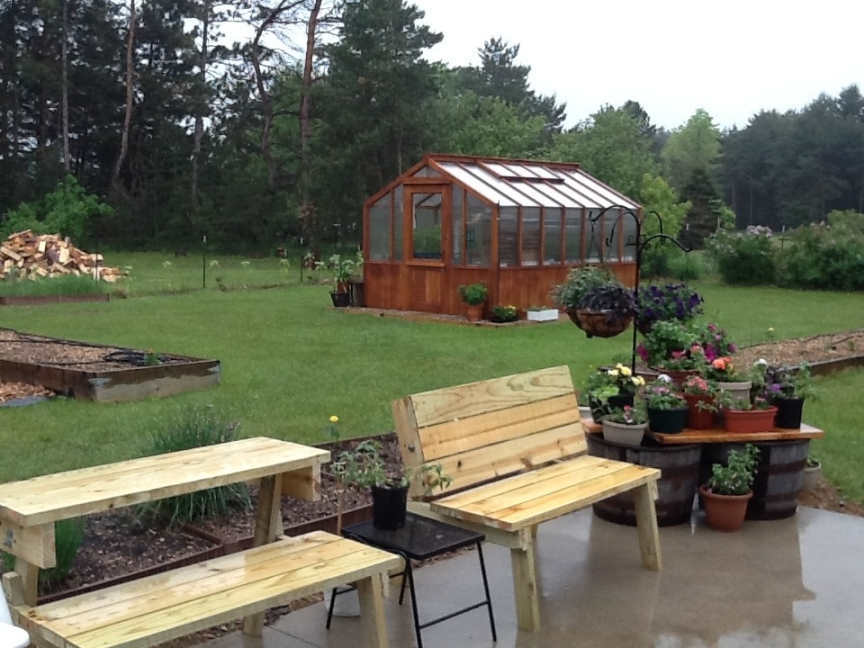
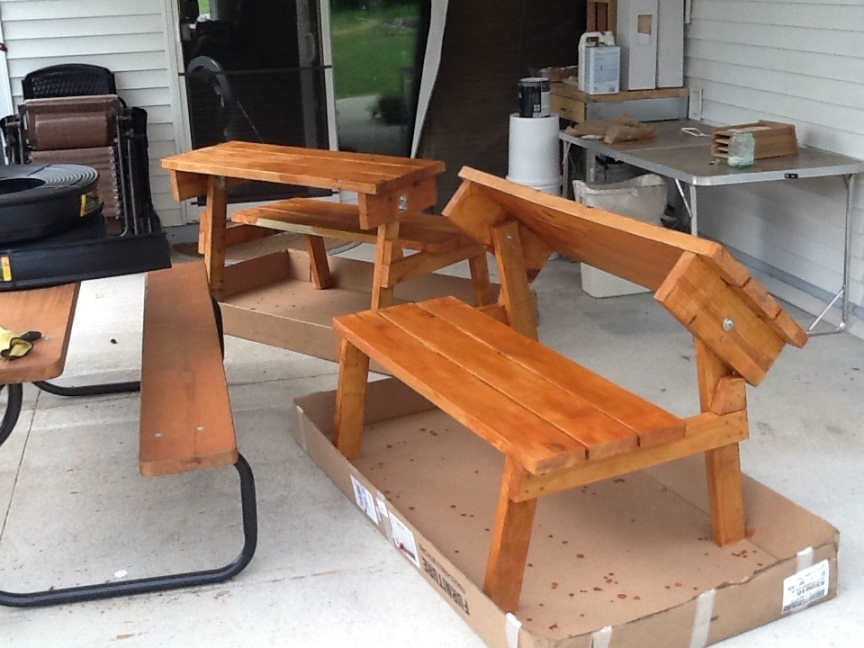
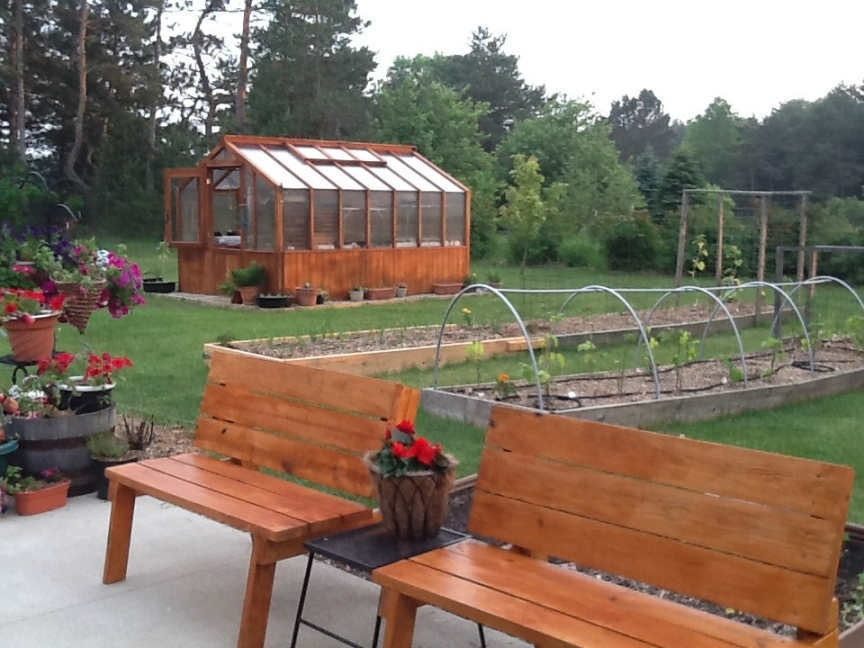
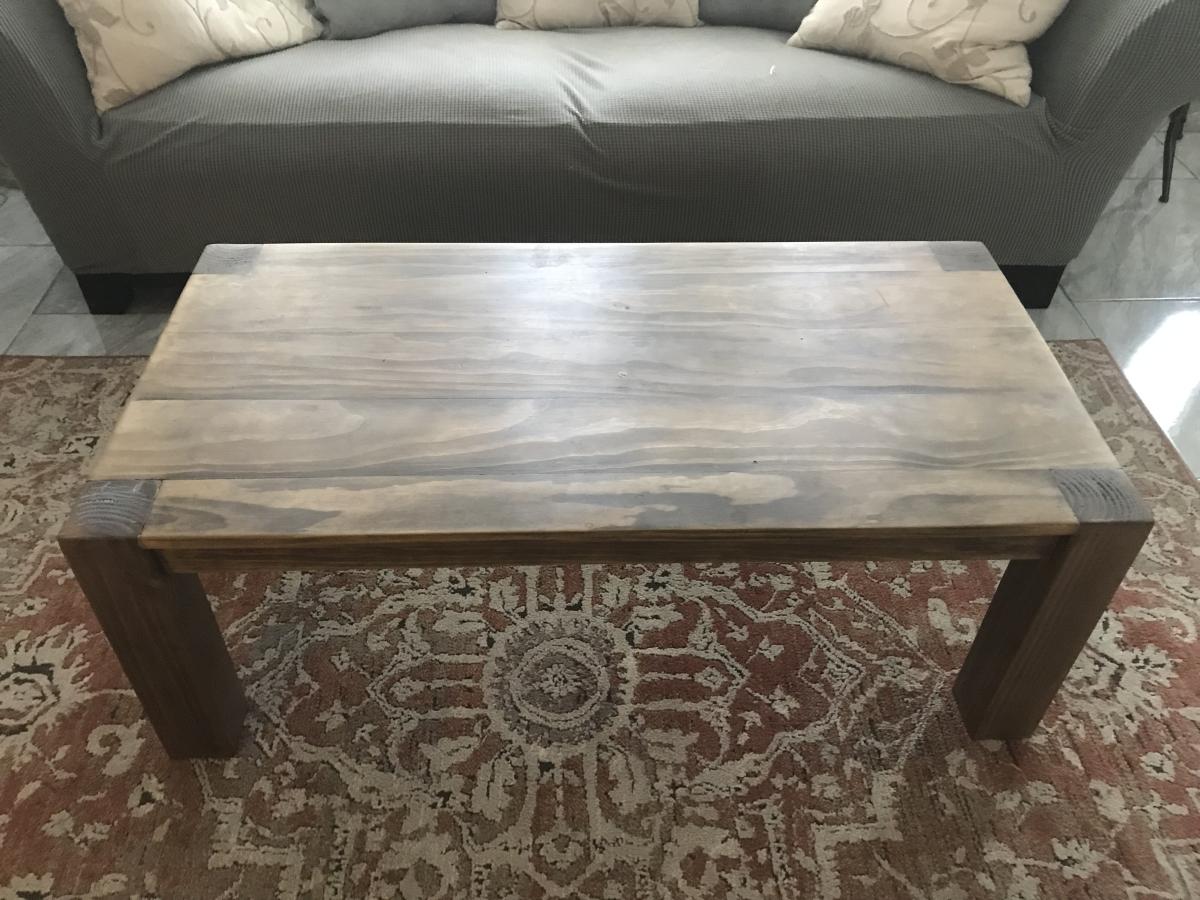
I saw a type of this for sale at Costco for $109 (for just ONE bench, not a pair). It' looked nice, and I almost bought it, but it had metal legs and trim and I wanted more of a natural look to go with my Cedar theme that I have going in my back yard garden/patio/greenhouse area. After seeing it in the store, I did an online search to see if I could find something a little more organic in nature... imagine my surprise when Ana's version of the bench/table came up! I looked over the plans and thought... well, I made the modified Farmhouse Table via her excellent instructions, I can surely do this! I did make a small change, I cut small pieces of wood to use as stops for the backs of the benches, instead of using holes and bolts to hold the backs at an angle that is comfortable. You can see this in the pictures, they are just beyond the back of the seat boards, on the leg supports. Thank you Ana! It was easy, quick, and they look SO good on my patio. I will be making more, maybe even selling a few because so many have asked me if I might :) I figure the cost was about $65 for both benches. A great deal and a fun project! Patrick really has to refrain himself from wanting to "help" me, but I am determined to do it myself... and low and behold! With Ana's generous free plans and inspiration, no problem!
Estimated Cost
$65 for the two
Estimated Time Investment
Day Project (6-9 Hours)
Finish Used
Cedar Stain. The project was not stained until the benches dried out for several days. They were built using green treated lumber, so they needed to dry out well before staining.
Recommended Skill Level
Beginner

Comments

Kabarie

Wed, 07/17/2013 - 13:11

Oh, great job!! I love it. The back stops for the bench is a great idea because those bolts are expensive! I'm going to do the same. Thank you for the idea!
Seasonal And Holiday

Chalkboard Cubby

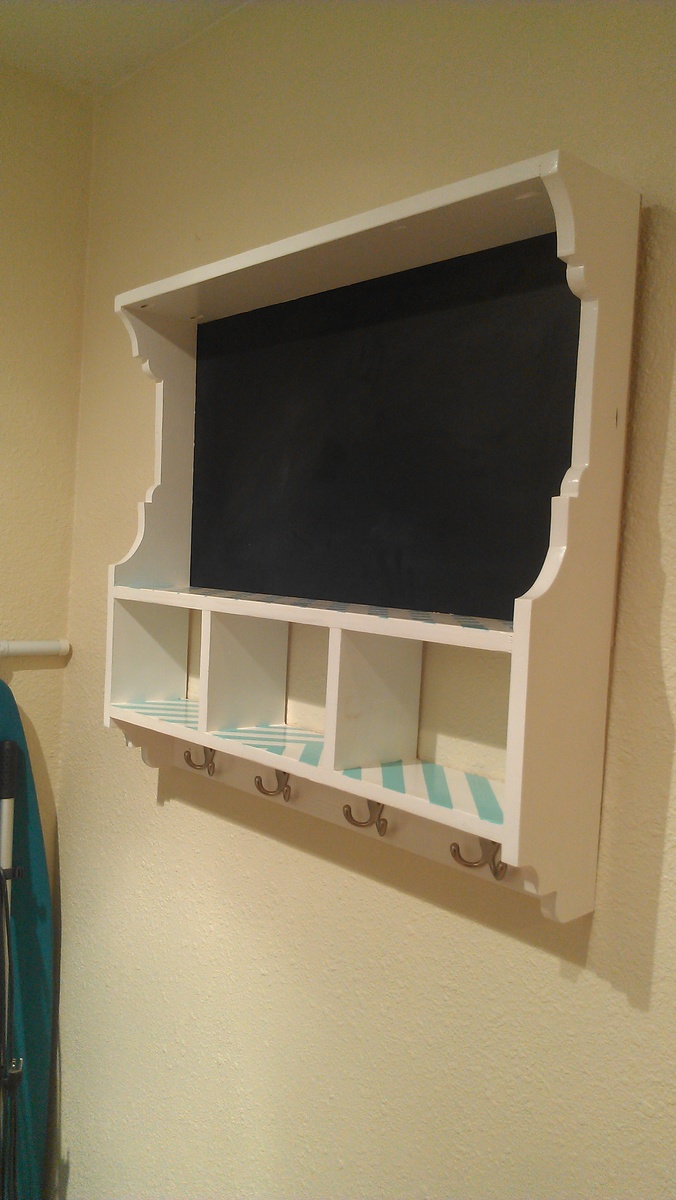
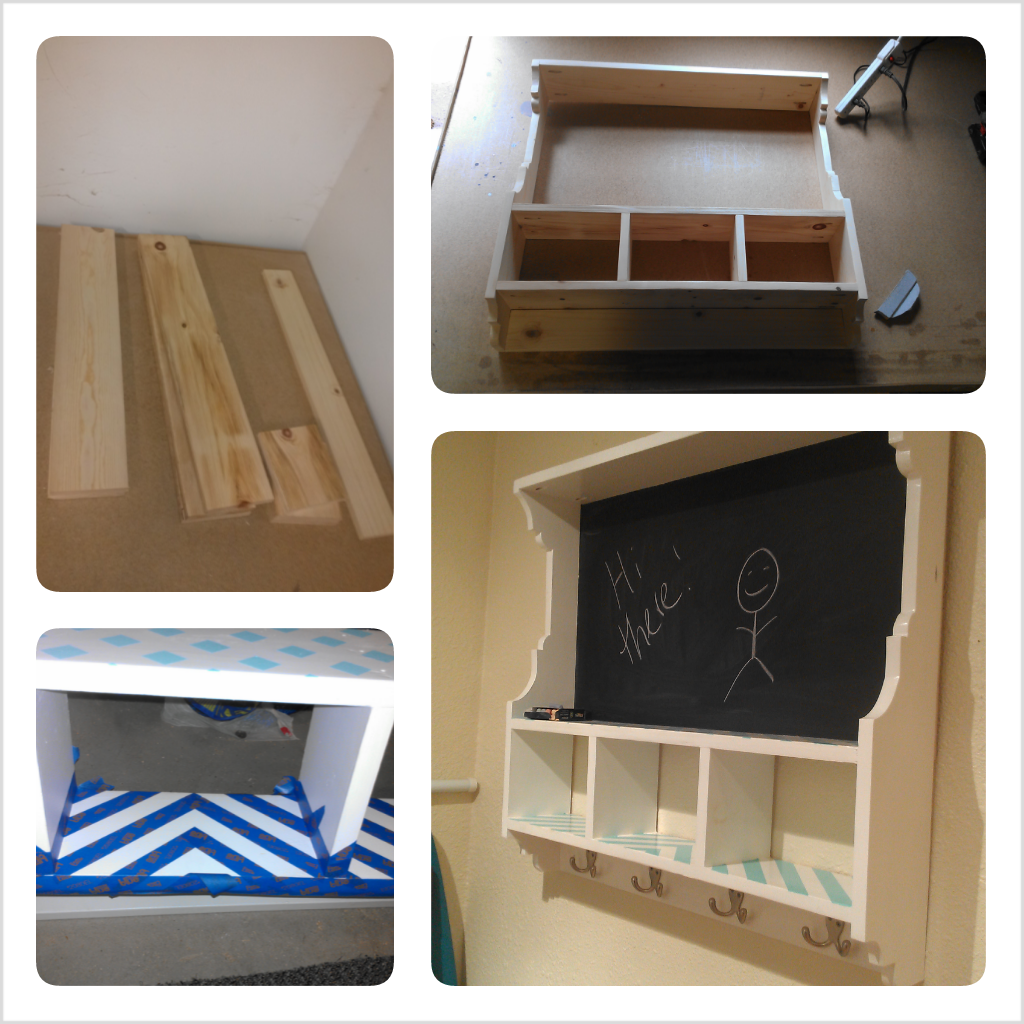
This cubby was my very first project! I just finished remodeling my kitchen, all that was missing was a place for my keys, dog leashes etc. My little house doesn't have a proper entryway so I created a "welcome station" with this cubby. The trickiest part was definitely cutting the sides, but I was able to get those tight circles with a little forethought and a lot of sanding :) I used leftover paint and samples from choosing colors for the kitchen, so it automatically coordinated with the rest of the decor.

Built from Plan(s)
Estimated Cost
~$40
Estimated Time Investment
Day Project (6-9 Hours)
Finish Used
3 coats of Behr "Polar Bear" white paint and samples (Rainwater, also Behr) with LOTS of taping! I think I spent ore time taping than I did actually painting! I also did 3 coats of clear satin coat. I didn't sand in between because I like the look of brush strokes :)
Recommended Skill Level
Intermediate

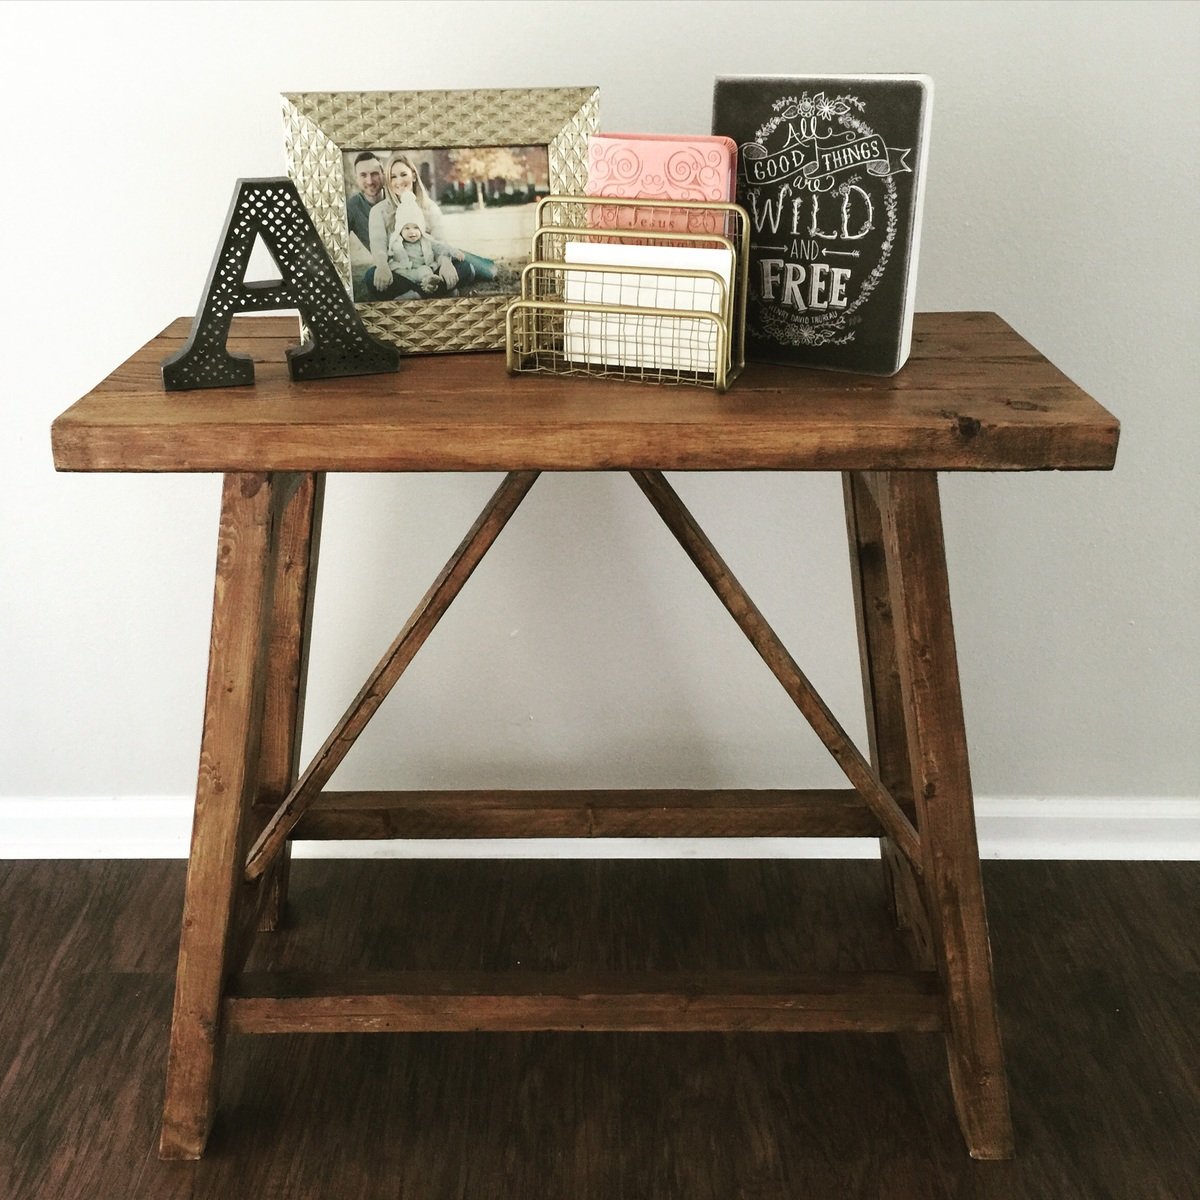
Pottery Barn Inspired Truss End Tables

Submitted by Amandaard on Mon, 06/22/2015 - 14:11

I changed up the plans so this table would fit my space better. This was my first time building with a Kreg jig and a miter saw(I'm a newbie). Love how it turned out!

Built from Plan(s)
Estimated Cost
$15
Estimated Time Investment
Afternoon Project (3-6 Hours)
Finish Used
Cabot brand in Aged Leather. One coat.
Recommended Skill Level
Beginner

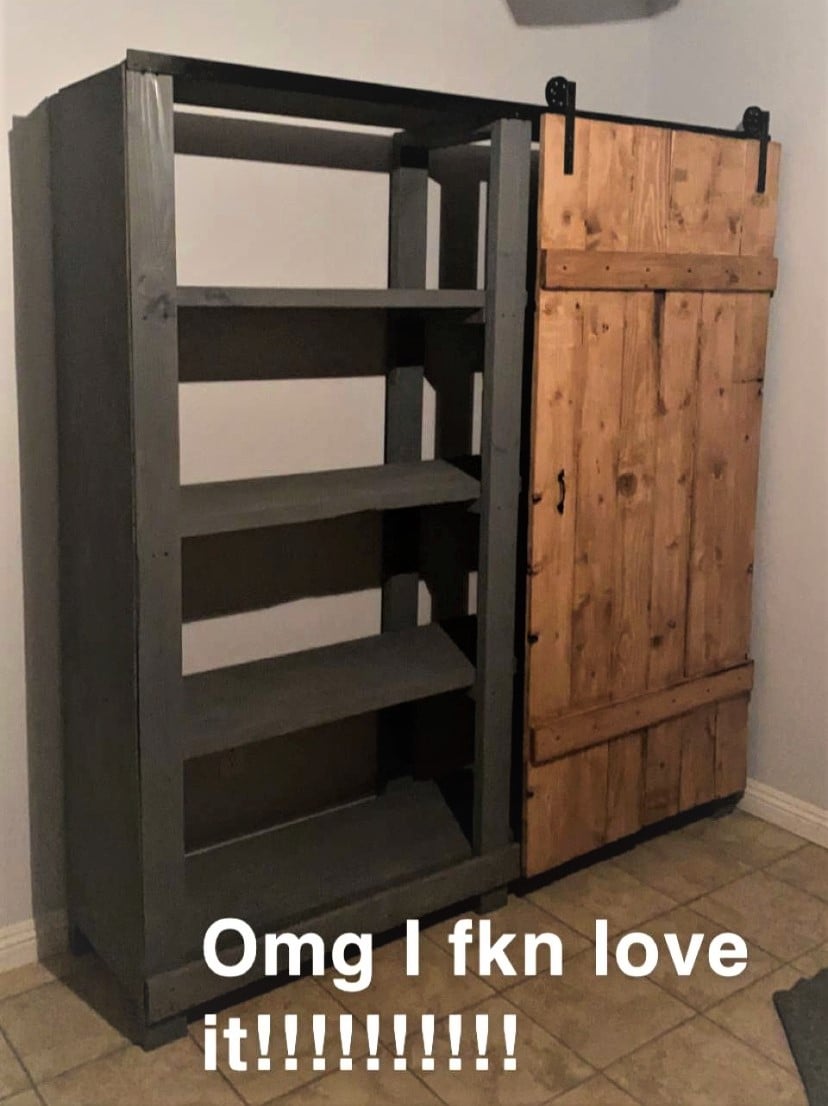
Garage shelving unit to inside shelving unit with barn door

Submitted by Anonymous (not verified) on Mon, 12/27/2021 - 12:08

We too you’re 2x4 shelving unit with some small tweaking of measurements and added a barn door!

Comments

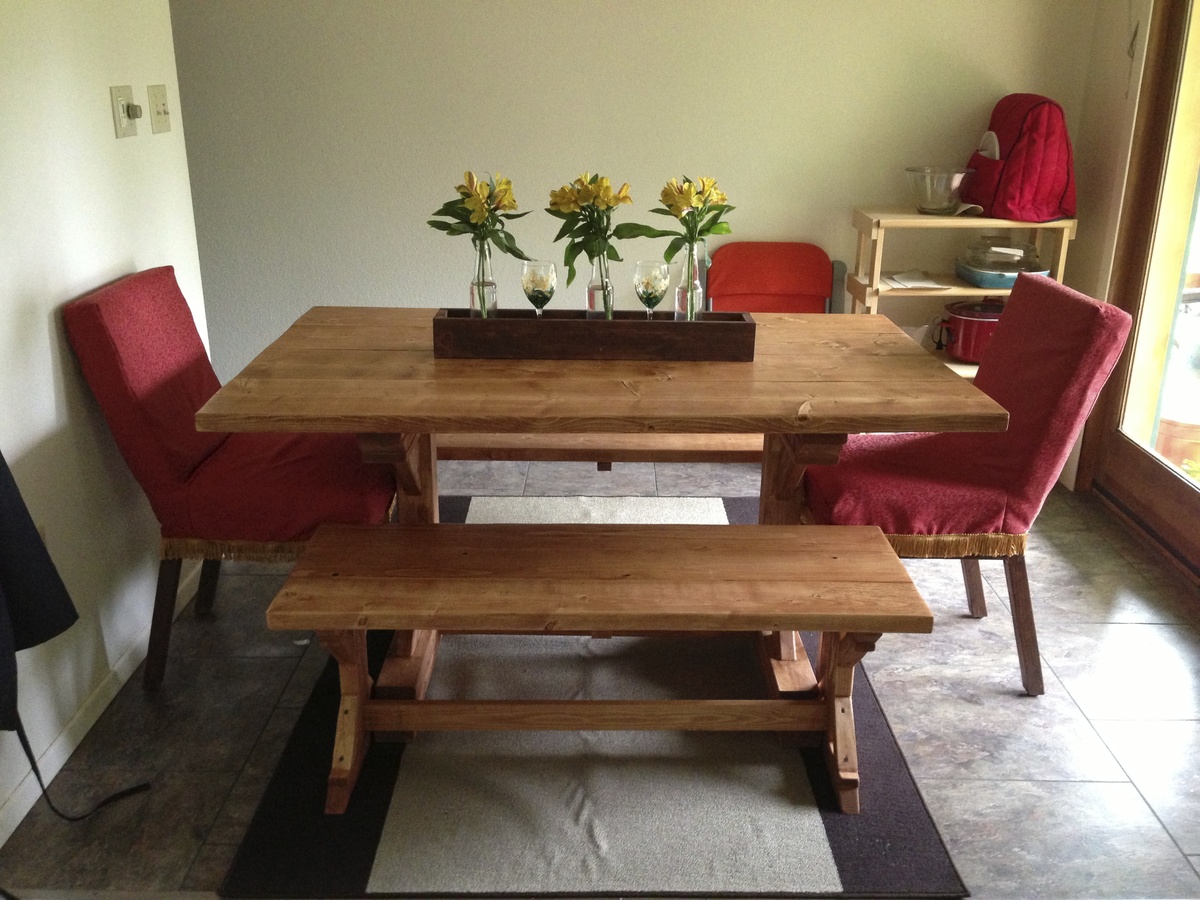
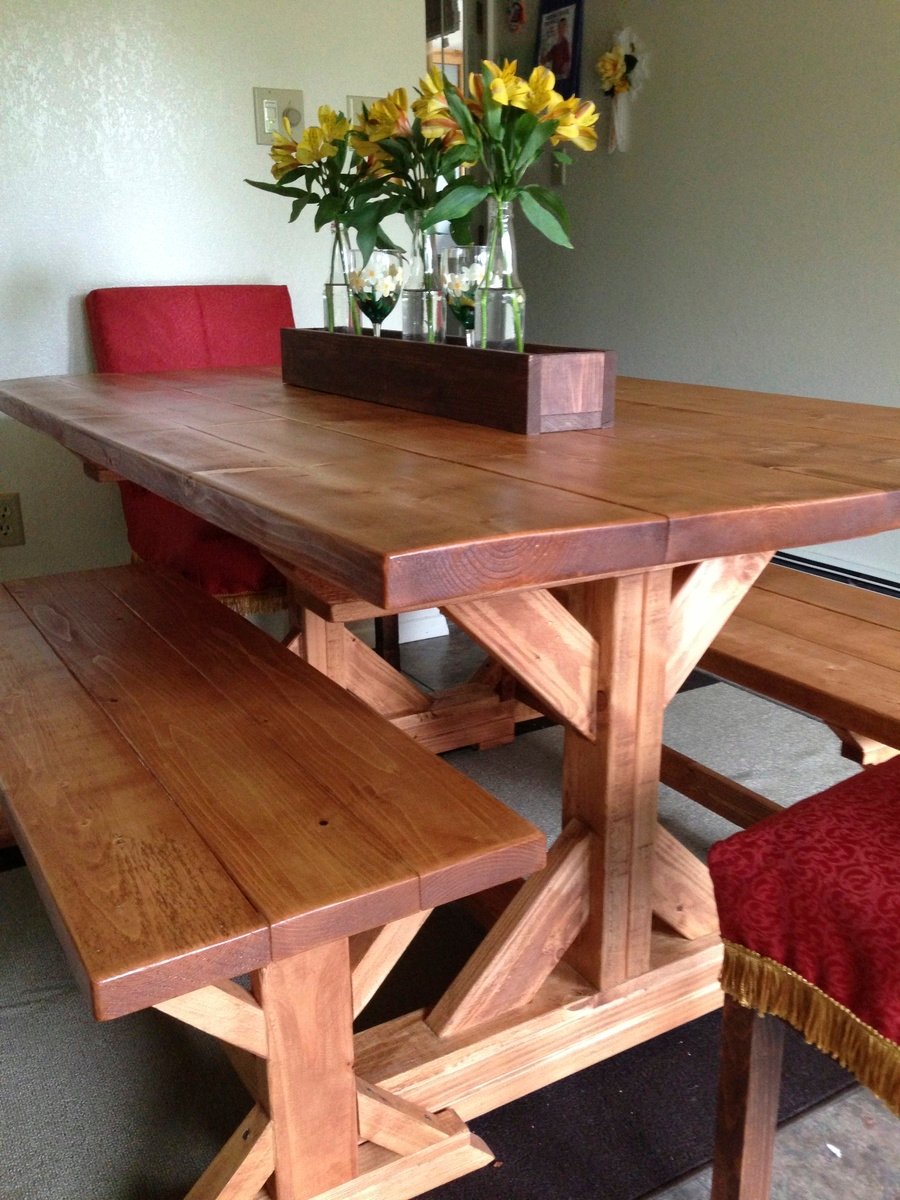
Fancy X Farmhouse Table and Benches

Submitted by LeaG on Mon, 07/08/2013 - 17:38

I was inspired to build this table after taking Ana's Adirondack Chair Class at Home Depot. Living in Fairbanks, AK means that the pickings are slim and pricy for quality furniture.

I shortened the table length to 5' to fit my space and made the benches 4' long and lined the legs up so they would fit comfortably under the table. I also made the chairs based on Ana's Parsons chair pattern.

Estimated Cost
About $250-300 Total
Estimated Time Investment
Week Long Project (20 Hours or More)
Recommended Skill Level
Beginner

Comments

In love with the Parsons

Submitted by avls on Wed, 01/26/2022 - 10:43

Love the result! Your plans for this is fool-proof for someone like me. Easy to build… only after attempting use (4) 1x6 for top and messed up the corners to attach legs with my terrible jigsaw skills, I scratched the 4th board and went with the (2) 1x4’s on each side surface. I’m now in love with this style and plan on (finally) having matching new furniture, once I build some of the other pieces in this Parson style collection! Thank you for the plans

Comments

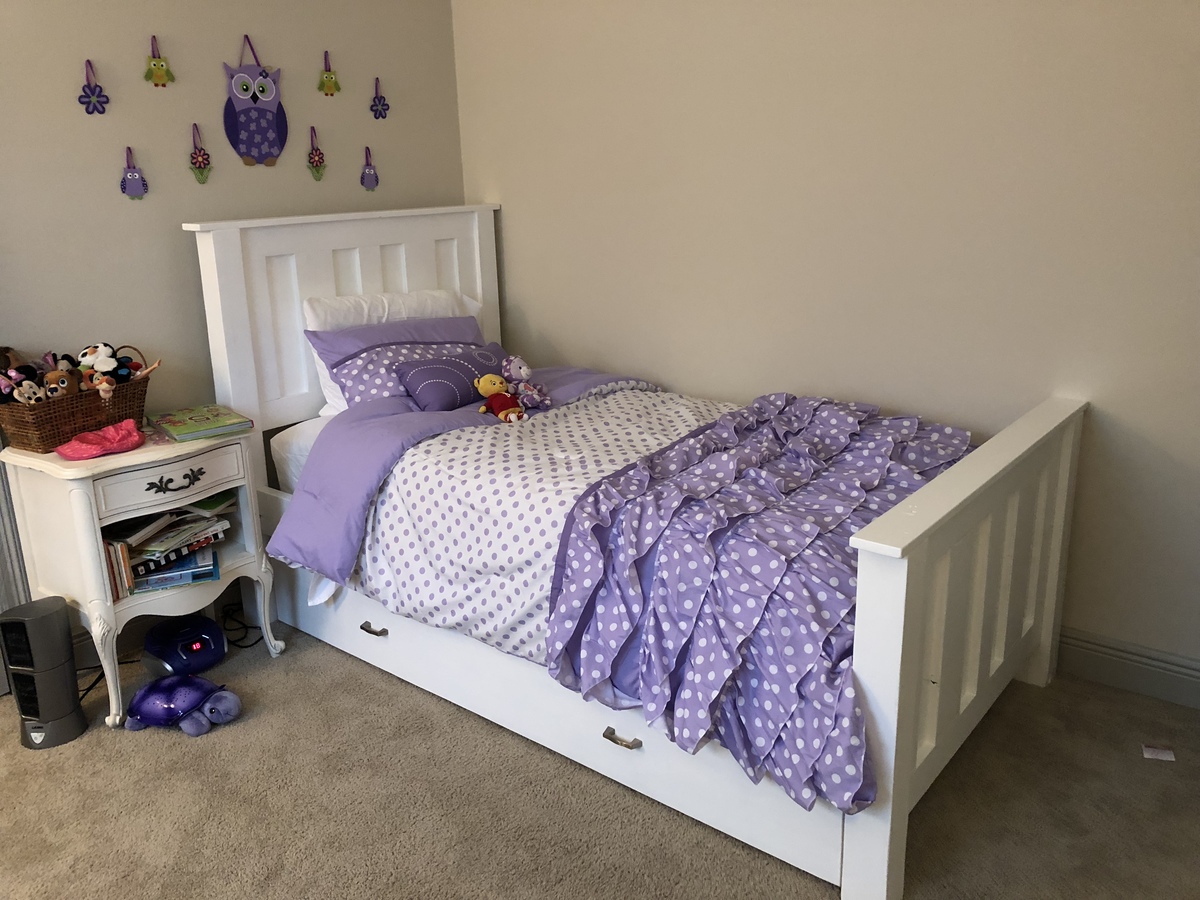
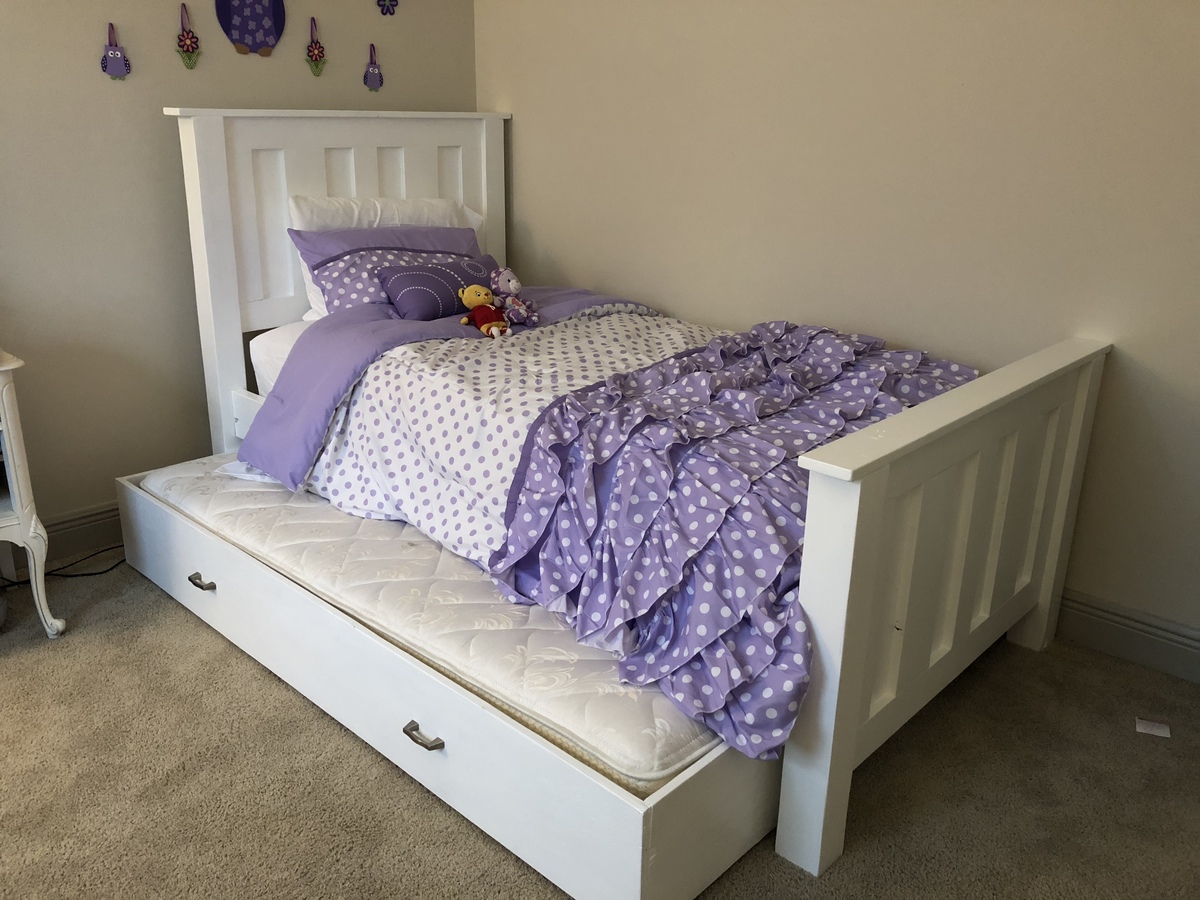
Addison’s room

Submitted by aderosa on Thu, 02/01/2018 - 12:45

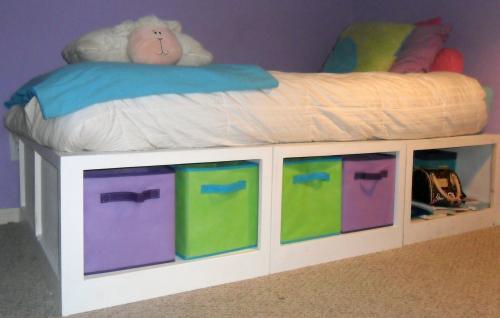
It was time for Addison to get a big girl bed. We used the Kentwood design and the trundle bed plans. 

Estimated Cost
140
Estimated Time Investment
Weekend Project (10-20 Hours)
Finish Used
Valspar cabinet paint
Recommended Skill Level
Beginner

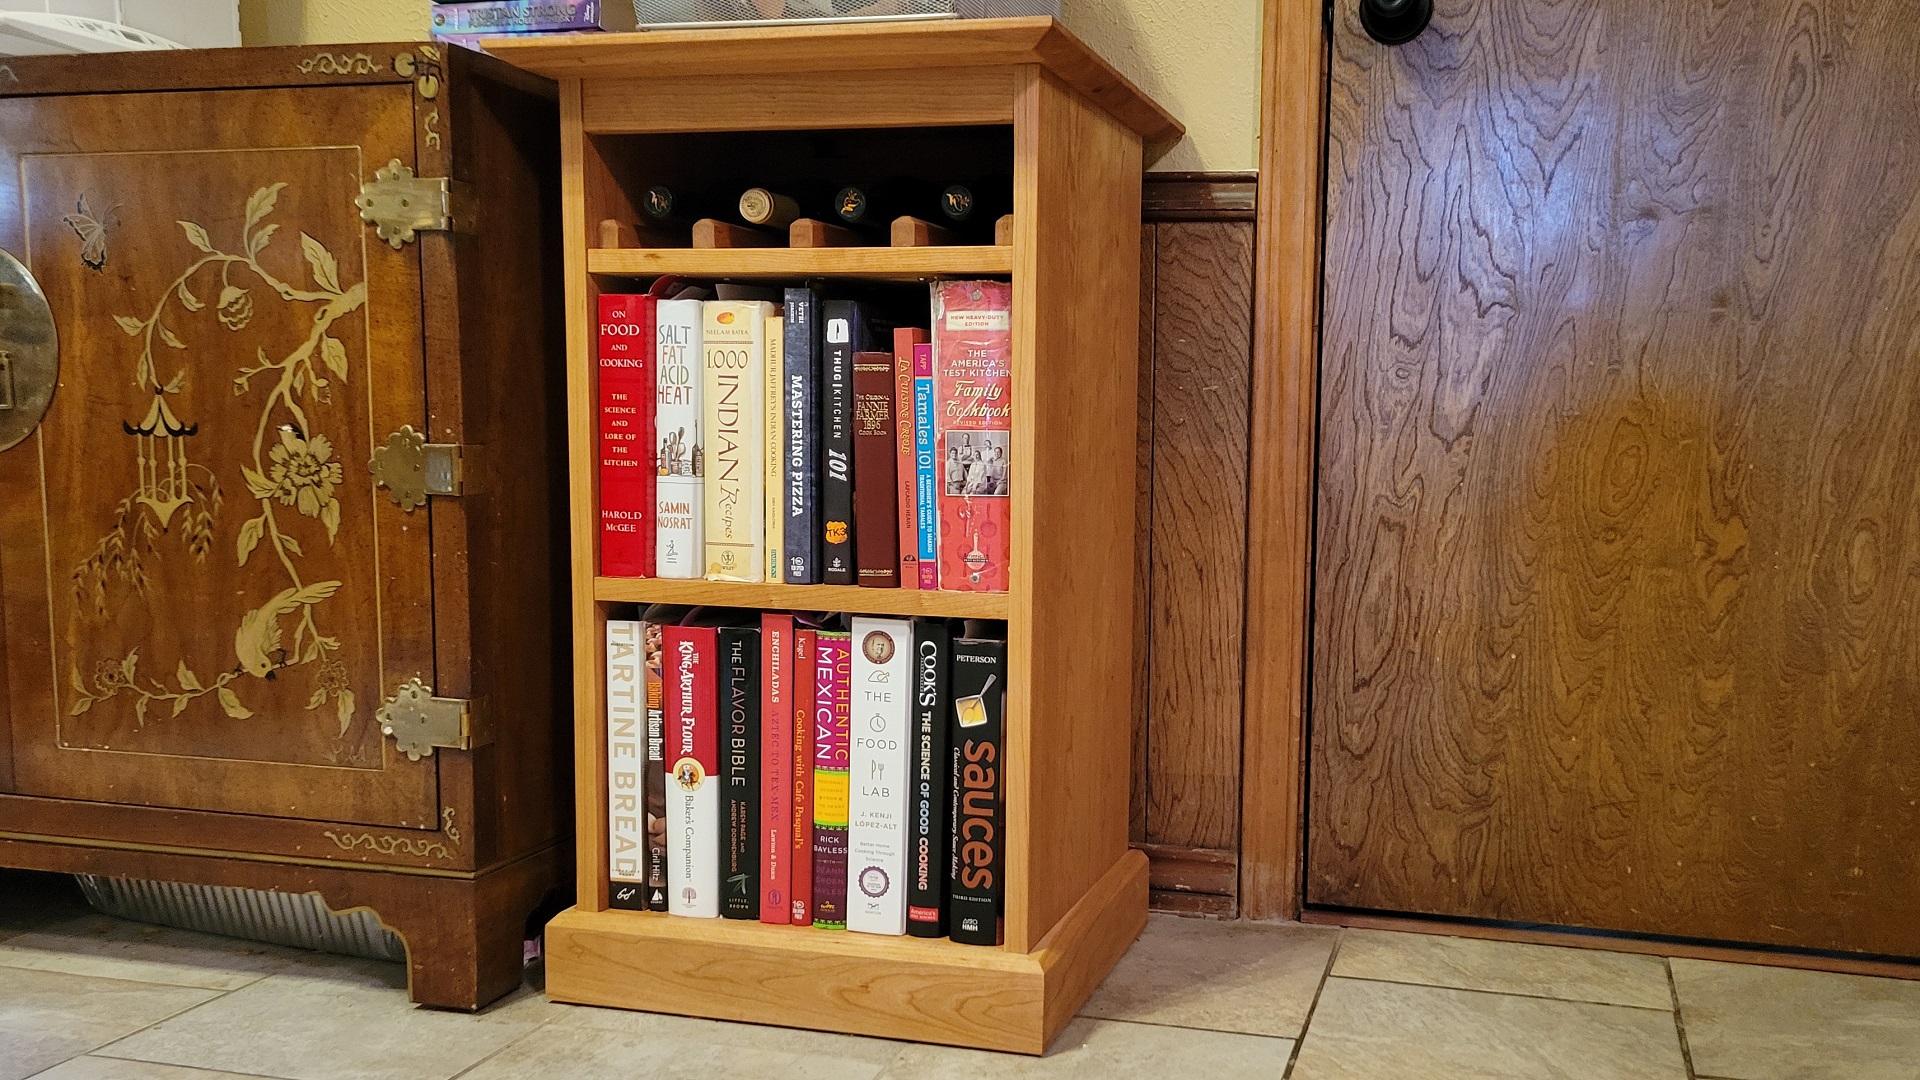
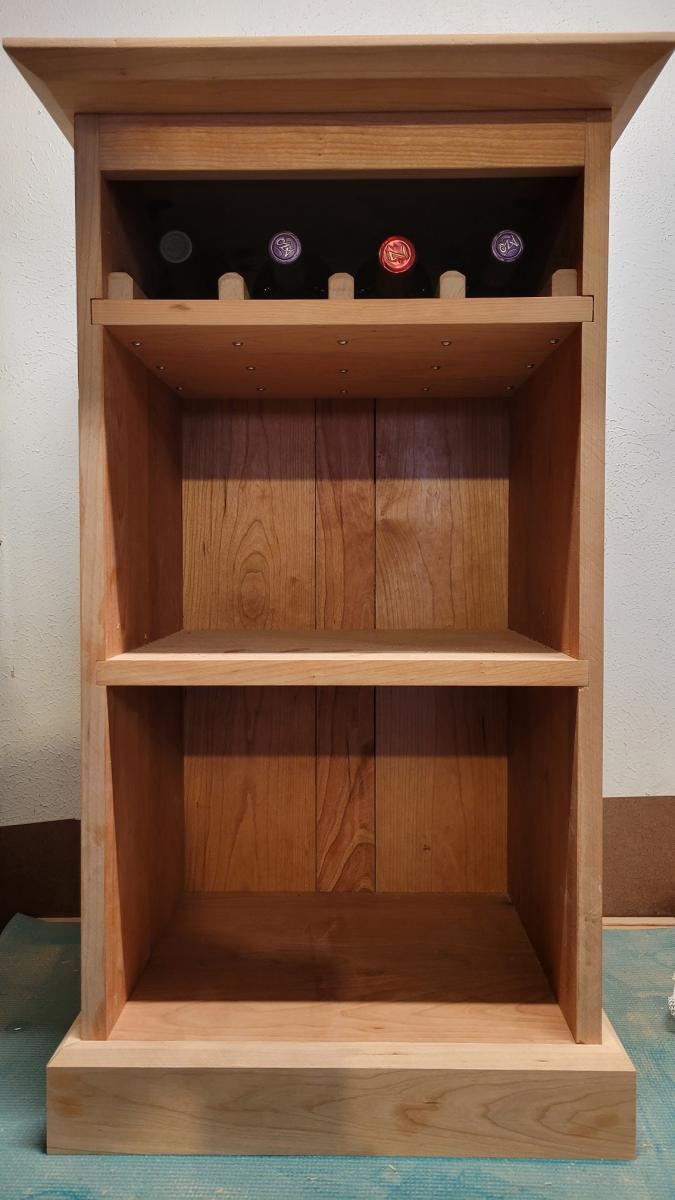
Kitchen Book & Wine Case

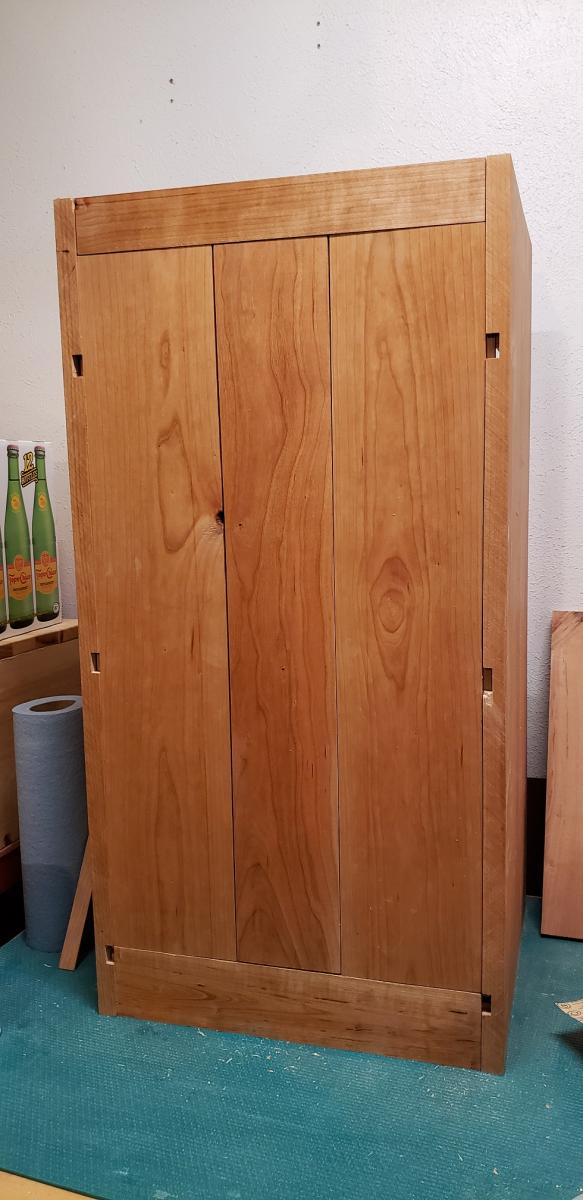
I made a small book case that includes a wine shelf.
It is all solid cherry. I used a shiplap paneling design for the back panel.
It is finished with many coats of natural color Danish Oil.
Here's a video of how I built it:
https://www.youtube.com/watch?v=Hxil44OfJ9M

Comments

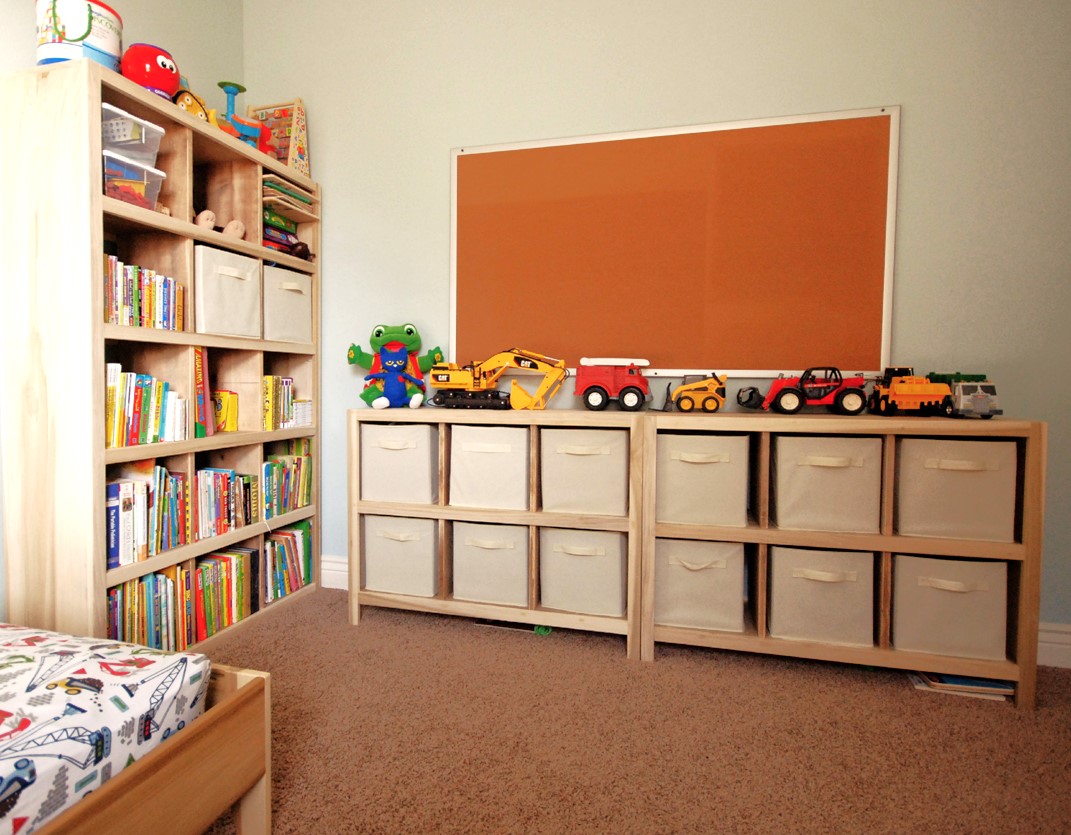
6 Cube Bookshelf - Poplar

Submitted by kev117s on Tue, 07/28/2015 - 18:29

I built this set of cube shelves for my 3 yr old son's room. THANK YOU, ANA! I used poplar as I did not want to paint the wood and I love the irregular pattern of the wood grain. To save money, I used pine for the inner shelves and dividers. I stained it using the oxidized solution (http://www.friendly-home.net/2012/05/oxidized-x-console.html) that Ana recommended from the instructions of the Rustic Console. I added a cup of coffee to the solution to get a darker browner shade and unevenly sanded the wood for the distressed look. It matches the poplar wood more so than keeping the pine wood as is.

I also created a 5-tier version to match the 6 cube shelves but did not include the legs. I thought it would be more stable to keep the lower frame on the ground.

I purchased the storage boxes from Amazon It was around $20 for 6 boxes!


I am ready for the next project!

Built from Plan(s)
Estimated Time Investment
Week Long Project (20 Hours or More)
Finish Used
Oxidized solution for the shelves and dividers.
Recommended Skill Level
Beginner

Weatherly Sectional (L-shaped)

Submitted by OUKerri on Fri, 08/07/2015 - 21:50

When I first saw the outdoor sectional plans from Ana I had to build this! The sectionals at potterybarn cost at least $1500 and that is without the cushions. I chose cedar for the lumber because I wanted a high end stained wood look that would stand up to the pacific northwest weather. I purchased most of the lumber from Orange and some of the smaller boards from a local lumber yard. Every board was cut first then sanded and stained before assembly. This made it look a lot more professional and no drips! There are just too many tight areas to do this after it is assembled. I made 2 Weatherly outdoor sofas and used the plans from the Weatherly loveseat to leave the end off of one of the sofas to make an L-shaped sectional. This fit perfectly for my narrow deck which is the beauty of DIY and Ana's easy to modify plans. I  followed the suggestion of another brag post to attach the 2 sofas together with carriage bolts and nuts. It is important to be very accurate with all of the cuts because they have to fit together perfectly for the final product to look straight and measure correctly. Because there a about a million repetitive cuts in these plans I took the idea of another brag post and youtube and created a stop out of leftover lumber which really helped me keep my cuts accurate and saved me a lot of time. I really enjoyed using my new Kreg K5 pocket hole jig on this project which saved me time and my new Ryobi brad nailer that I convinced my husband I needed. I plan on using it on several projects which "require" a brad nailer! I bought six 25" cushions in turquoise from Pier 1 in mid-July which were on major sale and several pillows to match the color. I am somewhat of a beginner so I didn't adjust te plans to fit six 25" cushions so I had to have one cut down to 22" by a local upholstery shop (I could have purchased a 22" cushion but of course they were all sold out). I suggest at least a 3-4" depth cushion that is fairly firm, which Pier 1 cushion were.

I love the outdoor coffee table with built in beer cooler idea that another brag post had suggested.It uses a planter box as the cooler.  I used the same stain which worked well and adequately waterproofed the table. It also has a cover for the cooler when it is not in use. I thought it was a nice addition.


I loved this project and how it turned out! Thanks for the plans and inspiration!!!


Estimated Cost
$300 for the lumber, sand paper, screws and stain. $300 for 6 cushions and pillows from Pier 1.
Estimated Time Investment
Week Long Project (20 Hours or More)
Finish Used
Behr Transparent Weatherproof Wood Finish in Cedar Naturaltone
Recommended Skill Level
Intermediate