Community Brag Posts

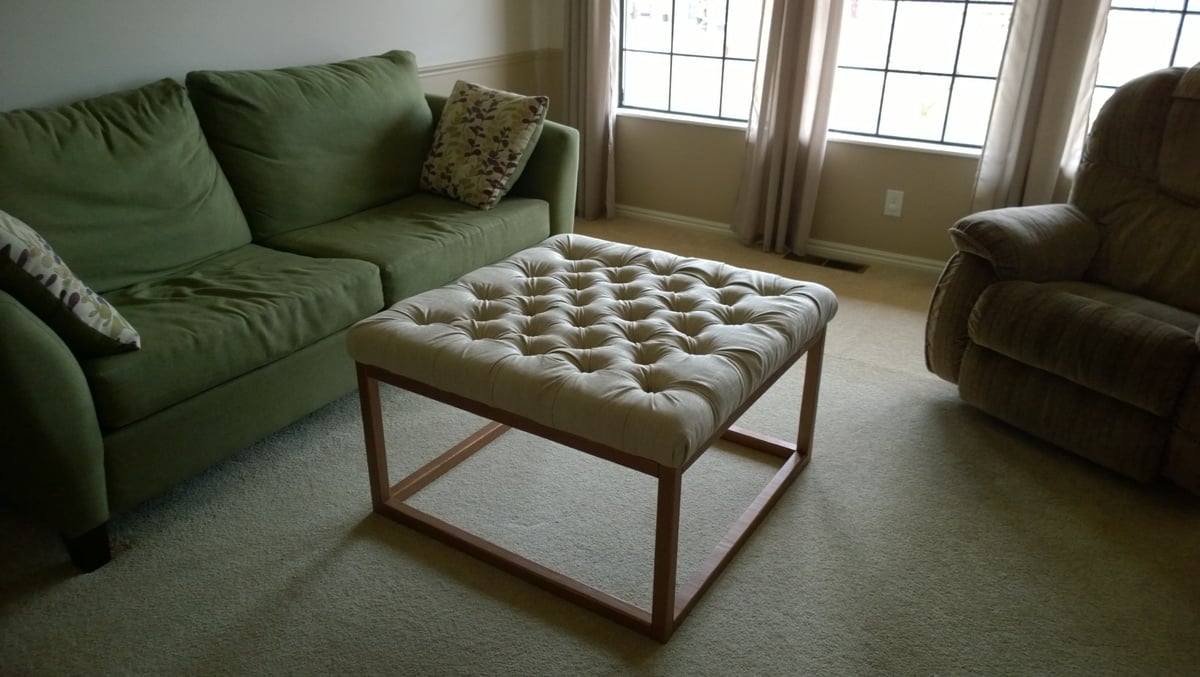
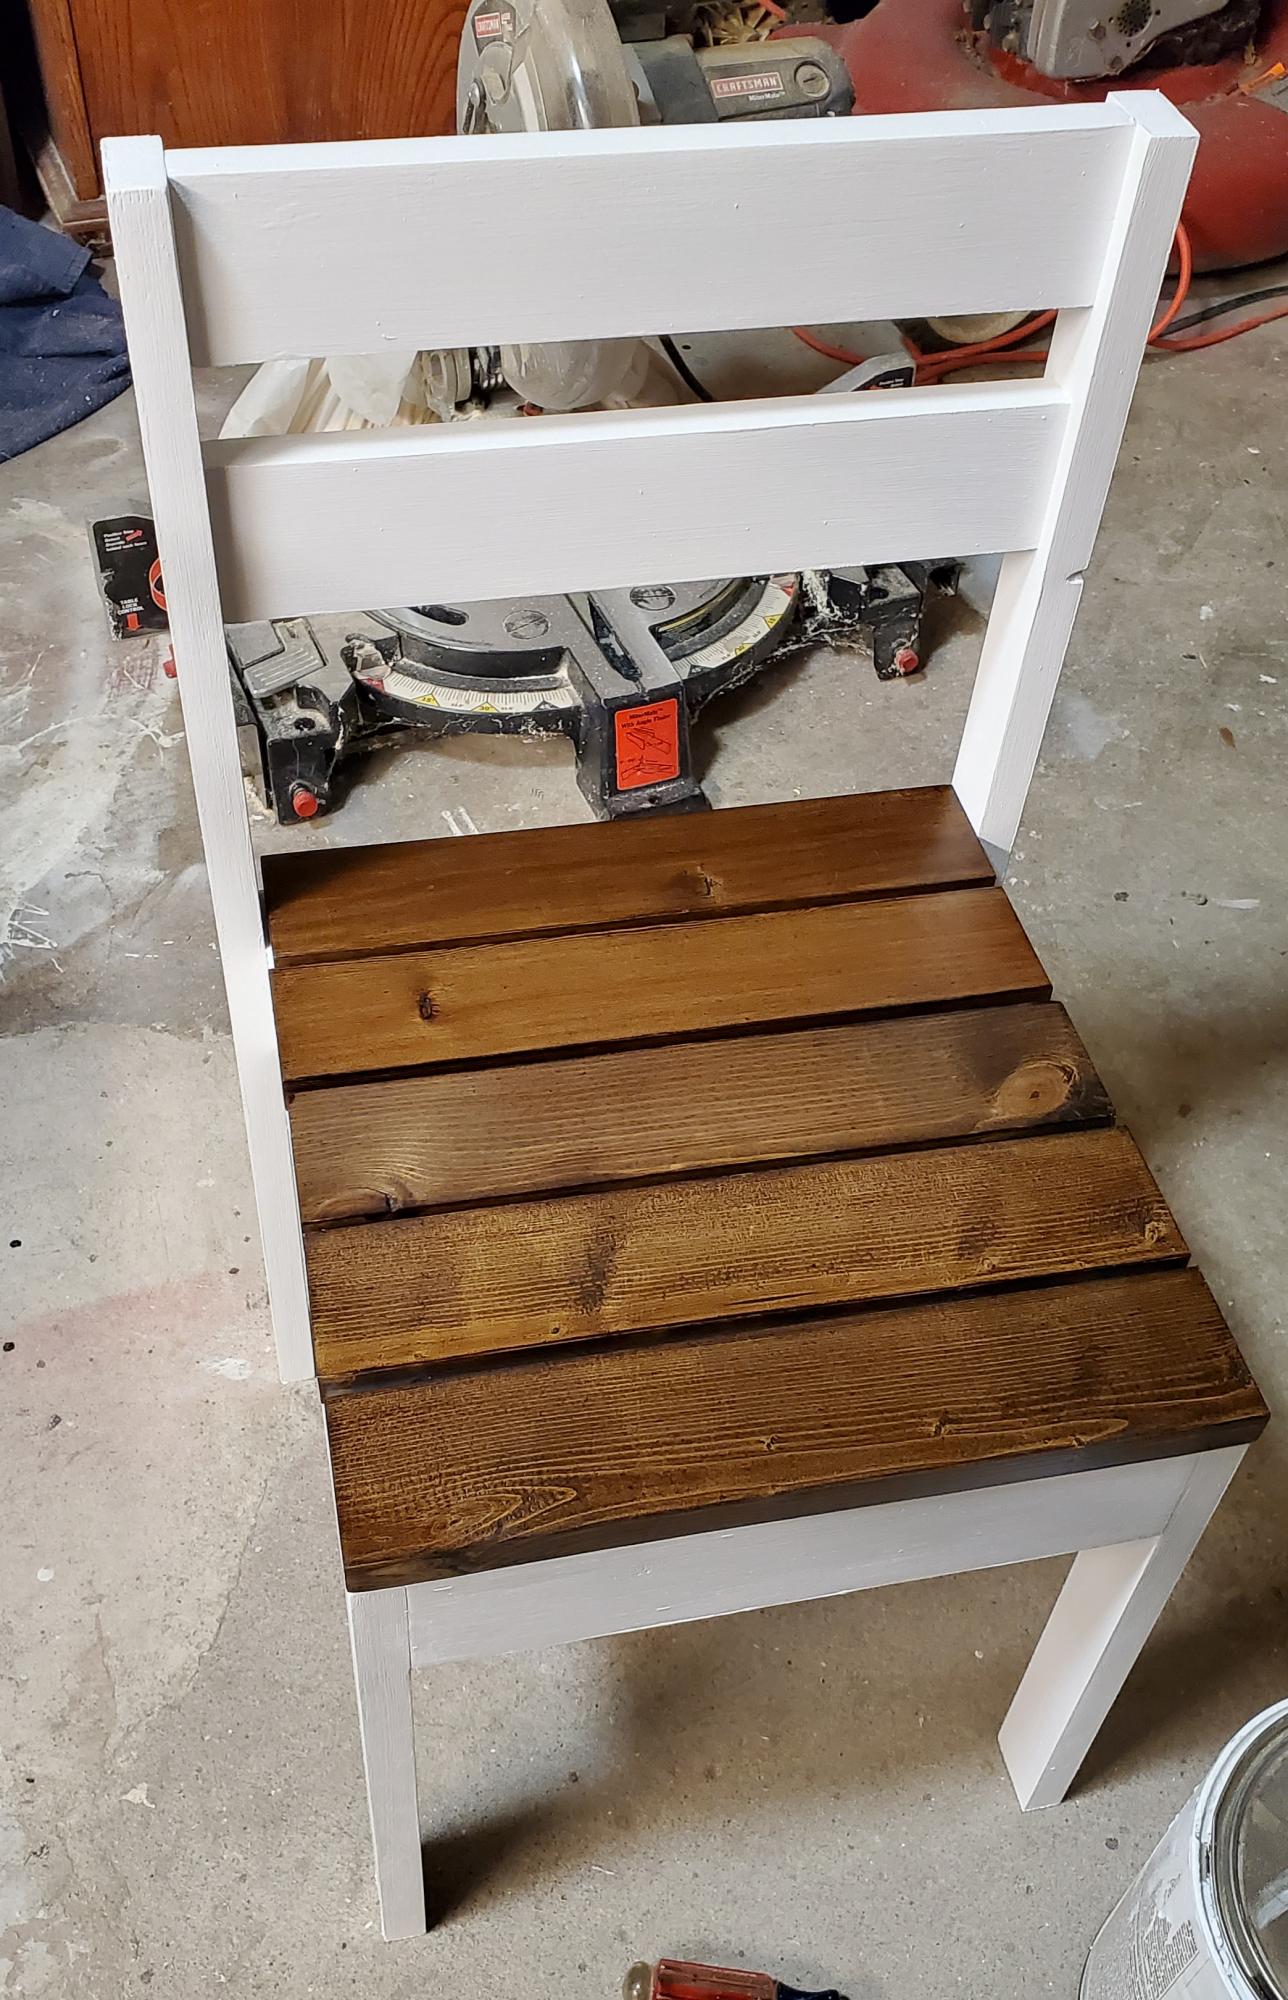
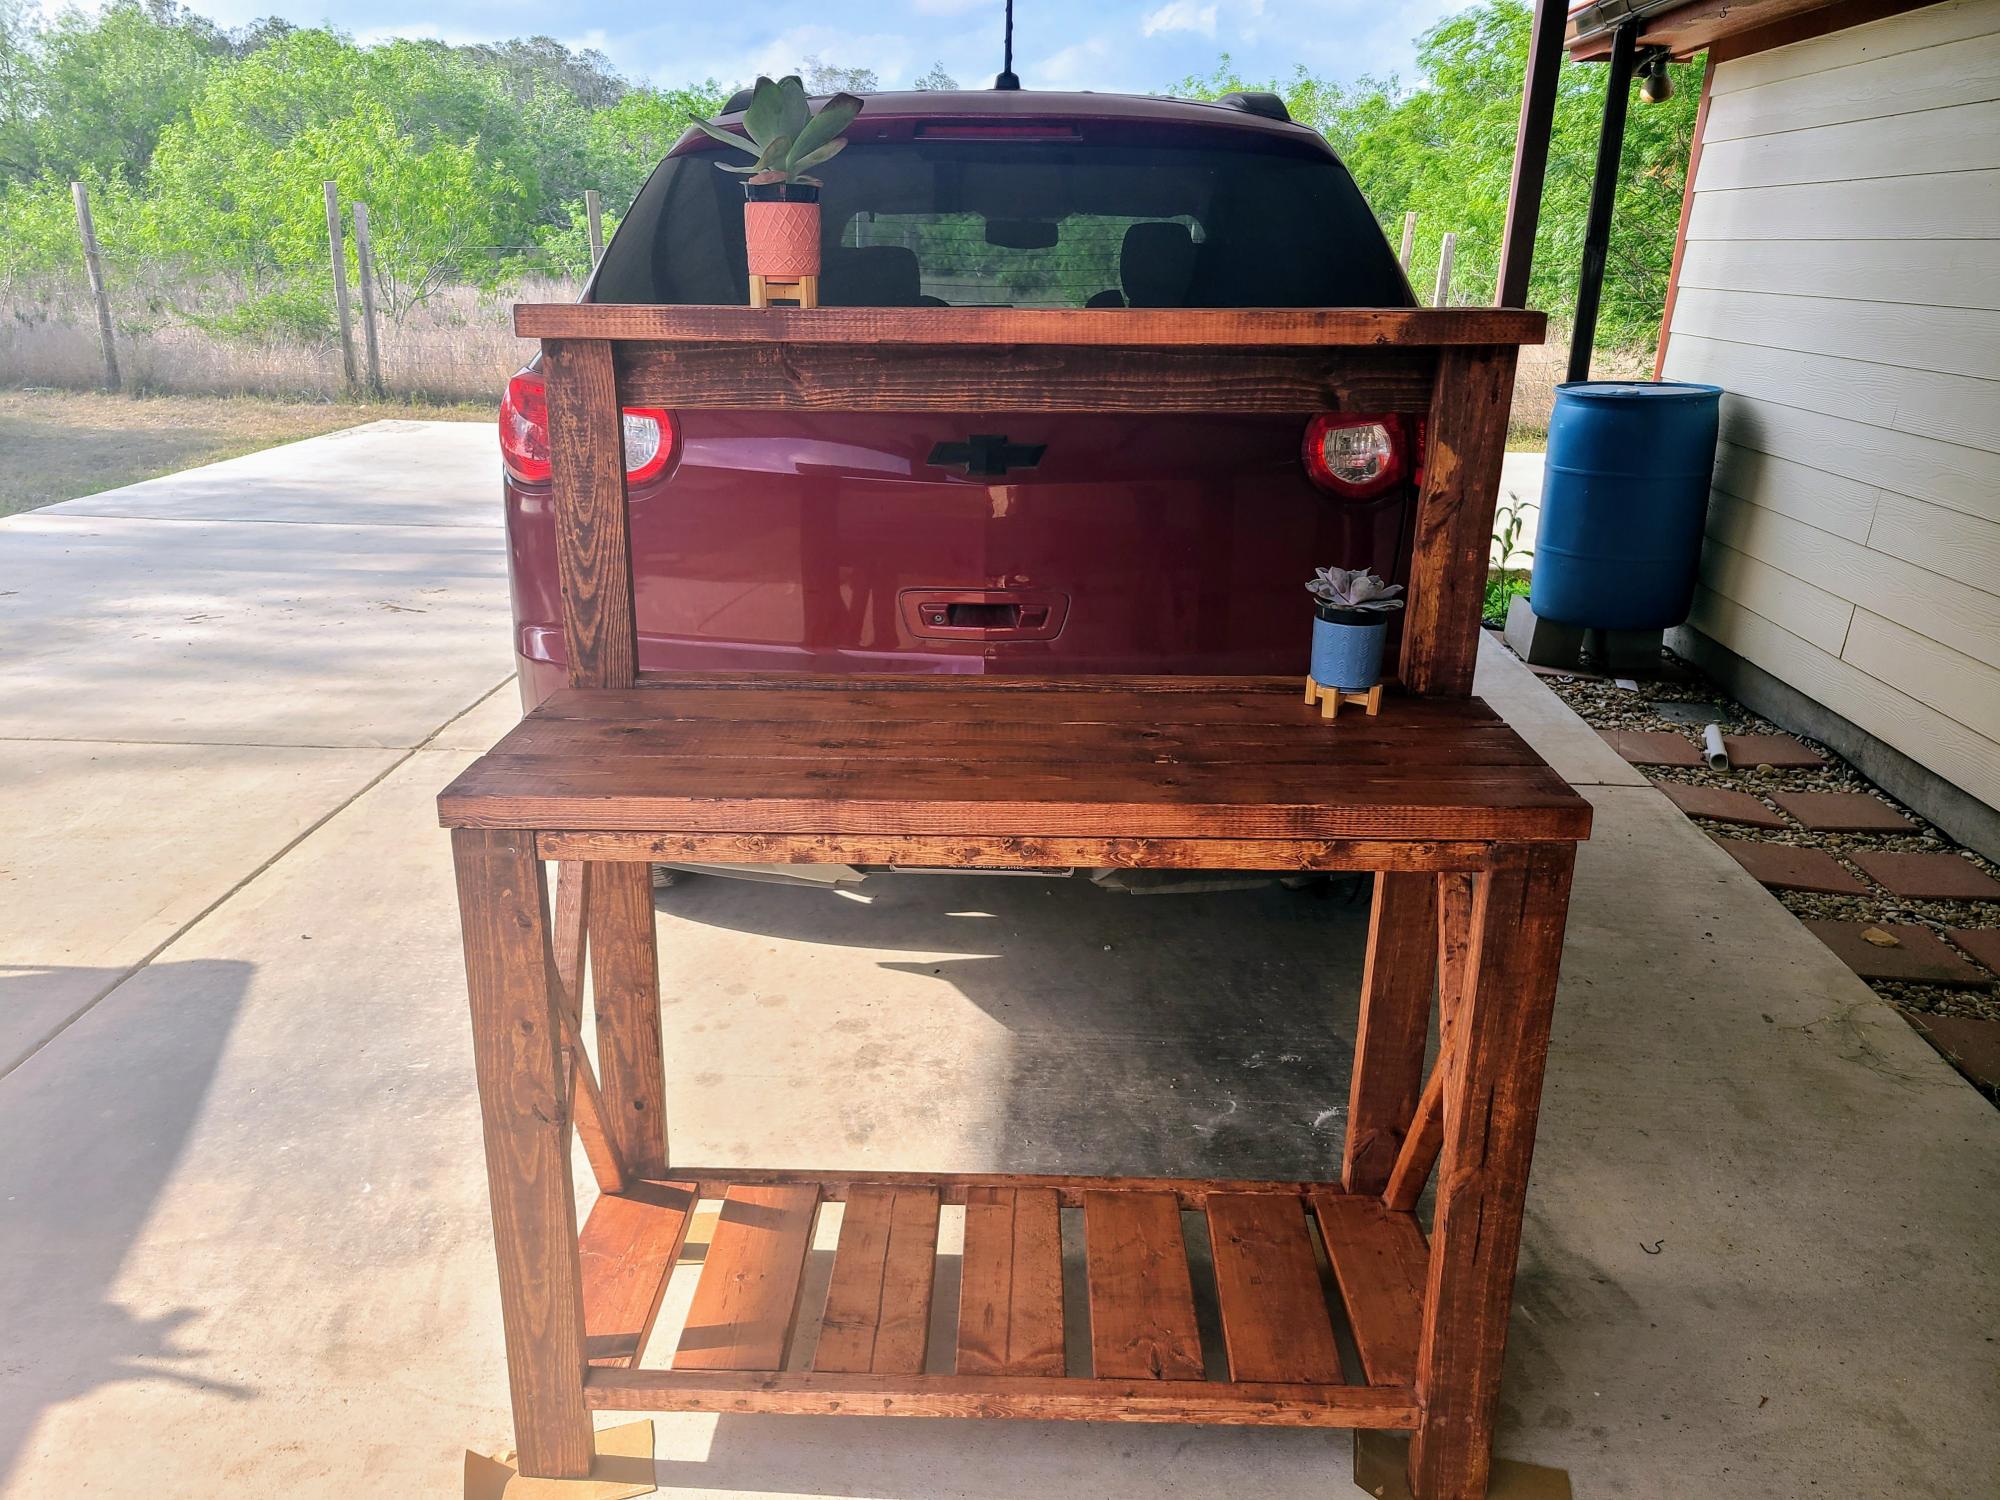
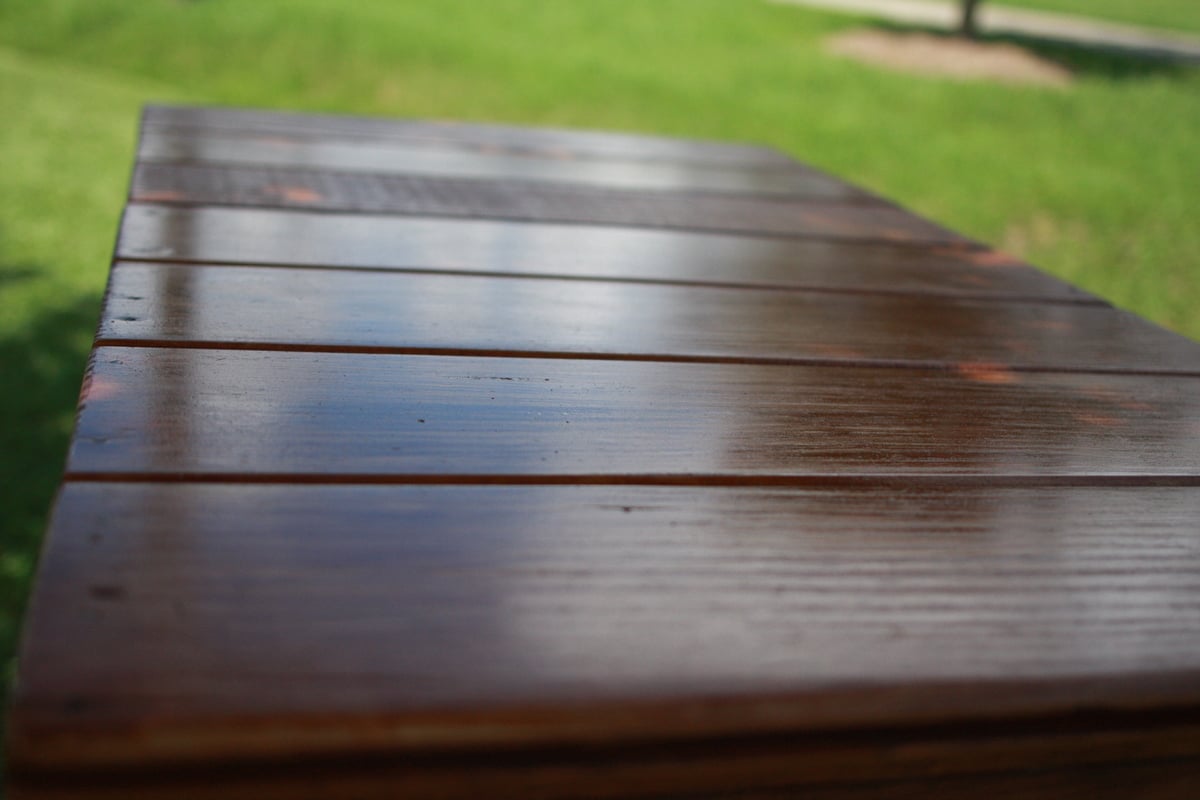
Simple Outside Serving Table

Submitted by jazberg on Fri, 07/15/2011 - 13:17

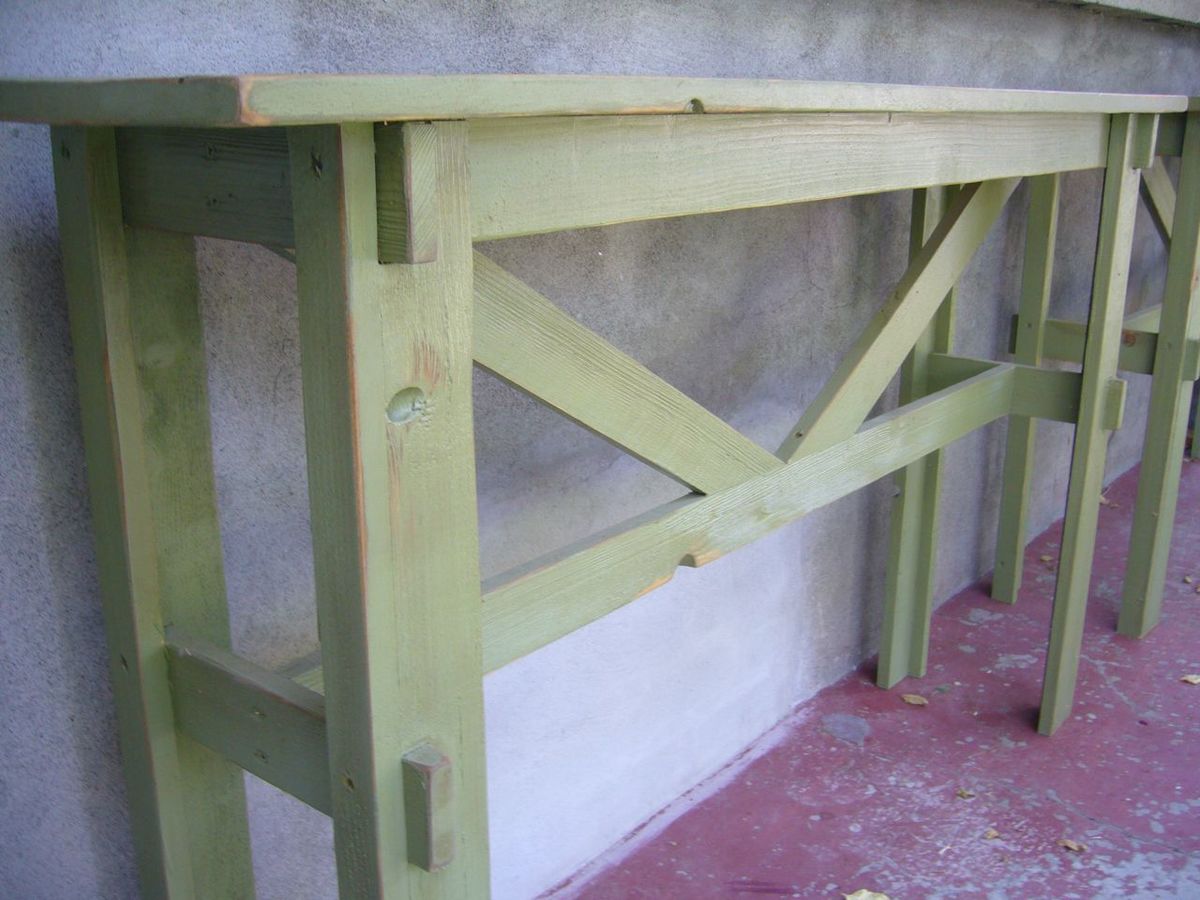
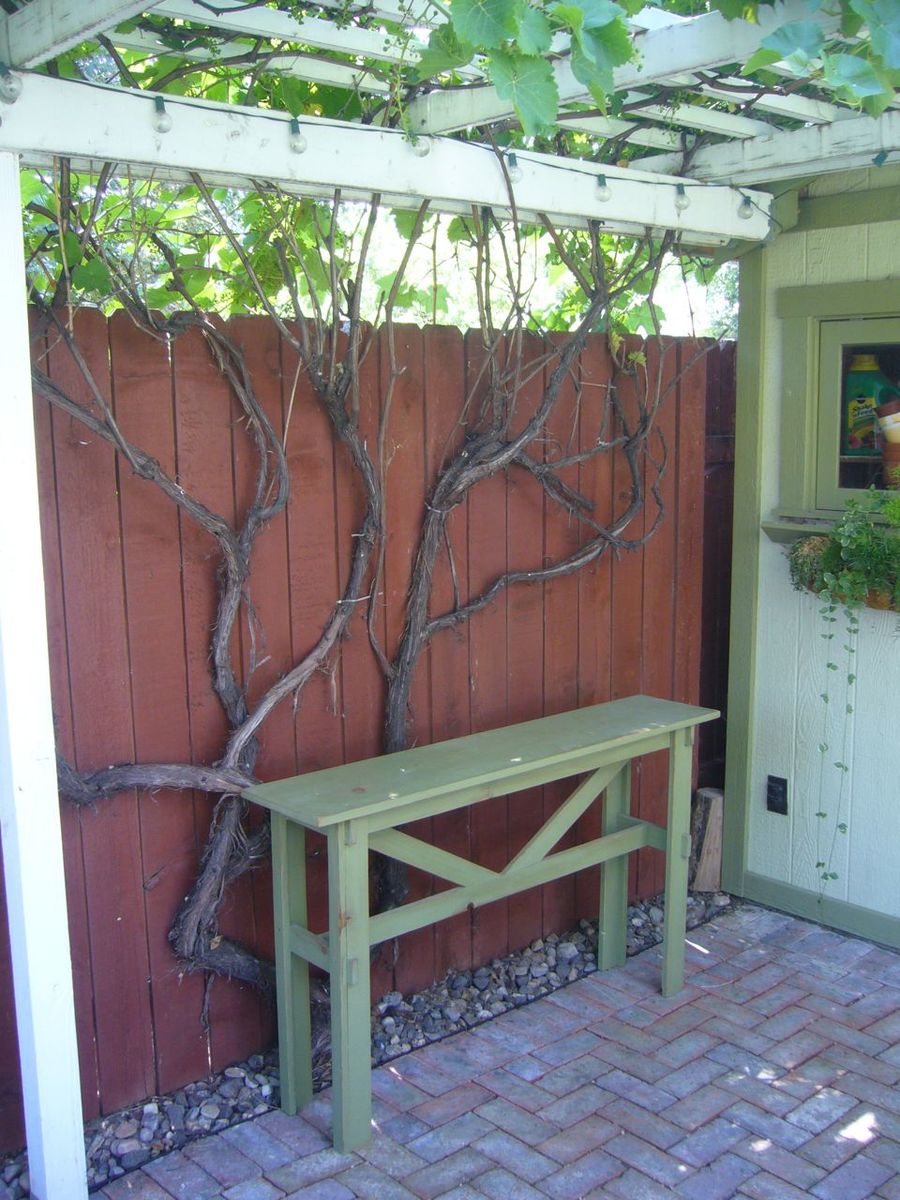
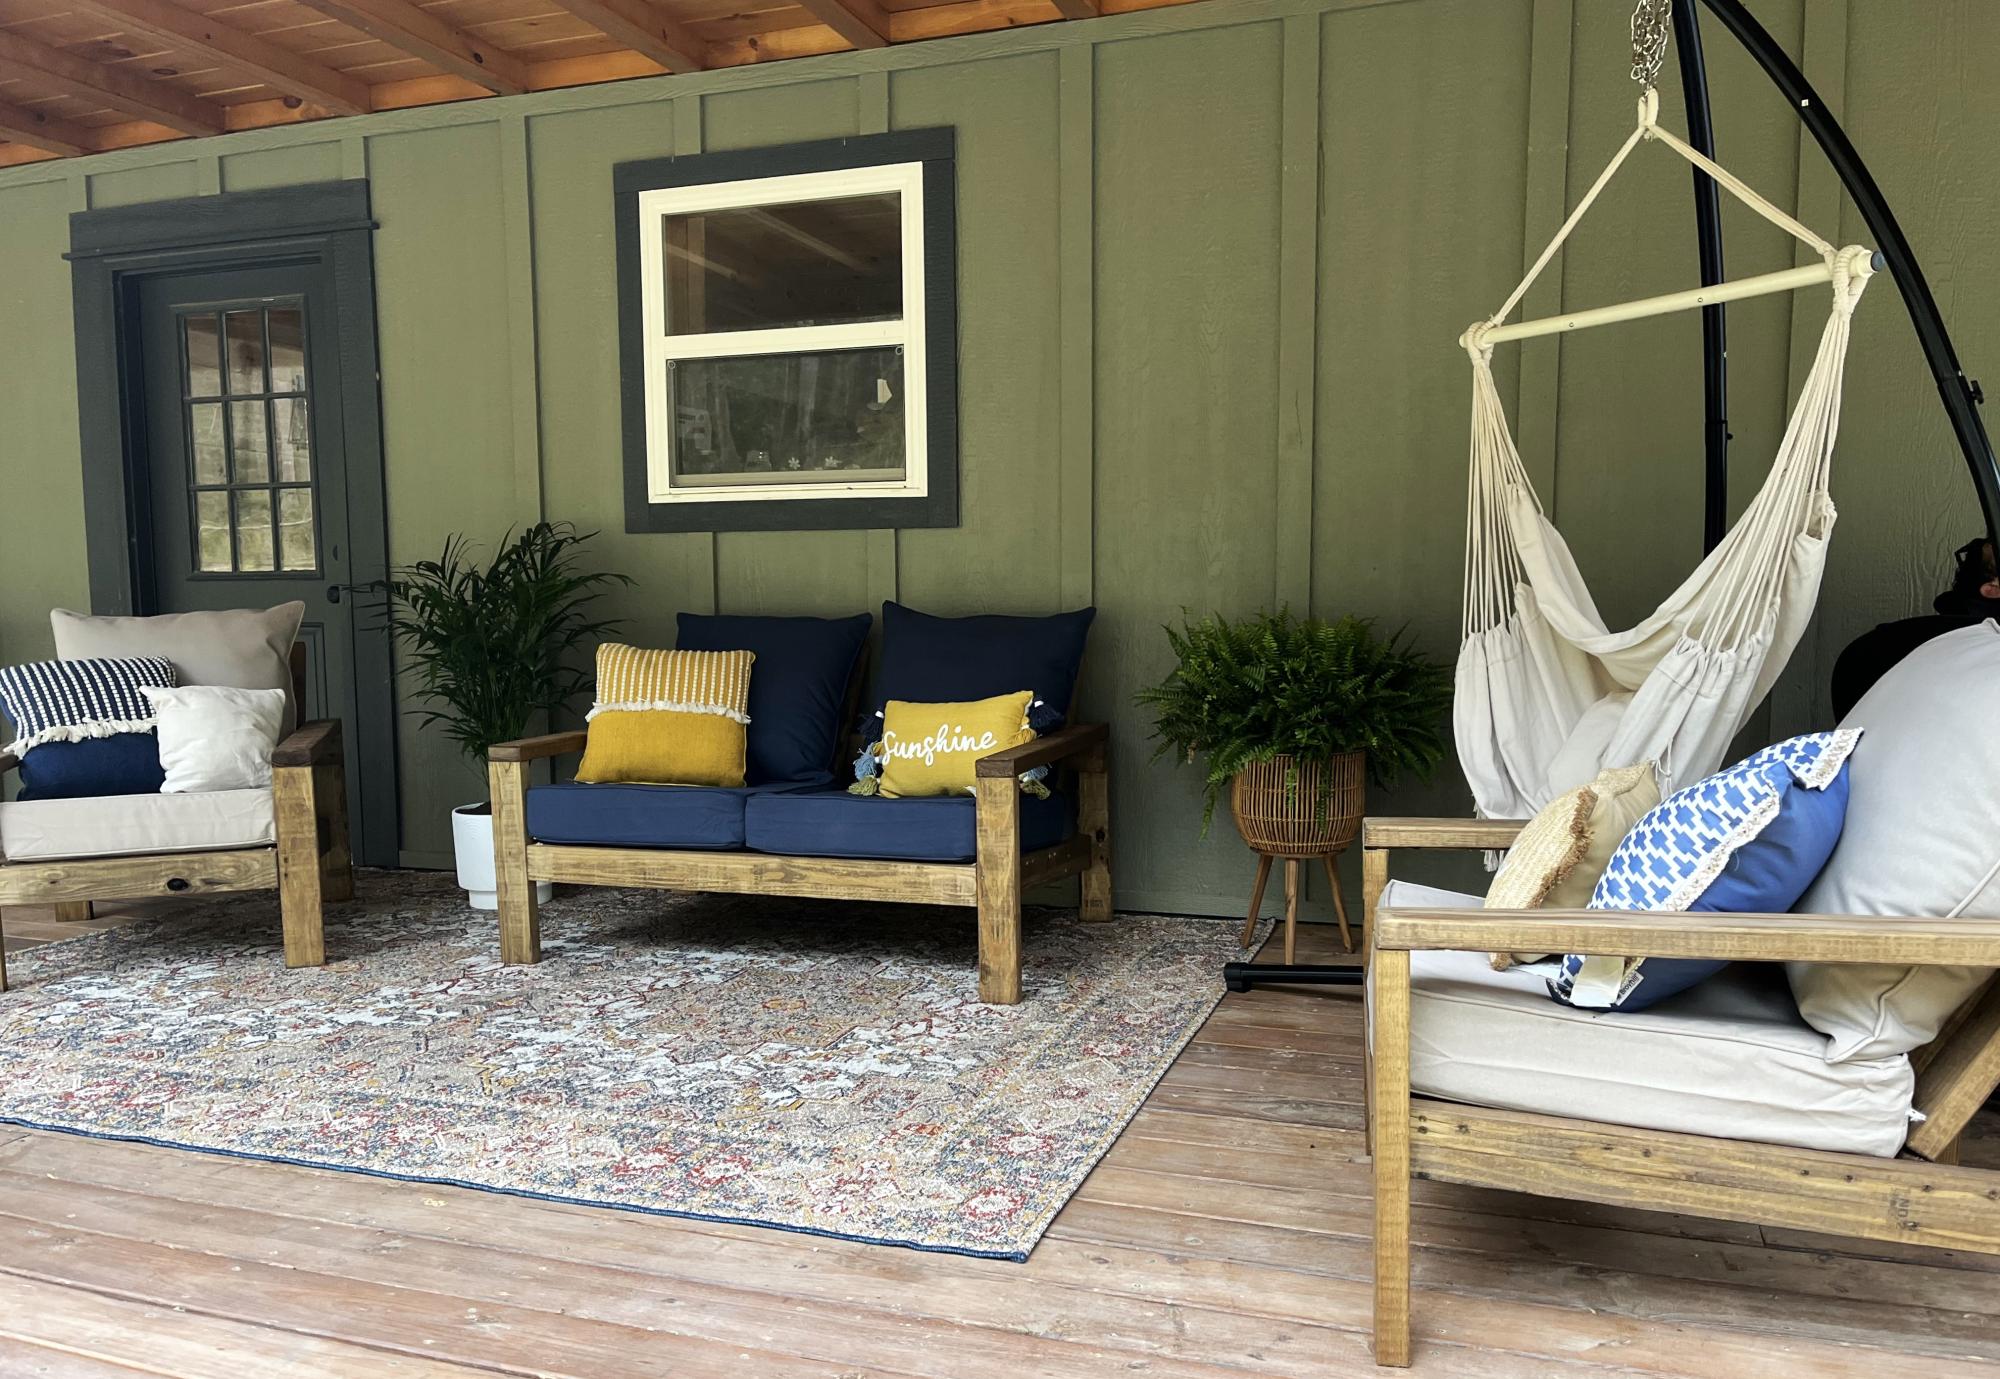
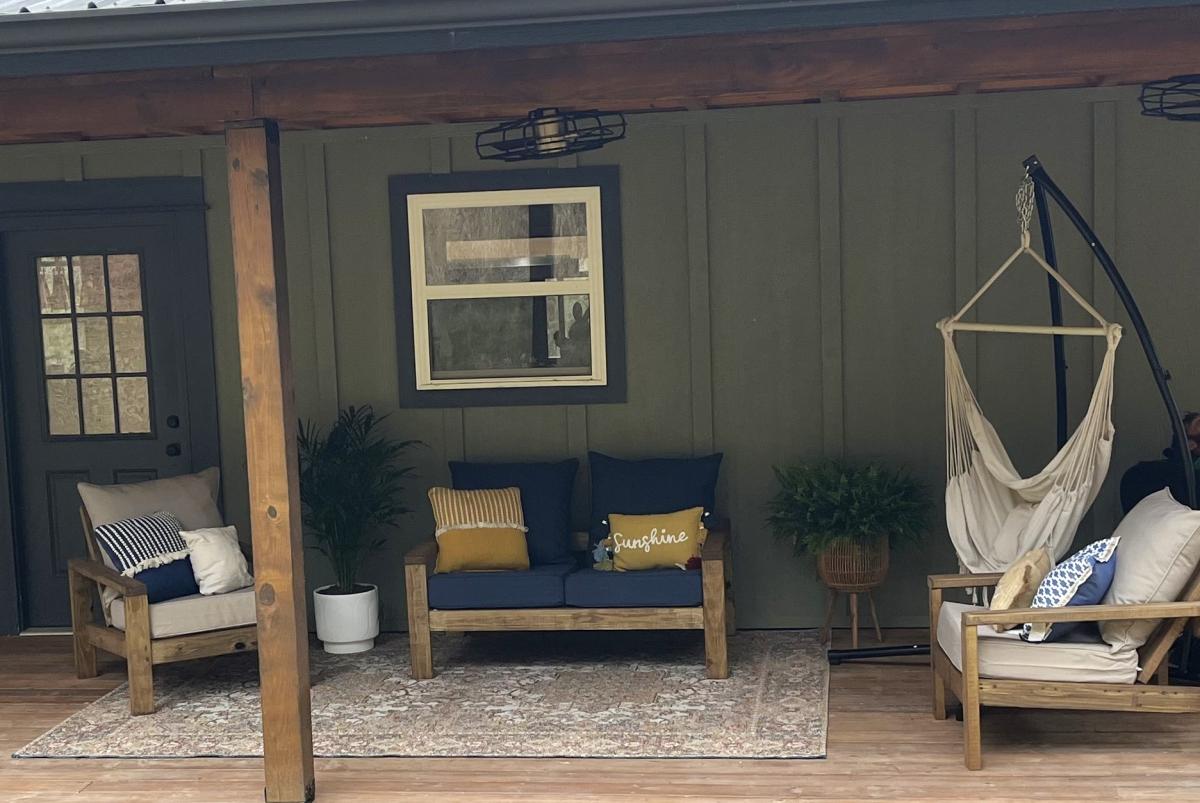
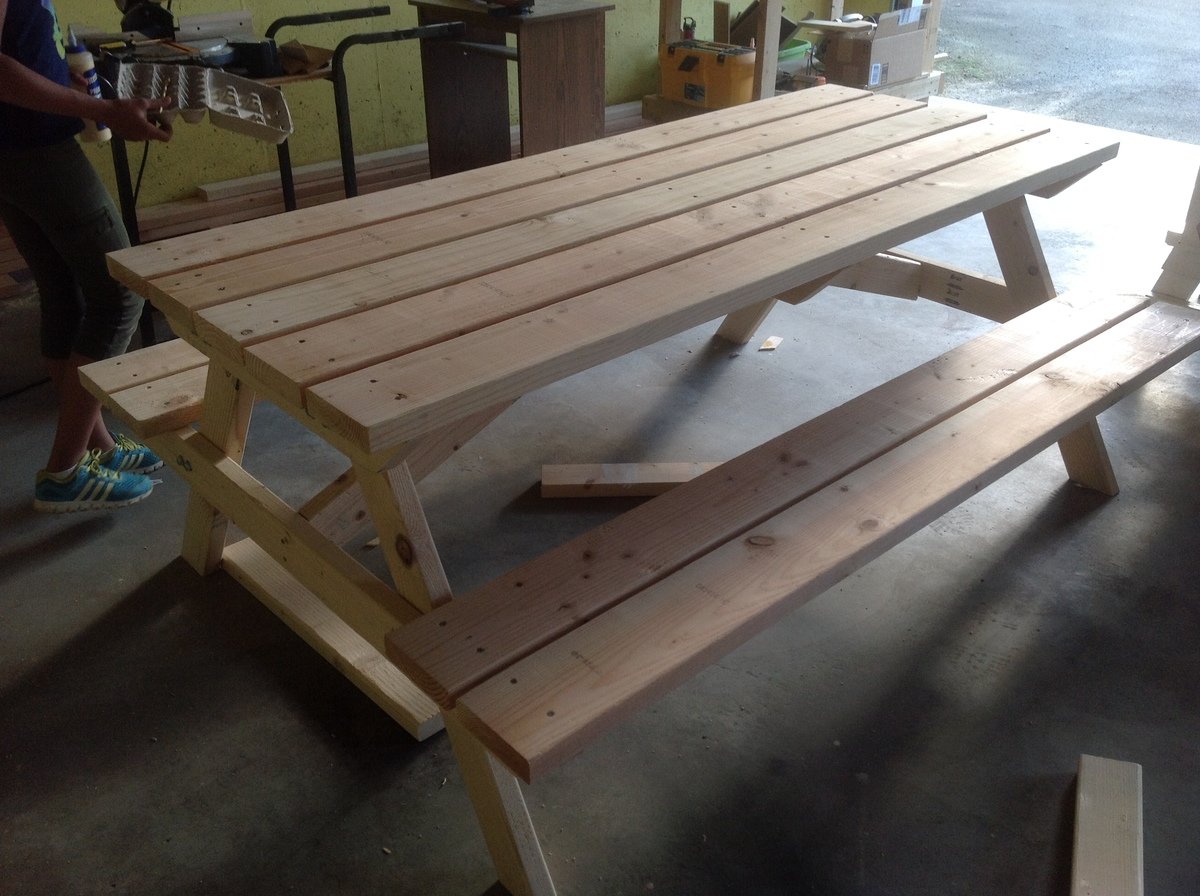
Problem: I want a serving table. I love the Rustic X Bench. Solution: Longer legs! This was made from the Rustic X Bench plans. We built two. And they serve us well. We love them. They are small enough to move around and use for all kinds of purposes from serving outdoor meals to holding the screw gun while I clamp the next ana-white inspired project (it was my tool holder/work bench when I built our chicken coop). Easy project made super cheap that works perfect for every outdoor serving table need.

Estimated Cost
$75 for two
Estimated Time Investment
Afternoon Project (3-6 Hours)
Finish Used
Dark Moss Green paint, distressed with a red mahogany stain rub.
Recommended Skill Level
Beginner

Comments

A Pair of Twin Headboards

Submitted by ChrisHobbs on Mon, 09/05/2011 - 12:00

I built two of these headboards over Labor Day weekend for my girls.

Estimated Cost
$100 for 2 Headboards
Estimated Time Investment
Afternoon Project (3-6 Hours)
Finish Used
One coat of semi-gloss white paint. Was going to put a second coat on, but wife loked seeing the wood peeking through, so we left it with only one coat.
Recommended Skill Level
Beginner

Comments

denny Shortt (not verified)

Mon, 11/26/2012 - 21:46

Your mattress look a little low be careful that your girls do not get their heads stuck between the top of mattress and bottom of headboard

Farmhouse Queen Bed

Submitted by Amanda G on Fri, 10/18/2013 - 19:56

First building project ever! I wanted a new bed for our new mattress and got inspired when I came across this website. A compound mitre saw, orbital sander, nailer, and many more tools later, I am building furniture whenever I get a chance!

Modified the way I attached the frame to the head board and foot board a bit. I used joist hangers on the footboard, which the frame slid into perfectly, and secured it with a couple screws on each side. I attached the headboard with 2 large carriage bolts on each side through the posts and frame.

Overall, I loved the way it turned out. On to the next project!

Built from Plan(s)
Estimated Cost
$200
Estimated Time Investment
Weekend Project (10-20 Hours)
Finish Used
Distressed white. I used a shade of white paint, sanded the edges and corners (mostly with an orbital sander) and used a stain pen (in Provincial shade) on the sanded spots. Sanded the entire project by hand using 220 grit sponge and finished with 3-4 coats of Minwax Polycrylic
Recommended Skill Level
Beginner

Comments

In reply to by Ana White

Amanda G

Wed, 10/23/2013 - 19:38

Your website really guided me through everything, from buying the wood to the finish. I credit you and tell people to visit this website whenever anyone asks me about my projects :)

Hidden Puzzle Table

Submitted by Anonymous (not verified) on Fri, 03/10/2023 - 12:02

I wanted a table that would protect my puzzles from puzzle piece eating dogs, so I used this Ana White desk plan and built a frame on top to hold the cover panels. The drawer is perfect for holding puzzle pieces during a build.

Comments

Upholstered Coffee Table/Ottoman

Submitted by Anonymous (not verified) on Wed, 01/27/2016 - 10:15

I built the plans exactly as given (minus the top of course) but in hindsight I would have reduced the height by three inches to accommodate for the three inch height of the upholstery foam. I am still very happy with it!

Built from Plan(s)
Estimated Cost
$100 approx.
Finish Used
For the base, I painted them with Rustoleum's Hammered in copper. (The quart, NOT the spray paint) I did two coats. When applying, go quickly and don't over brush the paint. I did spray on a light clear matte finish to tone down the shiny finish of the paint.
Recommended Skill Level
Beginner

Comments

Levi's play kitchen

Submitted by Ash Matson on Thu, 12/26/2019 - 11:17

We modified the plans a little we made the 2 pieces together instead of separate. We used a 2” hole saw to cut out the oven knobs, then drilled holes a tad bigger than the screw so they would still turn once attached. We also made the back splash taller to accommodate our faucet that had to attach on the back splash instead of the counter top. We used all pocket holes to attach everything it makes it look so much nicer but doesn’t need to be done that way. We bought vinyl circles for the burners on the stove. A dog bowl for the sink and a laundry room faucet for the faucet.

Links to products we used

Faucet - https://www.amazon.com/gp/product/B01KRCTHEA/ref=ppx_yo_dt_b_asin_title_o07_s00?ie=UTF8&psc=1

Oven hinges - https://www.amazon.com/gp/product/B004K7V8UU/ref=ppx_yo_dt_b_asin_title_o08_s00?ie=UTF8&psc=1

6 – 4 inch circles matte black Stove vinyl - https://www.etsy.com/listing/713062039/circle-circles-pack-set-vinyl-decal-car?ref=yr_purchases

Sink 56oz dog food bowl - https://www.amazon.com/gp/product/B00H6OXRN0/ref=ppx_yo_dt_b_asin_title_o01_s00?ie=UTF8&psc=1

Oven handle - https://www.lowes.com/pd/Sumner-Street-Home-Hardware-Vail-10-in-Center-to-Center-Matte-Black-Pull/1001368422

Estimated Cost
100.00
Estimated Time Investment
Weekend Project (10-20 Hours)
Recommended Skill Level
Beginner

Comments

Ultimate Workshop Workbench

Submitted by Anonymous (not verified) on Mon, 09/18/2023 - 15:38

My garage needed an overhaul and I wanted to start a hobby in woodworking.
I found my way to Ana's website and found some of the best ideas and decided to try my attempt at building the Ultimate Roll Away Workbench with Miter Saw Stand.
This helped inspire me to augment my garage and build that workbench and new french cleat wall.

Thank you Ana for having such an awesome website and offering up ideas for free!!

Comments

Potting bench -> coffee bqr

Submitted by Anonymous (not verified) on Mon, 04/27/2020 - 20:34

My husband and I decided to turn this potting bench into an indoor coffee bar. Great project for first timers, like myself. 😊

Built from Plan(s)
Estimated Time Investment
Weekend Project (10-20 Hours)
Recommended Skill Level
Beginner

Garden Boxes

Submitted by brittanyeg on Tue, 04/08/2014 - 14:00

Made 4 of these garden boxes for the side of the house. I love how they turned out and it was easy to change the size of boxes just by changing the side lengths. I love the trim on the top. It makes them look so much more finished. Can't wait to fill them.

Estimated Time Investment
Day Project (6-9 Hours)
Finish Used
I didn't bother with the wood glue step but am sure they'll be fine. Also I couldn't find any 1" screws. But the 1.75" screws worked fine.
Recommended Skill Level
Beginner
Seasonal And Holiday

Farm house queen/ crate storage

Submitted by Mathcky on Mon, 04/21/2014 - 10:50

Started with the farm house queen bed and changed the plans. I made the head/footboards 3 inches taller and took the panelling on the footboard all the way to the floor. I made storage underneath the bed and night stands. I'm using old apple crates for the storage. I made the night stands with the crate in it too to match the bed. I used a single piece of 18x18 ceramic tile for the top of the nightstand. The set is stained Minwax classic grey. I used a mixture of wood. Oak and pine, surprisingly it stained good and matched up. The crates aren't in the pictures yet. We have an older house with small rooms so the storage is perfect. The grey finish looks good for the old wood look with newer wood used

Estimated Cost
$100.00
Estimated Time Investment
Weekend Project (10-20 Hours)
Finish Used
Minwax classic grey
Some pieces were stained more then once to get an even,matching color
Recommended Skill Level
Intermediate

DIY storage shed with mower ramp and steps

Submitted by lookitsash on Thu, 07/28/2016 - 15:29

I used ideas on your site for inspiration for my current back yard shed.  I did a lot of research before choosing one.  If you've never built a shed before from scratch, it can be a little daunting, especially if its a larger shed.  I also documented my whole process from the laying the foundation to putting the last nail on the shingles.  Here's the link for you to my blog post:

http://www.justmeasuringup.com/blog/the-shed-project-phase-1

It was a lot of fun for me, and a huge wow factor to impress my friends ;)  I store everything in there from my riding mower to all my patio furniture in the wintertime.  It's such a useful thing to have.

I spent around $1500 and it took about 2 months to complete (working on it while having a full time job - otherwise would have finished a lot faster)

Estimated Cost
$1500
Estimated Time Investment
Week Long Project (20 Hours or More)
Finish Used
Used T-11 siding with several coats of exterior primer and paint
Recommended Skill Level
Intermediate

Comments

lookitsash

Sun, 07/31/2016 - 17:44

Thanks!   I looked at a bunch of different door trims online and found this pattern that I liked.  The mitre saw made quick work out of it, and it only took about 10 minutes to cut and install.

DIY Outdoor Wood Furniture

Submitted by Anonymous (not verified) on Thu, 03/21/2024 - 07:36

My daughter wanted patio furniture but did not want to spend a ton of money. The total project cost around $400. We used treated 2x4’s for the frame. We found $45 cushion sets, the rug and accessory pillows at Big Lots. I love we used different colors for the chair s and love seat.

Jennifer Poarch

Seasonal And Holiday

Ryobi Nation workshop and shelves

Submitted by Anonymous (not verified) on Tue, 06/30/2020 - 15:48

I bought a whole workshop full of Ryobi tools second hand from my brother over a year ago. I started researching workshop plans and came across Anna White’s Ryobi Nation Dream Workshop. I downloaded the plans and spent about 2-3 months working on it in my spare time. I made a lot of mistakes along the way but I’m pretty happy with it overall!

Estimated Time Investment
Weekend Project (10-20 Hours)
Finish Used
None
Recommended Skill Level
Intermediate

Comments

rcjones4

Fri, 08/11/2023 - 11:50

Do you still have these plans for the project? can't seem to find them anymore

Outdoor Wooden Cooler

An Outdoor Wooden Cooler is the perfect way to accent any deck, patio, or garage. Can be made from Cedar, Pressure Treated, Cyprus, etc. Sizes can vary from small 28 qt coolers to Large 120 qt coolers capable of holding hundreds of drinks. These coolers can be themed for your favorite sports team, favorite hobby, or anything of your choice. Engraving or wood burning is available.

Built from Plan(s)
Estimated Time Investment
Weekend Project (10-20 Hours)
Finish Used
Stain, painted, distressed, etc.
Recommended Skill Level
Intermediate

Comments

sgilly

Fri, 08/31/2012 - 09:52

Well, actually, two. My beer loving son-in-laws would love this, and Christmas is coming! Do you happen to have any "step-by-step" directions you'd be willing to share? I can figure out the dimensions but it would be really helpful to read - or see - the components and how you put it all together.
Thanks for sharing!

Adam_Scheetz

Fri, 09/28/2012 - 11:41

I had to make a new page because of some password issues. Thanks for comments. I have no plans yet, I've built so many it's sort of muscle memory now. Shoot me an email at [email protected] and perhaps I can help.

And no, the lid style I like is nothing more than some tongue~n~groove boards cut to length, attached with pocket holes and nailed to the lid frame. Tongue~N~groove is optional of course, you could just use regular boards.

sgilly

Fri, 09/28/2012 - 11:58

I really appreciate your response. And, I did indeed send you an email!
I have a bunch of cedar milled and planed by one of my son-in-laws. He'll be thrilled to see that I've made something he can use for his favorite beverage!

Picnic Table

Submitted by asaldanha on Fri, 06/27/2014 - 07:20

Wanted to kick start my summer projects with something that would not take too long. So I built this picnic bench for a friend over the last weekend. Thank you Ana for the plans.

Estimated Cost
$150
Estimated Time Investment
Day Project (6-9 Hours)
Finish Used
Benjamin Moore Red Barn Stain
Recommended Skill Level
Starter Project

Comments

gkatie26

Sun, 03/01/2015 - 12:16

I was just wondering if these are 5ft boards from the plan or if you used longer boards? If so what length did you use? Love the way this one looks! :)