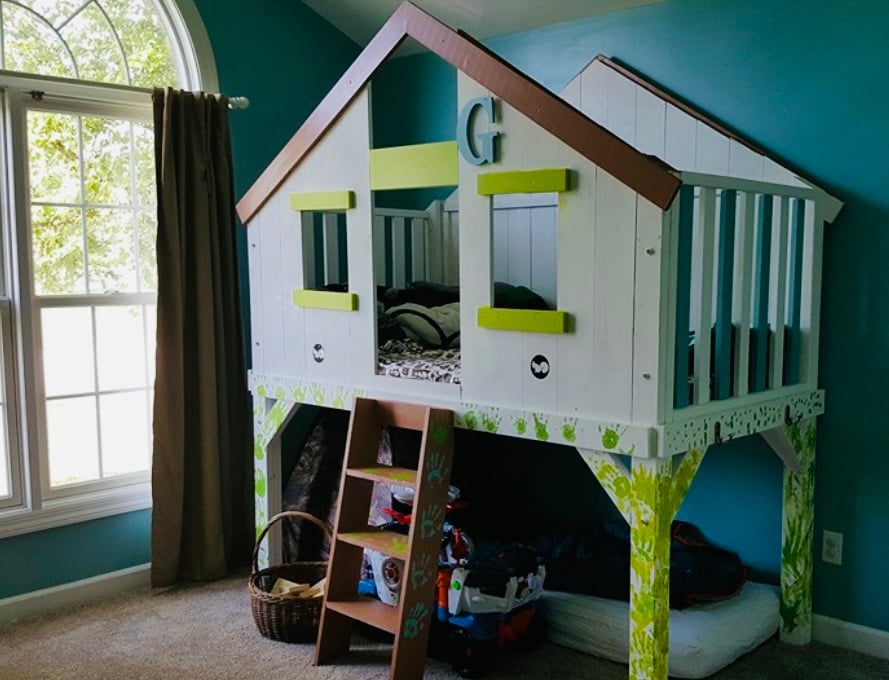
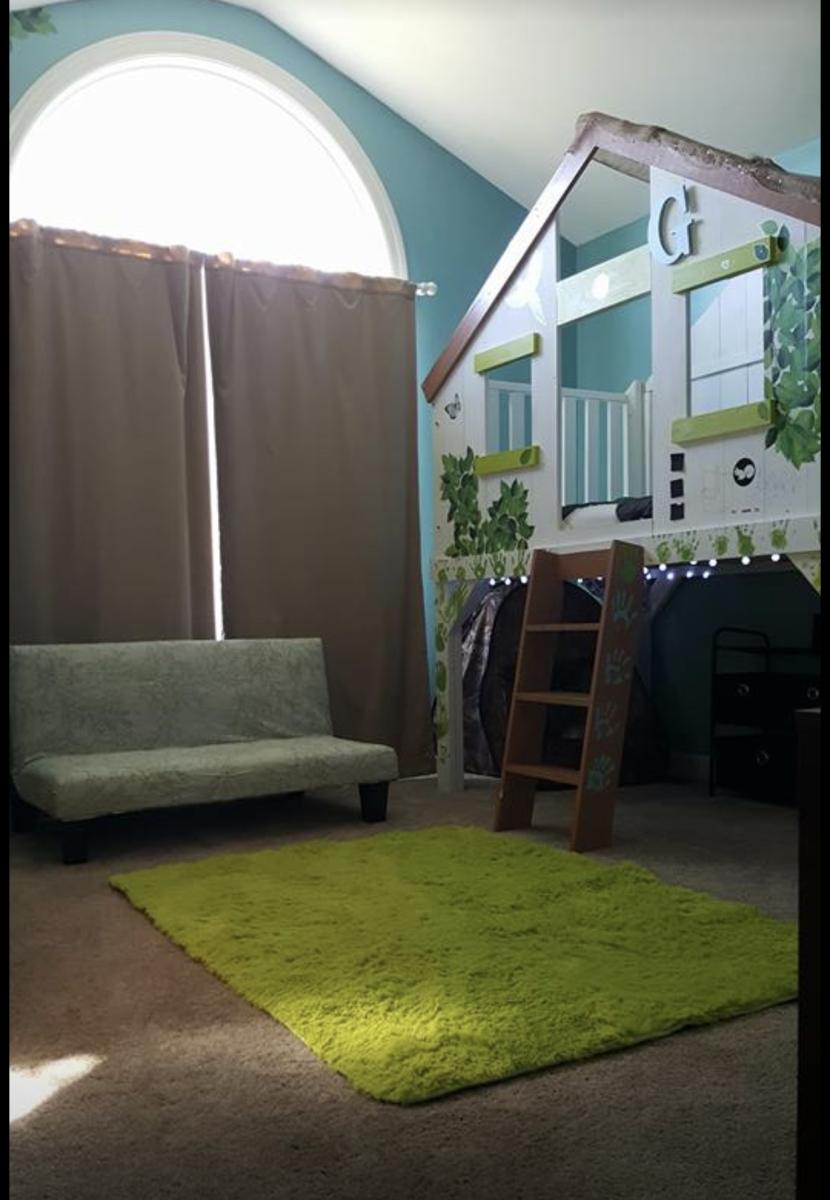
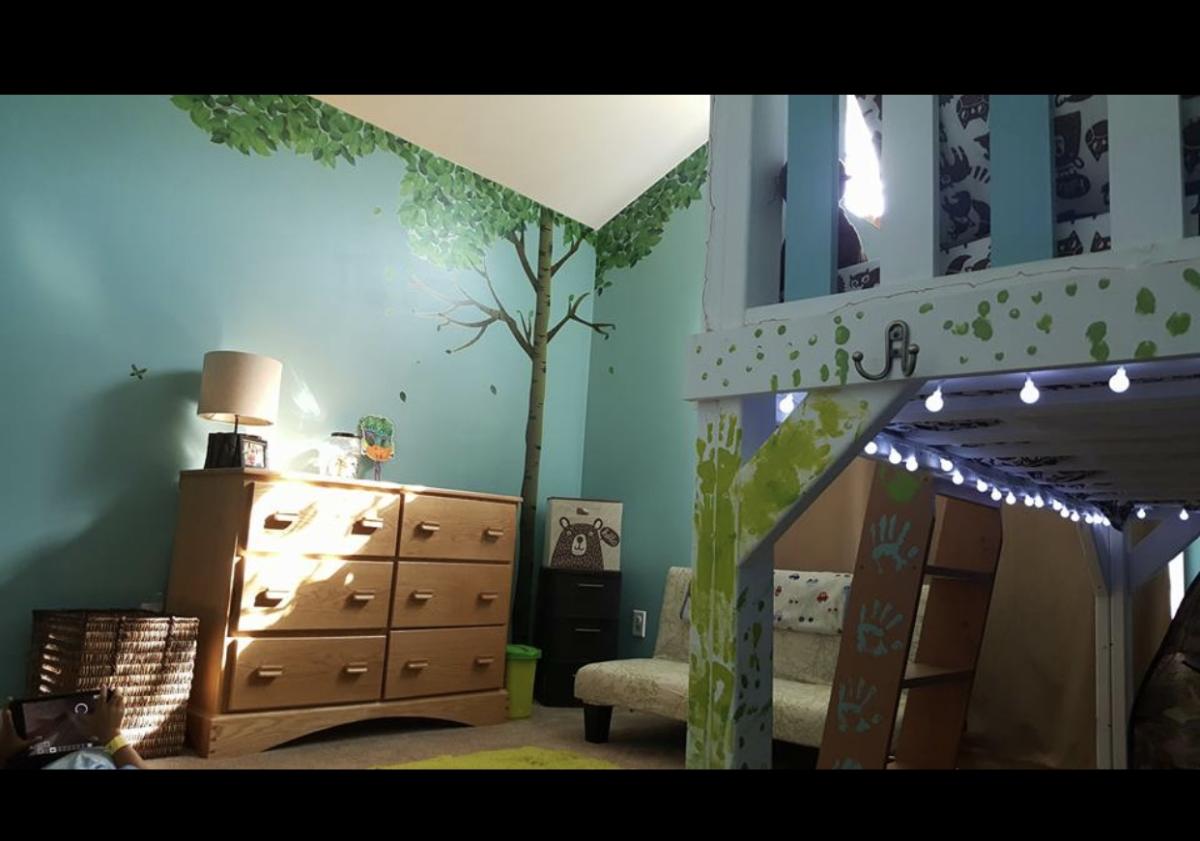
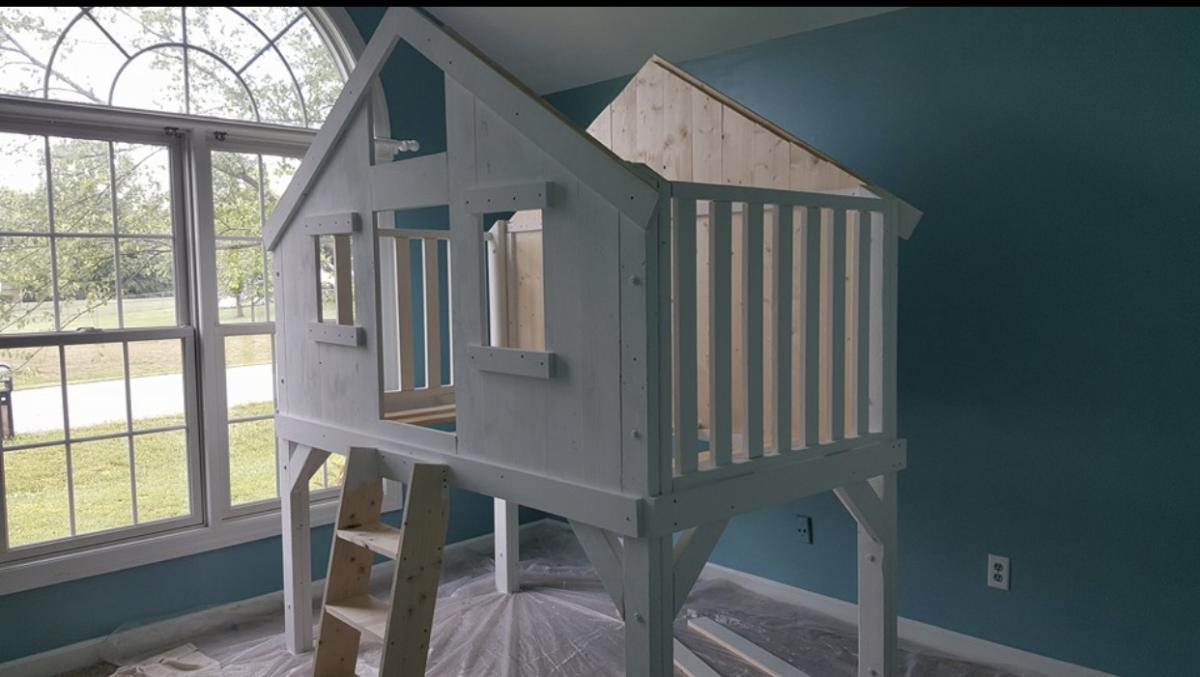
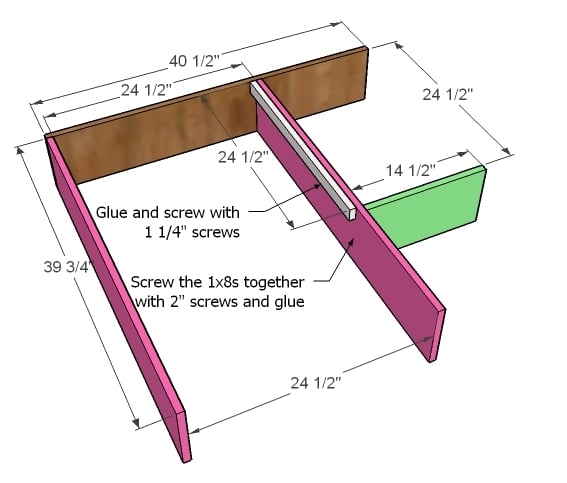
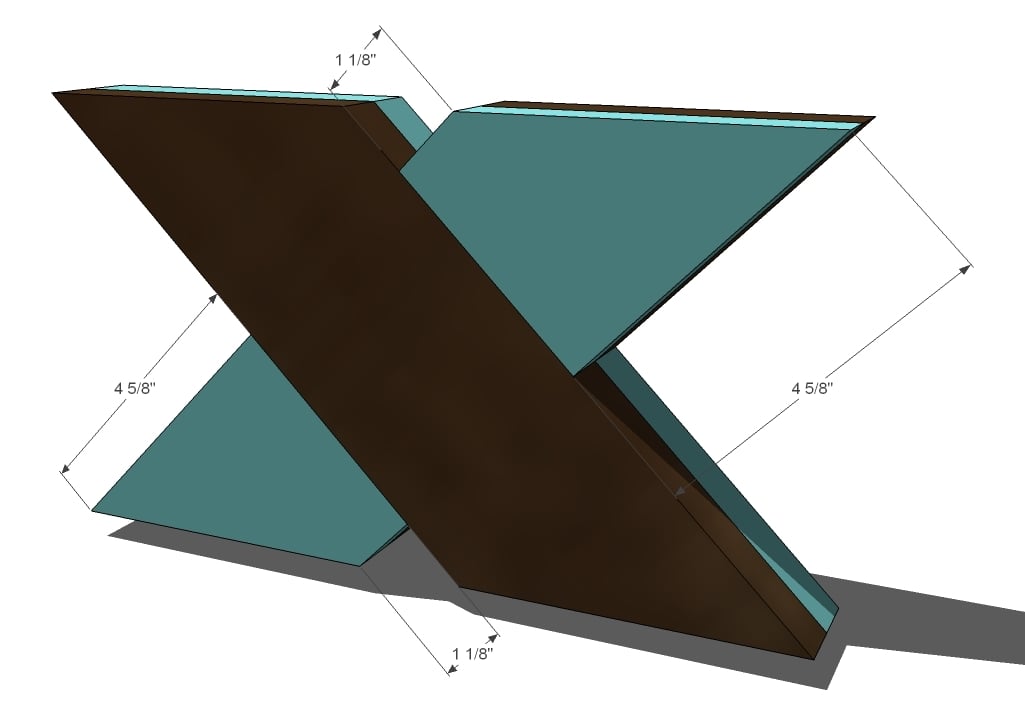
Floating Bunk Bed
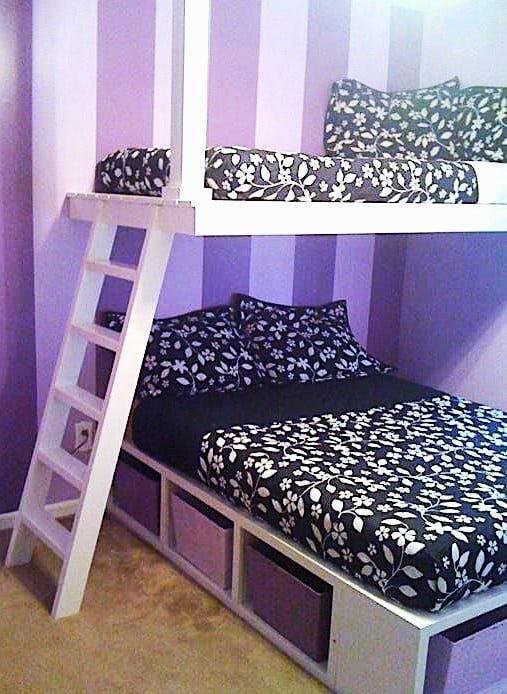
So...we are 6 people in a 3 bedroom house. We needed more room! Thanks for the inspiration Ana. I think these beds turned out GREAT. And the girls love them!!!
Built from Plan(s)
So...we are 6 people in a 3 bedroom house. We needed more room! Thanks for the inspiration Ana. I think these beds turned out GREAT. And the girls love them!!!
I made these for my two nieces and soon to be born daughter for Xmas. I used 1" hobby foam for the mattress.

Mon, 12/19/2011 - 14:52
Love the beds and the bedding is super cute! I bet your nieces will love their Christmas present!

Mon, 12/19/2011 - 16:54
Thanks, I hope so too!! Maybe next year I'll make your bunk beds for them!!
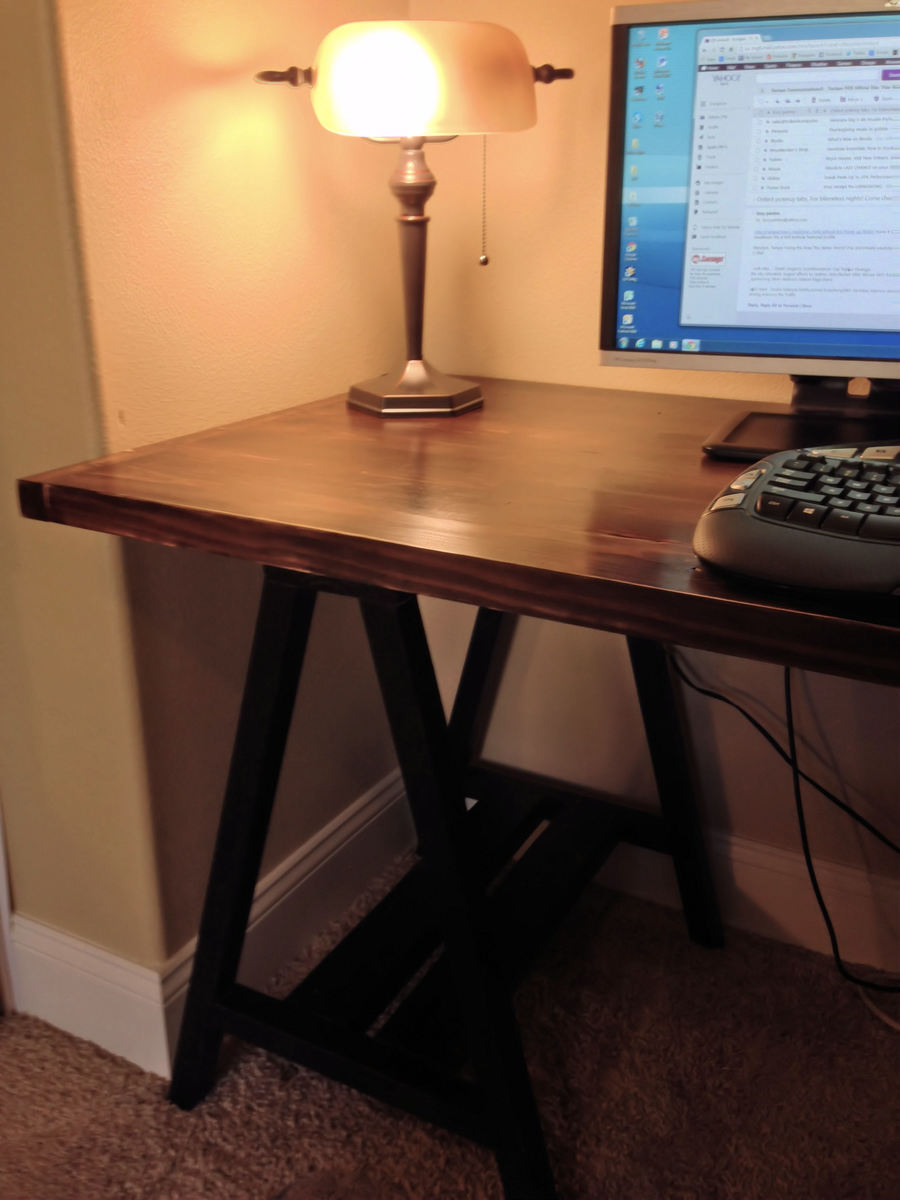
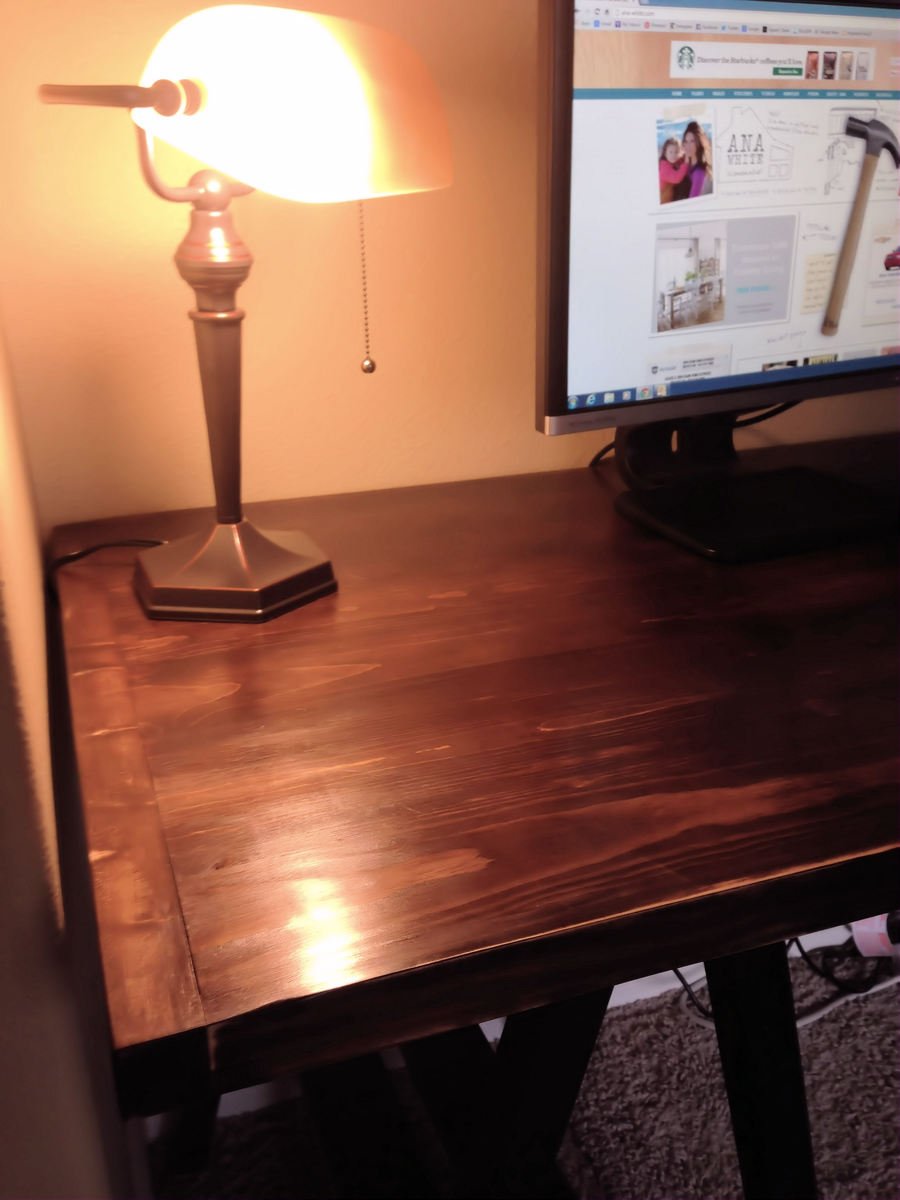
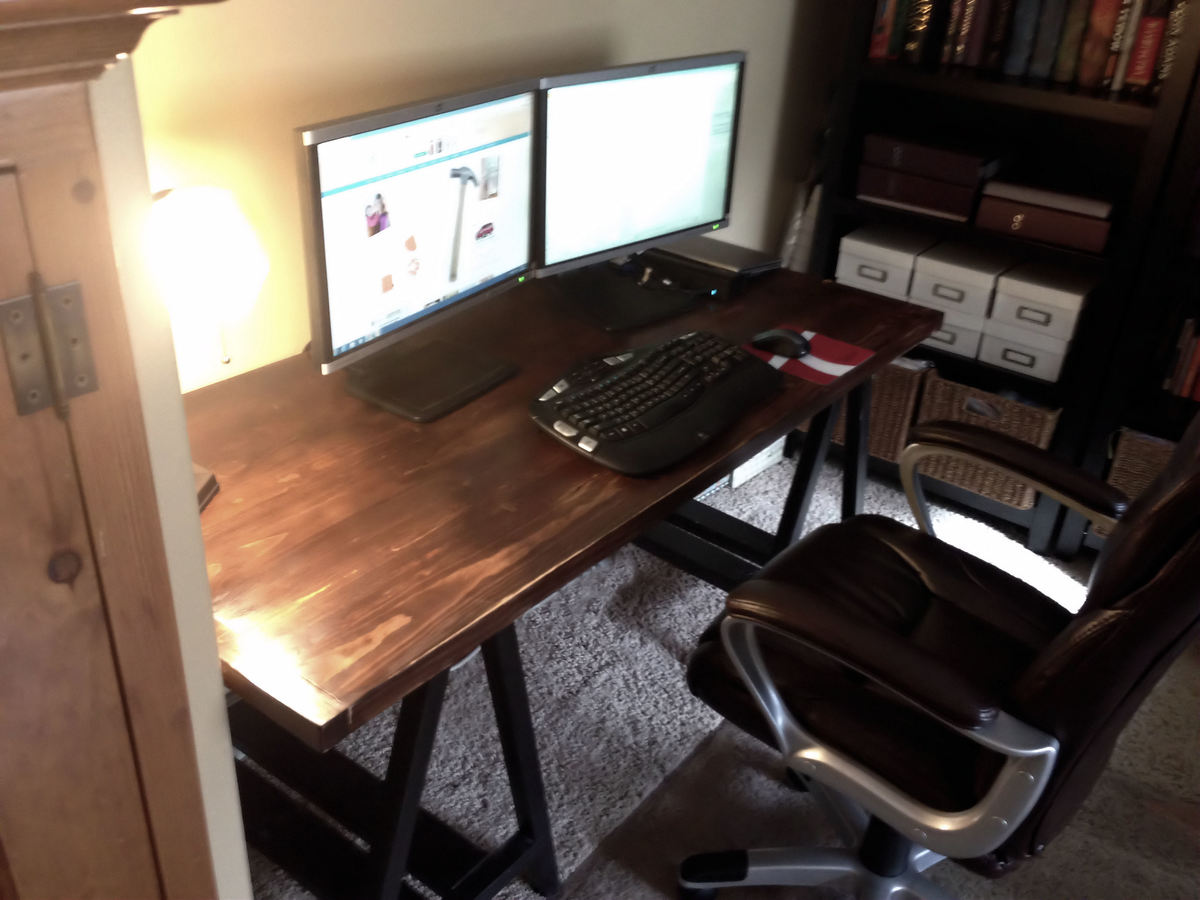
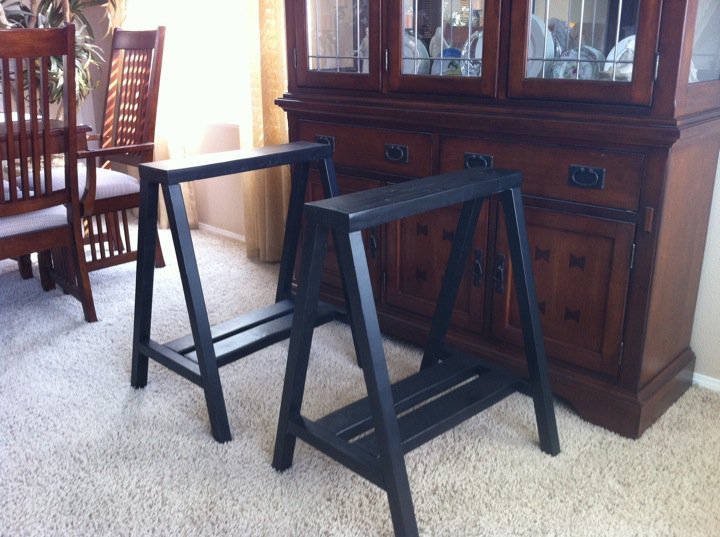
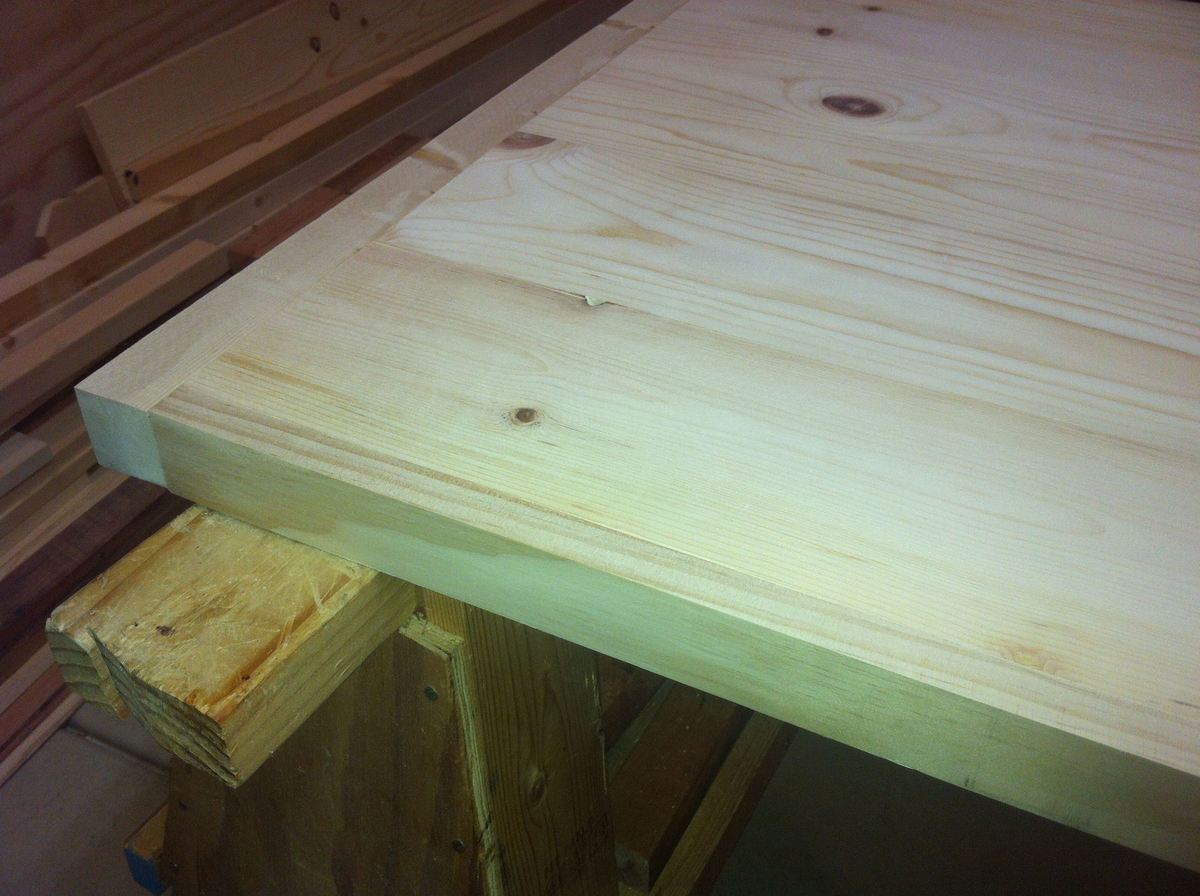
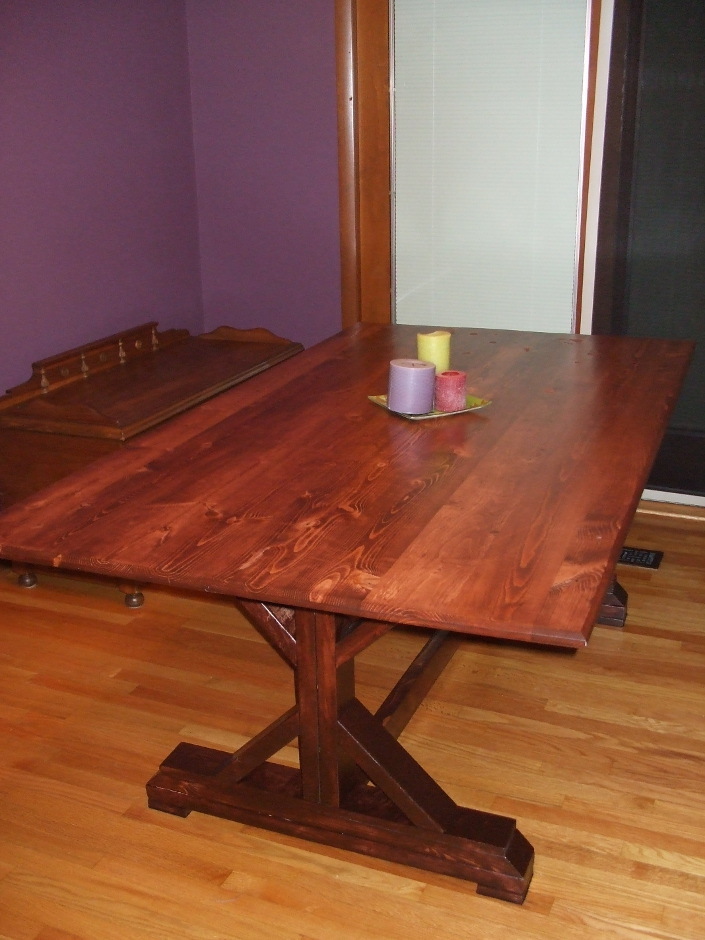
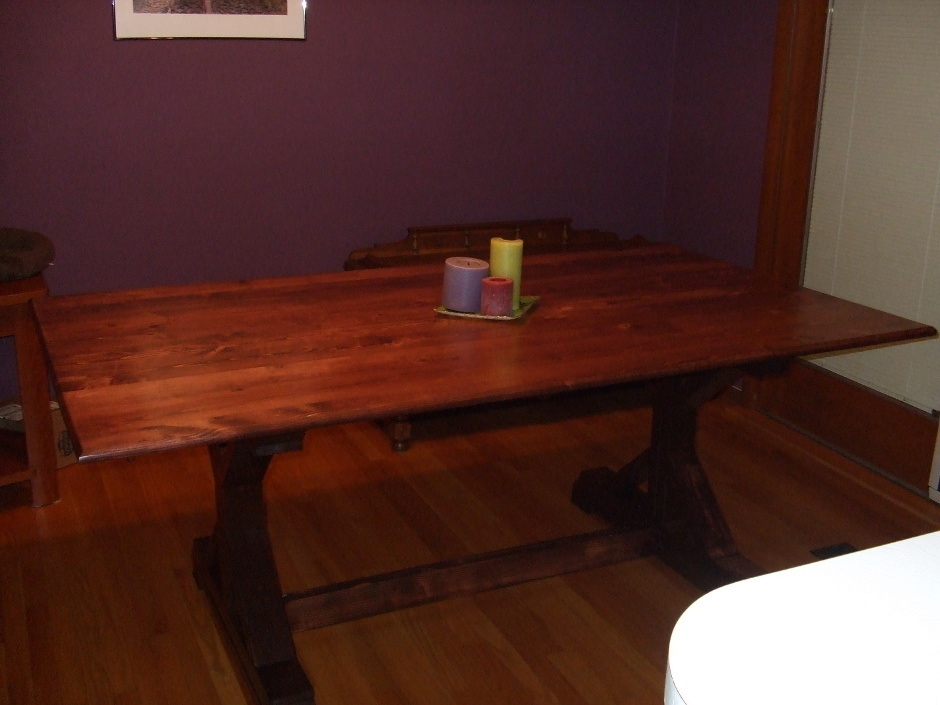
I used Ana's sawhorse plans and painted the sawhorses black. I made up a plan for the desk top inspired by some of the farmhouse table plans. The top looks very thick and chunky, but is mostly made from cheap 1x6 boards put together with glue and pocket holes. The ends of the top are made from 2x2 boards attached with pocket holes. The sides are from 1x2 boards - all attached with glue and pocket holes.
For the finish I used a water based stain from General Finishes - Black Cherry. I started with one coat of poly-acrylic and did not like the look. I sanded it back and bit (distressing the edges a bit) and put on two coats of wax.
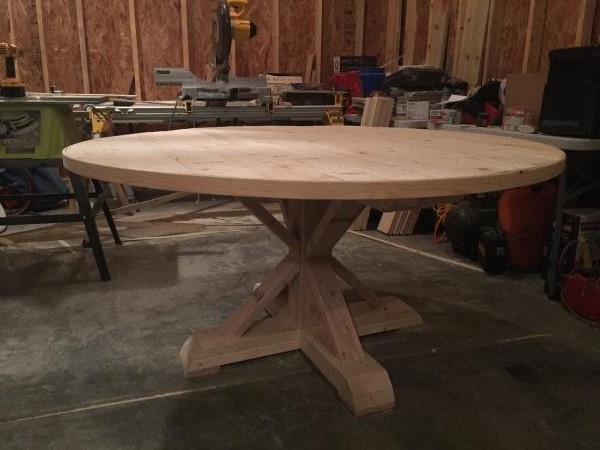
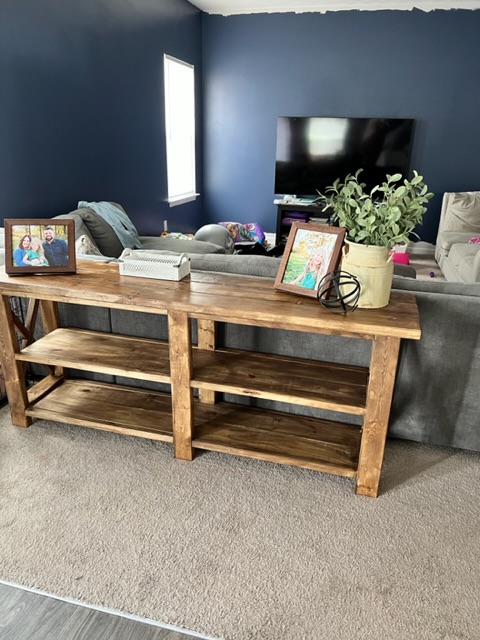
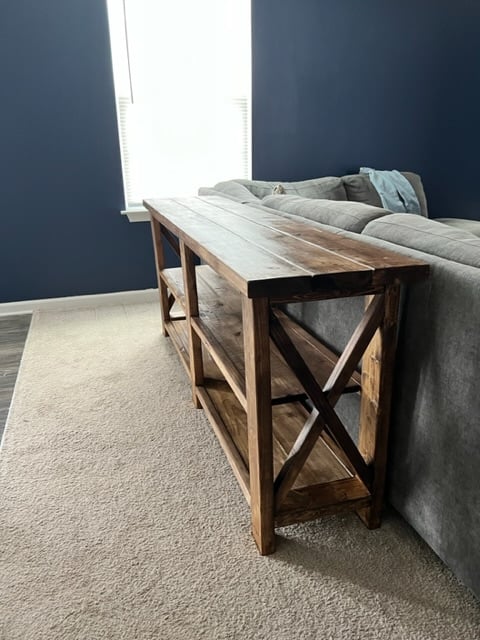
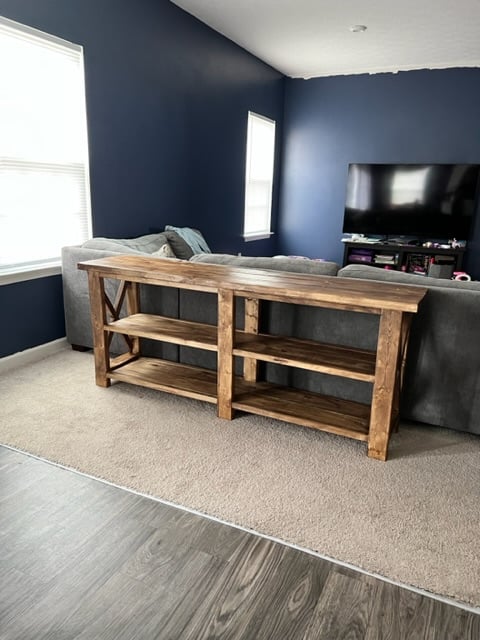
Made a round top 61" from 2x6 ripped to 5" wide so I deviated slightly for a wider bottom (42") and top (58") base. Used the cross pattern instead of the decorative supports. Thanks for the inspiration!
looking to whitewash whole thing or gray stain bottom and dark stained top.
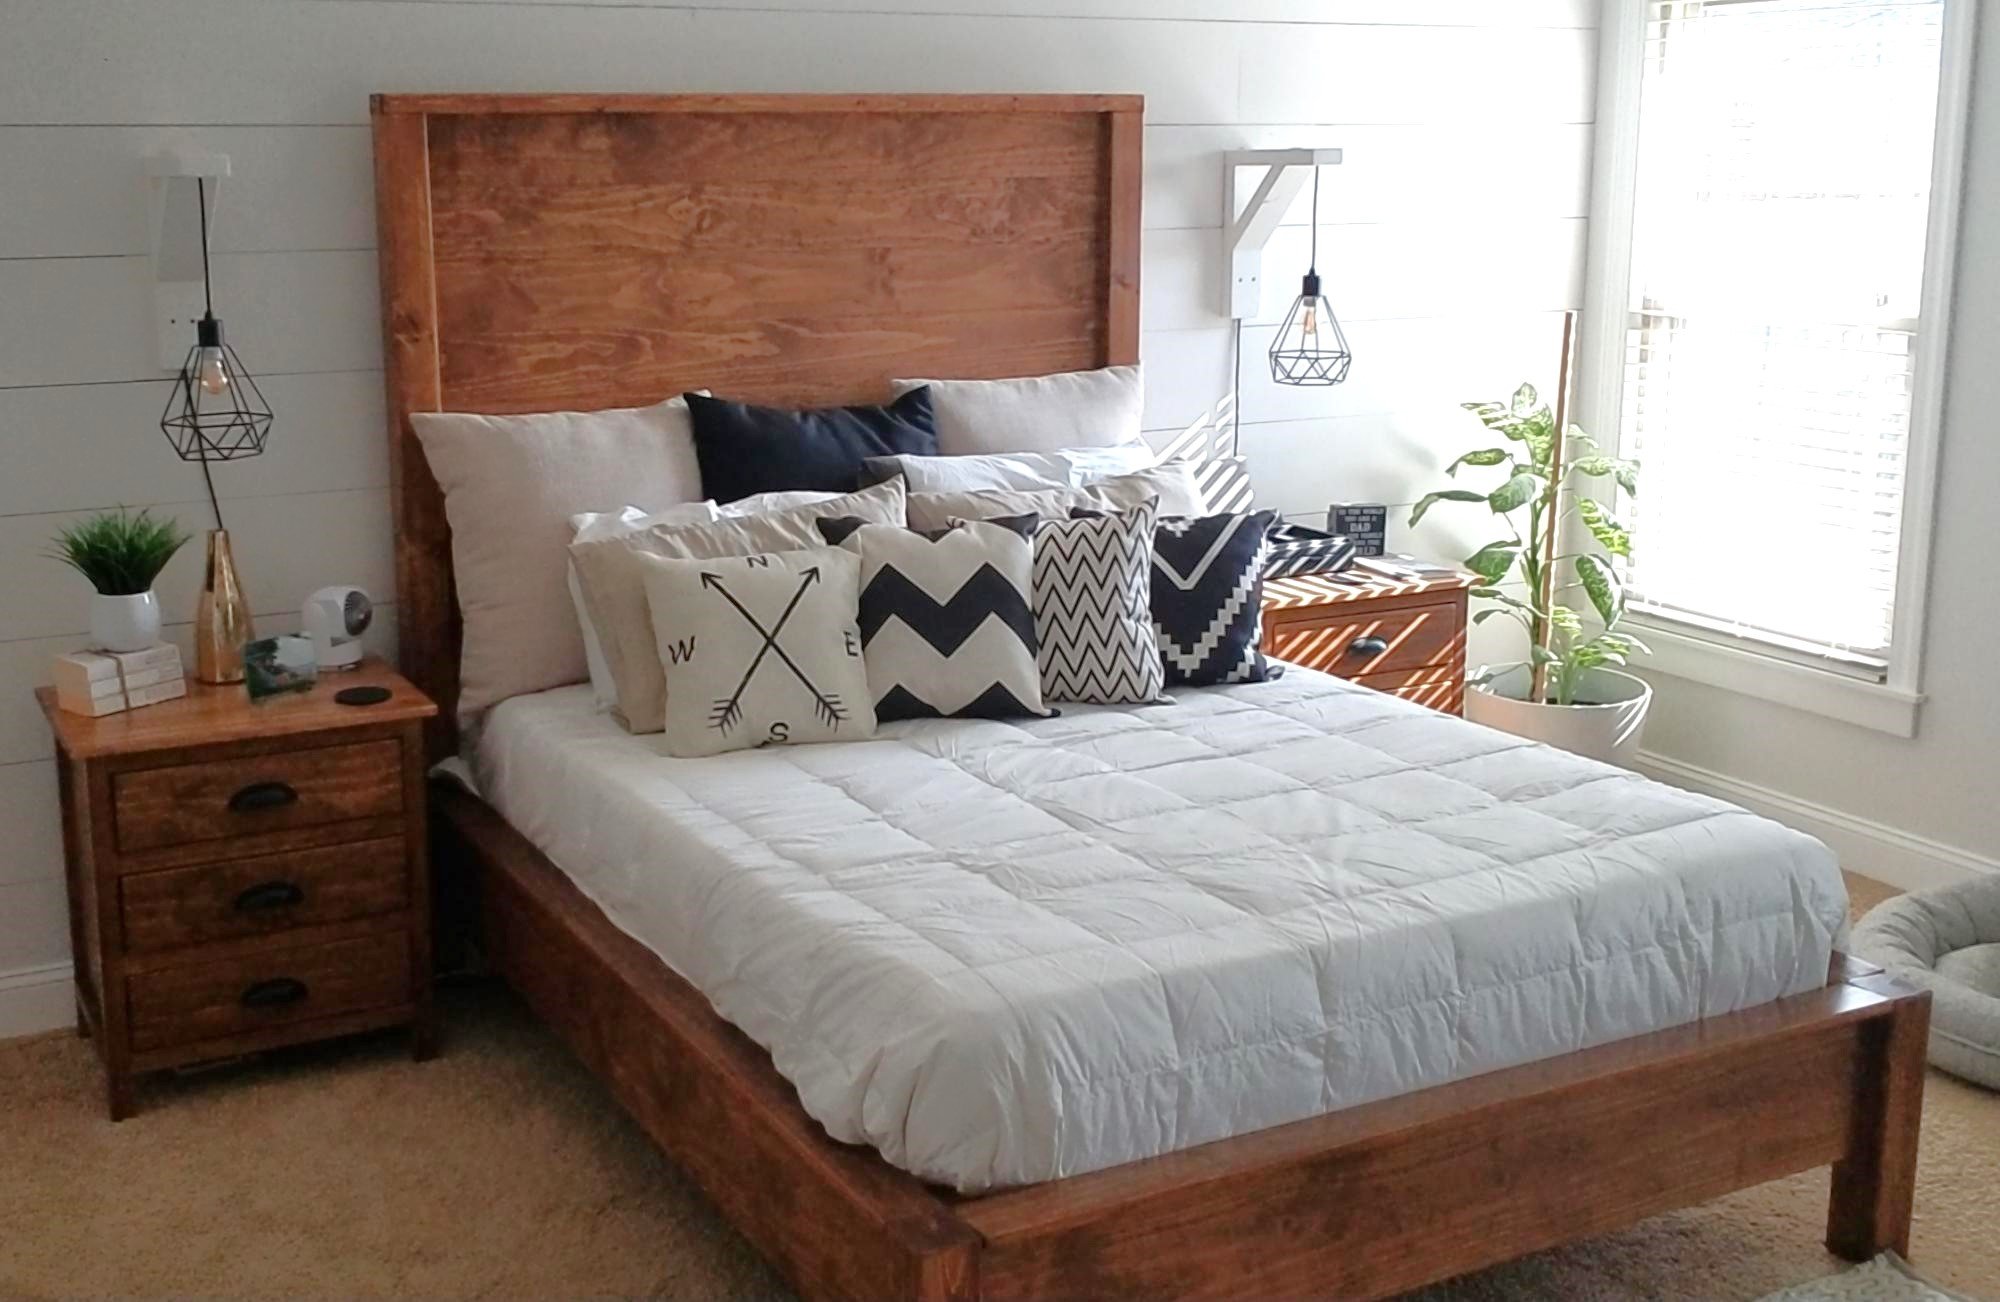
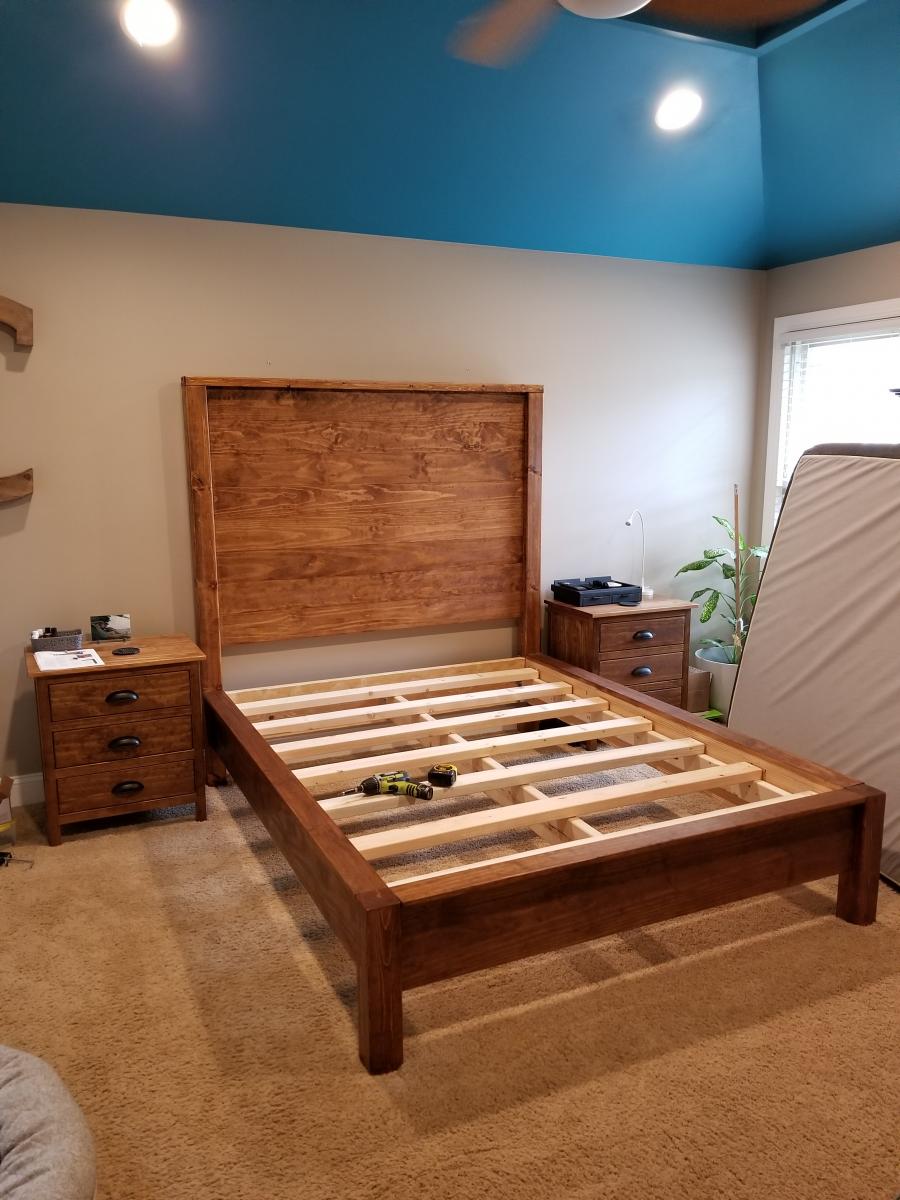
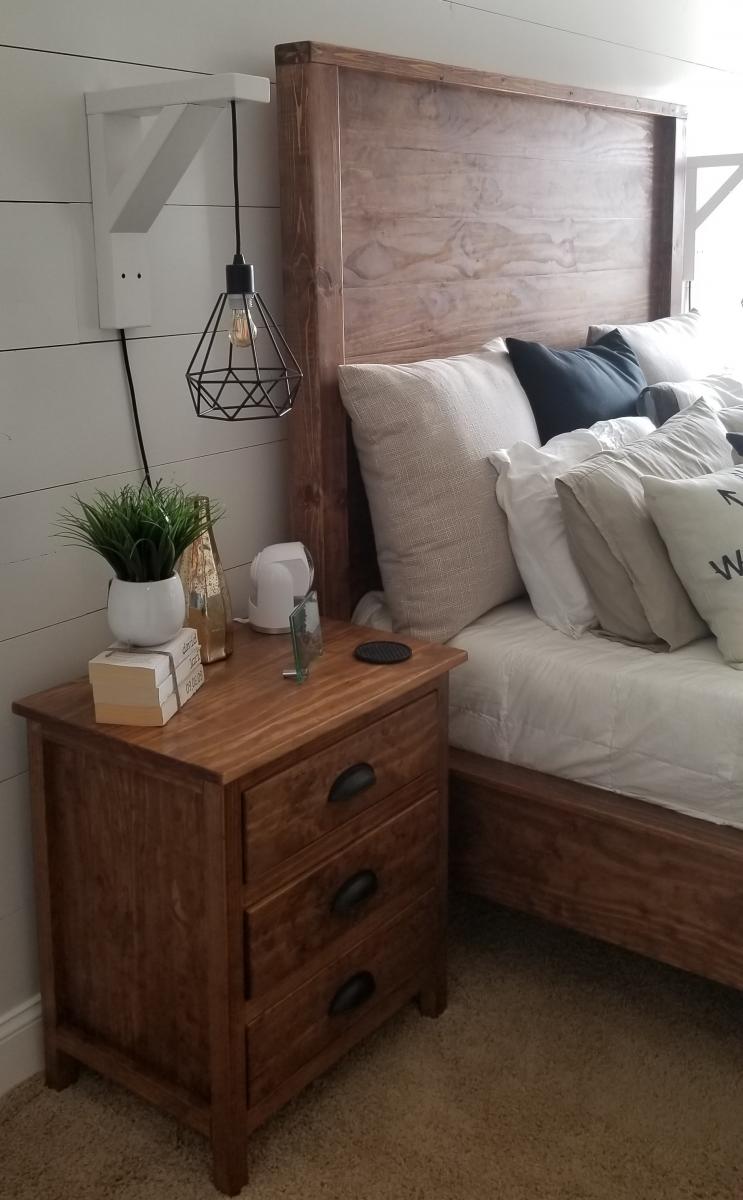
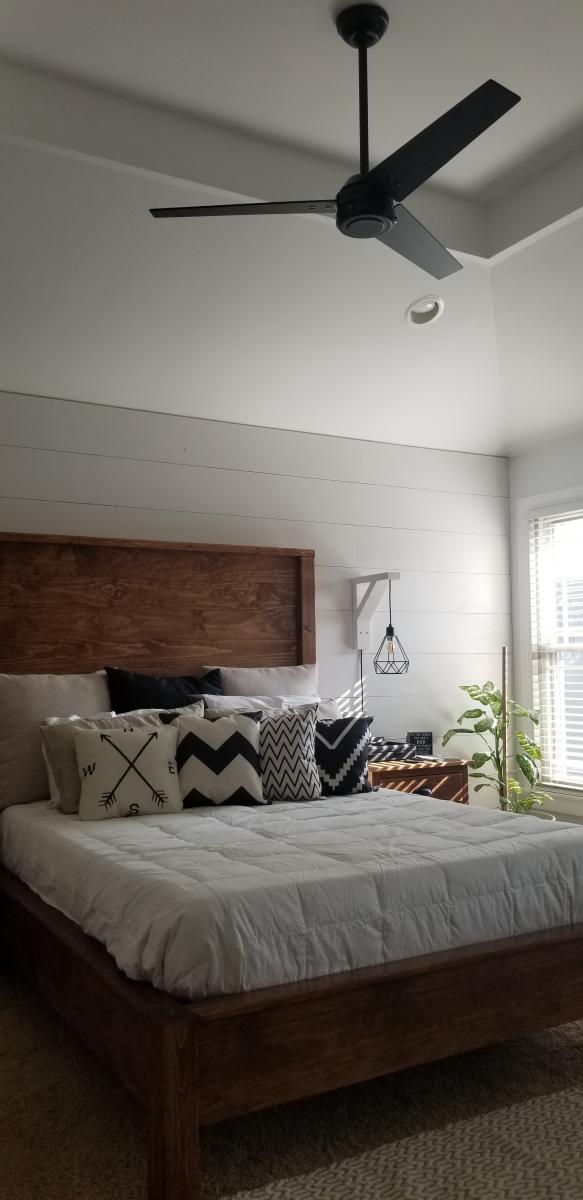
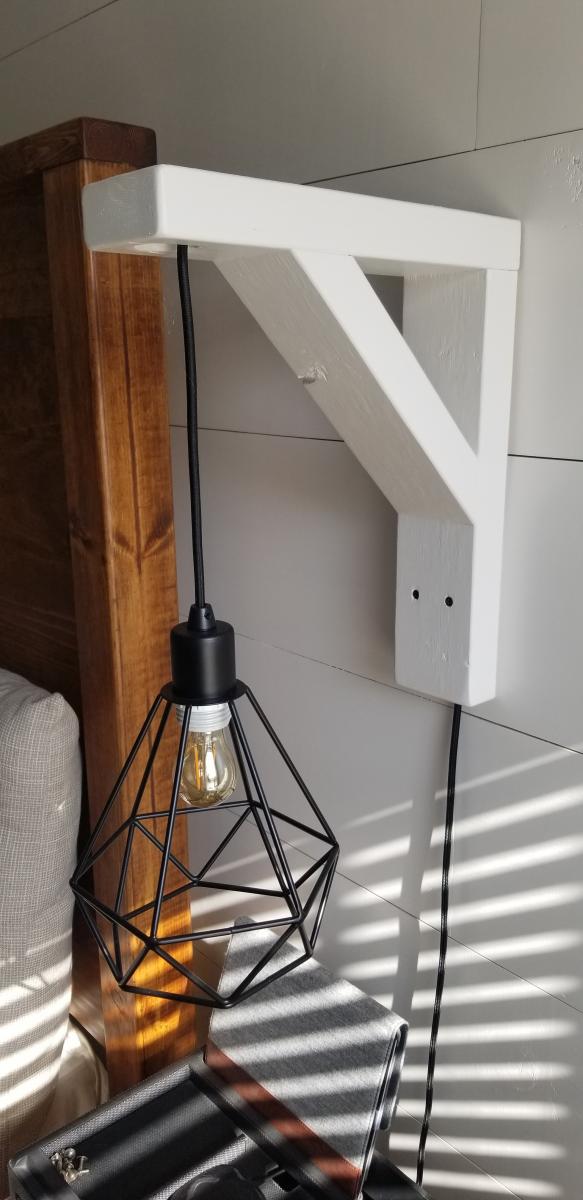
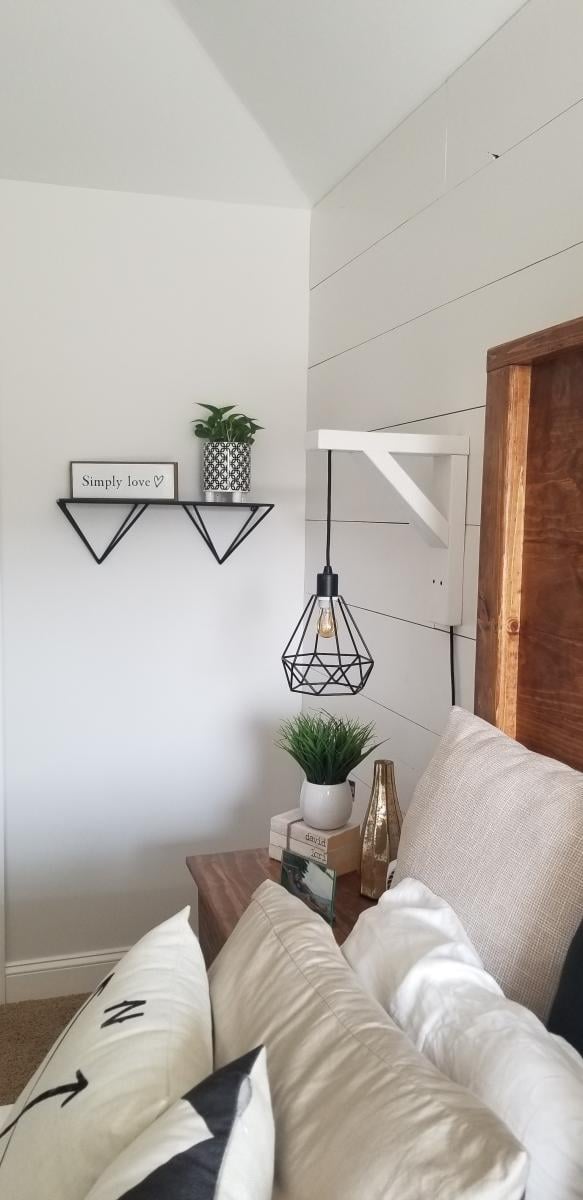
Just like my previous post on the nightstands, It was cheaper to build a bed that I envisioned instead of searching for something over priced. I found the plans for this bed on the site but made the headboard a little over 6 feet tall. This came out amazing and really compliments the nightstands. I also built the sconces that are centered over the nightstands to keep the tops of the nightstands clean and not cluttered. They also have touch pads for the lights mounted behind the bed to make them easy to turn on and off.
This is hands down the best transformation in any room in my house. Ana, you saved me a ton of money with DIY. I even picked up most of the Kreg jigs along the way which is an added bonus!

Tue, 07/09/2019 - 10:09
What a gorgeous room! The bed is just stunning in the space! Those nightstands and lights are perfect. Thank you so much for sharing brag posts!

In reply to What a gorgeous room! The… by Ana White
Fri, 07/19/2019 - 11:39
Thank you so much! I need to thank you for the plans!
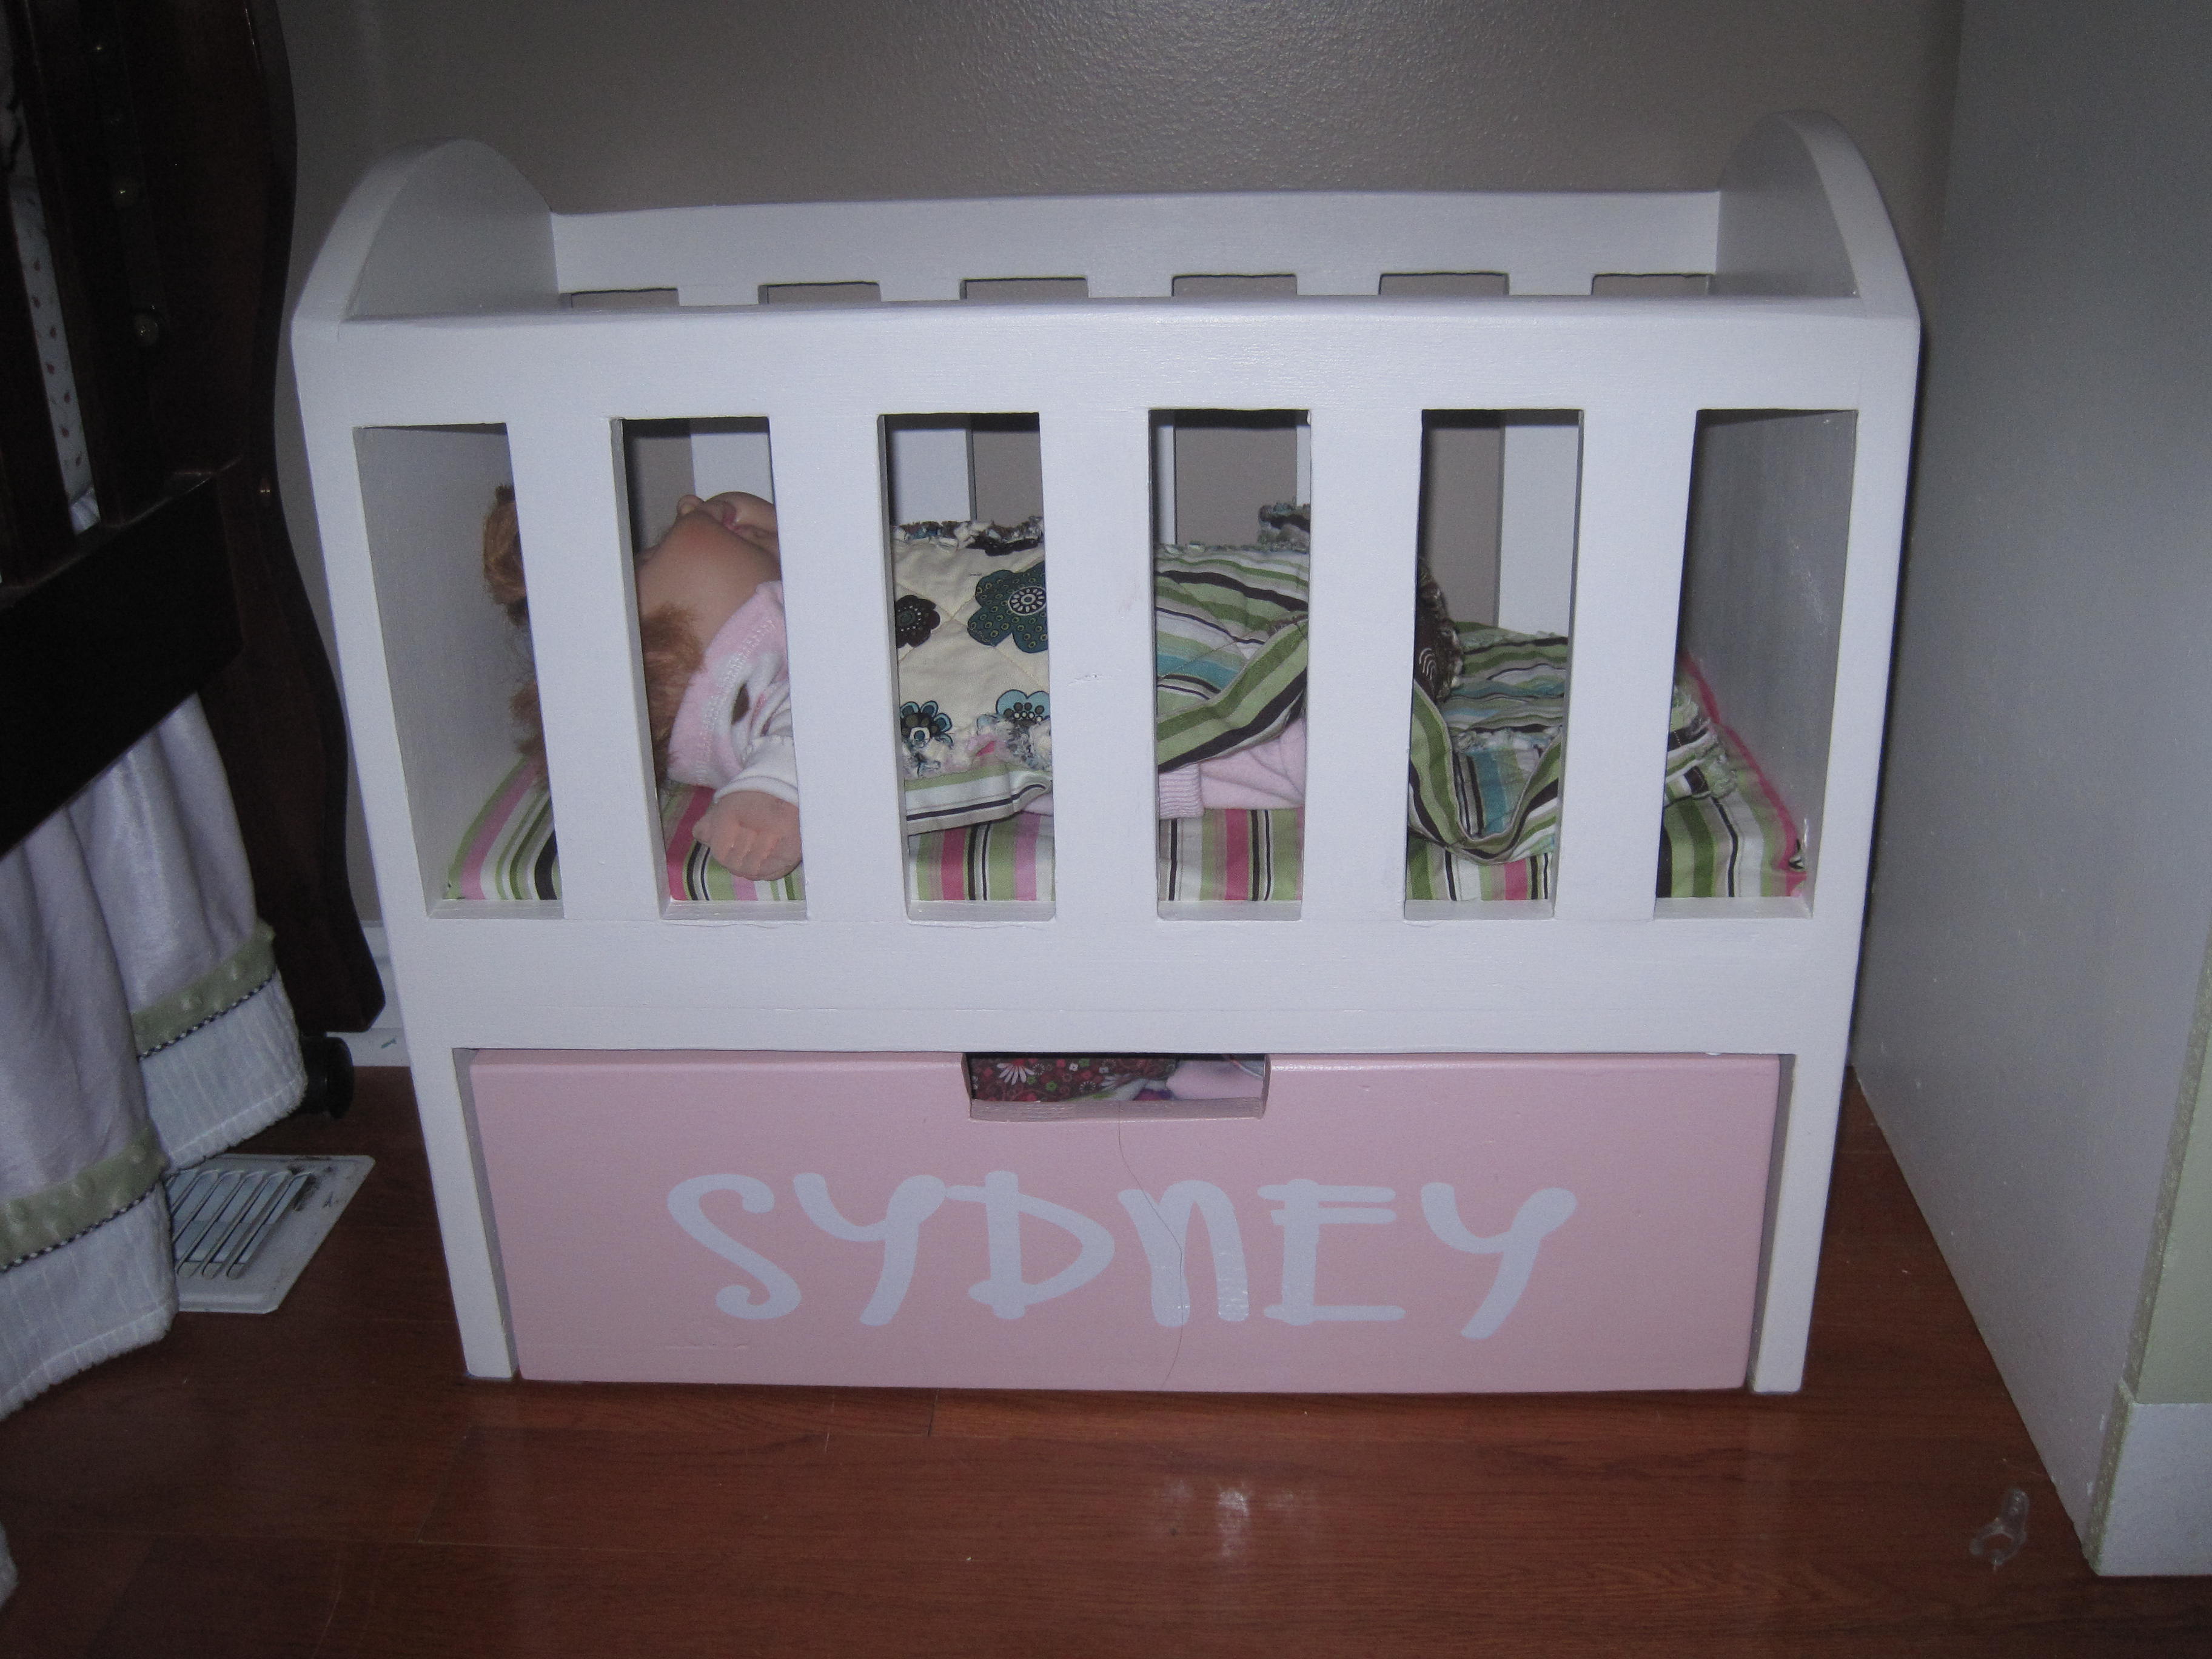
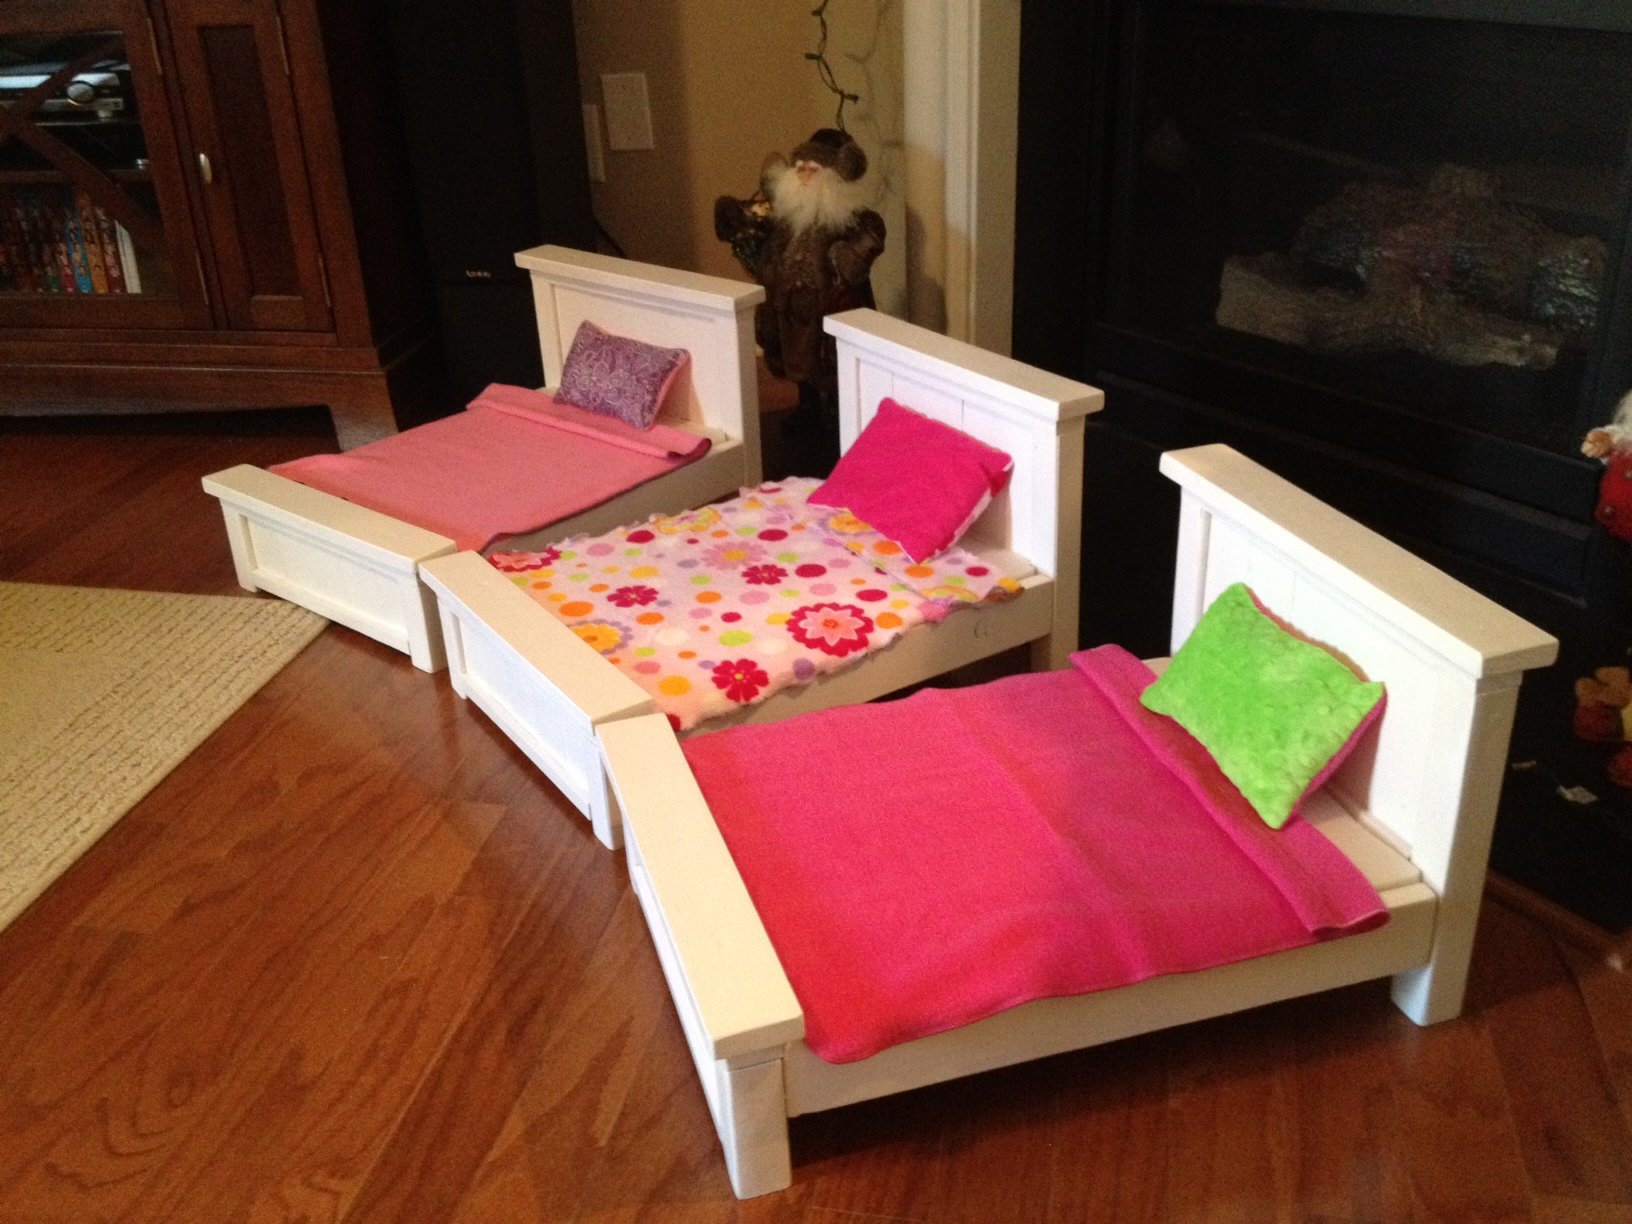
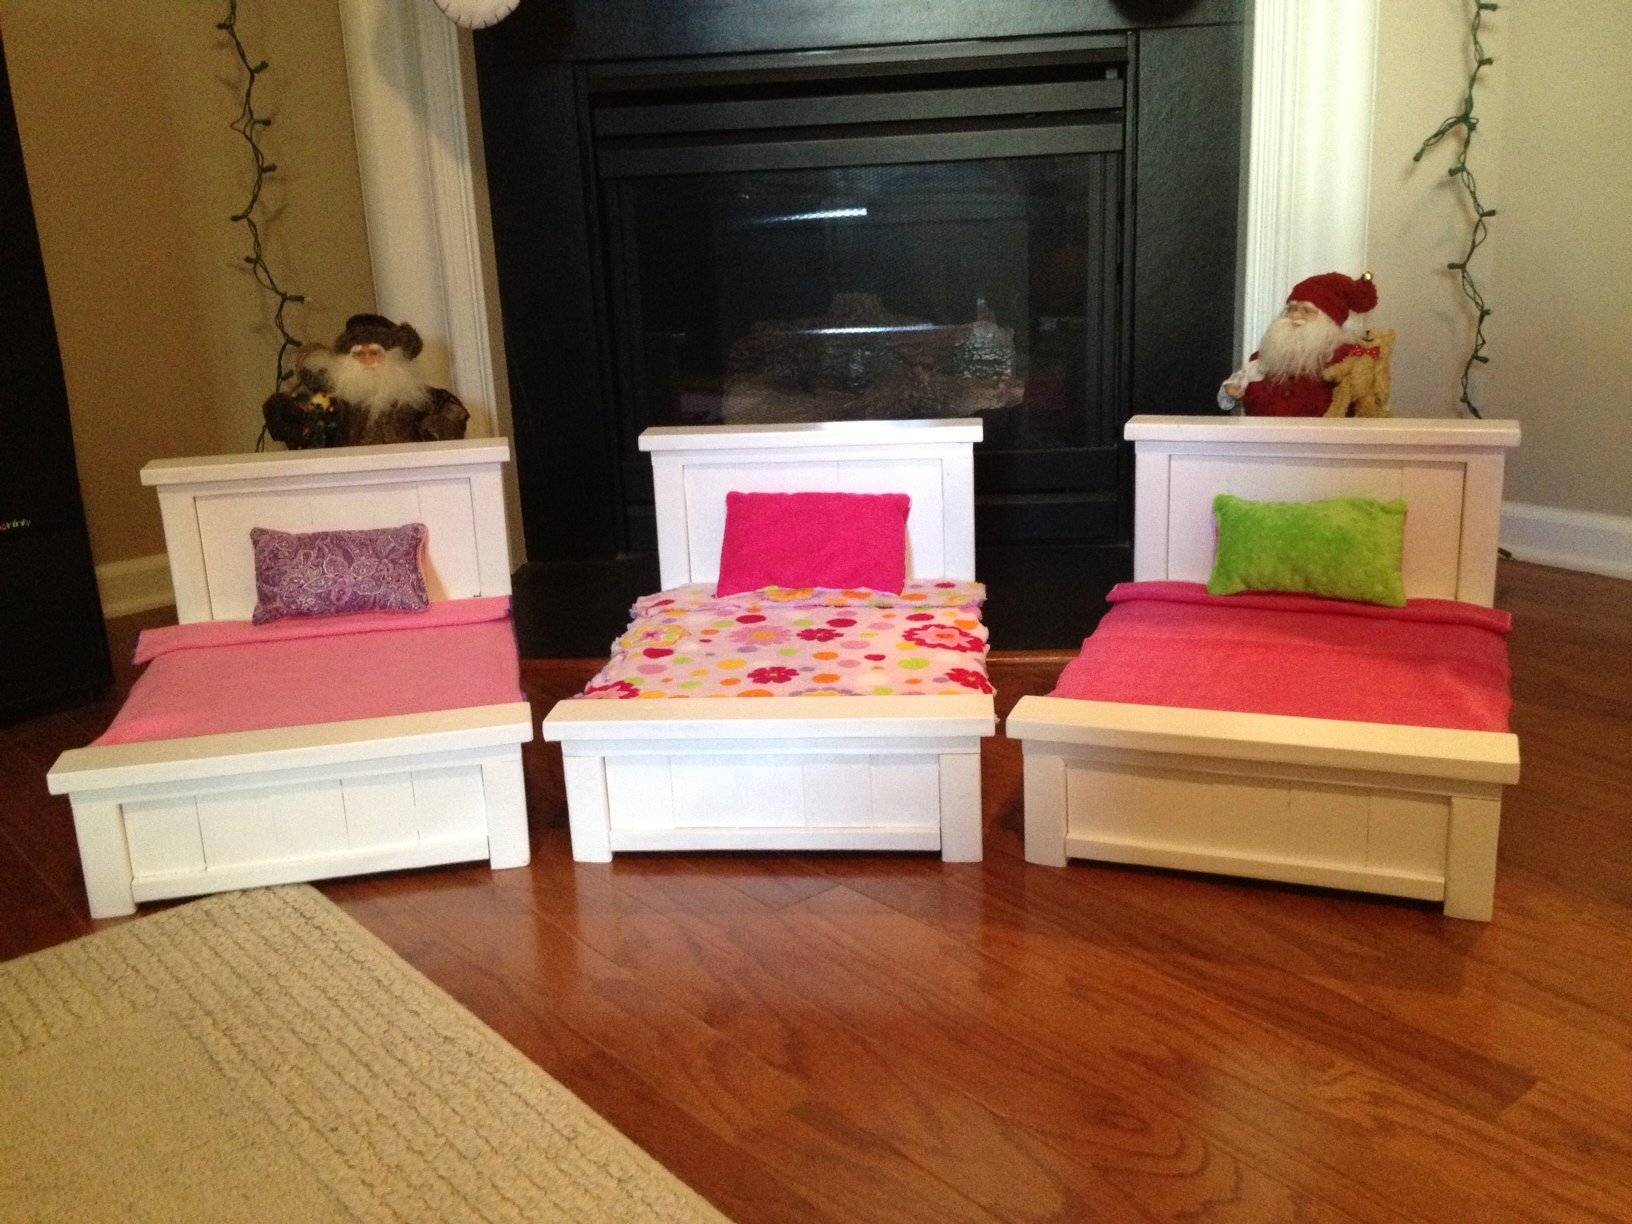
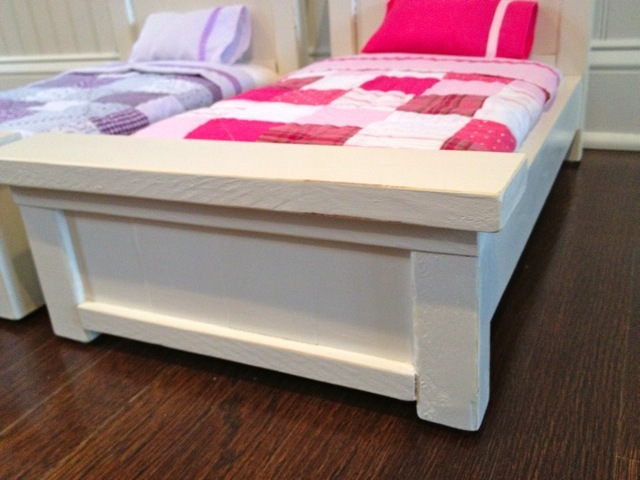
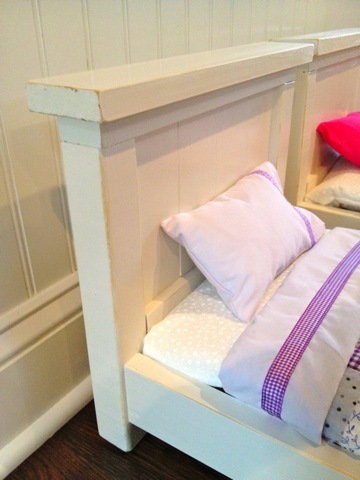
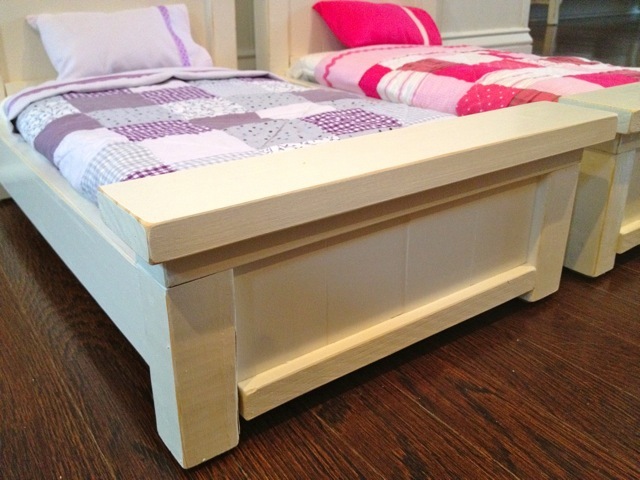
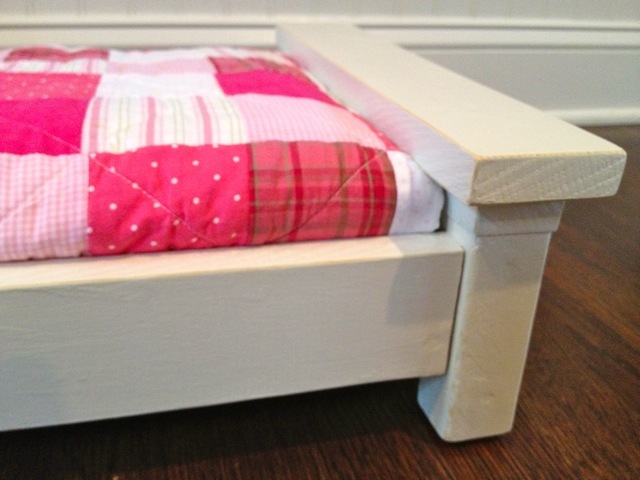
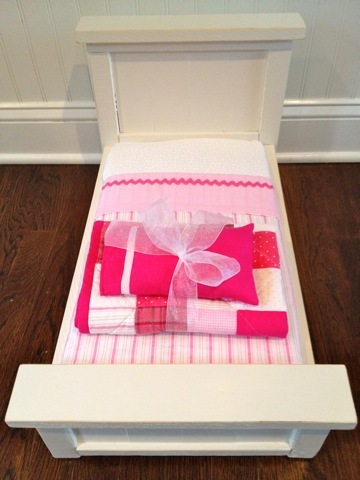
I built this for my little girl for Christmas. I think it is one of the cutest $20 presents I have ever gotten her.
Thanks to my sister in law who made the bedding. I also placed felt squares on each corner to make sliding the drawer out of the wood floor a breeze.
Wed, 12/21/2011 - 20:11
What a lucky little girl to have a momma (or dad??) who can build her such a cute gift. Great job.
Tue, 01/10/2012 - 08:49
Sorry it took me so long to get back with you. I got the plans on Ana-white.com all I did was search for doll furniture.
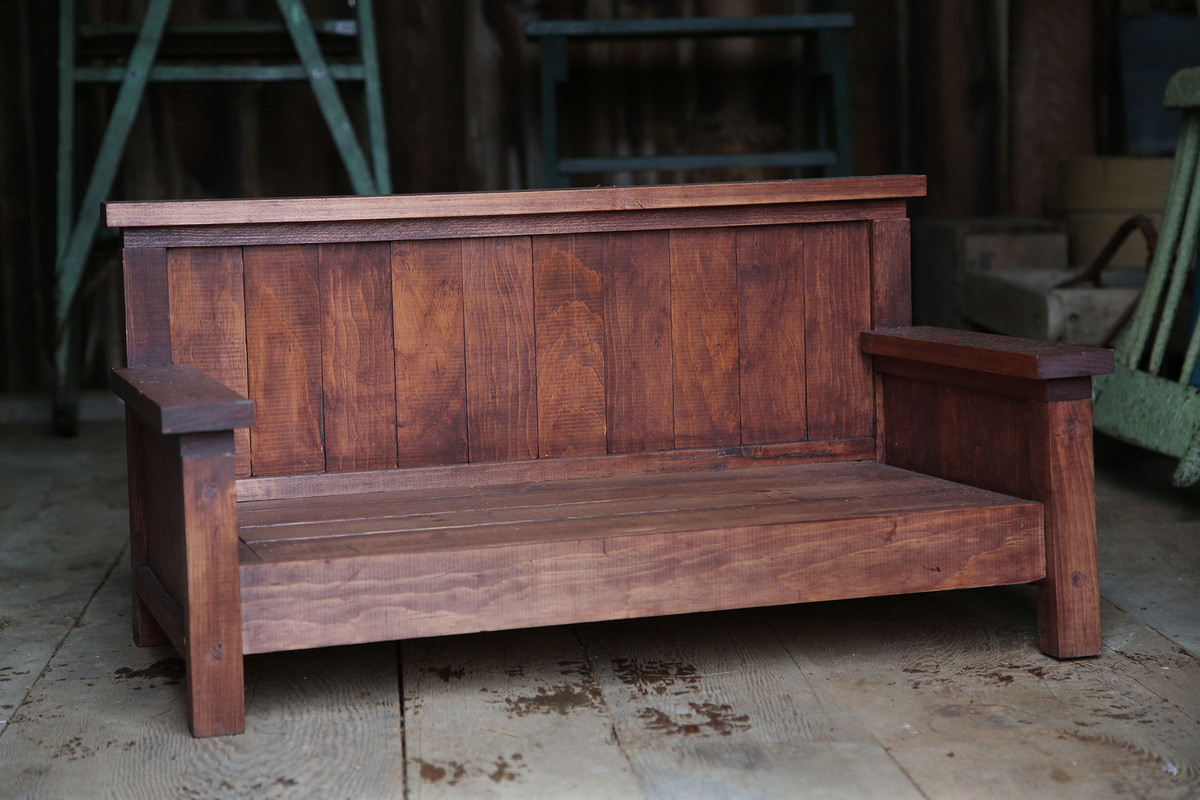
I started with the doll farmhouse bed. Someone made a super cute version as a dog bed- and I loved it as a mini sofa...
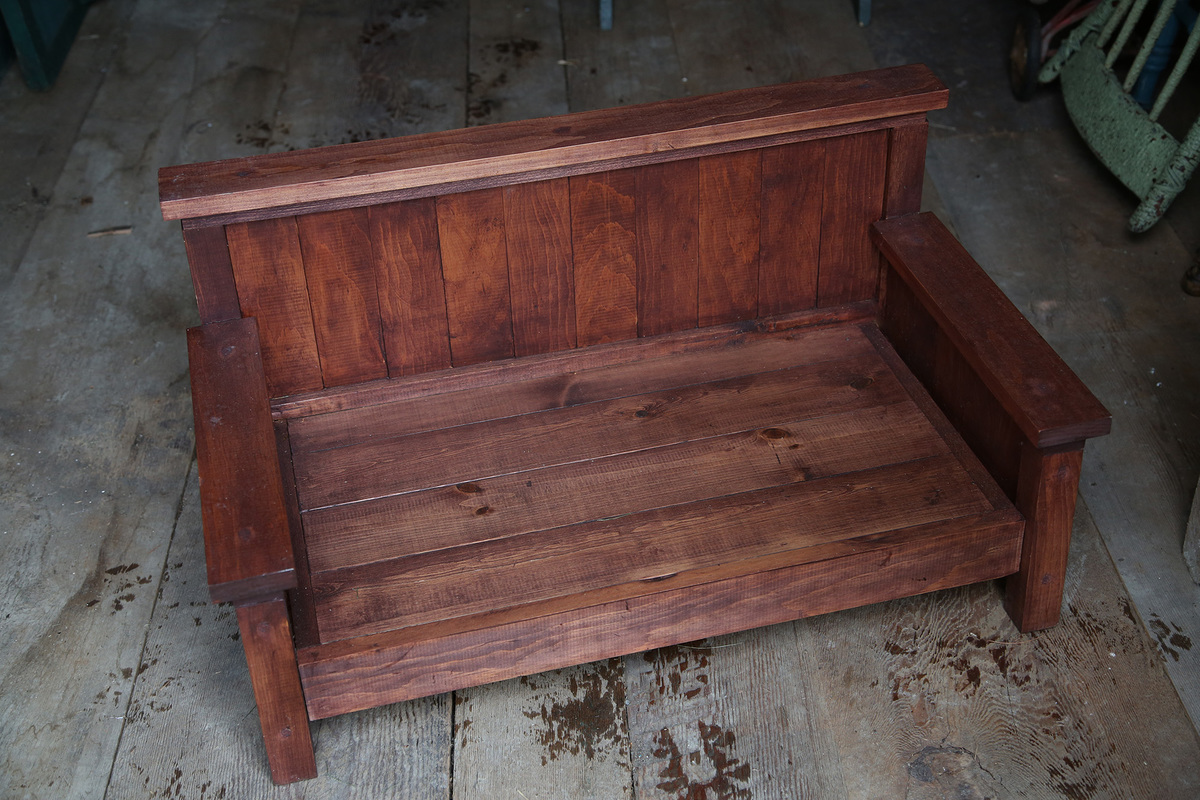

Tue, 12/31/2013 - 09:53
Hi Brad- so sorry for not getting back to you sooner. I saw that you'd left a message, and I haven't had a chance to get back into the shed to check- The seat is only about 5 inches off the ground, and the backrest is about 17 inches.
I hope that helps!
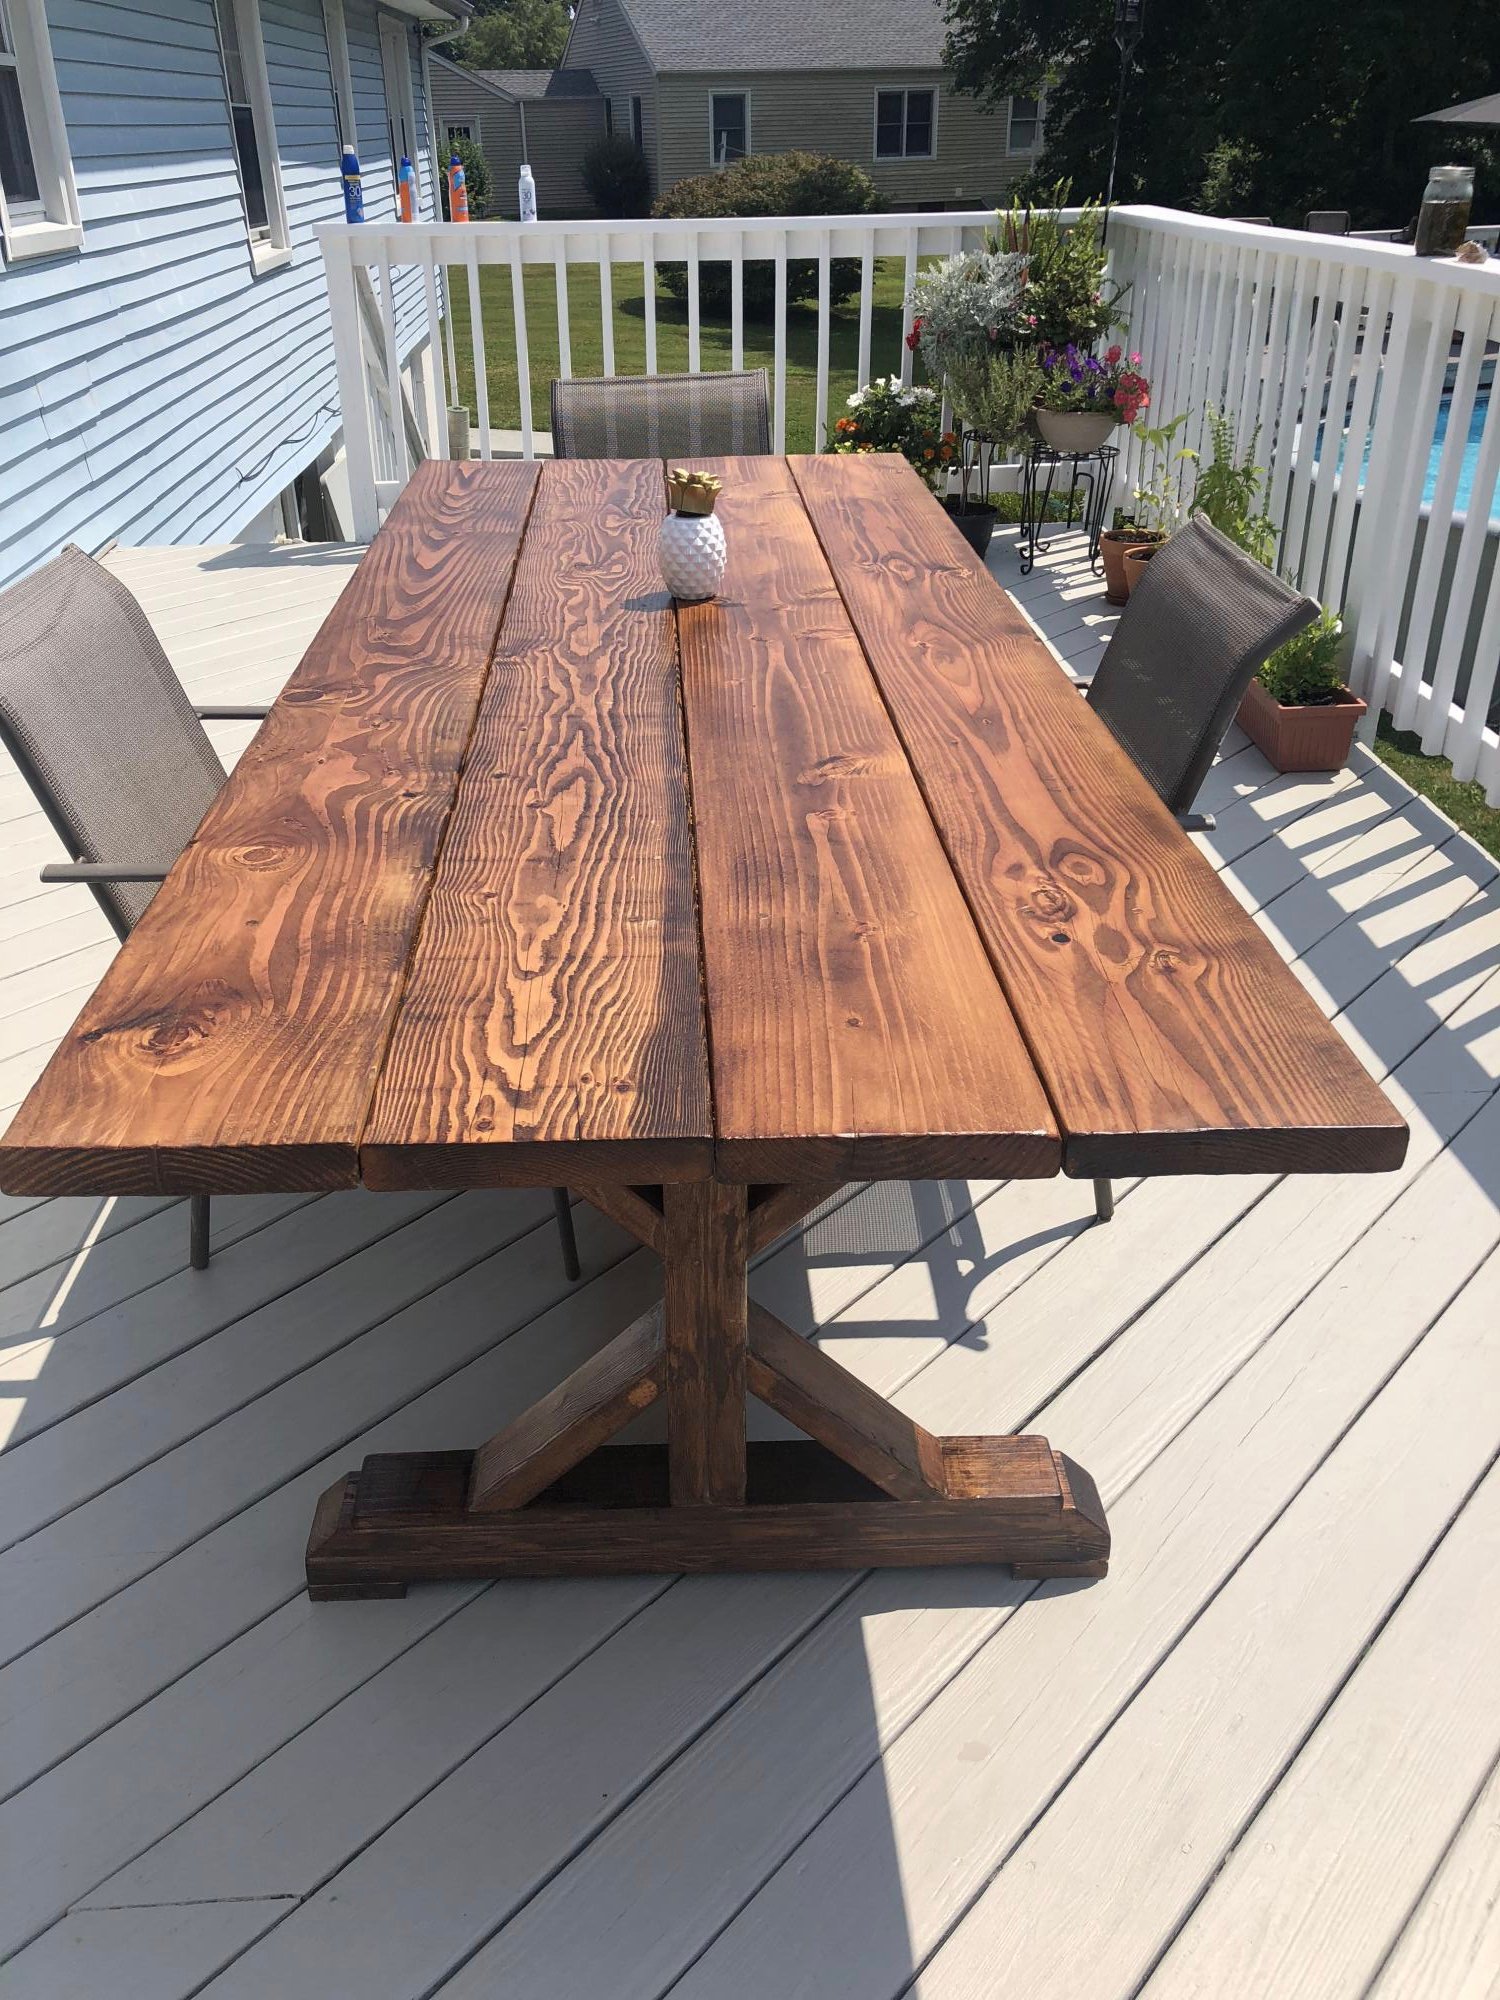
I love this table! On cool winter mornings we fill it with warm water. The built in umbrella stand will be essential once the Texas sun comes out.
Hopefully it buys me some free time to finish some projects! ![]()
I already have lots of requests to build more of these for friends and family. I have some edits in mind to make it a little faster and easier next time.
Many thanks to Ana and all the contributers for all the inspiration and tips!
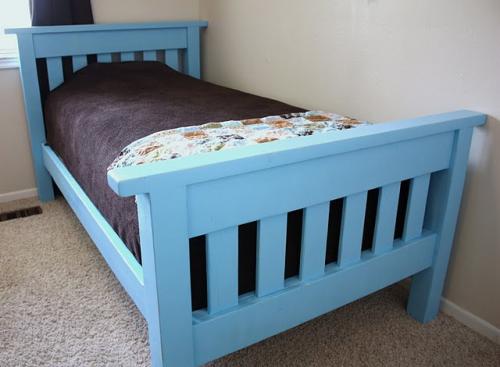
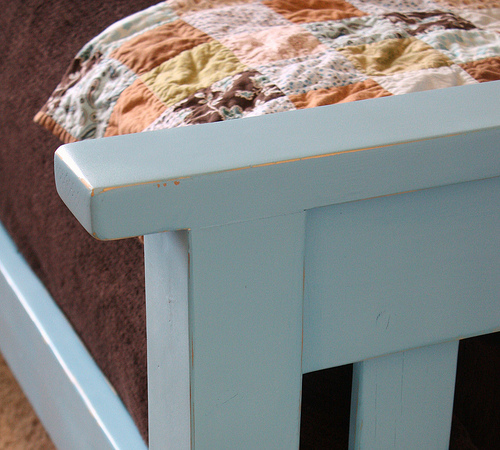
Pretty blue painted finish on simple bed
"Here's a pic of the planter I made! I modified it to fit a 36" planter. I LOVE it. Thanks!!"
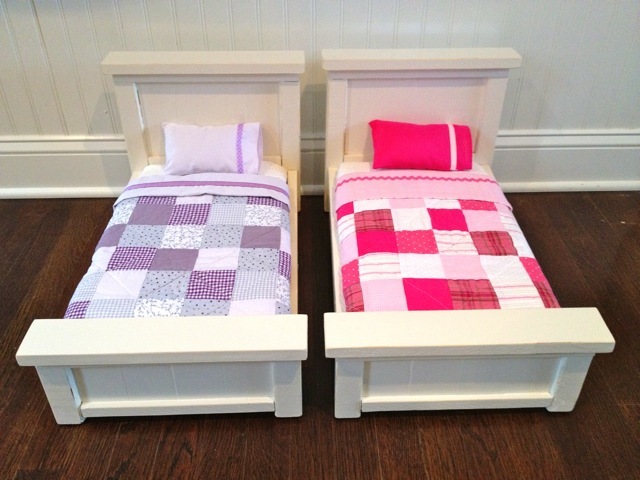
Farmhouse style doll beds modified width one less slat.
When I first saw this project I thought it might make a great looking table for our dining room - however after seemingly endless frustration with the 2x10s (and also 2x4s I tried after giving up on the 2x10s) badly warping I eventually gave up and bought a couple of pre-glued pine board panels to use as the table top. I had my heart set on a nice flat dining table and the construction boards just weren't working for that. The base was still made from basic pine 2x4s as per the original plan however.
I shortened the table by about 2 feet so it would actually fit in our dining room, removed the inner angled boards because getting the angles right after shortening the table was being a pain, and added a couple of support boards that run lengthwise under the table top since it's thinner than originally planned.
This project seriously took me about 2 years to make, between all of the re-starts and so on.
Tools used include circular saw, belt sander, orbital sander, router, power drill with pocket hole jig.
Not counting wasted materials, this project probably cost me about $120 between the lumber, the hardware,the stain, the finish, etc.
After all that work and hair-pulling though, in the end my wife says she loves it, so I guess that's all that matters :)
My wife's cousin builtthis table using your plans and we loved it. I wanted a lager table, so I made a few modification. The table top is 5 8 ft 2x10's. I love the finished product. More importantly, my wife loves it! Thanks for the plans!

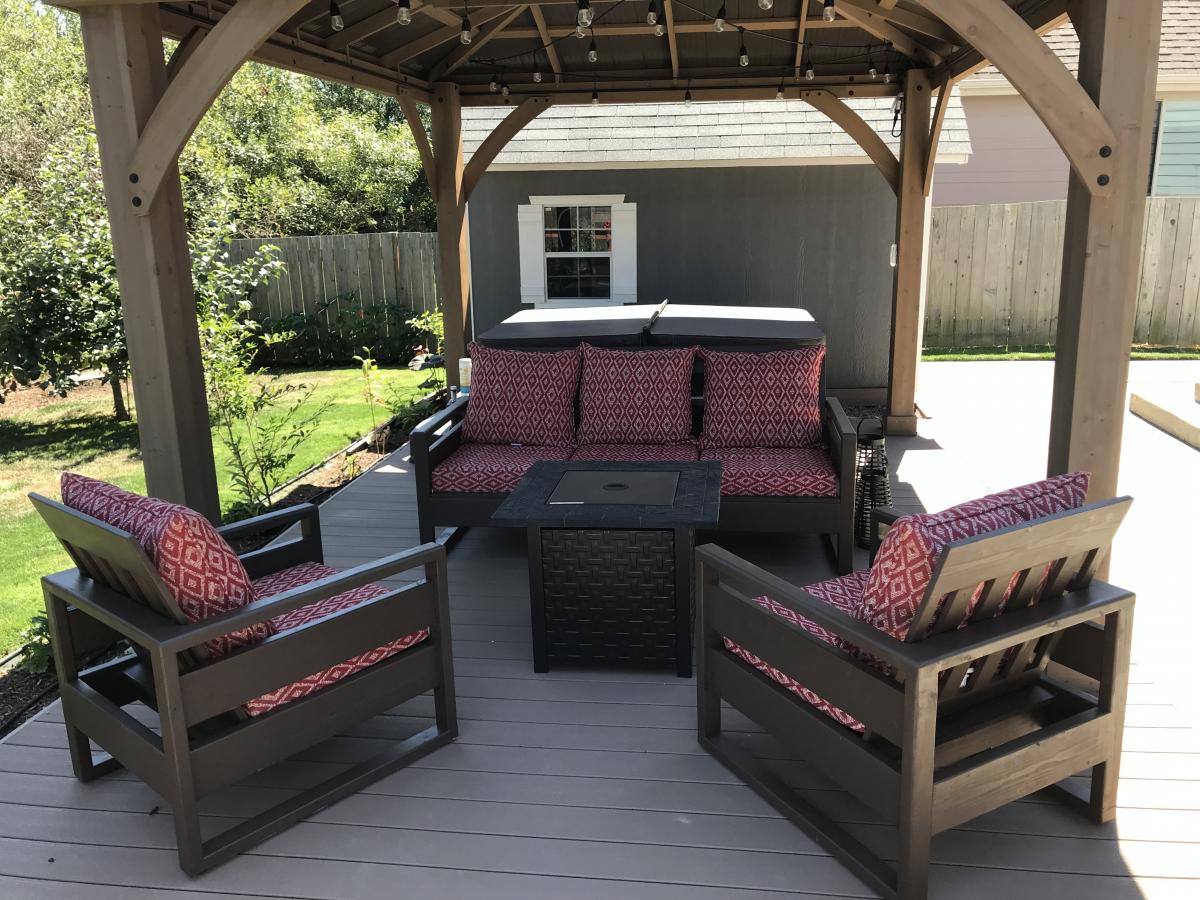
Combined the 2x4 sofa and 2x6 chair plans. Added the extra 2x6 under the arm rest, to keep future pillows from falling through the gap. Great plans! Thanks!


Mon, 07/22/2019 - 11:54
Love this! The 2x4 arms are so much better too. Thank you for posting!
Wed, 08/14/2019 - 23:38
Thank you! Actually added another couch, two side tables, and a ottoman to match! Looks like it came out of a magazine! Planning on doing one of your bedframes next. Love your site!
Mon, 12/21/2020 - 12:04
@papadog - I love your build and the way you iterated on the plans to make it work best for your specific needs. I'm in the process of building off these plans myself, and the one thing I cannot figure out is how the base of the back is intended to be secured to the sides. In the plans (step 7) it just says "secure to the sides using 2 1/2" screws". Am I supposed to drill from the outside of the sides into the back base? I'd like to avoid that, and based on the pictures, it looks like you have. If you can share how you secured the back base to the sides for your build, I would be very grateful.
Tue, 01/10/2023 - 10:24
So sorry, didn’t know there was a question/response to this! I didn’t secure them. Hasn’t been an issue.
This was a big undertaking for indoor furniture and I learned so much! I slightly adjusted the size to what I had available with some scrap wood from my old stairs so saved a little on costs with lumber!
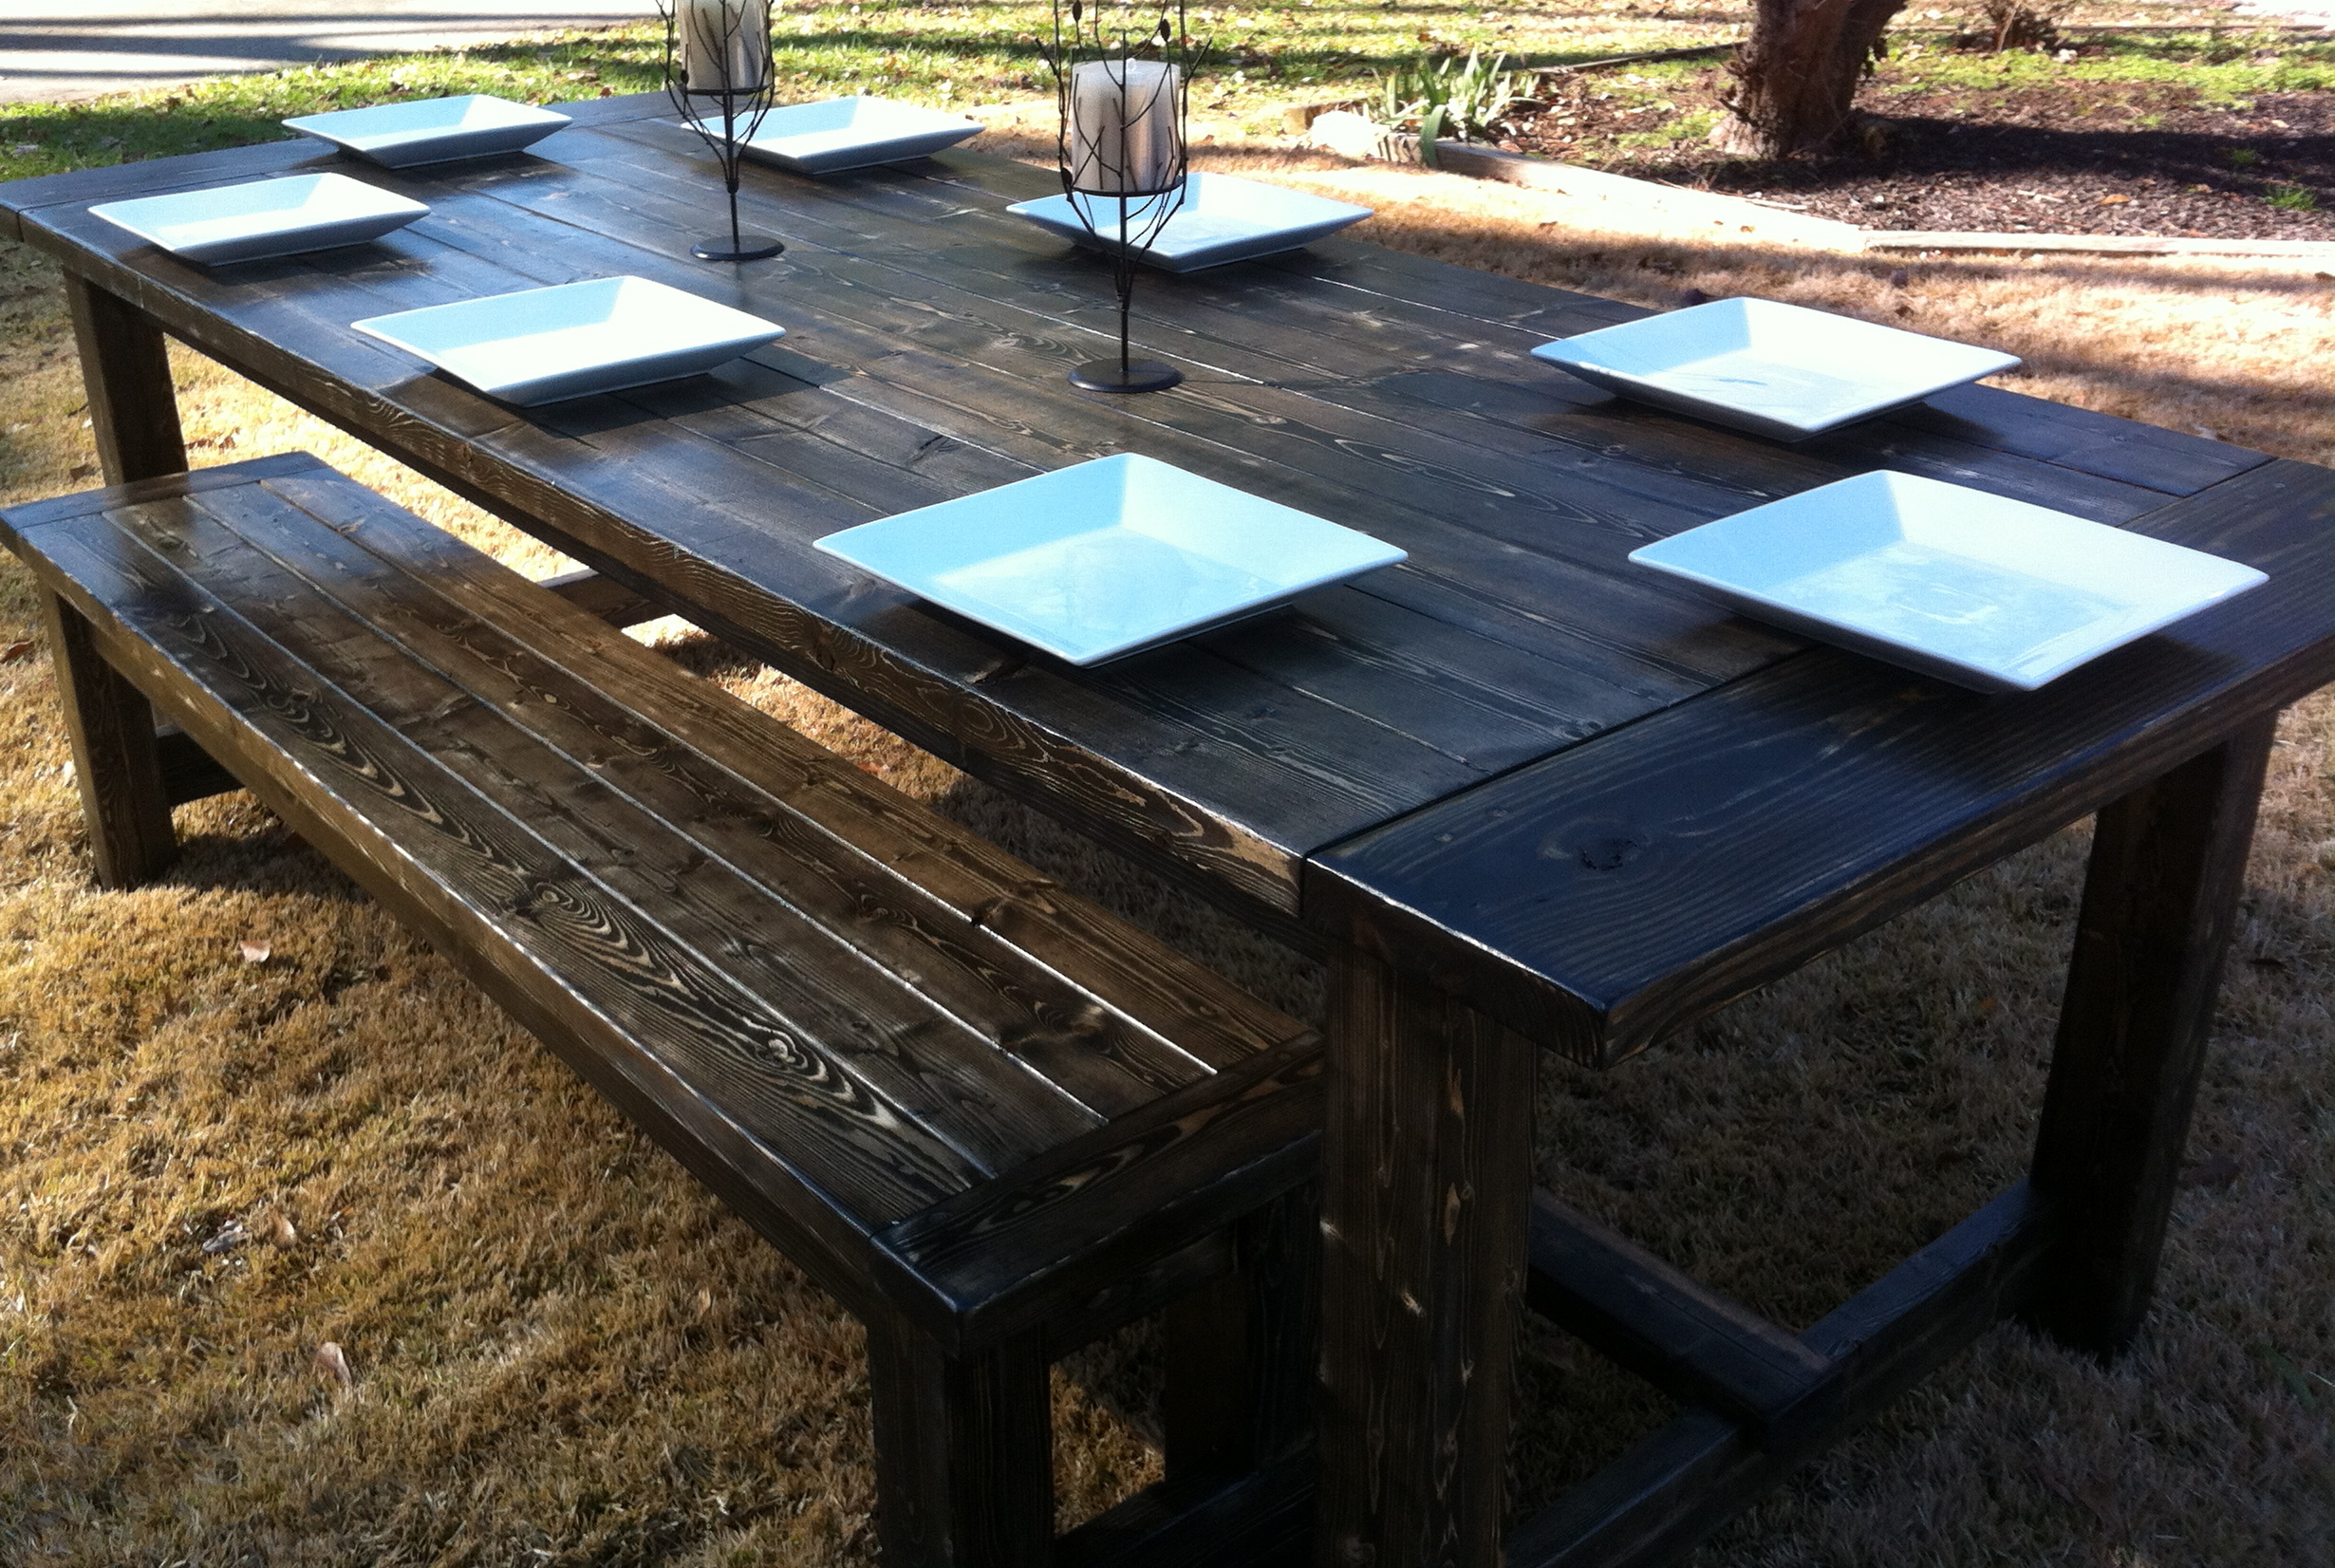
Finally completed my Farmhouse table and bench today and couldn't wait to post pics (brag). Many, many thanks to Ana for sharing her talents with us. I am thoroughly enjoying my new hobby.
Fri, 12/30/2011 - 00:58
What a breathtakingly beautiful farmhouse table and bench! Thank you for sharing, I'm so impressed and inspired!
Sun, 01/08/2012 - 12:40
I love this! You should sell this or any other woodworking you have like on Etsy. If you did I would definitely buy this! Awesome job!
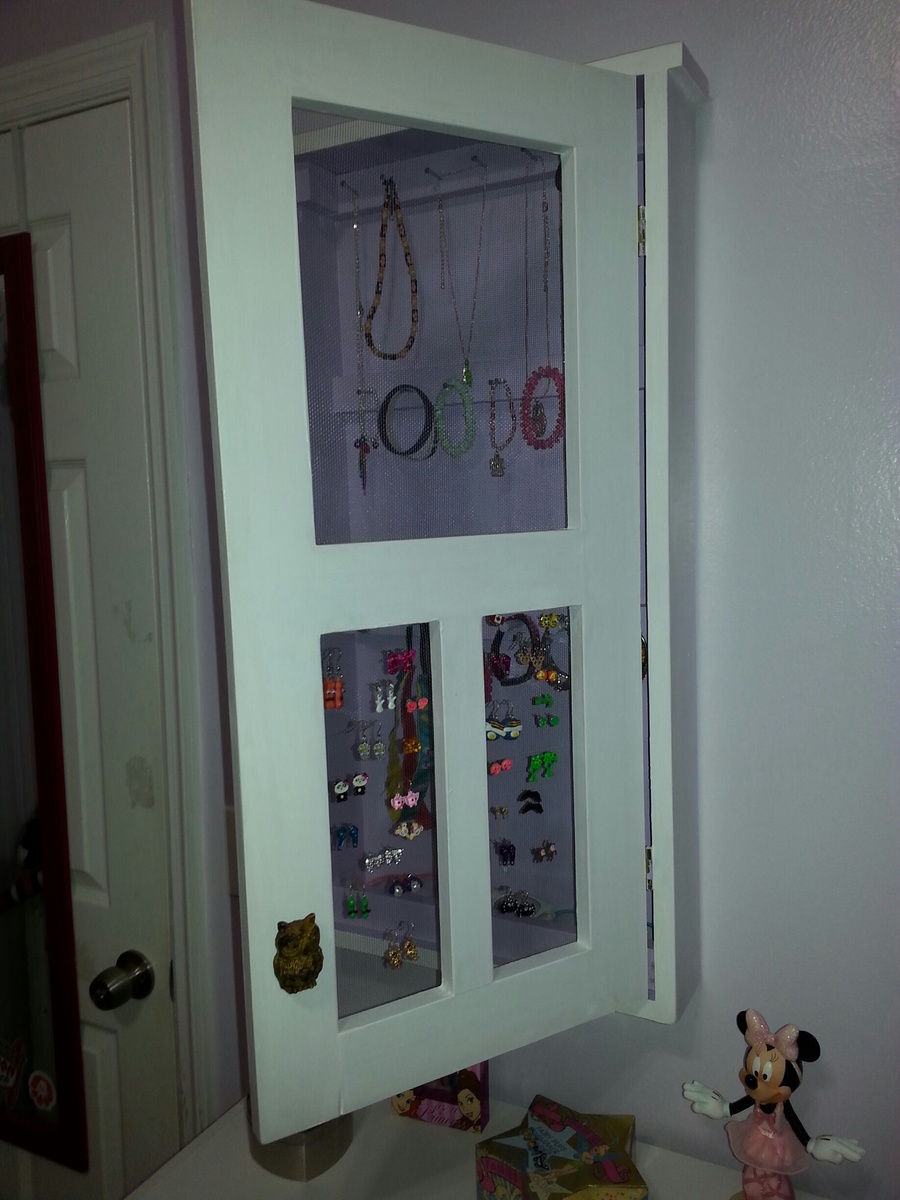
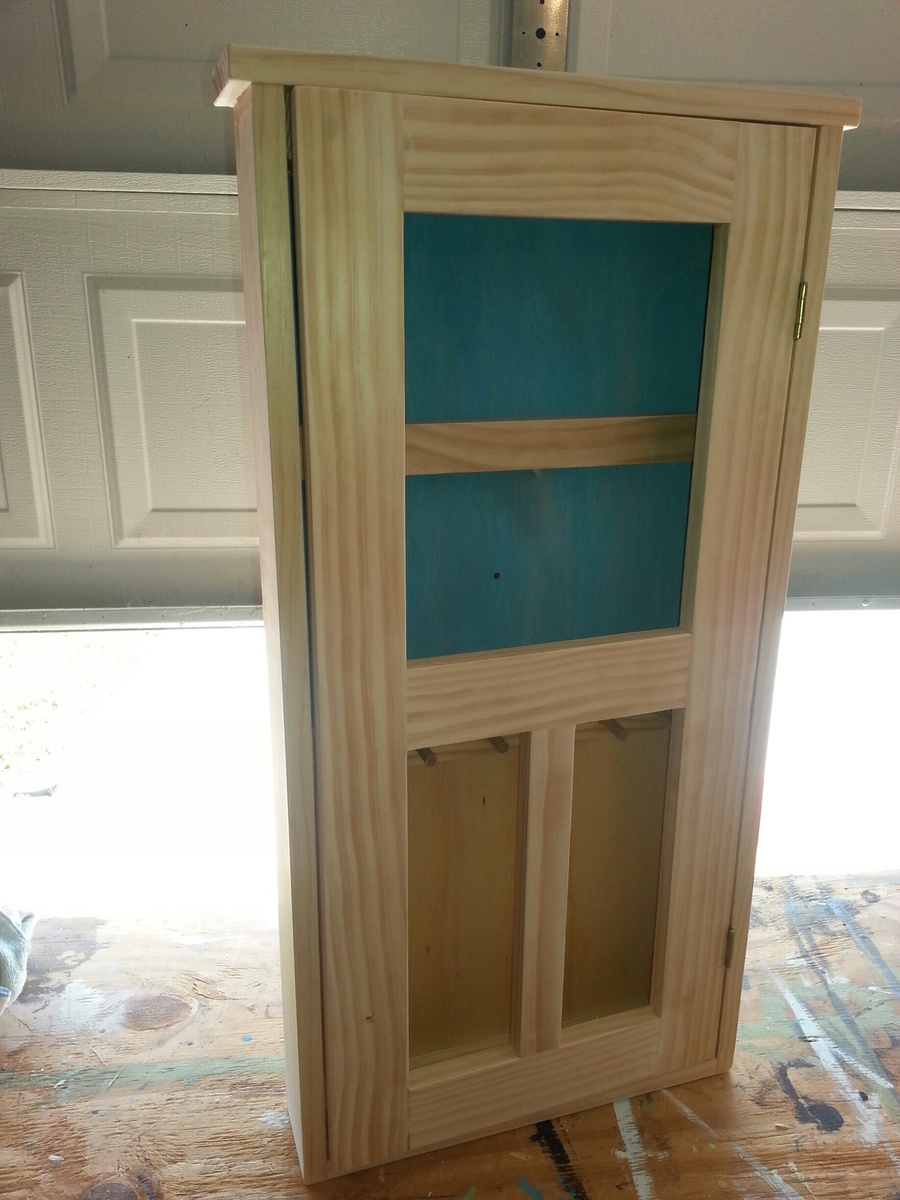
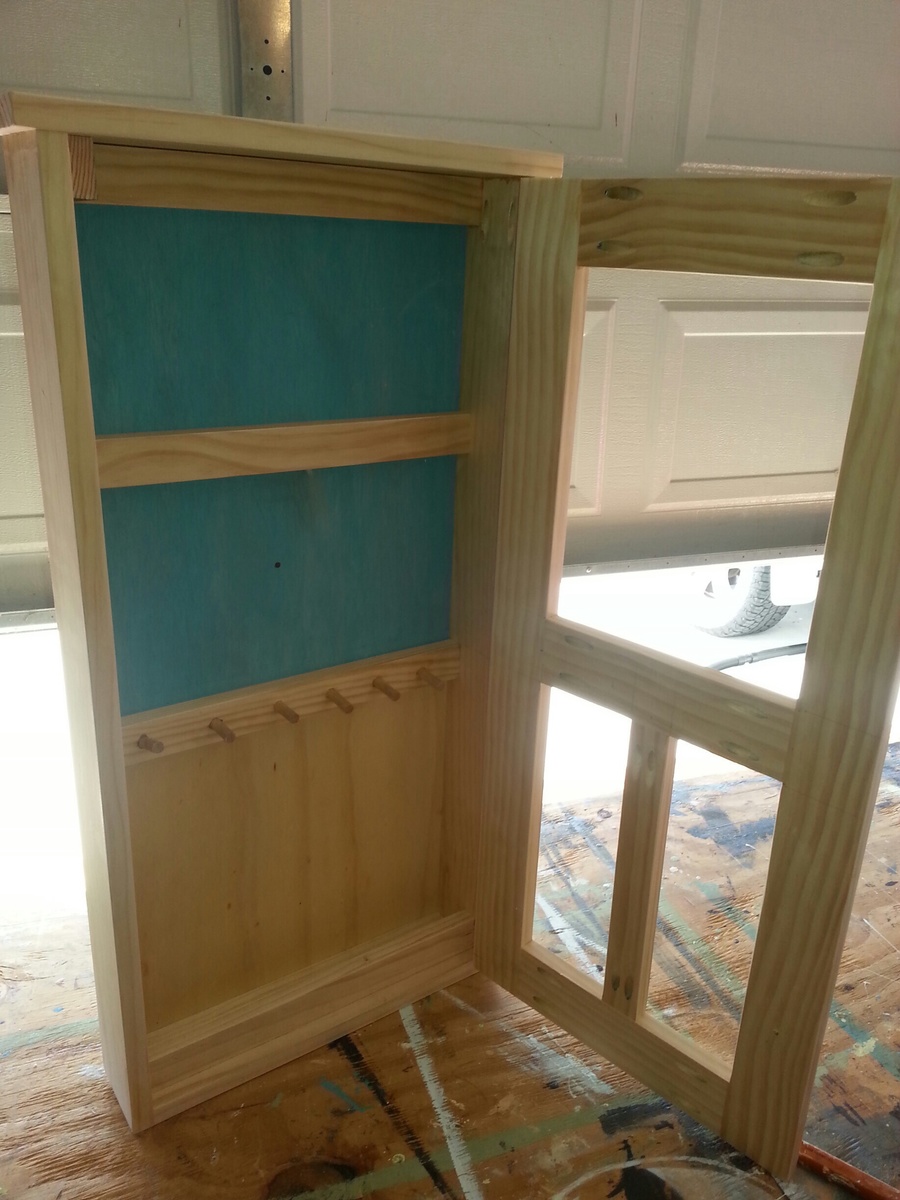
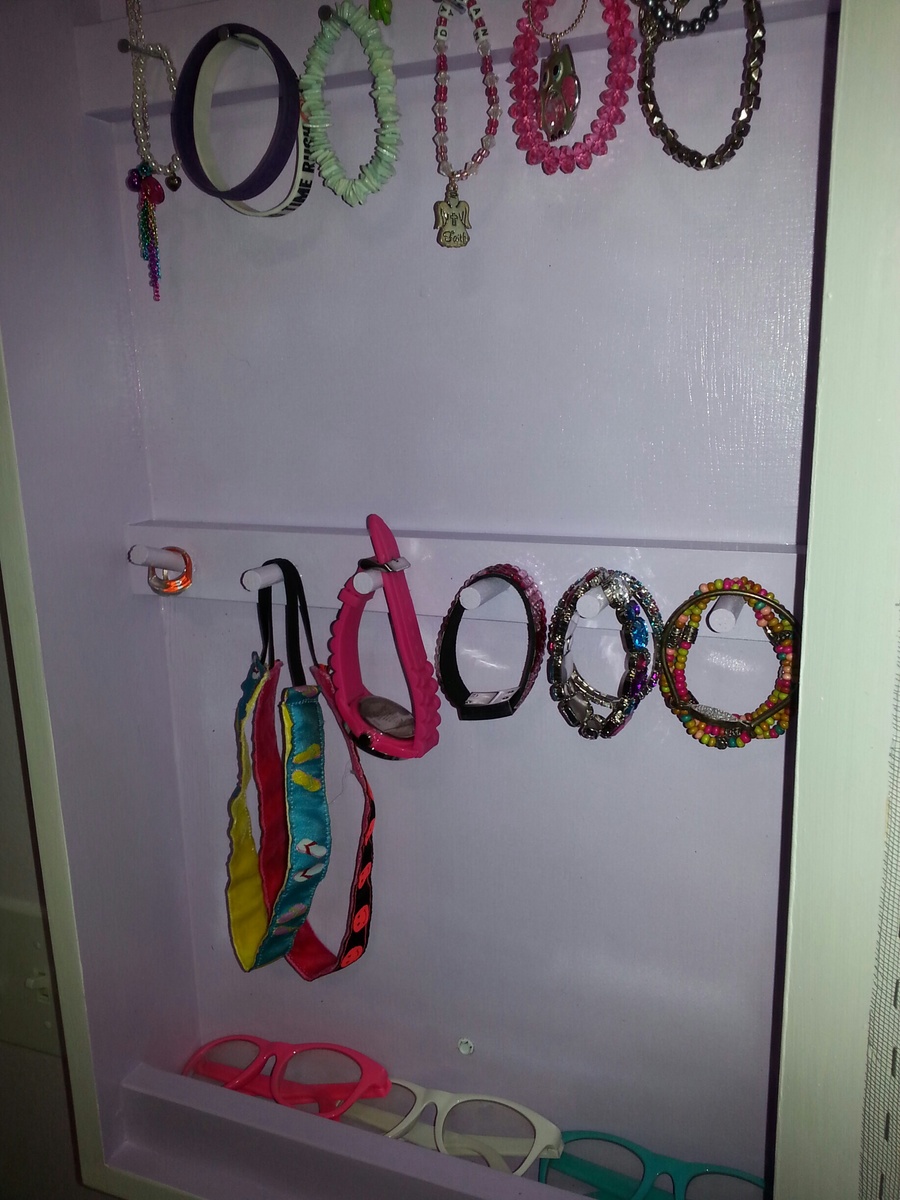
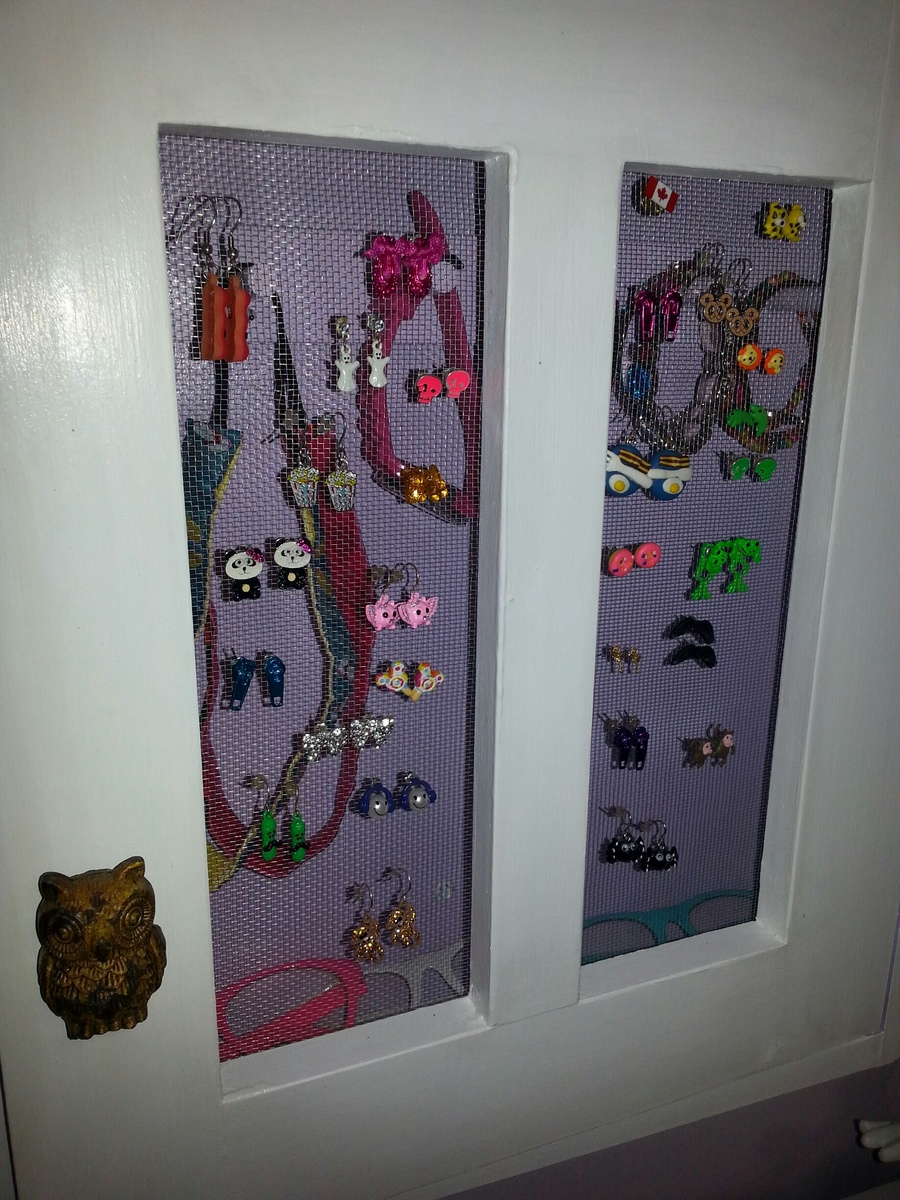
Needed something to help my daughter keep track of all her jewelry and especially earrings. This plan seemed to fit.
I decided to use small wooden dowels on one section and angled one for rings. For the doors I used metal window screening and stapled it on.

Sun, 11/17/2013 - 17:53
Looove this! What a brilliant idea for hanging the jewelry with dowels! And I absolutely love the "screen-door" look. It's fabulous!
Great pans and made my own hardware with the link that was on the site....
After looking for an outside table with no luck, not to mention the unbelievable price tag, I asked my husband to make me this table..He worked on it for the day with my son and ILOVE the way it came out!!! The plans were simple and easy to follow. Thank you Ana!!!

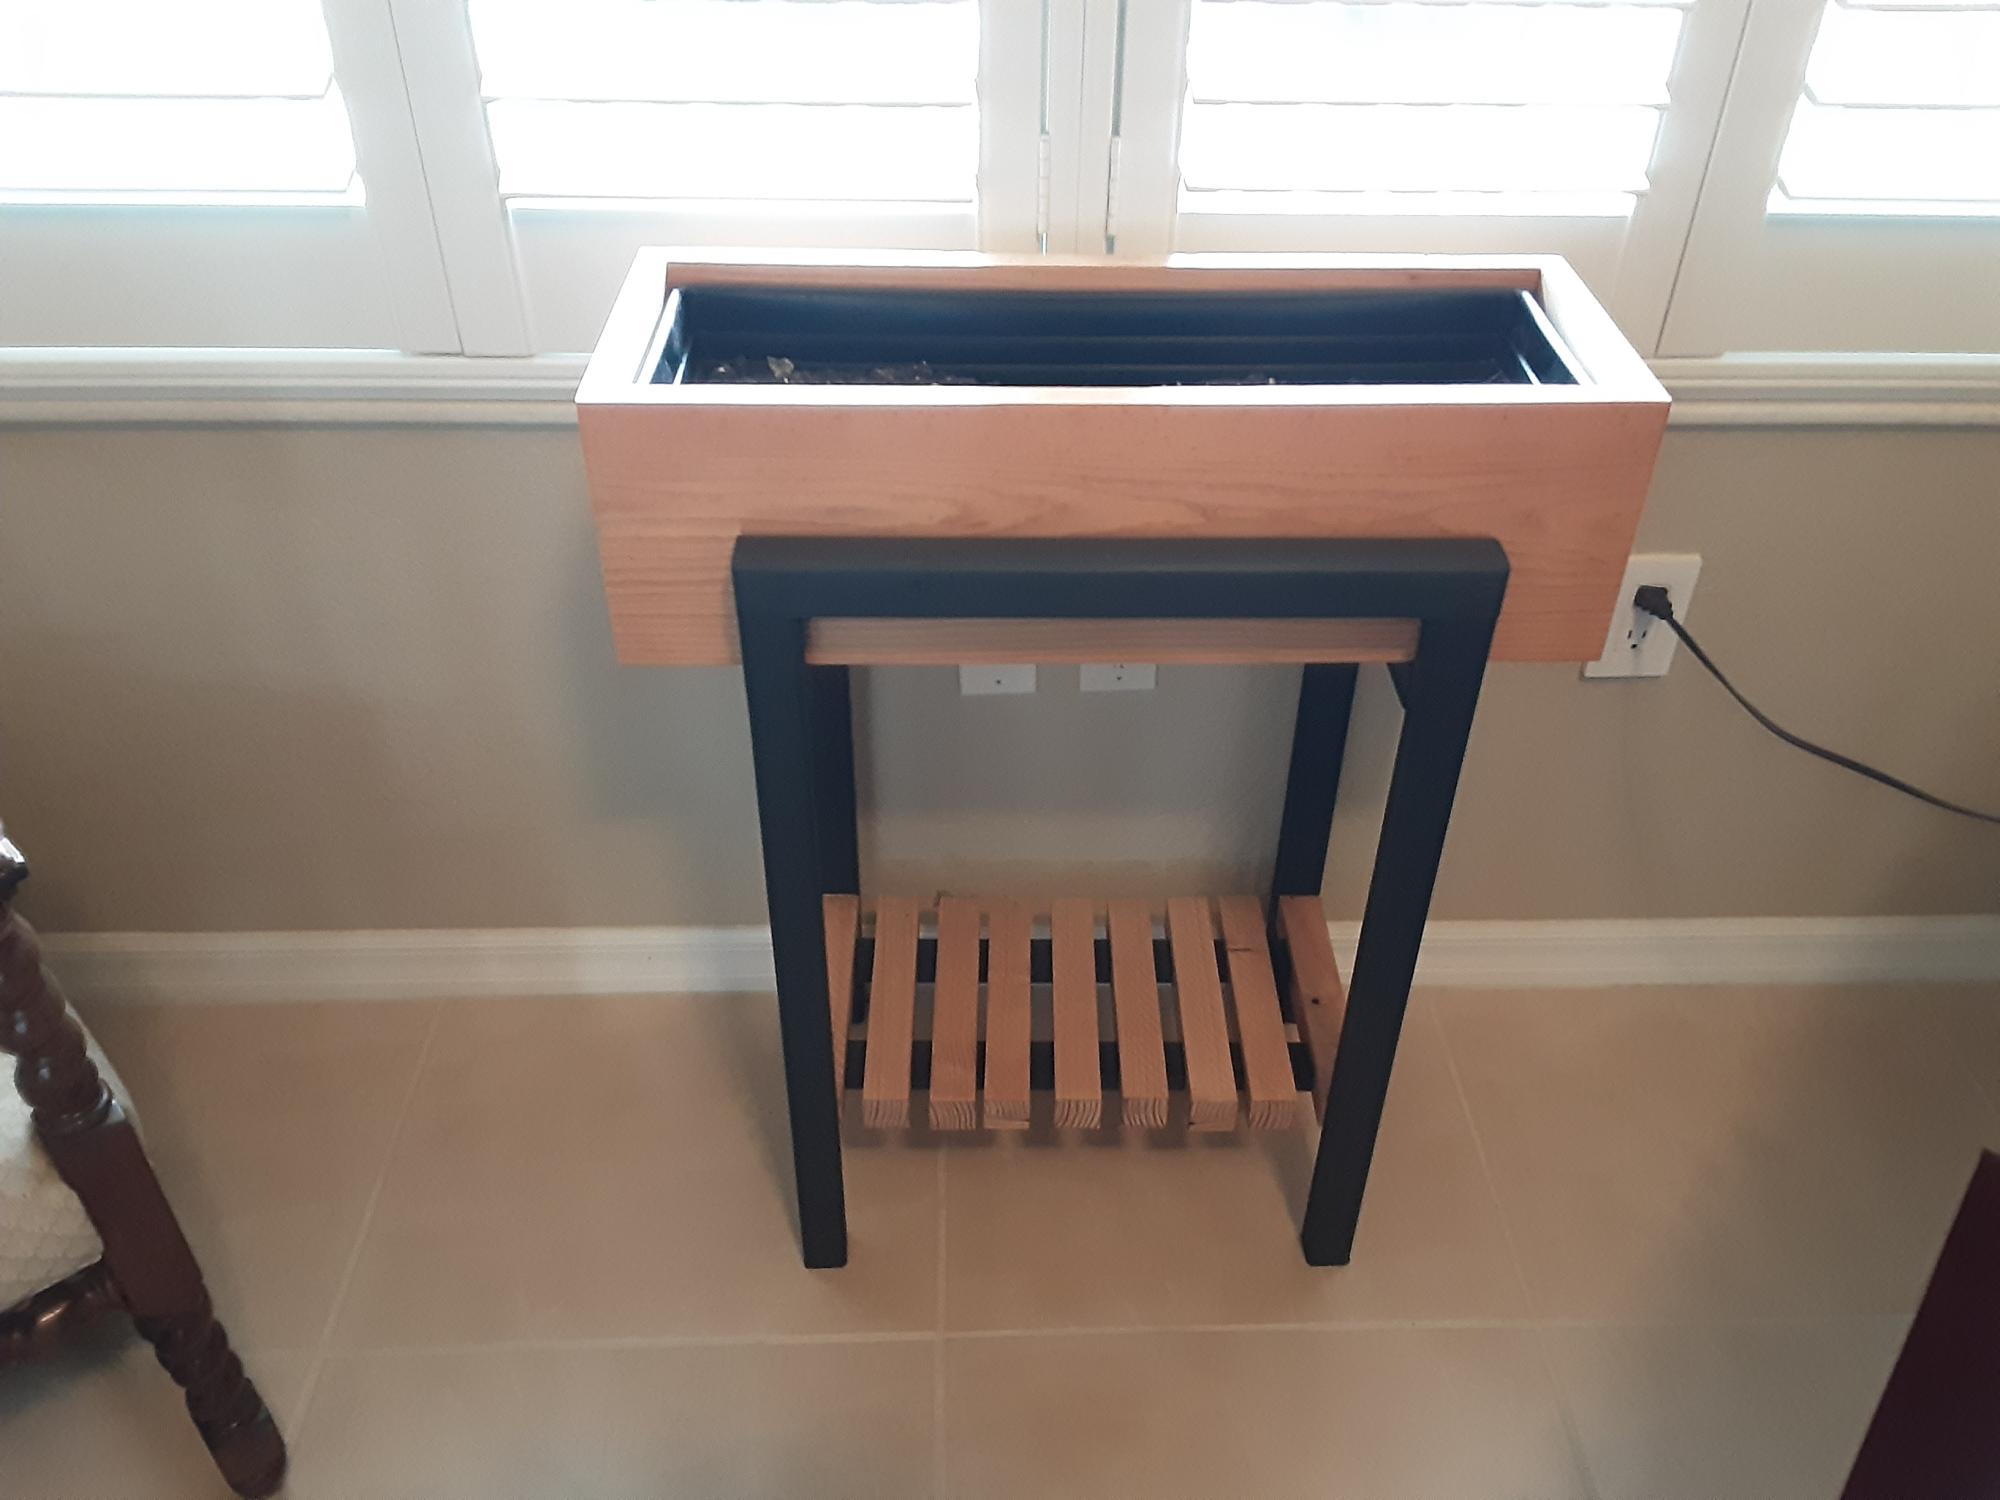
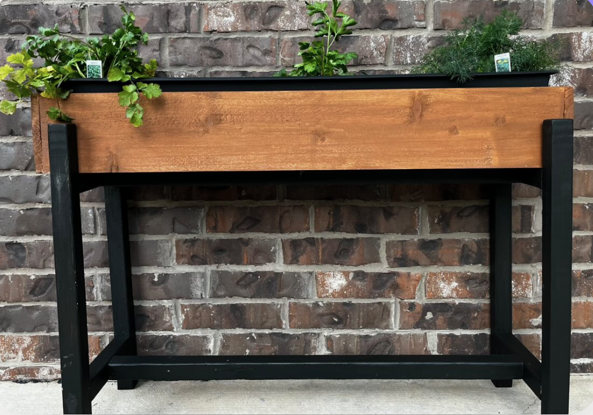
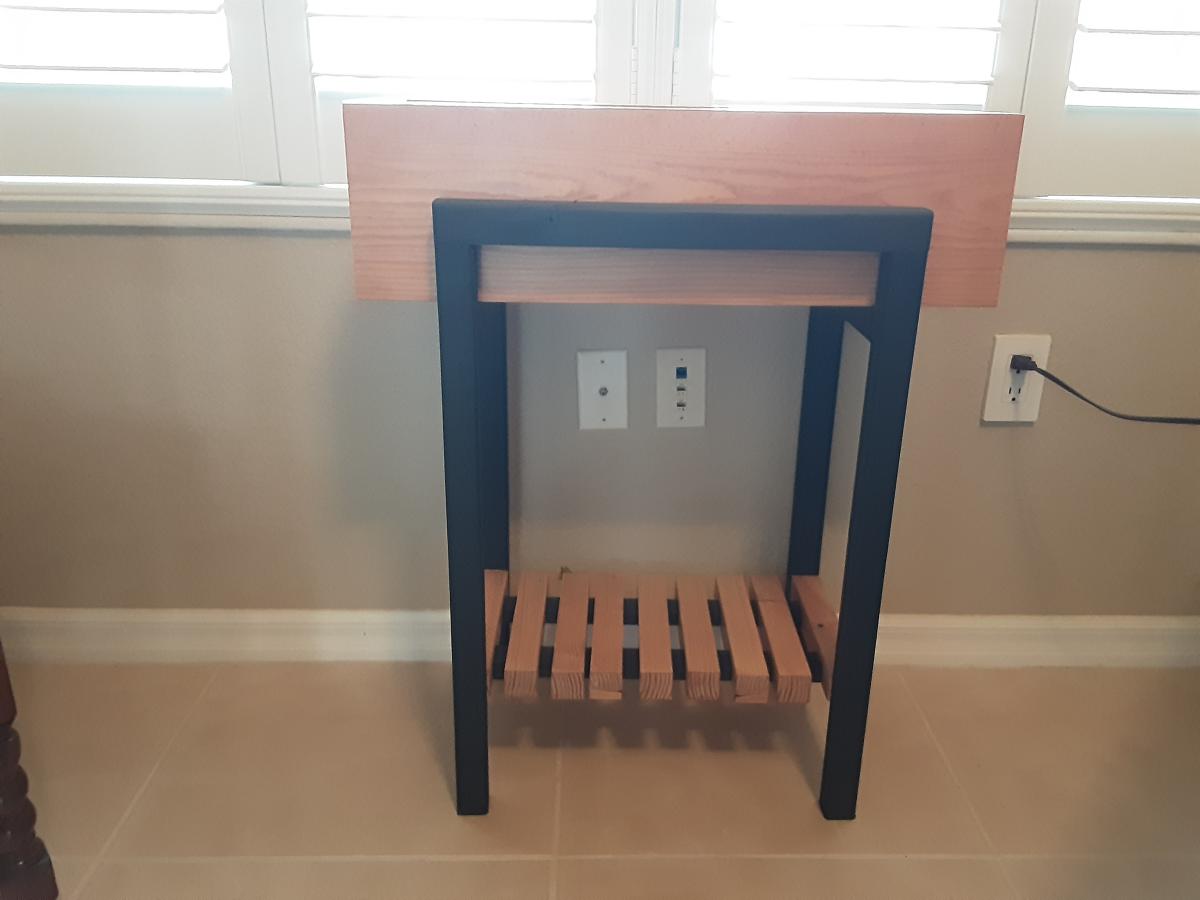
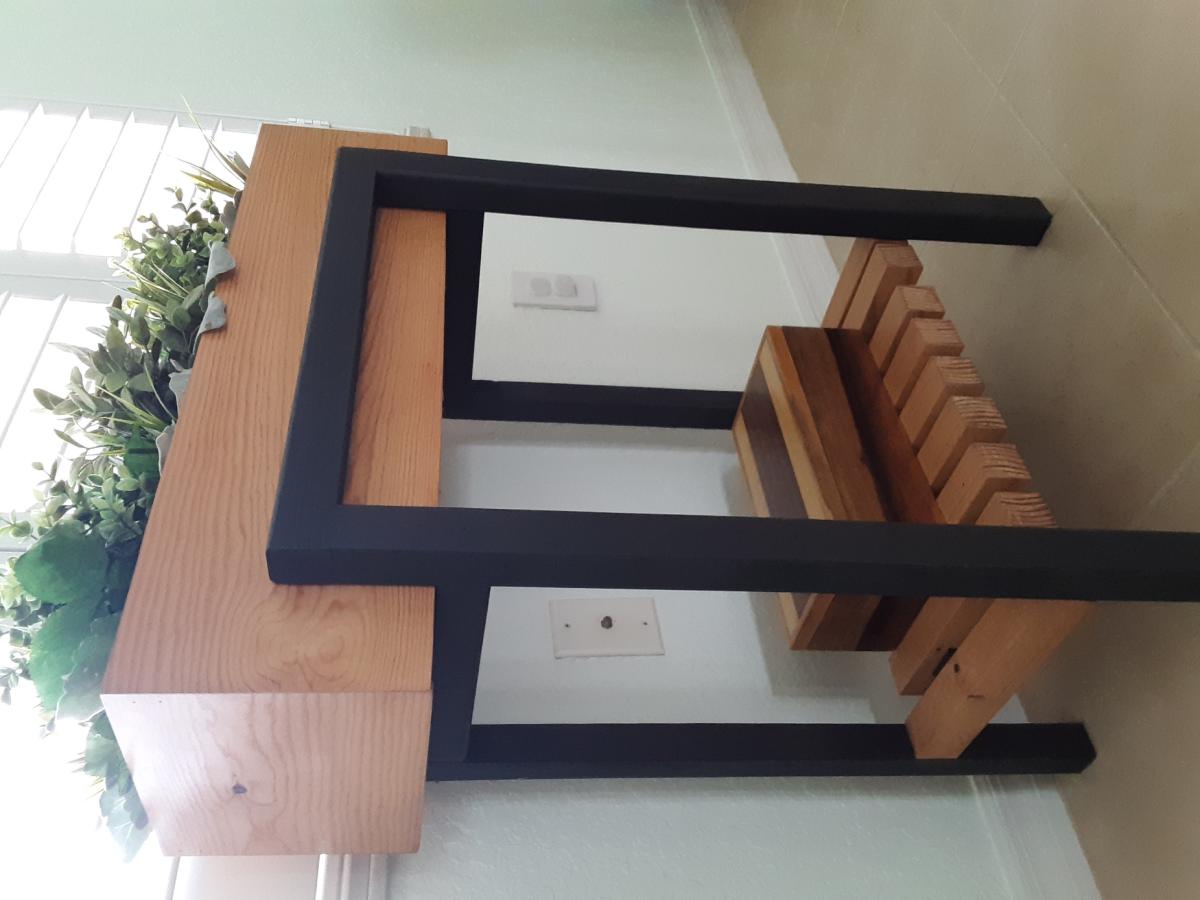
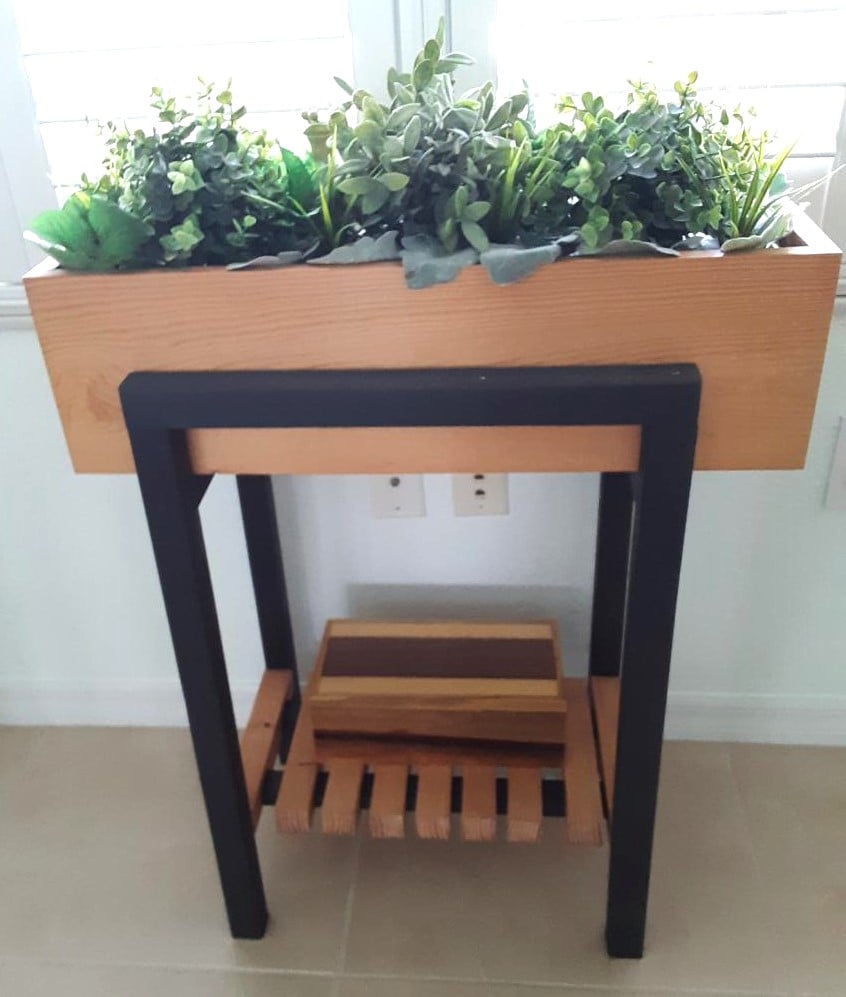
Created the stand for the raised planter using 2X2 assembled using dowels. Painted the stand mixing black with a bit of white to simulate metal. The actually plastic window box fits within a wood open box with mitered corners fir clean log. Bottom of the stand provides a shelf using (9) 2X2s with a dado placed on either end to fit on the runners of the stand.
Mon, 05/01/2023 - 08:24
It looks super high quality, love your take! Thanks for sharing.

Comments
Ana White Admin
Sat, 04/08/2023 - 15:37
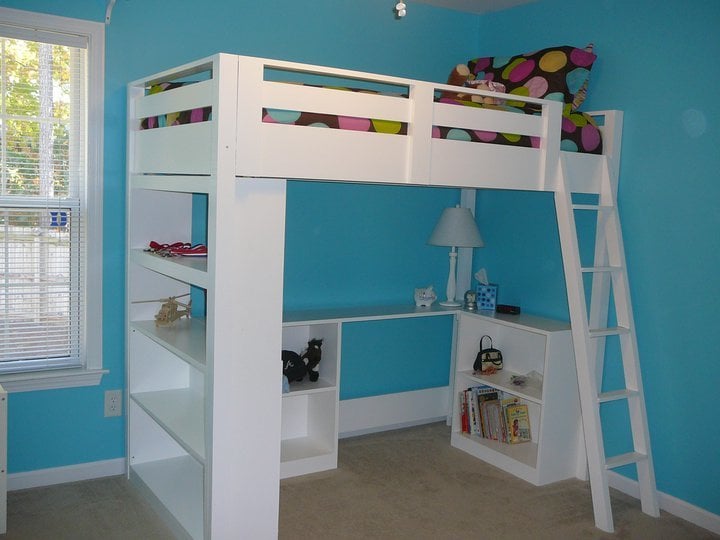
Floating bunk!
Love what you came up with, plus extra storage! Thanks for sharing.