Community Brag Posts

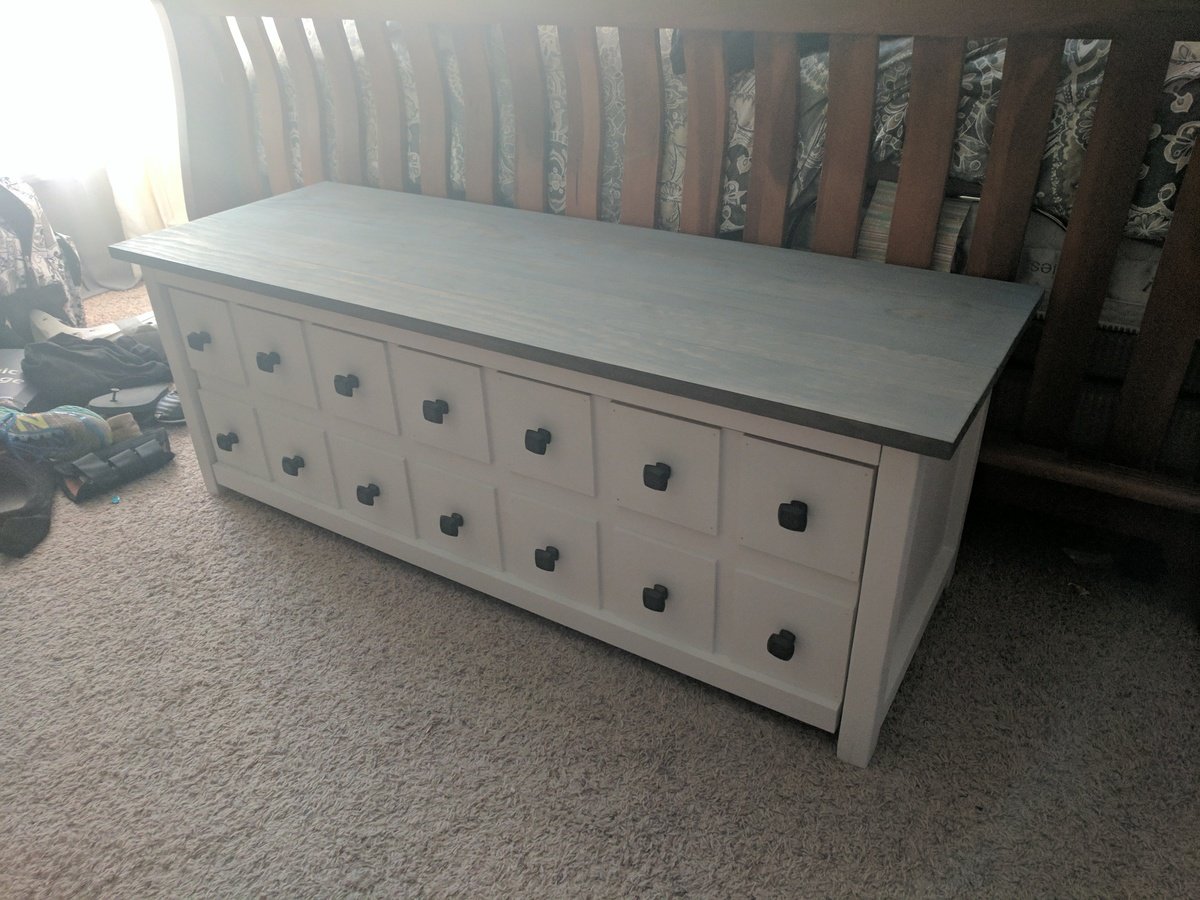
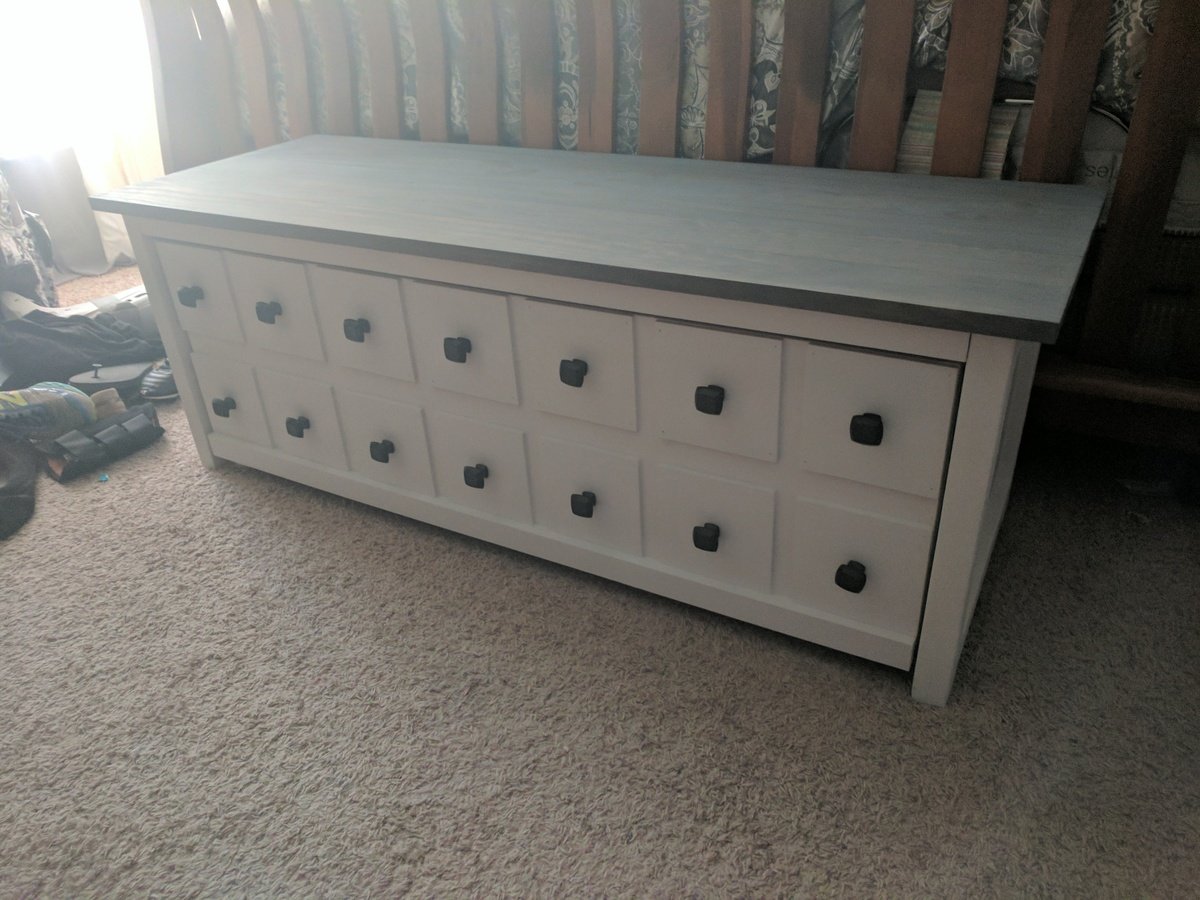
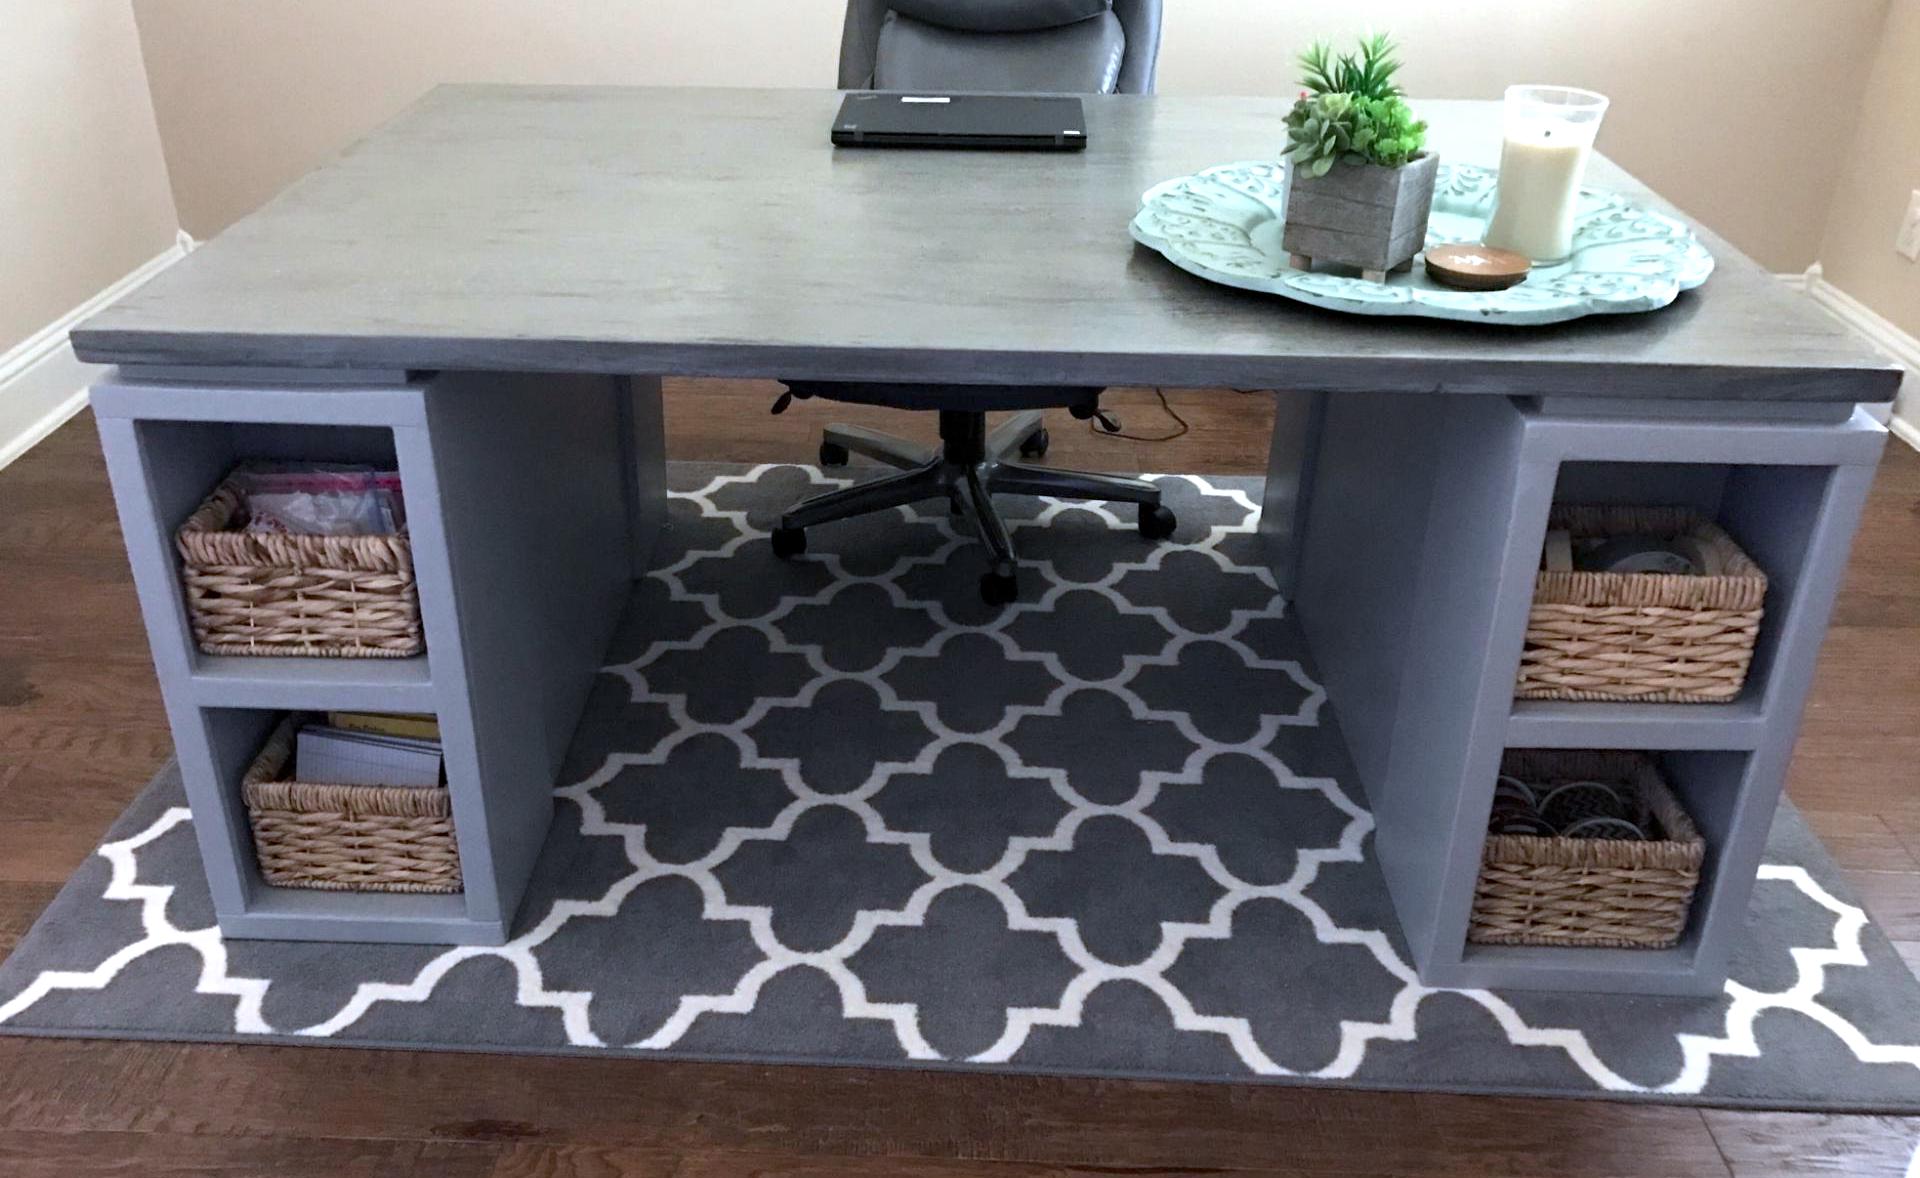
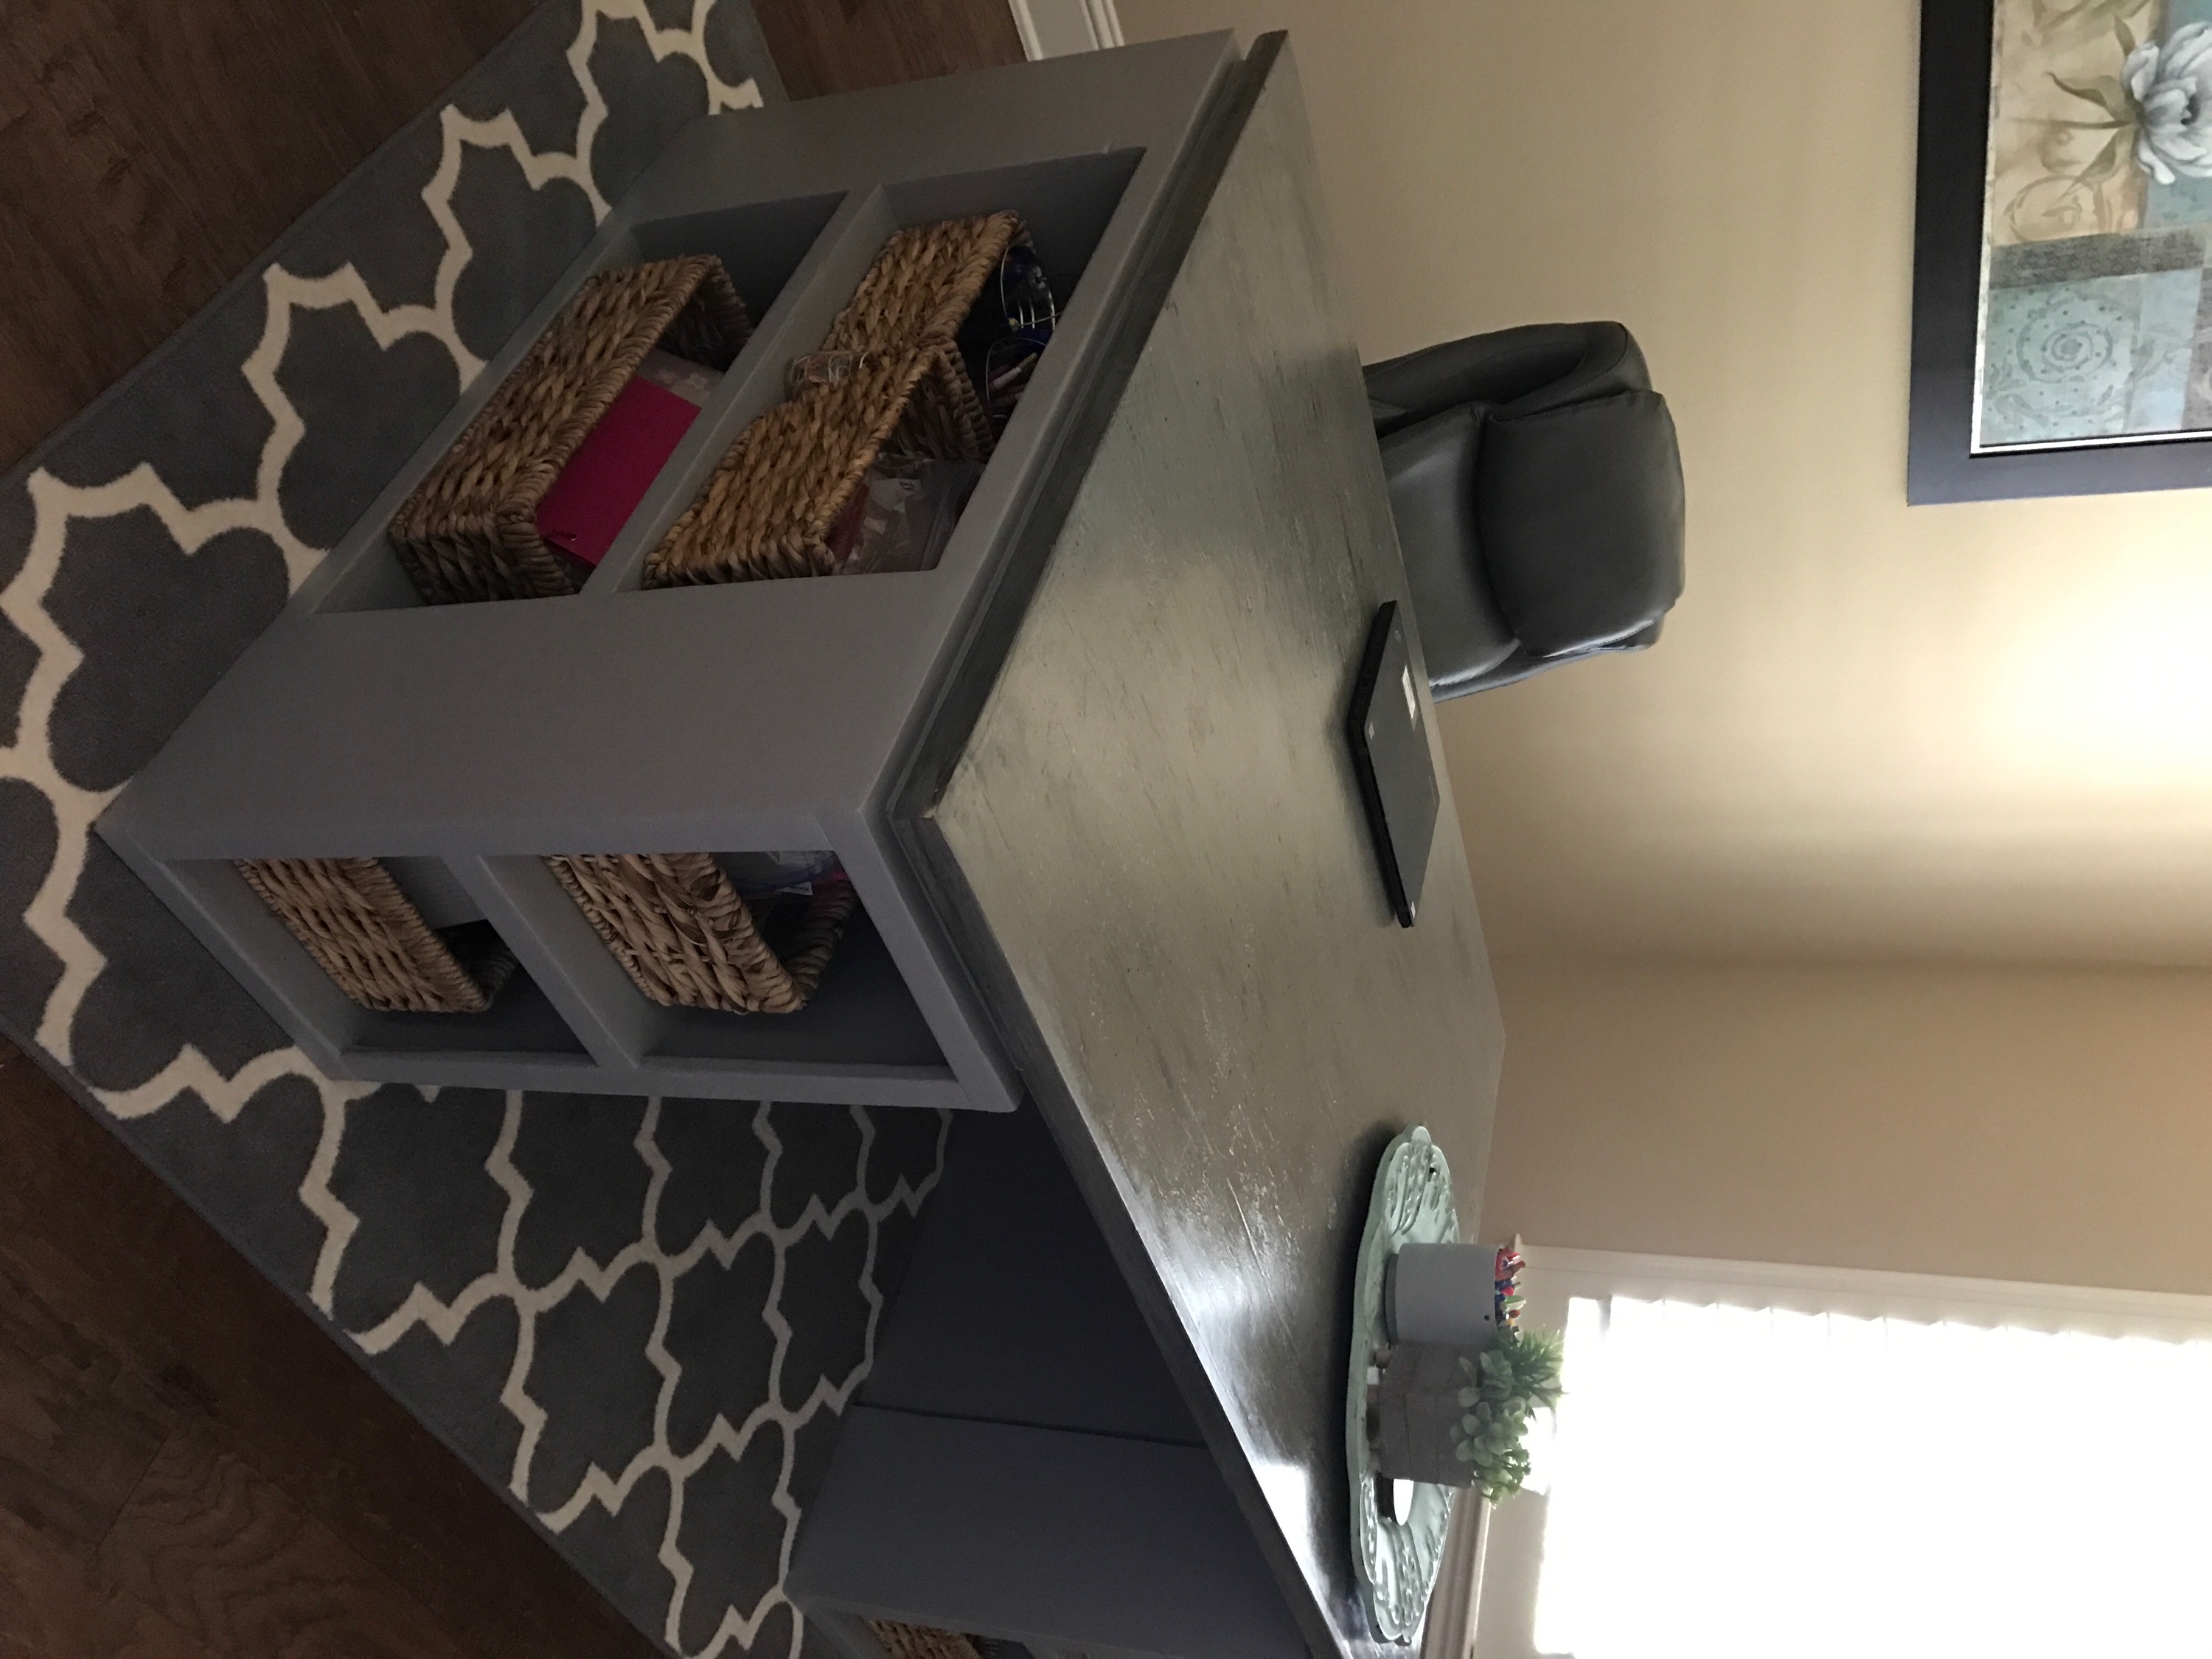
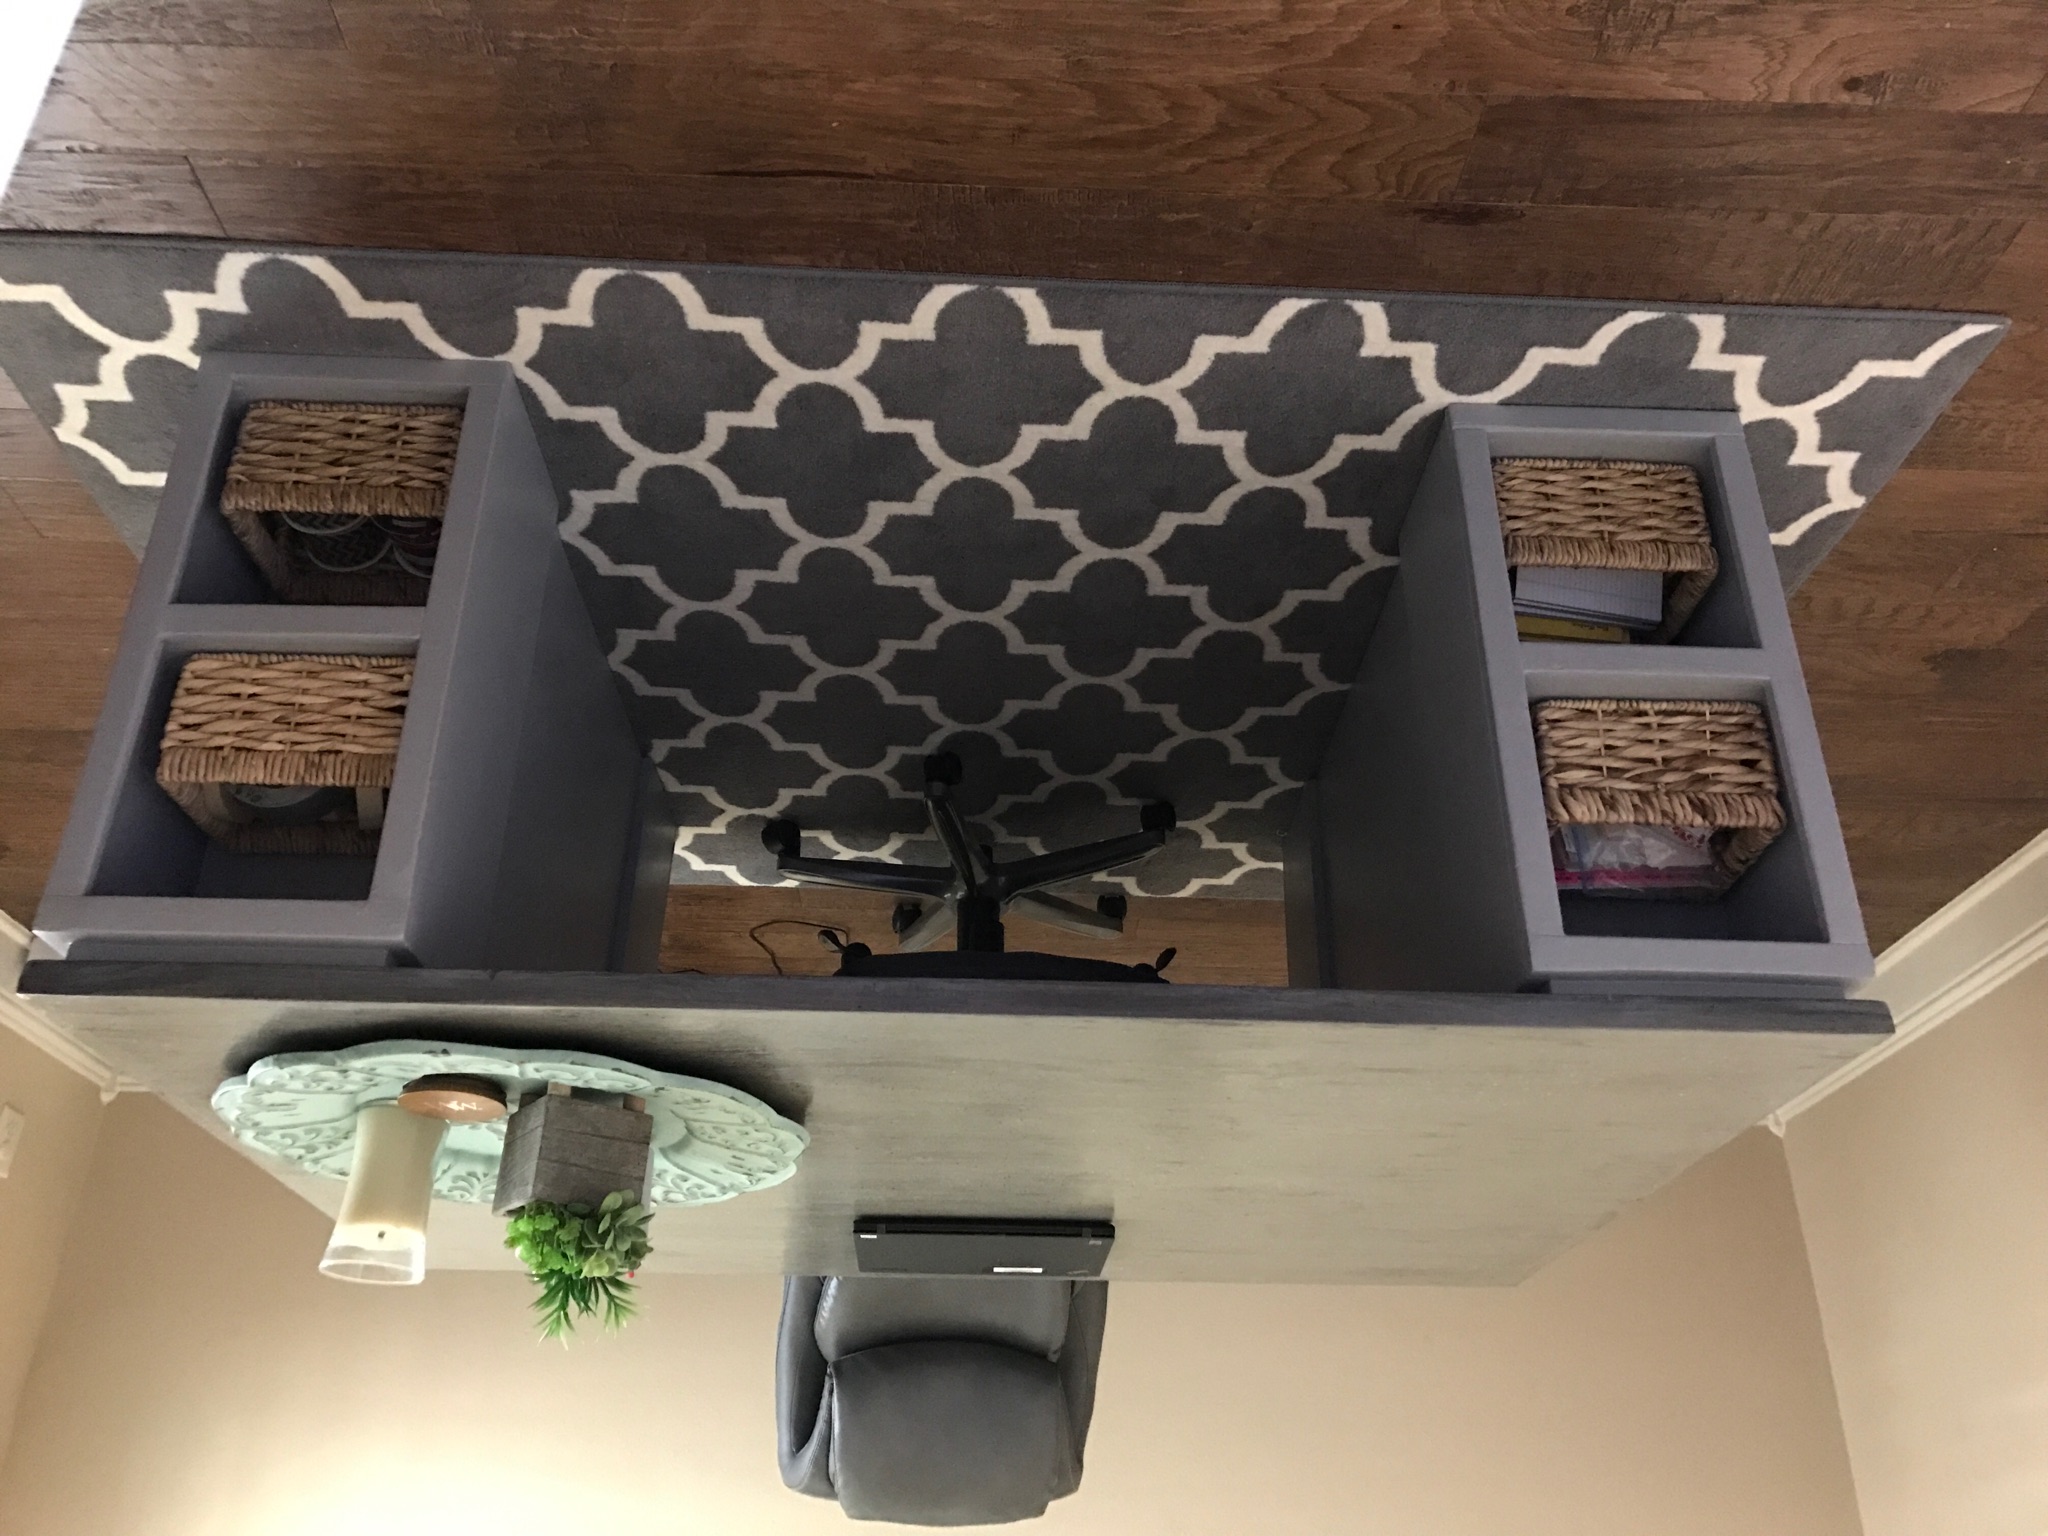
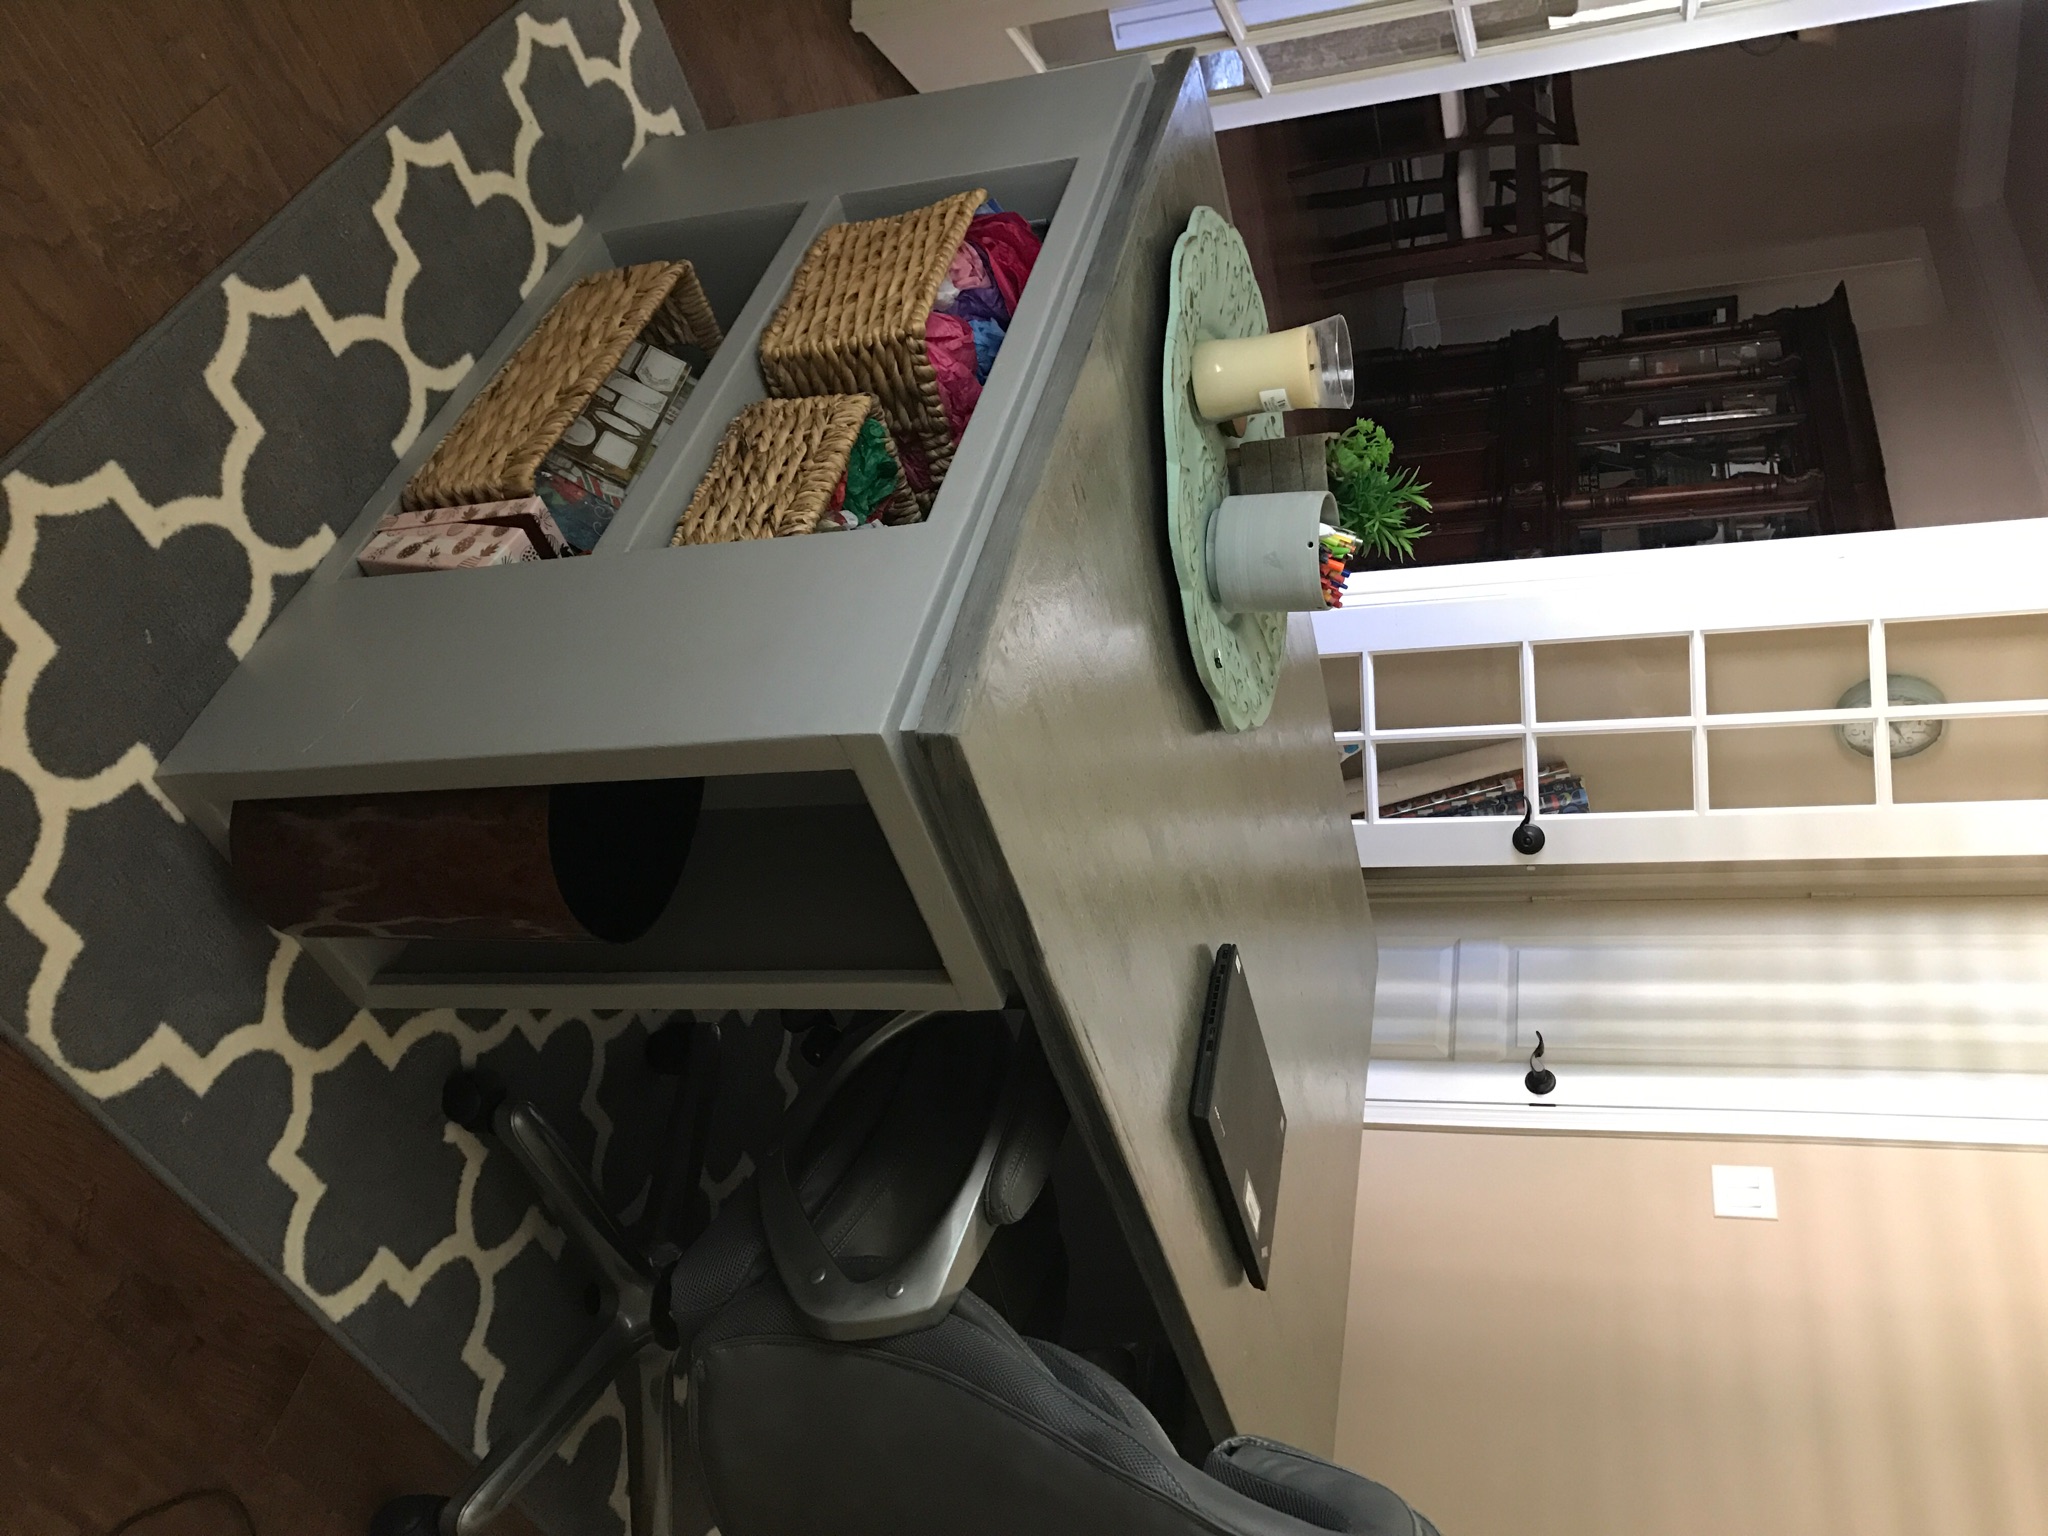
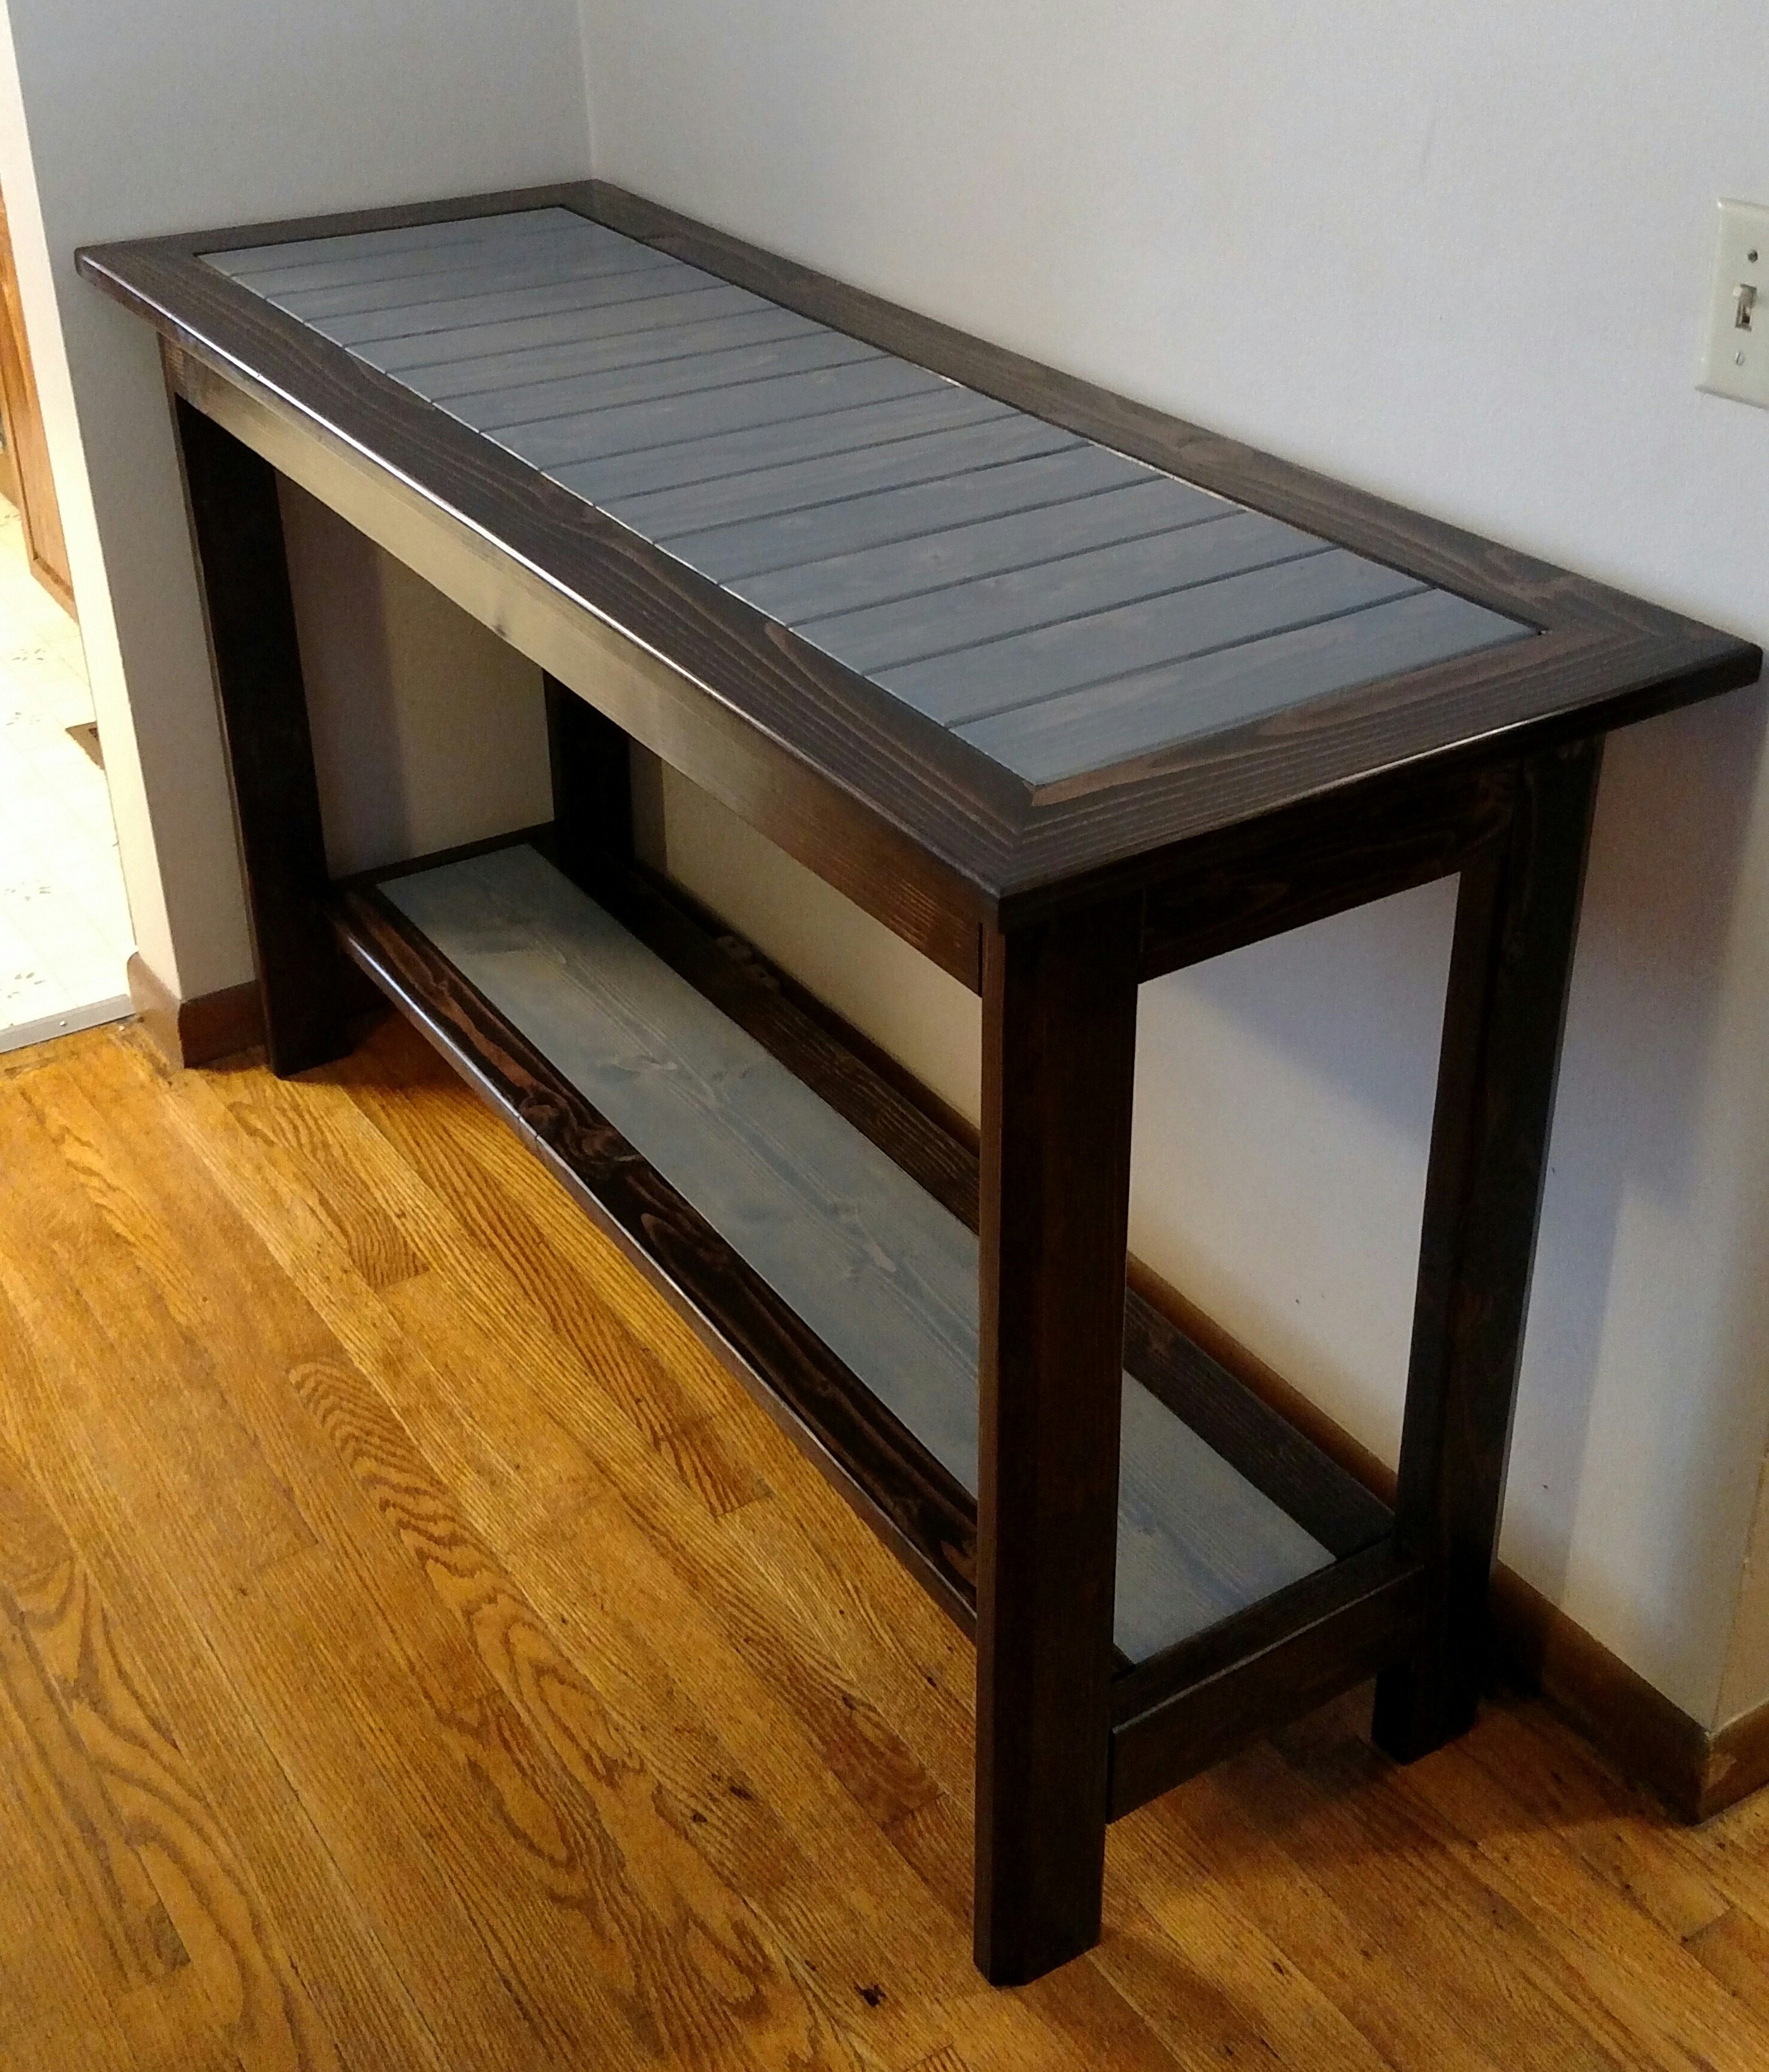
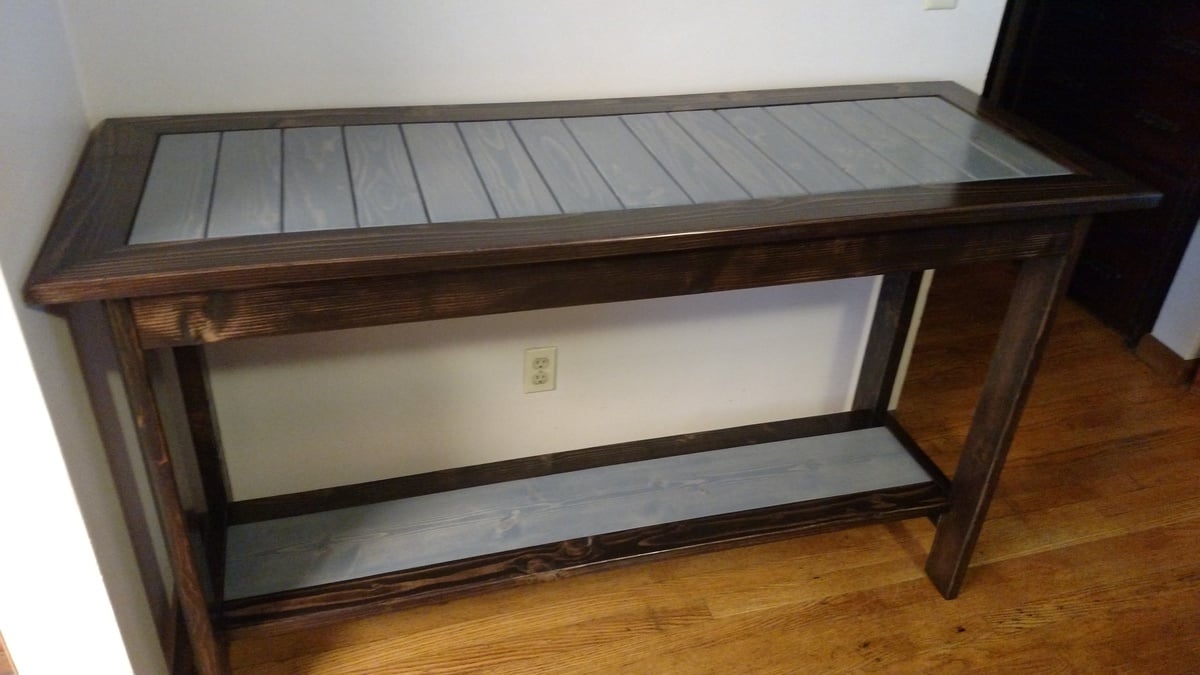
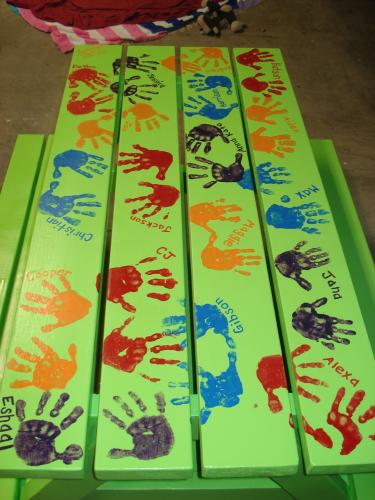
Tuscan Turquoise Farm Table and Rustic Benches

Submitted by LisaM1216 on Wed, 10/08/2014 - 21:32

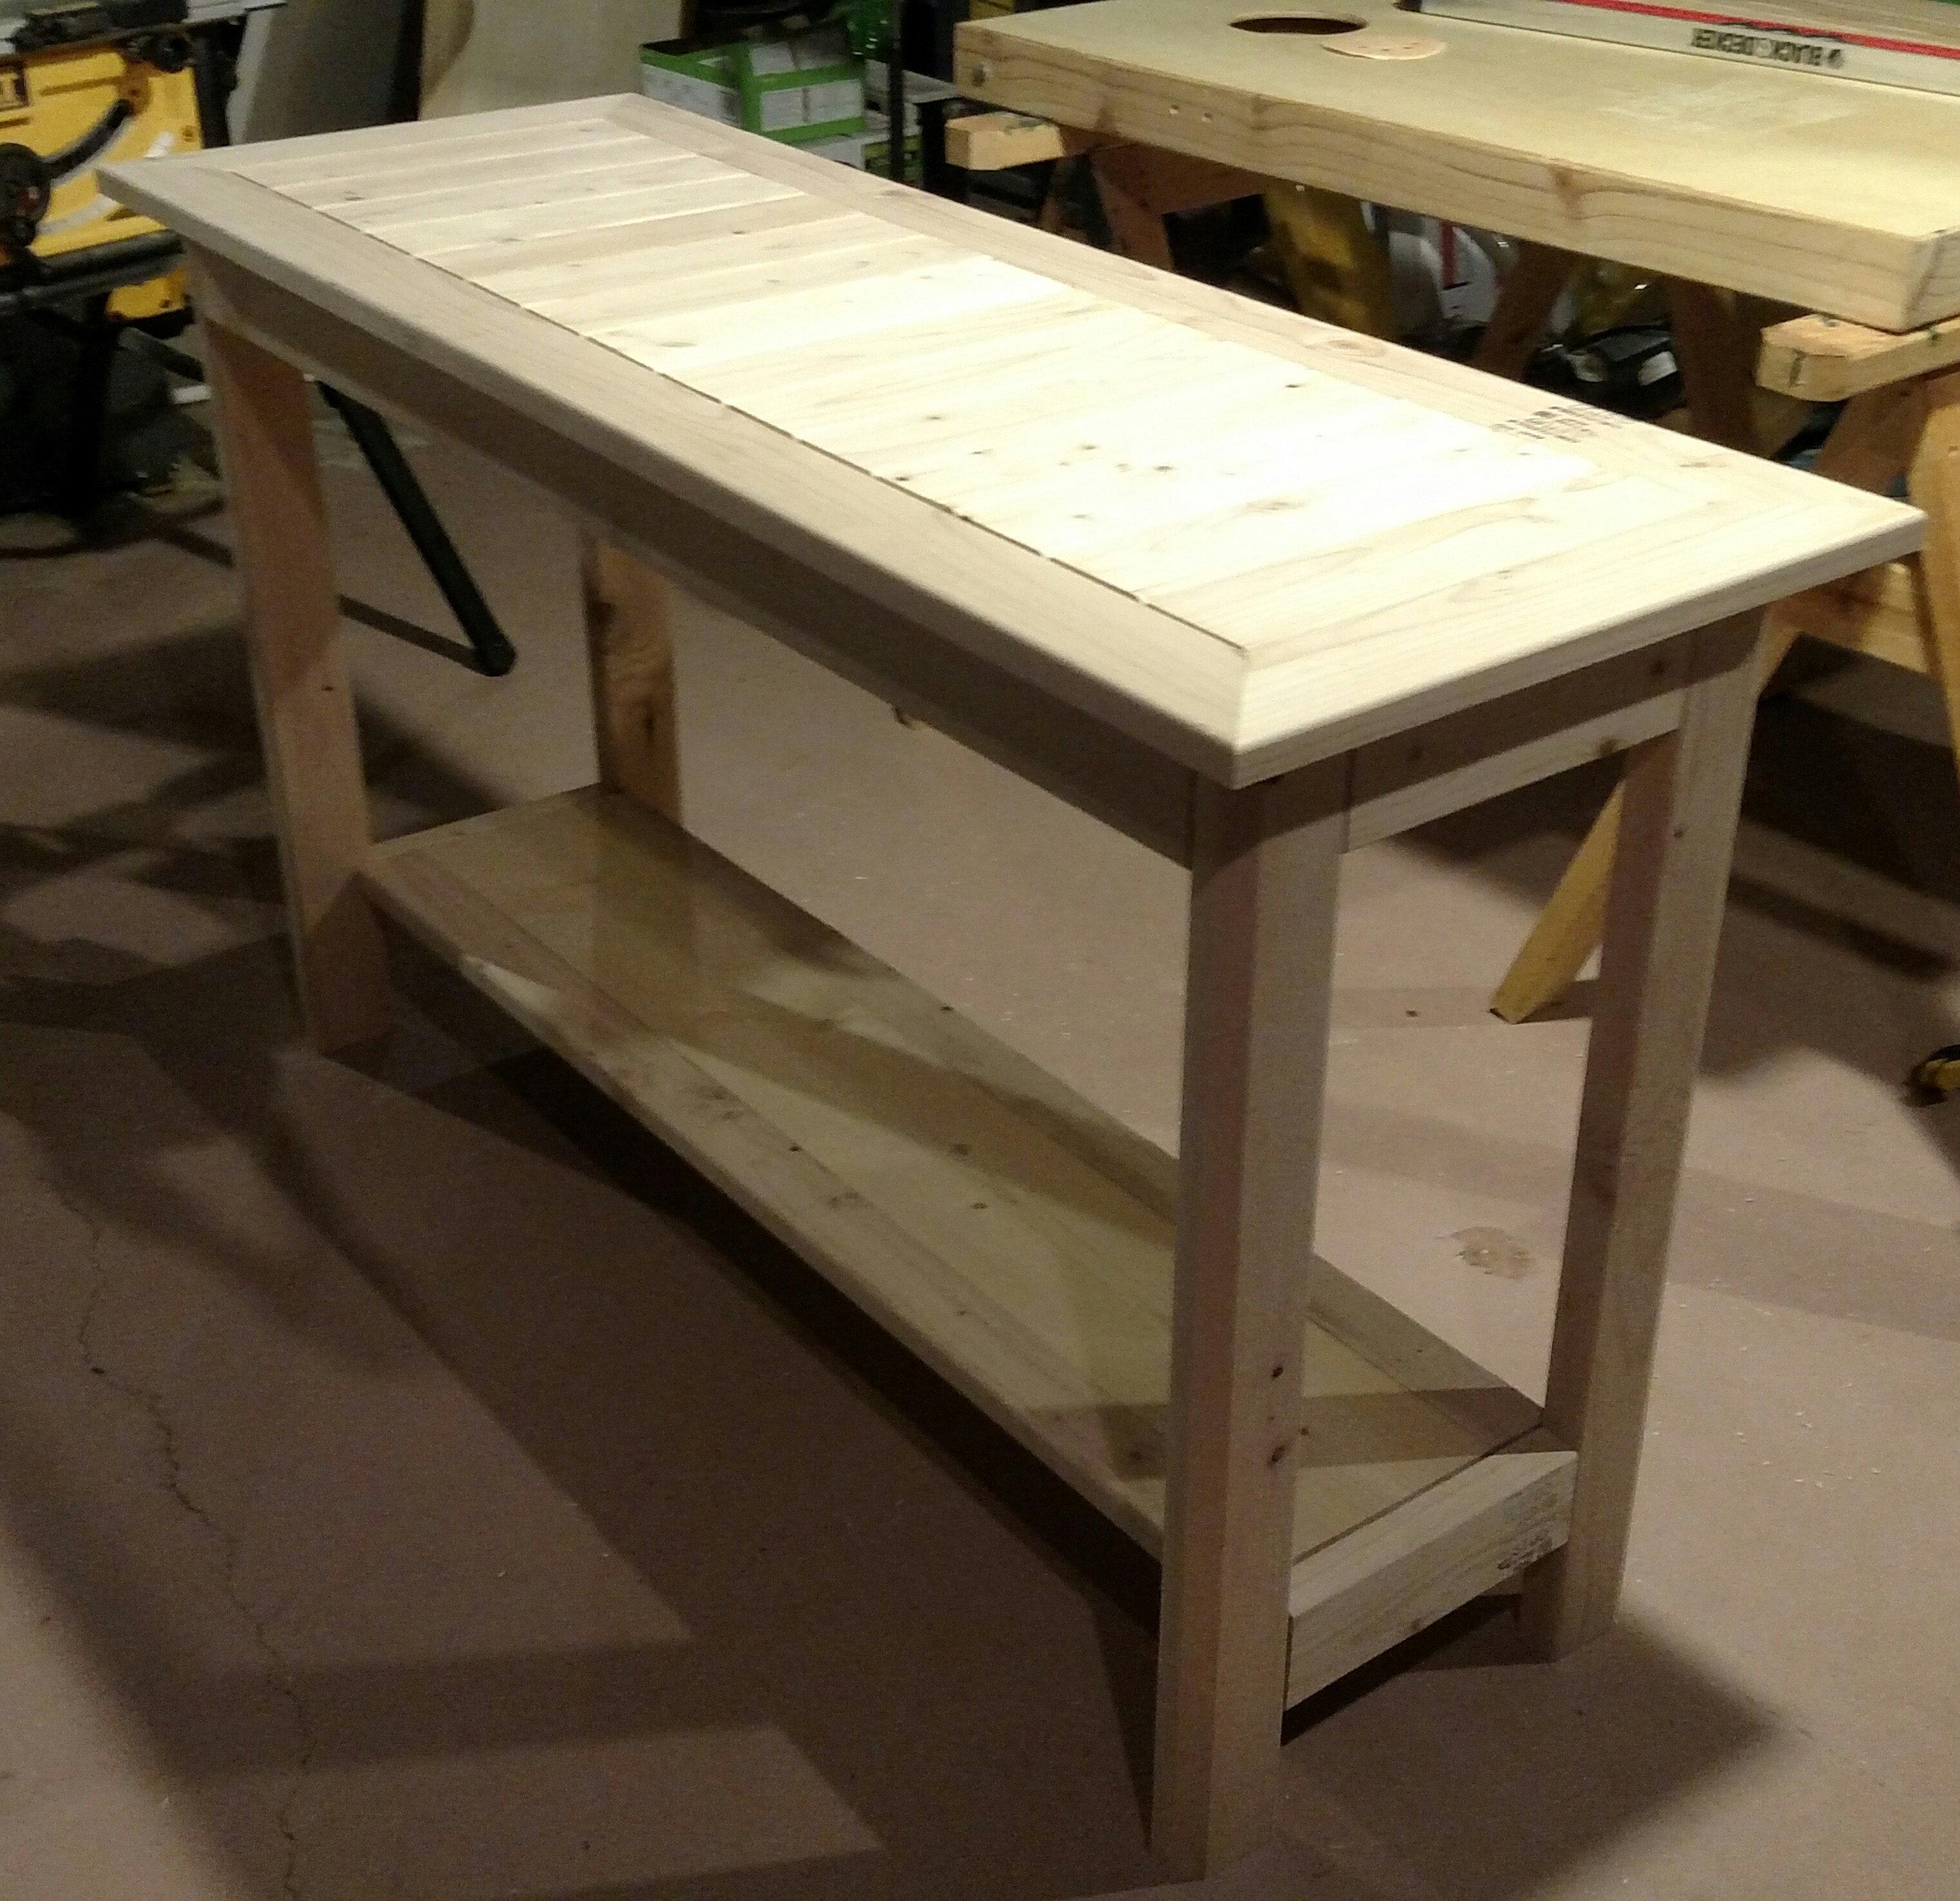
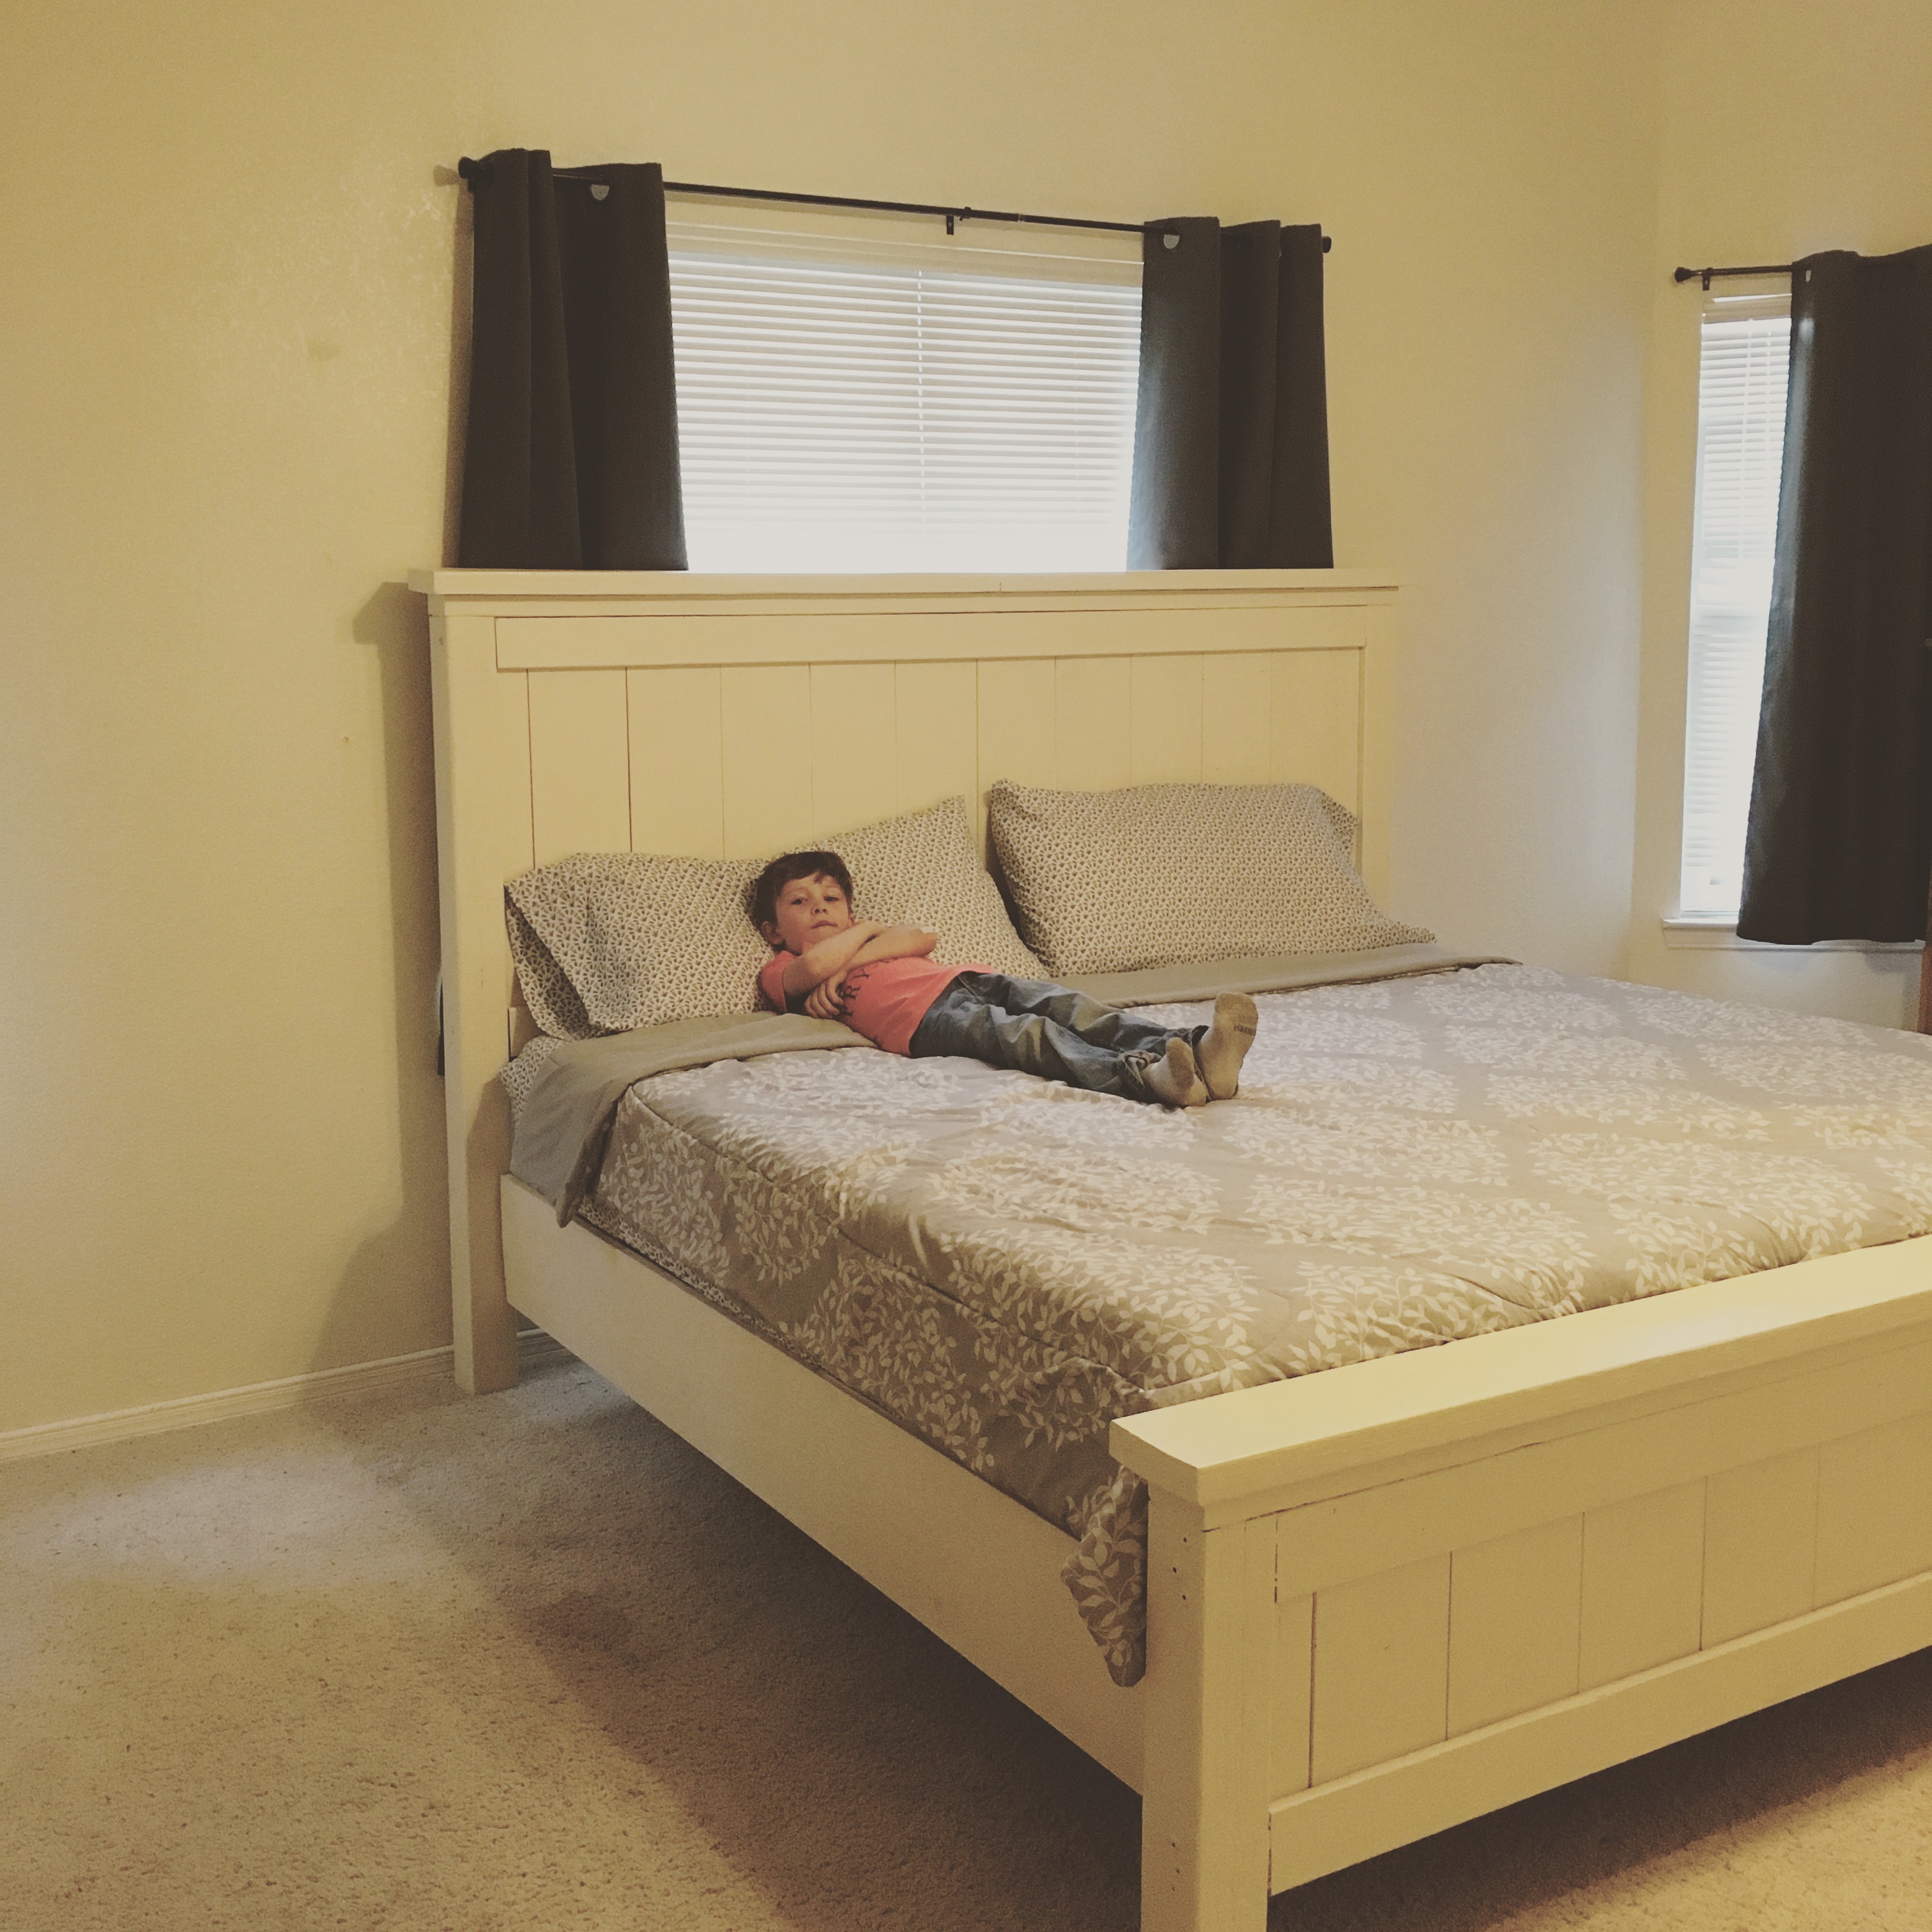
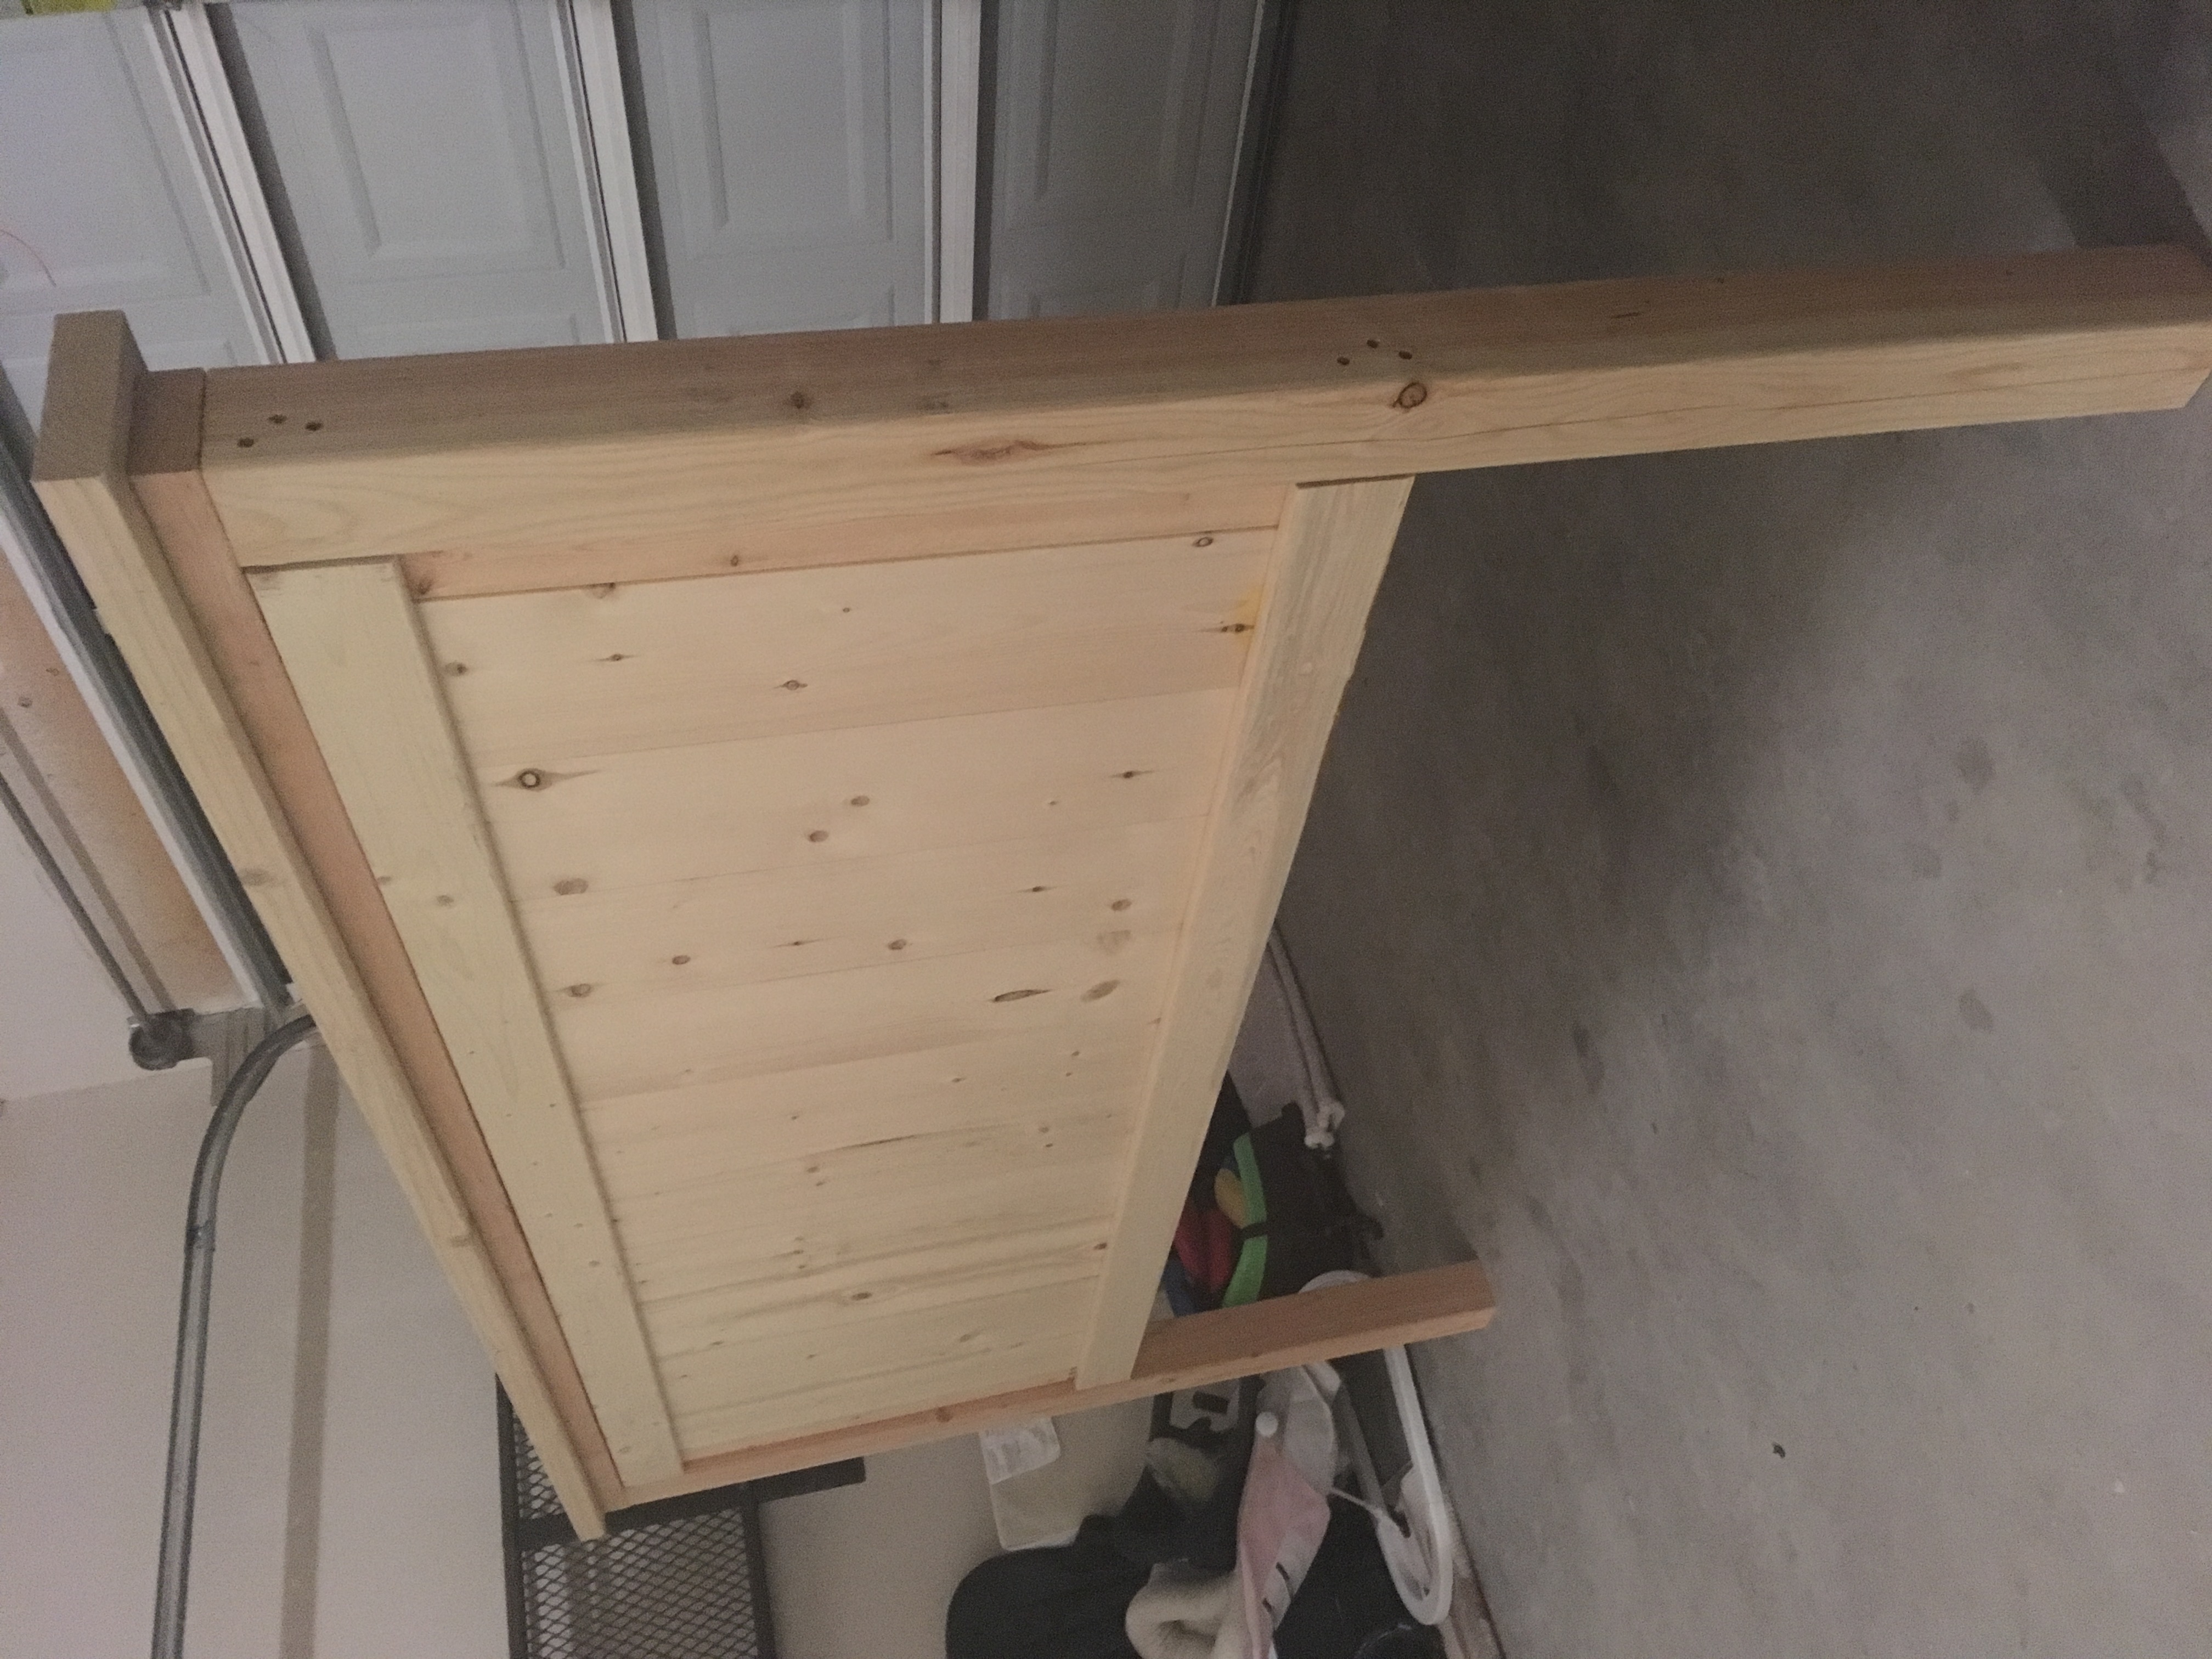
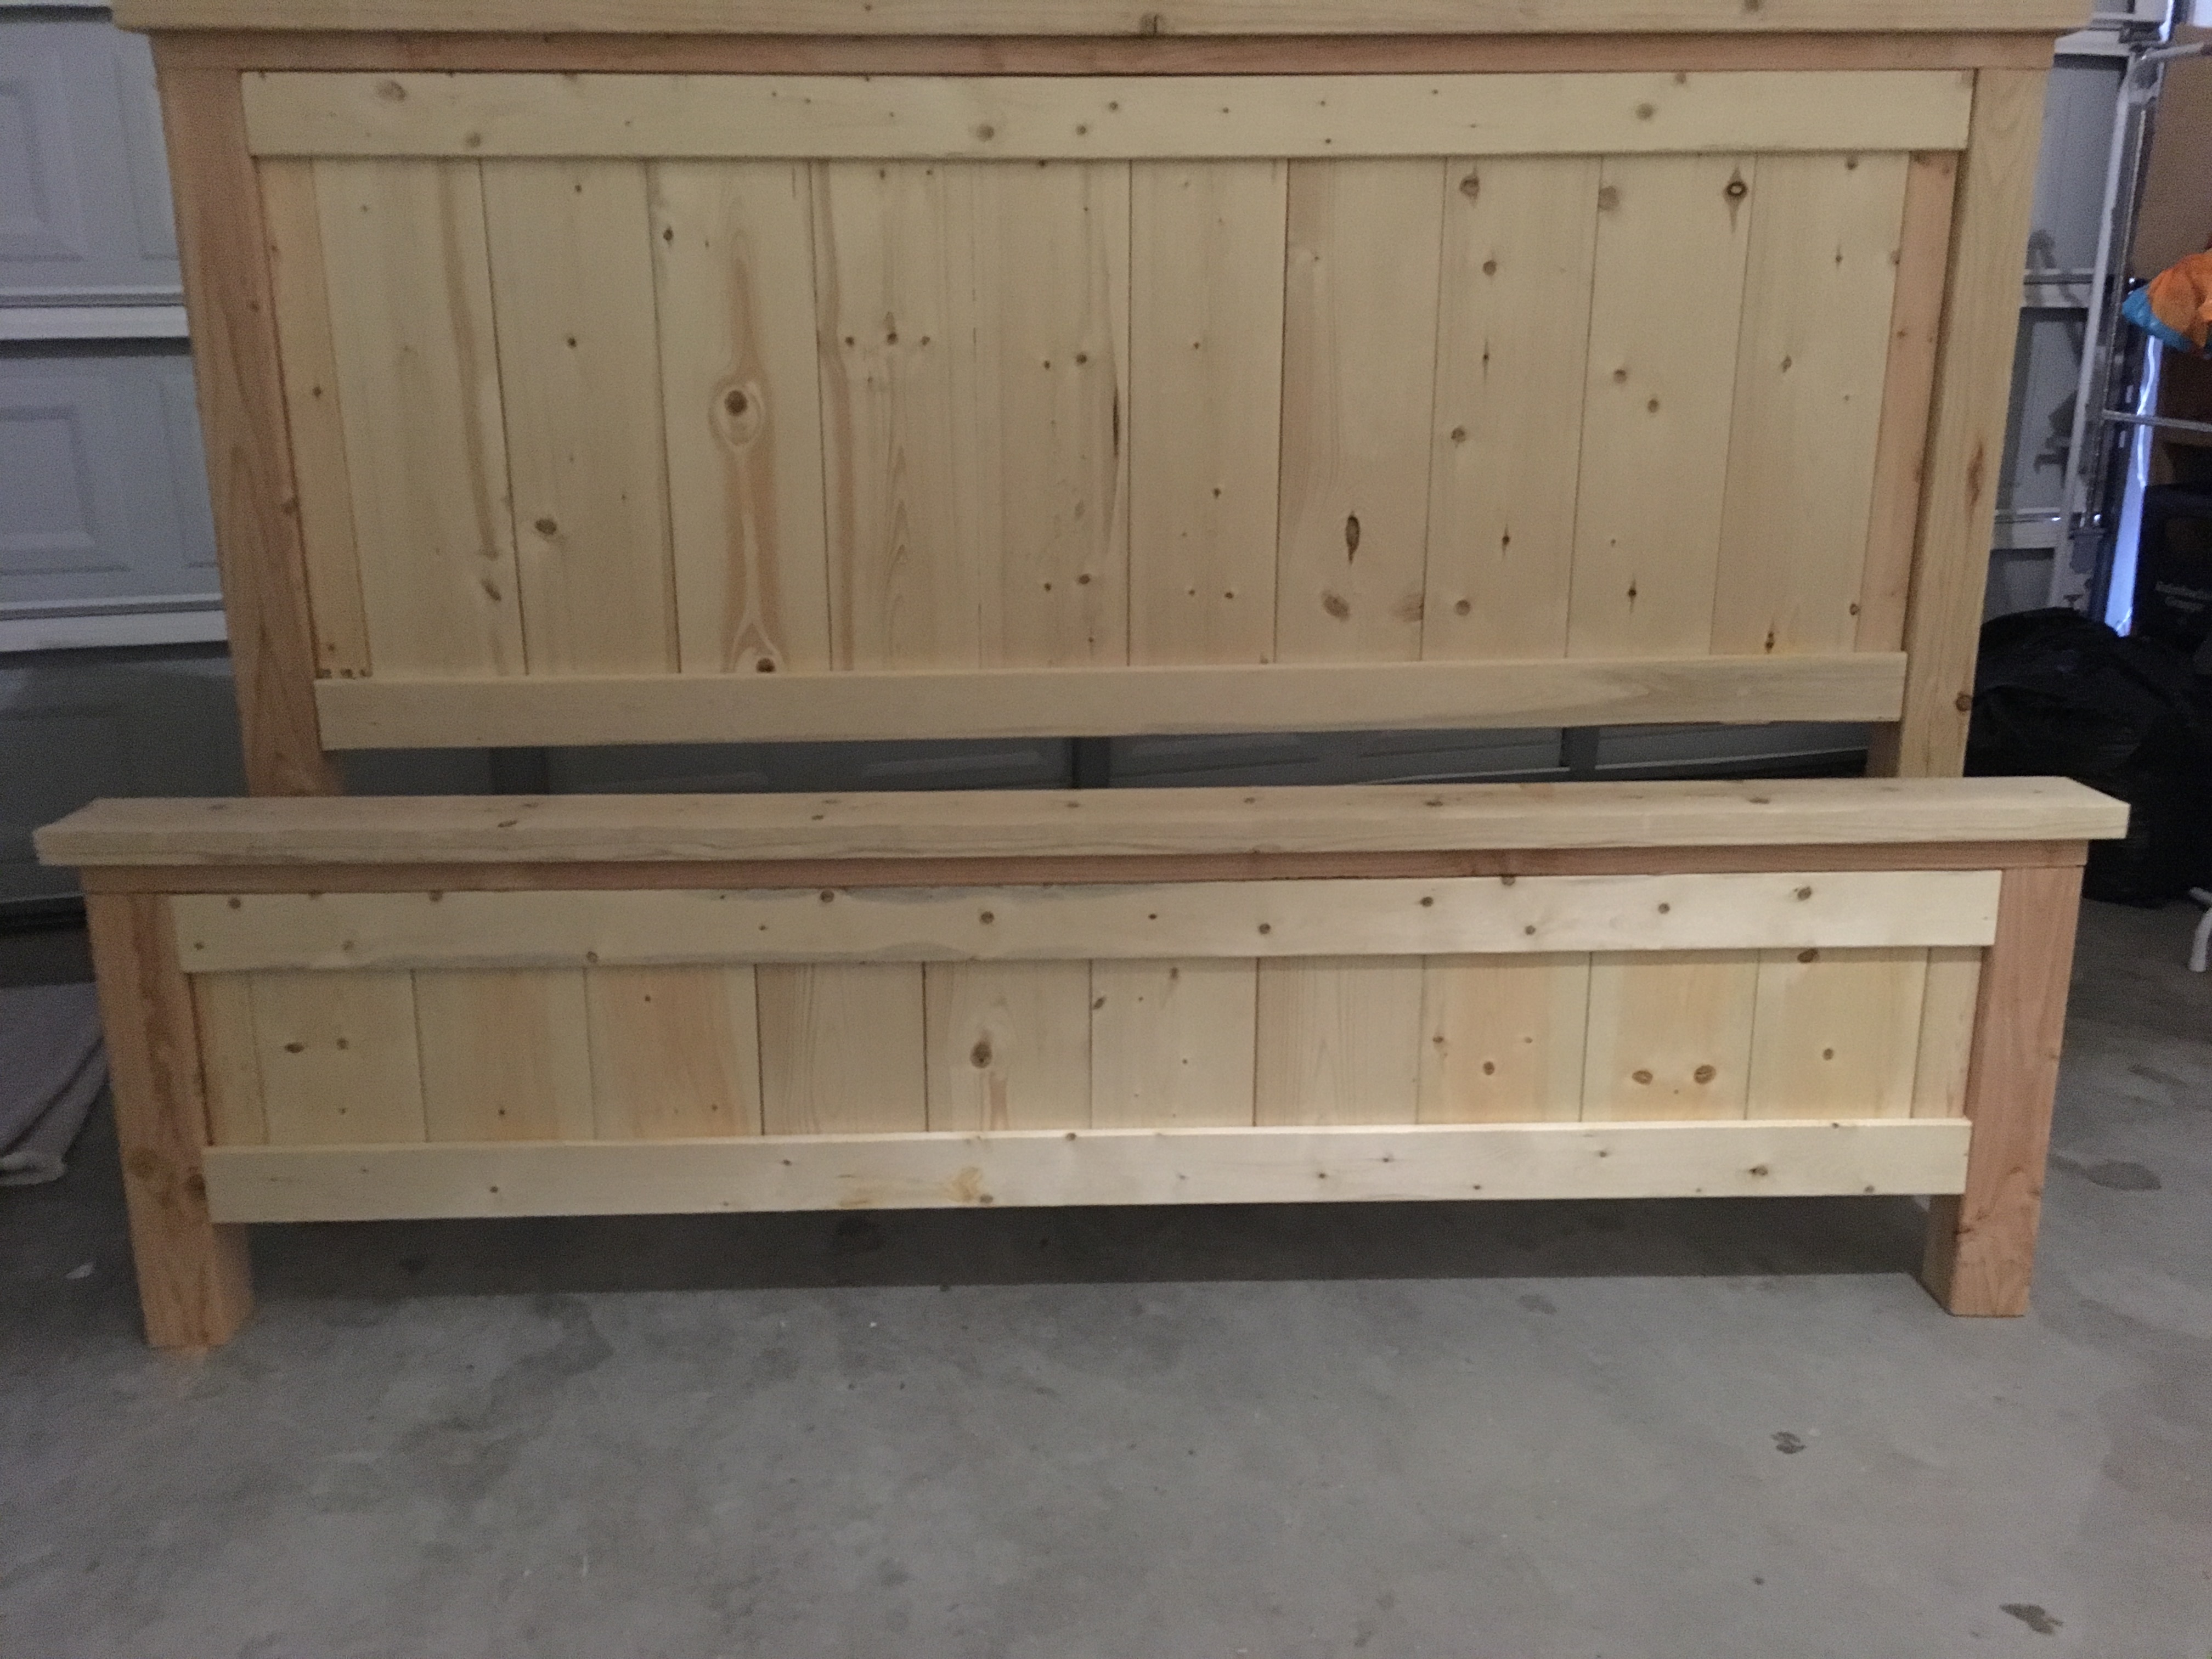
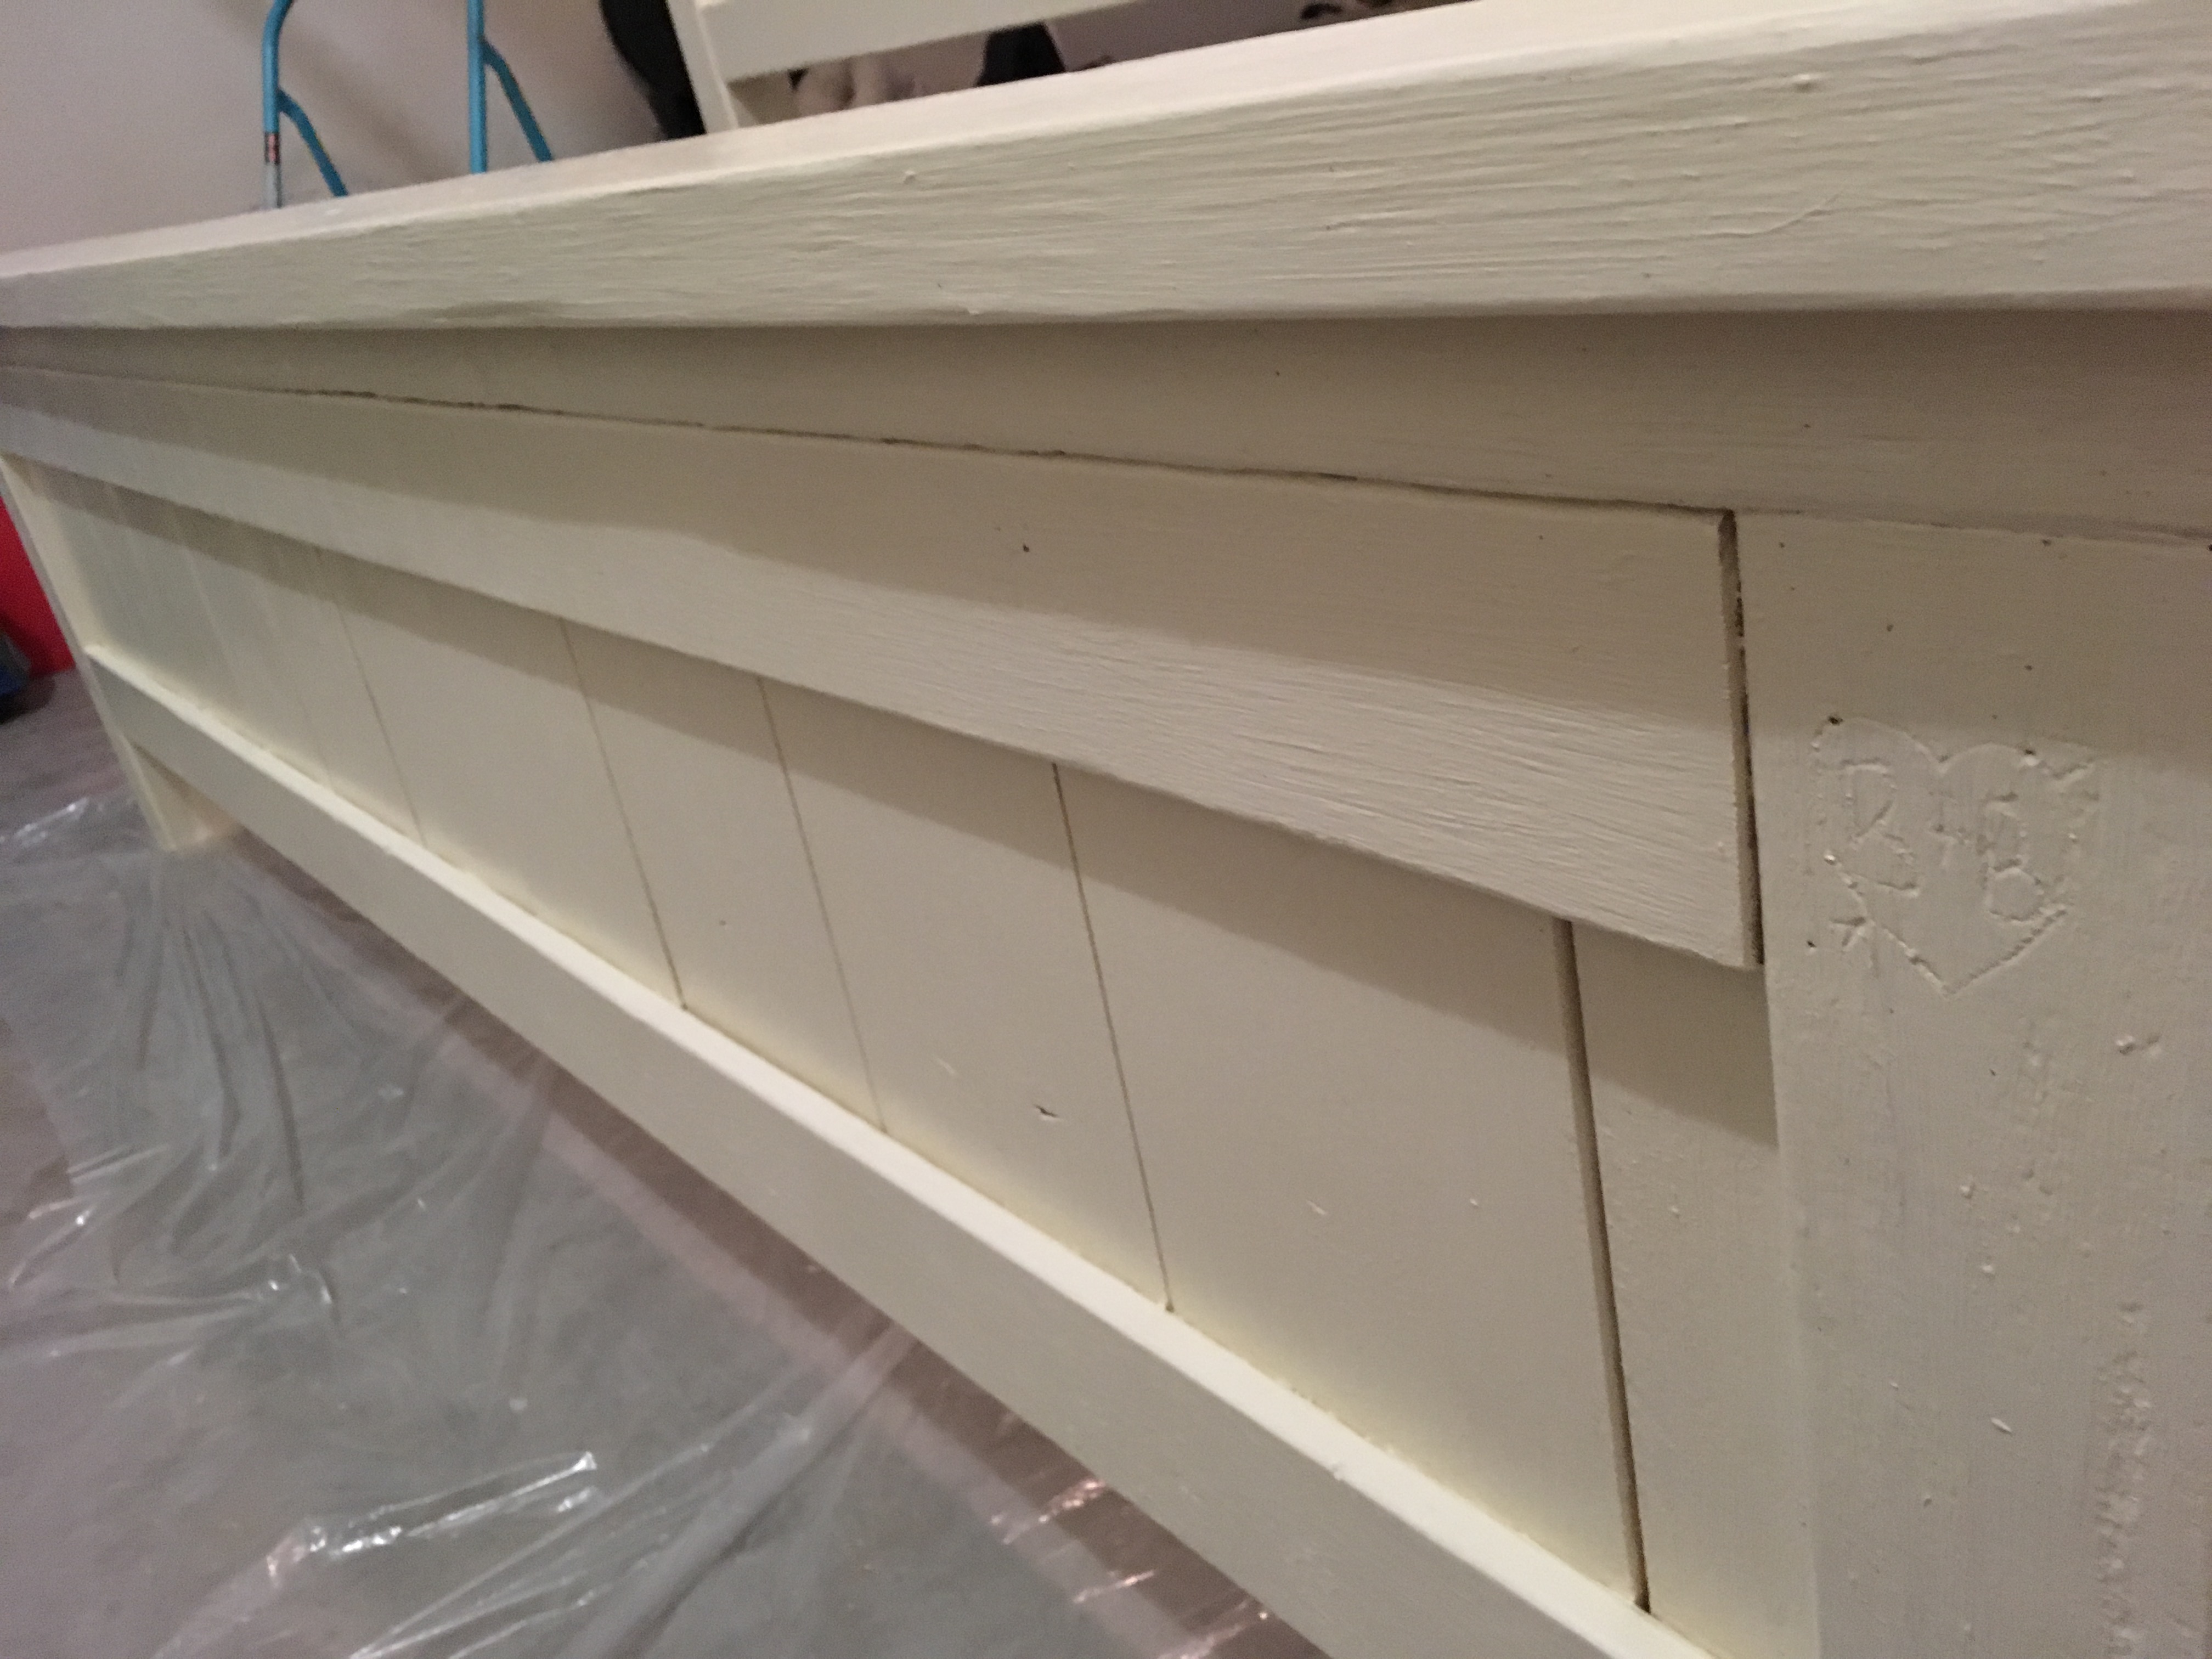
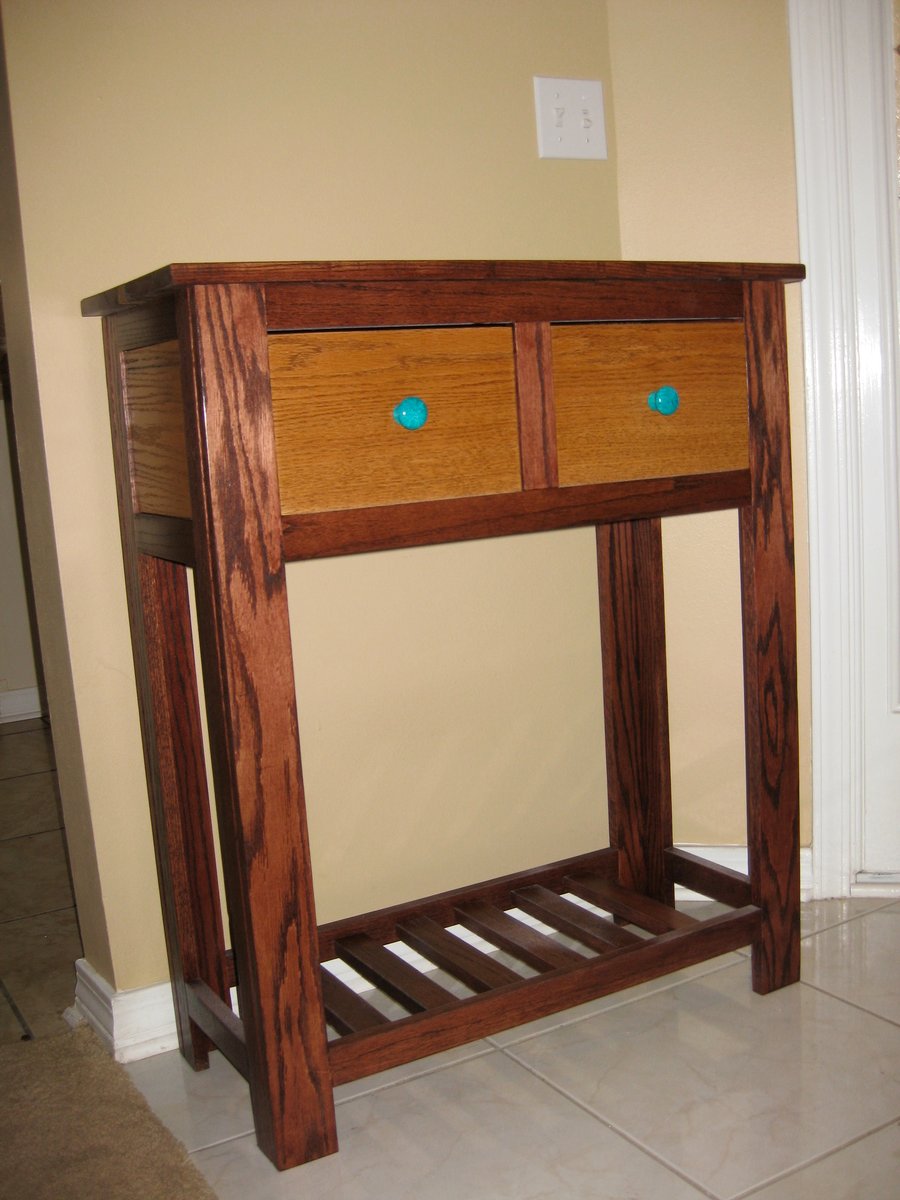
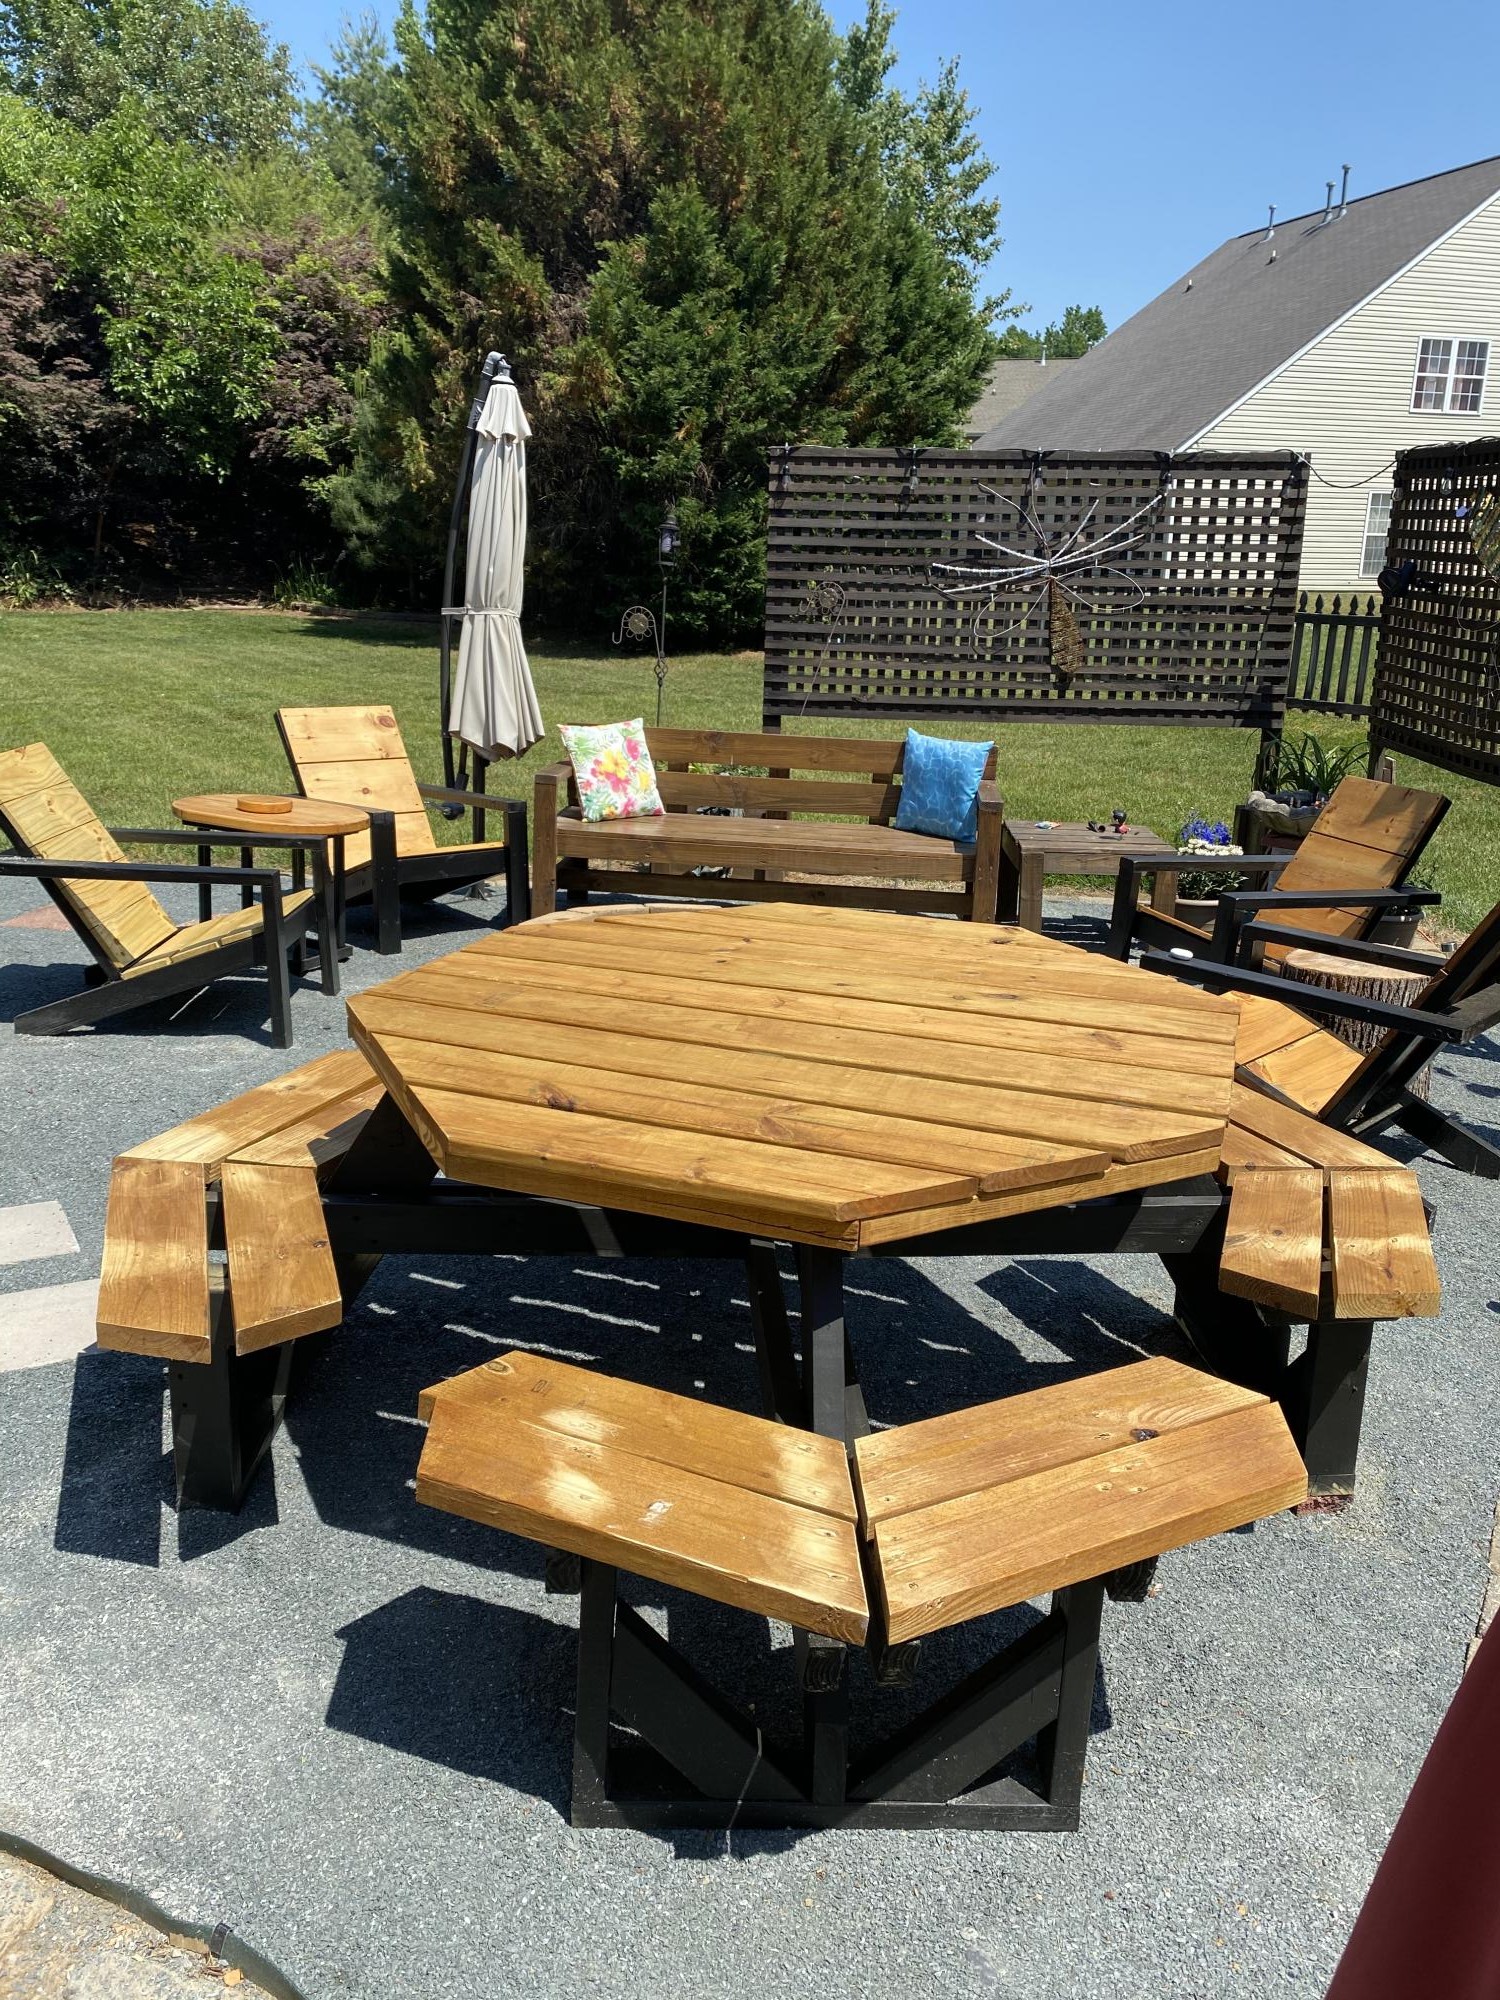
I had a lot of fun building this table and these benches for our Tuscan-themed kitchen. The weathered turquoise gives the surroundings a pop! Thanks, Ana, for the inspiration and for sharing the plans! The benches were built according to the plan, but I did modify the table without the runner underneath so that side chairs could be pushed in.

Estimated Time Investment
Weekend Project (10-20 Hours)
Finish Used
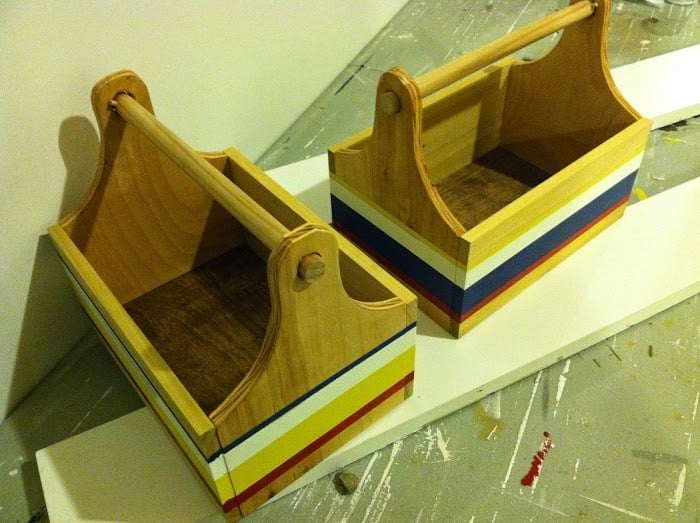
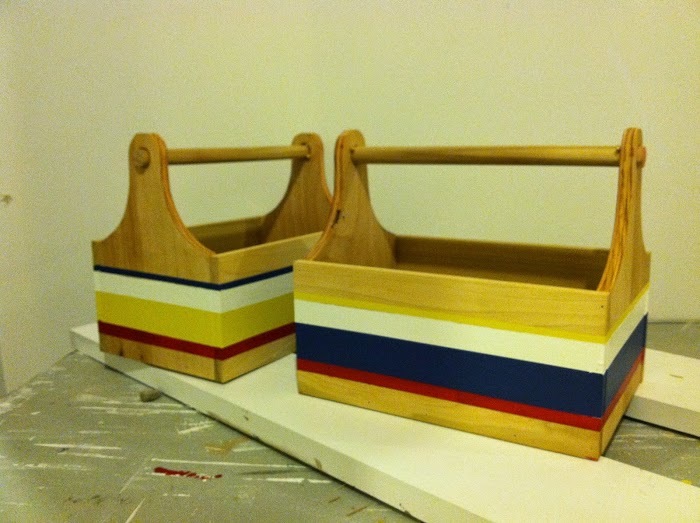
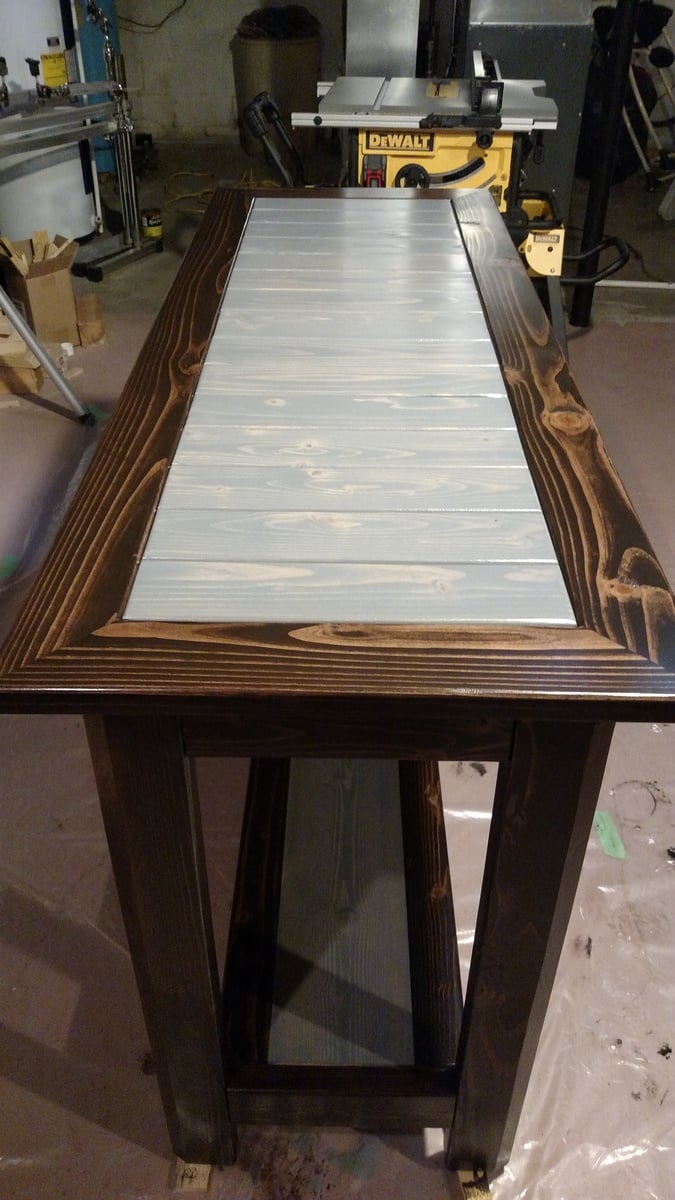
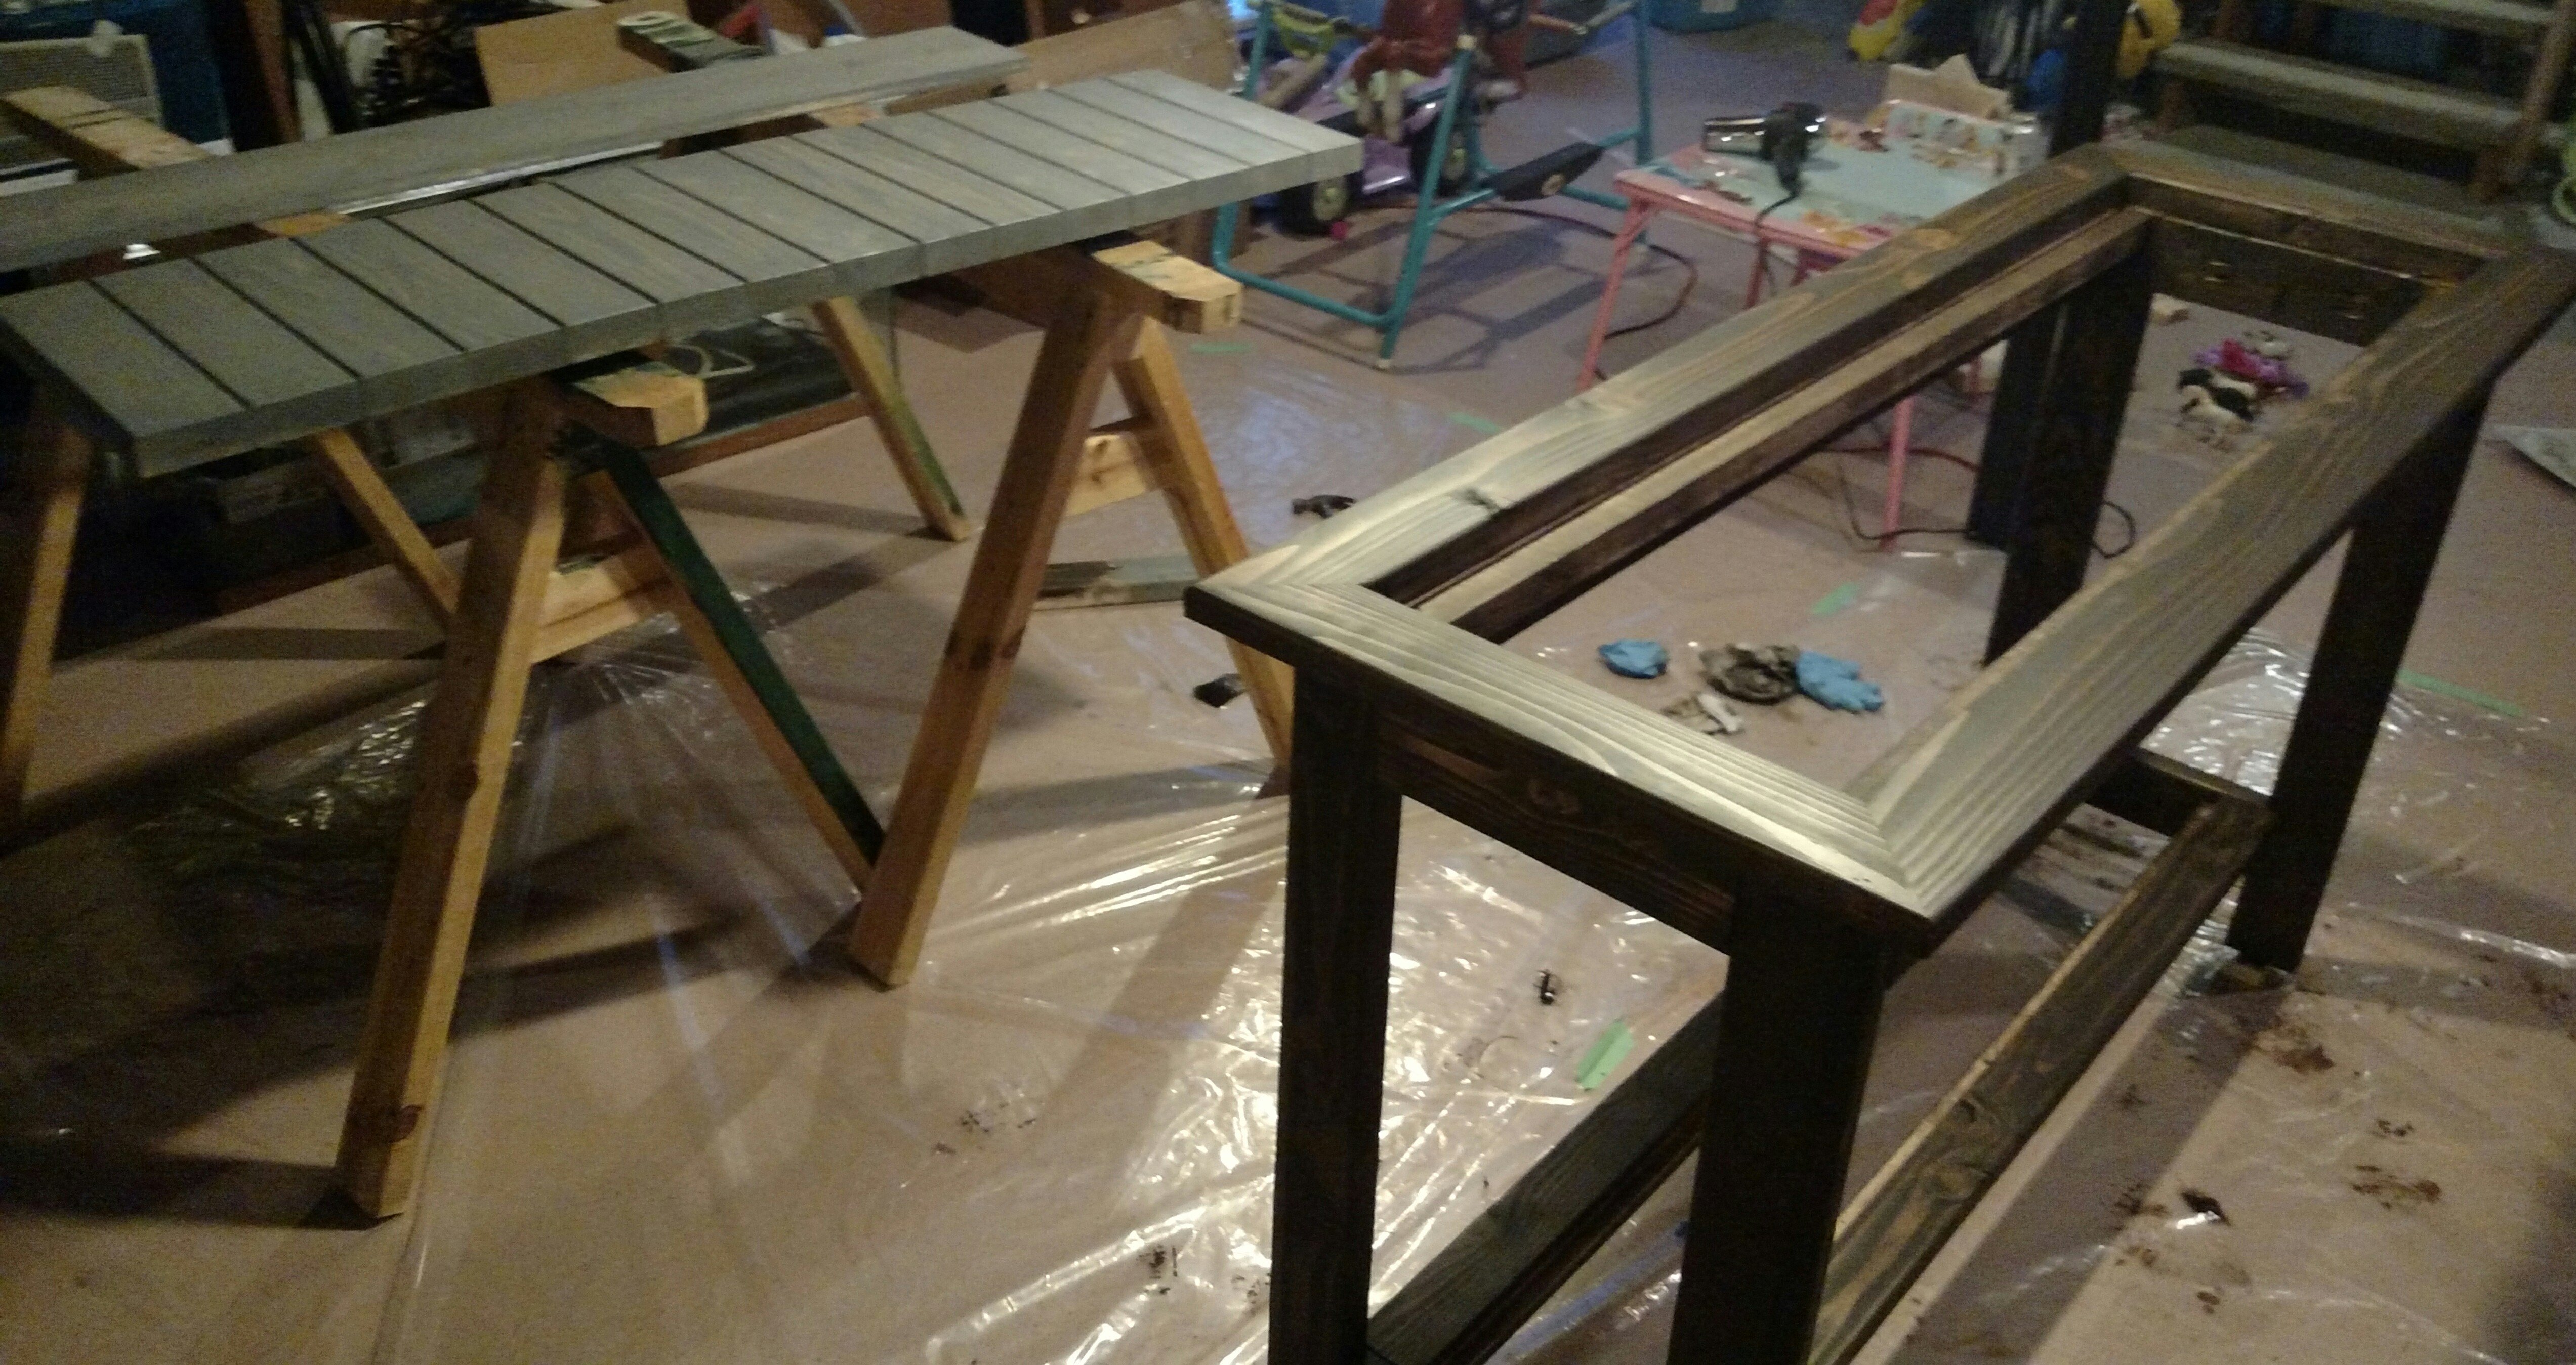
Tan chalk paint as base, then two more coats of turquoise mix colors. Sanded gently on the edges to get weathered look. Then three coats of polyurethane.
Recommended Skill Level
Intermediate

Boys Chrismukkah Tool Trugs

Submitted by brickton on Fri, 10/17/2014 - 05:32

I did a near direct copy of the tool trugs from Jamie and Ana using some 1/2" birch plywood and 1/2" craft wood from Home Depot. I was really happy with the ipswich pine stain that darkened the wood and gave it less of an unfinished look. 

Built from Plan(s)
Estimated Cost
Maybe $20 total for both trugs. I bought some little stain and sample paints when I could have just used what I had laying around, and some of the wood was scrap from other projects so it's hard to say.
Estimated Time Investment
Afternoon Project (3-6 Hours)
Finish Used
Minwax Ipswich Pine stain on the main body, Minwax Provincial on the bottoms. The paint colors are mostly Martha Stewart Living from Home Depot samples, the only two names I remember are Cornbread and Barn Red.
Recommended Skill Level
Beginner

End of the bed storage bench

Submitted by Anonymous (not verified) on Sat, 02/04/2017 - 15:14

I changed up the dimensions to make a storage bench for the end of our bed. I wanted something different and couldn't be happier with the way it turned out. I stained it with weathered grey, then a coat of golden oak and then another of weathered grey. And painted the box with linen white chalk paint. I love the black knobs with the grey and white!

I only used 2x2s for the legs. I made the seat frame from 1x2s because of the warping I. The 2x2s. It made my life so much easier!

Estimated Cost
I used mostly scraps so it only cost me about $50 because of the knobs
Estimated Time Investment
Day Project (6-9 Hours)
Finish Used
Linen white Chalk paint, Rust-Oleum weathered grey stain and golden oak stain. Black knobs from home depot
Recommended Skill Level
Intermediate

Triple Doll Bunk Bed

Submitted by dananryan on Sun, 01/13/2013 - 21:18

My friend's 7 year old daughter custom ordered this bunk bed! She asked for a bunk bed for her 3 dolls and she even picked the color! I had a lot of fun building it and learned a lot in the process. As usual, finishing took longest. Lucky for me, my hubby likes spray painting :-)

Estimated Time Investment
Weekend Project (10-20 Hours)
Finish Used
3 coats of Rustoleum Berry Pink spray paint, sanding btw. coats.
Recommended Skill Level
Beginner

Comments

Outdoor To Indoor Wine Caddy

Submitted by calcowoods on Tue, 12/29/2020 - 08:30

Built a number of wine caddies with/without the stake. Stake useful for an outdoor environment, yet not useful for an indoor table top setting. Provided a simple alteration by inserting a t-nut into the bottom of the caddy & a hanger bolt screwed into top of stake. Simply screw in stake as needed.

Estimated Cost
$4
Estimated Time Investment
Afternoon Project (3-6 Hours)
Finish Used
Minwax Cherry and Minwax Satin Polyurethane
Recommended Skill Level
Beginner

Storage Leg Desk

Submitted by Anonymous (not verified) on Thu, 04/13/2017 - 09:56

I made this for a friend!  She has cubbies on all four corners.

Built from Plan(s)
Recommended Skill Level
Intermediate

Drop Leaf Mobile Kitchen Island

Submitted by jkjackson on Sun, 03/14/2021 - 11:19

This was born out of the need for more counter space in our galley kitchen. We don't have the space to add an island. Especially around the holidays, it would be great to have extra space for making cookies, serving big meals, etc. I used Ana's Small Kitchen Island Prep Cart plans for inspiration. I adapted the dimensions to fit at the end of our counters when not in use and added a drop leaf to give us almost 4 additional feet of butcher block counter top when we need it. I used scrap lumber that I had for the cabinet and had an extra drawer handle that matches our kitchen cabinets but bought the butcher block, locking casters, drawer slide and hardware for the legs. Also, the weight of the butcher block makes it want to tip when it's away from the cabinet with the drop leaf down so I added a lead counter weight inside the drawer.

Estimated Cost
$150-200
Estimated Time Investment
Weekend Project (10-20 Hours)
Finish Used
Behr paint for the cabinet, food grade mineral oil and cutting board wax for the butcher block
Recommended Skill Level
Advanced

Comments

jkjackson

Sat, 07/24/2021 - 16:59

Sure! I used a 4 foot butcher block and cut it down. The horizontal part is 13 1/2" and the drop leaf part is 32 1/8" attached with a piano hinge. The legs need to be cut and hinged to fit when folded up. This one is made so that the drop leaf fits right under the overhang of the kitchen countertop that it is next to so it's snug against the cabinet and not an issue but, if you want it to be freestanding, the weight of the butcher block will pull it over if you don't weight the cabinet down with something as well. I got a 5 pound lead bar from Amazon in case we need to use it somewhere else. I hope that helps! Let me know if you have any other questions.

Custom Rustic King Bed

Submitted by jhavinga on Wed, 01/14/2015 - 14:55

My wife is always annoyed with me. I make something for our home, and a few months later I decide I dont like it and want something better! I sold our 5th bed set months ago (Farmhouse Bed made through Ana White) and have been sleeping on the floor for the last few months.. Figured it was time to create something I wouldnt sell! Took some plan ideas from the Farmhouse King Bed Plans and came up with something a little more extravagent.

Hopefully I dont sell this one.

Estimated Cost
$350 With Reclaimed Wood, Im sure much cheaper with HD Wood.
Estimated Time Investment
Weekend Project (10-20 Hours)
Finish Used
For the Pine. used my favourite combo; Weathered Oak and Special Walnut.
For the Fir and Cedar I just sanded.
Recommended Skill Level
Beginner

Comments

jhavinga

Thu, 01/15/2015 - 05:06

Thanks thewoodbuilder, its super easy and you could probably figure it out just by looking at it. =)
I extended the legs 2" past top of footboard, and 4" past top of headboard with caps on top. And layed 1x4 vertically over top of the 1x6 planks, and horizontally across the top of both foot and head board.

Cheers!
Justin

tracygator

Wed, 01/21/2015 - 20:47

This bed is gorgeous!!!! If you don't mind I have a couple of questions... For your stain combo of Weathered Oak and Special Walnut do you layer the weathered oak, wipe it off then apply special walnut? Or do you mix the two stains? Your footboard looks taller than the plan calls for , did you make it higher , if so by how much? And what dimensions are your footboard posts? This seriously is an amazing build. Great job!

In reply to by tracygator

jhavinga

Fri, 01/23/2015 - 14:04

Thank you! I don't mind at all. =)
The stains I do seperataely. I start with weathered oak and let sit for 15min, wipe off. Than do special walnut right after for 15min than wipe off. I repeat this until I like my color. From the farmhouse plans I really only took the planking idea and how to attach planking section to legs. The foot board is higher by 11" while the headboard posts are higher by 10".

The posts are reclaimed fir 6x6's. Thank again very much tracygator! Its a super easy design! if you have any other questions just let me know. =)

Cheers,
Justin

awheat1

Sat, 05/23/2015 - 20:13

Do you have any other pictures of the side rails? I'm curious how you did them? Specifically, how did you mount them to the head and footboard?

2x4 Accent Table

Submitted by Deitrich on Sun, 02/01/2015 - 06:35

I used the ideas of many and added my own as well, with the bottom shelf and 30 degree edge cuts on legs and bottom edge of table top. I constructed this in two separate parts, frame and inserts. I stained the the gray and brown parts separately then finished assembly and clear coated. I used nine 2x4x8' and one 1x8x6'. Table top is 60" x 22". I had to use one piece of 2x6 and rip to 4" wide. This filled the 1/2" gap I was left with on the gray part of table top. 

Built from Plan(s)
Estimated Cost
$90.
Estimated Time Investment
Weekend Project (10-20 Hours)
Finish Used
Rust-Oleum Ultimate Wood Stain in Weathered Gray and Kona, one coat each.
for the top coat I used Rust-Oleum Ultimate Polyurethane in Semi-Gloss, three coats.
Recommended Skill Level
Beginner

Comments

Jody Knowles

Mon, 02/02/2015 - 14:26

I really like the contrast with the colors. You did an outstanding job of making this piece a one of a kind. Very, very nice.

DIYGoddess18

Mon, 03/12/2018 - 12:41

Did you happen to have a support for the bottom shelf?  This is exactly what I'm wanting for my entry way! Awesome job and love the colors!

King farmhouse bed

Submitted by Anonymous (not verified) on Sun, 04/30/2017 - 09:23

Built this over the course of a week, but could have been done in a weekend if I didn't have three young ones. My husband is military and we move often, so it is built to be broken down into three large pieces. Used these http://www.rockler.com/5-surface-mounted-bed-rail-brackets to attach the rails to the head board and footboard. This bed is a tank and doesn't move at all! We are in love with the way it turned out! 

Estimated Cost
$250
Estimated Time Investment
Weekend Project (10-20 Hours)
Finish Used
Ivory tower colored chalk paint by Renaissance with 2 coats of minwax polycrylic.
Recommended Skill Level
Beginner

Shirley Console Table (modified)

Submitted by wenikio on Thu, 04/04/2013 - 14:48

This was a modification of the Shirley Console Table. I had to change the dimensions to fit our entryway, and I wanted some color variation. Because I used two different stains, the pieces had to be fit together, sanded accordingly, taken apart, stained, and then glued/screwed together again. I learned how to use a router on this project, so it was a learning experience (thank goodness for wood filler!). I also inset the sides and back, though it's not really obvious in the picture. The drawers slide on a tongue and groove track. The pulls are white porcelain covered in teal sharpie (baked then coated with acrylic). Definitely learned a lot on this project! As this was made basically from wood scraps, I'm not sure what the cost was. The drawers, minus the facing, is 3/4" oak veneer plywood.

Built from Plan(s)
Estimated Time Investment
Week Long Project (20 Hours or More)
Finish Used
MinWax Red Mahogany and Golden Oak
Recommended Skill Level
Intermediate

Comments

JoanneS

Thu, 04/04/2013 - 17:15

Great project! It's beautiful! Your porcelain knobs method sounds fascinating -- did you sharpie them first and then bake in the oven (what temp & how long?) - that's a super creative idea!

Outdoor living space inspired by Ana’s plans

Submitted by Anonymous (not verified) on Thu, 05/27/2021 - 17:49

I started this backyard project at the beginning of the Pandemic. I used Ana’s plans for the Adirondacks and the picnic table and the bench.

Thanks for your ideas ams inspiration!!!!

Sincerely
Spencer Friedlander

Estimated Cost
$700
Estimated Time Investment
Week Long Project (20 Hours or More)

Comments

DIY Greenhouse

Submitted by aww92 on Mon, 05/31/2021 - 17:42

i followed the instructions for the DIY Greenhouse and even though there are a few warts and freckles neither the wife nor the flowers are complaining

Built from Plan(s)
Estimated Cost
$1200.00
Estimated Time Investment
Week Long Project (20 Hours or More)

Comments

2 x 4 Garage Shelves Built into Basement Storage!

Hello Everyone! This is my FIRST brag post here on Ana-White.com - but not the first project that we've built from her awesome plans. :) 

We have an unfinished basement that desperately needed some shelving because 1. It's our workshop in the Winter and 2. We don't have an official 'storage' room in the basement of our split level home. When I saw these plans I immediately thought they could be modified to fit our space and get my stuff off the floor! 

I modified the plans just enough to fit our space. After reading through them completely, I realized for an 8 ft wide space (beside the stairs) I only needed three supports for the shelves. Easy! The only trick was fitting the shelf into the space AFTER installing the shelves. Because I had walls on two sides (unlike the tutorial) I couldn't do the shelves as the last step. 

I LOVE how these turned out! They are a strong as a ladder (we tested them... :)) and they hold everything I need them to, and a little bit more. It's a definite improvement on my previously messy, cluttered, saw-dust covered space ... :) 

Estimated Cost
Our space was 8ft tall by 8ft wide, so we ended up purchasing about $60 worth of 2x4s to complete the project. We also used 2.5" screws, which are around $4 per box of 75.
Estimated Time Investment
Afternoon Project (3-6 Hours)
Finish Used
None - we left the wood bare and natural because it's just for storage - not for looks. :)
Recommended Skill Level
Beginner

PB Inspired Queen Storage Bed

 A local South Floridian found me through Pine+Main. She needed two beds for her older kids. Client hired me to build two queen size storage beds based on the Sumatra Storage Beds from Pottery Barn. These beds took over eight weeks to build. My first time making drawers boy was that a challenge. I installed full extension drawer glides to access all the content in the drawers. Bed comes together in 3 pieces. It is stained Varathane's Dark Walnut. And the top coat is the Rust-Oleum Triple Thick Polyurethane in a matte finish. Built with Purebond plywood. These beds are super heavy and super strong.  

Estimated Cost
$900
Estimated Time Investment
Week Long Project (20 Hours or More)
Finish Used
Varathane Dark Walnut and Rust-oleum Triple Thick Poly
Recommended Skill Level
Intermediate

Anna's Low Activity Table for her Dollhouse!

Submitted by ferbit on Wed, 03/09/2011 - 09:52

Anna's (the one on the right) new activity table with rolling carts! Rolling drawers are made of 3/4" MDF with 2" casters underneath. The chalkboard frames (found here) were painted with satin finish pink paint, then two coats of glitter Mod Podge. I love how they turned out!!! We added a piece of 1/8" plexiglass to the top to protect it better. The flat top is made of MDF, sides and frame are made of pine and the legs are poplar. Two coats of primer, three coats of semi-gloss paint and three coats of poly. She is sooooo excited!!! Ana's estimate of $50-$100 on her website is fairly accurate depending on where you live, minus the plexiglass. So adding it all up... 3 - 2" x 2" x 8' stud/strips are $1.29 each at HD (total $3.87) 4 - 1" x 2" x 8' Radiata Pine boards are $4.82 at HD (total $19.28) 1 - 49" x 97" sheet 3/4" MDF was about $40 at HD (they rip cut it for me for free) 8 - 2" casters were about $2.50 each at HD (total $20) That's $83.15 plus tax and doesn't include all of the smaller extras like screws, glue, sandpaper, primer, paint and poly. I had most of those already... but it's items like that would easily push the total over $100. The little extras that I did were pricier poplar legs since I didn't like the look of 2x2 stud/strips and the custom sheet of plexiglass $35 at local plastics company. 2x2 studs/strips are fine, but after using them on my sawhorses and painting them, I wanted something more perfectly square (prettier?) for this table.

Estimated Cost
$85.00
Estimated Time Investment
Weekend Project (10-20 Hours)
Finish Used
Primer, semi-gloss acrylic latex paint, brush-on poly
Recommended Skill Level
Intermediate

Modern Outdoor Chair with a twist

Submitted by Anonymous (not verified) on Wed, 07/05/2017 - 16:05

Taken from the Modern Outdoor chair project and added a back. Then decided that I love the andorak style chair arms and thus the Andrmodern chair was born.. 

Estimated Cost
$35.00
Estimated Time Investment
Afternoon Project (3-6 Hours)
Finish Used
Will use the Behr two in one
Recommended Skill Level
Beginner

Comments

jkess44

Tue, 06/09/2020 - 13:36

Wow! I really like this look, Im sure its very comfortable. Do you have plans to share? I am very much a beginner and need guidance, lol.

Picnic Tables

For my son's 4th birthday party, we were doing it at our house and needed outdoor seating, so I took on the task of building 3 Toddler picnic tables and 1 smaller one. Building them was not that big of a deal, but painting all 4 took some time! After the party, we sent 1 to my parents, 1 to in-laws & 1 to my bro/sis-in-law, so only ended up with 1 left over. FYI-the picture on the plan is one of mine, thanks Ana!

Built from Plan(s)
Estimated Time Investment
Afternoon Project (3-6 Hours)
Finish Used
I primed each table, then painted them with 3 coats of paint and sealed them.
Recommended Skill Level
Beginner

Comments

Seasonal And Holiday

Murphy Bed

Submitted by arkep on Tue, 05/14/2013 - 19:19

I'm turning my messy sewing room into an organized craft/guest room, so I made a murphy bed to conserve space. I used corrugated tin on the the face of the bed so that I can use it as a magnet board while not in use as a bed.

Estimated Cost
$100
Estimated Time Investment
Weekend Project (10-20 Hours)
Finish Used
Polyshades Antique Walnut--two coats with light sanding in between
Recommended Skill Level
Intermediate

Comments

Julie44256

Fri, 05/17/2013 - 09:54

The estimated cost is $100, but the hardware linked from the original plan was over $300. Do you have an alternate method of mounting this?

arkep

Fri, 05/17/2013 - 11:23

I think that link was a suggestion if you want an assisted lift/lowering system, and that hardware is part of what makes regular Murphy beds so expensive. I just used door hinges--3 for $8. It's not that heavy to lift and lower the bed, in my opinion.

Julie44256

Fri, 05/17/2013 - 11:40

Thank you for your reply! If I make this project, I think I'll try the door hinges. It won't be frequently used (a few times a year) and I'm pretty sure we can handle the minimal weight for those few occasions.

P.S. I really like the styling with the wood and corrugated metal, it looks sharp!

iMark

Fri, 06/28/2013 - 20:02

thanks for sharing the murphy bed. have been looking for a space solution for my daughter's bedroom. the corrugated tin look sharp in this project--my daughter would like the corrugatged tin as well--except for hot pink stain on the cabinet.

anyone know where to get hot pink stain?

DorieM

Wed, 02/10/2016 - 04:22

I would love this for my room let me save space versus sideways bed. Maybe spray chalkboard or dry erase on one side magnets to one side and daily to do notes on the other?

Adirondack Chair

Submitted by maparuna on Sat, 05/18/2013 - 19:07

Built three Adirondack Chair, got the dimensions from Ana's Adirondack Chair and modify dimensions for the smaller chair for my daughter. Used ceder and pine. Cost about CDN 40 per chair. Specially I would like to thanks Ana giving information about simple but beautiful furniture designs.

Estimated Time Investment
Weekend Project (10-20 Hours)
Finish Used
Used for my backyard
Recommended Skill Level
Beginner

Comments

Chicken Coop

Submitted by Anonymous (not verified) on Mon, 10/04/2021 - 15:53

We made this Chicken Coop this summer , with lots of help. We doubled the coop and the chicken run is 8x8 . We used the base of a previous clubhouse!! Thanks so much for the plans

Comments