Community Brag Posts
Bunk Bed From a Loft Bed
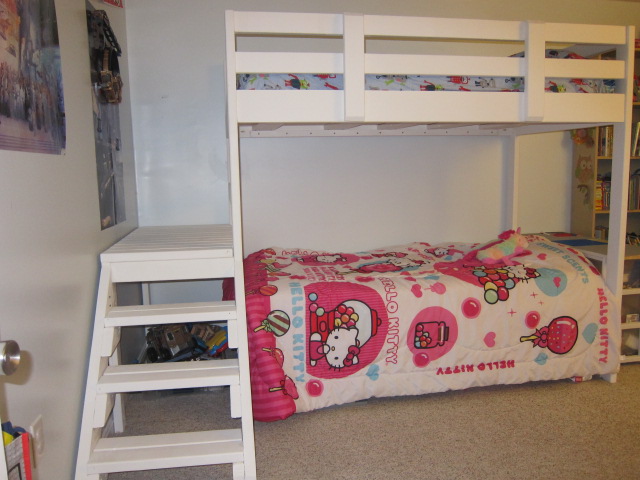
This bunk bed was made out the Camp Loft bed plans. With my daughter out growing her toddler bed, we really needed a "big girl" bed without giving up too much space. This was perfect. It was really easy to add an extra set of 2x6's around the bottom of the loft, and poof, it’s a bunk bed. The kids really love it and it is really strong. I weigh about 250 lbs and it doesn't even move when I get on the top bunk. To accommodate for the lower bunk, I raised it to 72” high. As you can see, I also added extra vertical supports on the top rails. I did this so all the weight on the top bunk wasn’t only supported by the 2x6s, but also the 2x4s as well.
I also painted it white becuase that matched the other furnature in the room better than staining it. To keep the wood from seeping sap all over the paint, I sealed it with BIN primer before painting it with latex paint.
I don’t have much experience building furniture, but this was extremely easy. The wood cost us around $100. Slightly more than the post said, but I added a few extra 2x4s and since comparable bunk beds are being sold for about $800, this was a steal. The plans were great and my son and I had a great time building it. Thanks for posting it
Built from Plan(s)
Estimated Cost
$100
Estimated Time Investment
Week Long Project (20 Hours or More)
Finish Used
BIN primer (2 coats), latex flat paint, a lot of sanding
Recommended Skill Level
Beginner
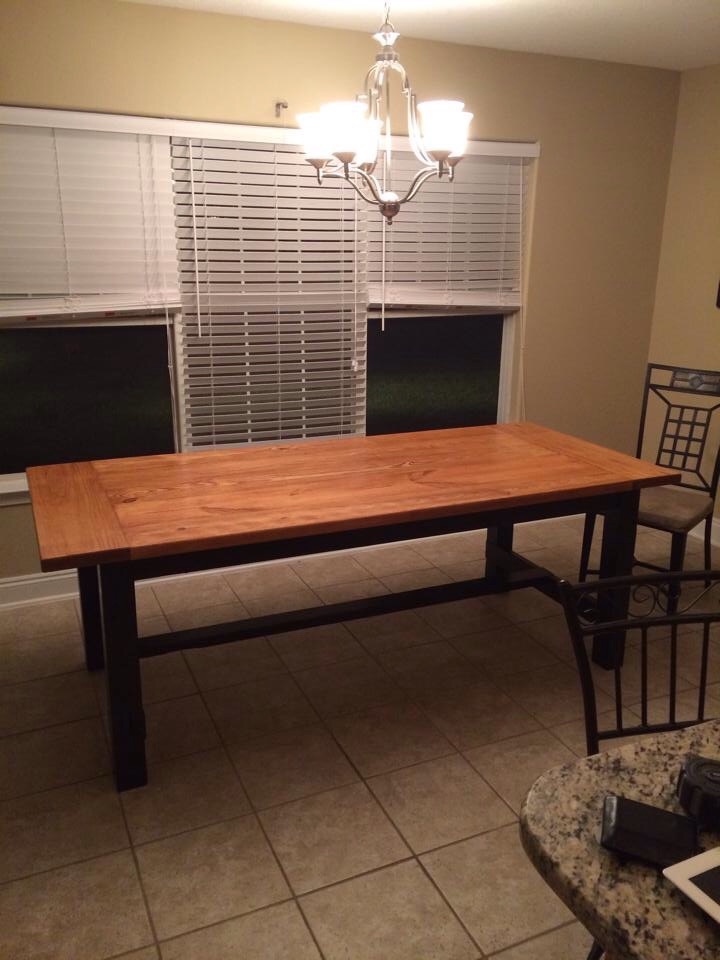
Farmhouse Table
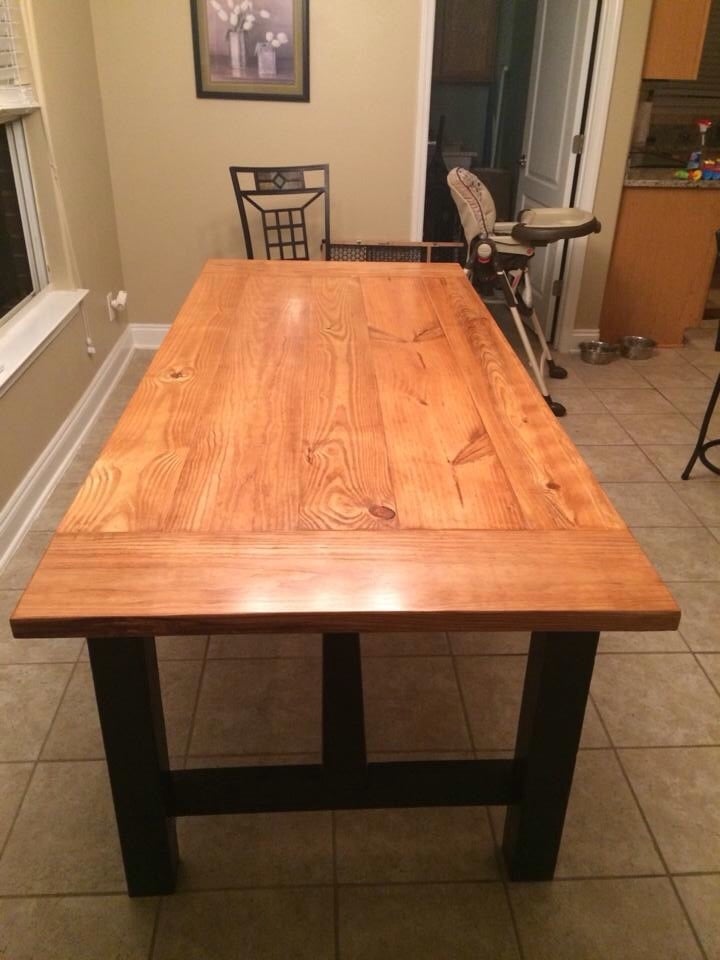
I built this table for our kitchen. Slightly modified the top for 3 - 2x8 and 2- 2x10 ripped down on each side to make the planks sit flush. Breadboard ends are 2x10 to give more room on the ends and the stretcher supports are on the inside to give more room as well. Notching was difficult, not the cleanest but they worked.
Final dimensions are 84.5 x 37 x 31
Built from Plan(s)
Estimated Cost
Lumber $70
Finishes $30
Kreg Screws $18
Finishes $30
Kreg Screws $18
Estimated Time Investment
Weekend Project (10-20 Hours)
Finish Used
Rustoleum flat black spray paint for base.
Minwax Ipswitch Pine for the top.
Finished with Minwax Helmsman Spar Uerethane 3 coats on top 1 coat on base.
Minwax Ipswitch Pine for the top.
Finished with Minwax Helmsman Spar Uerethane 3 coats on top 1 coat on base.
Recommended Skill Level
Intermediate
Butcher block
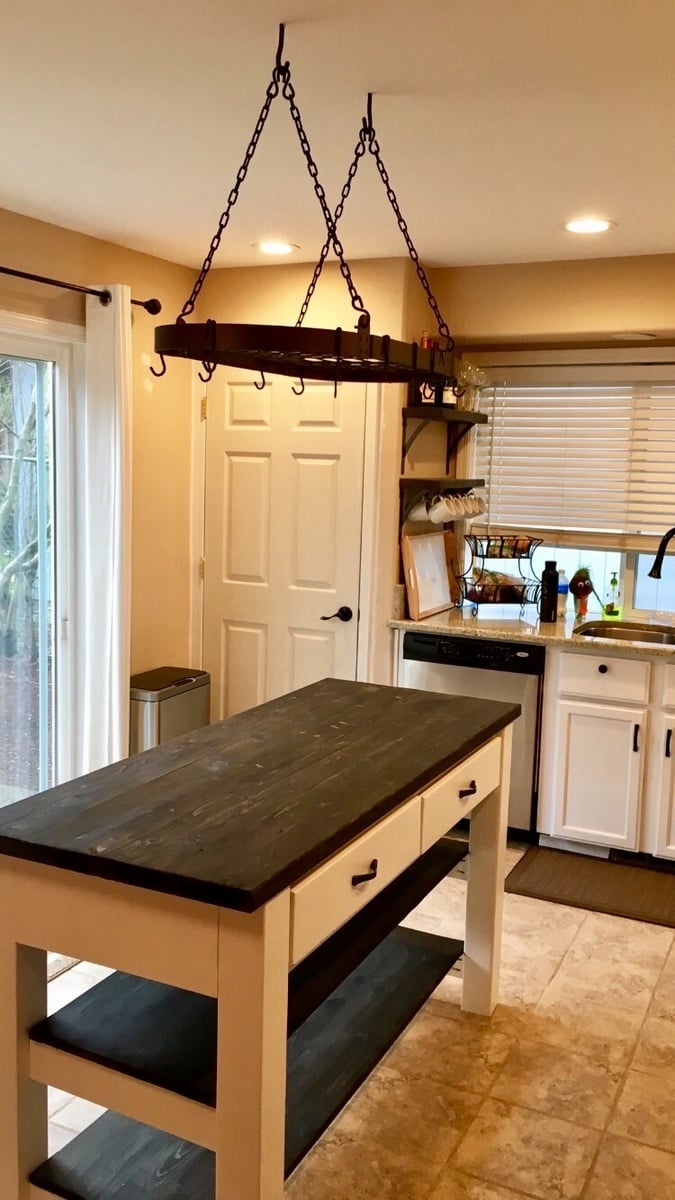
I decided to add this island to my kitchen as I had a lot of open space in my kitchen. It gave a lot more counter space and when I adjust the pot rack, it will open up an entire cabinet too! The body is painted the color my cabinets are about to become and the stain matches some other woodwork in the house. I applied polyurethane to the stained pieces and plan on using cutting boards to avoid the look of a beat up butcher block as well as the maintenance that goes with them! Wherever I could hide the edges, I used plywood instead of 1x8's as I had leftovers from a bench I made.
Built from Plan(s)
Estimated Cost
100.00??
Estimated Time Investment
Weekend Project (10-20 Hours)
Finish Used
Alkd pain, minwax Ebony 2718, wipe on polyurethane.
Recommended Skill Level
Intermediate
Comments
I used old fence panels
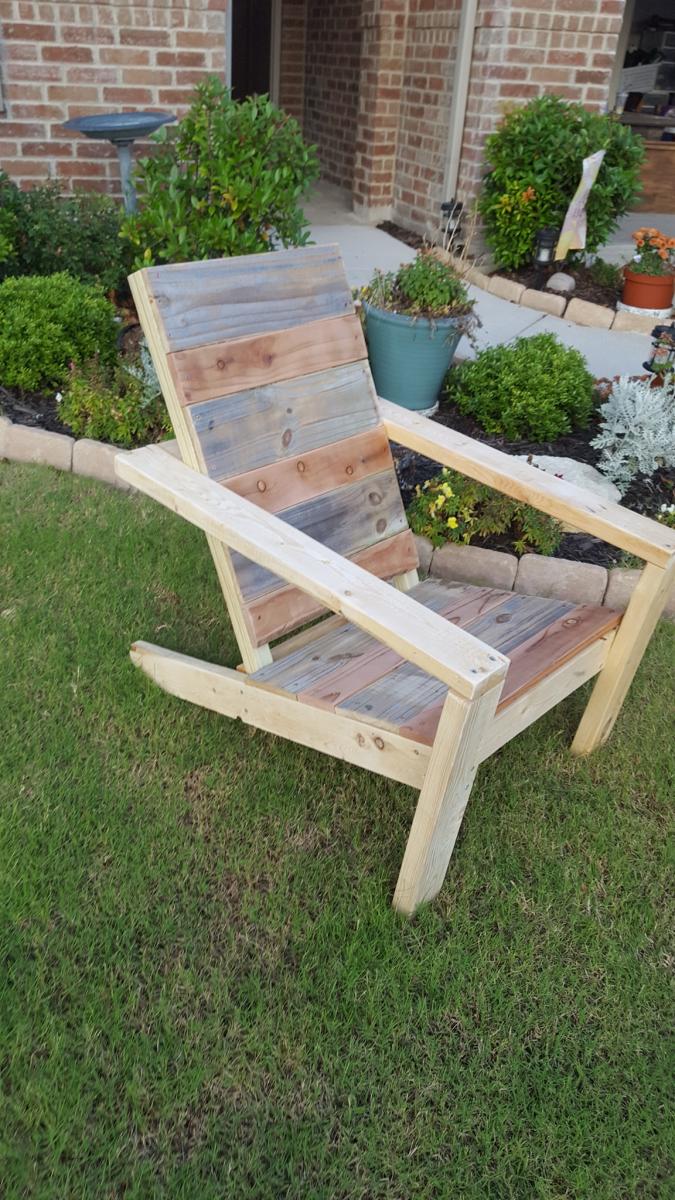
I love these chairs. I have made about 10 of them. I have several orders for 16 more. I use old fence planks for the seat and back. I also changed the back supports to 35 in. My husband is 6ft and he wanted to be able to rest his head back when he sits. Cutting the legs is the hardest part. I also changed the arms to jig holes so the Screws would not show.

Built from Plan(s)
Estimated Cost
$20
Estimated Time Investment
An Hour or Two (0-2 Hours)
Finish Used
If you are going to leave outside in the weather you should apply some sort of sealant.
Recommended Skill Level
Beginner
2x4 Banquette Seat
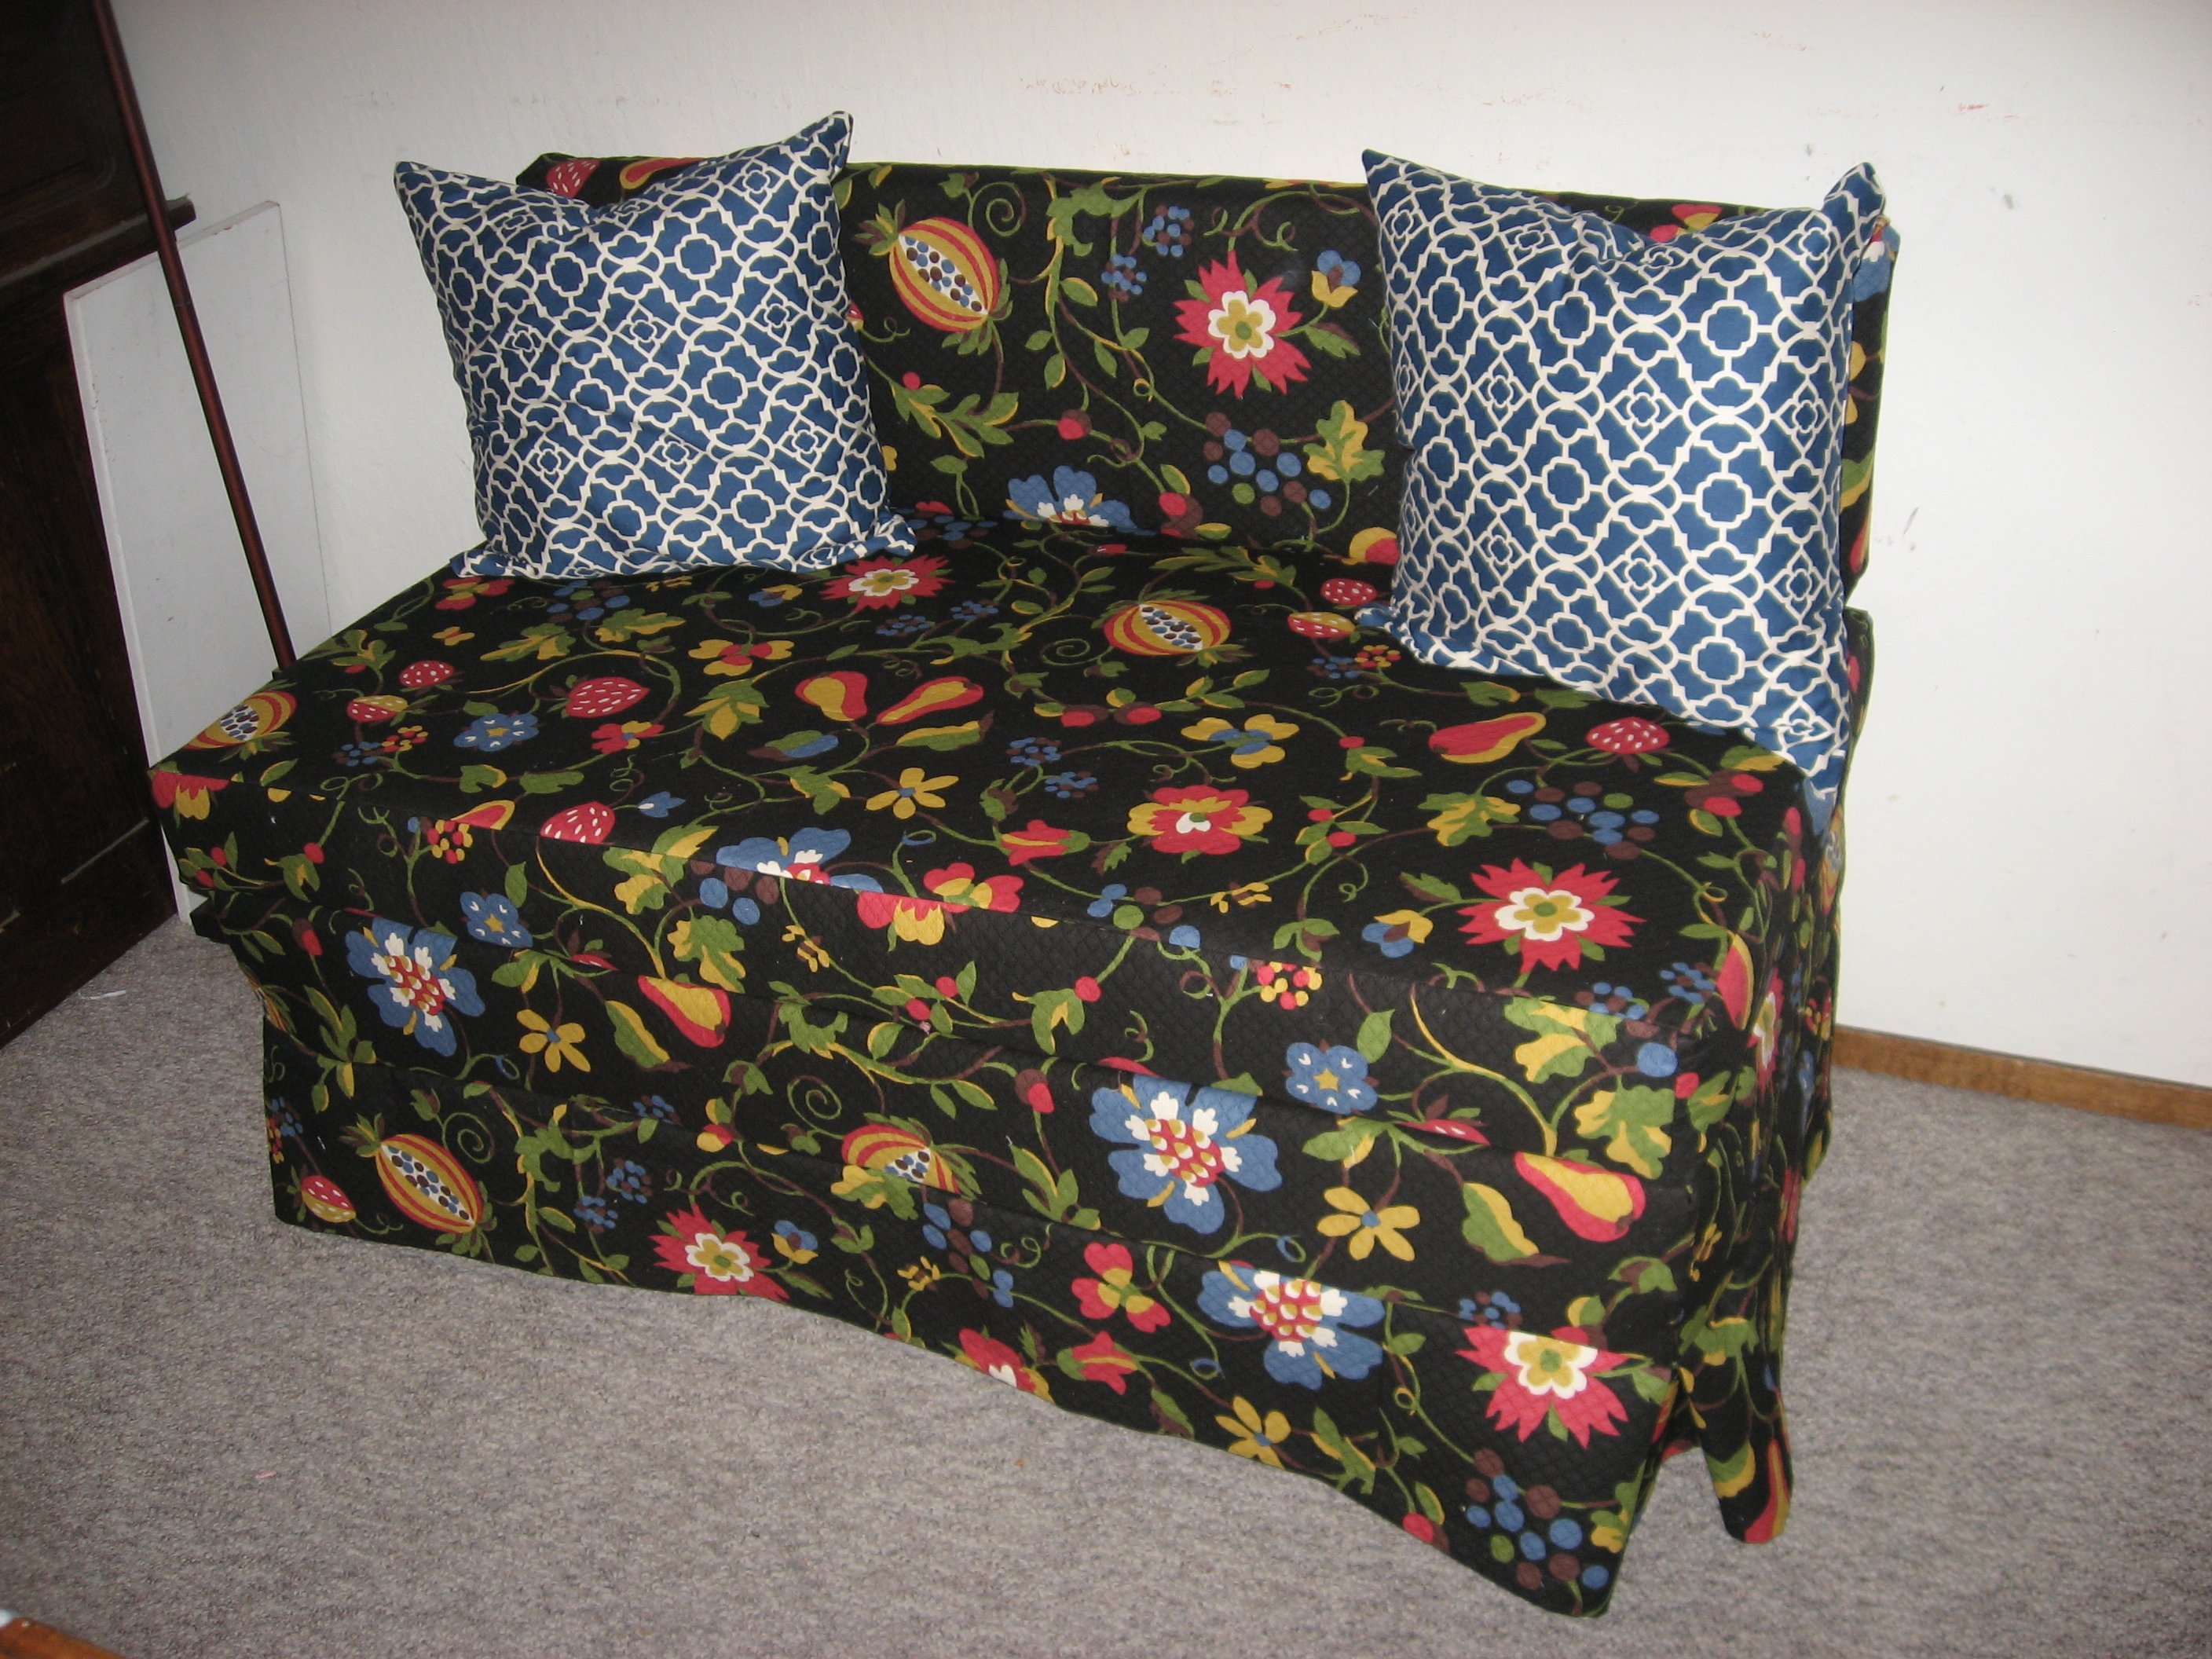
I have been wanting a banquette for years and when I spied Ana's version in the post about Grace's birthday party, I knew I could do it. I waited for the plans, and yesterday, I got out the tools and in 6 hours (real time - including cooking meals for kids, potty breaks, and life in general) I had my bench done.
I am so pleased with it. I had all the fabric on hand already, and was able to buy batting, foam and pillow forms all 50% off at Joann's, plus 2 zippers for the blue cushions. The woman who was cutting my foam asked me what I was making, and I told her I was building an upholstered bench for my dining room. She said "wouldn't it be less trouble to just buy one already made?" Clearly she has no idea how much this would have cost me. As it stands, I had the lumber and fabric on hand, so my total purchase price was just over $95.00. I would estimate the cost to build to be about $200.00 for everything, depending on how expensive your fabric is.
I love to sew, so I had no problem with the fabric portion of the project, though I did as Ana did and did not upholster the back of the bench. Instead of adding a piece of fabric across the back of the frame, I extended the side fabric by about 6 inches on each side and stapled it to the back. I hope that makes sense. I used a metal cleat to hold the seat back in place. I also used 3 L-brackets to attach the bottom to the frame. I think people will slide into their seat and I didn't want the seat cushion to move.
Not bad for a few hours work!
This project would be an easy starter project for building, though it is a little more advanced when you factor in the sewing. Here is the tutorial I used for the toss pillow cushions: http://sewmamasew.com/blog2/2011/02/add-a-zipper-to-your-pillow/, and here is another from the same blogger for boxed cushion covers (just leave the bottom off of yours for this project, since it will be stapled to the plywood, skip the zipper and handle, and add piping if you want to fancy your cushion up): http://sewmamasew.com/blog2/2008/07/summer-sewing-perfectly-portable-cu…
Thanks Ana for the constant inspiration!
Built from Plan(s)
Estimated Cost
$200.00
Estimated Time Investment
Afternoon Project (3-6 Hours)
Recommended Skill Level
Beginner
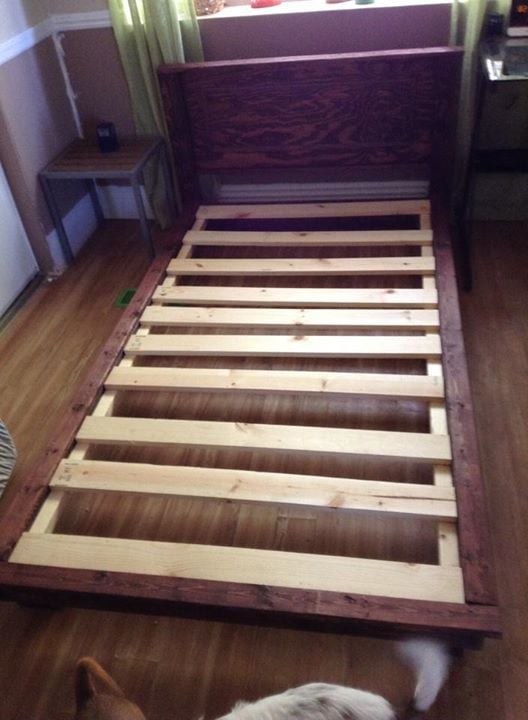
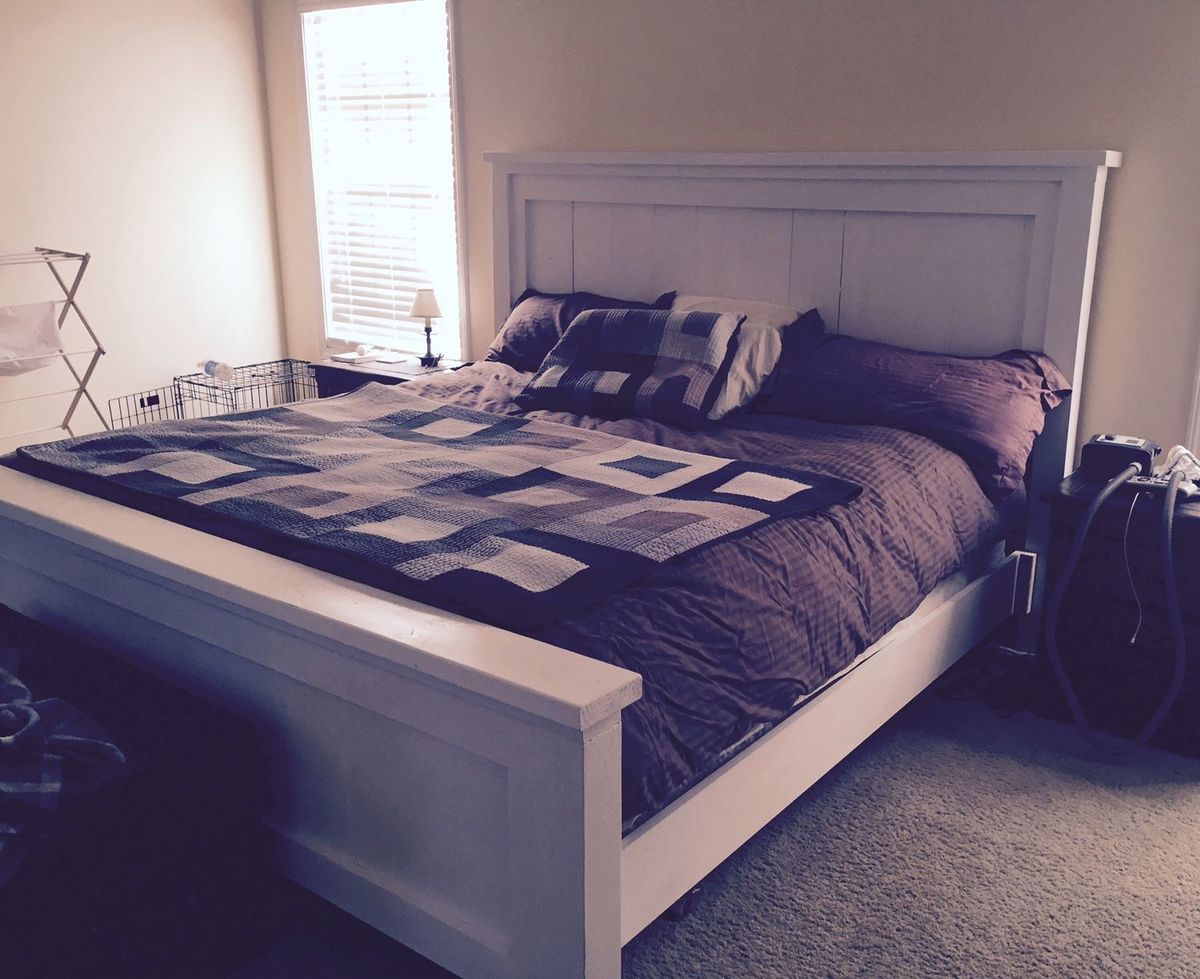
My Sister and I Made The Platform Bed For My Daughter
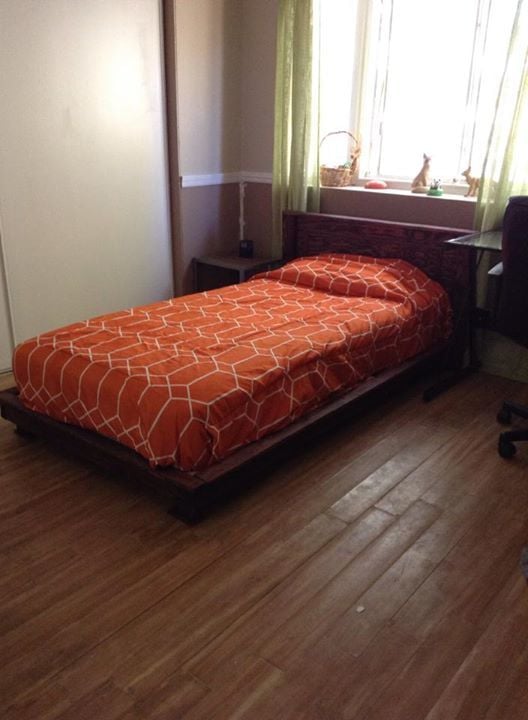
I decided on the Fillman Platform bed, for my daughter. It was a basic and simple style, the plans were well thought out, and the shopping list was a godsend. My daughter picked out a dark stain as well, which made the wood look really pretty. We broke up the platform and the headboard into two different days (so the stain would dry).
Love the bed!
Built from Plan(s)
Estimated Cost
$100.00 for platform and headboard. It was a little extra from the original estimated plans, because of the stain.
Estimated Time Investment
Afternoon Project (3-6 Hours)
Recommended Skill Level
Beginner
Barn Door Bookcase

My wife decided she needed a piece of furniture to contain the kids craft supplies. I found the ‘Ana White’ page with the Barn Door Bookcase design. We already make custom art pieces and I challenged my wife that we could make this bookcase with our own custom twist of art. Piece turned out great and we are both very pleased. Thank you for the plans! #AccindentallyArtisticDesigns
Estimated Cost
$200
Estimated Time Investment
Week Long Project (20 Hours or More)
Finish Used
Mix of stains, poured acrylic paint, burns and polyurethane
Recommended Skill Level
Intermediate
Comments
Sun, 11/01/2020 - 10:17
Beautiful!
To integrate your art with the cabinet is truly magnificent! Thank you for sharing:)
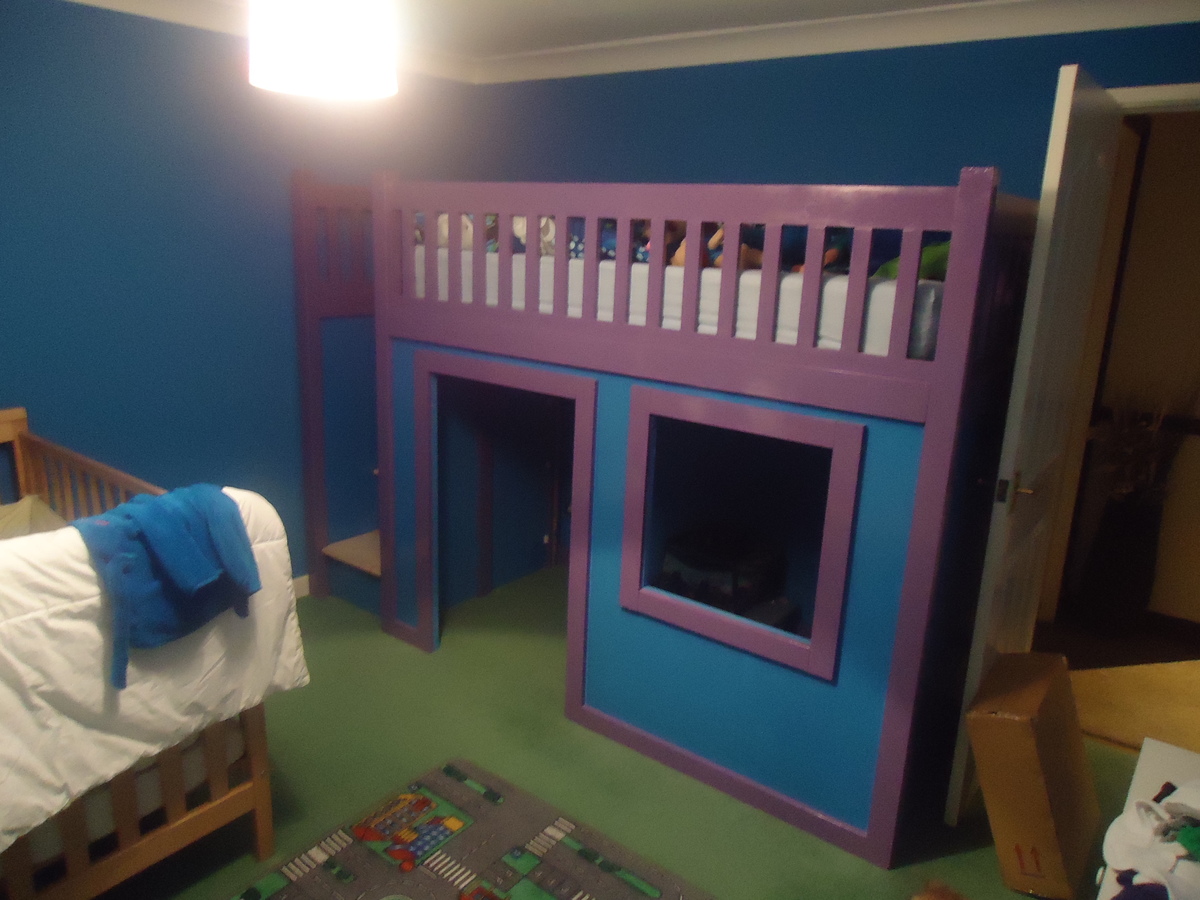
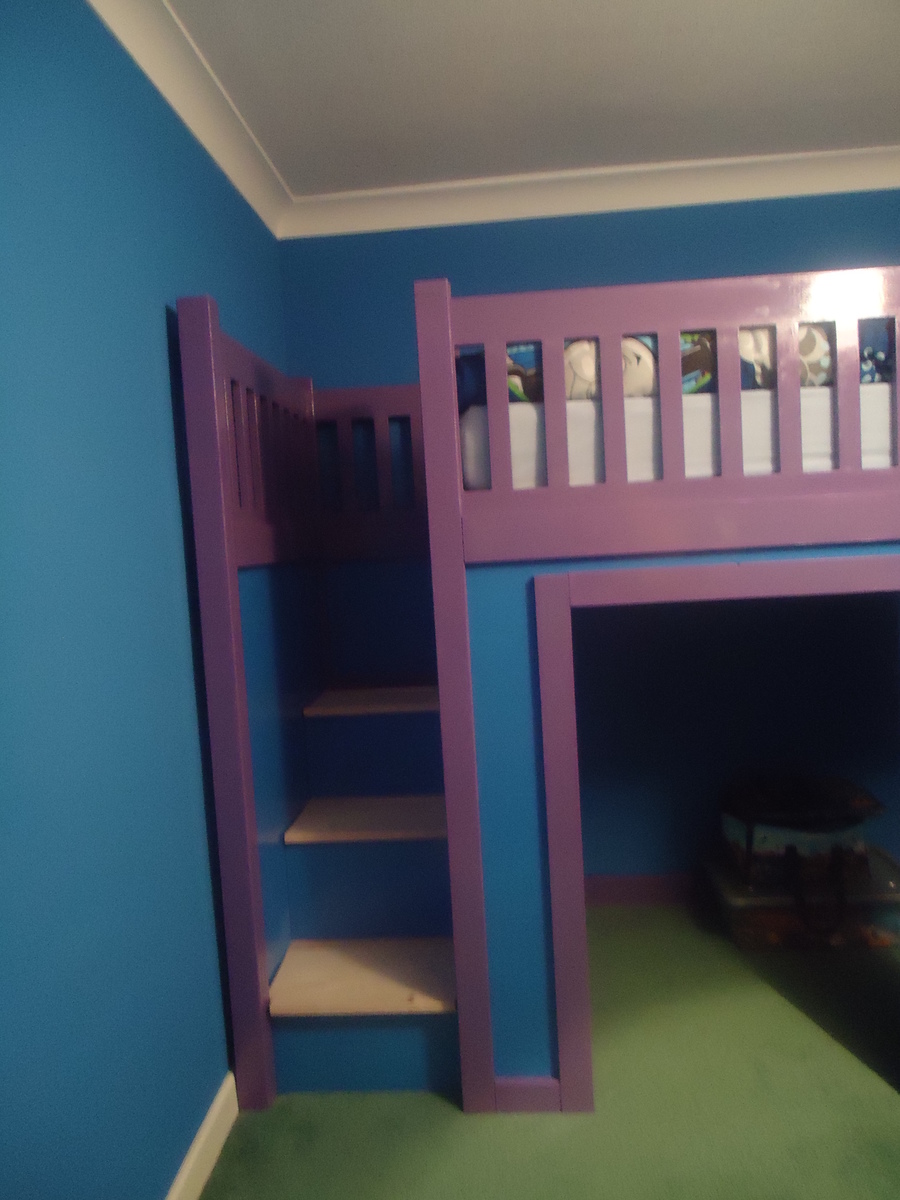
Playhouse Loft Bed- Thomas

This bed for my middle son (4 years old) was my first project, I enjoyed the build and my son absolutely loves it. He even want to go to bed early now.
I ammended the plans slightly to accomodate a UK size matress and reduced the stair width to fit the room.
Built from Plan(s)
Estimated Cost
£350
Estimated Time Investment
Week Long Project (20 Hours or More)
Finish Used
Gloss on Redwood, Emulsion on MDF with Varnish coat where possible scratces could occur.
Recommended Skill Level
Beginner
My Farmhouse Bed
This was my first project and took me several weekends to get it right. I wen overboard with the Kreg Gig and there are no nails at all in the project. The headboard does weigh over one hundred and fifty pounds but it does not sqeak or shake with the whole family watching cartoons in it watching cartoons on Saturday morning.
Built from Plan(s)
Estimated Time Investment
Week Long Project (20 Hours or More)
Finish Used
Chalk Paint finish with two coats of wax sealant.
Recommended Skill Level
Beginner
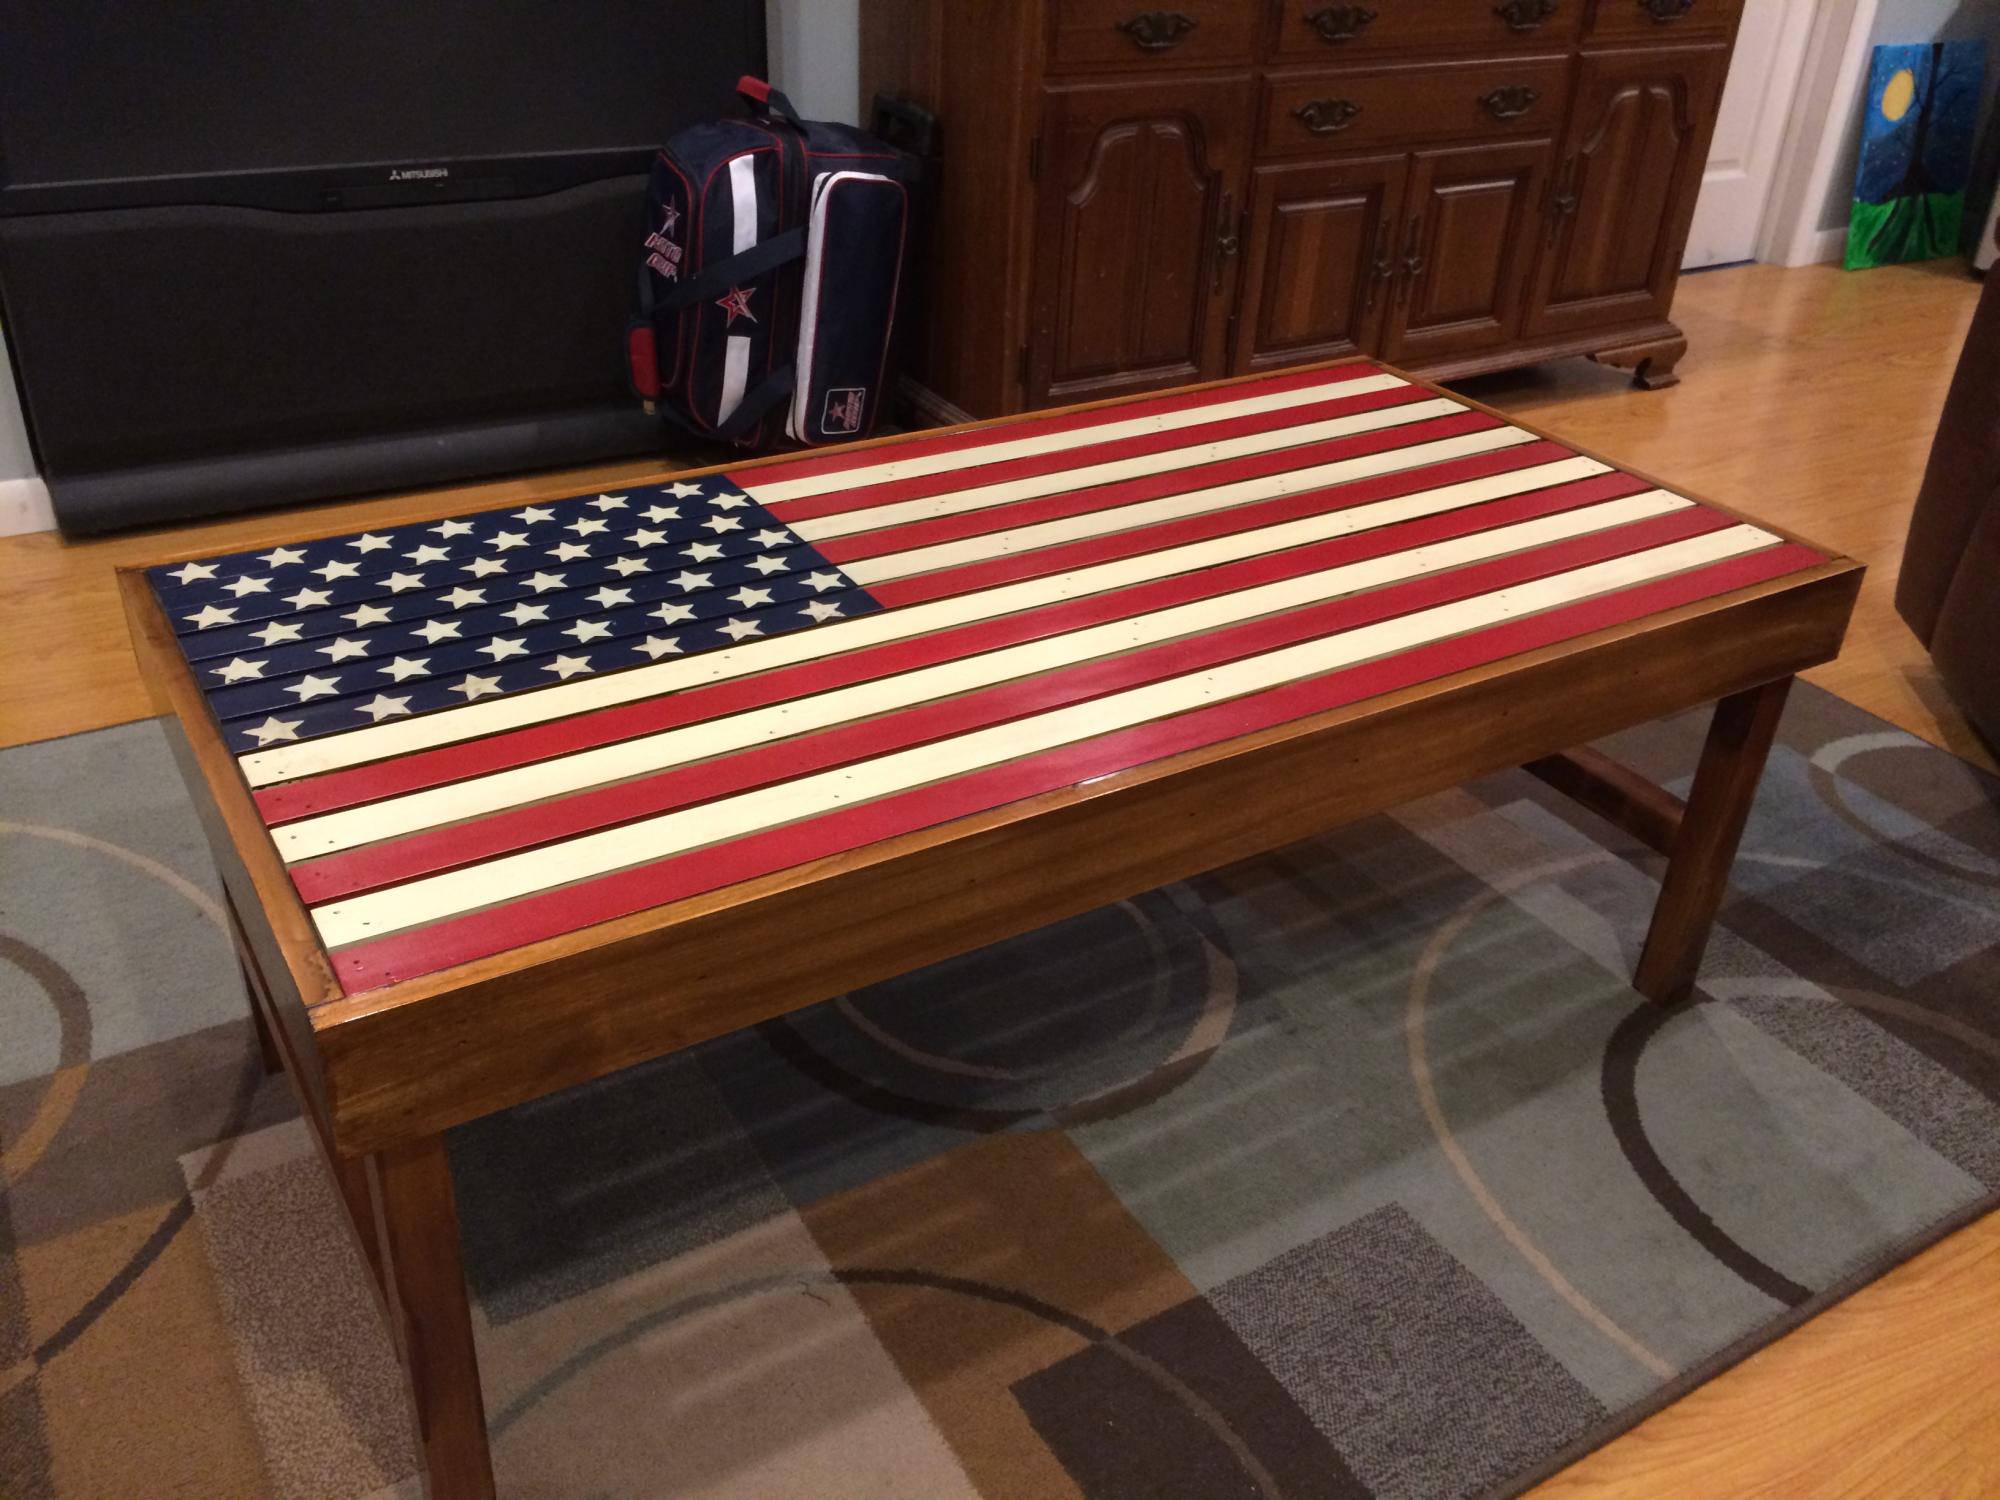
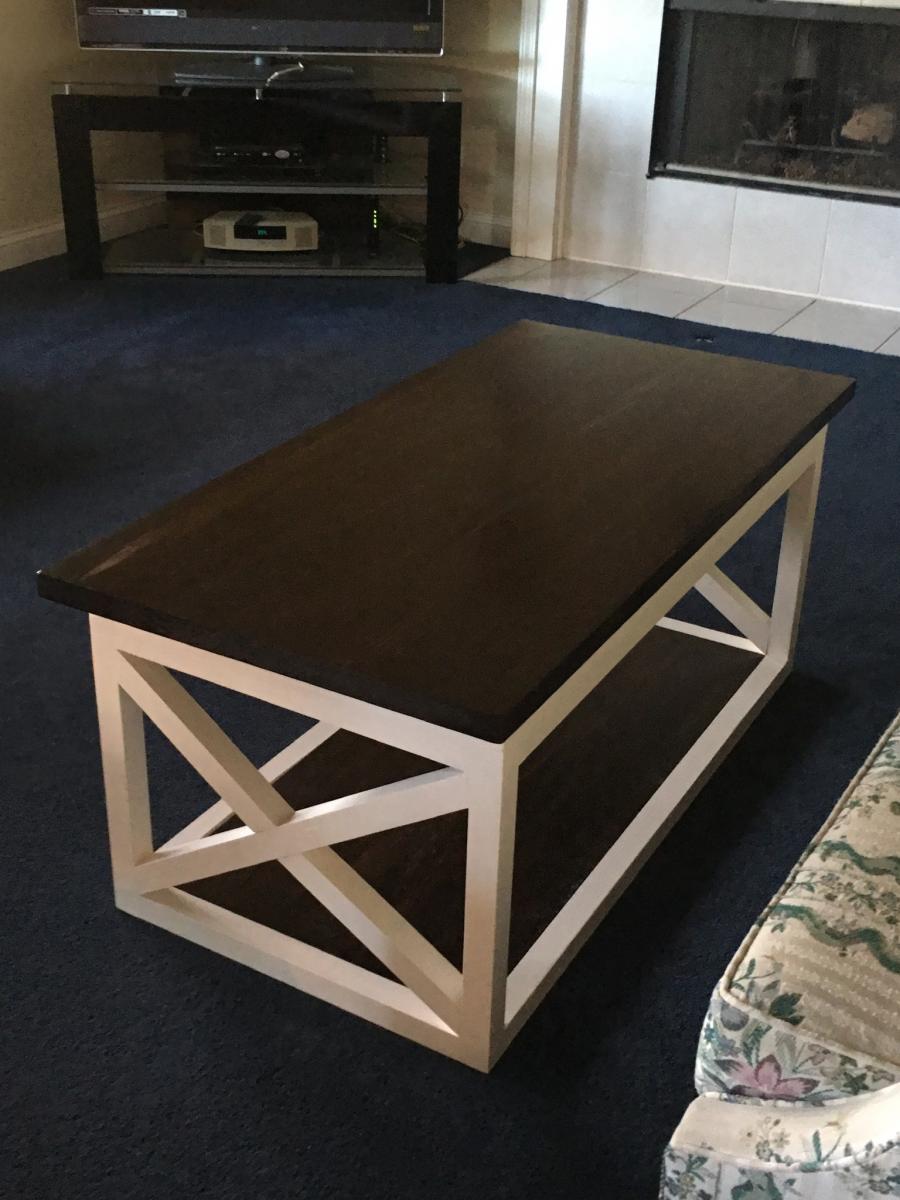
Lift Top Coffee Table
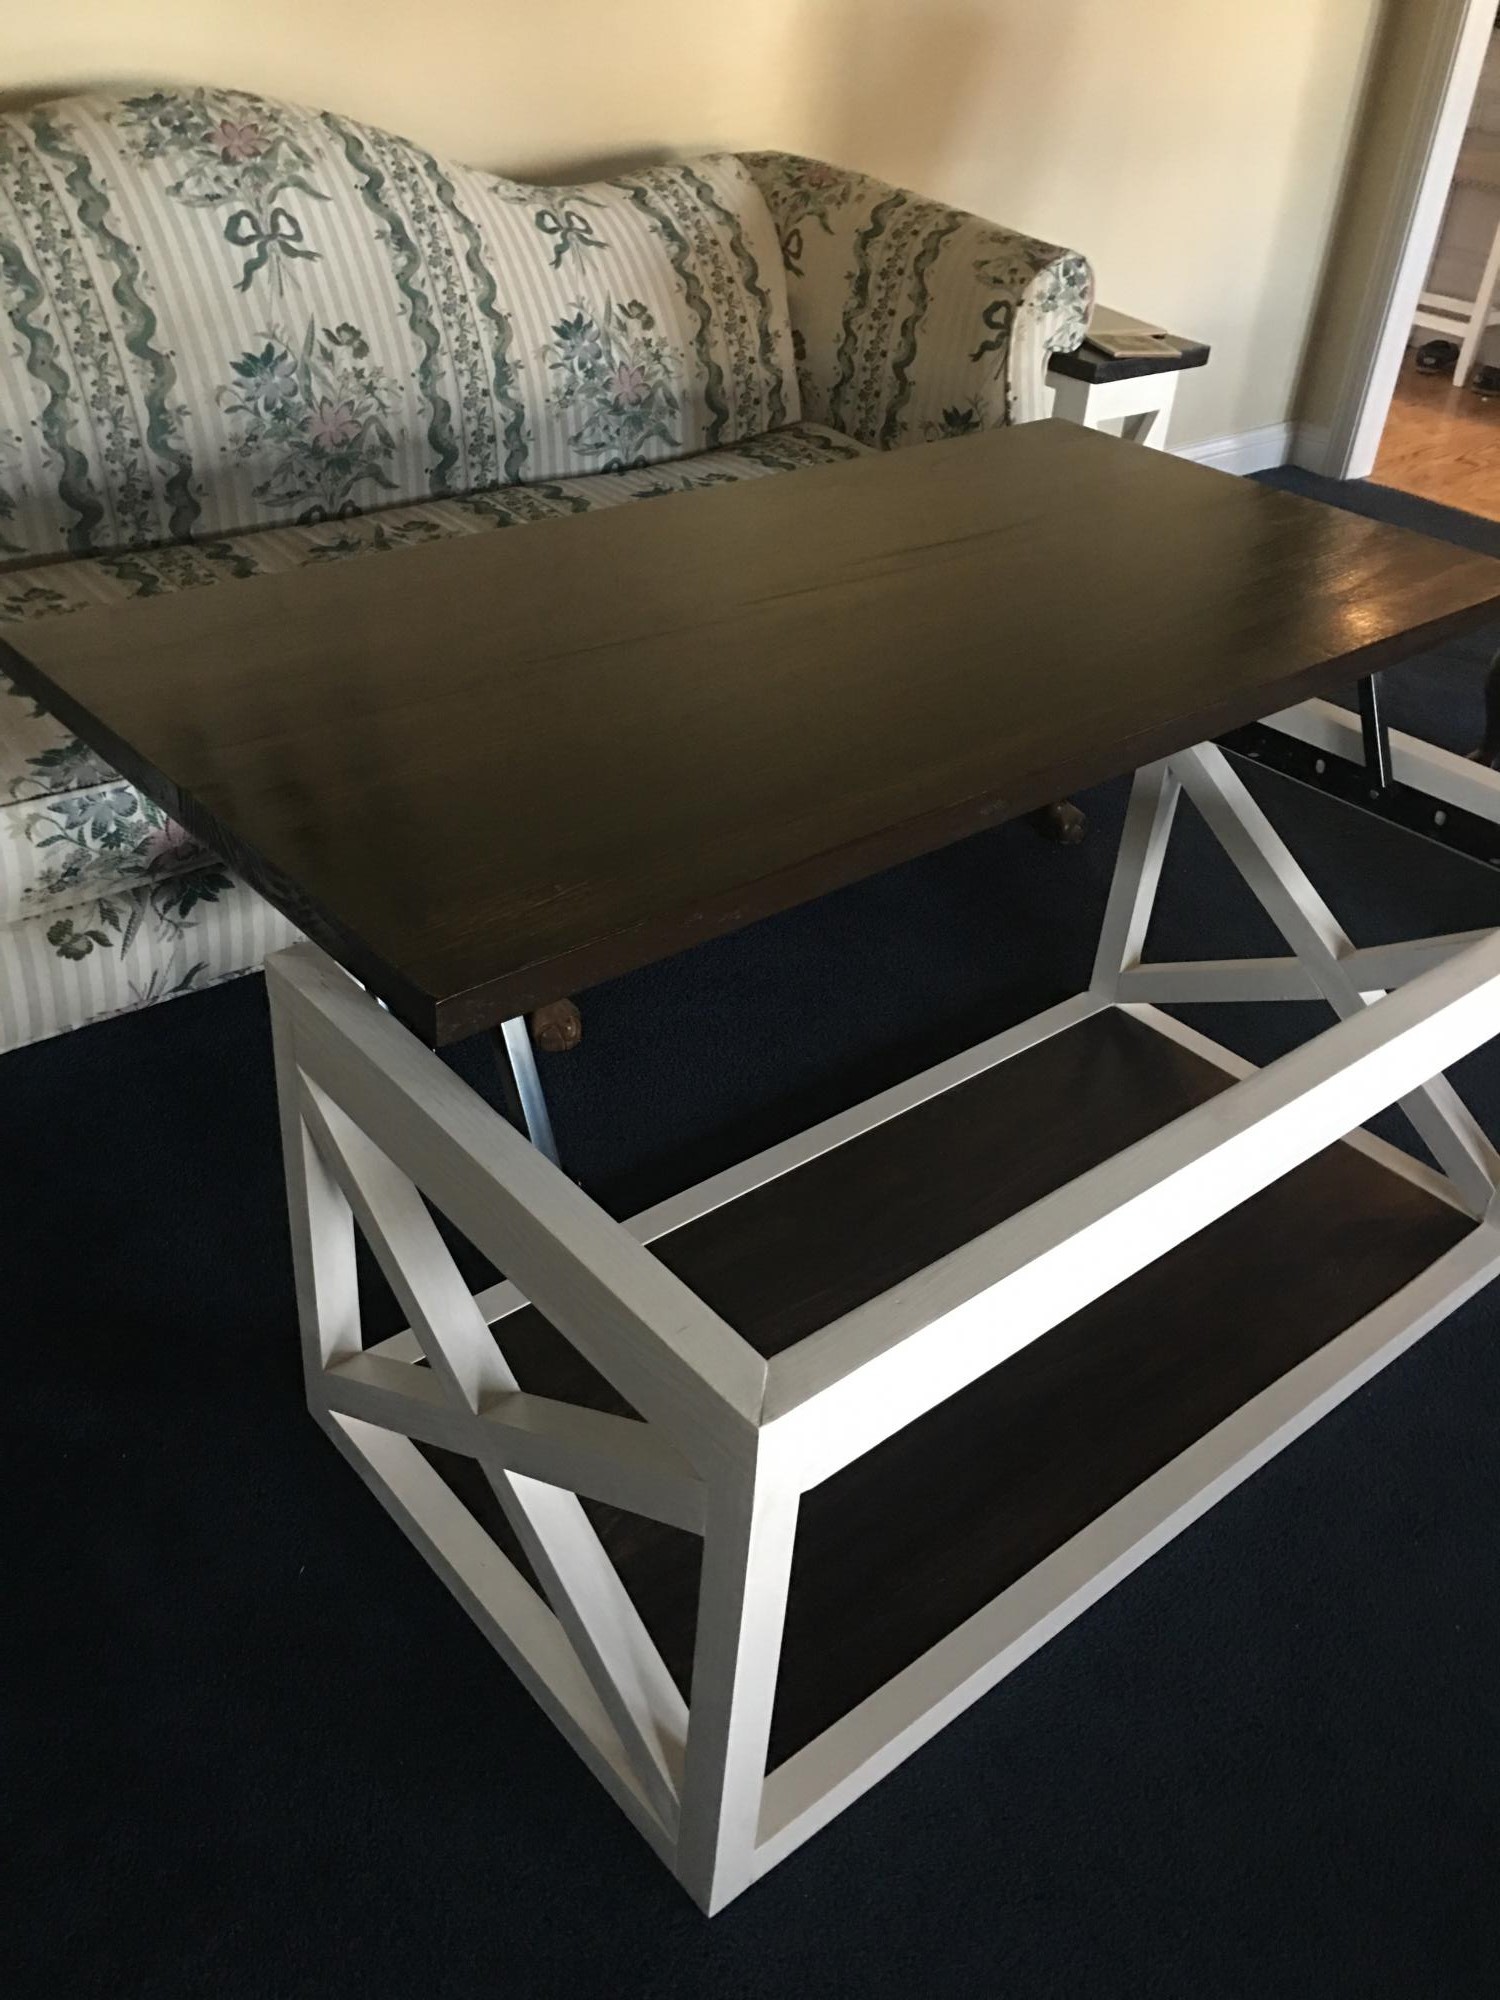
Sticking with the same color scheme as the Console Table. The brackets are a bit of a pain to attach
Estimated Cost
$225
Estimated Time Investment
Week Long Project (20 Hours or More)
Finish Used
Dark walnut stain & creamy white paint
Recommended Skill Level
Beginner
Comments
Craftsman Frame
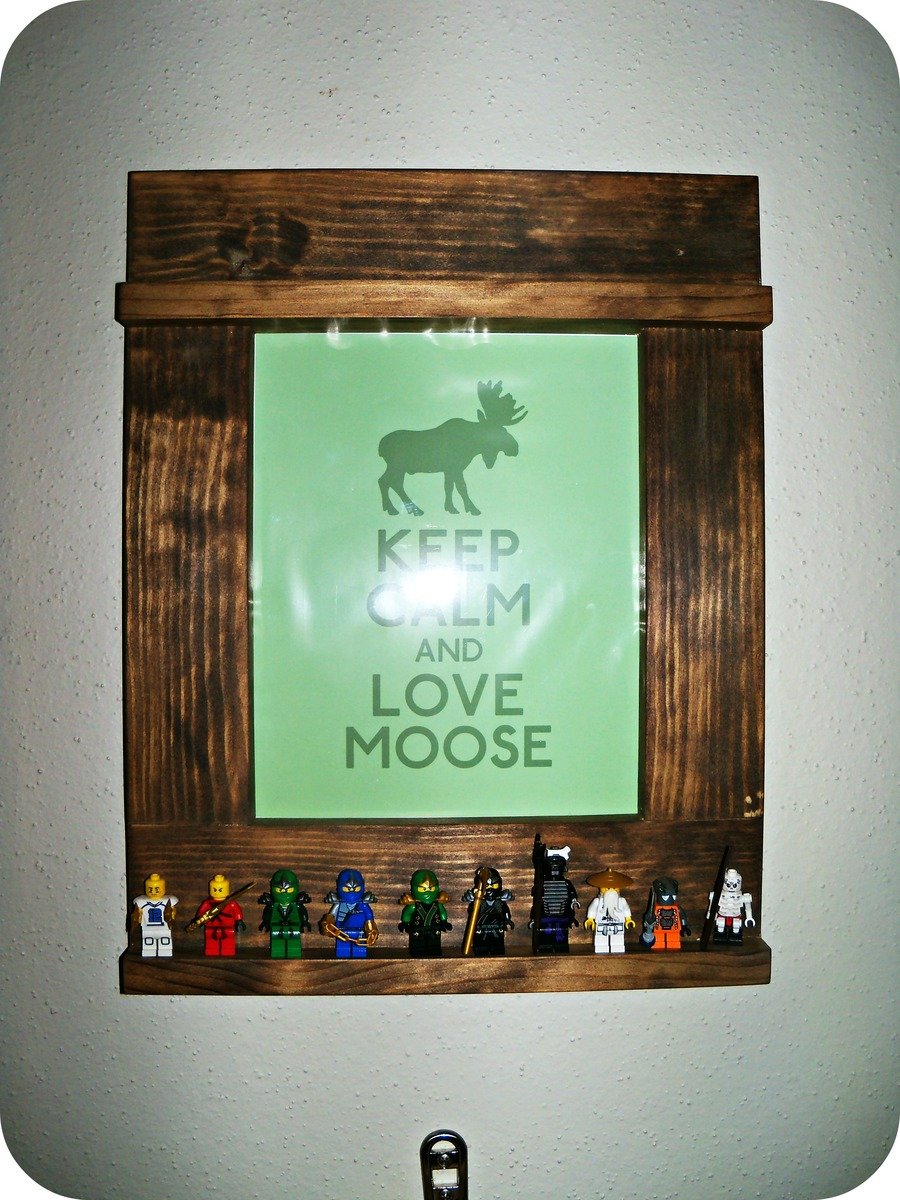
I bought this really cool print from a shop on Etsy, but I was having a hard time finding a frame for it My husband made the bed for his room too, and I wanted the frame to coordinate.
This was a simple project and really looks great in his room. We used an inexpensive pine and the same stain as his bed. I really wanted a green stain, but I couldn't find any like the type Anna used. This frame took just a little over an hour to put together.
Built from Plan(s)
Estimated Cost
$6
Estimated Time Investment
An Hour or Two (0-2 Hours)
Finish Used
minwax Americana and minwax furniture polish
Recommended Skill Level
Starter Project
Comments
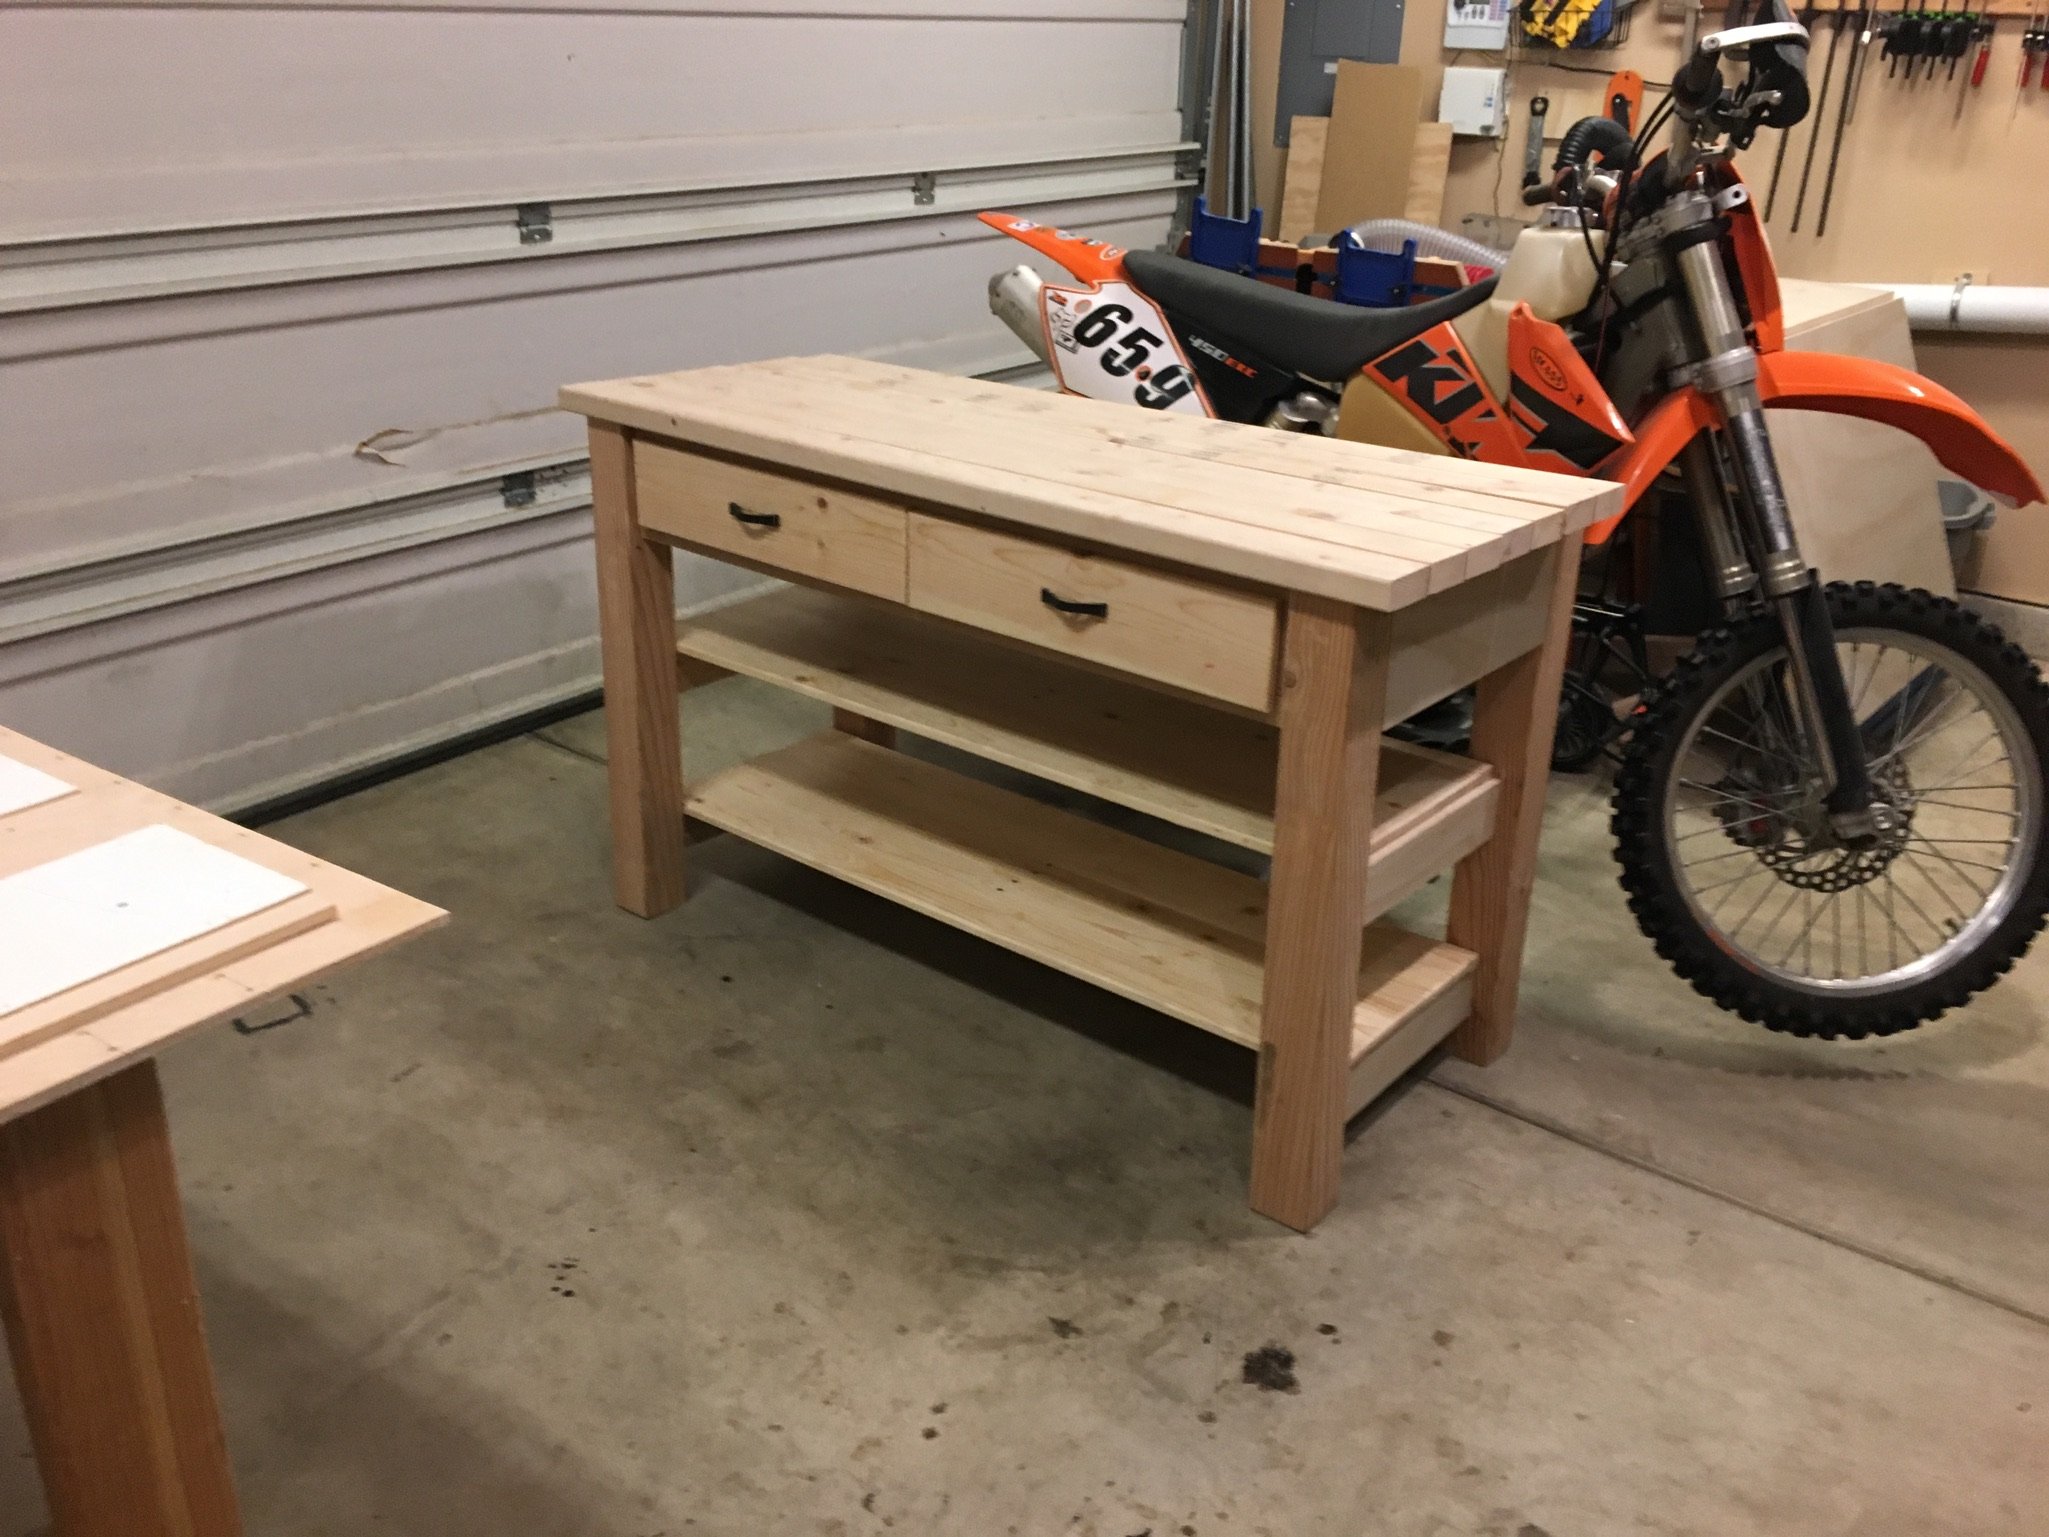
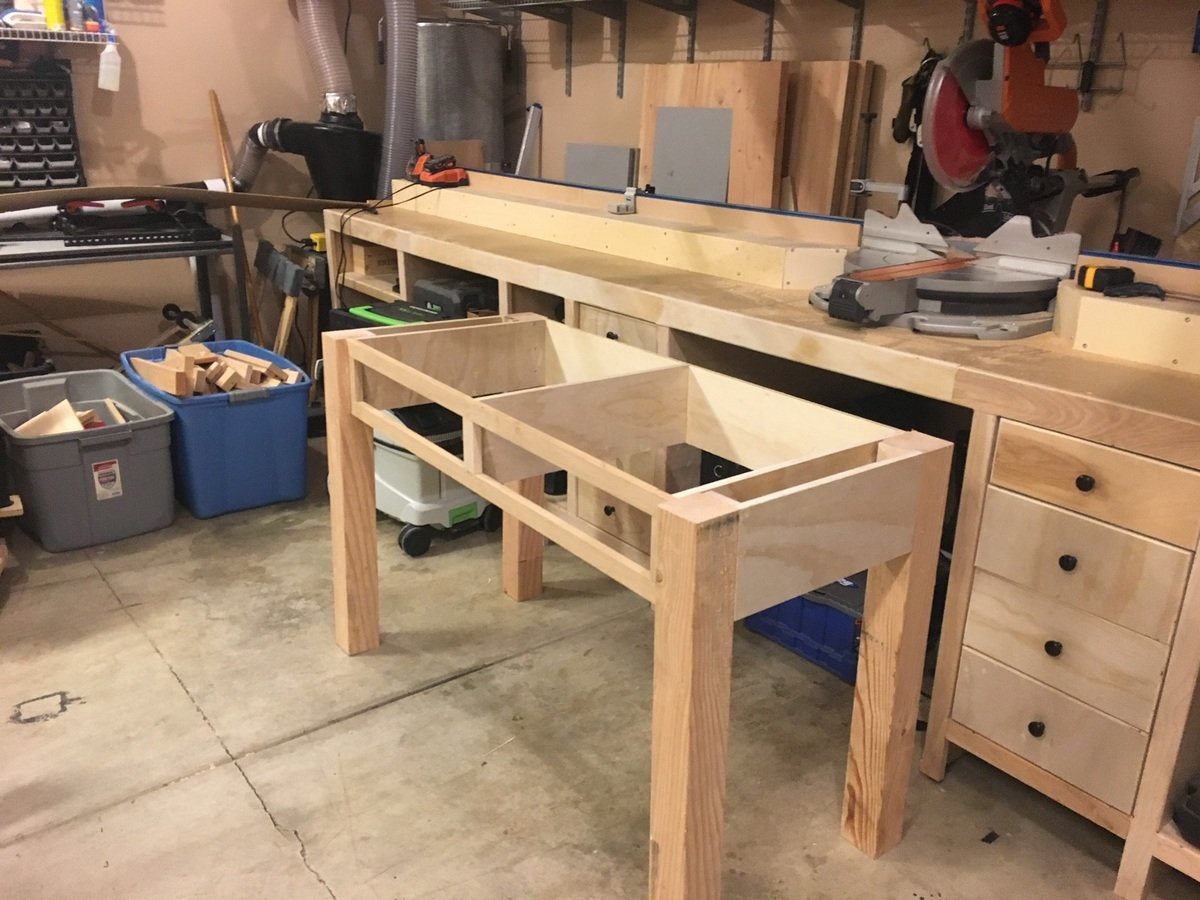
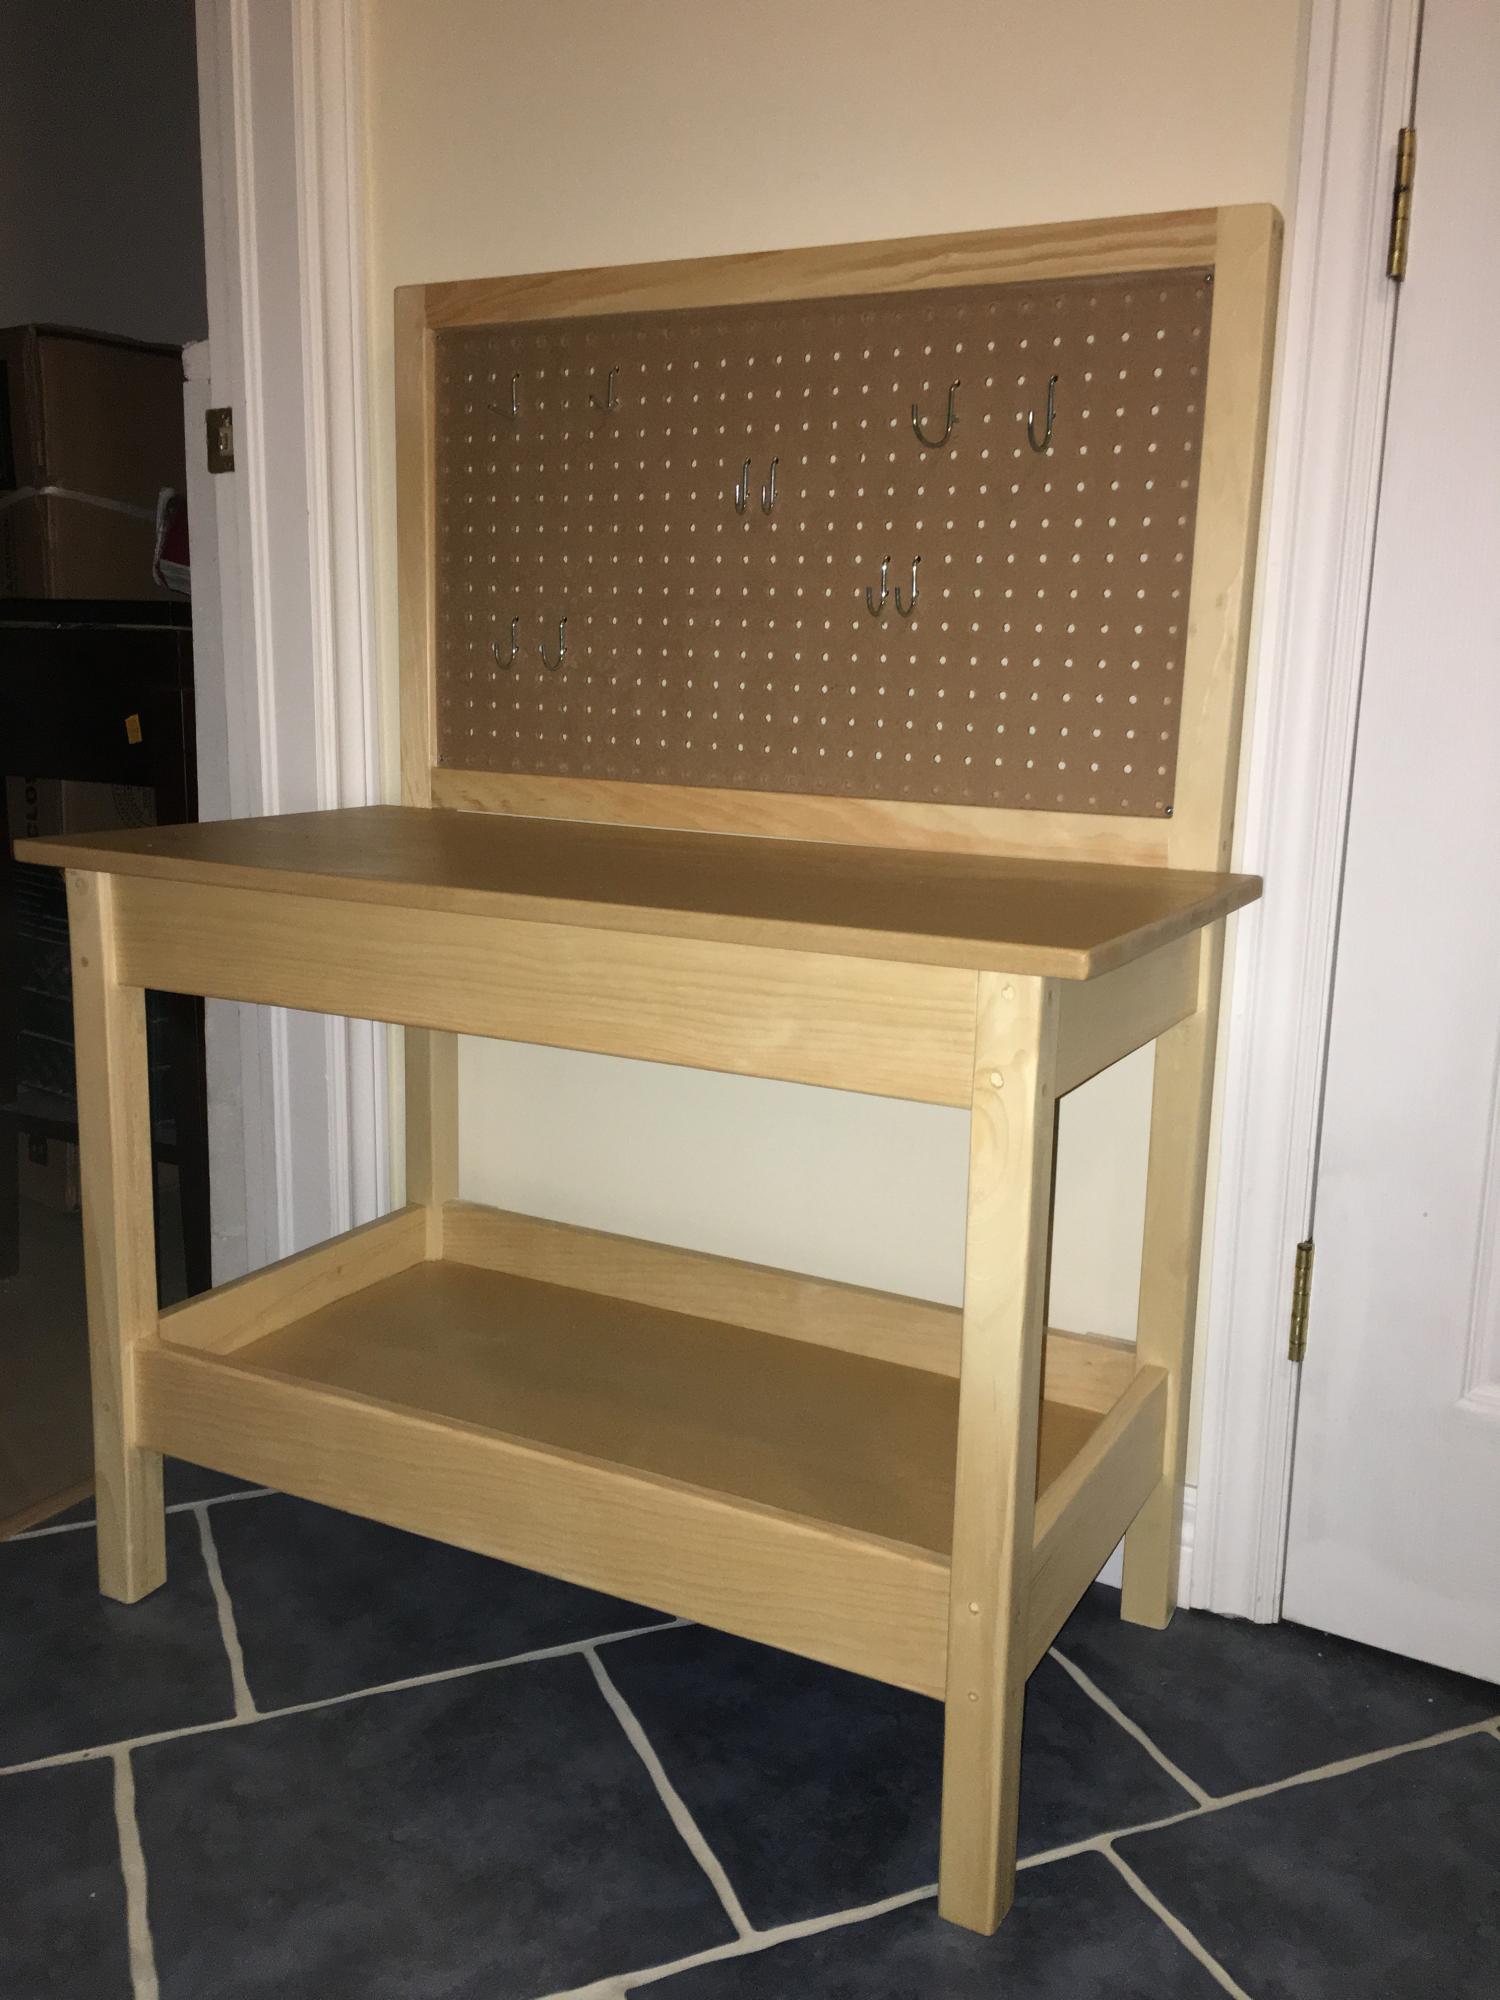
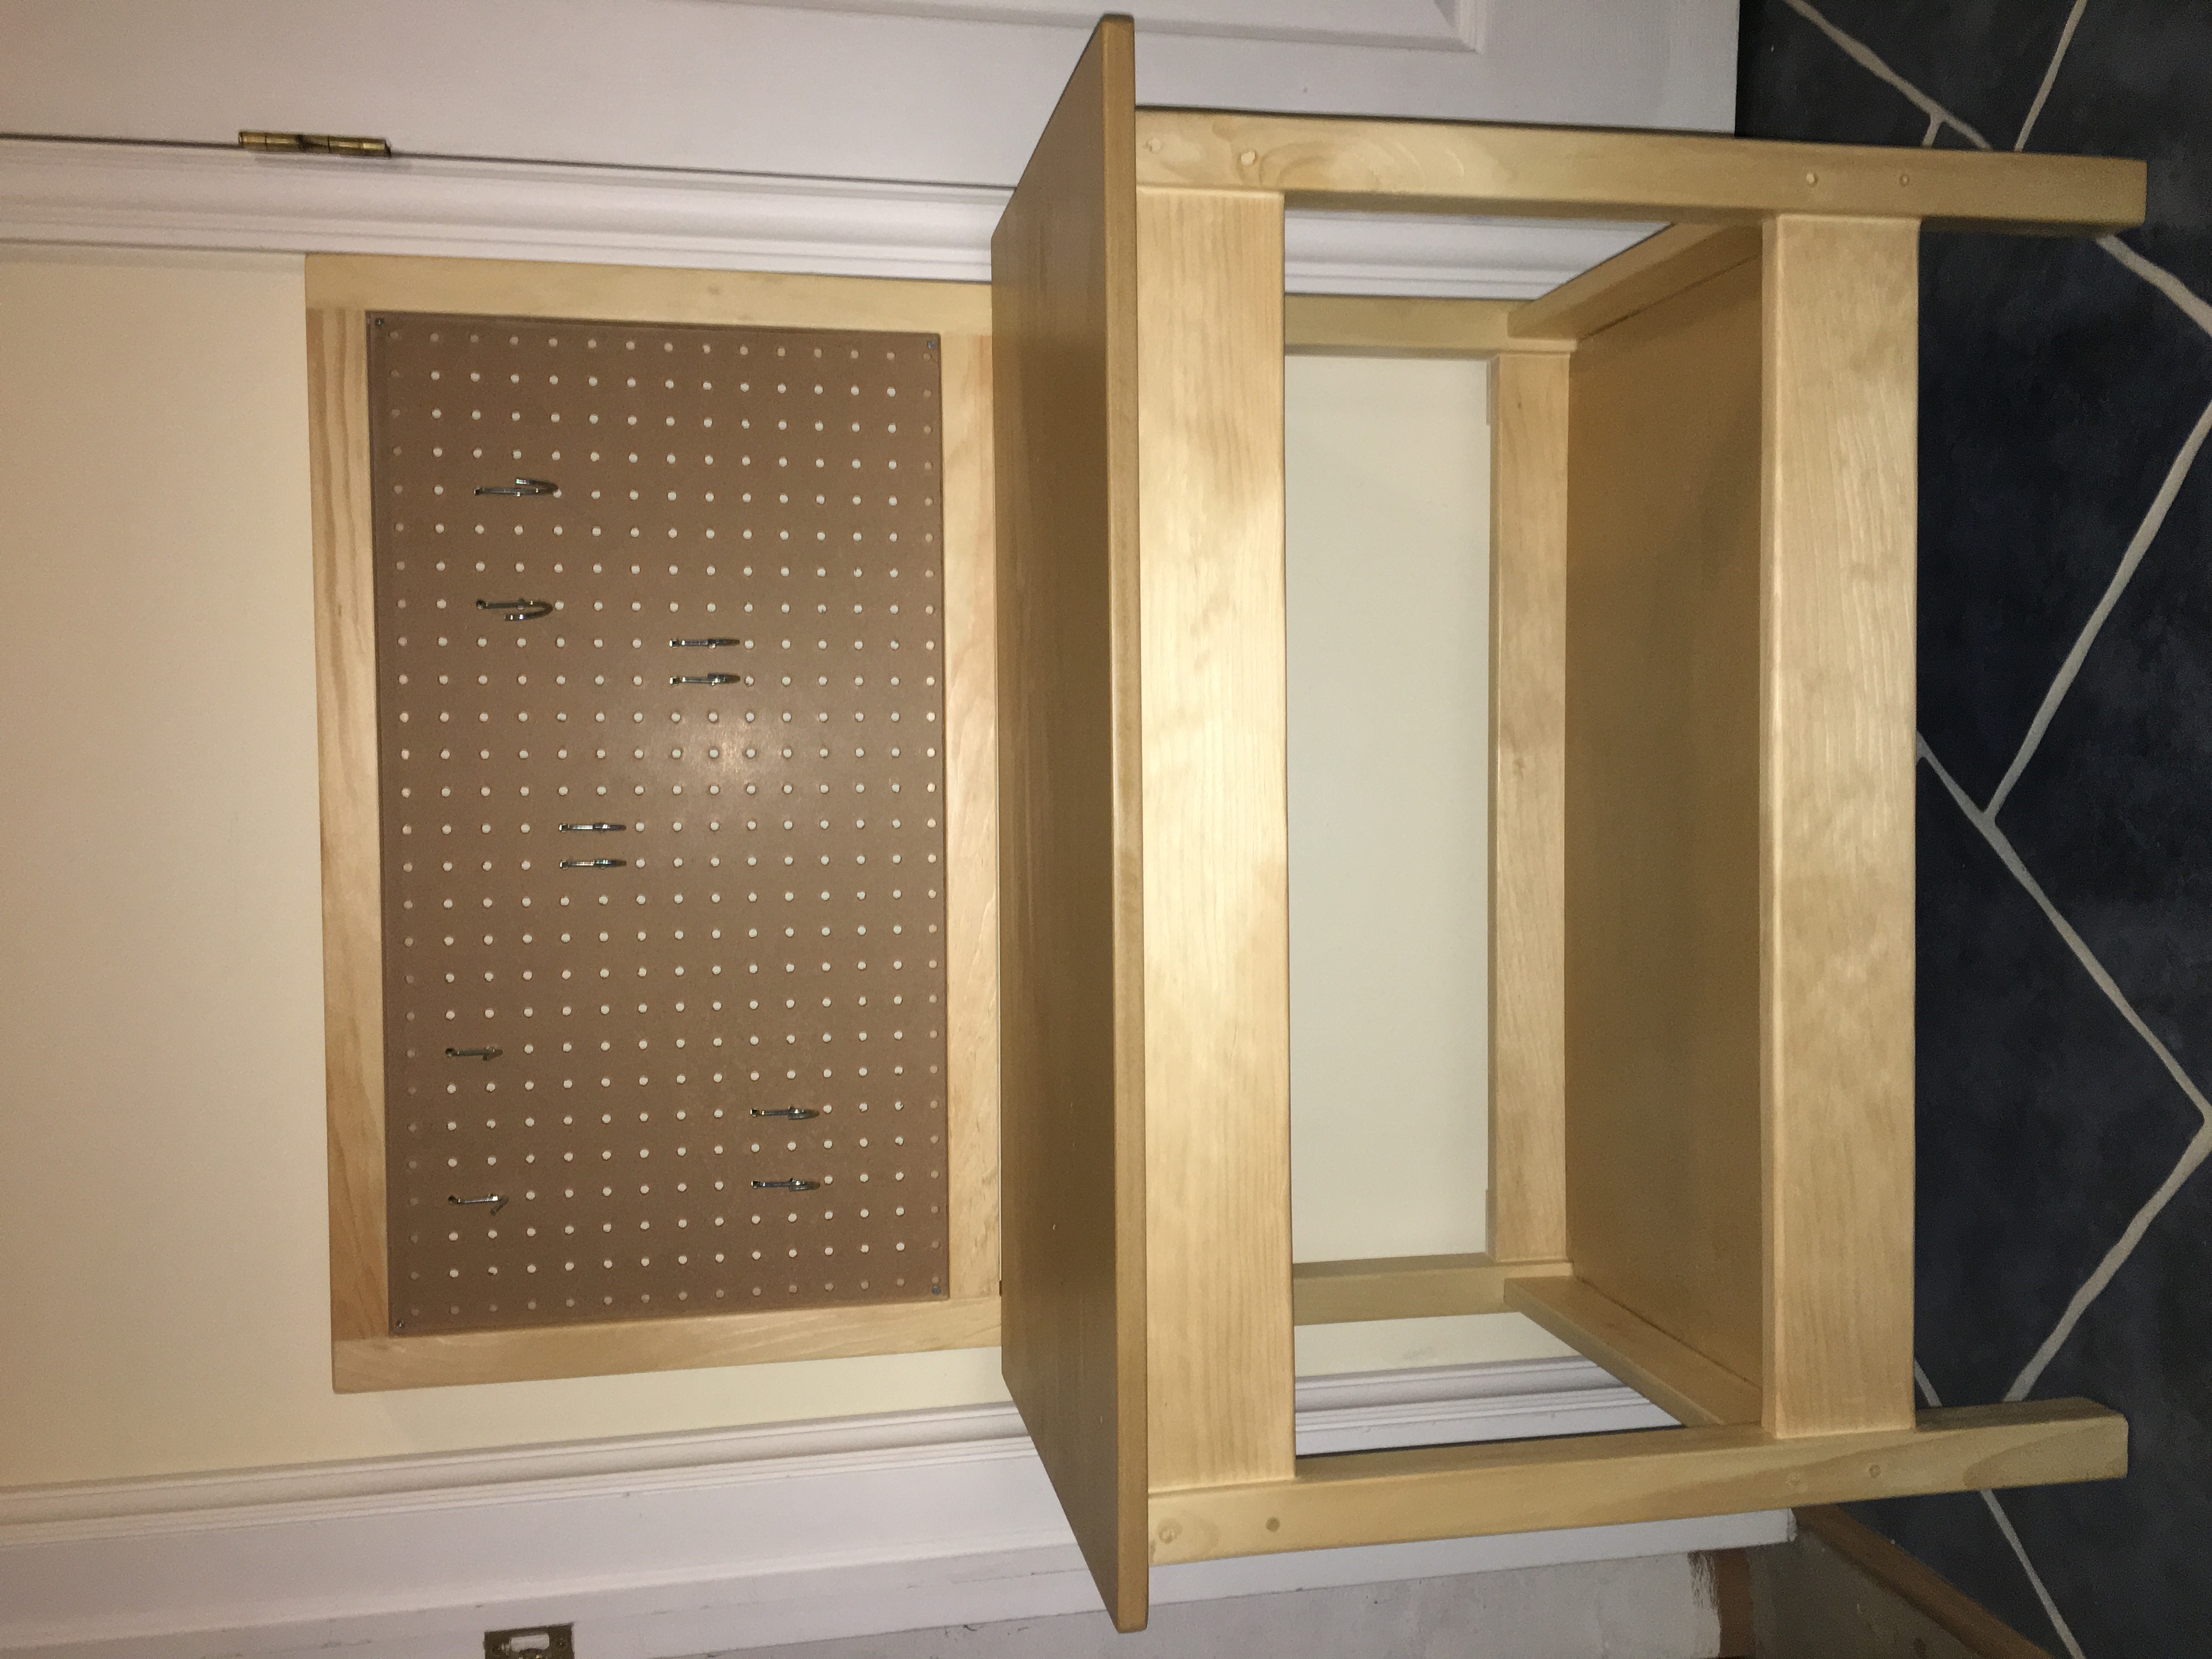
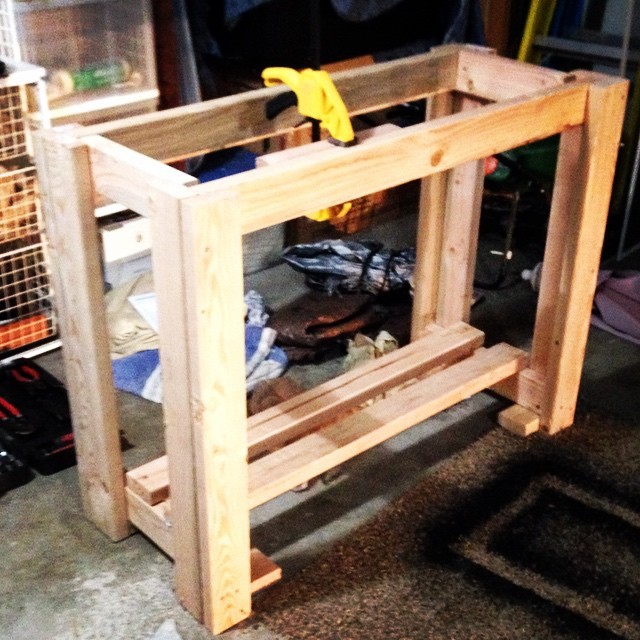
Sturdy Work Bench
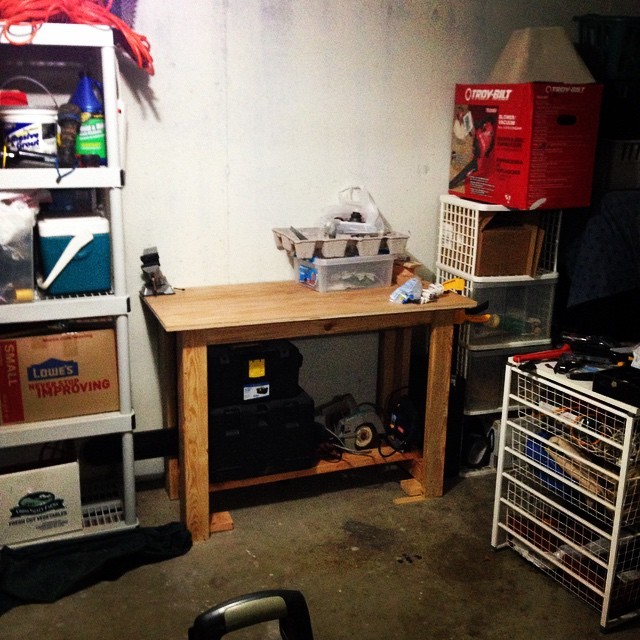
We needed a sturdy surface for projects, and this did the trick. We have plenty of storage, so the bottom shelf didn't need all three 2x4 boards. We might make another one just to extend the space!
Built from Plan(s)
Estimated Cost
About $60. Had screws, wood conditioner, etc. at home.
Estimated Time Investment
Afternoon Project (3-6 Hours)
Finish Used
Danish oil in natural finish.
Recommended Skill Level
Beginner
Beautiful headboard to match existing nightstands
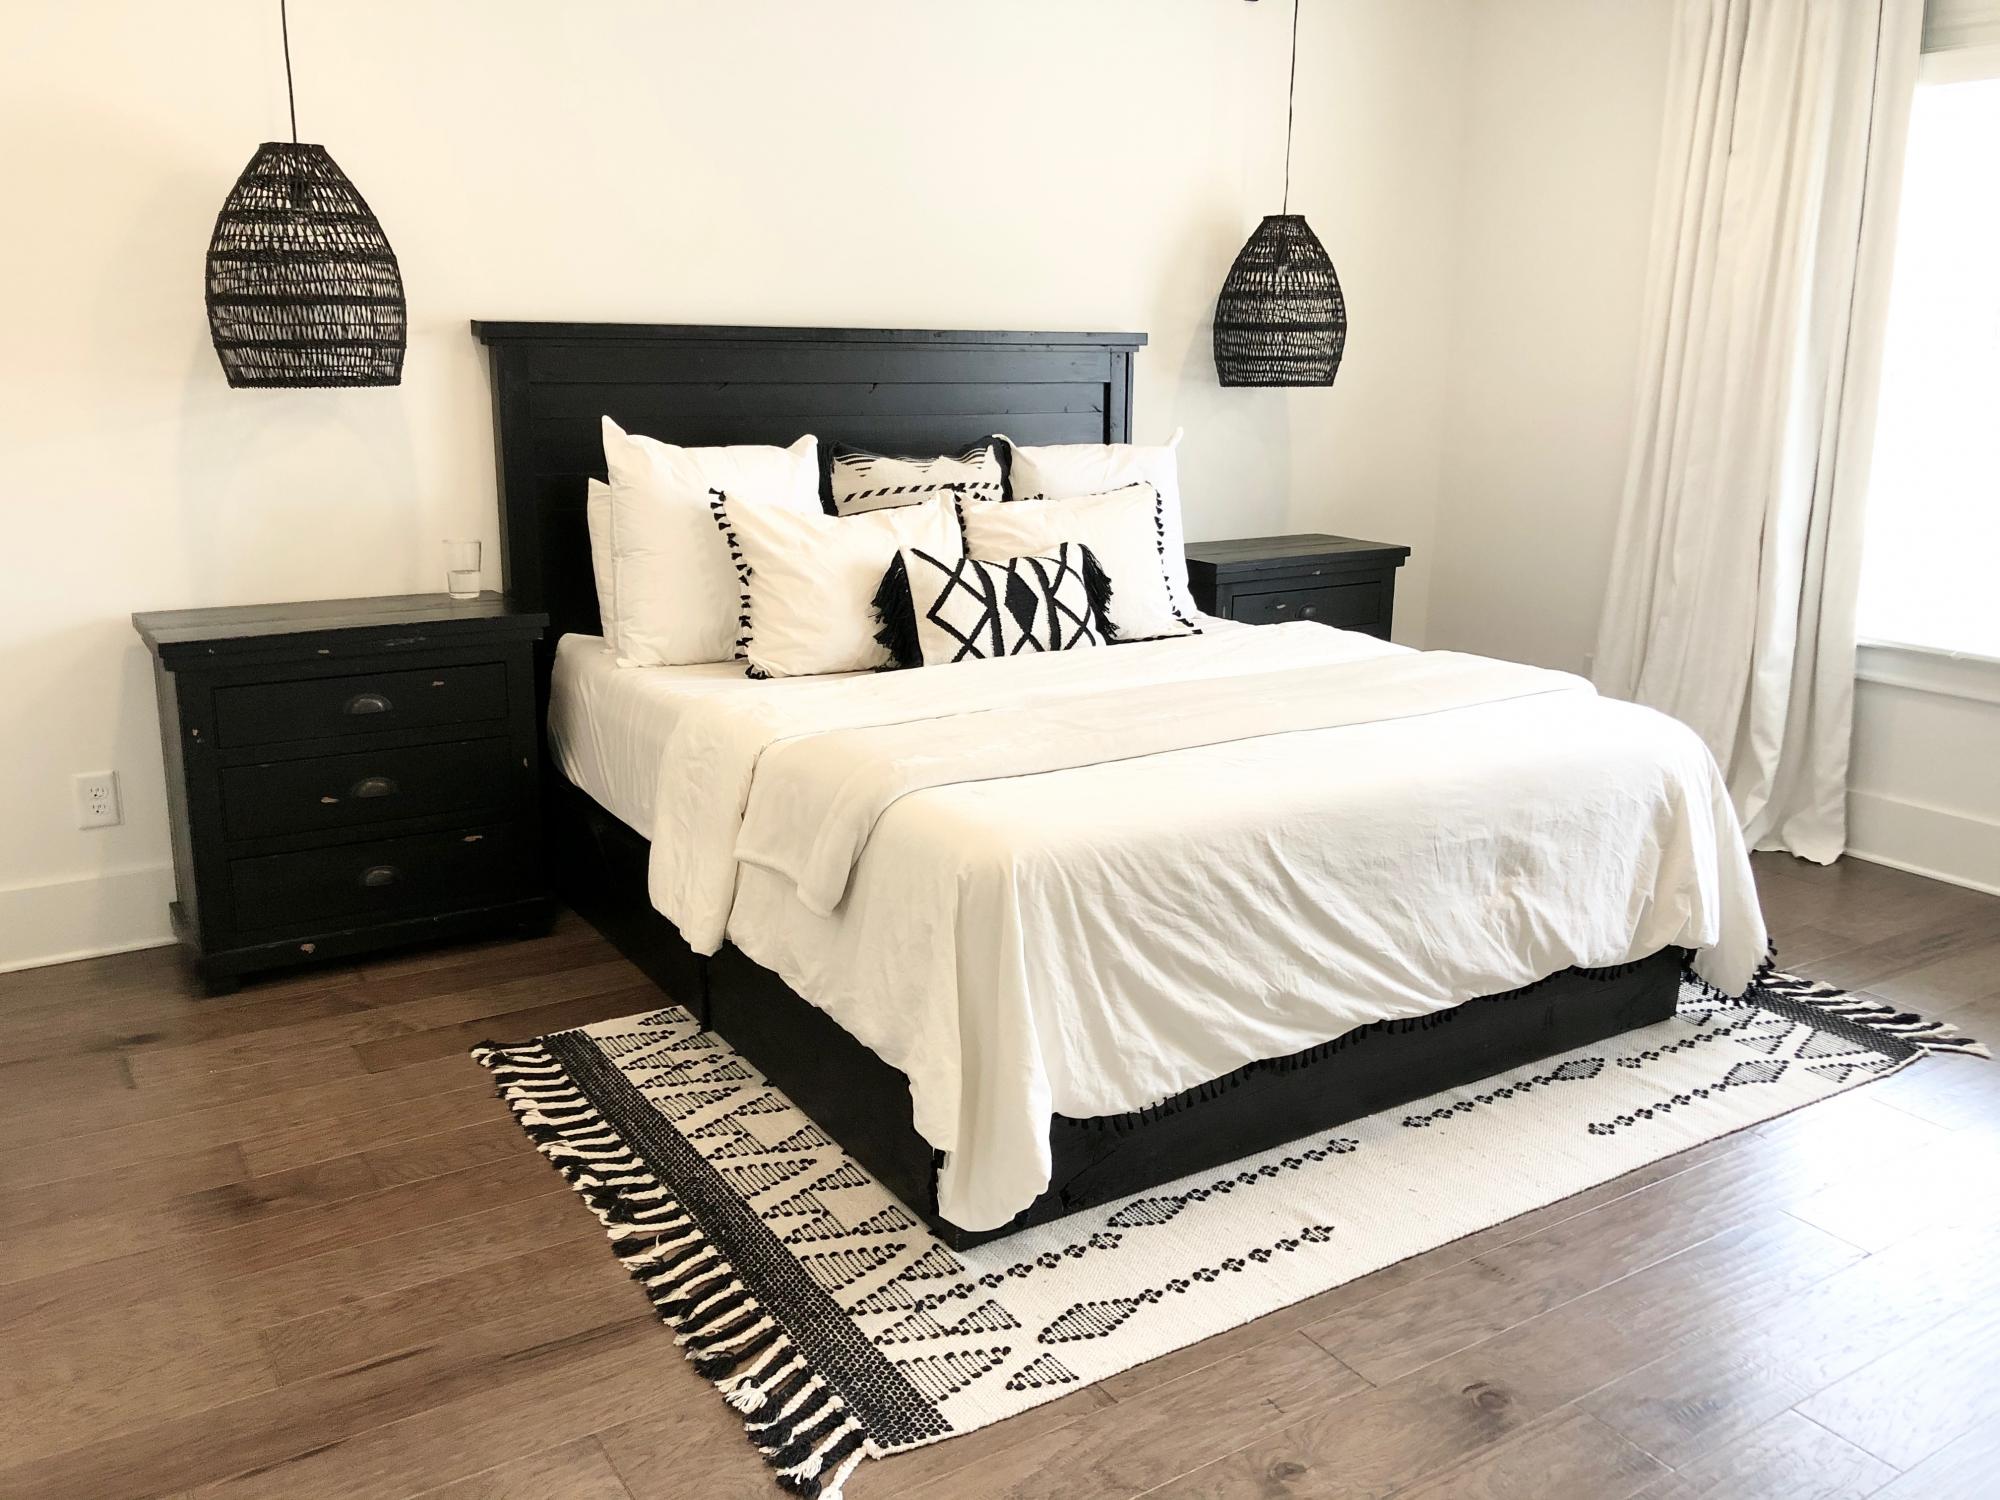
We slightly modified this headboard to fit a California King. We needed something to match the style of our nightstands. This turned out perfect!
Built from Plan(s)
Estimated Time Investment
Afternoon Project (3-6 Hours)
Finish Used
Minwax Polyshades Black
Clear Matte Poly top coat
Clear Matte Poly top coat
Recommended Skill Level
Beginner
Comments
Sat, 11/07/2020 - 14:27
Looks like it was meant to be!
Great job, love the finish and the whole look of the space!
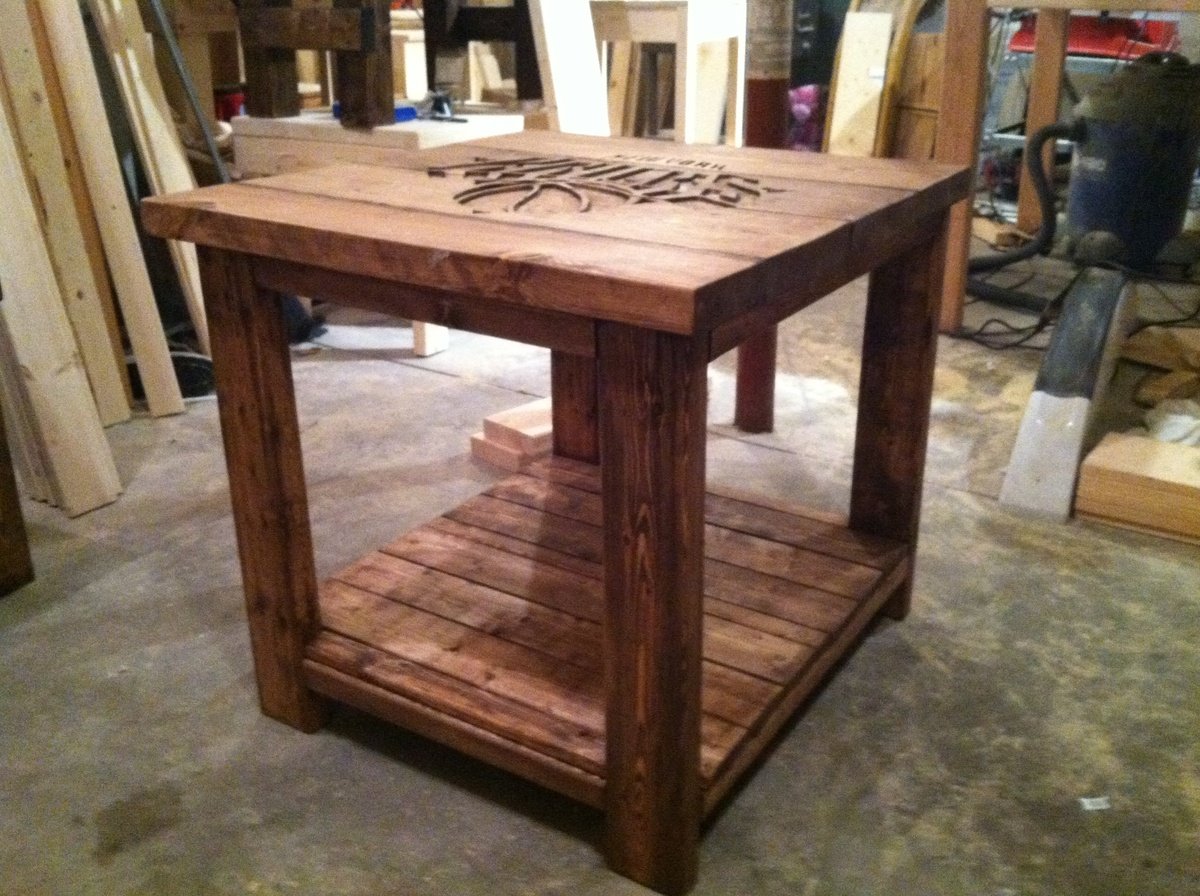
Rustic logo end table
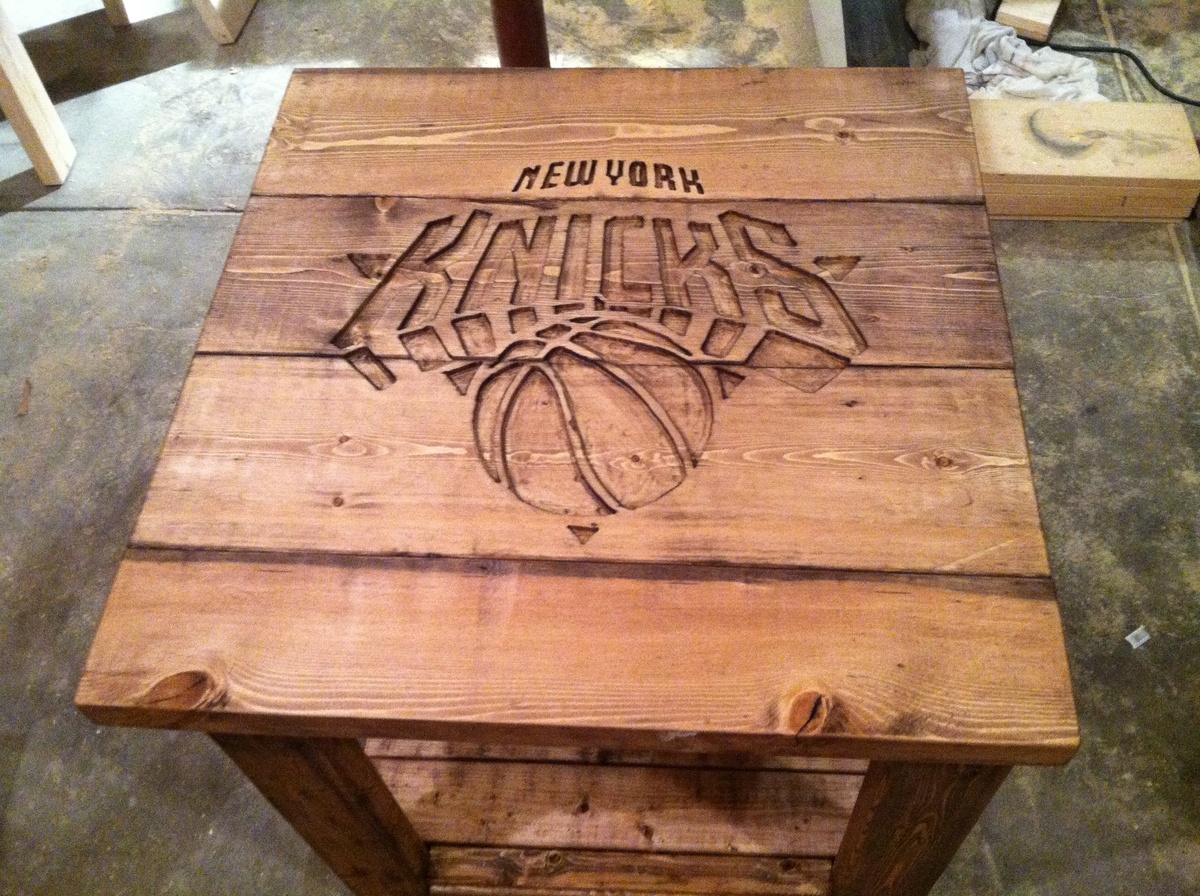
Made a gift for a Knicks lover. Used a dremel trio to etch in logo. Went back and forth on adding color and in end decided not to. But gave me another idea on my next logo table

Built from Plan(s)
Estimated Time Investment
Afternoon Project (3-6 Hours)
Finish Used
Min wax special walnut
Recommended Skill Level
Intermediate
Comments
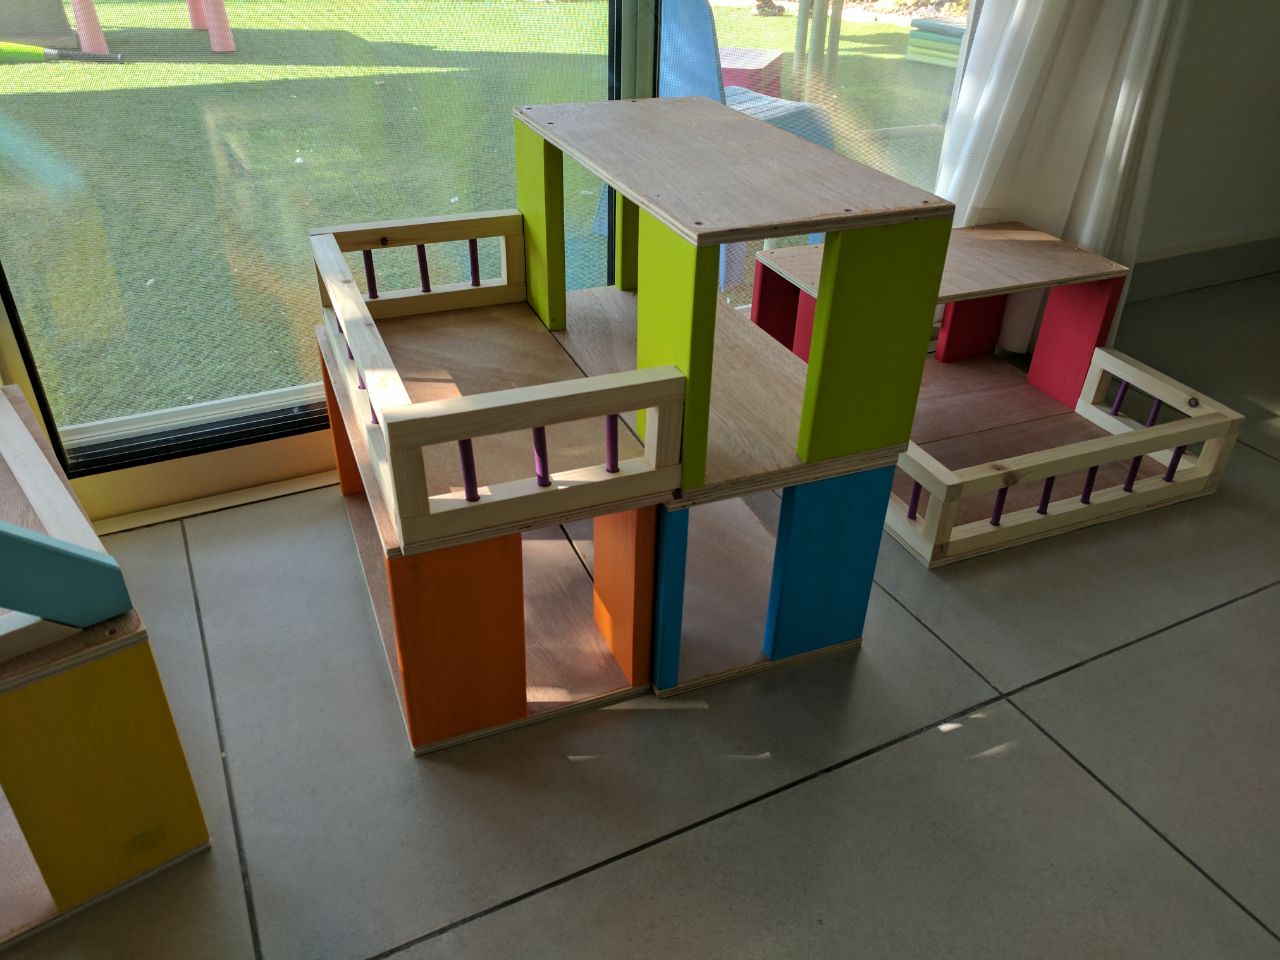
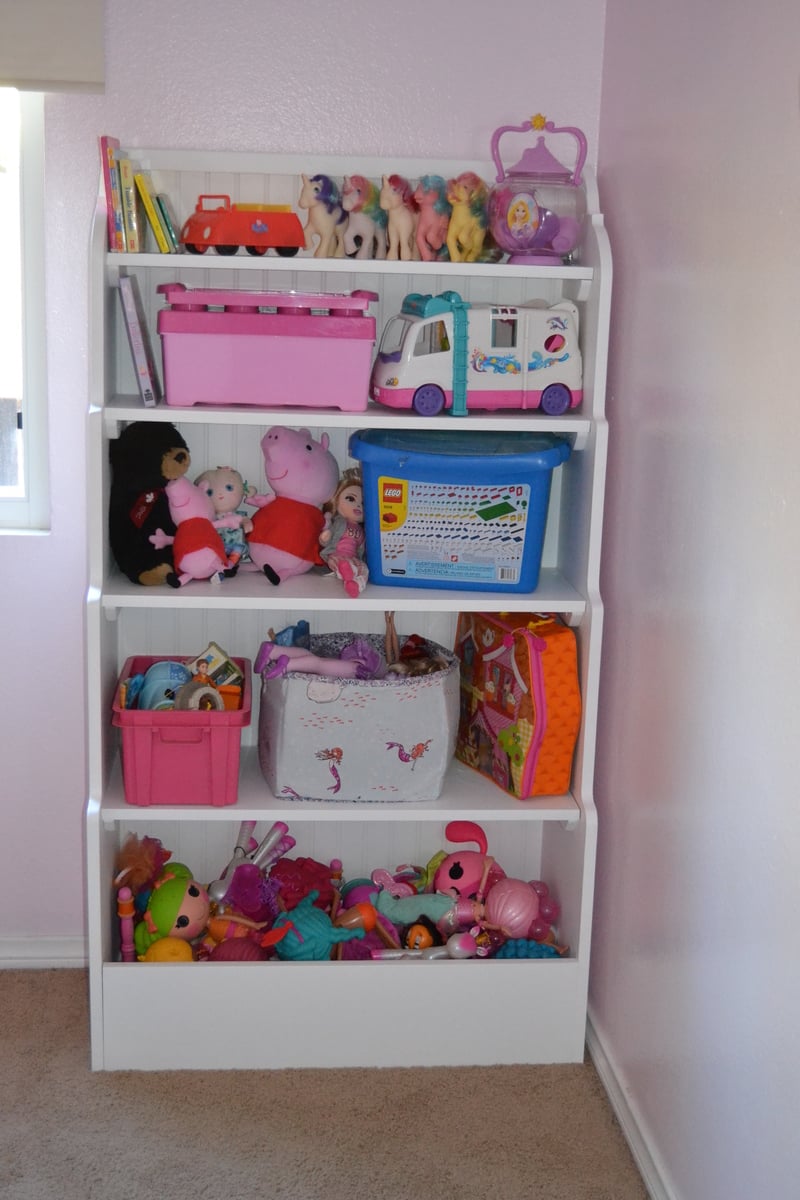
Sissy's Shelves
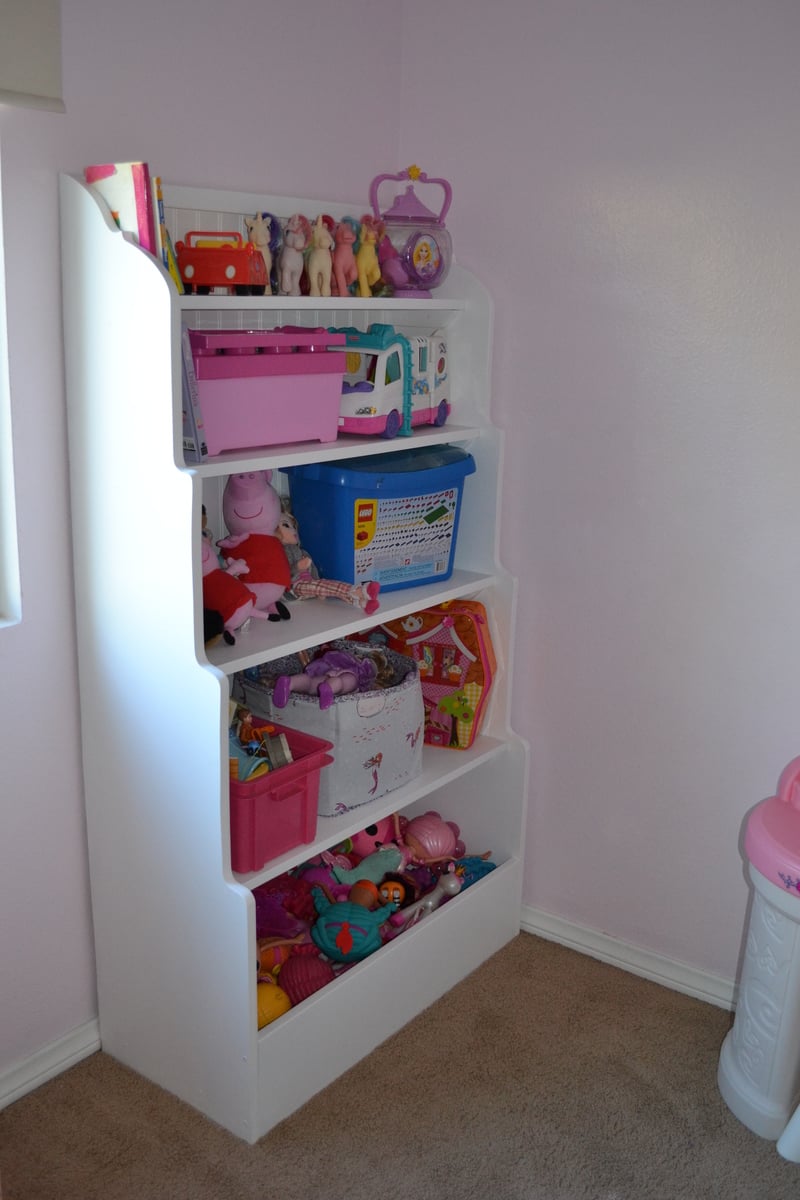
I have wanted these shelves for a long time, I first saw them on a retailer's website but could never justify $400 for kids shelves. I absolutely love the bin on the bottom.
The plans for this project were very easy to follow. I don't own a table saw so I paid 25c per cut to have my local big box cut the MDF for me. I used 1/4" wainscoting for the back which was $20 for the sheet but I like how it finishes the back. My daughter's walls were lined with small bins of toys on the floor, I'm so glad to have her room cleaned up.
Built from Plan(s)
Estimated Cost
$60
Estimated Time Investment
Day Project (6-9 Hours)
Finish Used
White eggshell finish
Recommended Skill Level
Beginner
Comments

Wed, 11/05/2014 - 12:46
Wifey-this is cool!! Love
Wifey-this is cool!! Love the white finish with the pale wall color!
Did it!
My Dad and I worked on this together. First time making furniture and using a Kreg Jig. So hapay with how it turned out!
Built from Plan(s)
Estimated Cost
80
Estimated Time Investment
Weekend Project (10-20 Hours)
Finish Used
Stain: minwax classic gray first then special walnut
Recommended Skill Level
Starter Project
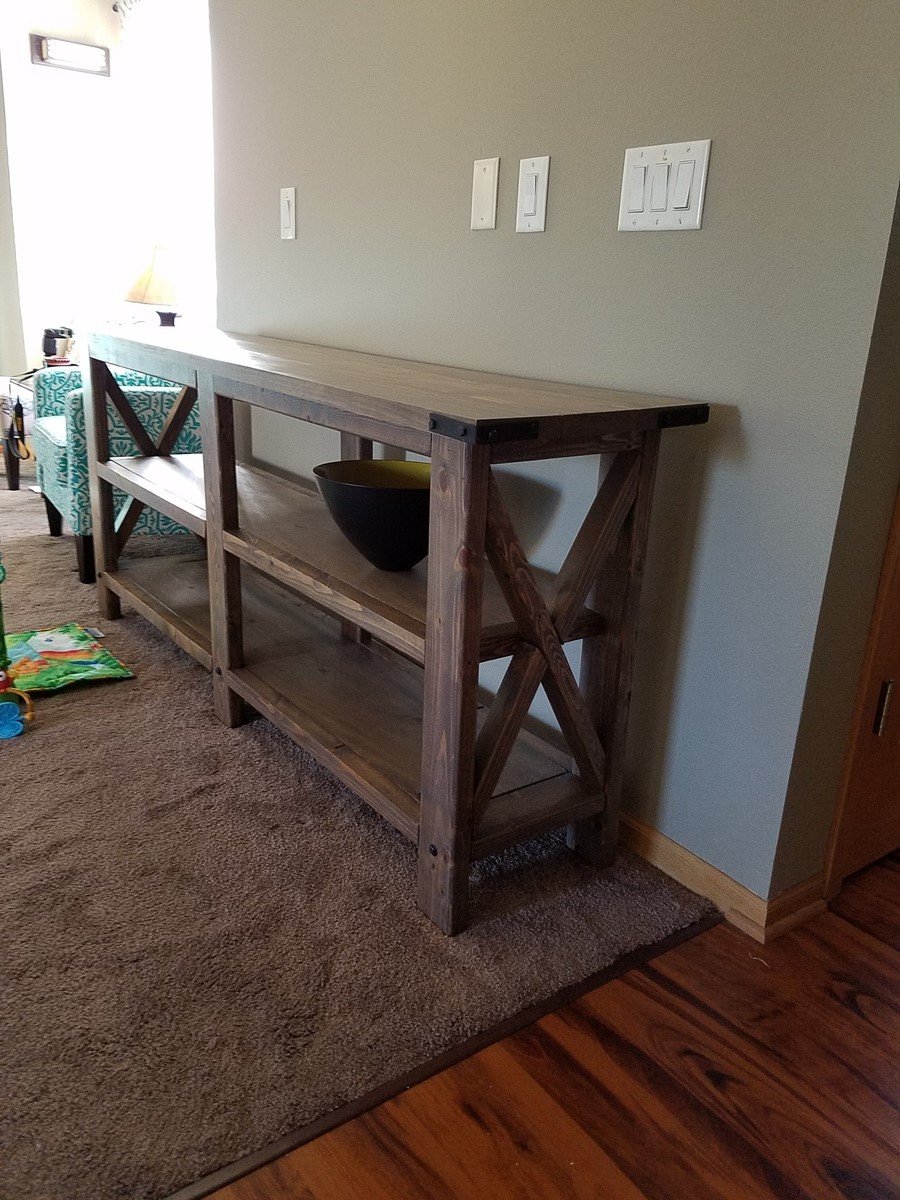
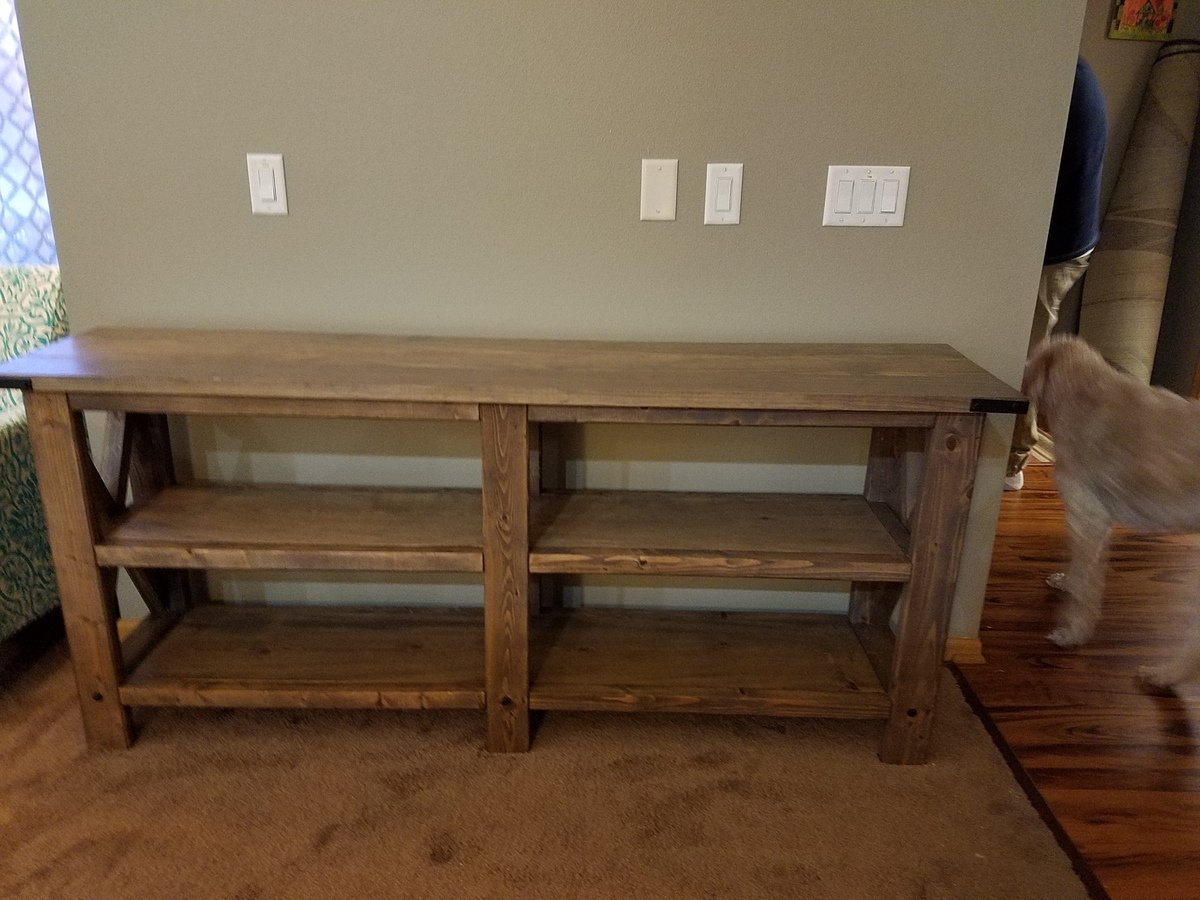
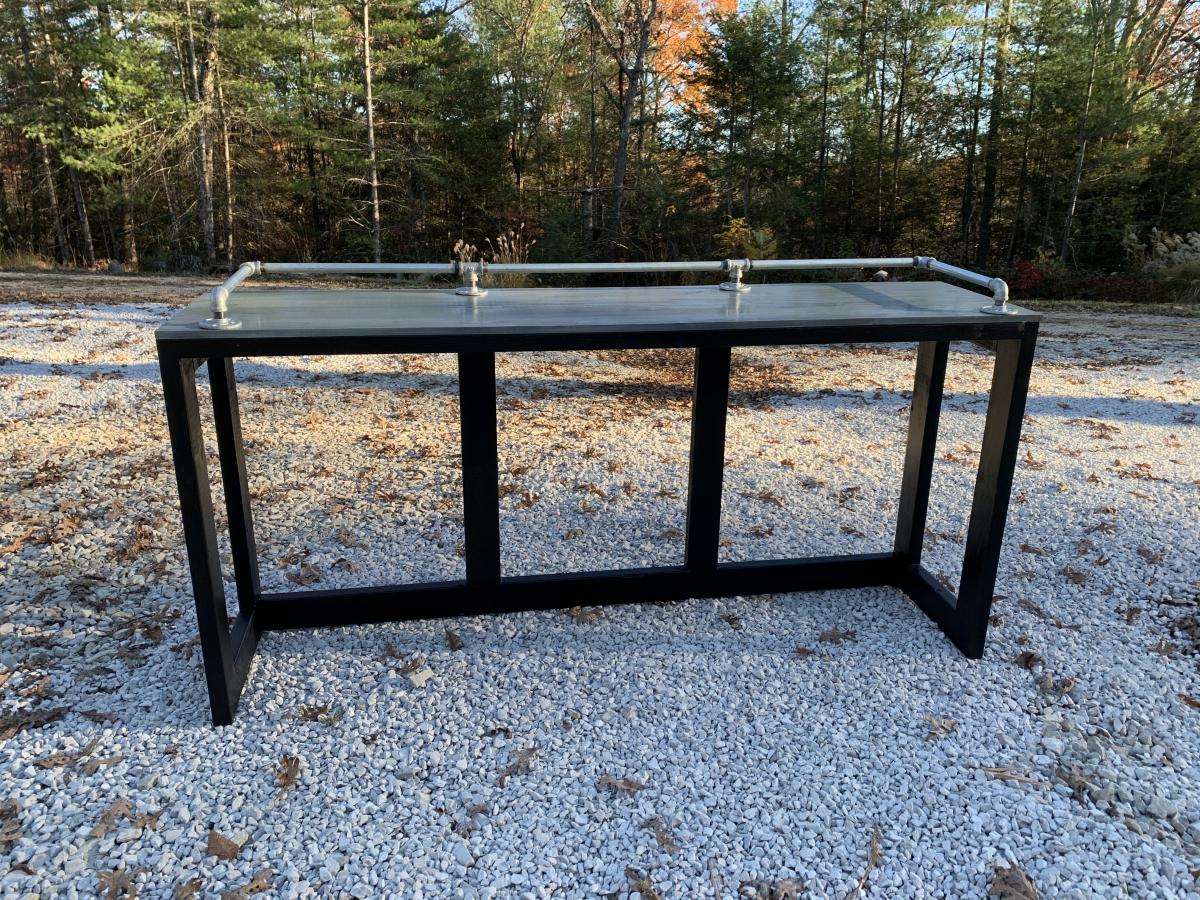
Sofa table
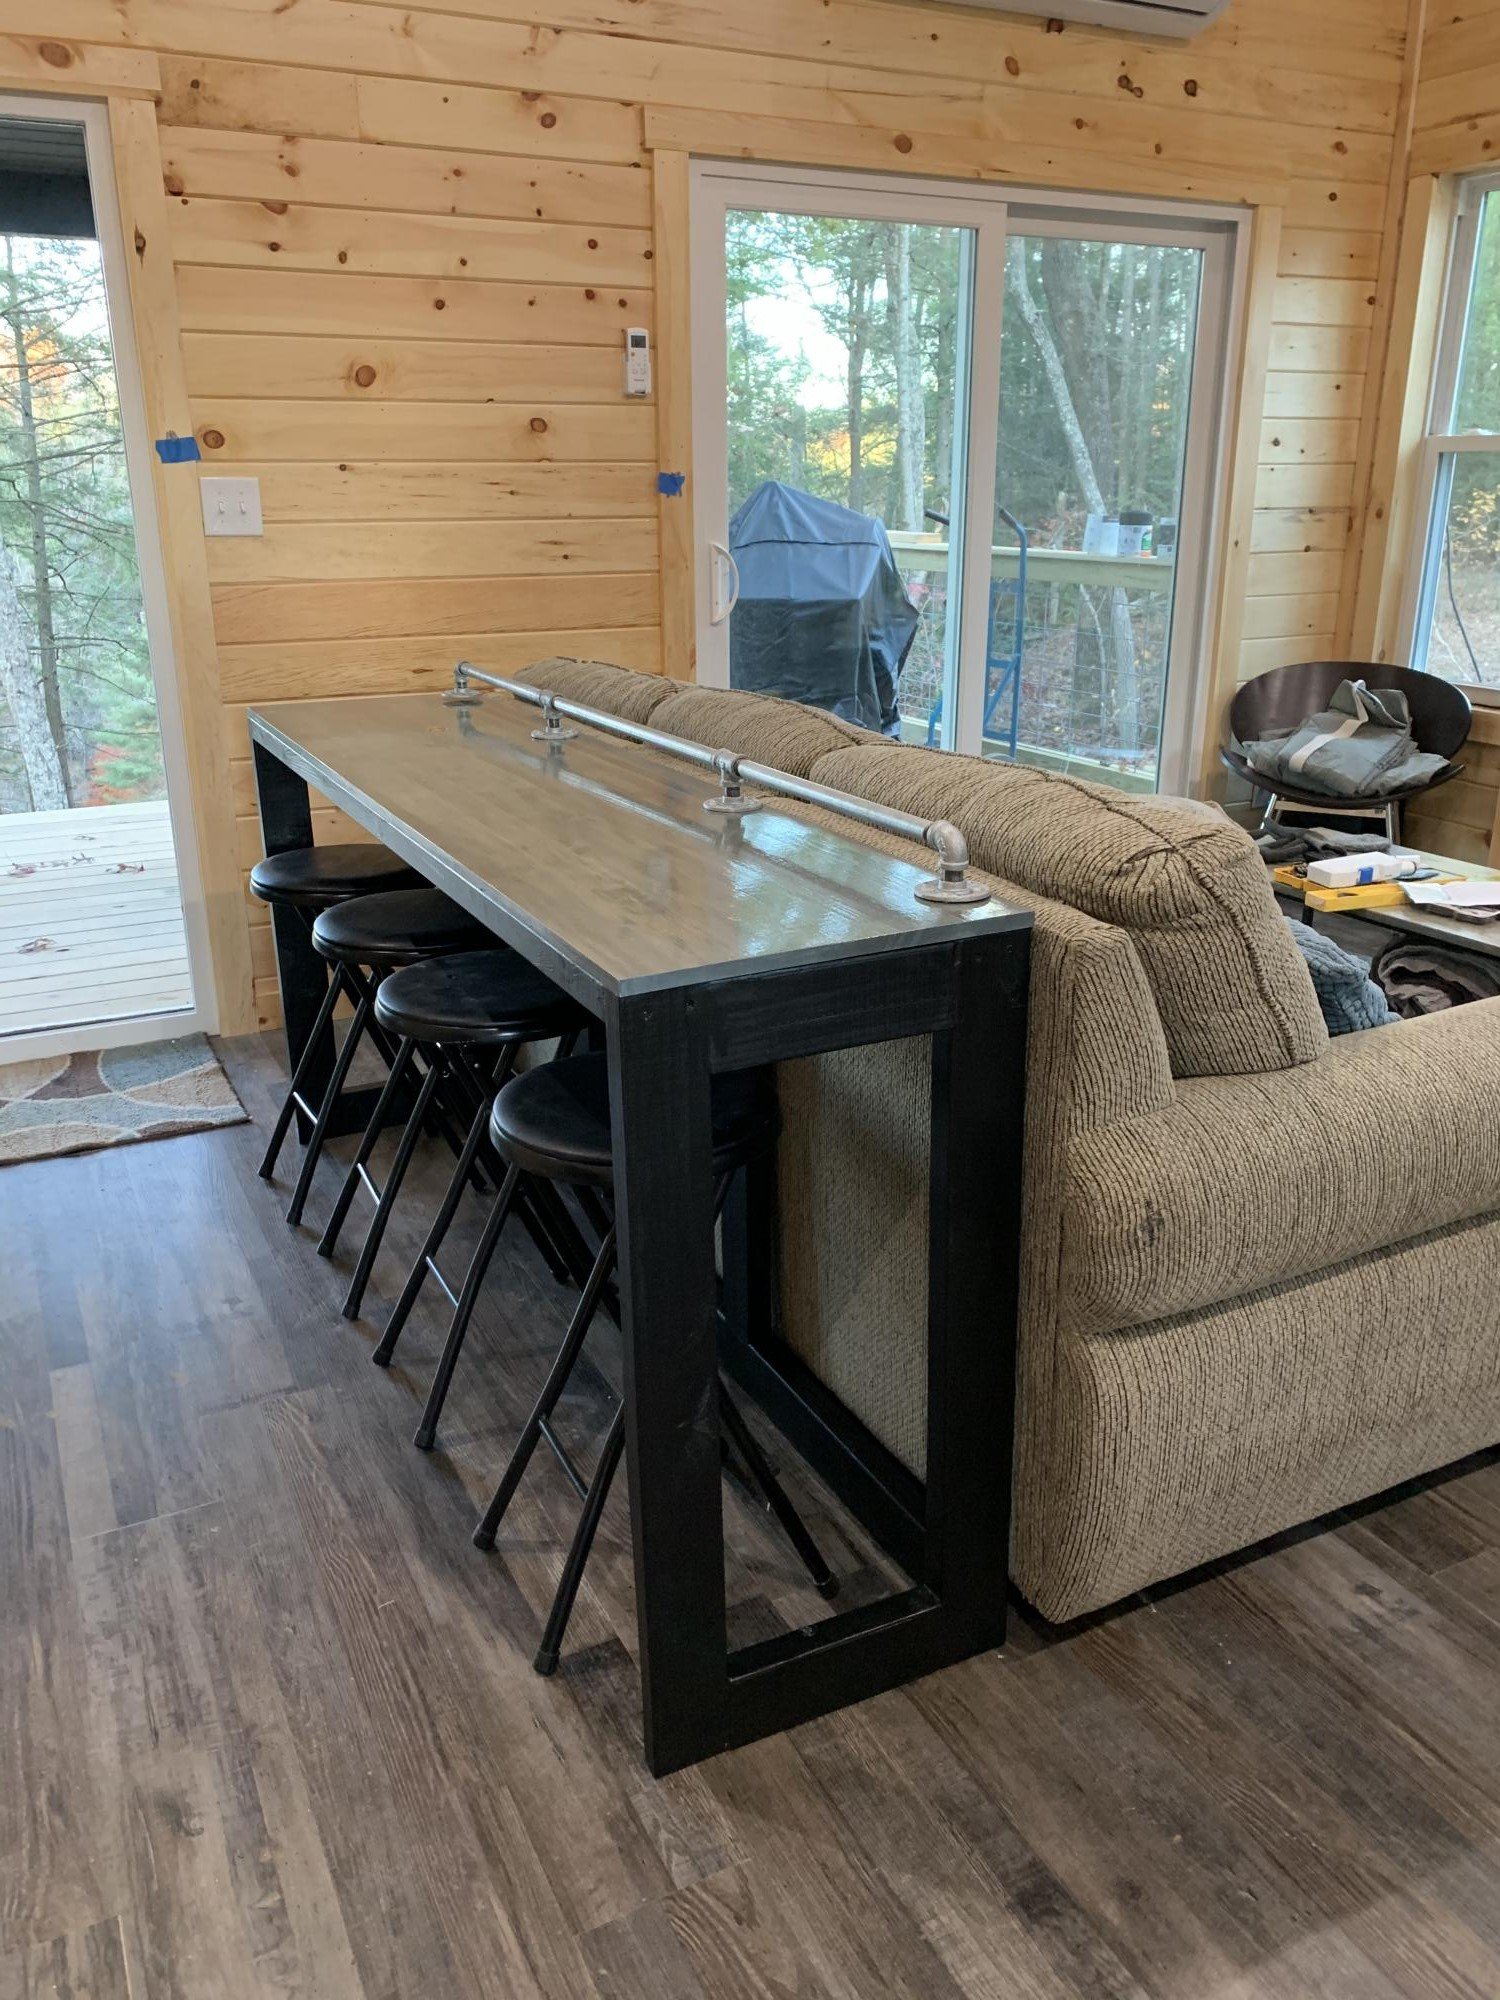
We are building a small rental cabin in the Red River Gorge and I needed a sofa table to do double duty. We needed a place for people to eat that would also be a useful sofa table when lounging. I modified this piece from the plan; very beginner friendly I’d say, lol. The bottom is painted glossy black and the top is stained a grayish blue. Galvanized hardware finished it off on top. I chose not to use the side arms once I brought it inside.
Built from Plan(s)
Estimated Cost
$65, I used scraps for the base. I already had the stain and varnish. Biggest cost was the galvanized pipe.
Estimated Time Investment
Afternoon Project (3-6 Hours)
Finish Used
Black gloss paint for base and gray blue stain (my own concoction) for top.
Recommended Skill Level
Beginner
Comments
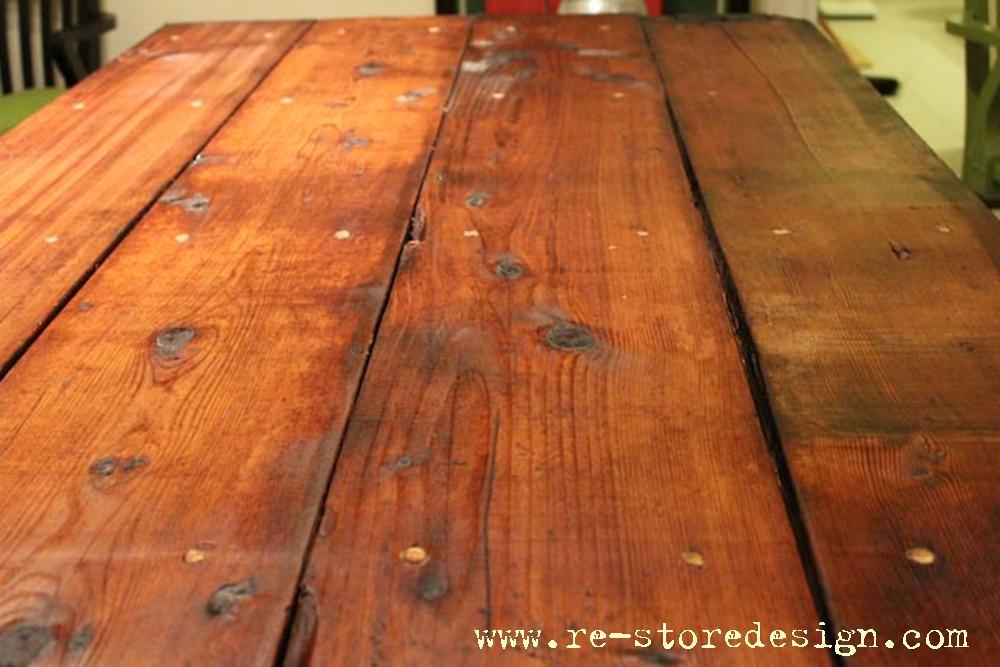
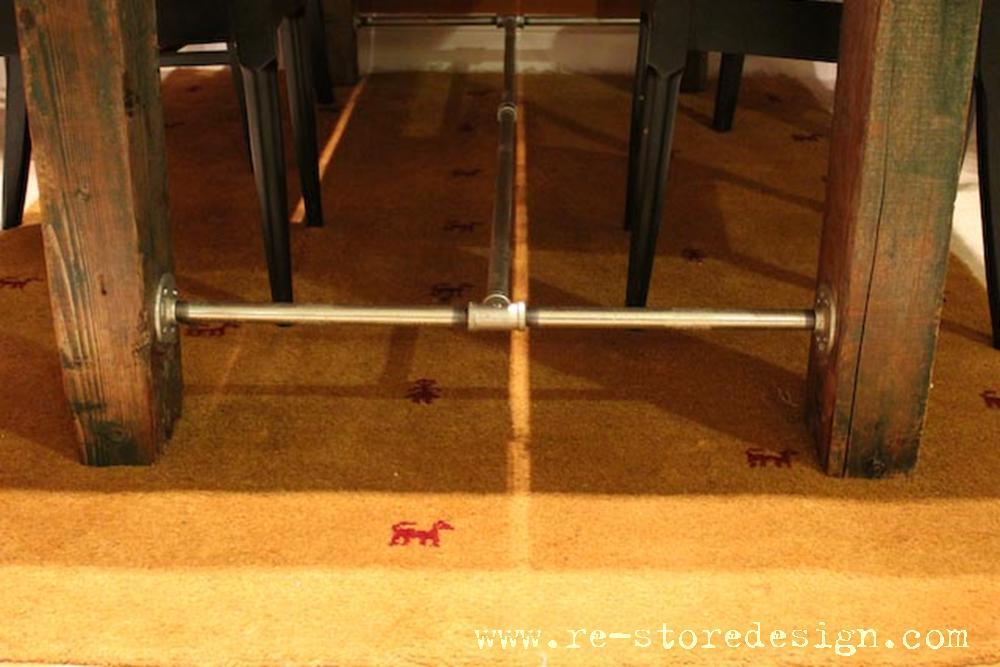
Farmhouse Table
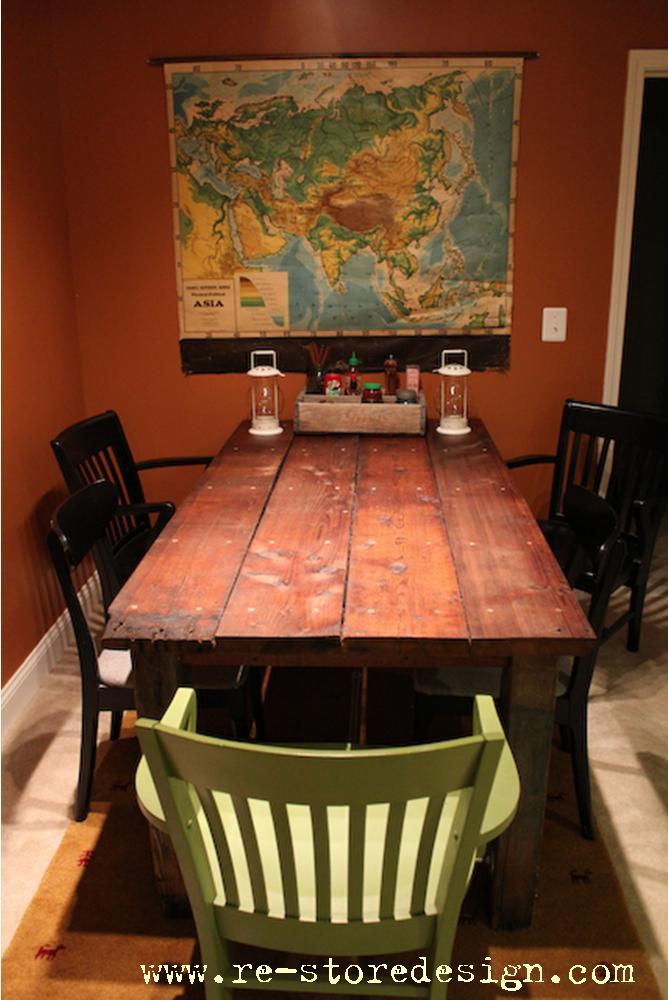
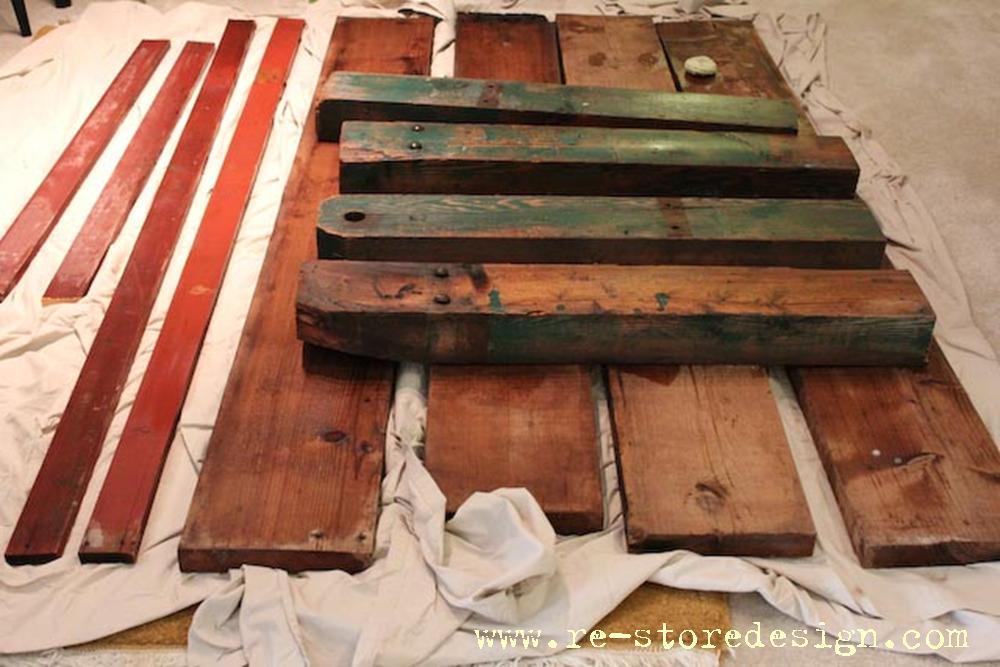
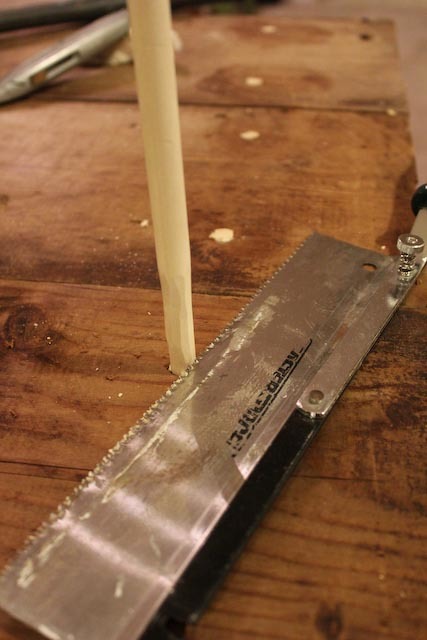
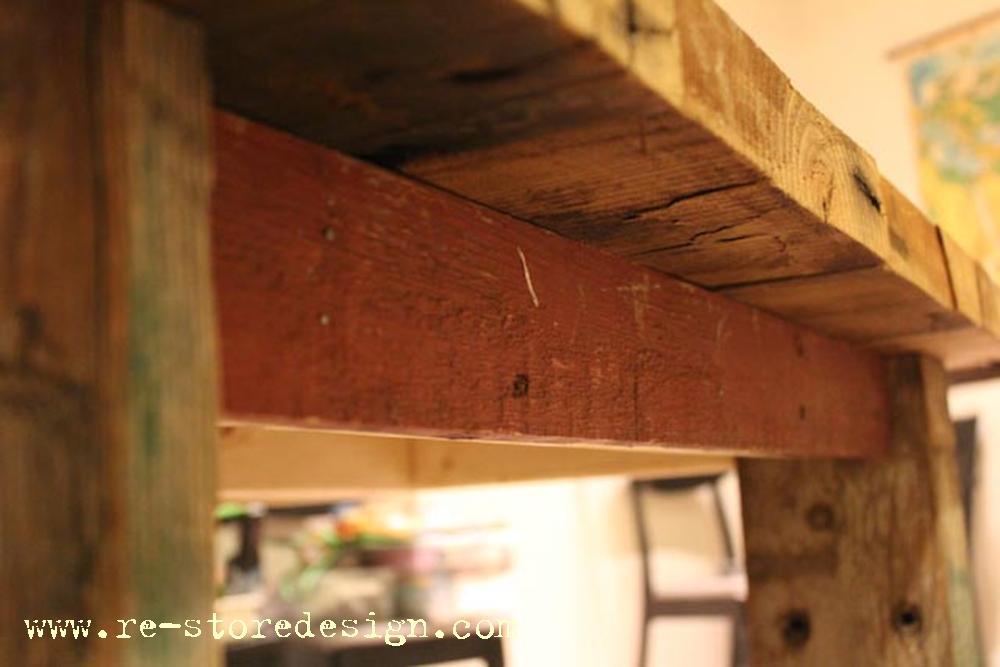
We recently moved from our small Minneapolis Bungalow to an apartment in Maryland. It was the prefect opportunity to build the Farmhouse Table plans I had been admiring. When we went to my parents farm in North Dakota for Thanksgiving we spent a couple hours digging through the barn to find old barn wood for the project. The wood then made the 1,400 mile trek to our new apartment in Rockville. Yes, you read that correctly…the table was built in our carpeted apartment! No excuses people…you can make this table in your apartment! If you do not have access to a saw your local big box home improvement store can make the cuts for you. If you go that route the cut list Ana has will come in very handy!
I do a fair amount of woodworking, so I was able to complete the project in one day. If this is your first project I would allow a weekend to finish it.
Built from Plan(s)
Estimated Cost
$80
Estimated Time Investment
Day Project (6-9 Hours)
Finish Used
Danish Oil Natural
Recommended Skill Level
Starter Project
Comments
Wed, 01/16/2013 - 02:25
wow this is stunning
wow this is stunning, you must be thrilled with the end result!!
