Community Brag Posts
$10 Cedar Tiered Flower Planter
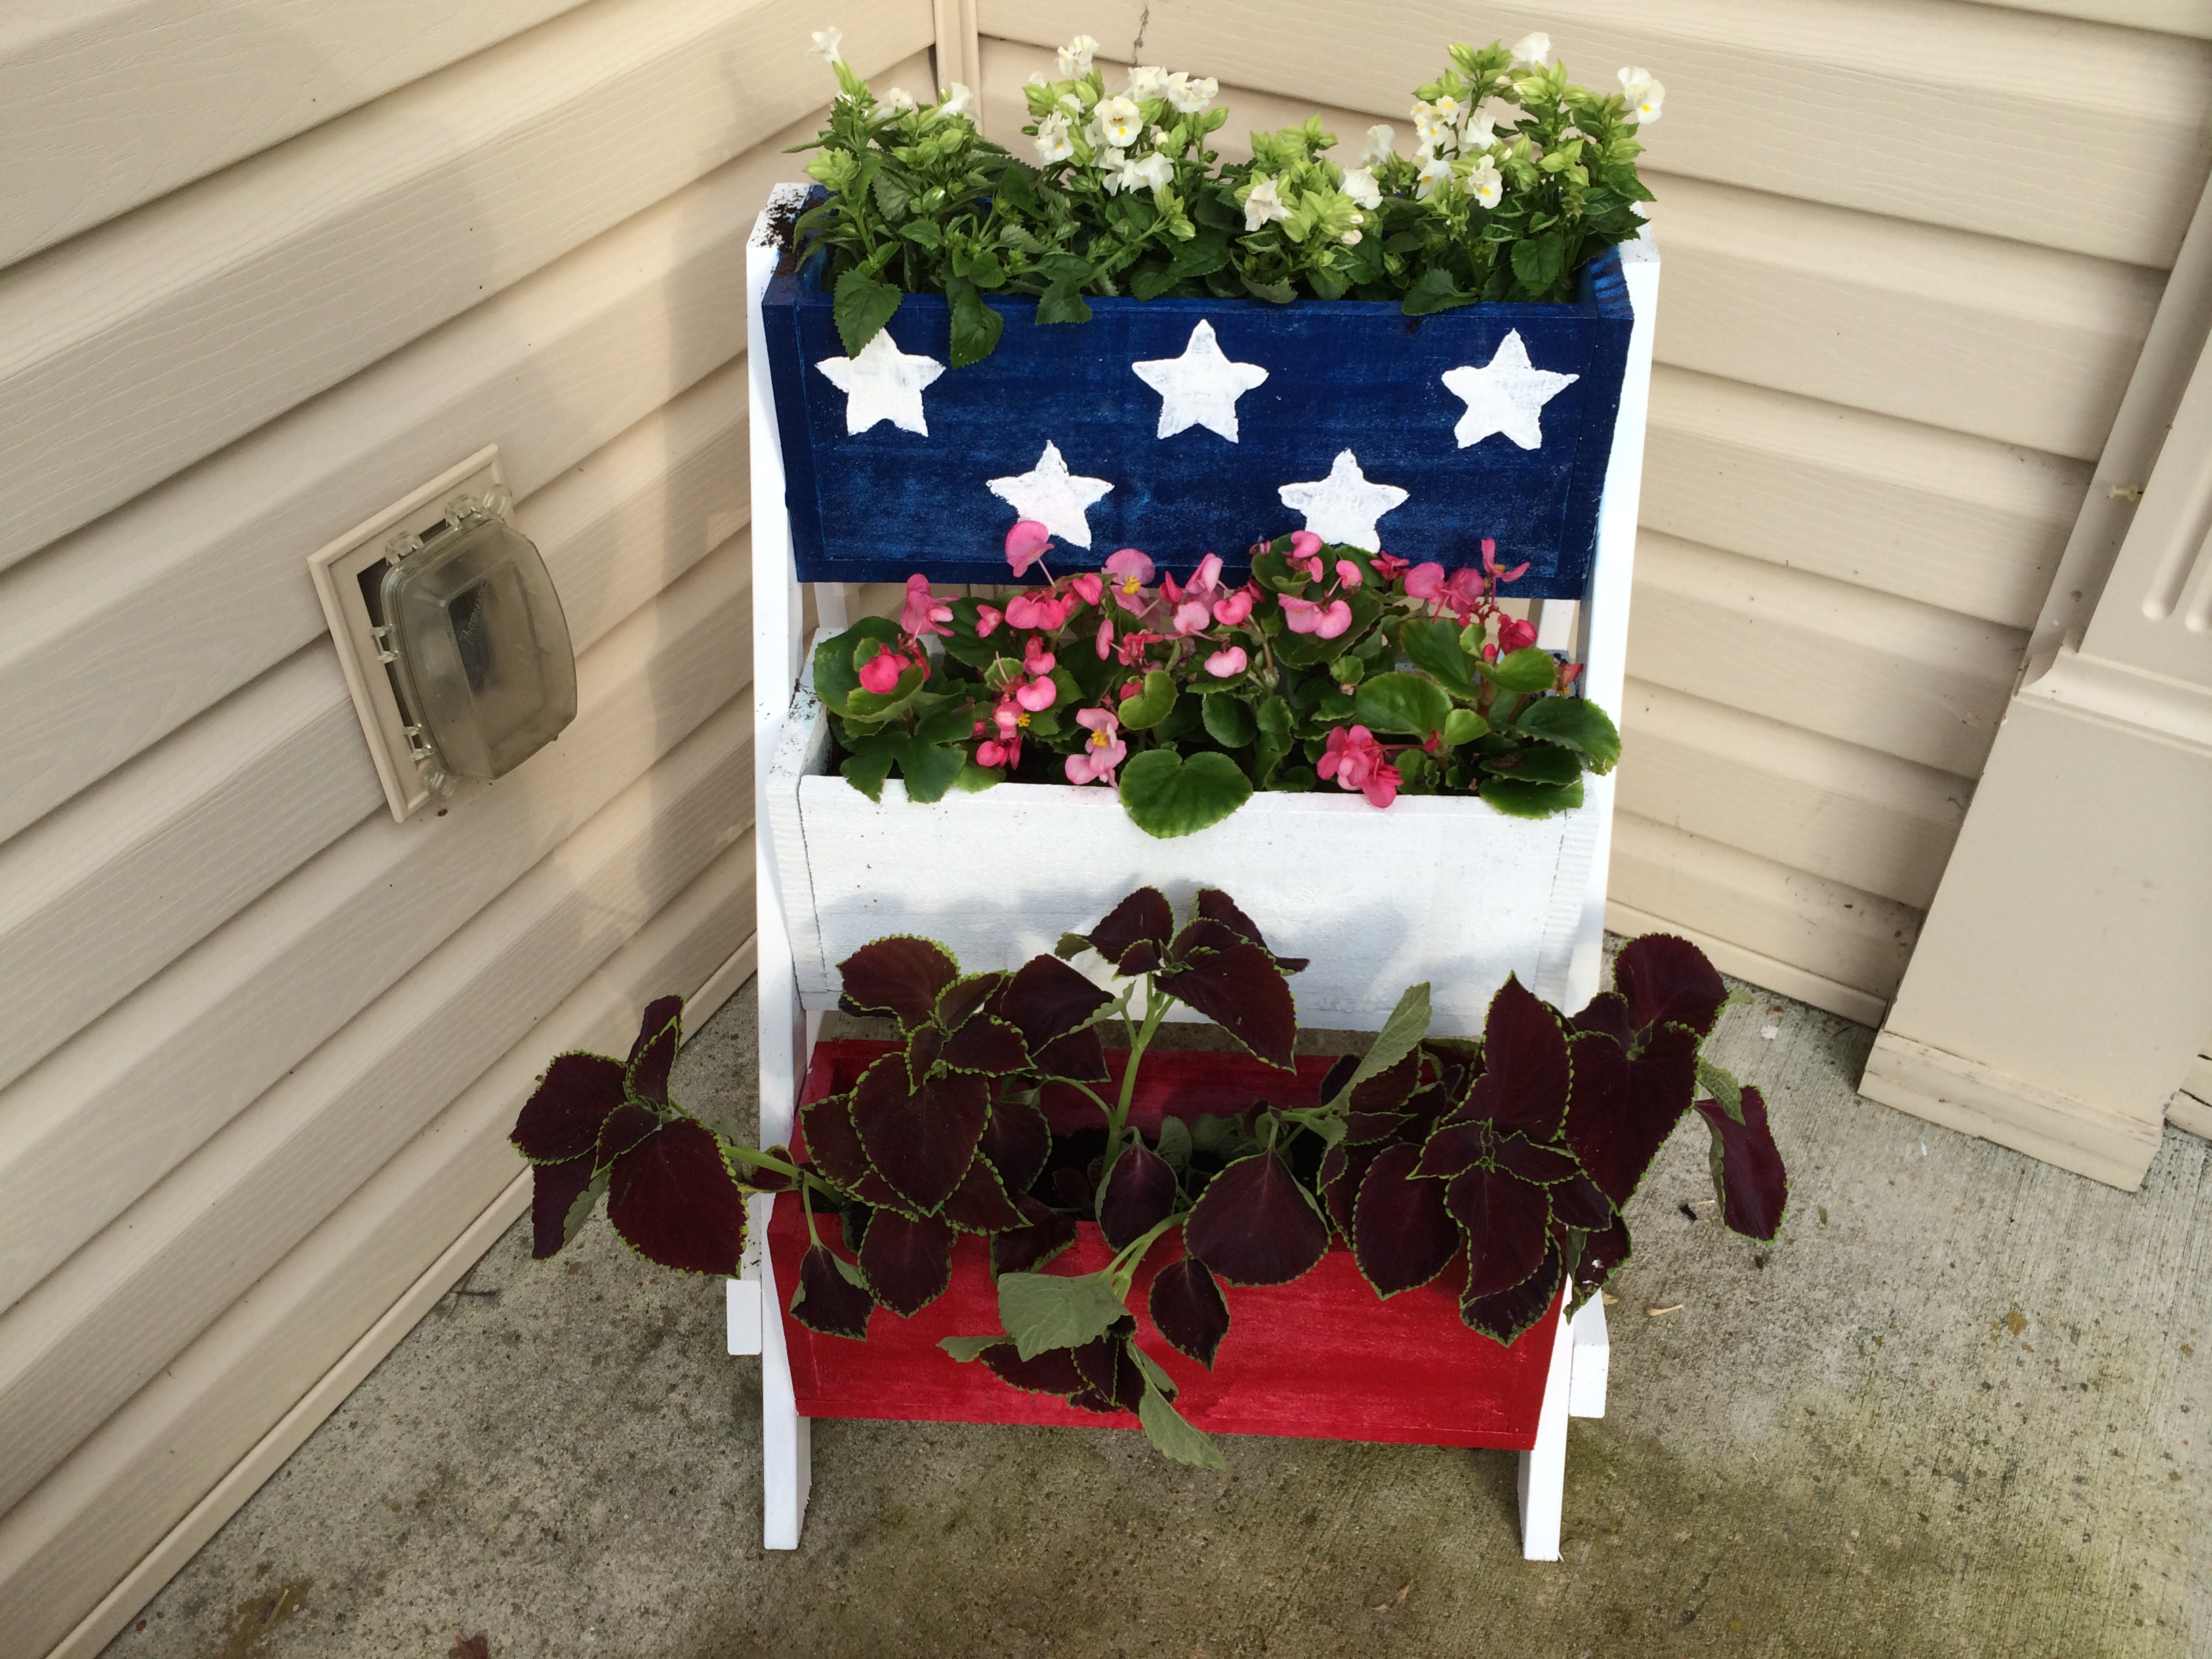
I made this using the $10 Cedar Tiered Flower Planter plans. Painted Red White and Blue with stars.
Built from Plan(s)
Estimated Cost
$10
Estimated Time Investment
Afternoon Project (3-6 Hours)
Finish Used
Outdoor spray paint and outdoor craft paint
Recommended Skill Level
Beginner
Corner shelves
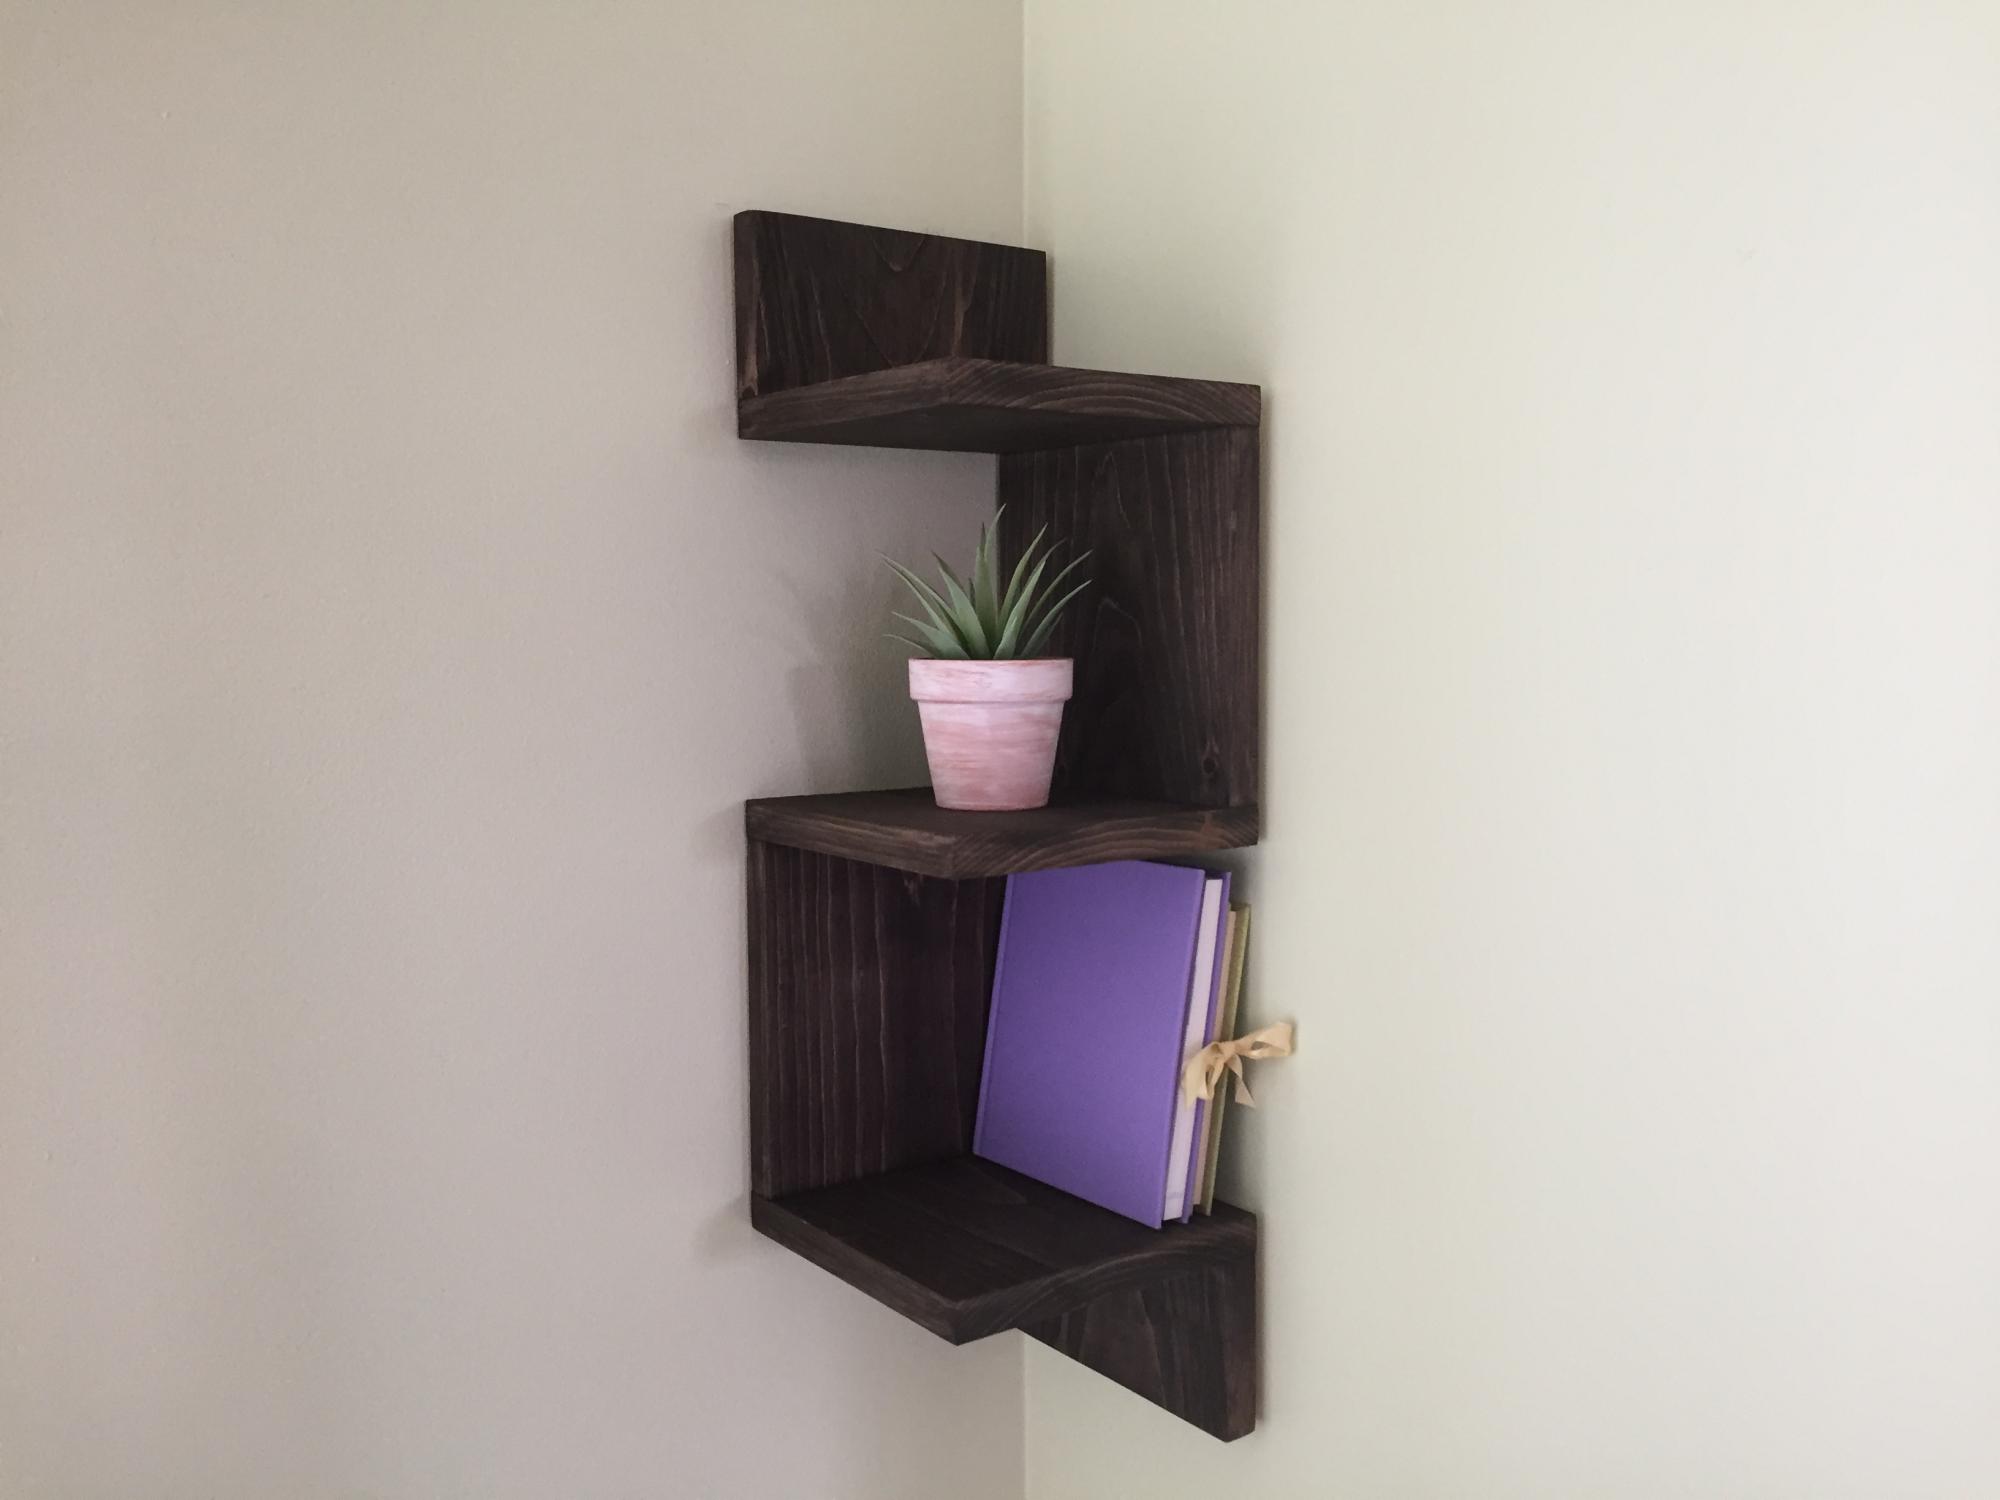
I built these beautiful corner shelves for a friend. It is a great beginner project. I used a 1x8 board but you could also use a 1x10 board. You could also build 5 shelves instead of 3. I used pocket hole joinery.
Estimated Time Investment
Afternoon Project (3-6 Hours)
Finish Used
Oil I find at my local mill.
Recommended Skill Level
Starter Project
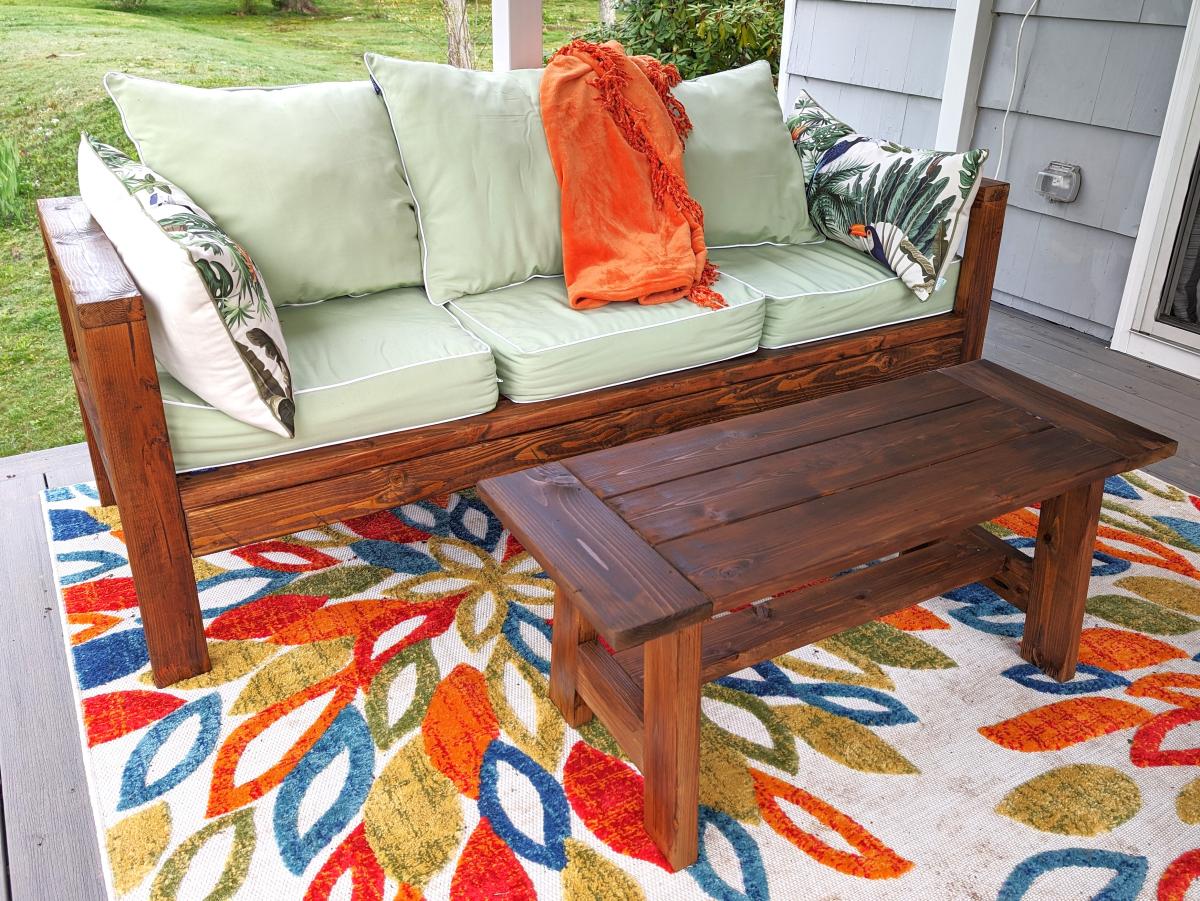
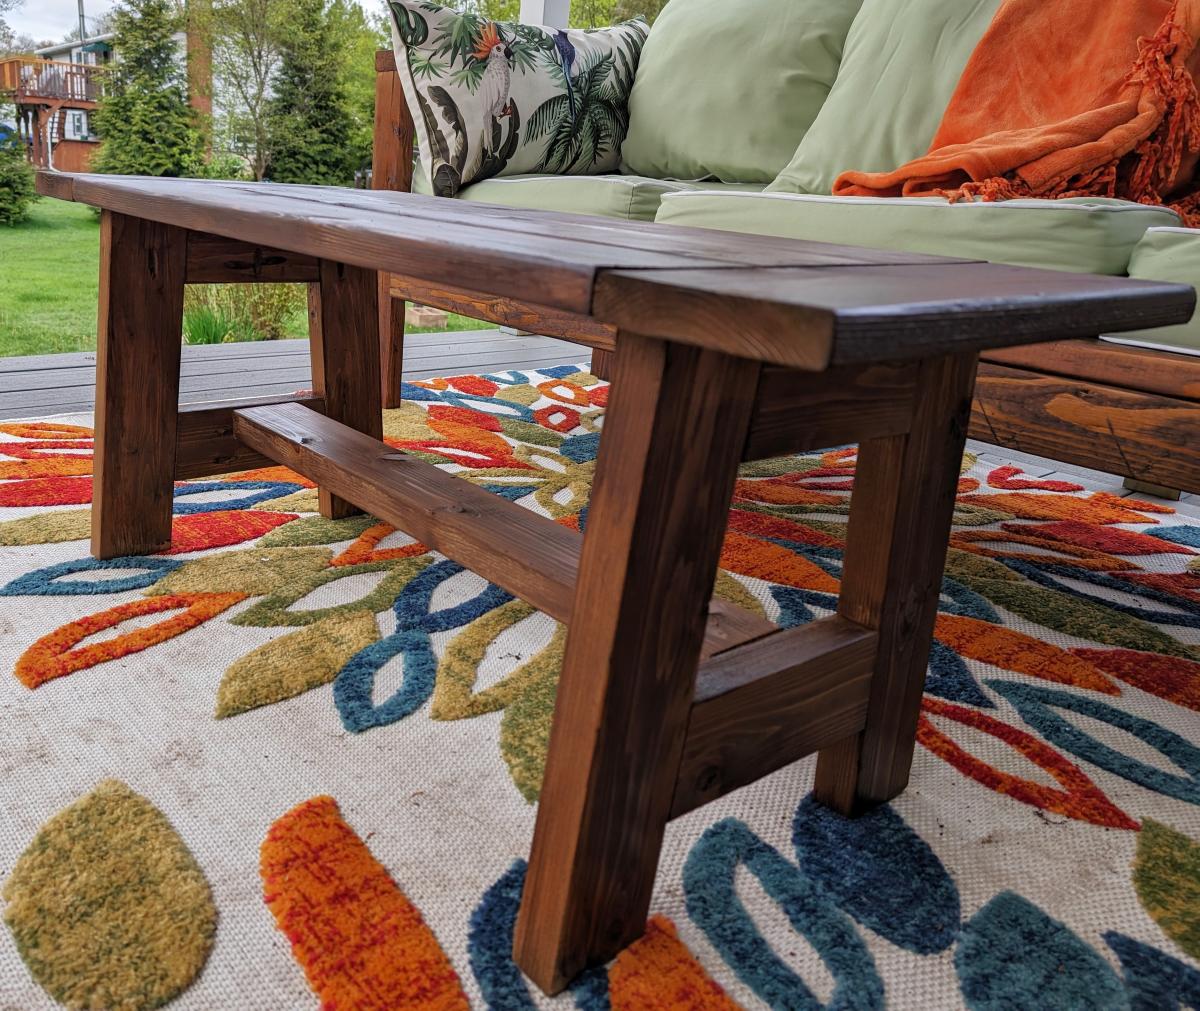
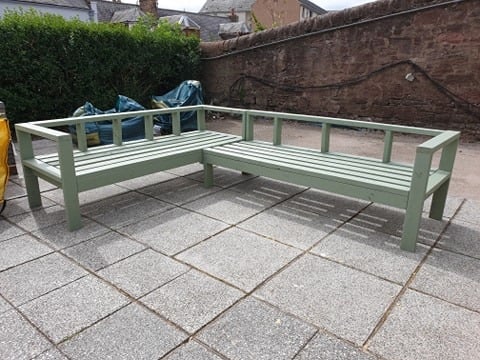
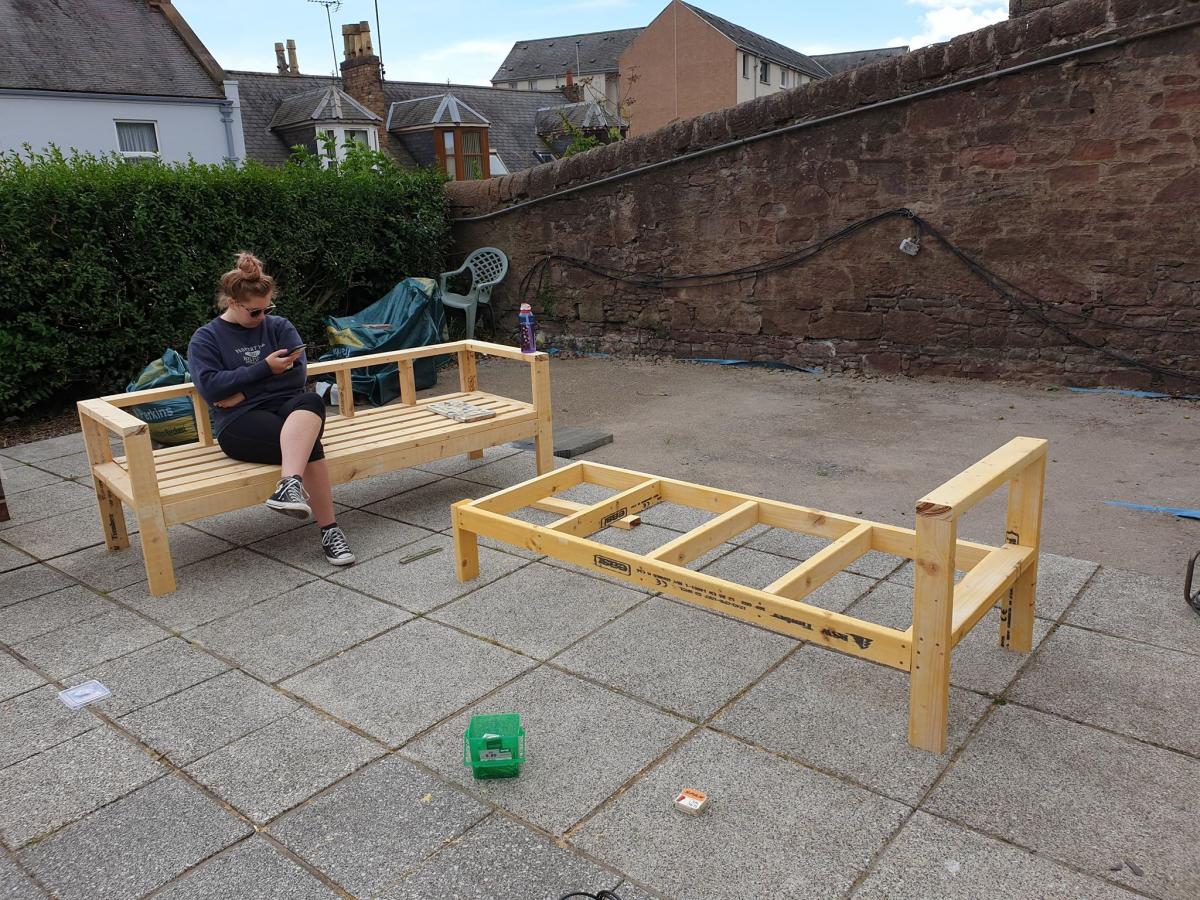
Sturdy Outdoor Furniture Set
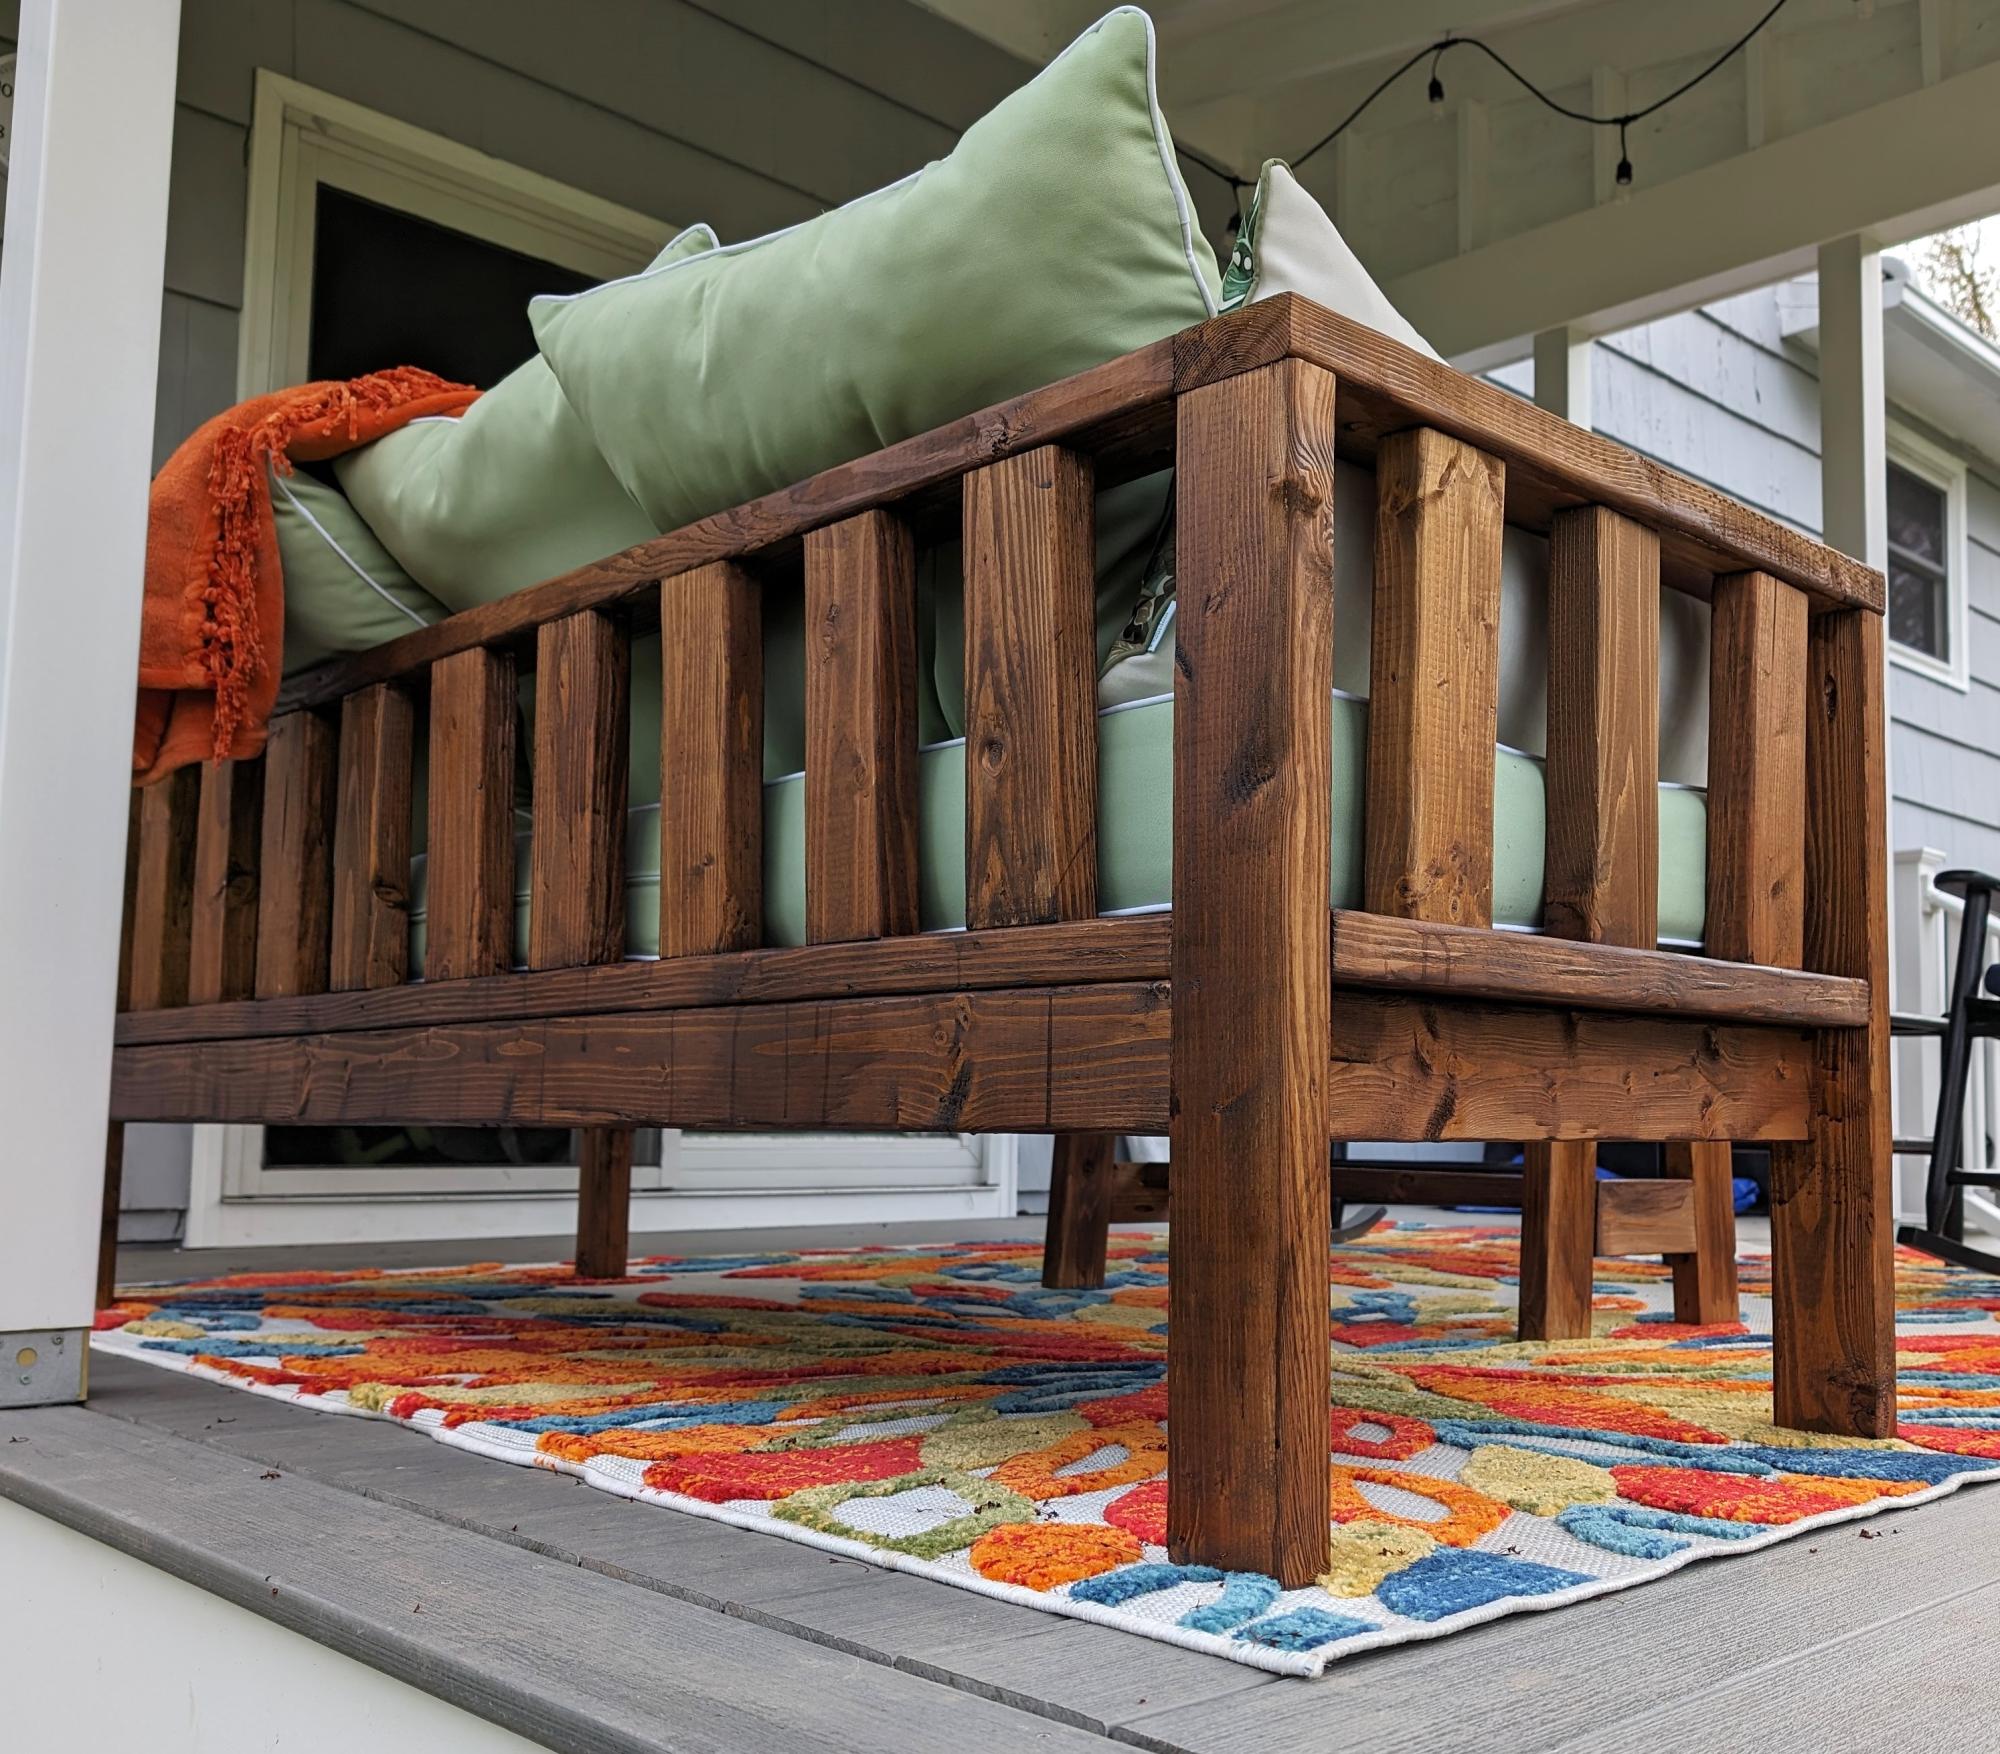
The sectional is based off the 2x4 outdoor sectional plans and the table is loosely based on the 4x4 truss beam table plans, although it's built out of leftover cedar decking boards and 2x4's. I made some additional adjustments to the sofa to keep the pillows in place and used the full 10' boards from the plan (and a few extra). Super happy with how it turned out!
Sarah E
Built from Plan(s)
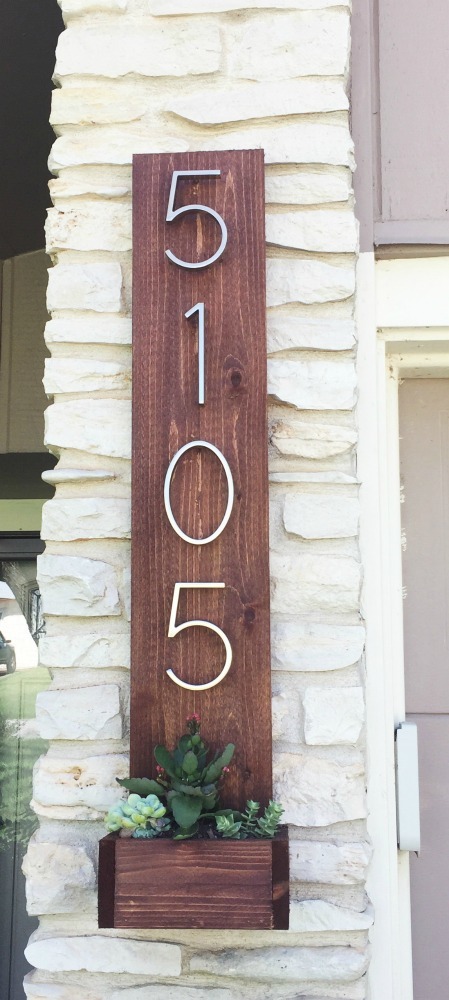
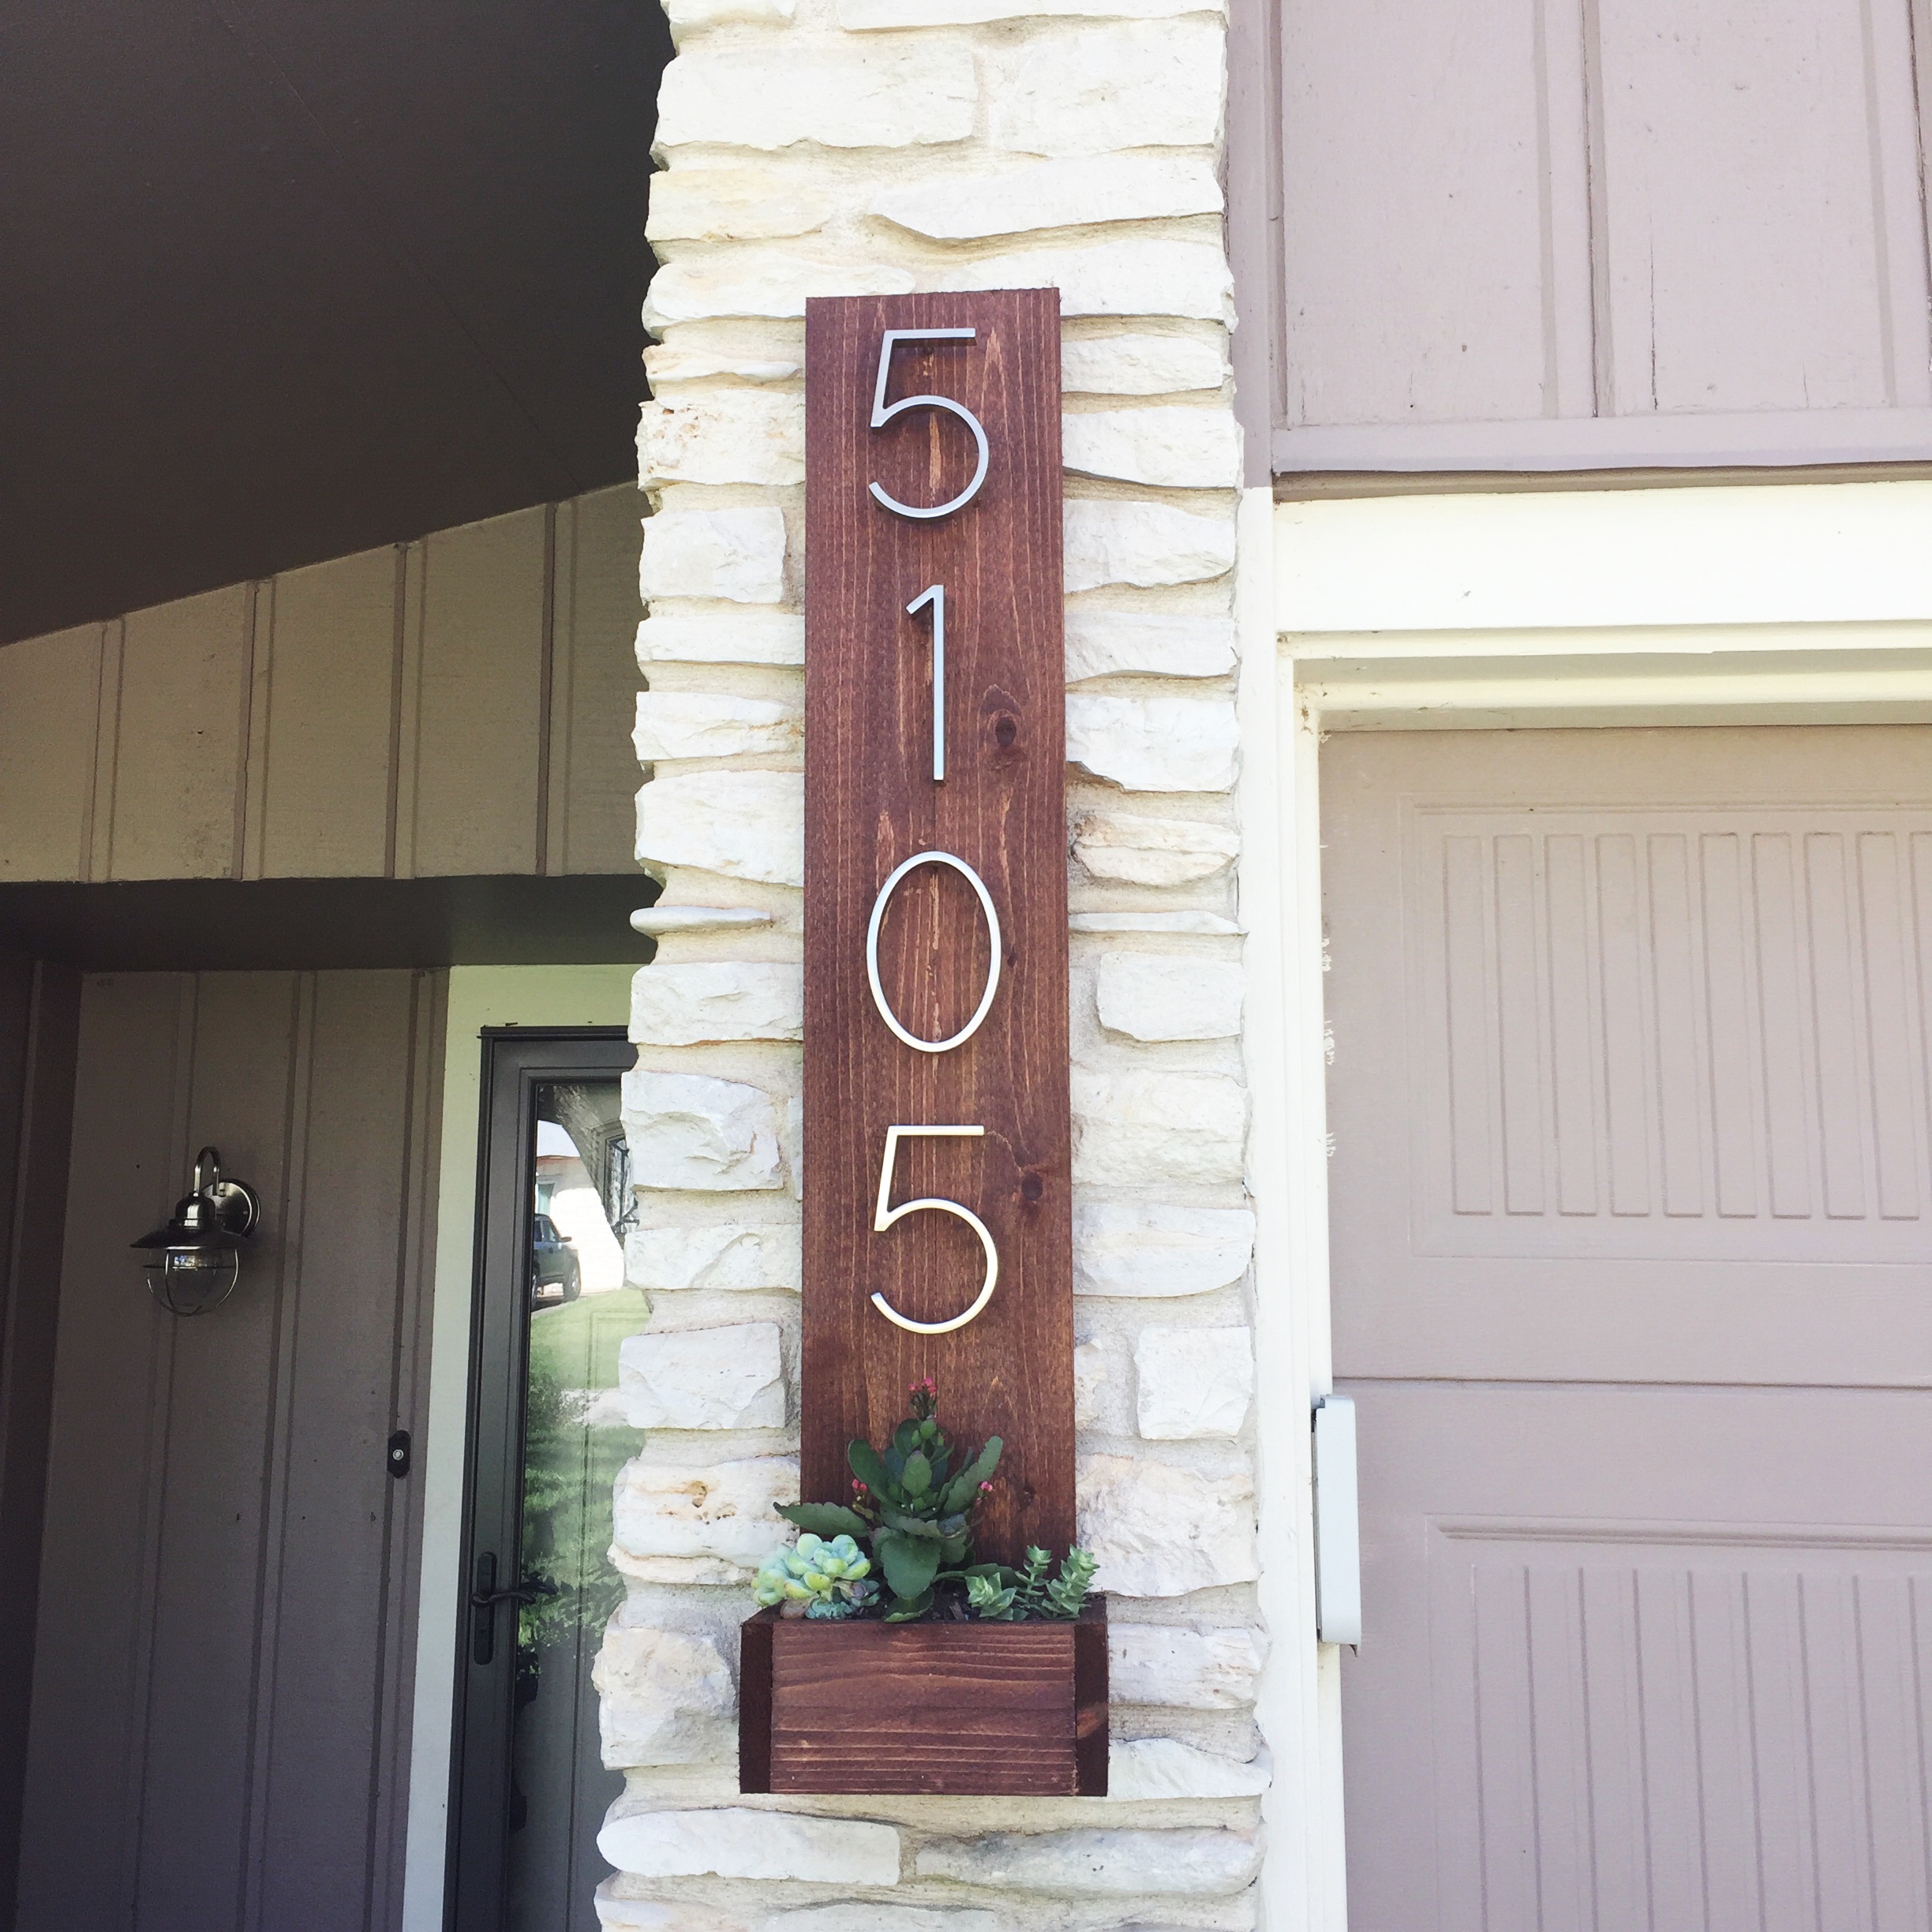
Cedar Street Number Planter
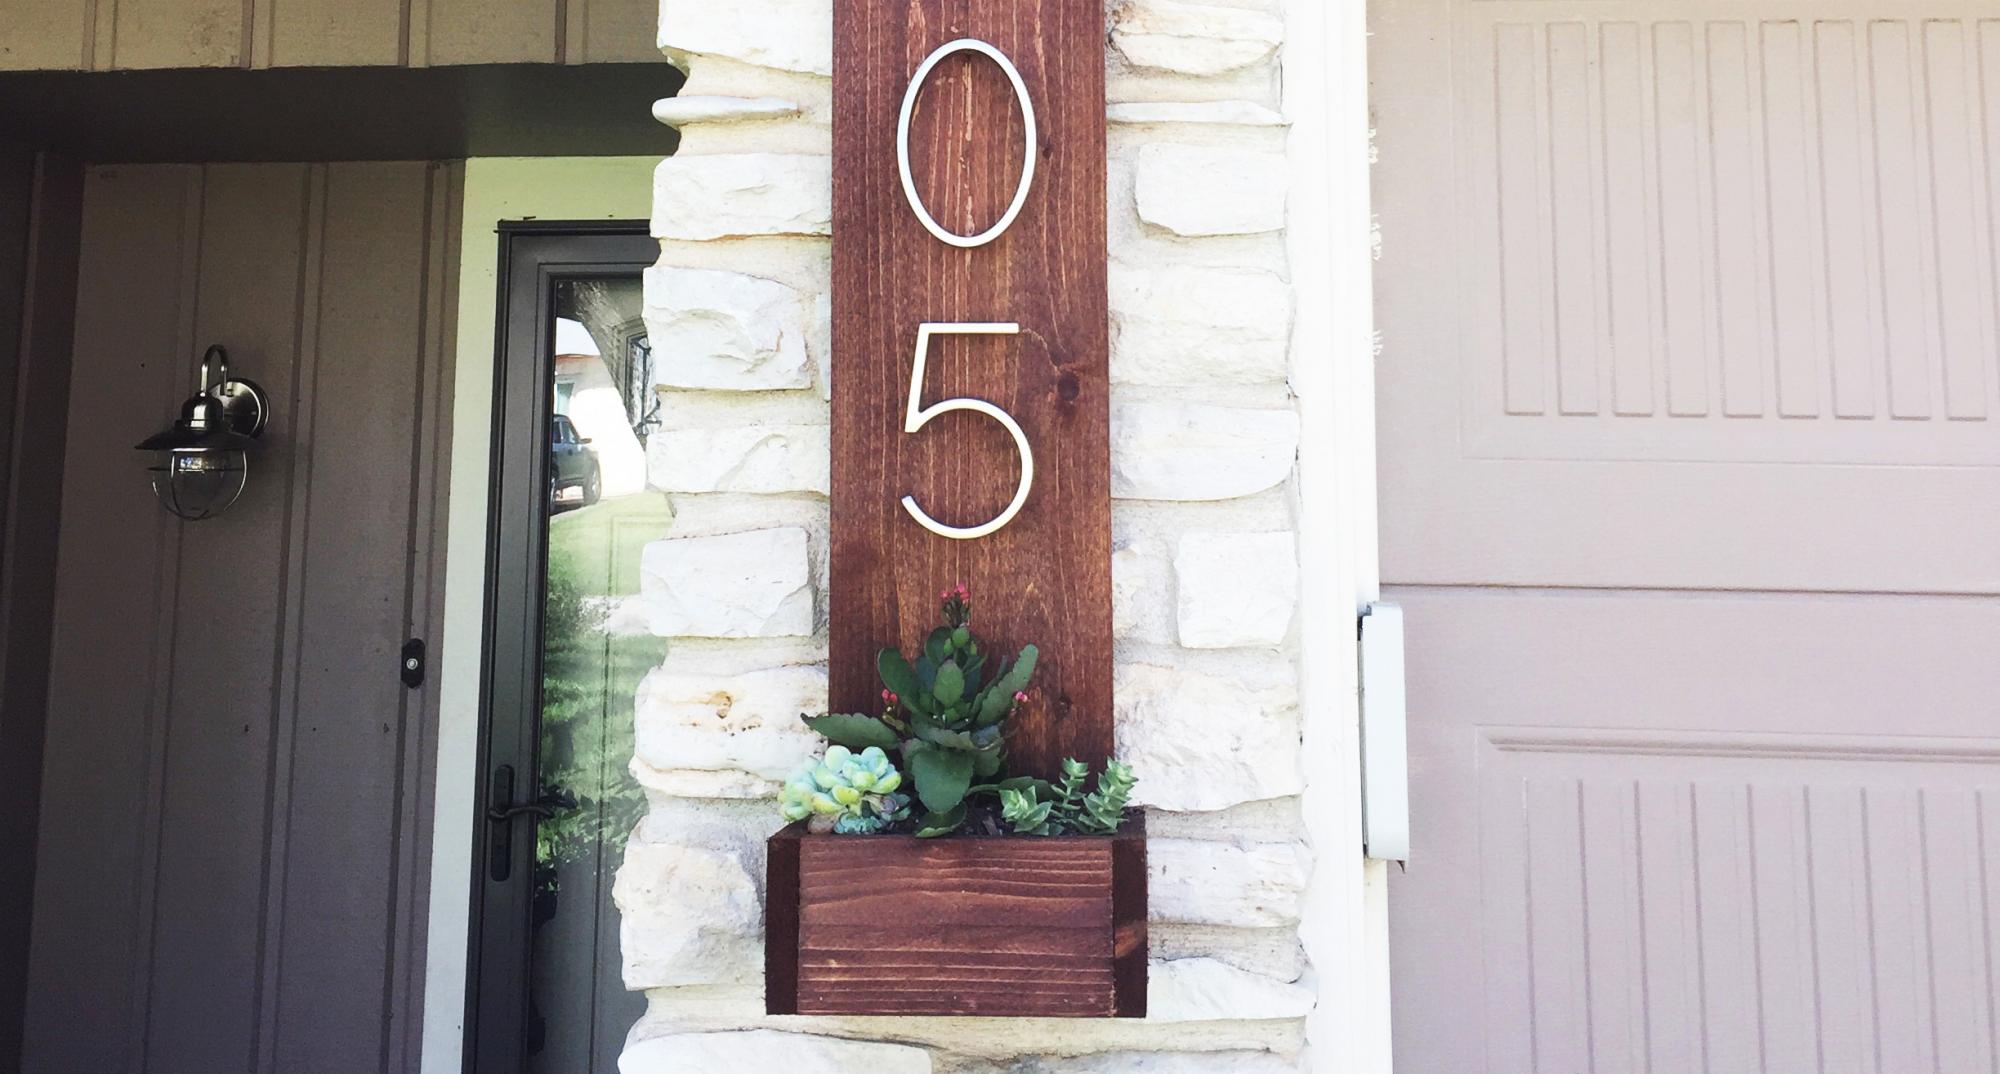
I was looking for a way to give our house some better curb appeal and decided our stree numbers could use a facelift. The majority of money spent on this project was for the numbers since I had enough spare cedar laying around.
Built from Plan(s)
Estimated Time Investment
An Hour or Two (0-2 Hours)
Finish Used
Sedona Red
Recommended Skill Level
Starter Project
Comments

In reply to Numbers by jesseamber
Mon, 10/10/2016 - 09:02
I got them from Home Depot. I
I got them from Home Depot. I think you can also probably find them online through Amazon.
In reply to Numbers by jesseamber
Mon, 10/10/2016 - 09:03
numbers
I got the numbers at Home Depot. I'm pretty sure you can also find them online through Amazon.
Mon, 10/24/2016 - 15:34
Measurements
So pretty! What are the measurements. Did you use real plants ?
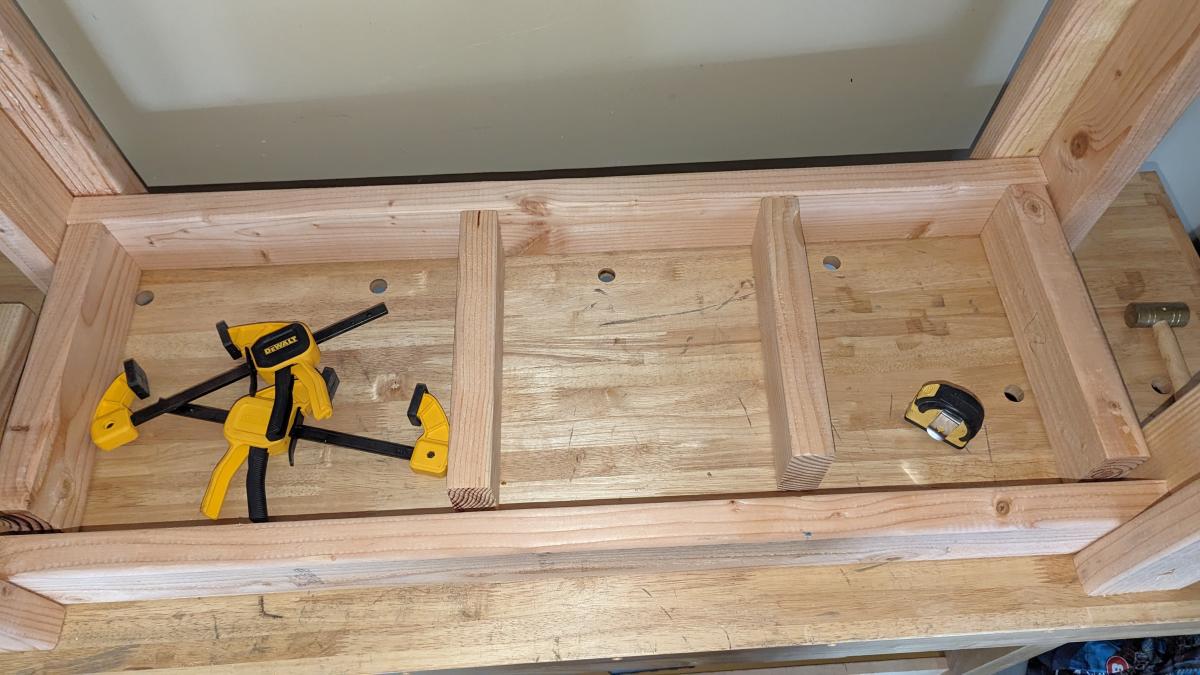
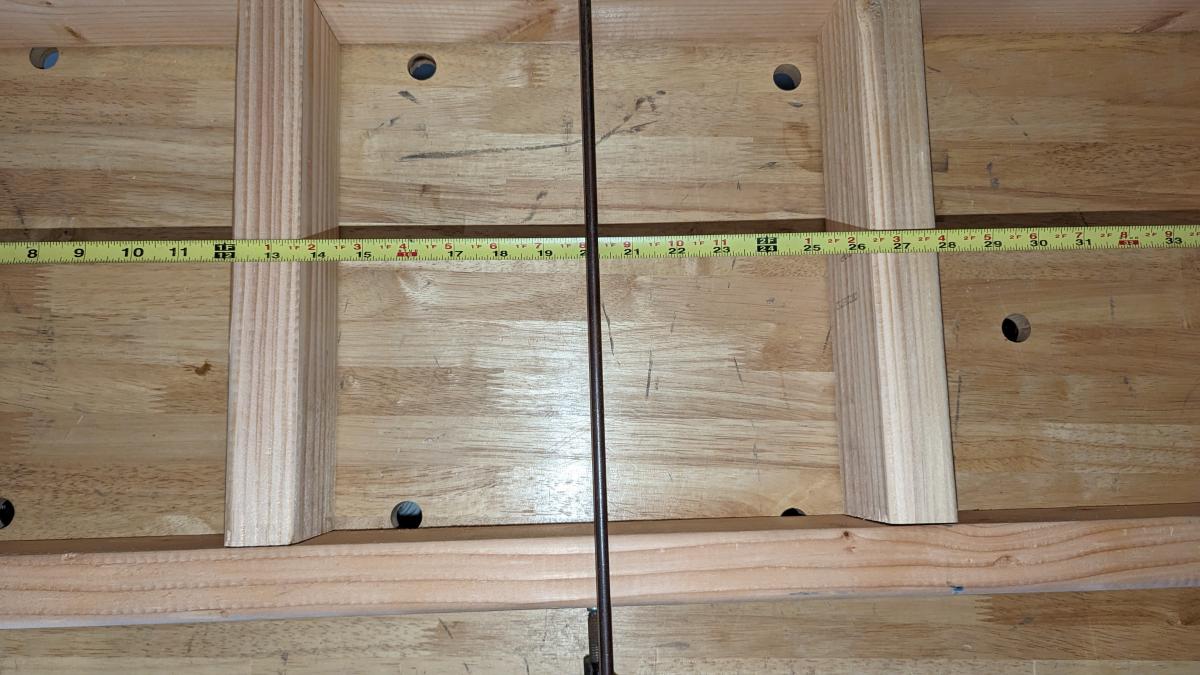
Easy Workbench
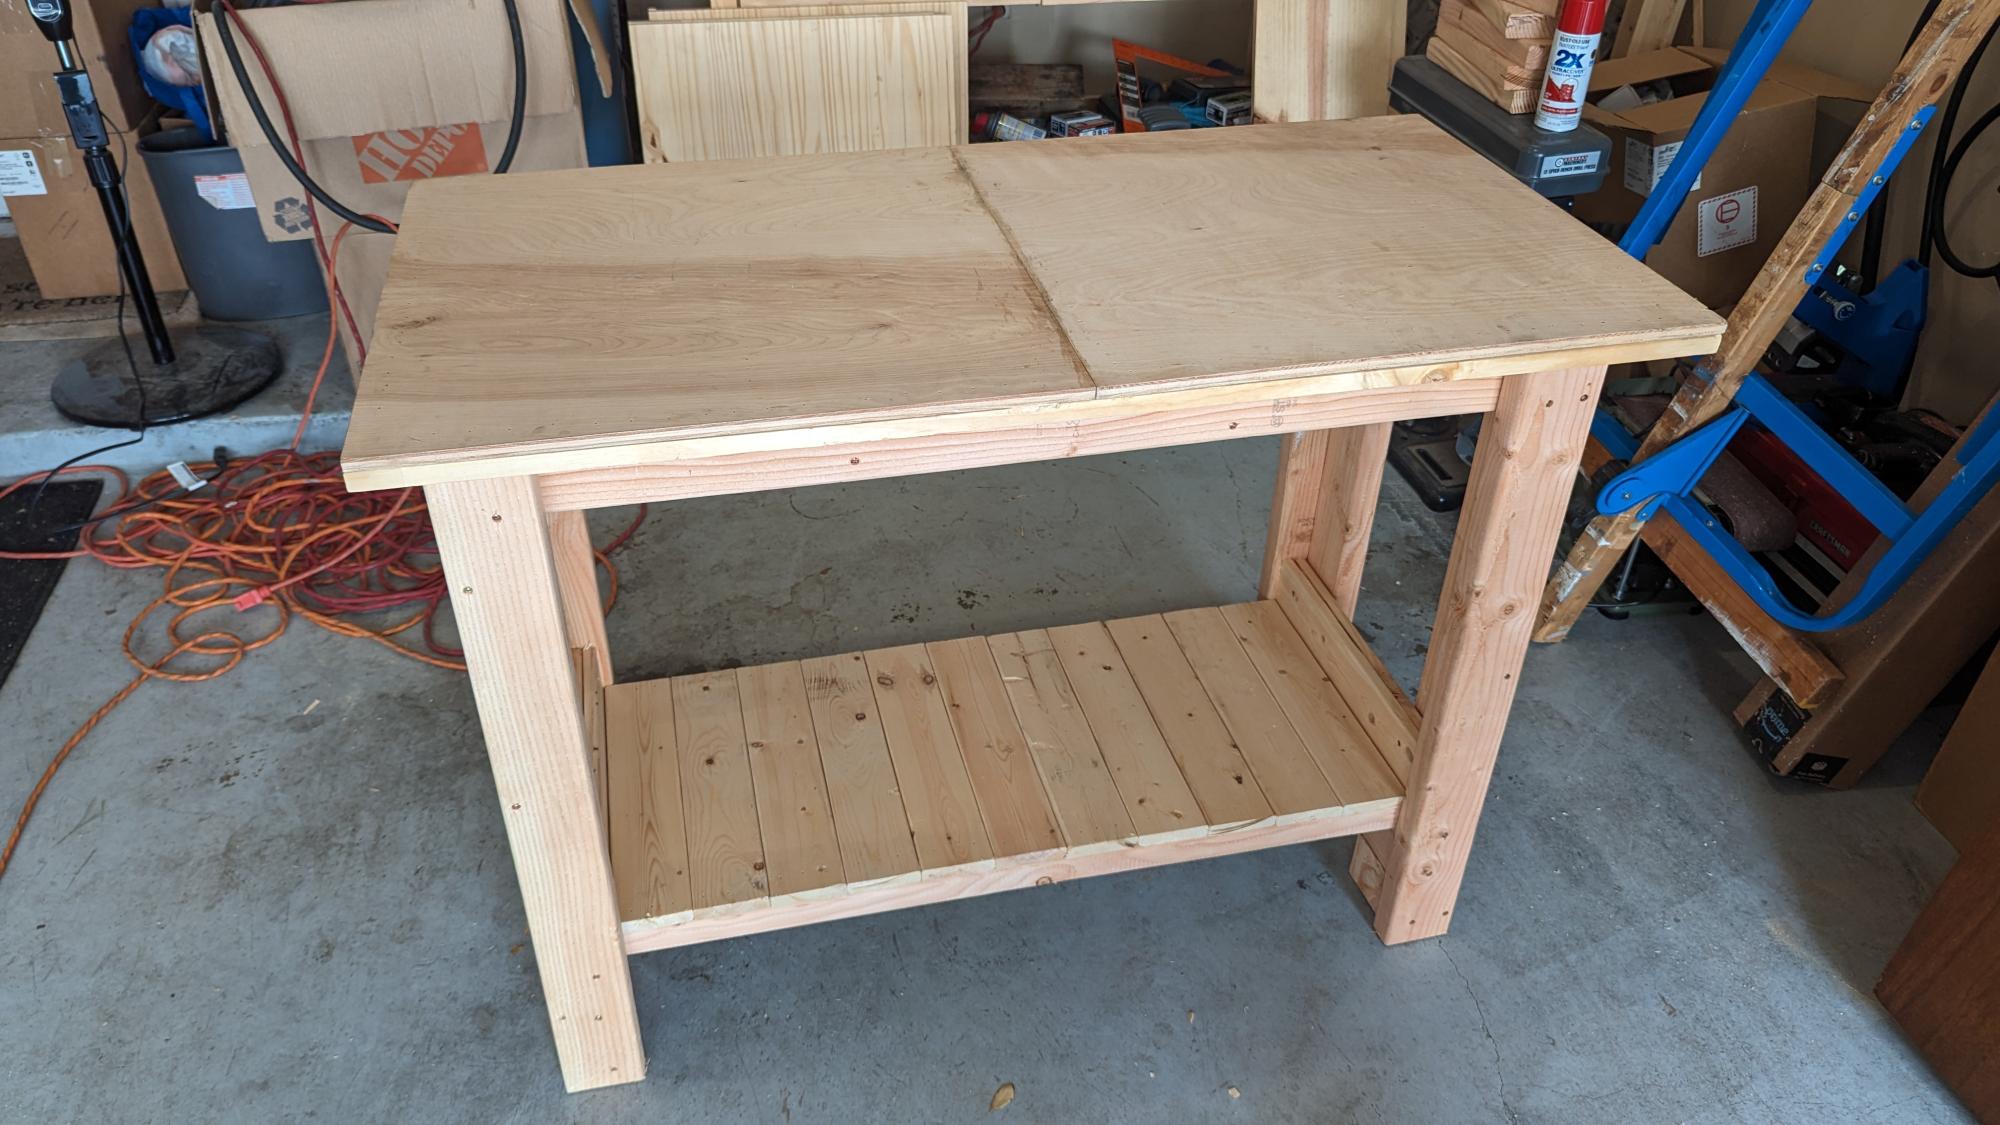
Easy to put together and quick! A great set of plans which produced a very sturdy bench. Some adjustments were made, as we had spare 1x3s which we used to expand the bottom shelf.
We pre-cut everything to specification. We only needed 6 2x4x8s. We only broke into the 7th because our cuts for the cross bars on top came up short once it was together and we had to recut. Just save the 12 inch boards to cut when you need to add them to ensure the measurements are accurate. The top was glued and nailed together with brads, a bottom layer of 1 inch pine with a top layer of 1/4 oak plywood on top. It was what we had on hand and it provides the strength needed with girth yet the hard exterior of the hardwood ply.
S Walker
Built from Plan(s)
Woodland Animal Stools
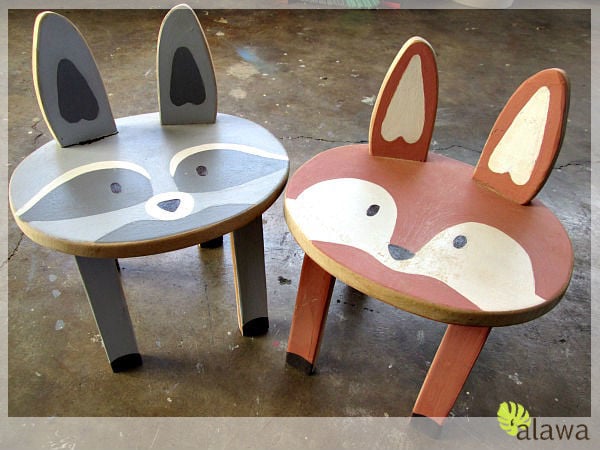
Following Brooke of Killer B Design's How-To blog post, I built and painted some woodland animal stools for my first handmade business collection. Please visit Brooke for her How To here: http://www.killerbdesigns.com/toddler-sized-animal-stools-a-how-to/
See all 4 stool designs I made on my little blog for a few more design ideas: http://sunnysideup-stairs.blogspot.com/2014/07/woodland-animal-stools.h…
Happy and safe building! :)
Estimated Cost
$5
Estimated Time Investment
Afternoon Project (3-6 Hours)
Finish Used
Valspar+ No VOC, Allergy and Asthma-friendly latex
Mixed with Earth Pigments
Sealed with Minwax Polycrylic
Mixed with Earth Pigments
Sealed with Minwax Polycrylic
Recommended Skill Level
Beginner
Comments


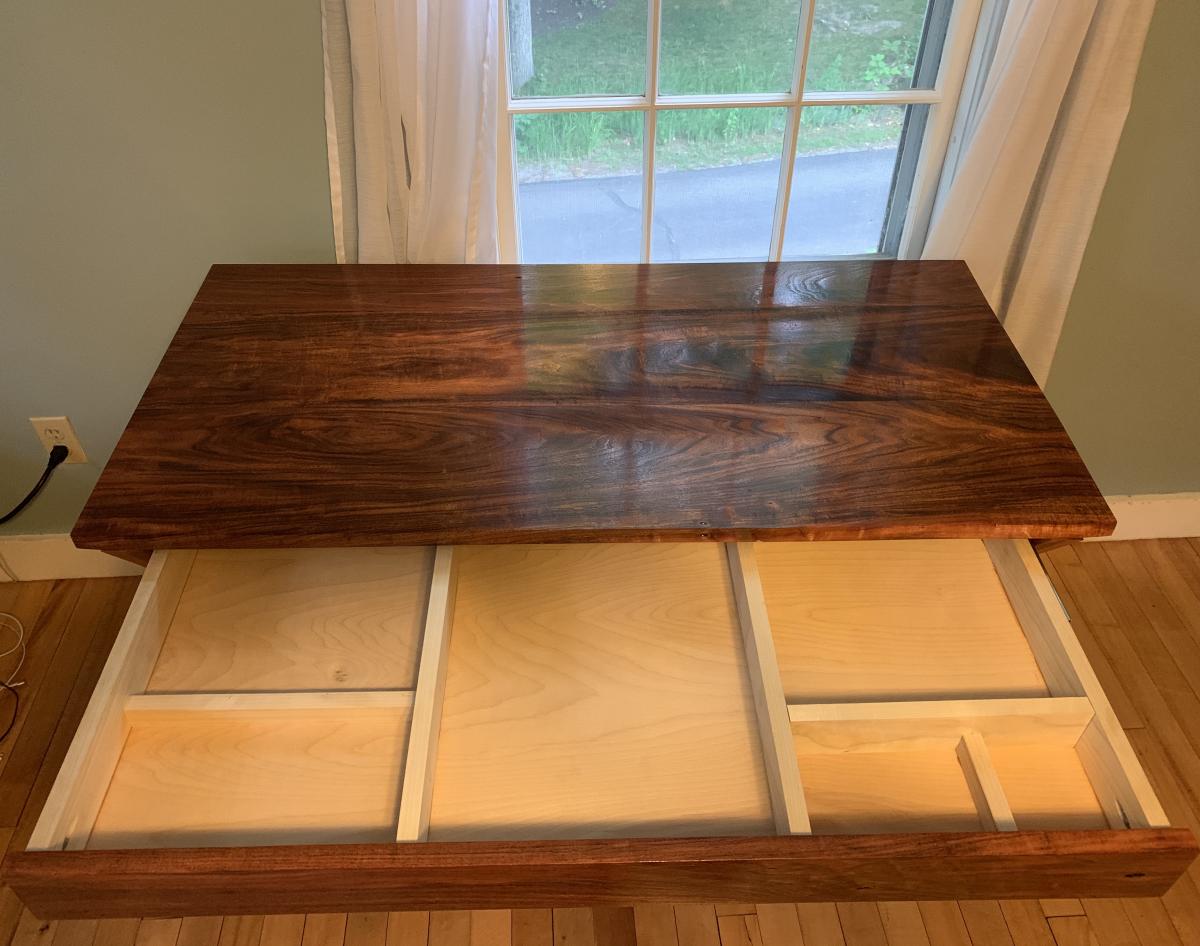
Two-Tone X Desk with Drawer
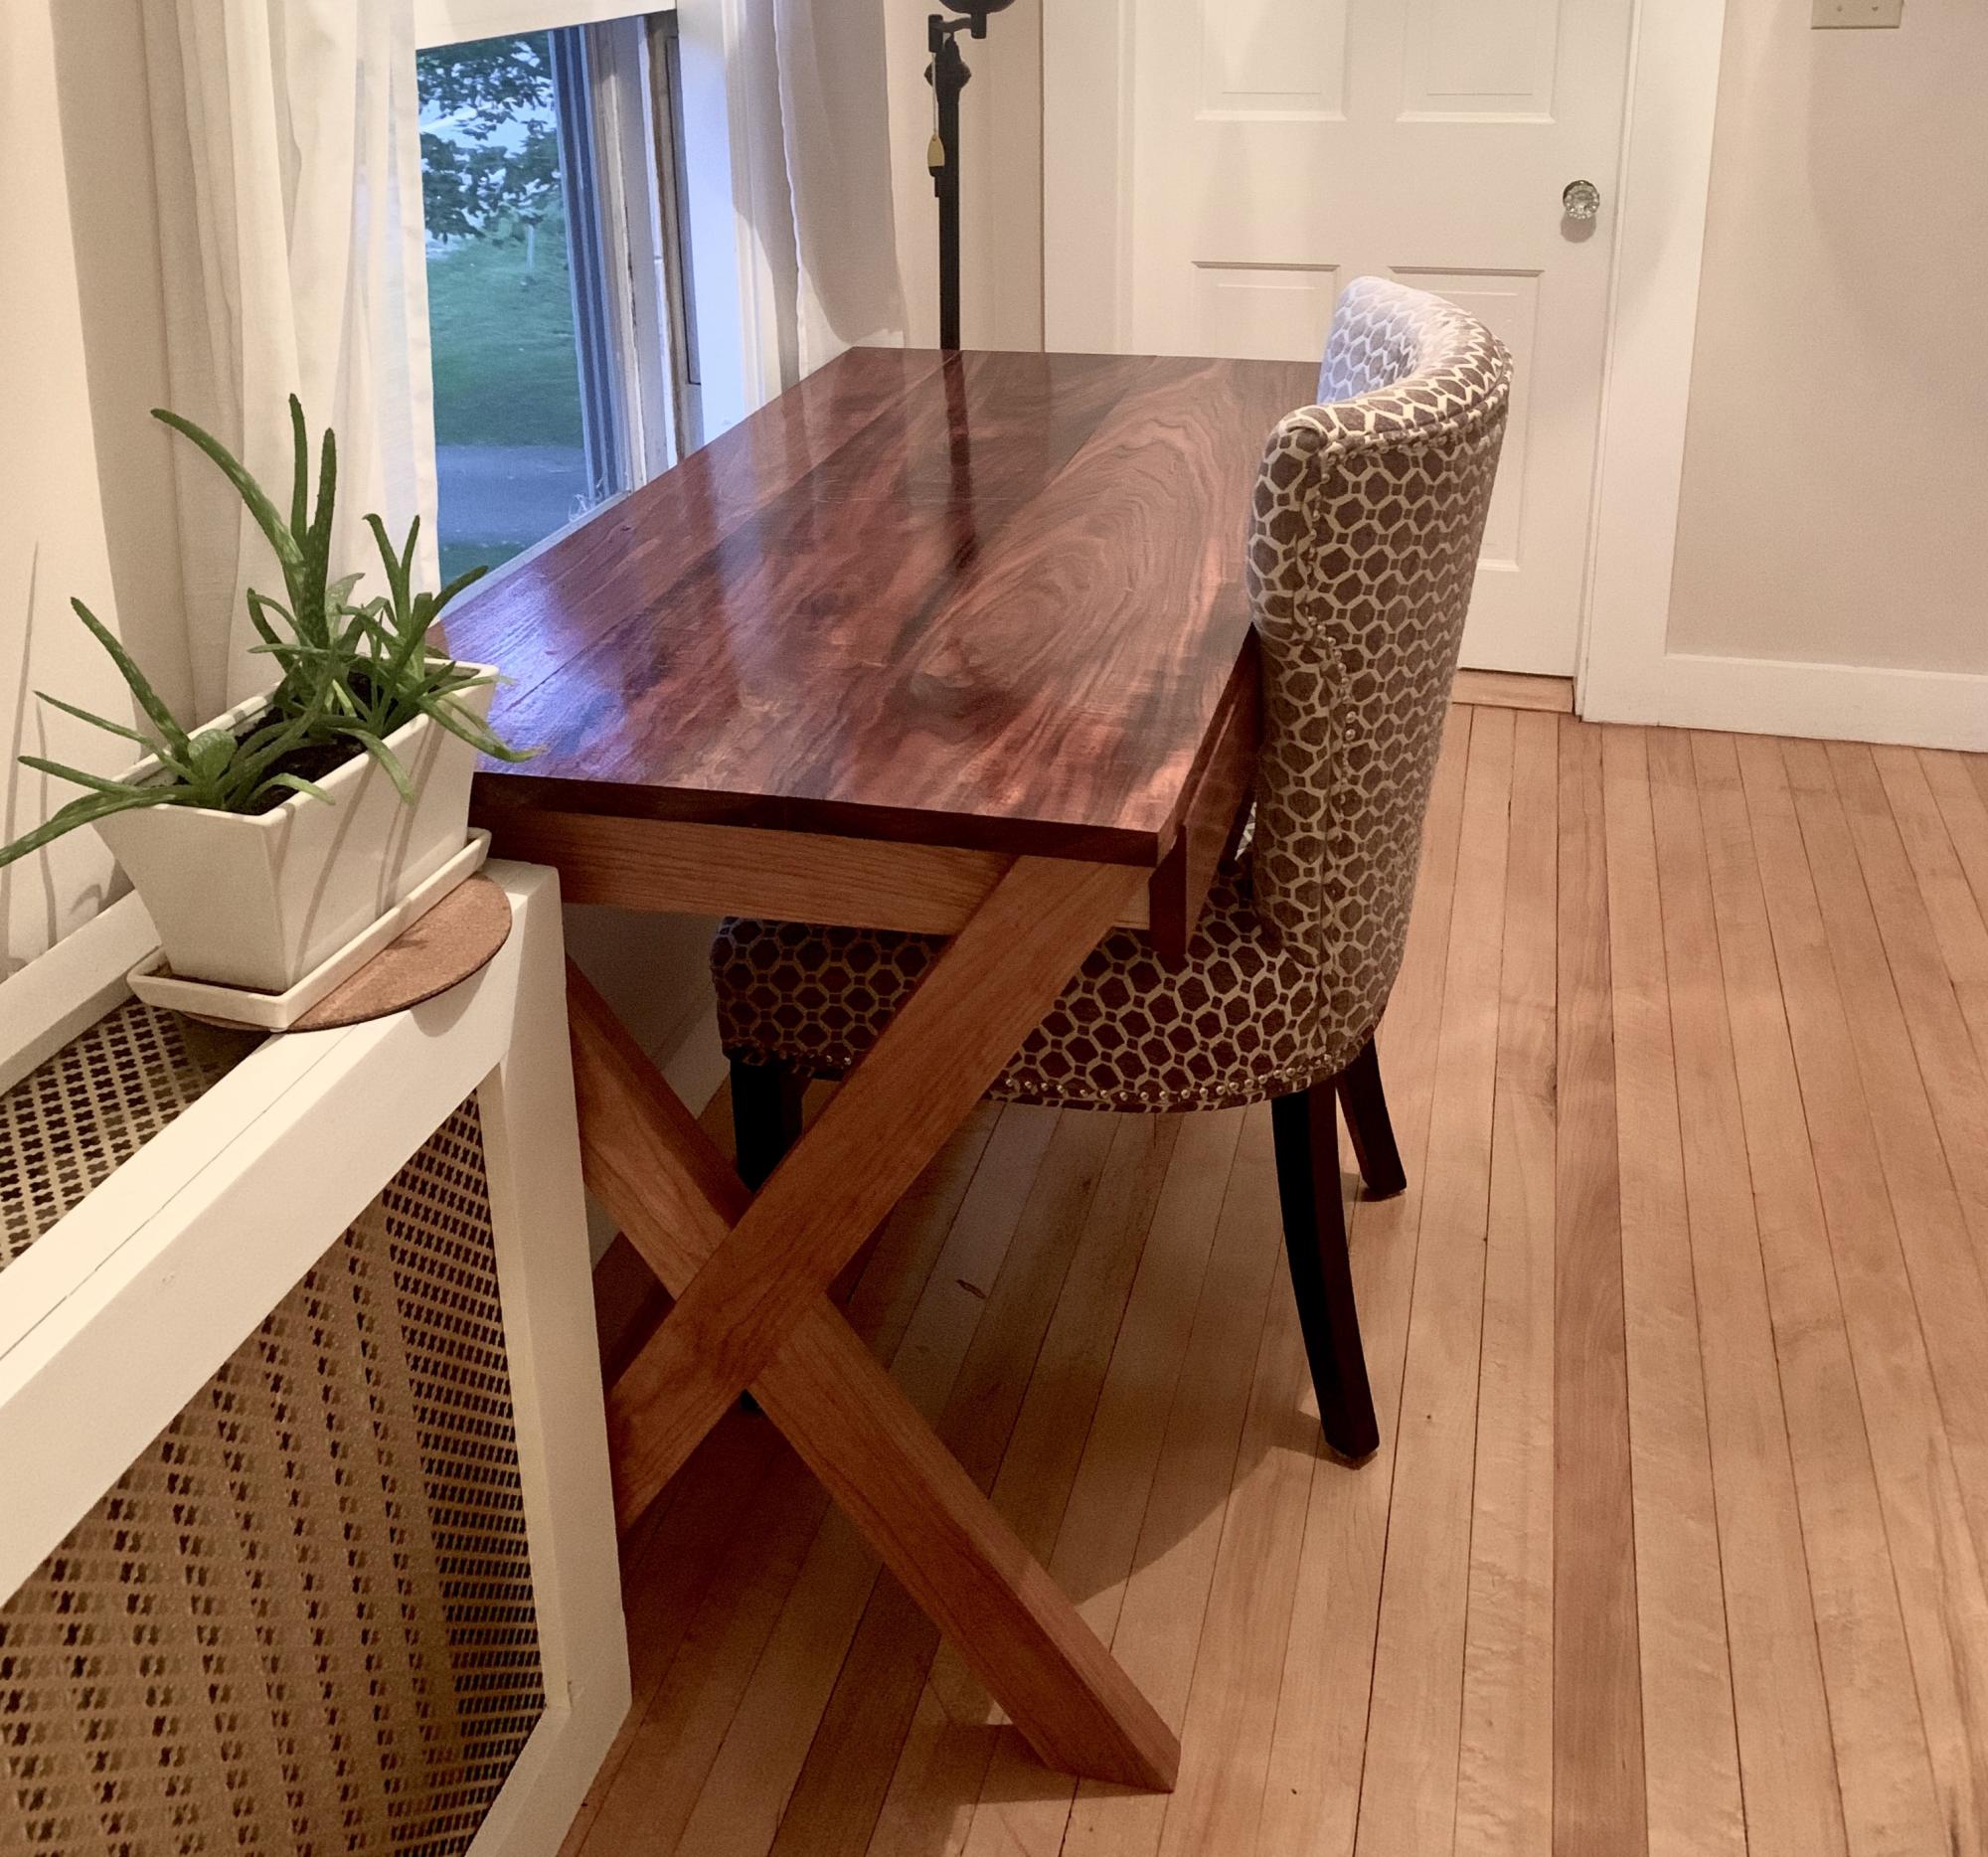
I'm a recent grad and made this desk during Covid-19 quarantine. Now I get to use it as my work from home desk as I enter the workforce. This was my first big project I made myself, and I had some trouble with the dimensions of the tops of the legs not matching the plans, but that could be just me. I used ball bearing slides because the drawer front was pretty heavy, but they were very difficult to install. I would recommend using the cheap slides as they give more room for error. Very happy with how it turned out! The horizontal support board between the legs makes a great footrest.
Built from Plan(s)
Estimated Cost
Don't ask
Estimated Time Investment
Week Long Project (20 Hours or More)
Finish Used
Morado had 5 coats tung oil
Cherry had 3 coats danish oil
Cherry had 3 coats danish oil
Recommended Skill Level
Intermediate
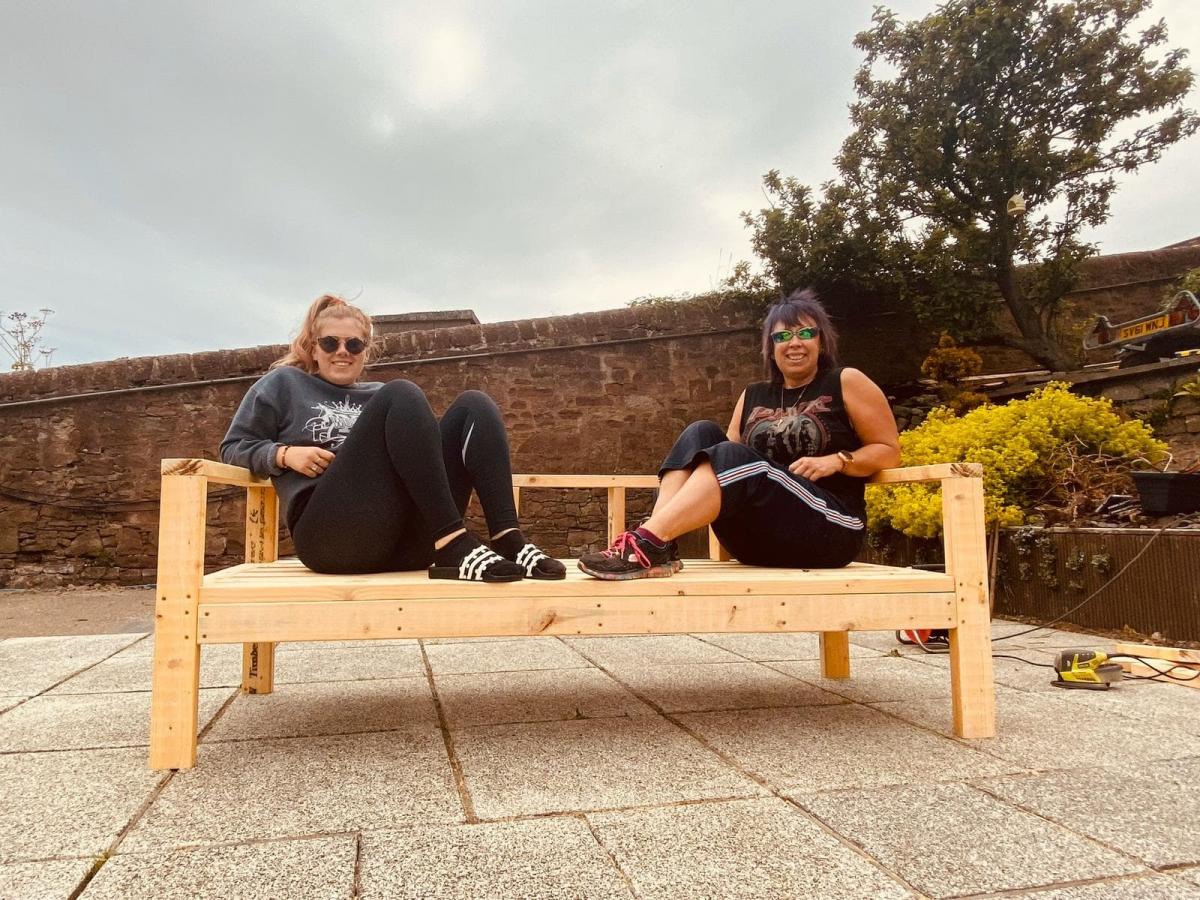
Paulieboxer
Ana, First time I have every attempted any kind of woodwork/building furniture other than building Ikea stuff. The plans were very easy to follow and now I want a chop saw for xmas. I roped my daughter in to help me and we completed the project in 2 days. Husband was totally blow away by our achievement. I love it and feel accomplished. Away to work on the table and further benches/seating over the next few weeks. Pauline
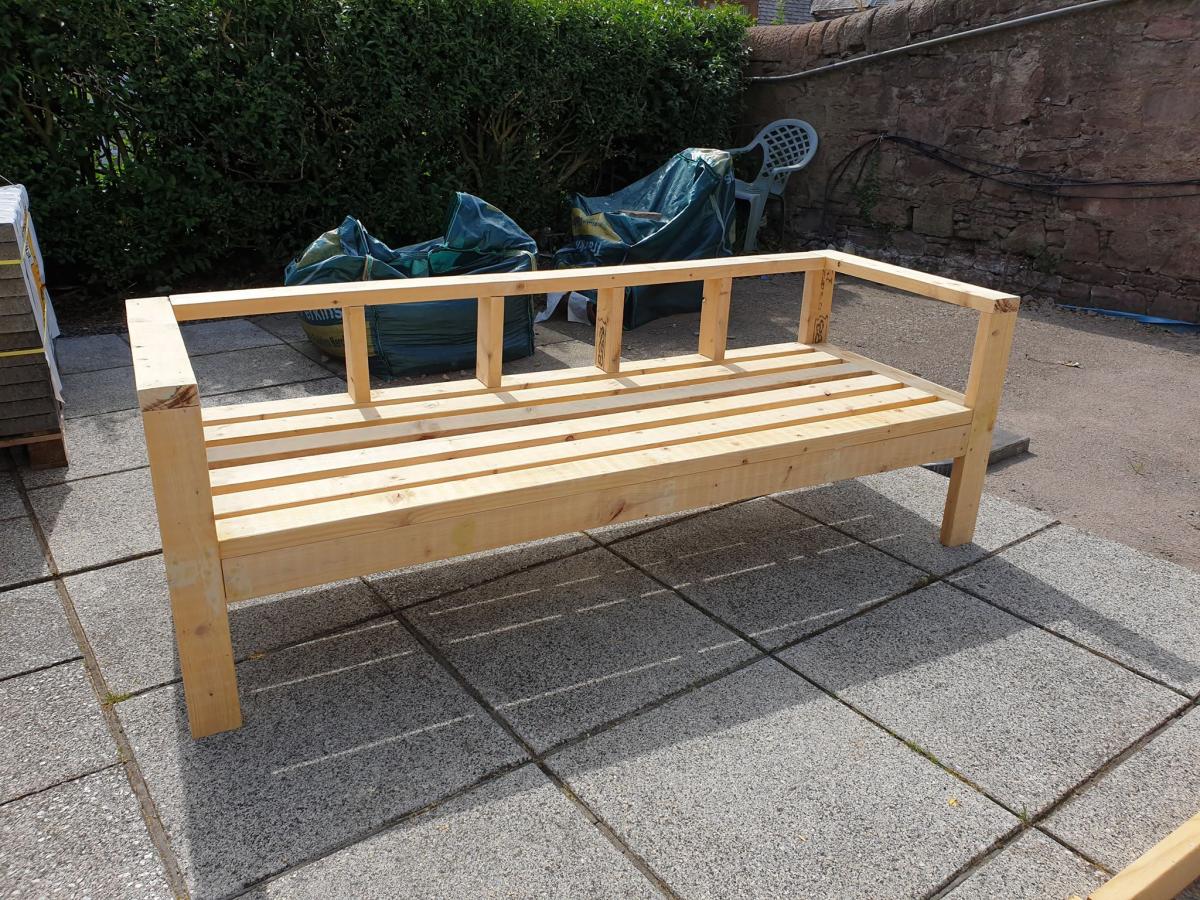
Built from Plan(s)
Estimated Cost
£200
Estimated Time Investment
Day Project (6-9 Hours)
Recommended Skill Level
Beginner
Dining Room Table
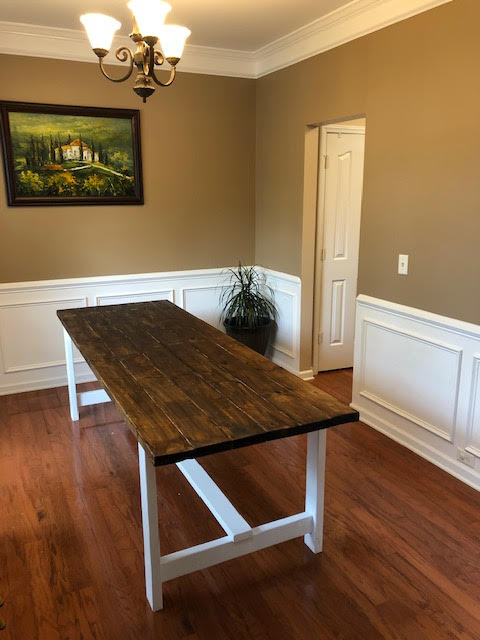
My husband and I built this together as a celebration of our 9th anniversary. We had a lot of fun learning a new skill. Thank you for posting these plans for beginners like us!
Built from Plan(s)
Under Fort Sandbox Cover
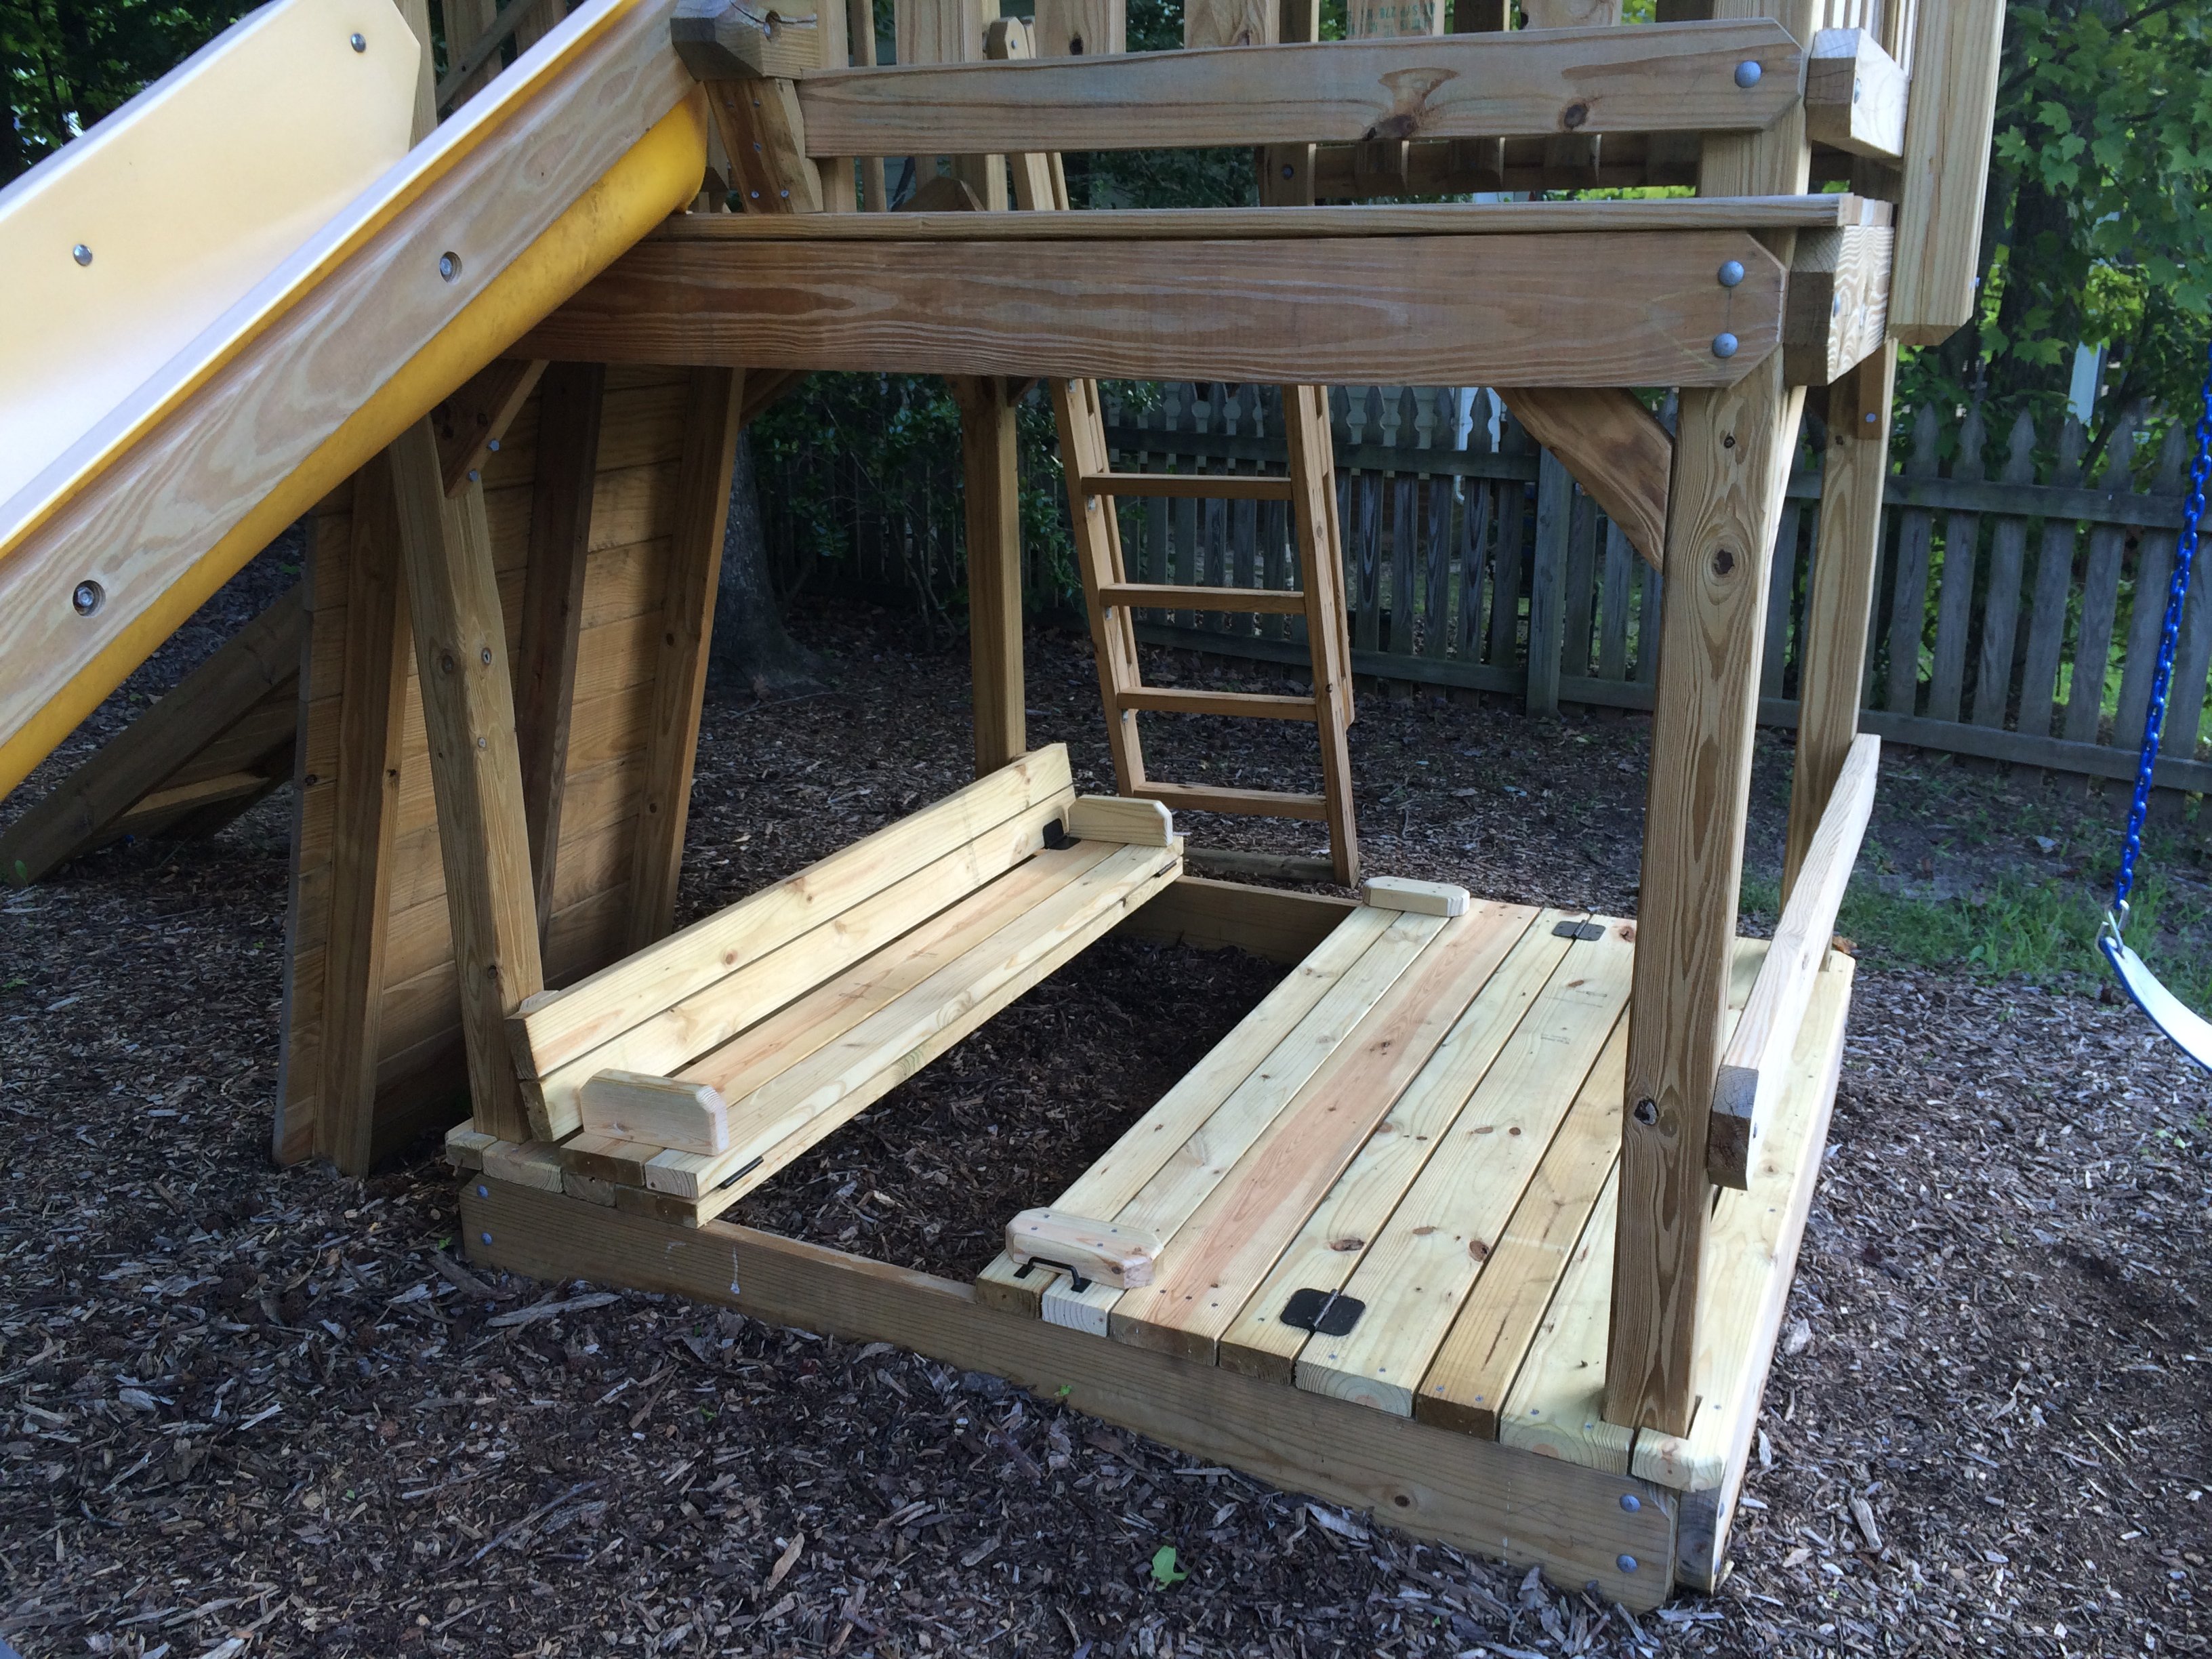
Thanks to inspiration from Ana's post on the Sand Box with Built-in seats, I've retrofit our Jungle Fort (http://www.detailedplay.com/Jungle-Fort-Swingset.htm) with the sandbox cover/bench system. I've upgraded the lumber dimensions to 2x4s and 2x6 to accommodate the increased 67.5" span.
Built from Plan(s)
Estimated Time Investment
Day Project (6-9 Hours)
Recommended Skill Level
Beginner
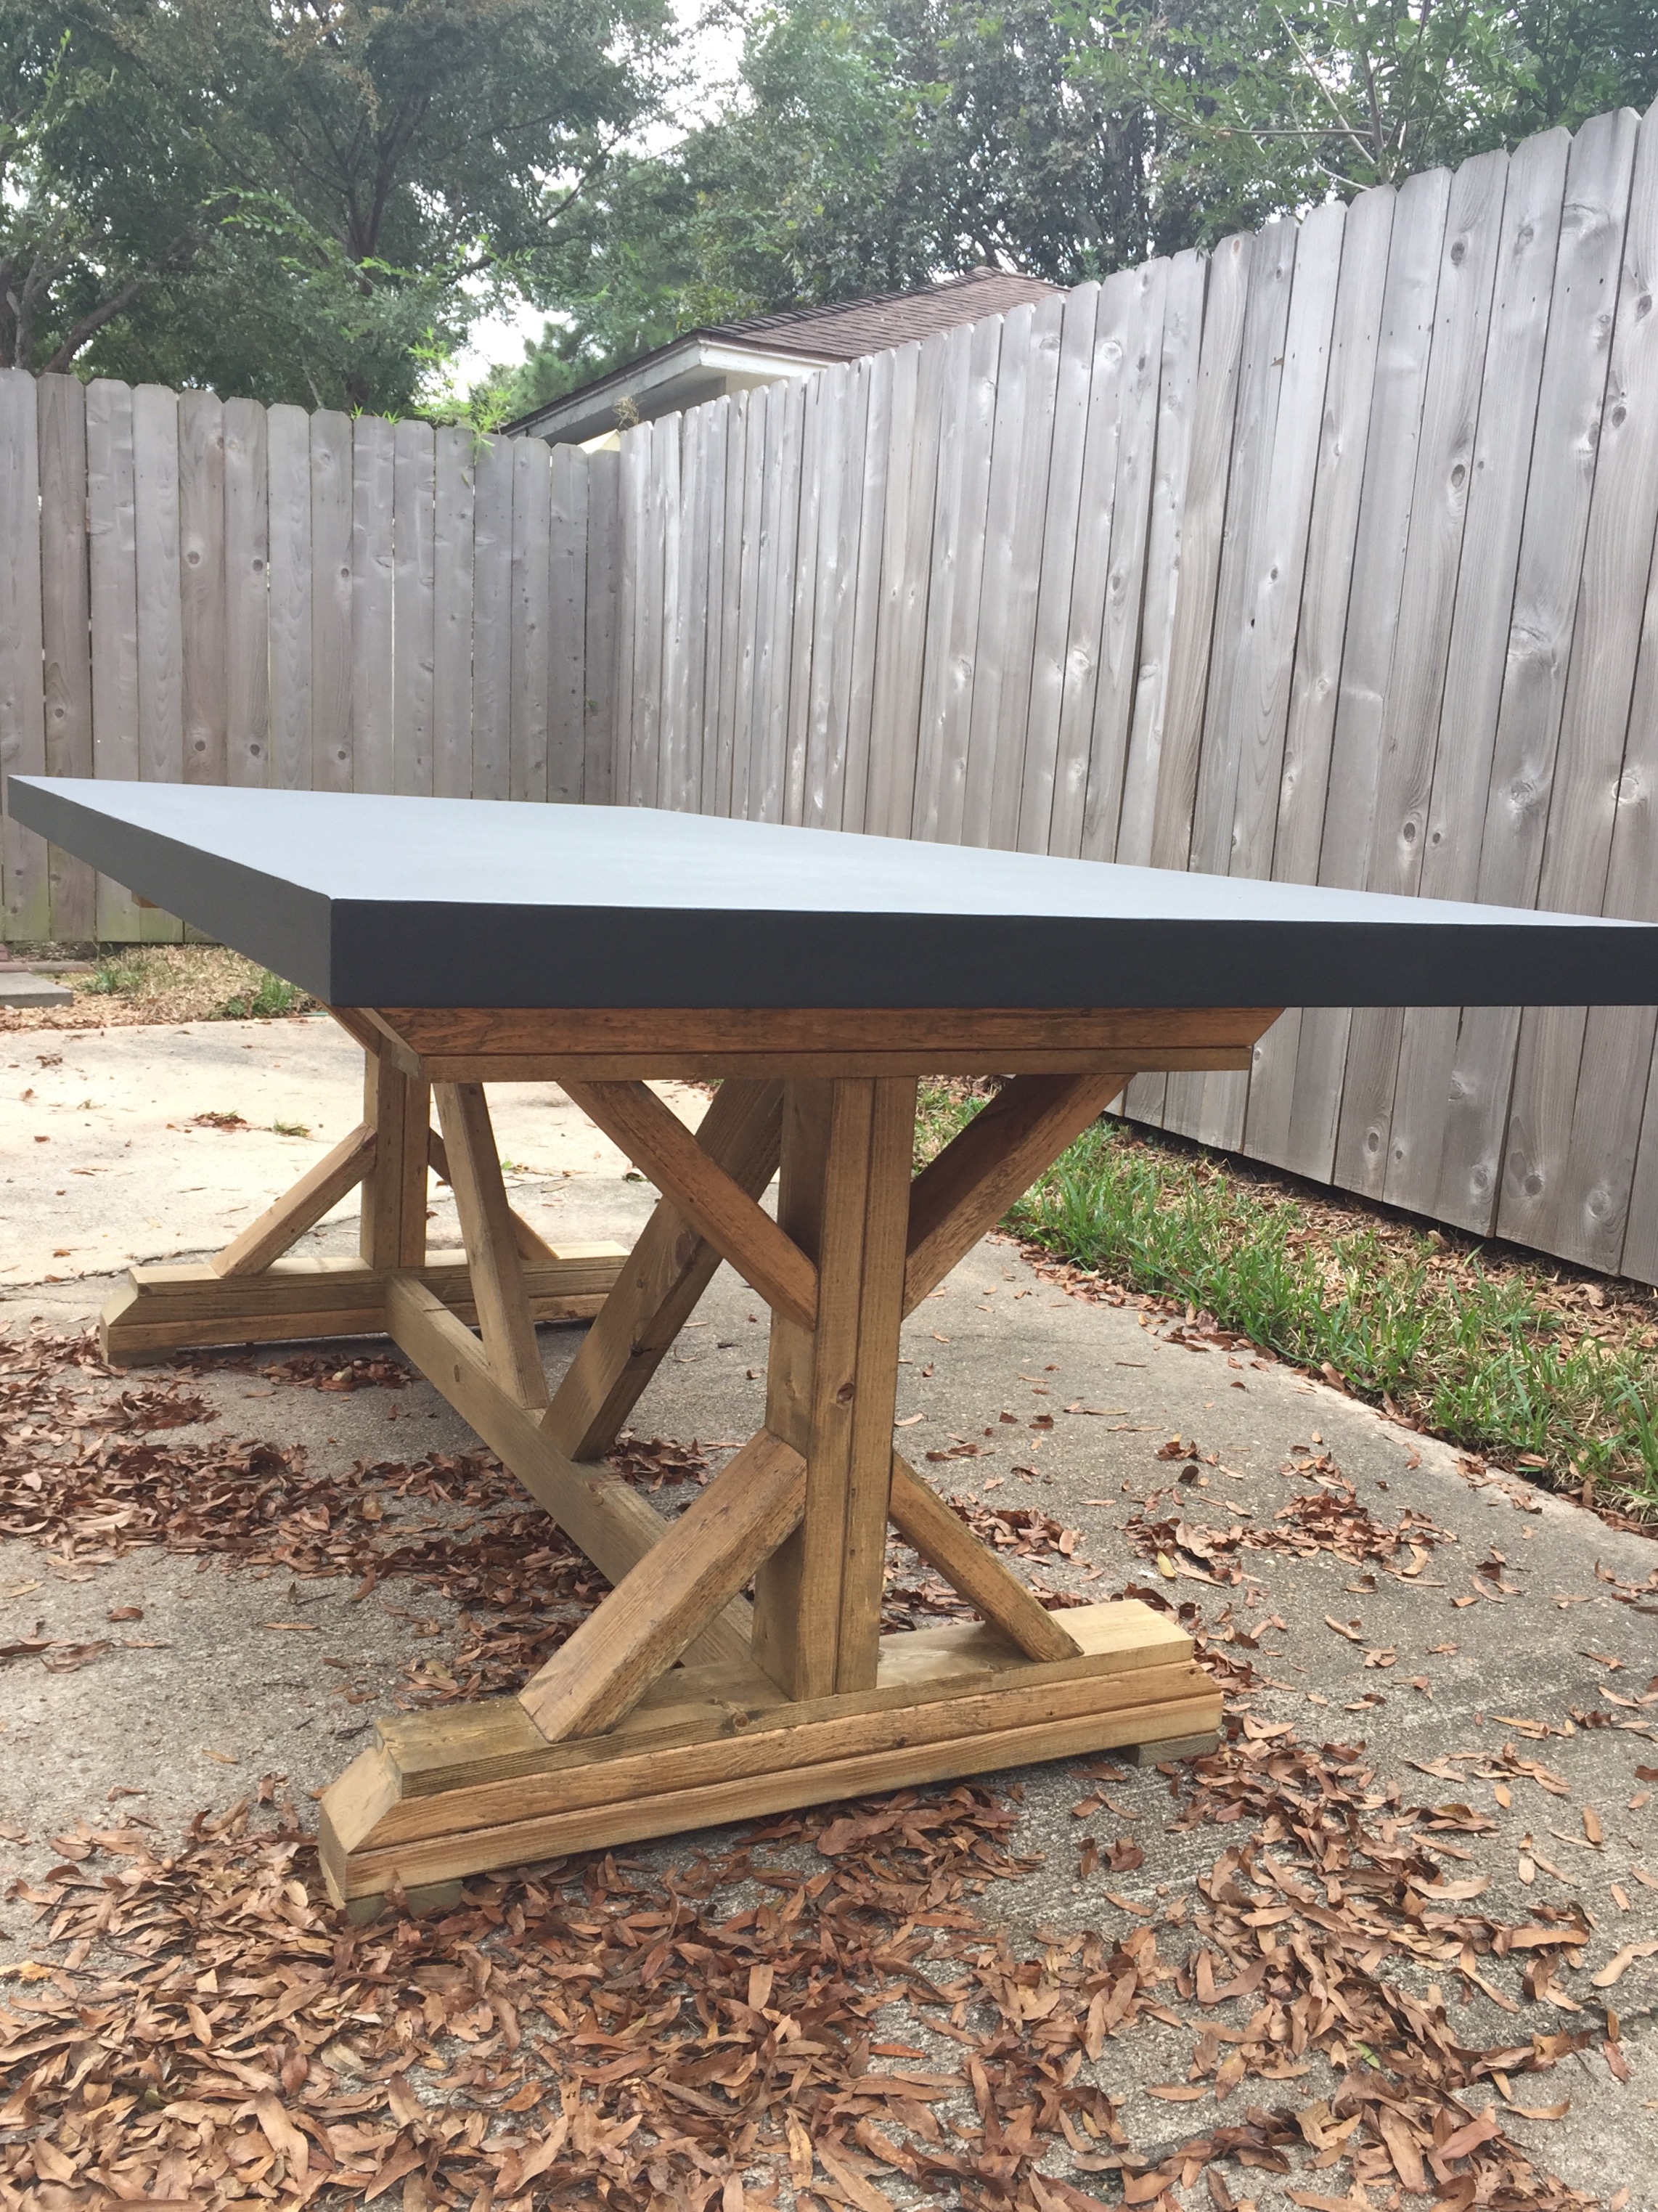
Restoration Hardware Inspired
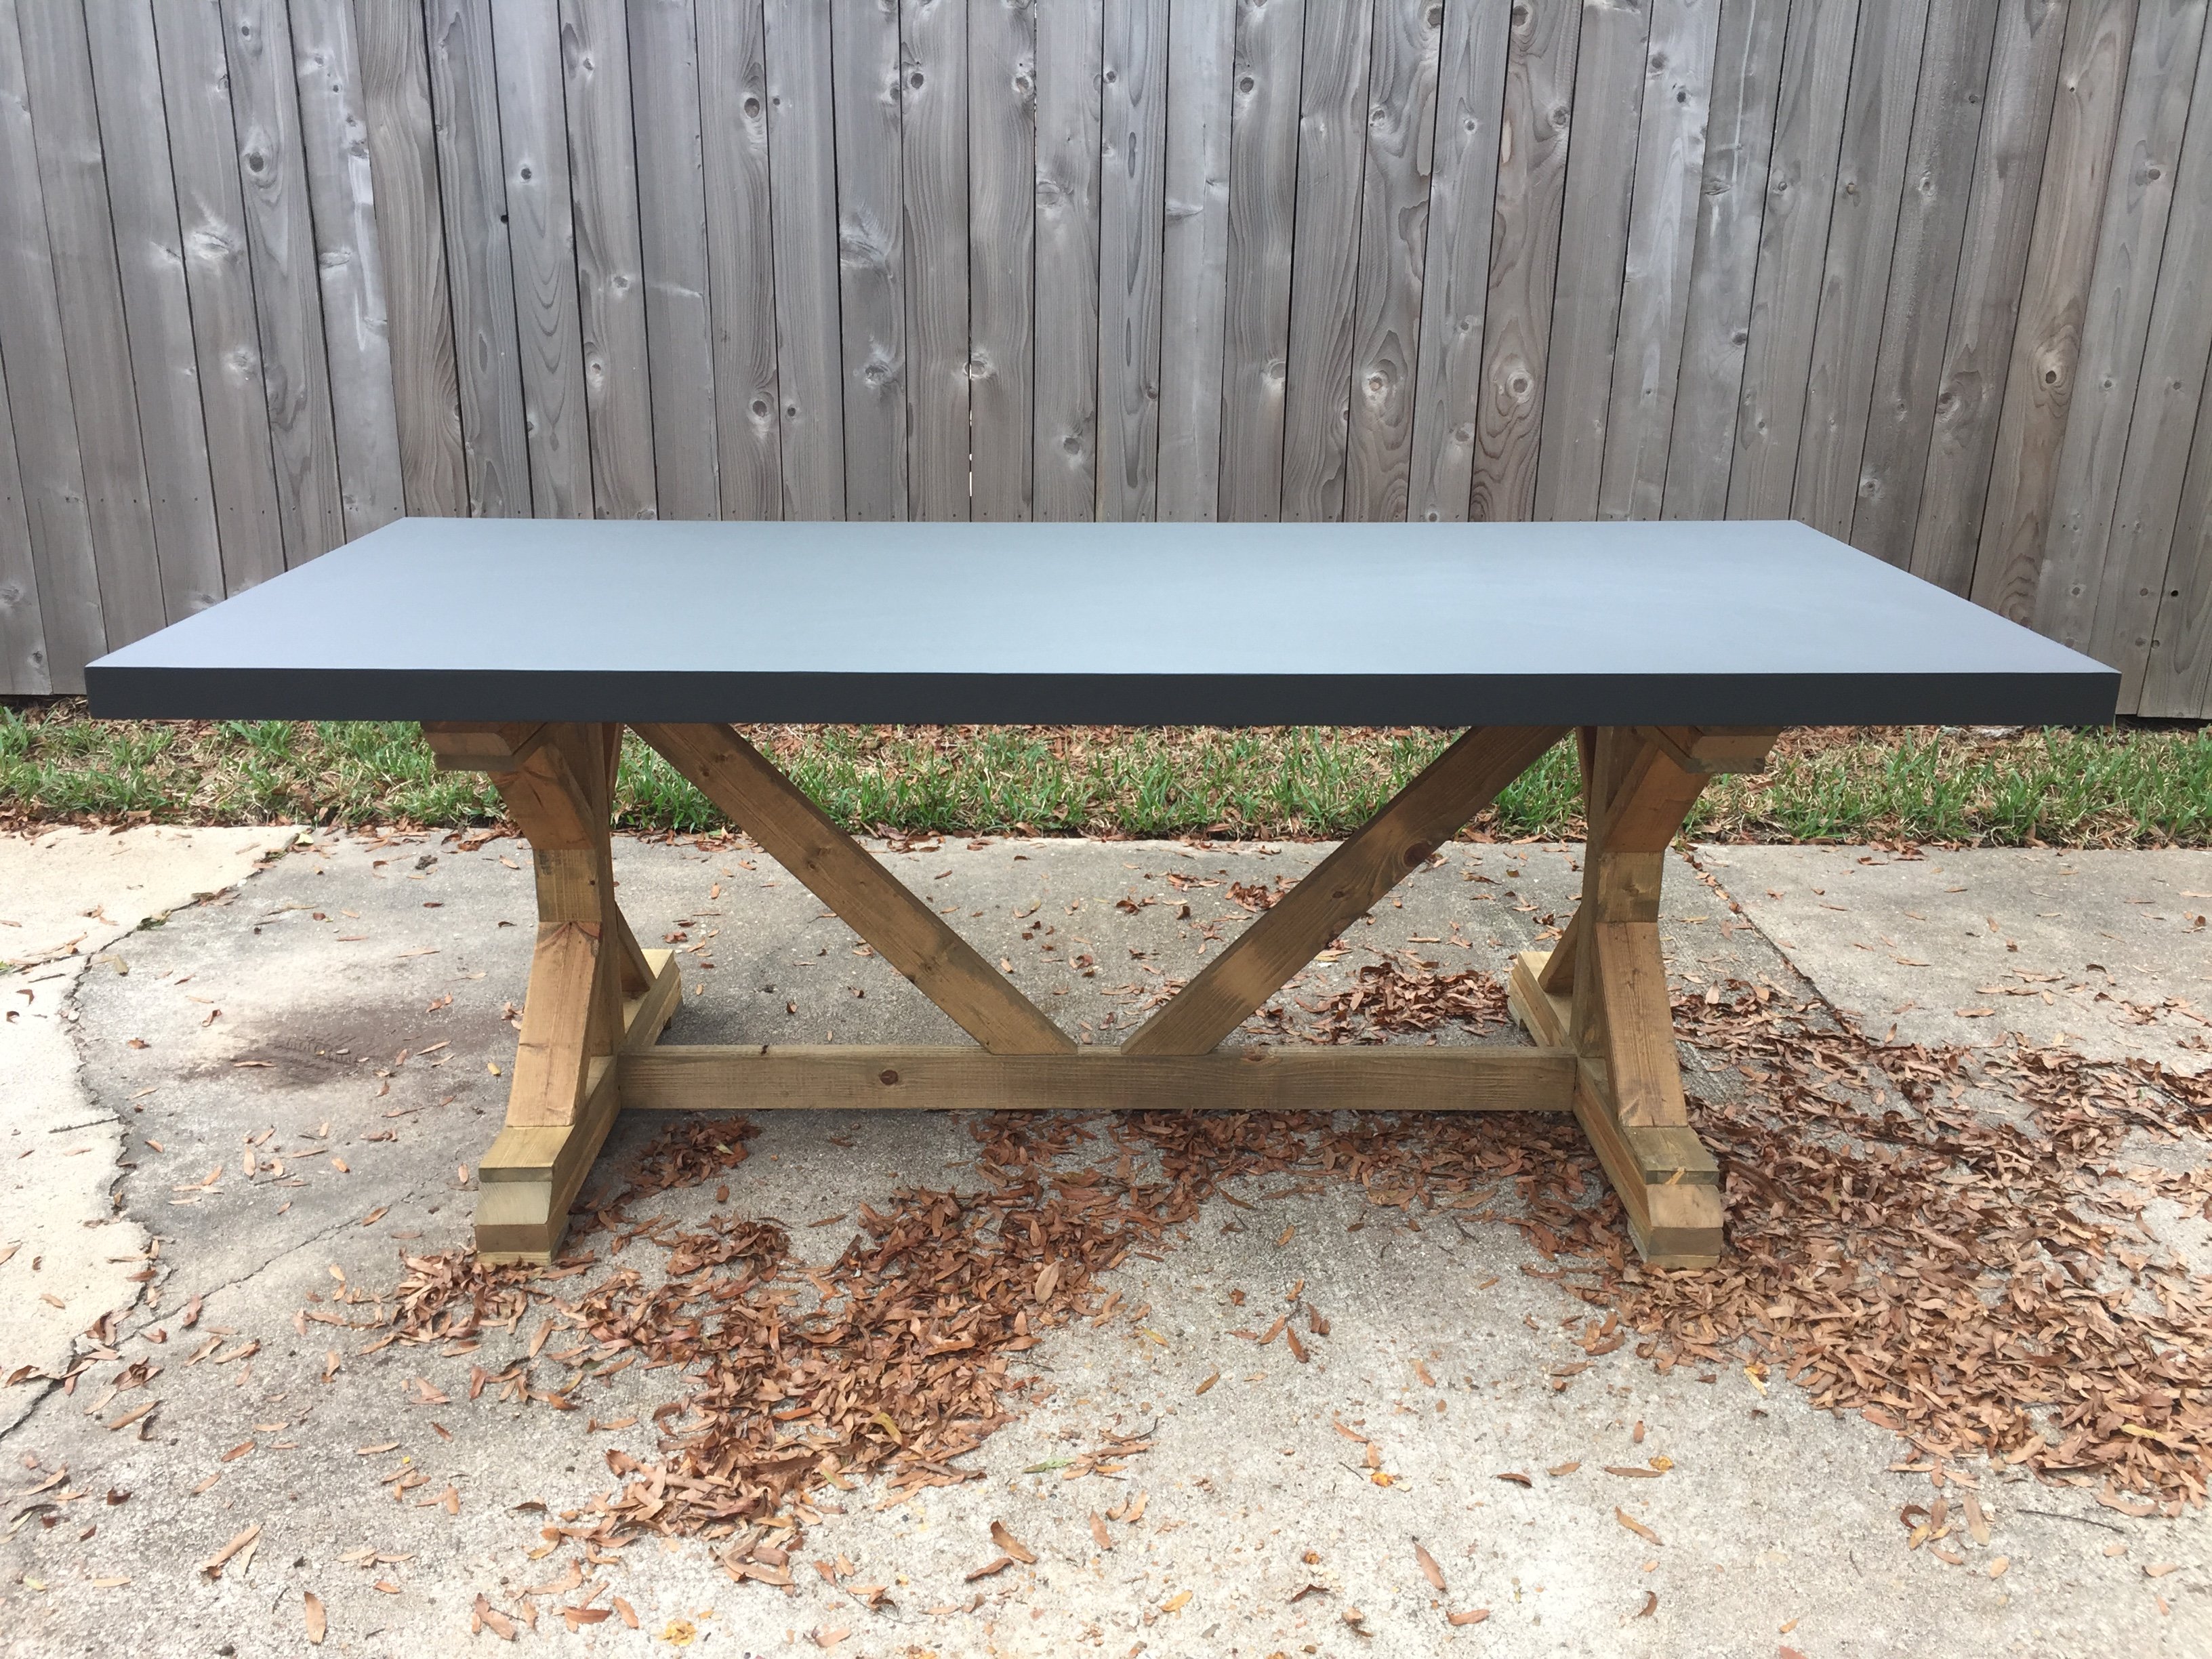
I was in the process of making the fancy farmhouse x dining table to spec based on the plans provided. Then I came across a restoration Hardware table that had a similar base but a concrete top and decided to mimic the concrete top with plywood.
Built from Plan(s)
Estimated Cost
150-200
Estimated Time Investment
Weekend Project (10-20 Hours)
Finish Used
Minwax Driftwood stain with The Home Depot's Behr Ultra Premium Plus interior Matte Broadway color.
Recommended Skill Level
Intermediate
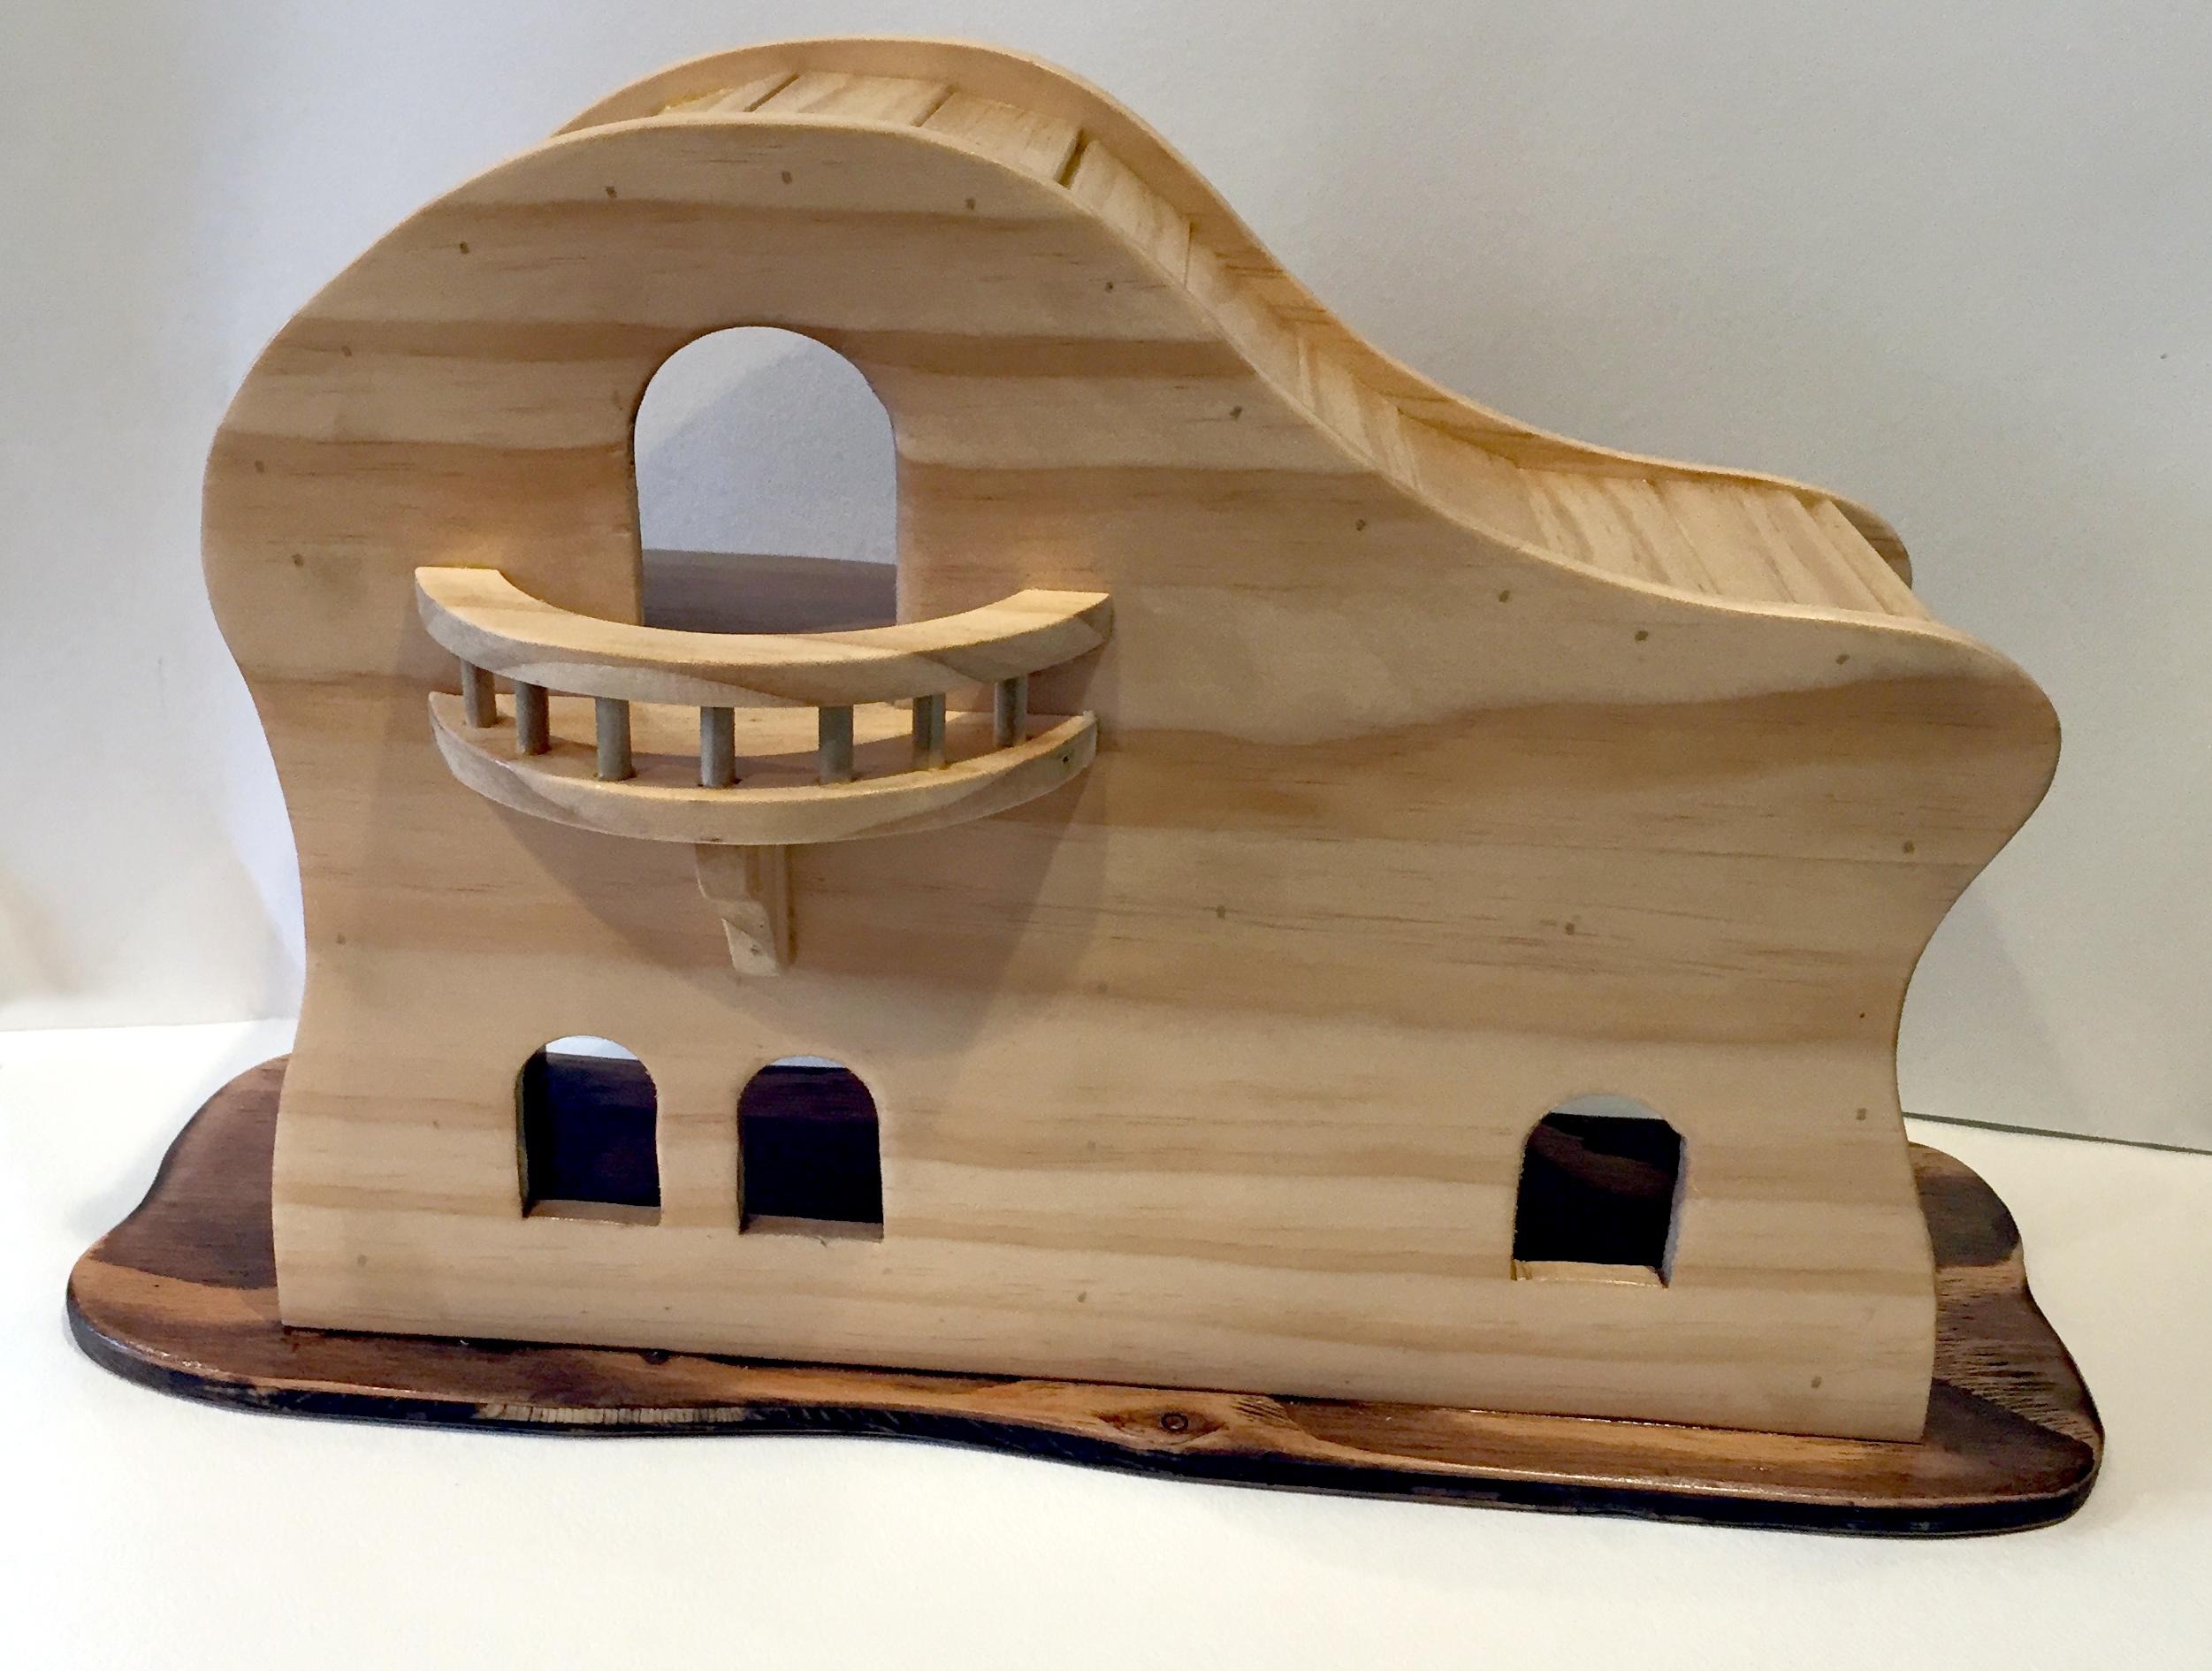
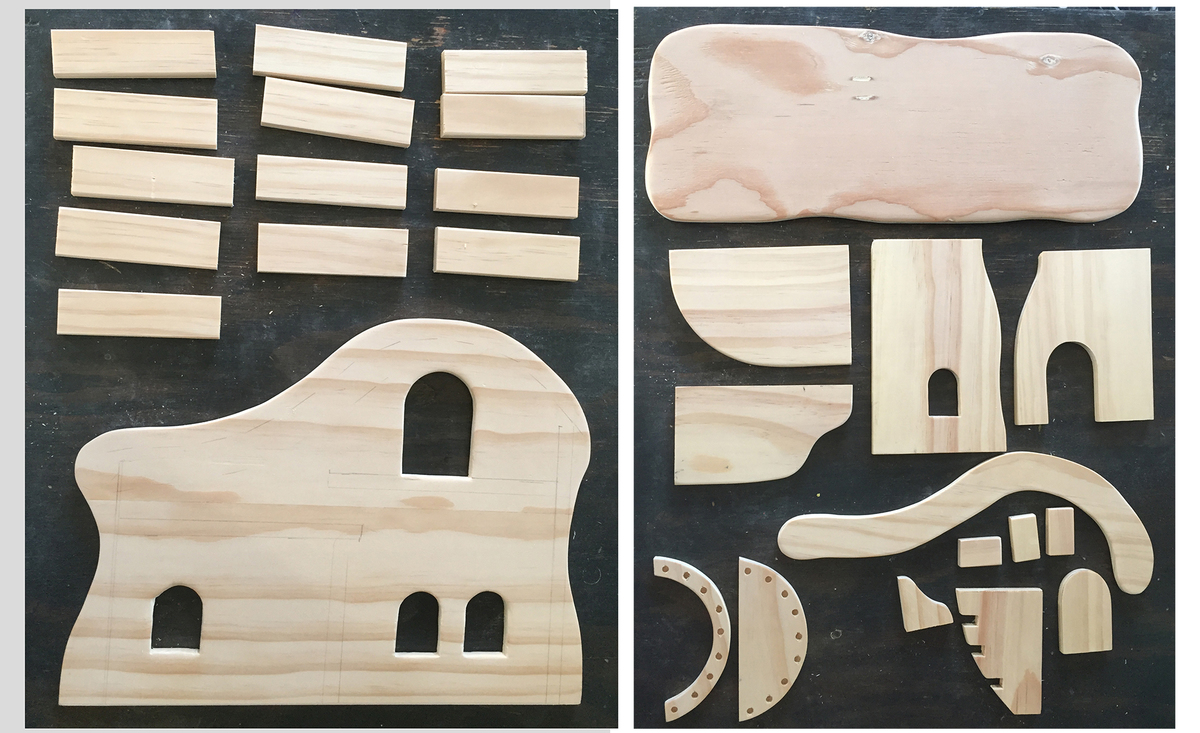
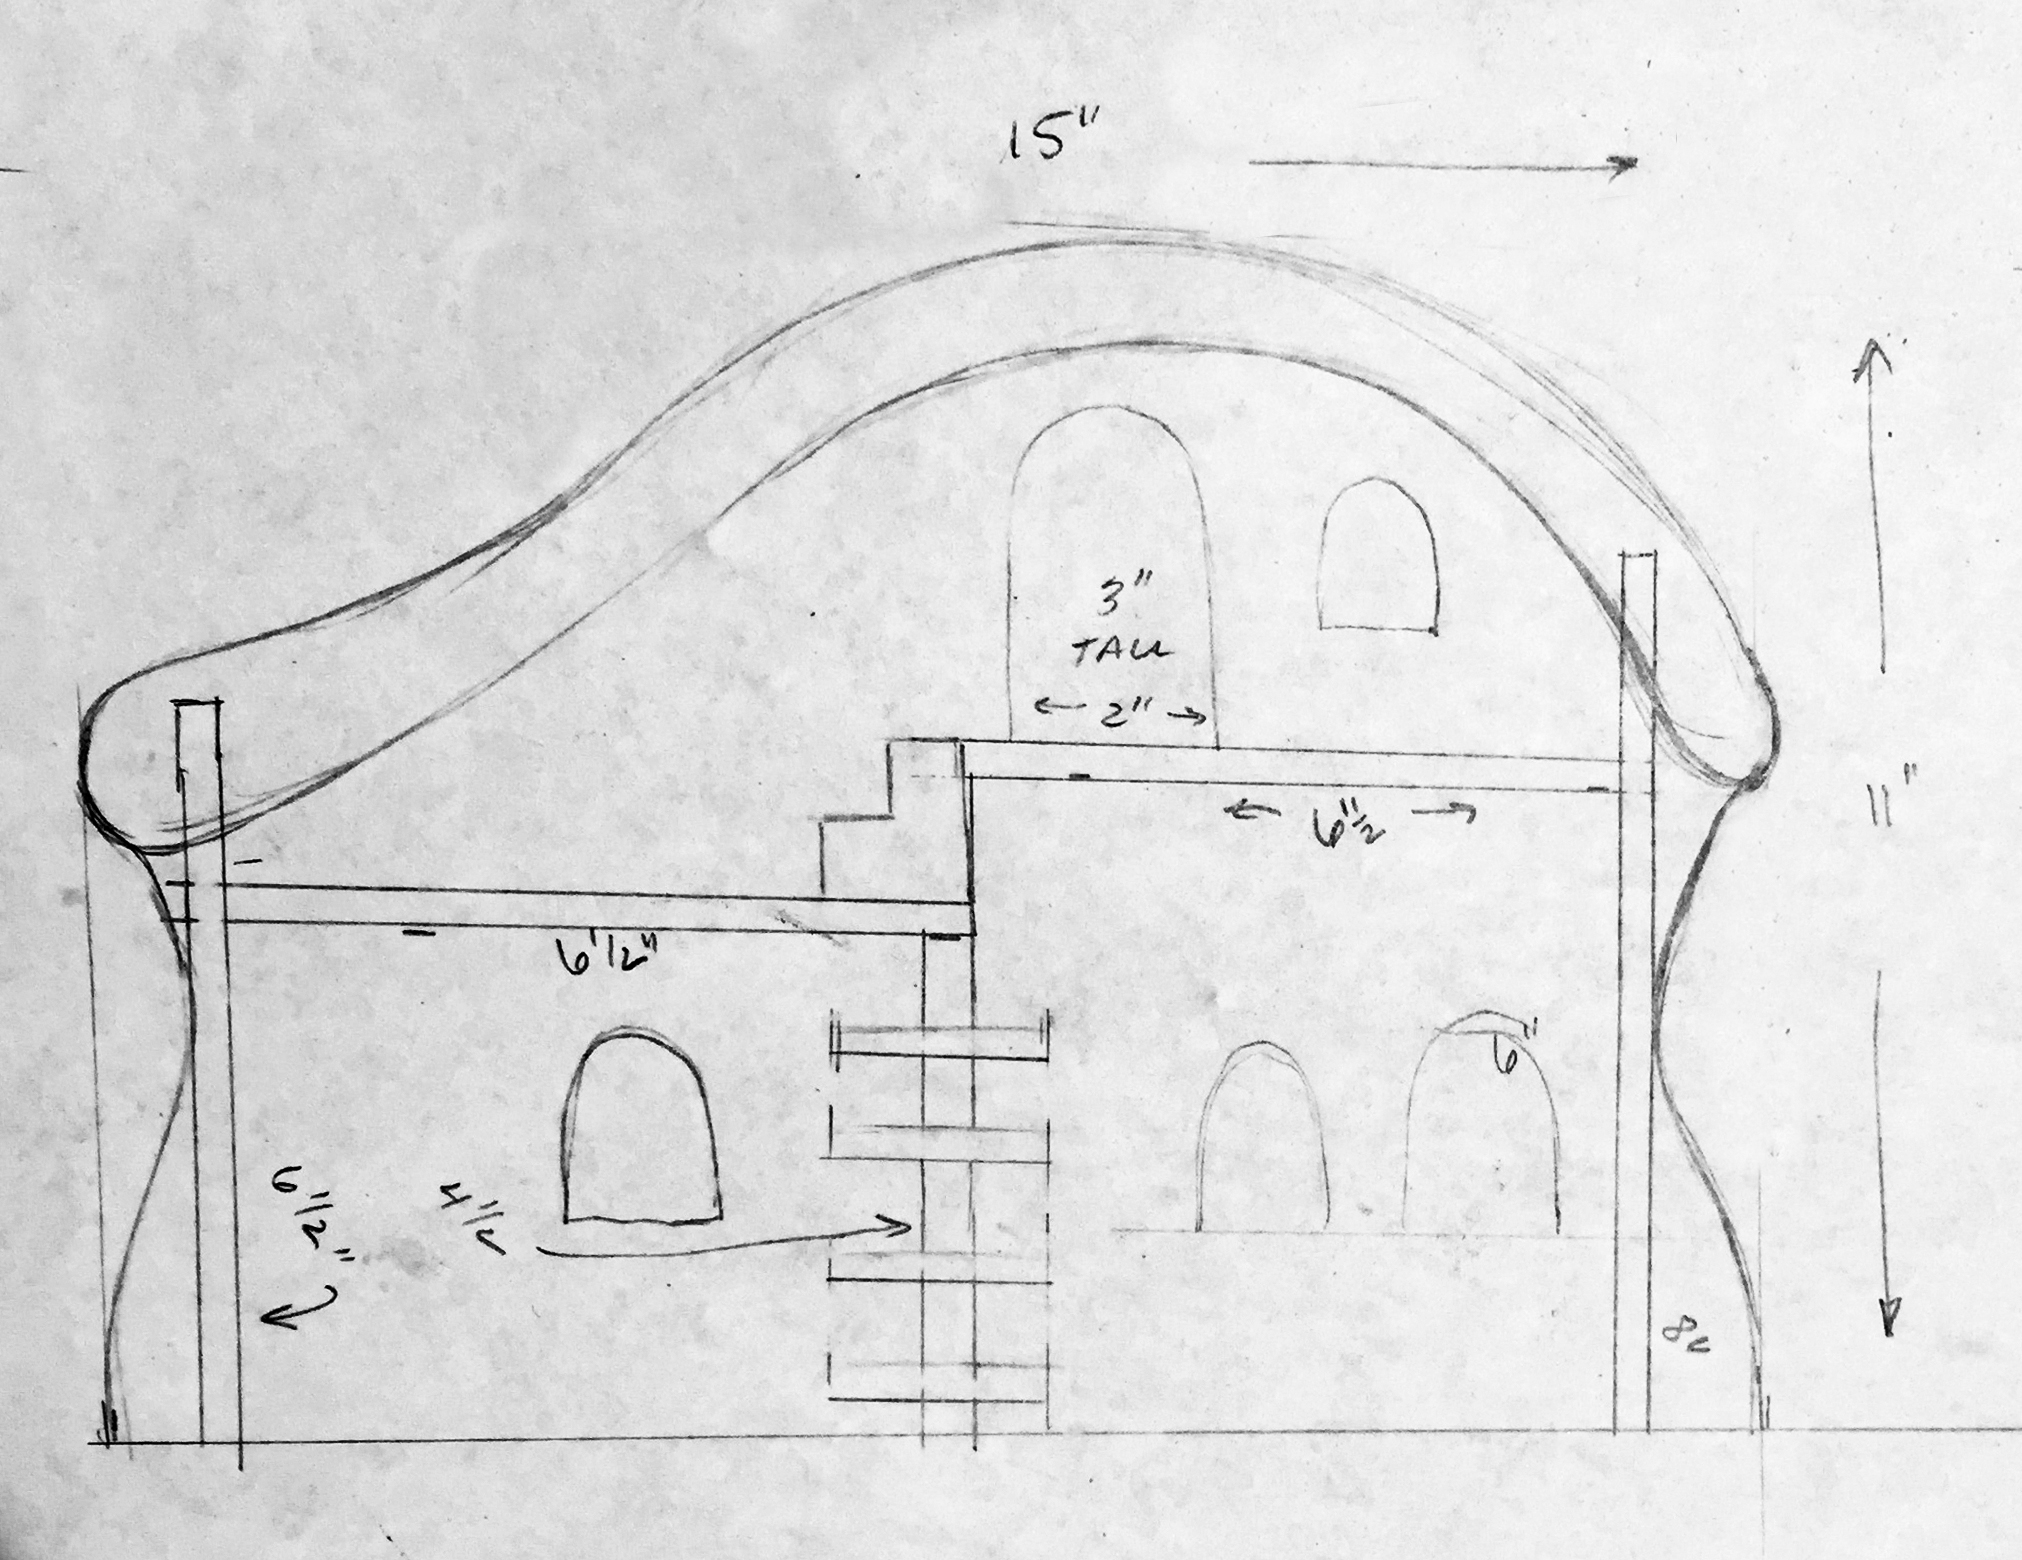
Peg Doll House
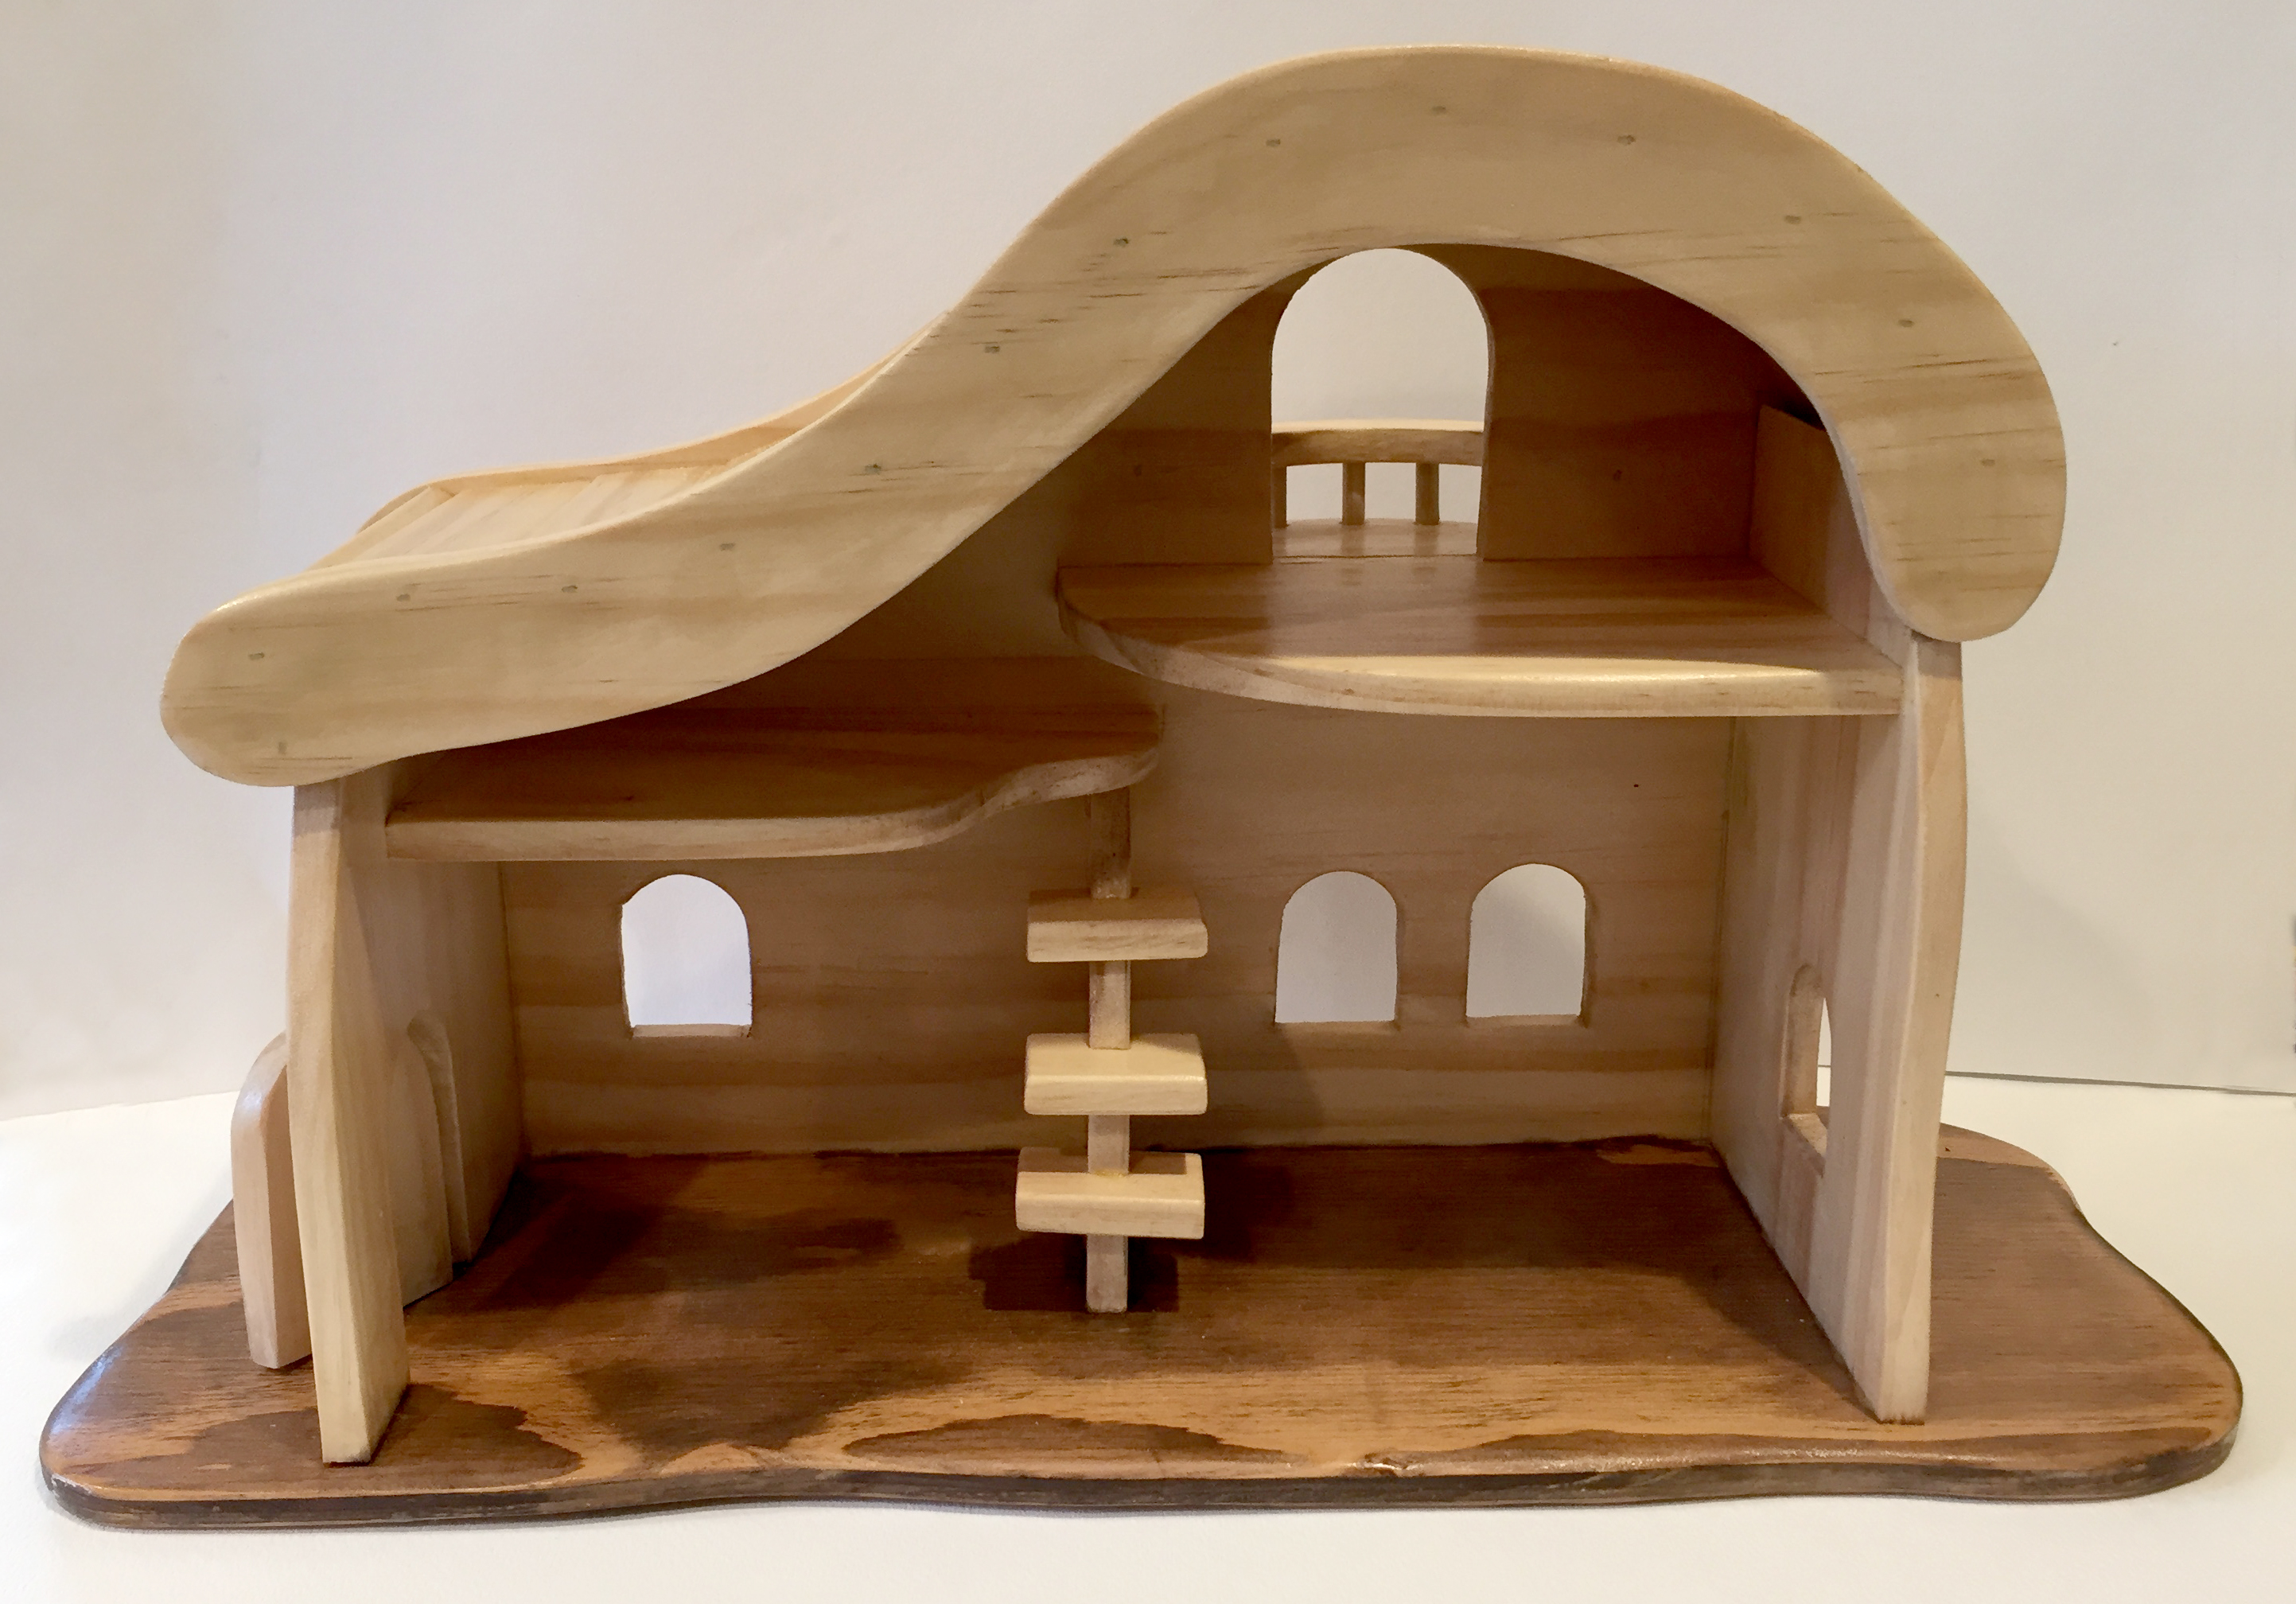
My grandson wanted a set of peg dolls and a house to play with them in. I wanted to build something that was gender-neutral - so many doll houses are pink and feminine! This doll house is sized just right for his peg dolls and playmobil people. It's made from 1/2" poplar, although it could also be cut from a sheet of 1/2" plywood.
Estimated Cost
$20
Estimated Time Investment
Day Project (6-9 Hours)
Finish Used
clear polycrylic
Recommended Skill Level
Beginner
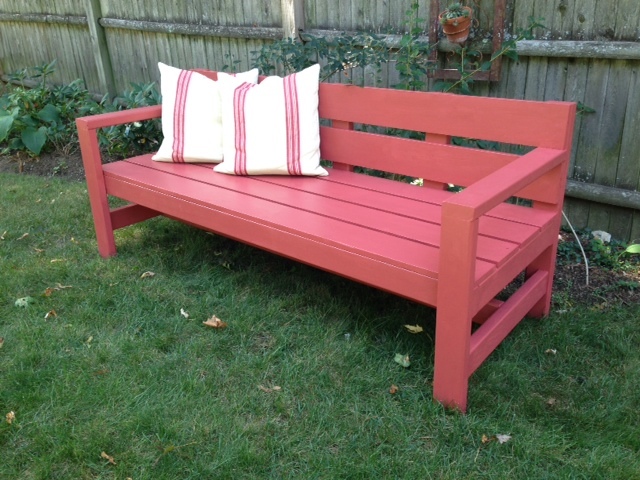
Modern Park Bench
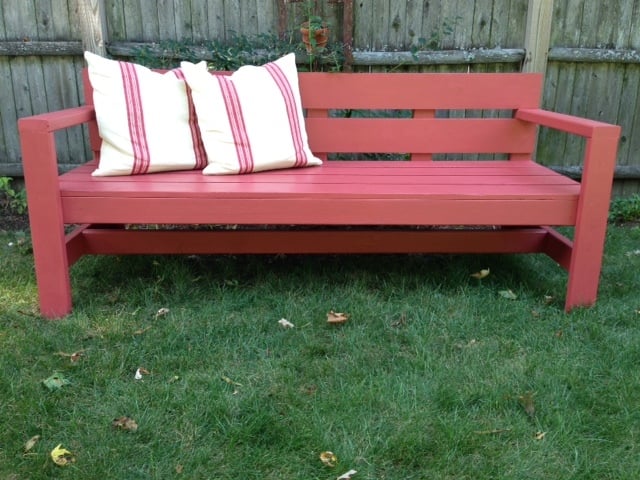
This is my third build and it took about 1/2 a day and cost $50 for lumber and $15 for hardware (decking screws). I previously built Ana's Farmhouse Table and doll farmhouse bed and cupcake stand.
I used the small kreg jig for part of the underseat frame, but it is not necssary. I wasn't using kreg screws so I found it easier to just attach through the end of the 2x4s. I recommend checking for squareness often for this project, especially as the arms and stretcher are attached.
Estimated Cost
$65 plus finishing paint
Estimated Time Investment
Afternoon Project (3-6 Hours)
Finish Used
Acrylic exterior primer and Ben Moore latex semi gloss in Spanish Red
Recommended Skill Level
Beginner
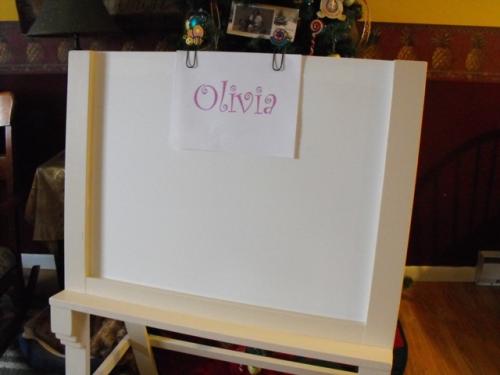
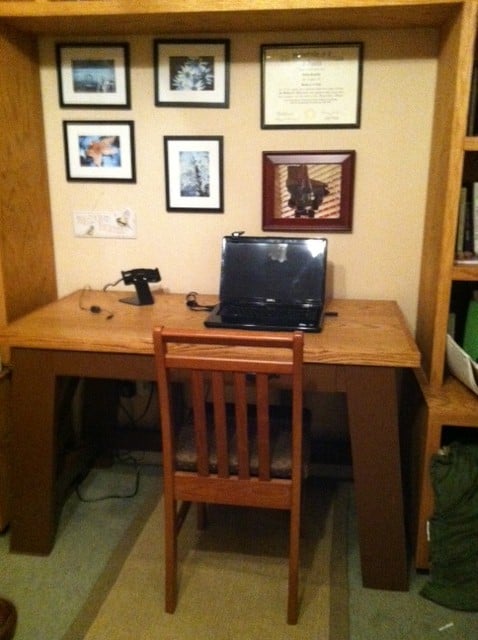
Country Desk
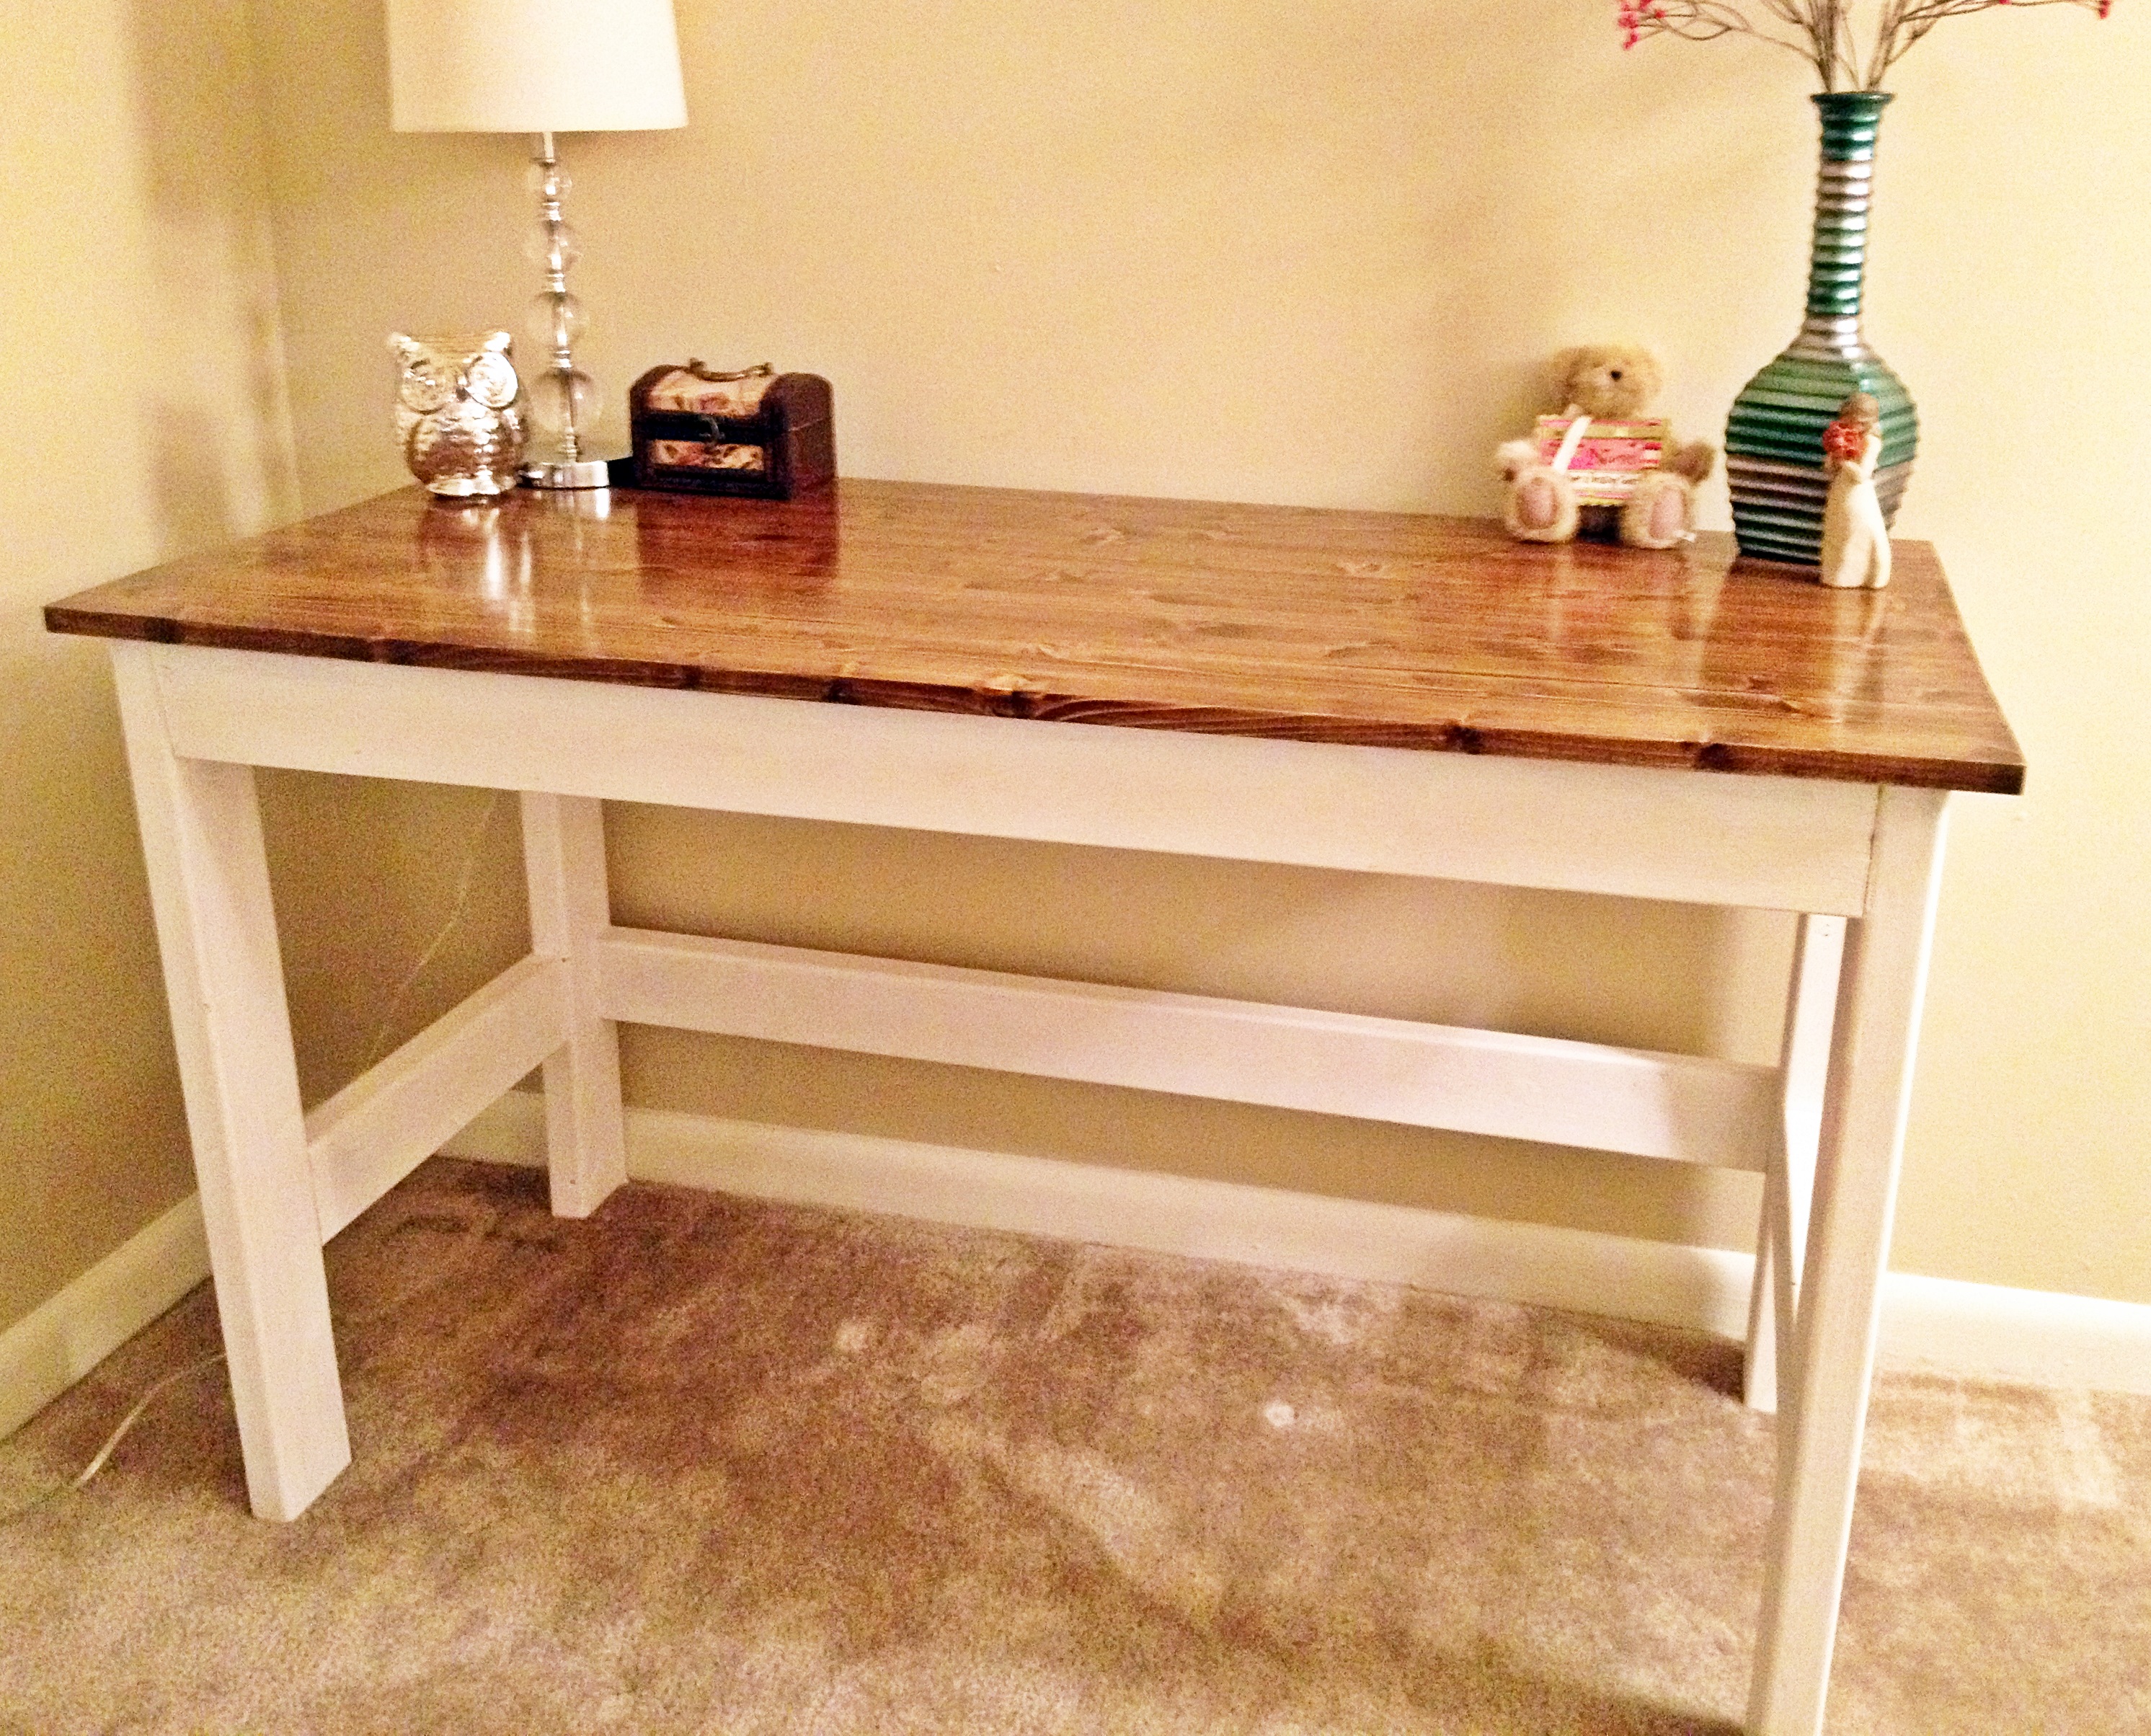
I wanted a good solid desk for my office and I thought these plans were perfect. The wood, screws, paint, and stain all cost less than $30. Instead of using 2x4's for the top I used a solid piece of aspen. I then stained the top and painted the bottom white.
Built from Plan(s)
Estimated Cost
$30
Estimated Time Investment
Weekend Project (10-20 Hours)
Recommended Skill Level
Beginner
Comments

Simple 2x4 Bench

I made this in an afternoon. Loved this project. It is made with 2x4's using a Kregs Jig and mitre saw (plus additional tools like a drill and square). This was my frist time using the Kregs Jig and I am sold!!
The free plans were taken from another website. They are very detailed and there is even a video (I recommend it as he gives a great tip for making sure the back stays equal/level to each other before putting the back on). Even though you can build this by yourself, I did have help for the heavier sides once they were assembled. I plan to build the additional side table soon and finish them both with sanding and staining when the weather seems less iffy for rain.
If you are looking for a good beginner project that doesn't take forever or have complicated steps, this is your project.
Built from Plan(s)
Estimated Cost
Around $50
Estimated Time Investment
Afternoon Project (3-6 Hours)
Recommended Skill Level
Beginner
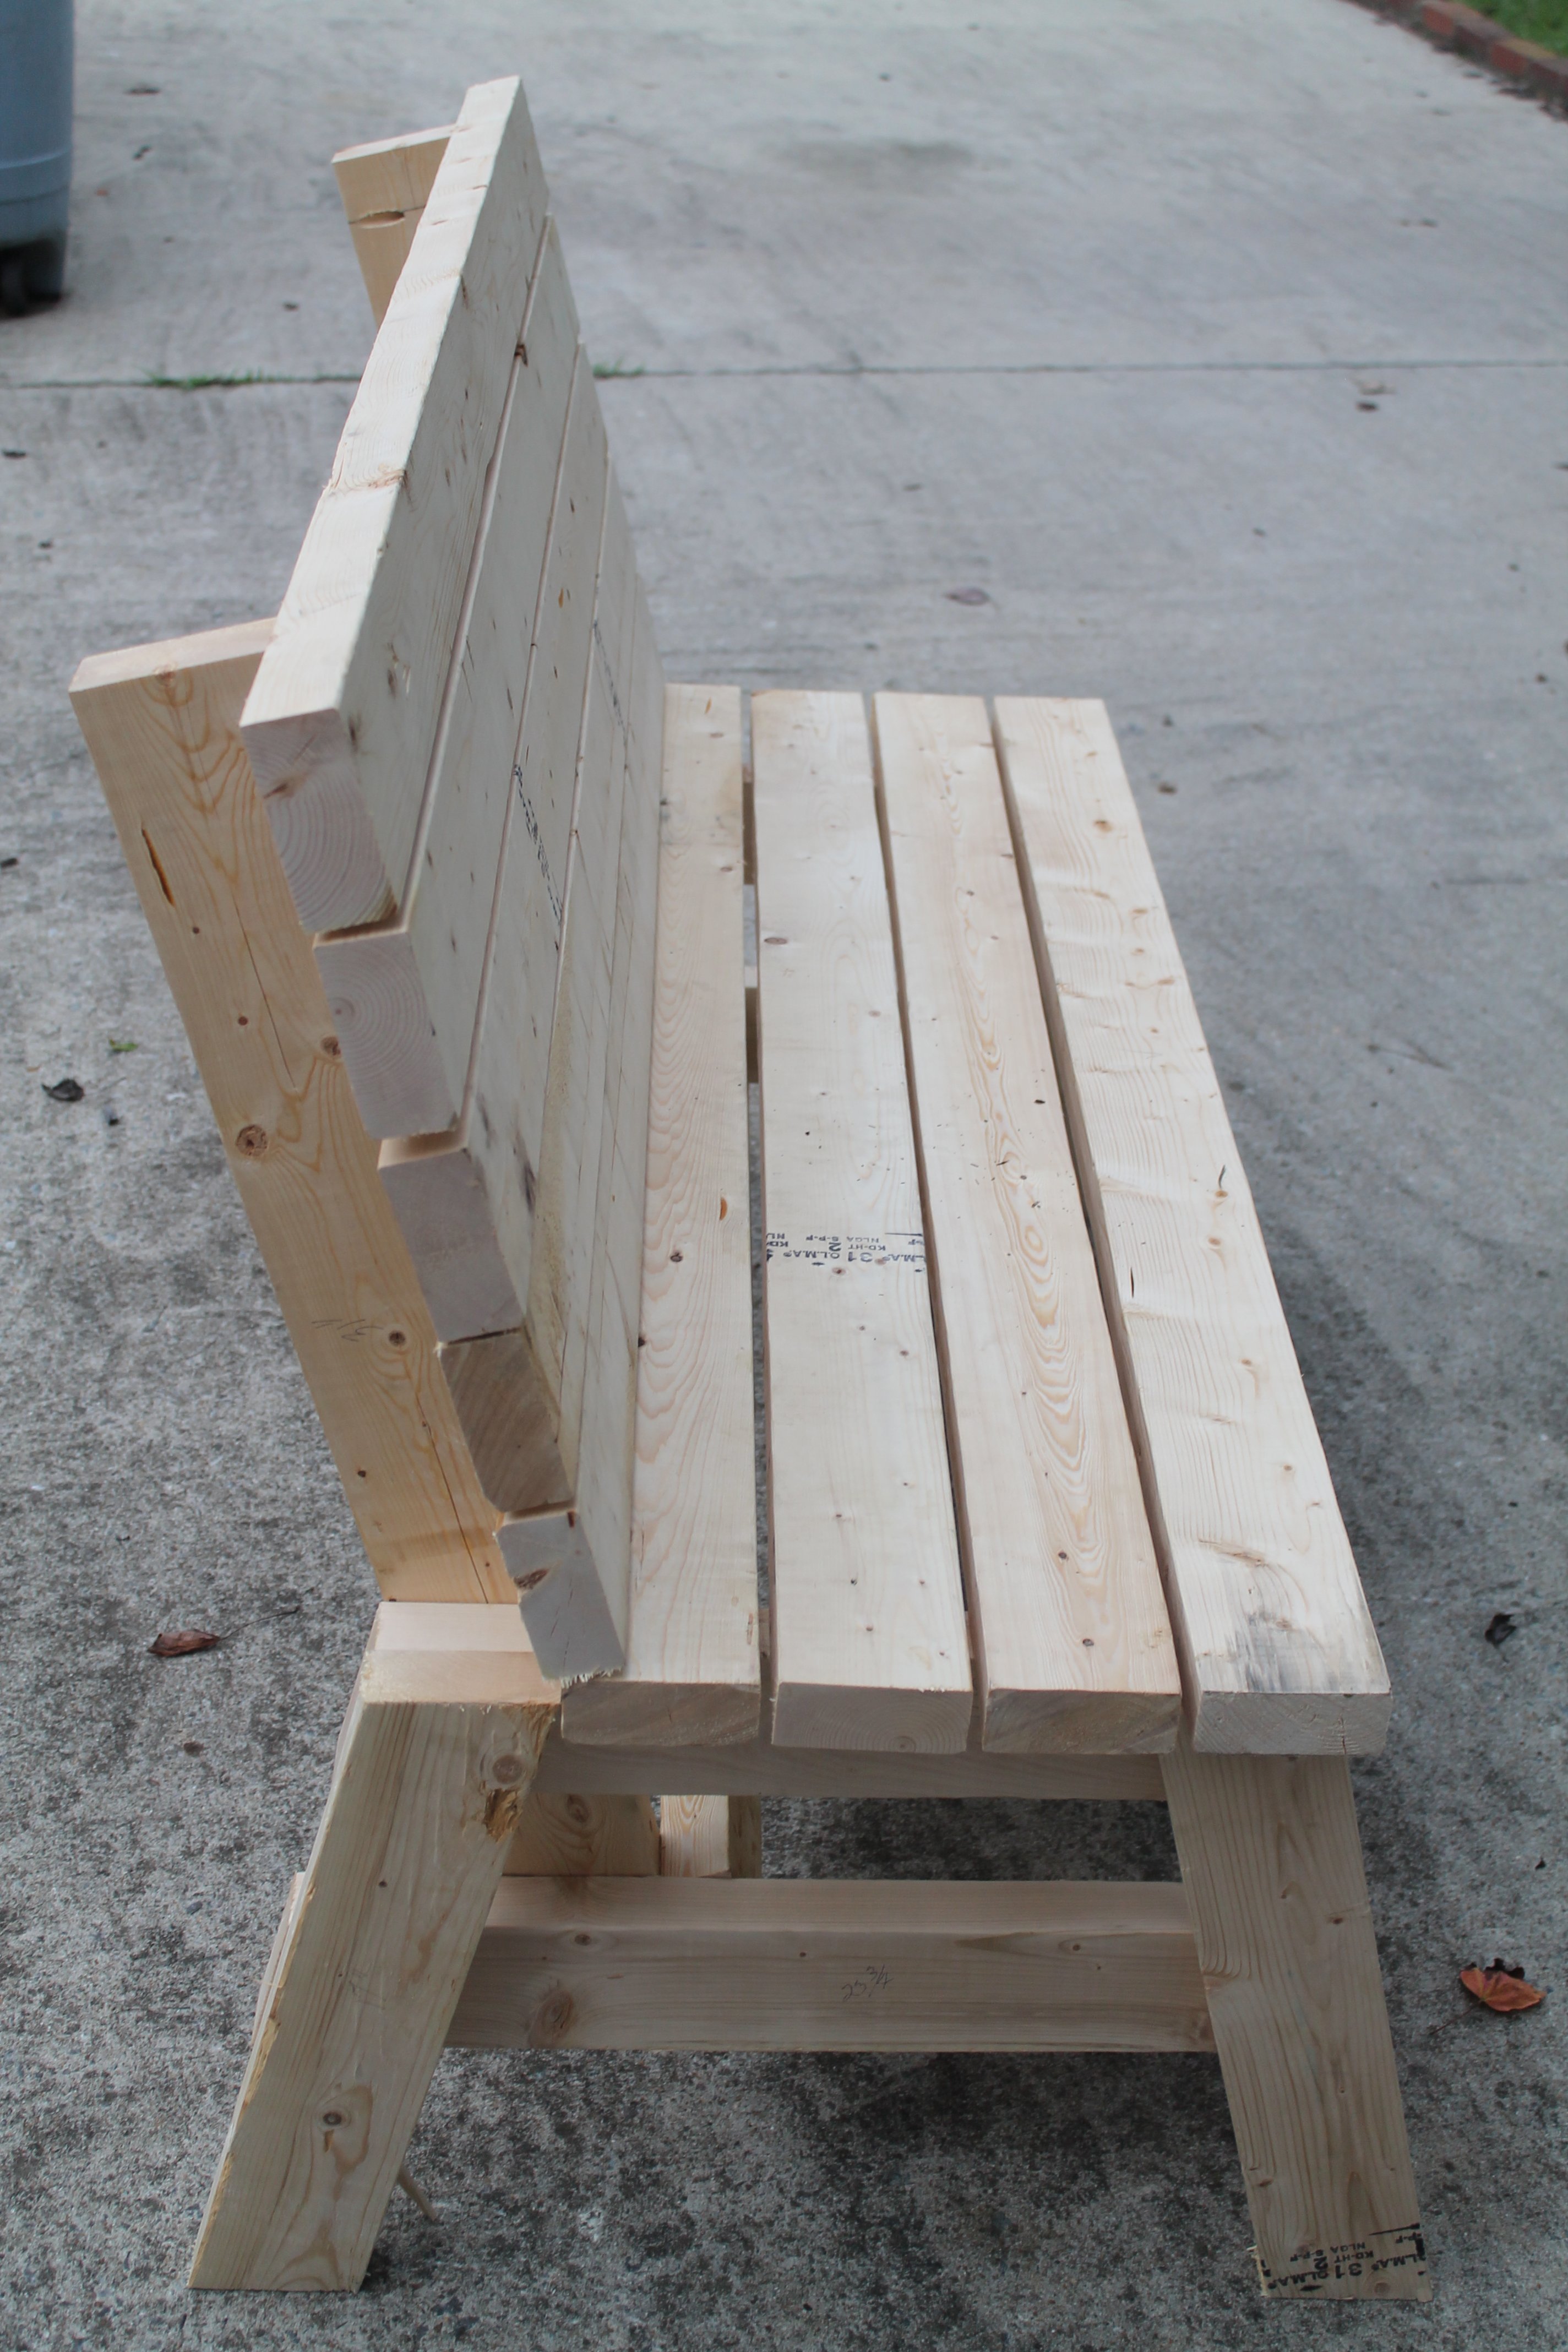
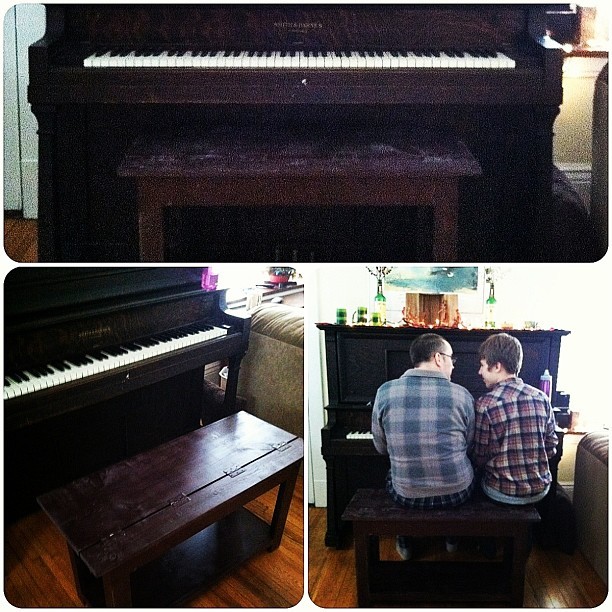
Flip Top Piano Bench
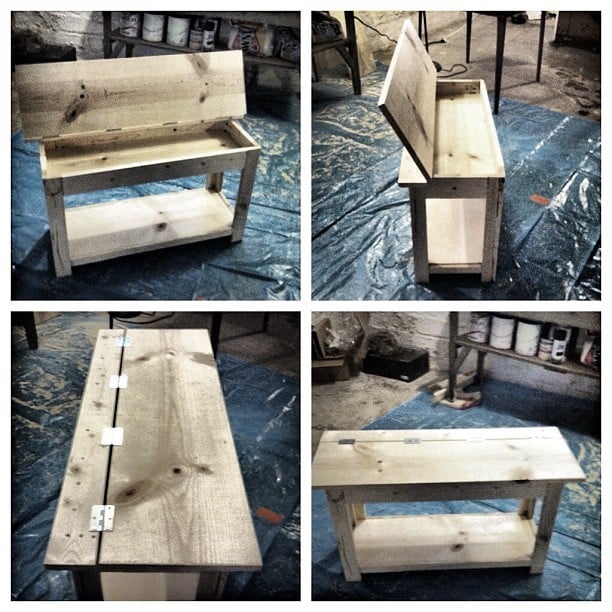
This was my first DIY build. Having been inspired by my good friend, the brilliant Jen Woodhouse of The House of Wood, I decided surely I could do this too. So I picked something that looked like a challenge, but that we also needed. We have an old piano we bought from Craigslist that has heretofore been benchless. So I used the Flip Top Storage Bench plans, headed to Home Depot, collected the wood (and let them cut it - but made a few of my own cuts, too), and got to work.
I had a little trouble at first, simply because, after assembling the sides and aprons, the unit did NOT square up. I took a few pieces apart and realized it wasn't user error (what?), but warped wood. That's right: one of my 1x3s was warped and bendy. So I rebuilt that side with some of my leftovers, and made sure to square up after each step, and lo and behold it came together!
It's not perfect - one of my legs is a bit off, so it wobbles when no one's sitting on it, but there's no issue when it bears weight - but for my first build, I'm quite pleased! And now that I know I can do this...well, this is just the beginning!
Total time it took me was probably around 15 hours, which includes practicing using my circular saw and kreg jig (both of which were straight out of the box when I started), along with my rebuilding the side.
I used Minwax pre-stain wood conditioner after sanding, followed by two coats of Rustoleum spray stain in Kona. I sanded with 400 grit sand paper after each coat of stain, and finished with one coat of semi-gloss polyurethane. I considered a few more coats of stain, but so fell in love with the weathered look that evolved from the staining and sanding that I just left it!
I also spray painted the hinges - that was a bit of an accident (I didn't know how NOT to cover them in stain...), but turned out to my liking!
My estimated cost is about $100, which covers the wood (including the extra 1x3s and an extra 1x2 I needed for a screw-up), nails, screws, three cans of spray stain, polyurethane, wood conditioner, paint brushes, two packs of sandpaper, and my hand sander. All but the wood will be used in my next few projects too, so that cost covers QUITE a bit!
Built from Plan(s)
Estimated Cost
$100
Estimated Time Investment
Weekend Project (10-20 Hours)
Finish Used
Two coats "Kona" spray stain, Minwex wood conditioner, one coat polyurethane, for a weathered look.
Recommended Skill Level
Starter Project
Comments
Wed, 01/30/2013 - 08:19
re: Kreg Jig
Hey Angela,
The Kreg Jig is a tool that creates pocket hole joints on all your boards - whether you're joining vertical to horizontal pieces, or two horizontal or two vertical, etc.... - and made this build, as my first, INFINITELY easier. You don't *need* the Kreg Jig to build this bench, but Ana recommended it, my good friend Jen Woodhouse, who contributes a lot of plans and builds to this website recommended it, and I highly, highly recommend it. It's about $100, and worth every penny.
Here's the video I used as a tutorial on how to do it. And seriously - it made this job SO much faster than it would have been without the Jig! :)
Ilie's Herb Garden
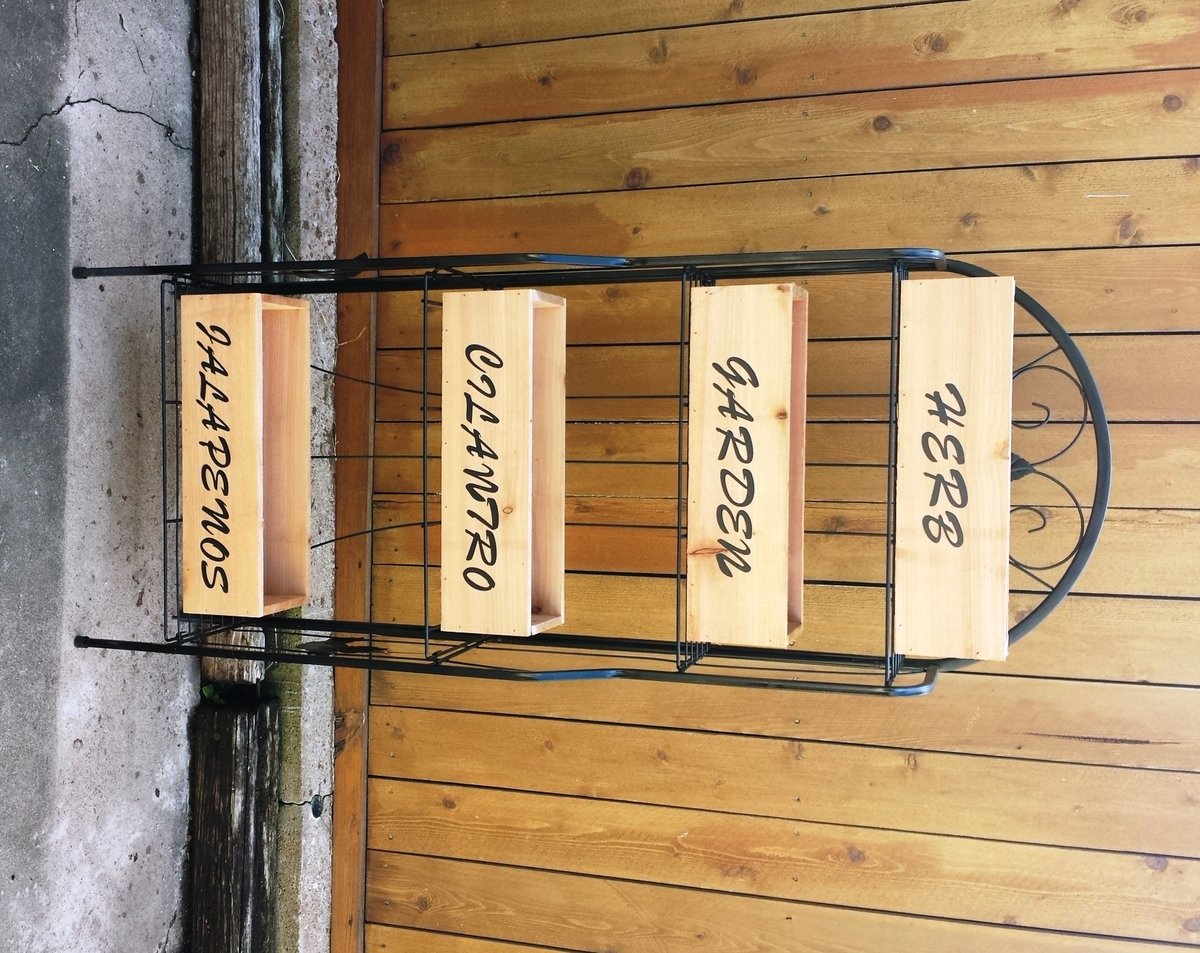
I made these super easy herb planters for my daughter. When I say easy I really mean super simple. I built 4 planters within 1 hour, that includes cutting the wood. I used all cedar pickets from Home Depot. The black rack was sitting under my patio collecting everyone's junk. I decided to use it to stack all the planters. I spruced it up with a little touch of black spray paint. The planters look awesome outside next to the elevated planter I also made. Thanks Ana!! You rock!! 
Estimated Cost
$10 for all 4 planters
Estimated Time Investment
An Hour or Two (0-2 Hours)
Recommended Skill Level
Beginner
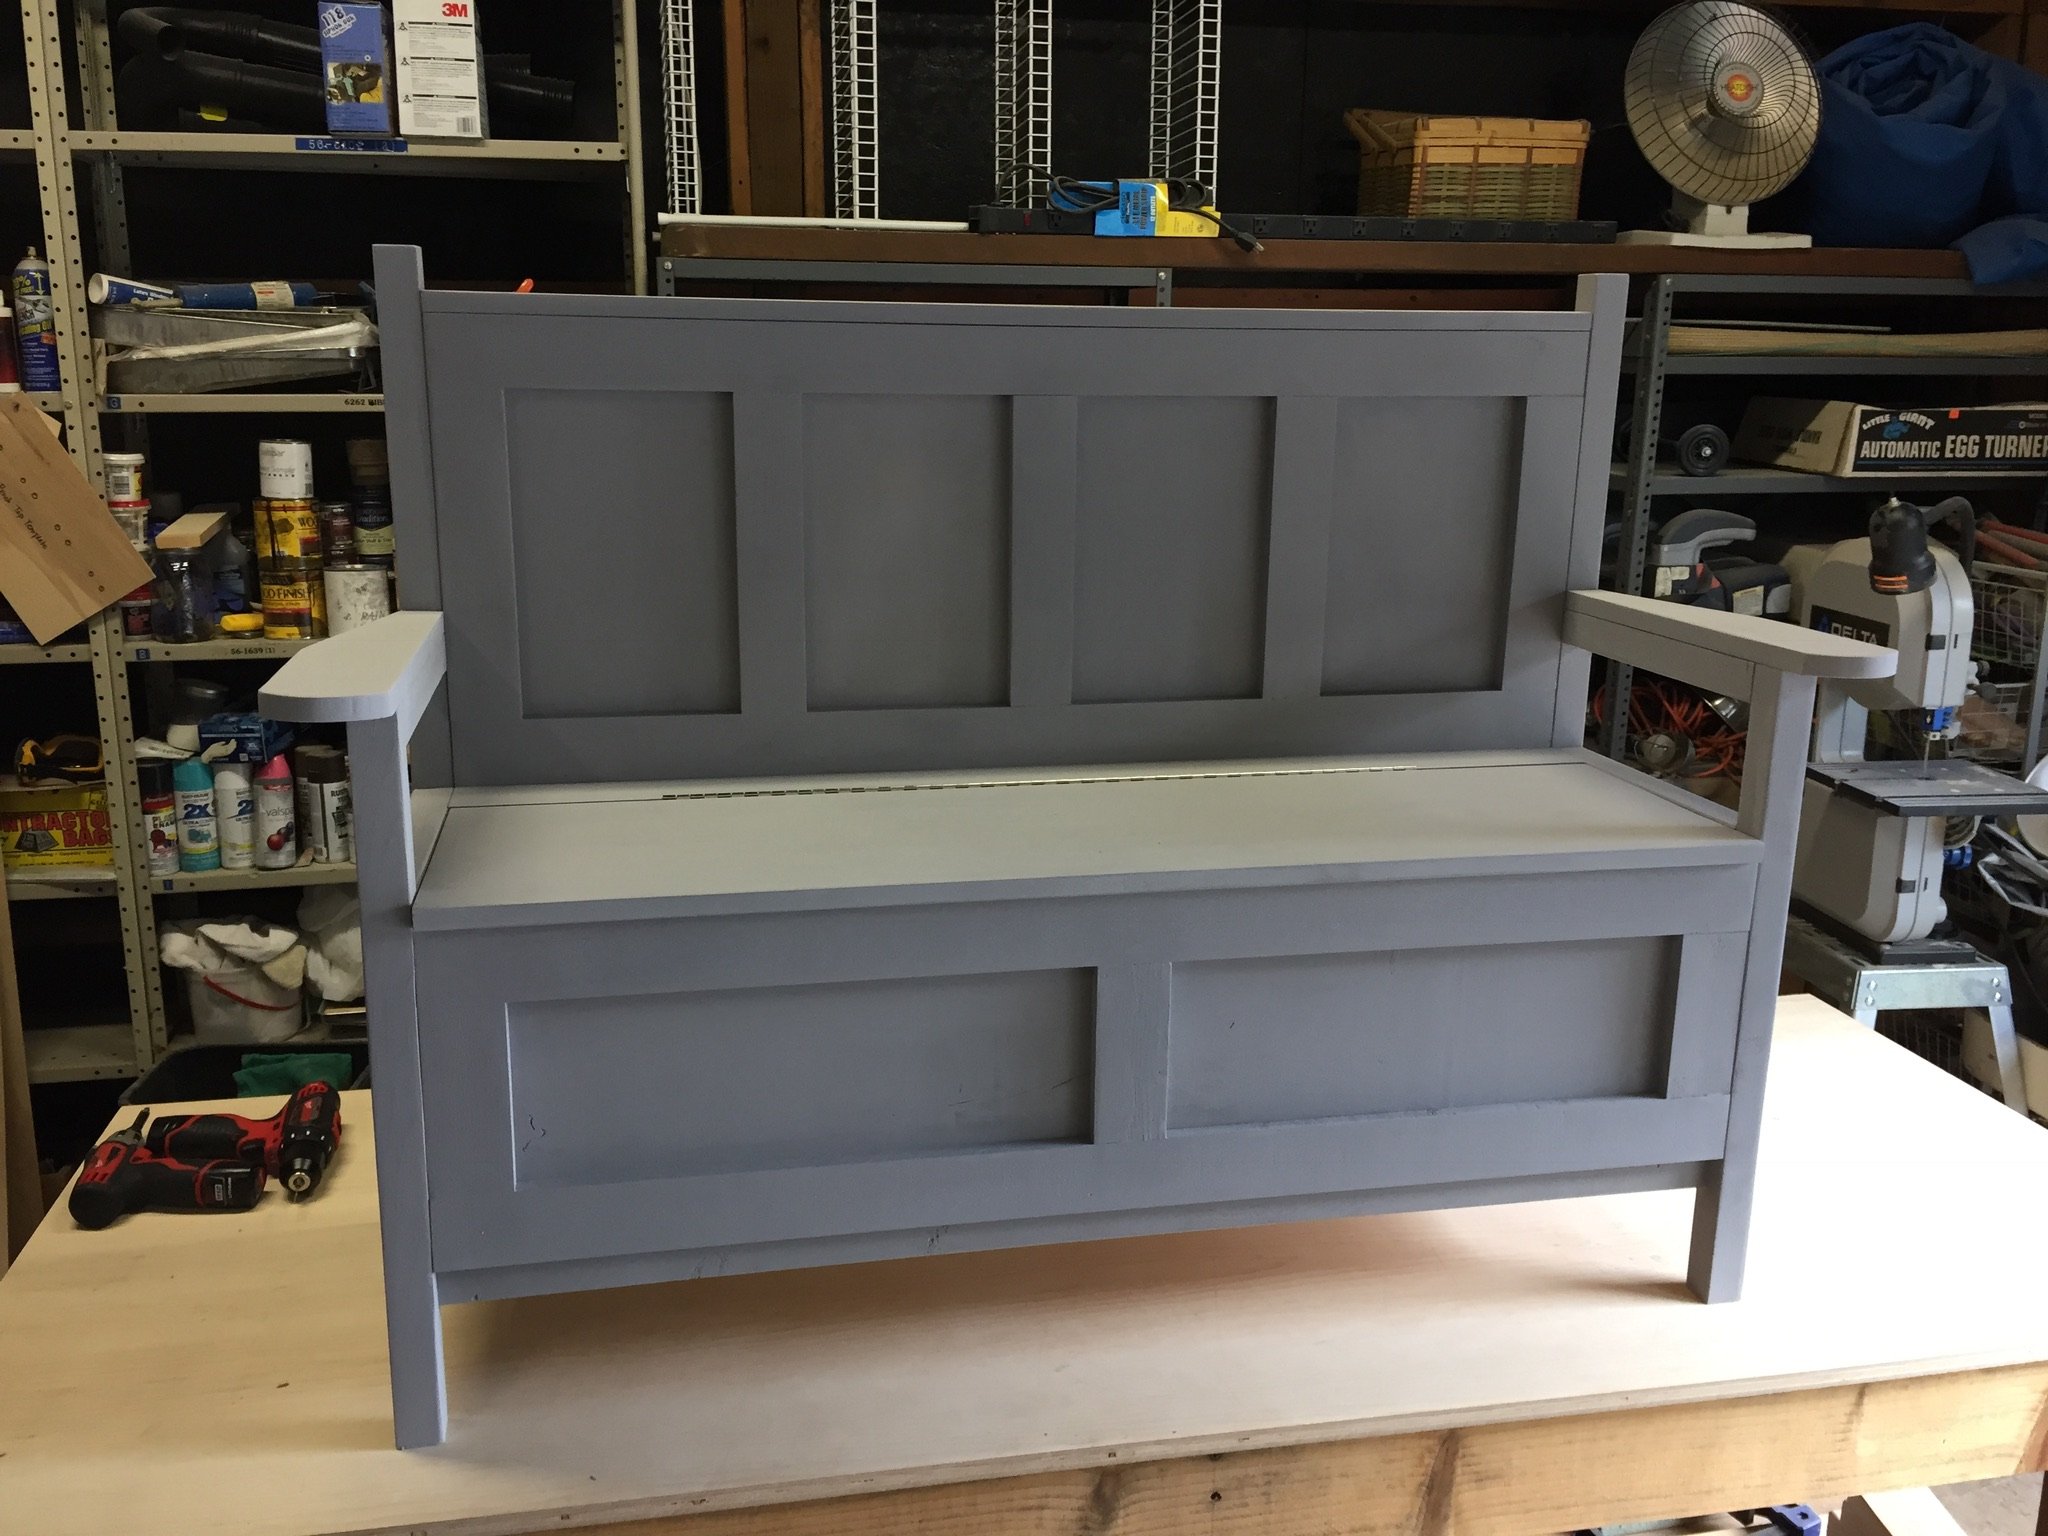
Farmhouse Style Toy Box / Blanket Chest
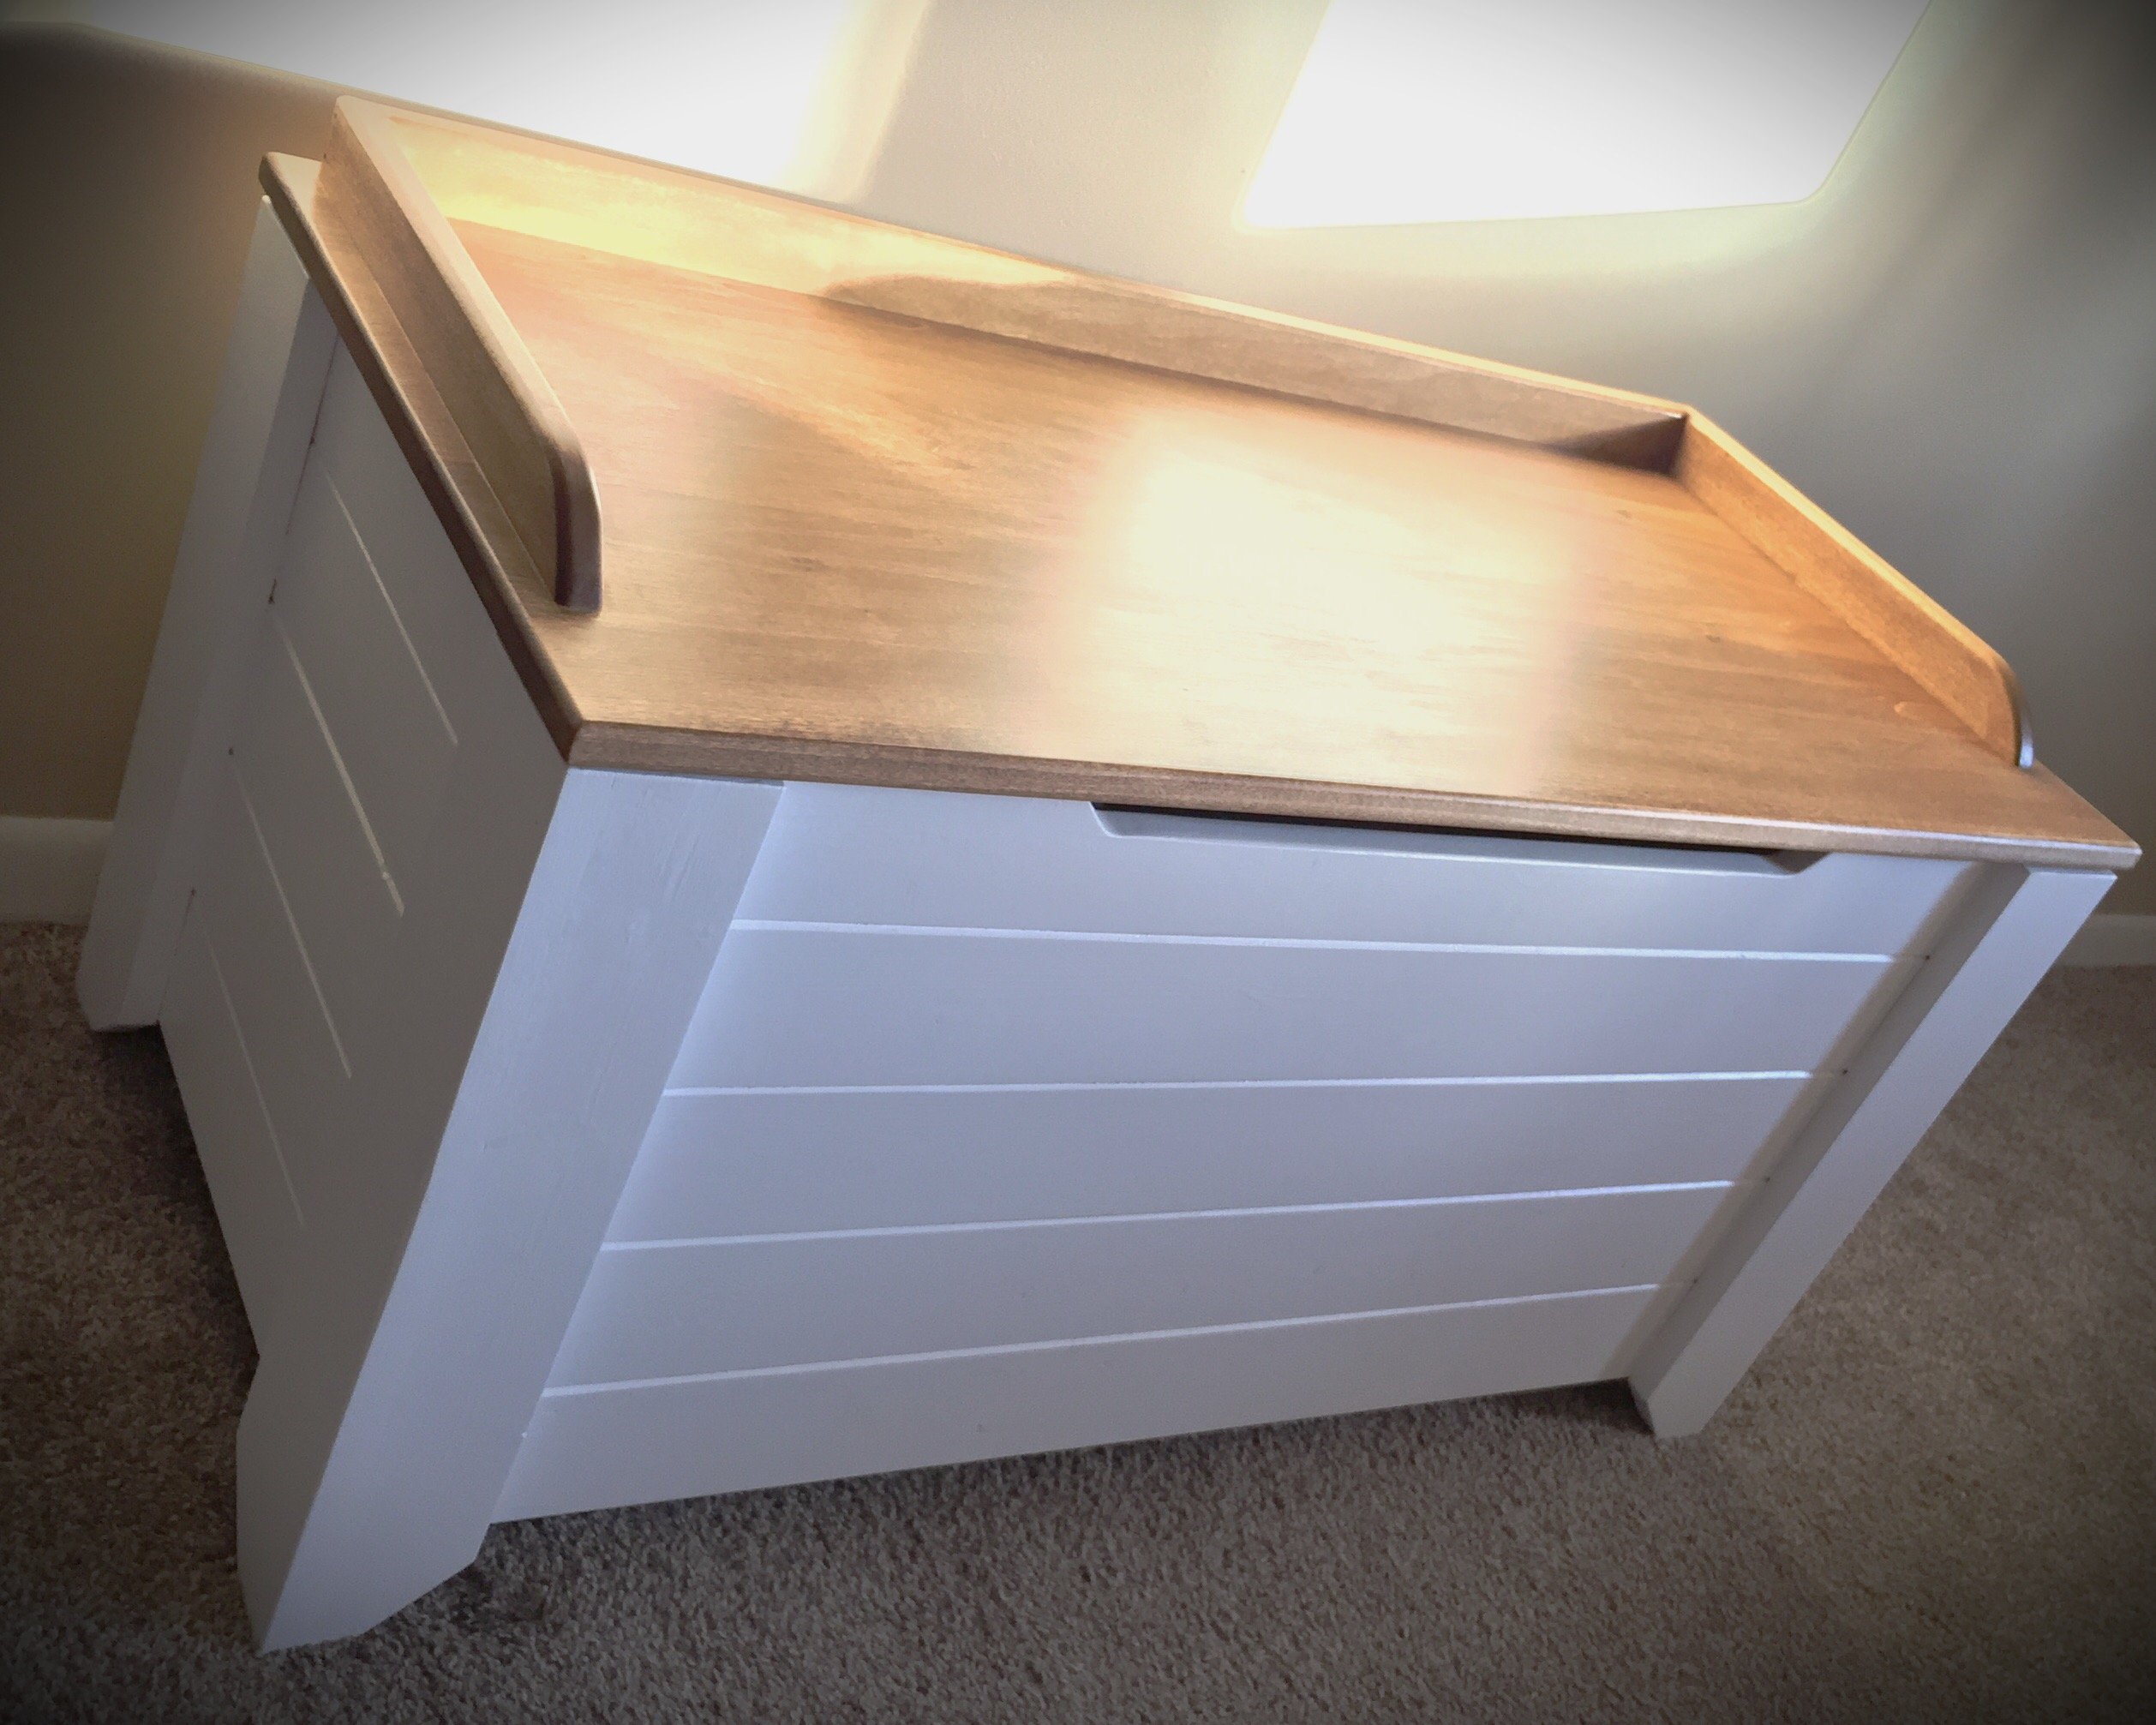
I built this for my daughter after Christmas sinse she had the living room covered in toys. The dimensions are 37" x 18" x 20"
Built from Plan(s)
Estimated Cost
$75
Estimated Time Investment
Weekend Project (10-20 Hours)
Finish Used
Watco Danish Oil - Medium Walnut (2 coats) with a light sanding between coats with 220 grit, I allowed 24 hours between each coat to dry. To protect the surface I used water based polyurathane matte finish (3 coats) with a light sanding - 400 grit.
Recommended Skill Level
Beginner
Comments
Tue, 01/09/2018 - 05:51
More details!
HI Anna,
Can you provide more pictures or instructions on how you assembled this toy box? i want to make one just like it!
Thanks!
Wed, 03/10/2021 - 16:31
Pronounced panel edges
Looking at the wall panels they look like the long edge of each panel has a small bevel cut on it. This gives each panel edge a more pronounced or well-defined edge? Is this true? Was it done with a router?
Hendrix desk
Built this desk for my parents to fit in their office space. It is made to look like the Hendrix desk except smaller. I sandwiched together 2 pieces of plywood to make the desktop thick and sturdy.
Estimated Cost
$85.00
Estimated Time Investment
Weekend Project (10-20 Hours)
Finish Used
Minwax Golden oak on the top and Sherwin Williams paint for the legs.
Recommended Skill Level
Intermediate
Comments
pitaters23
Mon, 10/26/2020 - 14:27
Xx
Xx
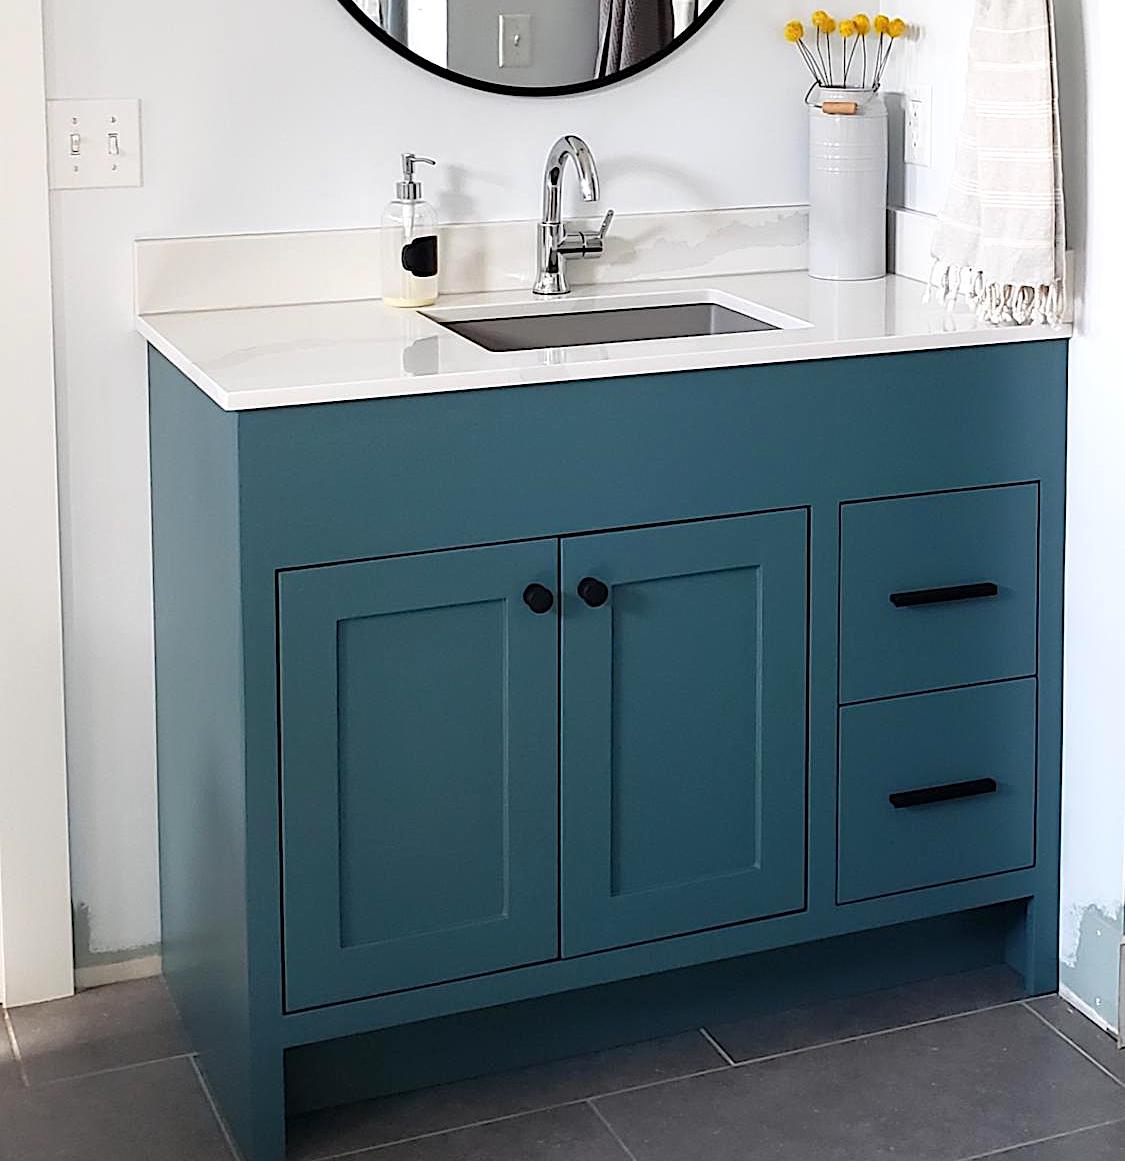
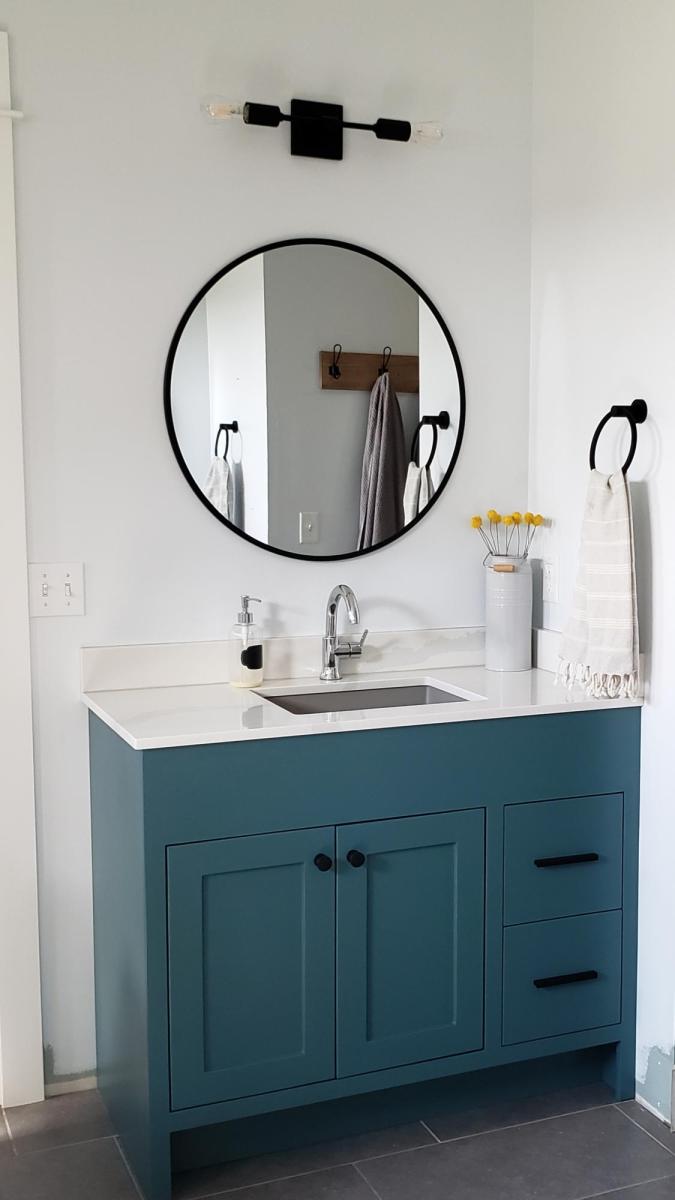
lsduran
Wed, 04/21/2021 - 10:01
This is exactly the size I…
This is exactly the size I need to build, potentially with the same plumbing requirements. Would you mind sharing your plans, please?
mfast10
Tue, 06/13/2023 - 18:29
Exact vanity
This is the exact size and style I am looking for as well. Would you mind sharing the plans with me as well?