Community Brag Posts

Christmas Tree Shelf

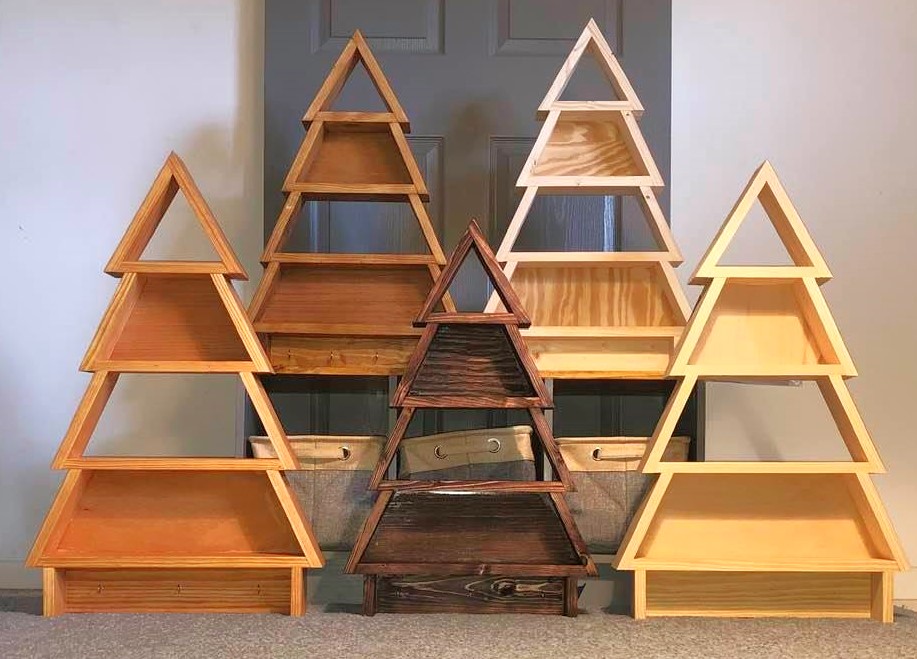
After building myself a Christmas Tree shelf for 2019, friends and family wanted me to build them one for 2020. Three people wanted a smaller tree so I scaled down the plans and used 1x4's ripped to 3 inches. I also included cup hooks (3 or 4) and an aluminum french cleat hanger I found on Amazon for about $5 each when you buy three.

Built from Plan(s)
Estimated Cost
$10-$15
Estimated Time Investment
Afternoon Project (3-6 Hours)
Finish Used
Various stains. Including mahogany, pecan, oak, special walnut, and white. Three clients wanted theirs unfinished.
For a top coat I used spray lacquer on one of white-washed trees and clear Krylon on another. No top coat was applied to the other trees.
Recommended Skill Level
Beginner

Comments

Seasonal And Holiday

Adirondack Chairs

Submitted by Tbecker on Fri, 02/17/2017 - 18:06

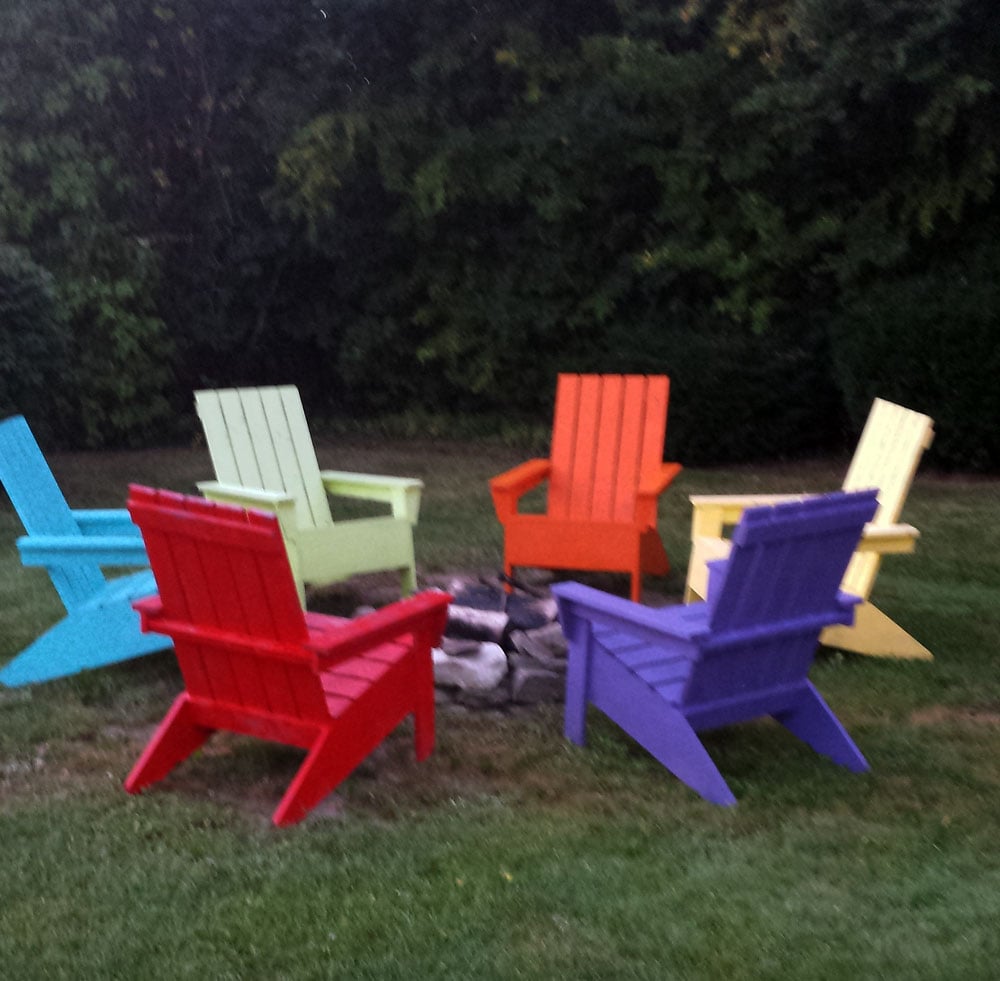
I completed these chairs about 3yrs ago.  It was a great project and I learned a lot.  I really appreciate this site and have made a sofa and 2 benches as well.  Thank you Ana for the site and I wish HGTV or another station would pick up your DIY show!  

Built from Plan(s)
Estimated Cost
$37.00 each including paint
Estimated Time Investment
Week Long Project (20 Hours or More)
Finish Used
Outdoor Rustoleum
Recommended Skill Level
Beginner
Seasonal And Holiday

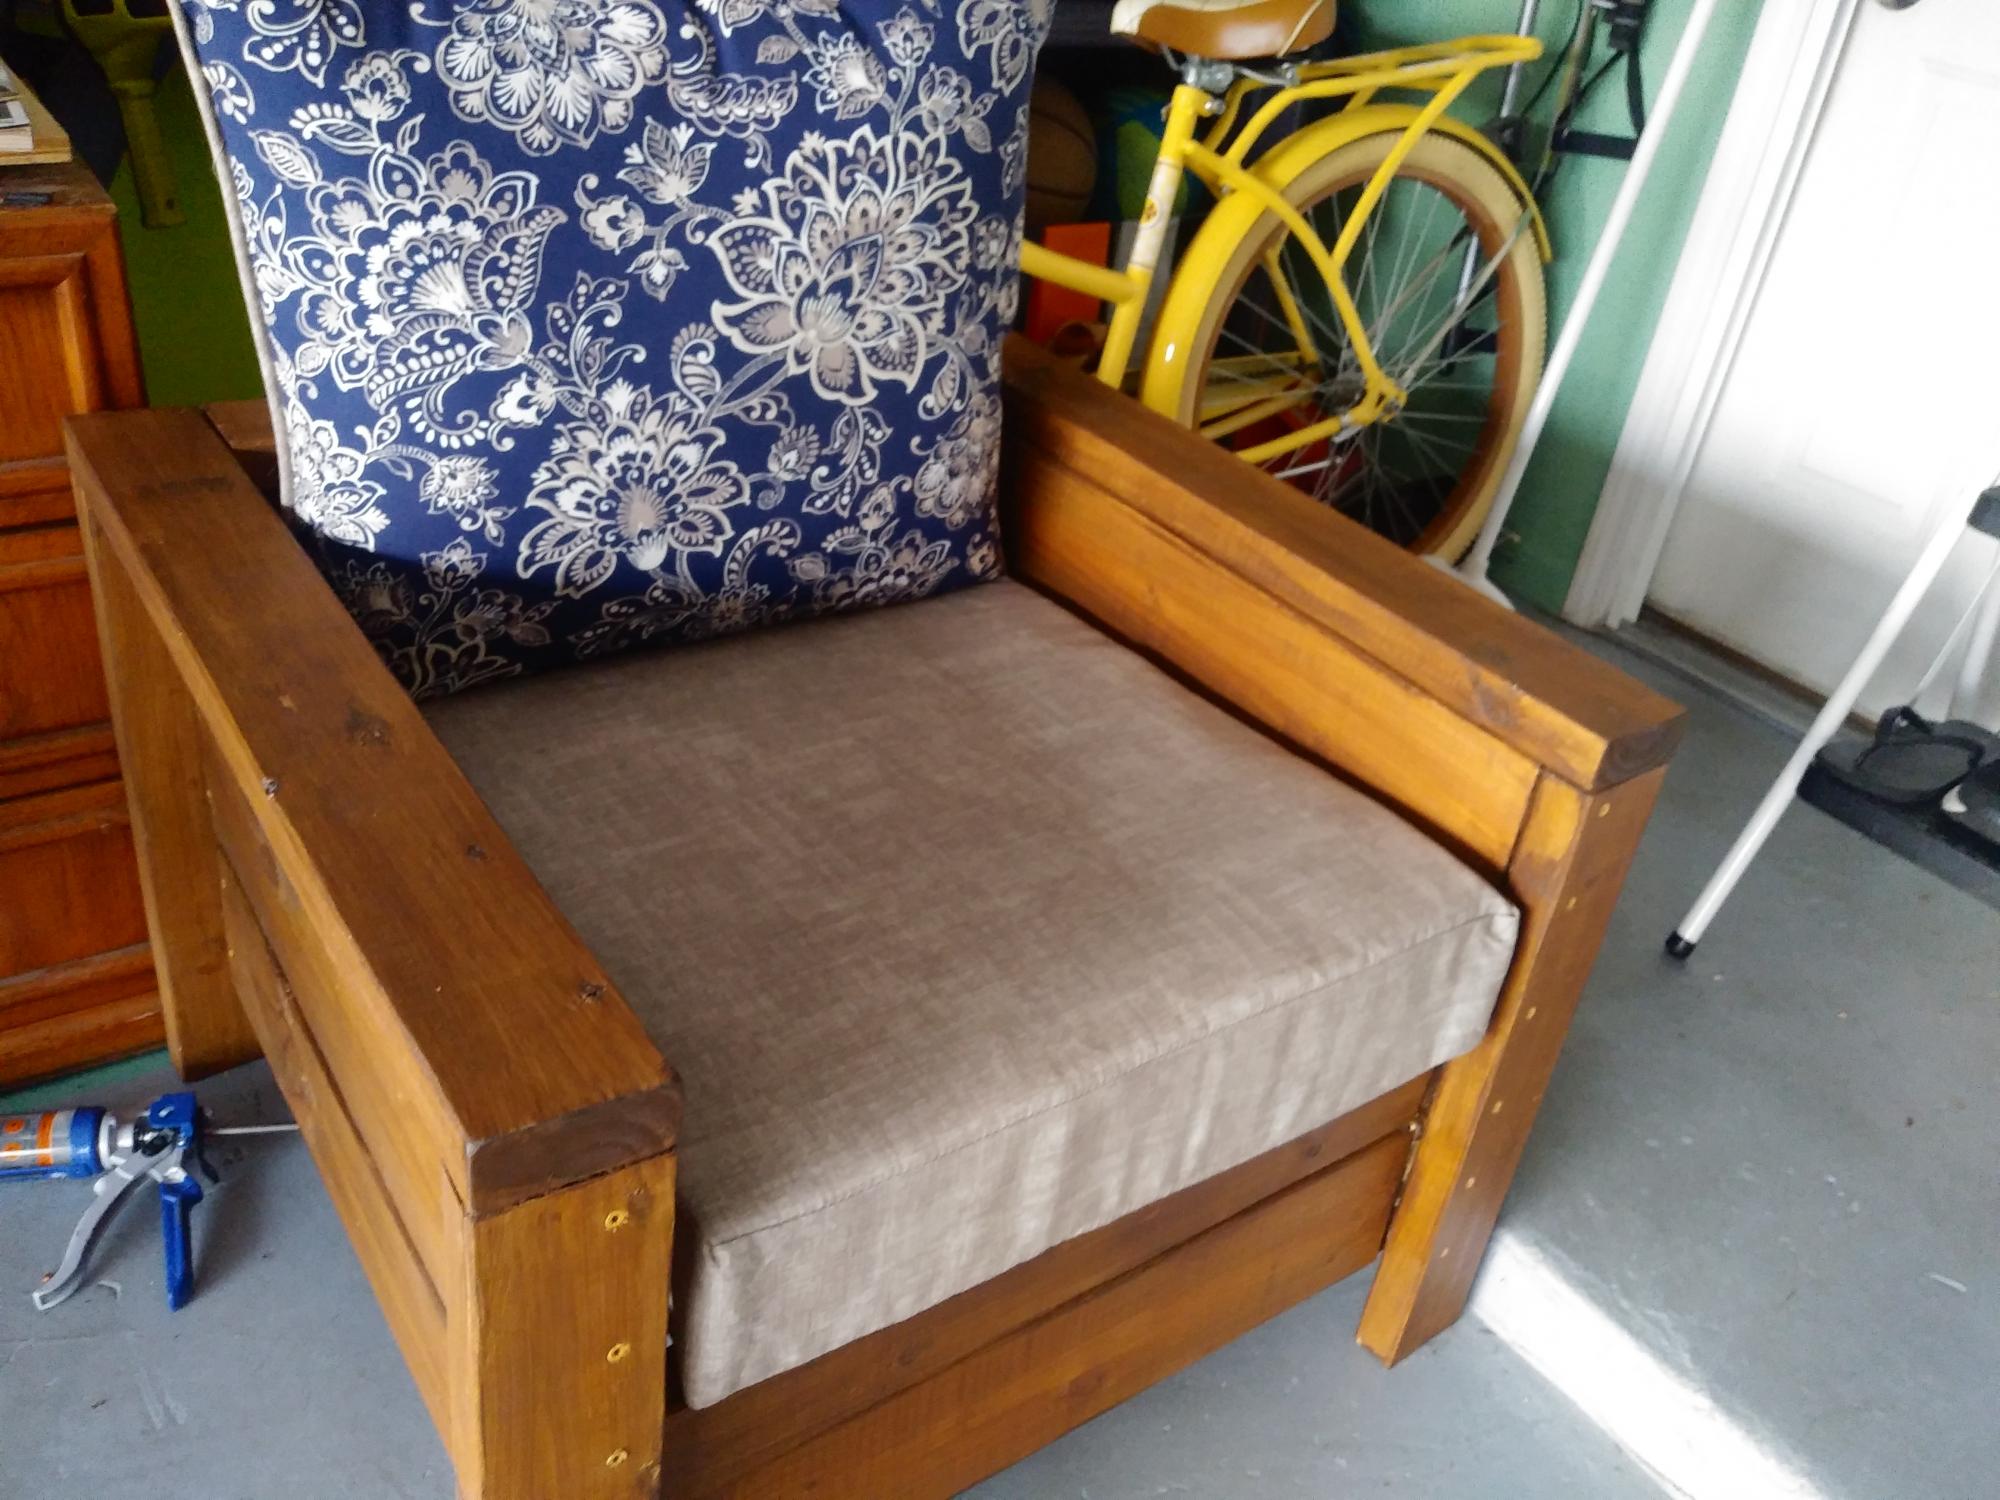
Modern Outdoor Chairs (modified for 24in cushions)

Submitted by Anonymous (not verified) on Wed, 11/25/2020 - 18:25

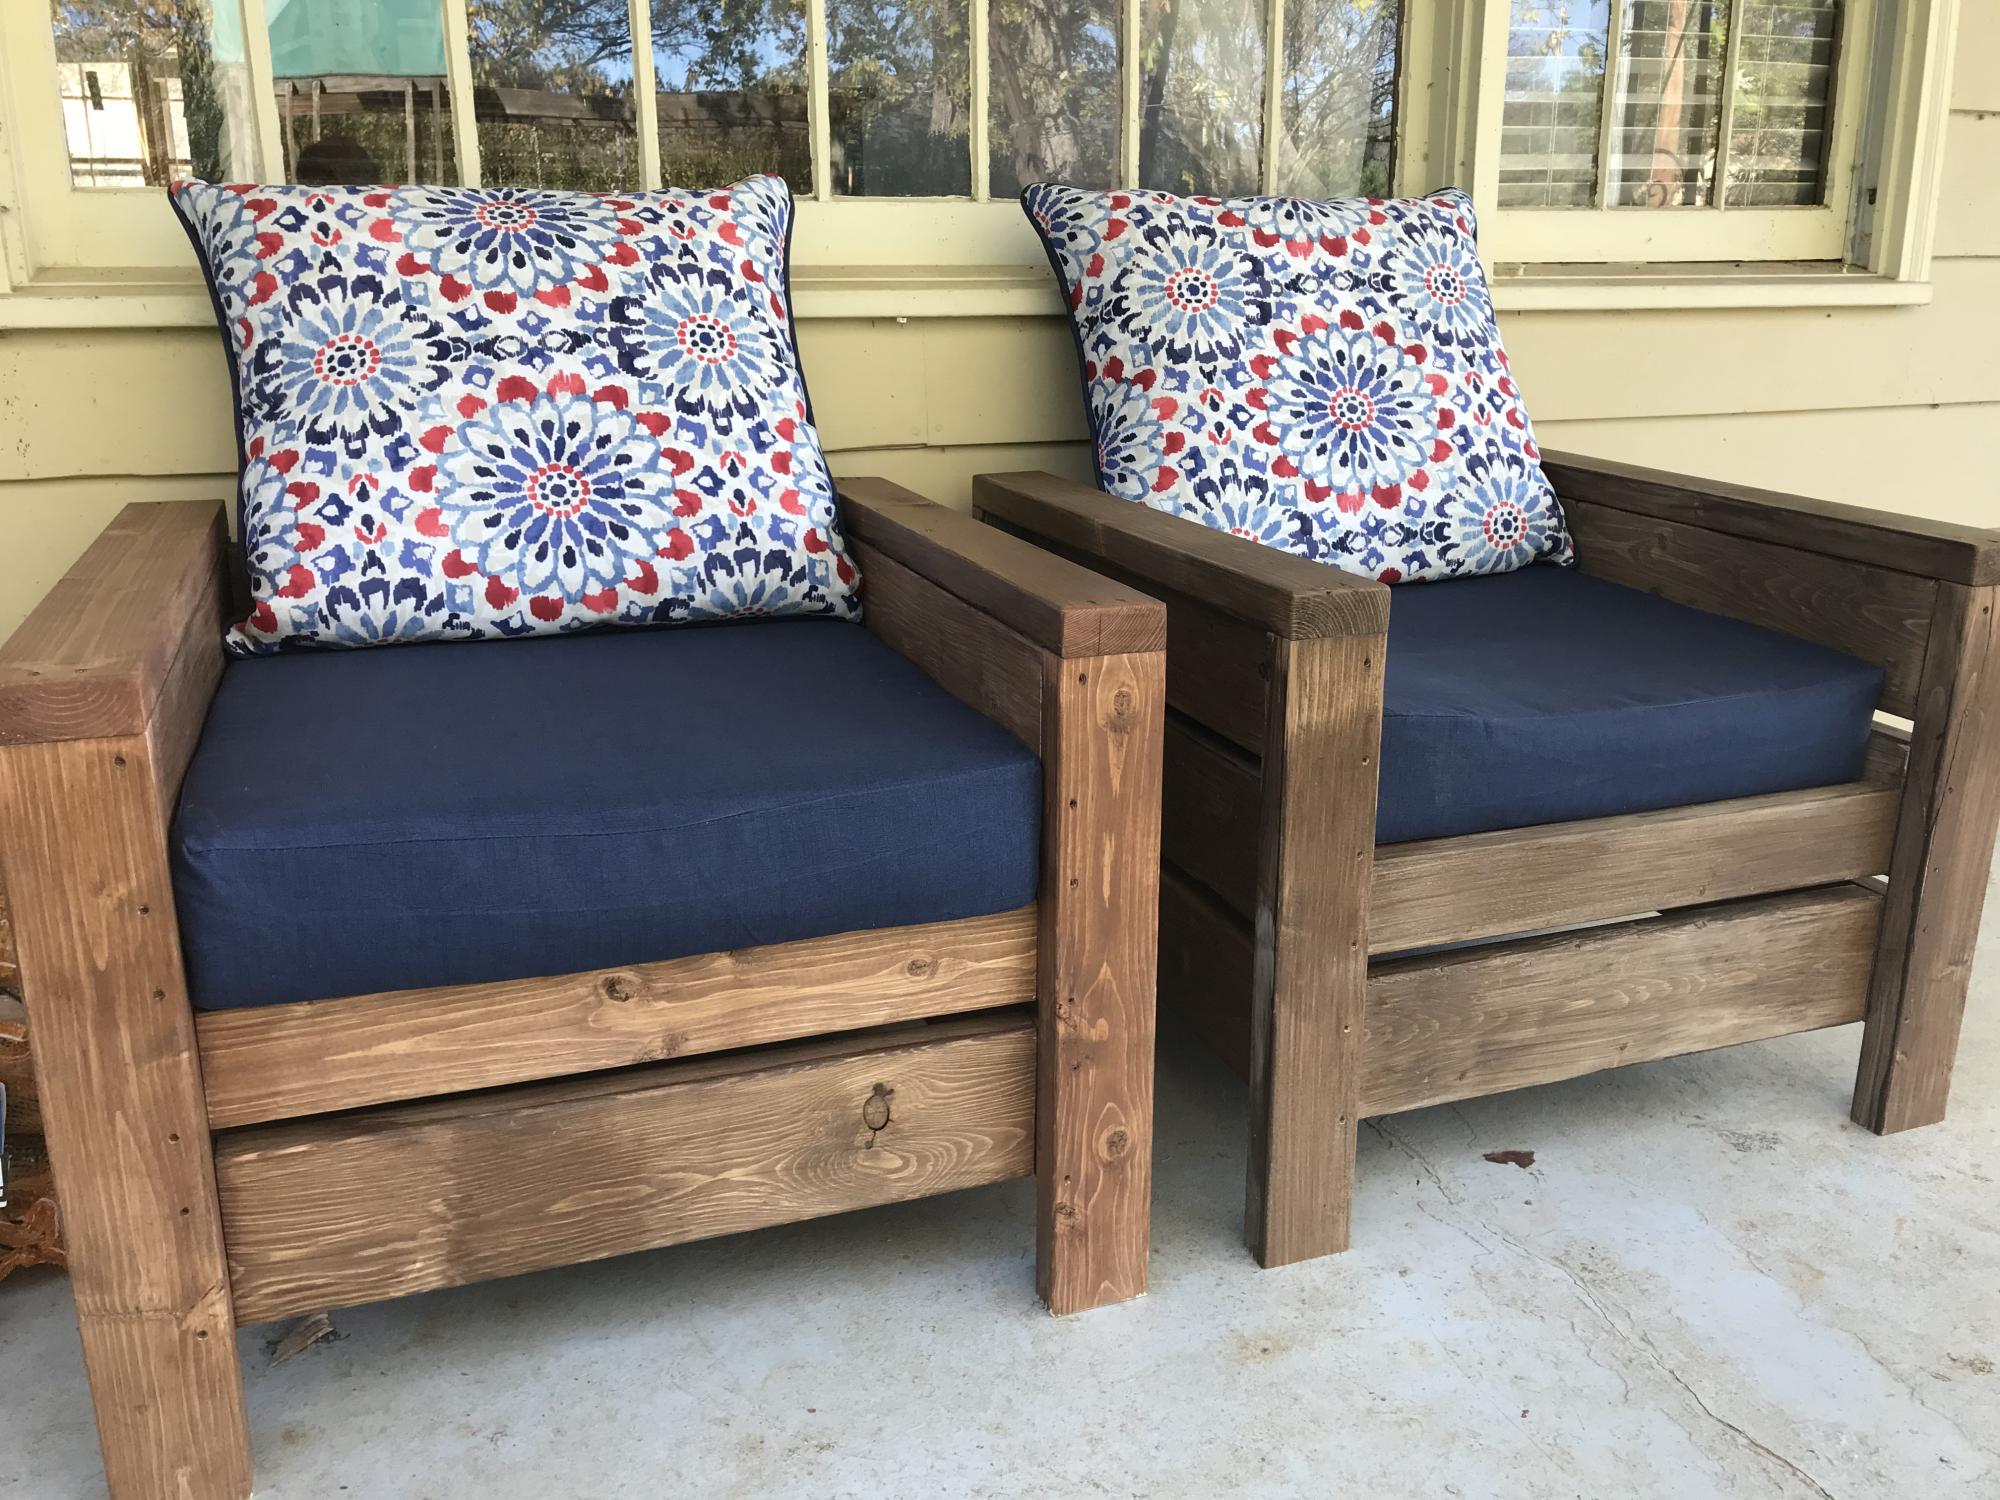
I built two of Ana's "Modern Outdoor Chairs" and adjusted the plans to accommodate 24" in cushions. We're pleased with how they turned out and have gotten great use out of them. Thanks for the plans, Ana!

Estimated Cost
~$60 per chair (not including the cushions)
Estimated Time Investment
Weekend Project (10-20 Hours)
Finish Used
I used the exact finish that Ana recommended.
Recommended Skill Level
Starter Project
Seasonal And Holiday

Large Wood Pet Kennel End Table

Submitted by Anonymous (not verified) on Thu, 02/23/2017 - 18:27

I used the plans provided. I made a small change to the windows and made the bigger. 

Built from Plan(s)
Estimated Cost
$140
Estimated Time Investment
Weekend Project (10-20 Hours)
Finish Used
Water based stain with water based sealer.
Recommended Skill Level
Beginner

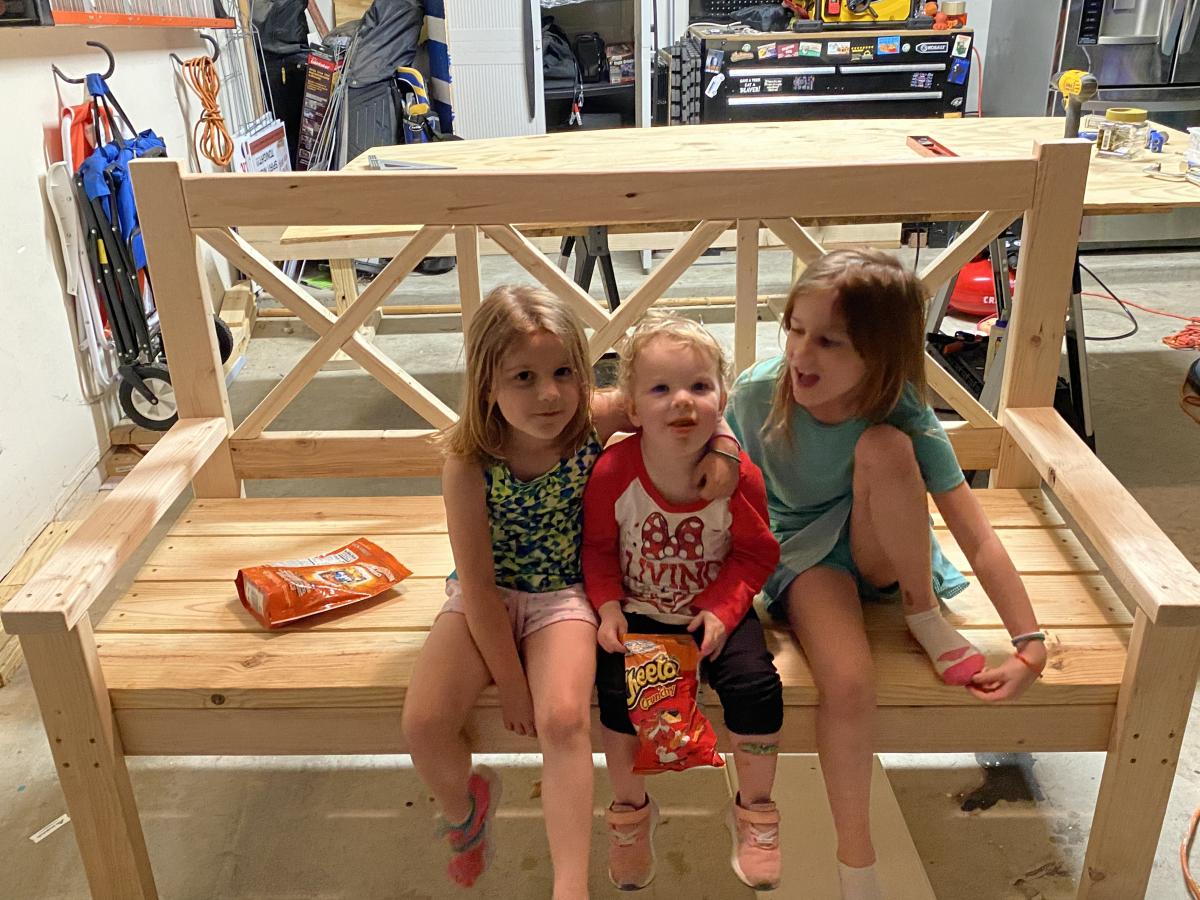
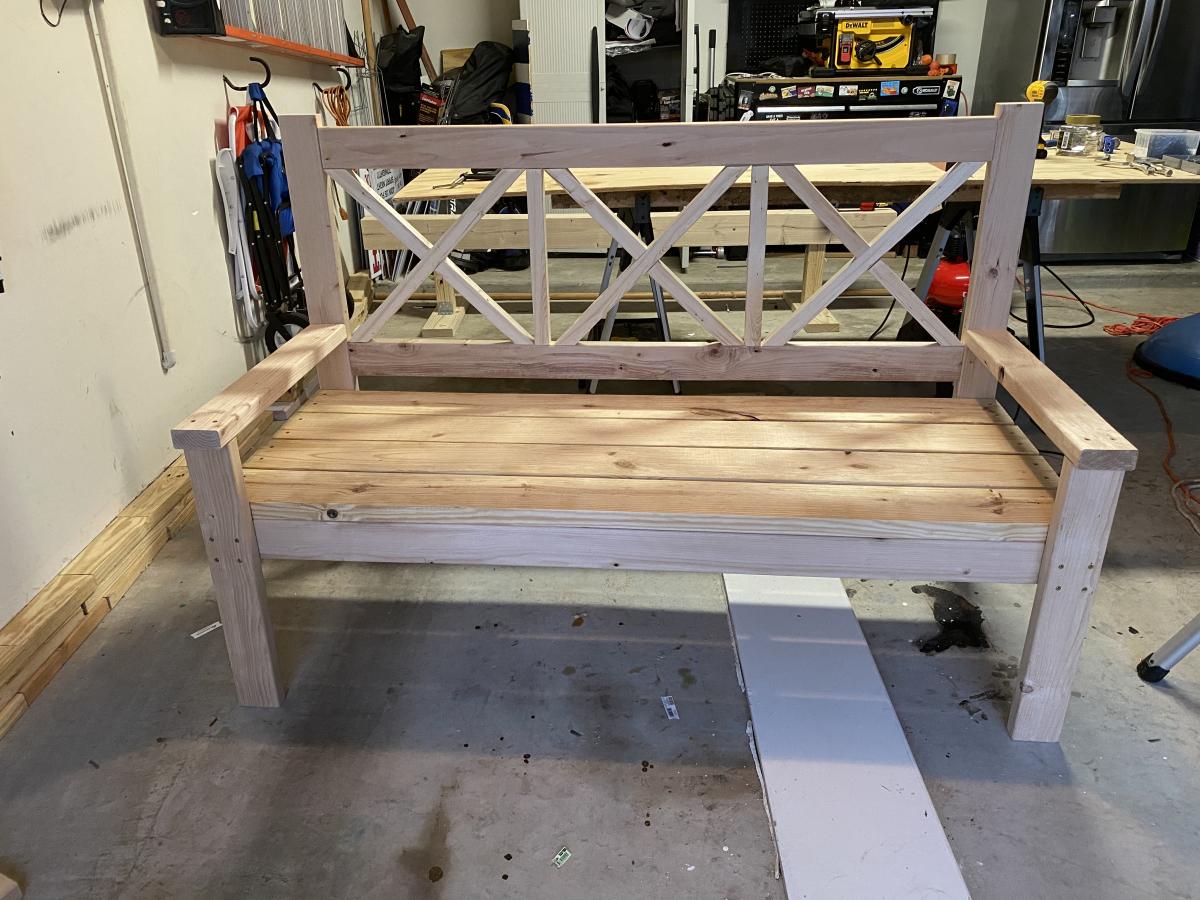
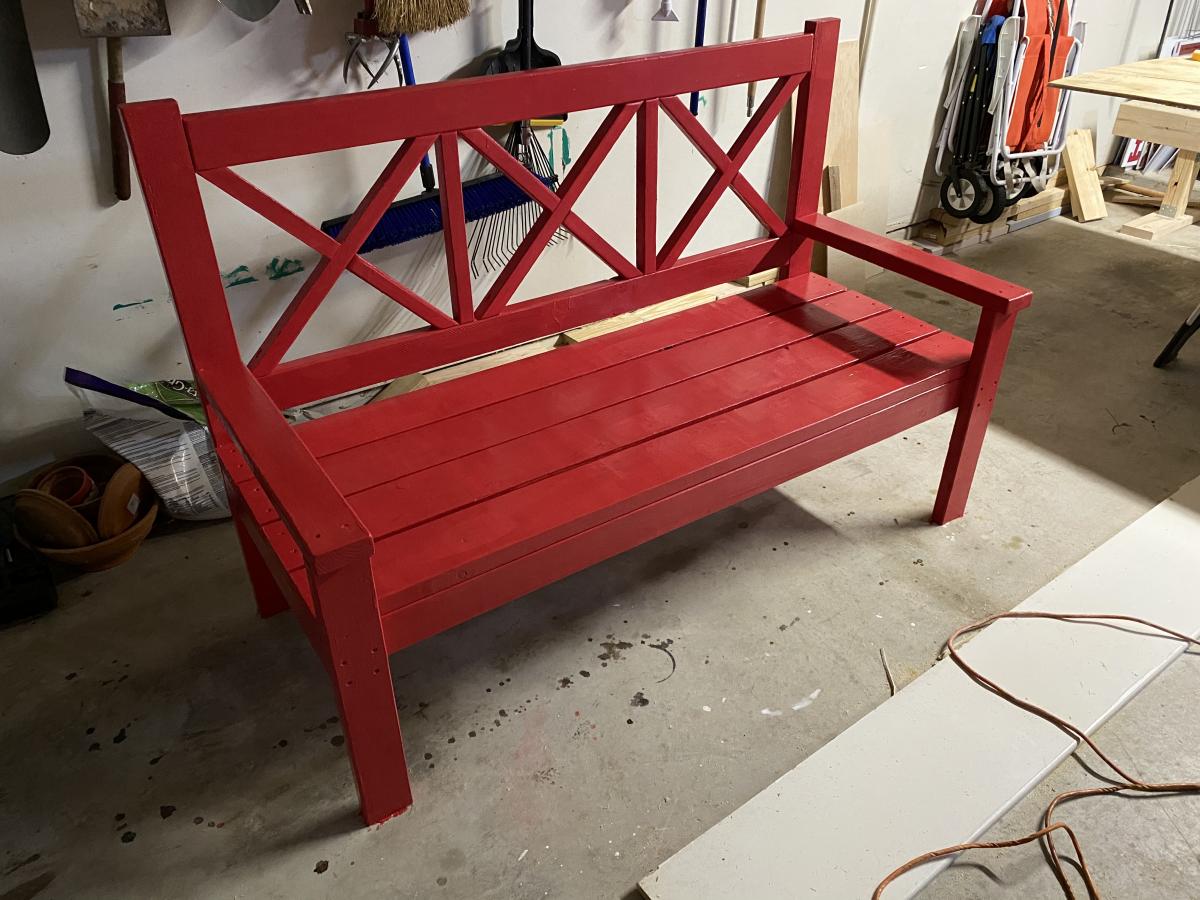
Grammy’s bench

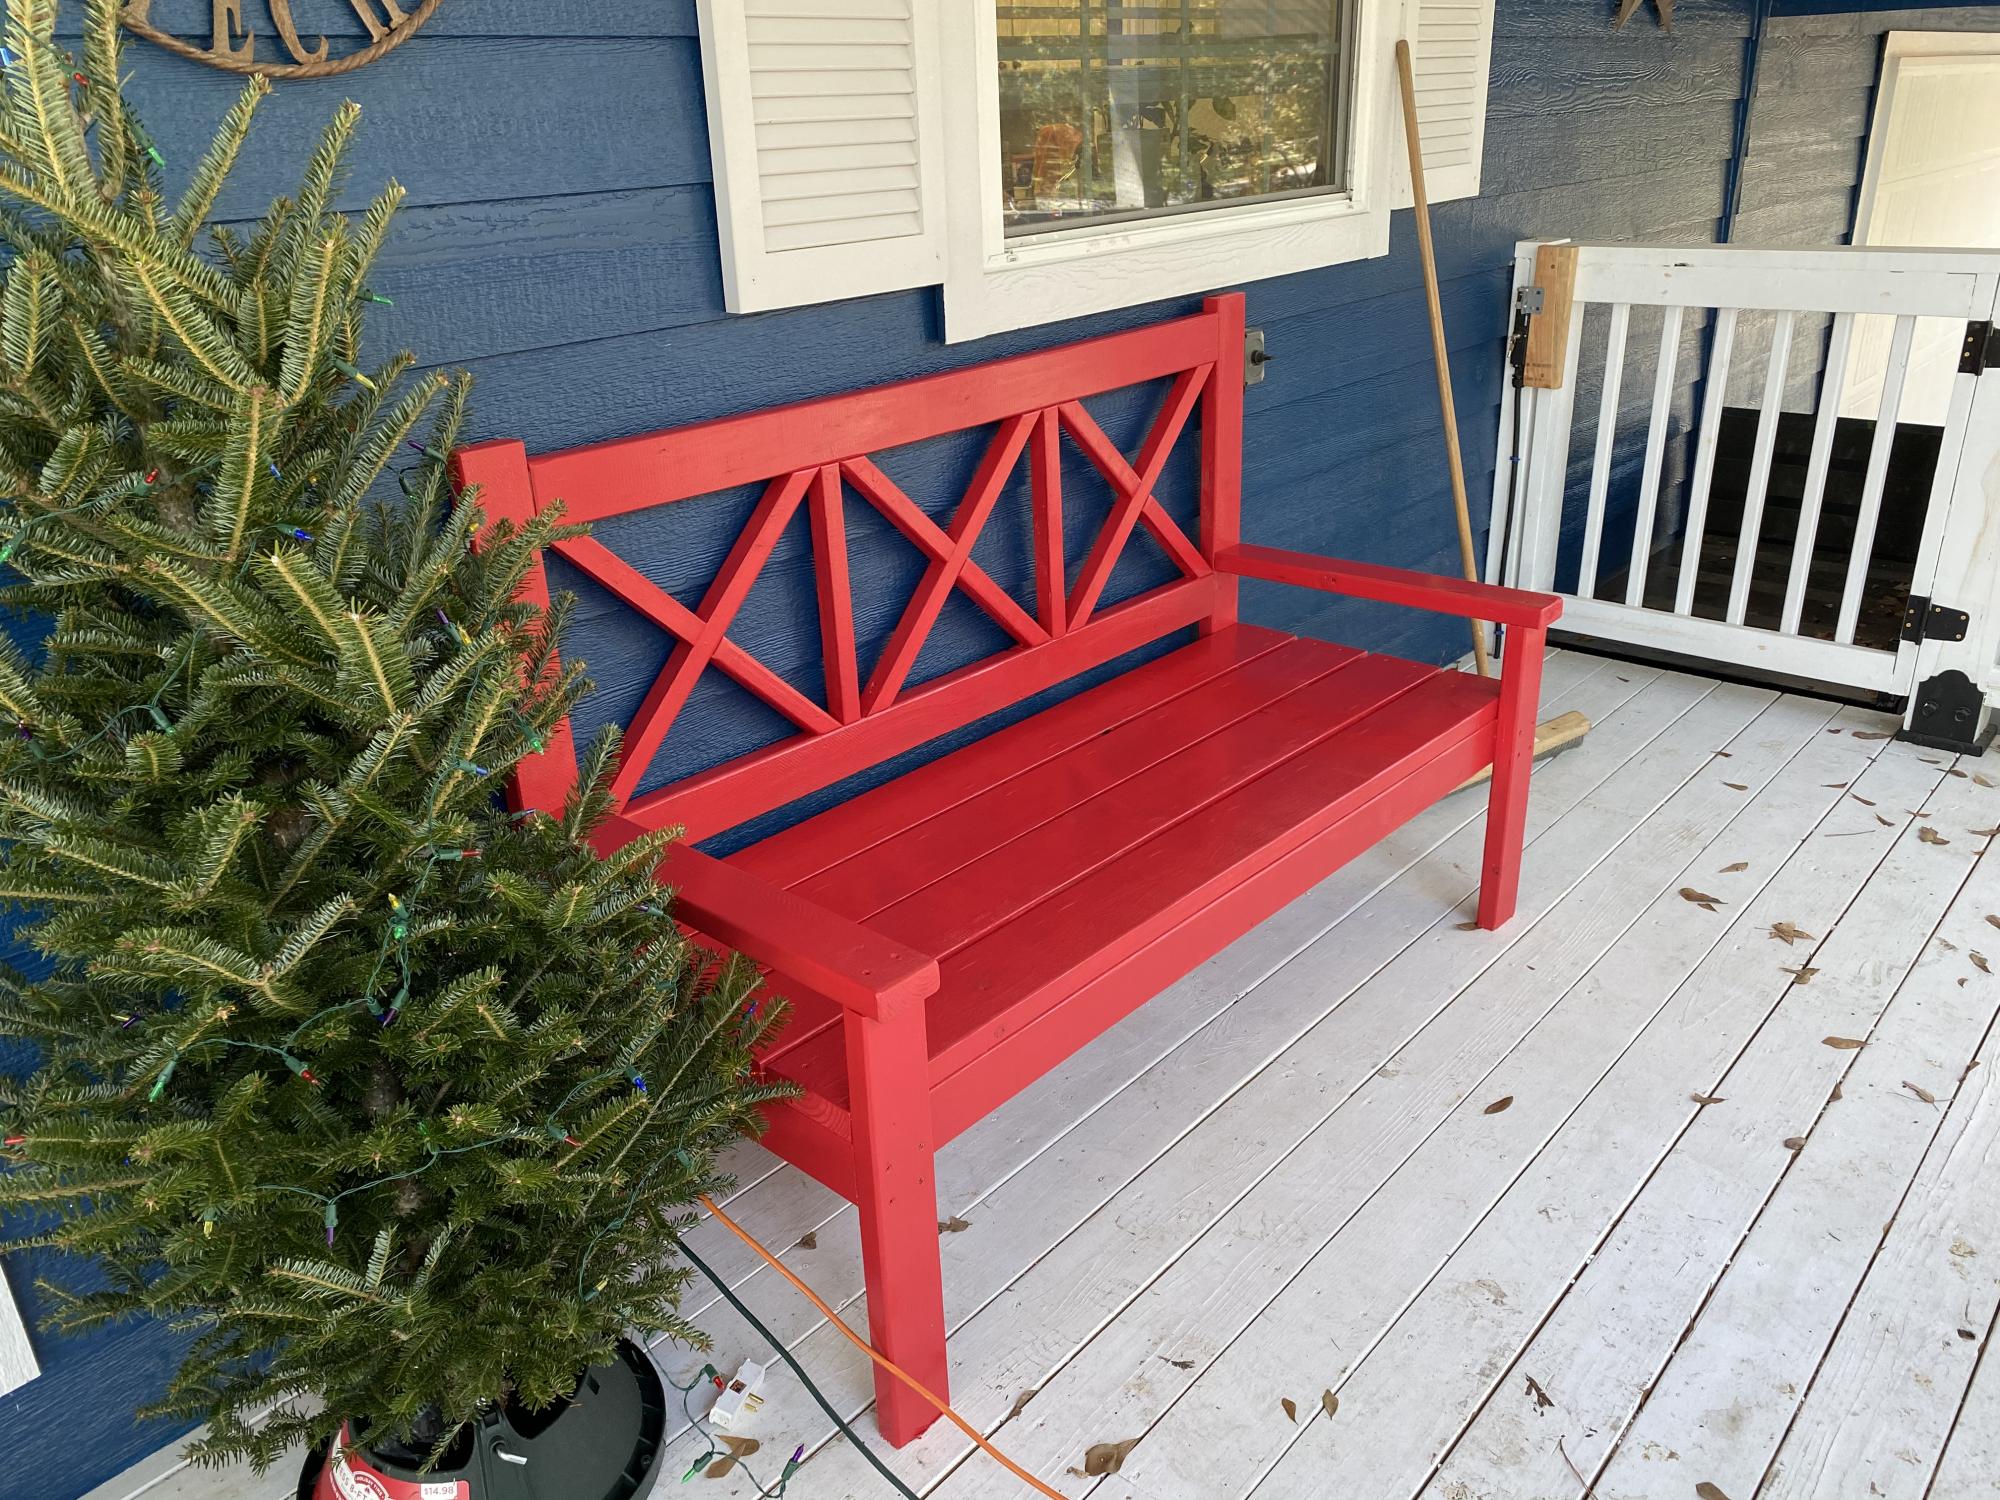
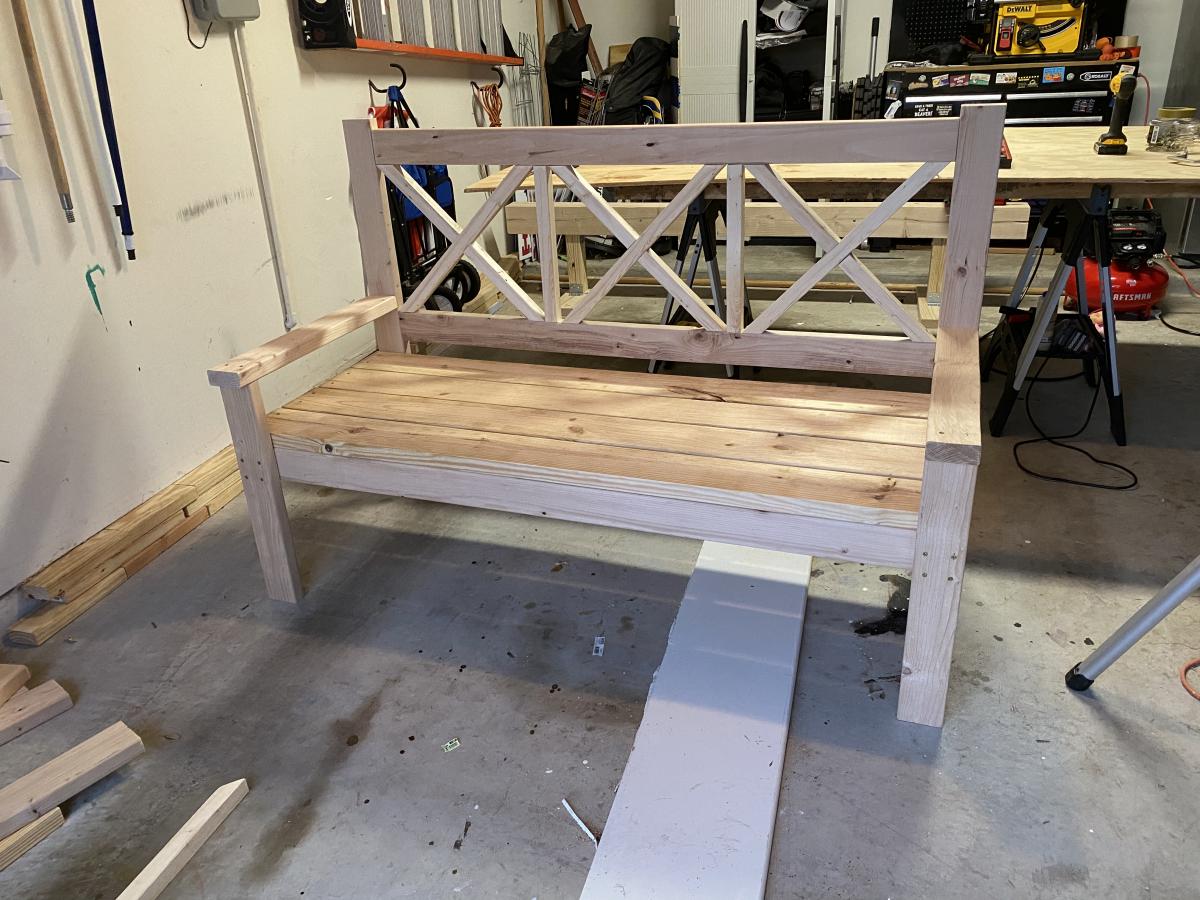
Porch bench for my parents’ new house.

Estimated Cost
$100
Estimated Time Investment
Day Project (6-9 Hours)
Finish Used
Exterior Valspar - Bright Red
Recommended Skill Level
Intermediate

Comments

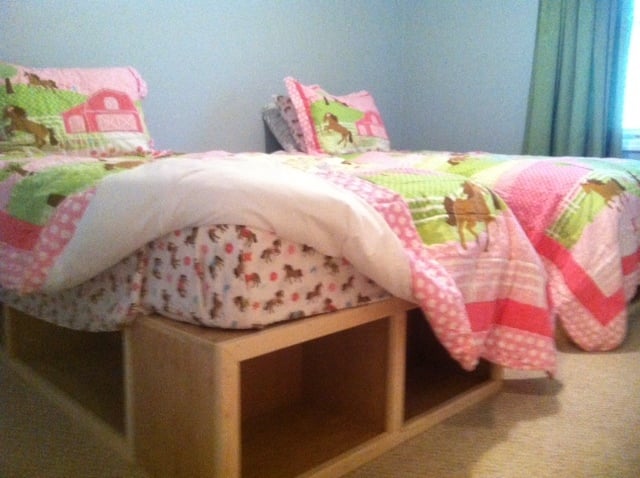
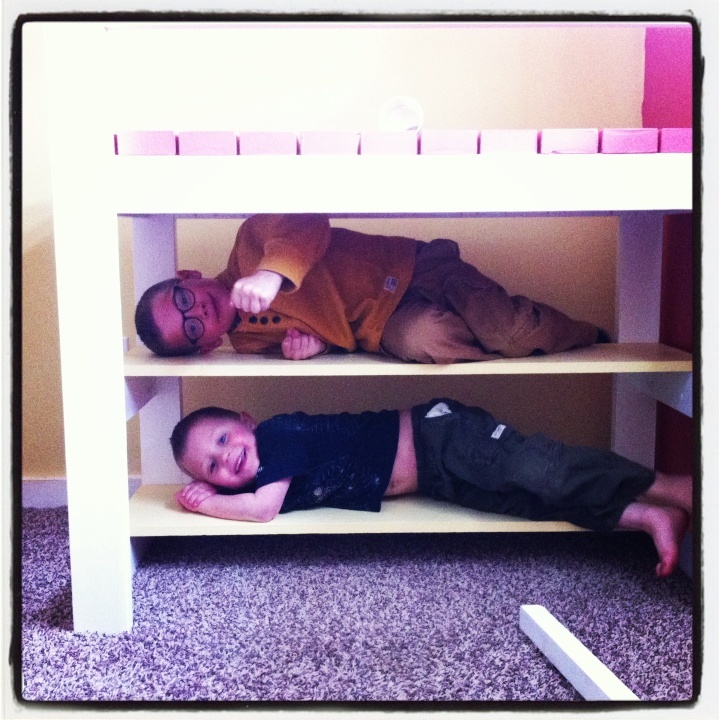
Beds for my girls

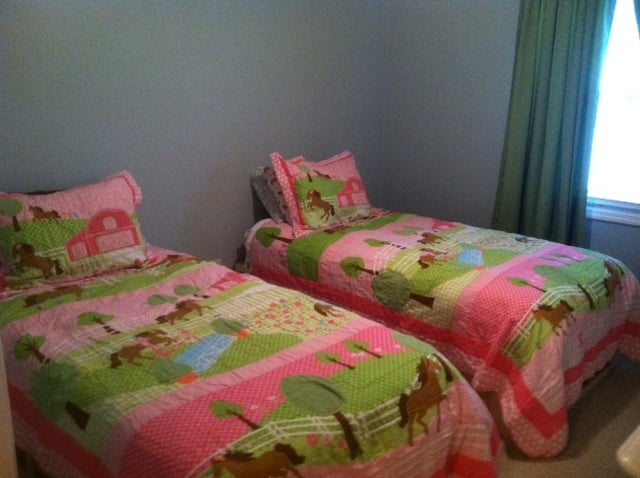
Rather than buying beds for two of our daughters, I wanted to take the opportunity to build them. I really had a great time doing. I used the plans from the Captains Storage beds, but modified it a little.

We ripped two 3/4 inch finished ply into 12in pieces.
That gave us all the sides, ends, and dividers.
The platforms are 12x12 3/4x
The ends are the same only sorter.

Rather than using slats for the middle support I just used the remain ply.
We finished the front with 6ft sections of 1x2 inch furring strips. A good sanding and clean up, and we are good to go!

Thanks for posting the plans! We really enjoyed building the beds and our girls love them!

Built from Plan(s)
Estimated Time Investment
Weekend Project (10-20 Hours)
Finish Used
unfinished wood
Recommended Skill Level
Beginner

Comments

sulu293

Fri, 09/20/2013 - 13:14

LOVE this! was looking for something other than the slats that would TRULY hold my polynesian kids, thank you for sharing! :-)

Patio Seating

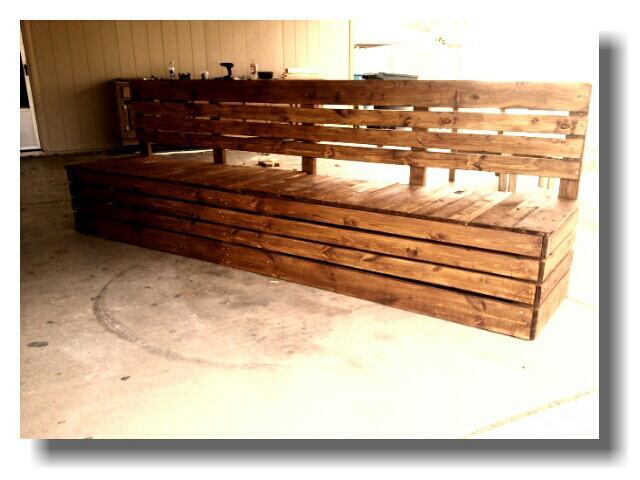
Patio Seating I decided on.. Went with the same concept i did as before with the pallet storage table bench, just on a larger scale. Added the back and complete.. Probably should of done 6 supports for the back since its a solid 10 foot bench. Its completely stable but most defiantly would recommend 6 vs 5. I did do the lid in 5 foot sections to make easier for taking on and off.

Estimated Cost
80.00
Estimated Time Investment
Weekend Project (10-20 Hours)
Finish Used
stain
Recommended Skill Level
Starter Project

AT & T Park Bed

Submitted by Auntie LAD on Tue, 02/26/2013 - 08:07

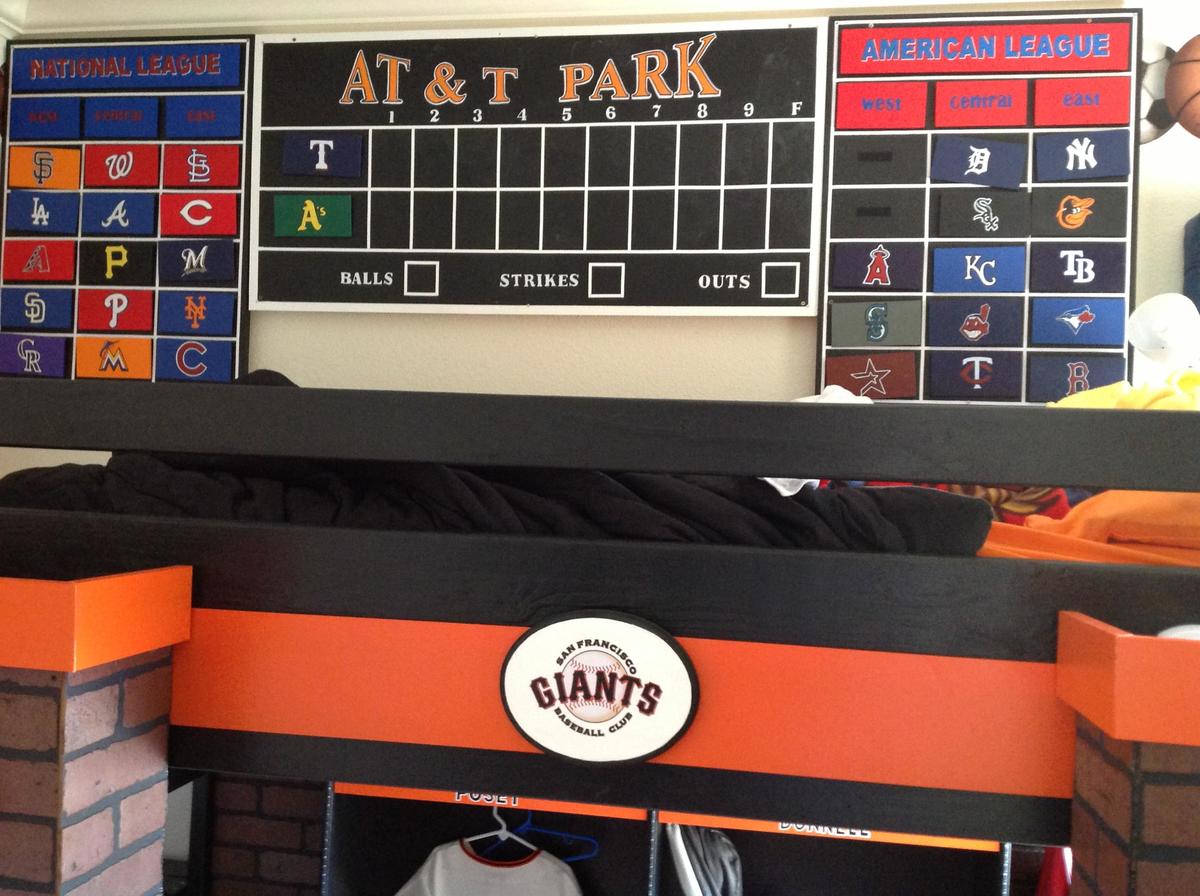
My 7 year old nephew, Jack loves the San Francisco Giants, so my brother and I decided to create an AT & T Park bed using Ana's Camp Loft Bed plans as a guide. I started with the scoreboard to hang above the bed. The teams are all hand painted and hung with Velcro so Jack can arrange the teams according to their current league standings. He can also decide who he wants to play and change the teams on the actual scoreboard, which is painted with chalkboard paint.

The bed was created using Ana's plans. We added brick facade columns to make it look more like AT & T Park. The columns have shelves in the back built in for storage. I found some great Giants stickers and added them as well.

Under the bed, I built a locker using Ana's Small Locker Cabinet plans for Jack to hang and store all of his athletic gear.

Estimated Time Investment
Week Long Project (20 Hours or More)
Recommended Skill Level
Intermediate

Comments

heatherfabris

Sun, 01/26/2014 - 12:04

Wow, this bed is fantastic. My 4 year old son saw this picture and asked if I could make him one.

I was wondering if you would share your plans with the modifications making it with the bookshelves.

Thanks,
Heather

sftball09

Wed, 11/19/2014 - 20:15

Can you tell me what the scoreboard is made out of? I know chalkboard paint is used but what did you paint on? Wood, corkboard?

Outdoor Toys Contained

Submitted by lmflerlage on Mon, 02/22/2021 - 12:32

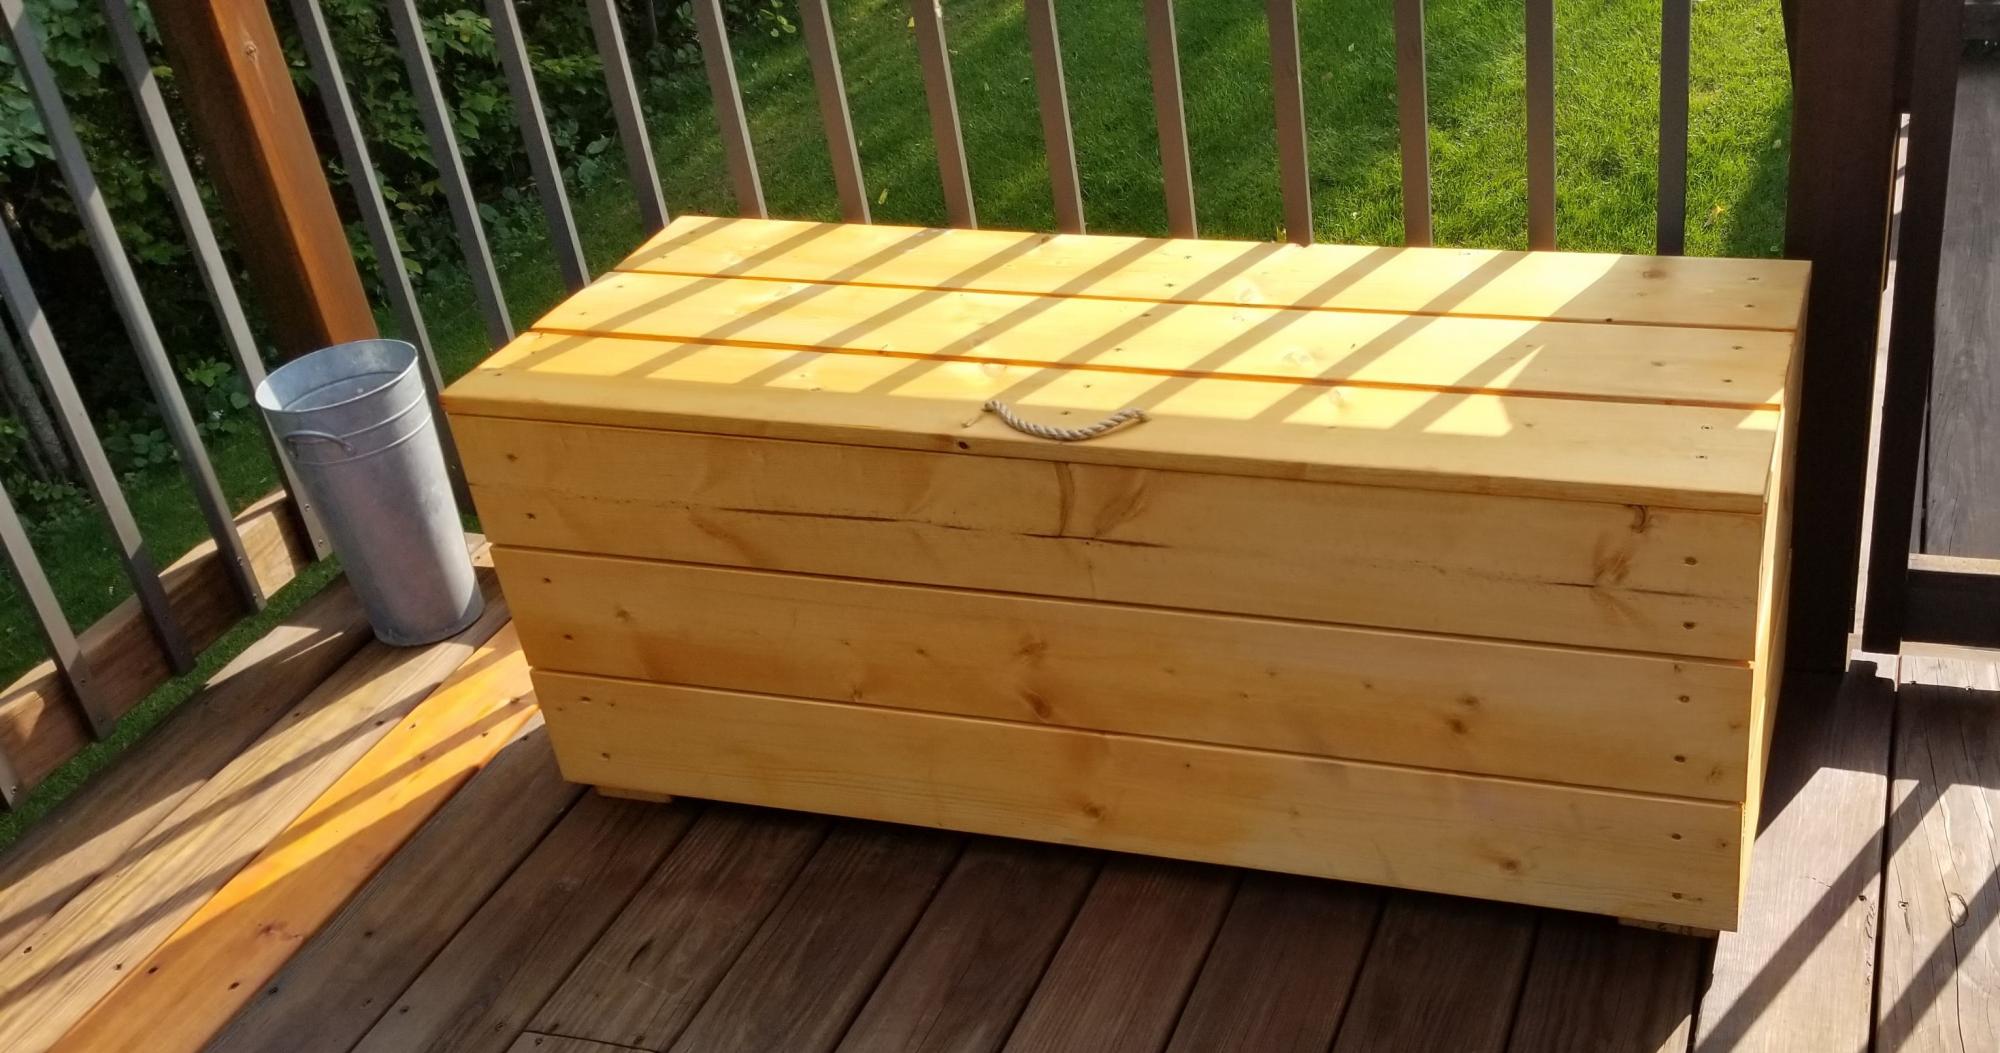
I love this dual outdoor seating plus toy storage bench. I lengthened the plans so I needed to add some additional support for the lid. I also decided to go with a rope pull which is easier for the kiddos to utilize.

Estimated Cost
$40
Estimated Time Investment
Day Project (6-9 Hours)
Finish Used
Cedar finish
Recommended Skill Level
Beginner

Comments

Andrea's Sewing Table

Submitted by Ben Ben on Tue, 03/05/2013 - 18:07

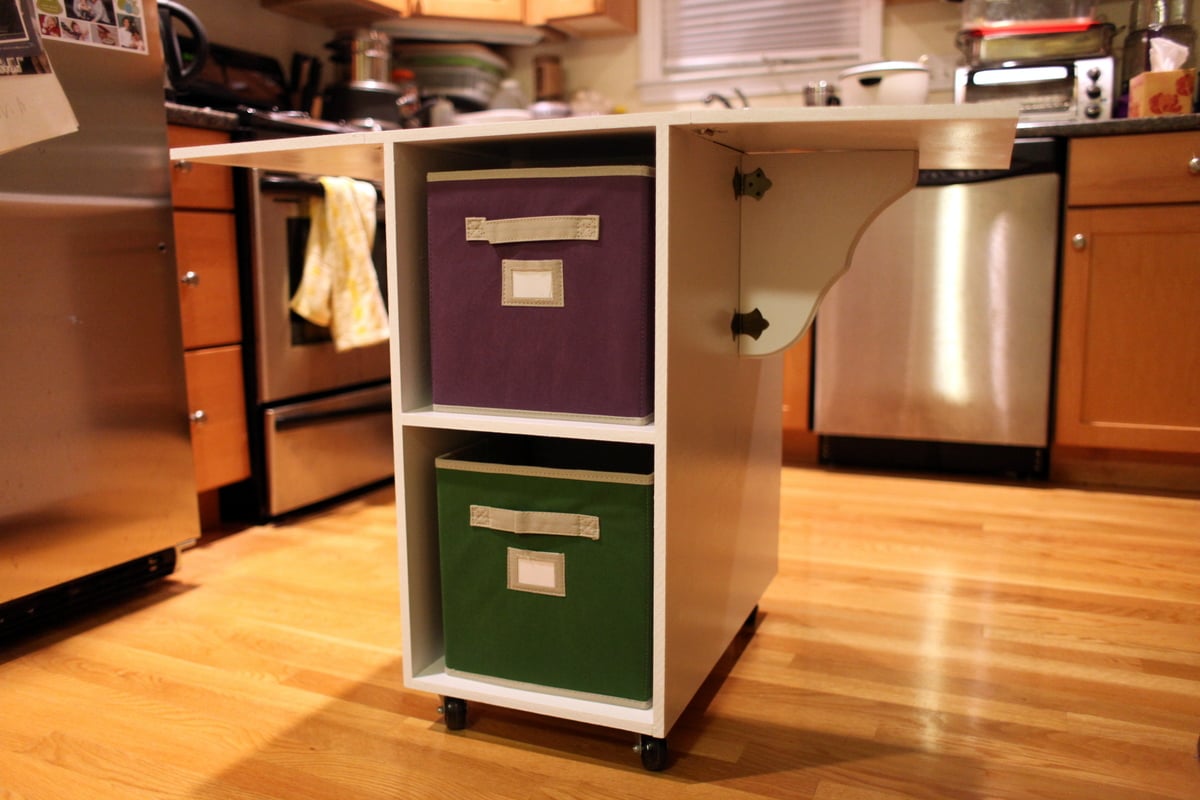
I built this table for my wife and I love how much space this table saves when it's all folded up.

More pics and details on our blog: http://bendrea.wordpress.com/2013/03/04/andreas-sewing-table/

Built from Plan(s)
Estimated Cost
80
Estimated Time Investment
Week Long Project (20 Hours or More)
Recommended Skill Level
Beginner

Comments

Pam the Goatherd

Wed, 03/06/2013 - 09:22

I really like the way you used the brackets instead of legs. I've wondered about the legs getting in the way, too. Obviously when you changed the measurements to fit your space you also made the "wings" of the table top shorter than in the original design. How big are they? What is the finished width/length of the tabletop when it is opened up?

Ben Ben

Wed, 03/06/2013 - 18:34

Yep, I made the table a bit smaller to fit our place. I only made them 12in x 24in. But if I had more room, I wouldn't hesitate extending the wings to 18+in x 24in. The brackets are very stable and could easily handle larger leaves. The table fully opened up is 39.5in x 24in.

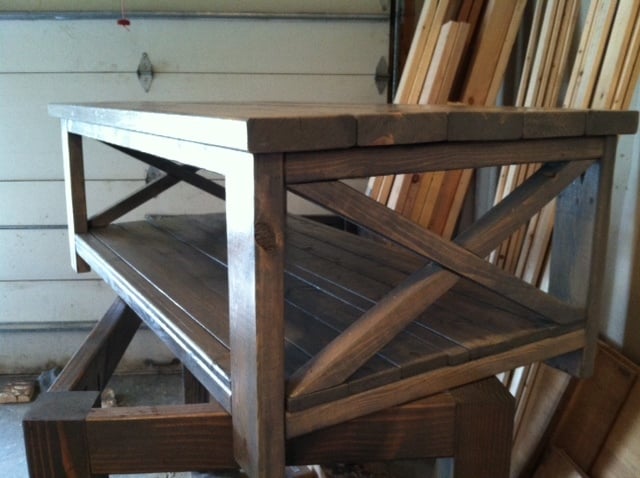
x frame coffee table

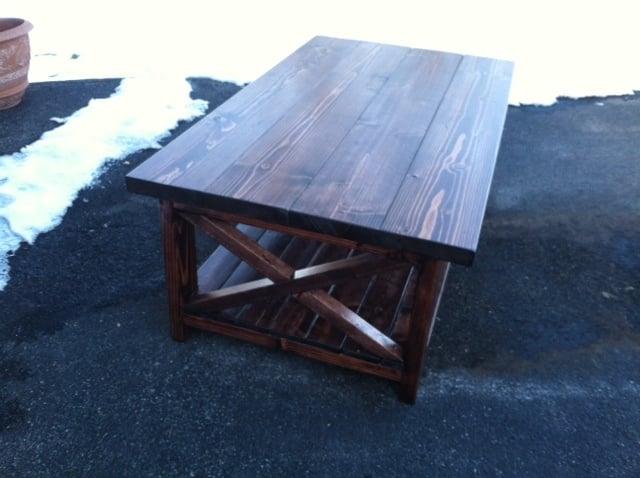
fun table from the X Series

Built from Plan(s)
Estimated Time Investment
Day Project (6-9 Hours)
Recommended Skill Level
Beginner

Comments

Courtlh

Sat, 03/30/2013 - 22:59

I was wondering what stain you used? I have a lot of douglas lying around and like the way it turned out!

Aesimpson

Tue, 01/27/2015 - 11:49

Approximate cost for this project? Thank you for the help! :)

jlynchtx

Fri, 01/05/2018 - 23:13

i am thinking about building one of these myself soon. Have you noticed any warping or cracking since you built it?

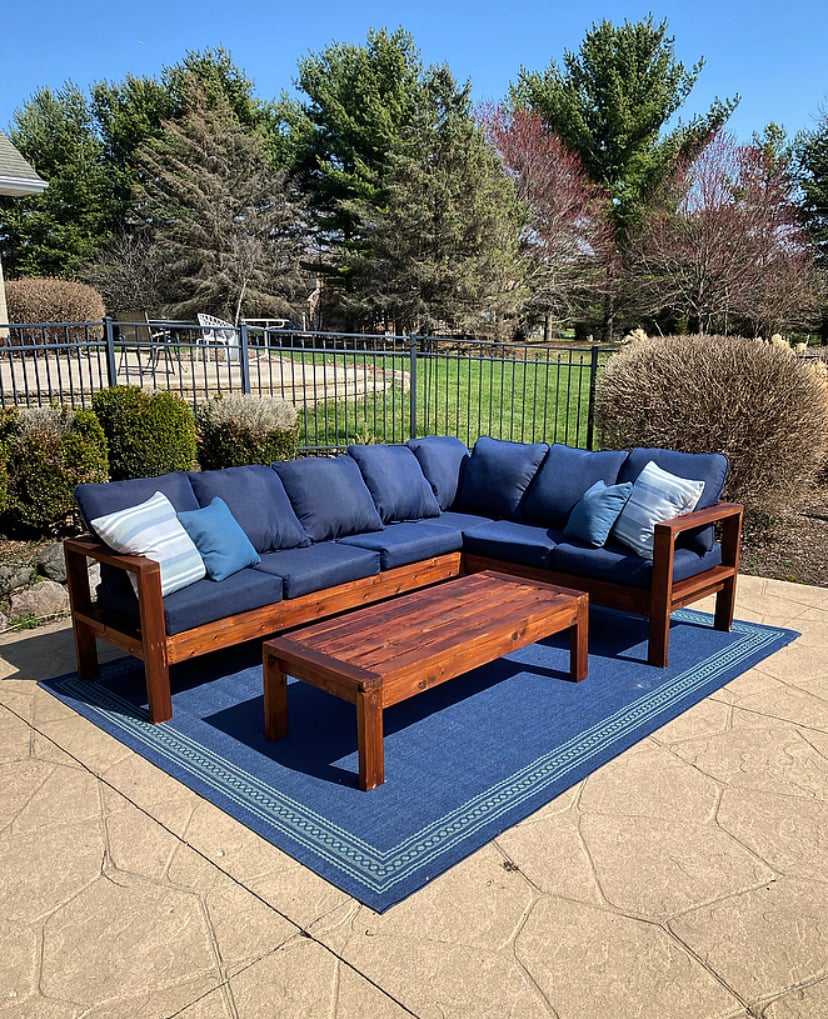
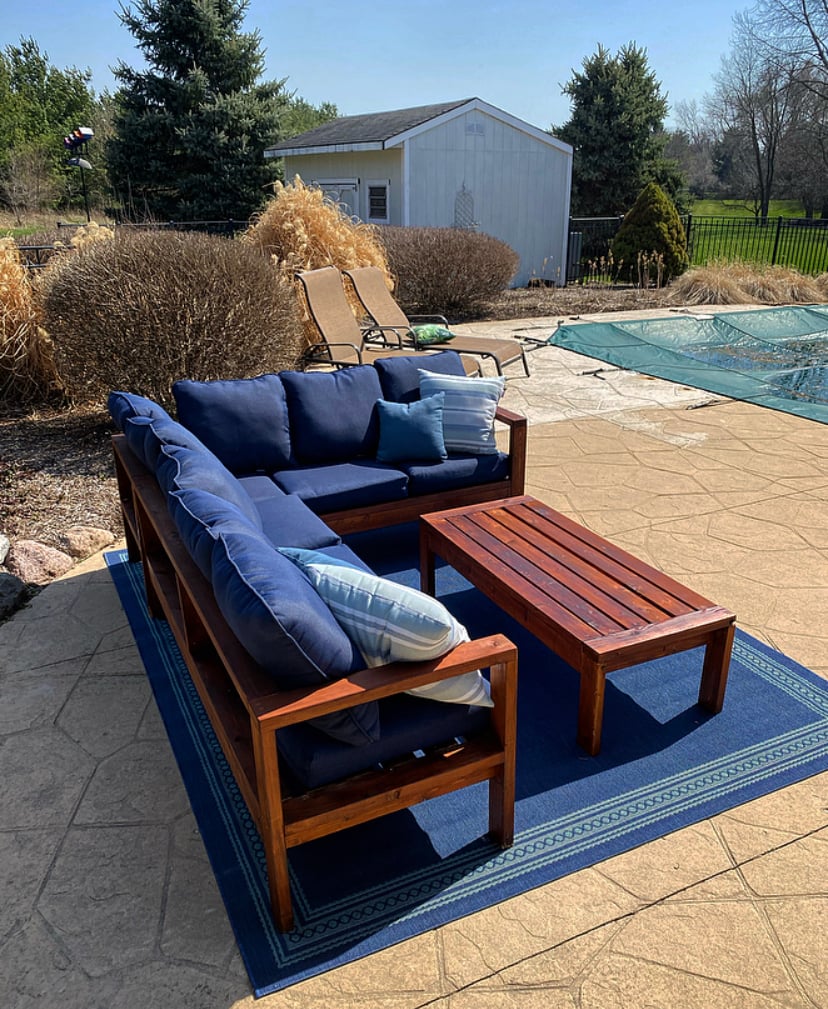
Outdoor Patio Sofa, Sectional, and coffee table

Submitted by Anonymous (not verified) on Sat, 04/03/2021 - 13:59

Here’s my new outdoor sitting area by my pool. Built from Ana’s outdoor patio sofa/sectional/coffee table plans! Used cedar for the build, Hampton Bay 24”x24” cushions (Home Depot), and found some outdoor throw pillows from The Great Escape store. Stained the cedar with Cabot’s Jarrah Brown exterior wood stain. Very happy with how it all turned out!

Estimated Cost
$600
Estimated Time Investment
Weekend Project (10-20 Hours)
Finish Used
Cabot’s Jarrah Brown exterior wood stain
Recommended Skill Level
Beginner

Comments

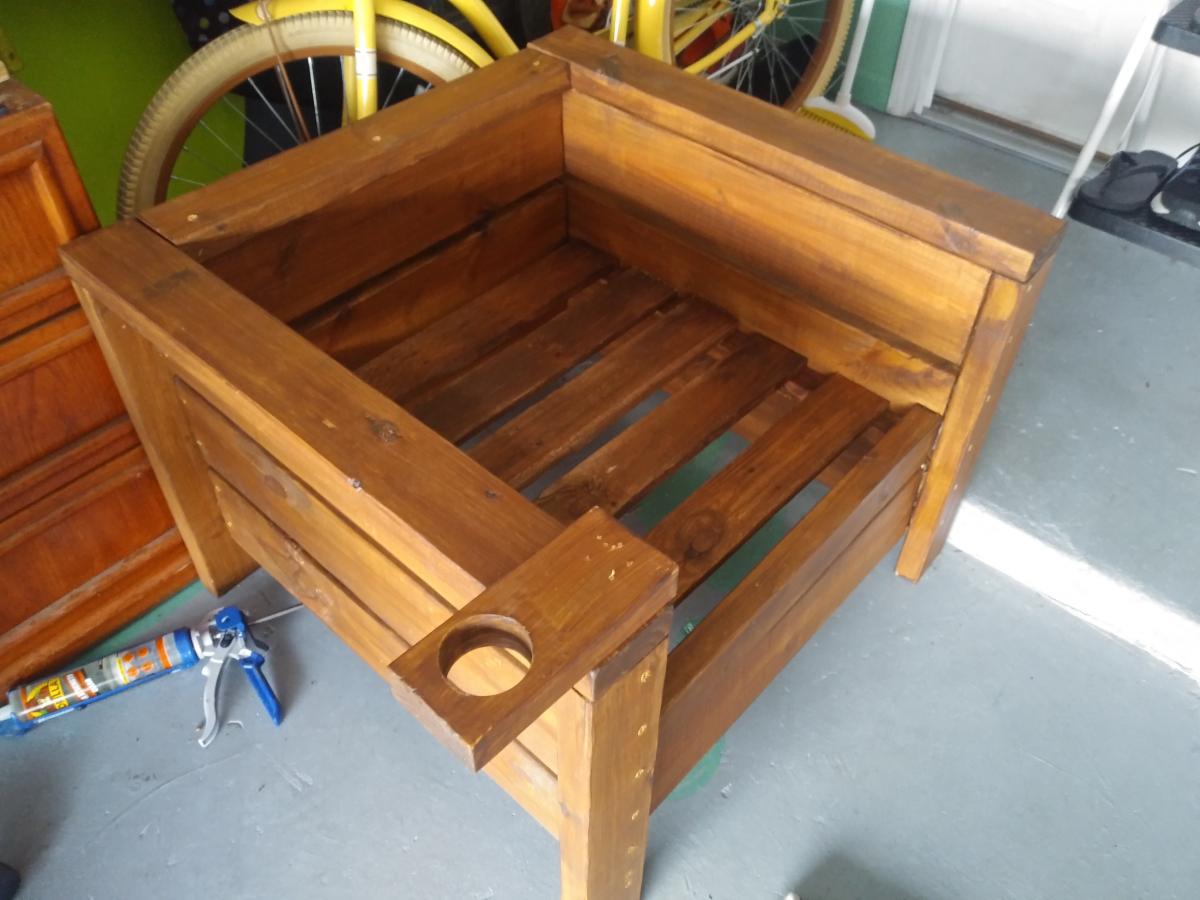
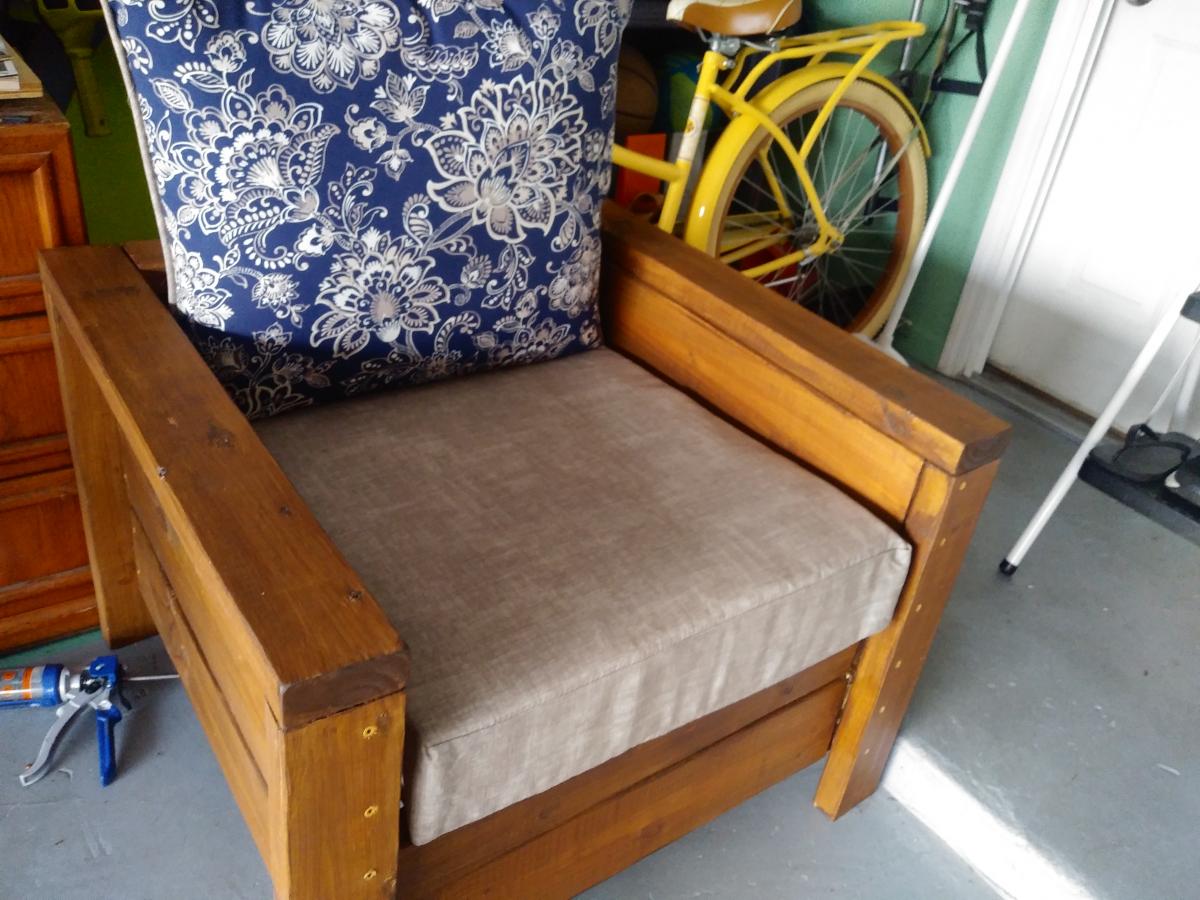
2x4 2x6 chair with 1x4 slats and a cupholder on a hinge.

Submitted by Anonymous (not verified) on Mon, 07/12/2021 - 16:34

Great project! Added a cup holder and due to lumber prices uses 1x4 for seat slats from a free pallet. This also allowed the thick cushion to sit lower in the chair and made the chair lighter, and did not have purchase an extra 2x4.

Comments

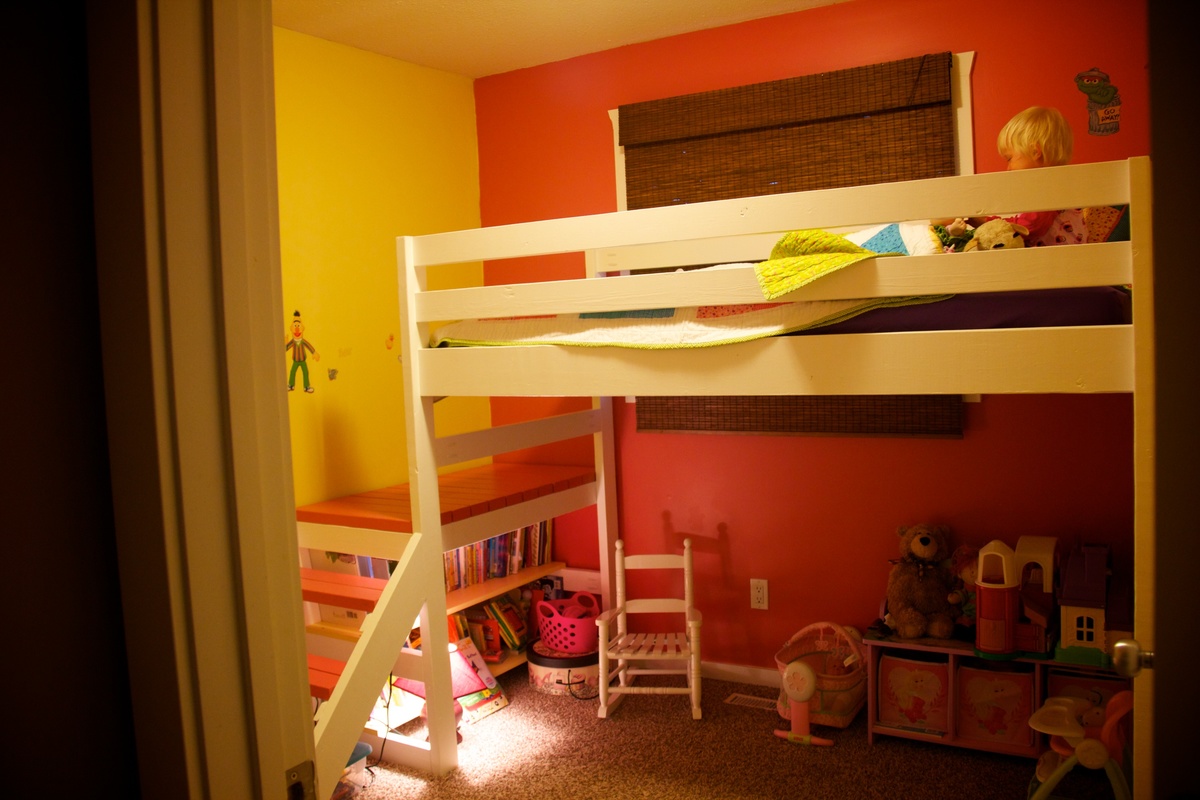
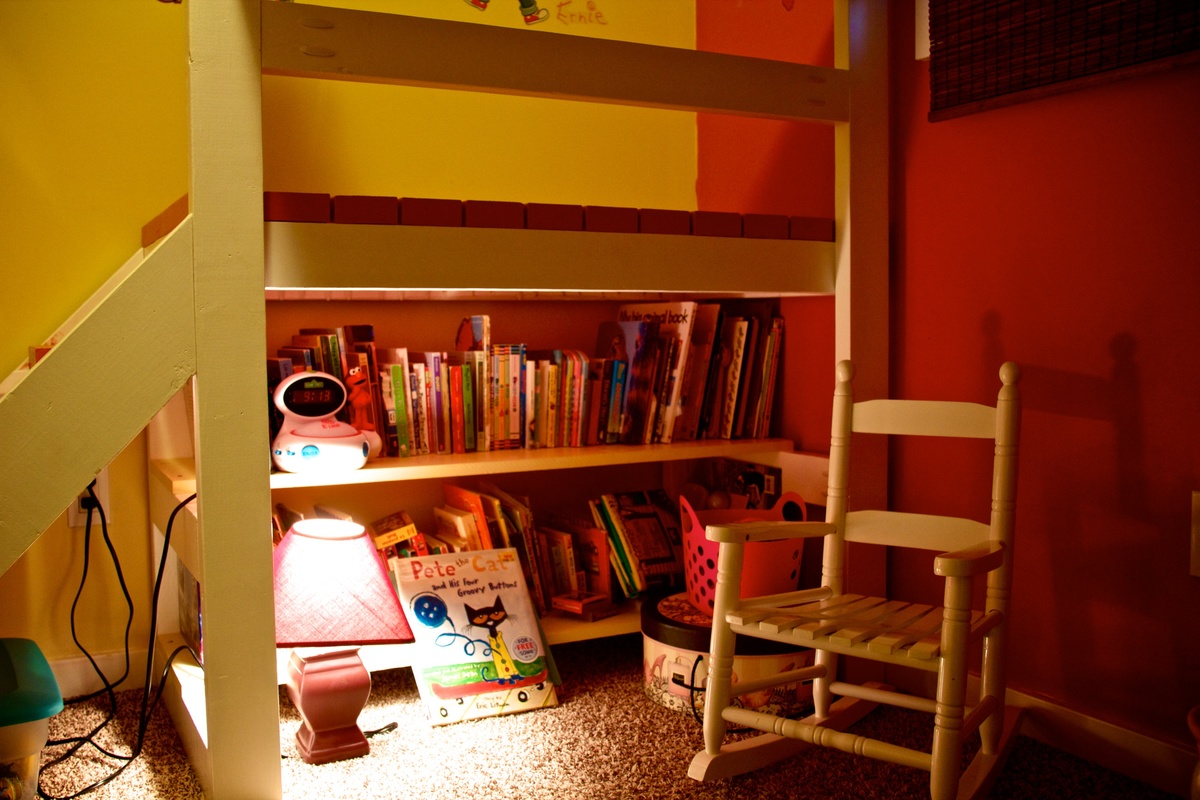
Camp Loft Bed for the Little Lady

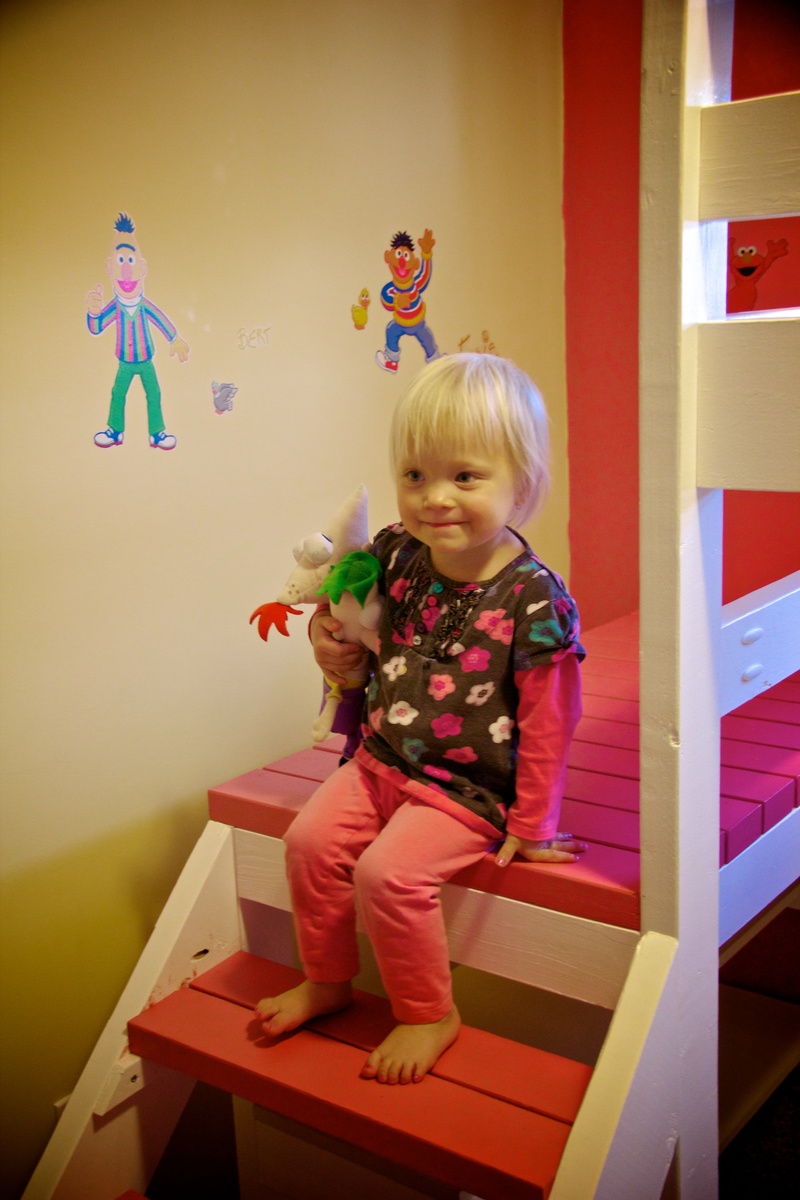
I came across the Camp Loft Bed on Pinterest a couple of months ago. My daughter was still sleeping in a crib, but I knew that she would need a big girl bed by summer. Since her room is small (inside walls measure just under 9'x9'), i thought a loft bed would be ideal.
I have NEVER done a DIY. I don't even own tools. But my step-dad is very handy, so I asked him to be my consultant and helper to tell me if I was doing things the wrong way! Fortunately, he was able to lend me a miter saw, some aluminum saw horses, and the odd screw (when I seemed to run out).

From start to finish, this was a 7 day project. I used construction grade spruce for my lumber, which cost me just shy of $100. I also went back the next day and bought a couple more 2x4s to make two shelves under the platform, which was another $30. I then pre-drilled with my new favourite tool the Kreg, and proceeded to sand, prime, and paint all of the pieces before assembly. With assembly being in my daughter's room, and having nice fresh paint on her walls and carpeted floors, I did NOT want to be finishing the bed in there, but there was no way I could move it into her room completely assembled. I did all the finishing BEFORE assembly.

Sand, prime, sand, paint, paint, paint. That process took three days, obviously not the entire day. Painting goes relatively quickly, but with boards, you paint one side, let dry, roate 90 degrees, paint, let dry, etc. I also had to work a couple of days in between as well. I went with Benjamin Moore Aura paint and that required three coats. I used to some leftover pink and yellow for the platform and shelves, but if I consider the cost, the paint set me back another $100.
I also had to order in the proper screws and I bought some of the white Kreg plugs to cover the exposed holes. Hurray for amazon! Even selecting the free shipping, the screws arrived within 4 days.

Assembly day:
My step-dad and I worked from 10:30-1:30. By this time, the bed and platform were completely assembled and in place. My daughter, however, needed to nap, so I put her down in her brother's bed, and we took a couple of hours off for lunch!
We then worked from 5-8:45 pm building the stairs, cleaning the room, measuring and screwing down the slats for the mattress, then making the bed and getting it ready for sleep. It seemed like a much longer day because in between, I had to run out and pick up a twin mattress, some extra screws, help my son play his new Skylander game, and deal with three kids trying to "help" with construction!

All in all, I am very pleased with the bed, with the plans, and with my first DIY. My kids are all in love with the bed and we spent a lot of time shooing them out of the room while we tried to assemble it.

Tips:
If I were to make this bed again (if my sons have their way, their beds are next!) I would not paint the wood, opting instead for a stained more natural look. I love the colours for my daughter, but what a pain all that painting and rotating the boards was. Paint was also a more expensive option for finishing.
That being said, if I do paint, I will NOT paint the ends of the boards that will be joined via pocket holes. In some cases, the boards were just a smidge too long to fit and we had to take the back to the saw and shave off the layer of paint in order for the board to fit.
I also opted to buy firm twin mattress as opposed to the plush ones. The plush mattresses add a lot of height and I was worried about my daughter having a bit too much fun up there and possibly tipping out from a high mattress. Stick to thinner mattresses on loft or bunk beds!
Estimated Cost
$250
Estimated Time Investment
Week Long Project (20 Hours or More)
Finish Used
Benjamin Moore Aura paint
colours: white, glamour pink and cornsilk (for the two shelves)
Recommended Skill Level
Starter Project

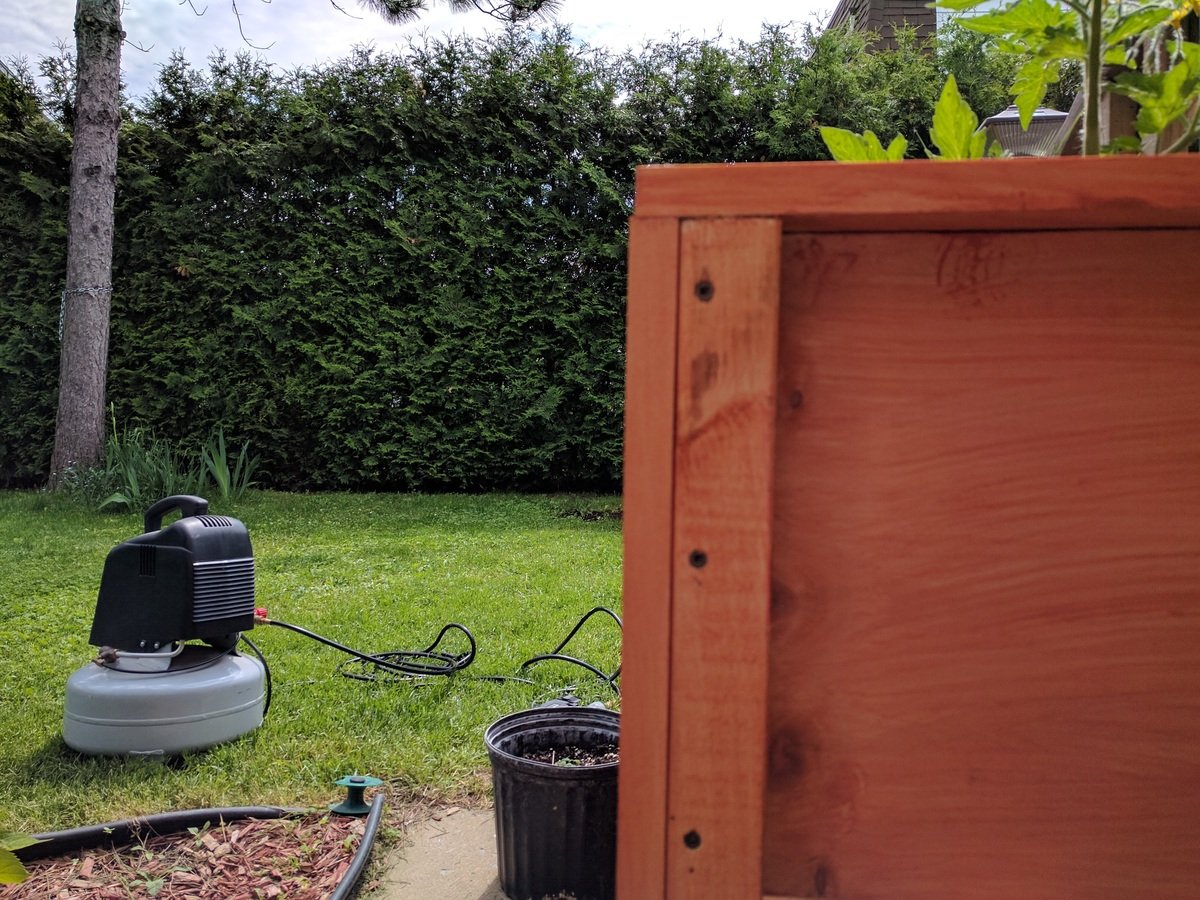
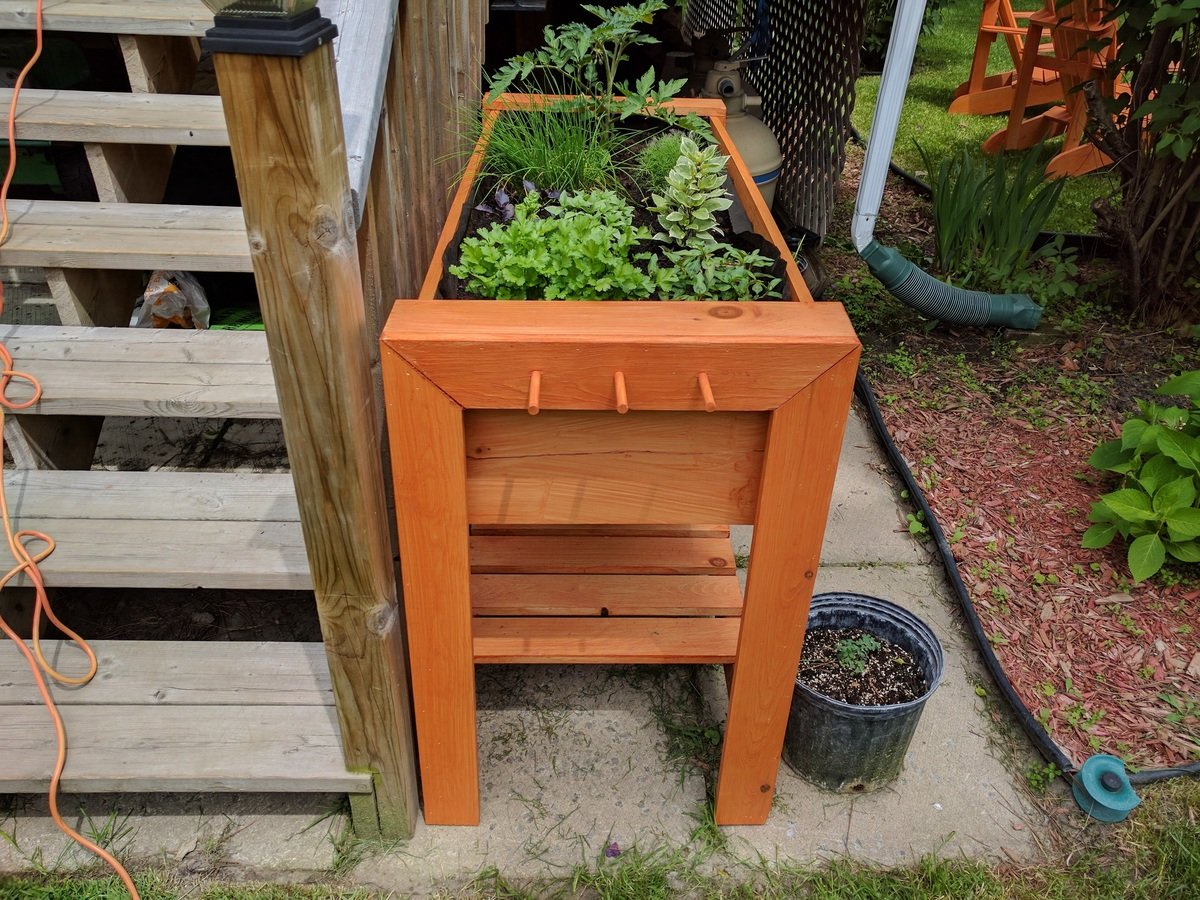
Raised planter box (modified)

Submitted by Anonymous (not verified) on Sat, 06/10/2017 - 07:50

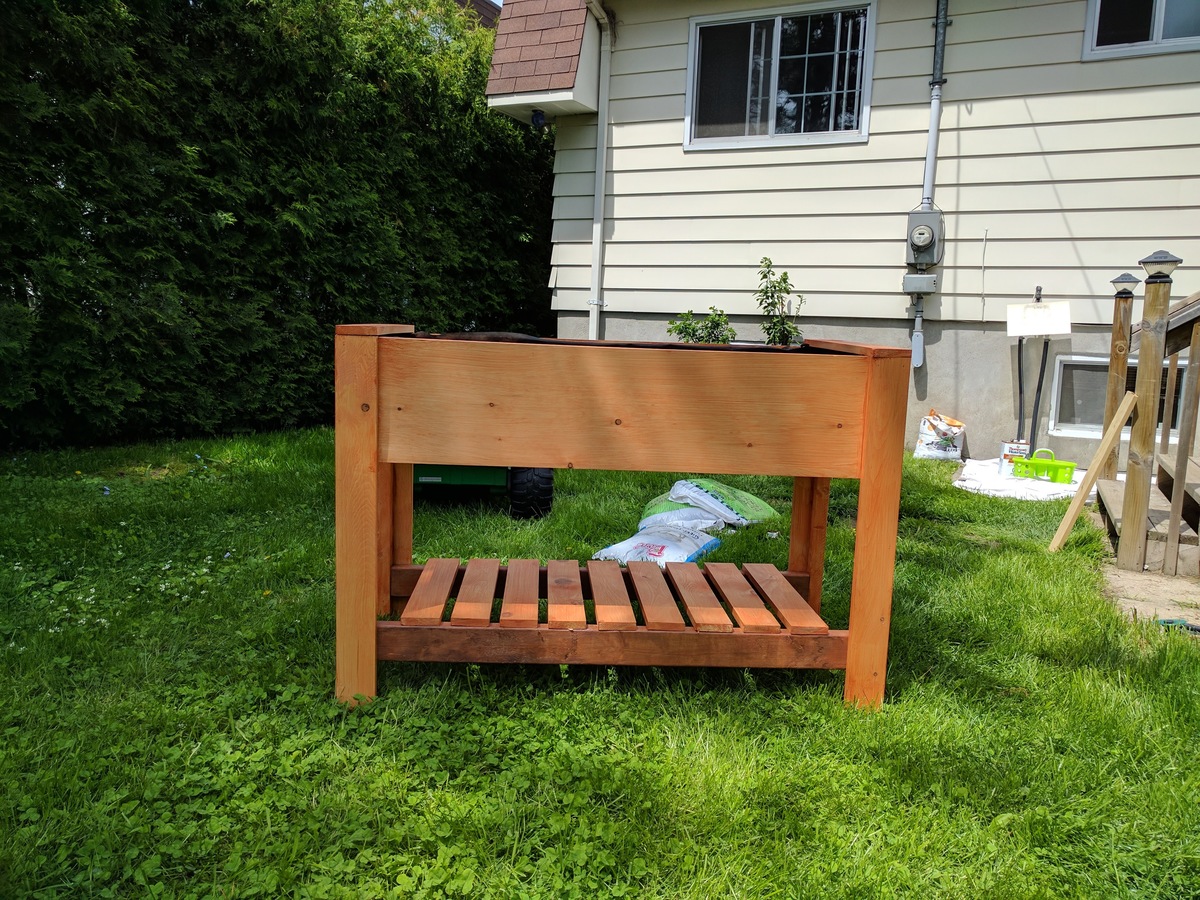
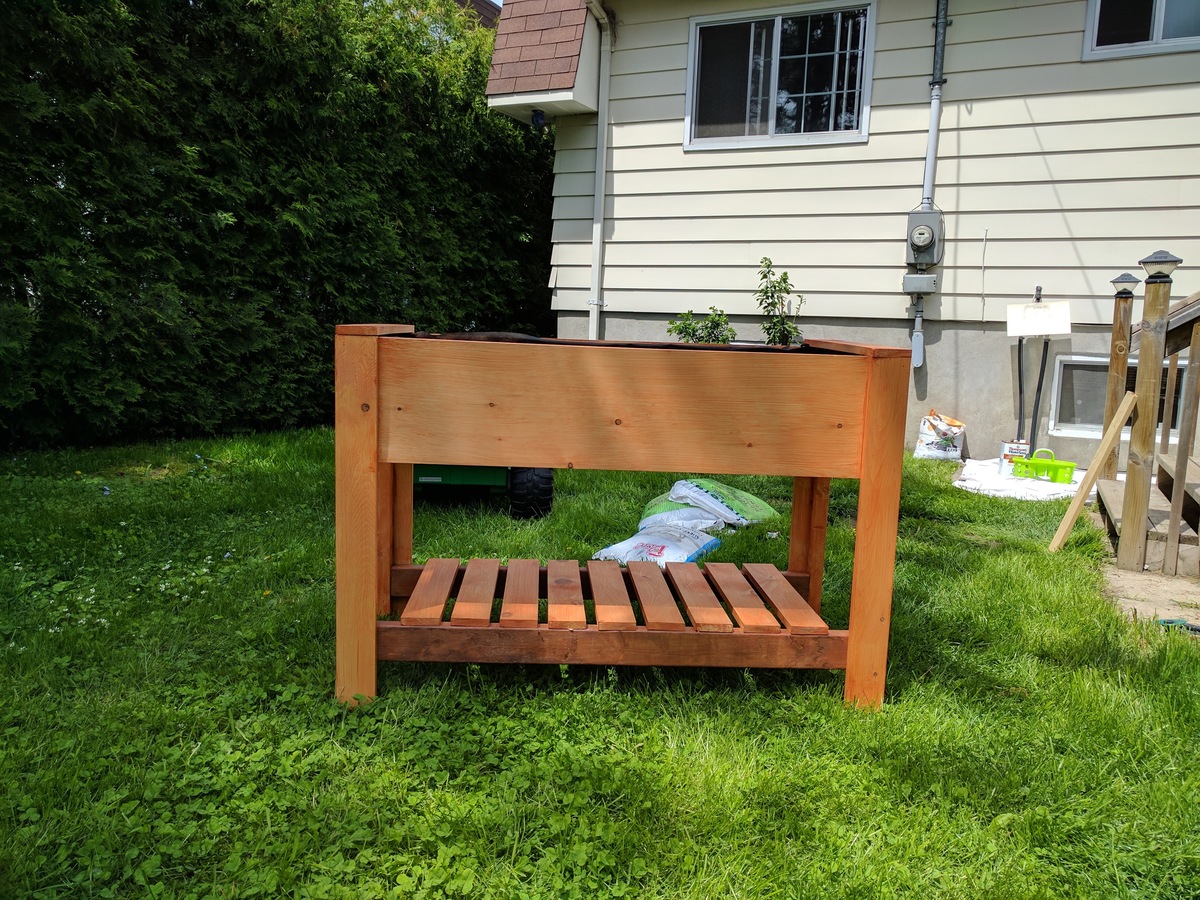
Completed the project in about 4 hours including pre-staining the cut lumber (Thompson's water seal). I made a few changes on the fly. 

1: I assembled the front and back panels by tacking them together with a nail gun using 2 1/4 inch finishing nails. This allowed me to forego the drilling of pocket screw holes and instead drill pilot holes through the 2x2's and into the 1x12 panels then securing them with 2 1/2 inch deck screws (see the second picture).

2: after completing assembly I found that I did not like seeing the 2x2 legs from the side. I cut some more 1x4's at 45 degree angles and nailed them to the sides in order to conceal the legs (see third picture).

3: I decided to add some pegs to one of the sides to hang garden implements (third picture). I used 7/16 round dowel stock, drilled holes for them using 3/8 bit with some tape wrapped around it at 1/2 inch mark in order to avoid drilling completely through the board. I slightly whittled the first 1/8 inch at one end of the pegs which I had cut to 3 inch lenghts. Applied some wood glue to the holes and gently hammered the pegs into the holes.

All in all a good looking planter.

Estimated Cost
$100.00 Usd
Estimated Time Investment
Afternoon Project (3-6 Hours)
Finish Used
Thompson's water seal (cedar colored). Sand boards before applying 2 coats 1 hour between coats.
Recommended Skill Level
Intermediate

Comments

Four station desk (PB inspired)

Submitted by monty742 on Sun, 03/15/2015 - 08:58

I really liked the PB mega desk, but I didn't want to spend $1600 on it.  After seeing someone's post here (a couple years ago...) asking for plans on that desk, I decided to do it myself.  I took these two plans and made 4 base units.  They are 18" square at the top and 34" tall.  I used 2 IKEA table tops connected underneath for the top, to make a total height of 36" - counter stool height.  I constructed them a little differently than the plans, but no matter how you make them, the idea is the same.  The plan is to take them apart and make 2 desks once everyone is too old and cool to do homework/artwork together.

Estimated Cost
$500
Estimated Time Investment
Week Long Project (20 Hours or More)
Finish Used
Kitchen and Bath finish paint (2 coats) - it's a little shinier than eggshell (I only used it because I had 2 or 3 gallons extra at home :) then 2 coats acrylic top coat matte finish.
Recommended Skill Level
Intermediate

Comments

monty742

Sat, 08/15/2015 - 04:33

Just seeing your comment...sorry for the delay!  I got the stools and the light fixture at a Ballard Backroom (outlet) store near me.  3 of the stools ended up being about $40 each with the sale they had at the time, and the 4th was $60? - bought at a later time than the first 3.

AlisaH

Wed, 11/04/2015 - 07:40

How did you connect the table tops from the bottom so that the tables were secure together? I'm curious what's the best way to do this. Since two of the four seats will be where the seam is, I want to make sure I secure it properly so it's not wobbly. Thanks so much.


monty742

Sat, 01/09/2016 - 05:06

I'm just seeing these latest comments for the first time, so you may have long finished this project already!  The tops were surprisingly sturdy but I did reinforce them.  I placed the tops on the floor upside down and screwed some metal brackets (about 12" long each) across the joint in four places.  I just screwed them in through holes already in the brackets.  This wasn't the most stable because those tops are particle board and don't hold screws very well...  But since it was already pretty sturdy, I figured it would do.  It has been fine, even with standing on the top (kids who get up there and me hanging the light fixture above).

Once the tops were joined, I placed the bases so there was about a 1" overhang on the top.  To hold the top in place, I used small pieces of wood screwed to the underside of the top at the inside corner to act as a placement stop.  The top is pretty big and heavy even though they are IKEA tops, so they don't have a tendency to move or slide at all anyway.  I'm going to try to figure out how to post another picture of the braces and corner stops...we'll see if I can do it!  Let me know if you have any more questions...again, sorry I didn't see this in a more timely manner!

Pmprdwife

Sat, 01/02/2016 - 05:55

Is the photo above the Pottery Barn version or your product result?  I'm trying to figure out the dimensions for the drawer and shelf configurations.  Thanks!  BTW, I'm totally addicted to your style and personality...my husband loves the productivity inspiration I've received. :-)


monty742

Sat, 01/09/2016 - 10:17

Hi!

I'm glad you like the desk!  The one in the picture is the one I built, not the pottery barn one!  My dimensions were a good bit different than the PB desk - square bases instead of rectangular and counter stool height instead of desk/table height.  So, I have no idea if I have my plans for this anymore, so I went and measured it again for you!  

So each base is 18" x 18" square and 34" high so that with the 2" top the total height is 36".


Each base was made of oak plywood that made with 3 sides, a top and a bottom.  All edges were rabbit joints (3/8" deep in thickness of boards and probably 3/8" wide - not 100% on width of rabbits).  It's kind of a pain to do rabbit joints if you don't have a dado blade for your table saw, so you could use pocket hole screws instead.  I glued and nailed these joints with a finish nailer, I believe.  

I figured a diagram with measurements would be easier than trying to write descriptions...so I'm adding another pic with the dimensions outlined.  Drawing is NOT to scale, so sorry about that!  I really need to learn to use SketchUp.  Let me know if you have any questions!  

Monty742

monty742

Sat, 01/09/2016 - 07:57

Hi!

I'm glad you like the desk!  The one in the picture is the one I built, not the pottery barn one!  My dimensions were a good bit different than the PB desk - square bases instead of rectangular and counter stool height instead of desk/table height.  So, I have no idea if I have my plans for this anymore, so I went and measured it again for you!  

So each base is 18" x 18" square and 34" high so that with the 2" top the total height is 36".


Each base was made of oak plywood that made with 3 sides, a top and a bottom.  All edges were rabbit joints (3/8" deep in thickness of boards and probably 3/8" wide - not 100% on width of rabbits).  It's kind of a pain to do rabbit joints if you don't have a dado blade for your table saw, so you could use pocket hole screws instead.  I glued and nailed these joints with a finish nailer, I believe.  

I figured a diagram with measurements would be easier than trying to write descriptions...so I'm adding another pic with the dimensions outlined.  Drawing is NOT to scale, so sorry about that!  I really need to learn to use SketchUp.  Let me know if you have any questions!  

monty742

Thu, 07/28/2016 - 14:13

No you can't buy them from Ikea.  I bought the table tops from Ikea, but I built the bases.  The dimensions for the bases are in one of the additional pictures with the post if you want to see them!

treverandamber

Mon, 10/10/2016 - 07:41

What are the total dimensions of the table top? Thinking of building something like this, but want to make sure it will fit in my space.

Simgre81

Thu, 12/28/2017 - 07:00

Are these just slide in drawers, or did you use some sort of hardware to have them slide in and out?

2x4 Outdoor Sofa & Sectional Piece

Submitted by Anonymous (not verified) on Wed, 08/11/2021 - 05:36

These plan were fantastic! Sorry for the messy picture!

As I live in Sweden I had to convert all measurements to metric. I also couldn't get hold of cedar boards easily so I went with regular treated construction pine. The pine boards are 45 mm by 95 mm, so I adjusted acording to that as well. The downside with using fresh treated pine is the extreme weight of the wood. It's also probably going to shrink a fair bit.

We live in a chain house, so it wasn't possible for me to build the sofa in place. Instead I hade to build it at my parents place. So I modified the plans a little to be able to build the sofa in pieces and transport the whole thing in my car. The sides are bolted to the base with carriage bolts and the back rest is bolted to the sides using hex wood screws.

To make the joints a bit sturdier I opted to use two 10mm wooden dowels and glue in every joint. I also didn't want any screw heads showing. So I used decking screws and screwed them in at an angle as hidden as possible.

Will probably sand all the rough edges in a few days and will be making a matching table later on.

As it's late in the store season (Ikea didn't have any good cushions in the store) we opted to go with rugs instead of cushions.

Estimated Cost
Roughly 200 $
Estimated Time Investment
Day Project (6-9 Hours)
Finish Used
No finish
Recommended Skill Level
Beginner

Comments

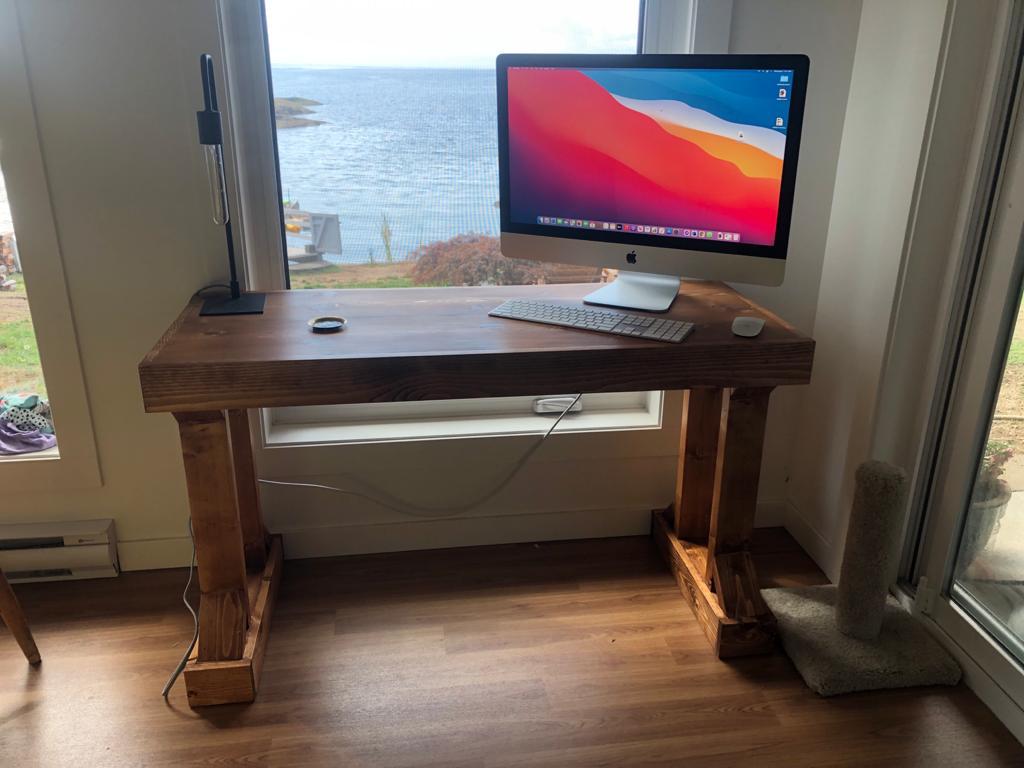
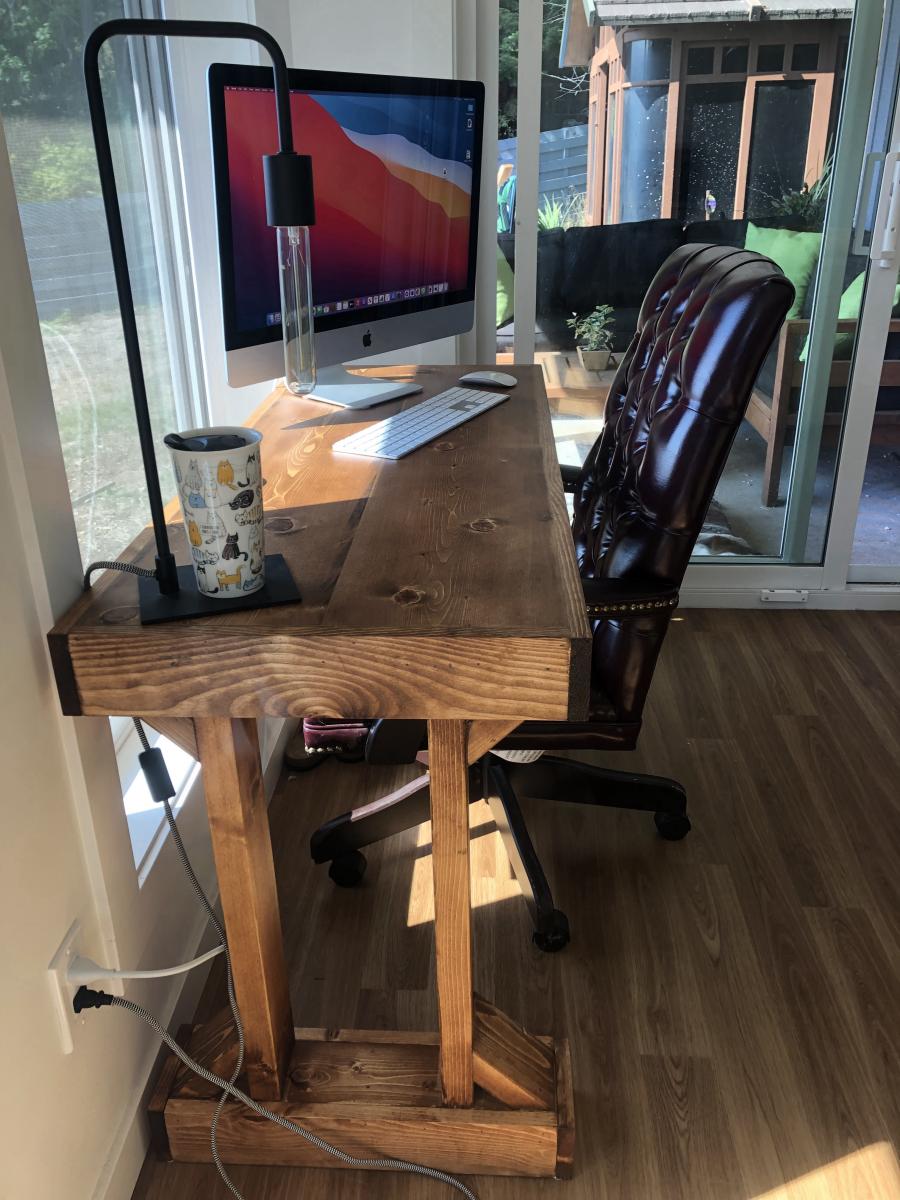
Writing Desk - Modern farmhouse collection

Submitted by SofiaTaz on Wed, 09/08/2021 - 22:25

I love how this desk turned out. I haven't had corner brackets catch my eye yet, but I may still add them. This was the first real Brad Nailer project I have completed. It is stained in a dark walnut. Thanks again for another great plan and tutorial video!

Comments

Wide Short Pine 1x12 Bookshelf

Submitted by ariela on Wed, 03/09/2011 - 03:15

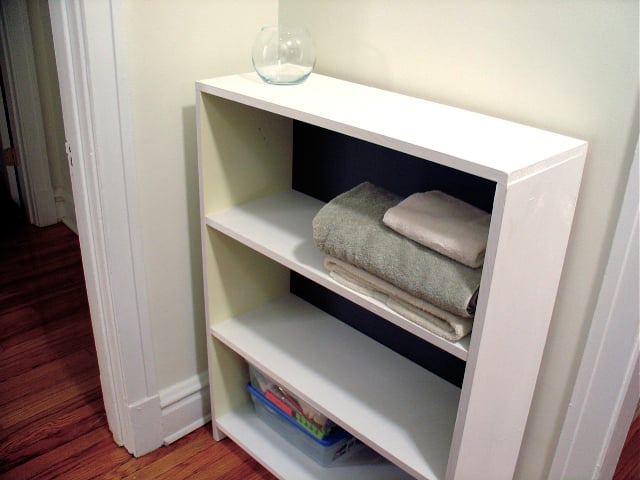
This was my first project ever, and while there are a few things I could have done better (don't judge the imperfections!) the shelves still came out beautifully. I followed Ana's plan exactly, painting the backboard a charcoal grey before attaching, and the shelves themselves white with light lemon yellow on the inside-sides. If I were to make these again, I would want to sand the shelves down more and use a higher gloss paint or sealer. The matte finish is more difficult to clean when it gets dusty, which happens pretty quickly!

Built from Plan(s)
Estimated Time Investment
Afternoon Project (3-6 Hours)
Recommended Skill Level
Starter Project

Stuffed Animal Cage

Submitted by Anace on Mon, 05/20/2013 - 17:26

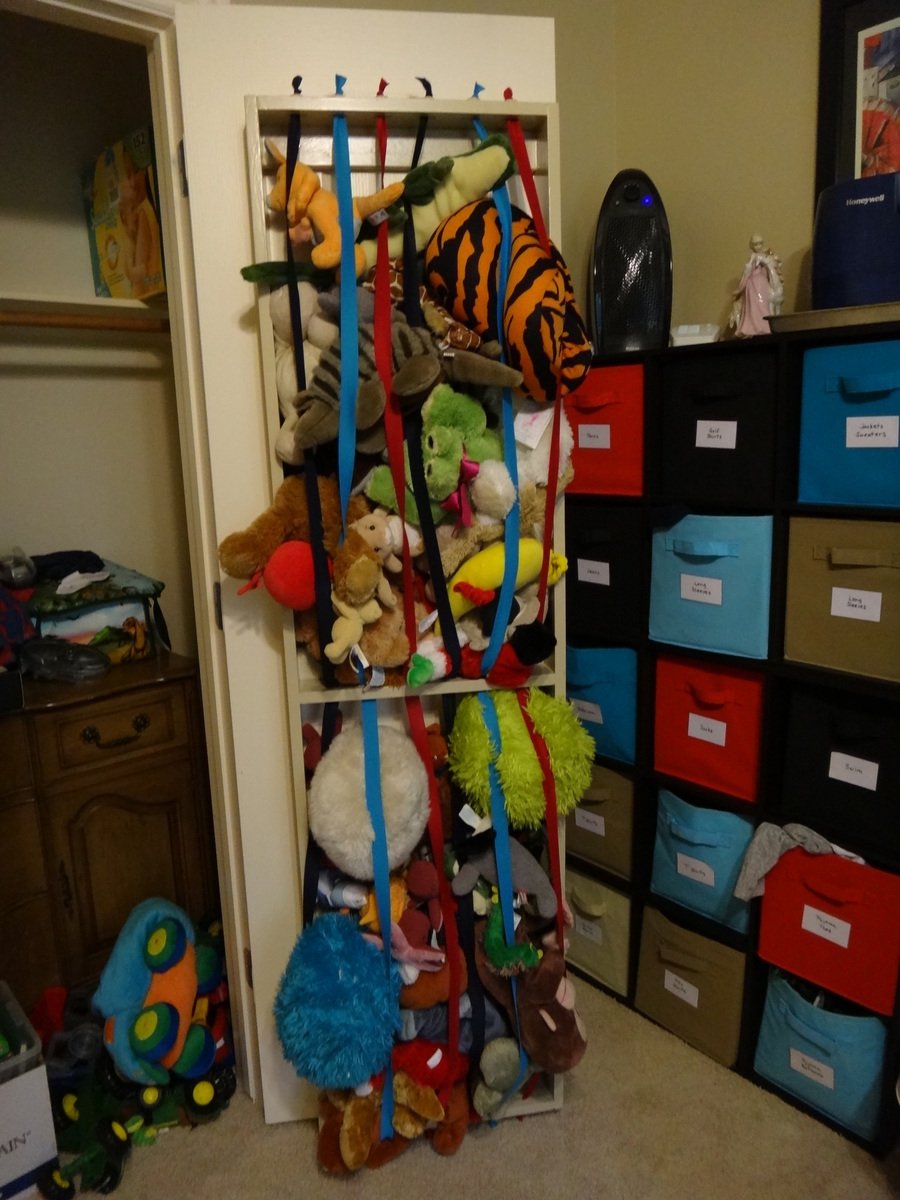
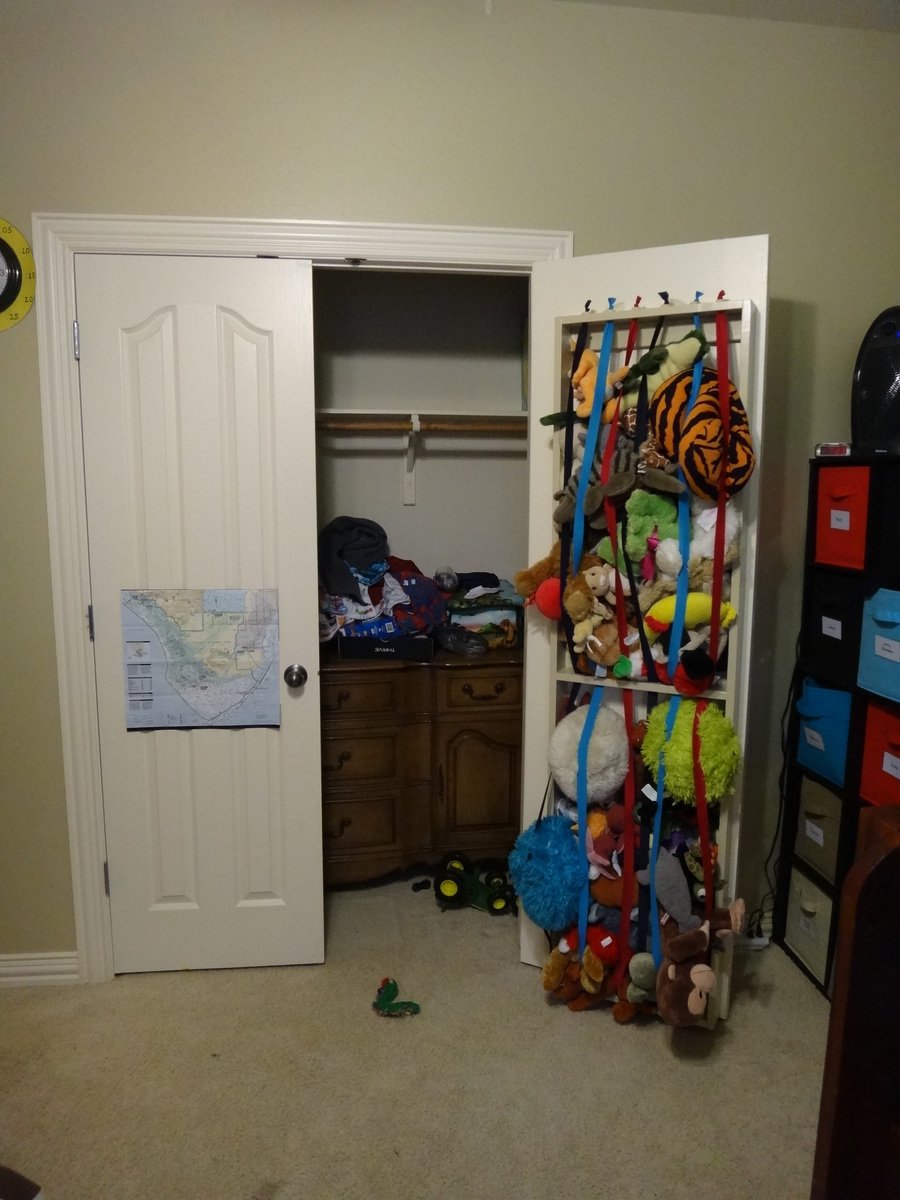
No more free range stuffed animals! We needed stuffed animal storage because they are bulky and keeping them in bins meant the one the kids wanted was always on the bottom. But none of us (my husband and I included) could manage to cull them.

I was inspired by the way Walmart contains their giant beach balls -- bungee cord verticals on a fixed frame. I was going to make it free standing til I saw the behind closet door storage plans. Perfect!

I made the frame and shelf from 1x4s because that was the depth of my doorframe -- 3.5 inches. It took (3) 1x4s @6' - One for each side and one cut for the top, bottom, and shelf/support.

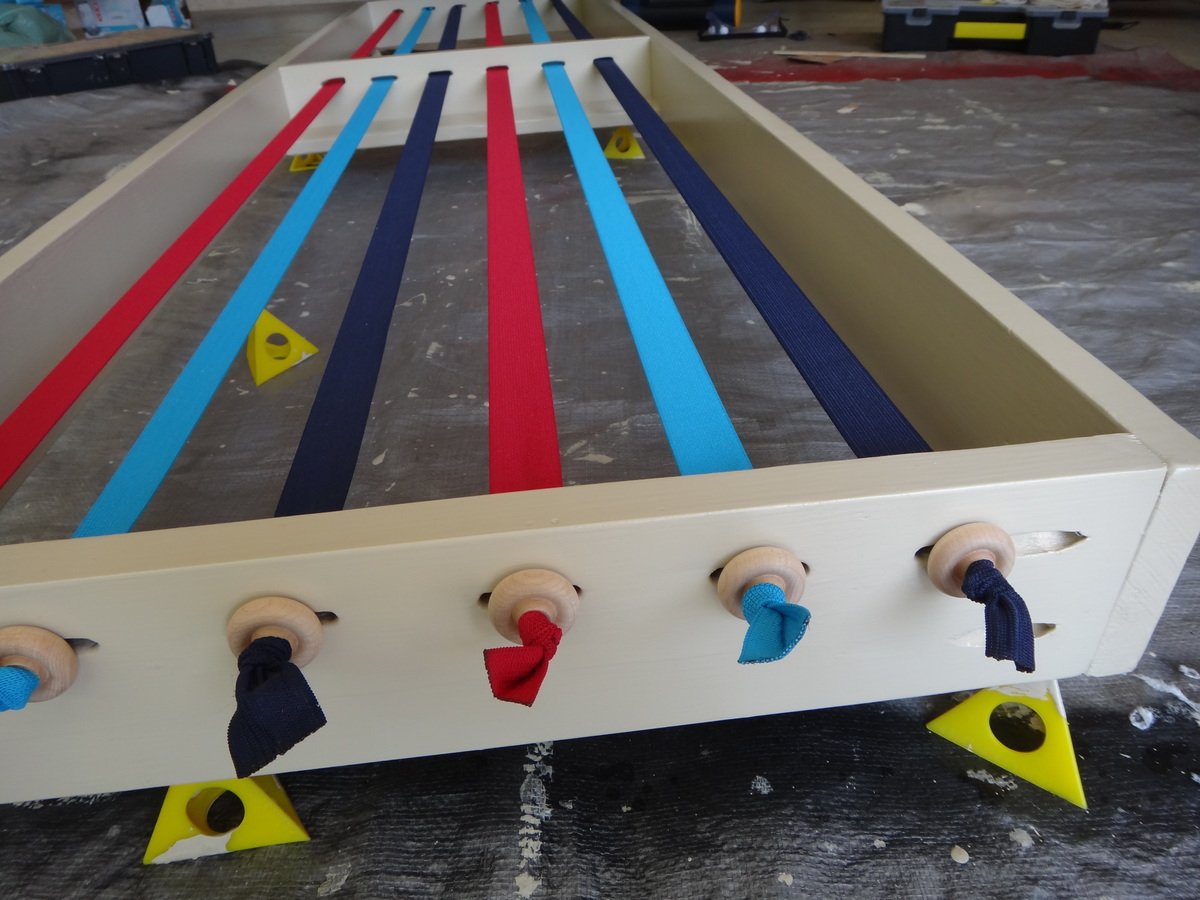
I couldn't find bungee cord by the roll (should have checked Amazon first!), so I bought colored 1 inch wide elastic from JoAnns. Each 3 yard pkg cost $4. I needed 3, so that drove the price up. I cut them in half, and the 4.5' lengths have plenty of give on the 6' frame, so you could probably use standard 4' bungee cords from the box store.

I used my router to make the holes for the elastic. I used wooden toy wheels to keep the knotted elastic from being pulled through the holes. You could just drill holes, but my router was new and I wanted to practice with it.

The kids love putting their stuffed toys away now, and they can see all of them so they can pick the ones they want to play with rather than dumping them all out of a bin. I love it.

I've already decided to do the other door with the bottom half of the frame in elastic like this for costume storage, and the top half shelves. Thank you, Ana!

Built from Plan(s)
Estimated Cost
$30
Estimated Time Investment
Afternoon Project (3-6 Hours)
Finish Used
2 coats of leftover interior latex, then 2 coats of Polycrylic.
Recommended Skill Level
Starter Project

Comments