Bar Stools with Back
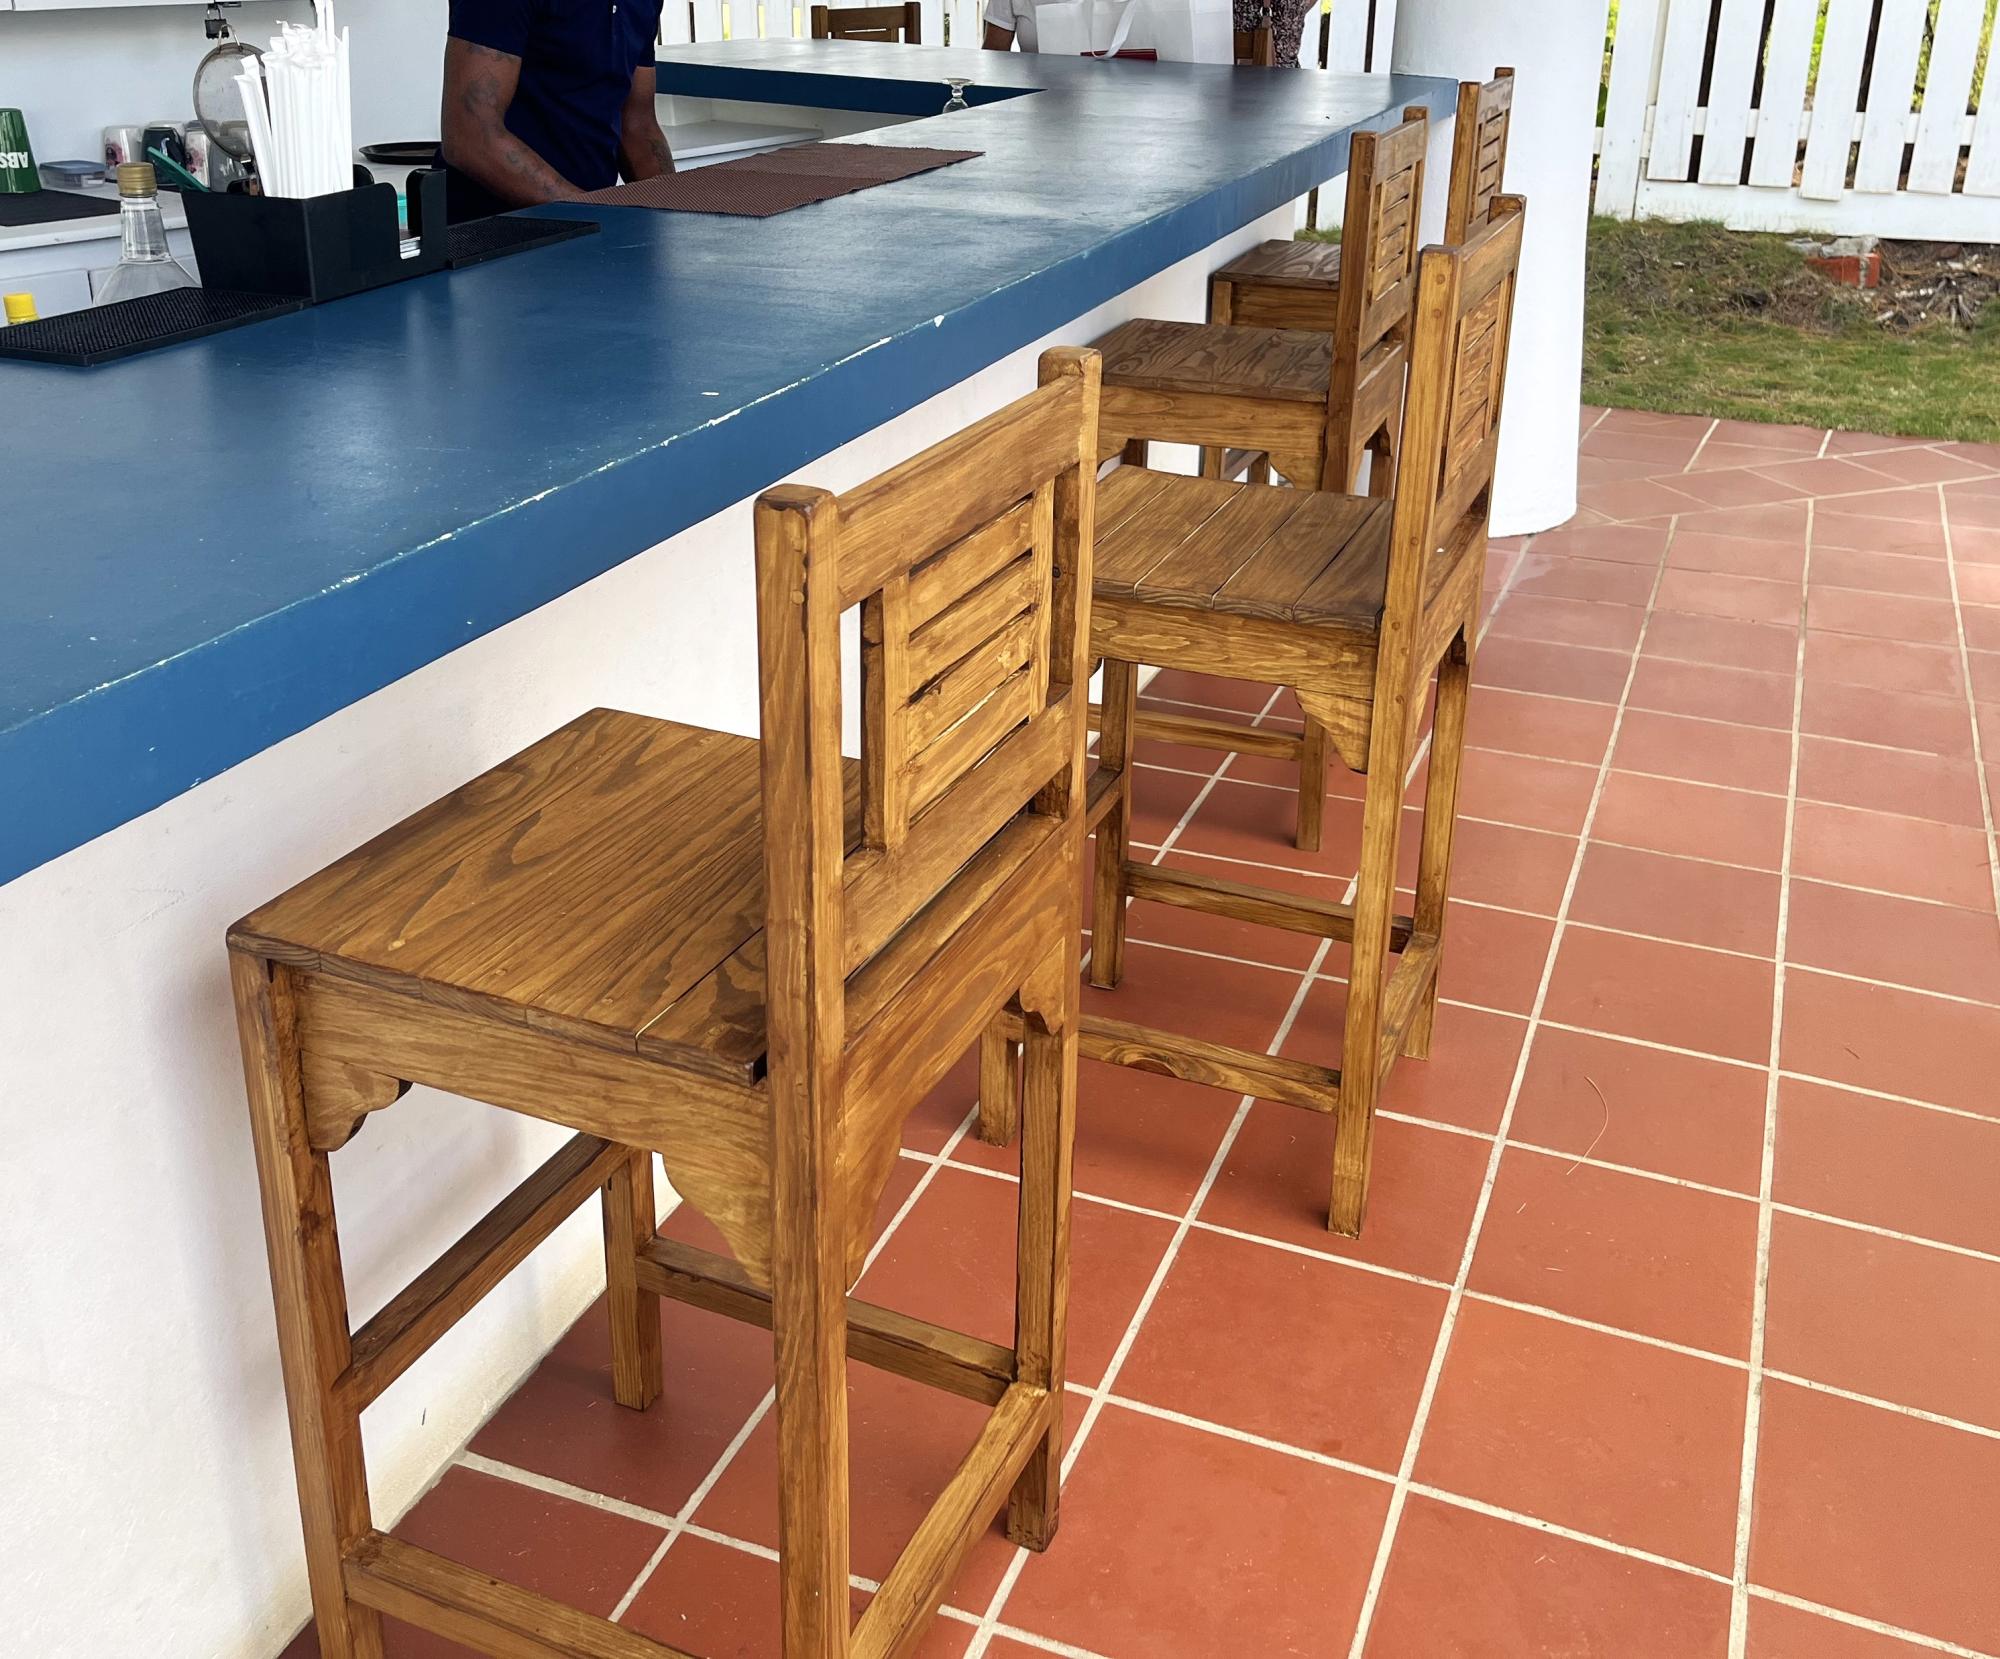
Great wood bar stools!
by Dennis
Built from Plan(s)
Great wood bar stools!
by Dennis
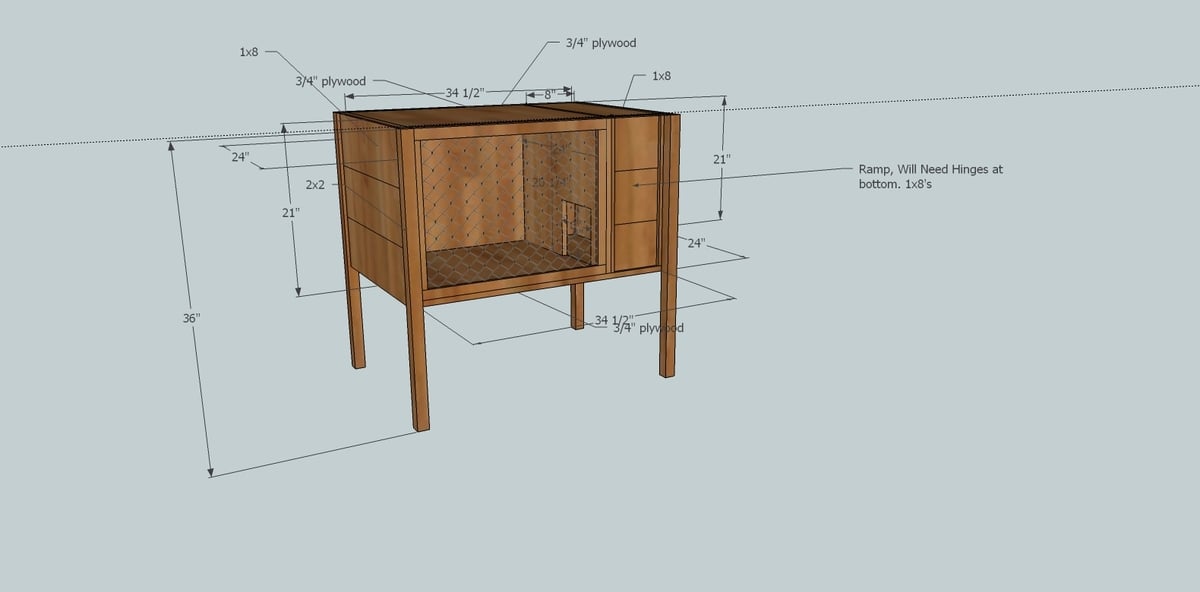
I have a pet ferret that has little room to run around. So I seen this rabbit/ferret cage at the pet store. It was about $150 or so. So I took a pic of it on my phone, and found the Google Sketch app, and watched some videos, and now I have plans for the cage. Some 2x2's, 1x8's, plywood, chicken wire, and some locks and hinges for the ramp an lid.... Still tweaking it, but hopefully it will work out.
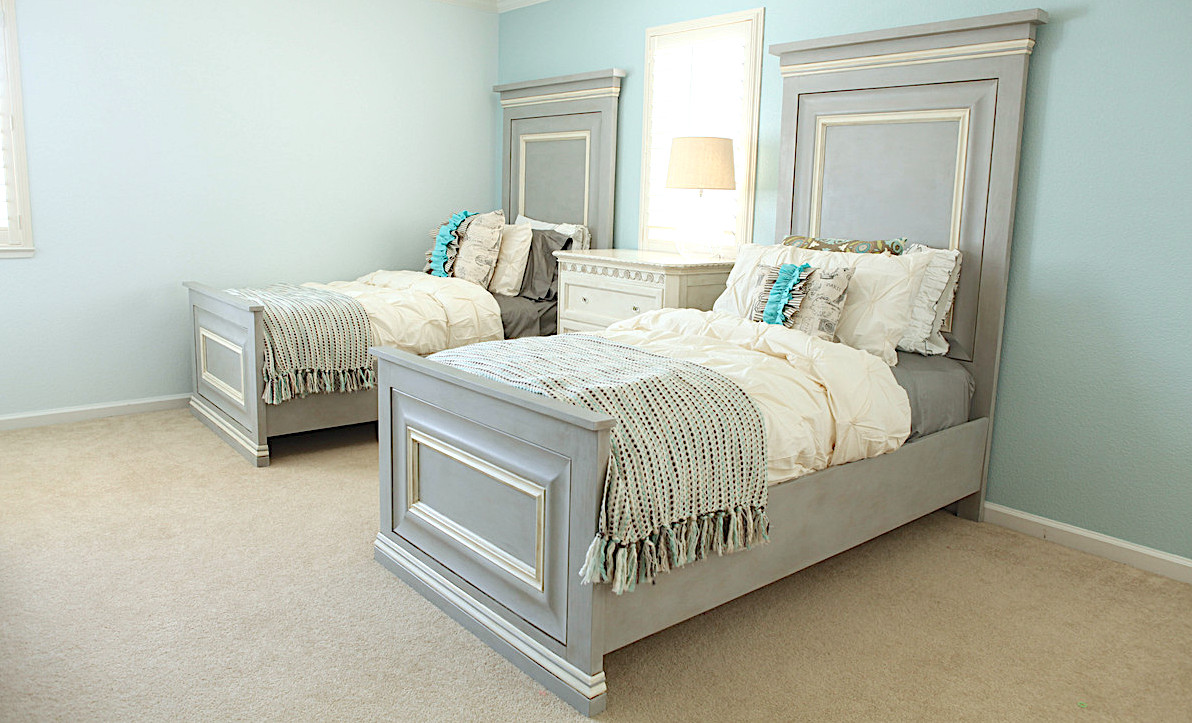
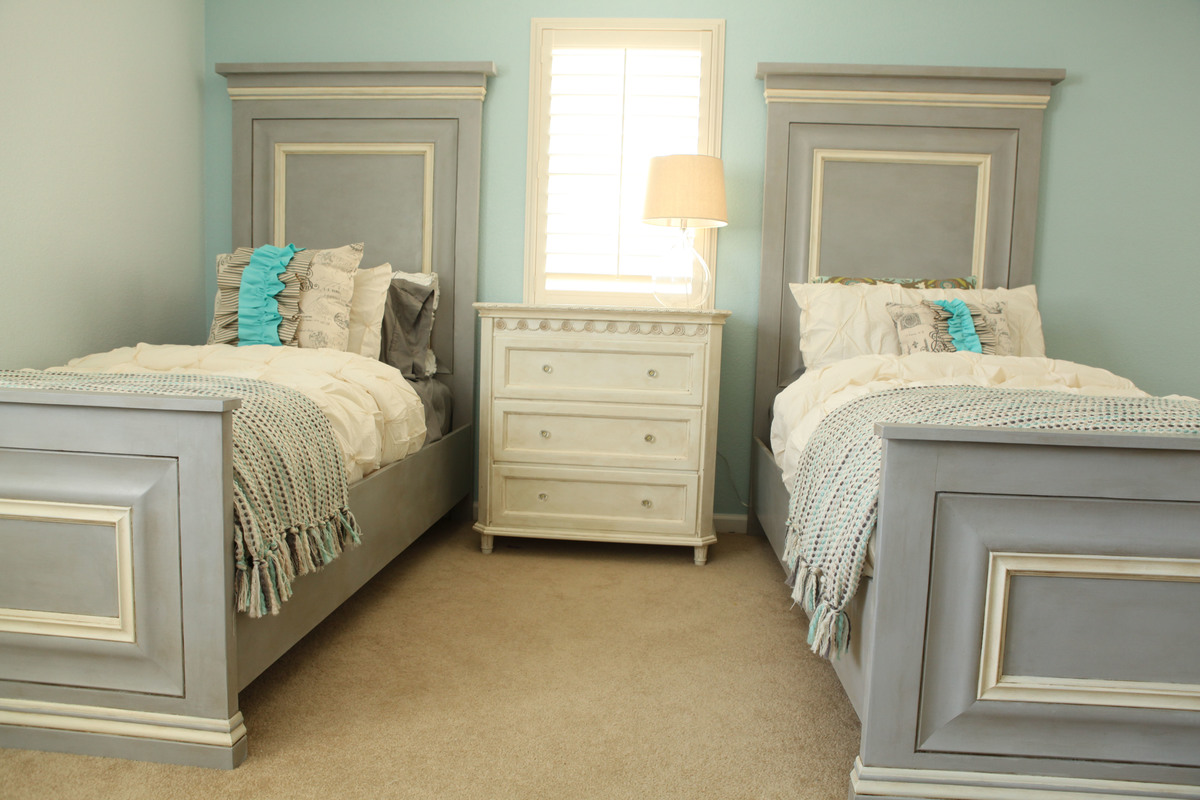
Thank you so much for these awesome plans. When I saw the original twin panel bed, I knew this was exactly what I wanted to build for my two daughters. I love super high head boards, and these are exactly that. I am in love. I did make some changes to the plan. I went with taller side rails, and used metal bed rail brackets. The brackets were super important. We move every few years being in the military, and I wanted something that would with-stand time and moves. I am also quite impressed how solid these beds are. I could never find anything this amazing in a store. I would also like to thank my husband for his help. It was our first build, but definitely not our last. Thank you!


Wed, 06/11/2014 - 17:27
Thank you for your very nice comments:
Here is some info, let me know if I can help further more.
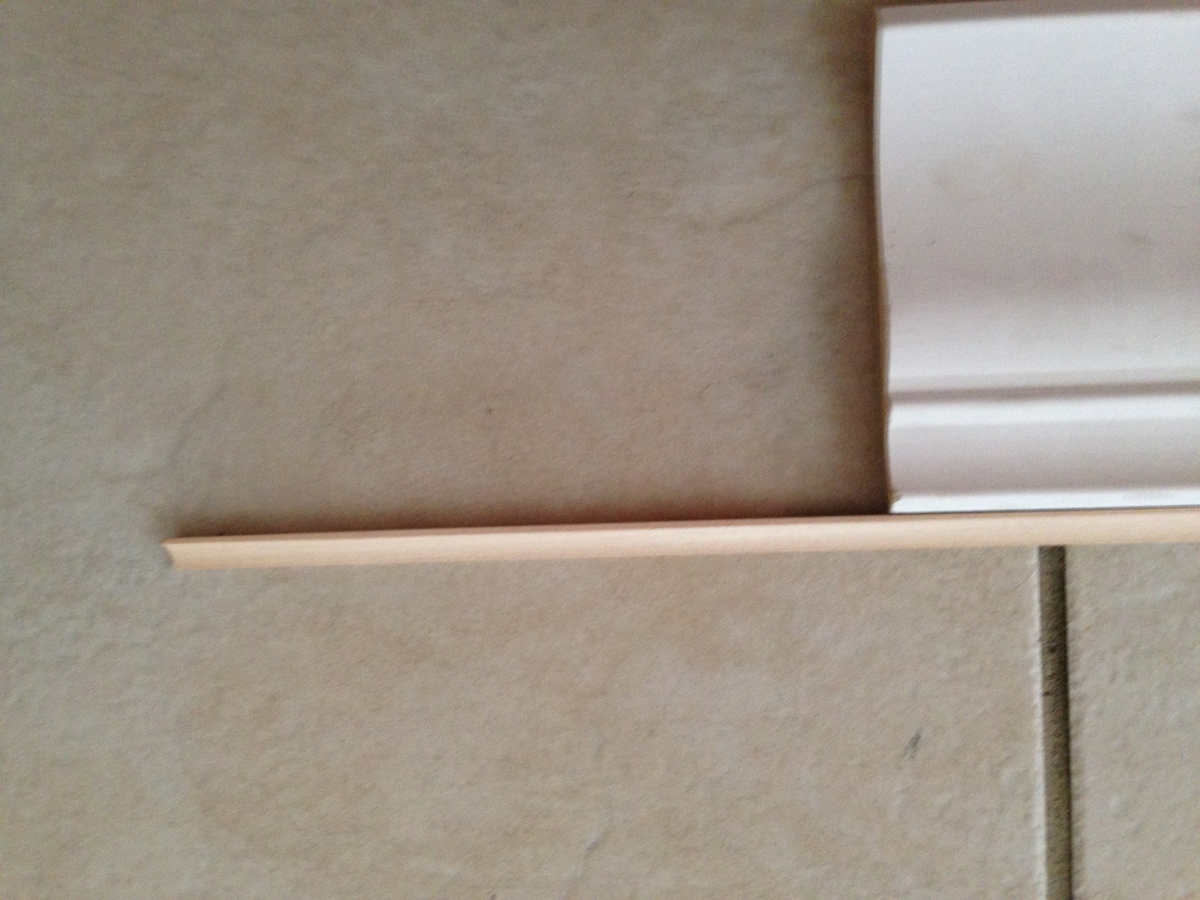
This is what we used for the base molding and the headboard molding at the top. http://www.homedepot.com/p/House-of-Fara-5-8-in-x-4-in-x-8-ft-MDF-Base-…
For the the inner molding we used two pieces of molding: This is the style (link below) we used, but ours was a little bigger, 5 1/4 inches. Couldn't find it on the home depot website, but this is exactly the same style.
The addition molding below is a finishing molding that we had to use since the above molding was not flush to the back board. It finished really nice. Glad we added this addition dimension. You can easily skip using it with different "above" molding.
http://www.homedepot.com/p/American-Wood-Moulding-LWM47-9-16-in-x-4-1-4…
http://www.homedepot.com/p/American-Wood-Moulding-WM100-11-16-in-x-11-1…
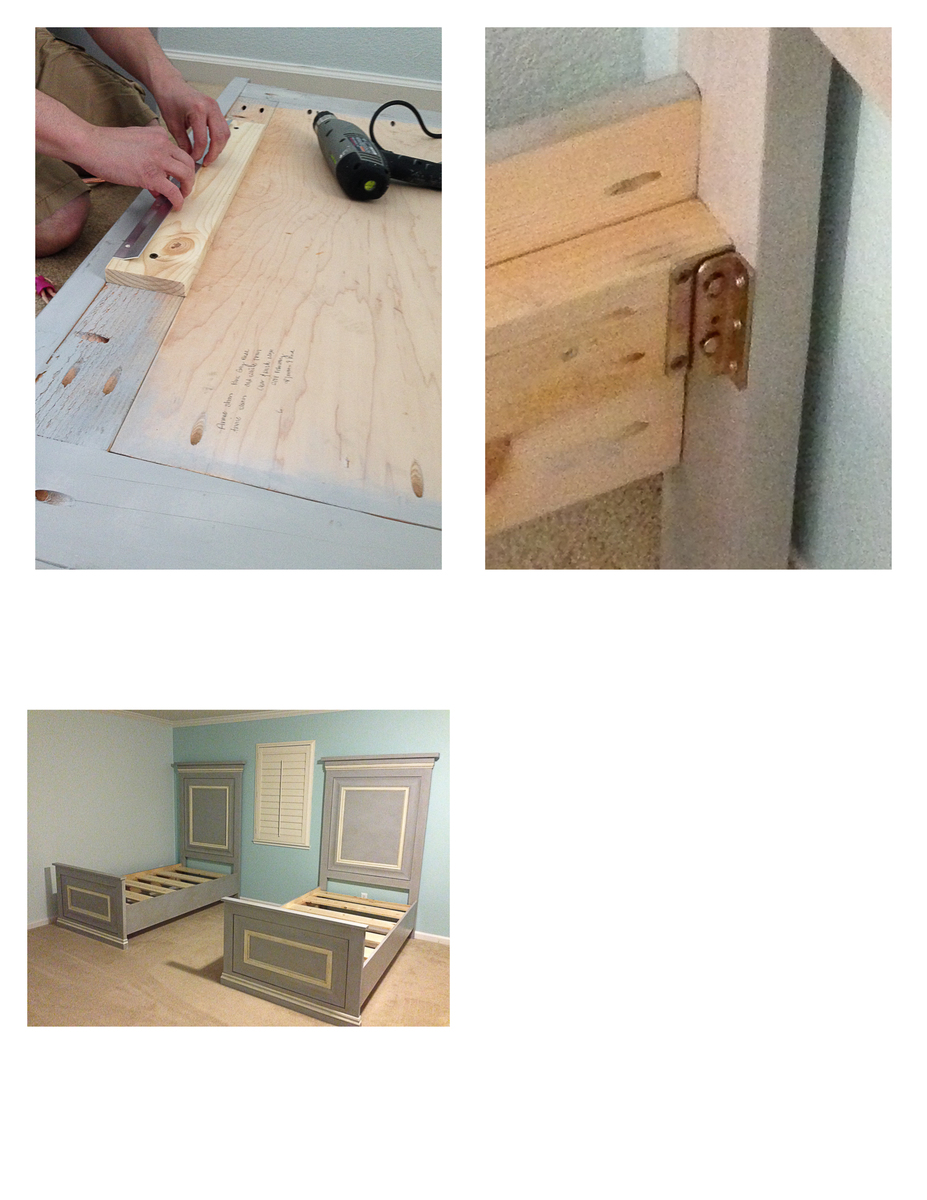
For the side rails we also used 10 inch boards. I thought it made the bed look more proportioned. I will add additional pics of the molding, so re-check pictures. Again, let me know if you have further questions.
Wed, 06/11/2014 - 17:27
Thank you for your very nice comments:
Here is some info, let me know if I can help further more.
This is what we used for the base molding and the headboard molding at the top. http://www.homedepot.com/p/House-of-Fara-5-8-in-x-4-in-x-8-ft-MDF-Base-…
For the the inner molding we used two pieces of molding: This is the style (link below) we used, but ours was a little bigger, 5 1/4 inches. Couldn't find it on the home depot website, but this is exactly the same style.
The addition molding below is a finishing molding that we had to use since the above molding was not flush to the back board. It finished really nice. Glad we added this addition dimension. You can easily skip using it with different "above" molding.
http://www.homedepot.com/p/American-Wood-Moulding-LWM47-9-16-in-x-4-1-4…
http://www.homedepot.com/p/American-Wood-Moulding-WM100-11-16-in-x-11-1…
For the side rails we also used 10 inch boards. I thought it made the bed look more proportioned. I will add additional pics of the molding, so re-check pictures. Again, let me know if you have further questions.

Mon, 07/20/2015 - 18:51
I'm in awe!! Thank you so much for sharing, I just saw your beds and had to comment and say thank you for sharing and beautiful job! Ana

In reply to Your Bed is Beautiful!!! by Ana White
Sat, 11/28/2015 - 15:53
Thank you! You are the one made it possible. We truly feel inspired when we look at your page. Thank you for sharing all your plans. You are the best.
This was a super fun project and didn't cost much at all.

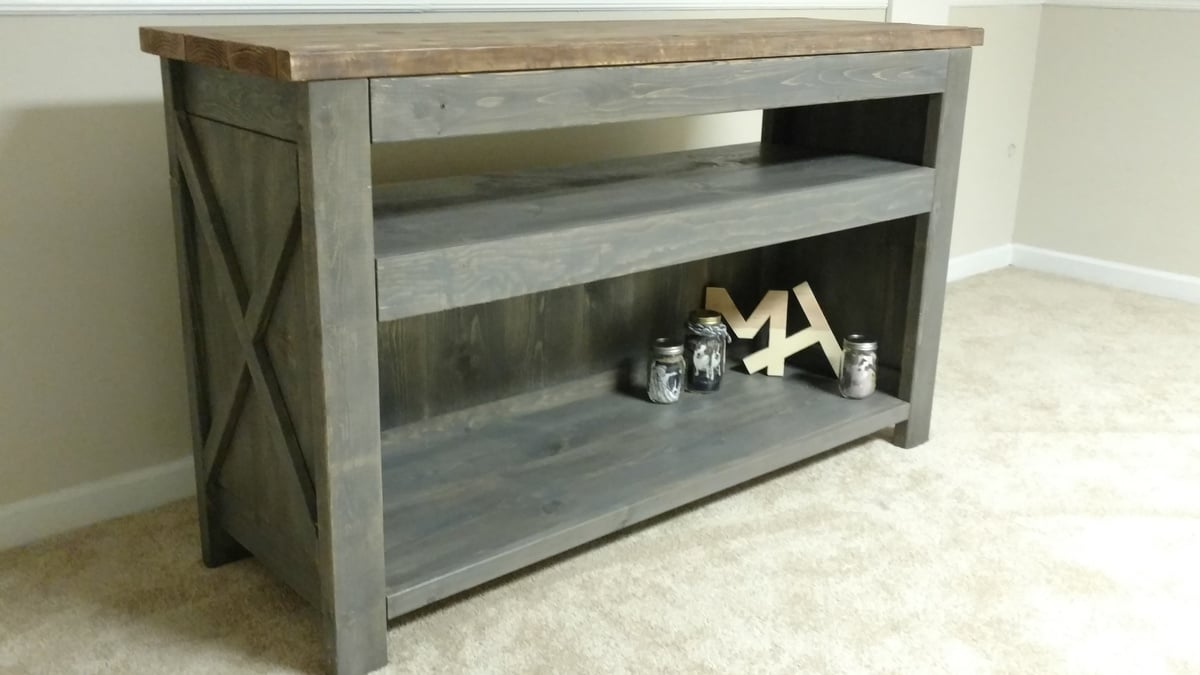
Started with Ana's basic plan/dimensions. Changed the back legs to 1x6, added aa 2nd shelf and storage closet to hang hand tools/gloves.
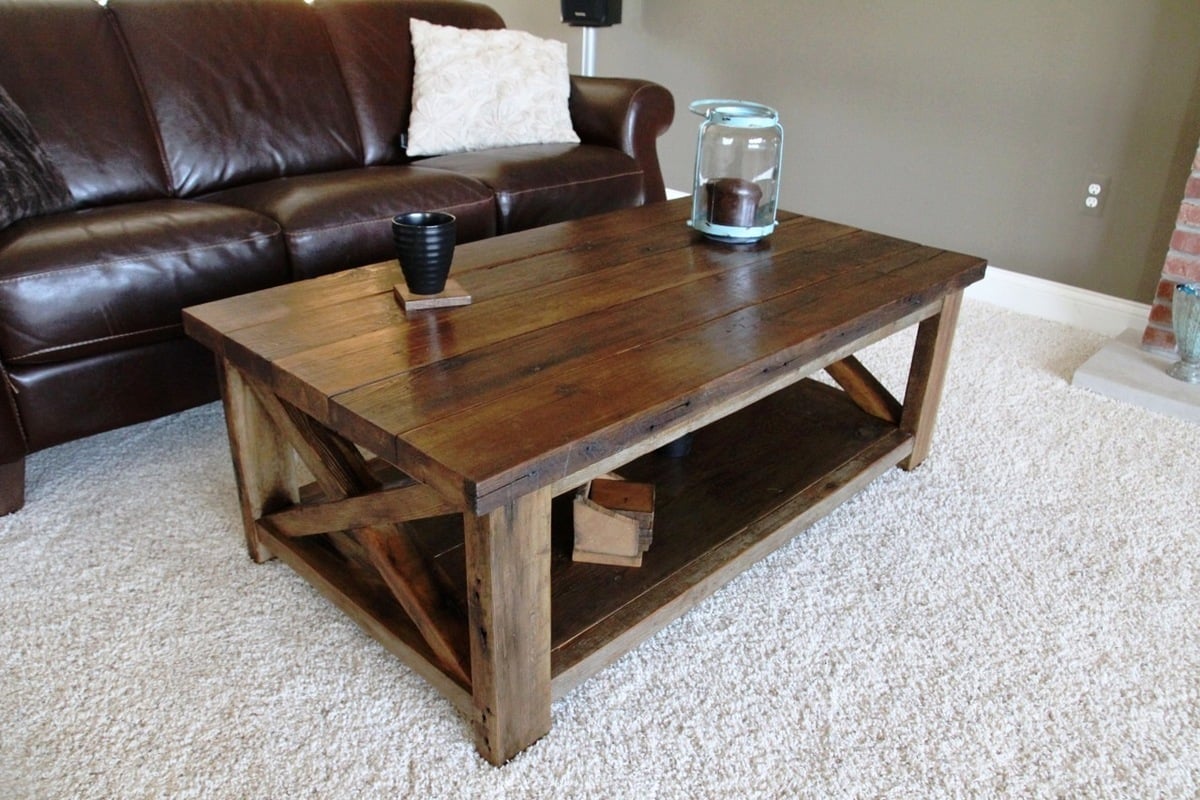
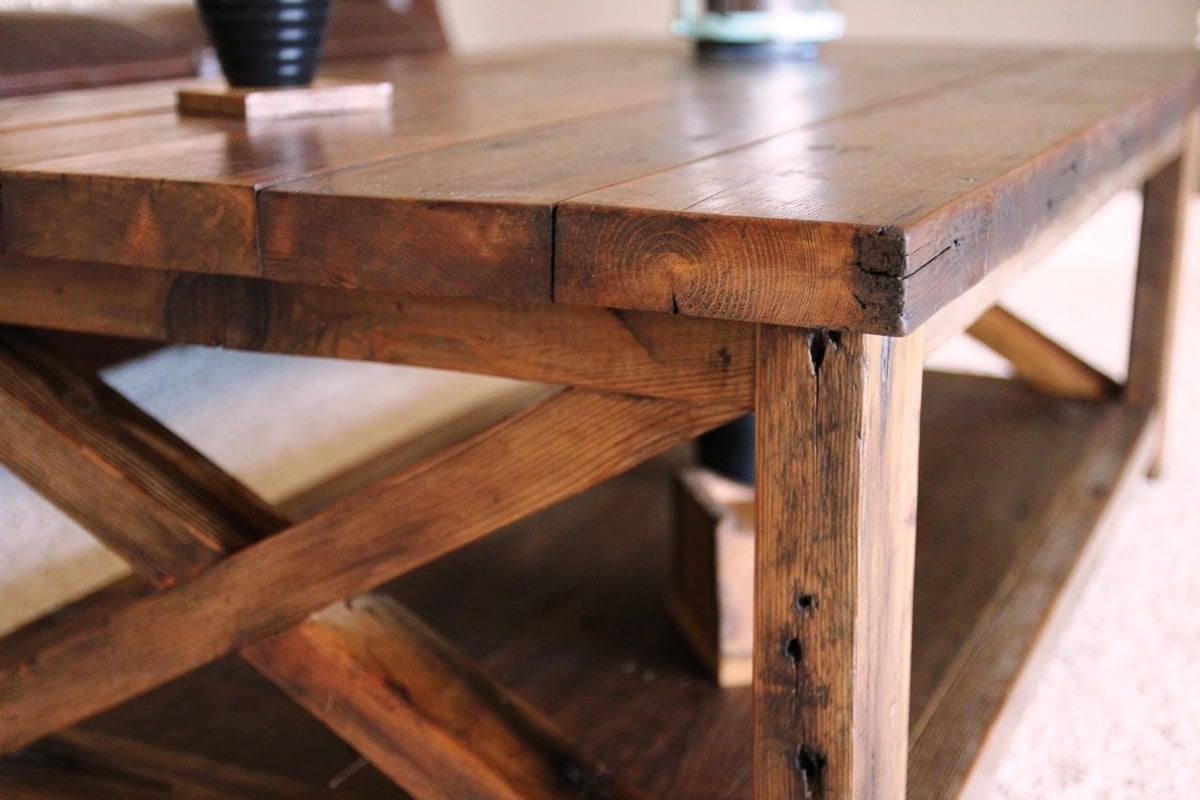
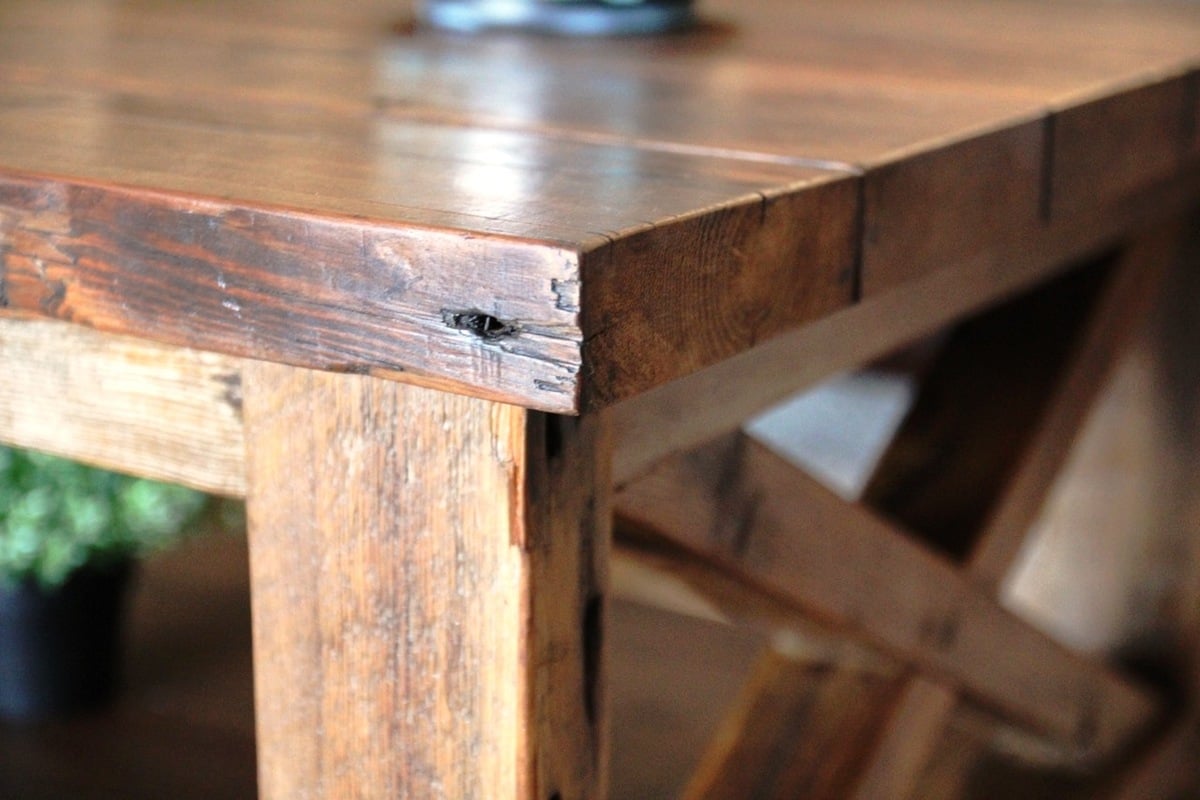
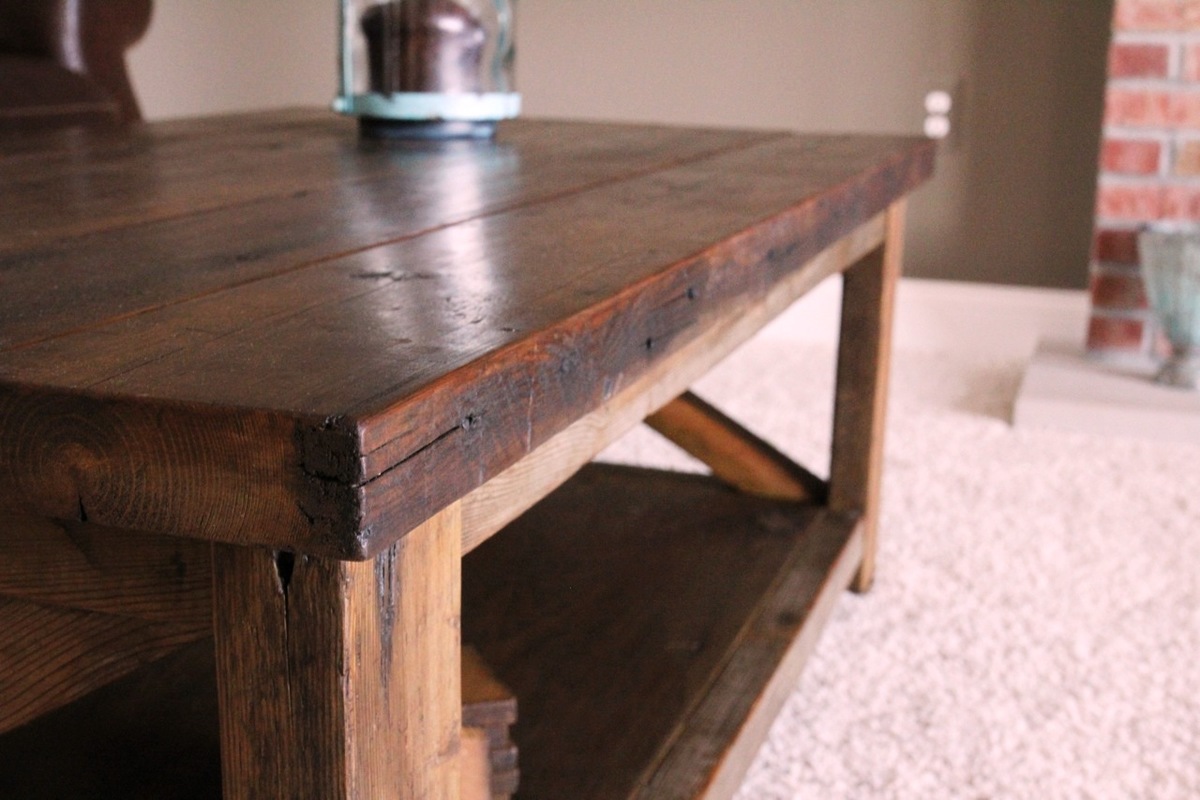
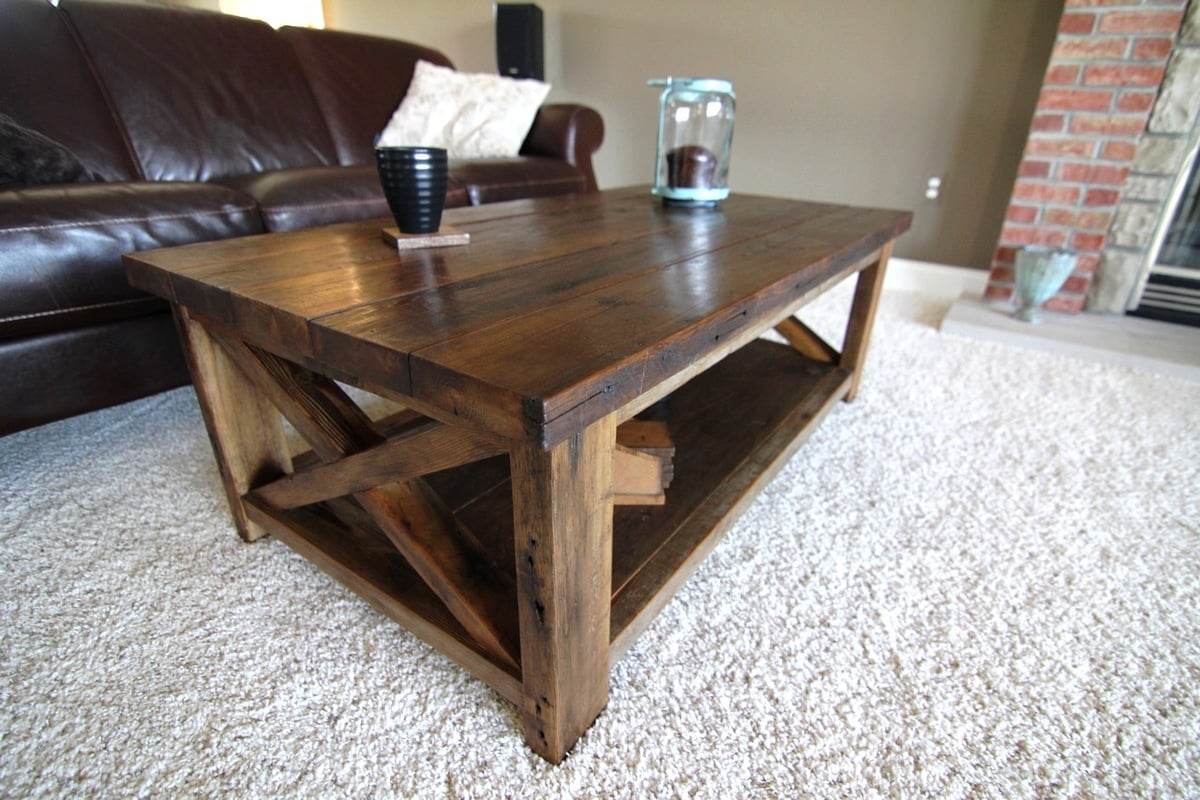
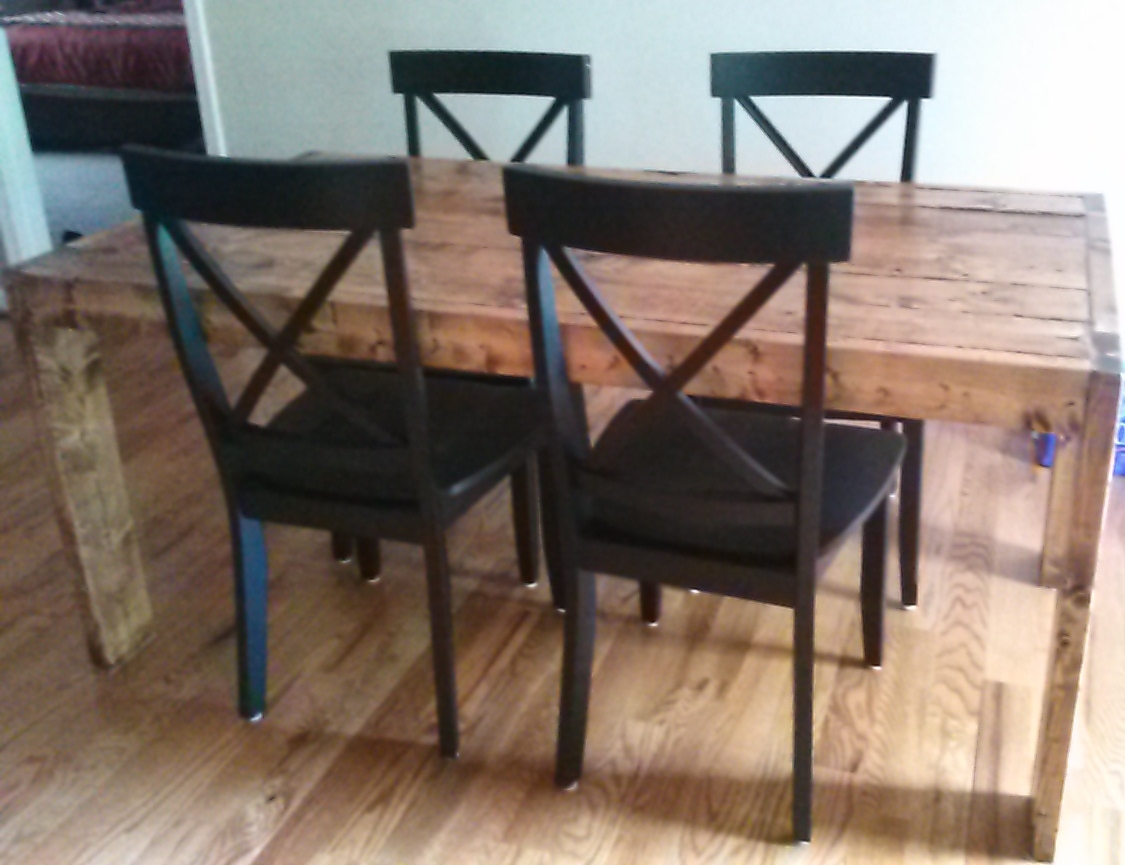
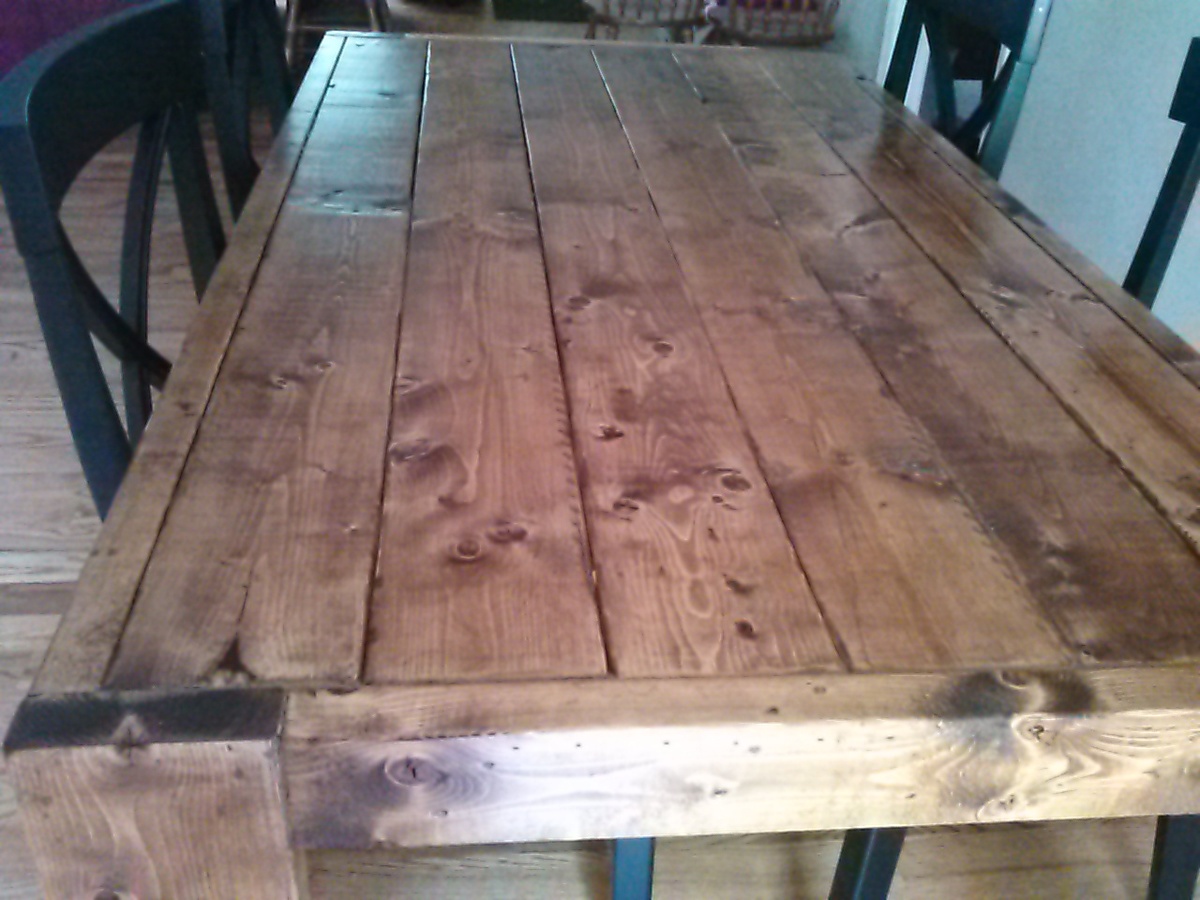
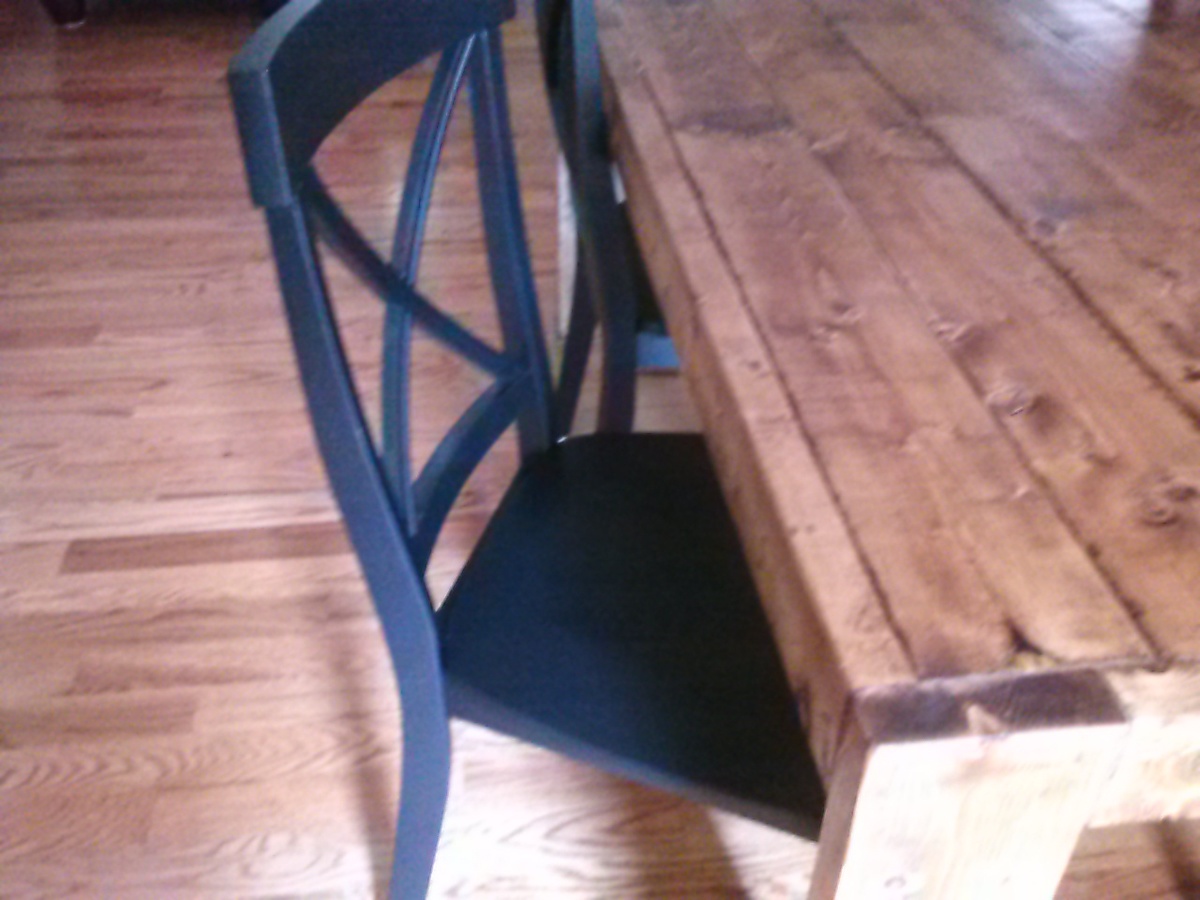
Used the plans as provided by Ana for the Rustic X Coffee Table.
I built this table using barn wood I reclaimed from a farmstead in Saline, MI which I dismantled in 2010. Interestingly enough, during the dismantling, the farmstead served as a movie set for the filming of Cedar Rapids, starring Ann Hesche, John C. Riley and Sigourney Weaver.
Thanks for looking,
Mike
Fri, 07/20/2012 - 16:42
Thank you for your compliment, much appreciated!!
I'm fortunate to have been working with reclaimed wood for eleven years now and the outcome never ceases to amaze me once the finish is applied.
Thanks again.
Mike
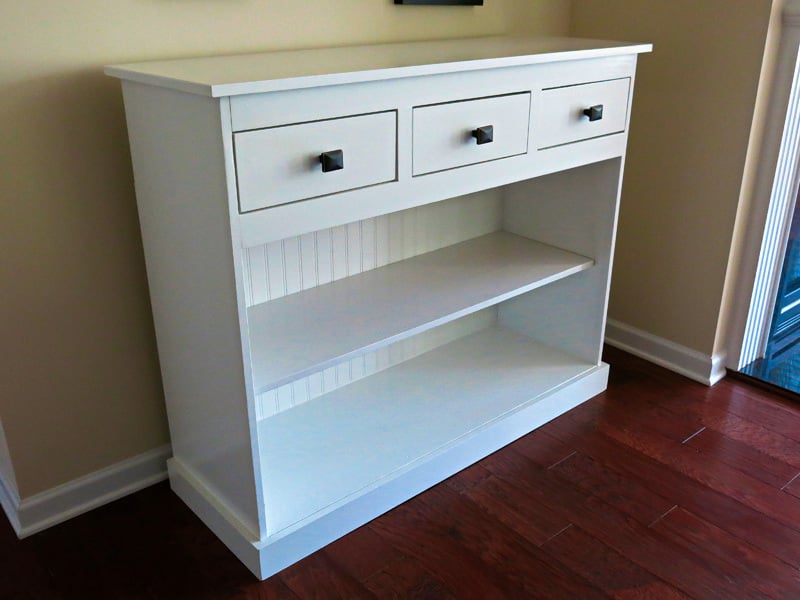
I modified the plan slightly to make it longer and higher to fill the space I wanted it to fill.
I primed and painted all of the boards before I cut them. Then I just had to do some touch up when I was done. This is my first woodworking project and the instructions were clear and easy to follow. I already have my next Ana White project picked out.
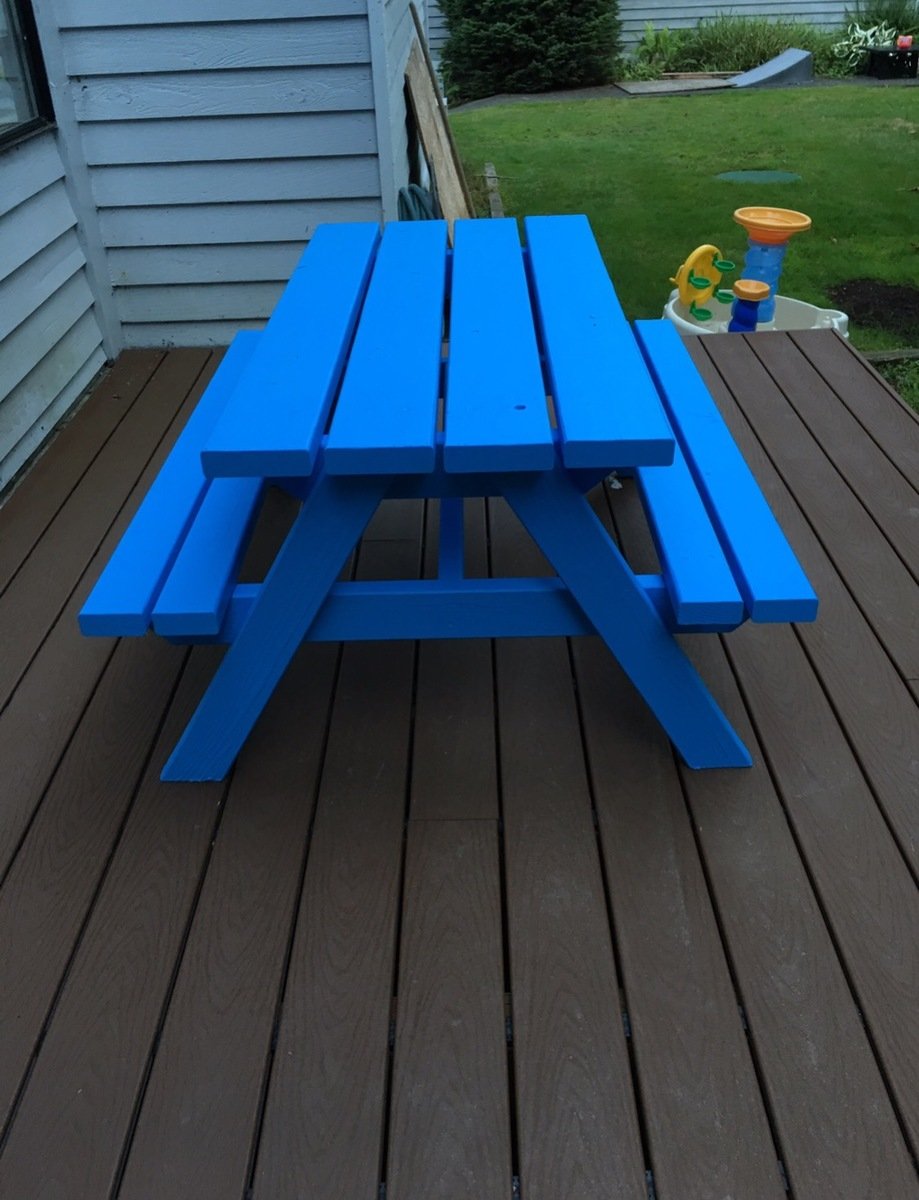
Went shopping Saturday, worked a few hours, then worked most of the day Sunday. Our boy is in heaven and everyone else wants one now.
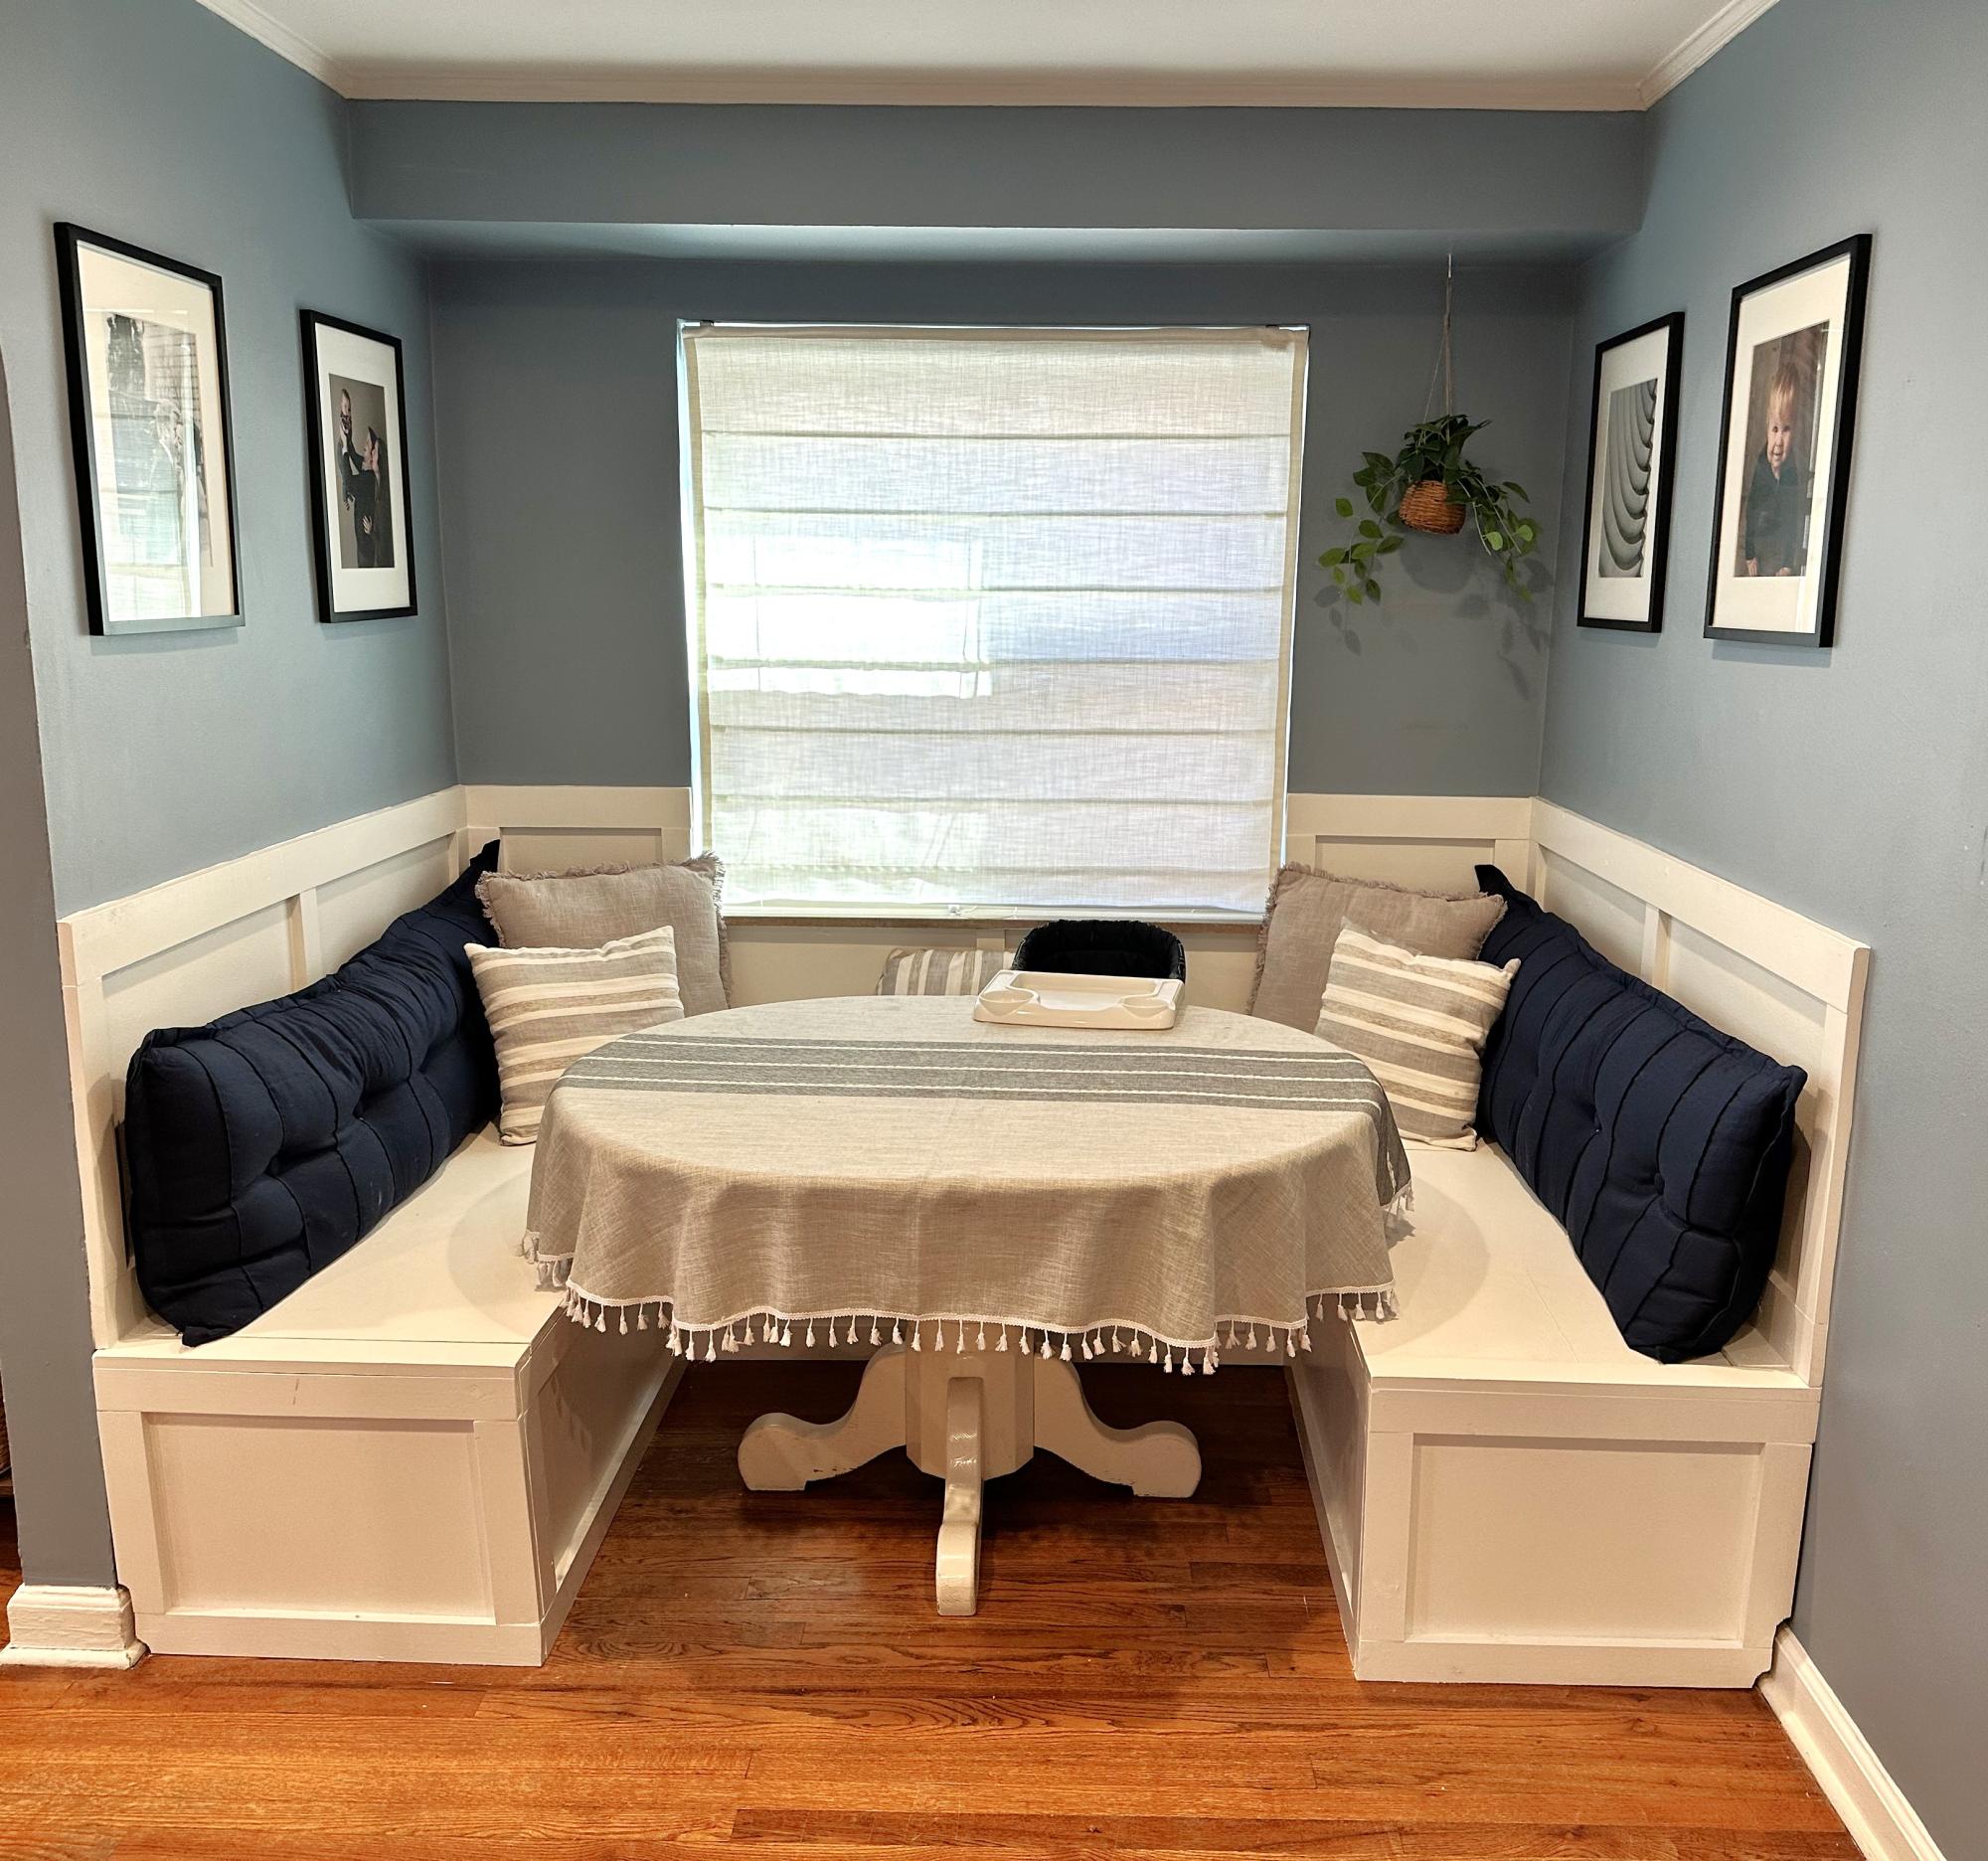
We love our new banquette so much! Thanks for the plans!!
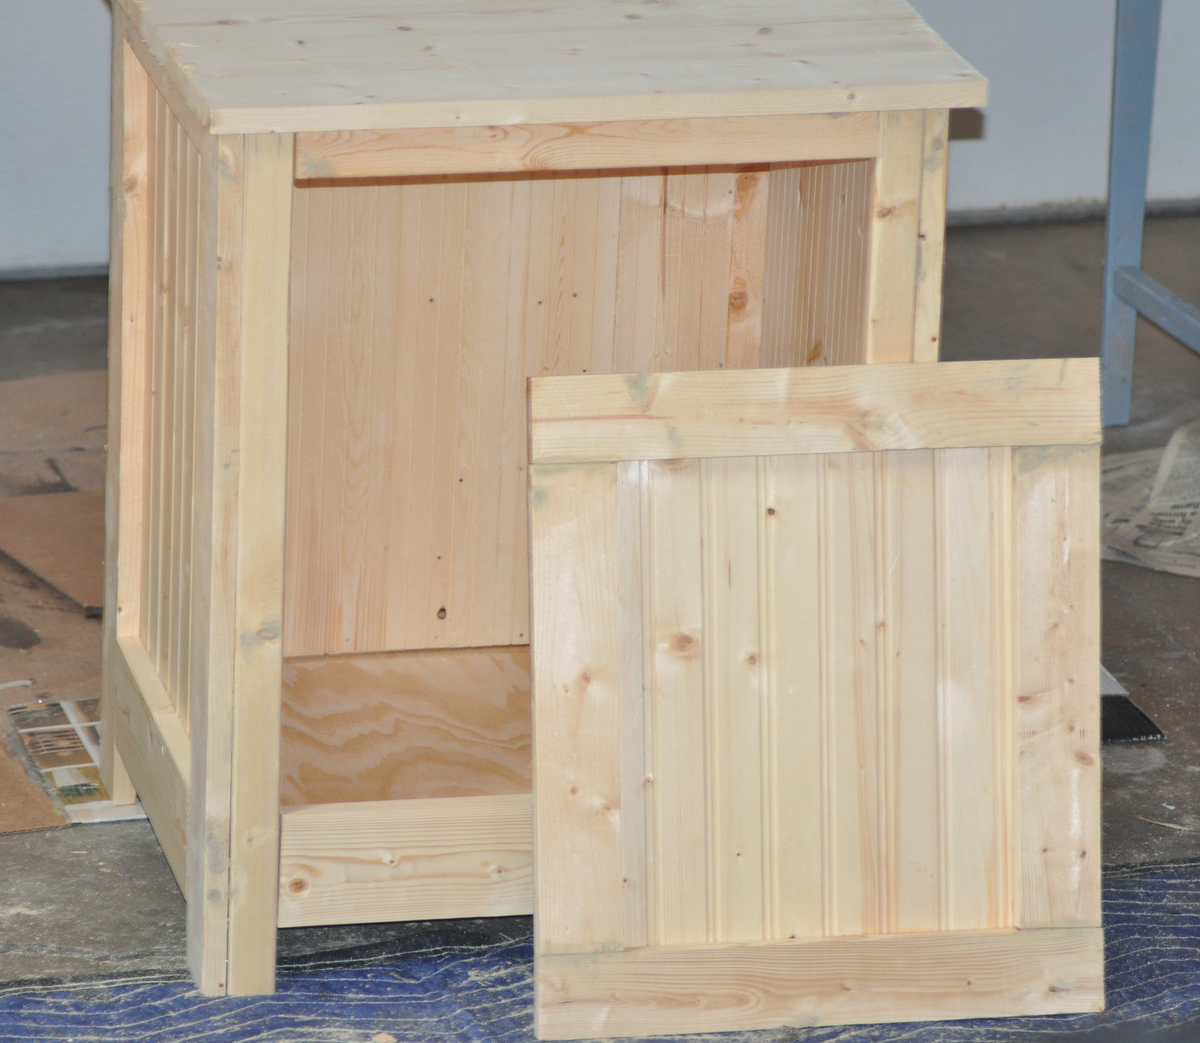
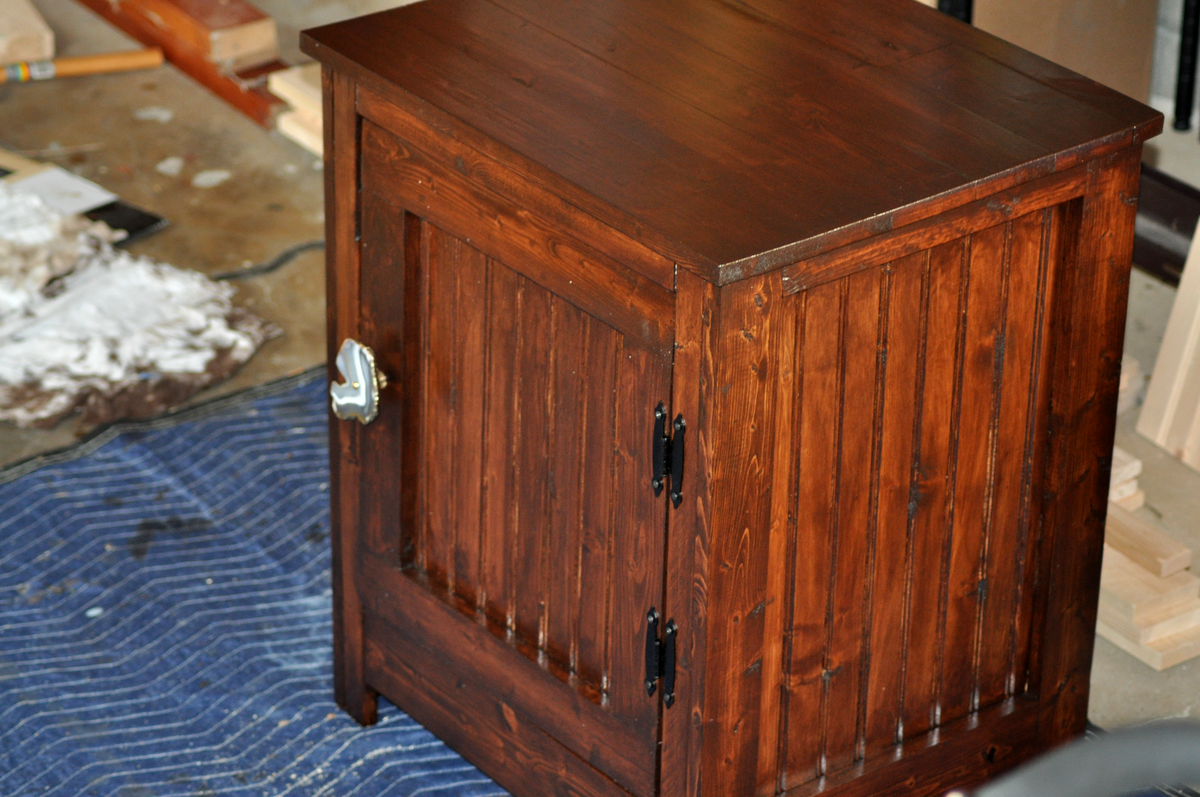
I DO NOT have a Kreg Jig. If you don't have a Kreg Jig, I recommend purchasing small mending plates. I got mine at Walmart, they were $1.77 a 4 pack. I do not recommend using 3 inch nail screws and trying to get them in super straight. While it worked for 3 face frames, the last frame I just could not get to work (maybe I was getting tired). Speaking of tired, I mostly build in the middle of the night while my family is sleeping. If you look closely, I put the 1x2 26 1/2 inch pieces on the front and back frame. Wah wah.... I had to add an extra 1x2 across the top and re-size the 3/4 inch plywood on the bottom.
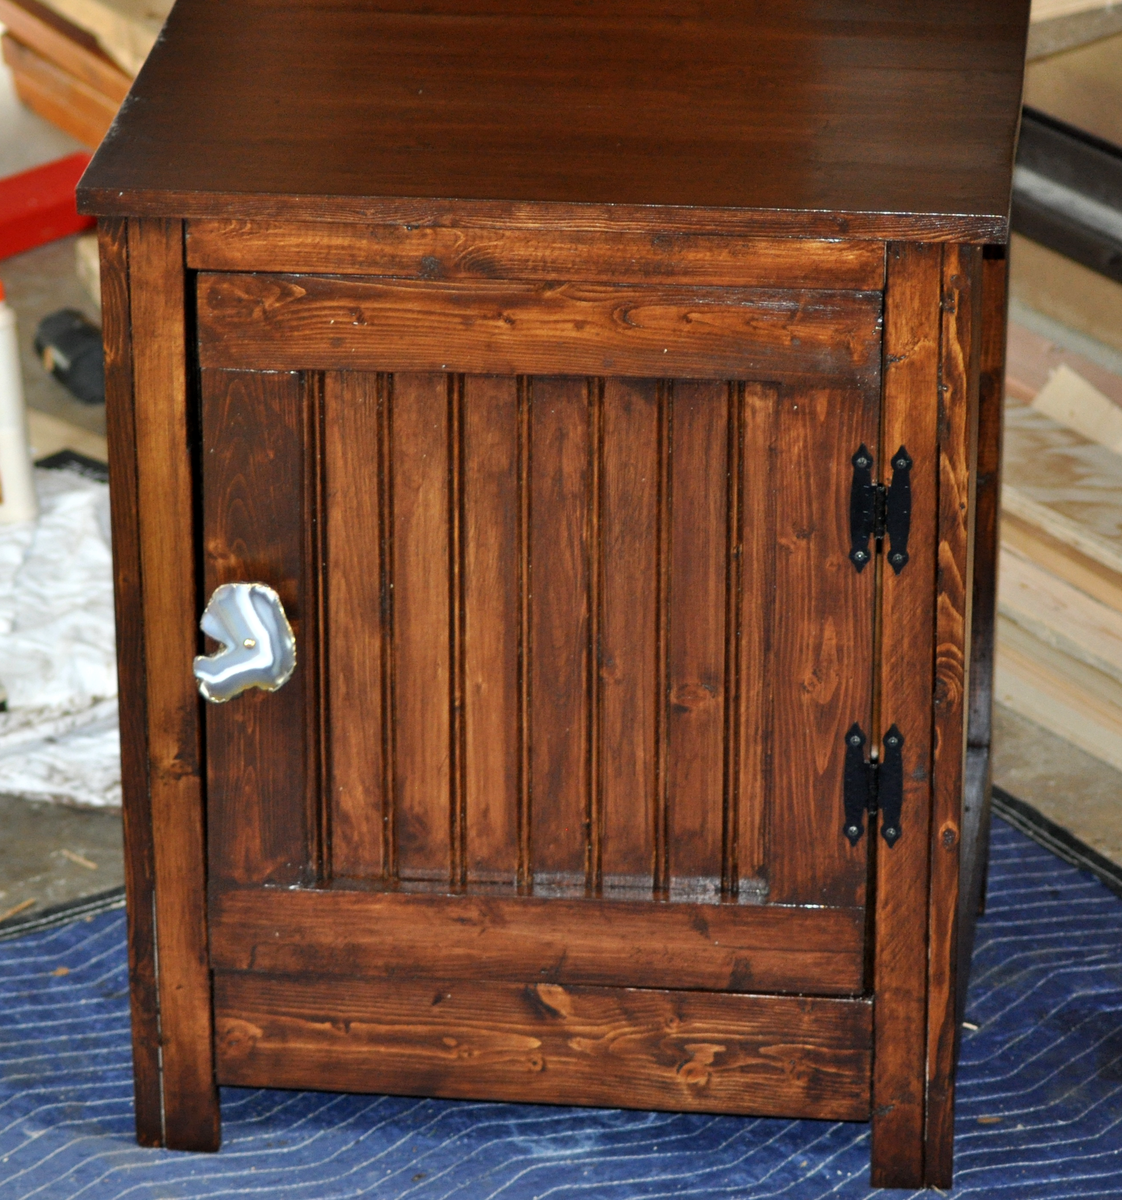
I'm pretty sure everything went wrong for me with this build but I wasn't going to let a nightstand beat me!
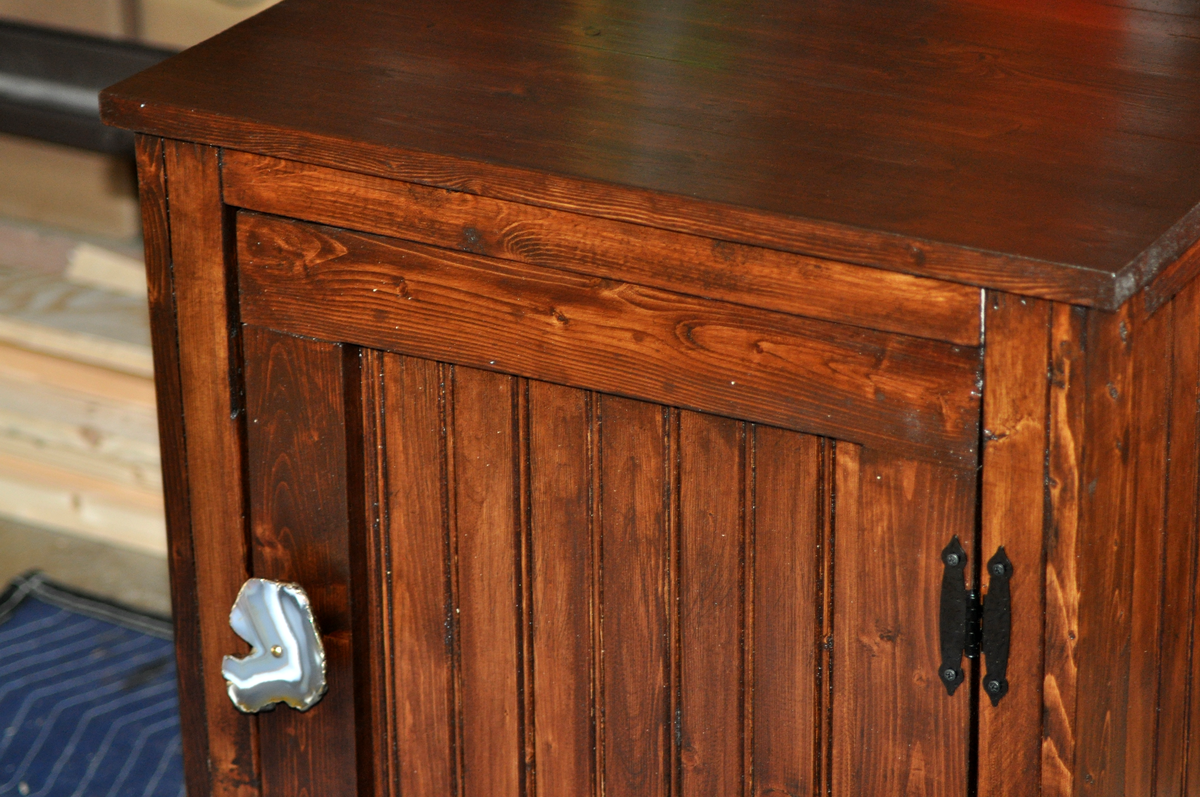
In case you are wondering, the cabinet pull is from Anthropologie. I haven't decided whether or not it's too fabulous for this piece.
I created a different top out various size select pine boards joined by biscuits and glue and then added utensil hooks on both ends and a bottle opener
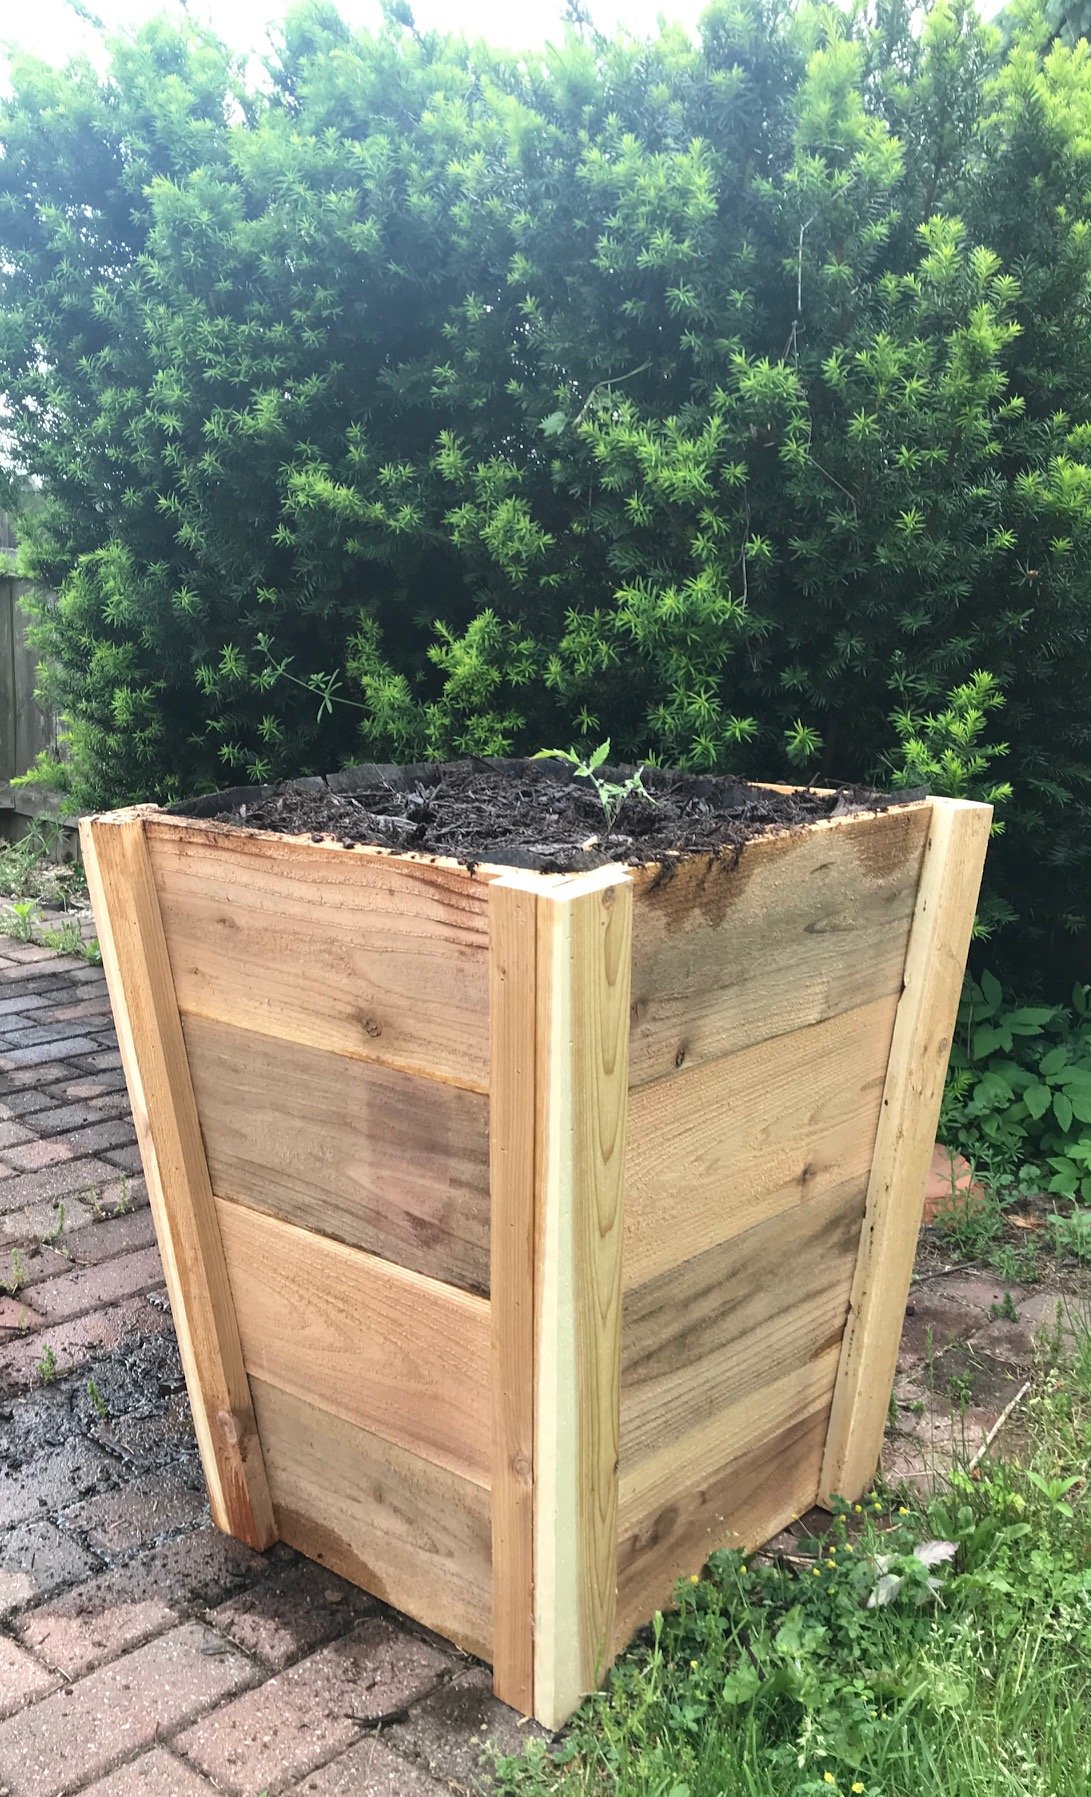
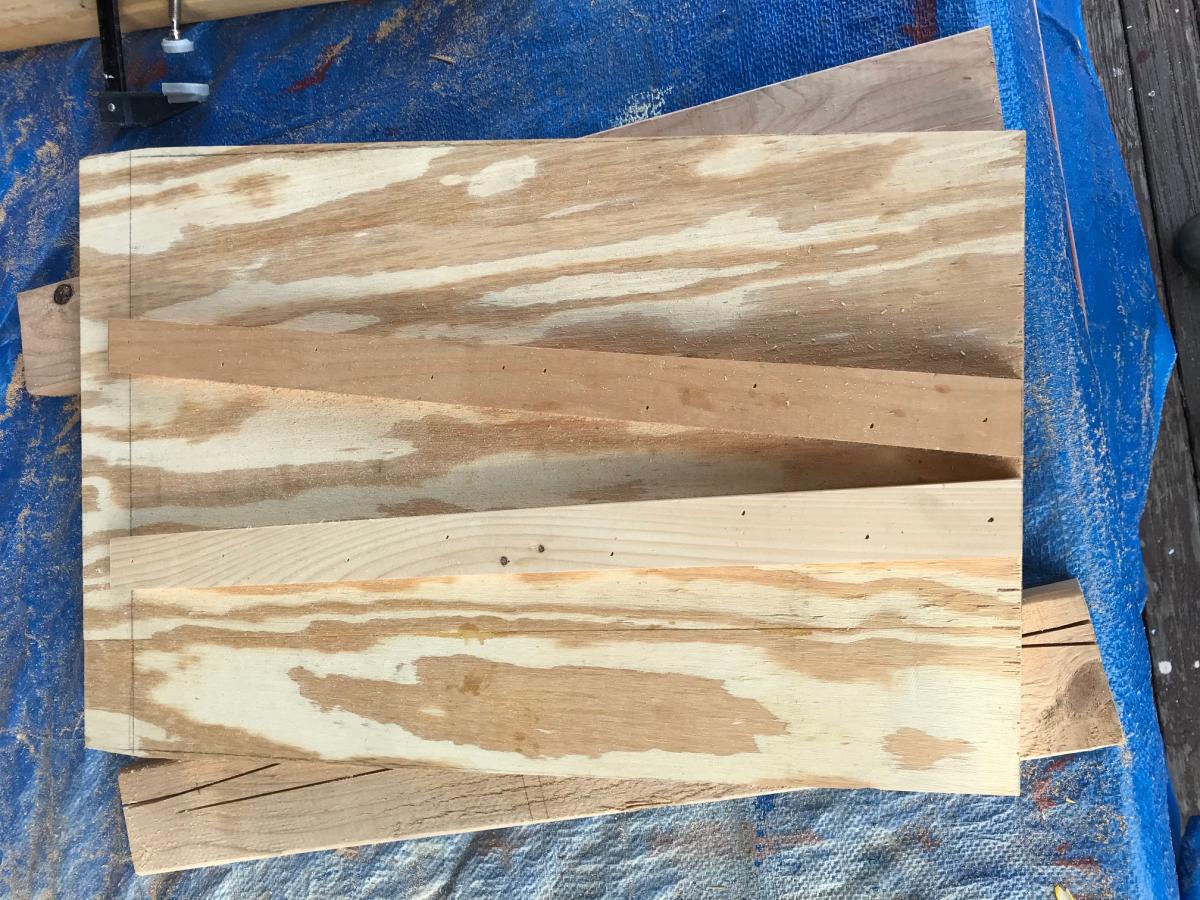
I love the way these planters look and knew I wanted to make them. My freehand circular skills aren't great, so I attached the pickets together with a furring strip and used a template (second picture) to make the cuts. I used screws to attach the furring strips so that once the trim pieces are attached, the furring strips can be removed - or not. This method takes a little longer but it allowed me to make uniform parts. It's also easier to align the sides of the planters since the pickets are already attached to one another - i.e. one unit. I've made two, have a third, shorter one in progress and plan to make more!
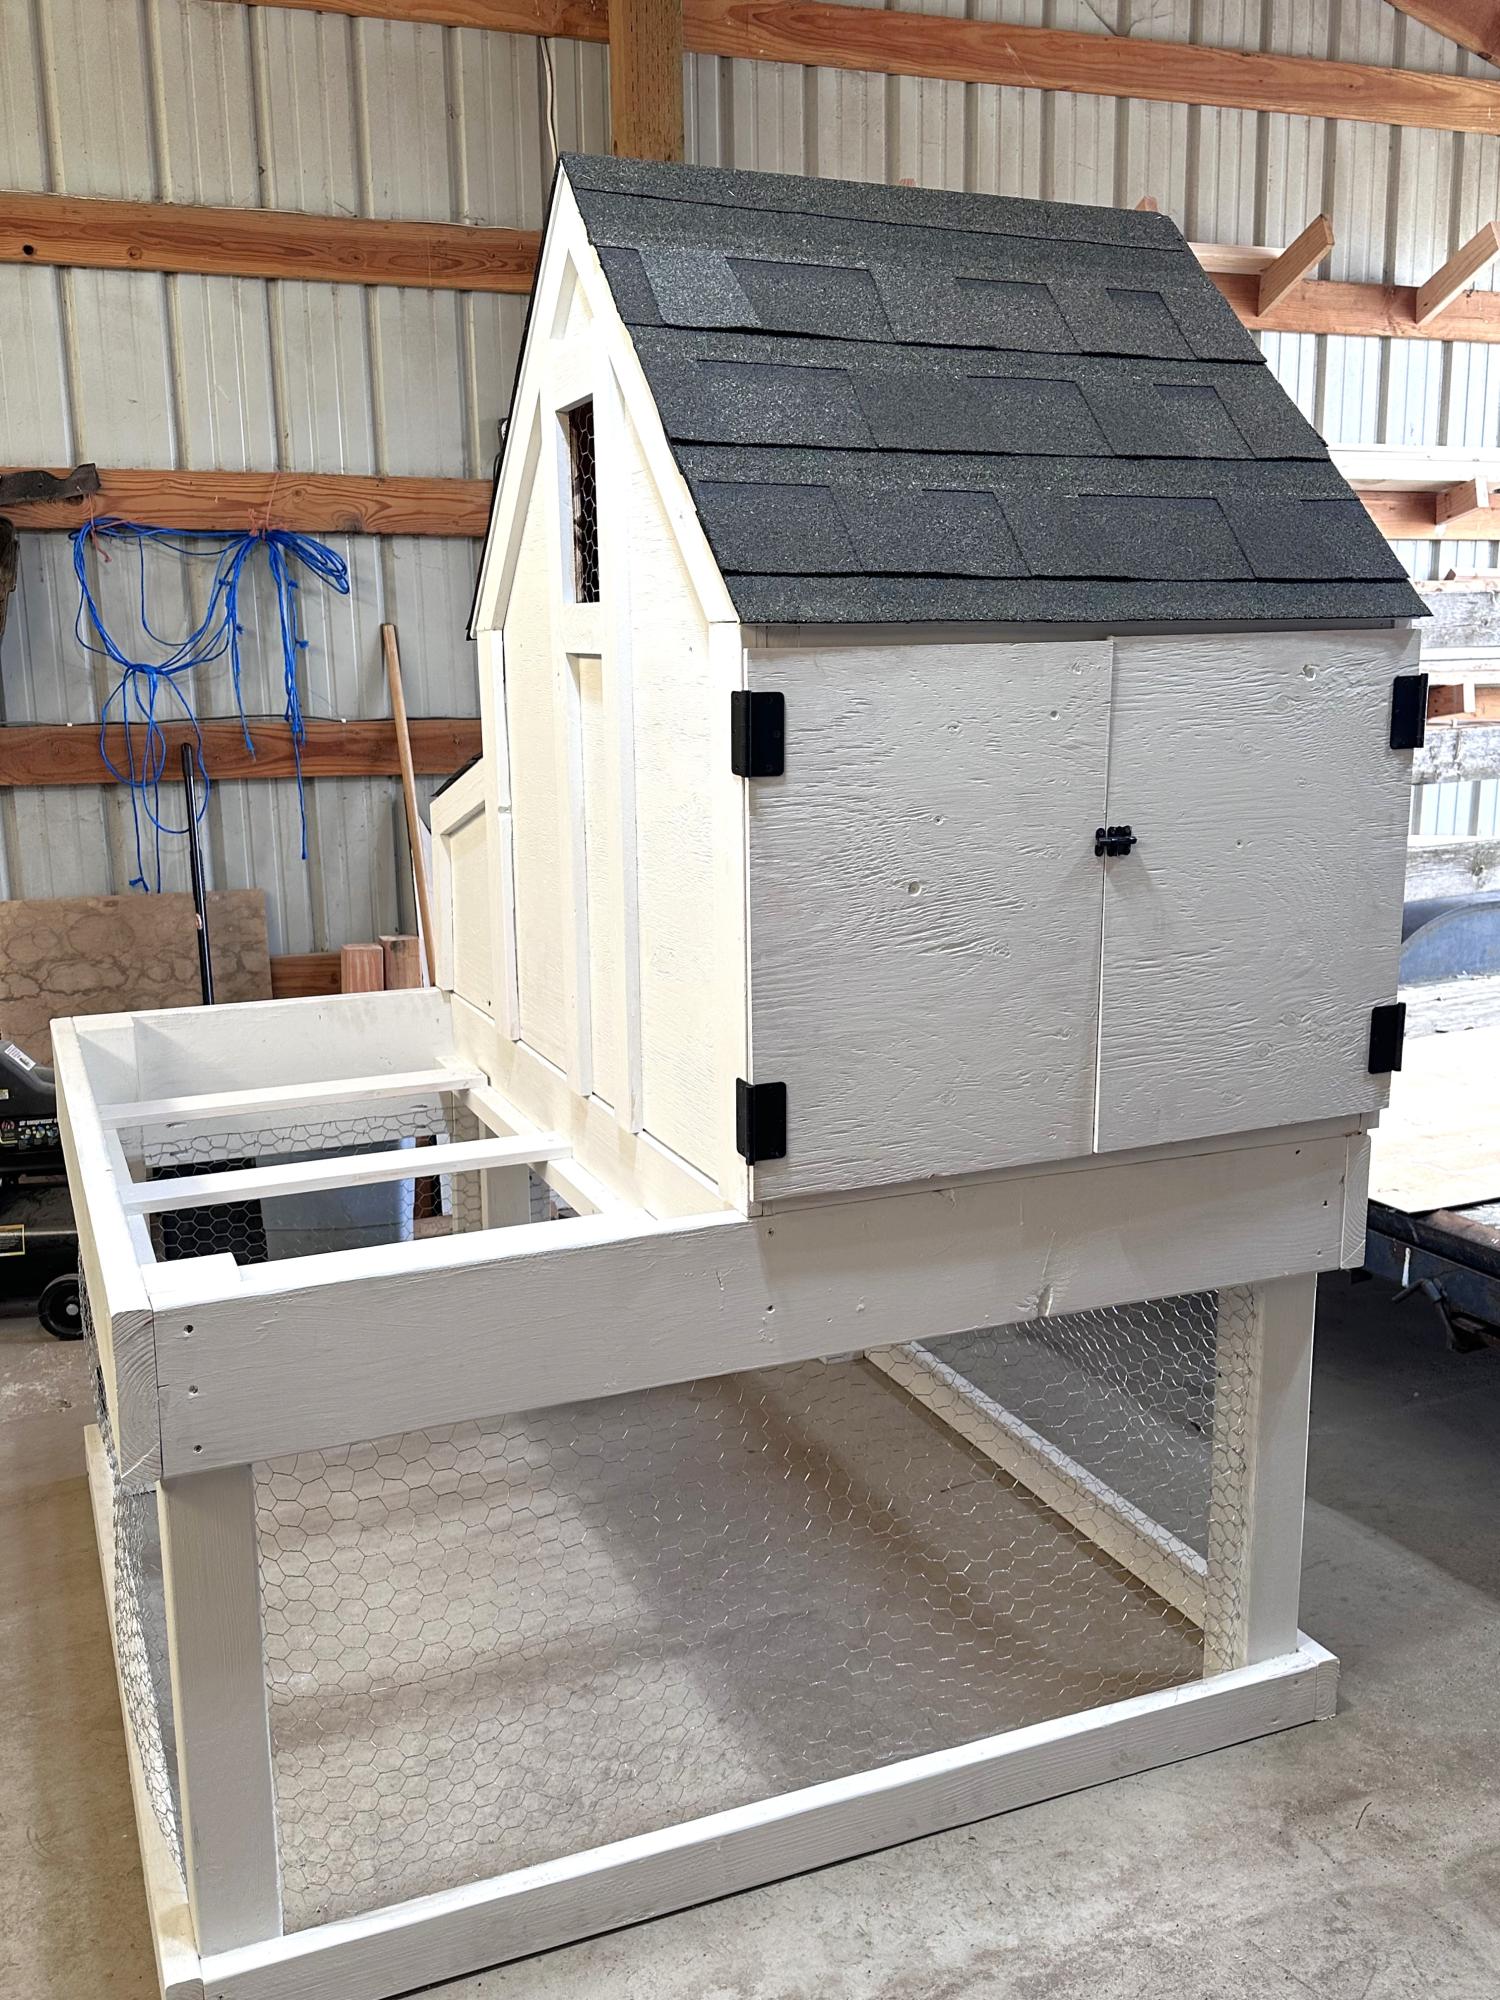
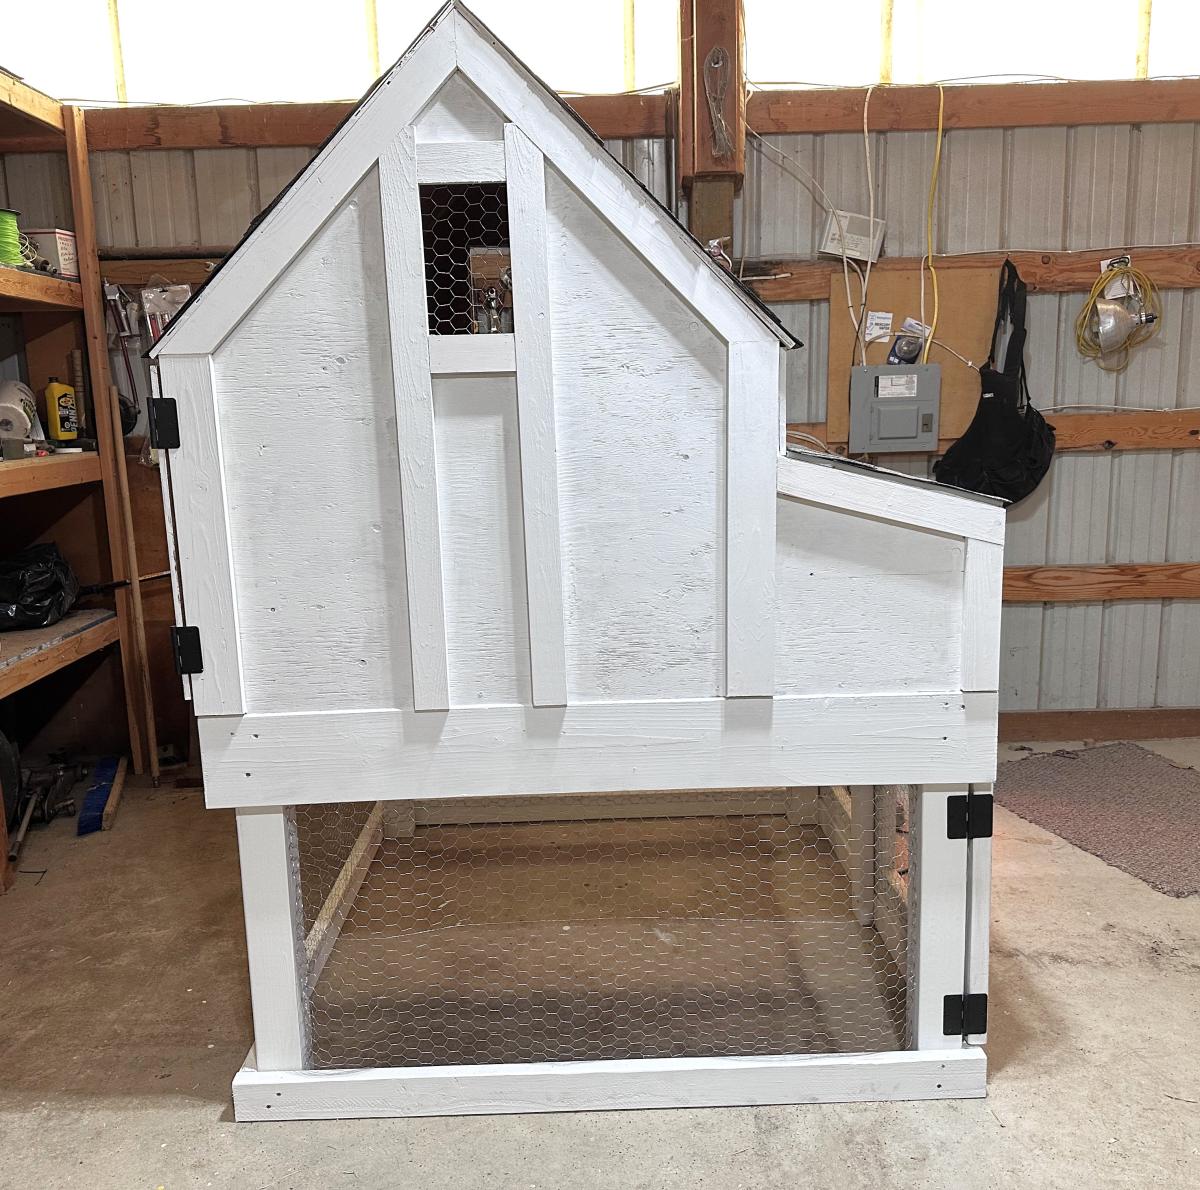
My chicken coop!
Susy A
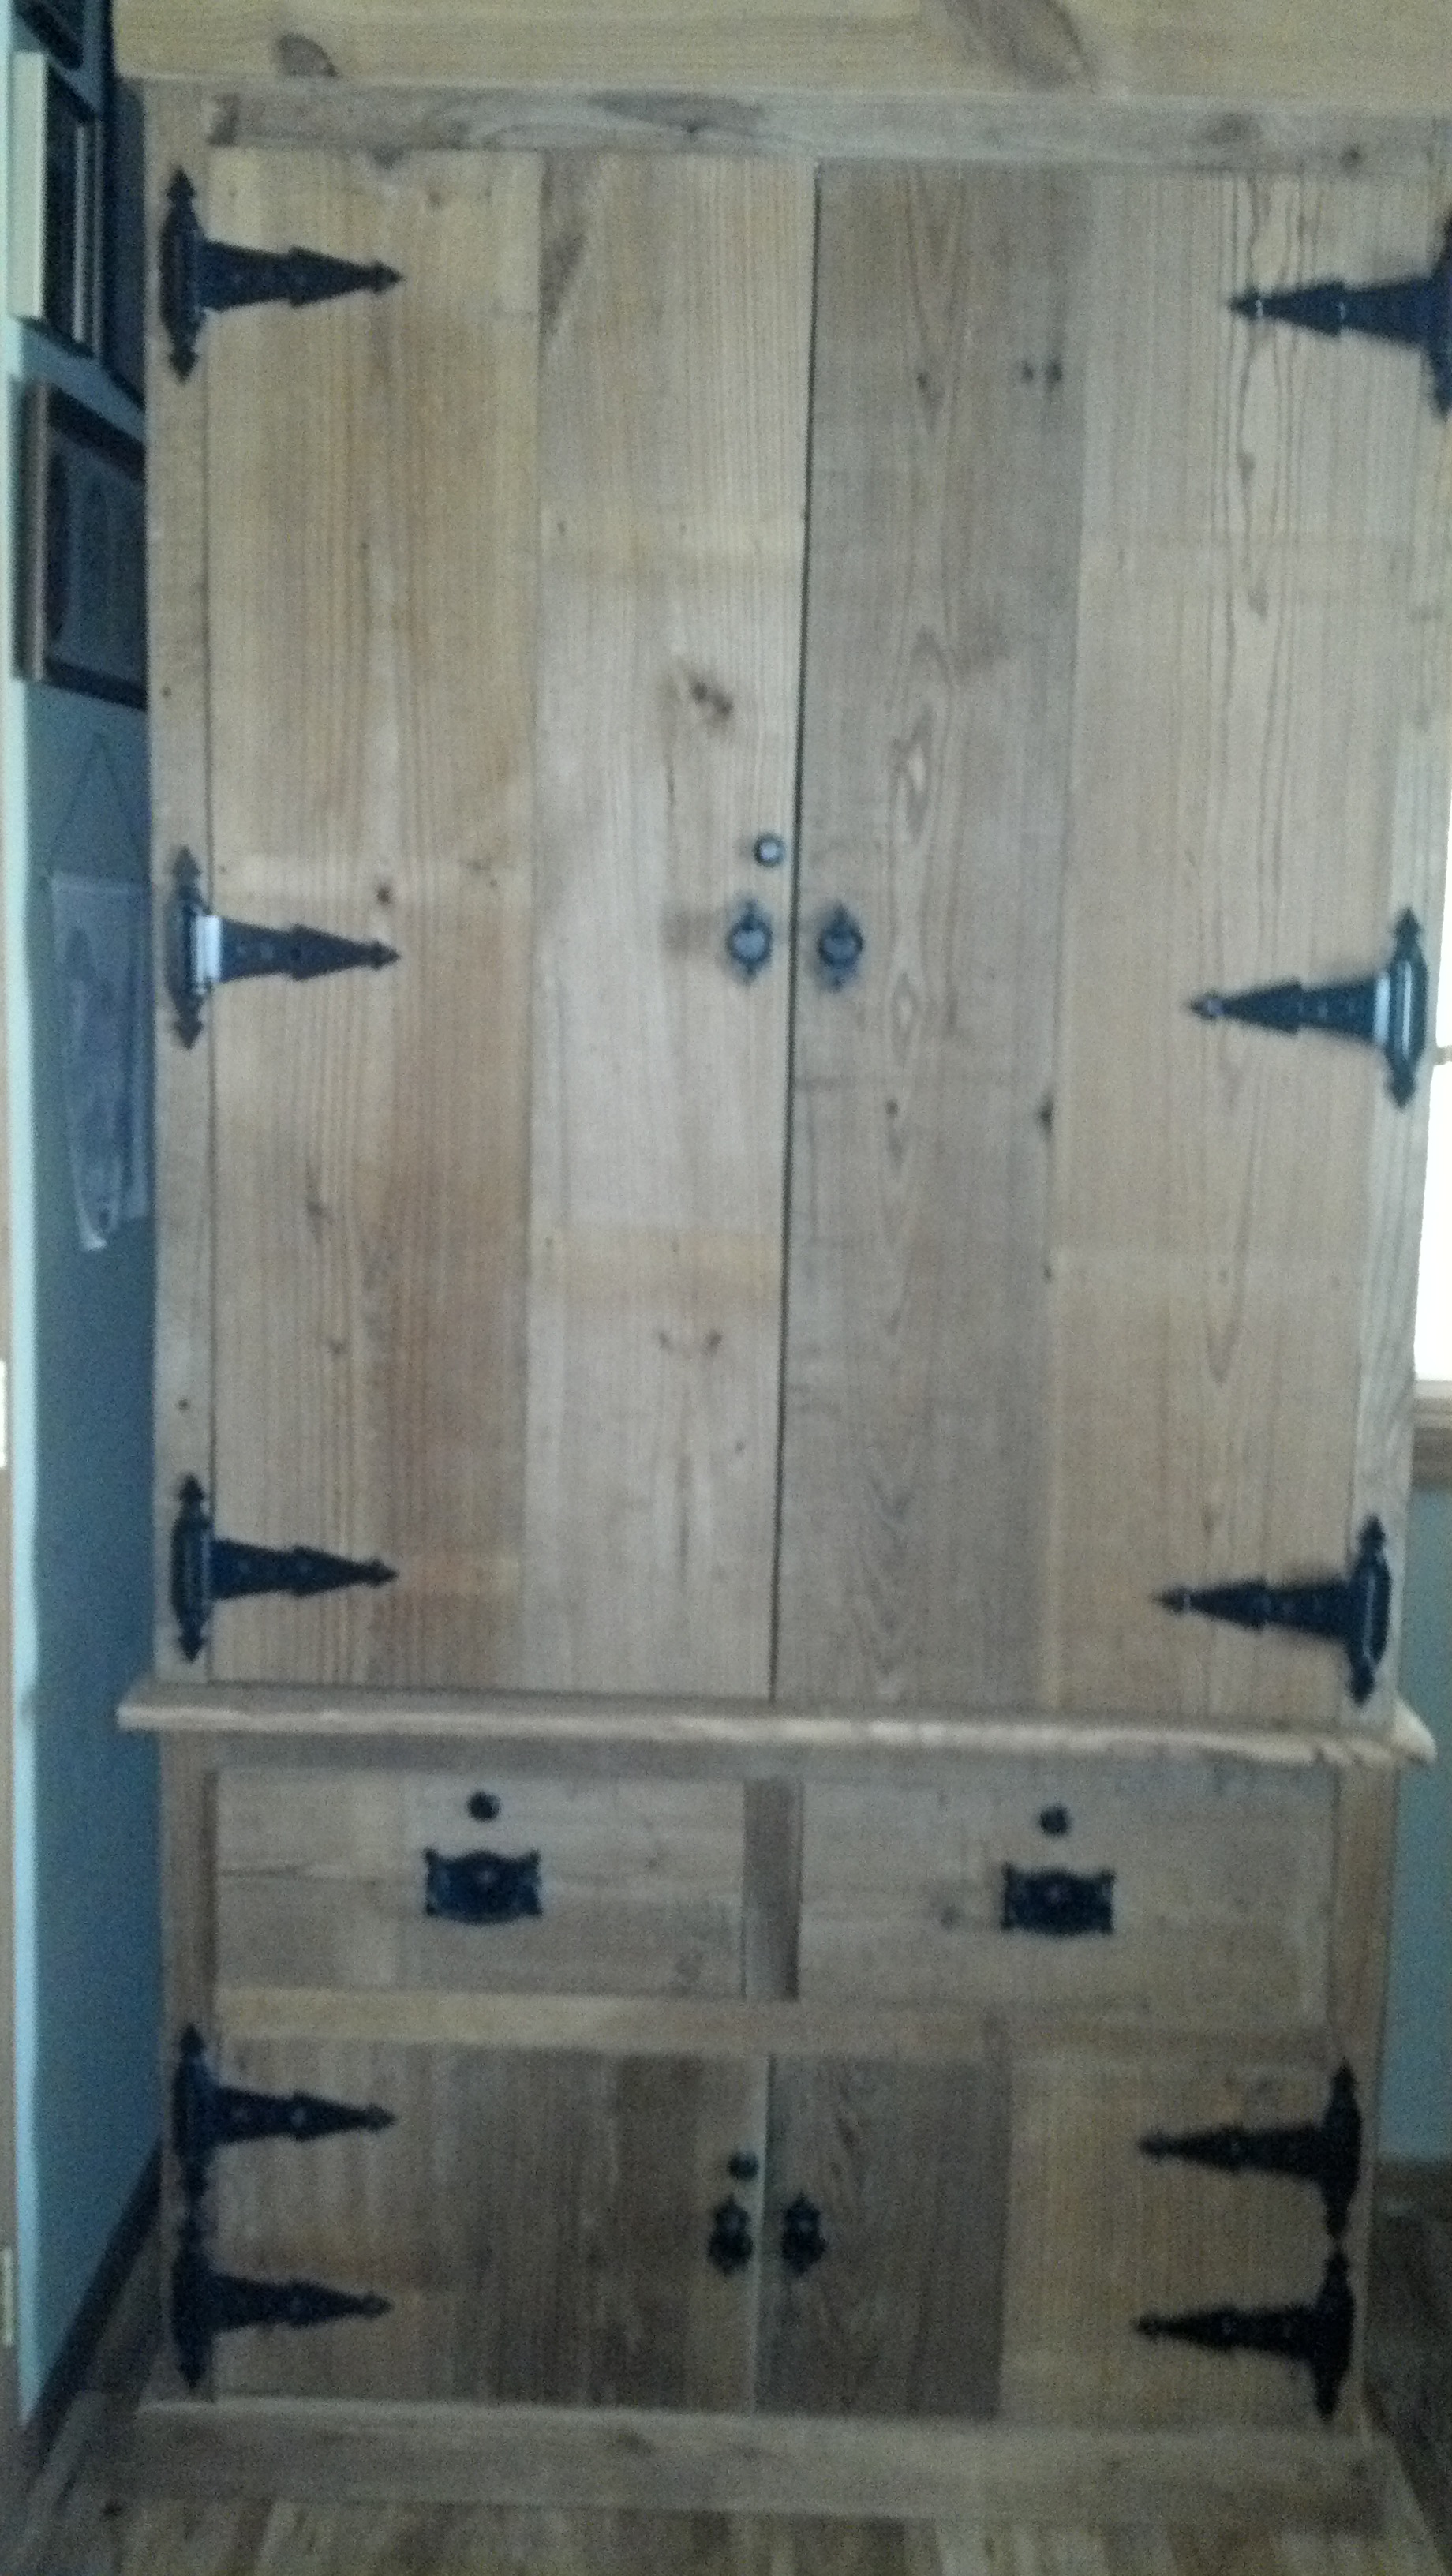
This is a gun cabinet I made for my dad out of old barn wood.
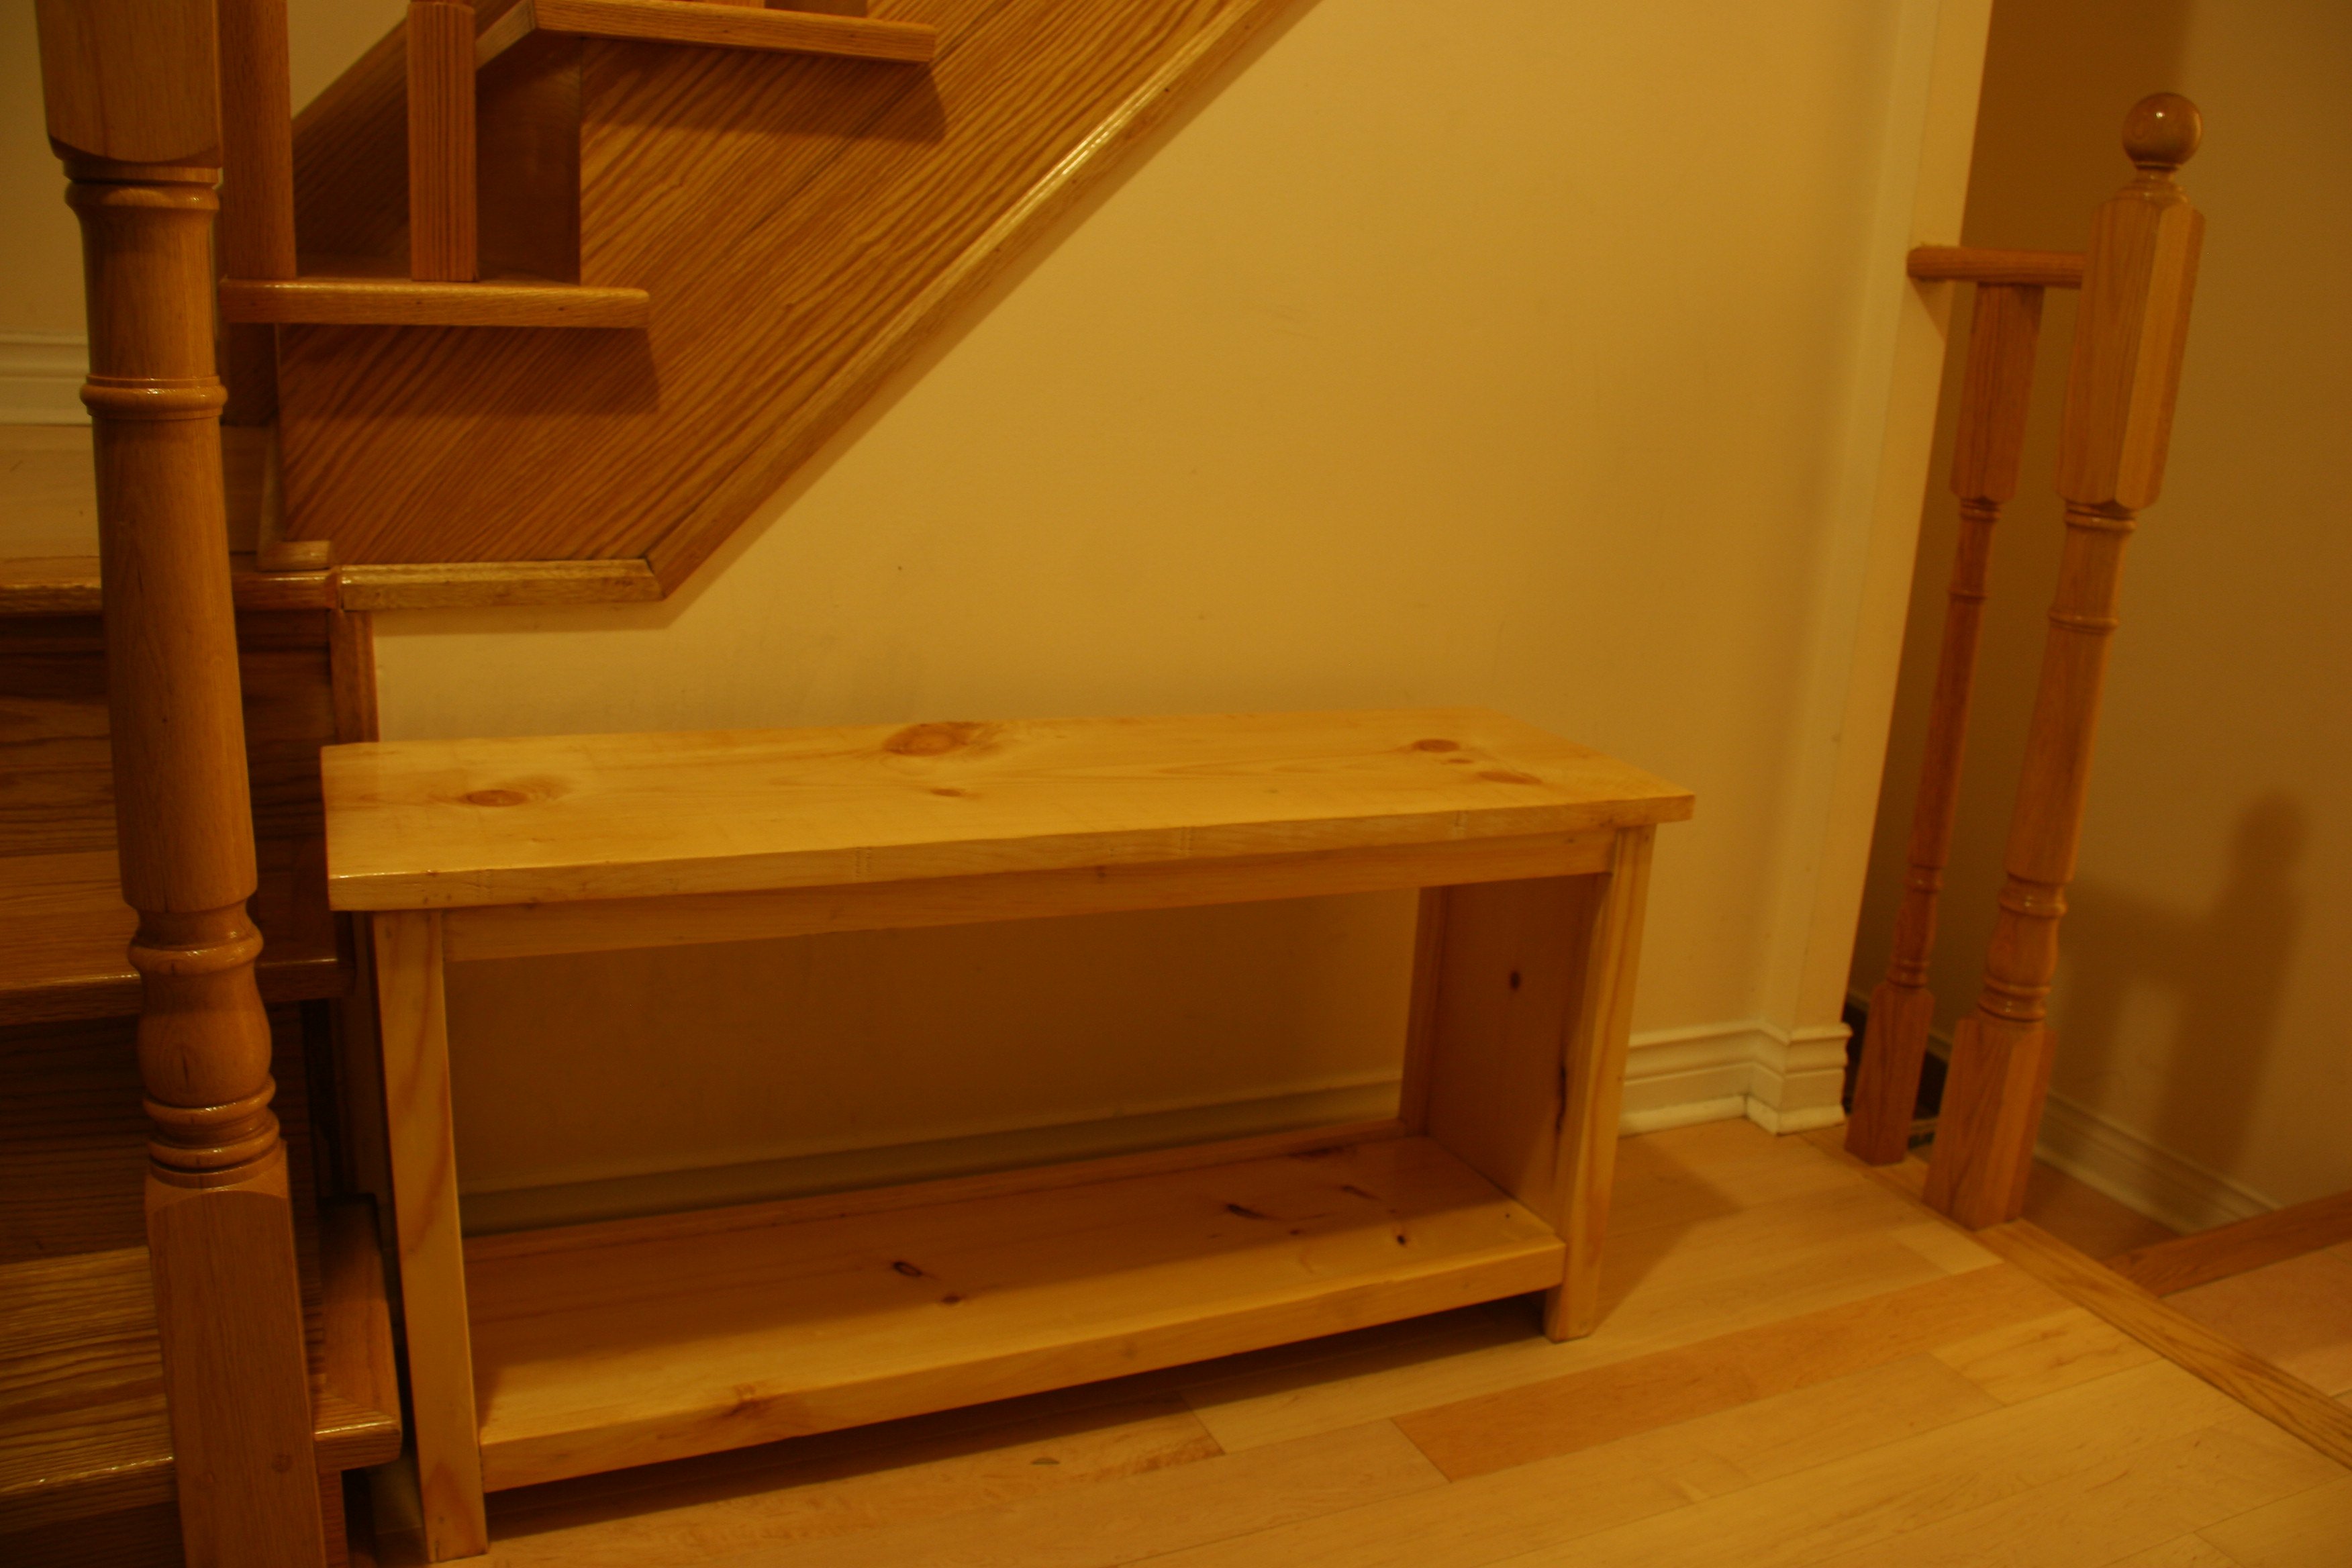
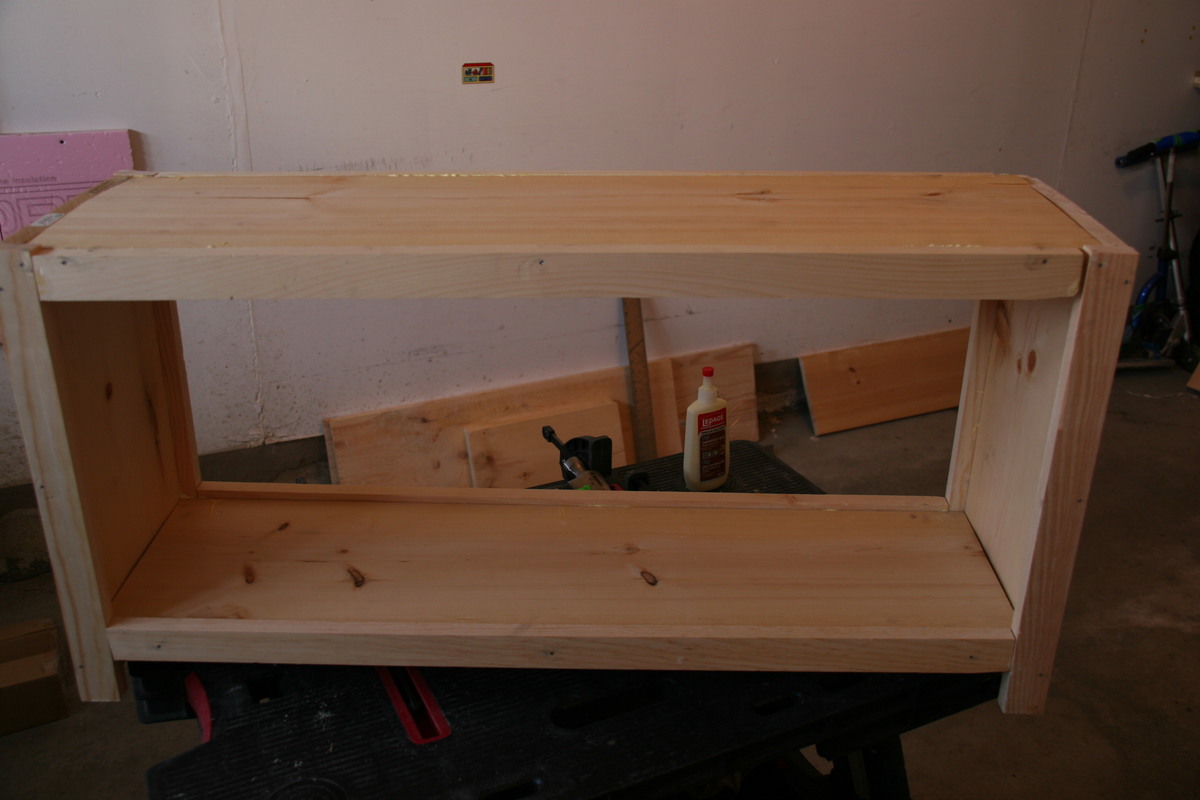
This is my second project. I based it on the "simple easy storage bench". I made this for my wife, she requested an entryway bench as you enter the house from the garage. I'm glad I was able to finish it just in time for Mother's Day :).
I learned a lot by doing this project (e.g. hiding nails, wood fillers, warped wood, sanding, to name a few). There's still a lot of things to learn, I'm hoping to be able to practice more.
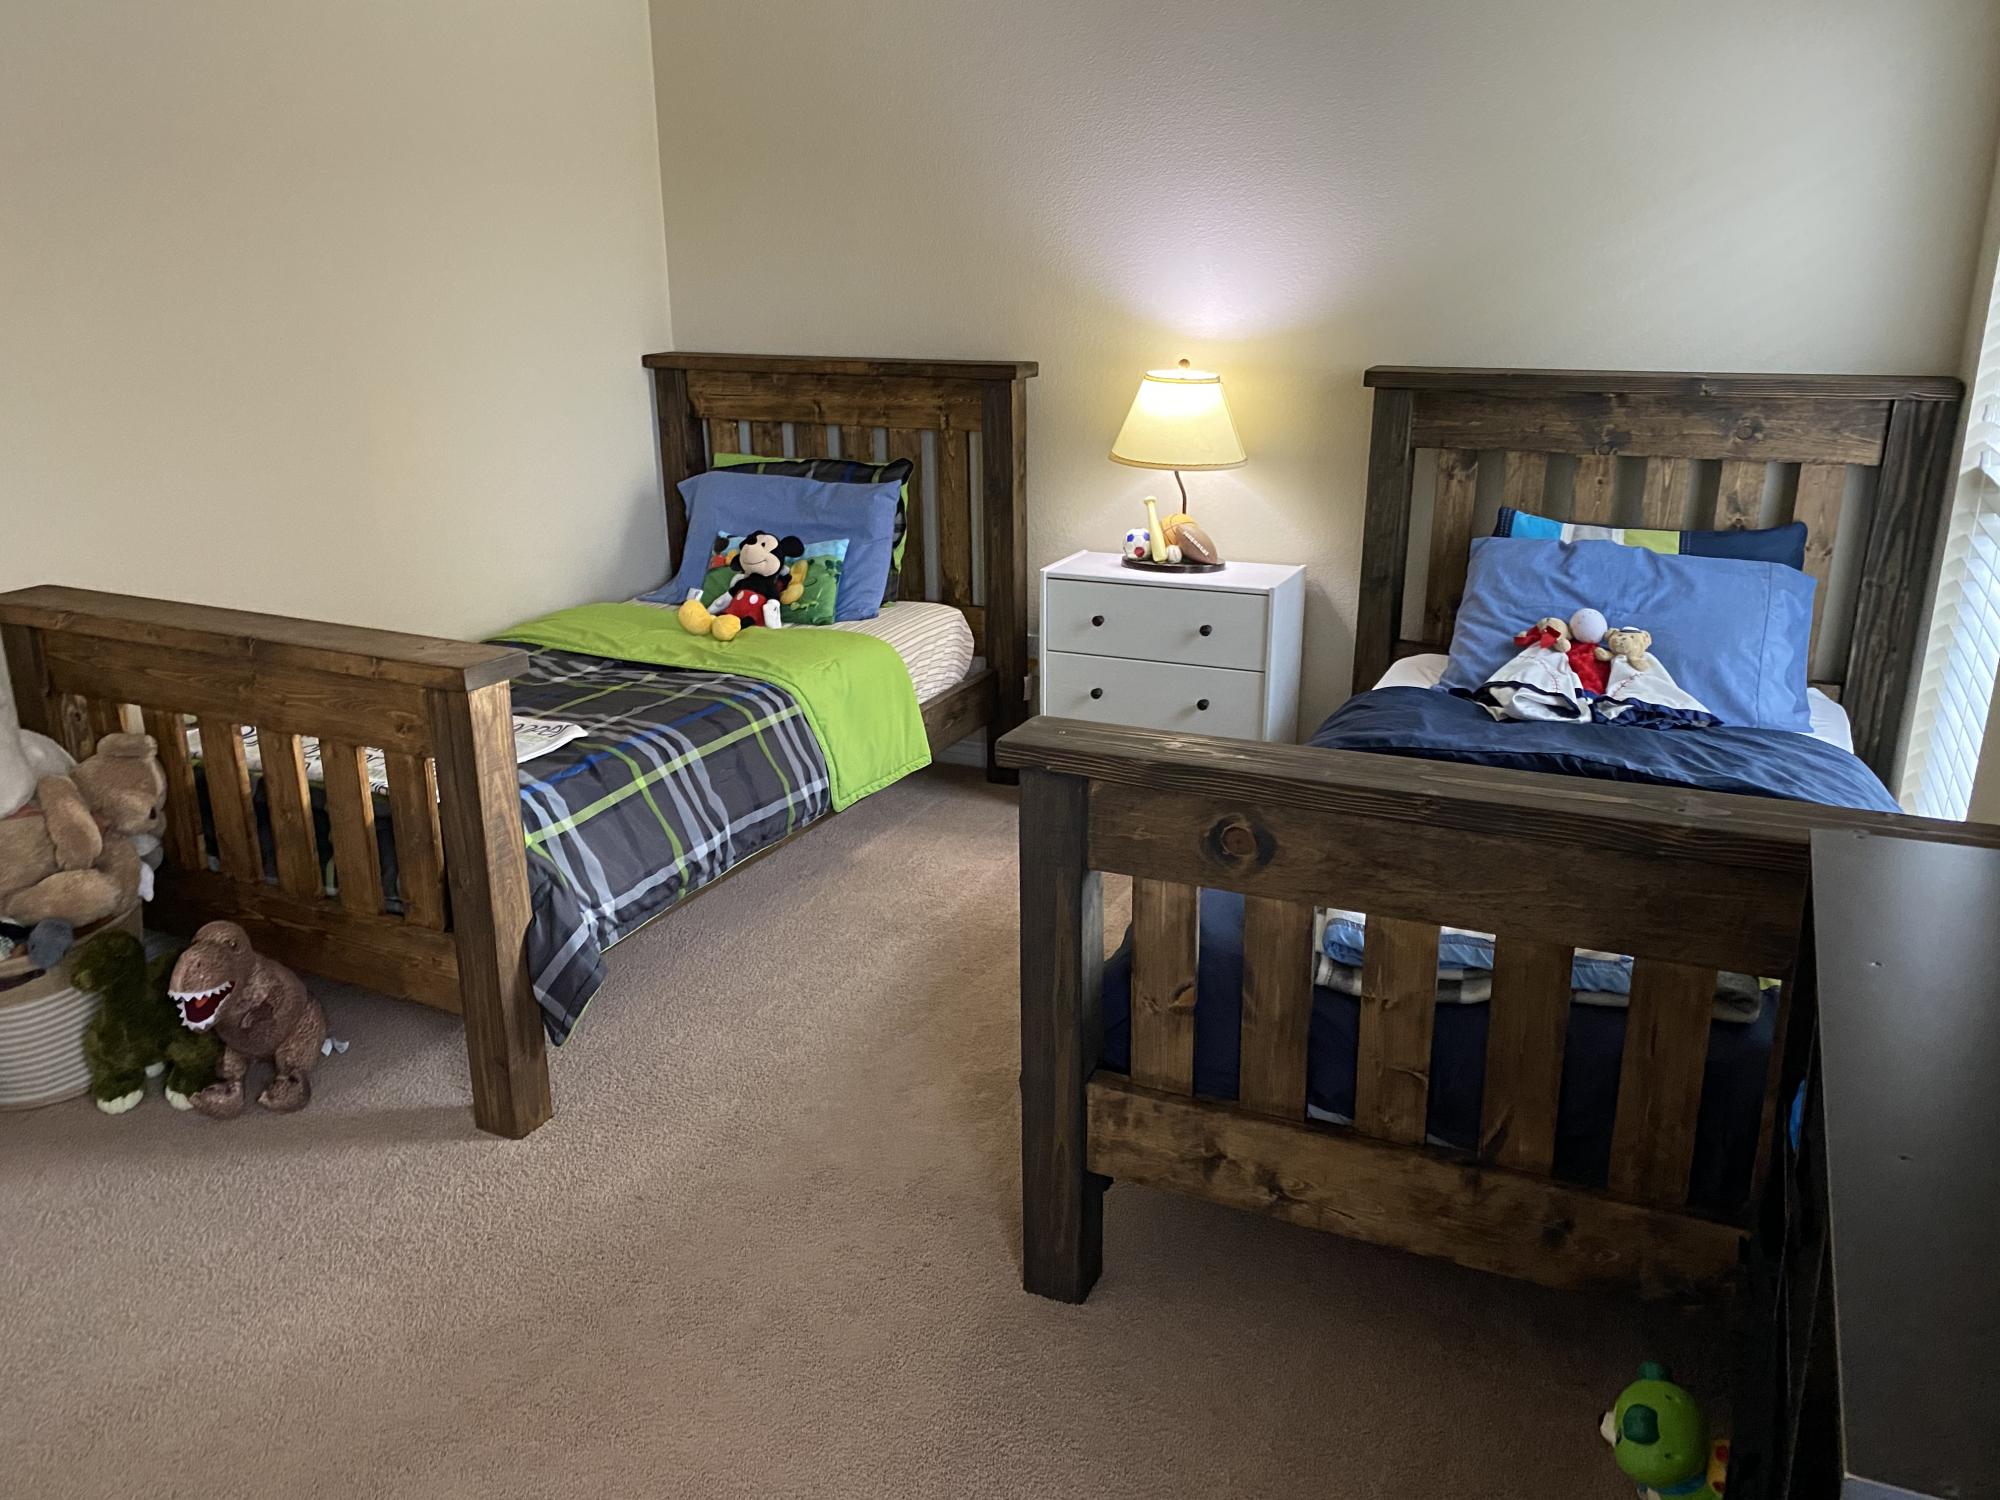
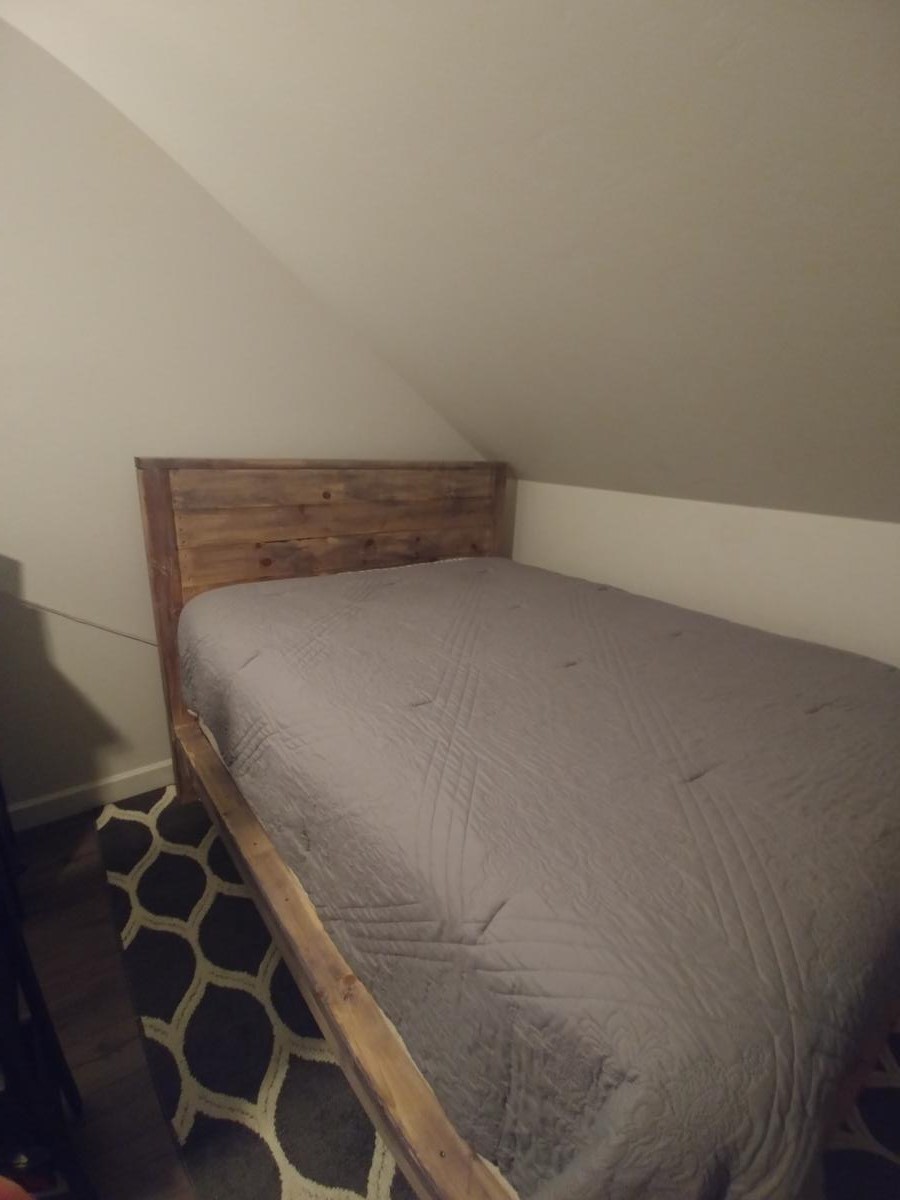
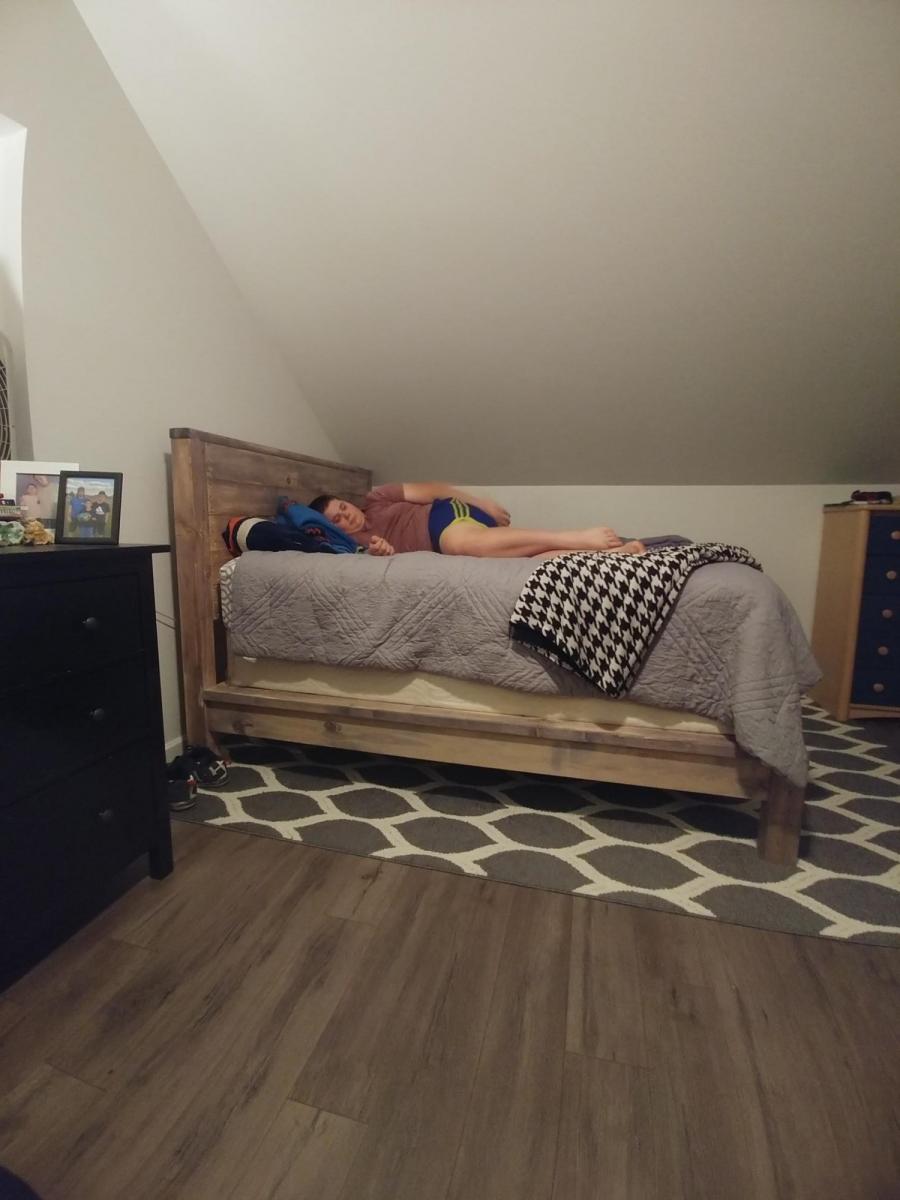
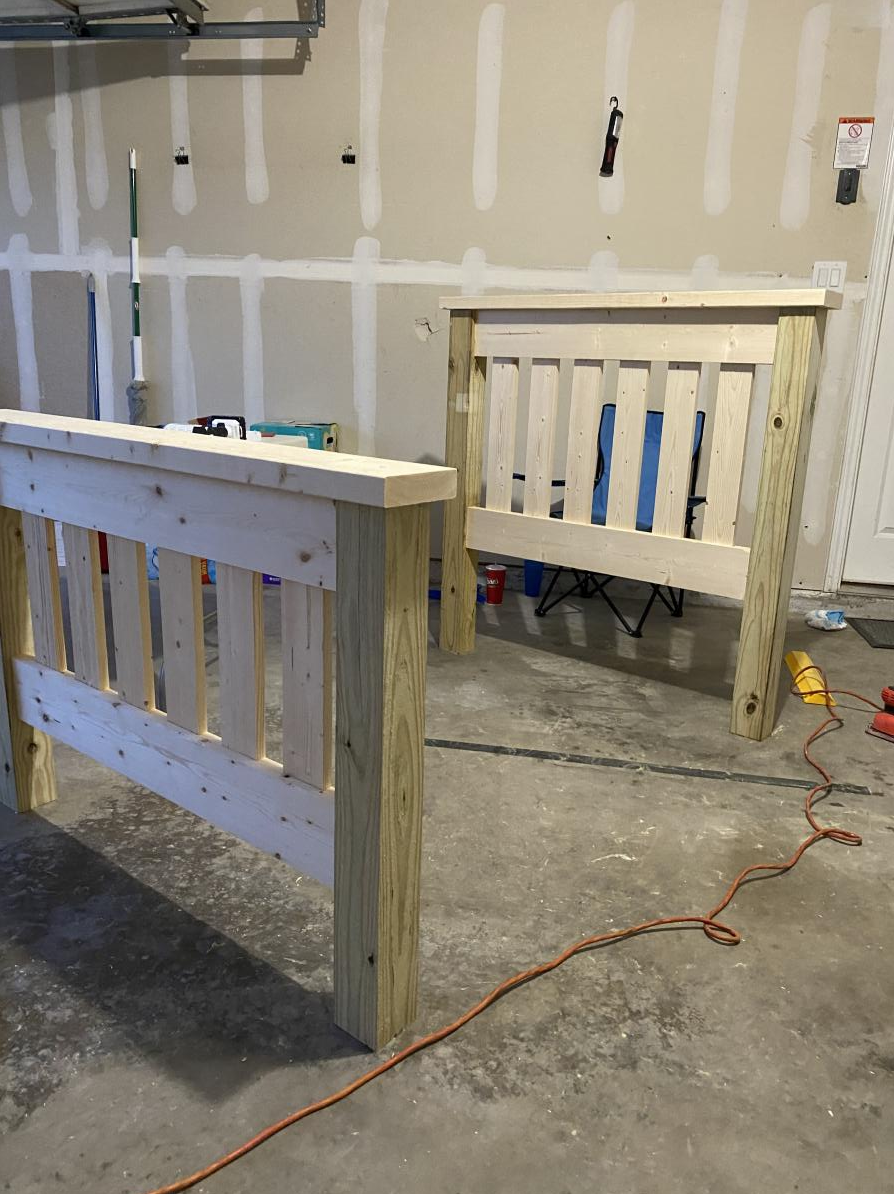
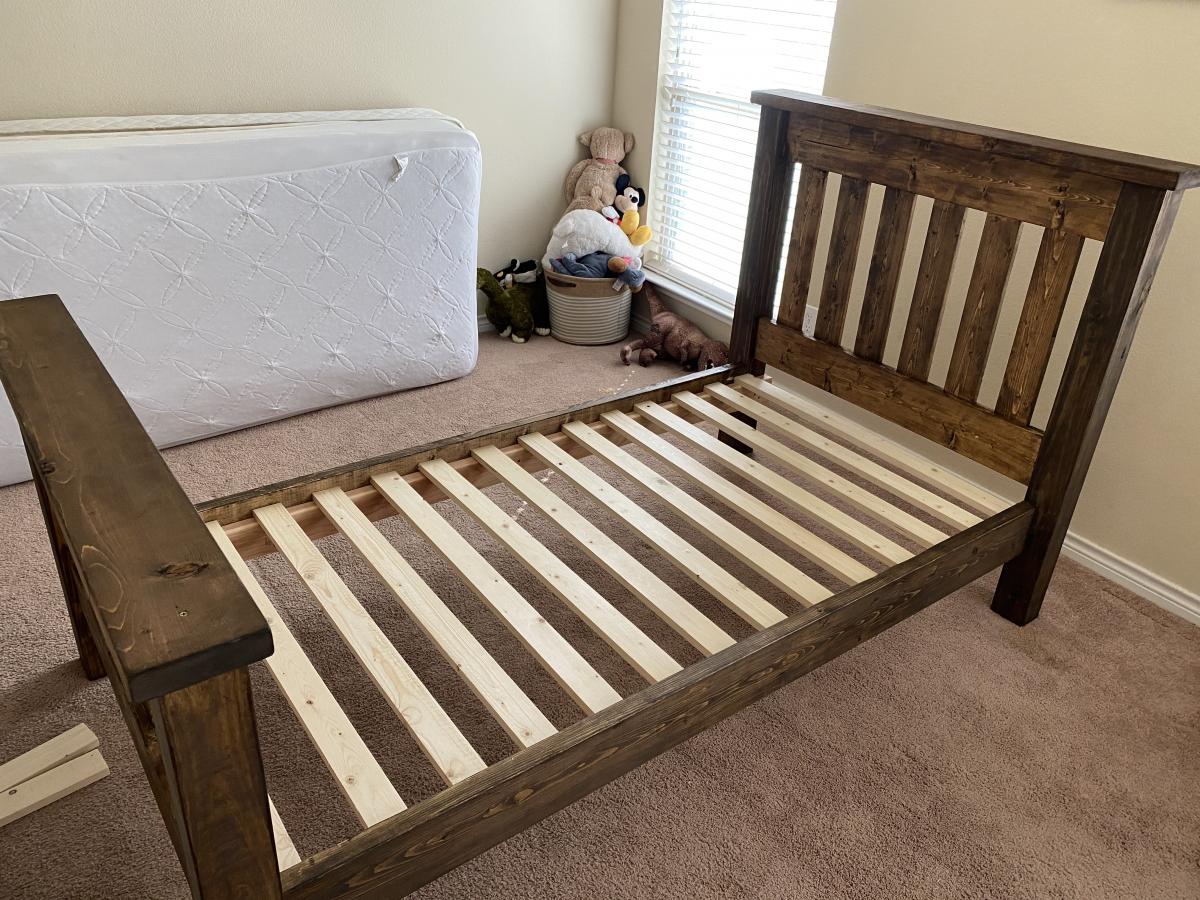
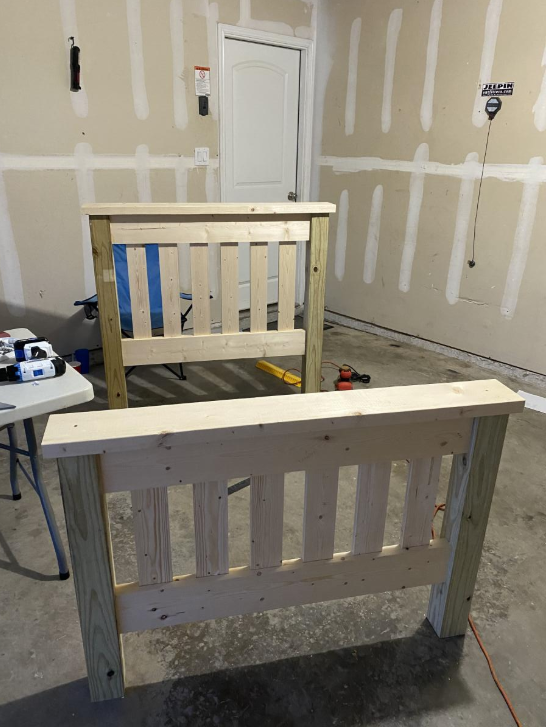
This is my first wood building project and I love the way they turned out. Took my about a week of work here and there on the first one and the second one I built from start to finish in two days. This is called the Simple Twin Bed and it's a great plan, very sturdy. Pocket holes work GREAT on this build. I added pocket holes to the side rails in to the posts for extra support.
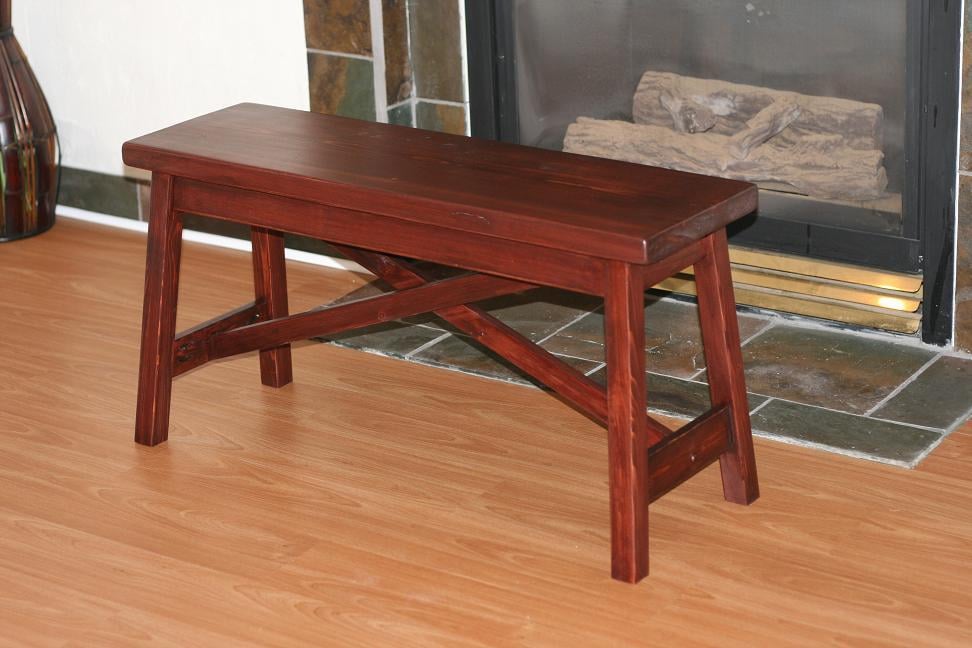
Created the small easy rustic x bench, it was super easy to build even with all the small angles. Very good plans, the video was also nice to watch before getting started especially since I made mine 36" long and the handy tip on how to cut the cross braces helped. I also decided to use a 2x12 for the bench top as opposed to the 1x12 because it felt even more rustic to me.
This was my first woodworking project. Thank you Ana for providing the plan and making it easier for me.
Thu, 05/15/2014 - 07:43
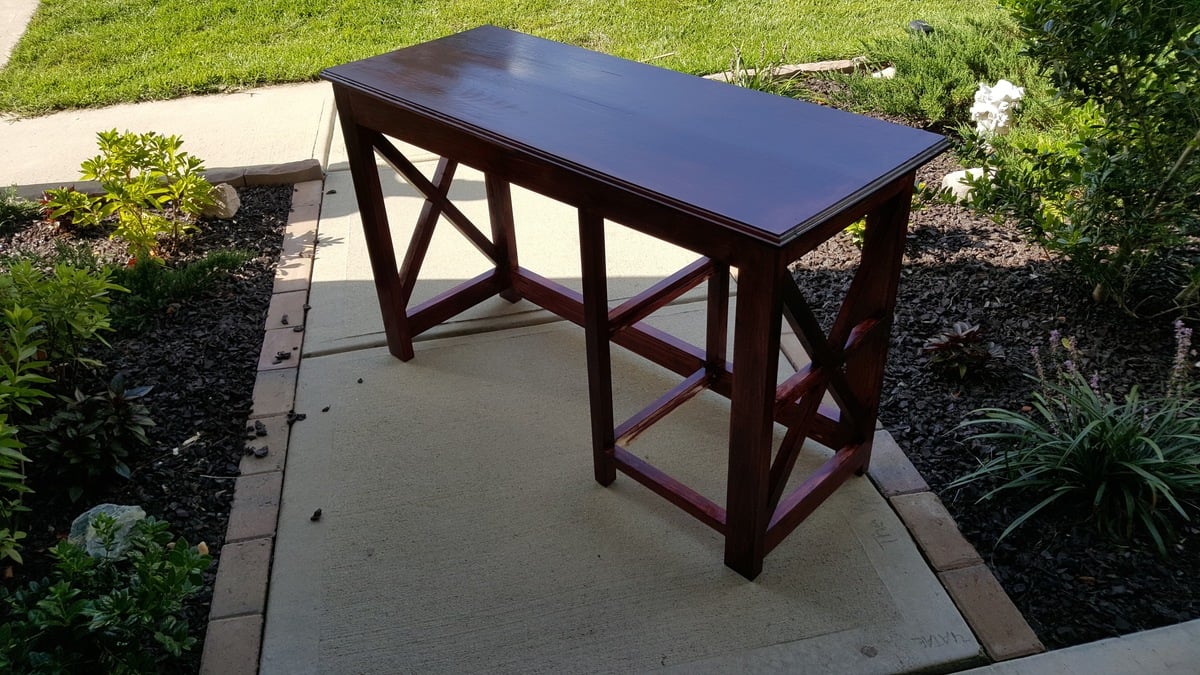
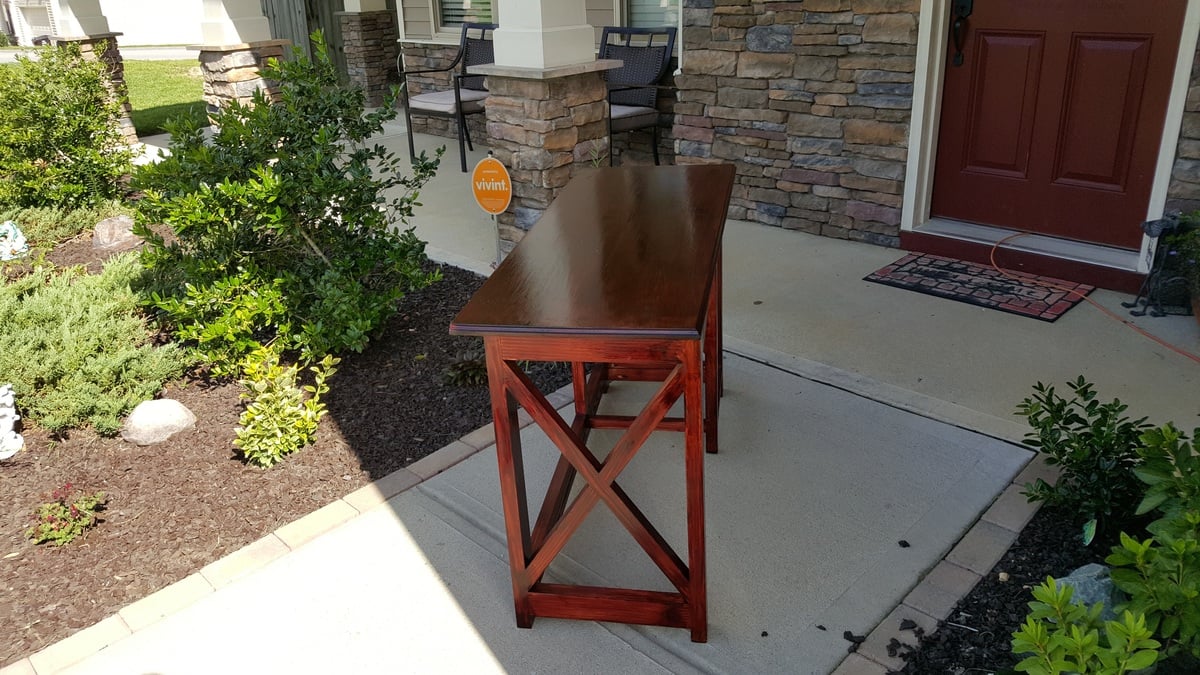
This was a fairly simple plan and I'm thrilled about how the table looks.
This was a fun project and the plans were perfect.