Community Brag Posts

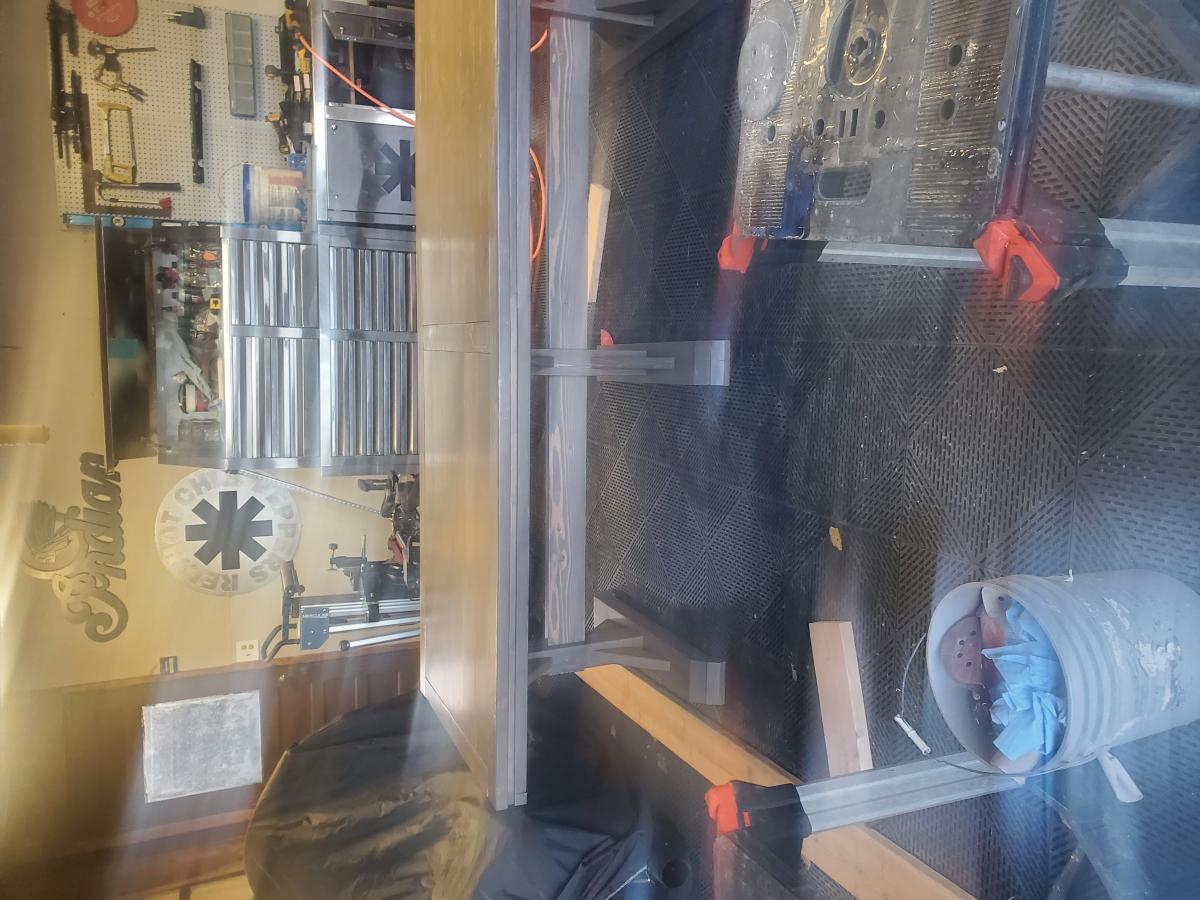
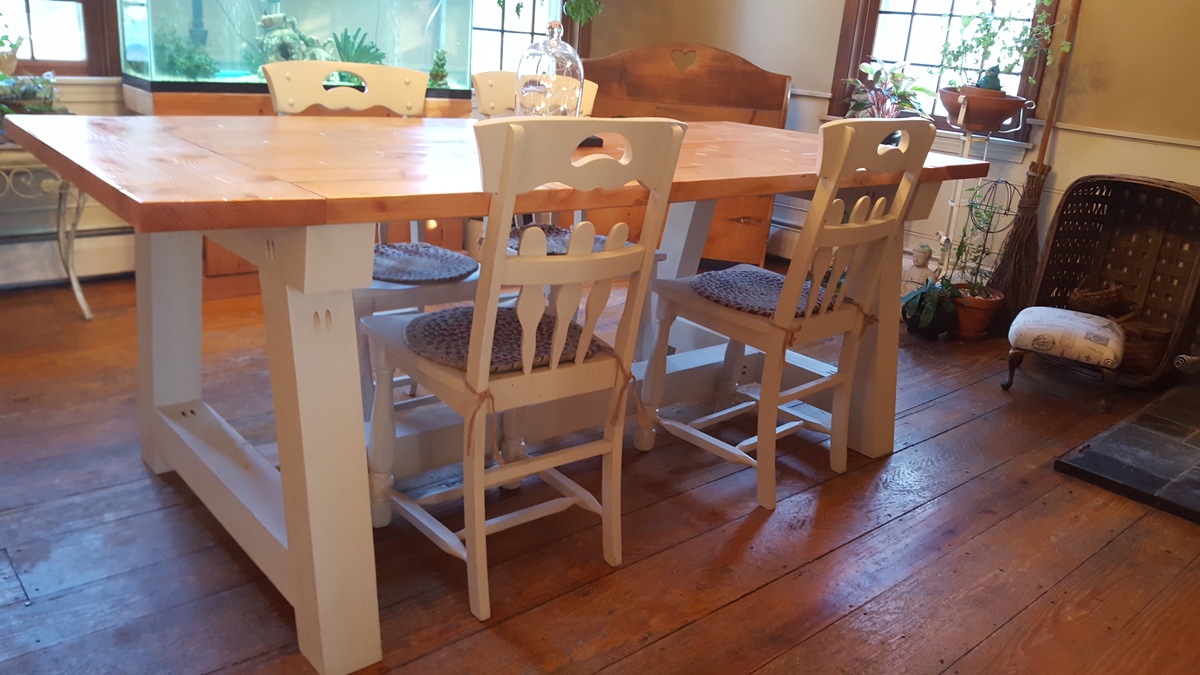
Truss table

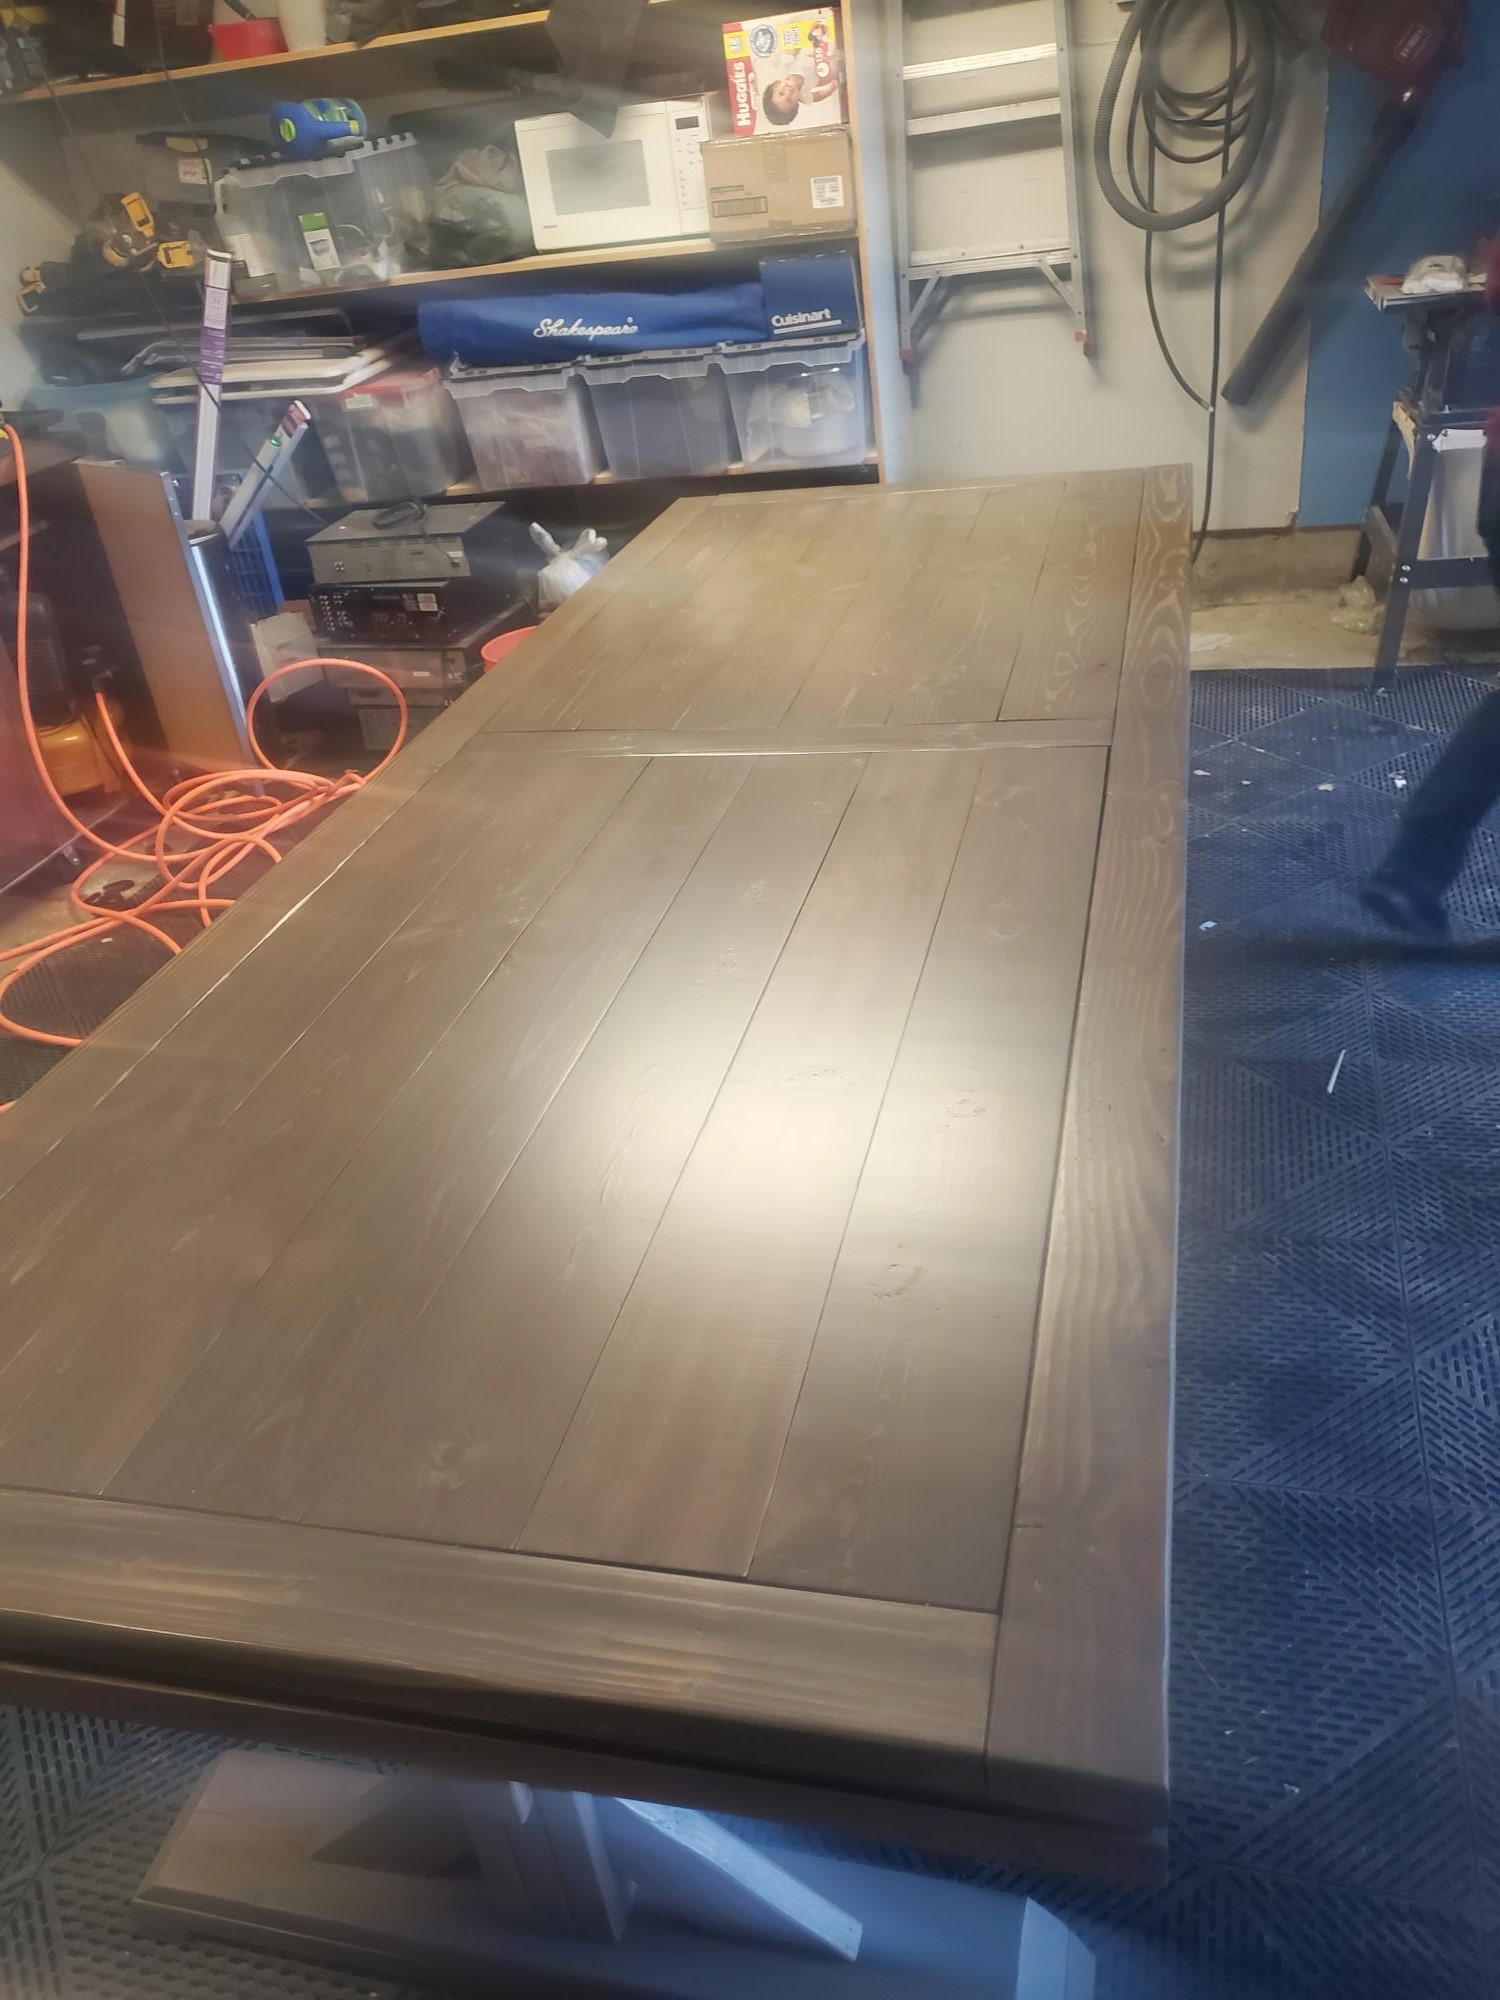
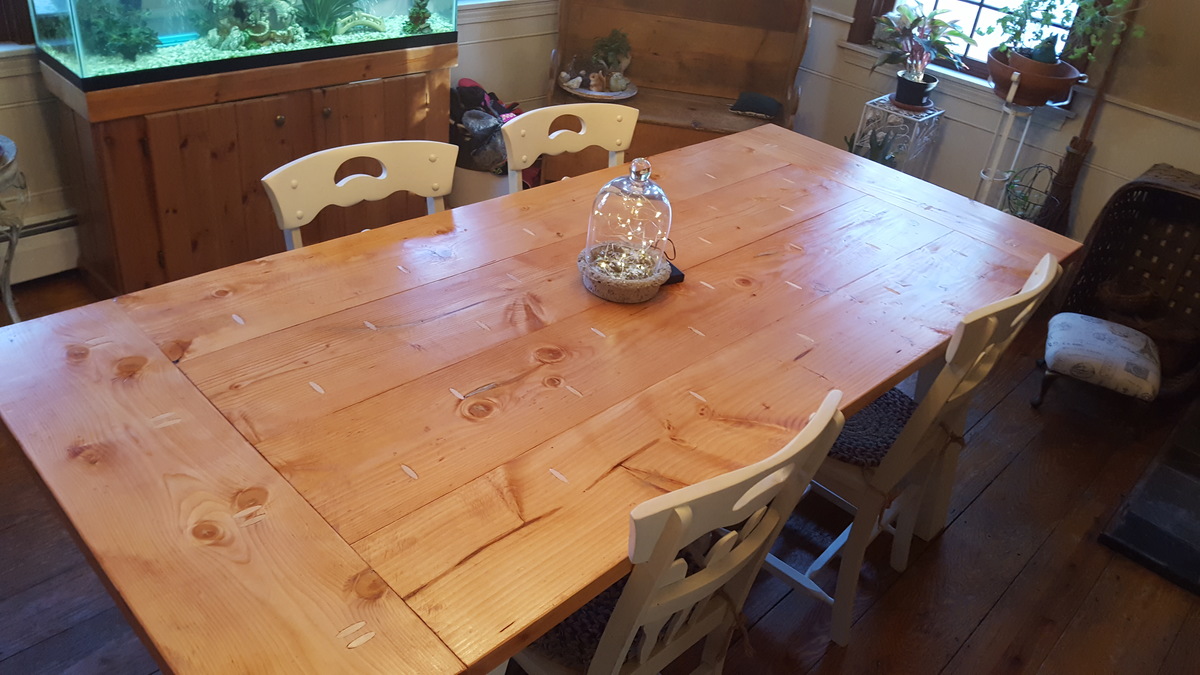
My husband built this table for me as an 8th Anniversary present.  It came out absolutely beautiful! For the first time,  we can host  family and friends with plenty of room. I paired it with some chairs that we already owned. He will be building the matching bench soon.

He left out the 45 degree diagonals,  may add them later.  It is so sturdy, they are basically decorative. 

Built from Plan(s)
Estimated Cost
$200
Estimated Time Investment
Weekend Project (10-20 Hours)
Finish Used
Min wax golden pecan for top
Behrman Roman plaster paint, satin finish
Satin poly on top.
Recommended Skill Level
Intermediate

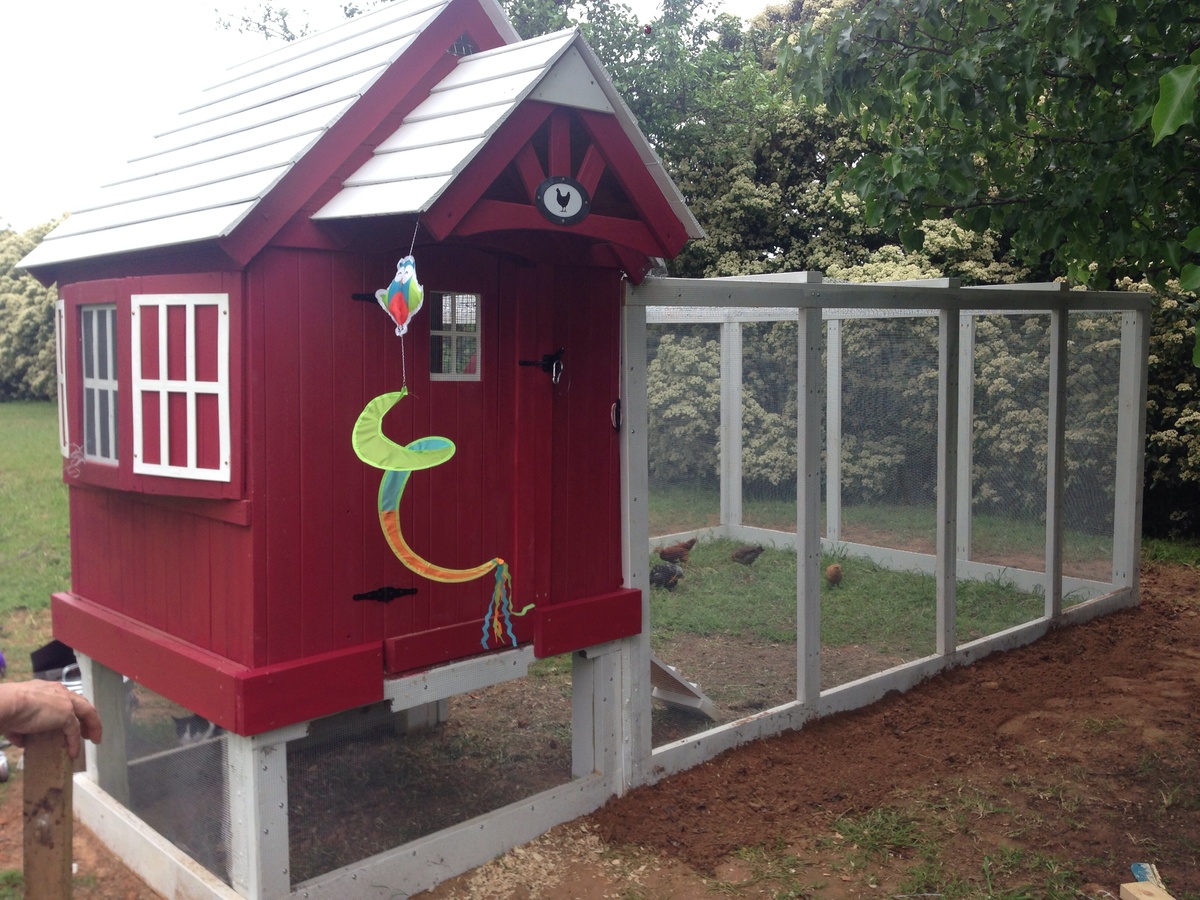
Ana White chicken coop with modifications

We started with the basic chicken shed coop plans and modified it some. We wanted the peak to be in the front for ease of access and to allow leaves from tree overhead and rain and snow to fall to the back away from the entrance. The windows raise from the inside using 1/8" wire secured on the inside with a rope cleat hook.

We added Dutch doors. We added latches for the pop door to keep it iopen or closed as needed. Dutch doors also have decorative latches and eyehook latches to secure them when they are fully open. I rested the shed on 12 in. x 8 in. x 12 in. concrete patio pier blocks to allow drainage. we extended the roof about 6 " to allow for extra protection and avoid dripping whe  it rains.

On the inside I have a roost and a poop deck. Hanging from the poopdeck I have their feed to keep it off the floor and keep shavings, etc. from getting into the food. The poop deck  and the floor are covered with comercial grade tile to facilitate easier cleaning.

Built from Plan(s)
Estimated Cost
$1,000 including tools (Keg Jig) decorative hinges, wood, sheathing, shingles.
Estimated Time Investment
Week Long Project (20 Hours or More)
Finish Used
White KILZ primer, Glidden Kenya for walls of coop and basic Glidden white. and Glidden red for Dutch Doors, for 1X6 under roof Glidden dark brown
Recommended Skill Level
Advanced

Comments

anxo-a

Sat, 03/14/2015 - 02:50

Hi!

I love your coop and the modifications you made - I was planning on doing the same thing with the placement of the door. I was wondering if you could post a couple of photo of the inside of the coop? I'm especially interested in where you placed the roost.

Thank you so much for sharing!

Toddler Book Shelf

Submitted by mjs1143 on Fri, 01/06/2017 - 09:14

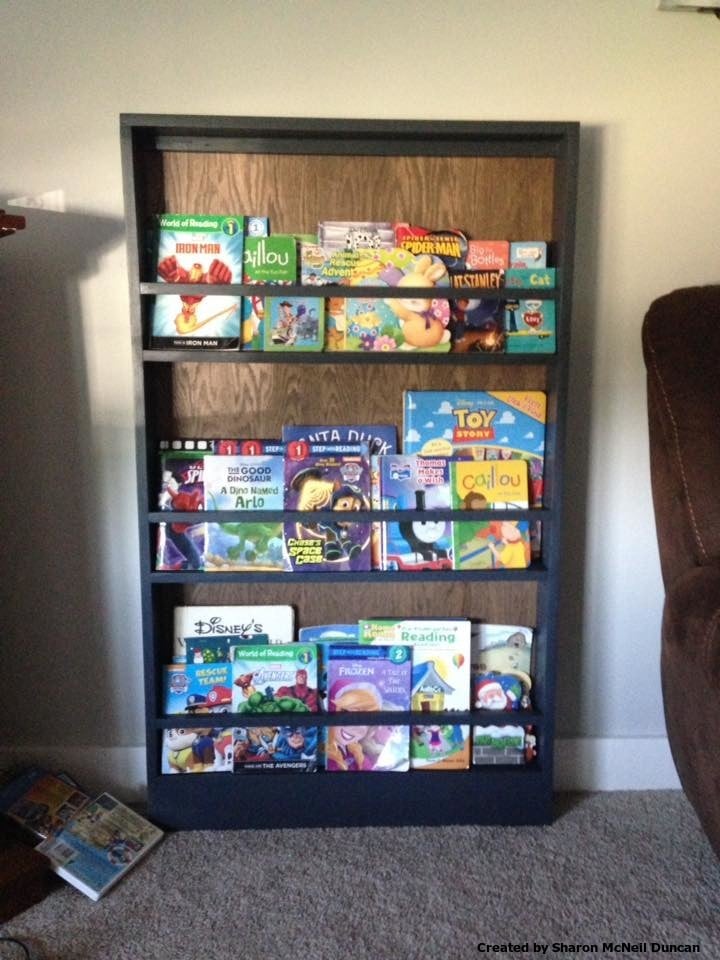
I needed a book display rack for my boys so I built this one from the plate rack plans and modified it to suit the size I needed. I actually used all scrap lumber from previous projects, so the cost was minimal.

Built from Plan(s)
Estimated Cost
$40 worth of leftovers maybe. 
Estimated Time Investment
Afternoon Project (3-6 Hours)
Finish Used
Grey Paint and Walnut Stain that matches a dresser in their room.
Recommended Skill Level
Starter Project

Chicken Coop

Submitted by Wraight on Fri, 10/30/2020 - 10:49

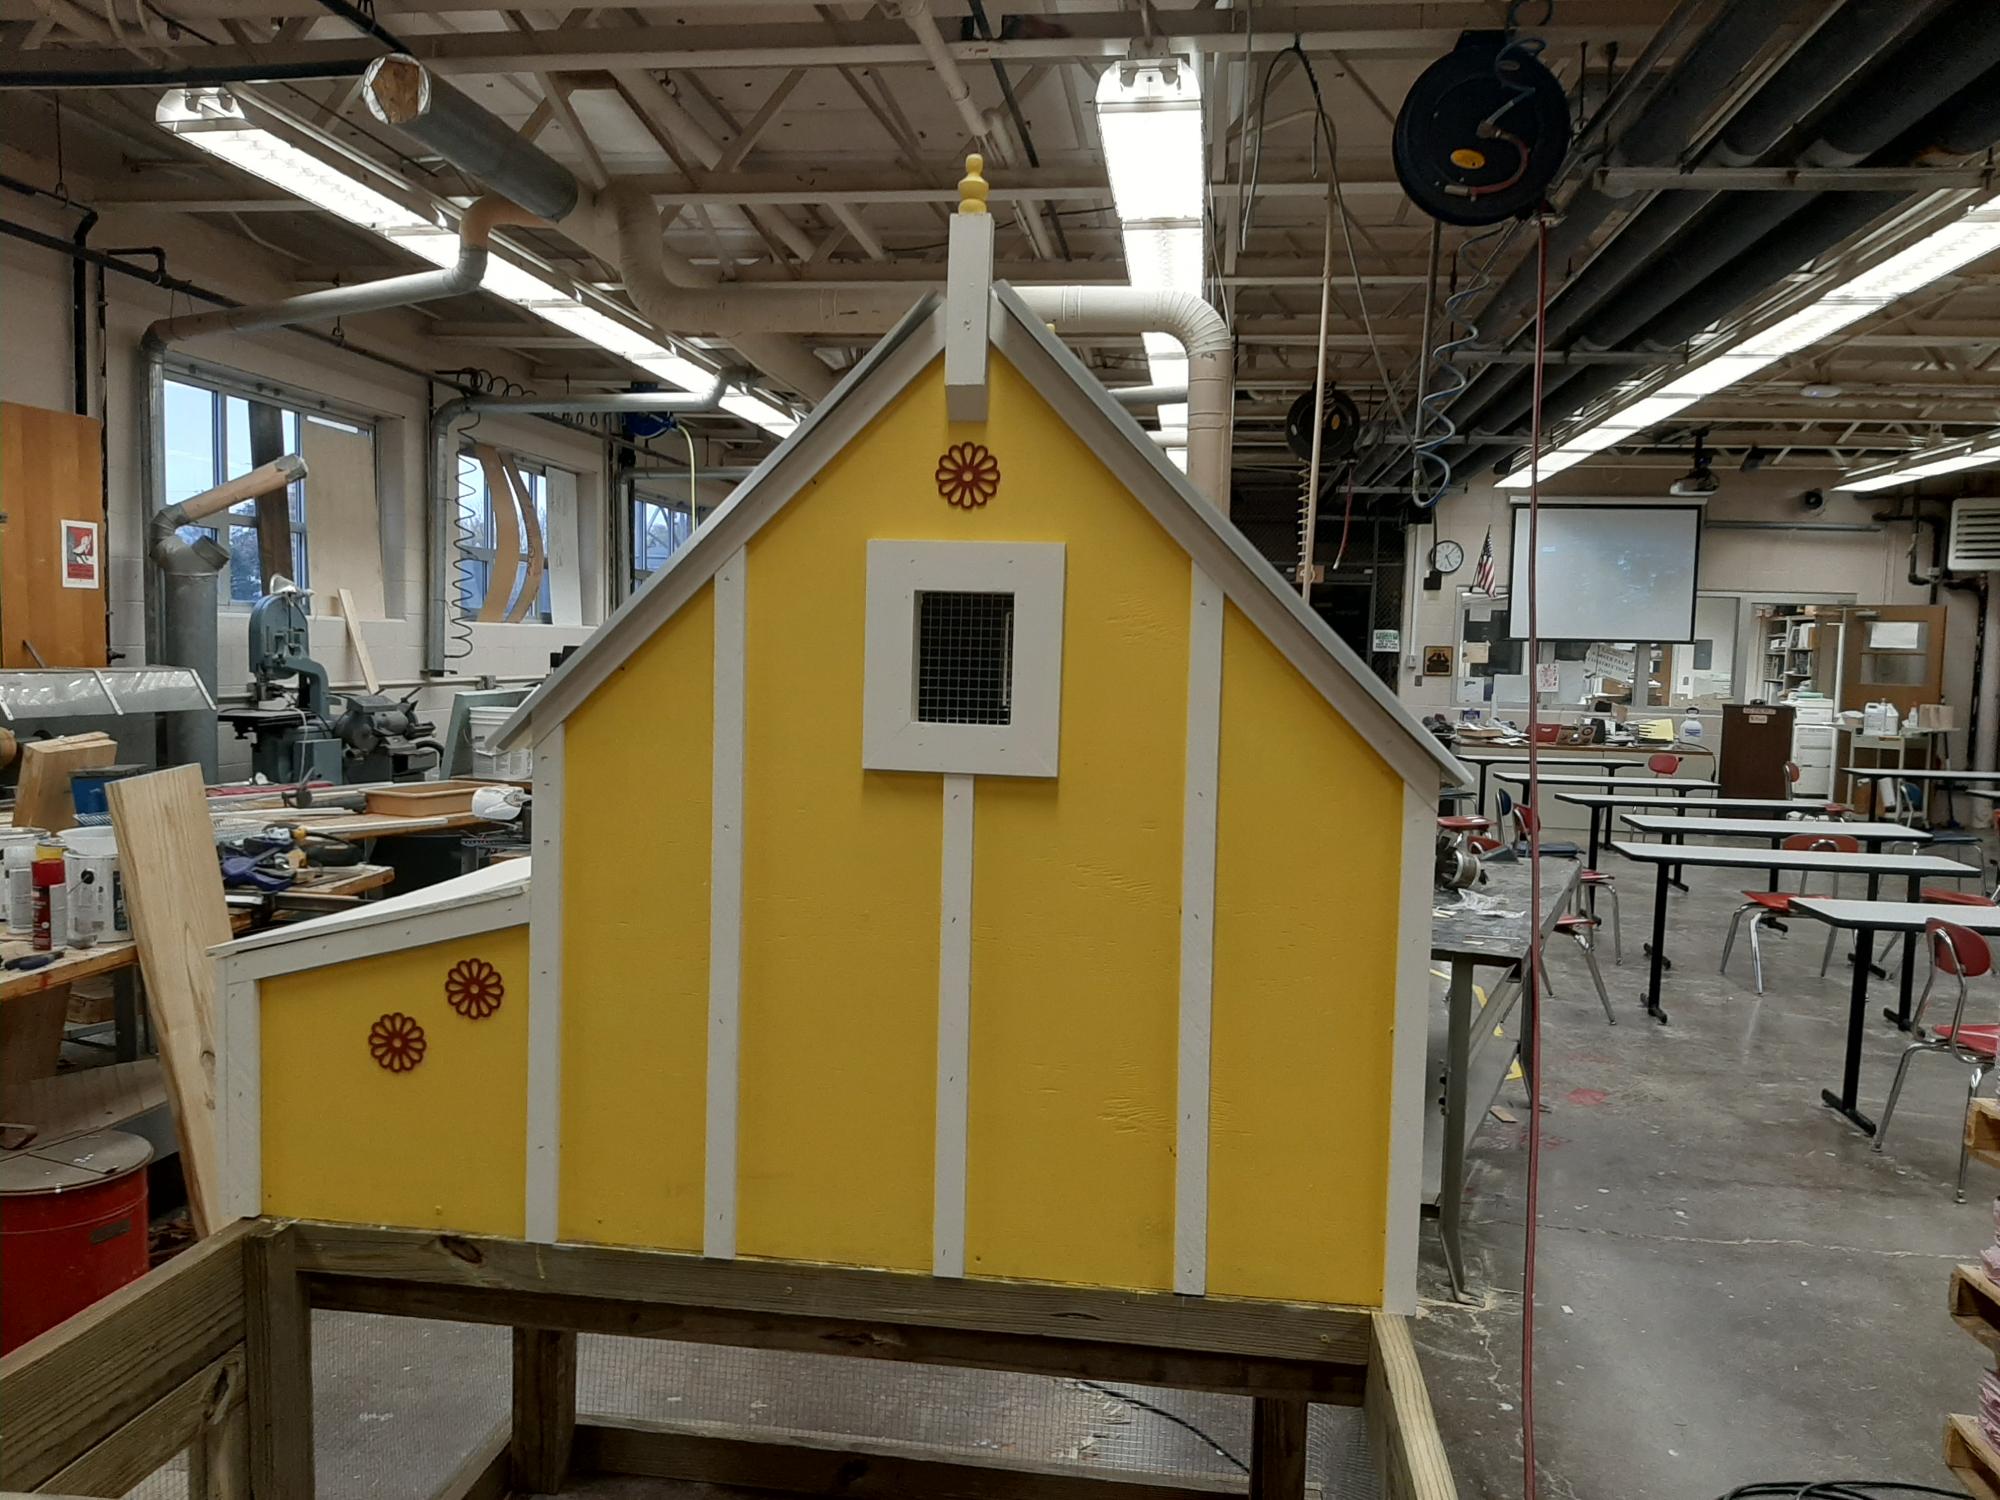
I teach construction at Plymouth High School. This was our first project of the year. The students did the majority of the work with my guidance. I had started the year with the intent to build sheds, but that requires groups of 4. The chicken coop allowed us to work with groups of 2. We only have 50 minutes each period to work, so it took us about 5 weeks to complete spread over 4 classes. Some of the wood was scrap that we had on hand. We cut a lot of it down to size from 2x10s. The roof was scrap metal roofing that we found in a recycling container. There were no trim pieces so we had to be creative and make our own ridge cap. I decided we would add the finials to give it more visual appeal. We took some liberties with decorating because I like to add extra flair - and I have access to a laser and CNC router. We used the plans that Ana developed for Lady Goats. https://www.ana-white.com/woodworking-projects/small-chicken-coop-plant…

Estimated Cost
$300
Estimated Time Investment
Week Long Project (20 Hours or More)
Finish Used
Exterior grade paint
Recommended Skill Level
Intermediate

Comments

American Girl Doll House-tweeked

Submitted by Anonymous (not verified) on Thu, 11/19/2020 - 21:09

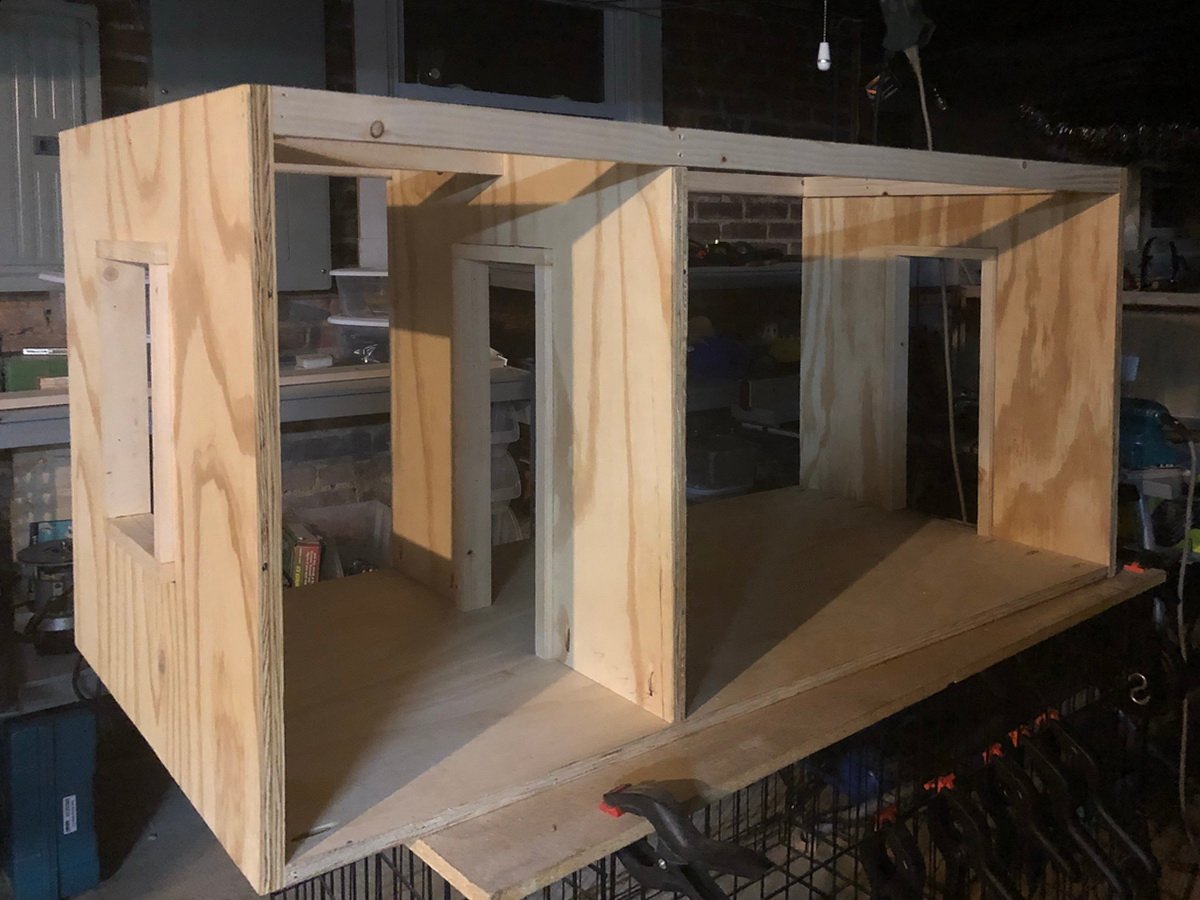
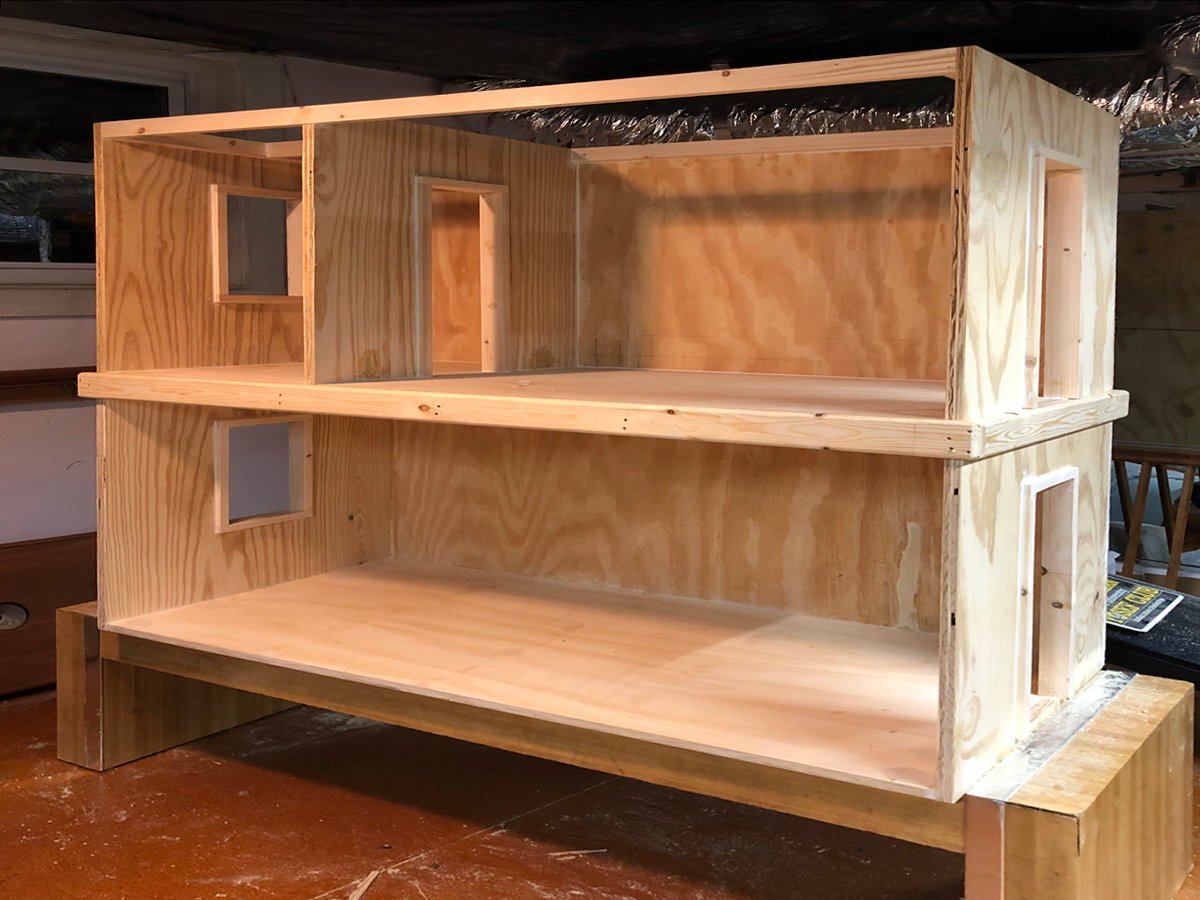
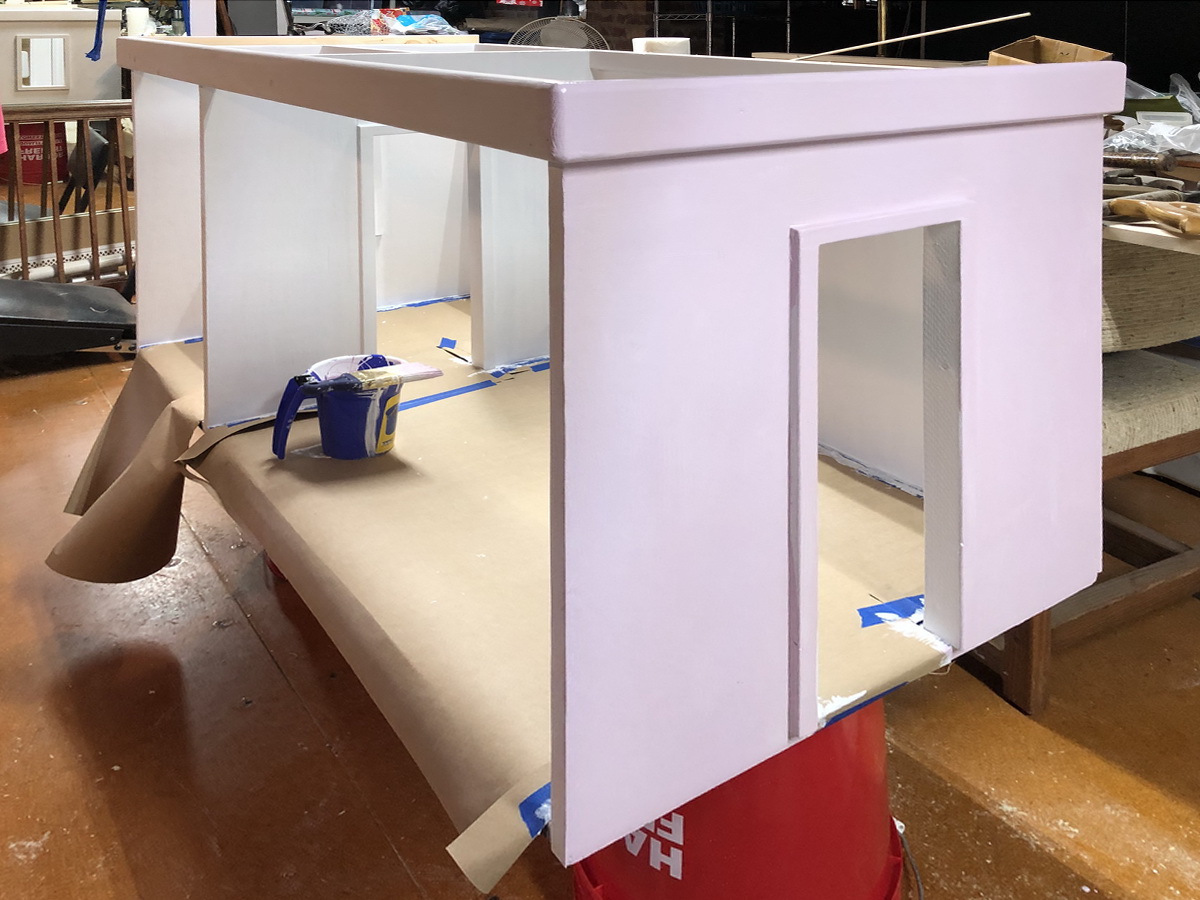
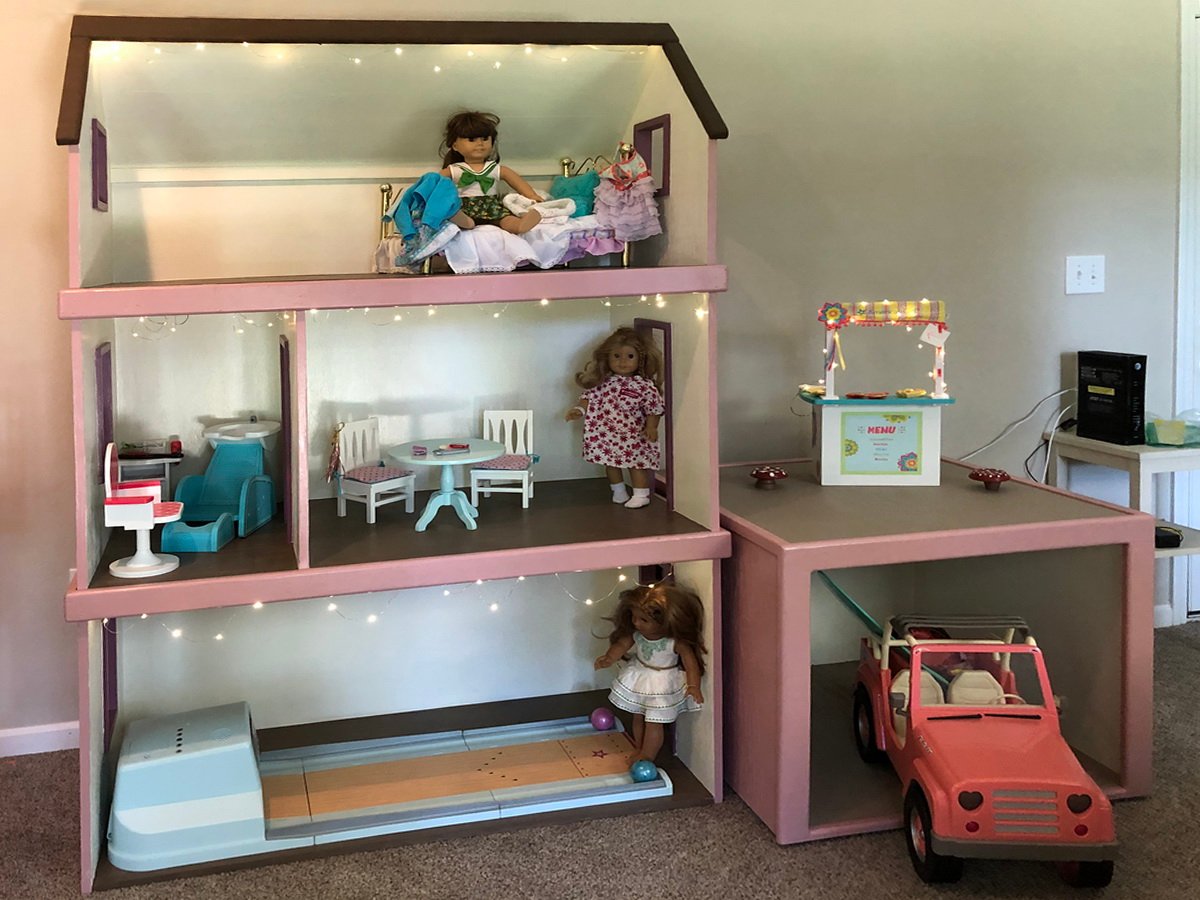
I loved the AG Doll House plans you designed and when my granddaughters asked me to make one for them.... how could I resist. Unfortunately my 7' basement ceiling and steps created a challenge. As a 72 year old female, there was no way I could man-handle a 6' x 4' x 2' - 3/4" plywood project in addition to the challenges of my work space. I was not going to disappoint my granddaughters so I had to come up with a plan. Instead of making the doll house in one piece, I decided to make it as 3 individual boxes (the floors) and stack them on top of each other. Not only would I be able to handle them mostly by myself, but I would be able to work around the low ceiling and transport them up the steps. With only a few modifications to the original plans, I believe I came up with a workable solution.

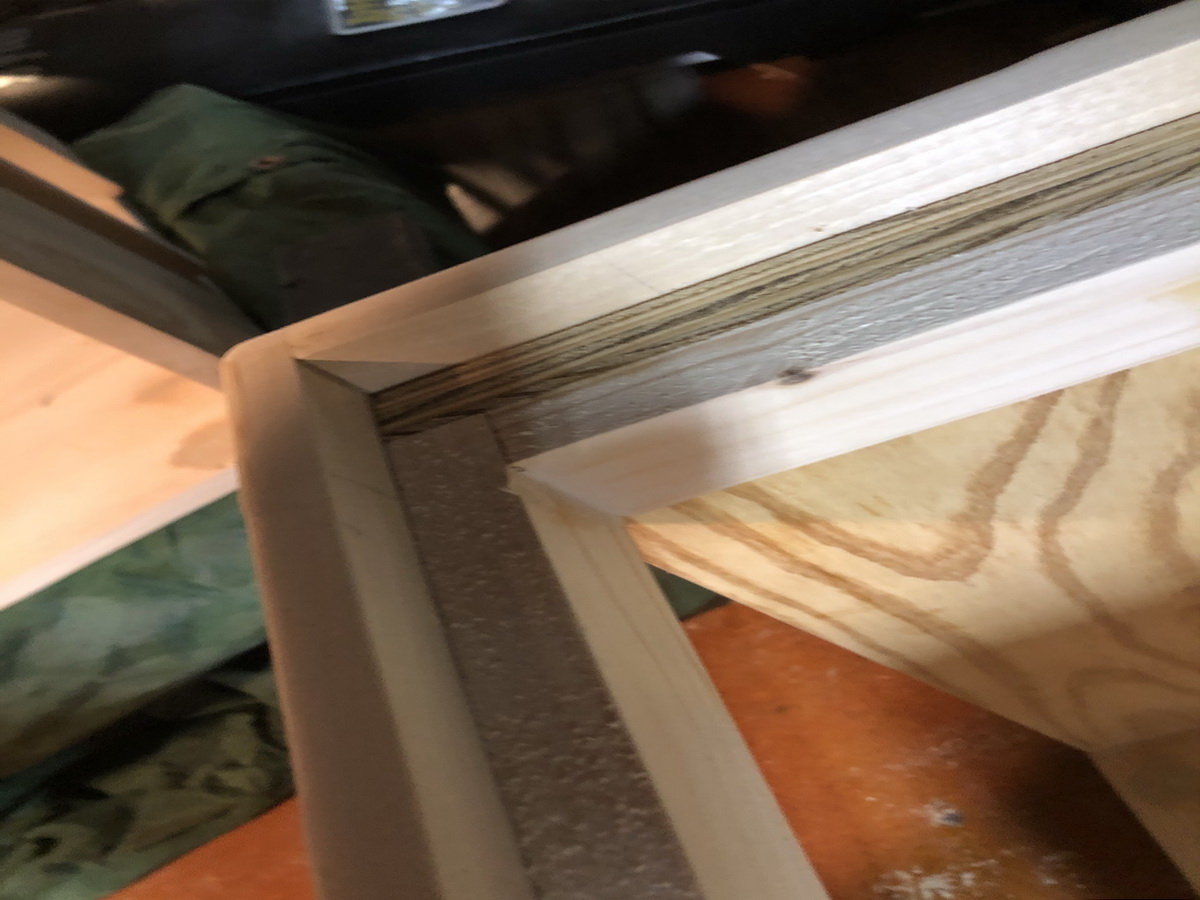
Instead of the sides resting on top of the doll house floor, I extended the sides 3/4" longer to run past the floor for more stability. I also used 1x 2s to frame the inside at the top of each unit for more support and to help in keeping the box square. This may not have been necessary, but I just wanted to make sure it would be sturdy. The main change to the original plan was to add 1" x 3" routed trim to the outside top of each box having it extend 3/4" above the sides. This created a pocket that allowed the next floor to nestle in place and protect it from sliding off in case any little ones decided to climb on it. I also made a 2 car (30" x 30" x 24") detached garage for the AG vehicles. I did fill the holes, plugs, and errors with wood putty, sand numerous times, prime and paint. It was a real help to add some of the paint to the primer because plywood really soaks it up. I think this kept us from having to paint a 3rd coat. The floor was painted a med dark brown, but wiped with the grain before it dried to give a wood grain look.

I finished it in time for the birthday party even though it took 3 vehicles to transport it to the destination. It was a joy to see their faces when it was unveiled and to watch them climb on it of course.
Estimated Cost
$200 (+/-)
Estimated Time Investment
Week Long Project (20 Hours or More)
Finish Used
PPG Acri-Shield (Exterior Semi-Gloss 100% Acrylic Paint and Primer in one.
Recommended Skill Level
Beginner

Tapered Crate

Submitted by dmcarwin on Sat, 02/16/2013 - 08:06

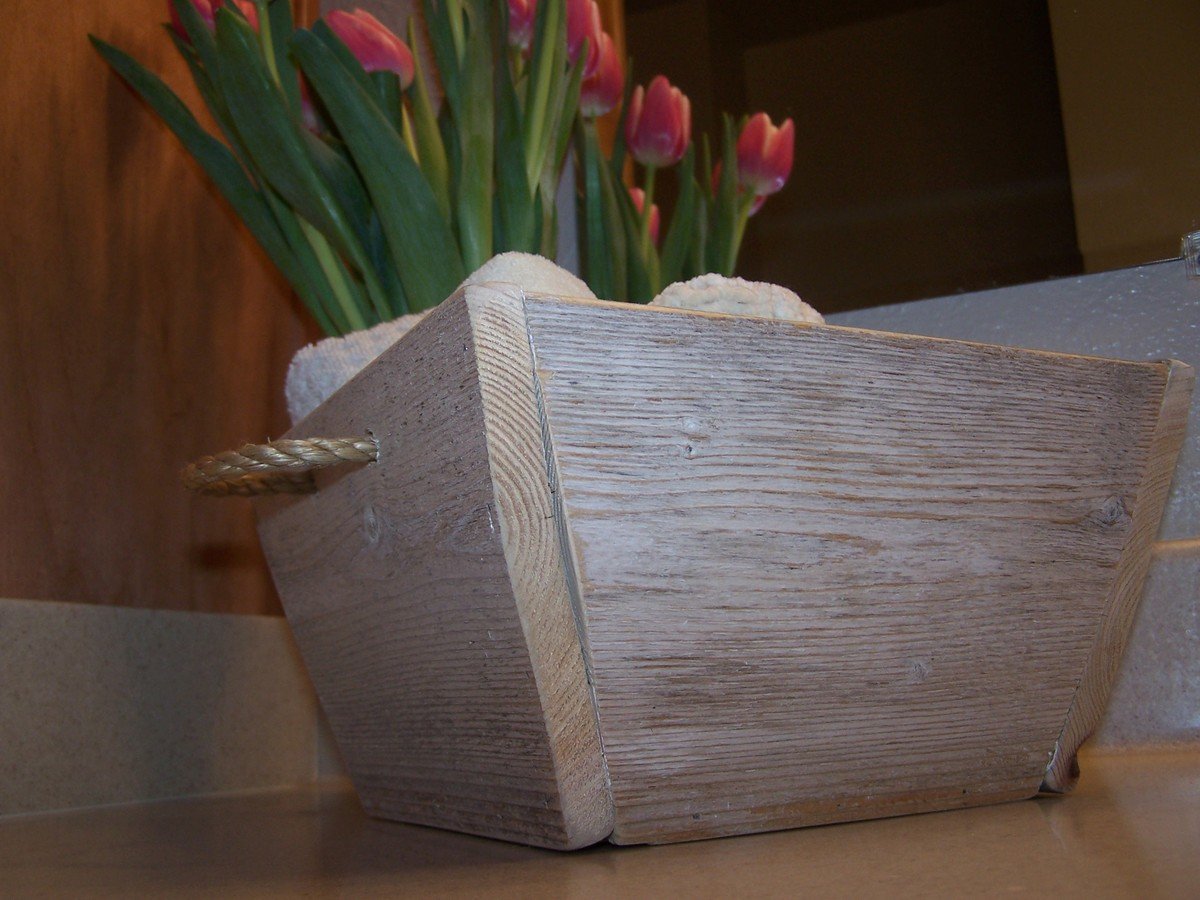
I was so excited when I saw the plan for this! I love making crates out of wood. It was quick and easy and I already had a cedar fence post! It was less than 30 minutes start to finish! For more pictures check out my blog post. Thanks Ana!
Estimated Cost
Free!
Estimated Time Investment
An Hour or Two (0-2 Hours)
Finish Used
It was naturally finished for me!
Recommended Skill Level
Starter Project

Comments

sarahwilley2

Sat, 02/16/2013 - 10:45

Great job! This looks awesome. I can't wait to make some of these babies!

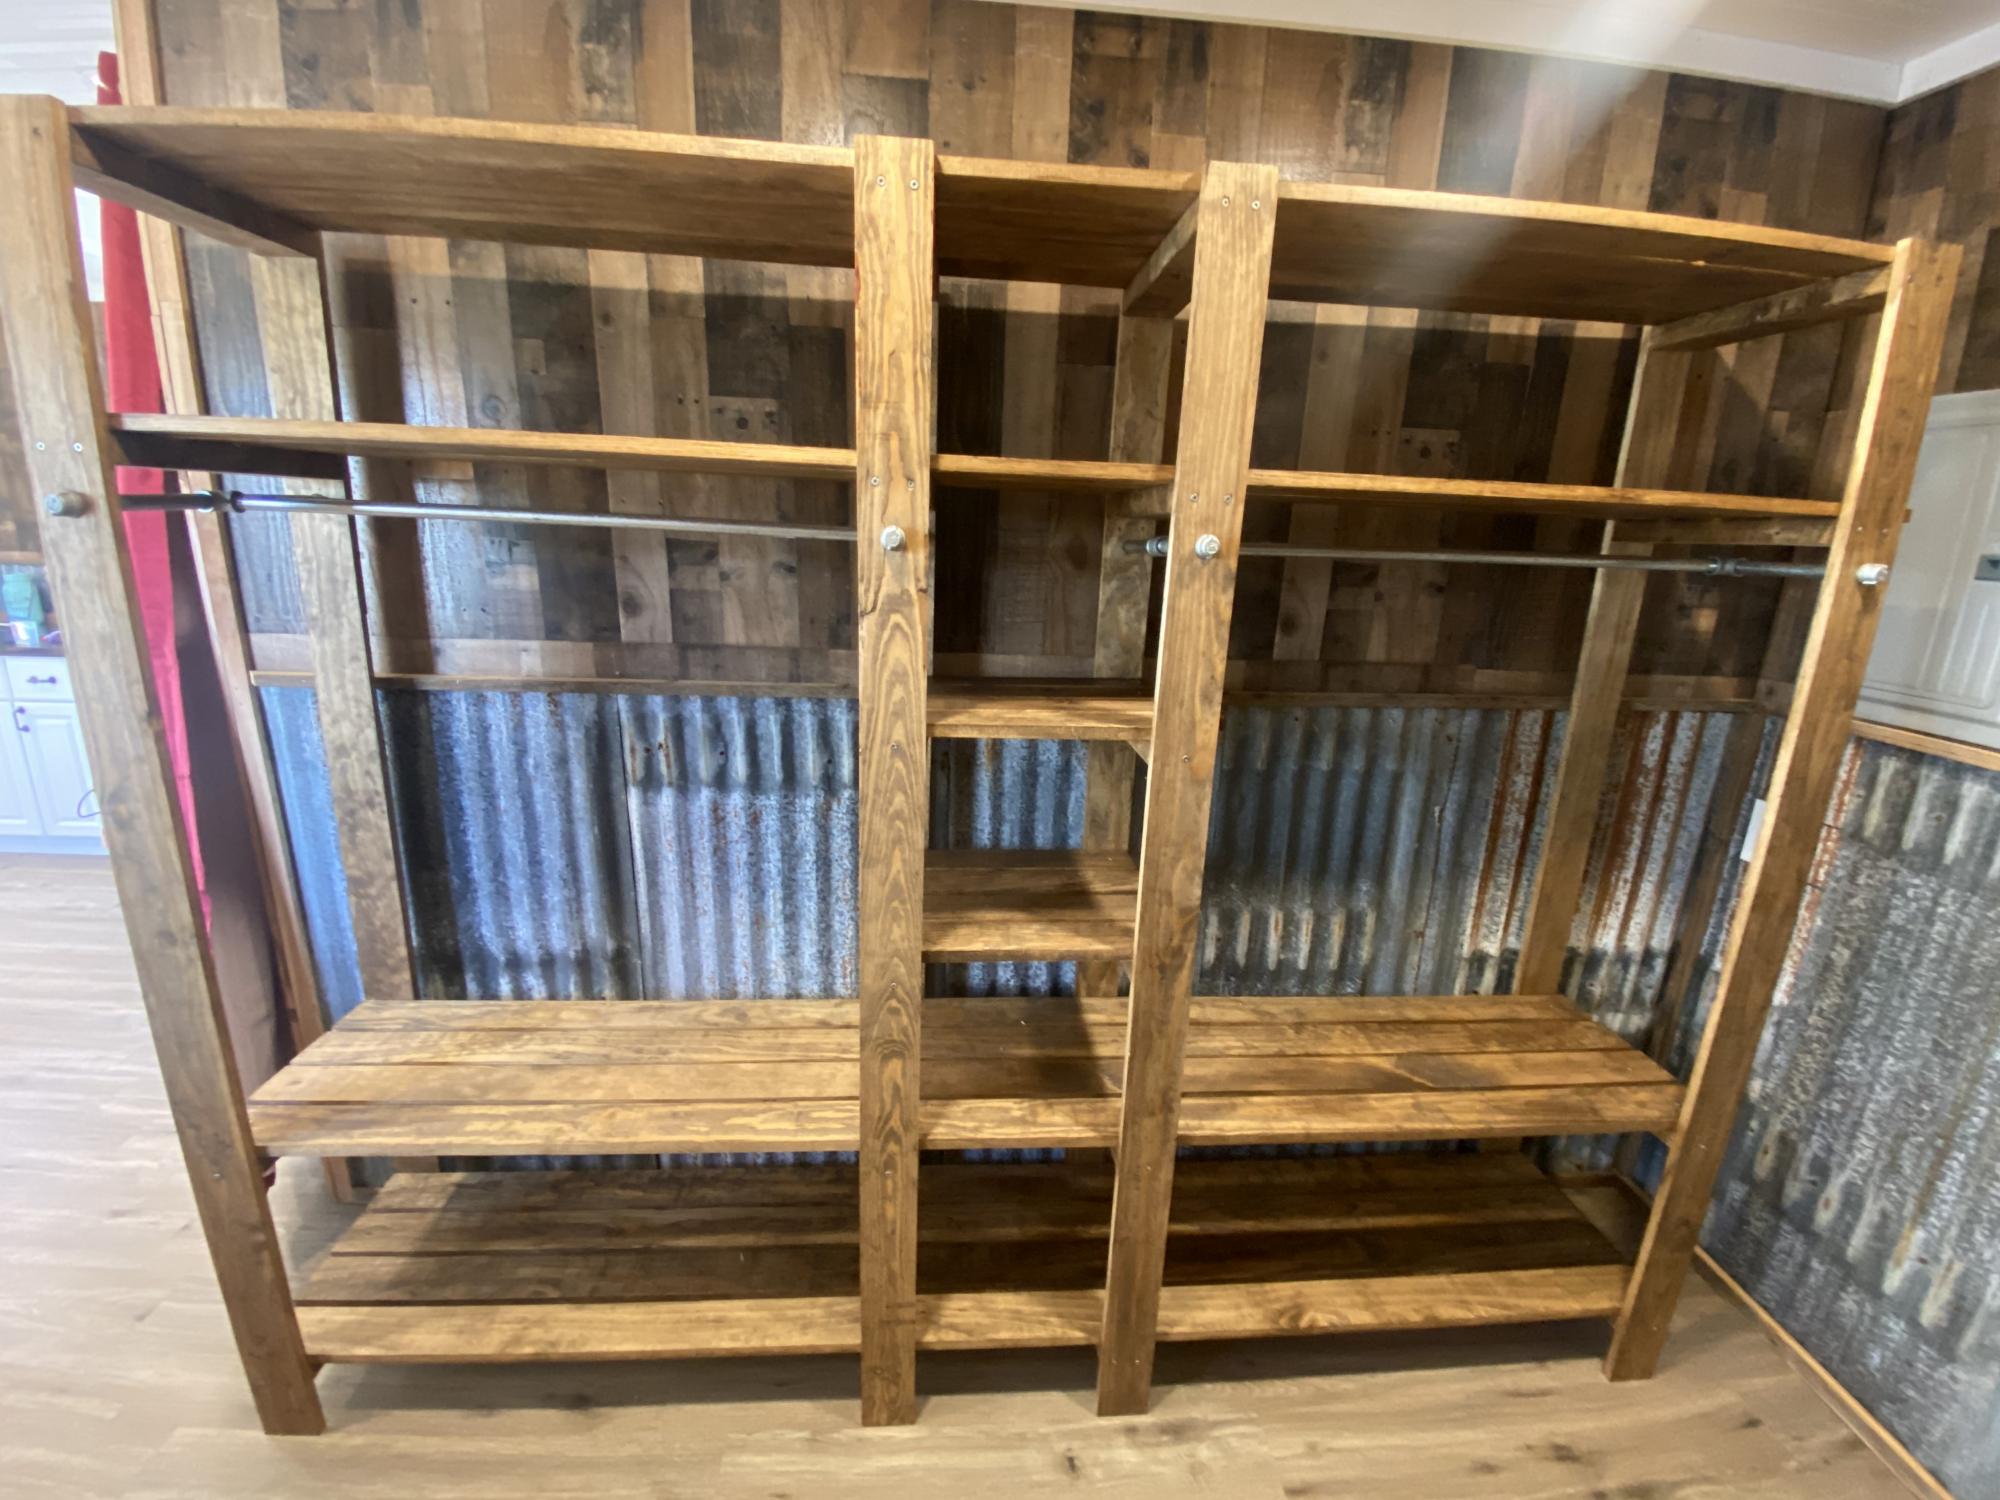
Wood Closet Shelving

Submitted by Anonymous (not verified) on Tue, 02/09/2021 - 06:38

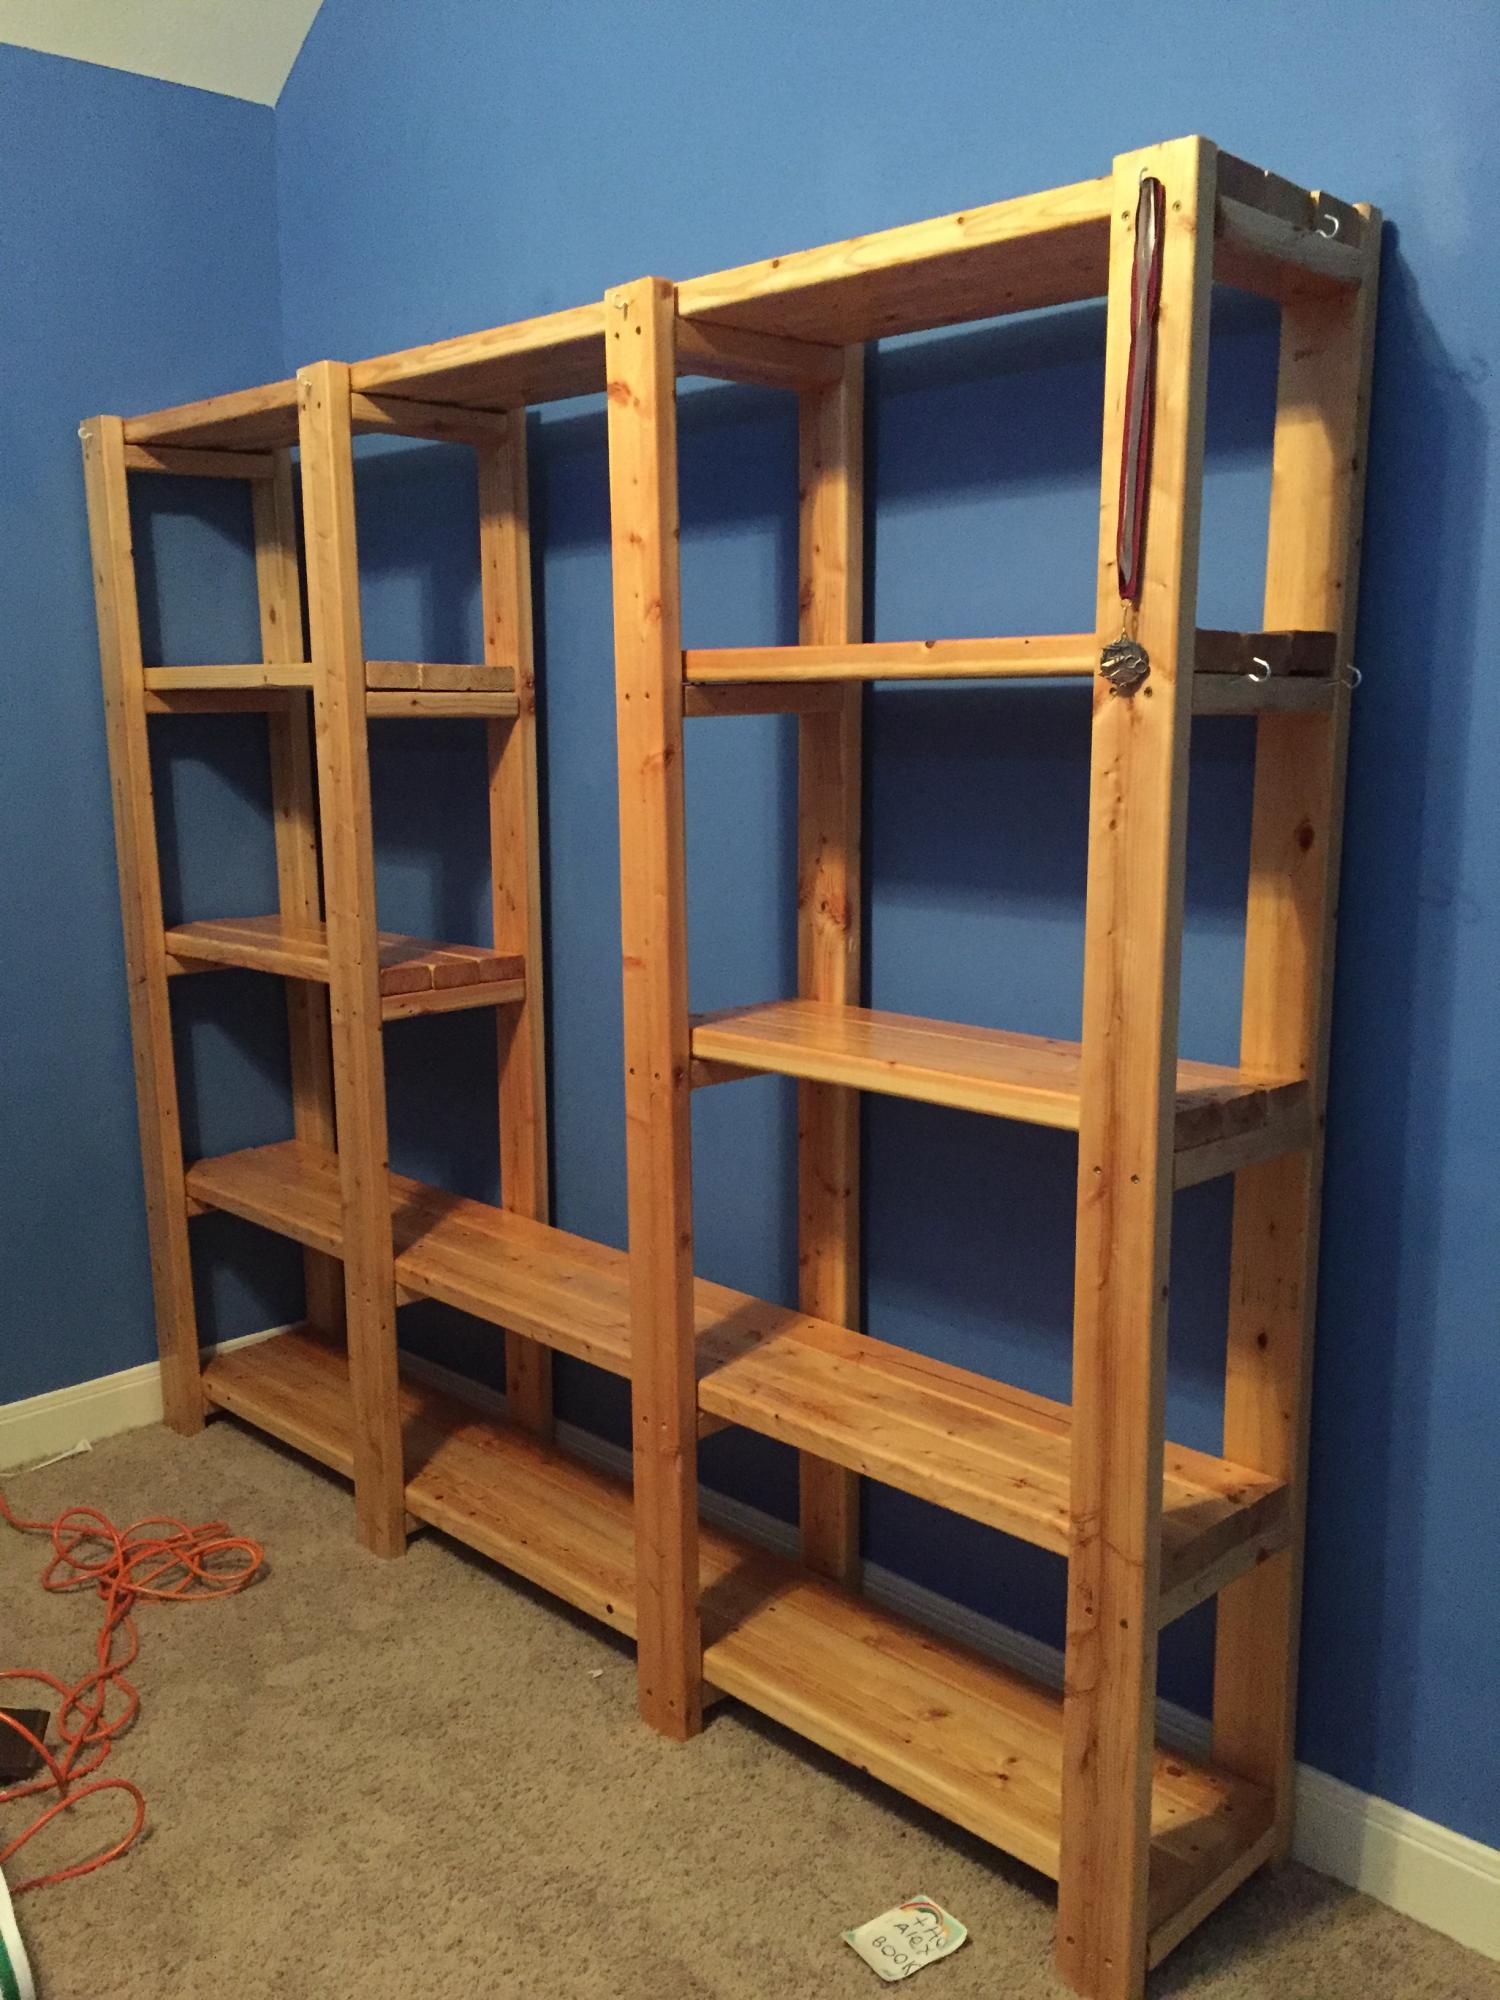
This plan turned out perfect!! Such a great idea, thank you for the inspiration!

Built from Plan(s)
Estimated Time Investment
Day Project (6-9 Hours)
Finish Used
Minwax Golden Oak
Recommended Skill Level
Beginner

Comments

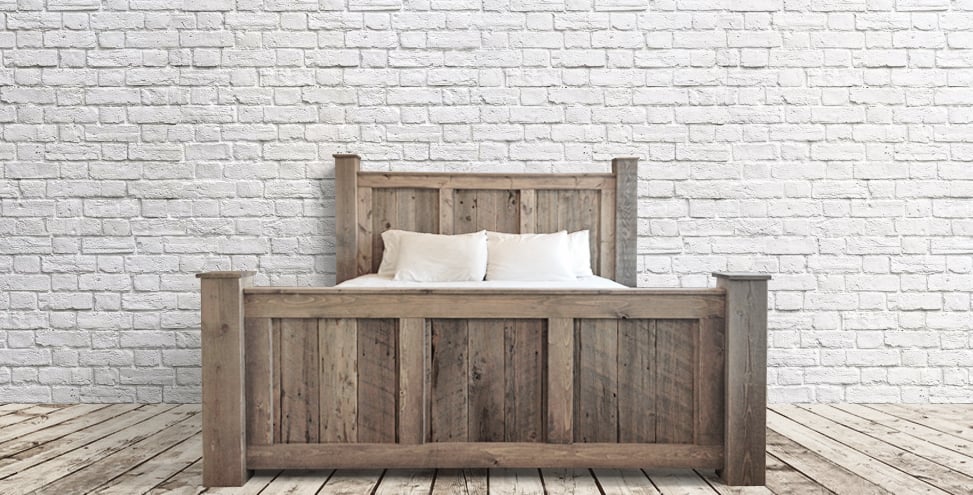
Custom Rustic King Bed

Submitted by jhavinga on Wed, 01/14/2015 - 14:55

My wife is always annoyed with me. I make something for our home, and a few months later I decide I dont like it and want something better! I sold our 5th bed set months ago (Farmhouse Bed made through Ana White) and have been sleeping on the floor for the last few months.. Figured it was time to create something I wouldnt sell! Took some plan ideas from the Farmhouse King Bed Plans and came up with something a little more extravagent.

Hopefully I dont sell this one.

Estimated Cost
$350 With Reclaimed Wood, Im sure much cheaper with HD Wood.
Estimated Time Investment
Weekend Project (10-20 Hours)
Finish Used
For the Pine. used my favourite combo; Weathered Oak and Special Walnut.
For the Fir and Cedar I just sanded.
Recommended Skill Level
Beginner

Comments

jhavinga

Thu, 01/15/2015 - 05:06

Thanks thewoodbuilder, its super easy and you could probably figure it out just by looking at it. =)
I extended the legs 2" past top of footboard, and 4" past top of headboard with caps on top. And layed 1x4 vertically over top of the 1x6 planks, and horizontally across the top of both foot and head board.

Cheers!
Justin

tracygator

Wed, 01/21/2015 - 20:47

This bed is gorgeous!!!! If you don't mind I have a couple of questions... For your stain combo of Weathered Oak and Special Walnut do you layer the weathered oak, wipe it off then apply special walnut? Or do you mix the two stains? Your footboard looks taller than the plan calls for , did you make it higher , if so by how much? And what dimensions are your footboard posts? This seriously is an amazing build. Great job!

In reply to by tracygator

jhavinga

Fri, 01/23/2015 - 14:04

Thank you! I don't mind at all. =)
The stains I do seperataely. I start with weathered oak and let sit for 15min, wipe off. Than do special walnut right after for 15min than wipe off. I repeat this until I like my color. From the farmhouse plans I really only took the planking idea and how to attach planking section to legs. The foot board is higher by 11" while the headboard posts are higher by 10".

The posts are reclaimed fir 6x6's. Thank again very much tracygator! Its a super easy design! if you have any other questions just let me know. =)

Cheers,
Justin

awheat1

Sat, 05/23/2015 - 20:13

Do you have any other pictures of the side rails? I'm curious how you did them? Specifically, how did you mount them to the head and footboard?

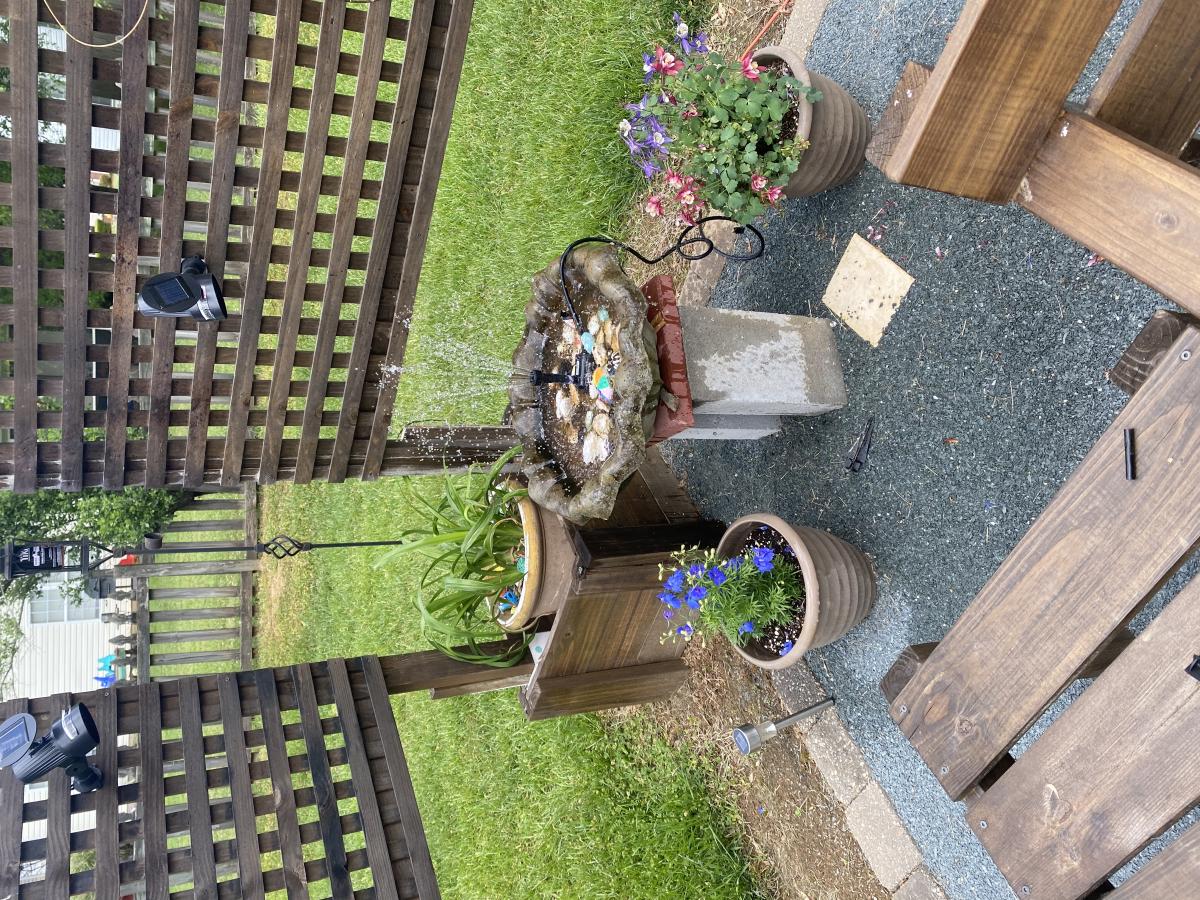
Outdoor living space inspired by Ana’s plans

Submitted by Anonymous (not verified) on Thu, 05/27/2021 - 17:49

I started this backyard project at the beginning of the Pandemic. I used Ana’s plans for the Adirondacks and the picnic table and the bench.

Thanks for your ideas ams inspiration!!!!

Sincerely
Spencer Friedlander

Estimated Cost
$700
Estimated Time Investment
Week Long Project (20 Hours or More)

Comments

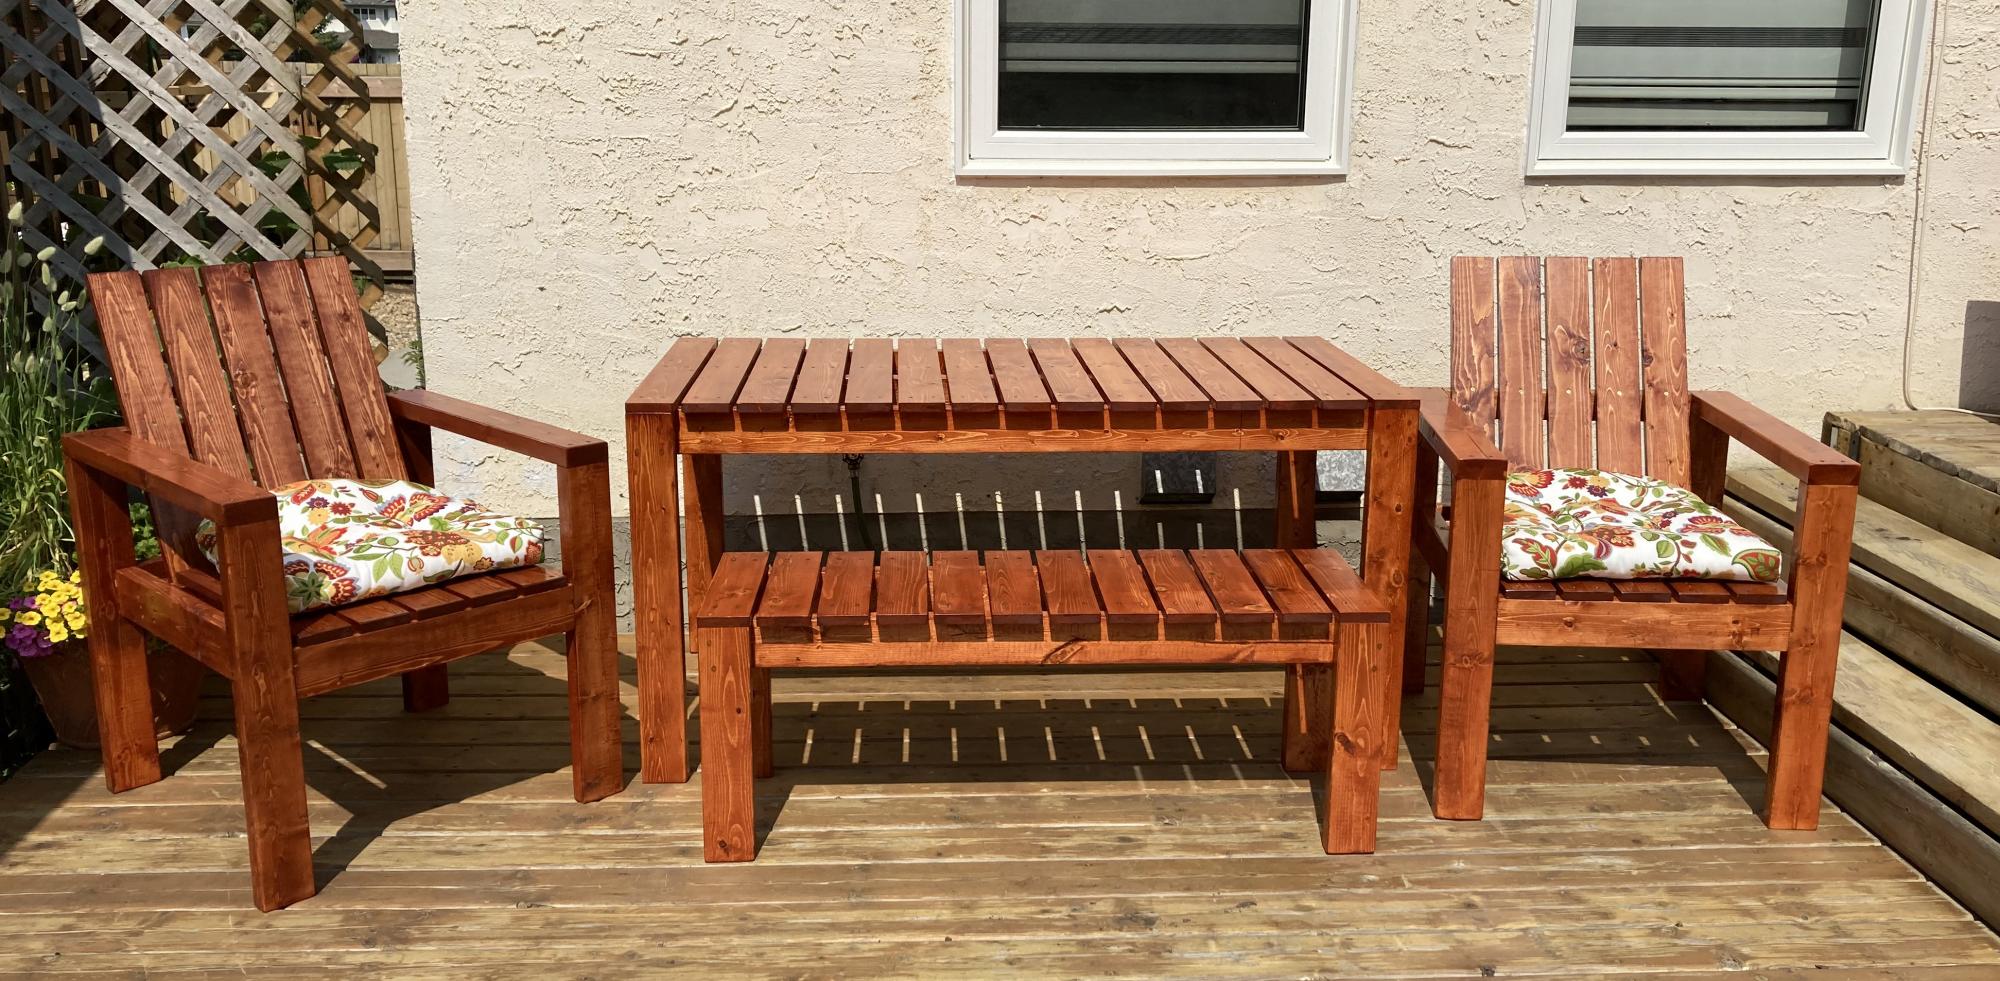
Simple Modern Outdoor Patio/Deck Collection

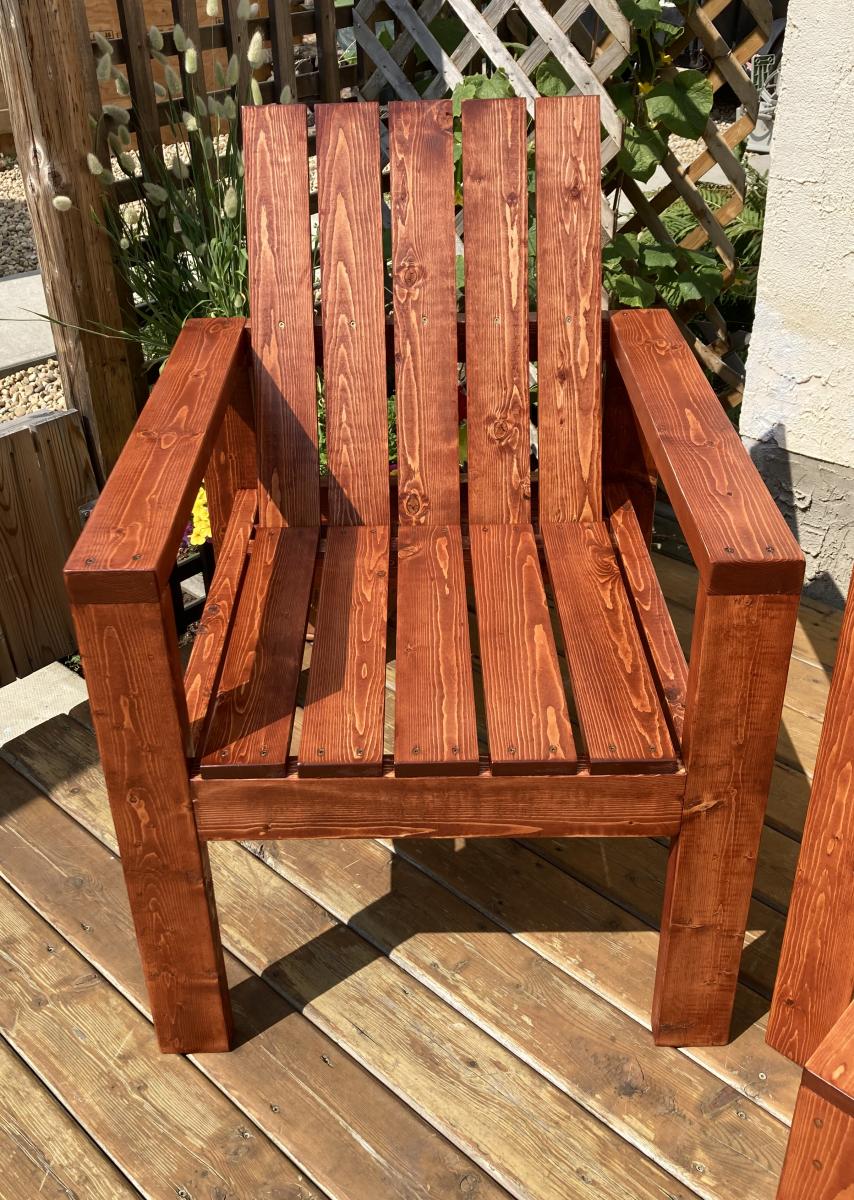
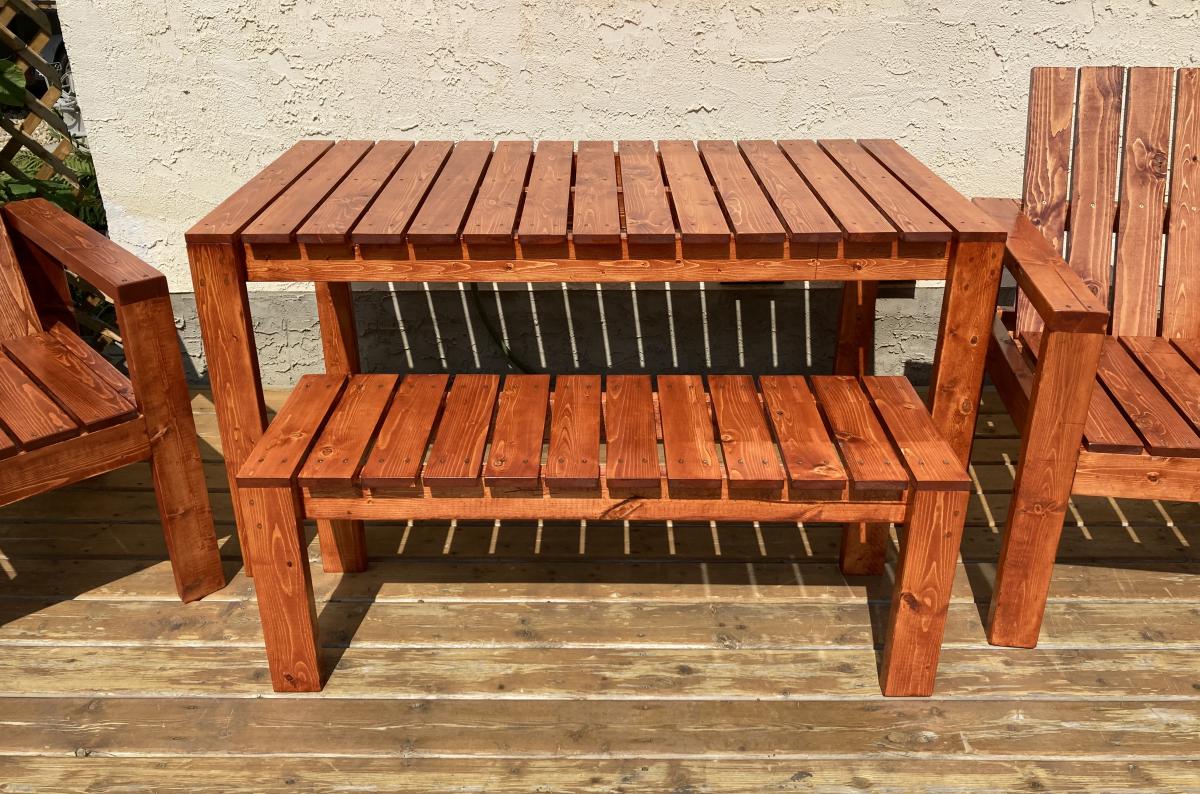
Submitted by frmoody on Mon, 07/26/2021 - 14:48

This was a simple yet very time consuming building. Lots of pieces and lots of sanding. I am really pleased with how it turned out. I stained the edges of all the 1 x 4's prior to assembly just to make things easier. I also increased the sides of the chair from 24" to 26" and set the seat height to 18" to match the bench.

Estimated Cost
$255
Estimated Time Investment
Week Long Project (20 Hours or More)
Finish Used
I stained everything with Minwax Gunstock and then finished with three coats of Helmsman Spar Urethane exterior semigloss. I sanded with 600 grit paper between coats.
Recommended Skill Level
Intermediate

Comments

Redwood Planters

Submitted by powerof2 on Thu, 09/09/2021 - 21:39

Planters from Easy Build DIY Planter Box. Some modifications, but essentially direct from the plans. I used redwood fence pickets for the slats, finished the frame with an "ancient oak" stain and the faces with spar varnish diluted with paint thinner.

Comments

Triangular Rabbit Hutch

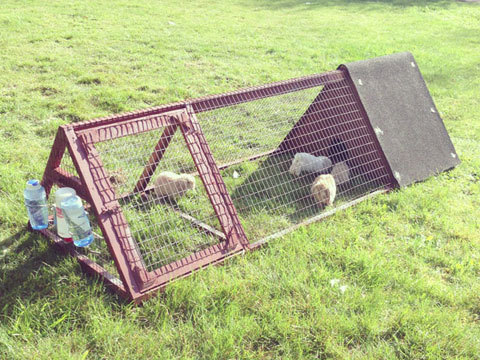
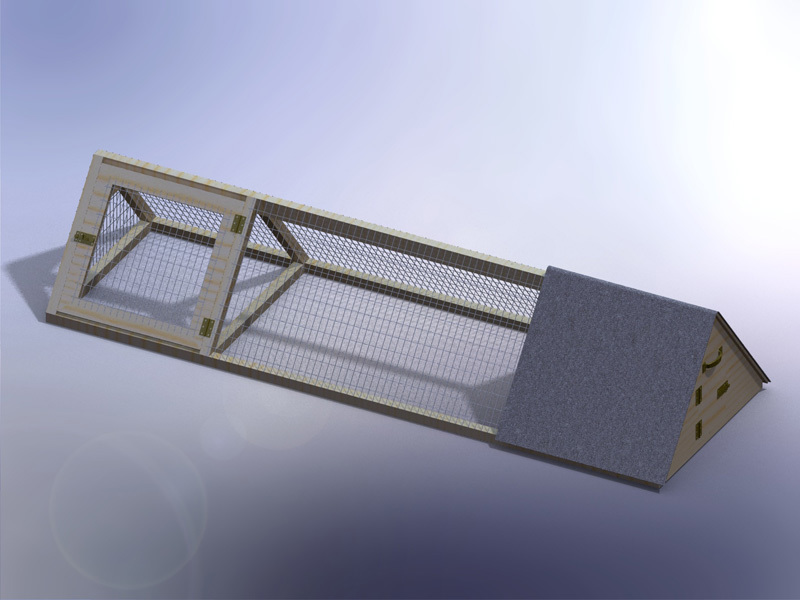
Submitted by Medeek on Fri, 05/03/2013 - 18:14

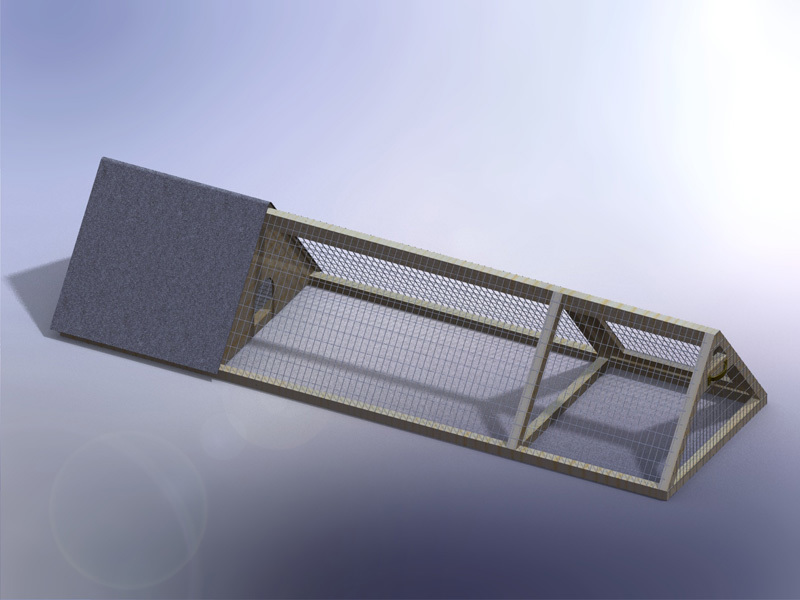
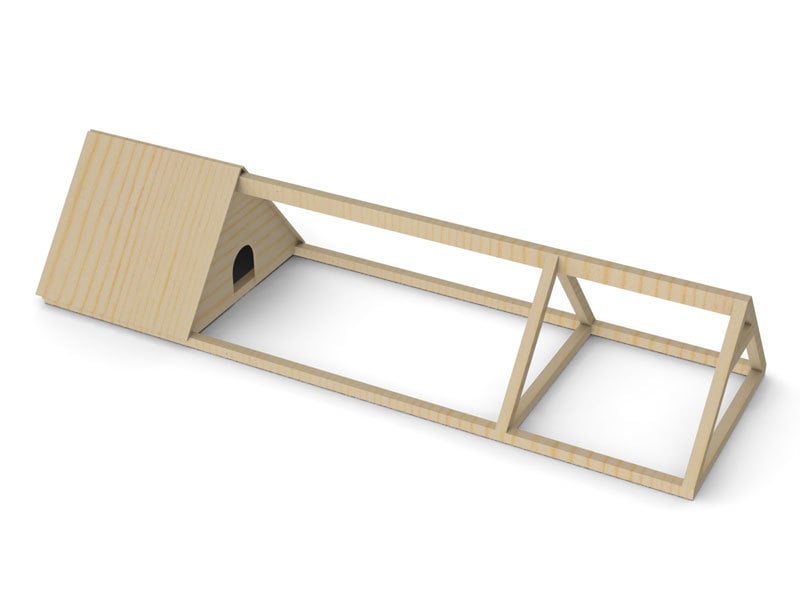
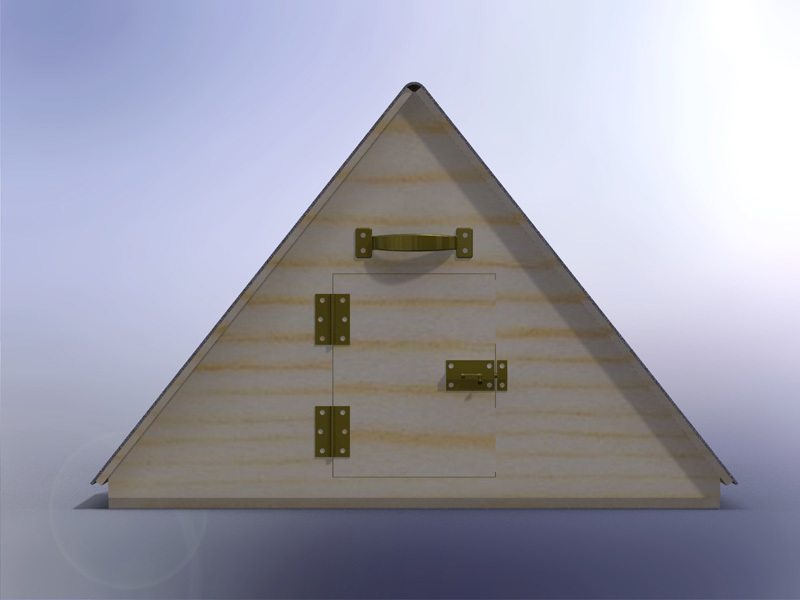
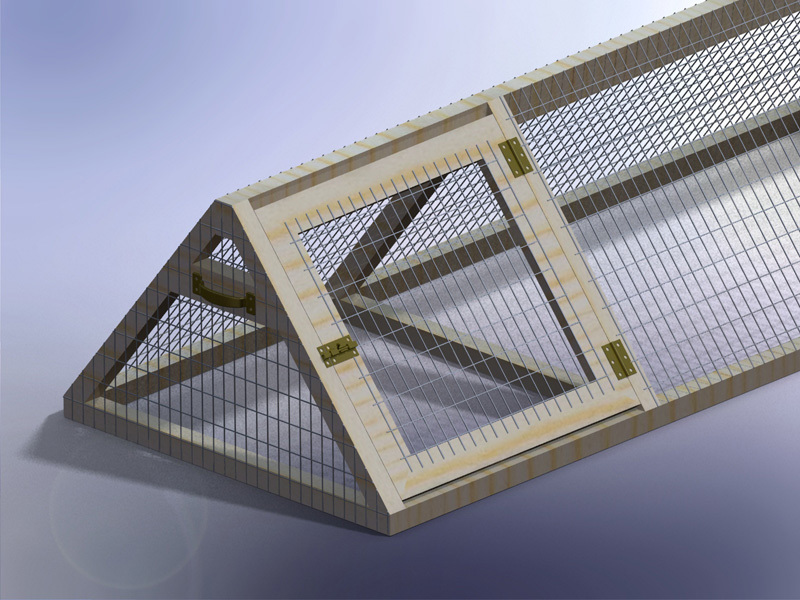
This is a rabbit hutch I created for my kids 5 rabbits. The thing that makes this hutch really nice is if you have a large lawn you can just move the hutch a little bit every day and the lawn gets mowed, fertilized and you don't have to worry about cleaning up all the rabbit droppings. I also mounted a rabbit feeder on the inside of the house door to keep the food dry, which has worked really well.

Here is a short blog of all the steps in its construction:
http://design.medeek.com/gallery/RH3080_COPALIS_2013/RH3080_COPALIS_201…

Estimated Cost
150
Estimated Time Investment
Day Project (6-9 Hours)
Finish Used
Exterior Paint brush or spray. Choose your color.
Recommended Skill Level
Beginner

Comments

Medeek

Sun, 05/05/2013 - 01:52

I apologize I haven't got the completed planset up for this project yet but I will try to get it up in the next couple of weeks as well as a very complete materials list. You will need to go to a farm/feed store to get the correct 1"x2" wire and 1/2"x1" wire for the floor. Do not go to Home Depot and use the cow wire they have or the hardware cloth for the floor, neither of which are the correct choice. Home Depot has the lumber but not the wire. If you have any questions or even improvements to my design I would be interested in hearing from you.

Medeek

Sun, 09/13/2015 - 19:18

Finally got around to uploading the plans.  I still need to create a material list for this plan but the basics are there now.   We've had rabbits in it for about a year but recently we've tried some guinea pigs and it works great for that as well.  The guinea pigs can pretty much live off just the grass and dandelions but you do need to move it daily to give them plenty to eat.

Bookshelf with bench for kid's room

Submitted by Anonymous (not verified) on Tue, 06/27/2017 - 15:12

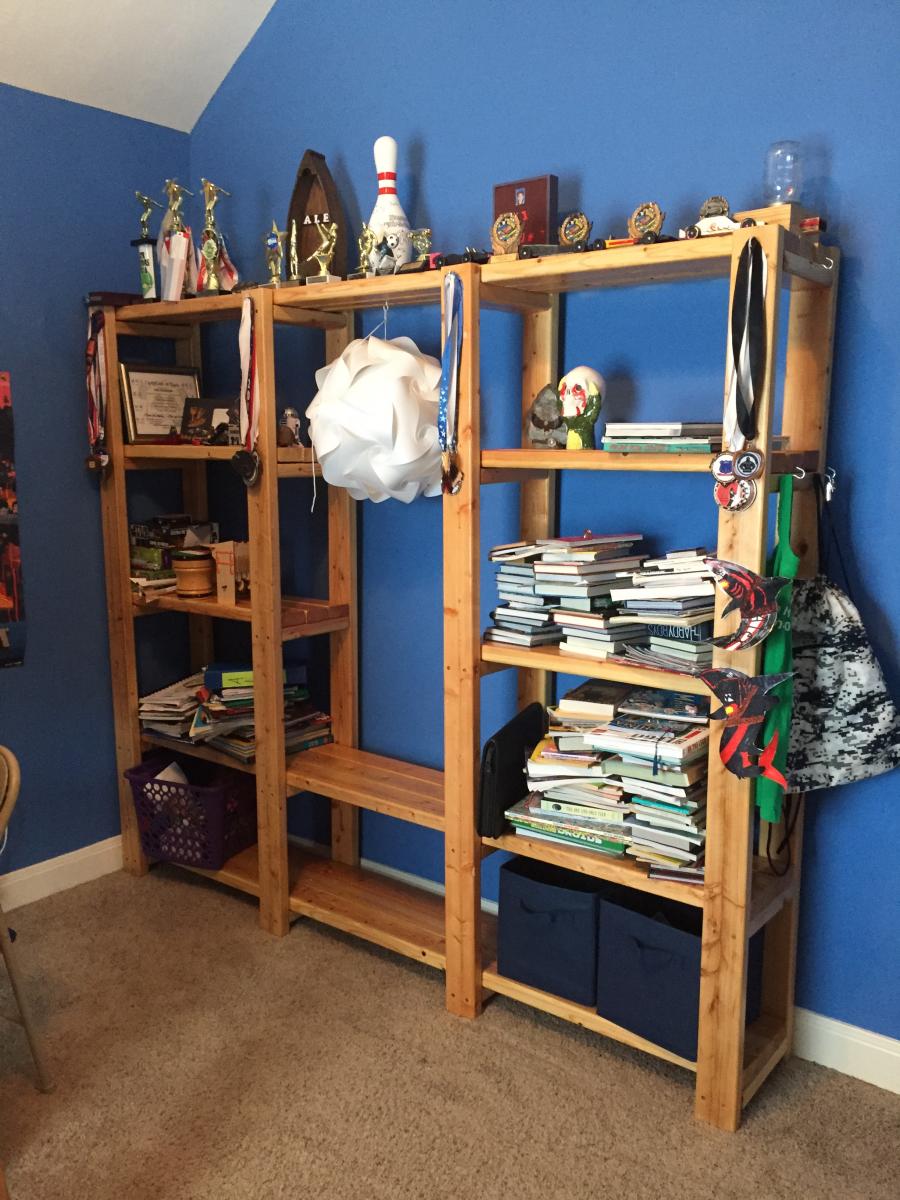
I was looking for something for my son's room that would last him until college, so I adapted your plans and added hooks and a bench and stained it.  Bookends are all we are missing to make it perfect. He loves it, and I don't think he will be able to break it.  I could use a suggestion for anchoring it to the wall, though. Thank you for the great, easy-to-follow plan!

Estimated Cost
$75
Estimated Time Investment
Week Long Project (20 Hours or More)
Finish Used
Natural stain and polycrylic
Recommended Skill Level
Starter Project

Comments

DIYMomof4

Tue, 06/27/2017 - 18:30

Your bookshelf and bench look really nice and sturdy!  I'm sure it will hold up for many years.  As far as anchoring it to a wall, I have had luck with anti-tip furniture straps.  I would use several and anchor them right to the studs.  I also use long, self tapping construction screws instead of the screws that come in the package.  

Media console

Submitted by Anonymous (not verified) on Mon, 10/04/2021 - 13:28

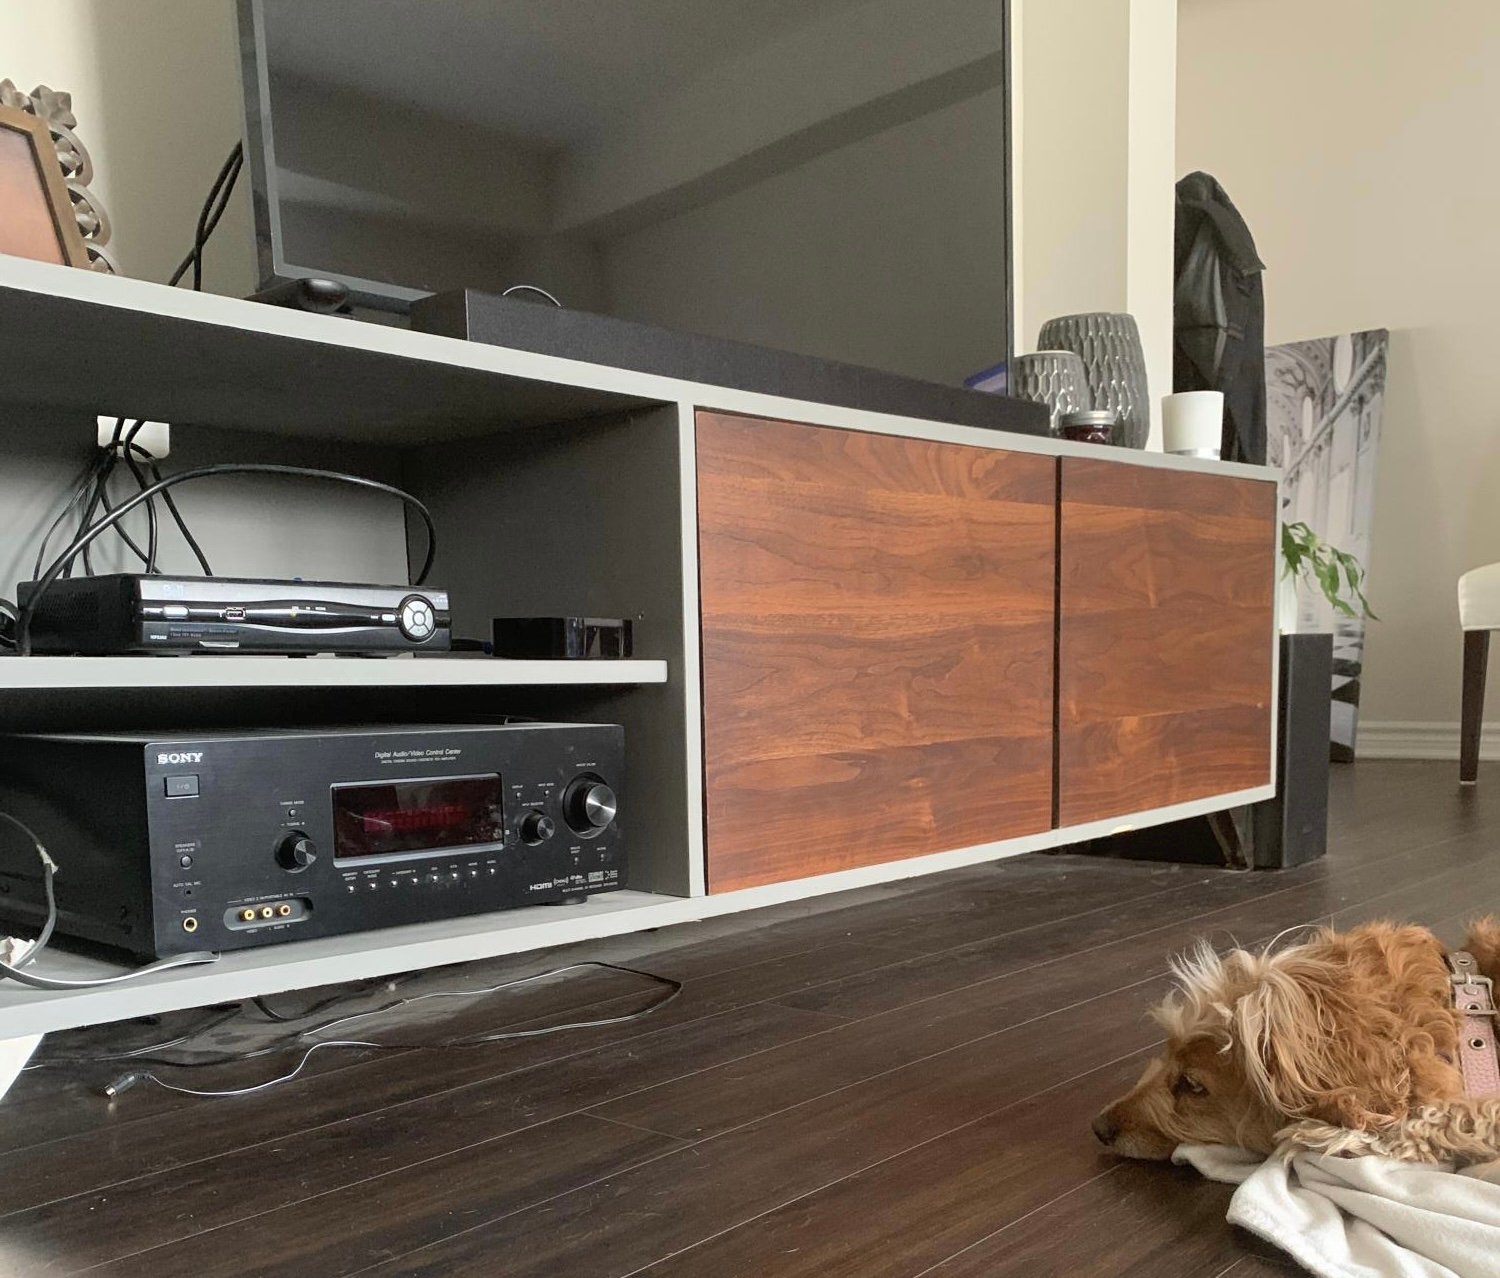
This great plan!! Thx Ana!

Comments

Square Picnic Table

Submitted by Anonymous (not verified) on Mon, 10/04/2021 - 15:01

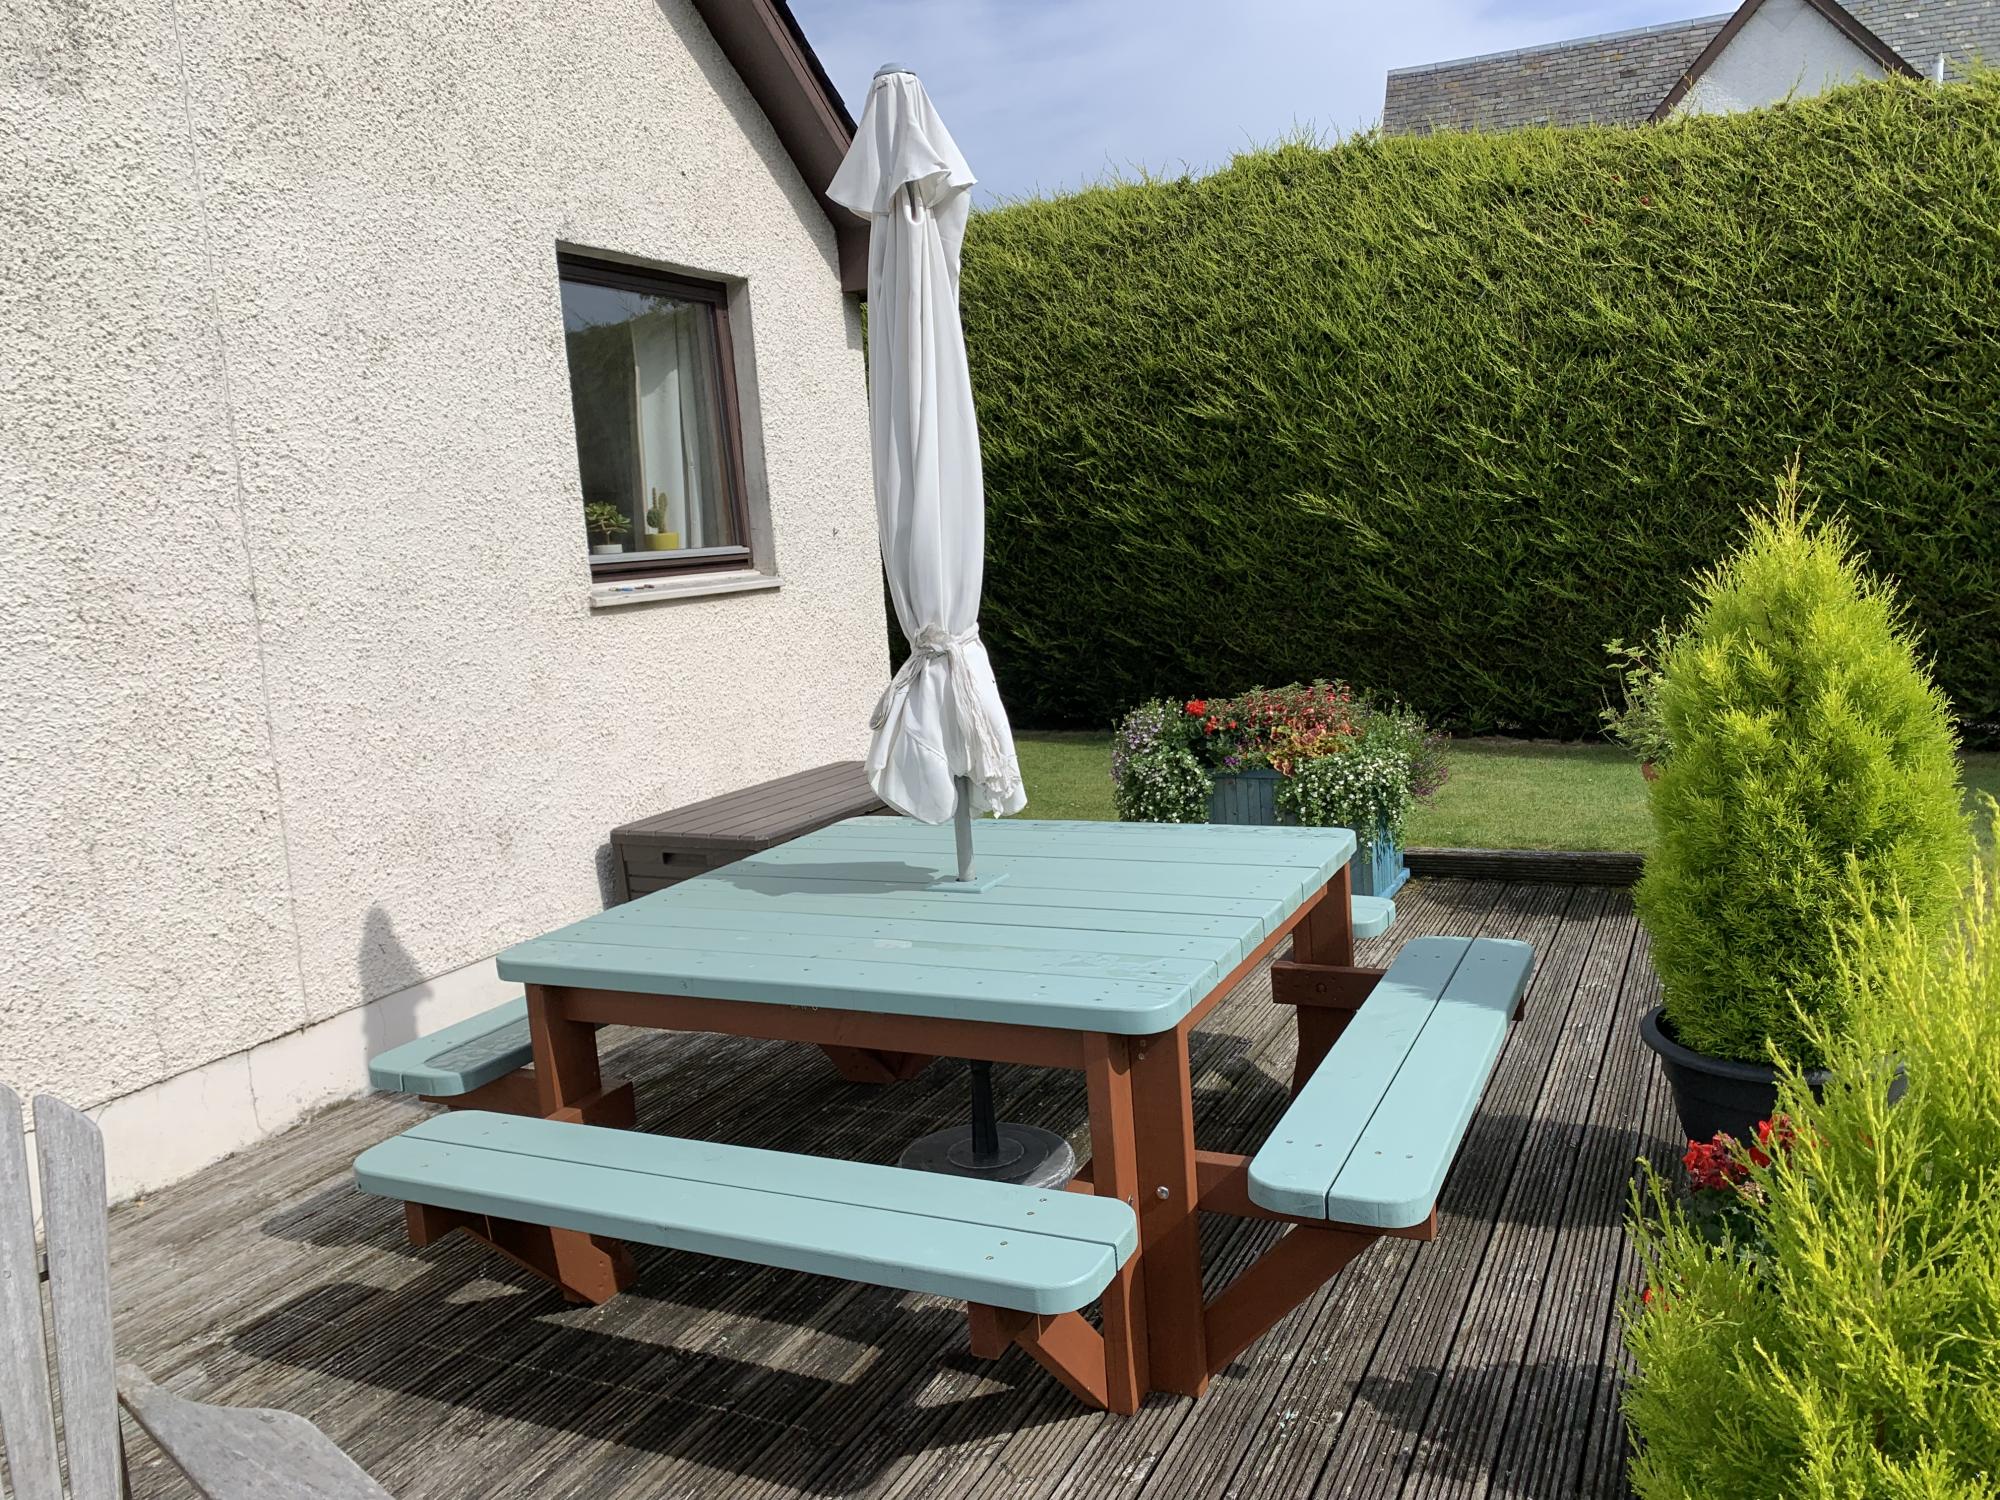
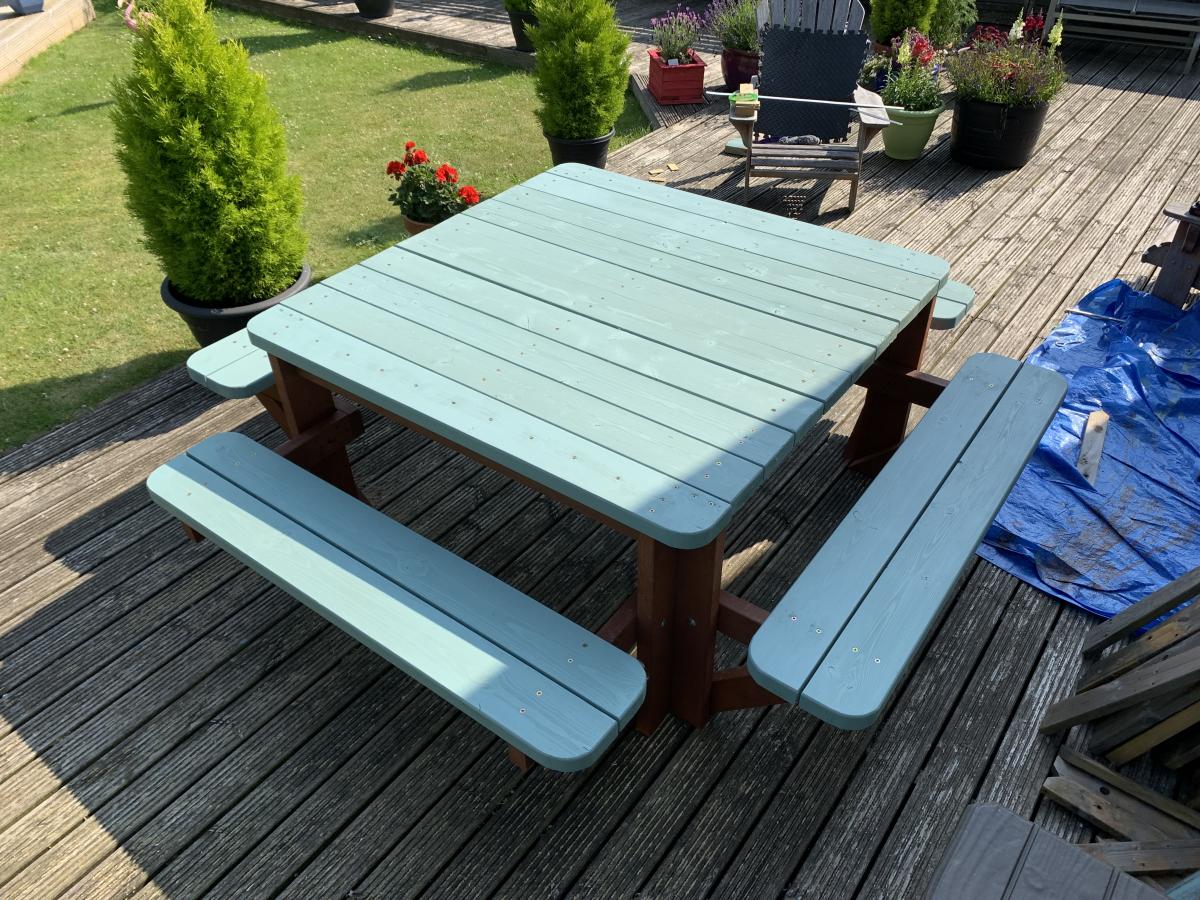
This is a bit larger than Ana’s plan. I added additional support to the table top and added a braced opening for the umbrella. I also went for a more rounded finish by rounding all the corners of the table and benches with my jigsaw and then sanding to create smooth curves.

Built from Plan(s)

Comments

Adirondack Chair

Submitted by maparuna on Sat, 05/18/2013 - 19:07

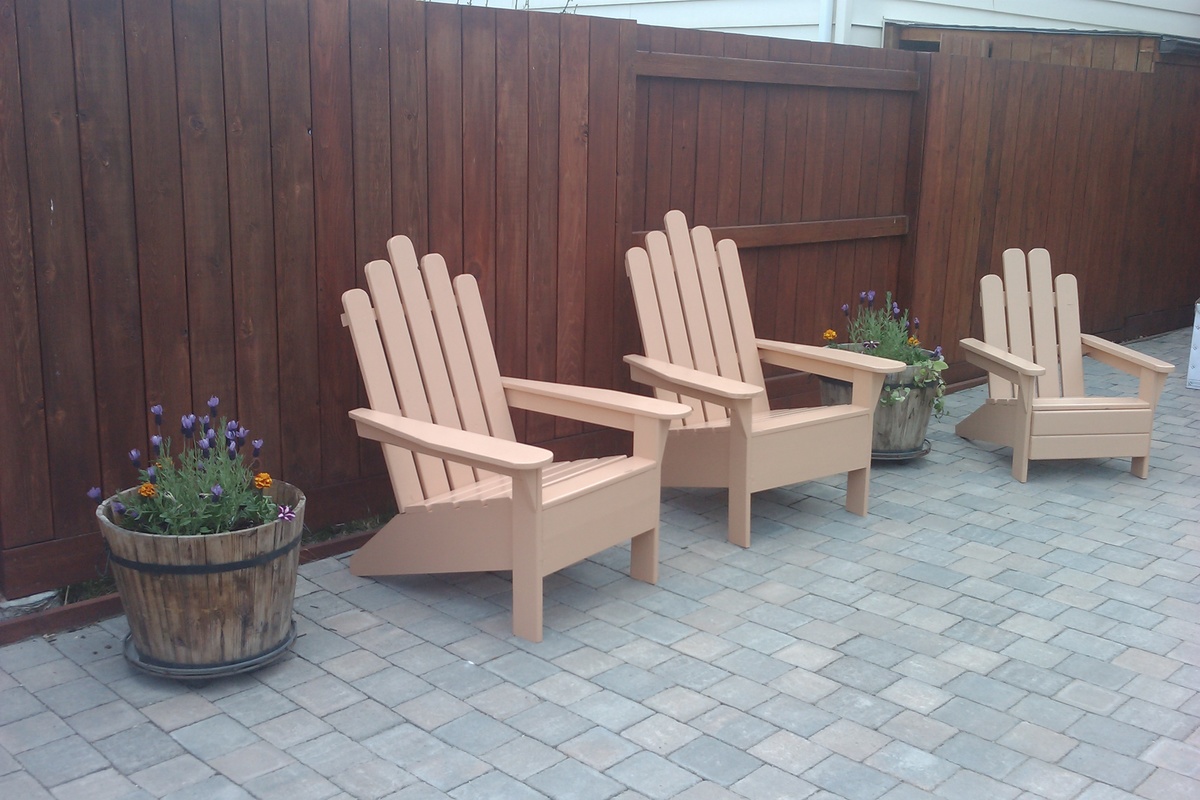
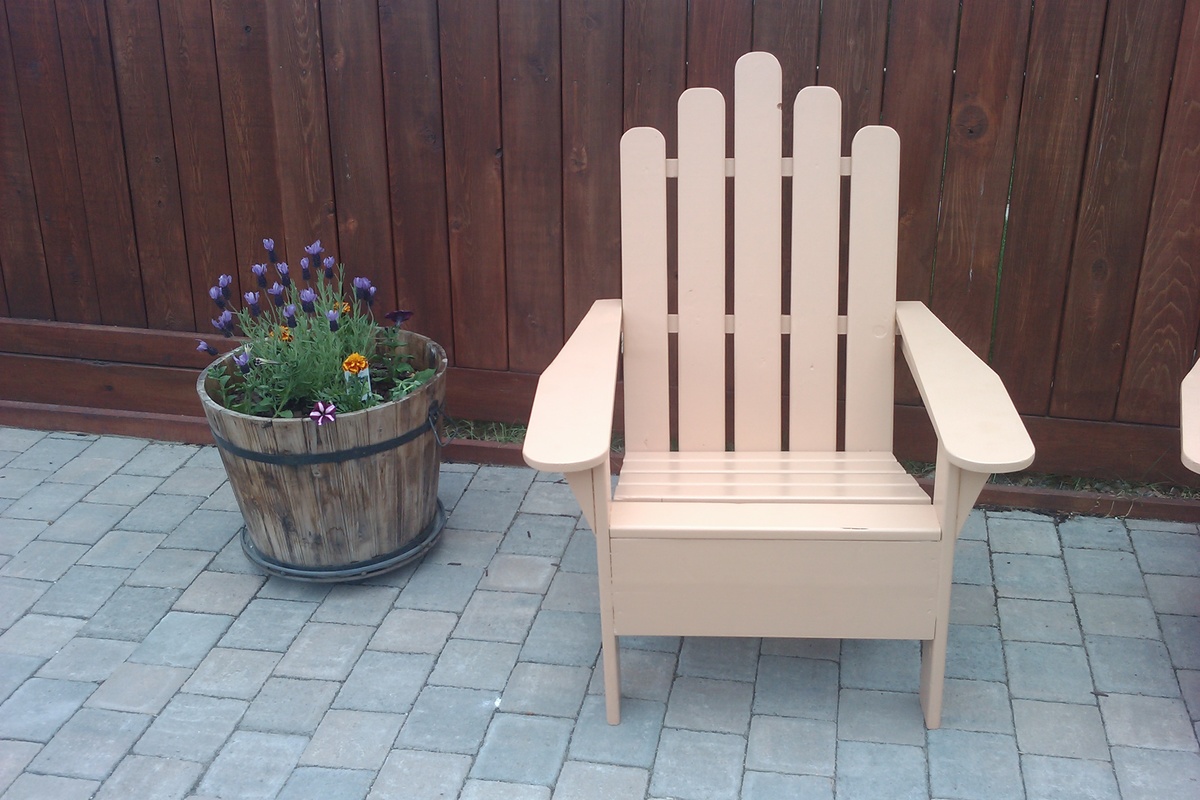
Built three Adirondack Chair, got the dimensions from Ana's Adirondack Chair and modify dimensions for the smaller chair for my daughter. Used ceder and pine. Cost about CDN 40 per chair. Specially I would like to thanks Ana giving information about simple but beautiful furniture designs.

Estimated Time Investment
Weekend Project (10-20 Hours)
Finish Used
Used for my backyard
Recommended Skill Level
Beginner

Comments

Farmhouse table

Submitted by Anonymous (not verified) on Mon, 10/04/2021 - 15:58

Farmhouse table

Comments

Chicken Run

Submitted by Kdline on Mon, 04/13/2015 - 06:36

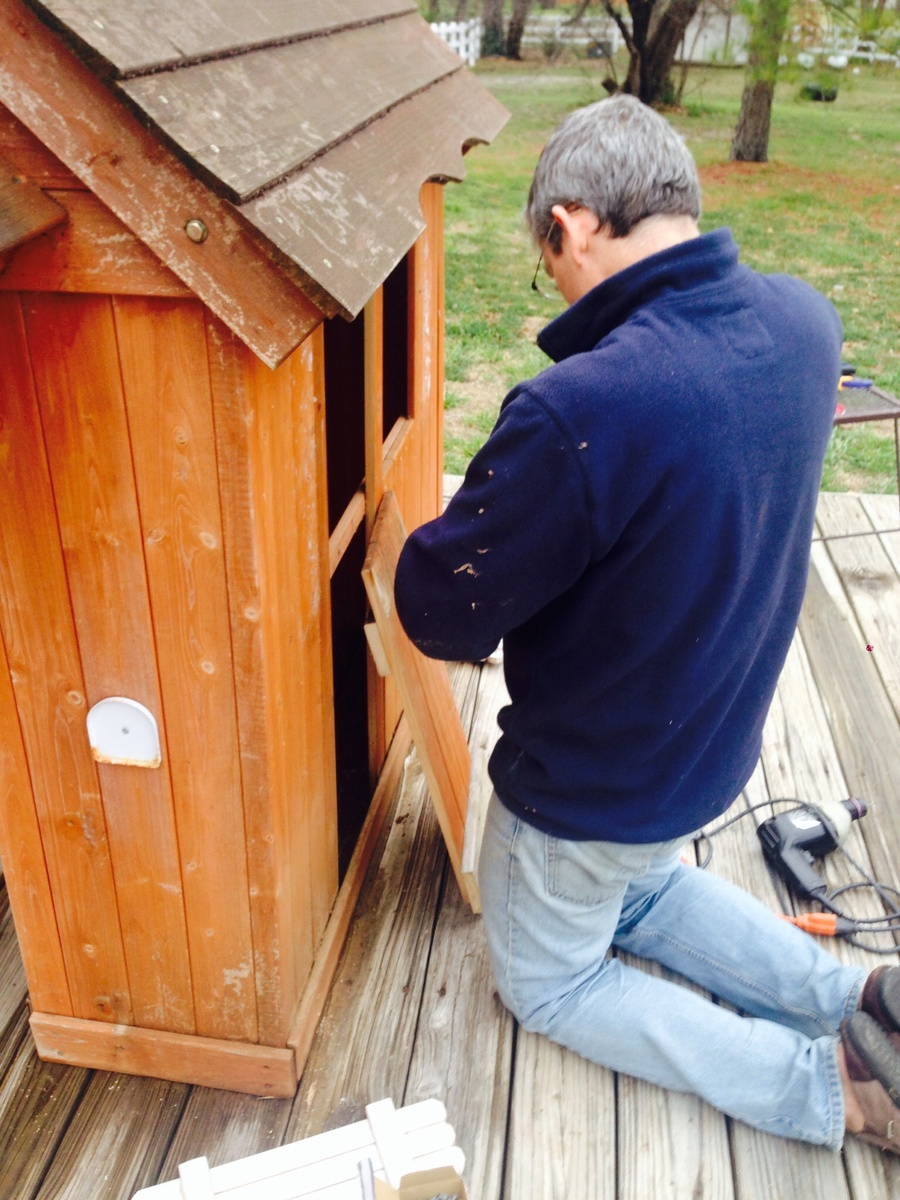
We built this coop from an existing playhouse and used Ana's plans to build the run!  So easy and turned out perfectly!

Built from Plan(s)
Estimated Time Investment
Day Project (6-9 Hours)
Recommended Skill Level
Beginner

Comments

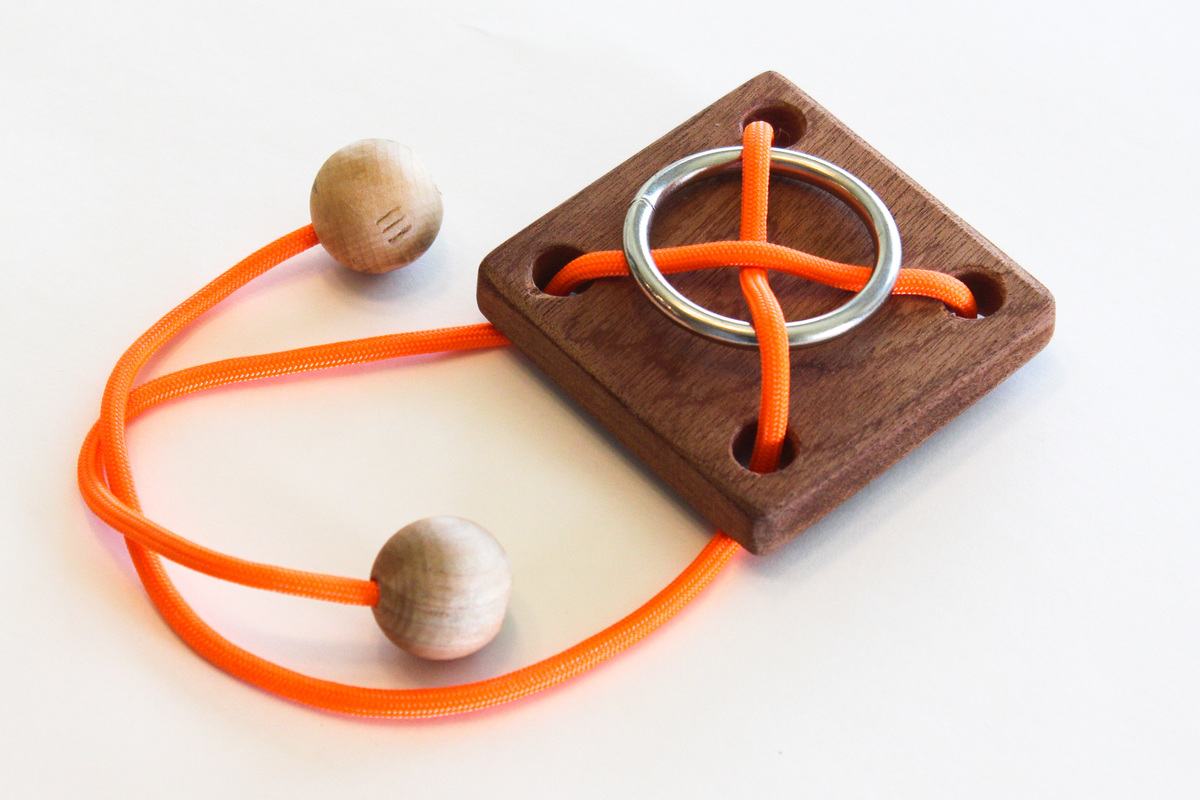
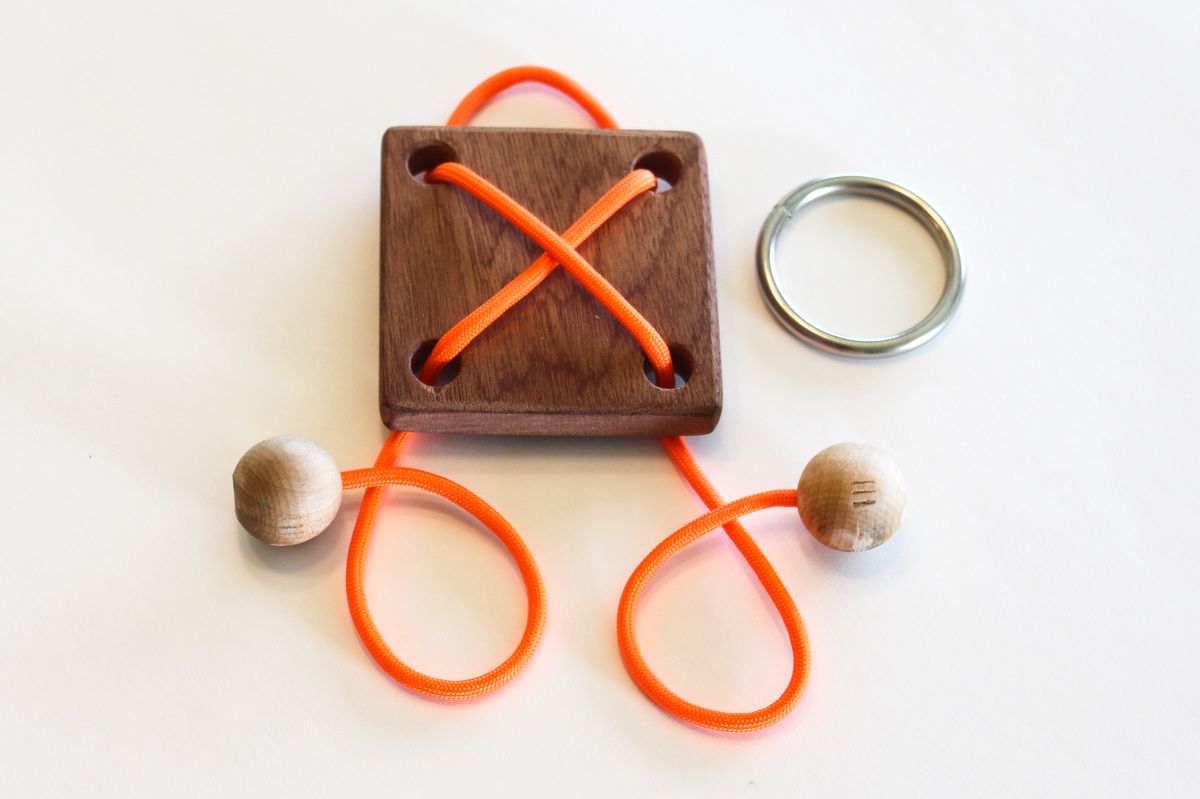
Rope / Ring Puzzle

Submitted by mtairymd on Mon, 09/04/2017 - 07:51

This is a really easy project to make. The goal is to separate the ring from the puzzle. Refer to the solution video if you can't figure it out.

Build Instructions:
https://www.instructables.com/id/Rope-Ring-Puzzle/

Solution: 

https://youtu.be/0juqeATz29I


Estimated Cost
$2
Estimated Time Investment
An Hour or Two (0-2 Hours)
Finish Used
None
Recommended Skill Level
Starter Project

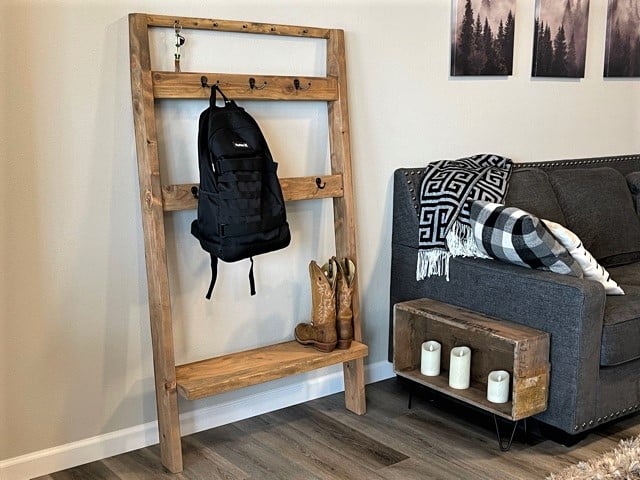
Leaning Hall Tree

Submitted by vendo on Wed, 10/20/2021 - 12:33

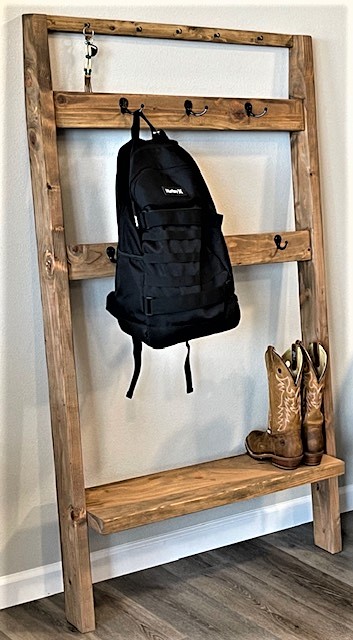
I had a small piece of 2x10 left over from this plan's original post, as well as some 2x4's and a scrap 1x2 laying around, so added the top key hook and stained instead of painted. Love how it turned out. I did the top angle a little different too, so it sits a bit closer to the wall, making it awesome for a narrow entryway or space. Easy to modify for whatever the need.

Built from Plan(s)

Basement Storage Shelves

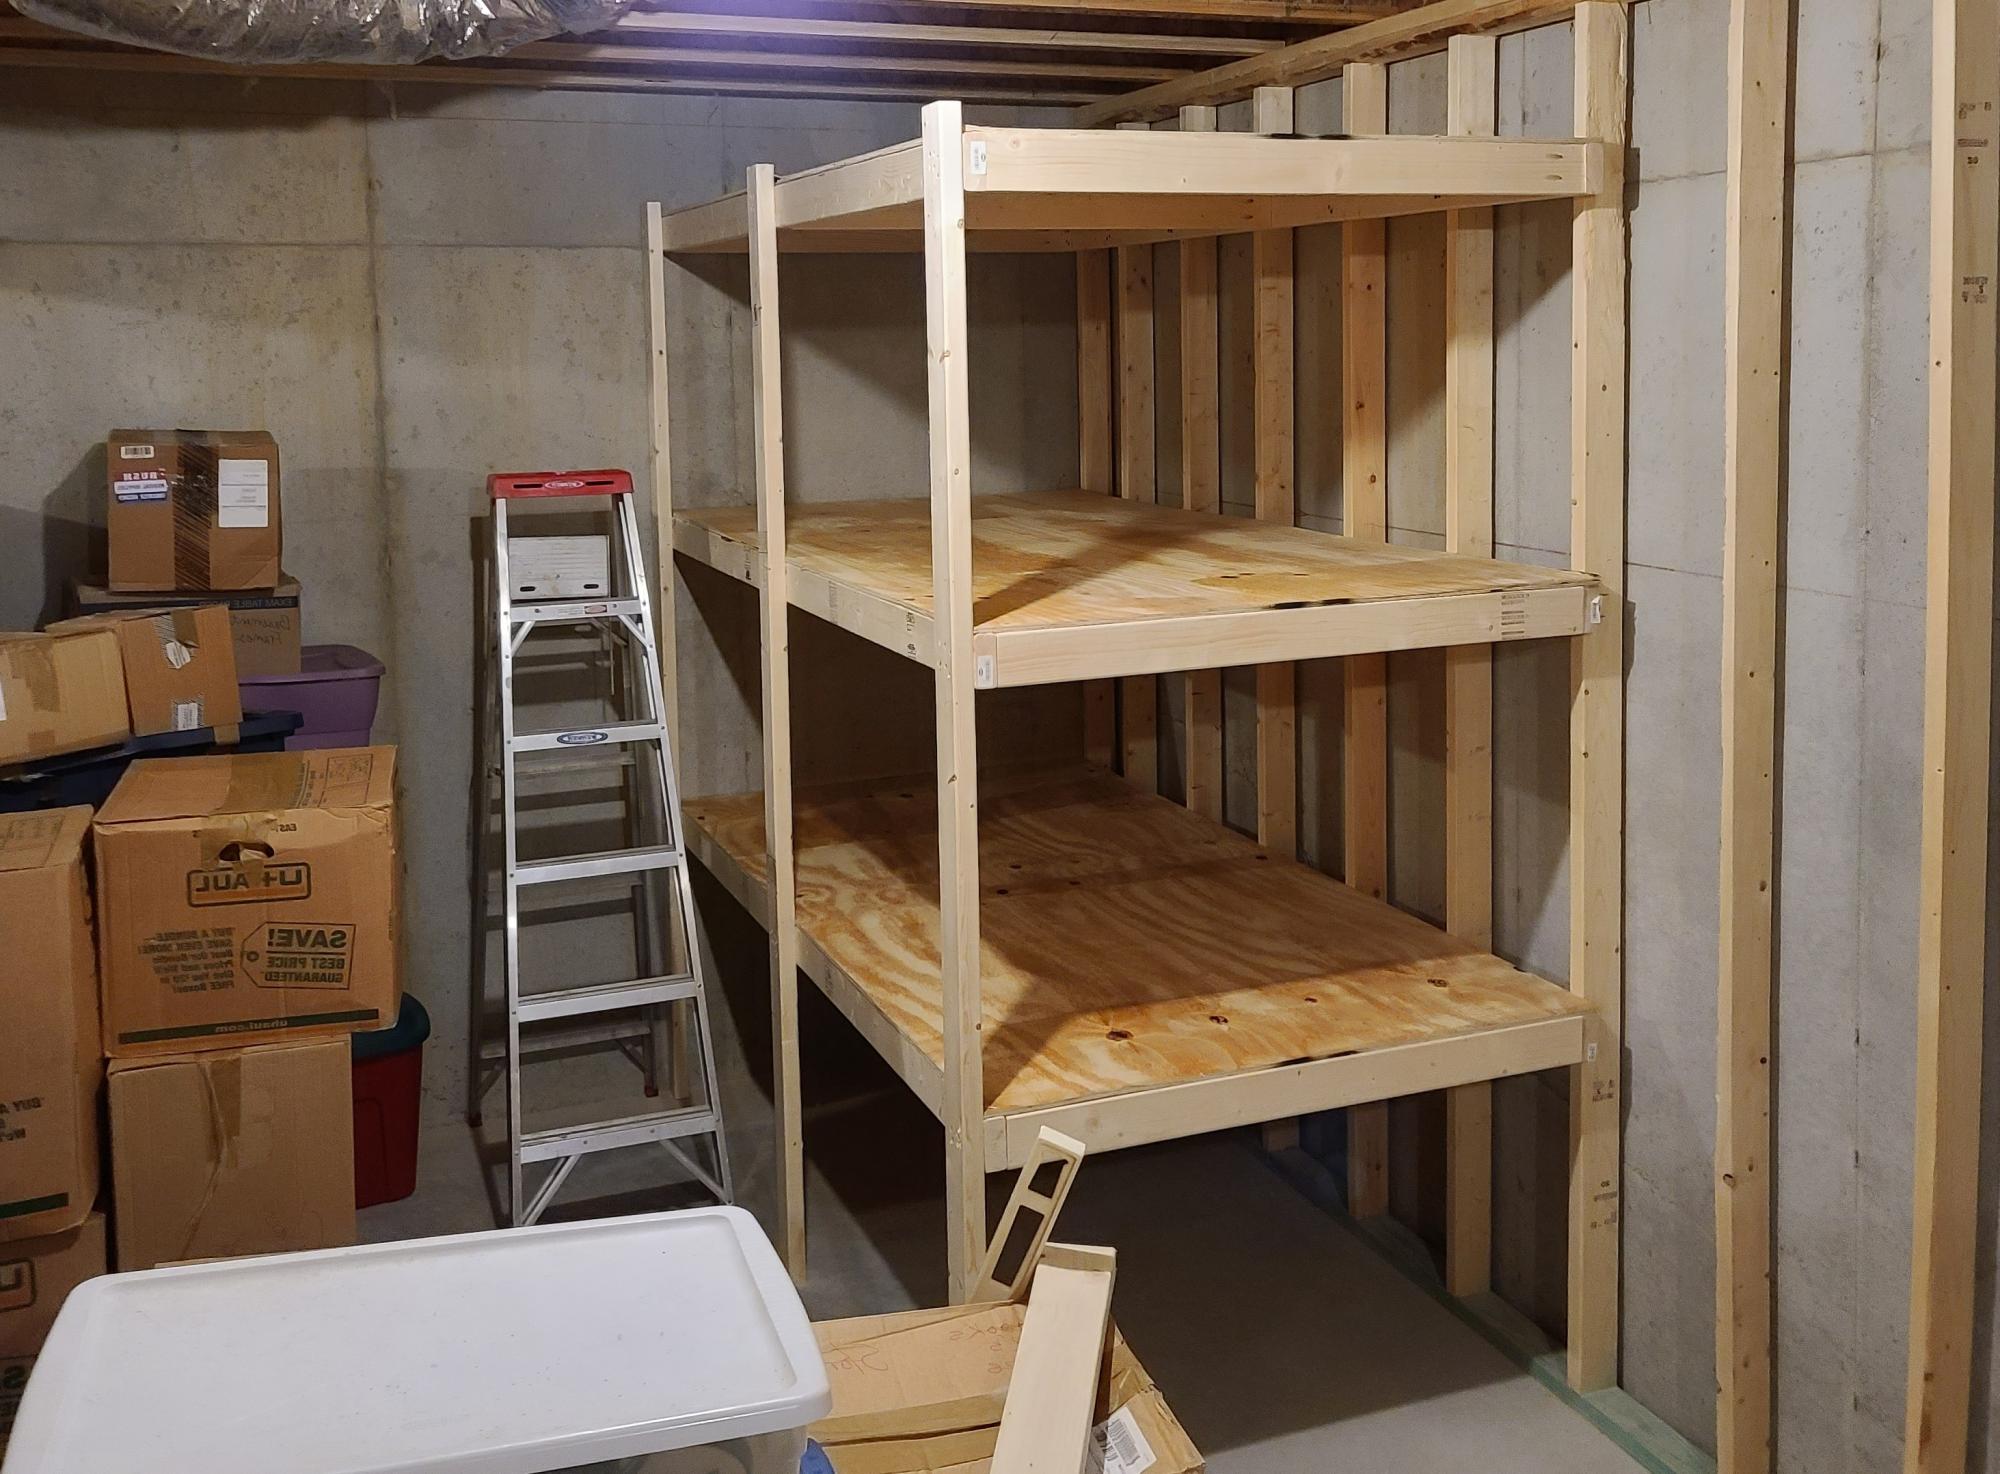
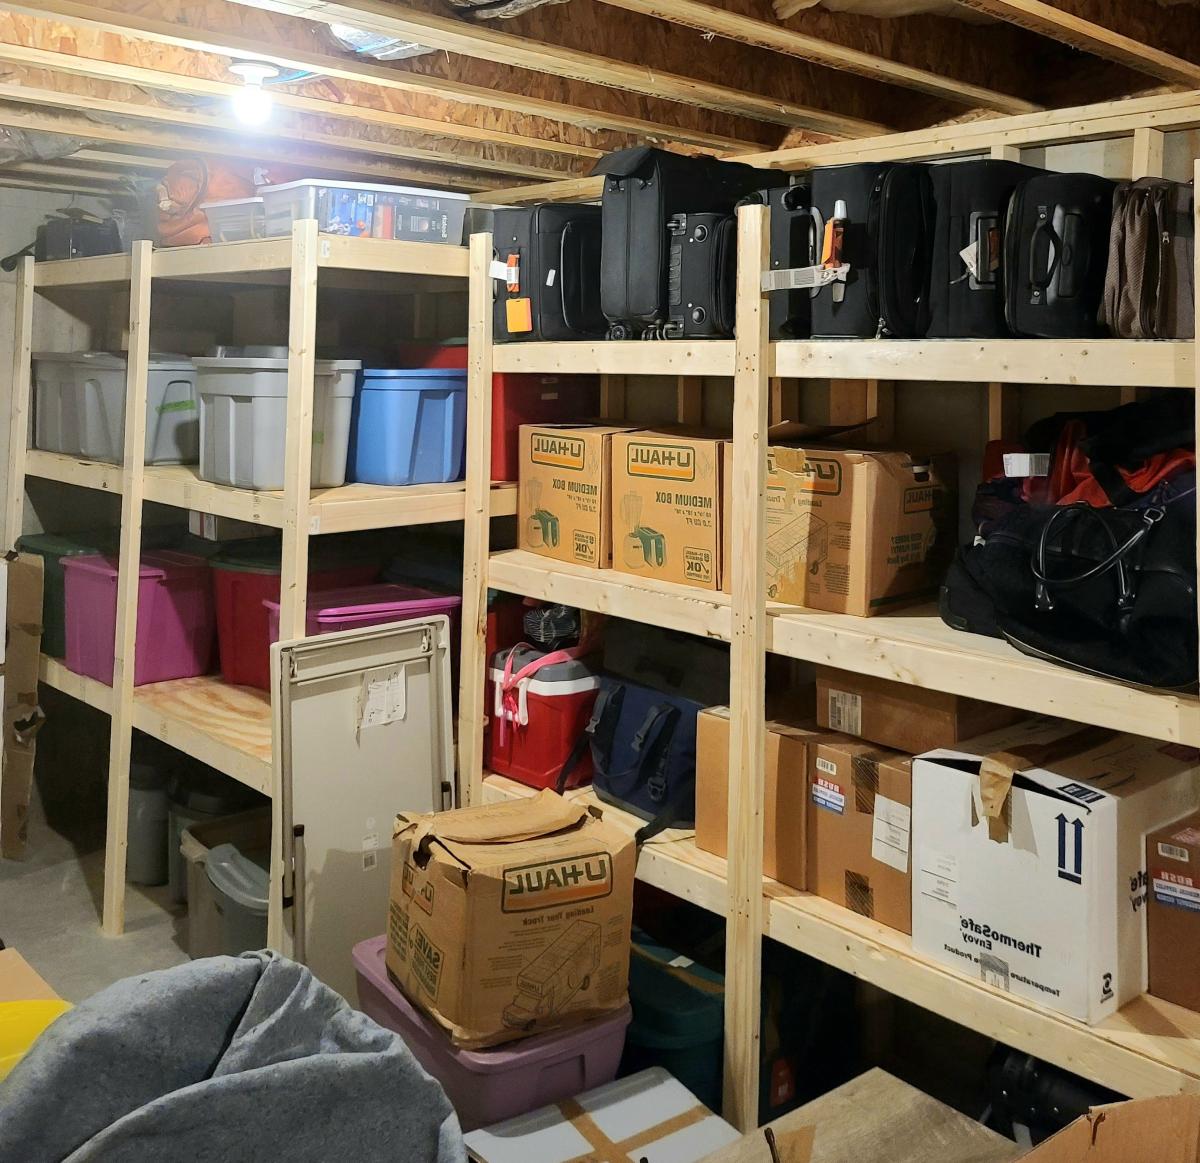
New house equals room for all the junk. Built this off the Garage Storage Shelves plan for our basement storage area. Leveraging the existing exposed studs made it a bit easier. Made these 48" deep to accommodate the big bins with all the holiday decorations. I added another along side, but made it 24" depth...one more yet to go. The wife can't throw anything away!

Comments