Community Brag Posts
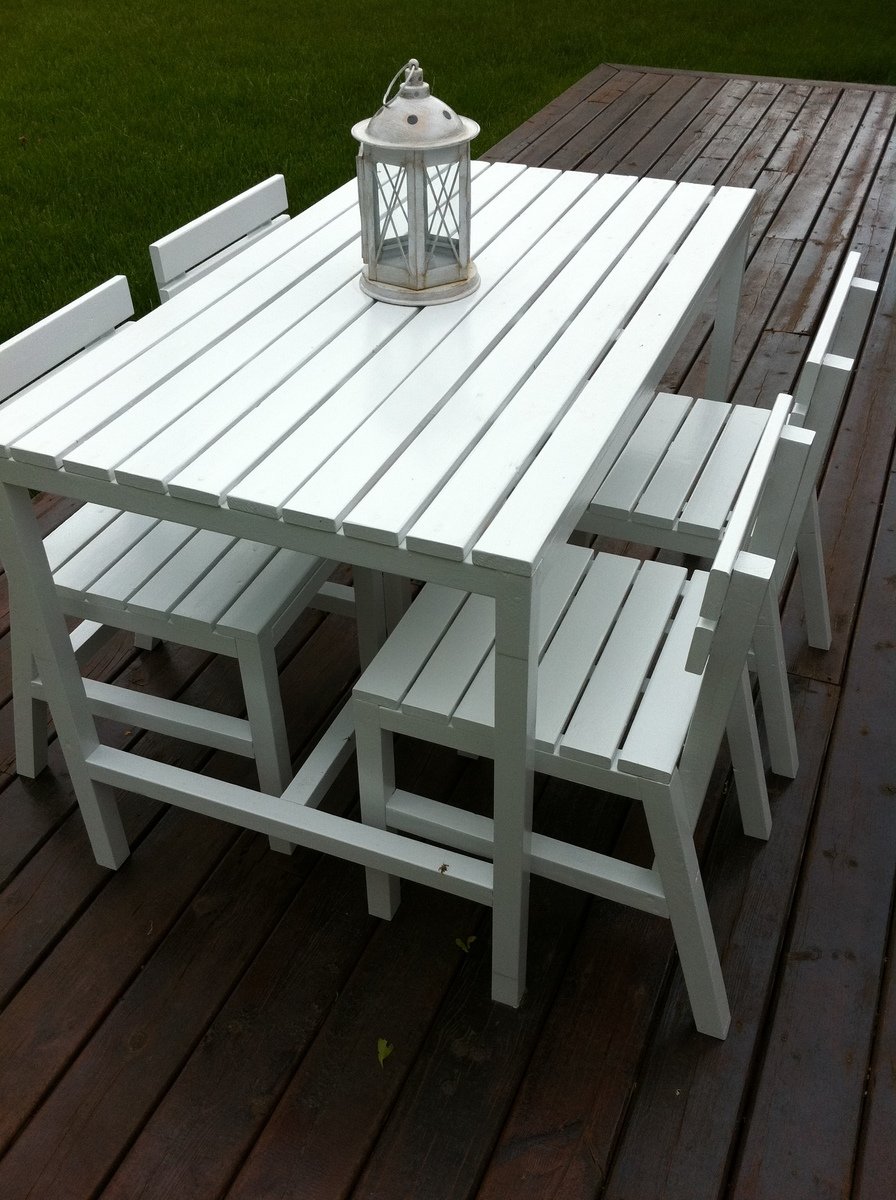
Harriet Outdoor Table & Chairs
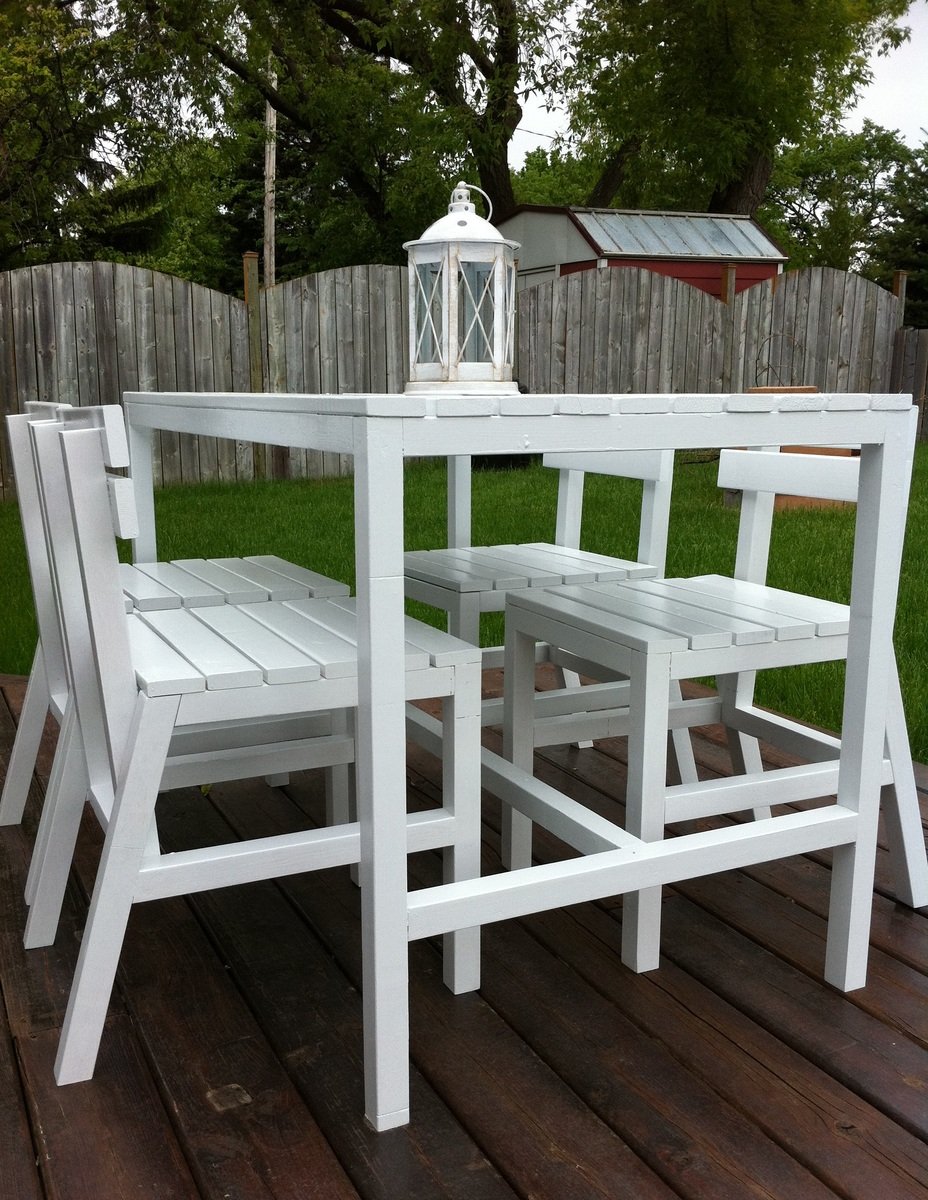
When I saw these plans I couldn't wait to build them for my deck. I'm so happy to finally have some outdoor furniture, especially solid wood pieces that I built myself. Thanks Ana!
Built from Plan(s)
Estimated Cost
$80
Estimated Time Investment
Week Long Project (20 Hours or More)
Finish Used
Rust-Oleum High Gloss White Outdoor Paint
Recommended Skill Level
Beginner
Comments

Mon, 06/06/2011 - 10:38
Beautiful! Love this, thank
Beautiful! Love this, thank you so much for sharing!

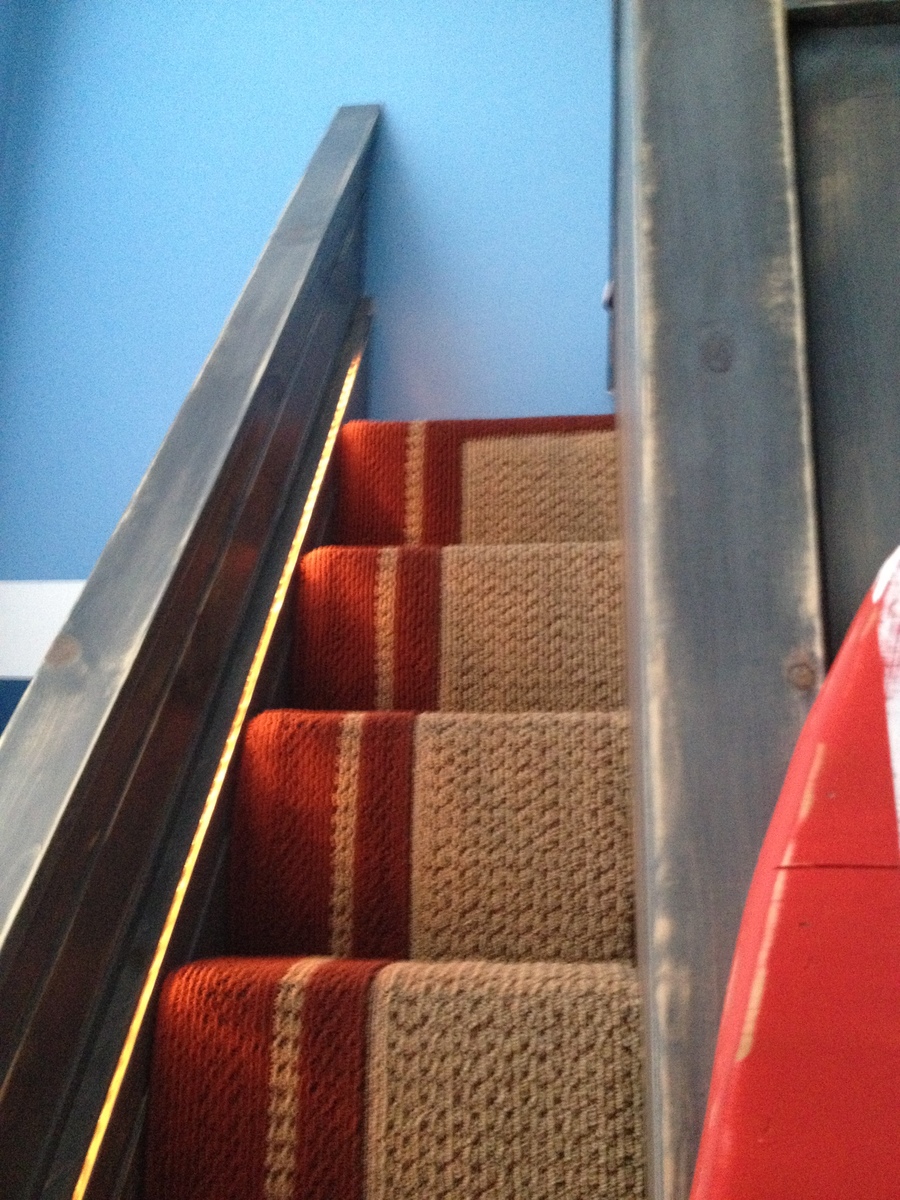
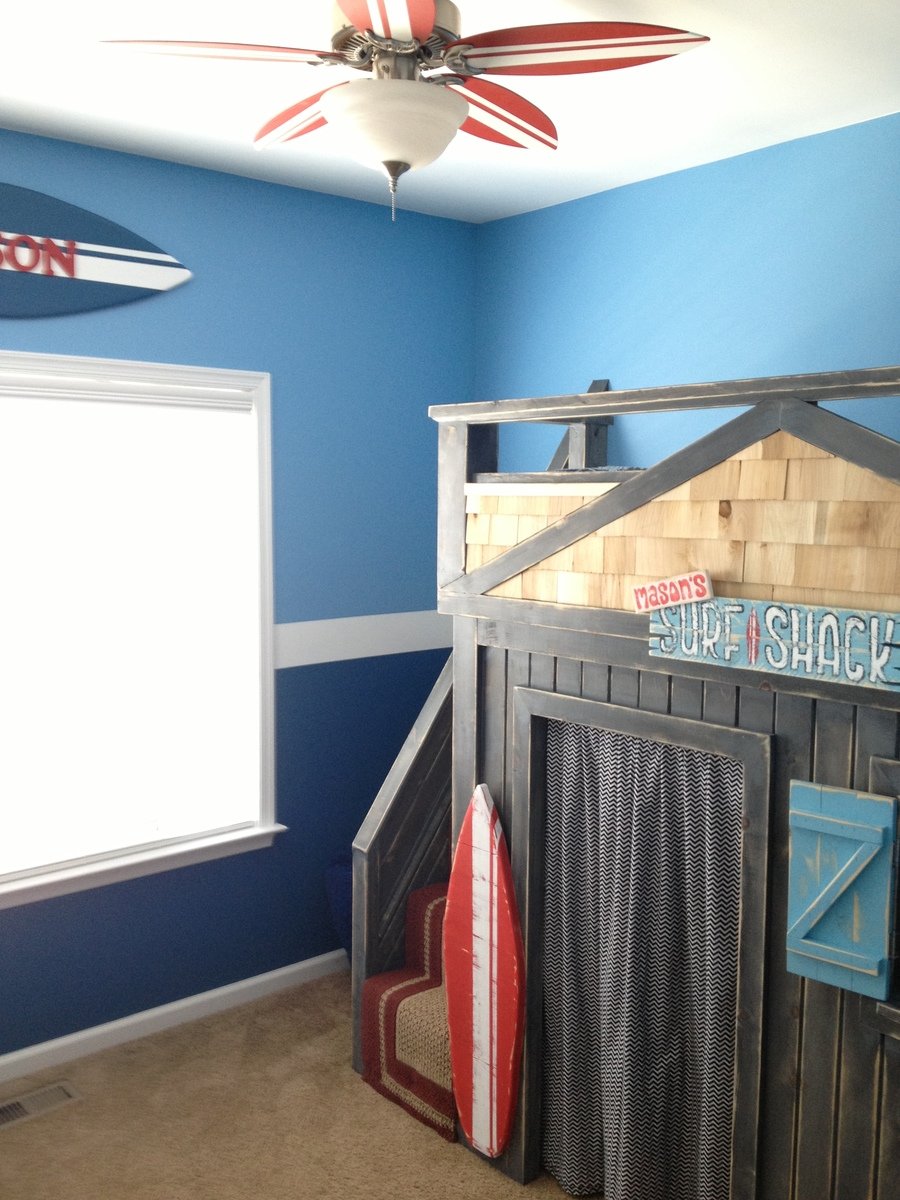
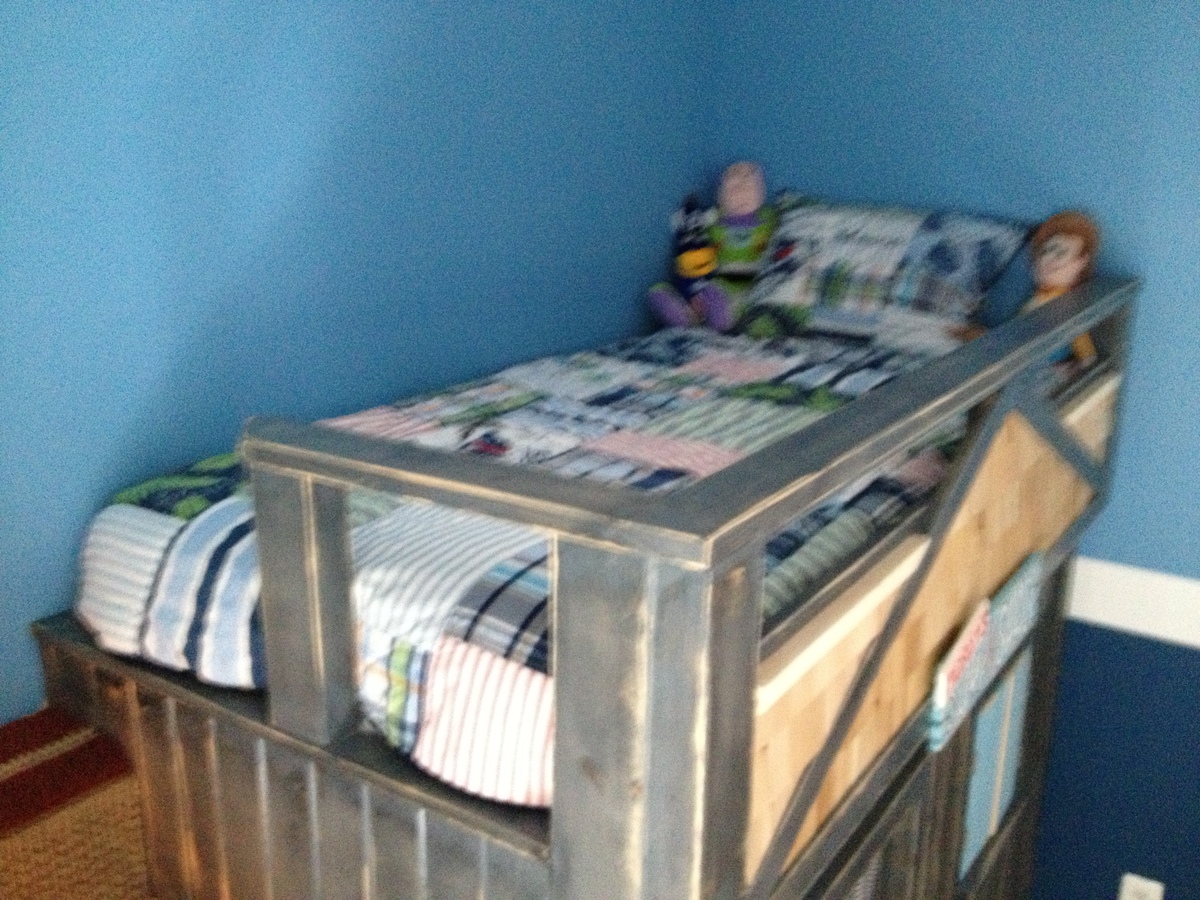
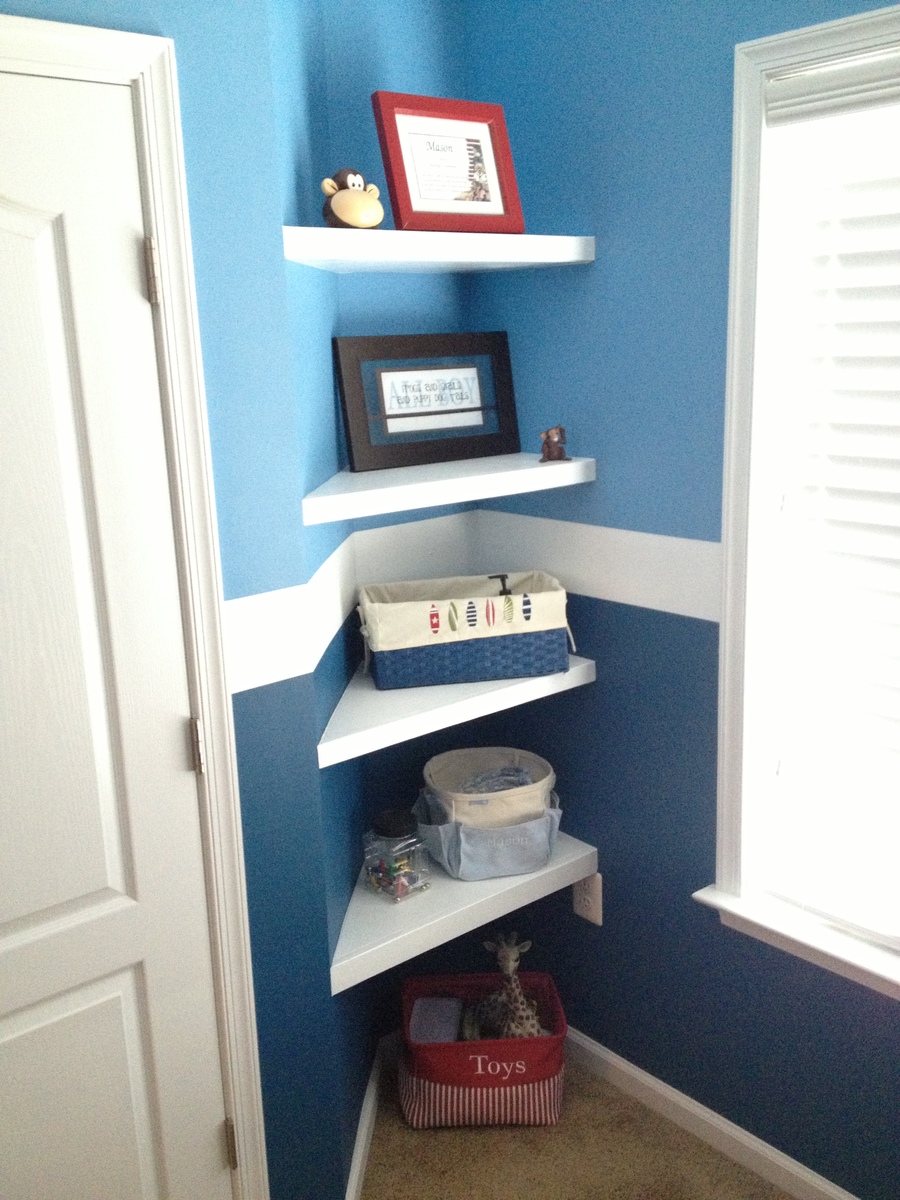
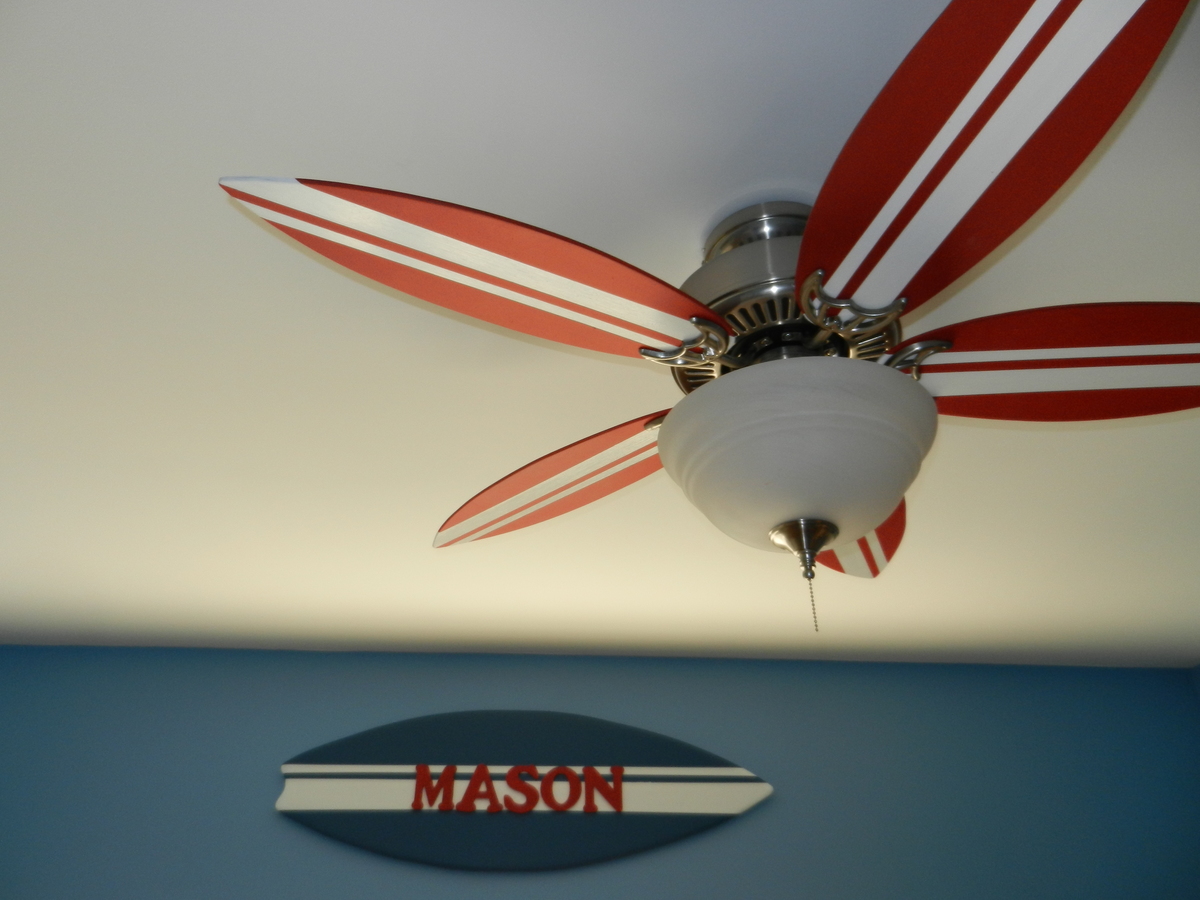
Surf and Beach Themed Bedroom
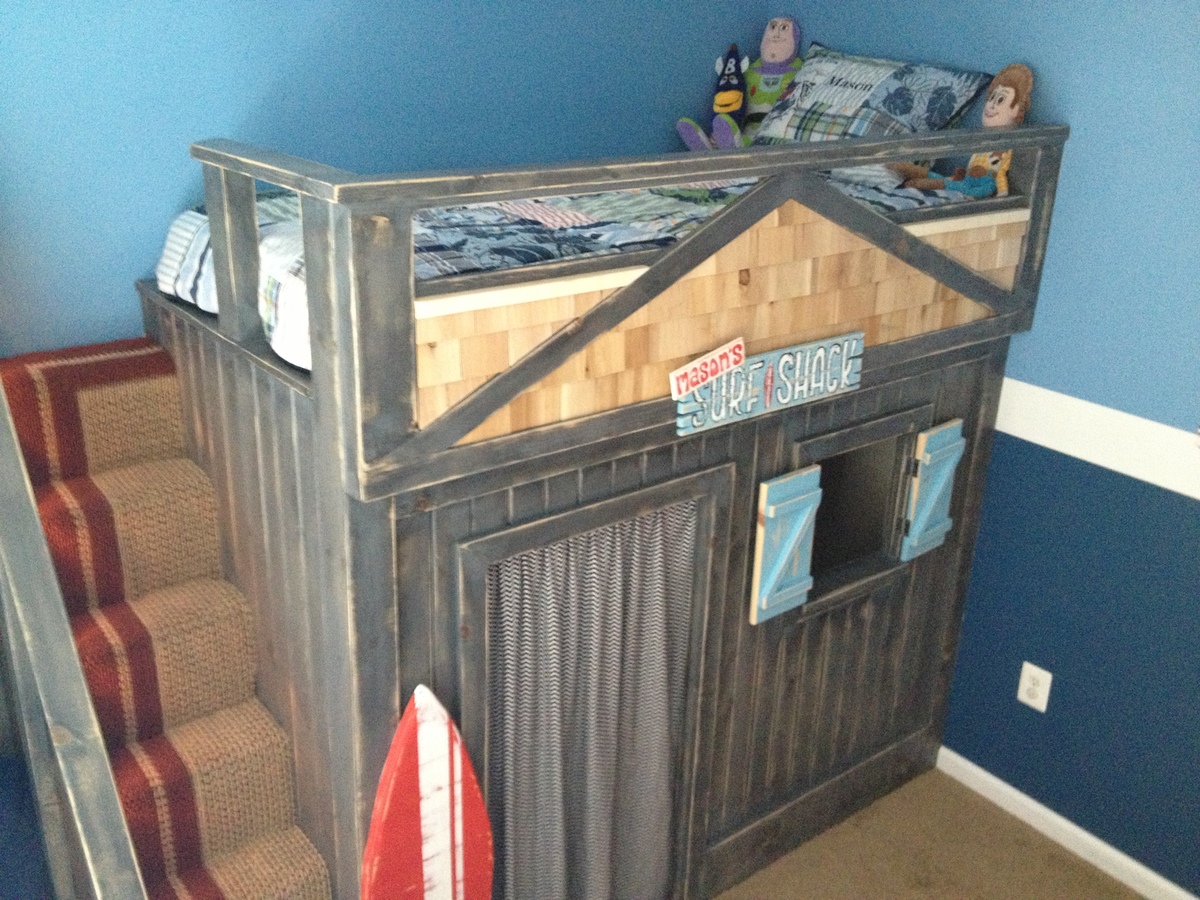
This project started with my son having the need for a loft bed. I began building the framing with some 2x4s and my imagination took over. The more I built, the more ideas and details I thought would be cool for whole theme. After finishing the "surf shack" loft, i moved to creating custom made fan blades, switch plates, placards, etc to fit the theme. It was all finished off by installing built-in shelves and painted walls.
Estimated Time Investment
Week Long Project (20 Hours or More)
Finish Used
Watered down black paint applied and then wiped off to bring out grain and knots. Finish coat of Minwax Weathered Gray Stain.
Recommended Skill Level
Advanced
Comments

Wed, 07/24/2013 - 09:24
Resourceful
That came out really nice. Love all the added touches. Good use of that corner with shelves. We had a bigger niche like in our kitchen where we put shelves as well. The icing is the custom fan blades! Very clever!
Wed, 07/24/2013 - 10:28
Very Nice Work
Looks like it should be in a Pottery Barn Kids catalog. It looks beautiful. Good work.
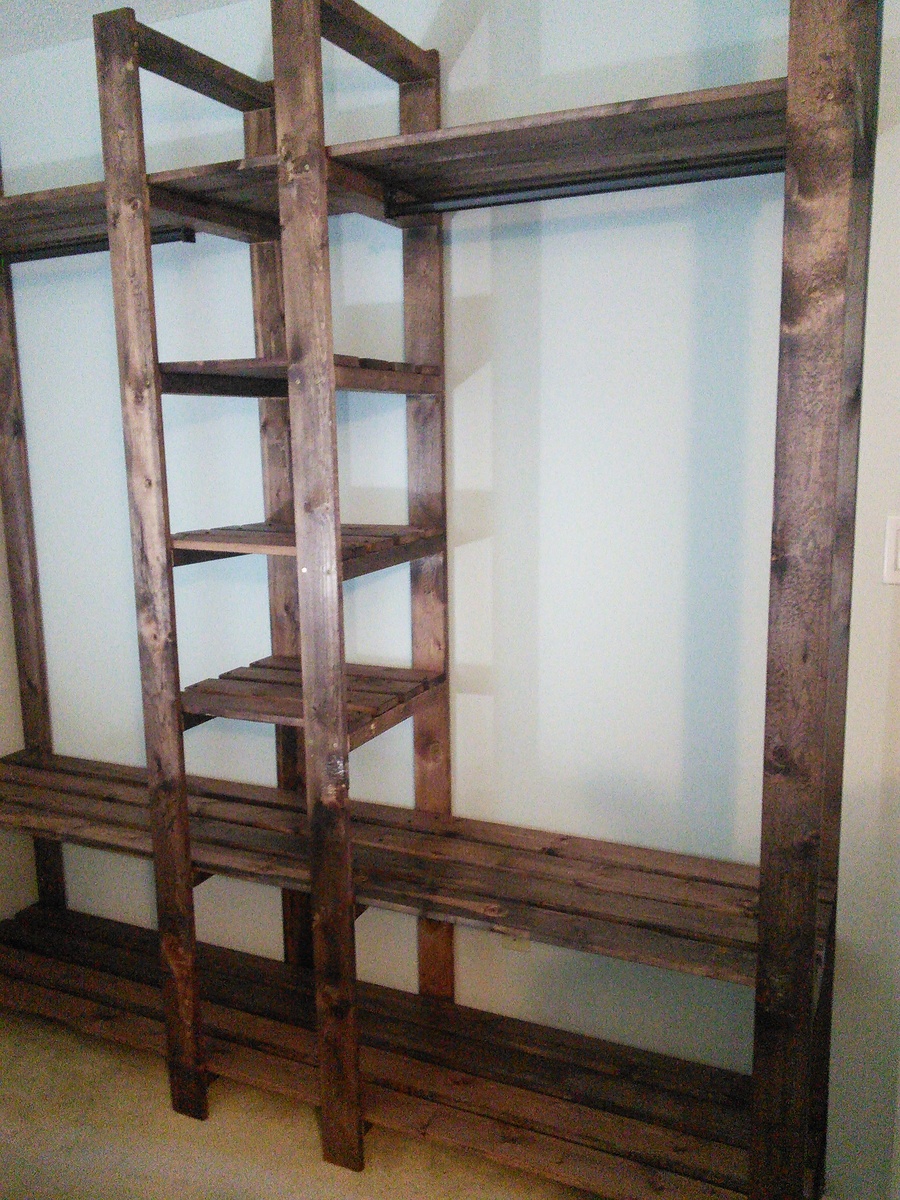
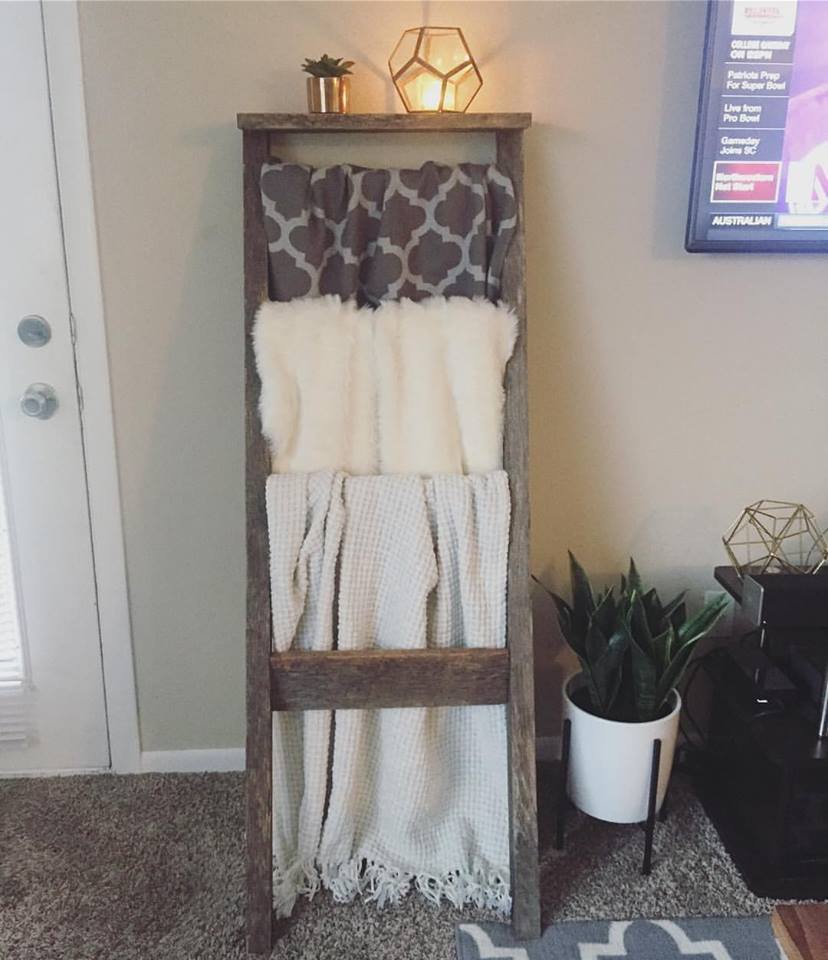
Slat Closet for Soldier
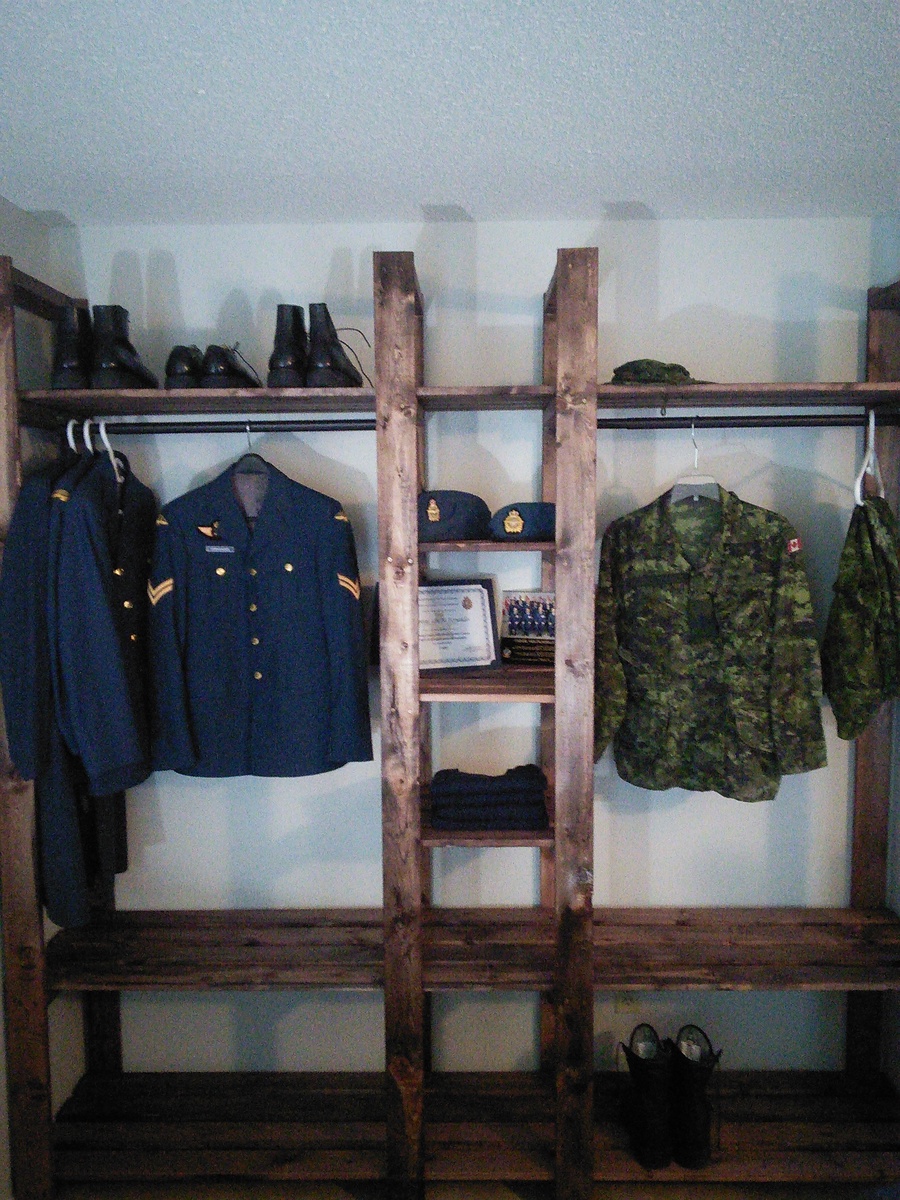
Slat closet.
Built from Plan(s)
Estimated Cost
$100 - $150
Estimated Time Investment
Day Project (6-9 Hours)
Recommended Skill Level
Beginner
Comments
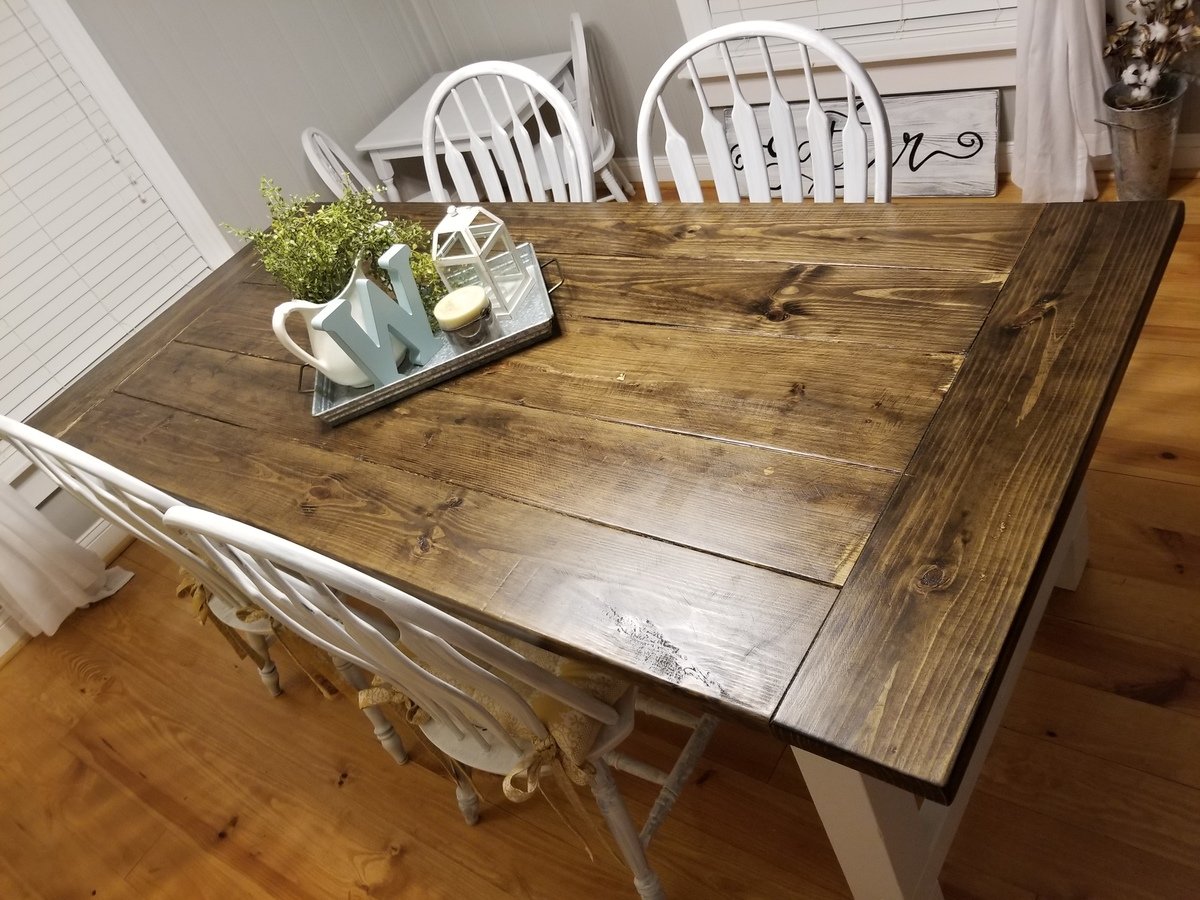
My Ana white farmhouse table
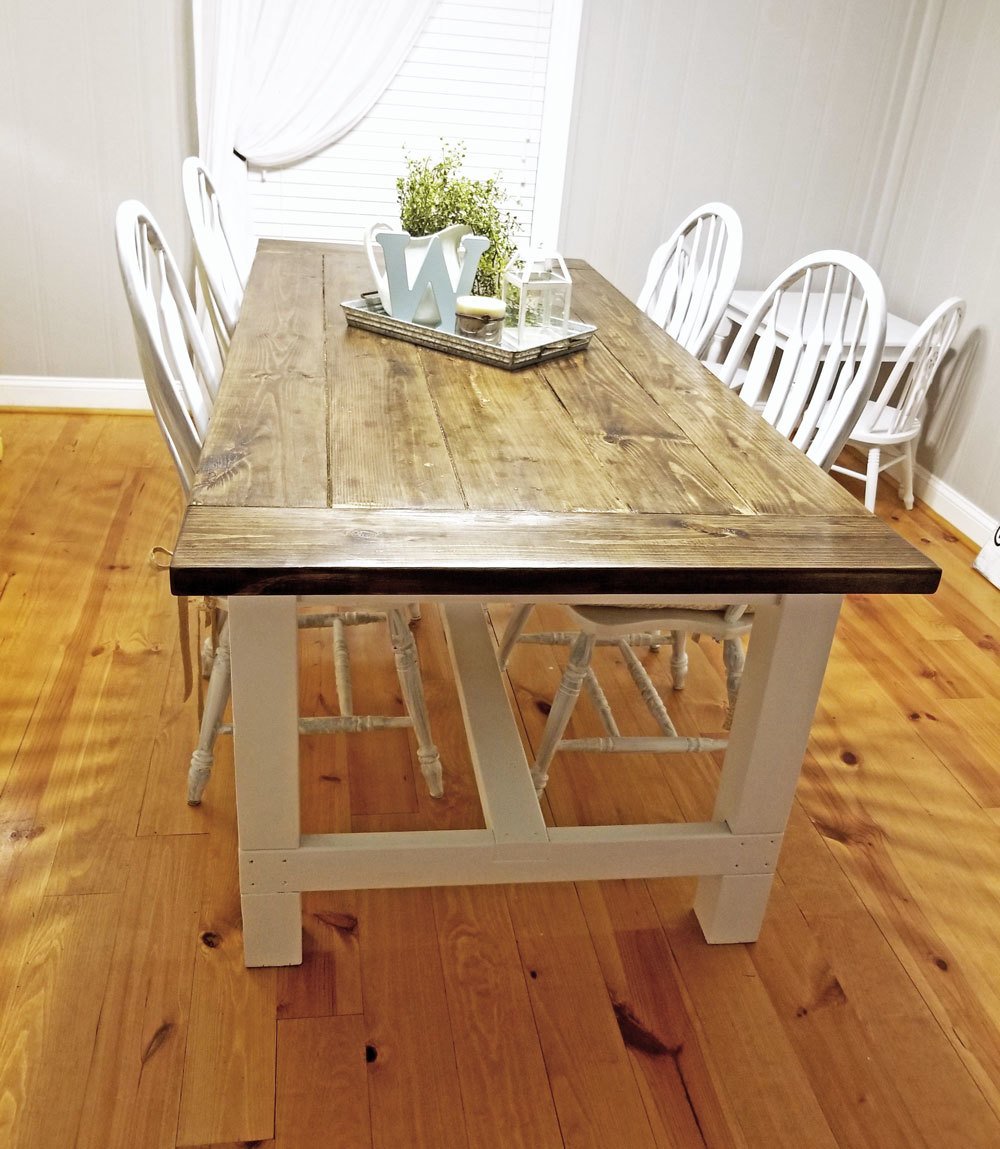
After buying our first home we decided we wanted to build our own kitchen table so we stumbled across Ana's plans and I'm so glad that we did!
Built from Plan(s)
Estimated Cost
$90 bucks give or take.
Estimated Time Investment
Day Project (6-9 Hours)
Finish Used
Minwax
Polyurethane
Sanding sealer
Dark walnut stain
Sherwin williams
Satin white
Polyurethane
Sanding sealer
Dark walnut stain
Sherwin williams
Satin white
Recommended Skill Level
Beginner
ADIRONDACK CHAIR
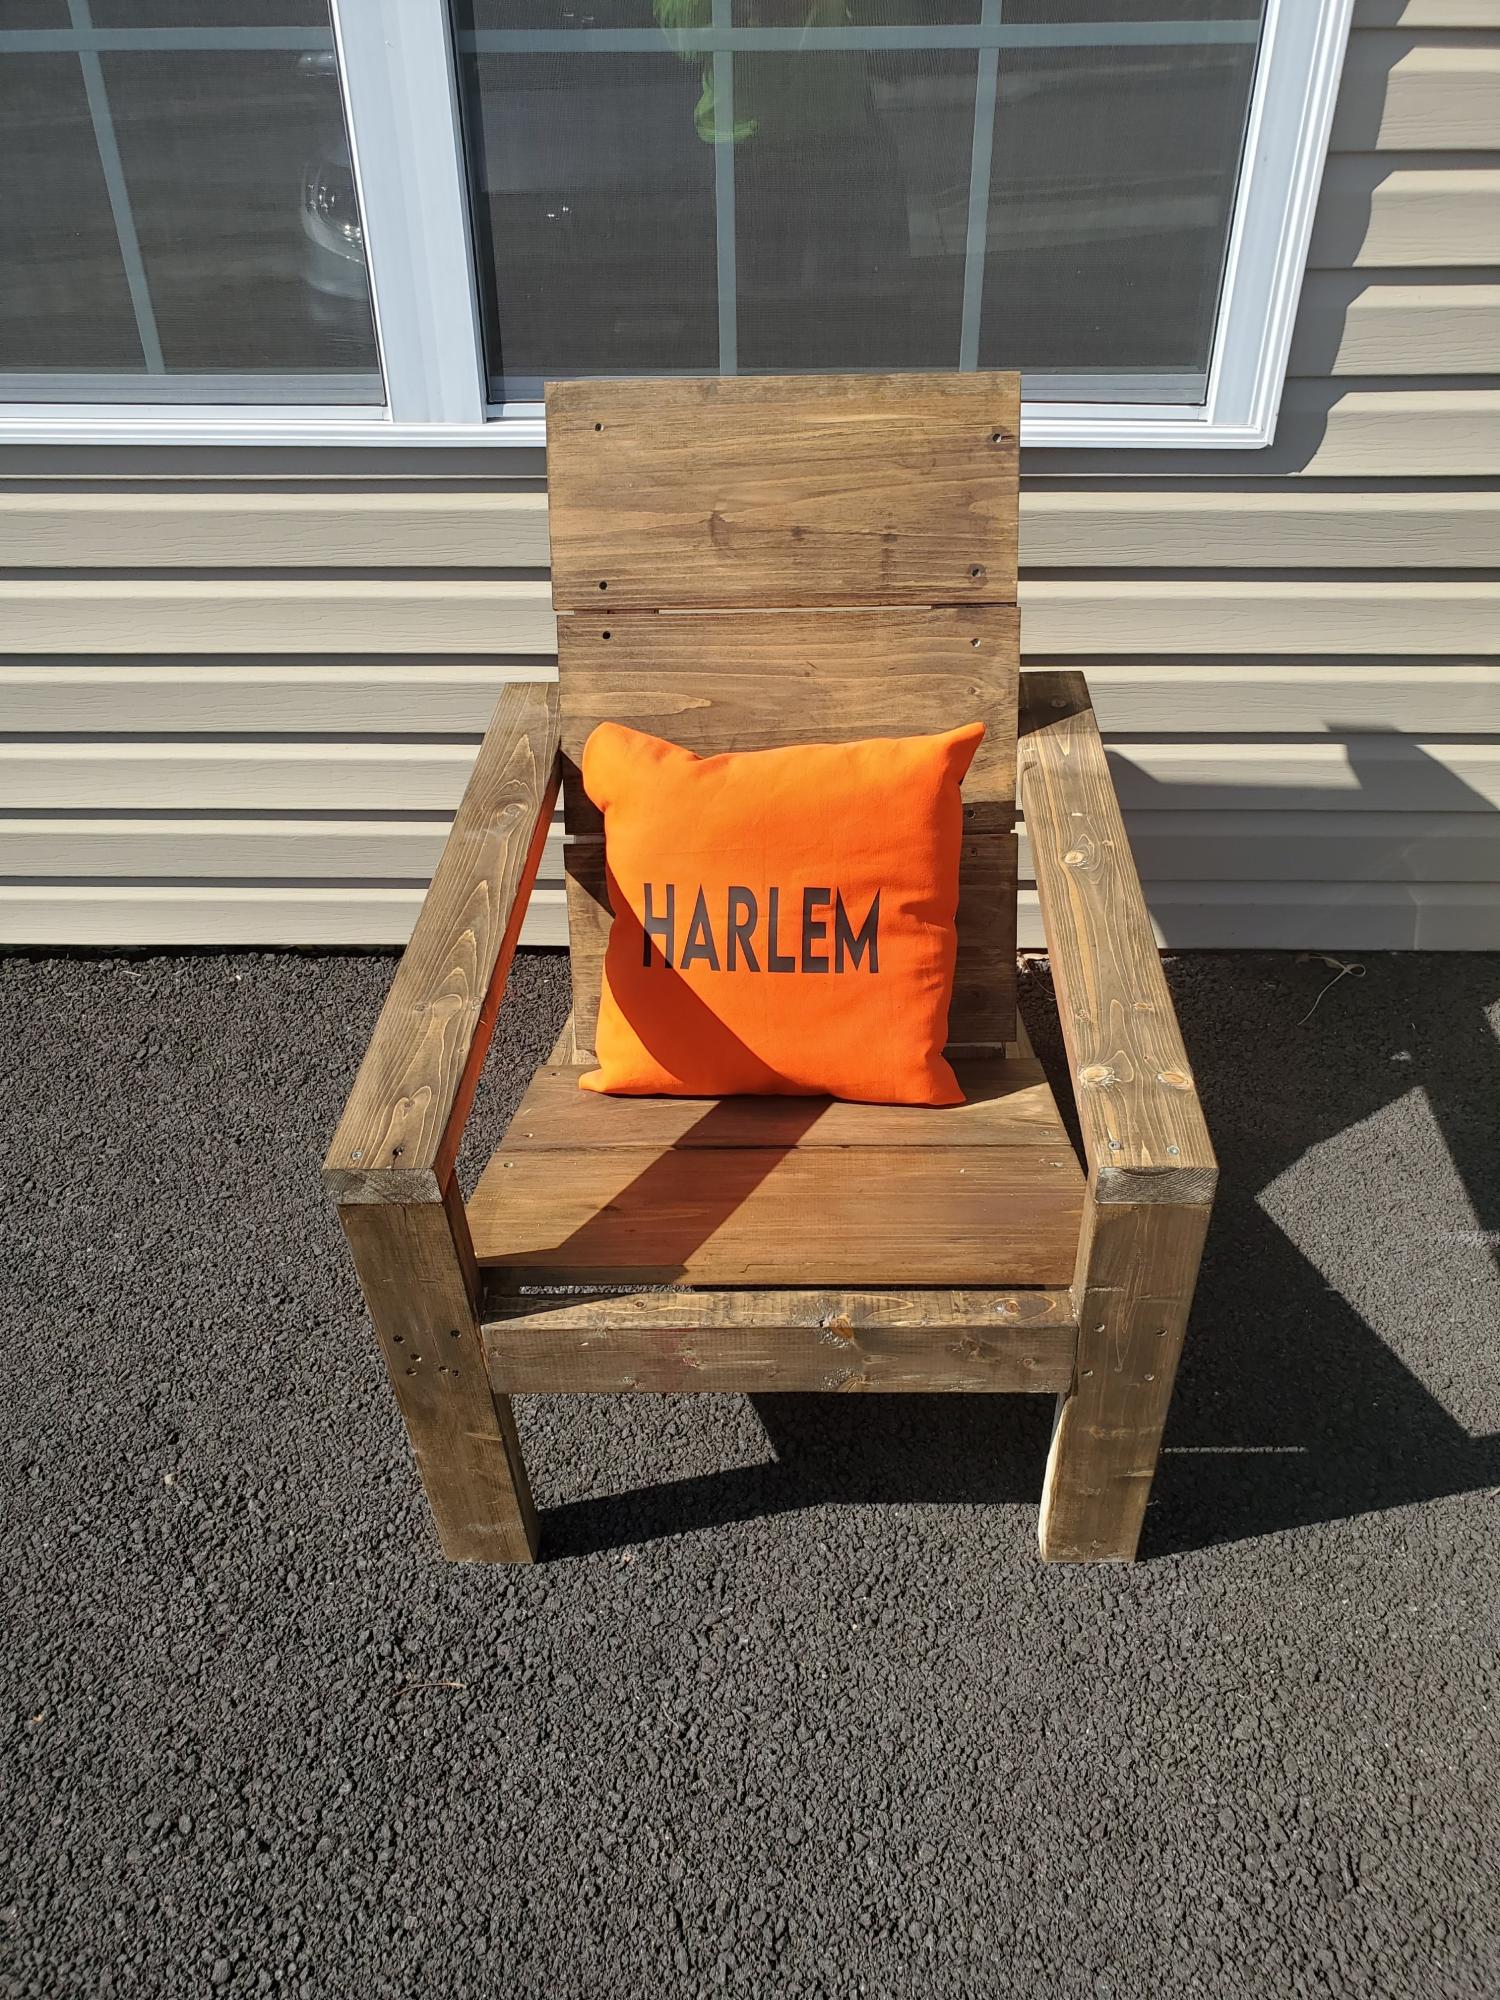
This was my first AW Buid and I loved it! I am a beginner and the video was so easy to follow. The only thing I needed (and still need) is how to do the off cut angles. I've made several since this one. Love the modern design too. Thank you Ana!
Mik da Builder
@harlemcrafted
Built from Plan(s)
Comments
Thu, 04/21/2022 - 12:01
Thank you so much for…
Thank you so much for sending in a photo! I'm so glad to hear the chair plans worked out well for you. This is one of our most favorite chairs too!
Farmhouse King Bed
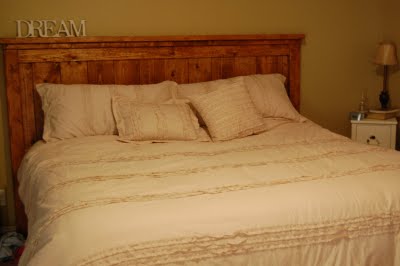
I have been dreaming of building a bed since I found Ana's website over a year ago. I bought the wood in January and slowly worked on it over 3 months, mainly because I was uncertain that I could actually do it myself! After spending about 3 hours in a row to finish it, it is finally complete! I am so happy with how it turned out and friends of mine cannot believe that I did this BY MYSELF! View more on my project at http://thevpfamily.blogspot.com/2011/05/lumber.html or http://thevpfamily.blogspot.com/2011/06/did-you-guess-bed.html
Built from Plan(s)
Estimated Cost
$75
Estimated Time Investment
Day Project (6-9 Hours)
Finish Used
Minnwax stain. I mixed dark walnut and early american. I applied a coat of one, then a coat of the other until I got the honey/brown color I wanted. I then used a poly to give it some sheen at the end!
Recommended Skill Level
Starter Project
Comments
Fri, 06/10/2011 - 11:45
The bed turned out just
The bed turned out just beautiful! Love the finish, and $75? Wow! Thank you so much for sharing with us!
Reading center.
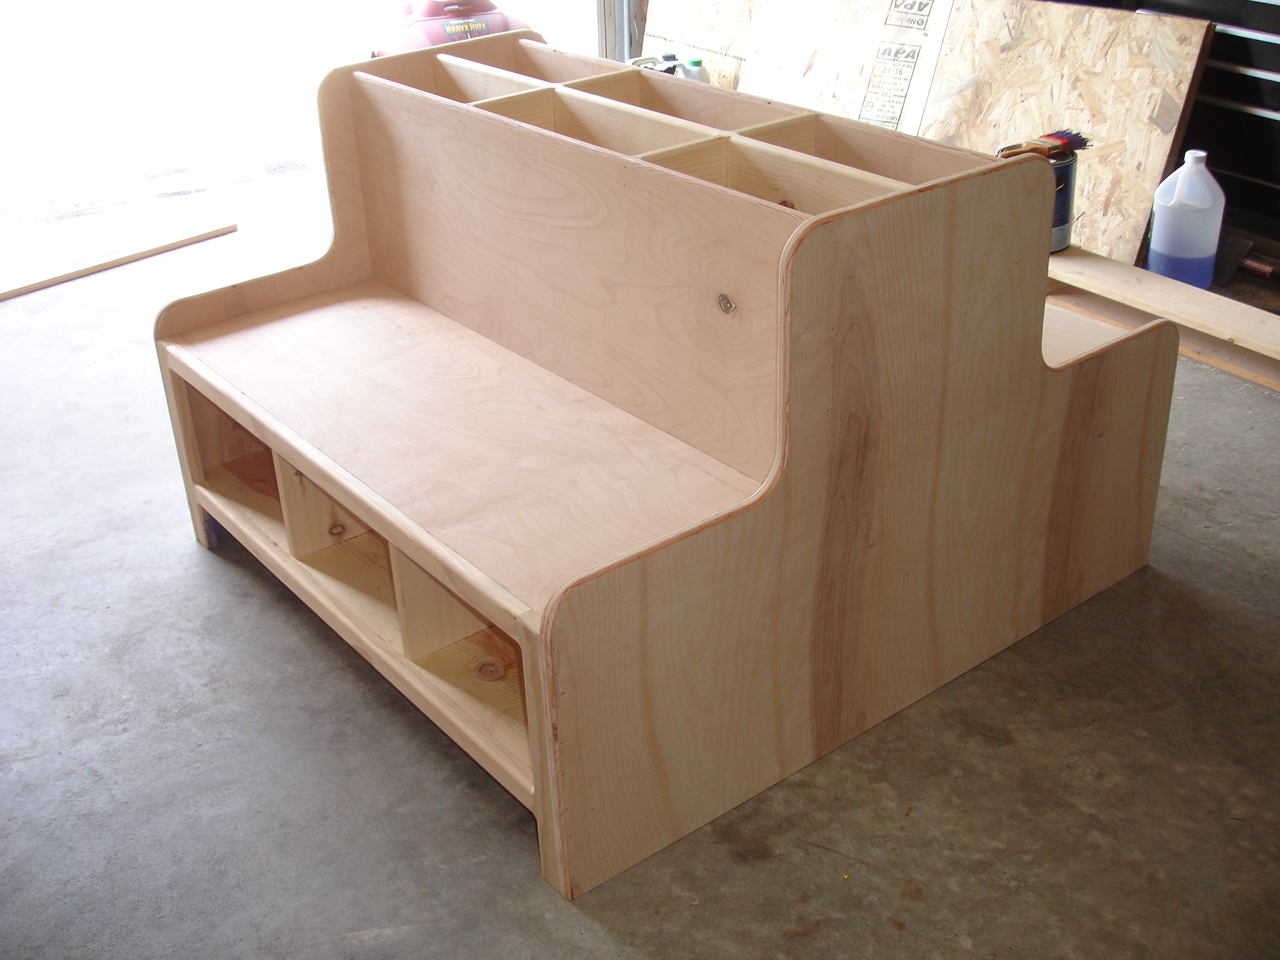
I was asked by a friend if I could build a reading bench for his daycare and this is what I created.


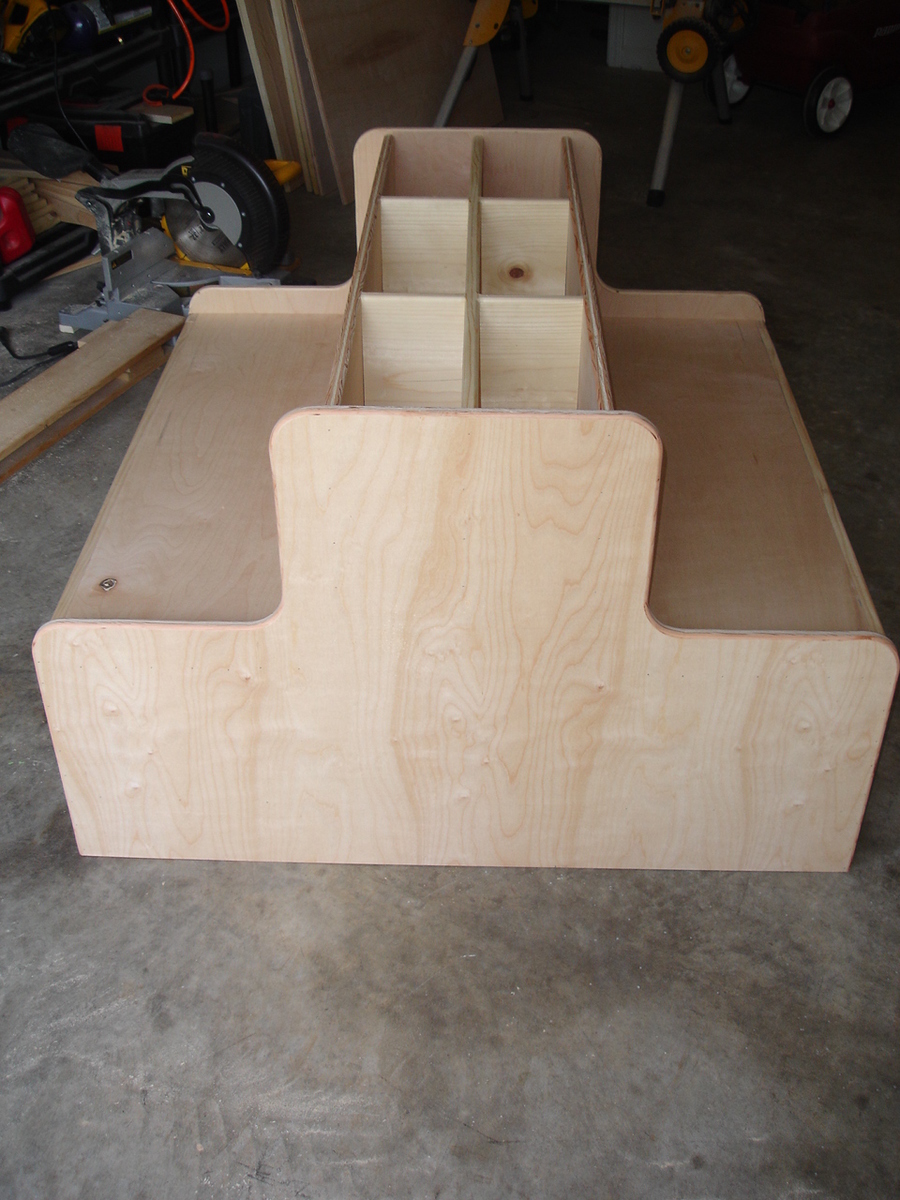
Estimated Time Investment
Day Project (6-9 Hours)
Recommended Skill Level
Intermediate
Comments
Wed, 07/31/2013 - 13:17
which plan ?
I really like this. I know a new teacher that might like something like this for her 1st grade room. Which plan did you use? Thank you.
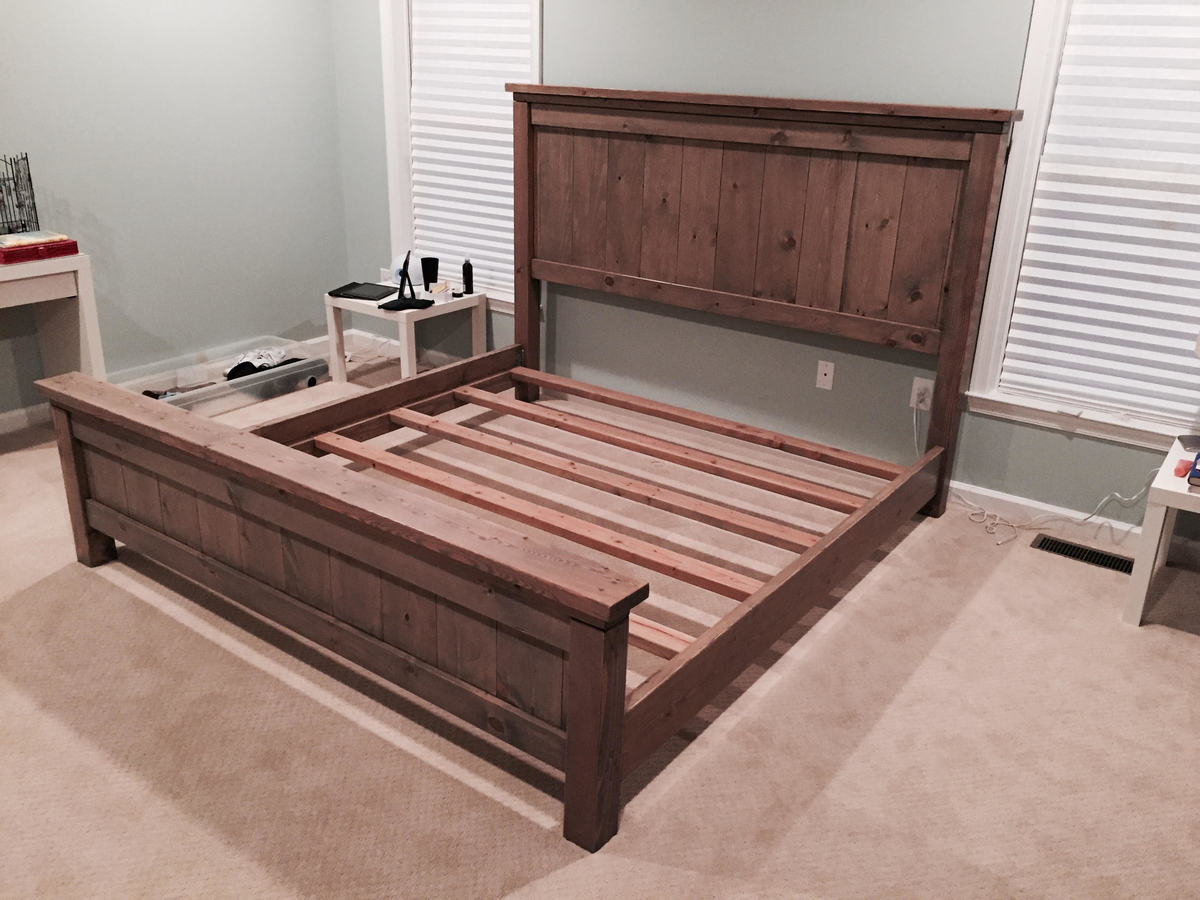
Custom King Bed Frame
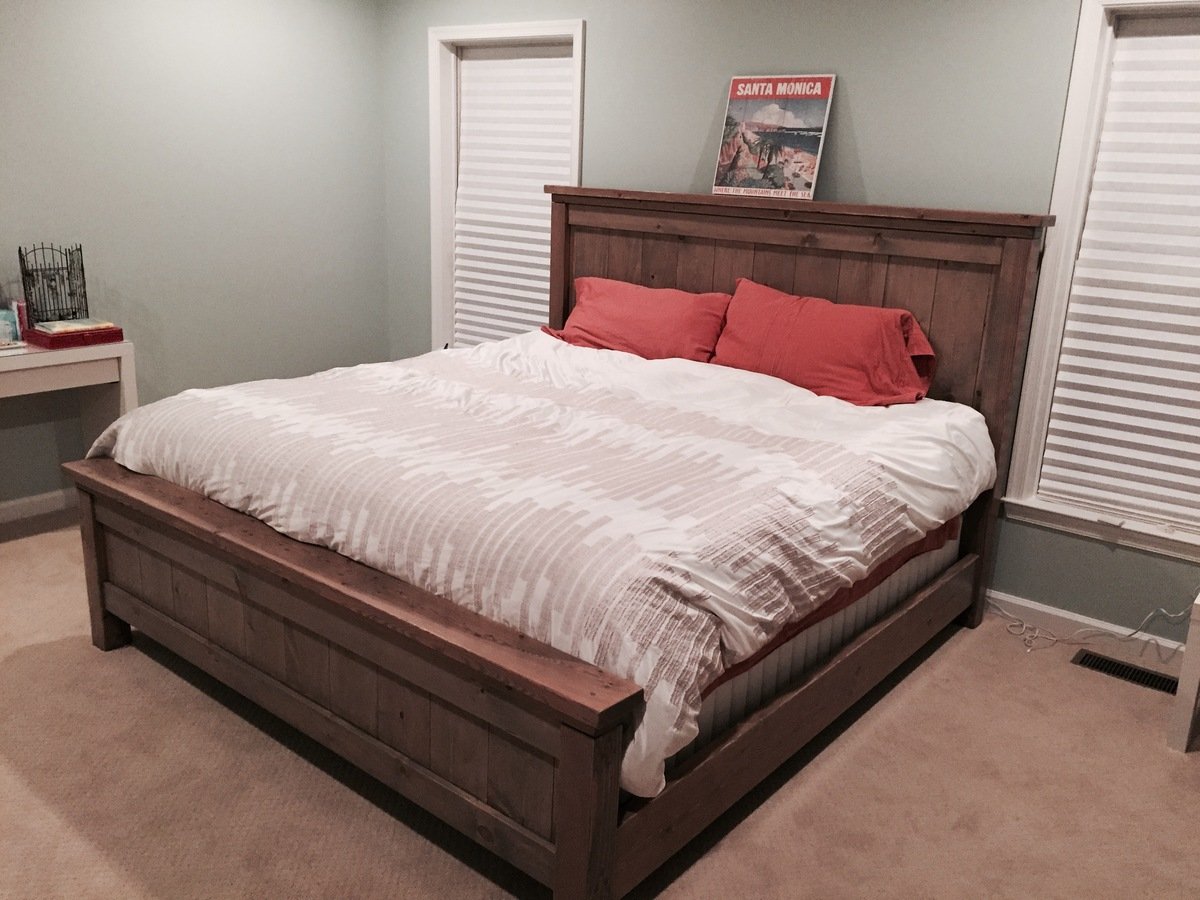
This was my 2nd woodworking project. My wife had been asking for a farmhouse bed for some time, so I figured I'd go for it. The end result was even better than I was hoping. It came together really well and the bed is just perfect. Thank you Ana for the plans!
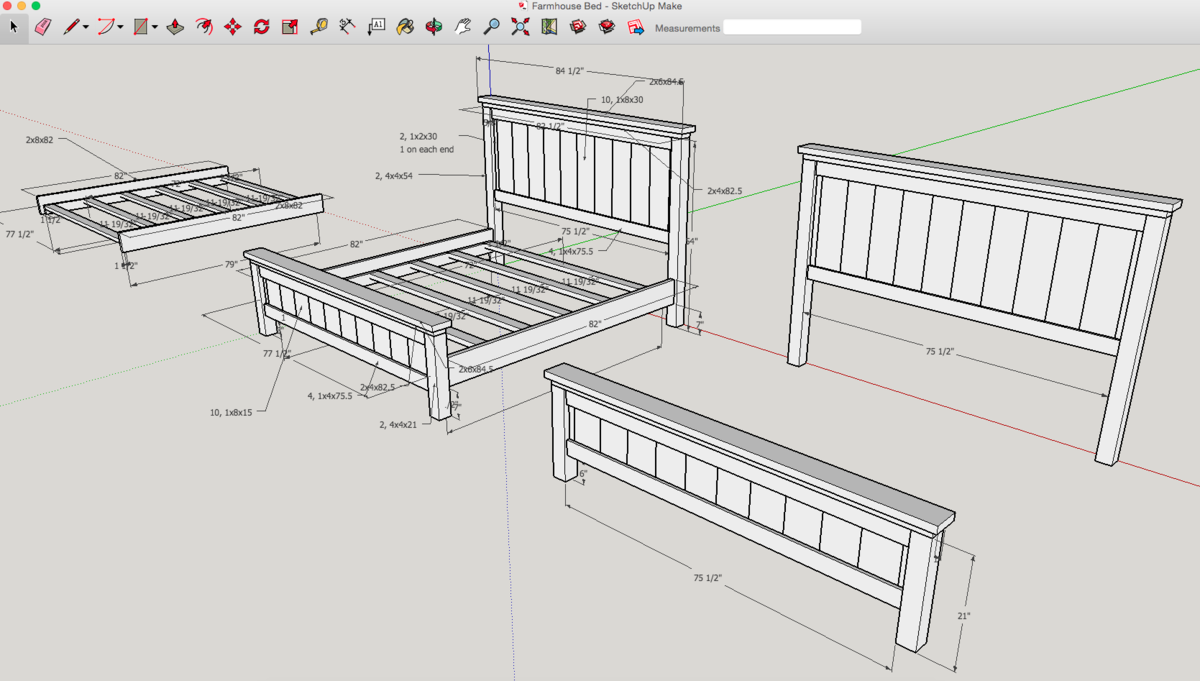
I used the Ana White Queen Bed and King Bed plans as guides, as well as another blog called A Lesson Learned. I modified the dimensions to fit our specific bed, then I drew up the plans using Sketchup and got to work. All the wood is pine from Home Depot. The total project took a couple months because I could only work on it on weekends and didn't have full days to commit to it. In the end though, totally worth it and we love the bed!
Built from Plan(s)
Estimated Cost
~$250 (not completely sure of that as I didn't track it, but with the lumber & everything, it was probably $200-$300)
Estimated Time Investment
Week Long Project (20 Hours or More)
Finish Used
Minwax Pre Stain
Minwax Weathered Oak Stain
Minwax Clear Satin Polyurethane
Minwax Weathered Oak Stain
Minwax Clear Satin Polyurethane
Recommended Skill Level
Beginner
Live Edge Shelf
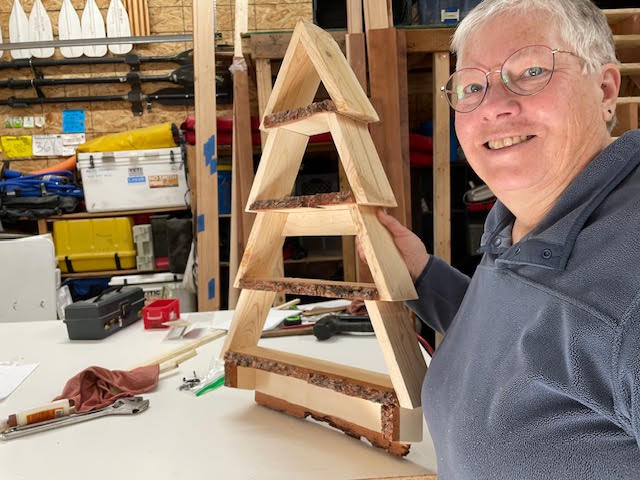
Live edge Christmas tree shelf.
Built from Plan(s)
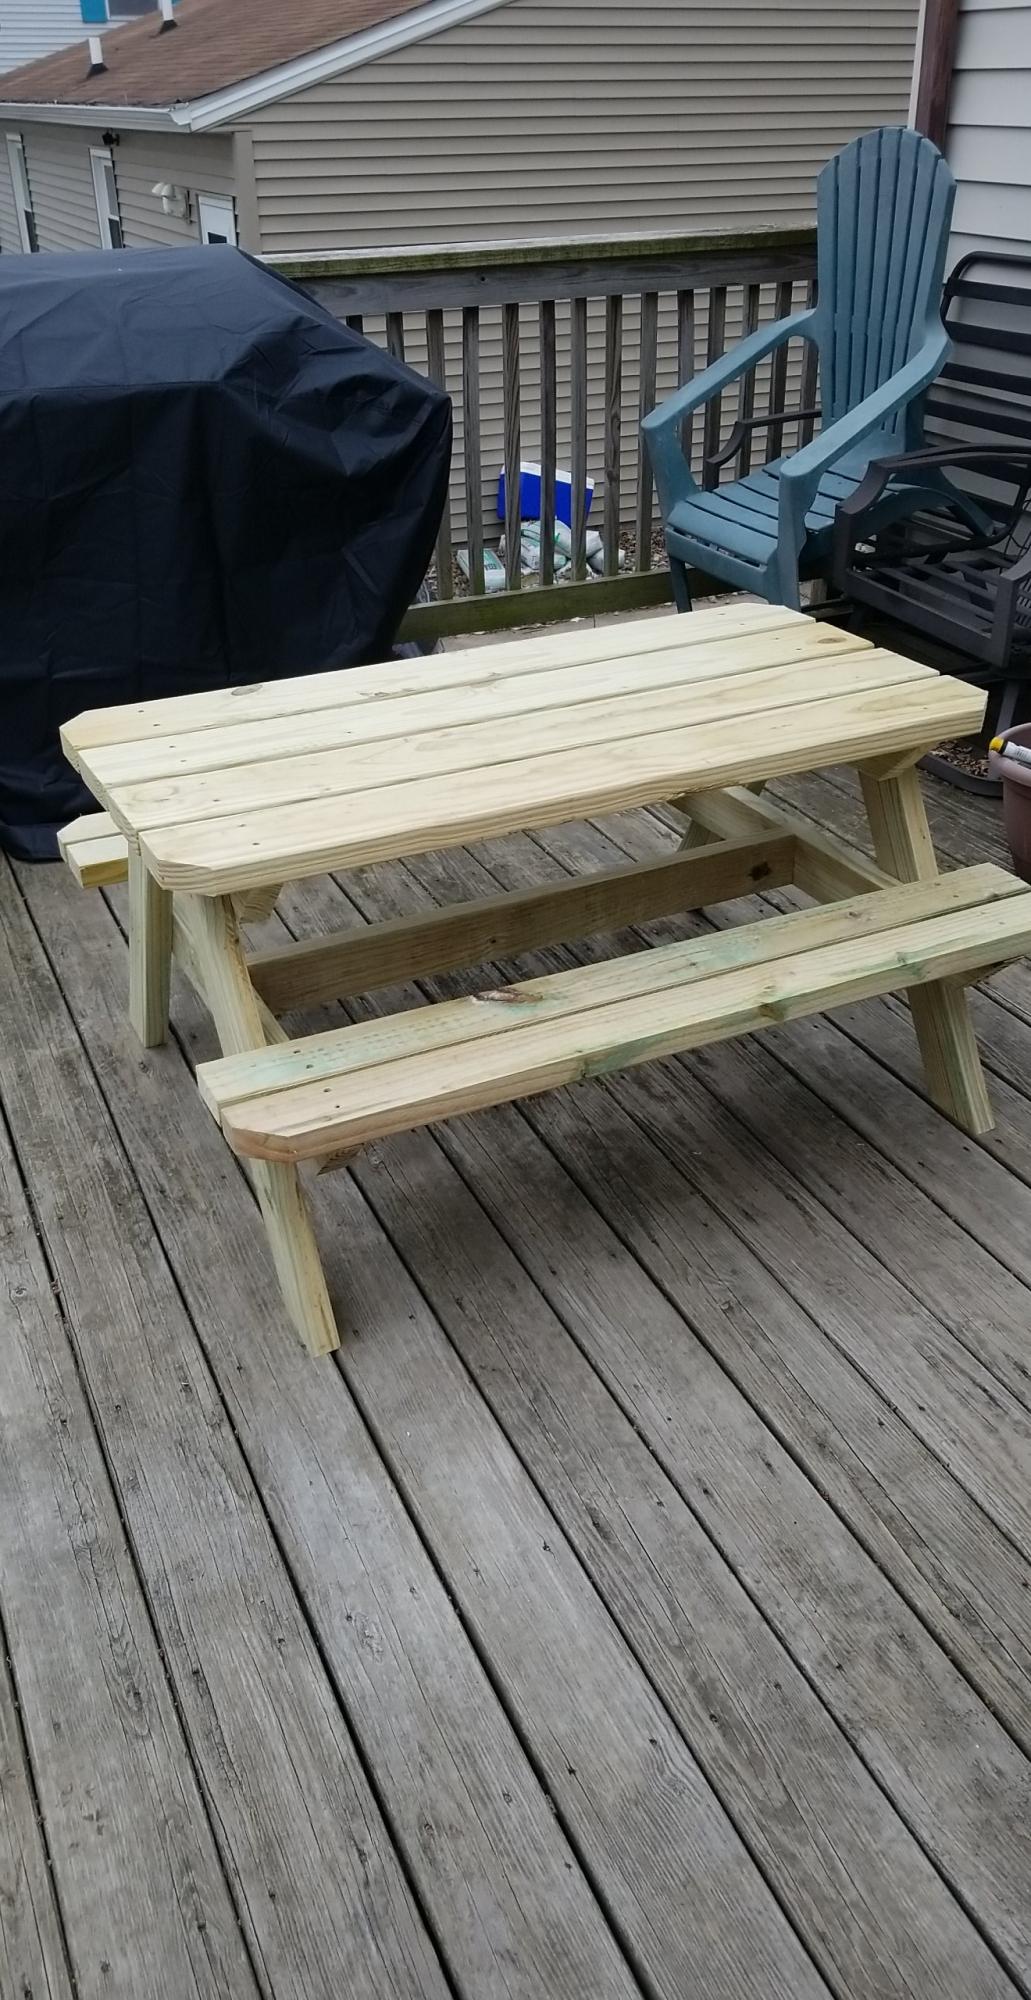
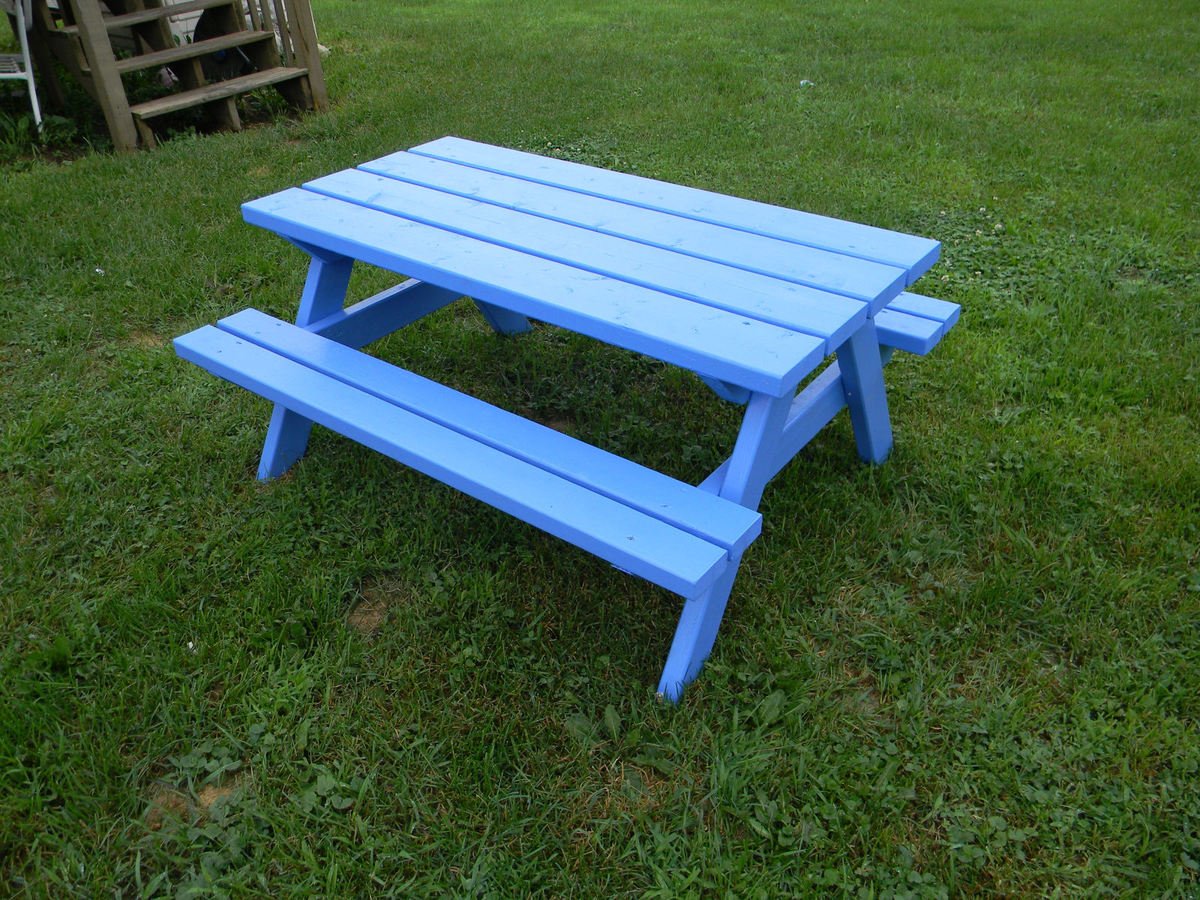
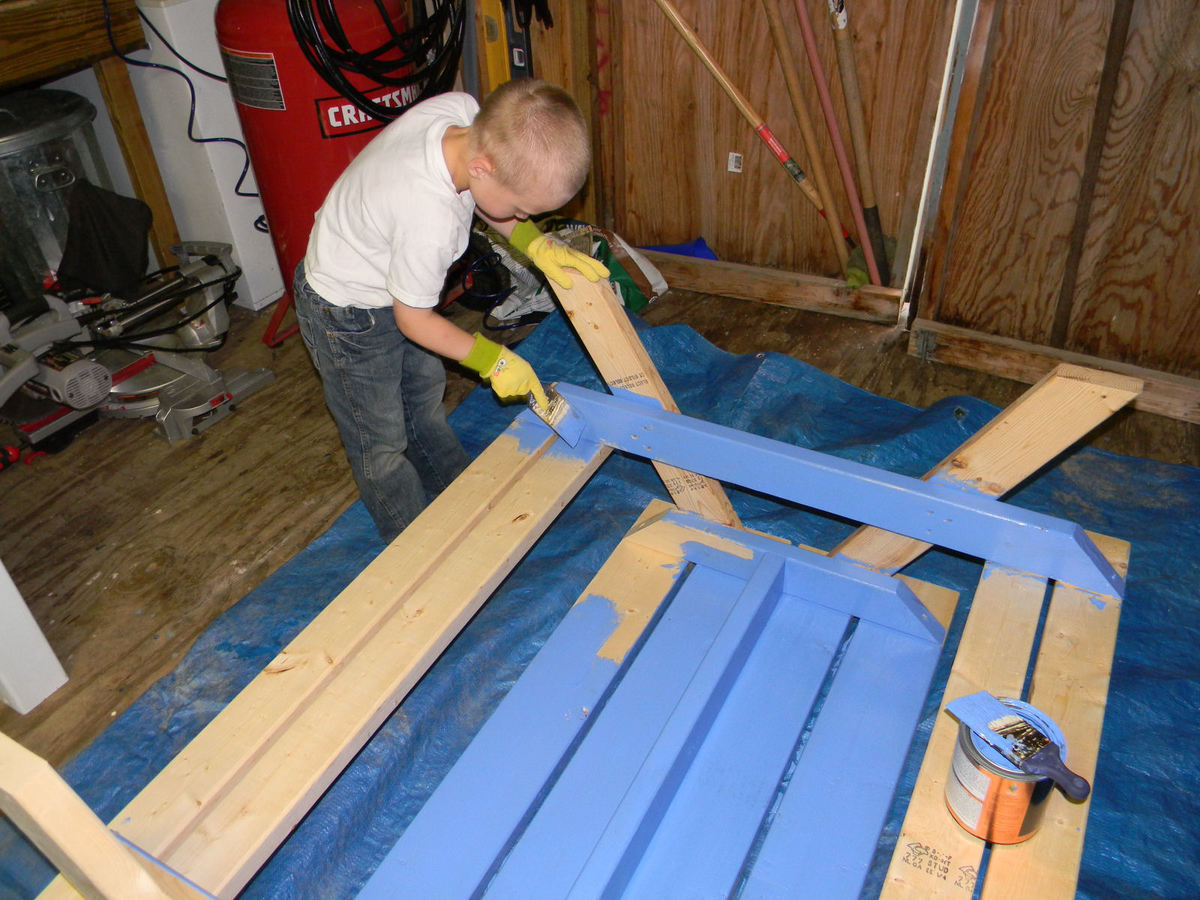
Big Kids' Picnic Table
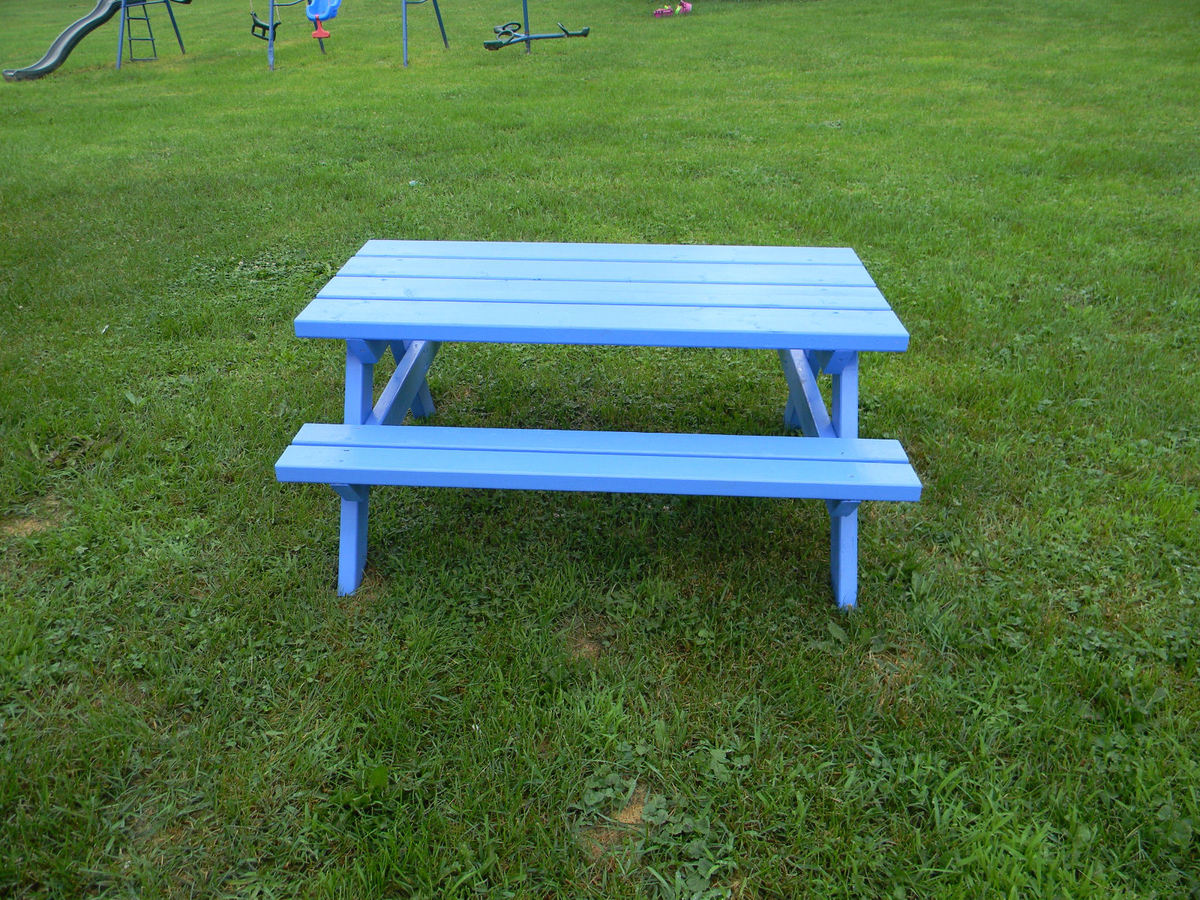
My 5 year old grandson, Trevor, came for an overnight and we worked on building Ana's Big Kids' Picnic Table. Grandpa cut the boards the day before and Trev easily helped me drill all the holes and place the screws, then painted the table his favorite color. He was so excited to have built something so useful that he could take to his home and share with his new step-siblings.
This project took about 3 hours with painting, but was really easy to follow. Trev enjoyed learning how to use the drill safely, wearing his own work gloves and safety glasses and learning the art of painting! It was the PERFECT project for the two of us to keep us busy.
Thanks for another great plan Ana!
Built from Plan(s)
Estimated Cost
50$ including Valspar exterior Paint with Primer
Estimated Time Investment
An Hour or Two (0-2 Hours)
Finish Used
We used our favorite paint, Valspar exterior with the primer already in it. We used a high gloss for outdoor protection. One coat is all you need with this paint. We used less than a quart and probably had enough to re-coat in case you want extra protection.
Recommended Skill Level
Starter Project
Comments

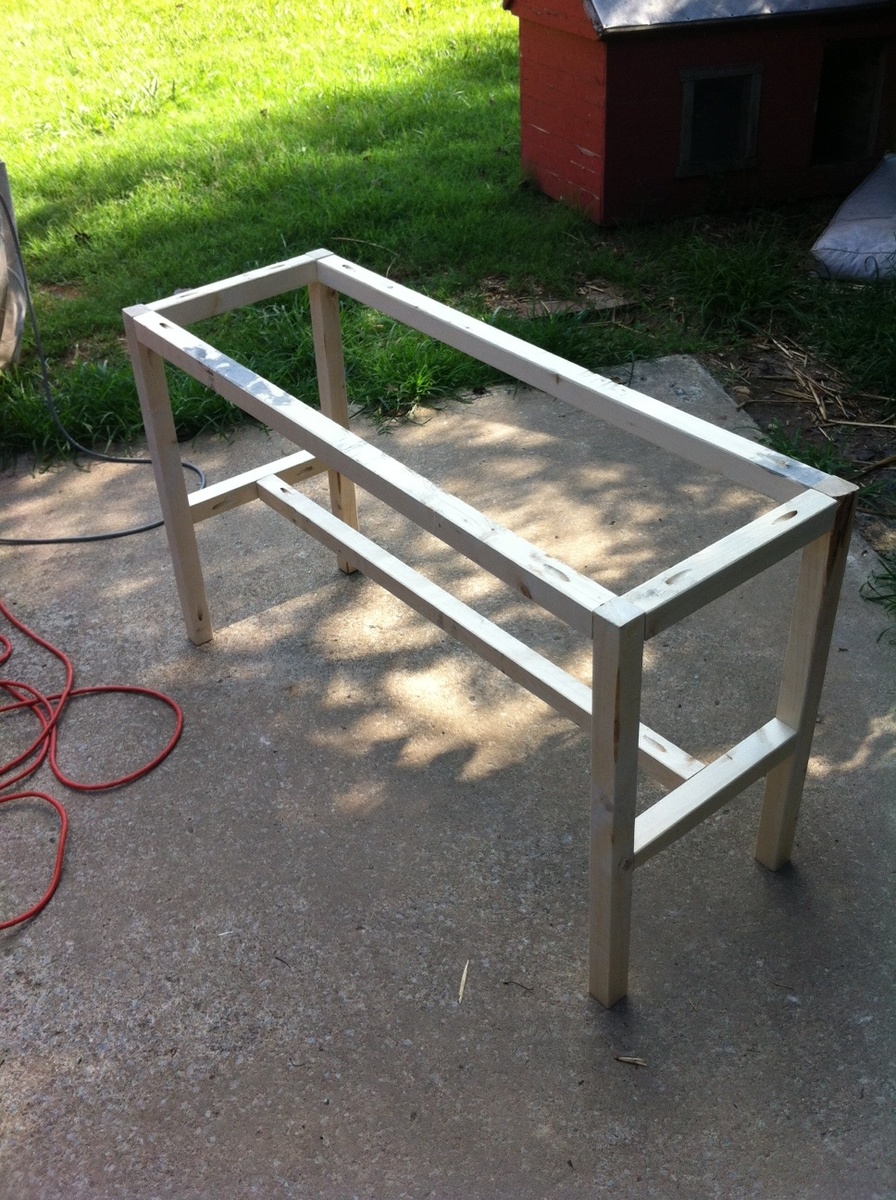
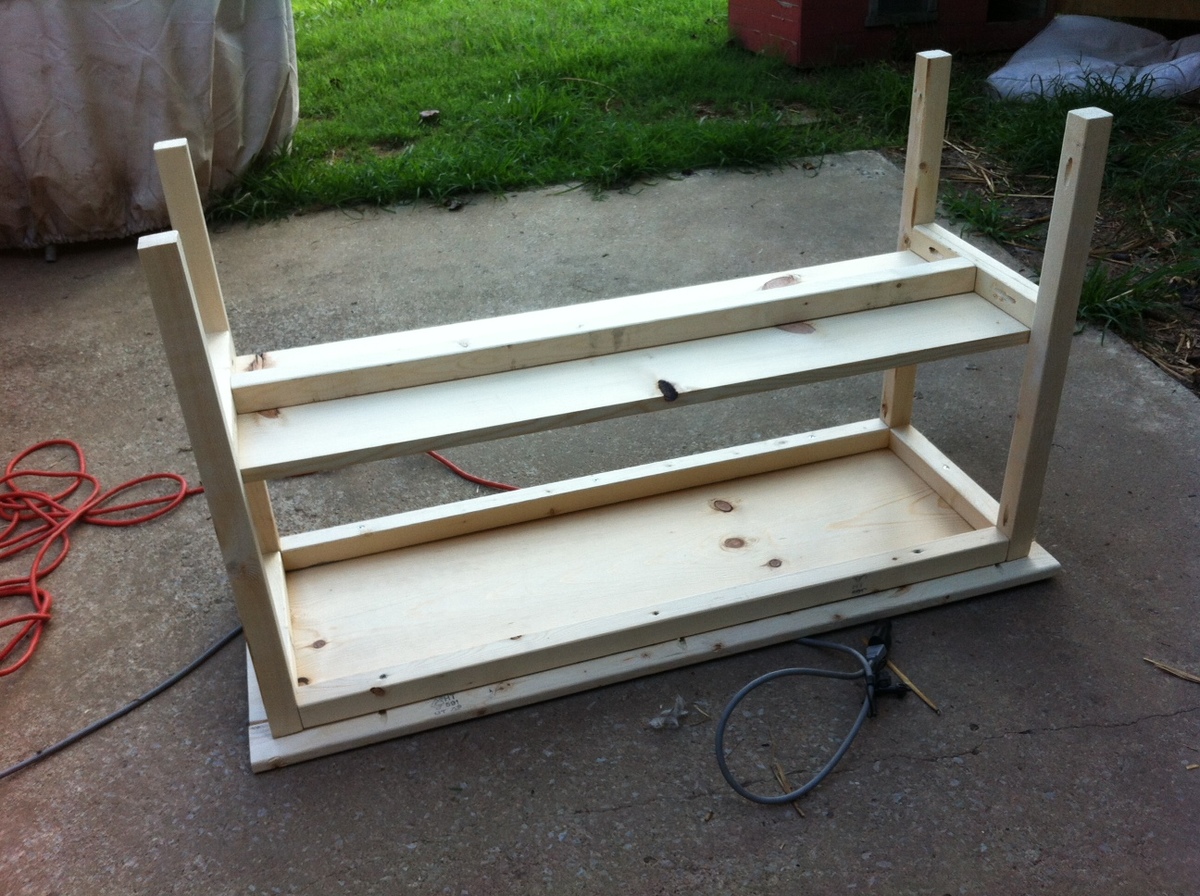
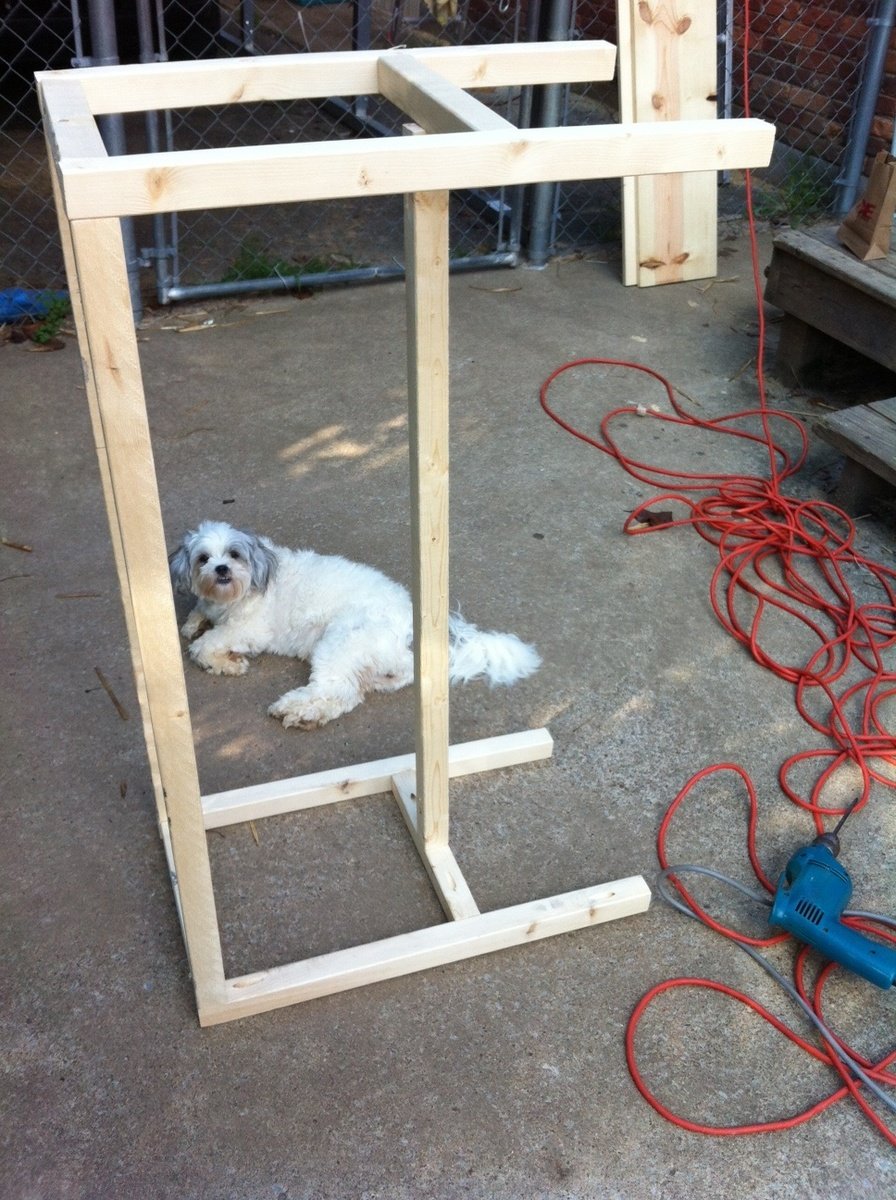
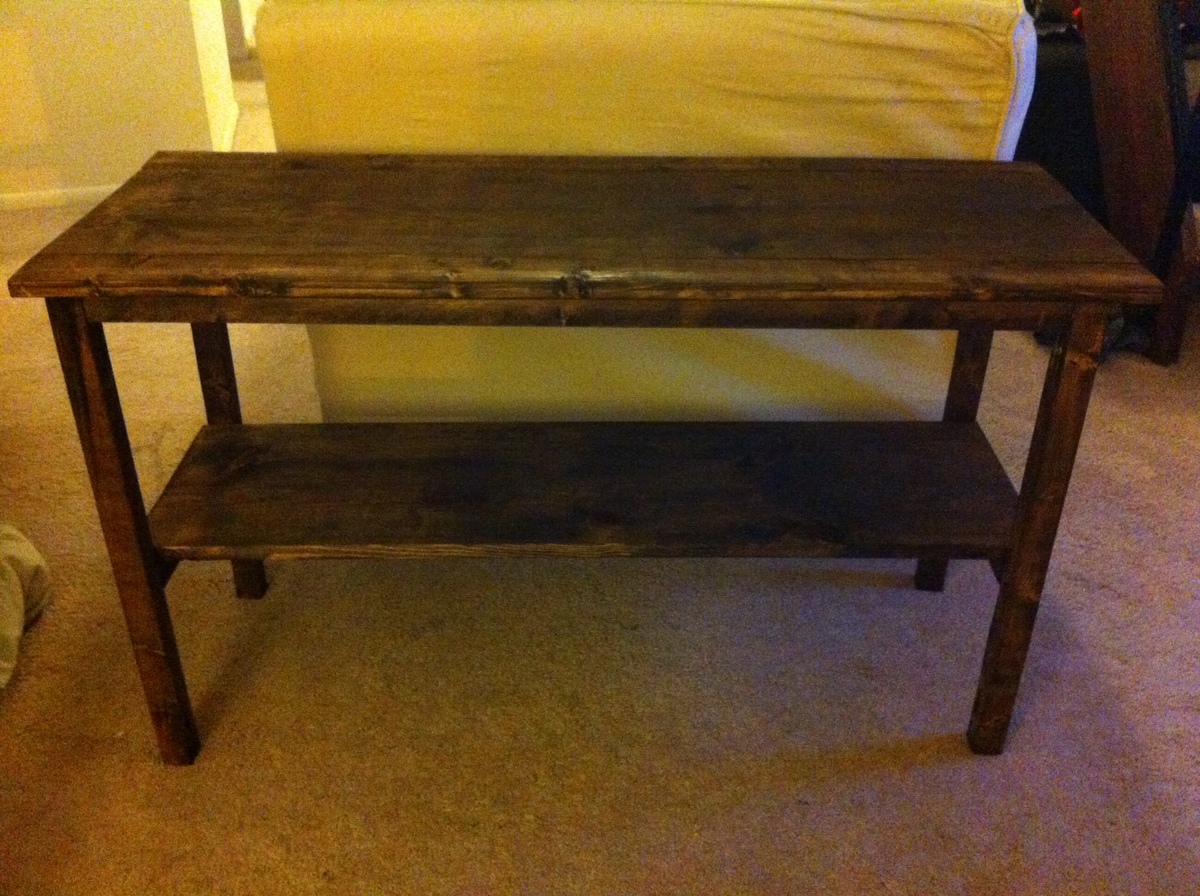
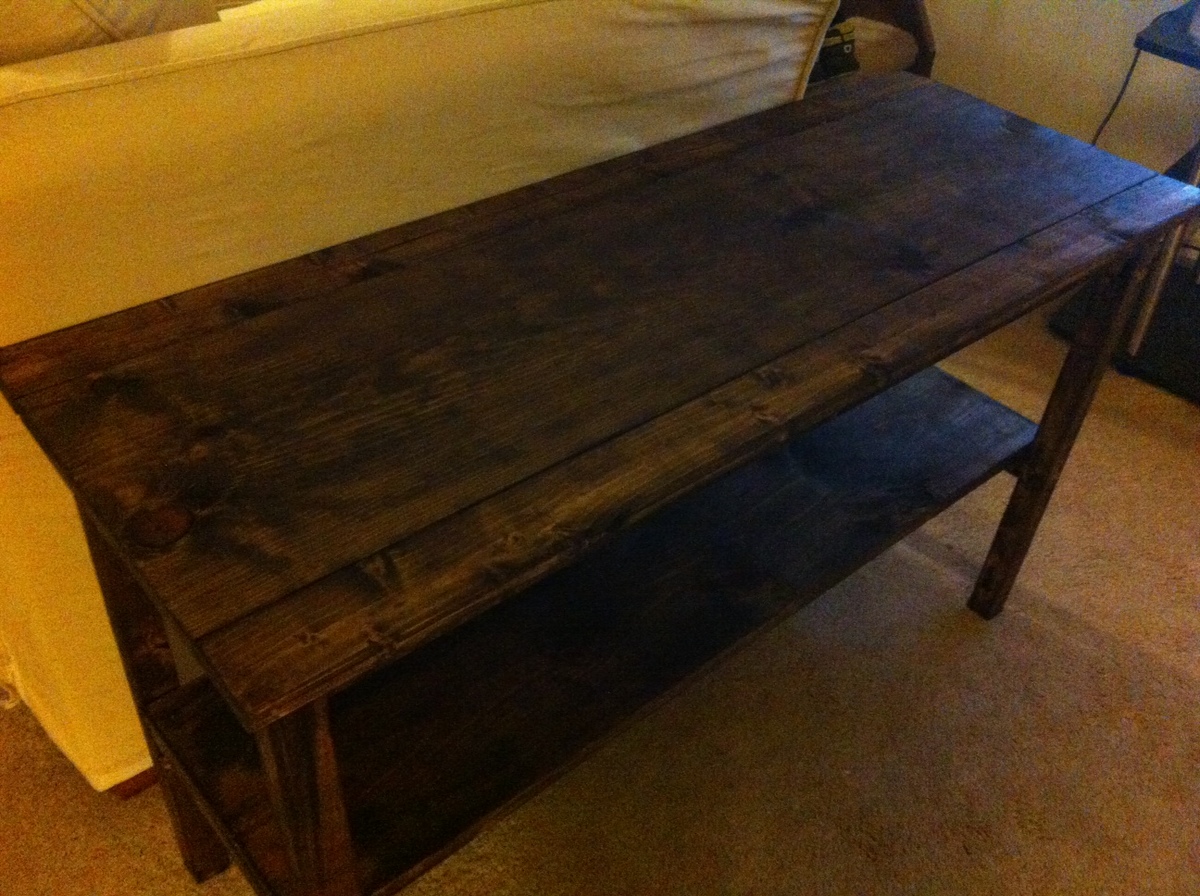
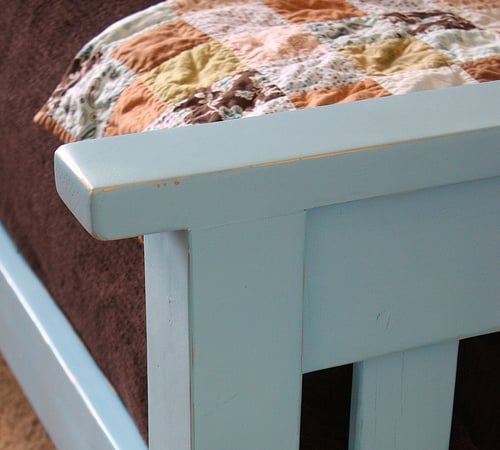
Love the end table
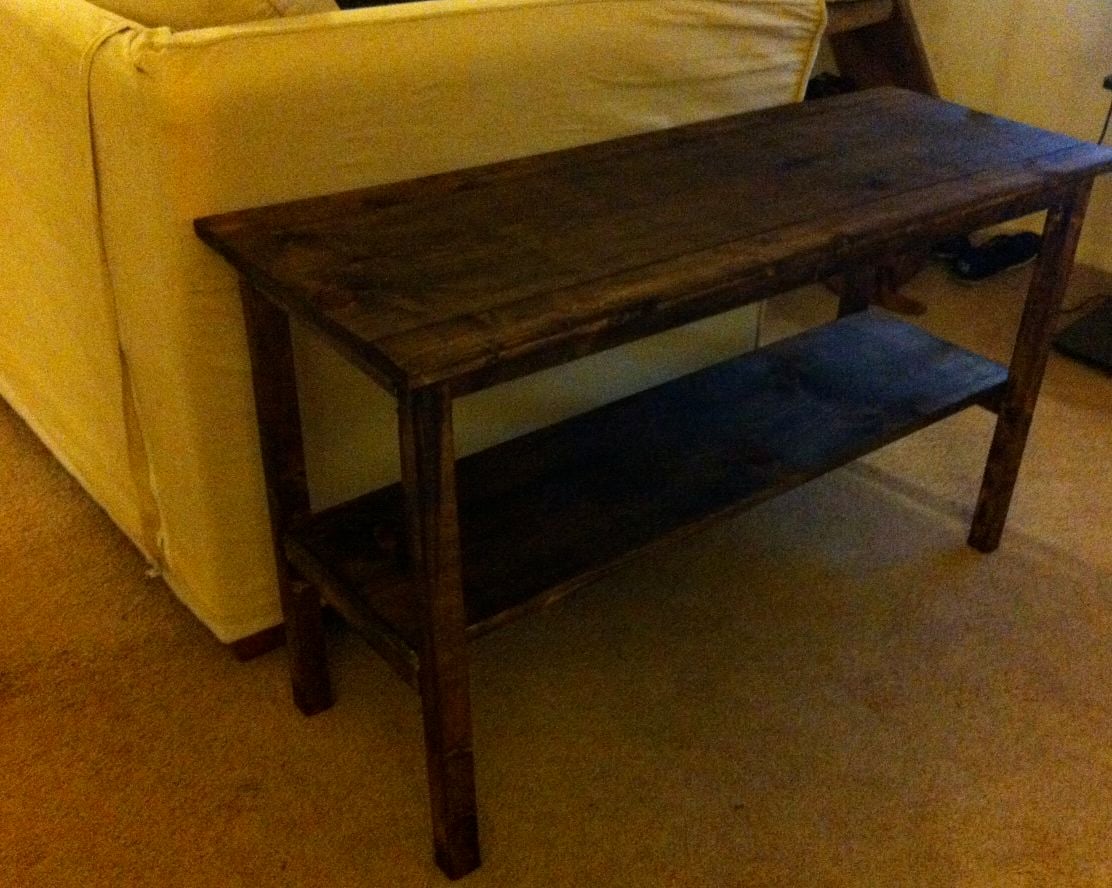
I really love this table, even though it didn't turn out perfectly. I'm not sure what happened, but the shelf on the bottom ended up not fitting well and is sticking out some on one end at a weird angle. But you really can't tell unless you're looking and I plan on just putting that side on the wall. It was REALLY easy to make and took barely any time. I love how the stain turned out (it looks a little darker in the pictures that it really is). I think this table could be used for a lot of different things too and could be modified in height for different uses. Thanks Ana!
Built from Plan(s)
Estimated Time Investment
Afternoon Project (3-6 Hours)
Finish Used
Minwax Dark Walnut
Recommended Skill Level
Beginner
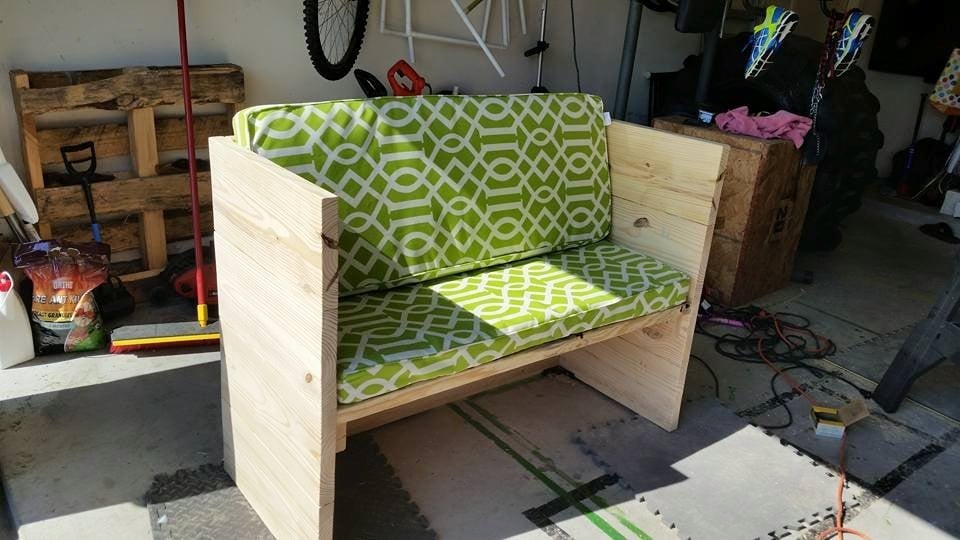
Box Sofa
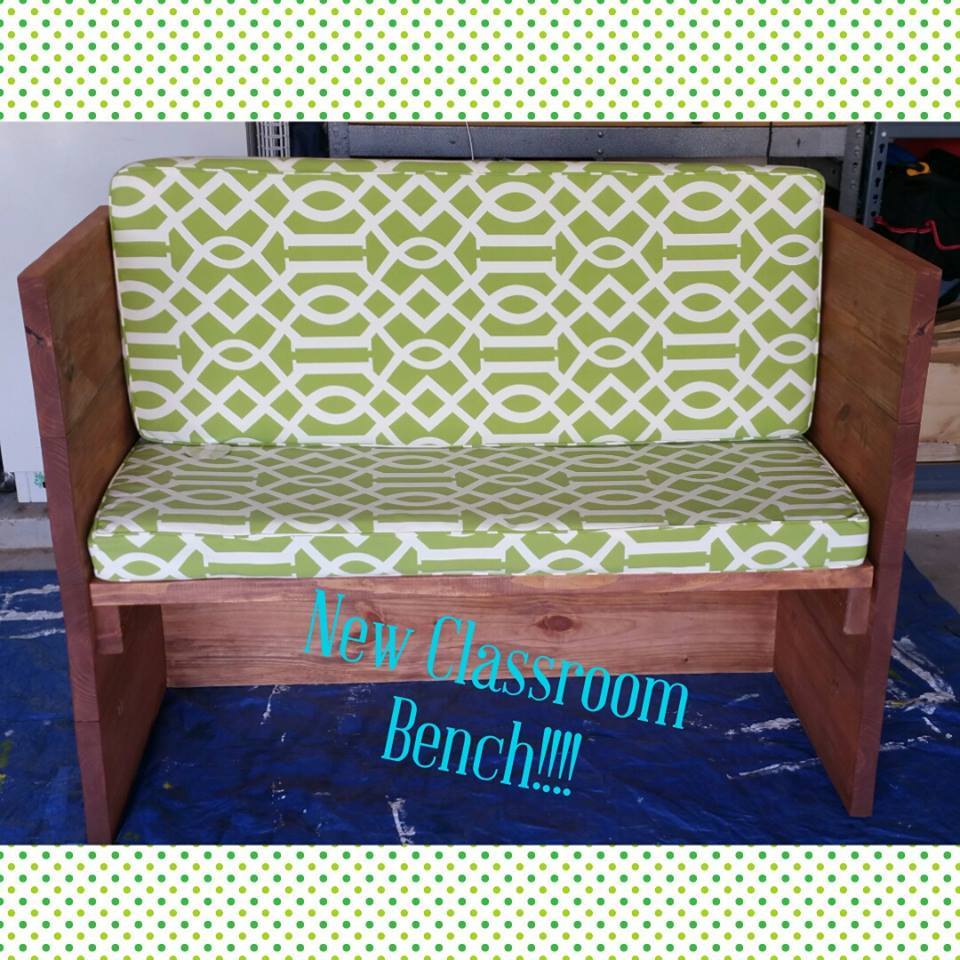
Fun easy project. I built it for my wifes classroom. We used 4 2 x 10 instead of 3 and I used a kreg Pocket Jig instead of biscuit joiner and l brackets. Very easy fun project.
Built from Plan(s)
Estimated Cost
50 - 100 Cost really depends on the cushion you use and if you apply a finish.
Estimated Time Investment
Weekend Project (10-20 Hours)
Recommended Skill Level
Beginner

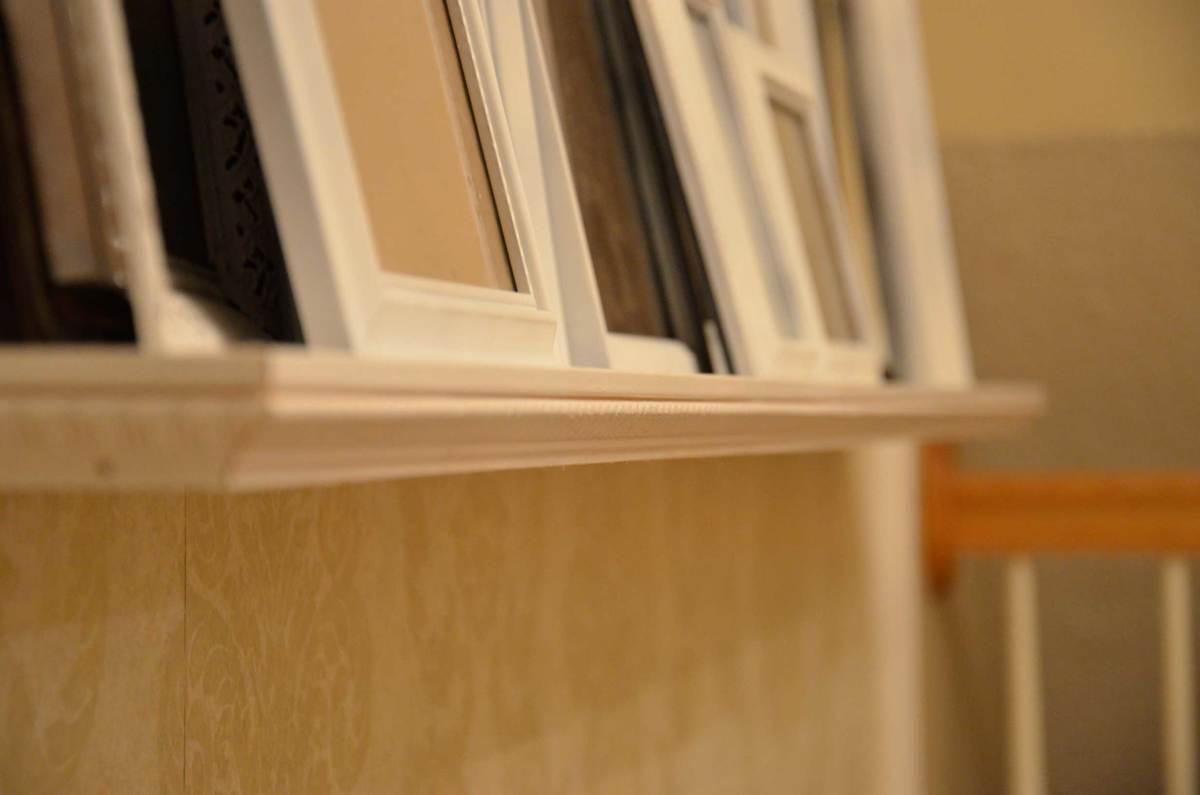
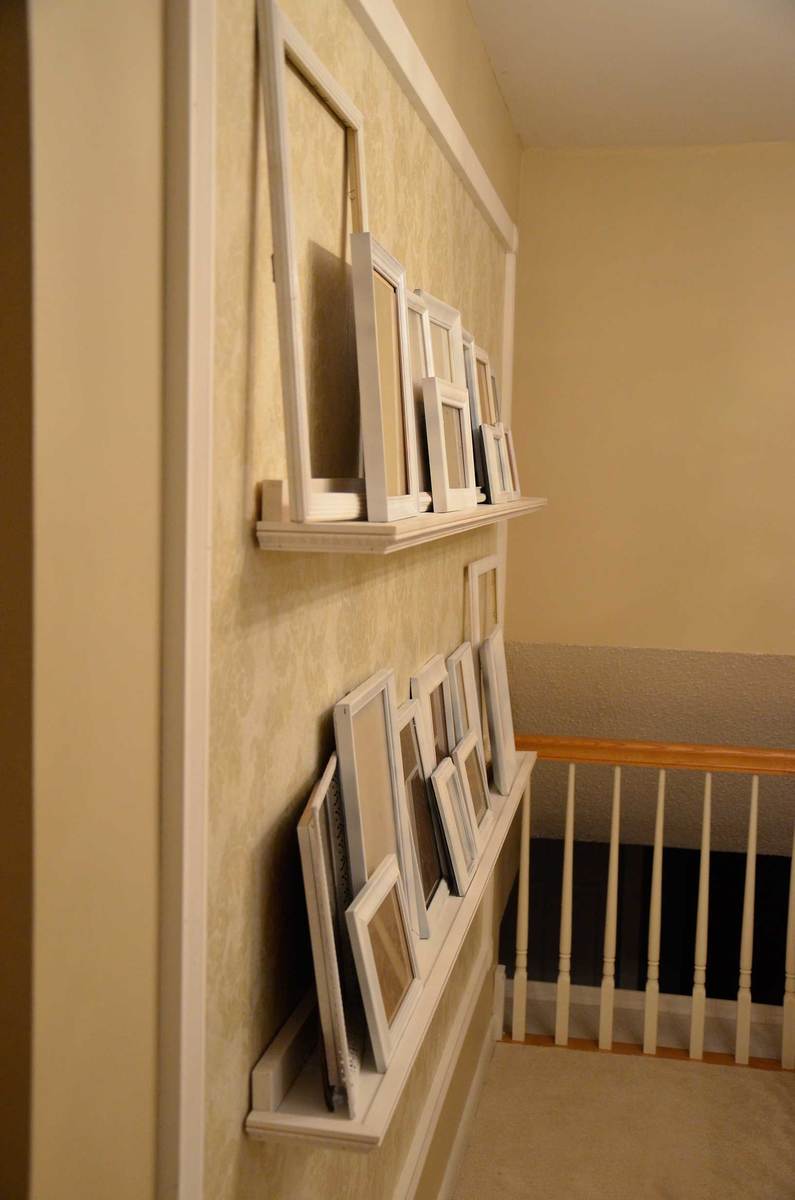
Accent photo gallery wall
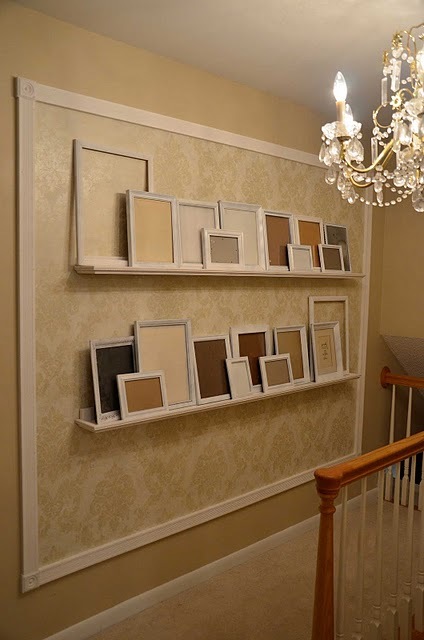
When I first saw Ana's $10 ledges - I knew I wanted to do them, with a twist. I have this random nook in my house - and I knew they would be perfect. I wanted a feature wall there. And a feature it is.
I posted more pictures and how I framed everything out on my blog.
Thank you Ana for your continued inspiration! I wouldn't have been able to do any of it without you!


Estimated Cost
Ledges $20, full wall $160
Estimated Time Investment
Afternoon Project (3-6 Hours)
Finish Used
Prime and white gloss paint
Recommended Skill Level
Starter Project
Comments
Tue, 03/06/2012 - 11:55
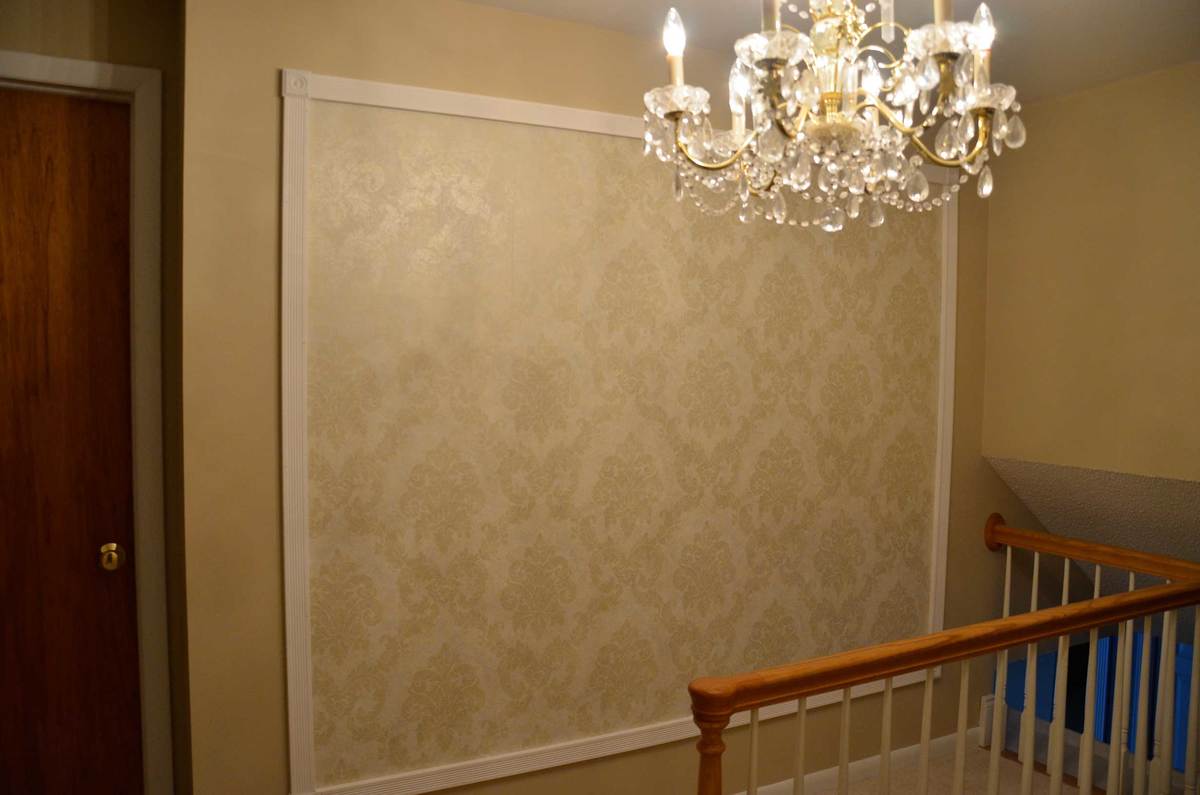
I love this! I love the area
I love this! I love the area of wallpaper framed out. Can you tell me how you did that? Did you attach the wallpaper to the wall? Or did you attach to plywood or something and then attach to the wall? I have a perfect spot in my hallway to do something cute like this! LOVE!
Tue, 04/17/2012 - 10:28
accent photo wall
This is absolutely gorgeous!! I would love to something just like this...so creative! By any chance, can you tell me what wallpaper you used??
Tue, 04/17/2012 - 10:29
So beautiful! Can you tell me
So beautiful! Can you tell me which wallpaper you used?? I love it!
Sat, 04/21/2012 - 05:44
I'll look to see if I can
I'll look to see if I can find the name and brand of wallpaper. We actually wallpapered the wall. It was super easy the whole thing. We lined out where it would be centered. Then put up I think 4 sections. When it was done it was super easy We put a decorative block in one corner - cut the next molding piece to line up with the next corner, and continued all 4 sides. No mitering cuts - super easy!
Sun, 04/22/2012 - 19:24
Thank you!!
Wow! Thank you so much! I cannot wait to start! I really appreciate you trying to find the wallpaper pattern. It just so happens i have the same color carpeting, banister and paint already in my upstairs hall, so as soon as i saw your picture i knew it could work. Hopefully you will be able to find it..if not, i can't thank you enough for your detailed instructions. That will really help being i am not that handy! Hope to hear back from you.
Thanks again,
Erica
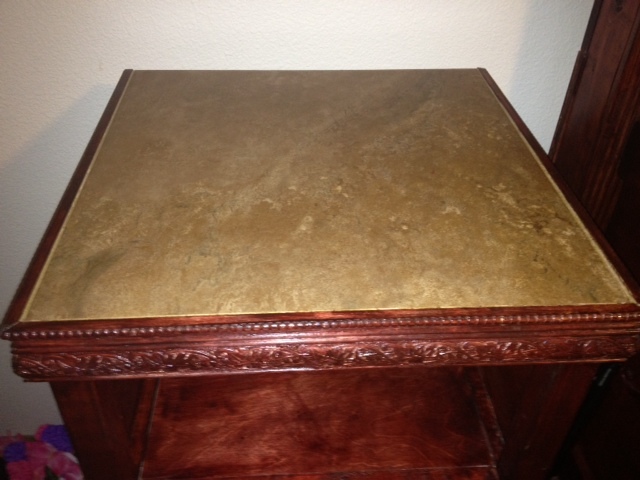
Nightstand
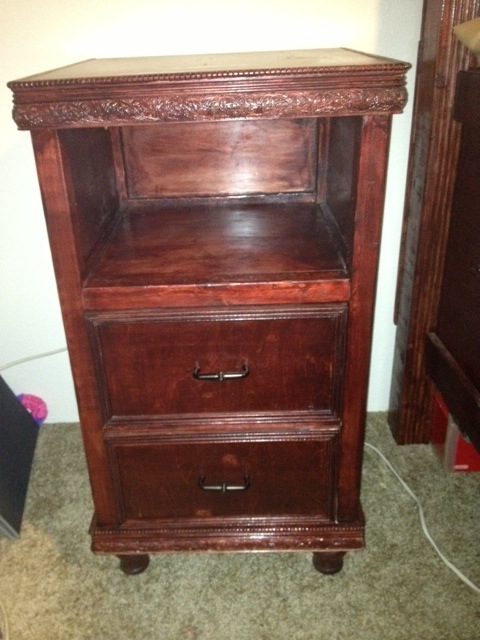
Decided to build a bedroom set and like the Rhyan end table, but fell in love with tiled version. So we used porcelain tile on top.
Built from Plan(s)
Estimated Cost
$50-75
Estimated Time Investment
Weekend Project (10-20 Hours)
Finish Used
Minwax red oak - my fav!, poly coat
Recommended Skill Level
Beginner
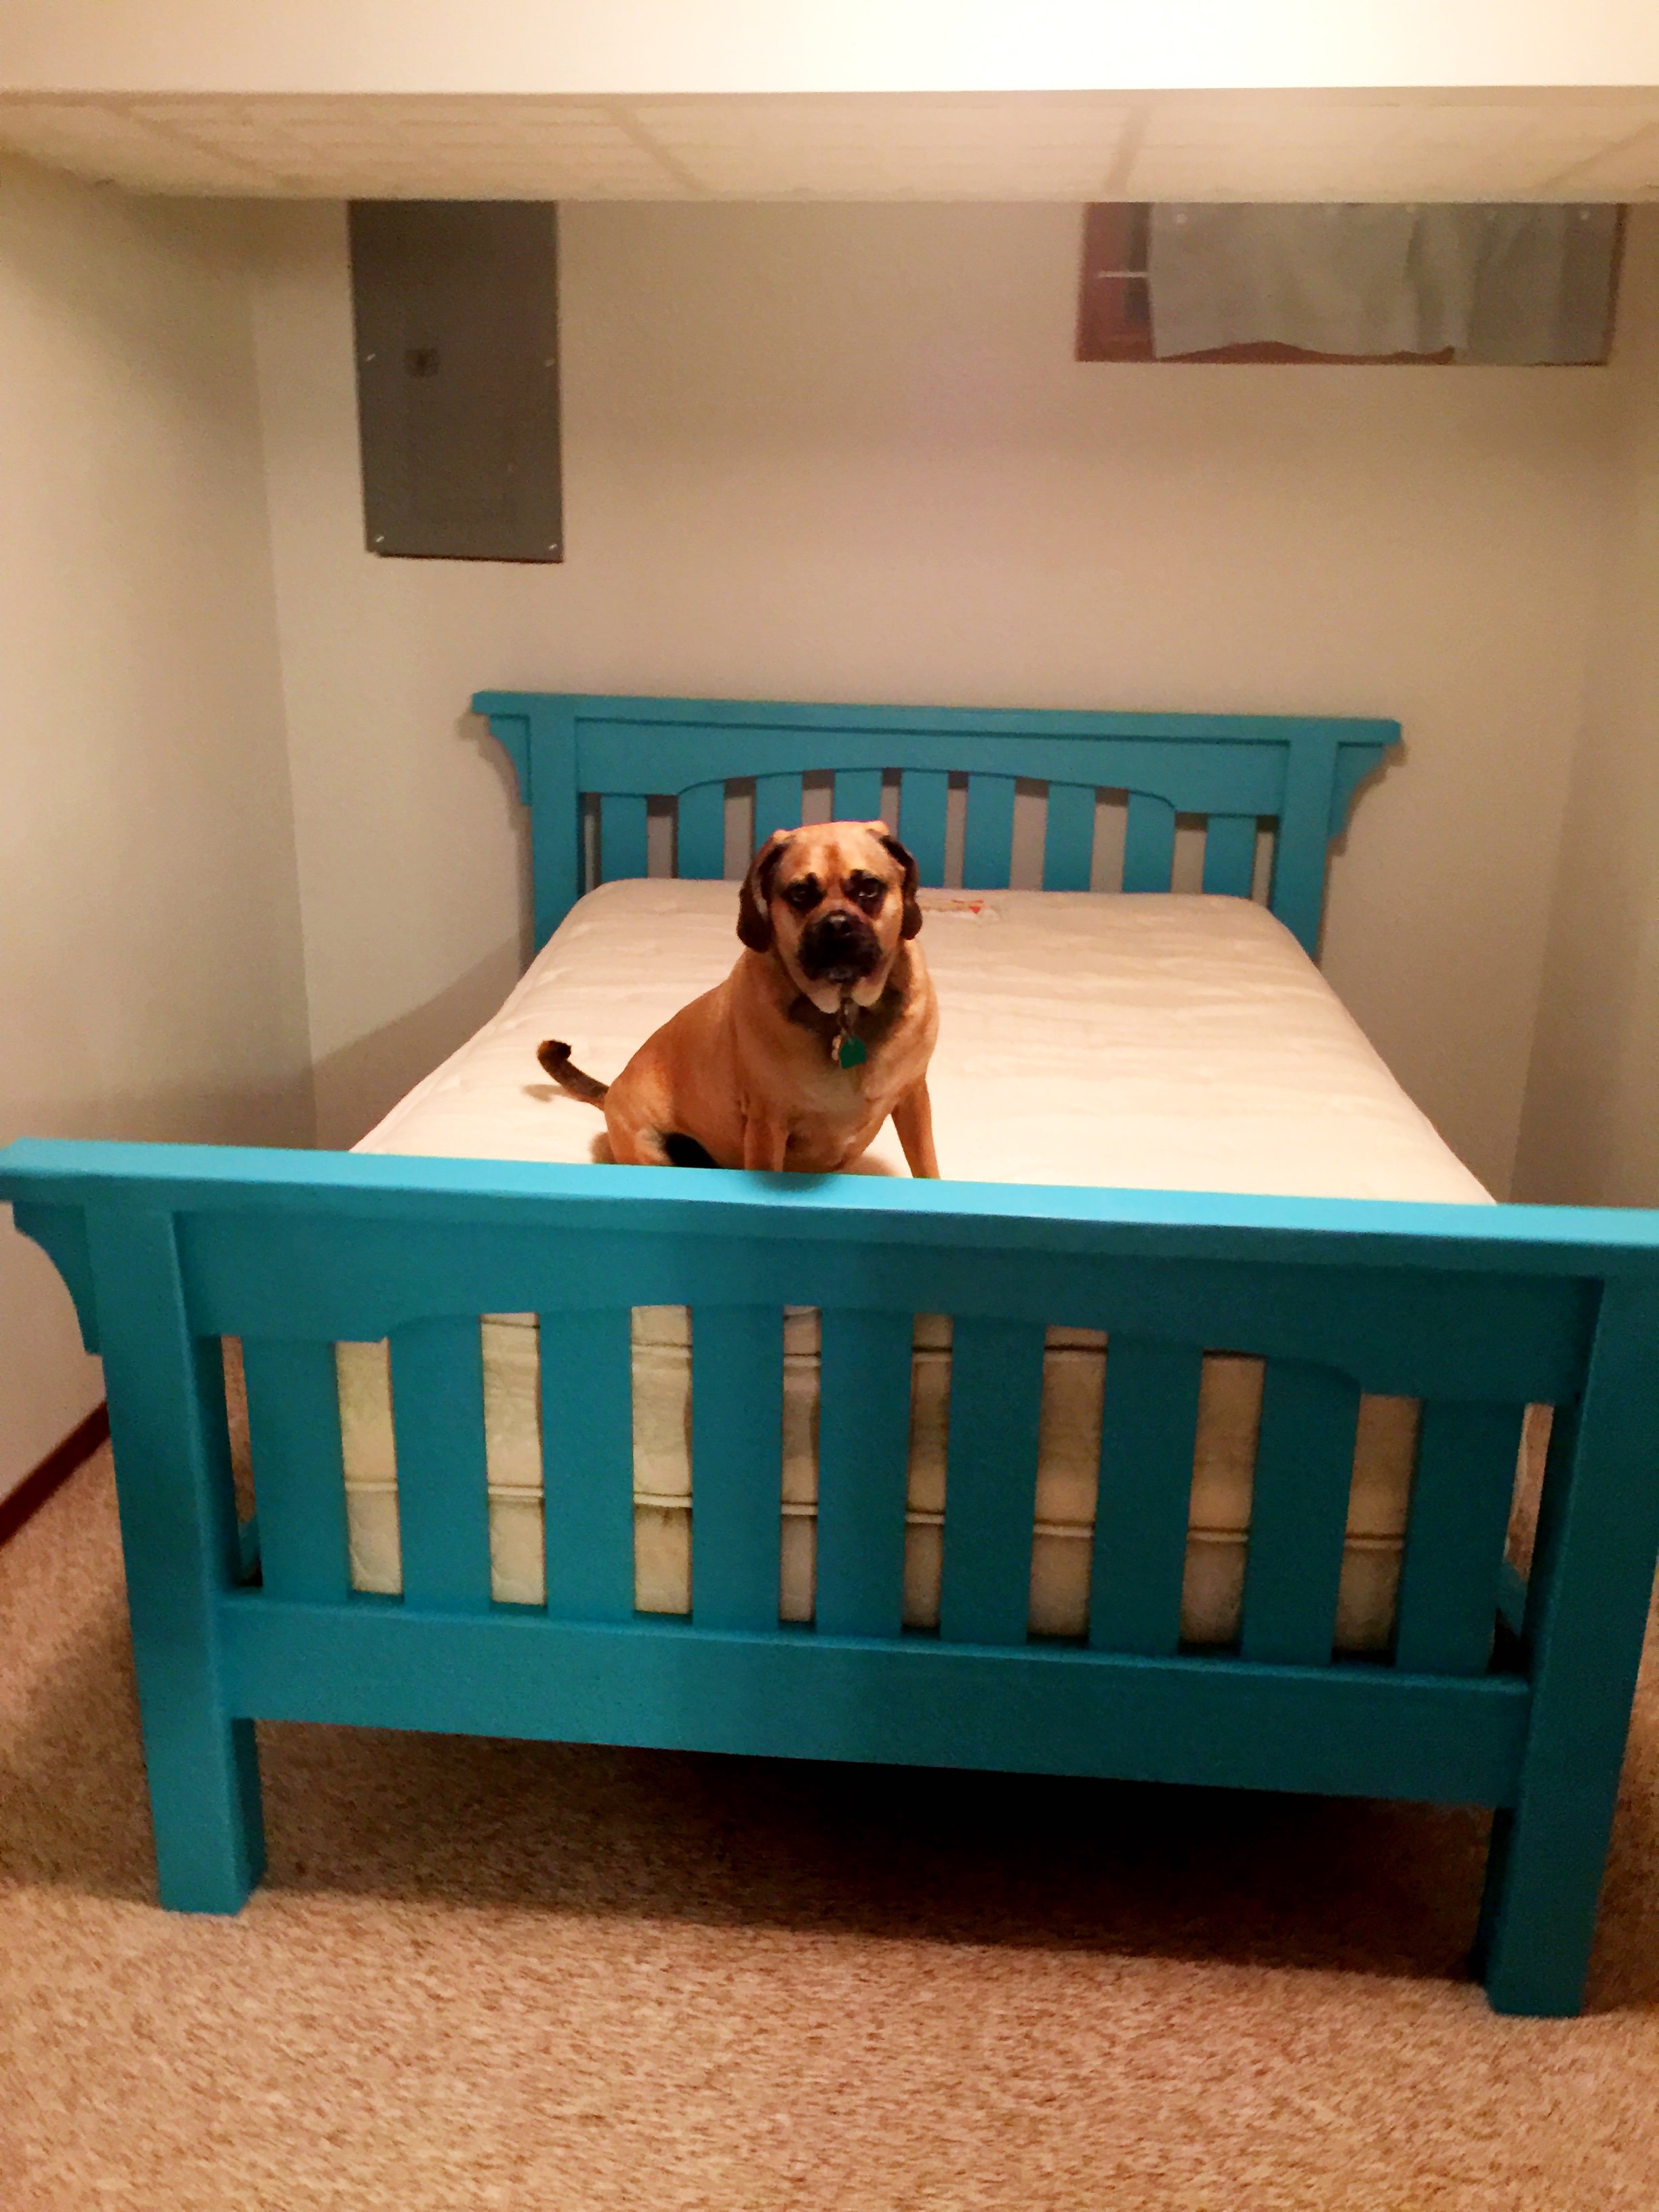
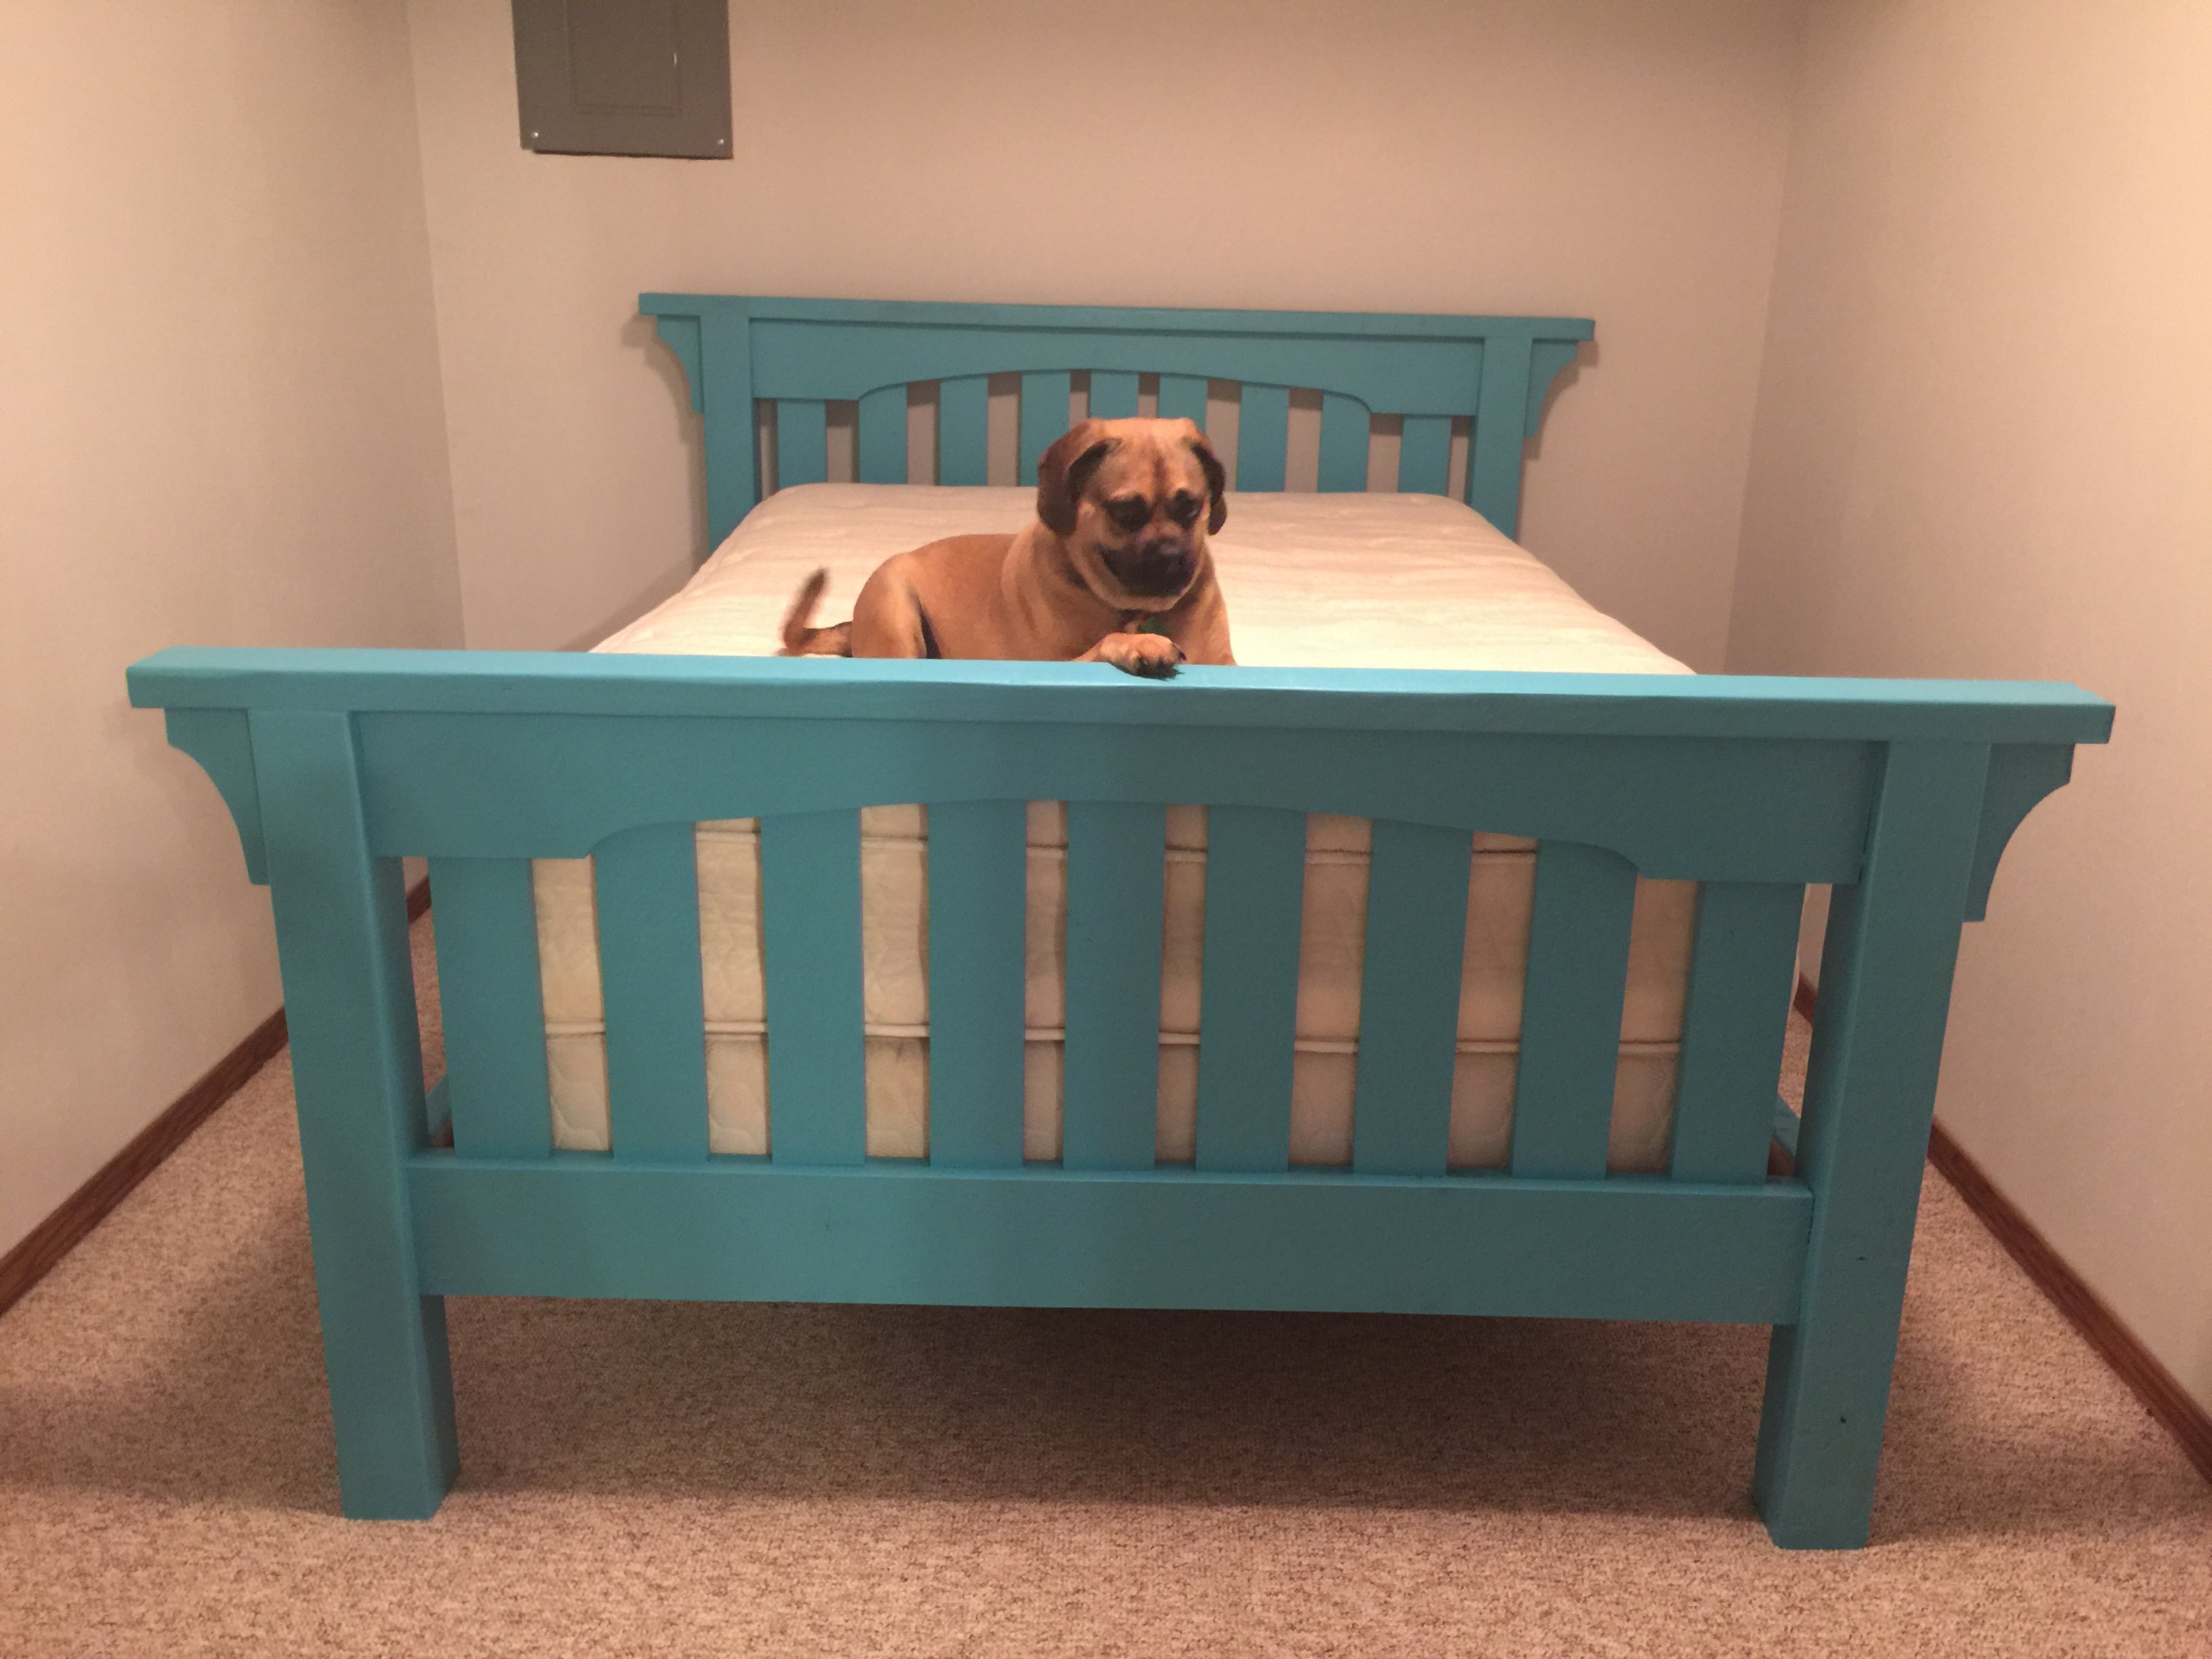
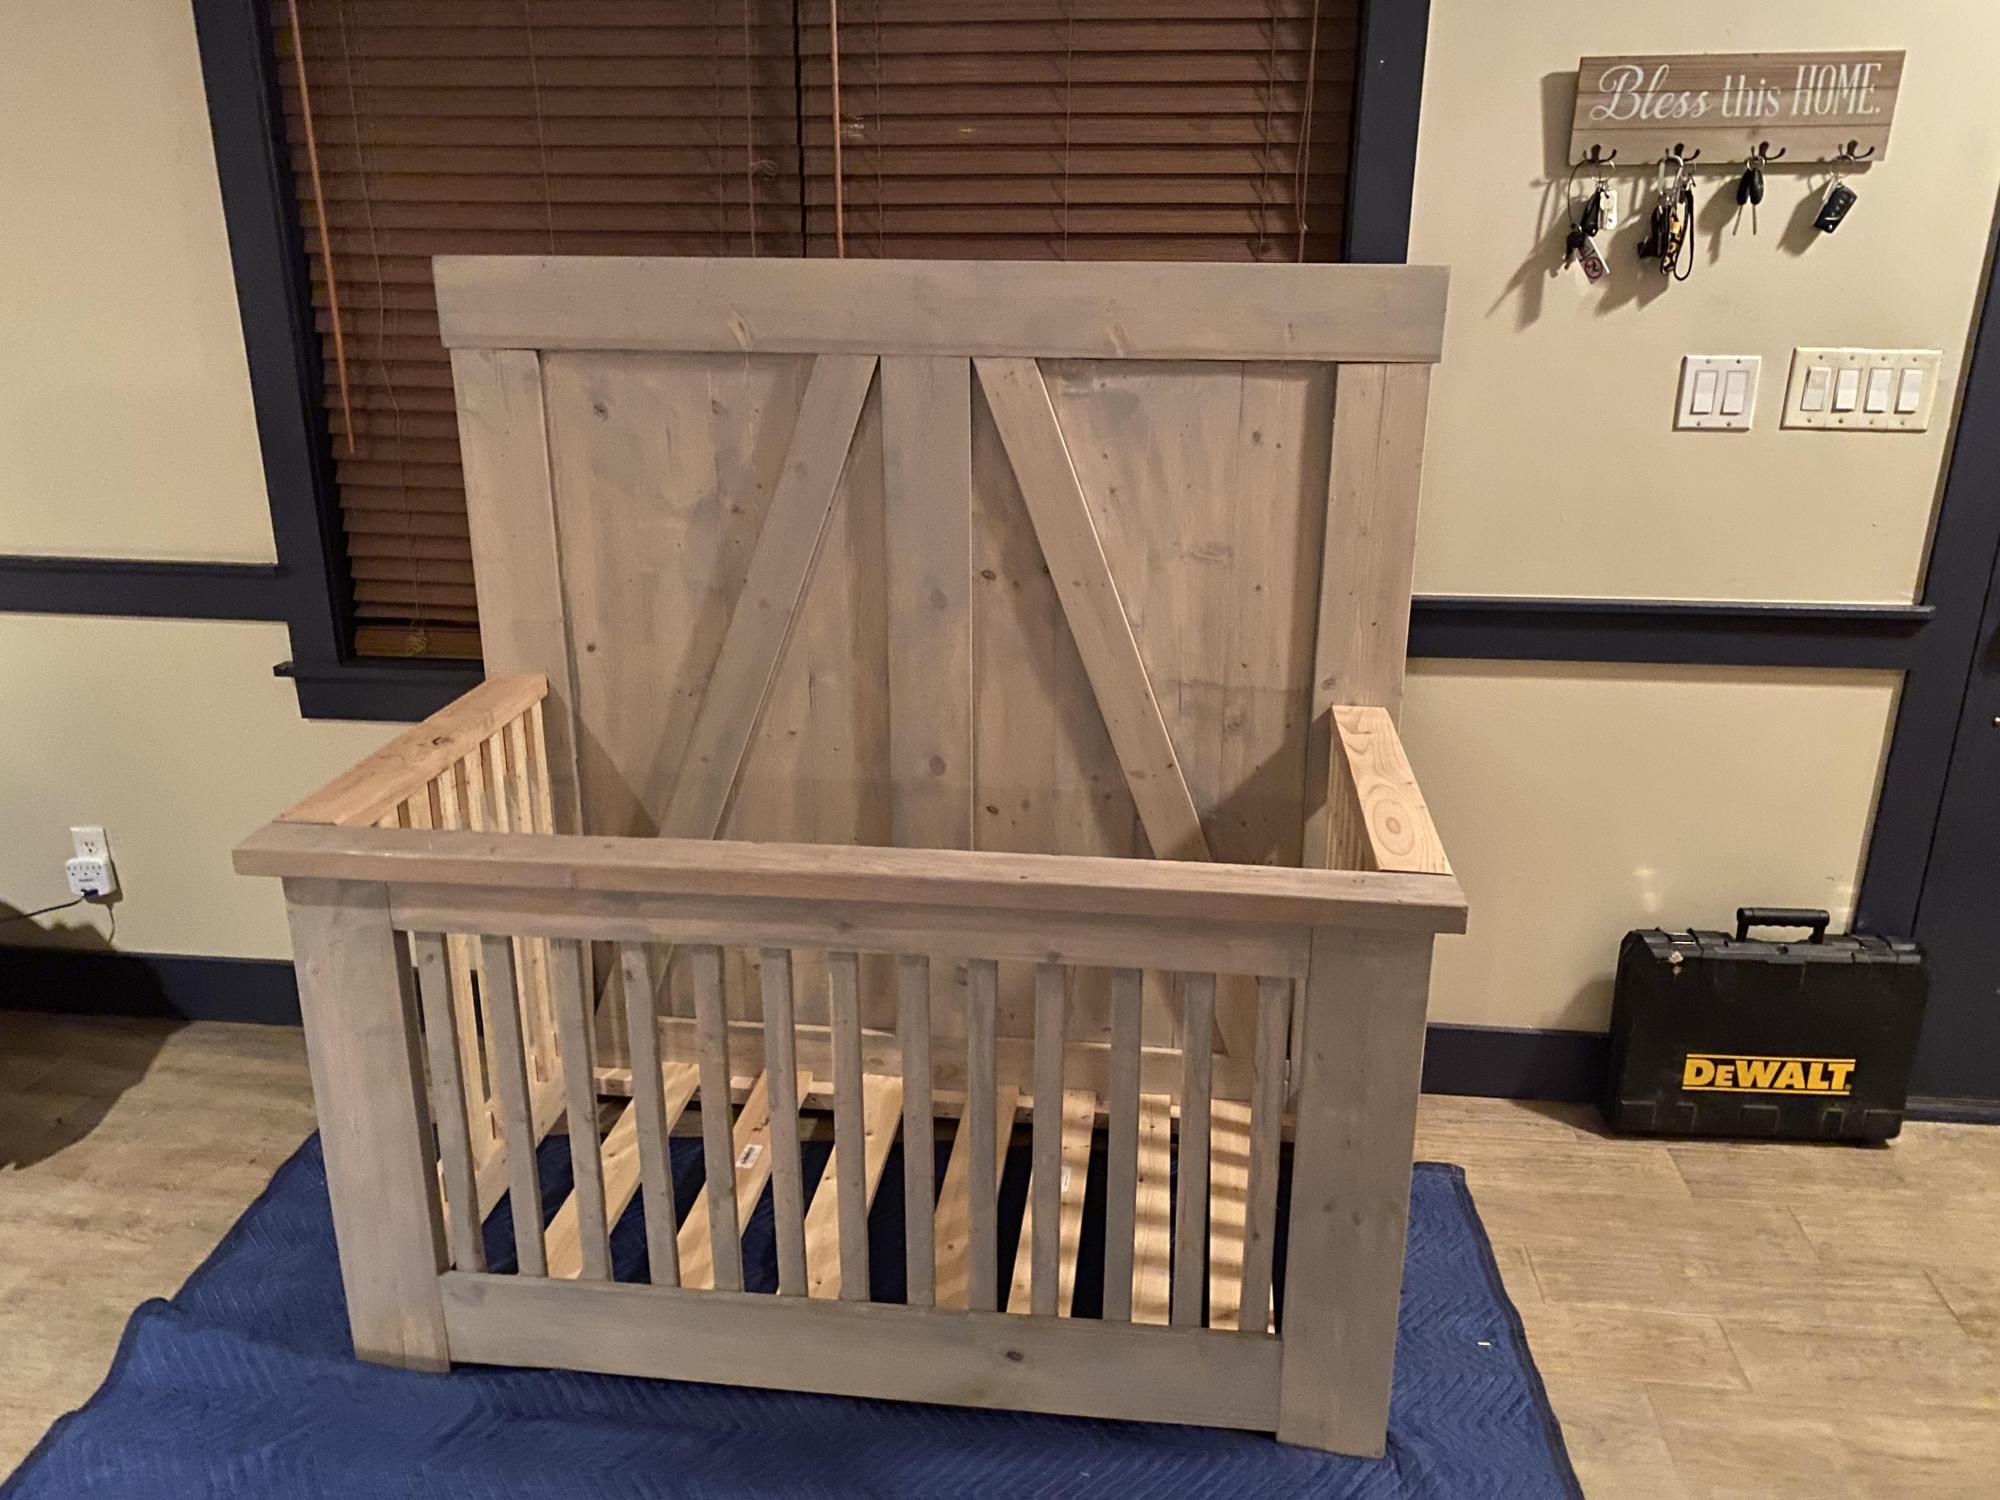
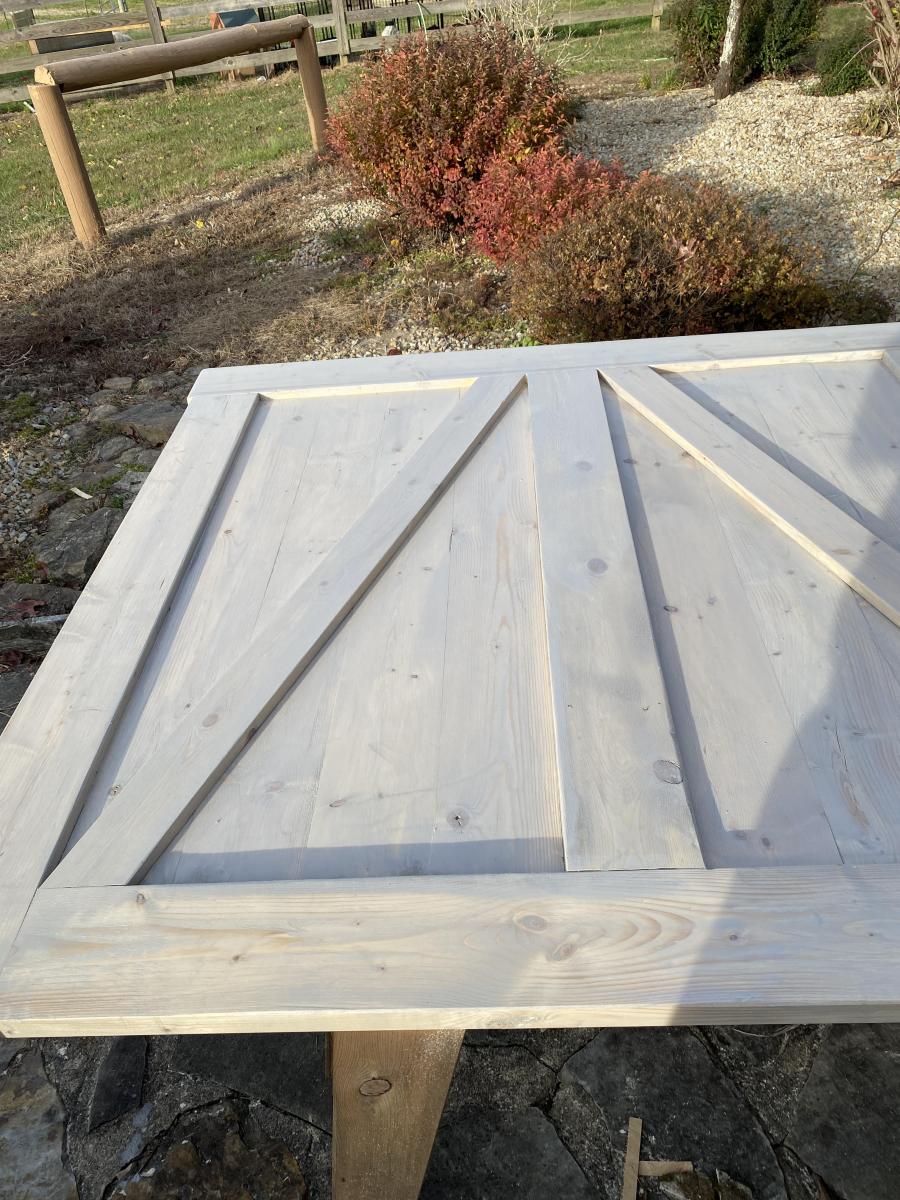
Mission Style Bed
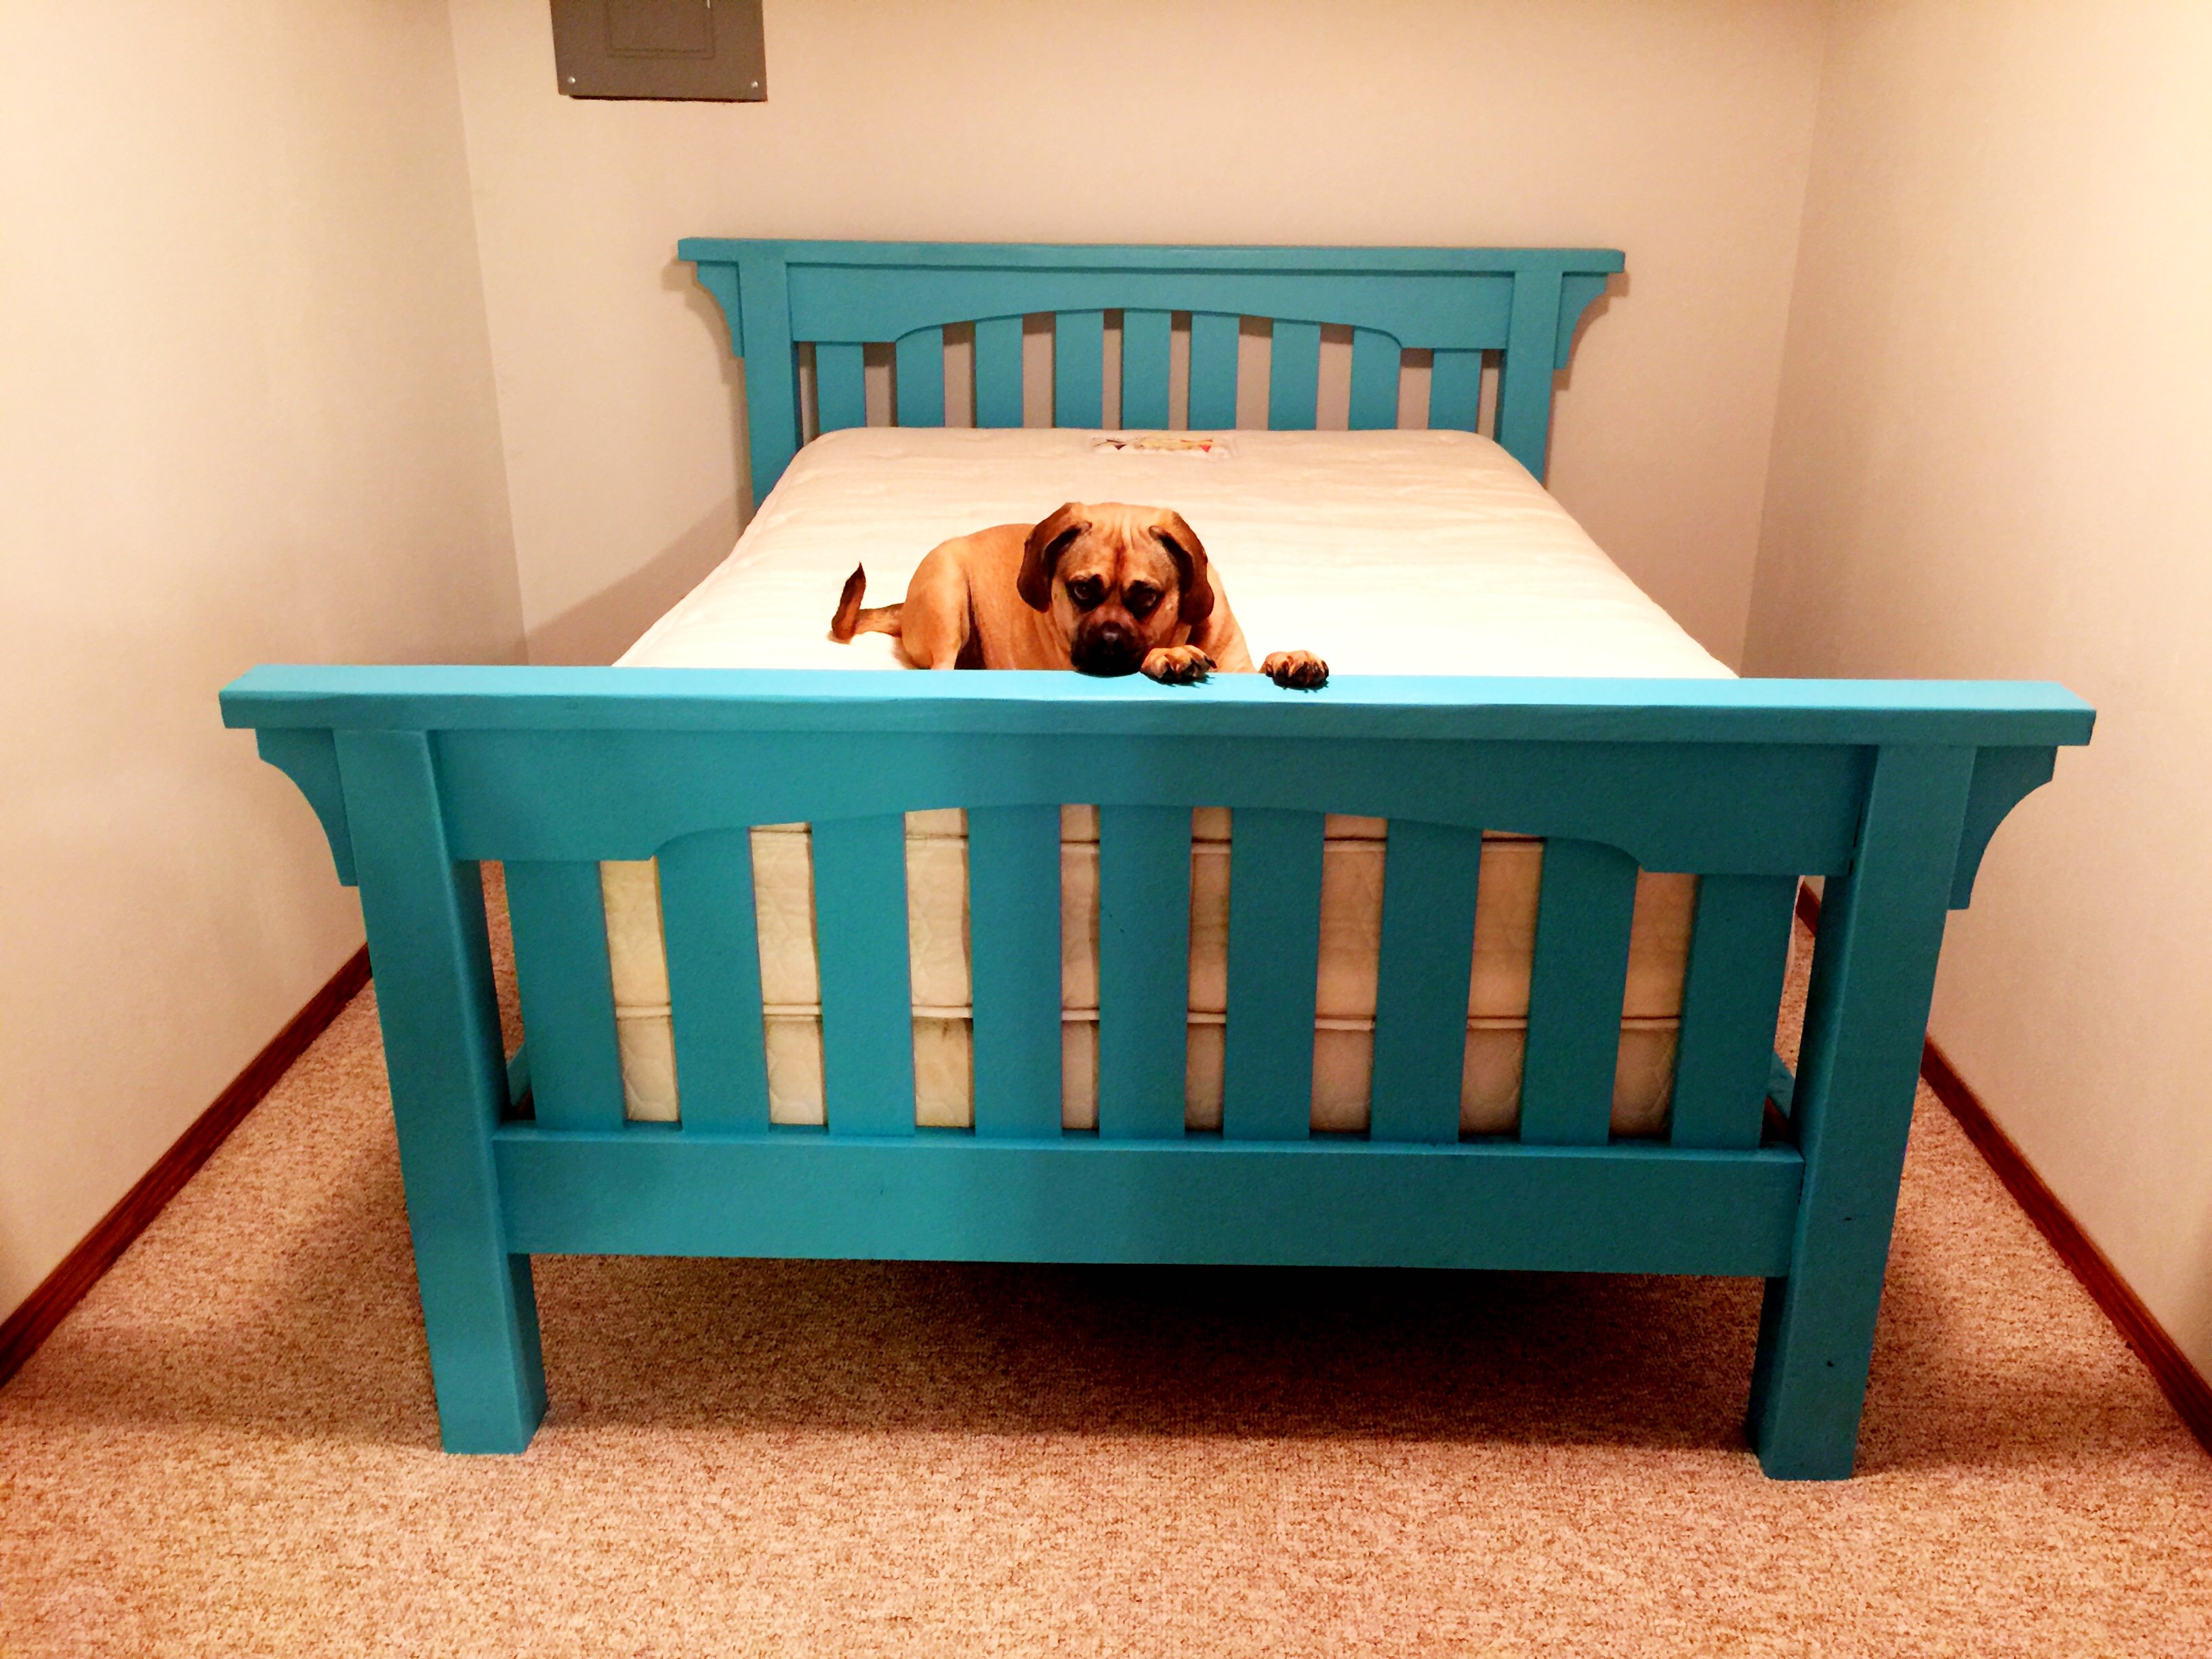
We have a small extra bedroom in our basement for out-of-town guests that needed furniture. This plan was perfect. For the time being, Clarence the Dog will keep the bed warm.
Built from Plan(s)
Estimated Cost
$60.00
Estimated Time Investment
Day Project (6-9 Hours)
Finish Used
Behr Mermaid Treasure with Minwax Polycrylic
Recommended Skill Level
Intermediate
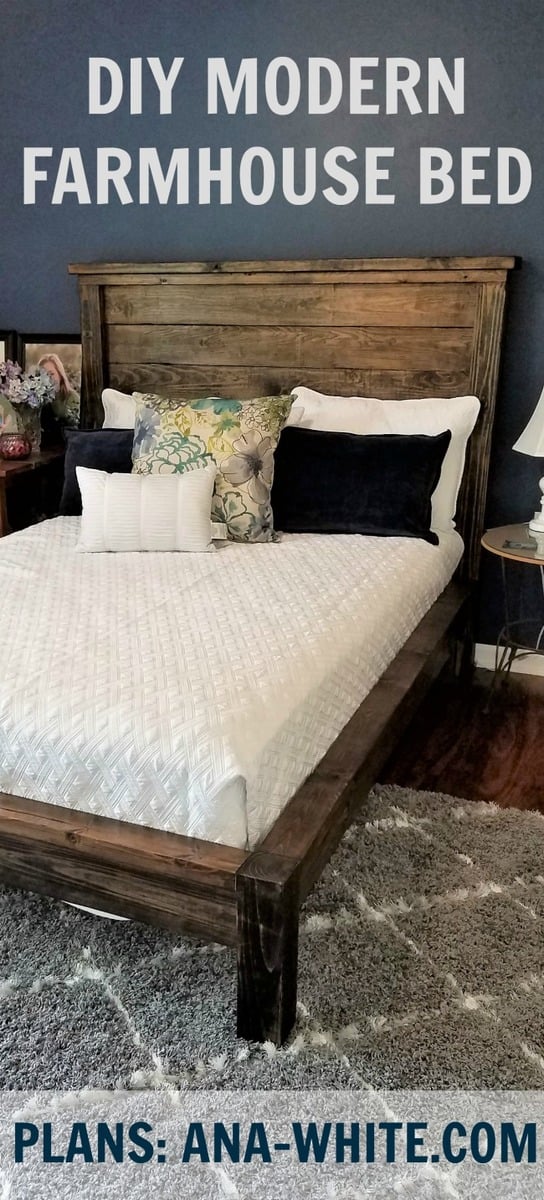
Modern Farmhouse bed
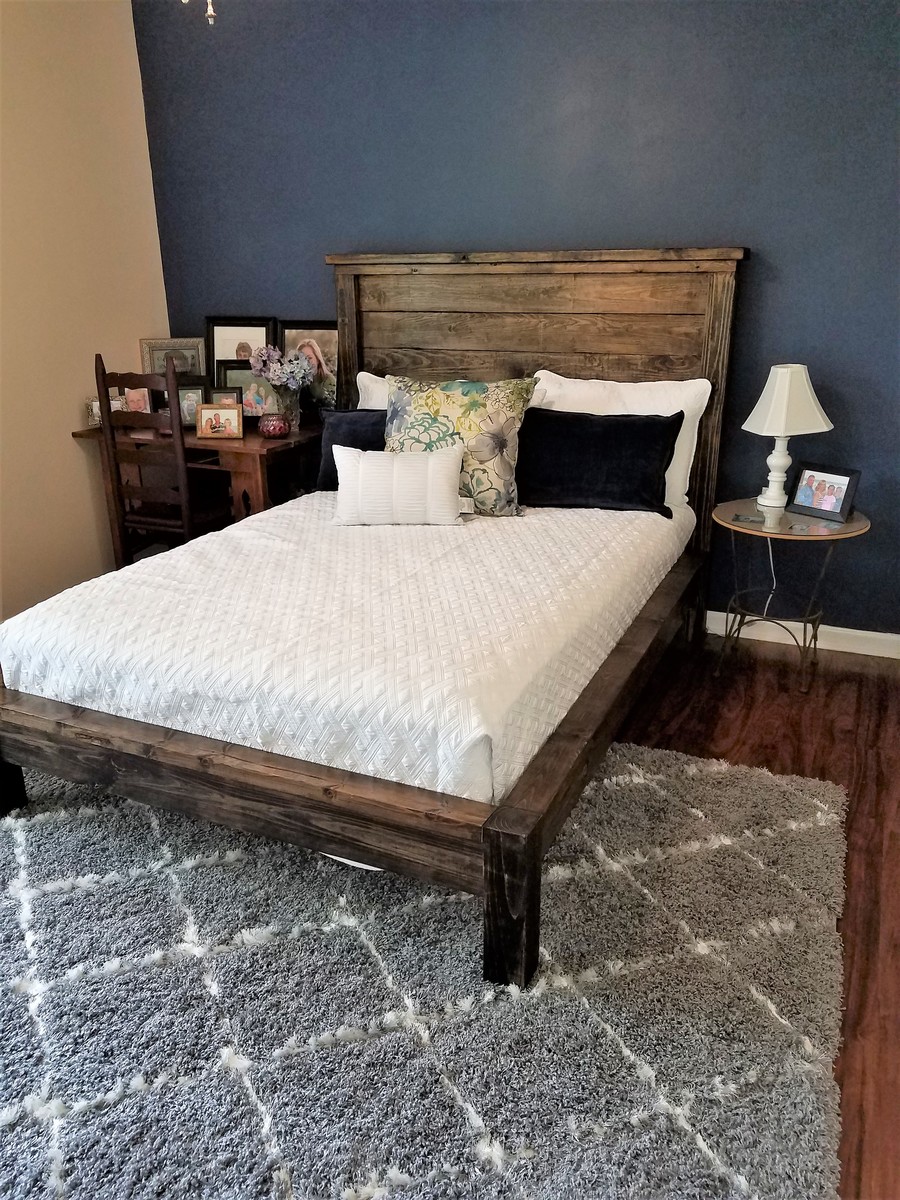
Love this bed! My first build from Ana White. Took 3 weekends but could have been finished in one if I was fully prepared. Did most of the build first weekend and stained the next. Third weekend was putting it up in the bedroom. Nice guestroom addition.
Built from Plan(s)
Estimated Cost
Not sure as I had the 4x4 but probably $150
Estimated Time Investment
Weekend Project (10-20 Hours)
Finish Used
black walnut with poly on top
Recommended Skill Level
Beginner
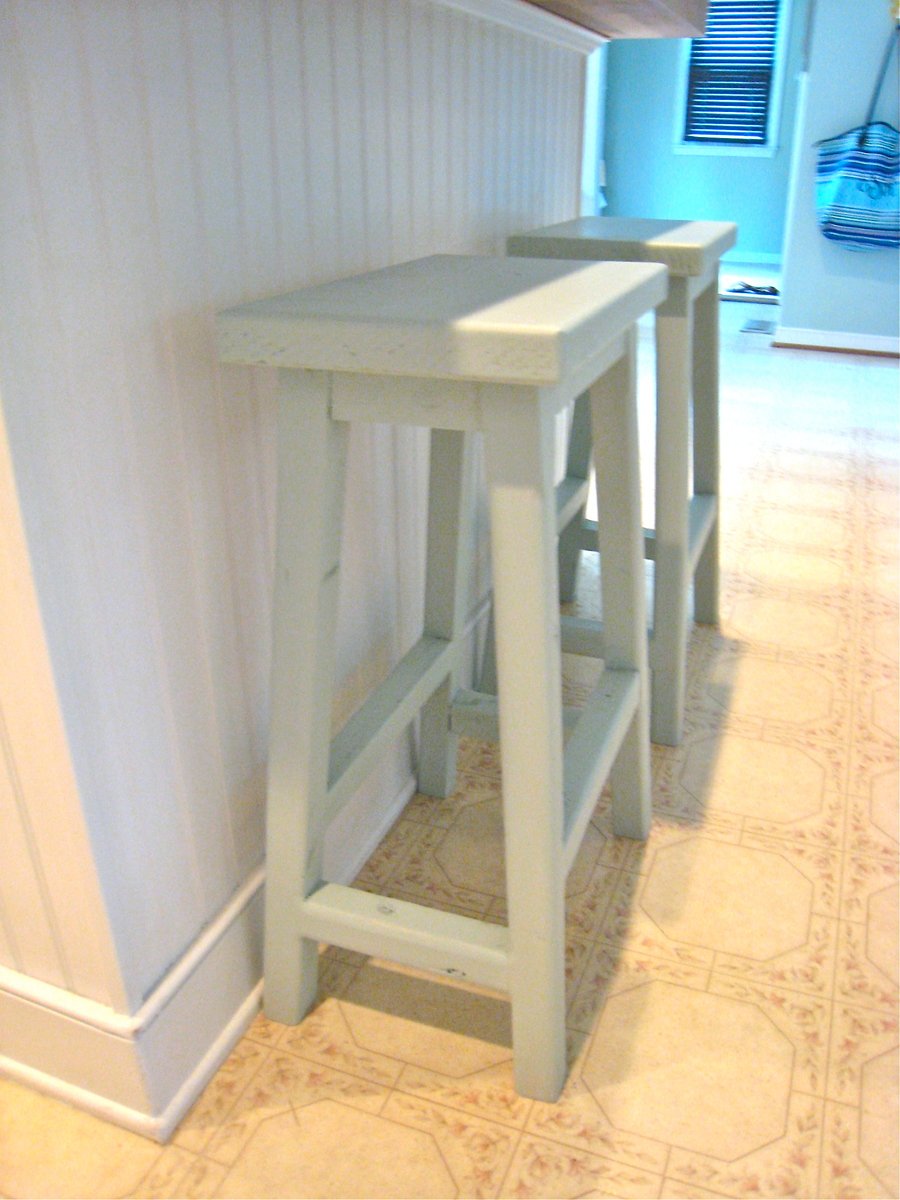
Simplest Stool : Saddle Back Style

We've been looking for some saddle back stools for quite a while that would fit snug under our kitchen island. I couldn't find any, so I checked Ana-White and found the perfect building plan. I used scraps to build two matching stools and so I altered the plans to fit what I had. Other then the dimensions being different, I also used a 2x12" piece of wood cut down to 9x15" for the stool top.
I've documented the process as best as I could at; http://www.tommyandellie.com/Site/Home/Entries/2011/6/13_More_Seating_f…

Built from Plan(s)
Estimated Cost
$0 I used all scrap wood from a previous project
Estimated Time Investment
An Hour or Two (0-2 Hours)
Finish Used
"Rainwater" Martha Stewart Paint
Recommended Skill Level
Beginner
Comments

Thu, 06/30/2011 - 04:50
Wood Filler
I skipped a step that I might redo. I'd recommend taking some wood filler and spreading over the knots and imperfections before painting it. Sand it down, smooth it out, and it'll be Looking flawless.
Thu, 07/07/2011 - 15:02
Awesome job!!
I've been looking for some stools like this, so I followed your lead and just finished making some. Thanks so much for sharing!
Comments
Ana White Admin
Mon, 04/11/2022 - 10:45
Super cute picnic table!
This looks great, thank you for sharing!