Community Brag Posts

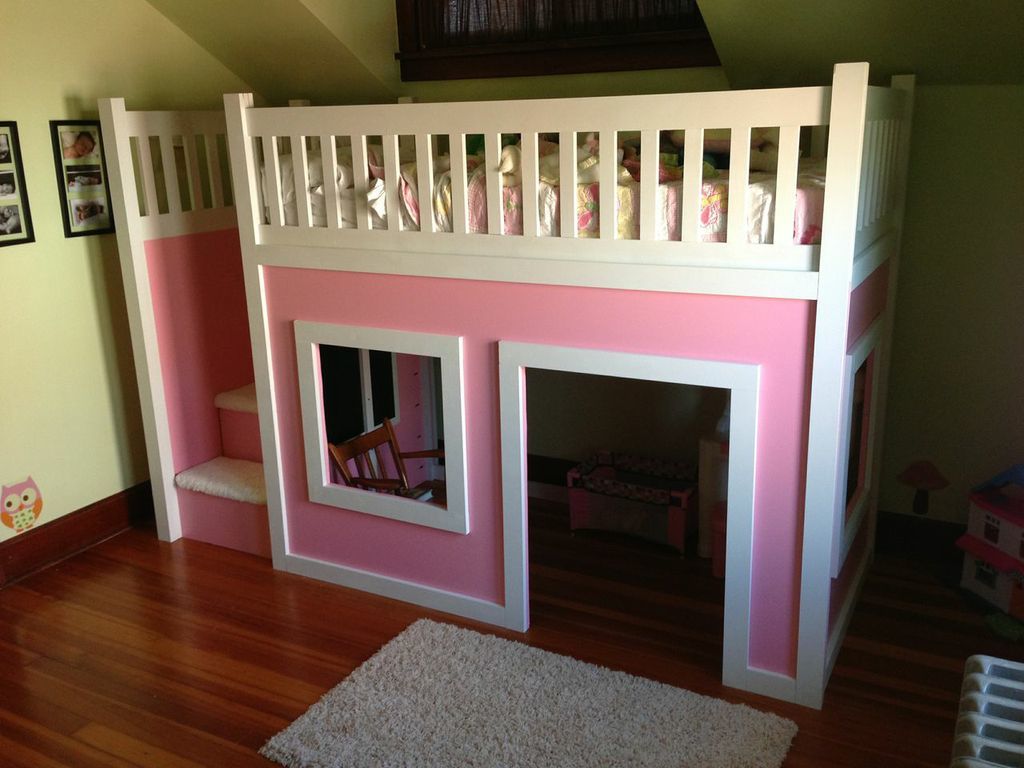
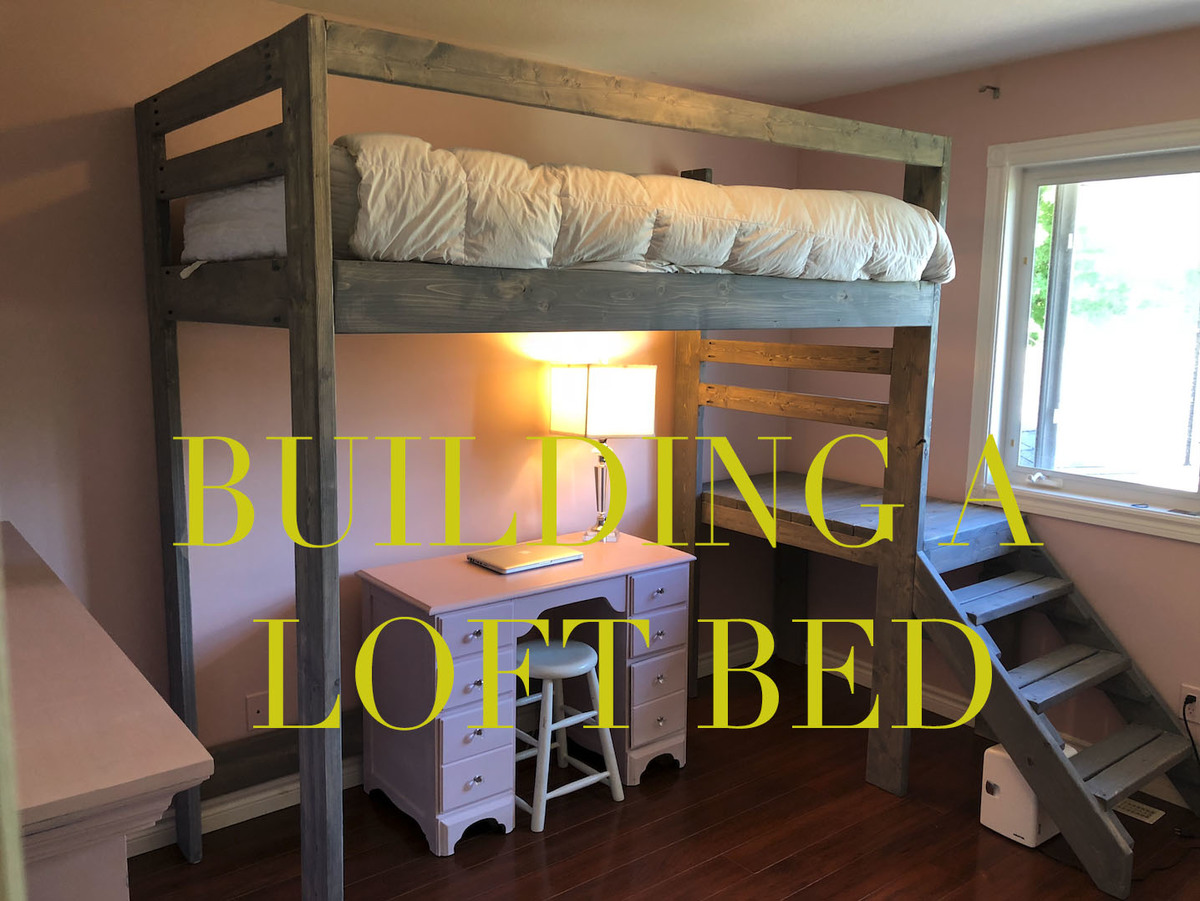
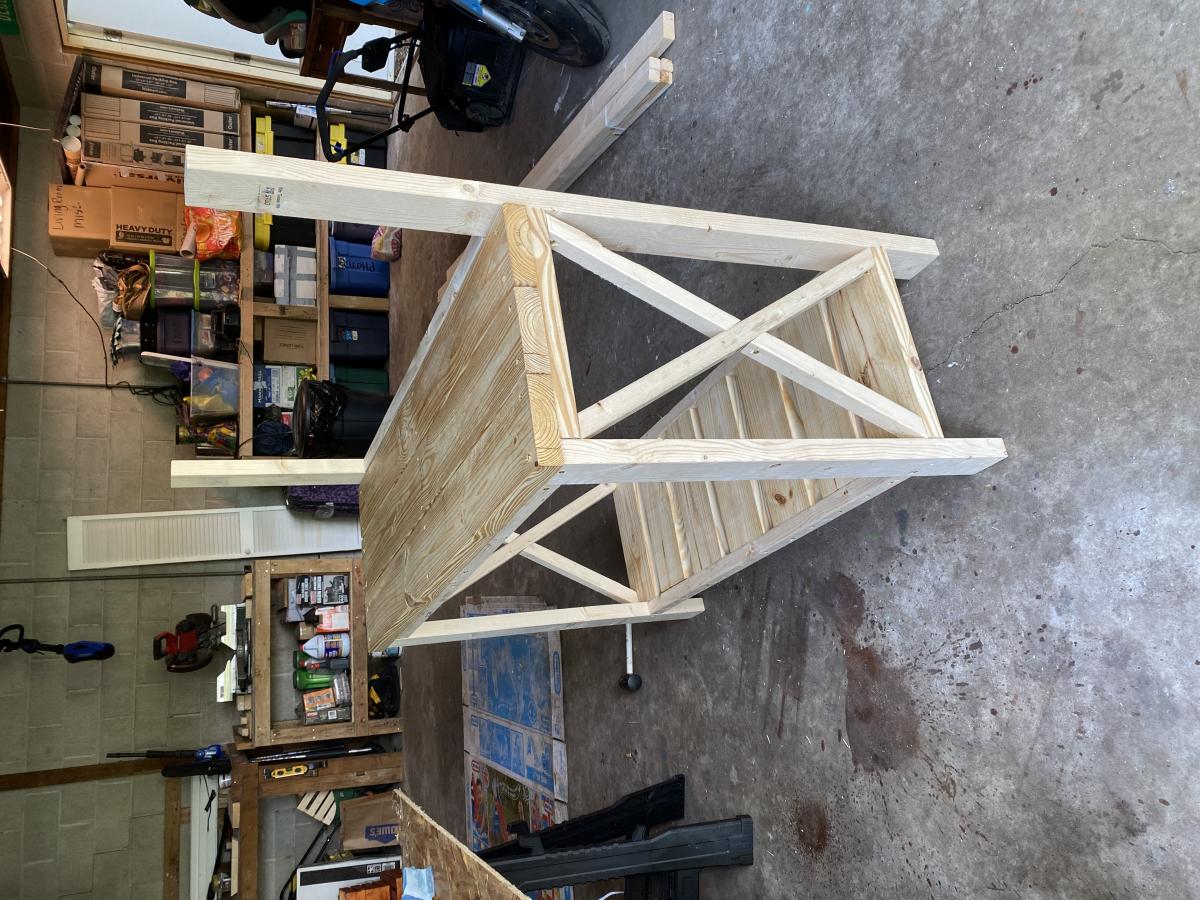
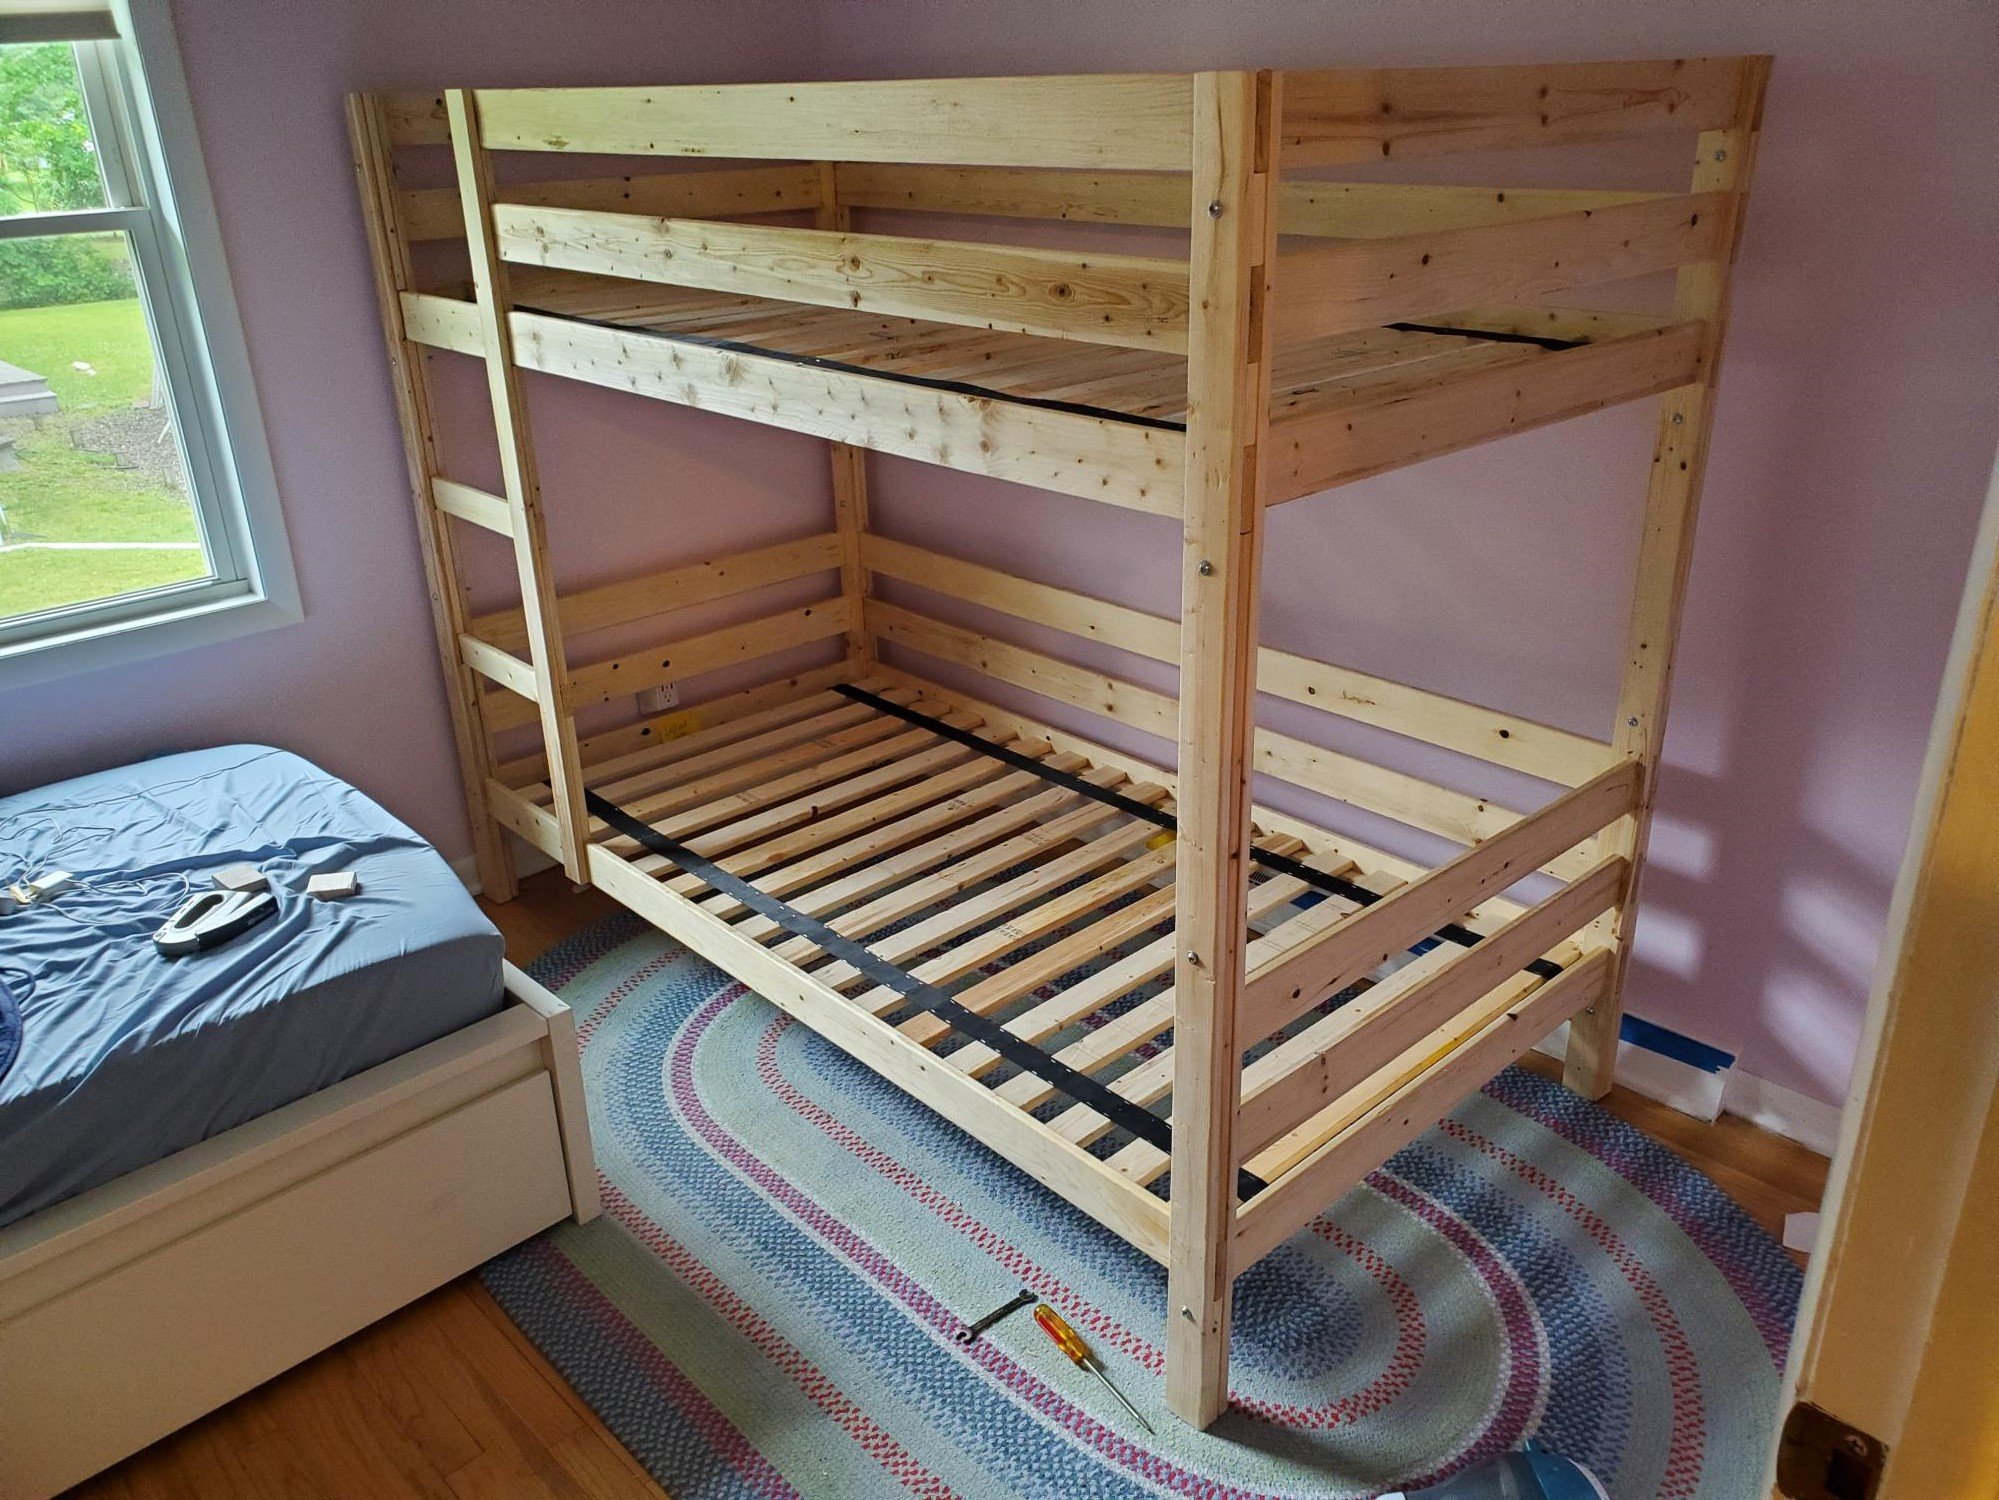
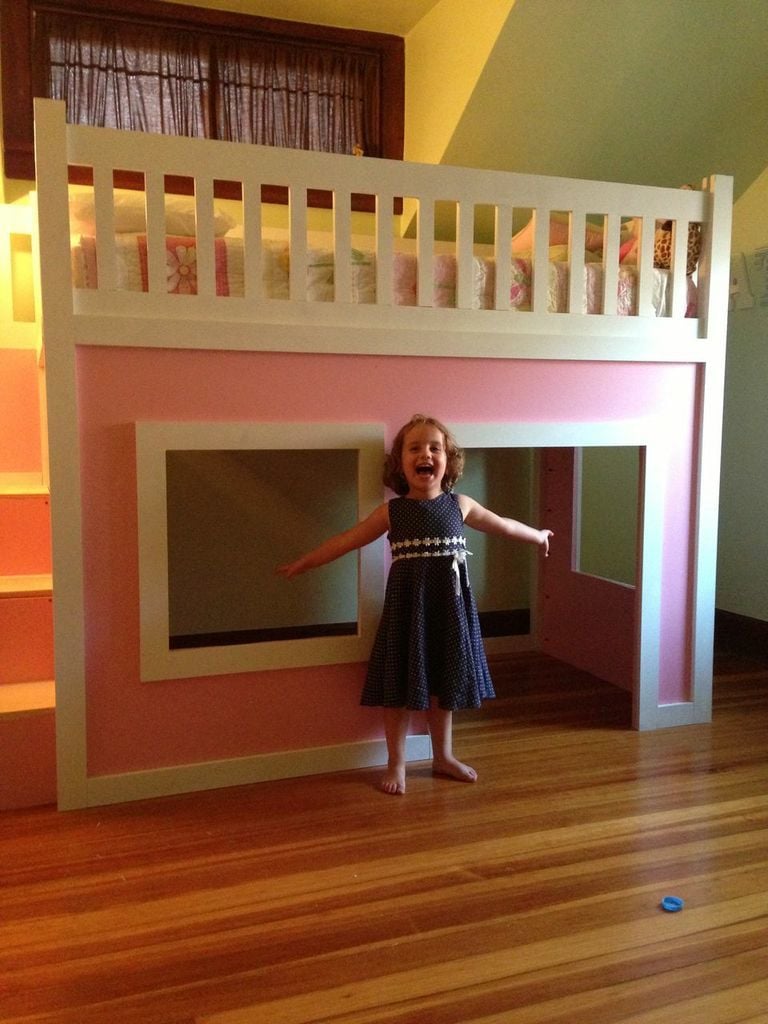
Playhouse loft bed with stairs

Submitted by Benjies on Fri, 08/16/2013 - 13:24

This was my first "real" project other than making a small bench to hold my miter saw in order to make this project! :)

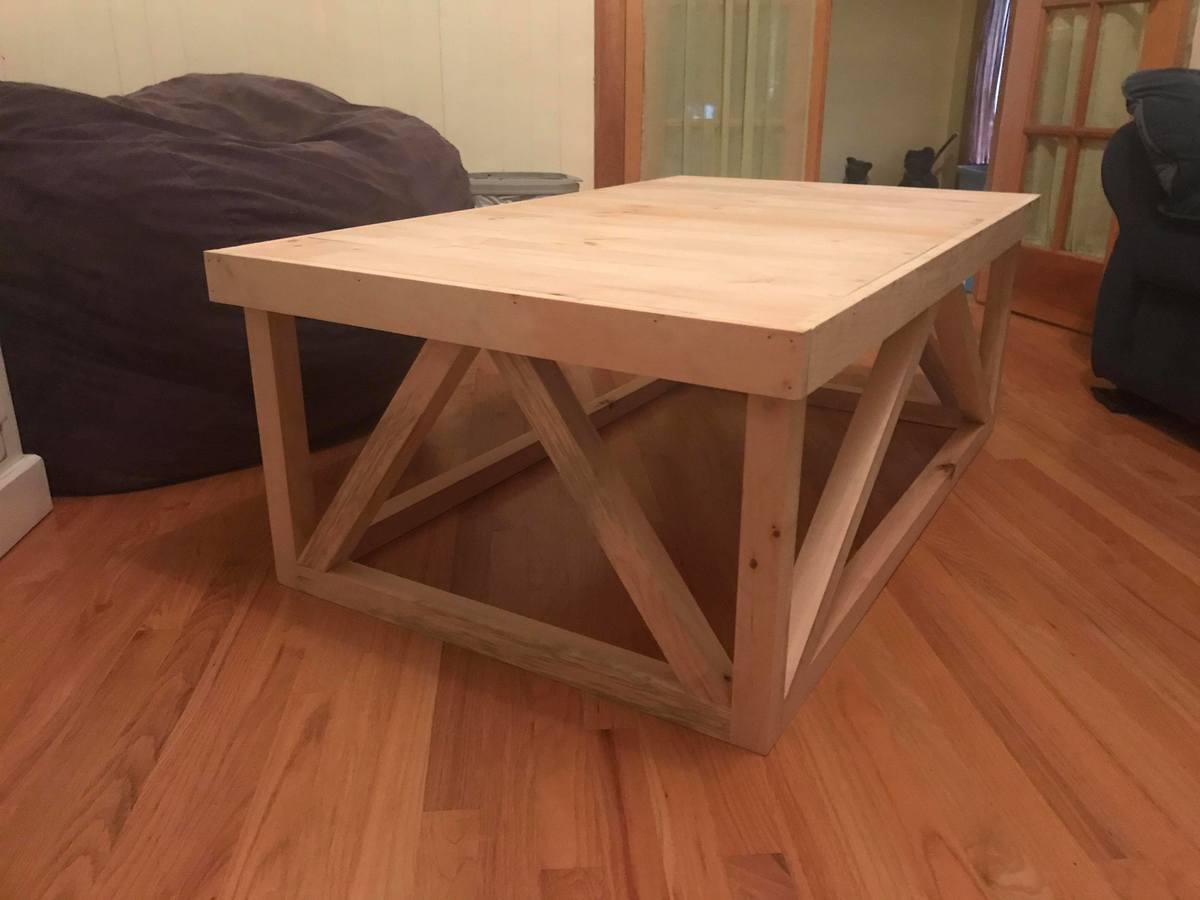
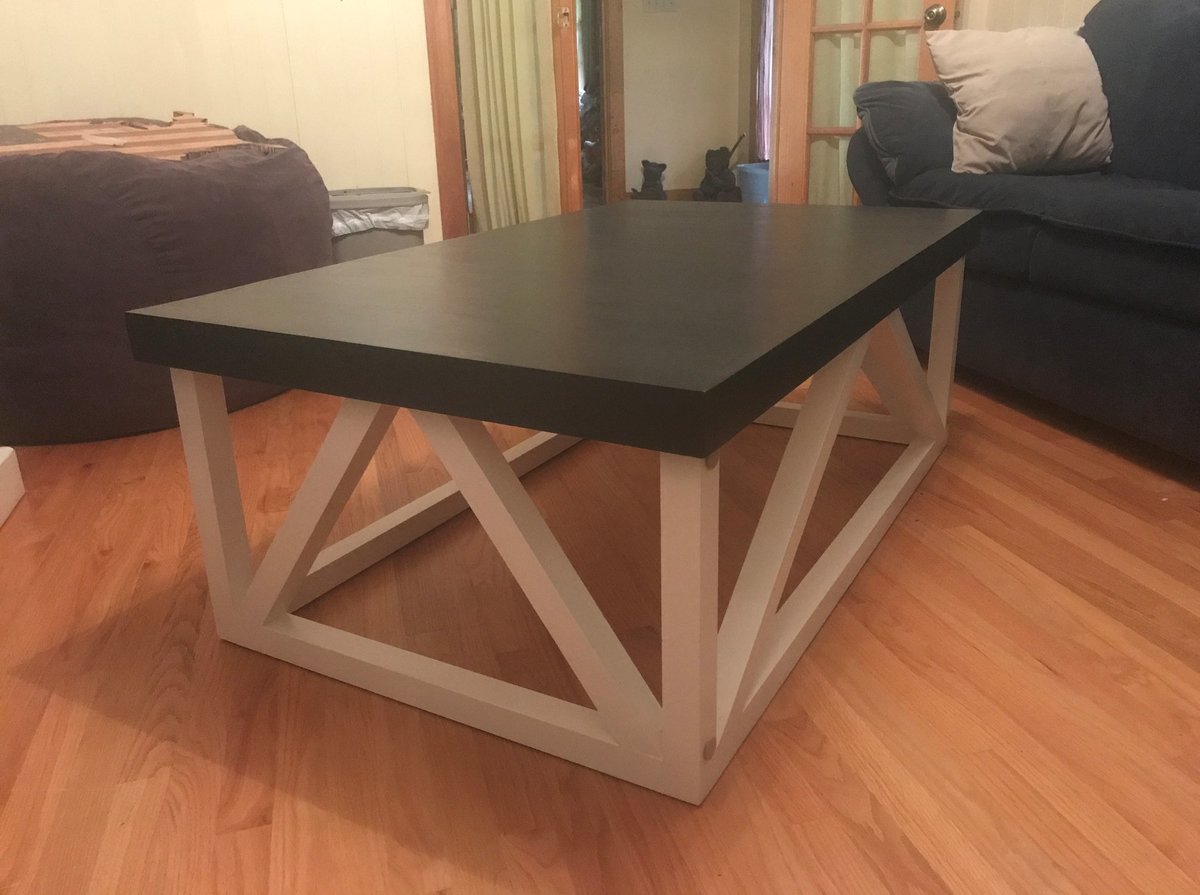
Saw these plans and instantly fell in love. I knew my daughter's birthday was coming up soon (she turned 4) so I got to work!

I used Poplar wood that had different nominal dimensions than the standard making this project not nearly as easy as what it should be. A lot of headaches, but seeing Tatum's smile on her face when we revealed her surprise made it ALL worth it!

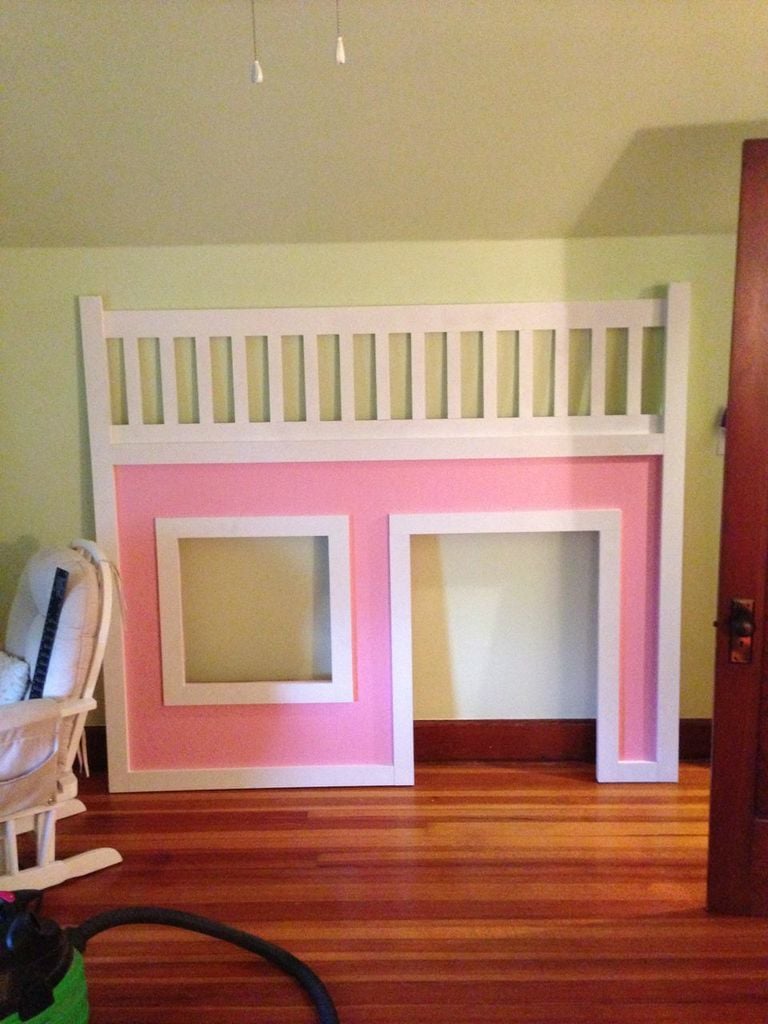
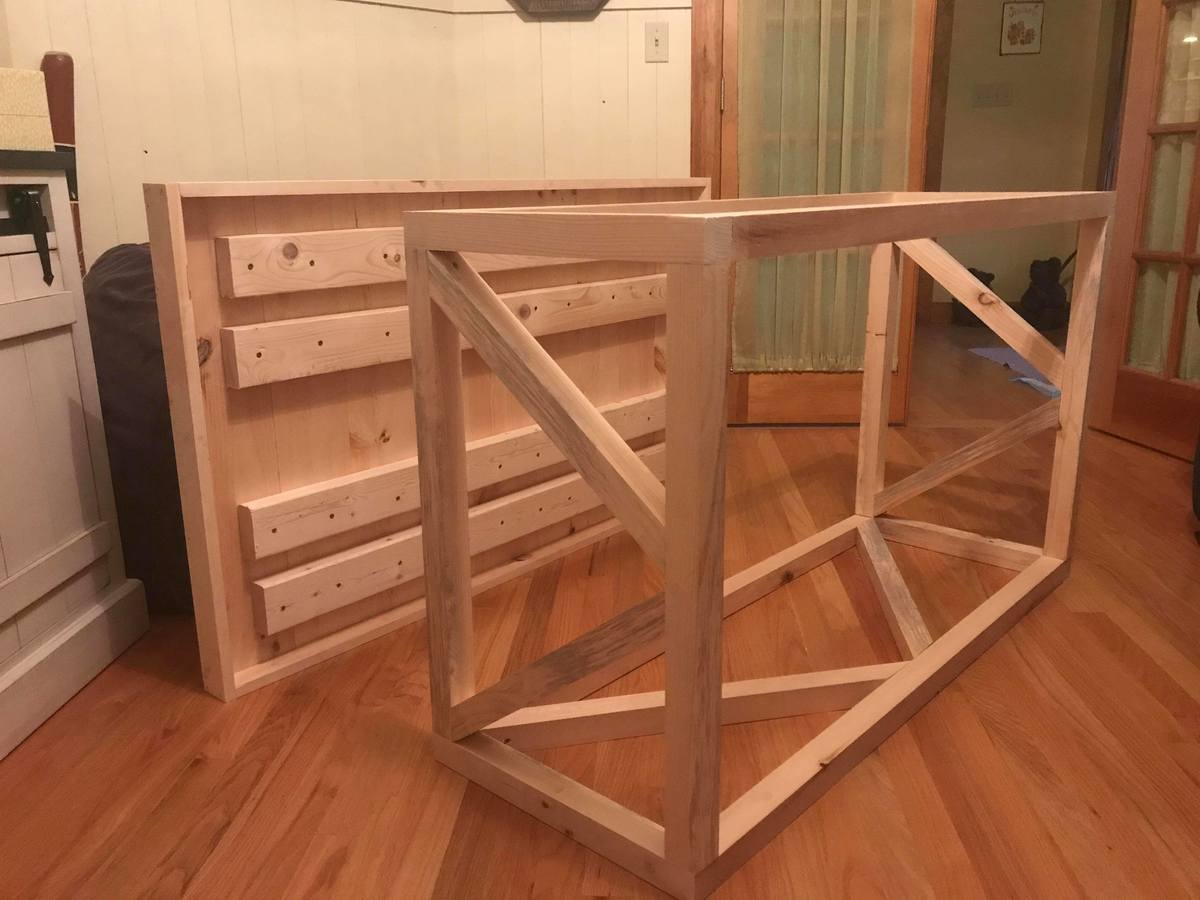
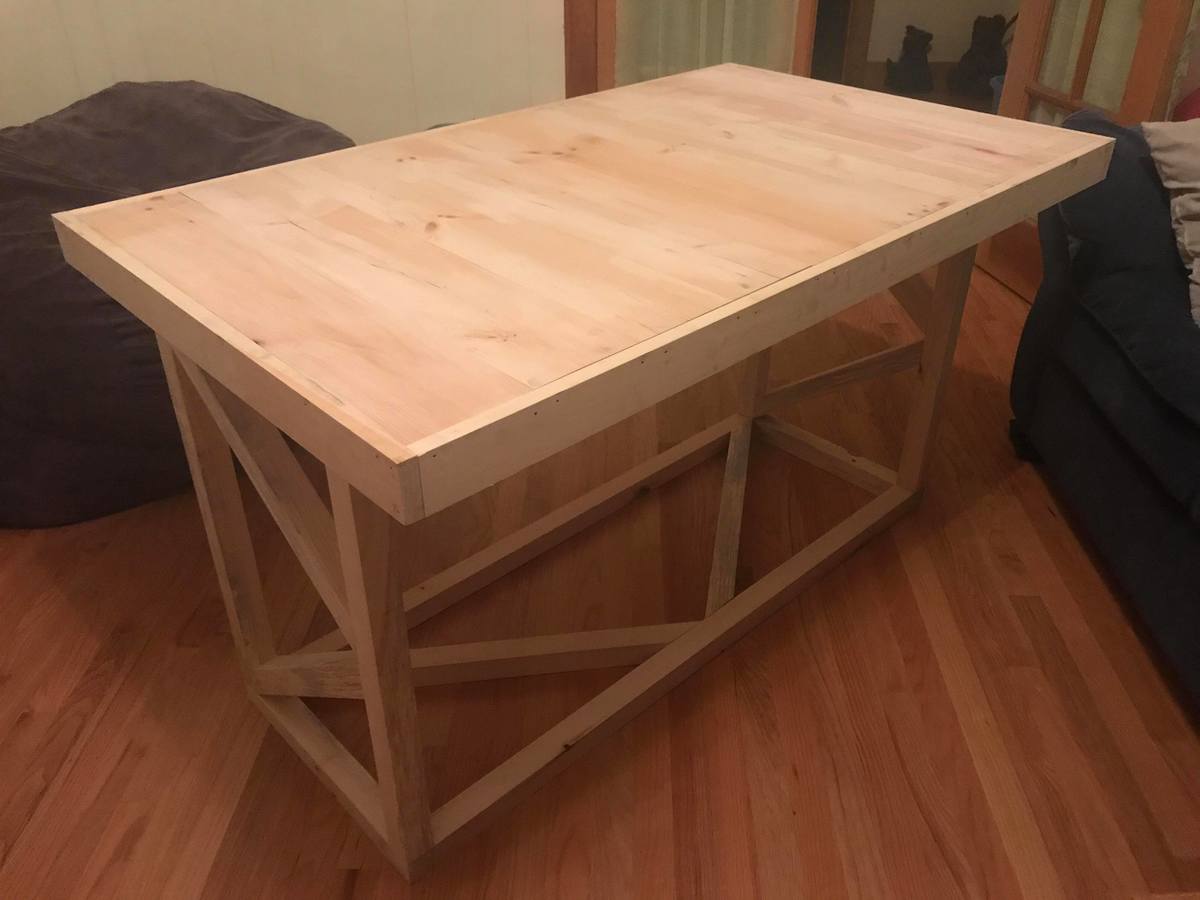
I mostly used my Kreg Jig and Kreg screws. Used my nailer to tack up all trim. used wood screws to secure all of the walls together through the legs.

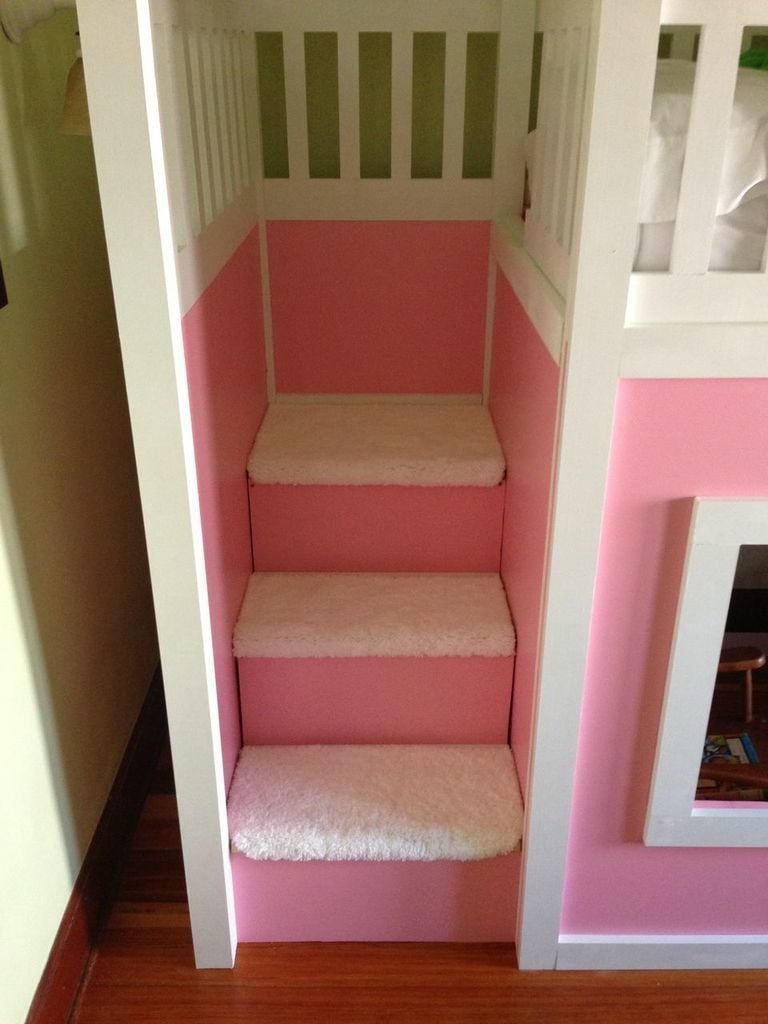
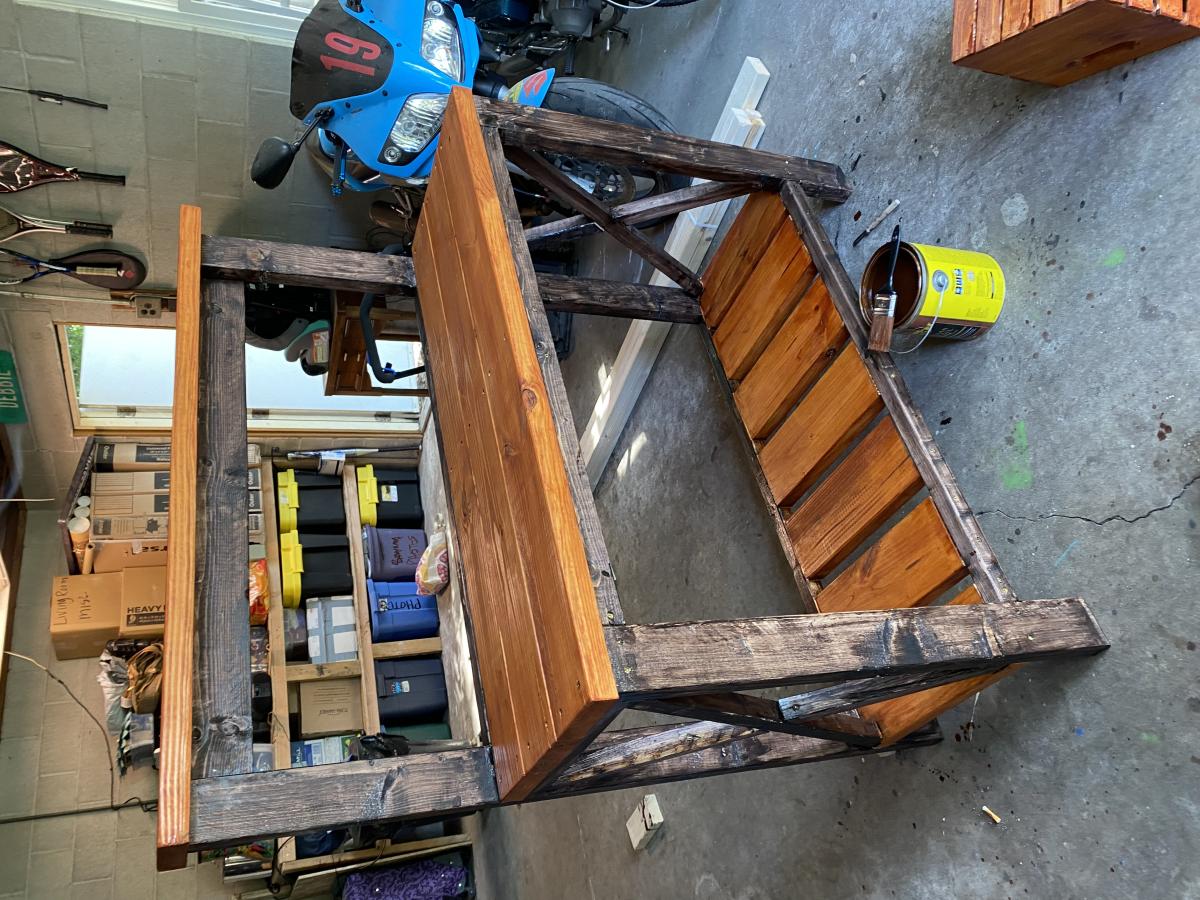
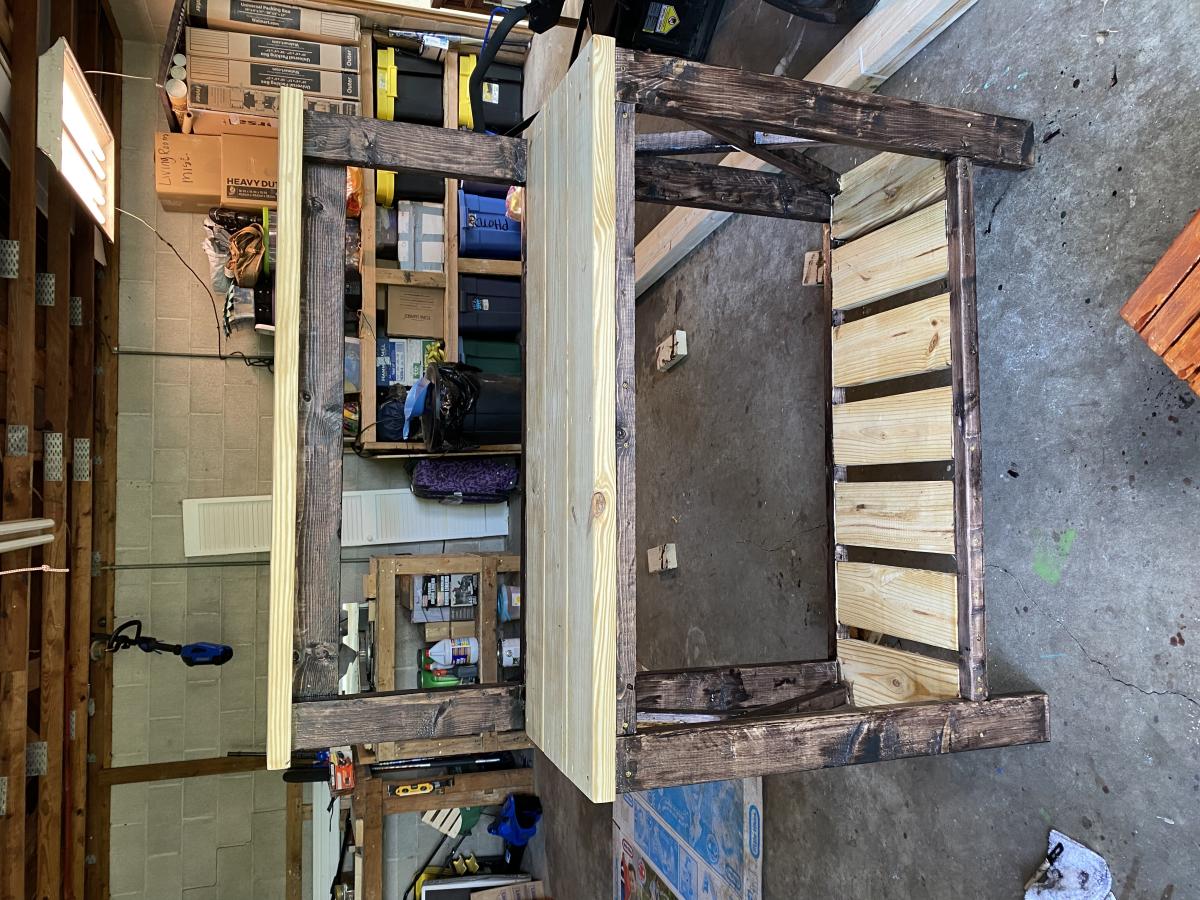
For the stairs, I purchased a large bathmat from Walmart and cut it to fit each step. I tacked it down with some staples and adhesive. I used 12" continuous hinges for the stairs and they worked perfectly.

Keep in mind other expenses, as the bill can increase rather rapidly!

My total wood bill was $398...but I used Poplar. If you go with pine, it will cost you less. $40 for primer and paint. $100 for new twin mattress. $30 for protective mattress cover. $75 for pottery barn quilt set (eBay). $13 for carpet on stairs. $24 for hinges ($8 each)!! $28 for 2 sets of sheets...bringing the grand total to a whopping: $708!

Built from Plan(s)
Estimated Cost
$400
Estimated Time Investment
Week Long Project (20 Hours or More)
Finish Used
2 coats of primer then Glidden latex paint from Walmart.
Recommended Skill Level
Beginner

Hexagon Picnic Table

Very finicky to assemble, but love the finished product!

Built from Plan(s)
Estimated Time Investment
Day Project (6-9 Hours)
Finish Used
Haven't stained it yet, will add photos when stained.
Recommended Skill Level
Intermediate

Loft Bed

Submitted by dgardner on Sat, 08/25/2018 - 16:33

This is my youtube video of me building the loft bed.

https://youtu.be/b5LpGZ87DG4

Instagram:  @gardners_garage


Thanks Ana for your plans.  I used them but made just minor adjustments to the height to suit my daughter.

Having your website defenitly made things easier, from picking up the wood to the cuts!

Thanks!
 

Estimated Cost
$200 Canadian
Estimated Time Investment
Weekend Project (10-20 Hours)
Finish Used
Classic Grey stain
Recommended Skill Level
Beginner

Potting Bench / garage bar

Submitted by Anonymous (not verified) on Tue, 05/31/2022 - 15:46

So easy… about 3 hours to cut and assemble. Will make another one for sure when I go to visit my mom at Thanksgiving. I absolutely love it!

Built from Plan(s)

Comments

Rustic Garden Bench

Submitted by jazberg on Fri, 07/15/2011 - 13:29

The side of our house needed some character, and this pallet wood bench was the perfect solution. Very rustic, very worn, very out of square and poorly measured, yet cute, sturdy, rich and perfect. The weathered rough sawn oak pallet that we made this out of was so heavy it took two to carry out of the weeds it was found in. The bench probably weighs 100 pounds. The hardest part? Getting the 100 year old pallet apart. Bring all your muscles (or a saws all!). Perfect for decoration and if need be a quiet spot to sit and think.

Built from Plan(s)
Estimated Cost
Free! Yeah for free furniture!
Estimated Time Investment
Afternoon Project (3-6 Hours)
Finish Used
Stain. Lightly sanded (no short shorts on this bench!)
Recommended Skill Level
Intermediate

Toddler Picnic Table

Submitted by lmolli84 on Mon, 08/19/2013 - 19:08

My husband and I made 2 of these for my 3 year olds "Picnic Birthday Party", and they worked out great! We will definitely be using them for a while! They took about a week off and on since I just had a little time each day to do them, but I could have gotten them done in a couple easily. Very fun, easy project! We ended up staining the bottom support pieces and painting the top pieces a light blue, I love how it turned out!

Built from Plan(s)
Estimated Cost
$50 per table
Estimated Time Investment
Day Project (6-9 Hours)
Finish Used
Stain/ Outdoor Latex Paint

I ended up cutting out the pieces, and finishing all of them with the stain/paint before we assembled the table. It worked out great! All we had to do after they were assembled is fill in the top screw holes and then paint the table top and bench seat tops.
Recommended Skill Level
Beginner

Comments

JoanneS

Mon, 08/19/2013 - 19:13

This little table is just darling! The picture of your girls at the table is just the cutest thing! Thank you for posting this!

King Size Farmhouse Bed

This was our first big DIY project and I absolutely LOVE the finished product. We now have a solid, sturdy king size bed that everyone loves. The plans were pretty easy to follow although I chose to make the headboard and footboard taller than mentioned on the original plans. The measurements came from another Ana White DIY-er  http://diystinctlymade.com/2014/02/05/diy-pottery-barn-farmhouse-bed/  . For the bed frame, brackets and 2x4s were used. The stain use was dark walnut by Rust-o-leum and finished with minwax polyurethane semigloss. Working on and off, it took us approximately 2 weeks to finish the project; although, I'm pretty sure it could've been completed in a weekend. 

Finish Used
dark walnut stain by Rust-o-leum and finished with minwax polyurethane semiglos
Recommended Skill Level
Intermediate

Entryway console

Submitted by danwade on Tue, 09/18/2018 - 17:23

Entryway console without base pieces to more closely match my other furniture.

Estimated Time Investment
Weekend Project (10-20 Hours)
Finish Used
Nautica shimmering sea paint with furniture was. American walnut stain with clear satin poly.
Recommended Skill Level
Intermediate

Rustic Kitchen island

Submitted by Anonymous (not verified) on Thu, 06/09/2022 - 11:45

We built this island with the top offset so you could use it for stools on 2 sides. It fit perfectly in our daughter's first college house! The plans were easy to follow we added drawer slides and dovetailed the drawer.

Comments

Bathroom shelf

I needed a little shelf on our bathroom wall and I had lots of scraps hanging around. I made this loosely based on one of Ana's plans. I built it around the size of the baskets I purchased at Homegoods and the size of the four towels.

Built from Plan(s)
Estimated Cost
$10
Estimated Time Investment
An Hour or Two (0-2 Hours)
Finish Used
There is some blues in the tile work, so I decided to paint it blue (left over paint). I then distressed the edges with sandpaper and finally used Valspar antiquing glaze over the top. My new favorite top coat is wax, so I finished it off with one rubbing.
Recommended Skill Level
Beginner

Comments

Rustic x desk

Love how it turned out cost a little more if you count stain,wood conditioner..etc wasn't bad still.wood probably cost around 60-70 cheap and better then most anything you can buy.. Lots more to come 

Built from Plan(s)
Estimated Cost
60-120
Estimated Time Investment
Day Project (6-9 Hours)
Finish Used
Minwax, poloyshine blue is transparent behr Wedgwood stain
Recommended Skill Level
Intermediate

Coffee Table - Gaming/Dining Table Combo

Submitted by bknjohnson on Sun, 10/14/2018 - 12:25

My wife was interested in a coffee table that we could also use for playing games or company for meals, and naturally we found just the thing on Ana White's website.  I got some 2x2 pine from a lumberyard after not being happy with box store lumber.  The table top is made of pine glued together.  I decided to put the 2x4s underneath which gave some heft to the top so it does not wobble.  It fits tighter than I would want, so lesson learned for me I should have paid more attention there.  Since we wanted to paint the piece I went with the pine top.  If it were going to be displayed somewhere else in the house, or stained, I would have chosen a harder wood for the top.  The nice part of this plan, I could easily build another nicer top to go with the base if I wanted too.

Estimated Cost
$100
Estimated Time Investment
Weekend Project (10-20 Hours)
Finish Used
Zinsser Bulls Eye 1-2-3 Primer; Valspar Signature interior paint and Minwax Polycrylic. I also tried Minwax One Coat Polyurethane with horrible results. Don't bother with the One Coat. I ended up sanding it off, repainting two coats, and using the polycrylic I usually use with much better results. Light sanding between each coat. Be patient, don't rush.
Recommended Skill Level
Intermediate

Comments

Another successful Classic Bunk beds build

Submitted by Anonymous (not verified) on Thu, 06/23/2022 - 10:06

I followed Classic Bunk Beds instructions with the ladder to the left end instead of the right. I think this by accident though it works out fine in the room either way. It's finished with Danish Oil rubbed on.

Comments

Farmhouse inspired table

Submitted by adidas30 on Mon, 07/25/2011 - 09:12

My first furniture project was Ana's Tryde Coffee Table. All along though, the goal was to learn enough to be able to make a dining room table. I love the coffee table, and I love Ana's Farmhouse table plans, but I was worried about getting food and stuff stuck in between the table top boards.

So I decided to embark on the adventure of learning how to make a solid table top that I could rest on top of Ana's base design. The result is below, and although it took about 6 months of learning, practicing, and prototyping, I am finally done!

Because I made a solid top, I was able to skip the support beams on the base, which hopefully reduced the weight a little bit.

I don't have a blog, but I added some additional comments in my Picasa Album.

Estimated Cost
$600 total -- The 2 inch thick ash was expensive -- and still half the price oak!
Estimated Time Investment
Week Long Project (20 Hours or More)
Finish Used
For the stain, I used General Finishes Medium Brown. It is similar to Minwax Special Walnut, which I used on my pine coffee table, but it looked a lot better than the Minwax on the Ash. For the finish, I used Minwax Polyurathane, thinned 50% with mineral spirits (Paint thinner), and wiped it on with old t-shirts. No brushing required (which means no brush strokes), but as it is thinner you need more coats. I have about 3 coats on the bottom of the table, 4 coats on the legs and base, and about 7 coats on the table top. After much research online, it seems that the general wisdom is that if you want a satin finish, you should use the gloss for all coats except for the last 1 or 2 coats, and that is what I did. 2 satin coats on top, and 1 satin coat on the base. The reason is that the satin has "flatteners" in it, and that if you do all coats with satin, it could get a little cloudy. Hope that quick summary helps.

I bought Minwax paste finishing wax, that I plan to run on the top within the next week. I was told that helps protect the polyurathane, and gives it a nice rubbed look. I tried it on a test piece and although it looks good, I didn't think it made a huge difference in looks.
Recommended Skill Level
Intermediate

Comments

Crystal_thenewgirl (not verified)

Thu, 12/22/2011 - 11:52

You said you prototyped and practiced, but what did you actually do to make it a solid top????

claydowling

Thu, 12/22/2011 - 13:53

He did was is known as a panel glue-up. They aren't terribly difficult once you've done one. The first one is exciting though. My technique is a bit simpler than what he used, but everyone needs to adapt a method suited to their available tools and knowledge.

If you want to try something like this, check local sawmills and timber suppliers first. adidas30, around here (Ann Arbor, MI), I can lay hands on a single slab of oak or walnut big enough for that table for half to a third that price. The bigger challenge is finding a friend with a big enough truck who is also strong enough to help me shift that beast. Still, what you paid is way less than what you'd pay to buy a table like that.

adidas30

Wed, 01/04/2012 - 10:46

Crystal: Take a look at the blog link in my post. It links to a picasa photo album that shows a few of the steps along the way. Clay is exactly right. Now that I have done one, the next will not be so bad. It took a long time to learn how to do it right the first time, but it was really fun and extremely satisfying.

Clay -- I'm jealous. I felt silly spending so much on the Ash, but it was half the price of the oak. I think the ash was around 4 dollars per board foot, and the white oak was 7.80 per board foot. Good lumber yards are hard to find in DC. I had to venture over to MD.

Straight leg farmhouse table

Slightly based on Ana White's husky farmhouse table, this table has 4x4s as legs and a nice, thick planked top with breadboard ends. It will easily seat 6 and will seat 8 in a pinch! I also build a bench to match, using the same concept, just smaller dimensions.

Built from Plan(s)
Estimated Time Investment
Day Project (6-9 Hours)
Finish Used
I used a combination of golden pecan and dark walnut stain on the top. I painted the legs black and used Rustoleum's polyurethane in semi-gloss to seal the whole thing.
Recommended Skill Level
Beginner

Comments

spiceylg

Fri, 08/23/2013 - 09:26

I concur with JoanneS. Love the stain on the top and I also love the two tone look. Beautiful build!

Under the Sink Storage

My under the sink door cabinet is smaller than what's on the plan so i had to improvise.  A paper towel dispenser won't fit anymore so I just made another shelf.  I love it.  No clutter and everything is so organized. :) 

Estimated Time Investment
An Hour or Two (0-2 Hours)
Finish Used
I painted it with the same color as my kitchen cabinets SW Urbane Bronze
Recommended Skill Level
Starter Project

Thank you, Ana, for the easy plans for a great table!

Submitted by Anonymous (not verified) on Wed, 10/17/2018 - 13:29

I made the table from rough-cut cedar that was harvested on my father's land. All I spent was $16 on Danish oil and $5 on sand paper but its priceless to me. Thanks Ana!!!

Estimated Cost
$25.00
Estimated Time Investment
Afternoon Project (3-6 Hours)
Finish Used
Danish oil
Recommended Skill Level
Beginner

$20 DIY Cedar Planter

Submitted by Anonymous (not verified) on Fri, 07/01/2022 - 06:09

This is the 1st planter I have ever made! Thanks Ana, plans were easy to follow! I shared with my brother, and he said "I'm impressed!", I said "Me too!"
It isn't perfect but I love it! Started 2 more, just 1 inch smaller on both sides. Thanks again, great project to help with fears and confidence!

Comments

Queen Farmhouse Bed with Arch

Submitted by perchik on Fri, 07/29/2011 - 11:34

I build the Farmhouse Bed with Arch in queen Size. I built this over the course of a couple days and then finished it slowly over a month. I did modify the bed to have a 6 inch taller footboard. Also, the mattress I have has a low profile box spring that's only 4 inches tall. The mattress itself is about 10 inches tall.

Additionally I changed the plans a little bit to make it modular. The legs of the headboard are mounted on with bolts and the side rails are also bolted on. This allows me to take it apart and move it fairly easily. The other modification I made was because I couldn't find untreated 4x4s. I ended up using two 2x4s with a 1x4 in the middle. Cut everything separately and then glued/nail-gunned the leg together.

Also in the extra pictures you can see the set of Tryde tables I made at the same time. That post will come once I get a finish on them.

Built from Plan(s)
Estimated Cost
120$
Estimated Time Investment
Weekend Project (10-20 Hours)
Finish Used
I sanded it with 80grit, 120grit and then 220grit sandpaper. Then I applied MiniWax PreStain Conditioner before staining. I used one coat of Cabot Oil Based "Autumn Harvest" stain [this was one of the colors they have to mix at the store for you.] After that I applied two coats of High-gloss Polyeurathane.
Recommended Skill Level
Beginner

Comments

benfoldsfivealive

Fri, 07/29/2011 - 14:14

Are you kidding? That's a lot of stuff you just built, and it ALL looks amazing!! I am really loving the autumn harvest stain. :)

Patrick (not verified)

Fri, 07/29/2011 - 20:05

Thanks! Everything was built in a week but I did have the advantage of a nailgun and lots of time.

chris.allen5 (not verified)

Thu, 11/10/2011 - 19:56

how did you mount the side rails to the foot board?

First Project!

Submitted by meg_odom on Sun, 08/25/2013 - 16:09

My husband and I built this as our first project & are thrilled with the way it turned out! We shortened it to 44" to fit our space. It took us a few hours but we got the Kreg Jig working the first try (though on a current project it is giving us some headaches). We really enjoyed building this on a rainy Saturday and received many compliments after posting the finished project on facebook. Looking forward to our next project - thanks so much for all your tutorials Ana & other submitters!

Built from Plan(s)
Estimated Cost
$100
Estimated Time Investment
Weekend Project (10-20 Hours)
Finish Used
Minwax Early American (1 coat) with Minwax Satin Poly (2 coats, brushed) for the top & shelves; Olympic Bewitched Satin (high grade with primer).
Recommended Skill Level
Beginner

Comments

Cameron nightstand

Submitted by TMW on Thu, 10/08/2015 - 07:18

After I built the dresser for my son, he decided he needed a nightstand. This was his project, I only advised and offered assistance. He was 15 and he came up with the design and we glued up the panels. He cut, sanded and assembled himself. He stained and applied the shellac. I am very proud of him.

Estimated Time Investment
Weekend Project (10-20 Hours)
Recommended Skill Level
Beginner