Community Brag Posts

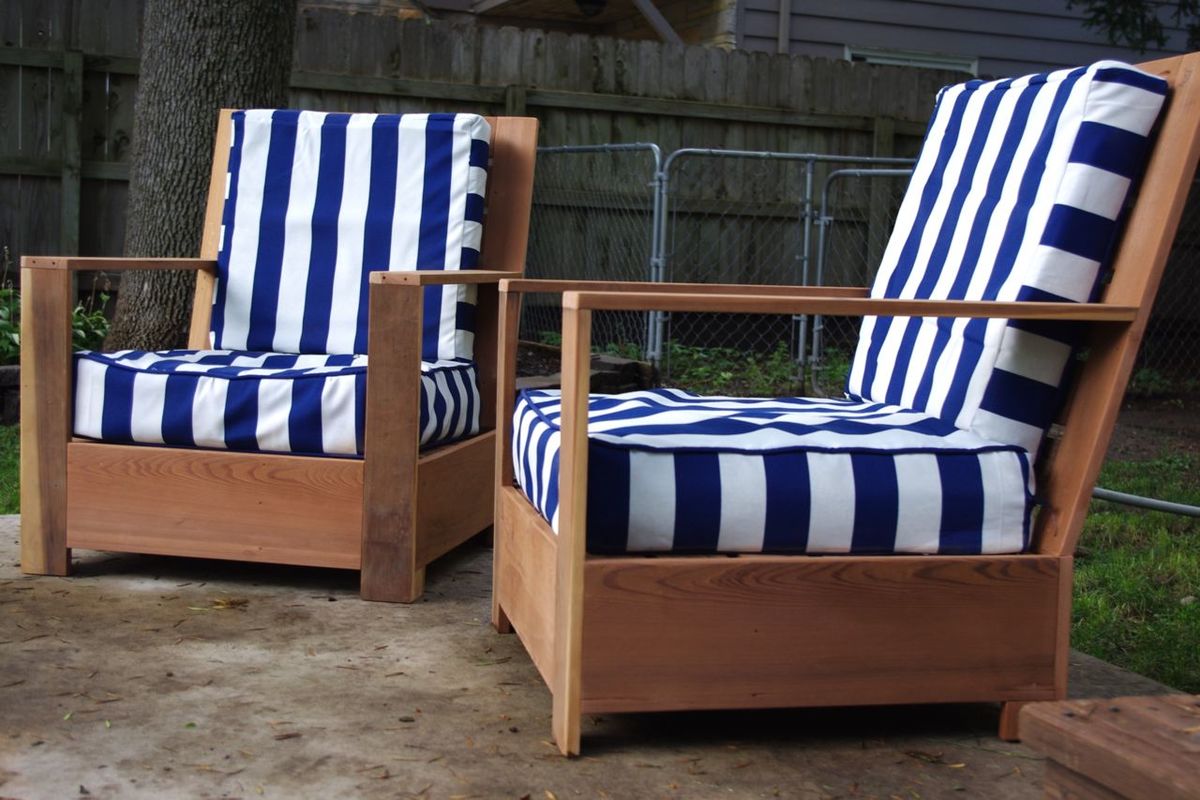
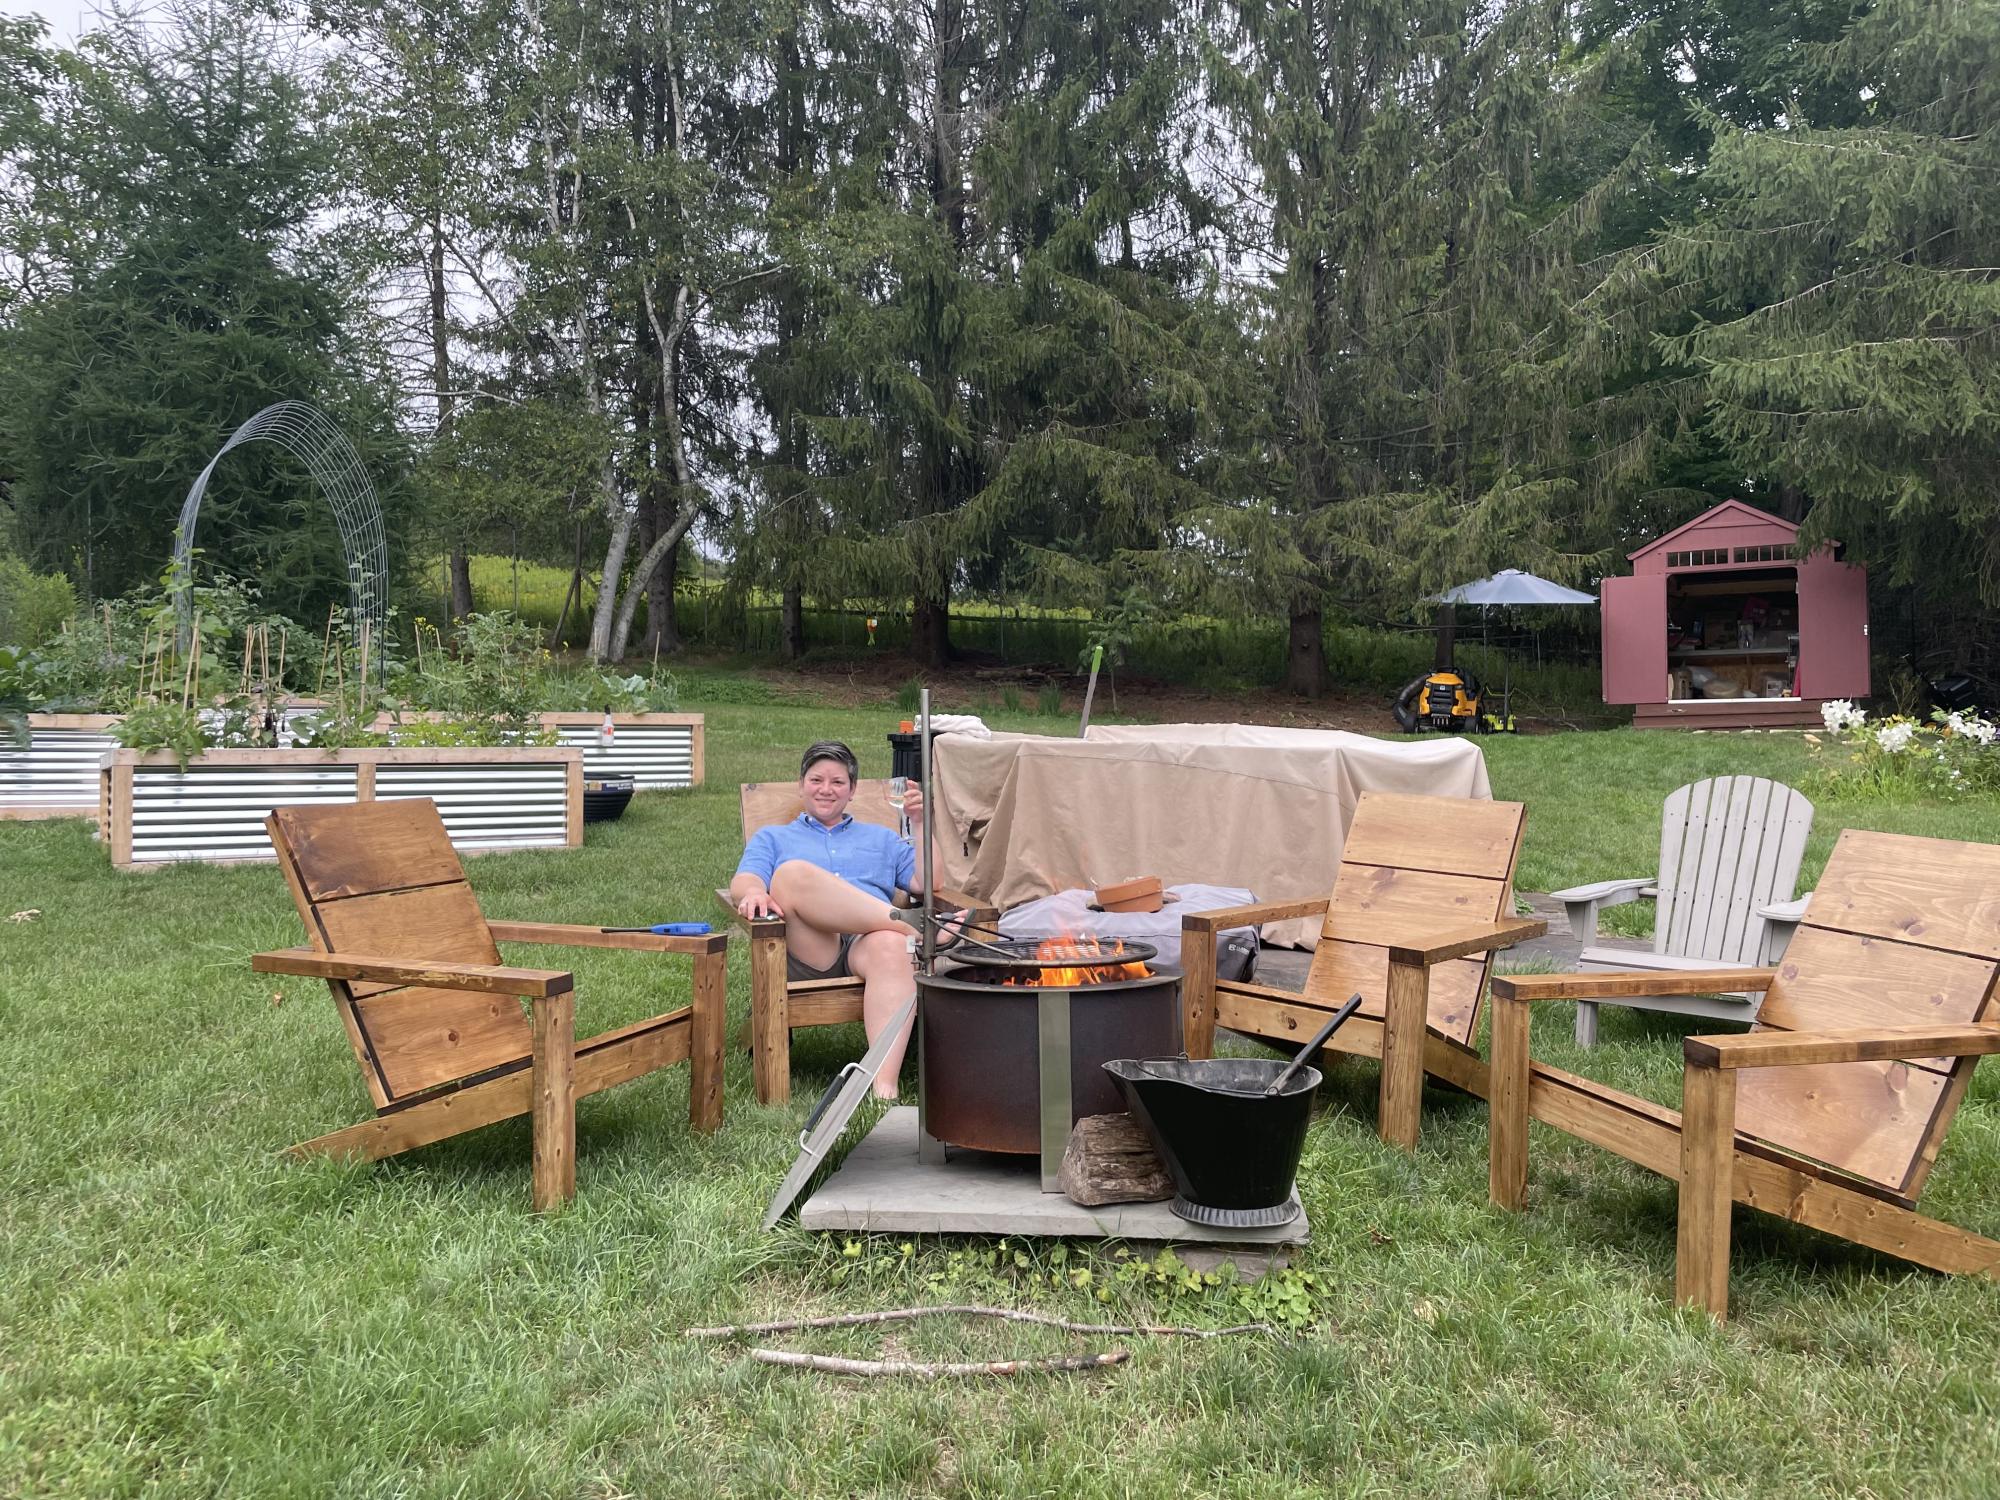
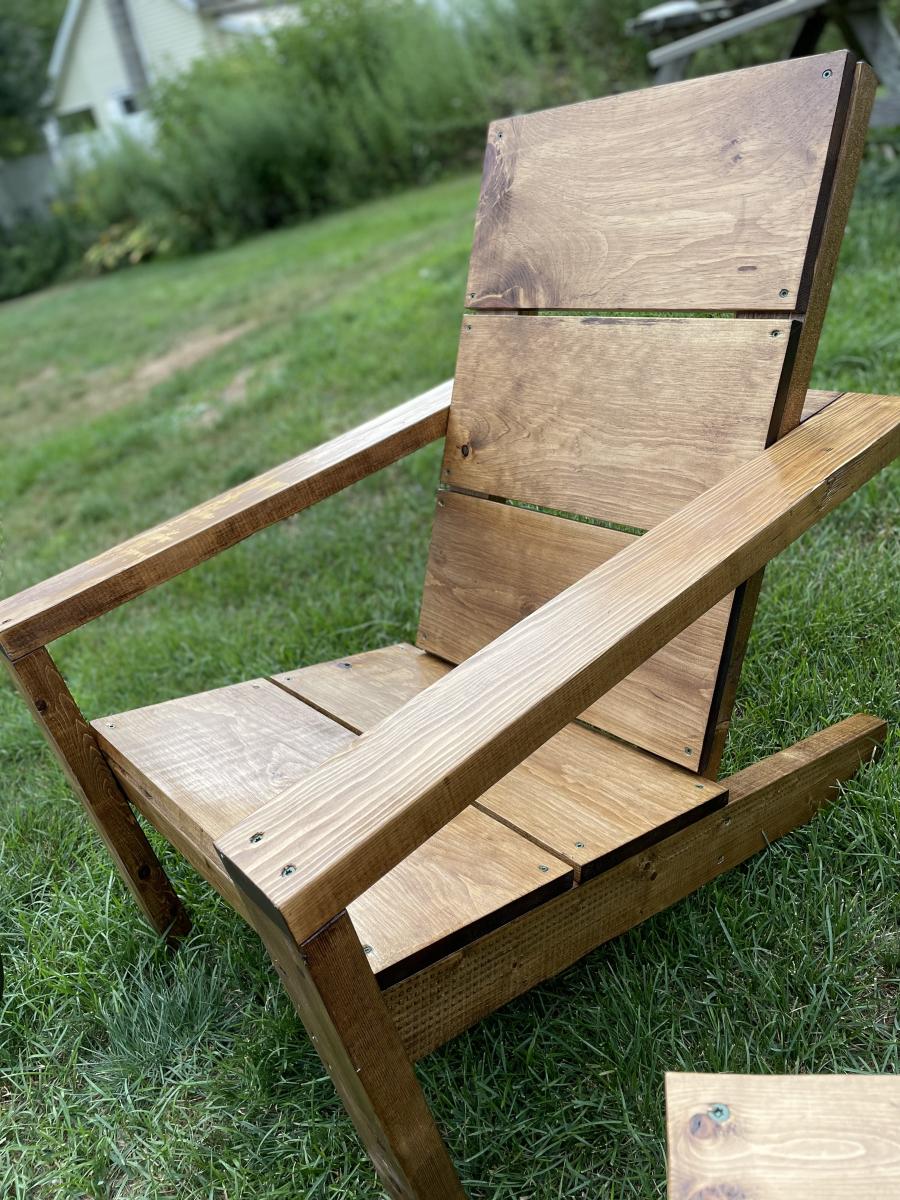
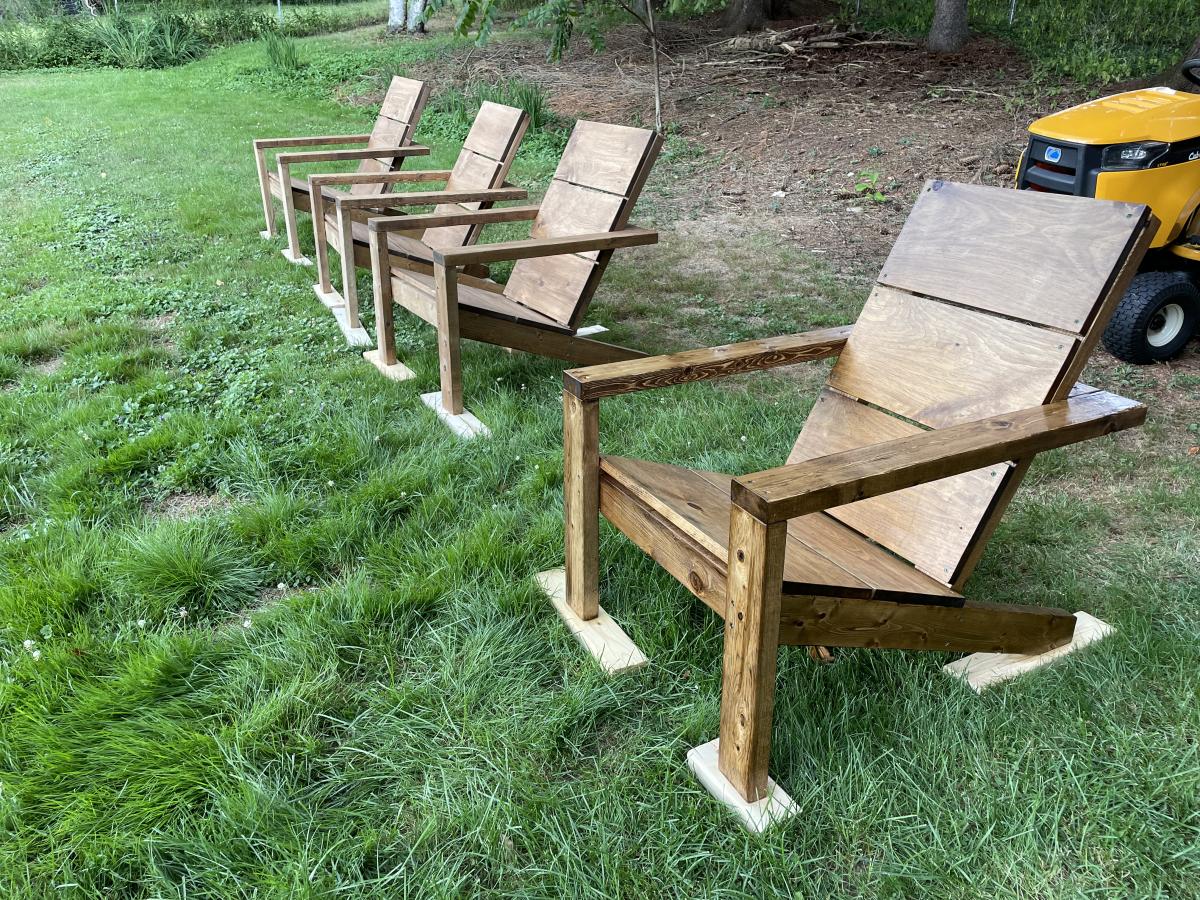
Bristol Lounge Chairs and Love Seat

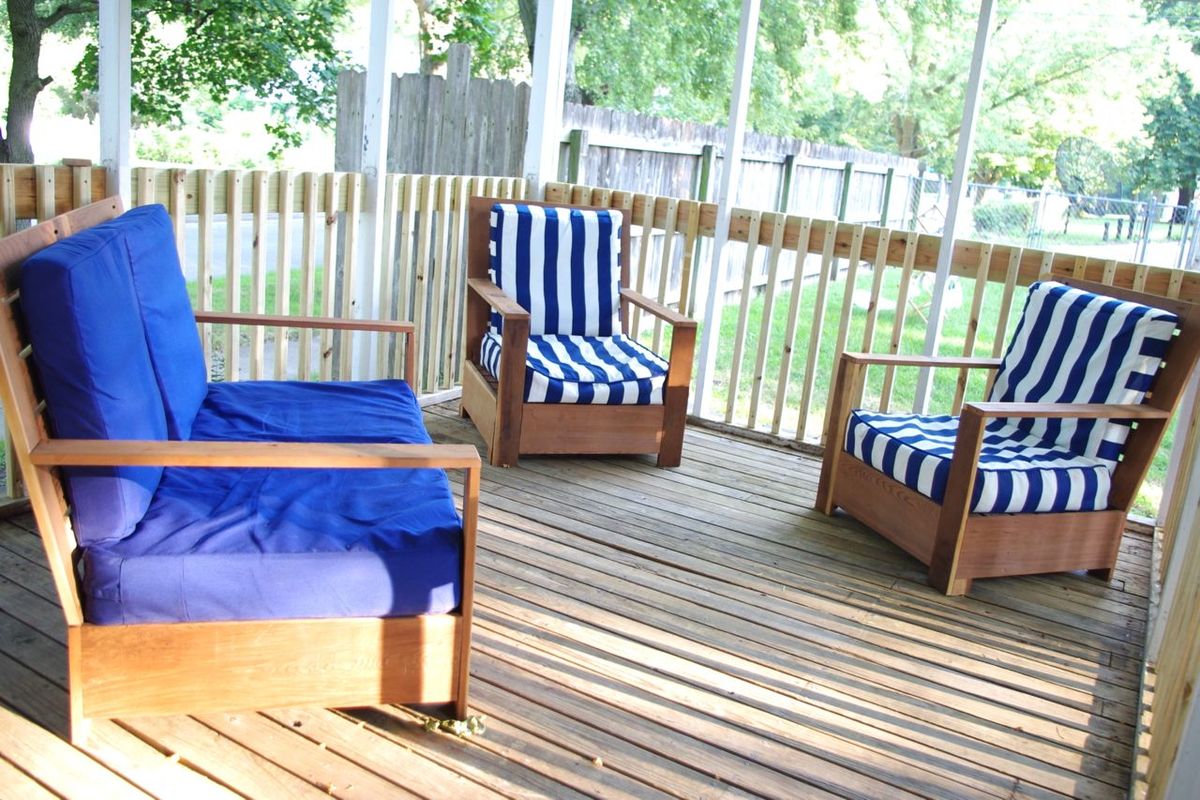
I loved this lounge chair when I saw it posted. After contemplating them for awhile they became my first building project.

Unfortunately, the cushions from the original design were to expensive for my budget. I resized the lounge chairs to fit cushions I found at my local big box store.

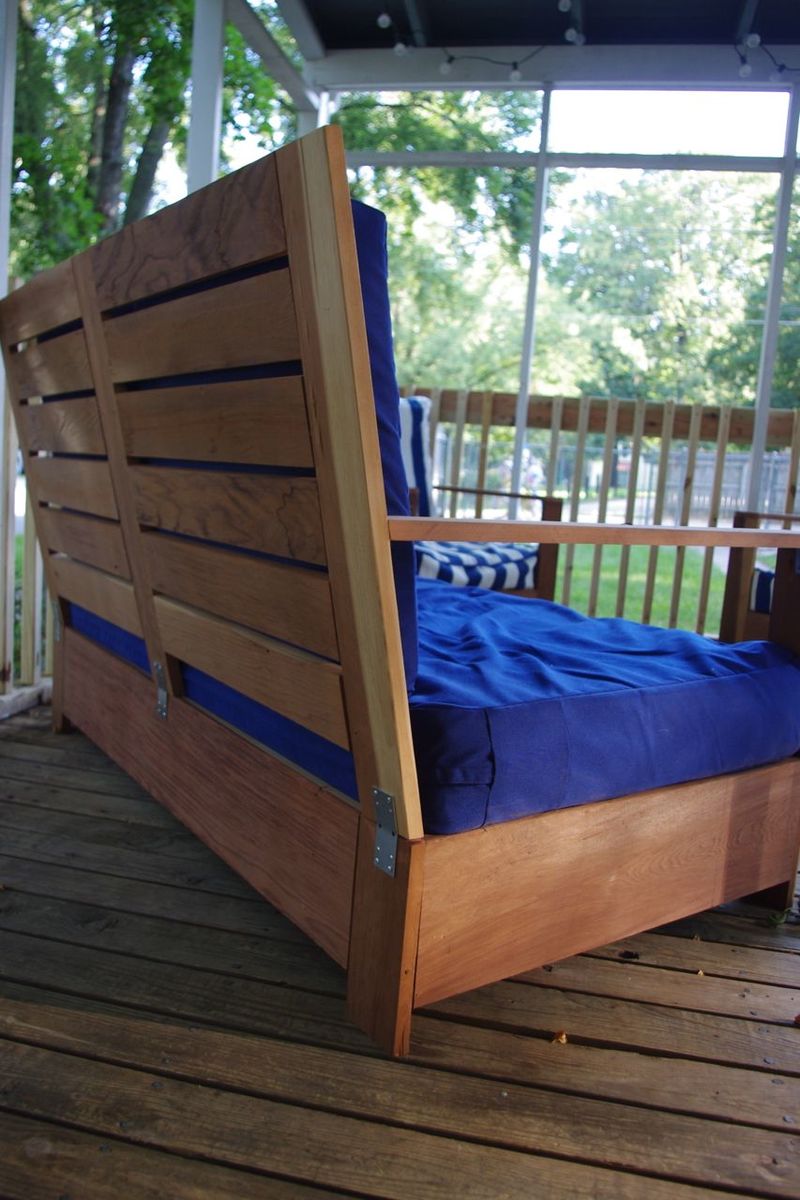
A couple of weeks later I made the loveseat using these plans: http://www.oldpaintdesign.com/2012/03/05/bristol-outdoor-loveseat/. The also resized the loveseat and made it to fit the same back cushions as the chairs and a crib mattress for the seat. I also added three more cleats to add sturdiness to the seat.

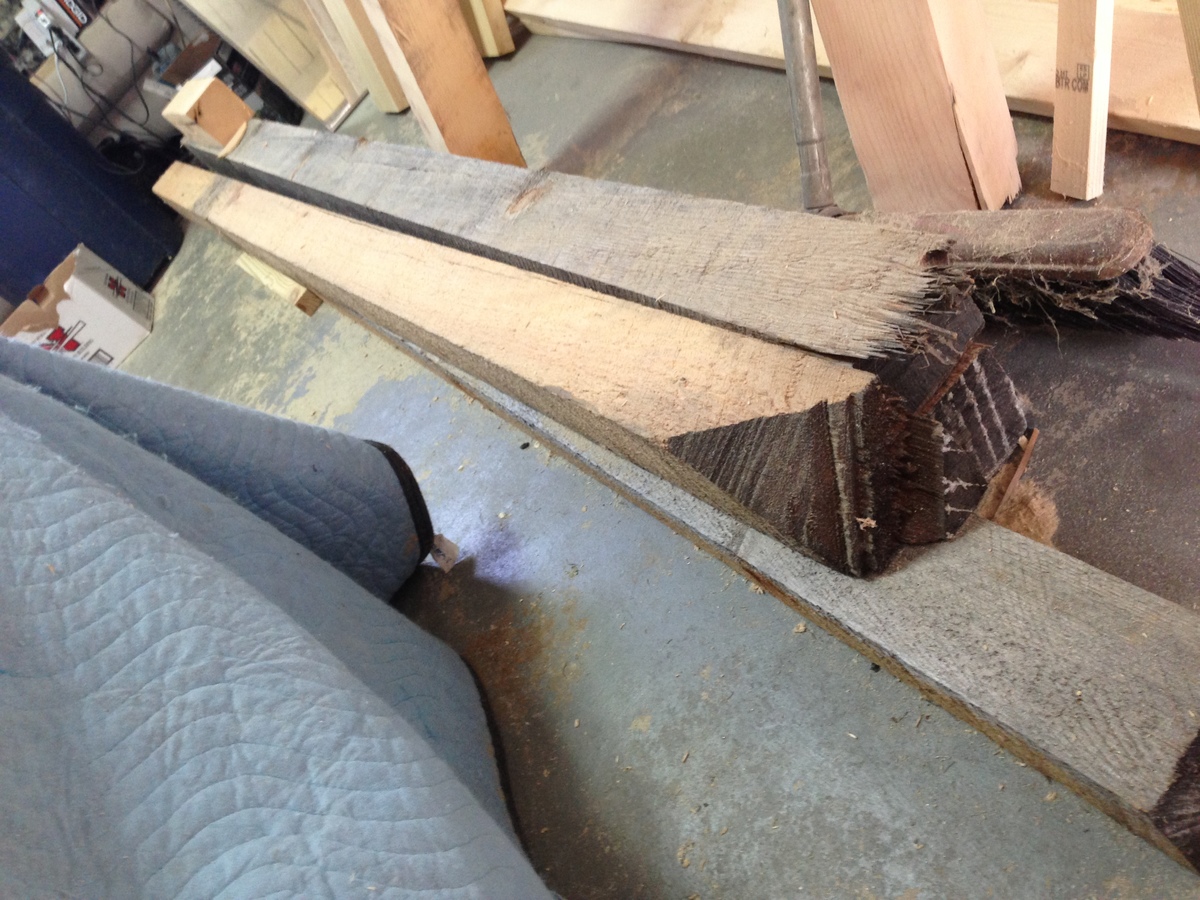
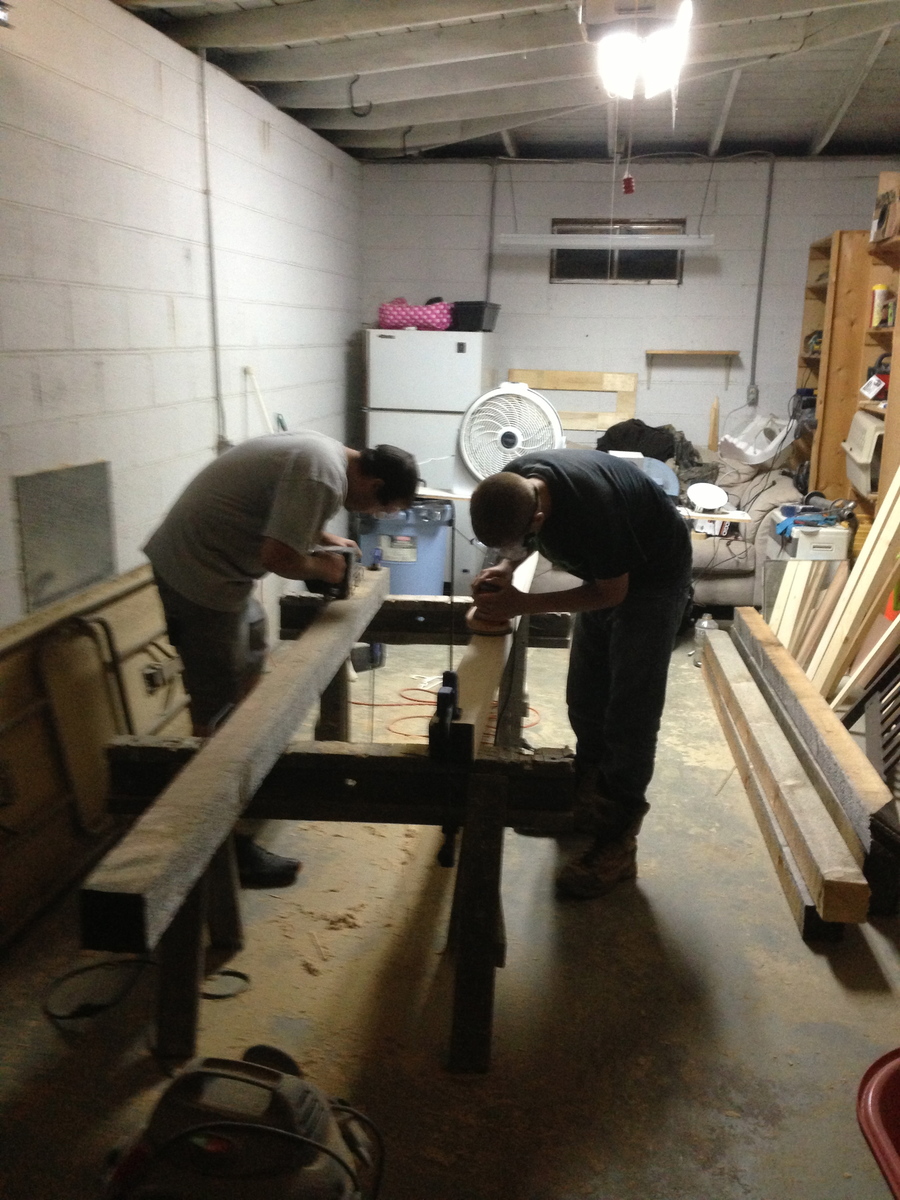
I was able to use cedar that I reclaimed from an old sauna in our basement. So, the wood was free to me!

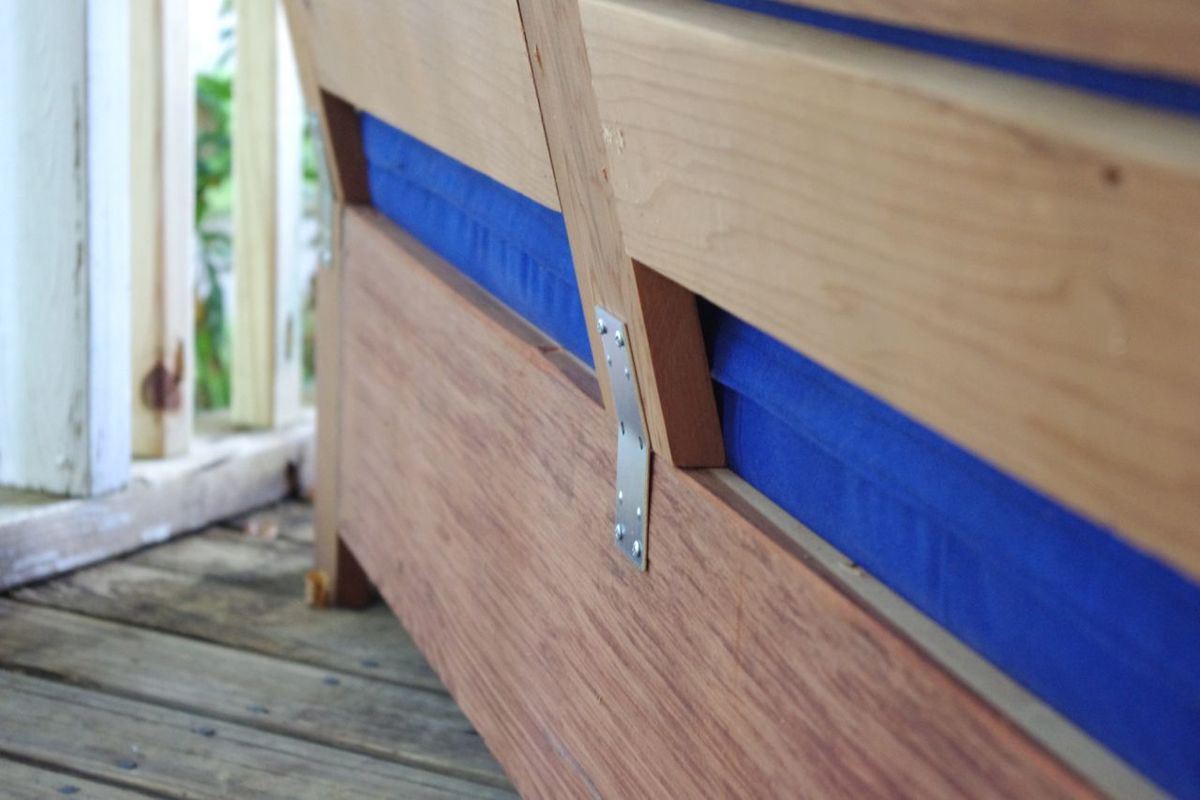
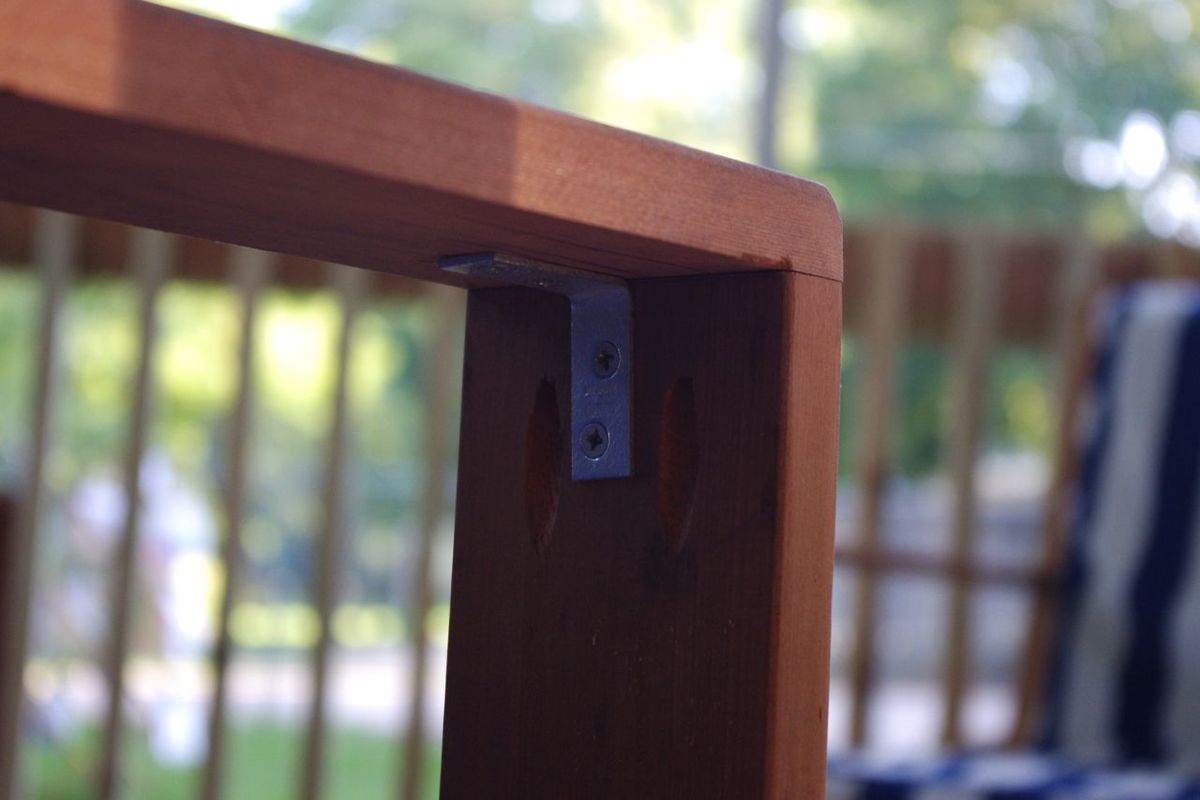
After using the chairs and loveseat a couple of times two of the arms popped off the front. As a result, I added some extra sturdiness to both the arms and to the angled back.

To the arms I added "L" brackets. For each back I added "mending braces".

I'll be adding more information about the modified dimensions and cut list I used on my blog: http://amilliontinylittlethings.blogspot.com/2013/08/bristol-lounge-cha….

I'm very happy with the furniture! Thank you Ana White and guest poster, Shane, for inspiring me into this new hobby!

Built from Plan(s)
Estimated Cost
$200
Estimated Time Investment
Week Long Project (20 Hours or More)
Finish Used
I haven't finished the chairs yet. Will likely just use a waterproofing sealer.
Recommended Skill Level
Beginner

Twin Farmhouse Beds

Submitted by lmshaffer on Thu, 10/08/2015 - 09:05

We made the headboards 7" shorter because the collage wall was already on the wall. Also, we used plywood instead of slats for support for the mattresses. Oh, and we had to trim the side rails to 75". Overall, it was a quick and simple project!

Built from Plan(s)
Estimated Cost
$150 each
Estimated Time Investment
Weekend Project (10-20 Hours)
Finish Used
white acrylic paint applied with a cantankerous paint sprayer
Recommended Skill Level
Intermediate

Flip top table

Submitted by Anonymous (not verified) on Sat, 10/27/2018 - 07:58

Great project!

Estimated Time Investment
Afternoon Project (3-6 Hours)
Recommended Skill Level
Beginner

Barn greenhouse

Submitted by Anonymous (not verified) on Sat, 07/16/2022 - 17:42

My first Ana White project, constructed in the first months after I retired. Well used now, a peaceful place to work.

Built from Plan(s)

Fancy Step Stool for Kids

Submitted by cdswhite on Mon, 08/01/2011 - 19:25

This was a fun project for us and our daughter loves to use it to wash her hands and brush her teeth. We used some wood scraps we had leftover so it didn't cost as much! I was inspired by another brag poster to change the detail on the bottom and printed my pattern from the computer. We did find that we really needed better saw blades than what came with our jigsaw - the second side's curves came out so much smoother.

Estimated Cost
$10 (total guess, I don't remember)
Estimated Time Investment
Afternoon Project (3-6 Hours)
Finish Used
We used some leftover paint and one coat of water-based poly.
Recommended Skill Level
Beginner

Love love love my new bedroom!!!!

Submitted by DogDoc25 on Tue, 08/27/2013 - 18:49

I've posted pictures of these separately, but I'm so excited about how these things came together in my room! This is the reclaimed wood headboard (queen) and the mini farmhouse bedside tables (only 1 pictured but the other is identical). Thanks so much Ana (and friends) for these awesome plans which have given me a fun thing to do in my free time and also inexpensively furnish my house!

Finish Used
Minwax Jacobean (looks slightly lighter in the picture than it is in real life)
Recommended Skill Level
Beginner

Bookshelf Mod

I needed a wider bookshelf with doors, to hide all my DVD's. I was able to make a mod of the original design and added panel doors to complete. This took a little longer than expected, as I ran into a complication with my original door plan. Once I found the panel door plan it all came together.


Estimated Cost
$150
Estimated Time Investment
Weekend Project (10-20 Hours)
Recommended Skill Level
Intermediate

Comments

Squared2 Headboard, Full

Submitted by bcarter_1 on Tue, 10/30/2018 - 04:59

Modified to Full sized, my first bed!

Estimated Time Investment
Week Long Project (20 Hours or More)
Recommended Skill Level
Intermediate

Comments

Sweet pea full over full bunk bed

Submitted by Anonymous (not verified) on Wed, 07/27/2022 - 17:24

Modified the original plans to make the bed a full over full. Planning on adding a trundle underneath later in the summer. Thank you so much for the plans! It was a lot of work, I can’t imagine having to design it too.

Comments

My Farmhouse/homework table

Submitted by ajcajj on Fri, 08/05/2011 - 10:47

I saw the plans for the narrow farmhouse table and had.to.have.it! I showed my husband and he liked it but wanted turned legs. This was the compromise. I'm so happy with how it turned out!

Built from Plan(s)
Estimated Cost
$28.00
Finish Used
I used a minwax stain with poly on the top and white on the legs
Recommended Skill Level
Beginner

The Perfect Patio Table

Submitted by pbookman on Thu, 08/29/2013 - 20:06

From the plans, we added 2x6's to each end of the table to make the table a better size for 6 people, and also used 4x4's as legs rather than the 2x4's suggested. It makes the table much more sturdy and even looks best in my opinion.

Estimated Time Investment
Week Long Project (20 Hours or More)
Finish Used
Olympic Maximum Stain+Sealant in One (Base 2) in Russet
Recommended Skill Level
Intermediate

Comments

kfeldi

Sun, 08/02/2020 - 10:55

Hi Ana! Would it be possible to make this into an 8 person table? If I were to simply extend the length of the boards, would it affect the sturdiness of it?

Modified rustic x

Modified the plans for the rustic x console to fit in my kitchen. This was my first furniture making adventure, but end product was worth it, even if not perfect. Final product is 41inches by 25 inches and is 36.5 inches tall. I used shiplap for the top, over leftover 3/4 inch birch plywood. 

Built from Plan(s)
Estimated Cost
$50
Estimated Time Investment
Weekend Project (10-20 Hours)
Finish Used
Min wax dark walnut and finishing paste
Recommended Skill Level
Beginner

Comments

Changing Table

Submitted by dritcheson on Sat, 11/10/2018 - 19:05

Changing table built for my first grandchild!

Built from Plan(s)
Estimated Time Investment
Weekend Project (10-20 Hours)
Finish Used
Valspar Oil Based Paint
Recommended Skill Level
Beginner

Simple Step Stool

Submitted by Anonymous (not verified) on Mon, 08/08/2022 - 07:43

Fun and quick build. Made this one out of maple and African mahogany (khaya) for the laundry area of the garage.

Comments

Refinished Dining Room Set

I know this website is more about building furniture, but I spent the last year refinishing this dining room set in my spare time (between working full time and going to school part time). I bought it at a garage sale for $100, and with a lot of love, time, and energy, it is finally ready for family dinners!

Estimated Cost
$150
Estimated Time Investment
Week Long Project (20 Hours or More)
Finish Used
I used white primer, white glossy Behr paint, Minwax Dark Walnut Stain, and Minwax Glossy Polyurethane.
Recommended Skill Level
Beginner

Comments

sgilly

Thu, 08/11/2011 - 15:06

That is a beautiful finish! I know you'll enjoy many wonderful meals at that table.

hiddenhalo360

Fri, 08/12/2011 - 17:47

My husband just left for Thailand for a month, and we had a nice family dinner on his behalf before he left. I was really happy I was able to finish the set before the dinner.

DIY Wood Shim bed plans - Queen

This Project was my second build. I had a few issues finding the materials required to even build it. Everything was found easily except the 4x4s. Everything here in my part of NC is either already pressure treated or cedar. Since everything else is Pine that really didn't float my boat. Plus for 1 4x4x8 of cedar cost $29 and for a color i didn't even want it wasn't even considerable. After calling around to a few places and no success i finally though of calling a lumber mill.

The Lumber mill had what i wanted for really cheap 4x4x8 for $5 but they were in rough condition. I had to do a lot of sanding to get them into workable condition. oh and by the way these are really 4x4s none of that 3.5in stuff here and man are they heavy.

Once i Started building my girlfriend decided she wanted the footboard to be higher and she didn't want to see any plywood for 1 we were going with a light finish and didn't think it would look to good. Instead of the footboard being at 20in high we raised it to 26. This allowed me to use some existing wood i already had to fill in the holes of exposed plywood. I used a 1x12 and 4 1x4s, i really only required 2 1x4 but to continue with the raised look of the footboard i used 4.

As far as the headboard goes i had to change that up a little bit as well. Im not sure if it was just because of the queen size or the fact that the lumber place i used to buy the 1x3s only had round edges so i opted to go with the 1x4s. Well because of that when i got to the last row of shims it was less than 1/2 the size. So resolve this issue again i used a existing 1x6 and replaced the top 1x4 with it. i made a line on the 1x6 which was taller then the headboard and cut it off with my circle saw so its now like a 1x5. Also on a side note when it came to the shims i cut them all 6in long due to the fact the center of the head board was 60in. it gave me an easy 10 shims per row. i used wood glue to hold them in place.

When it came to hooking the headboard and footboard to the bed frame i used 3/4s in-7in Lag bolts. this allows for easy on and off plus theres no way im breaking through them.

I loved this build but man those shim took forever. Sanding the 4x4s took me about 2 days. This job took me about 1 week to complete it working on it a few hours a night. But it was well worth it. I loved the way it turned out. its bigger than i though it would be but its workable.

Built from Plan(s)
Estimated Cost
200
Estimated Time Investment
Week Long Project (20 Hours or More)
Finish Used
I used Summer Oak as my finish of Choice. We didnt want anything to dark but had to have a fair amount of color in it.

To apply the finish we used a Cotton Rag and just rubbed it on. The finish for the shim part took me about an hour, well at least it felt like an hour and it gave my hands a definite workout.
Recommended Skill Level
Beginner

Comments

Fancy X Farmhouse Table

Submitted by Goodge12 on Fri, 10/23/2015 - 11:22

Made a couple modifications:

  • Used 4x4 for the cross beams instead of 2x4. 
  • Used 4x4 anywhere there were (2) 2x4s together. 
  • Used a dowel jig to attach the (4) 45 degree pieces on each post
  • Sanded down the table top until the seams disappeared.  Thank you, belt sander!

That last bullet was super-important to the Mrs.  She was adamant that the table should not have spaces in between the boards, yet she did not want any seams for crumbs to collect.  The result was that I had to sand down the table top about an eighth of an inch... but the seams disappeared.


Also, we initially used Ebony stain... until we realized it was too dark.  Sanded that down a bit, then went over top with the Kona stain.  Result was a dark brown with some black detailing.  Finished with some minwax wipe-on poly.  Turned out really nice!


Thank you, Ana - This project was a ton of fun, challenging, and ultimately, very rewarding!

Built from Plan(s)
Estimated Cost
Approximately $120 - the 4 x 4s were Douglas Fir.
Estimated Time Investment
Week Long Project (20 Hours or More)
Finish Used
Minwax Ebony, Minwax Kona , Minwax Wipe-on Poly
Recommended Skill Level
Intermediate

Farmhouse toddler bed

Submitted by Lukilla on Fri, 11/30/2018 - 18:37

Our little guy decided at about 2 years old that his crib just wasnt going to cut it anymore. My wife and I had a blast throwing this together. A good tip is to use leftover pieces from the headboard to cut slats.  We love our wood projects, check out our facebook page. Wyvace woodworking.

Estimated Cost
100
Estimated Time Investment
An Hour or Two (0-2 Hours)
Finish Used
Minwax jacobean/espresso mix on the platform. Red mahogany on the headboard
Recommended Skill Level
Beginner

Love these modern Adirondack chairs!!!

Submitted by Anonymous (not verified) on Wed, 08/17/2022 - 17:16

We had some very old Adirondack chairs that just broke on us (in the middle of summer, no doubt) so I went looking for some new ones. They were so expensive I thought I’d make some but I have limited tools (circular saw, drills, etc. but no band saw or mitre saw or table saw). Found these because they were fairly simple and didn’t require fancy tools.
It took me a couple of weekends to build four of them, and they still need another coat of sealer, but I’m stoked with the results, and they're SUOER comfortable too!

Thanks Ana for these awesome plans!

Comments

Modified Brookstone Desk

Submitted by DTeague on Wed, 08/10/2011 - 15:01

I had to change the plan to better fit my son's room. I changed the depth to 22 and the width to 34 to fit in the corner. Big lesson learned don't use the worst wood possible where the drawer slides go, yikes the rigging I had to do was awful. Atleast no one can see it is all under the desk. :)

Built from Plan(s)
Estimated Time Investment
Weekend Project (10-20 Hours)
Finish Used
Minwax Red Mahogony and Minwax Wipeon Satin finish poly.
Recommended Skill Level
Beginner

Table top chalkboard easel

I saw these here on Ana Whites site and fell in love and wanted to make one for my 3 year old. Well at the time (we now no longer have it) we had a huge chalkboard wall upstairs for my 4 boys and therefor the hubs told me there was no need to build these....but I have a friend who has twin girls and I new that was the perfect opportunity to build these cute things as their birthday presents! So that is what I did. I also made a zipper pouch to hold the chalk. The girls love them :)

Estimated Time Investment
An Hour or Two (0-2 Hours)
Finish Used
chalkboard paint, Minwax Early American stain
Recommended Skill Level
Starter Project