Community Brag Posts

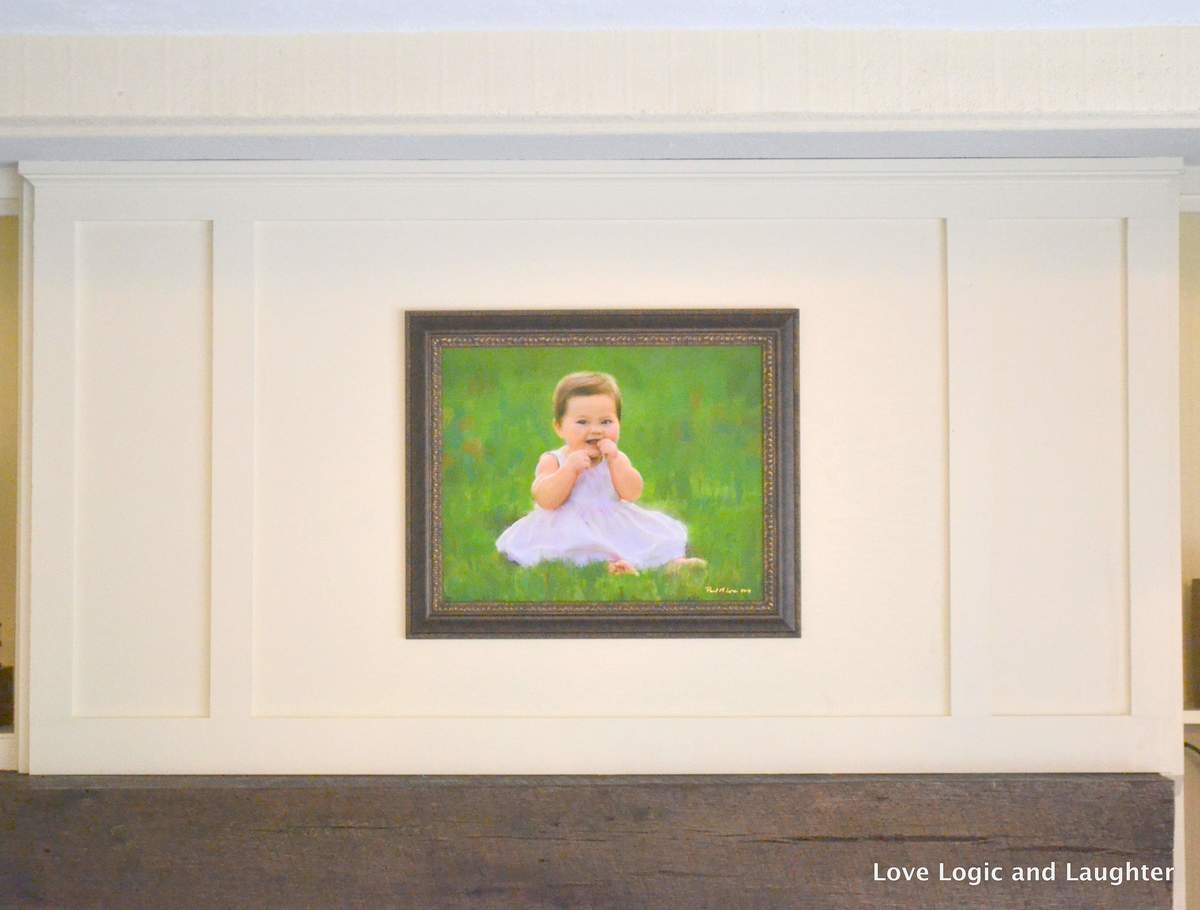
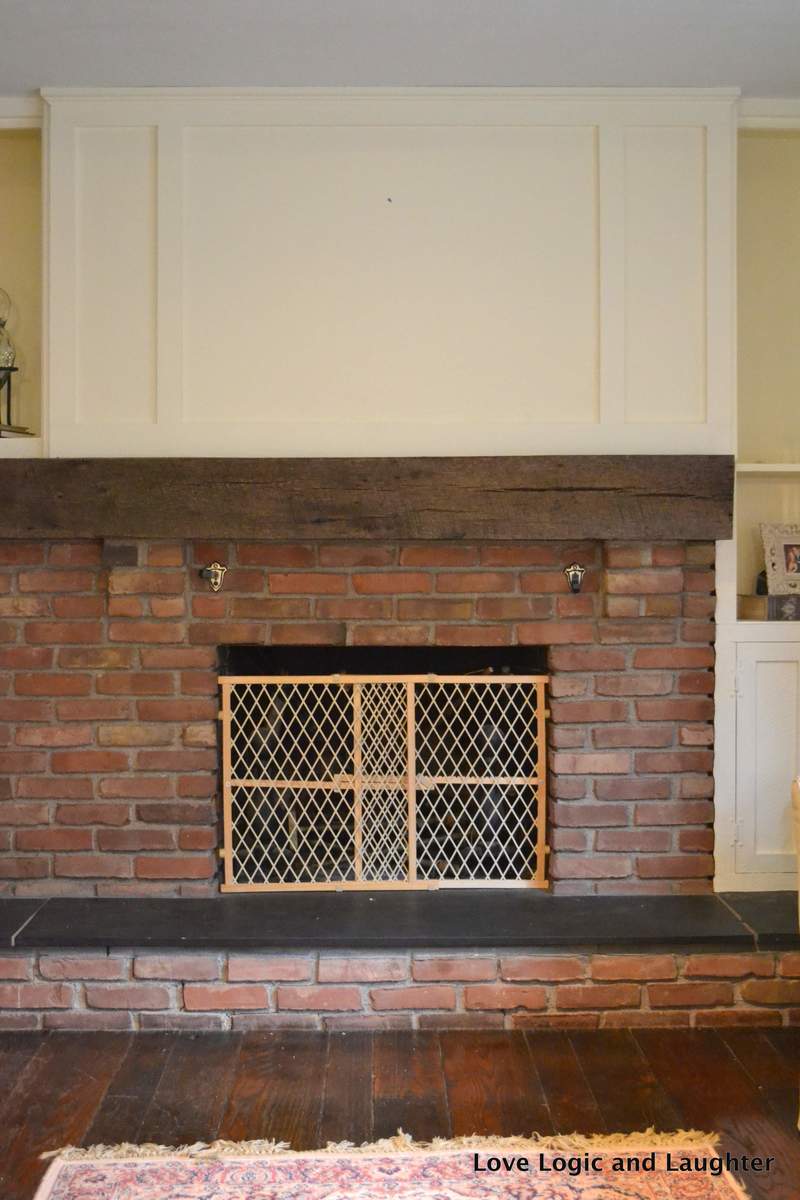
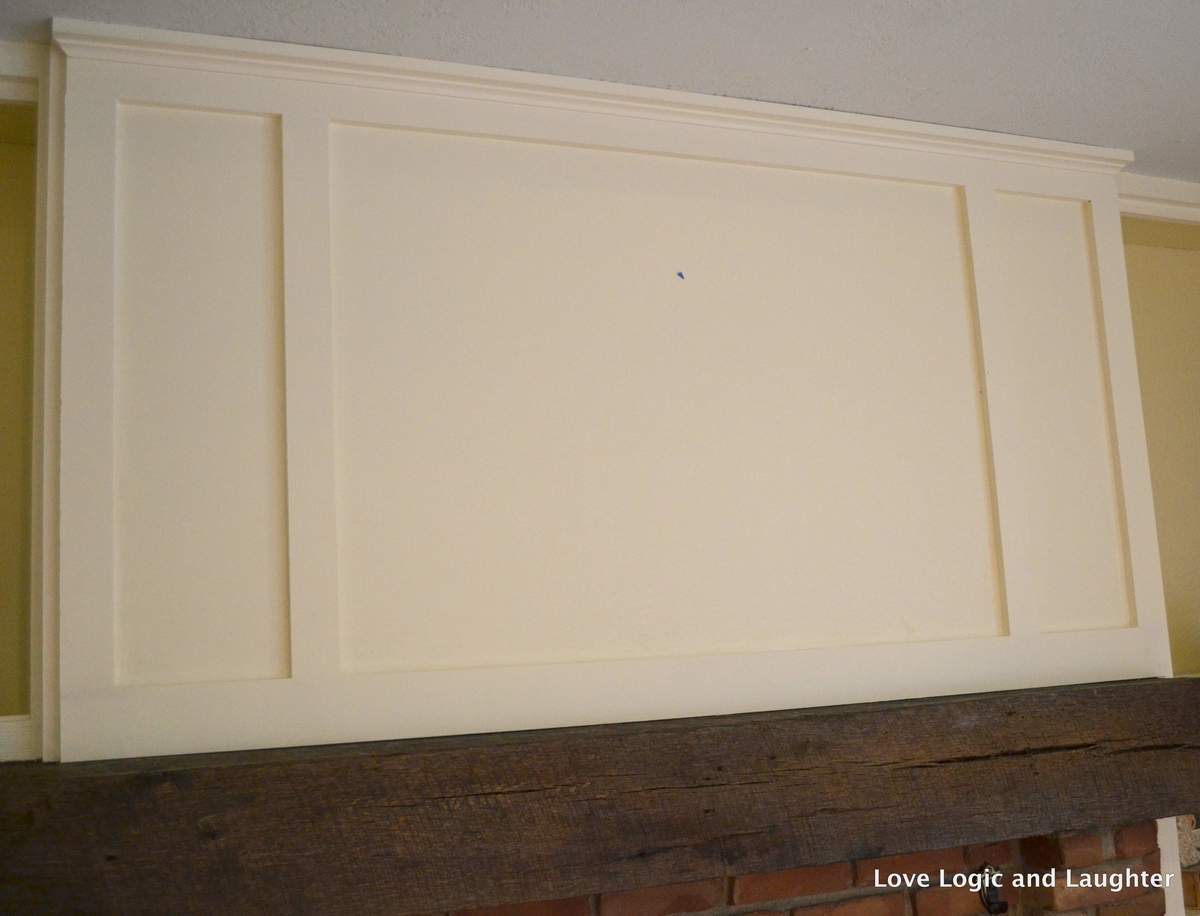
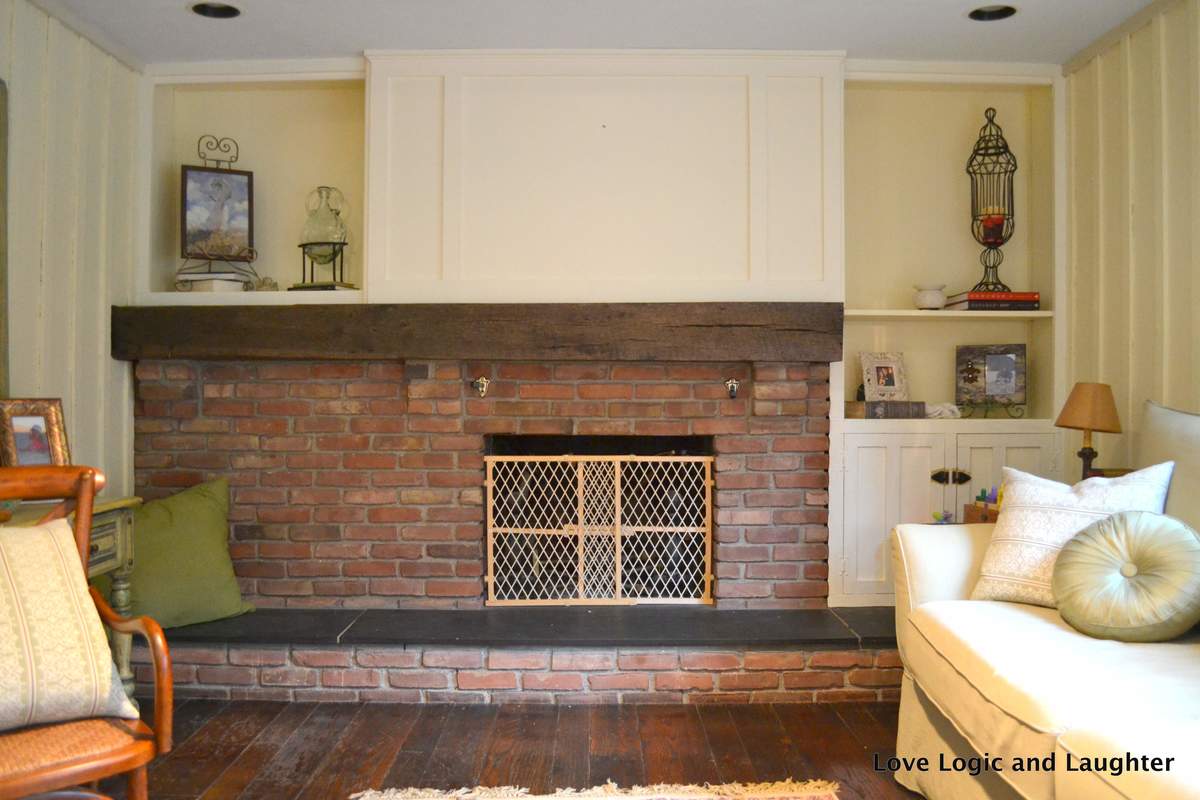
Board and Batten Fireplace Surround

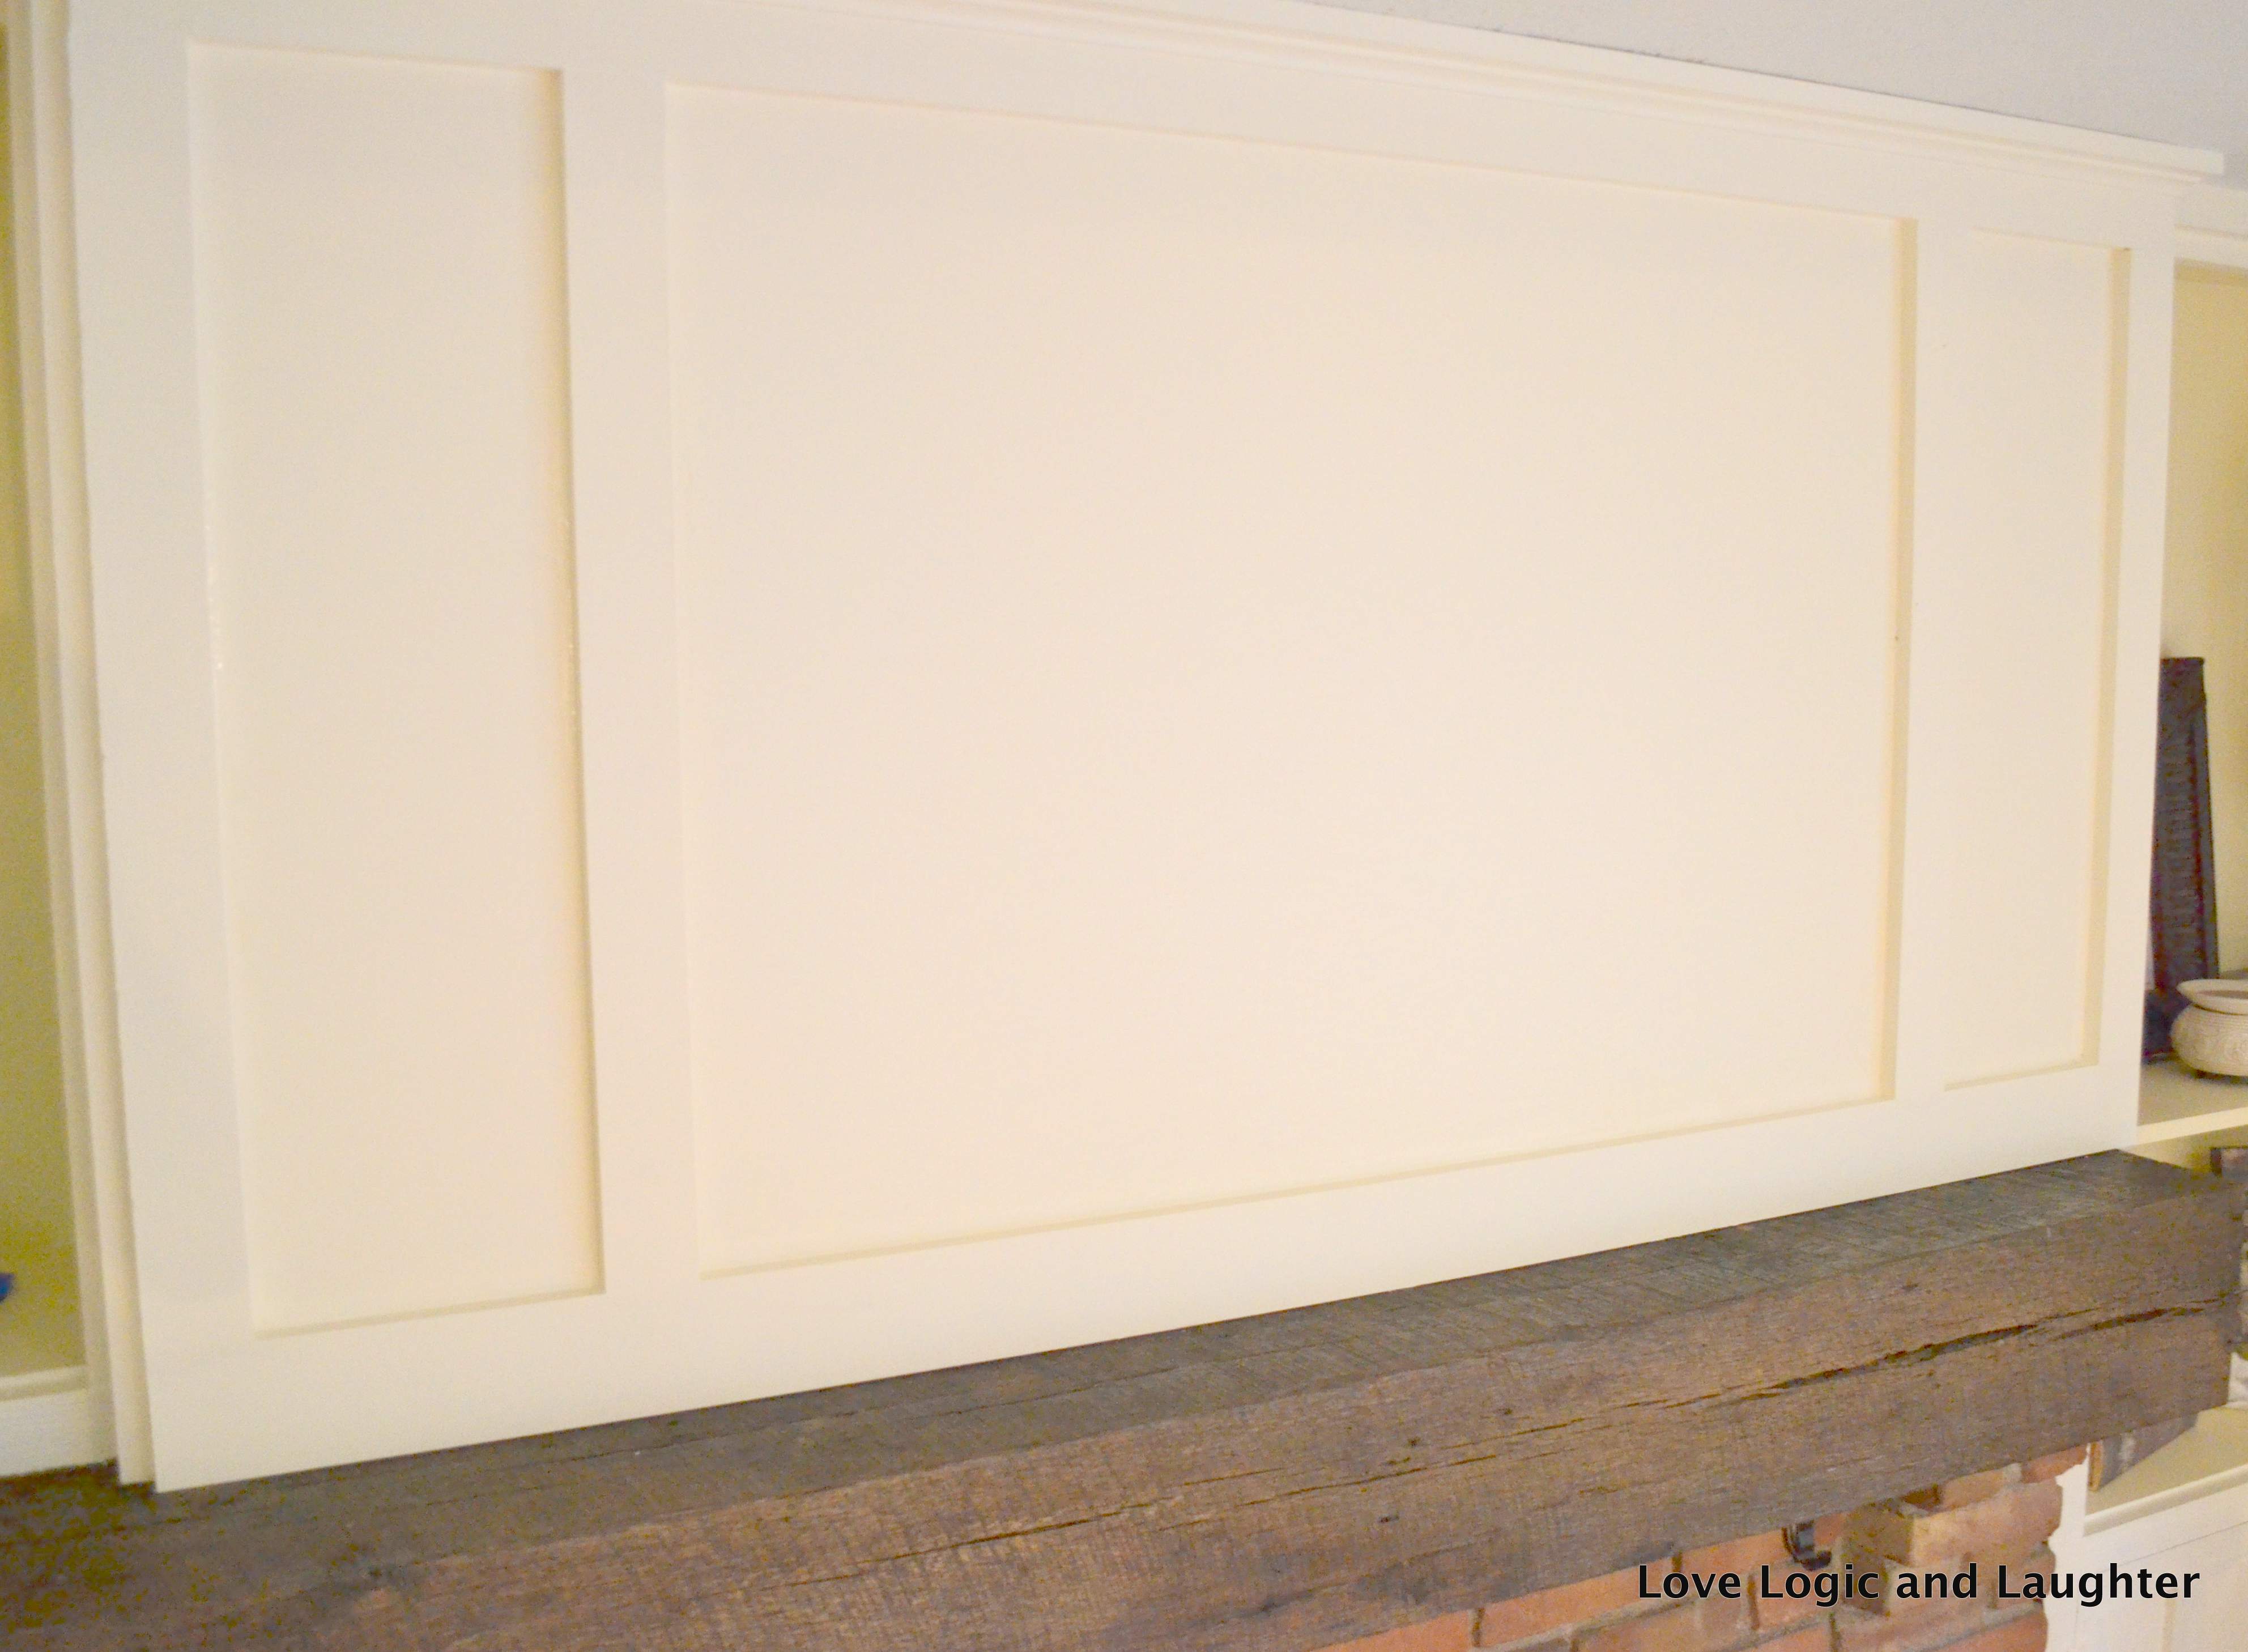
There was brick above my fireplace. I decided that I needed to lighten it up, but didn't want to necessarily paint the brick. Instead, I decided to panel above the fireplace using a board and batten style. I am so happy with the results! It is lighter and brighter in the room and goes with the style in the rest of the room (walls have board and batten as well).

Built from Plan(s)
Estimated Cost
$50
Estimated Time Investment
Day Project (6-9 Hours)
Finish Used
Painted white ("Linen White")
Recommended Skill Level
Intermediate

Comments

Patio Table w/Built in Beer/Wine Cooler

Submitted by RoyBoy on Sat, 05/18/2013 - 06:58

After seeing the patio table with beer/wine cooler, I wanted to build this for my brother and wife who recently bought a house. I asked them if they were interested and of course they said yes. I modified the original plans by adding a 2x4 on each side of the cooler to make the table wider. I also made the legs out of 4x4 vs the 2x4s that were originally called for. I used redwood and then stained it and used a varnish for the final coating. I probably wouldn't use the varnish again for an outdoor table, because it looks like it should be an indoor table vs outdoor. Overall, I'm pleased with the results and the best part about it, I get to enjoy it every time I go over for a BBQ.

Estimated Cost
$225-250
Estimated Time Investment
Week Long Project (20 Hours or More)
Finish Used
Olympic Redwood Naturaltone Toner Exterior Stain
Cabot Spar Varnish Semi-Gloss
Recommended Skill Level
Beginner

Comments

Msharp1211

Wed, 07/03/2013 - 13:04

Awesome table, do you happen to have the measurements you used. I'd like to make the same table but I need the lumber yard to make the cuts.

Spice Rack

I absolutely love this project. I do not have a pantry with a door so I just placed this spice rack on my wall and it really looks great! We have a ton of spices so I might need to make another!

Built from Plan(s)
Estimated Time Investment
Day Project (6-9 Hours)
Finish Used
White Spraypaint
Recommended Skill Level
Beginner

Comments

robynred

Sat, 09/21/2013 - 10:33

hi - I'm thinking of building this to hang on a wall like you have. Do you think the dowels are necessary? Seems like it would give a little more shelf room without the dowels - but do you feel like the spices would fall out without them?
thanks!

DIY Kids Art Table

I'm so excited Ana created plans for this table!  When I first came across it on Pottery Barn Kids it was love at first sight. :D  I built it over the weekend for my little toddler.  Unfortunately, he's too short for it, but he'll grow into soon enough. :)  (I secretly wished it was an art table appropriate for my height!)

It cost me about $75 to build.  I splurged and bought select pine boards for the project.  The art table was also my submission for September's Fab Furniture Flippin' Contest.  September's sponsor is General Finishes and the theme was geometry!

Now, I just need to build matching seats! I love the little stools Ana built; maybe I'll do something sorta like that. :)  


Thank you Ana for inspiring me to build!


Built from Plan(s)
Estimated Cost
$75
Estimated Time Investment
Weekend Project (10-20 Hours)
Finish Used
General Finishes Milk Paint (Snow White), Acrylic craft paints for the geometric pattern, ECOS Paints Woodshield in Pine Needles for the cubby stain, and ECOS Paints Gloss Varnish
Recommended Skill Level
Beginner

Comments

Two Sizes from One Set of Plans

Submitted by Anonymous (not verified) on Wed, 08/10/2022 - 19:45

We followed Ana's plans for the large project bench. We altered the plans to make a bench for our compound miter saw with the saw platform level with the project bench.

Built from Plan(s)

Comments

Sandbox with Cover

The cover is a tonneau cover for a pickup truck. It's for a 6.5' truck bed so if you notice, I had to ad a 2x4 and one more picket on top to accommodate the extra length. 

The cover would add a ridiculous amount of money to the project but it was repurposed.  I found it on a truck that was in an accident and going to the scrap yard. I think it it came out great and my grandson loves it.

John

Built from Plan(s)

Ladder shelf

Submitted by lazyLiz on Thu, 05/10/2012 - 13:43

Since I used hardwood (red oak) I have to modify the plan and eliminate the sides of the shelves. Modifications and measurement is on the additional photo. Thanks again Ana, you're the best!

Built from Plan(s)
Estimated Cost
$30-$50
Estimated Time Investment
Afternoon Project (3-6 Hours)
Finish Used
minwax red oak and poly
Recommended Skill Level
Beginner

Comments

Super Easy, Super Awesome! Thank you Ana & Ashley

Submitted by jhavinga on Tue, 03/18/2014 - 09:24

Loved this Coffee Table and wanted to suprise the wife for christmas, so being my first project I got started! had no idea what I was doing but they were great instructions, and the KREG JIG is AMAZING. altered the plans a bit to make it a rectangular coffee table (added 12 inches) instead of square to fit our living room better. Now to tackle the next project!

Built from Plan(s)
Estimated Cost
$200
Estimated Time Investment
Weekend Project (10-20 Hours)
Finish Used
Used 2 different stains to get a brown/gray finish. just one coat of each!
Minwax Weathered Oak & Minwax Special Oak.
Recommended Skill Level
Beginner

Comments

MichelleC

Wed, 03/19/2014 - 07:39

I absolutely LOVE the finish on this, thank for sharing!!! For the estimated cost you put $100, is that without including the cost of the turned legs? Did you get the legs through Osborne? I think I NEED to make this coffee table and use that finish!

jhavinga

Wed, 03/19/2014 - 09:02

Now that you brought it to my attention you are absolutely right, I completely forgot about the cost of the legs. including the cost of those, it does come to $200 dollars, ill change that. I also did get the legs from Osbourne. As for the finish yes do it! I am really happy with how it turned out :) thanks again and let me know when your coffee table is done so i can check it out!

Cheers,
Justin

Mandybeck

Wed, 08/27/2014 - 21:35

This is absolutely beautiful!!!! Quick question... You said you used weathered oak and special oak for the stain. Did you mean special walnut? I can't seem to find special oak! Thanks!!!

usmcjeff7489

Fri, 07/17/2015 - 12:59

Being as yours is much lighter (and i like it more than the darker). Did you use the wood conditioner and how long did you leave the stain on for? it almost looks like once it was on you were wiping it off. Love it well done :)

Also, do any of you guys use the paste wax when finished? I was thinking about following the stain with some poly to seal it. any suggestions?

Pallirondack Laundry Basket Dresser

I showed my wife the Laundry Dresser featured on Ana White's website and she asked if I could make one for her, but not quite so tall. I also turned the orientation to fit our laundry room space. I used primarily oak from recycled pallets to build the Laundry Basket Dresser. She wanted a work space on top, so folded laundry, empty baskets, etc. all have a temporary resting place depending on the day. From start to finish, it took me about 6 hours. She plans to stain the piece at some point, but its already in use, so I'm not 100% sure that will ever happen until we move or something. ;-) Great idea and laundry room organization!

Estimated Cost
Half a box of screws
Estimated Time Investment
Afternoon Project (3-6 Hours)
Recommended Skill Level
Intermediate

Comments

Kathy in Pittsburgh (not verified)

Mon, 09/10/2012 - 10:22

I love the open sides, plus it makes it much more feasible to build with scraps repurposed wood, which I love. Thanks for the inspriation

payne.kj

Mon, 04/08/2013 - 08:48

Hi, do you have any kind of plans for how you did this or atleast dimensions? I think this one fits more of what my wife needs, but I'm pretty new to making anything.

nicholas_ftm

Sun, 06/14/2015 - 20:16

Soooo I made this according to the measurements and no laundry basket I find fit. Kind of dissapointed in the fact that this cool thing I just built doesn't have any baskets that will fit it. Any advice on finding a basket that fits?

jkread

Fri, 07/10/2015 - 20:56

I think the idea is to build it to fit the baskets you have or buy some and build around them.

Kids Nightstand

Submitted by Medickep on Thu, 02/26/2015 - 19:48

Made this from the Owens nightstand plans.  Very simple to build, as long as you have built drawers before!  I painted it to match my sons bed I made for him recantly.  

Built from Plan(s)
Estimated Cost
50$
Estimated Time Investment
Day Project (6-9 Hours)
Finish Used
I used Behr Marquee paint, which advertises one coat on any surface. It didn't even require a primer!!
Recommended Skill Level
Beginner

DIY Murphy Wall Bed

Submitted by Dstor22 on Sun, 03/15/2015 - 07:05

Just finished up my Murphy Bed project. Hope you like.

Estimated Cost
280.00
Estimated Time Investment
Weekend Project (10-20 Hours)
Finish Used
Weathered Oak Stain
Recommended Skill Level
Intermediate

Comments

Double Pedestal Farmhouse Table (8 feet)

Built from the Triple Pedestal Farmhouse Table plans. Had to size down the plans a little bit to fit into my dining room. Created three pedestal legs but only ended up using two on the final table. Took about 16 hours from start to finish. All of the wood is pine except for the top, which is Poplar. Made a couple of mistakes along the way but am very happy with the way everything turned out. Feel free to ask questions and I will do my best to answer them. Happy Building!

Built from Plan(s)
Estimated Cost
$175
Estimated Time Investment
Weekend Project (10-20 Hours)
Finish Used
English Chestnut. Stained once and waited 7 minutes to wipe off. Two coats of Clear Satin Polyurethane.
Recommended Skill Level
Intermediate

Comments

Chicken Run with Turkey House

Submitted by vendo on Wed, 10/13/2021 - 10:03

My daughter helped me build this enclosure. We used Ana's chicken run plan, but just made it taller so we could walk in easily. We added an overhang to store food and pellets under, for the supports we used Ana's easy shelves angle support plan, and finally we used the playhouse base plan for the base of turkeys house. All plans used are linked below. We ran the chicken wire out under the structure and still need to bring in some large rocks or pavers, but so far no issues with predators. Turkey was getting too big to fit in the smaller coop, so we decided to have fun with his house and used cedar fence pickets and some treated 2x4's, built a box and jig sawed the shape of a turkey. As you can see in the first photo the ladder for turkey wasn't big enough, all the other chickens were in his house, lol. So I beefed up the ladder and he happily can put himself up at night now:) Overall a super successful project, I wasn't sure what to do with the top and just at that point, the neighbor walked over and offered the metal, talk about a huge win and the perfect solution! We attached the run to the previous smaller structure and now they have so much more room and are laying like crazy:) Finally, I think this would make a great dog kennel as well...

Outdoor Sectional

Submitted by Anonymous (not verified) on Fri, 04/28/2023 - 05:24

This was my seventh outdoor couch but my first sectional. My very first couches were all inspired by Ana White's plans and I have gotten so much better with my skills that I building other things as well. Thanks Ana for all your inspiration!

Comments

Podium for My Wife's Classroom

This is my first try at building furniture. I've built larger things in the past like decks and a fort for my nephews, but never furniture. Even though I used the plans to build the main box, I did change up the bottom and added some new stuff. I added wheels to the bottom my wife could easily move it around her classroom. I didn't want to put a square base on it because I thought it might hit her ankles when she was standing close to it. So I sort-of notched it out to give an opening for her feet and I used some scraps to create a short shelf at the bottom. I also added more trim that the plans call for. I cut strips of the pine plywood for the base molding and topped it with quarter round. I used corner trim for the front corners, the self inside and the bottom notched shelf. I also used screen trim for the back of it. I think it came out nice and I've very pleased with it. I used 2 coats of Minwax PolyShades American Chestnut on it.

Built from Plan(s)
Estimated Time Investment
Weekend Project (10-20 Hours)
Finish Used
Minwax PolyShades American Chestnut
Recommended Skill Level
Beginner

Hybrid Hall Tree

Submitted by jfloyd on Fri, 06/19/2020 - 08:17

We utilized Ana's rustic x bench to fit our hall tree design. Love the bench.

Built from Plan(s)
Estimated Cost
$50
Estimated Time Investment
Day Project (6-9 Hours)
Finish Used
Shellac, clear; leftover white paint
Recommended Skill Level
Beginner

Comments

Easy Workbench

Submitted by Anonymous (not verified) on Tue, 05/07/2024 - 07:44

Easy to put together and quick! A great set of plans which produced a very sturdy bench. Some adjustments were made, as we had spare 1x3s which we used to expand the bottom shelf.

We pre-cut everything to specification. We only needed 6 2x4x8s. We only broke into the 7th because our cuts for the cross bars on top came up short once it was together and we had to recut. Just save the 12 inch boards to cut when you need to add them to ensure the measurements are accurate. The top was glued and nailed together with brads, a bottom layer of 1 inch pine with a top layer of 1/4 oak plywood on top. It was what we had on hand and it provides the strength needed with girth yet the hard exterior of the hardwood ply.

S Walker

Built from Plan(s)

Wooden Sandbox with Convertible Bench / Cover

I make and sell kids picnic tables on craigslist and a buyer asked about making one of these. I took it on and found the plans on here very easy! I now list these on craigslist also and hope to sell more before the summer is over.

Built from Plan(s)
Estimated Cost
~$100
Estimated Time Investment
Afternoon Project (3-6 Hours)
Finish Used
none, until PT has dried
Recommended Skill Level
Beginner

Comments

DIY Farmhouse Bed

We built this Farmhouse Bed in 1 weekend for less than $200!

Estimated Cost
Less than $200
Estimated Time Investment
Weekend Project (10-20 Hours)
Finish Used
Rustoleum Dark Walnut Stain applied with a brush and immediately wiped off using a lent-free cloth. Sealed with Minwax Satin Spar Urethane.
Recommended Skill Level
Beginner

Comments

Tiled Bar & Bar Stools

Submitted by iChristee on Sat, 04/04/2015 - 13:08

This was my second Anna project! I changed this one up quite a bit (size and style) so it would fit the area were I wanted to use it. I just love how it turned out!

The tiles were left over from my kitchen backsplash. They are inset so that they are practically flush with the wood on the top. 

Total cost: ~ $150.00 for the bar and 3 bar stools. 


Estimated Cost
150.00
Estimated Time Investment
Weekend Project (10-20 Hours)
Finish Used
Antique Walnut Gloss - stain & poly in one
I found the stain & poly in one to be hard to work.
Recommended Skill Level
Beginner

Comments

Tmoules

Sat, 01/09/2016 - 01:54

Is there a cut sheet on the material used to make the 3 tiered top.?

Back