Community Brag Posts

My first DIY project!
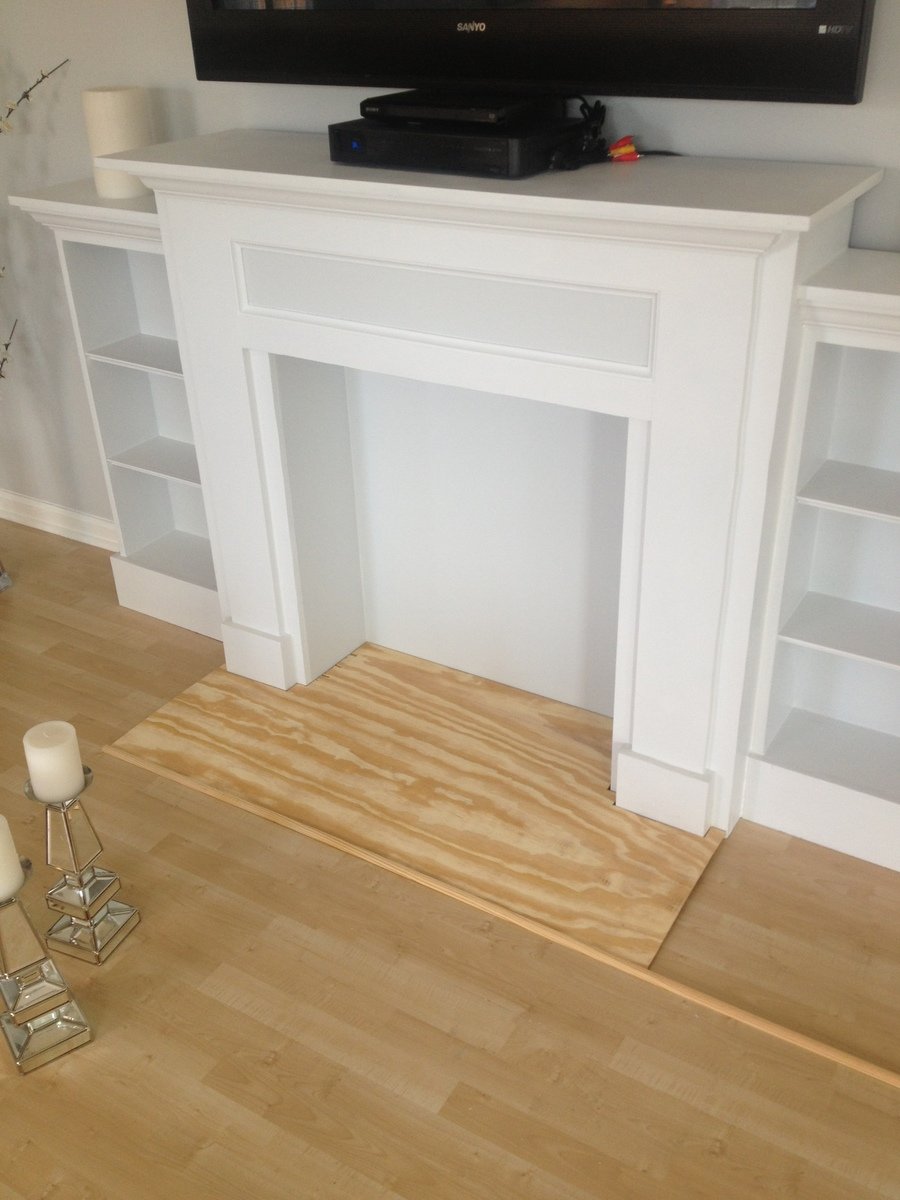
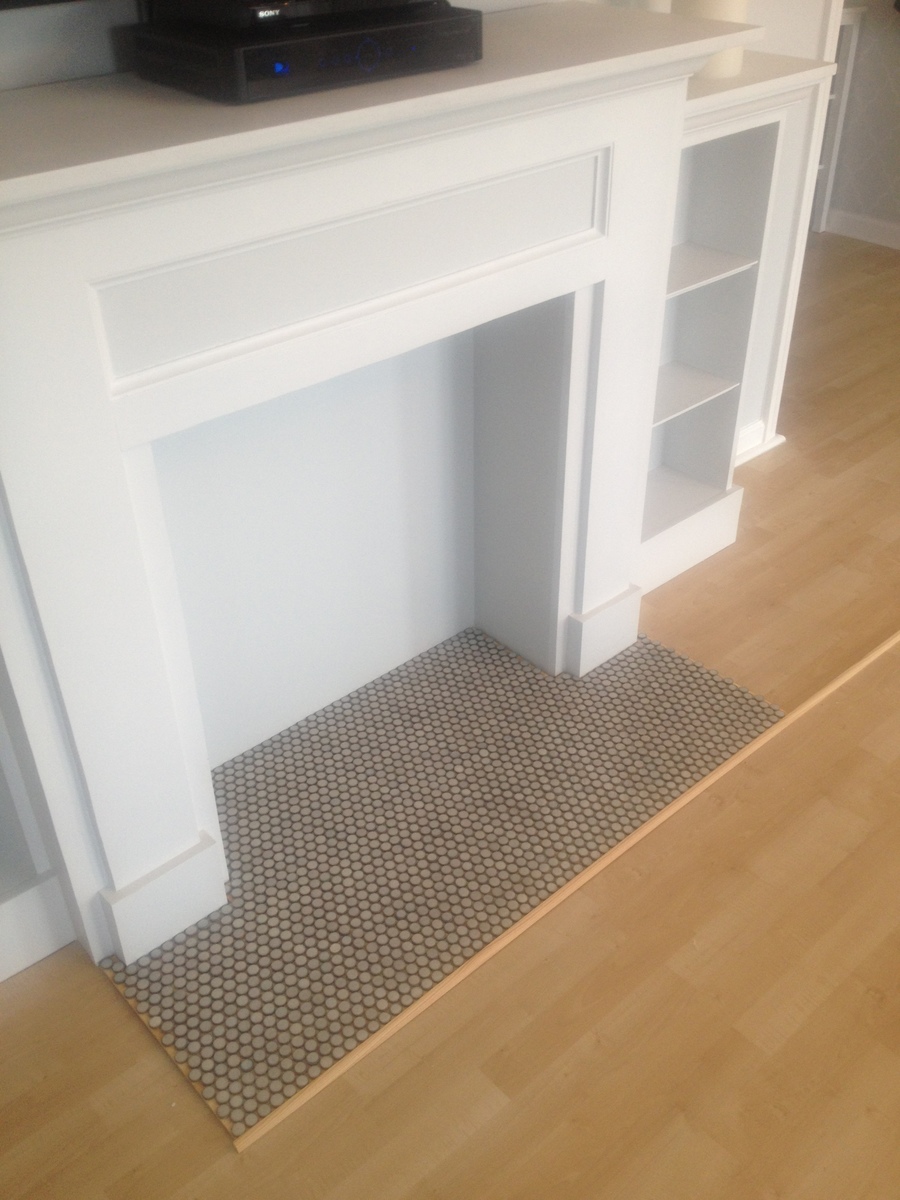
Finally Completed!!! Thank you rainy Saturday! So I wanted a new entertainment center of sorts... couldn't find one that was just what I wanted..... so why not just build what I want! Just DIY it. ;)
I used the faux fireplace plan and modified it to have attached shelves on the sides. I also added an extra strip at the top of the fireplace opening so I could mount an LED bar light.
I used 1/4 plywood to make a tile base, penny tile, and 1/2 quarter round to finish out around the entire bottom.
Total project cost was less than $200 including the tile and light!
Best part is the whole thing is movable!
Thanks Anna White for such an awesome plan to start with!

Built from Plan(s)
Estimated Time Investment
Week Long Project (20 Hours or More)
Finish Used
MDF & plywood
Recommended Skill Level
Beginner
Comments

Wed, 07/03/2013 - 10:24
Shelve units
This whole unit is great. My wife LOVES it, which means I will be building it! Did you purchase the two shelf units or build them yourself? Did you use a pattern or plan? Thanks!
Sat, 08/03/2013 - 18:25
I did make the depth of the
I did make the depth of the fireplace deeper so I could have room for the halves on the side. I just sketched out the dimensions I wanted the side shelves and built them along the same lines as the fireplace. Wasn't hard to figure out and just made it to fit the size I needed. The inset of the fireplace does not go all the way back to the wall either, that way the power strip can fit on the floor behind it. Glad you like it and thanks for the compliments!
Wed, 07/23/2014 - 14:54
Your First DIY success
Hi Celeste 808, What a wonderful faux fireplace WITH the bookcases, especially. I'm hoping I can try this in our space challenged bedroom. Did you by any change reply to the chap who asked if you had some kind of dimensions or plans you could pass along to us? I would love to see if we can make it work in the space we have available.
Thanks again for the inspiration,
e
Mon, 10/28/2013 - 18:25
LOVE IT!
I absolutely love what you did with this. I am going to have my fiance help me make this for our house. If you still have the dimensions and details of how you built the whole unit I would greatly appreciate it if you could post it.
Tue, 10/29/2013 - 05:36
Love it. I wasn't going to
Love it. I wasn't going to build the side shelving unit, but changed my mind. This is beautiful... I really love the base.
Sun, 04/13/2014 - 13:00
Beautiful! Exactly what I've been looking for.
This is gorgeous & I can't believe it's your 1st project. I would love to build this too. Did you use any particular plans for the side units? If you have any tips or information to share, that would be great! I've actually been trying to make up my own plans using Sketch Up, but that's not working too good, lol. Again, great job & thank you.
Lynda

Sun, 02/08/2015 - 12:31
Dimensions Added
I'm dying to know the dimensions you added to the width. Also, the dimensions of the book shelf. I have been trying to draw up plans for the last week and I'm stuck with trying to figure it out by looking at your pictures.
PLEASE HELP!
Thanks!!

Mon, 07/27/2015 - 09:15
Blue Print Request
Do you have the blue print of how you built the mantel and side book shelves? I am wanting to go buy supplies to build this tonight!!!
Thank you!
Sun, 11/15/2015 - 13:19
im having a hard time with
im having a hard time with the site. LOVE this and want to build it. how do i get the plans for it?
Sun, 11/15/2015 - 13:19
im having a hard time with
im having a hard time with the site. LOVE this and want to build it. how do i get the plans for it?
Mon, 07/18/2016 - 12:19
blue print/dimensions of shelves
Hello! I love the design! If you have the dimensions or blue print for the shelves please forward along!!
Sat, 12/31/2016 - 18:06
Hi there! Love this look!
Hi there! Love this look! Just wondering where you found the mirrors shown on either side? Thanks!
Tue, 12/19/2017 - 21:55
Dimensions
How wide is this? From the end of one bookshelf to the other? Also, how deep is it?
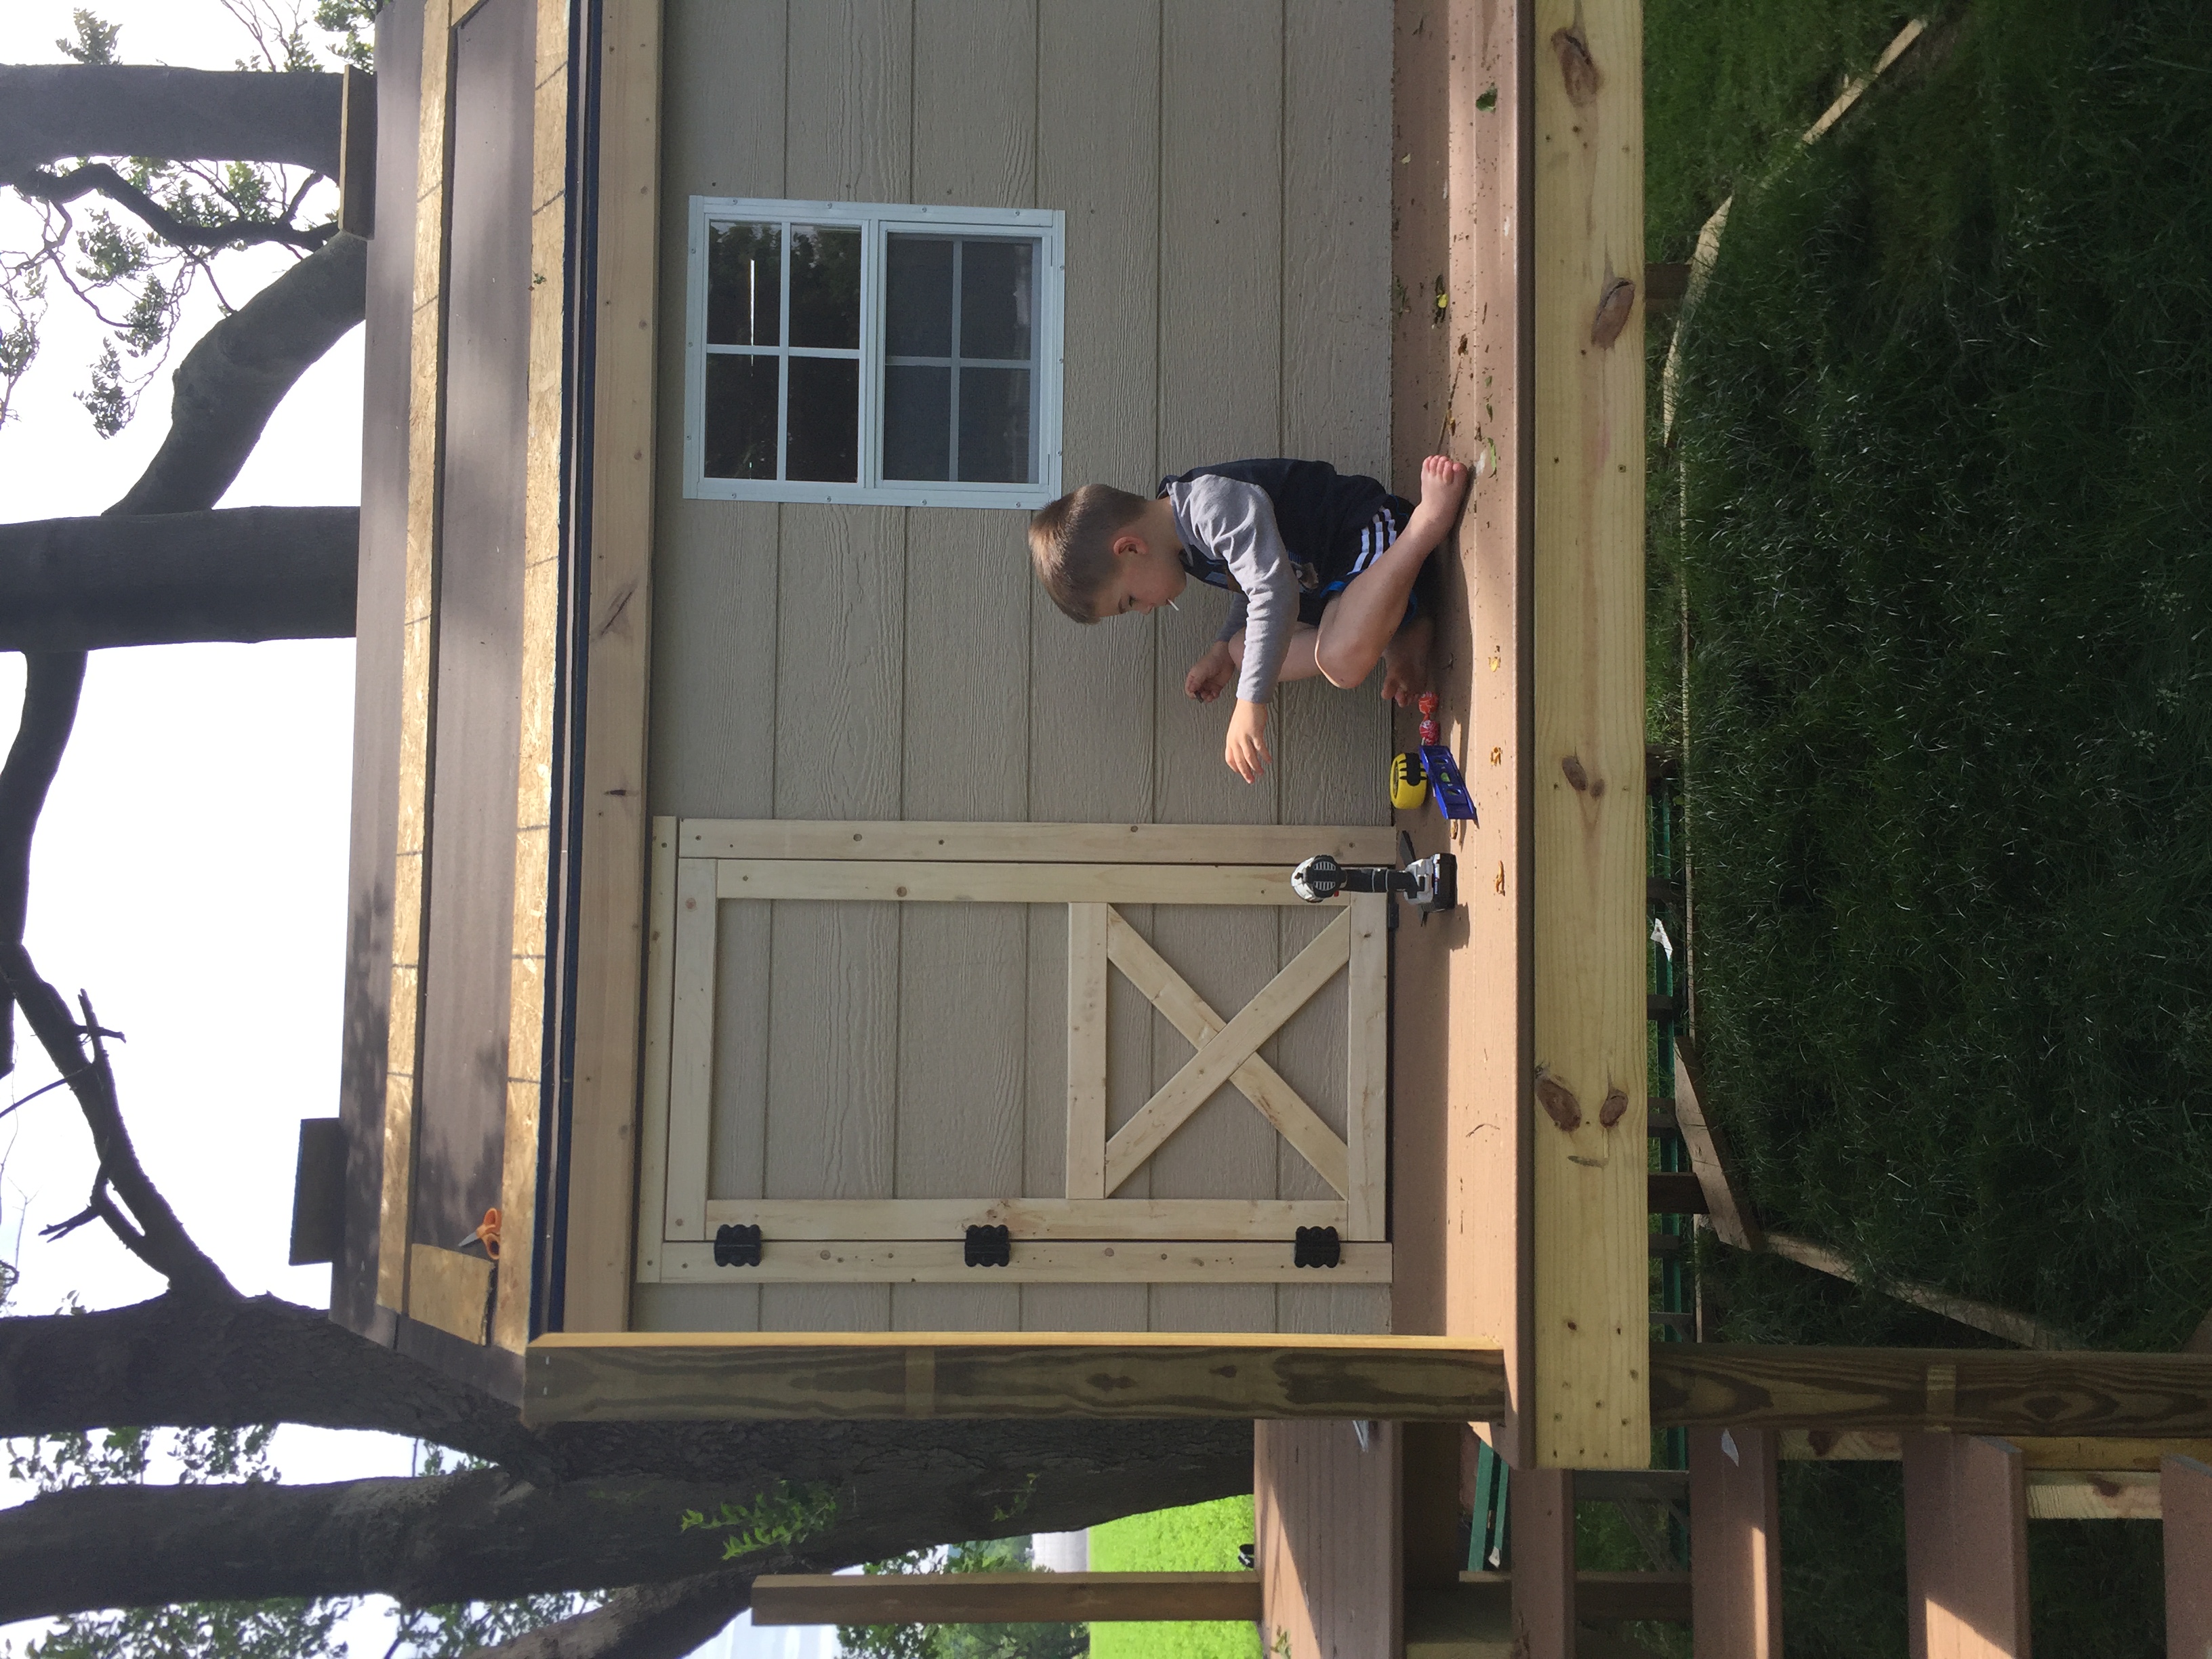
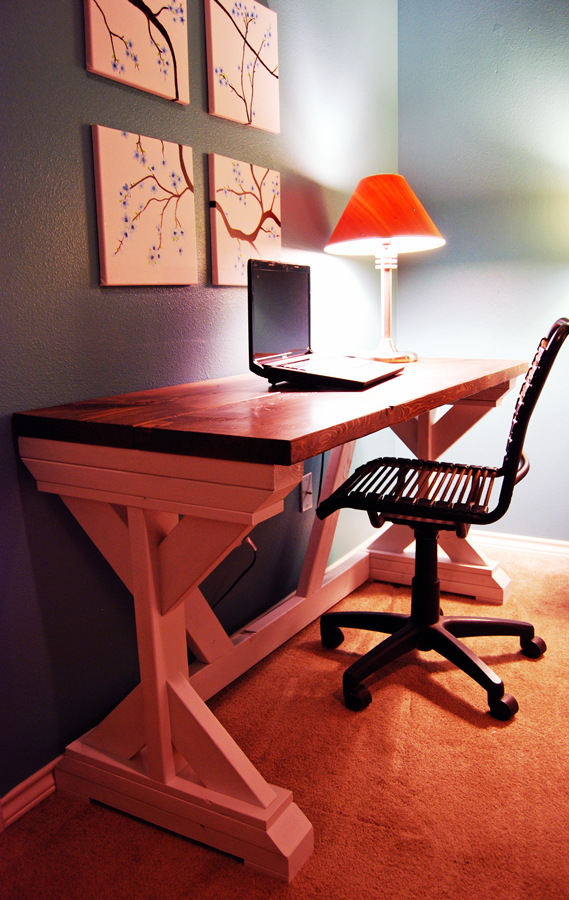
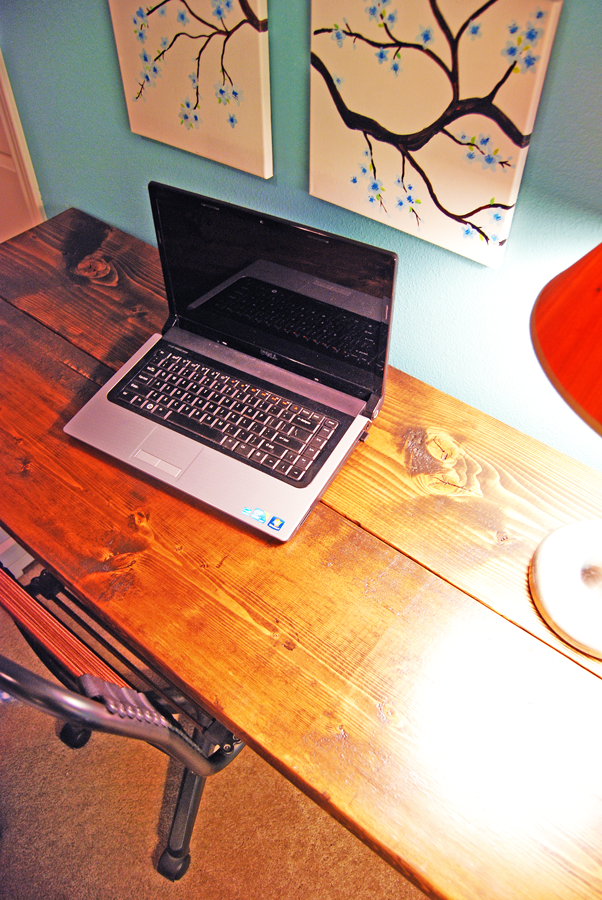
X Desk
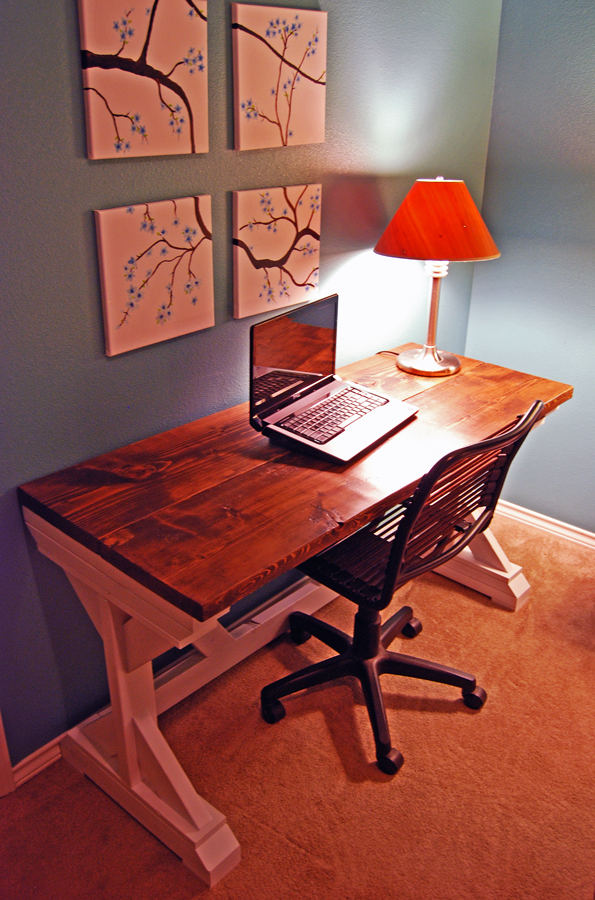
Pretty straightforward build, fun to use and build!
Built from Plan(s)
Estimated Cost
$70 ish
Estimated Time Investment
Afternoon Project (3-6 Hours)
Recommended Skill Level
Beginner
Comments
Montessori bed
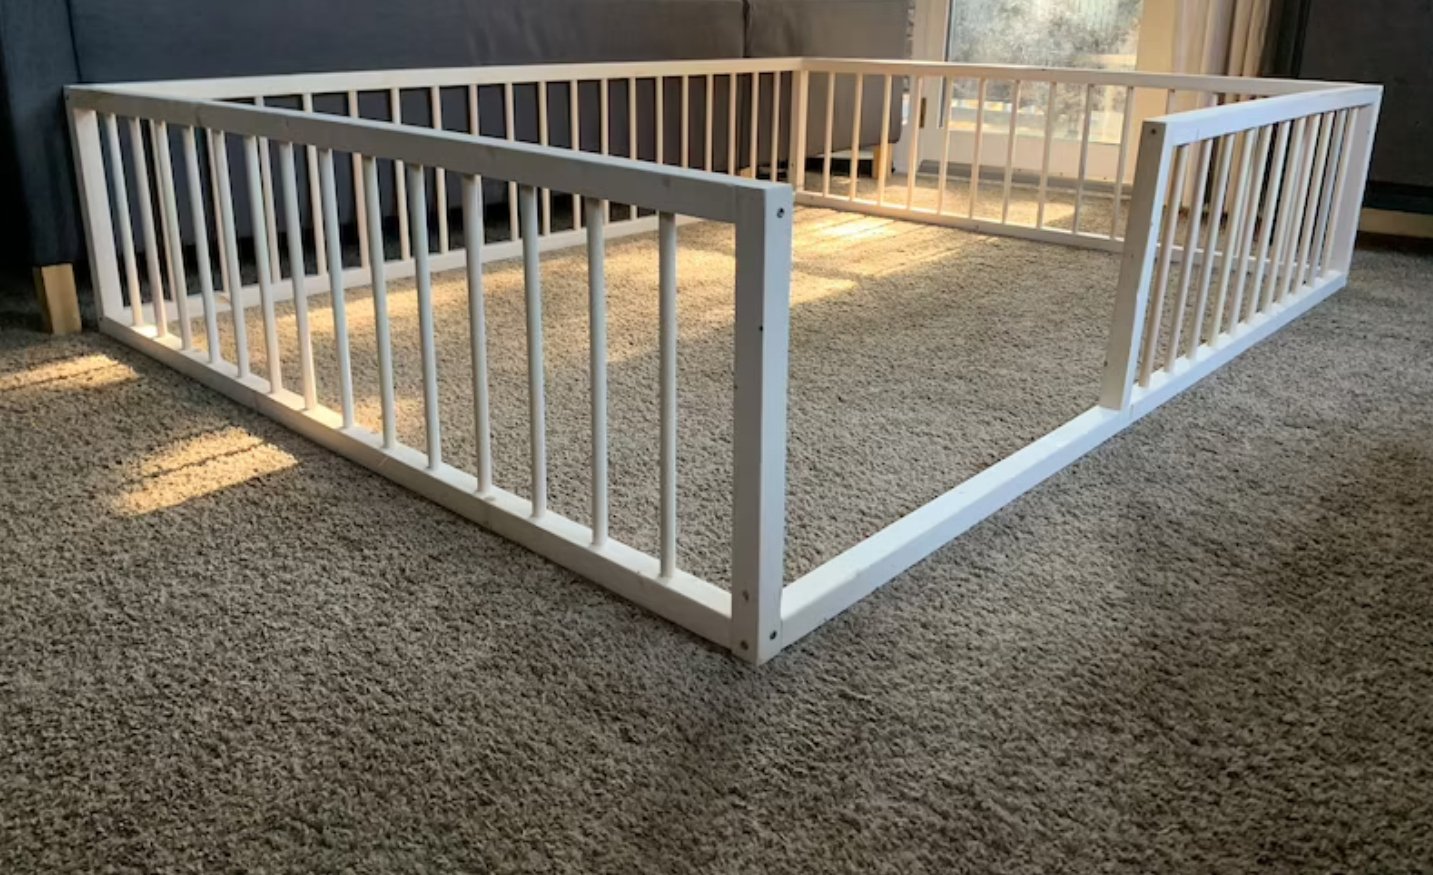
Was a little challenging at first but I was able to pull it off and it came out to be perfect
Built from Plan(s)
Comments
Flip Top Storage Bench

I made the entryway cubby from the book and finally couldn't stand the pile of shoes (3 year old) in the front entryway any longer! So I made the bench and my son is thrilled that he can open and close it and put things in it. I have a few touch-ups to do yet from the pocketholes and countersink holes, but I love it! It was really easy to do. I did modify the plans to fit my entryway, so it's about 36 inches long.
I love it!

Built from Plan(s)
Estimated Cost
40.00
Estimated Time Investment
Weekend Project (10-20 Hours)
Finish Used
Minwax Pre-Stain Wood Conditioner (1 coat)
Rustoleum Dark Walnut Stain (3 coats)
Rustoleum Soft-touch matte polyurethane (2 coats)
I sanded in between coats of finish and in between polyurethane coats
Rustoleum Dark Walnut Stain (3 coats)
Rustoleum Soft-touch matte polyurethane (2 coats)
I sanded in between coats of finish and in between polyurethane coats
Recommended Skill Level
Beginner
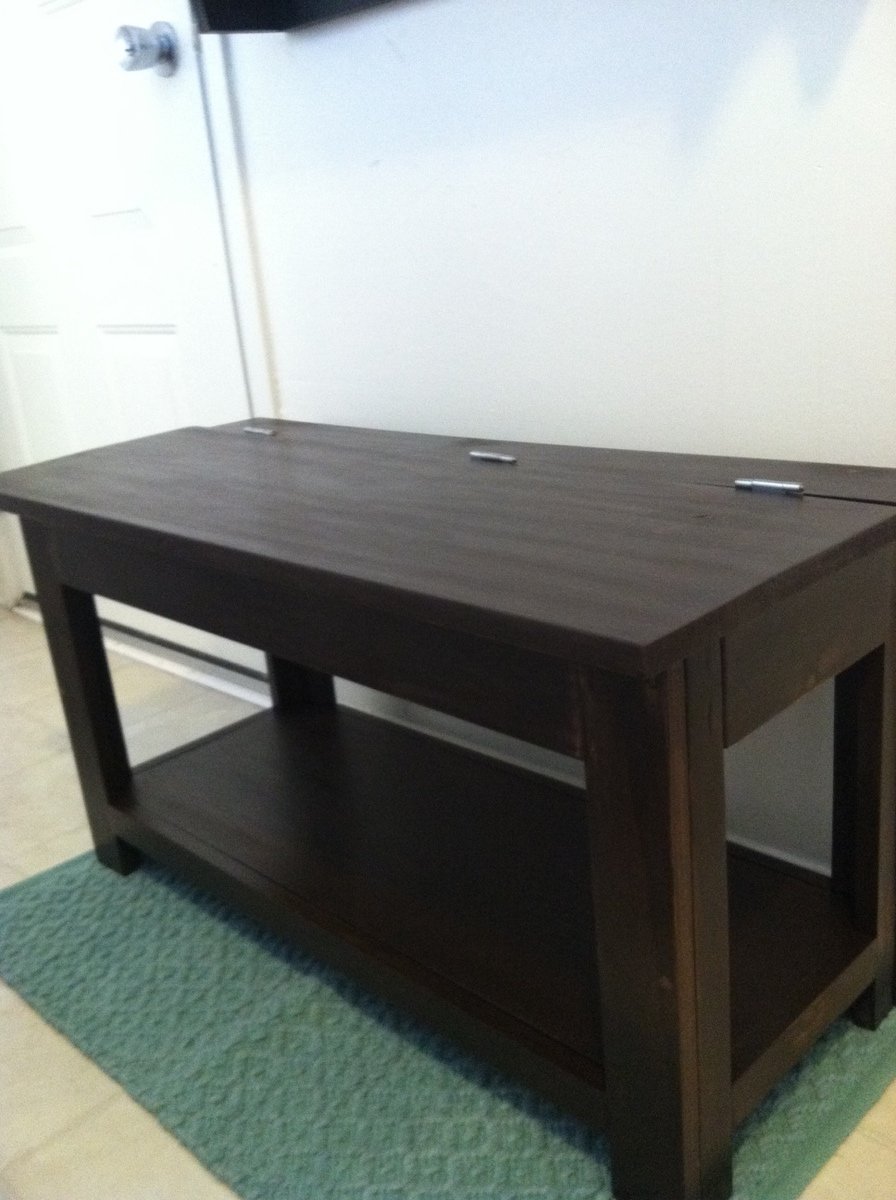
Charging station/nightstand/bookshelf
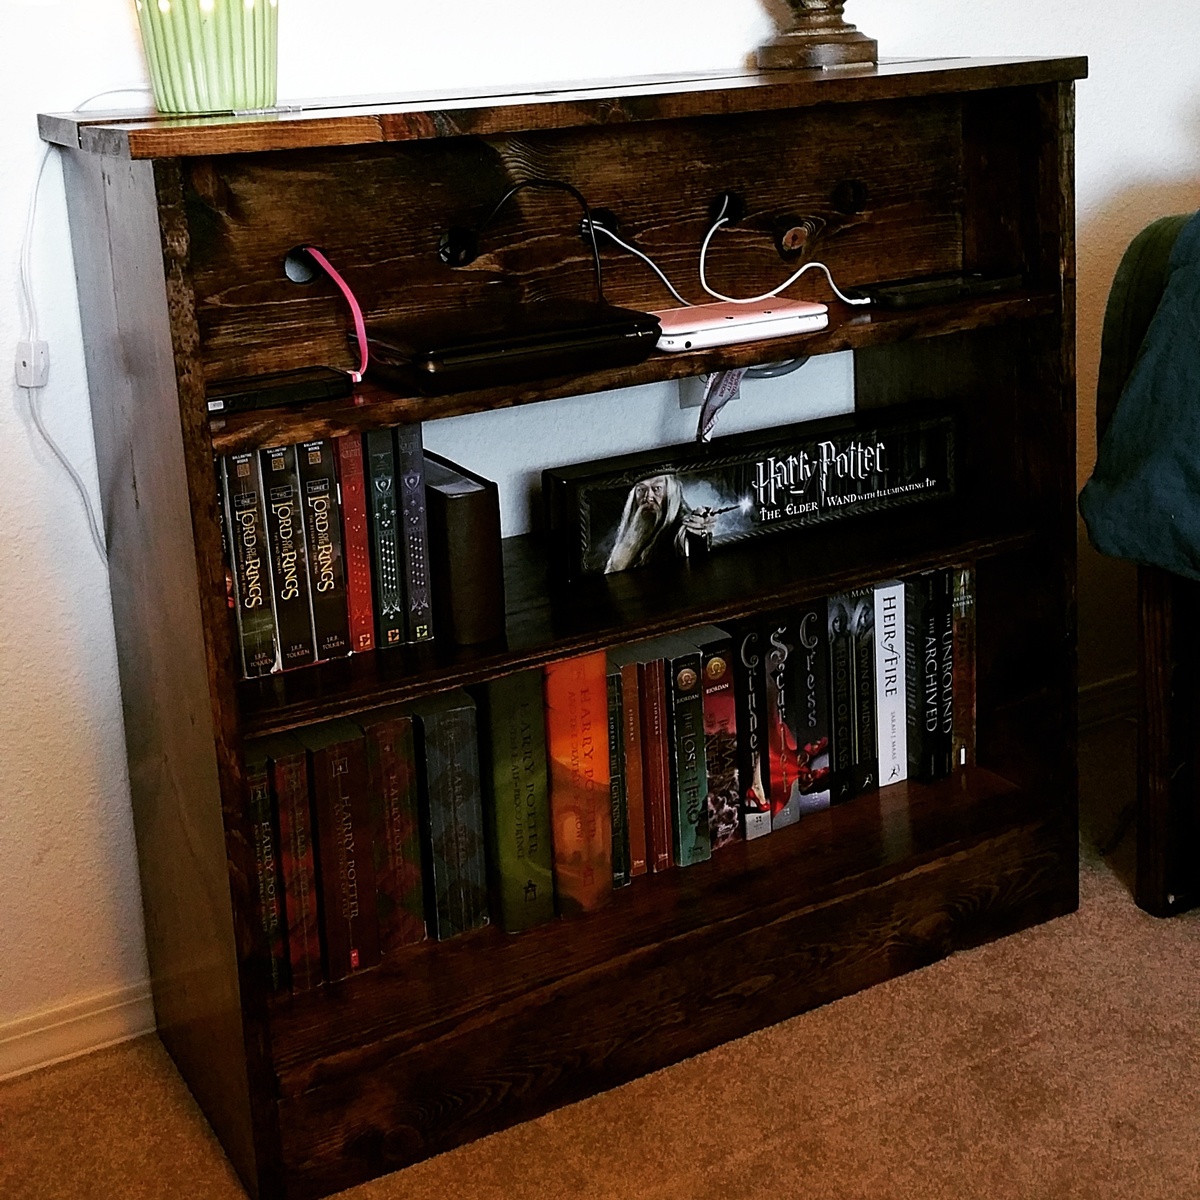
I made this a little bit taller and left off the doors since what we really needed was more bookshelf space. I'm very happy with the way it turned out!
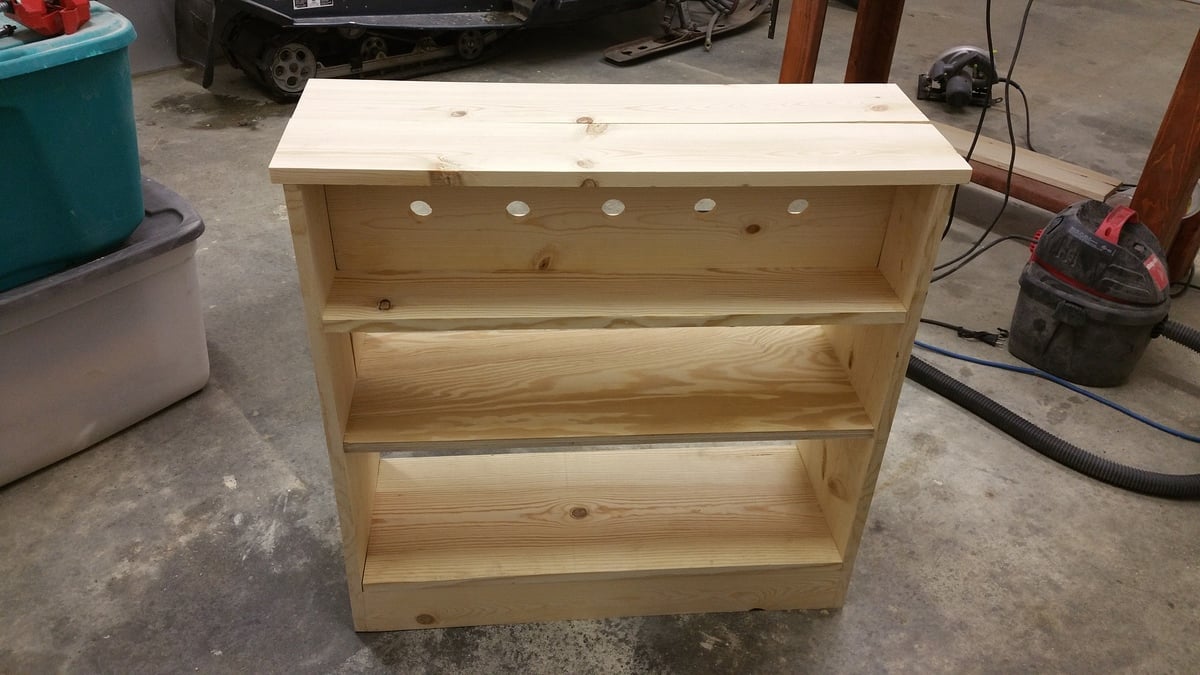
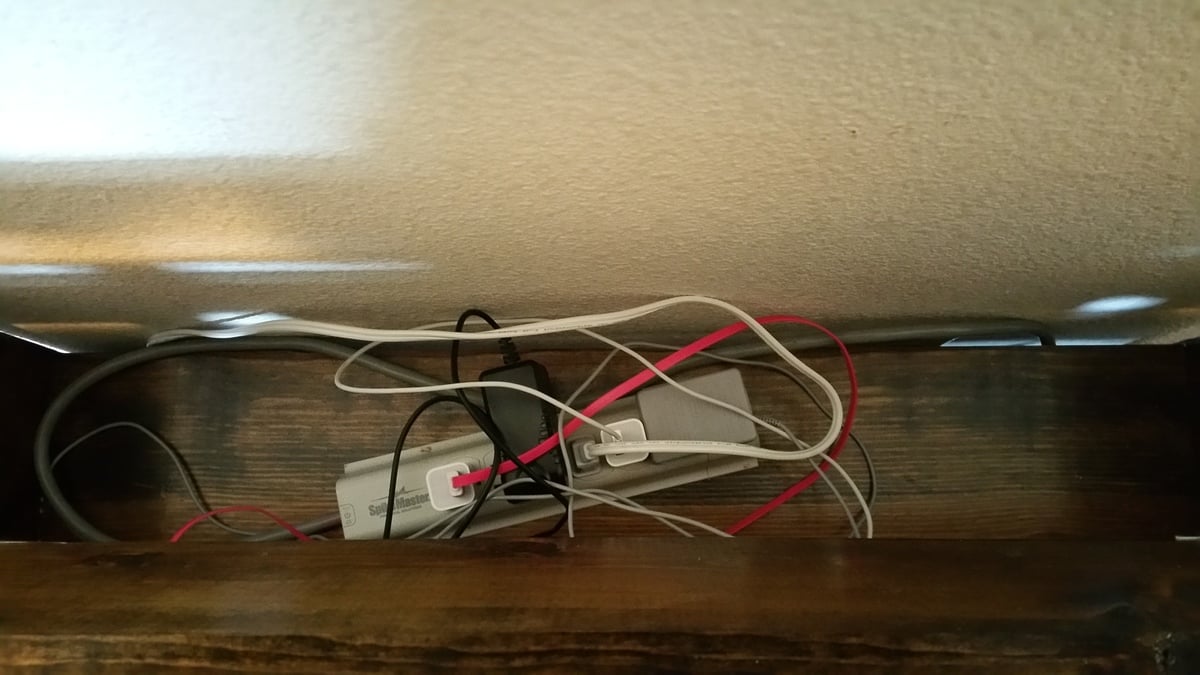
Built from Plan(s)
Estimated Cost
$50
Estimated Time Investment
An Hour or Two (0-2 Hours)
Finish Used
Dark walnut and two coats of semi-gloss polyurethane
Recommended Skill Level
Beginner
Latest Project
Built this for my mother in law. Was so excited how it turned out.
Built from Plan(s)
Comments
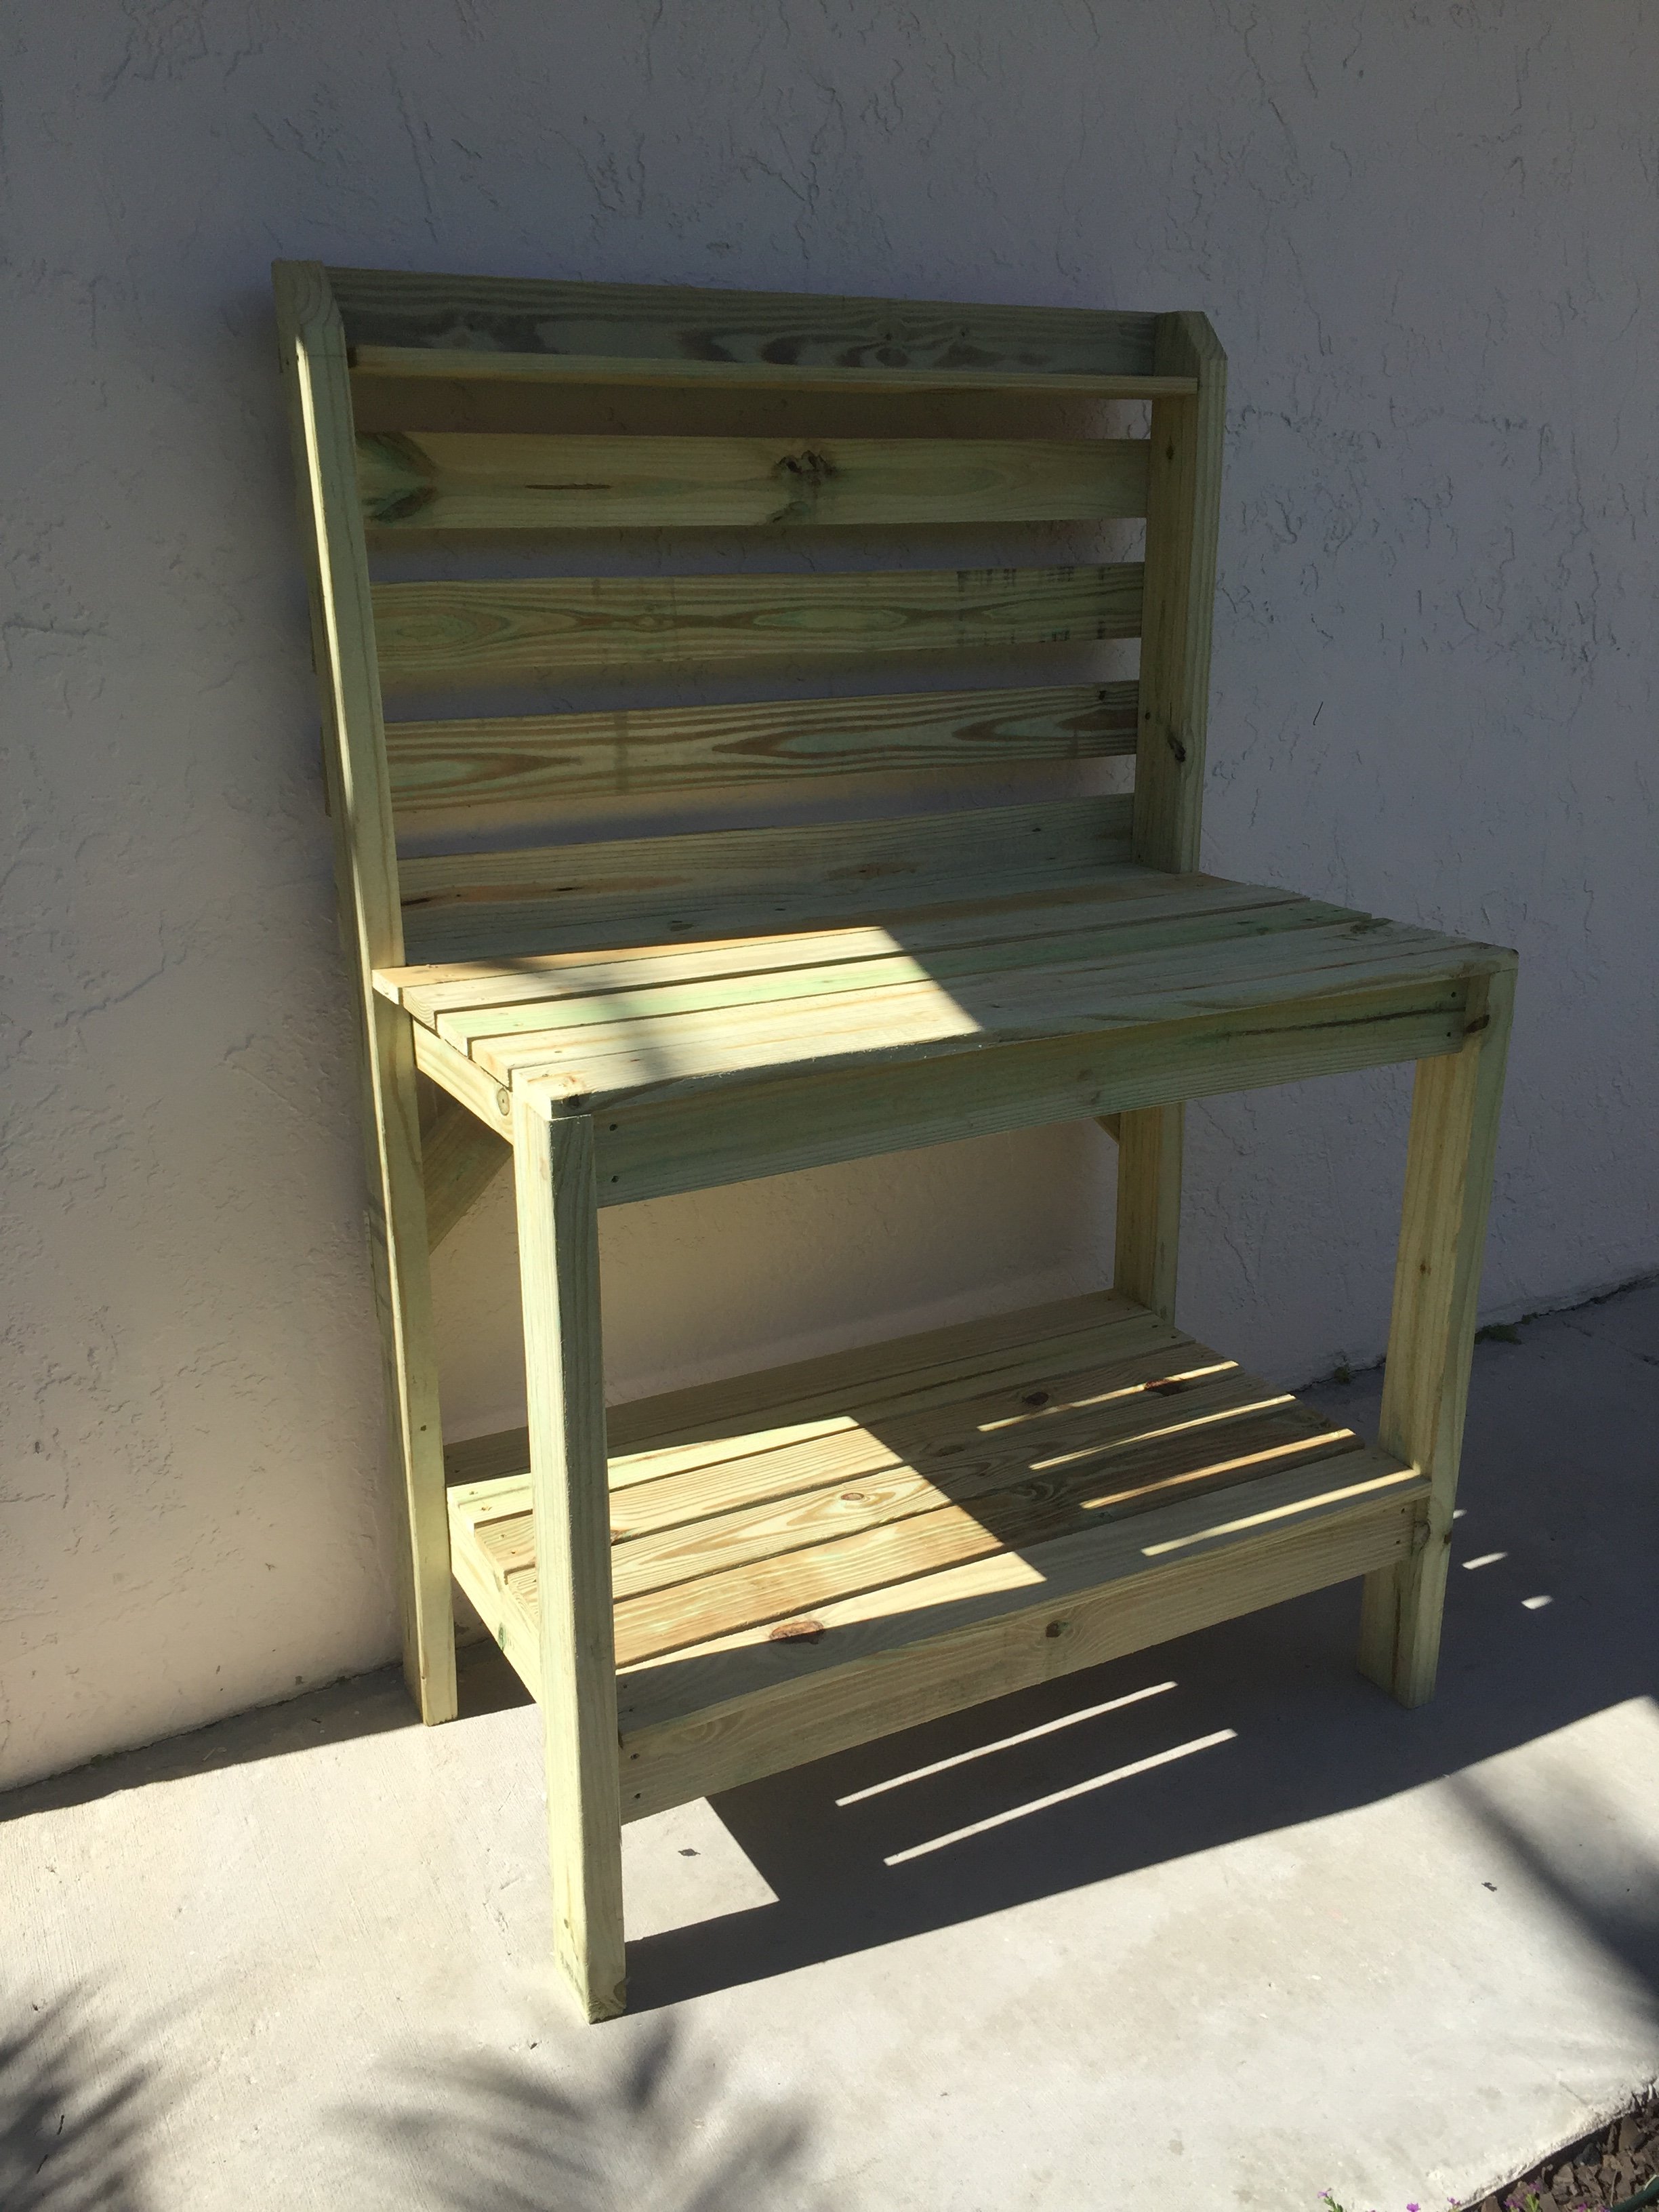
Cedar Planter - Mother's Day Gift
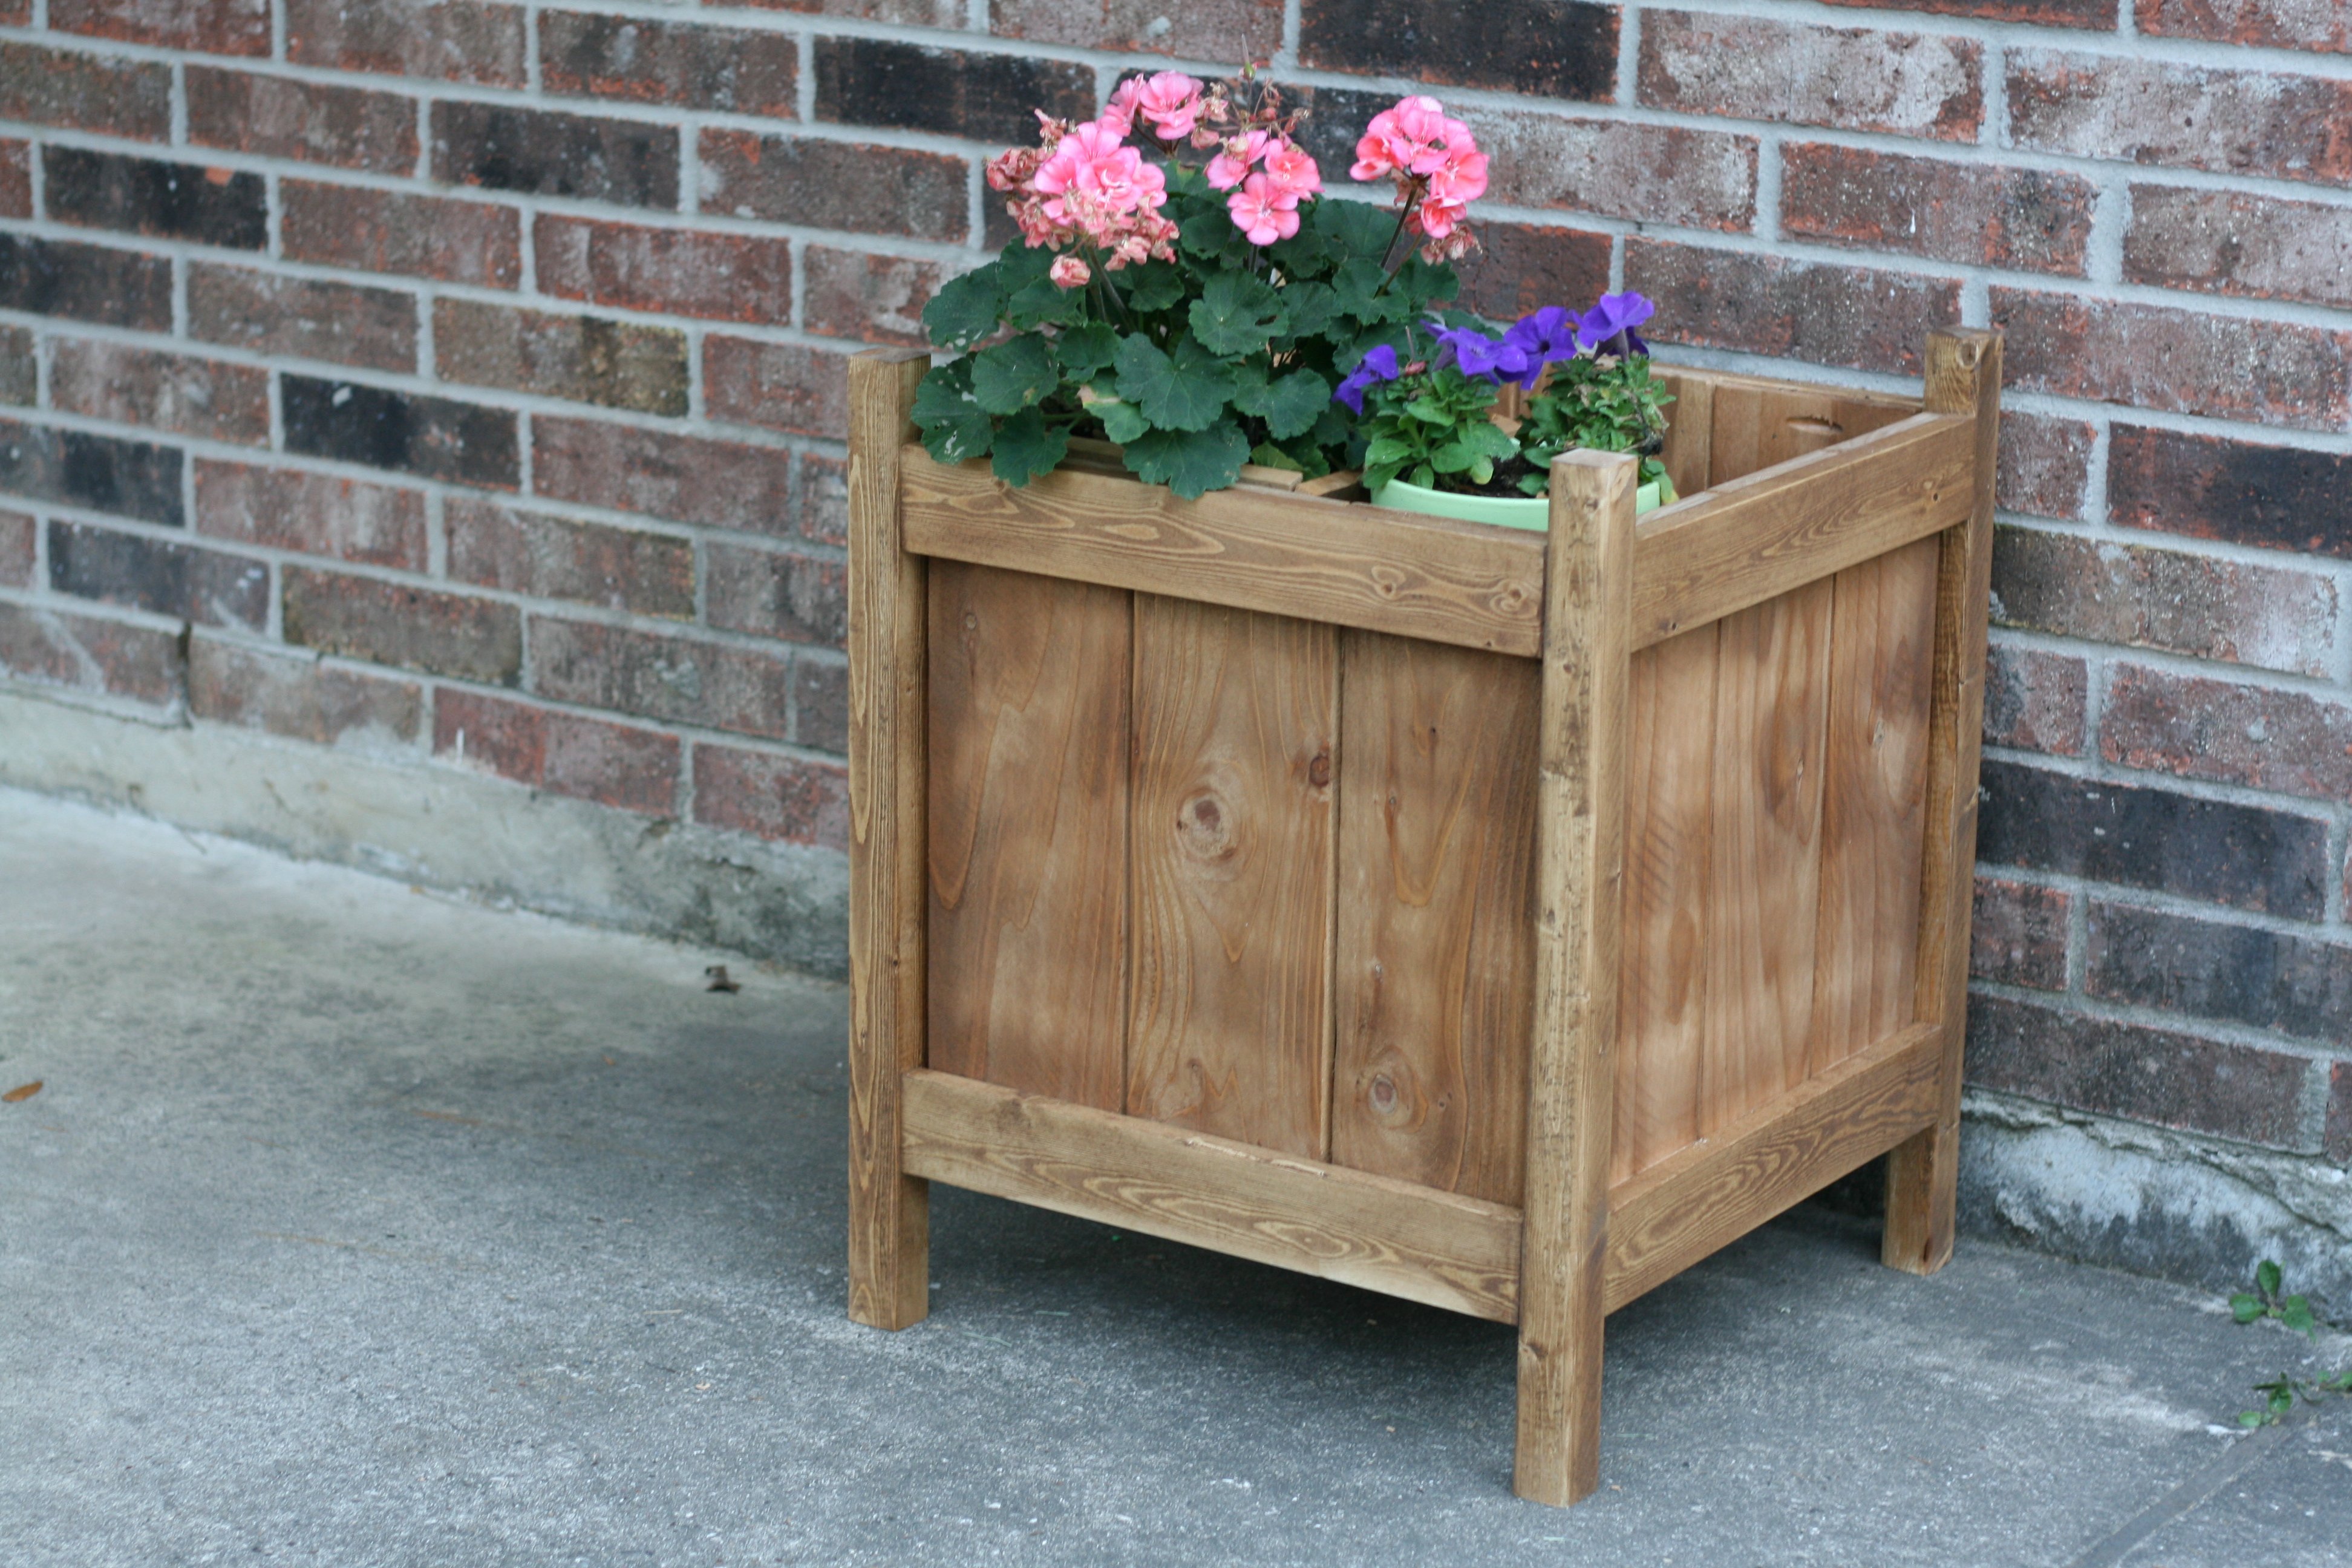
We made this for my husband's Granny who has a bright green thumb, campared to my slightly black one. It turned out great.
This is also the project I learned how to use a Kreg Jig. Amazing. My husband is hooked.
Built from Plan(s)
Estimated Cost
$25
Estimated Time Investment
Afternoon Project (3-6 Hours)
Finish Used
We used what was left of our SPRAY stain. I think it turned out well. Still has a bit of that cedar to it. We really did it so the Pine wouldn't stick out tremendously.
Recommended Skill Level
Beginner
Benchmark Storage or Media Tower
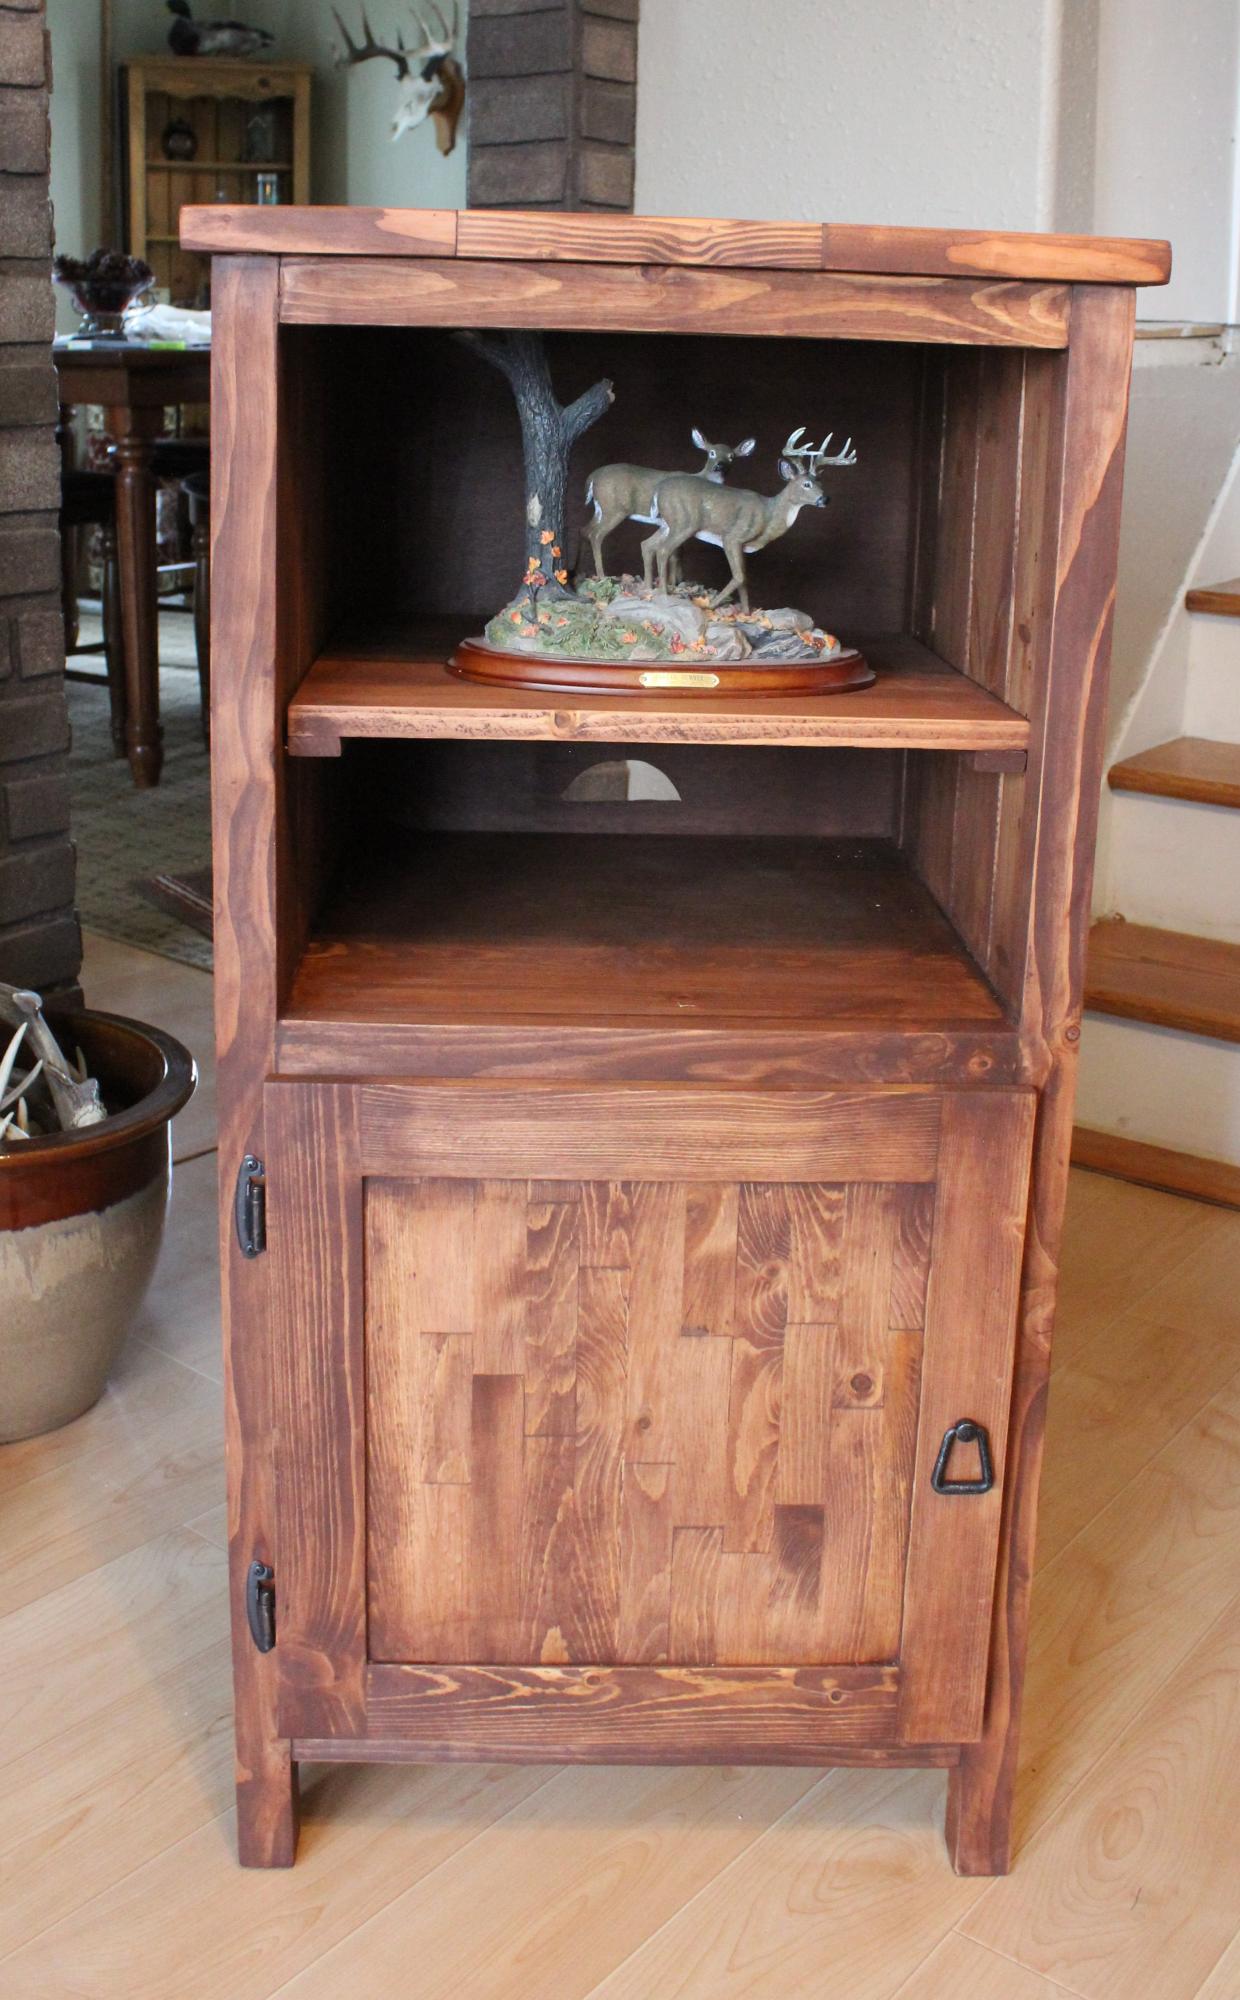
I built this Benchmark Storage or Media Tower as I was looking for some thing to put beside our fire place. I wanted to build some thing that would be about the same height as our fire place so it stands 40 1/4" tall. Also, this month was a the contest to build things from scrap lumber so I took 2 x's that I had laying aorund and cut them down to 1 1/4", then glued together and planed down to make butcher block for the door and top. The sides were actually built from 1 x 6. I also ended up purchasing a Kreg shelving jig so that I could change the shelving. A tool that I highly recommend if you are going to build alot of these projects with shelving. One down and one to go!
Built from Plan(s)
Estimated Cost
$30
Estimated Time Investment
Week Long Project (20 Hours or More)
Finish Used
Old Masters Stain with Minwax Helmsmans Spar Erethane
Recommended Skill Level
Intermediate
Comments


Mon, 03/30/2015 - 20:45
Thanks Ana....fun looking at
Thanks Ana....fun looking at your website and have built many things the last two years from this...and finally signed up w a profile! Thanks again!
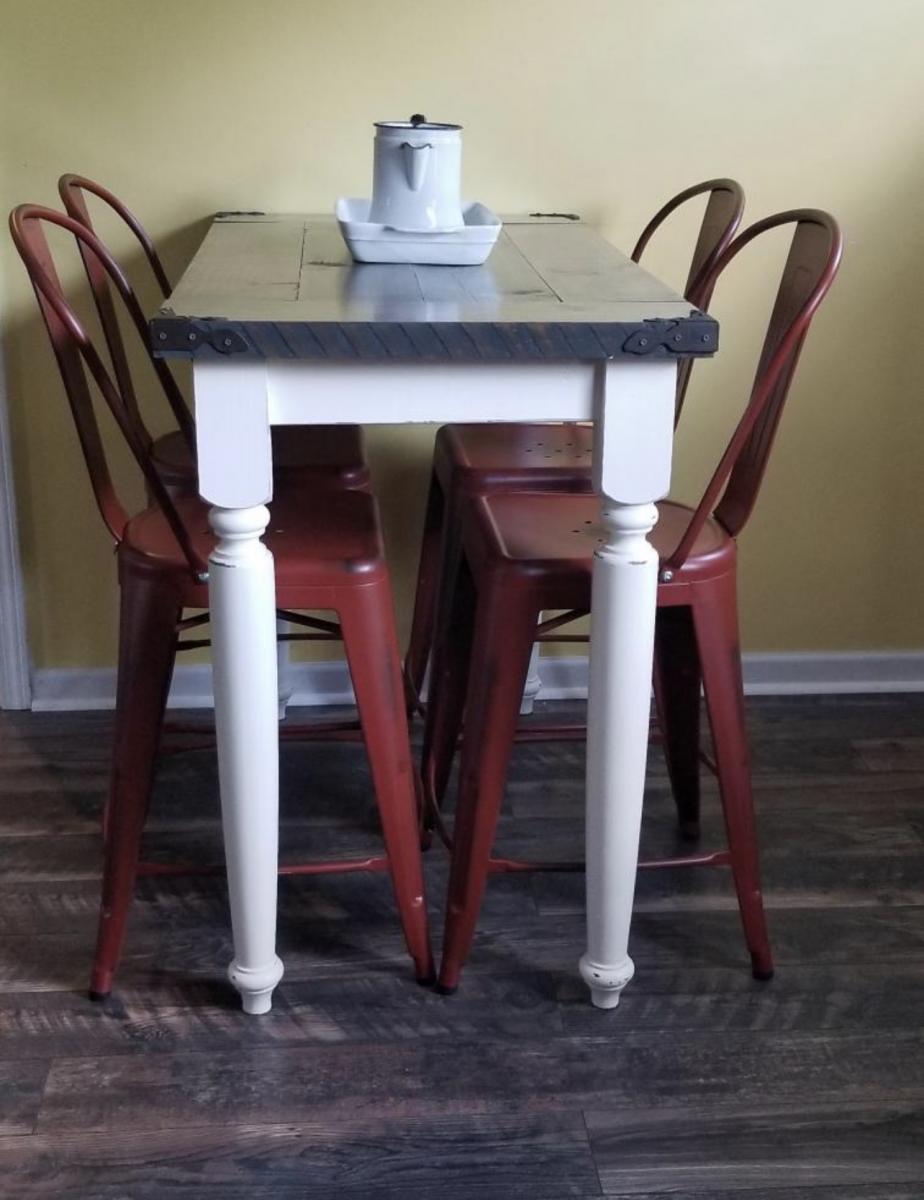
Counter height table/ island
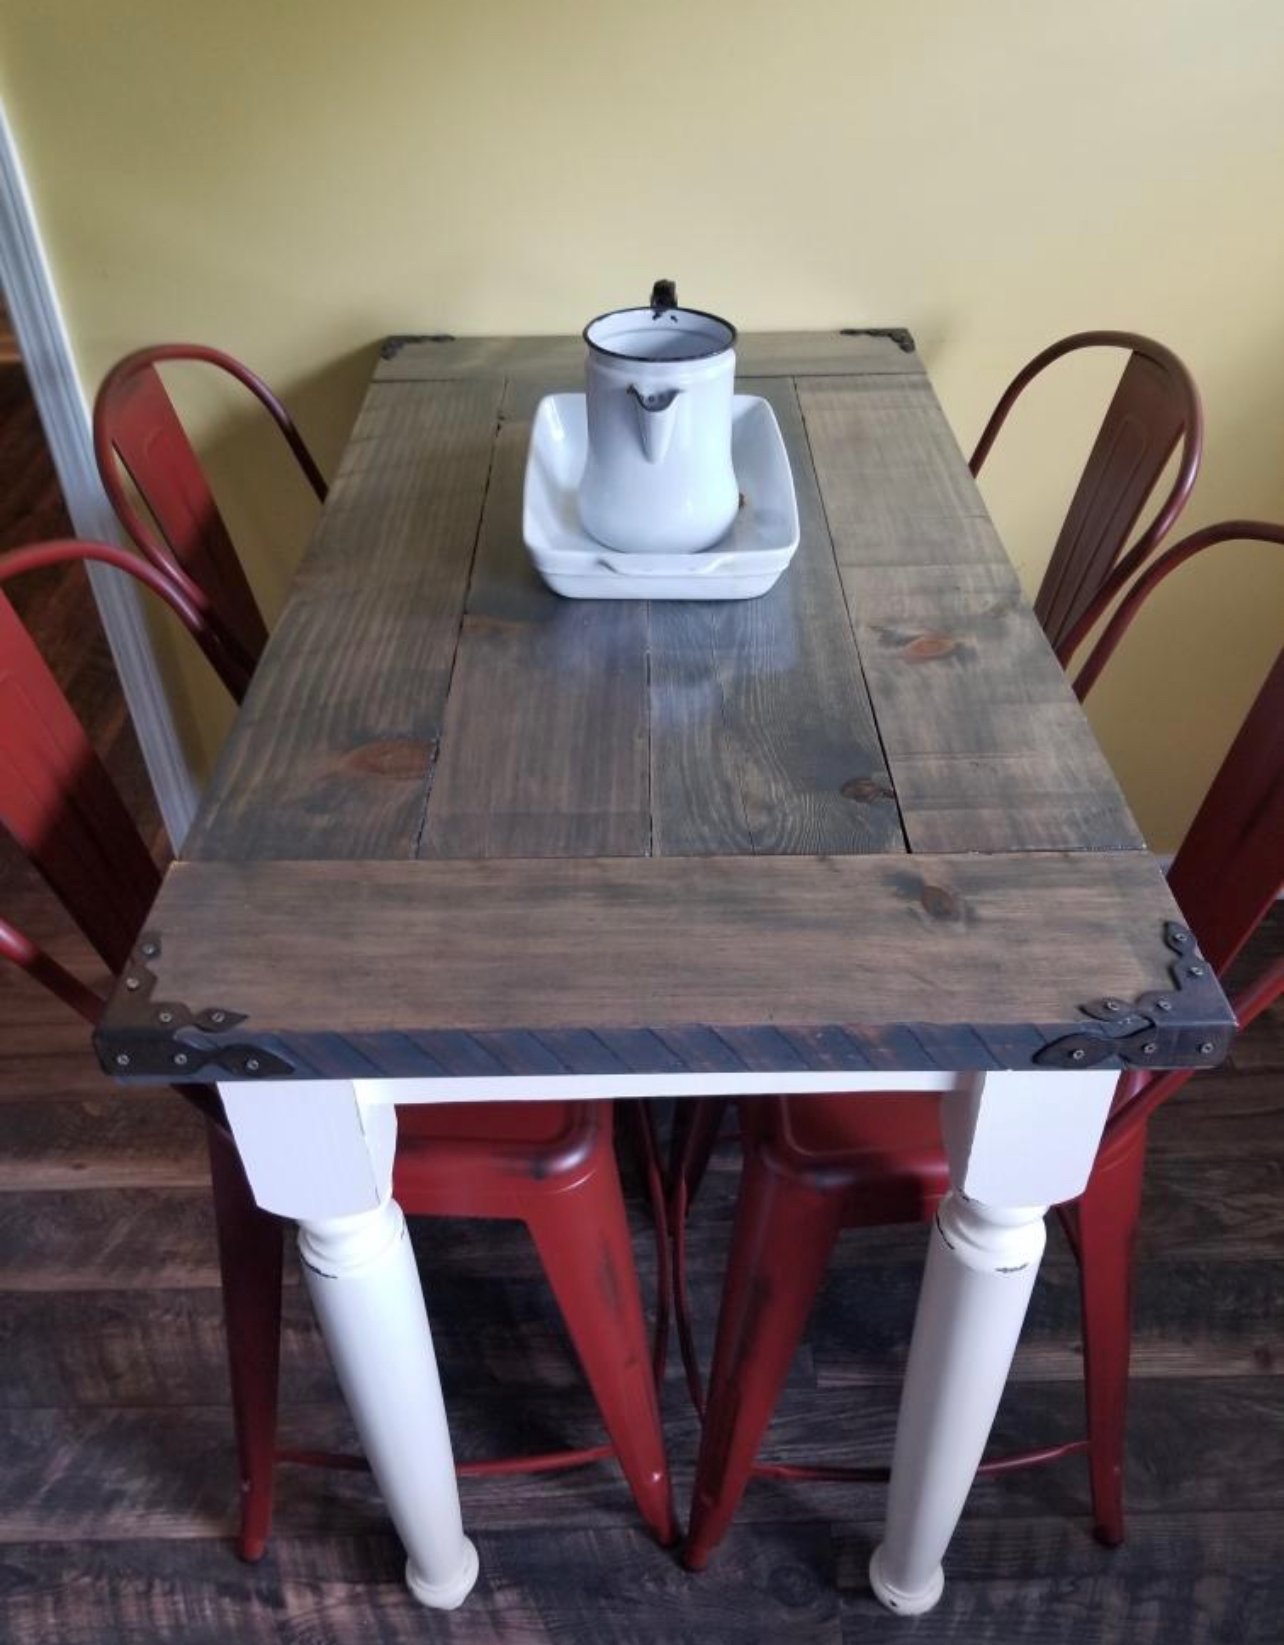
This table was built using wooden counter height legs purchased from Home Depot. The top was 3x6 natural pine cut from Stinking Creek Tennessee. The boards were rough cut lumber from a saw mill. I ran the boards thru a plainer. We left the saw marks on the edge, but sanded the rough part off. The apron is 2x4 wall studs purchased from Lowe’s. I screwed it all together with pocket hole screws and wood glue. The corner decorative metal pieces are from Hobby Lobby. The metal bar stools were ordered from amazon.
Comments
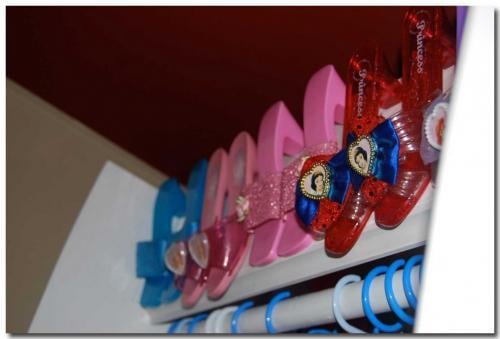
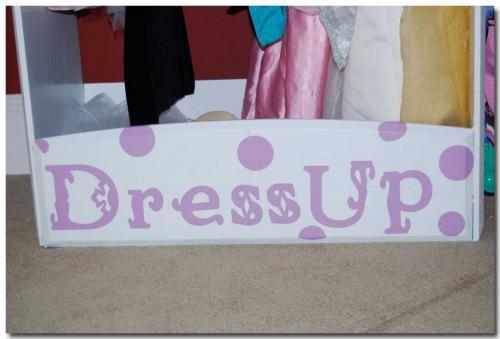
Dress Up Center (from recycled Baby Dresser)
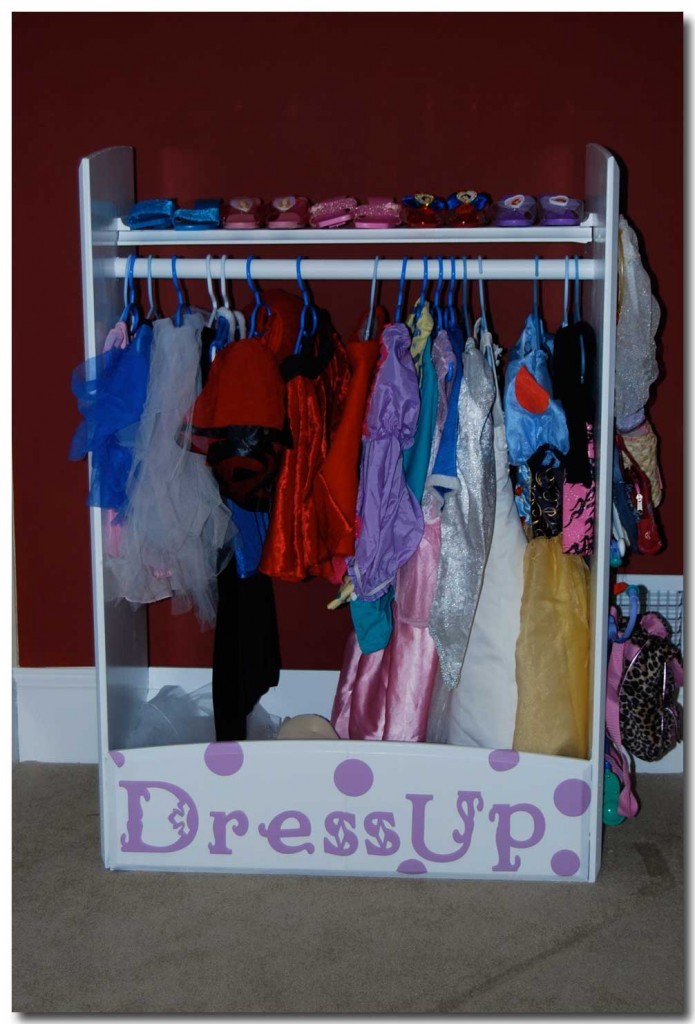
I used by kids baby armoire that was headed to the trash, and turned it into a dress-up center for my 3-year olds birthday gift. The best part is it was virtually free! The only thing I purchased was the pole. It was a lot of hit and miss, measuring, re-measuring, pulling nails out – but – it worked!! And it is awesome – and it only cost me a few bucks!!! As you can tell from the last pictures I took a lot of time getting it ready – and you can tell from the last picture it didn’t take them long to mess it up.
The best part was that the girls were so excited. Hayden – the birthday girl – looked at it with her eye’s wide open – walked slowly too it – looked at me and said “Mommy – It’s beautiful!” It was the sweetest most heart warming thing! I love that now my kids look at something and either ask me to make it – or did I make it.
Love for you to see all the before and after pictures over at my blog: http://mycreativeescapes.blogspot.com/2011/02/dress-up-center.html


Estimated Cost
$5
Estimated Time Investment
Afternoon Project (3-6 Hours)
Finish Used
Sanding, primeing, painting
Recommended Skill Level
Intermediate
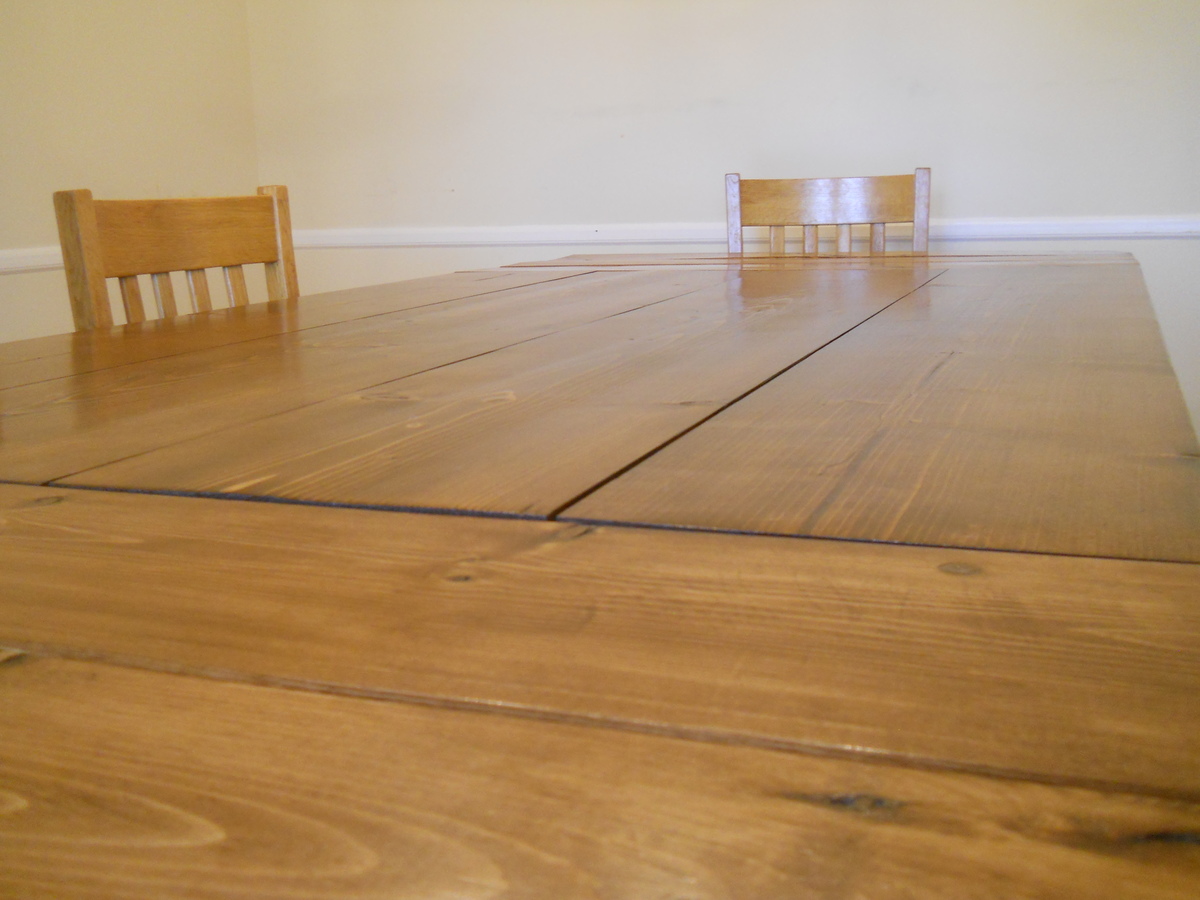
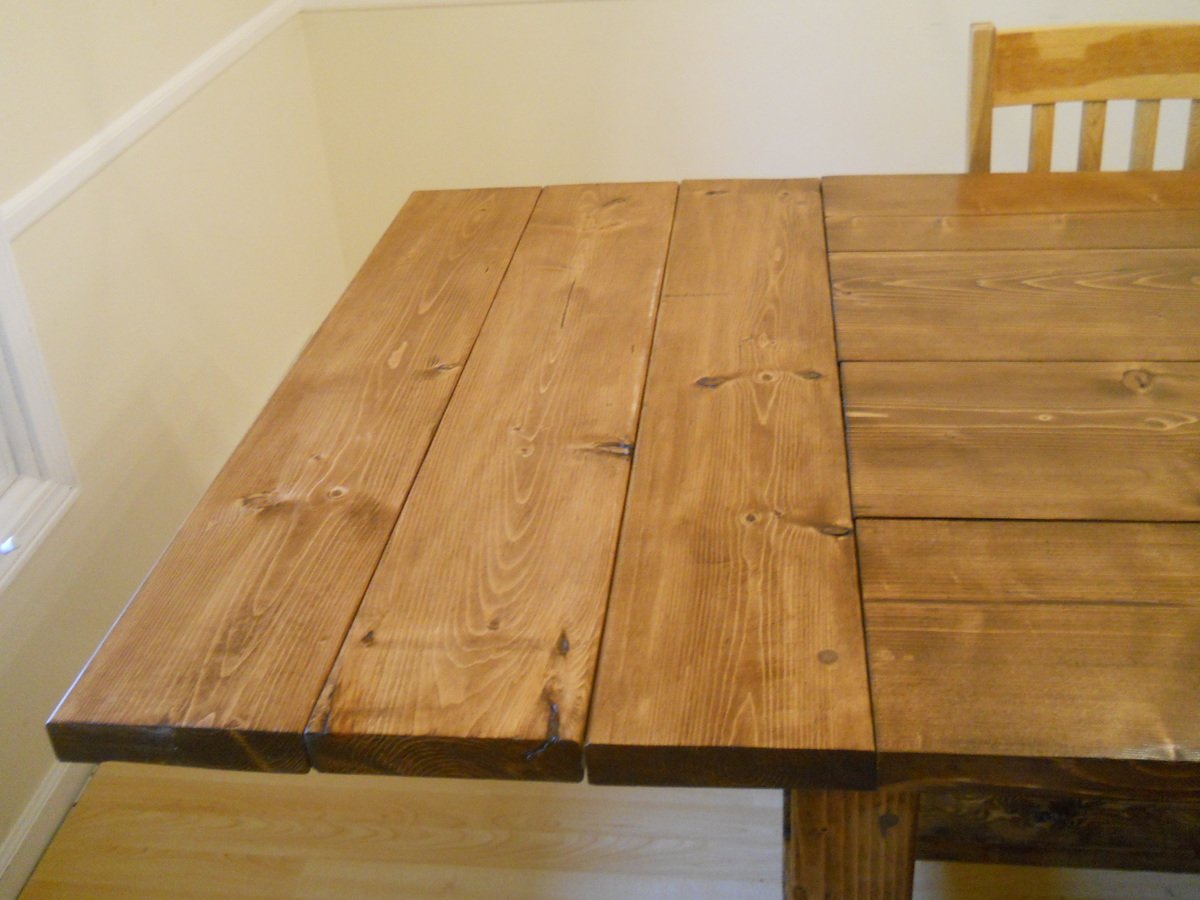
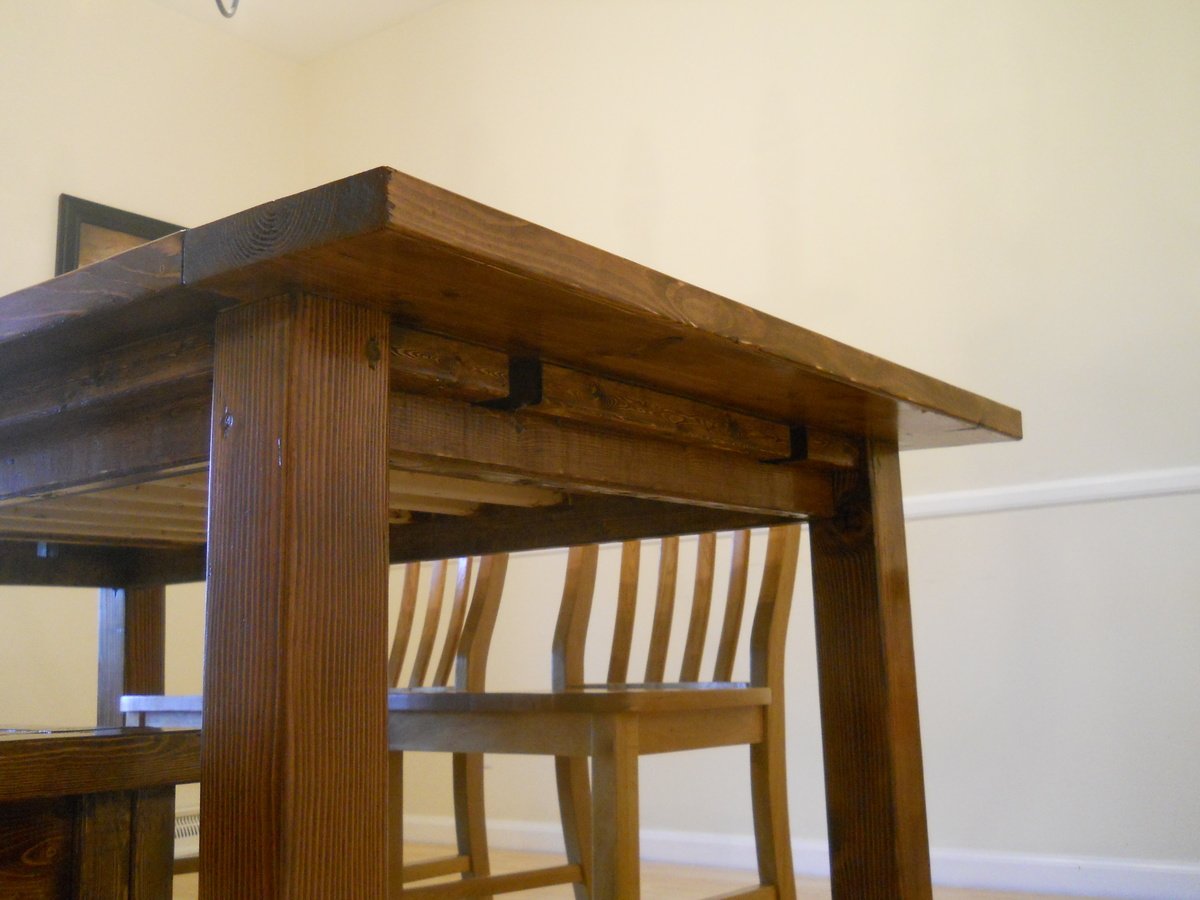
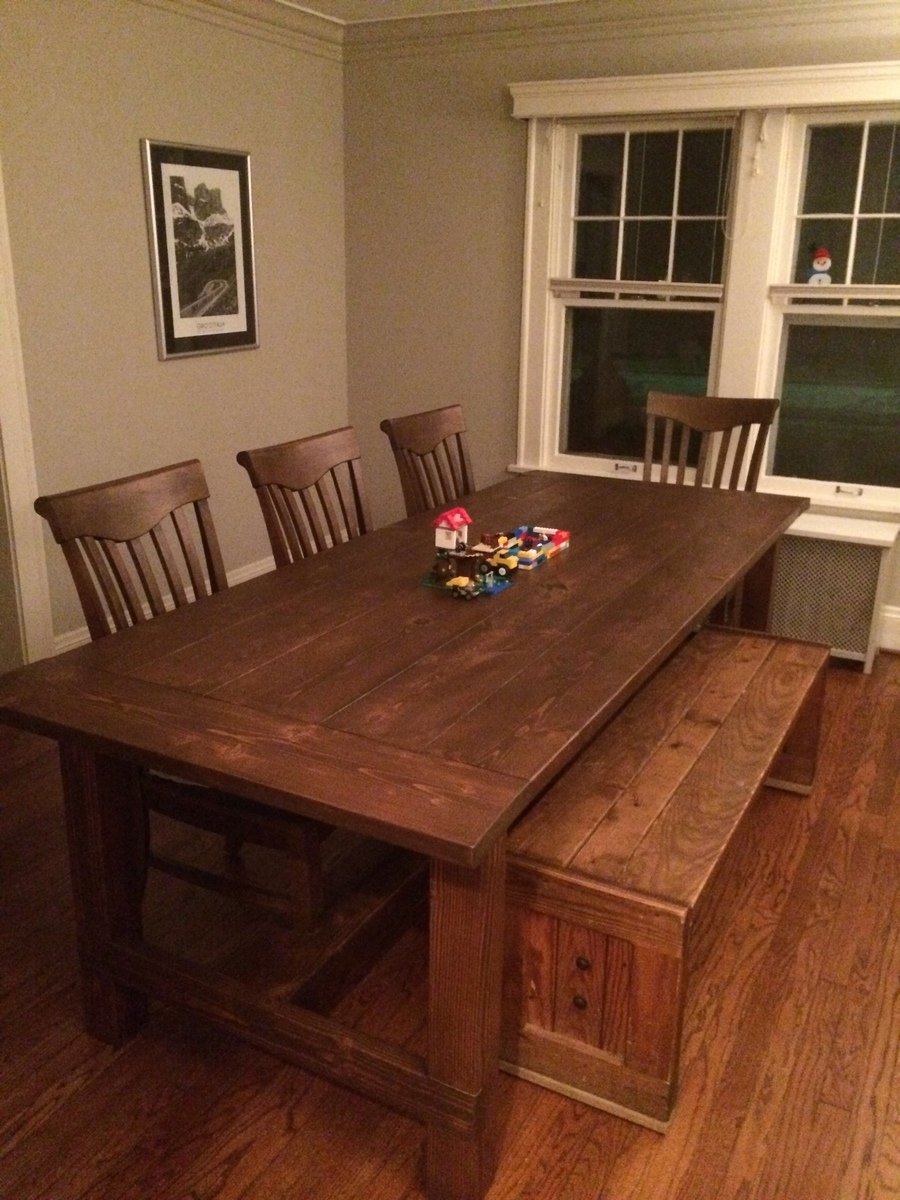
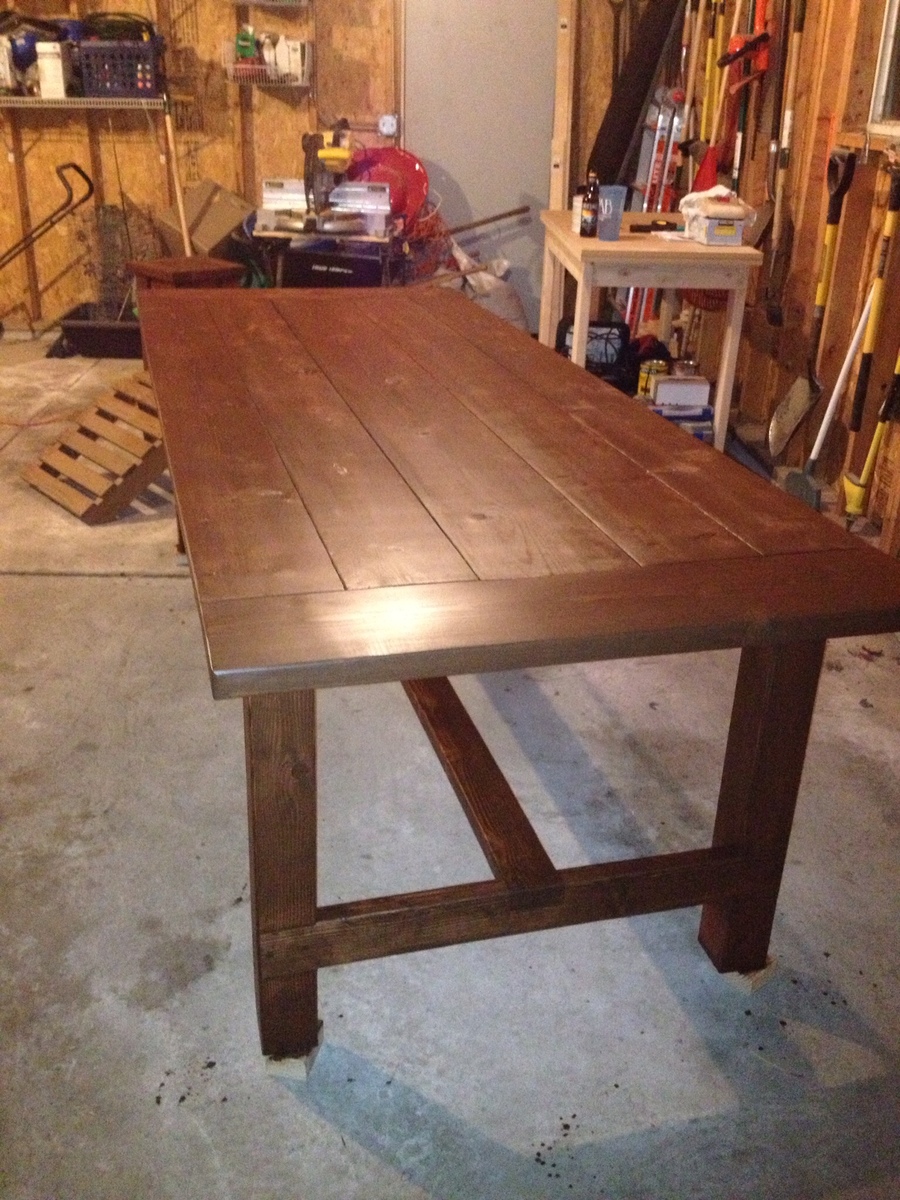
Farm House Dining Room Table (Modified with Breadboard Extensions)
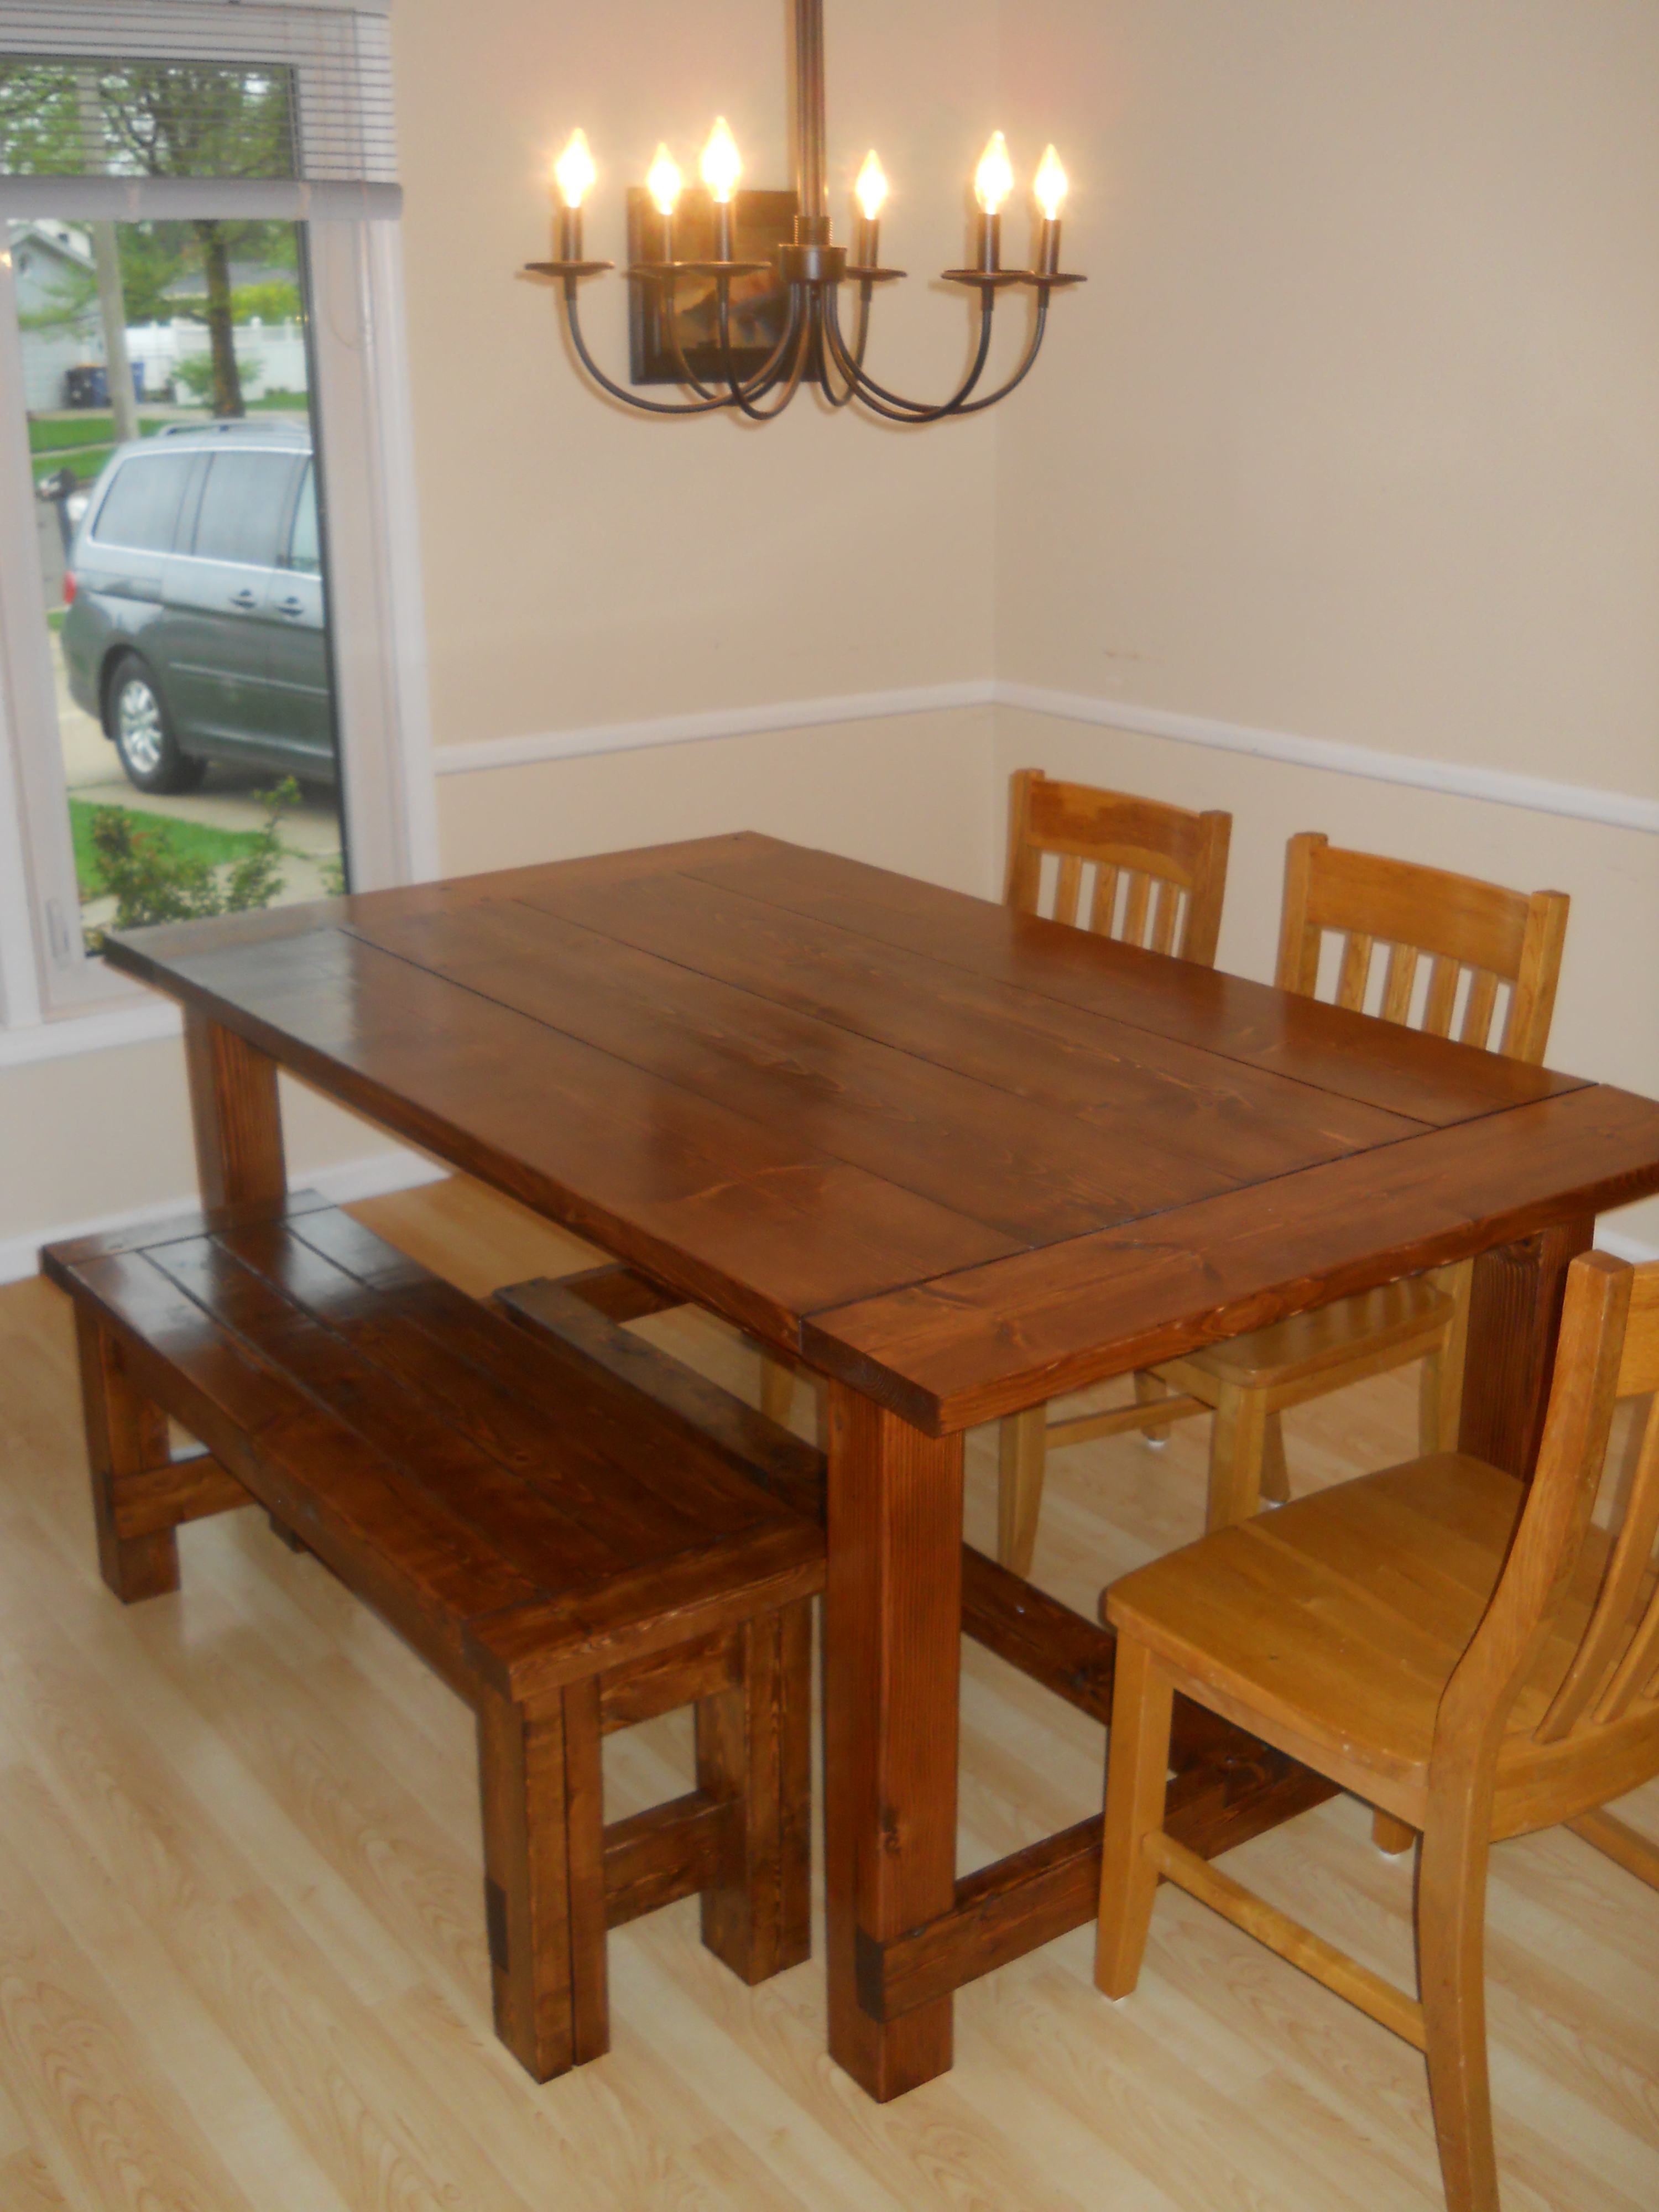
This is a modified plan for Ana White's Farm House Table.
I shortened the table to about 72 inches with breadboards on the ends and added removable breadboard extensions for a total of about 100 inches of table for a 12x11 room. I also built the Farm House bench but shortened it to 48 inches.
The wood is white pine and Douglas Fir 4x4 legs. The total cost was $198 for the wood/screws and about $30 for the stain and sand paper. I bought an additional set of countersink bits for holes.
I used the following tools:
- Hand Saw
- Table Saw
- Compound Miter Saw
- Hand Drill with various bits and countersinks
- Square, pencil and straight edges
- Tape measure
- Clamps
- Wood Chisel Set
- Sharpening Stone
- Level
-
It took about 35 hours of work.
The stain is English Chestnut and we pretreated the wood to accept the stain by using wood conditioner. This made a dramatic difference in leveling out the stain between the white pine and Douglas Fir. I used 3 coats of clear polyurethane and 2 coats of satin on the top with gentle sanding in between coats.

Estimated Cost
$230
Estimated Time Investment
Week Long Project (20 Hours or More)
Finish Used
Prepped the wood with wood conditioner before applying stain. English Chestnut stain with 3-clear polyurethane coats followed by 2-satin coats. Light sanding in between coats.
Recommended Skill Level
Intermediate
Cabin Bunk System

I made this bed for my son. I was a beginner with little to no experience before I started this project. I learned a LOT along the way and now I'm addicted to building things. It wouldn't have taken me so long if I had a little more experience. Staining was difficult, especially when you have two kids wanting to help. My drawers slides were absolutely impossible! Next time I will use a different method for the drawers. I still need to make the ladder. I haven't come across any plans for that so I'm going to wing it. The bed is not perfect by any means but my son doesn't care.
Built from Plan(s)
Estimated Cost
$300-400
Estimated Time Investment
Week Long Project (20 Hours or More)
Finish Used
I used one coat of Safecoat DuroStain, water based, Walnut color, low odor. For the poly, I used two coats of Vermont Natural Coatings, PolyWhey, water-based, clear satin. I should have used three coats of the poly but I ran out of energy. It took me 8 hours to sand the entire bunk system and apply the second coat. I like these products because they are not toxic and green.
Recommended Skill Level
Beginner
2x4s on the ends and 1x4s in the middle.
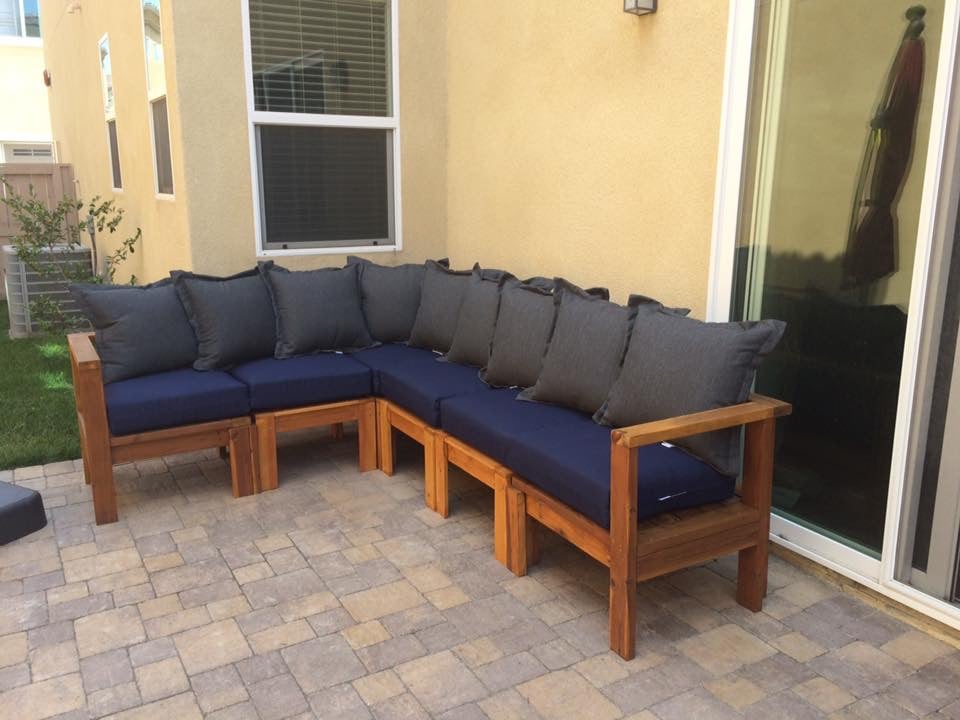
I made the ends with 2x4s and the middle with 1x4s. The most expensive thing was the seat cushions.
Built from Plan(s)
Estimated Cost
The wood was about 70 dollars.
Estimated Time Investment
Week Long Project (20 Hours or More)
Finish Used
Stain
Recommended Skill Level
Beginner
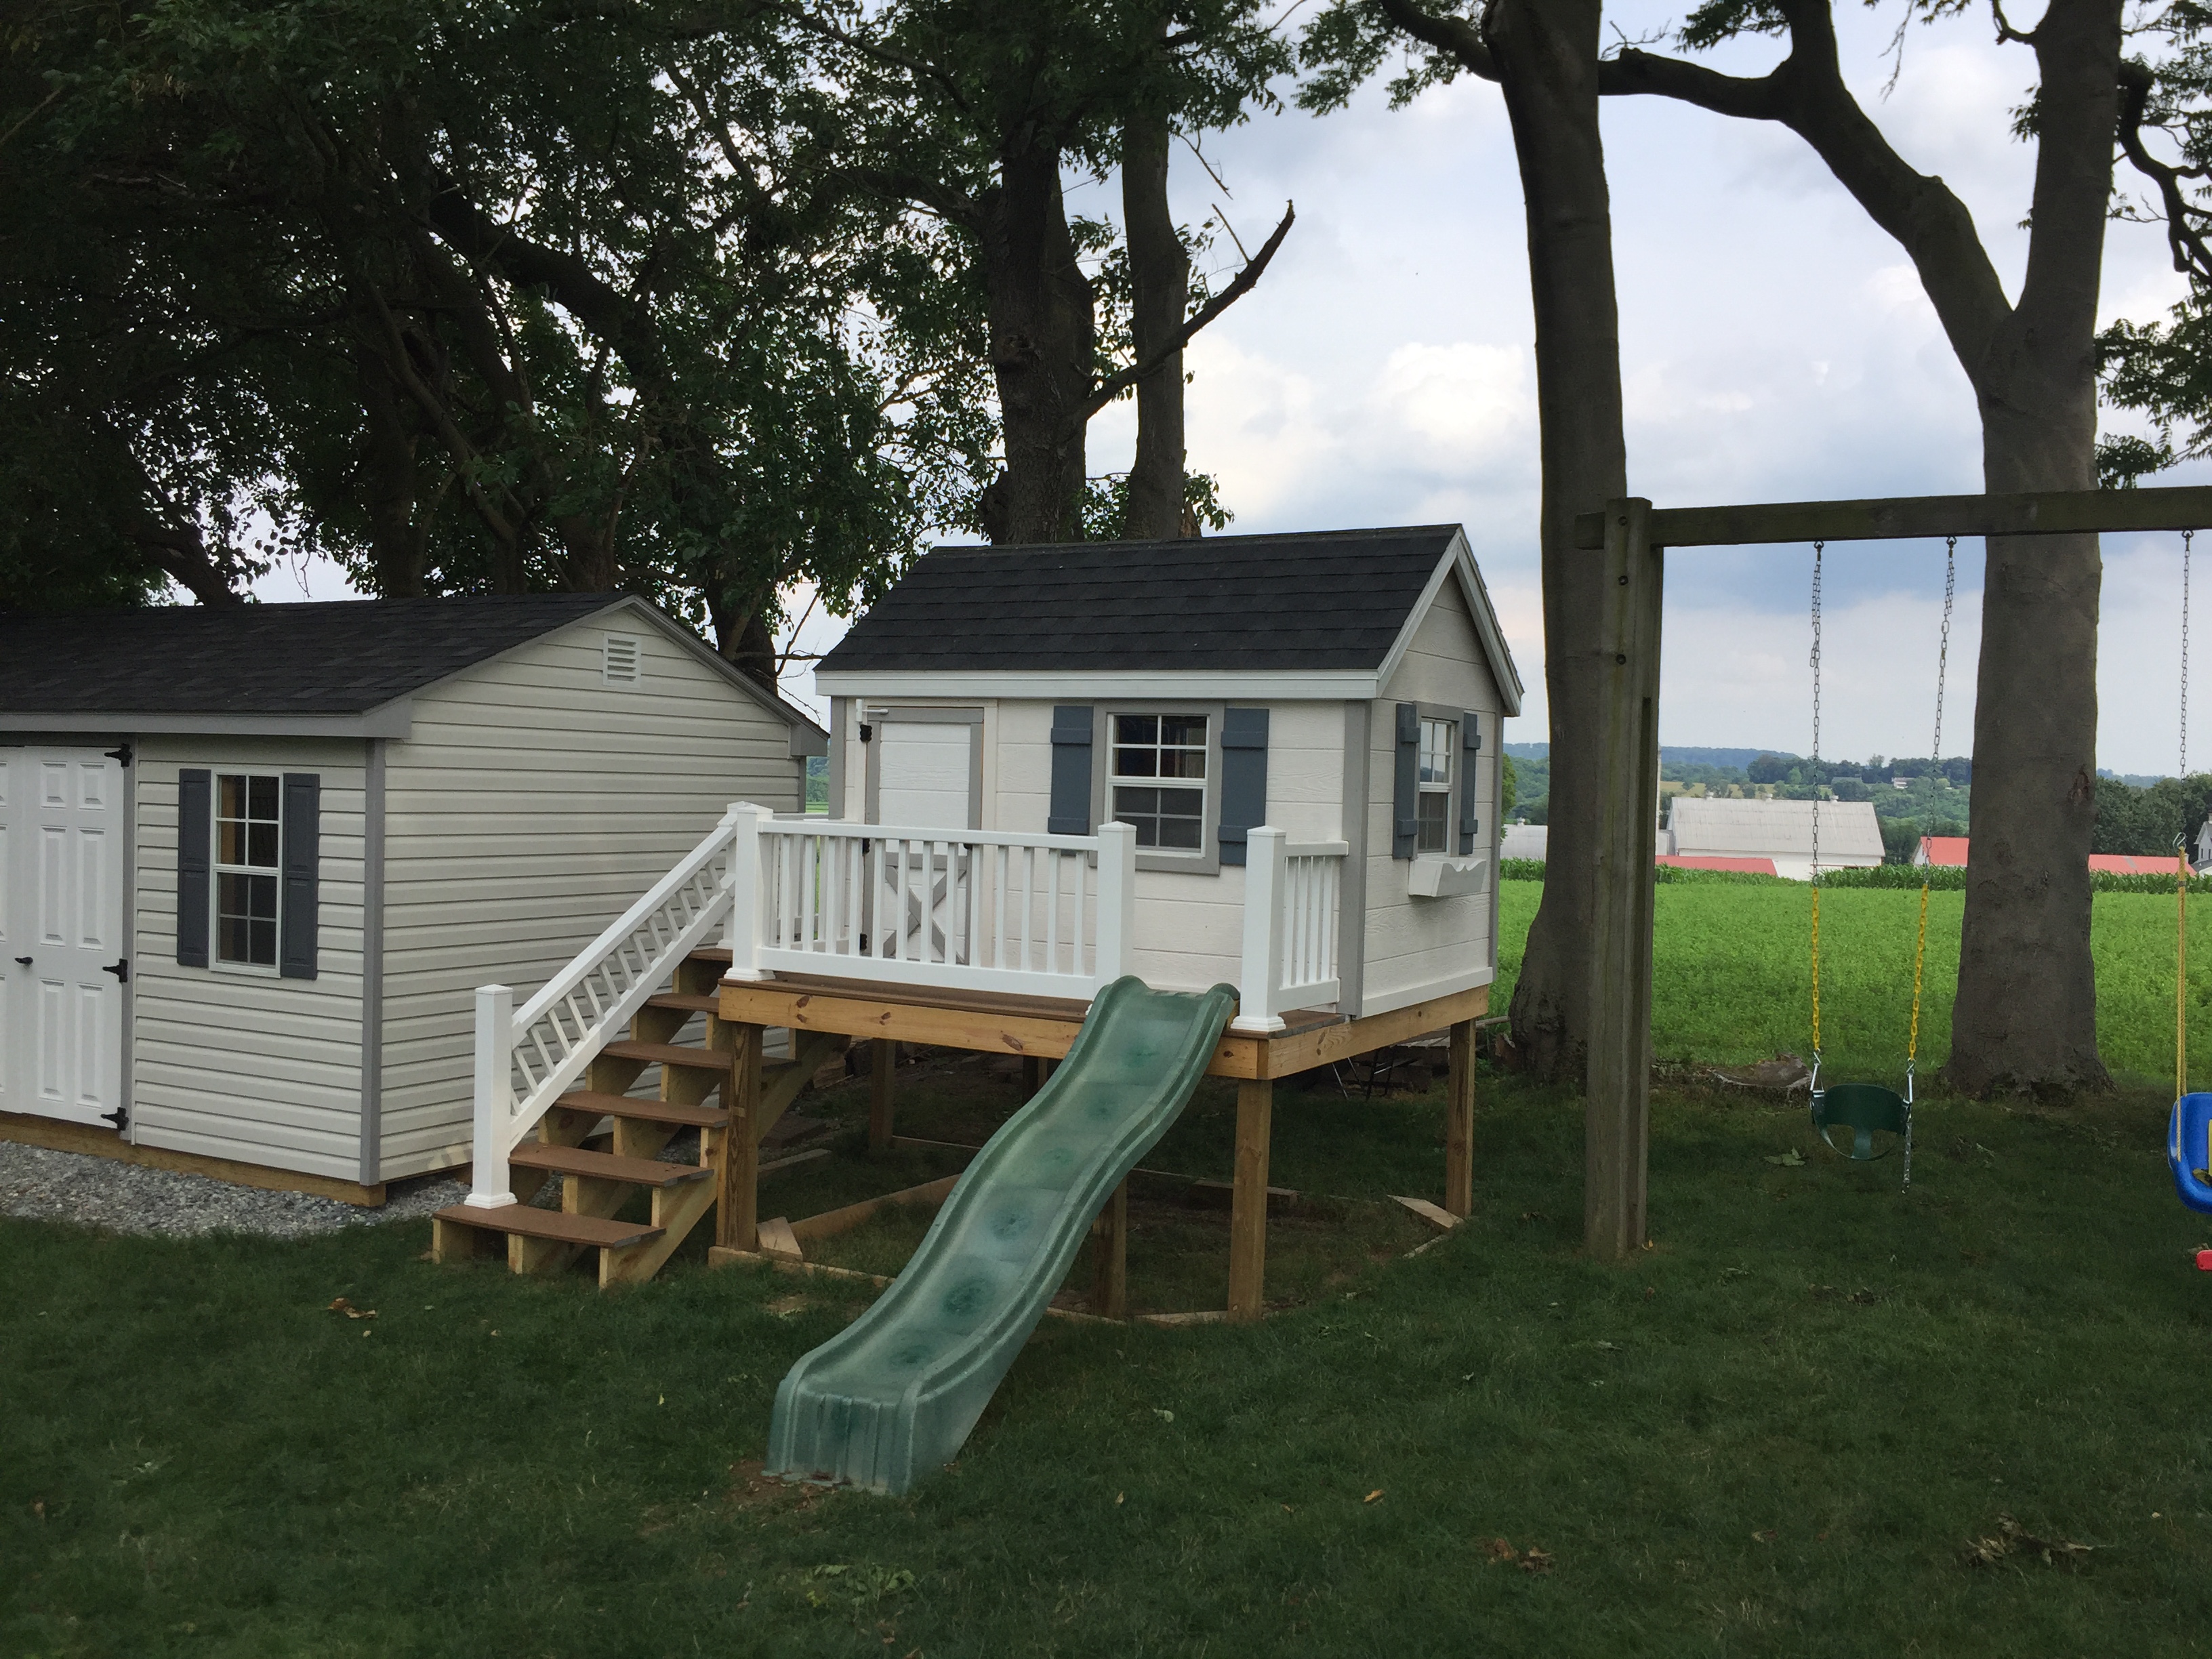
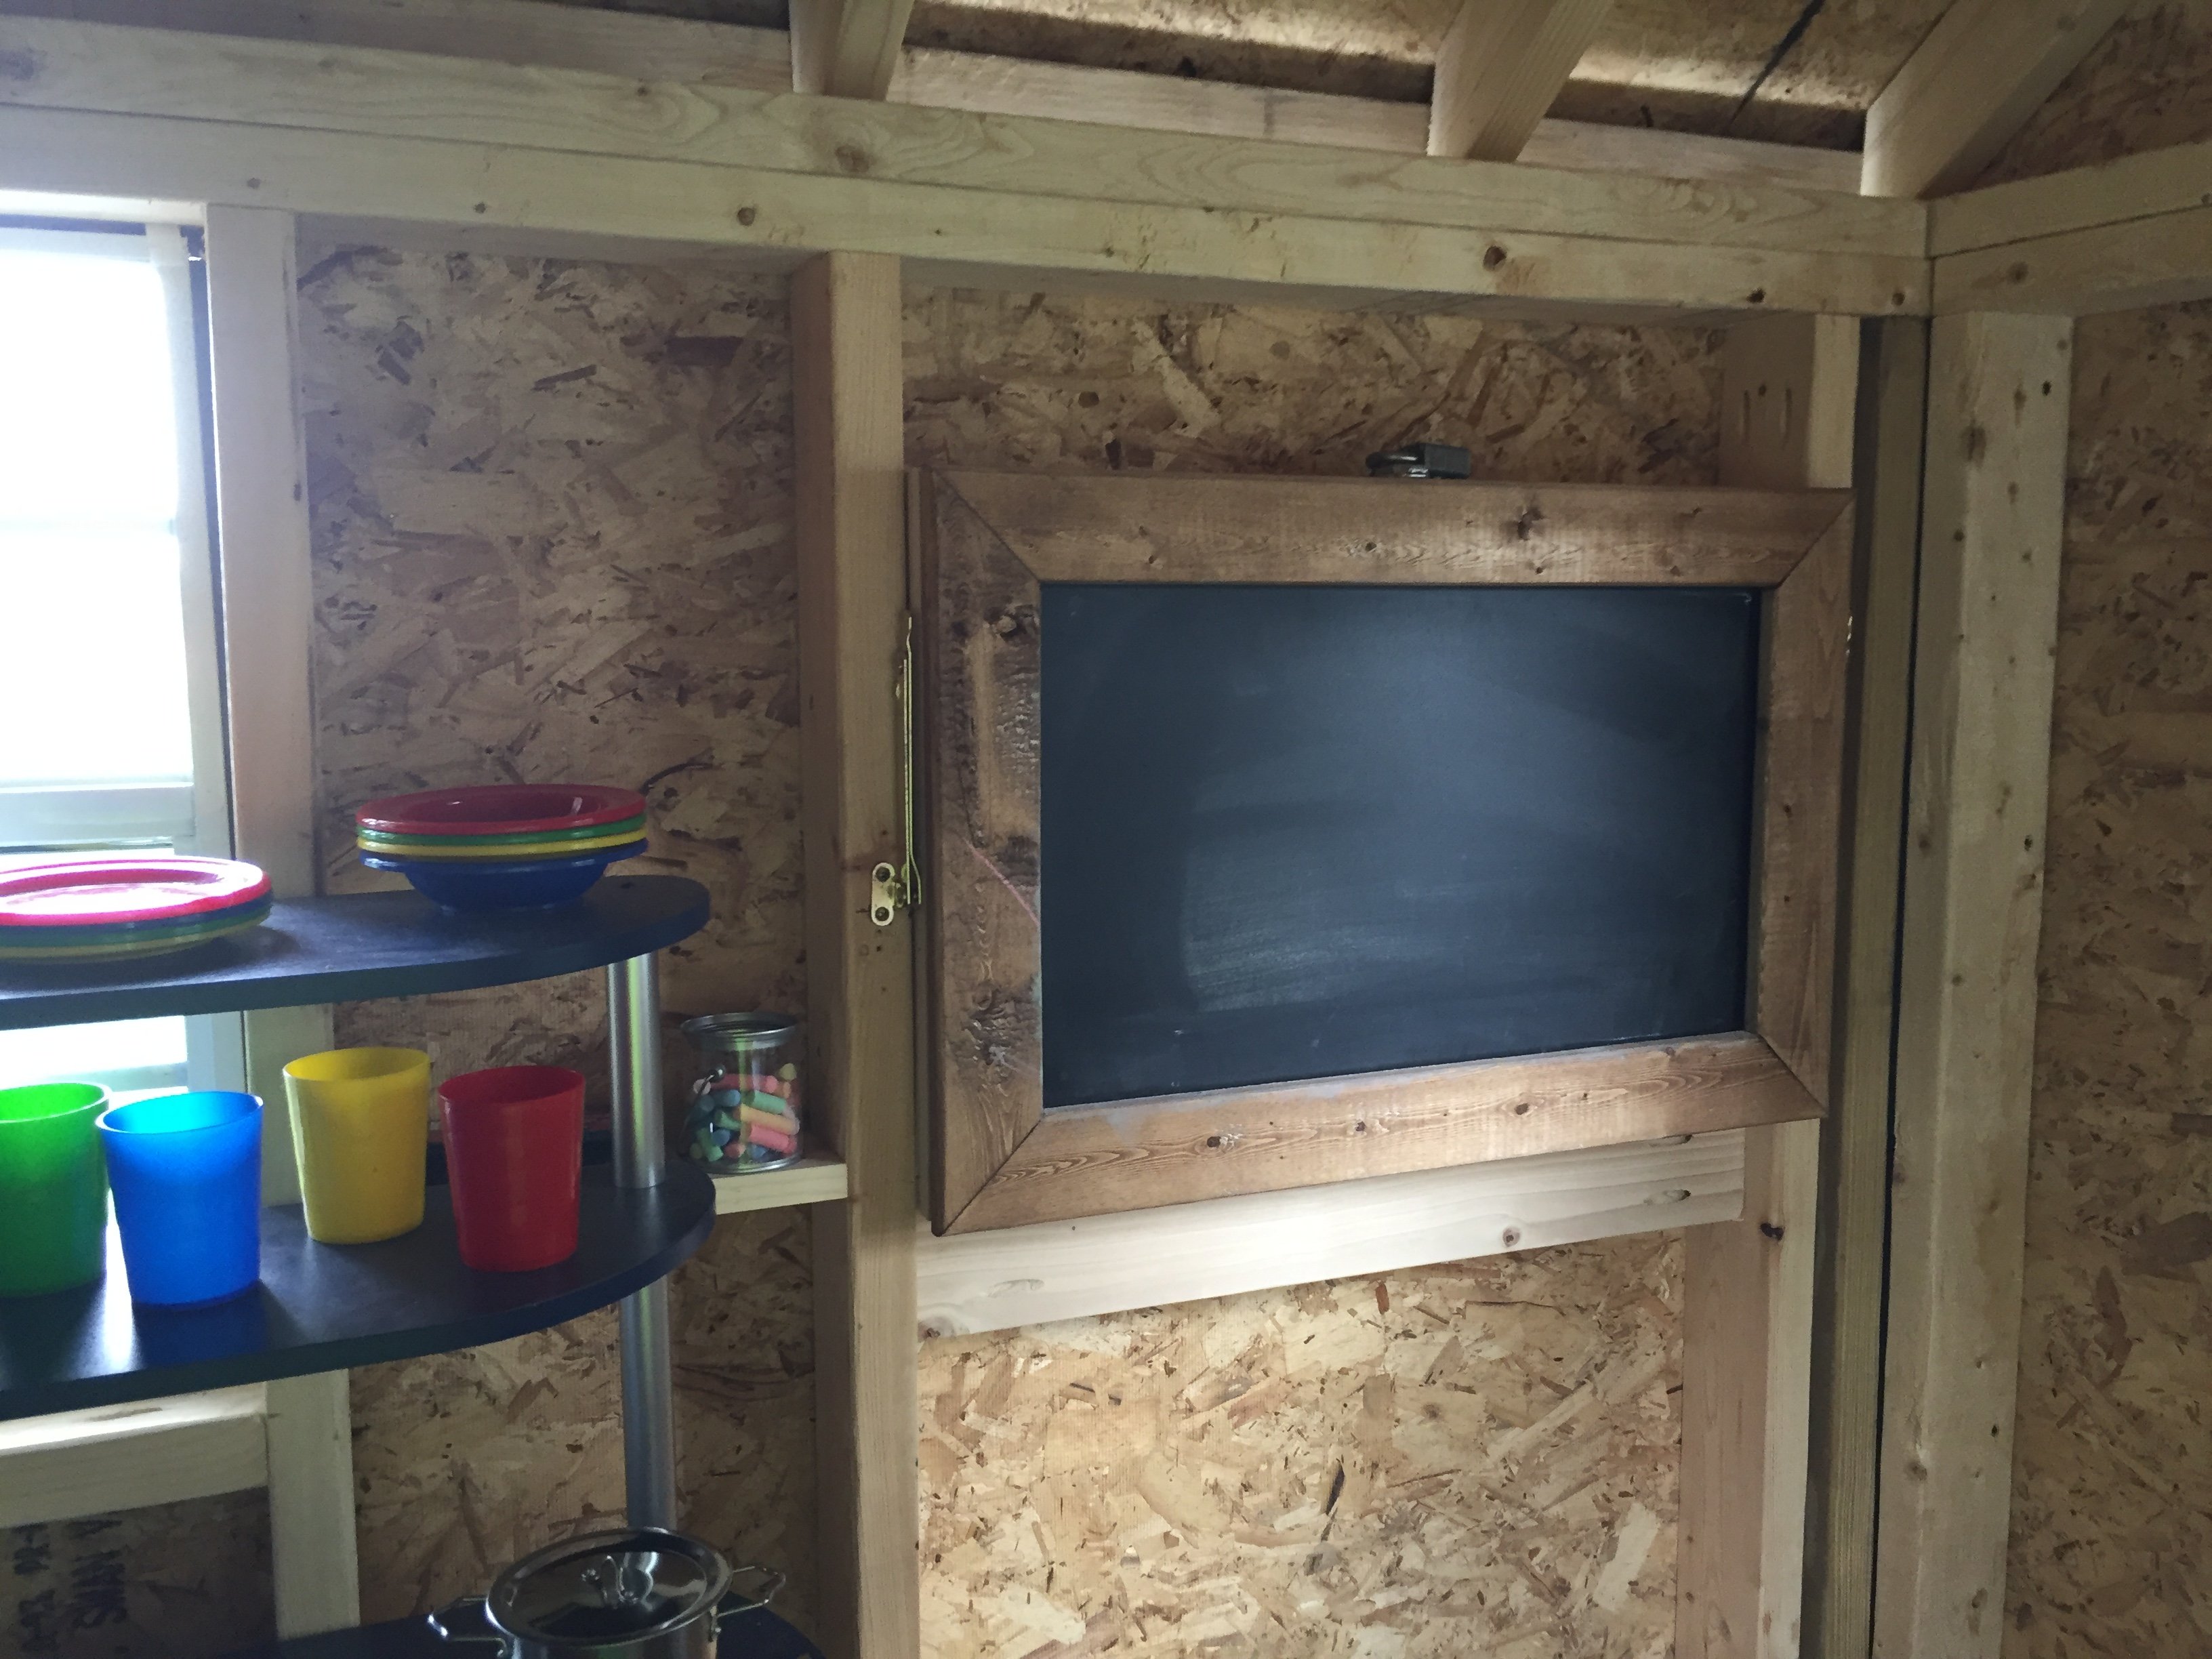
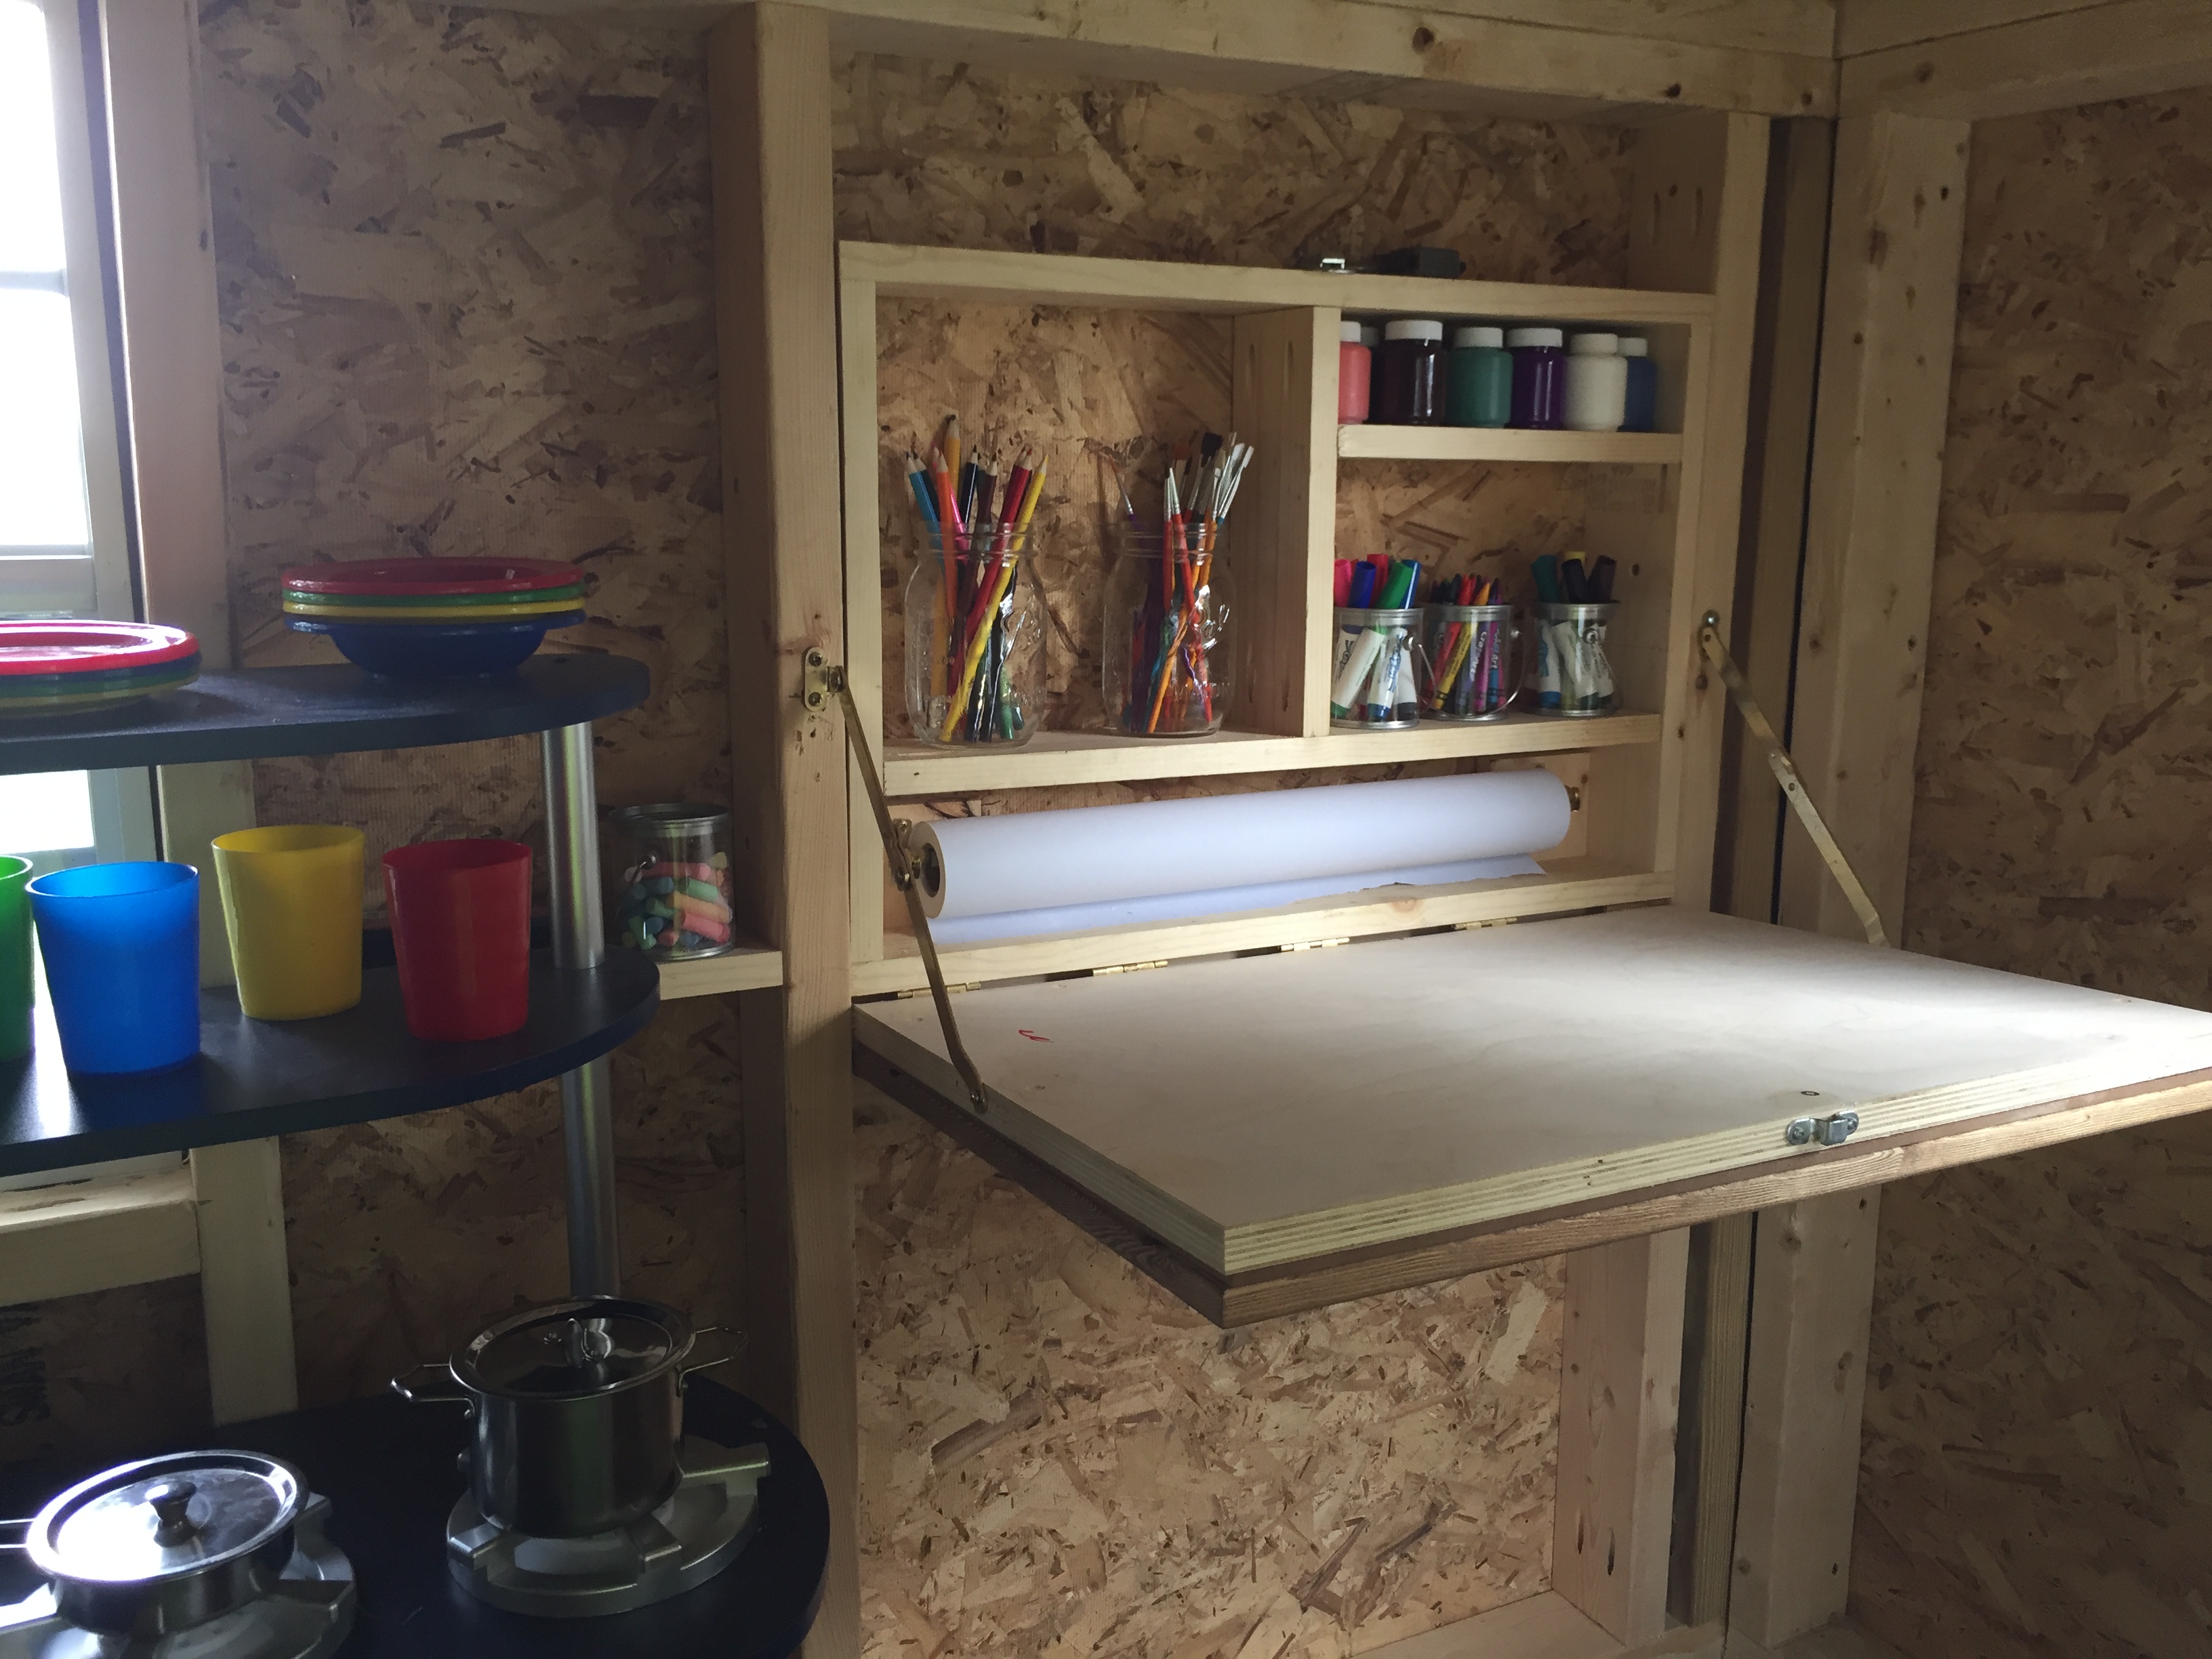
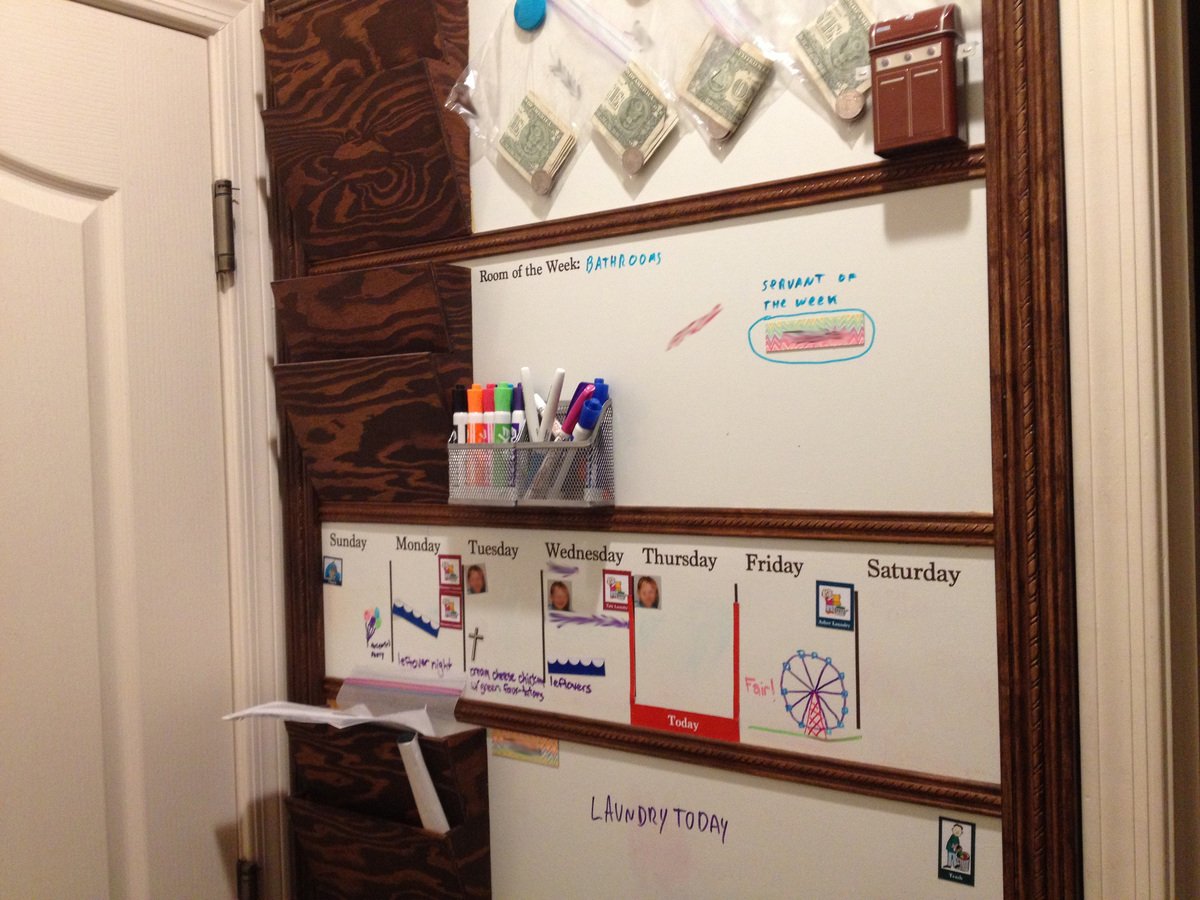
Magnetic White Board Organizer Wall
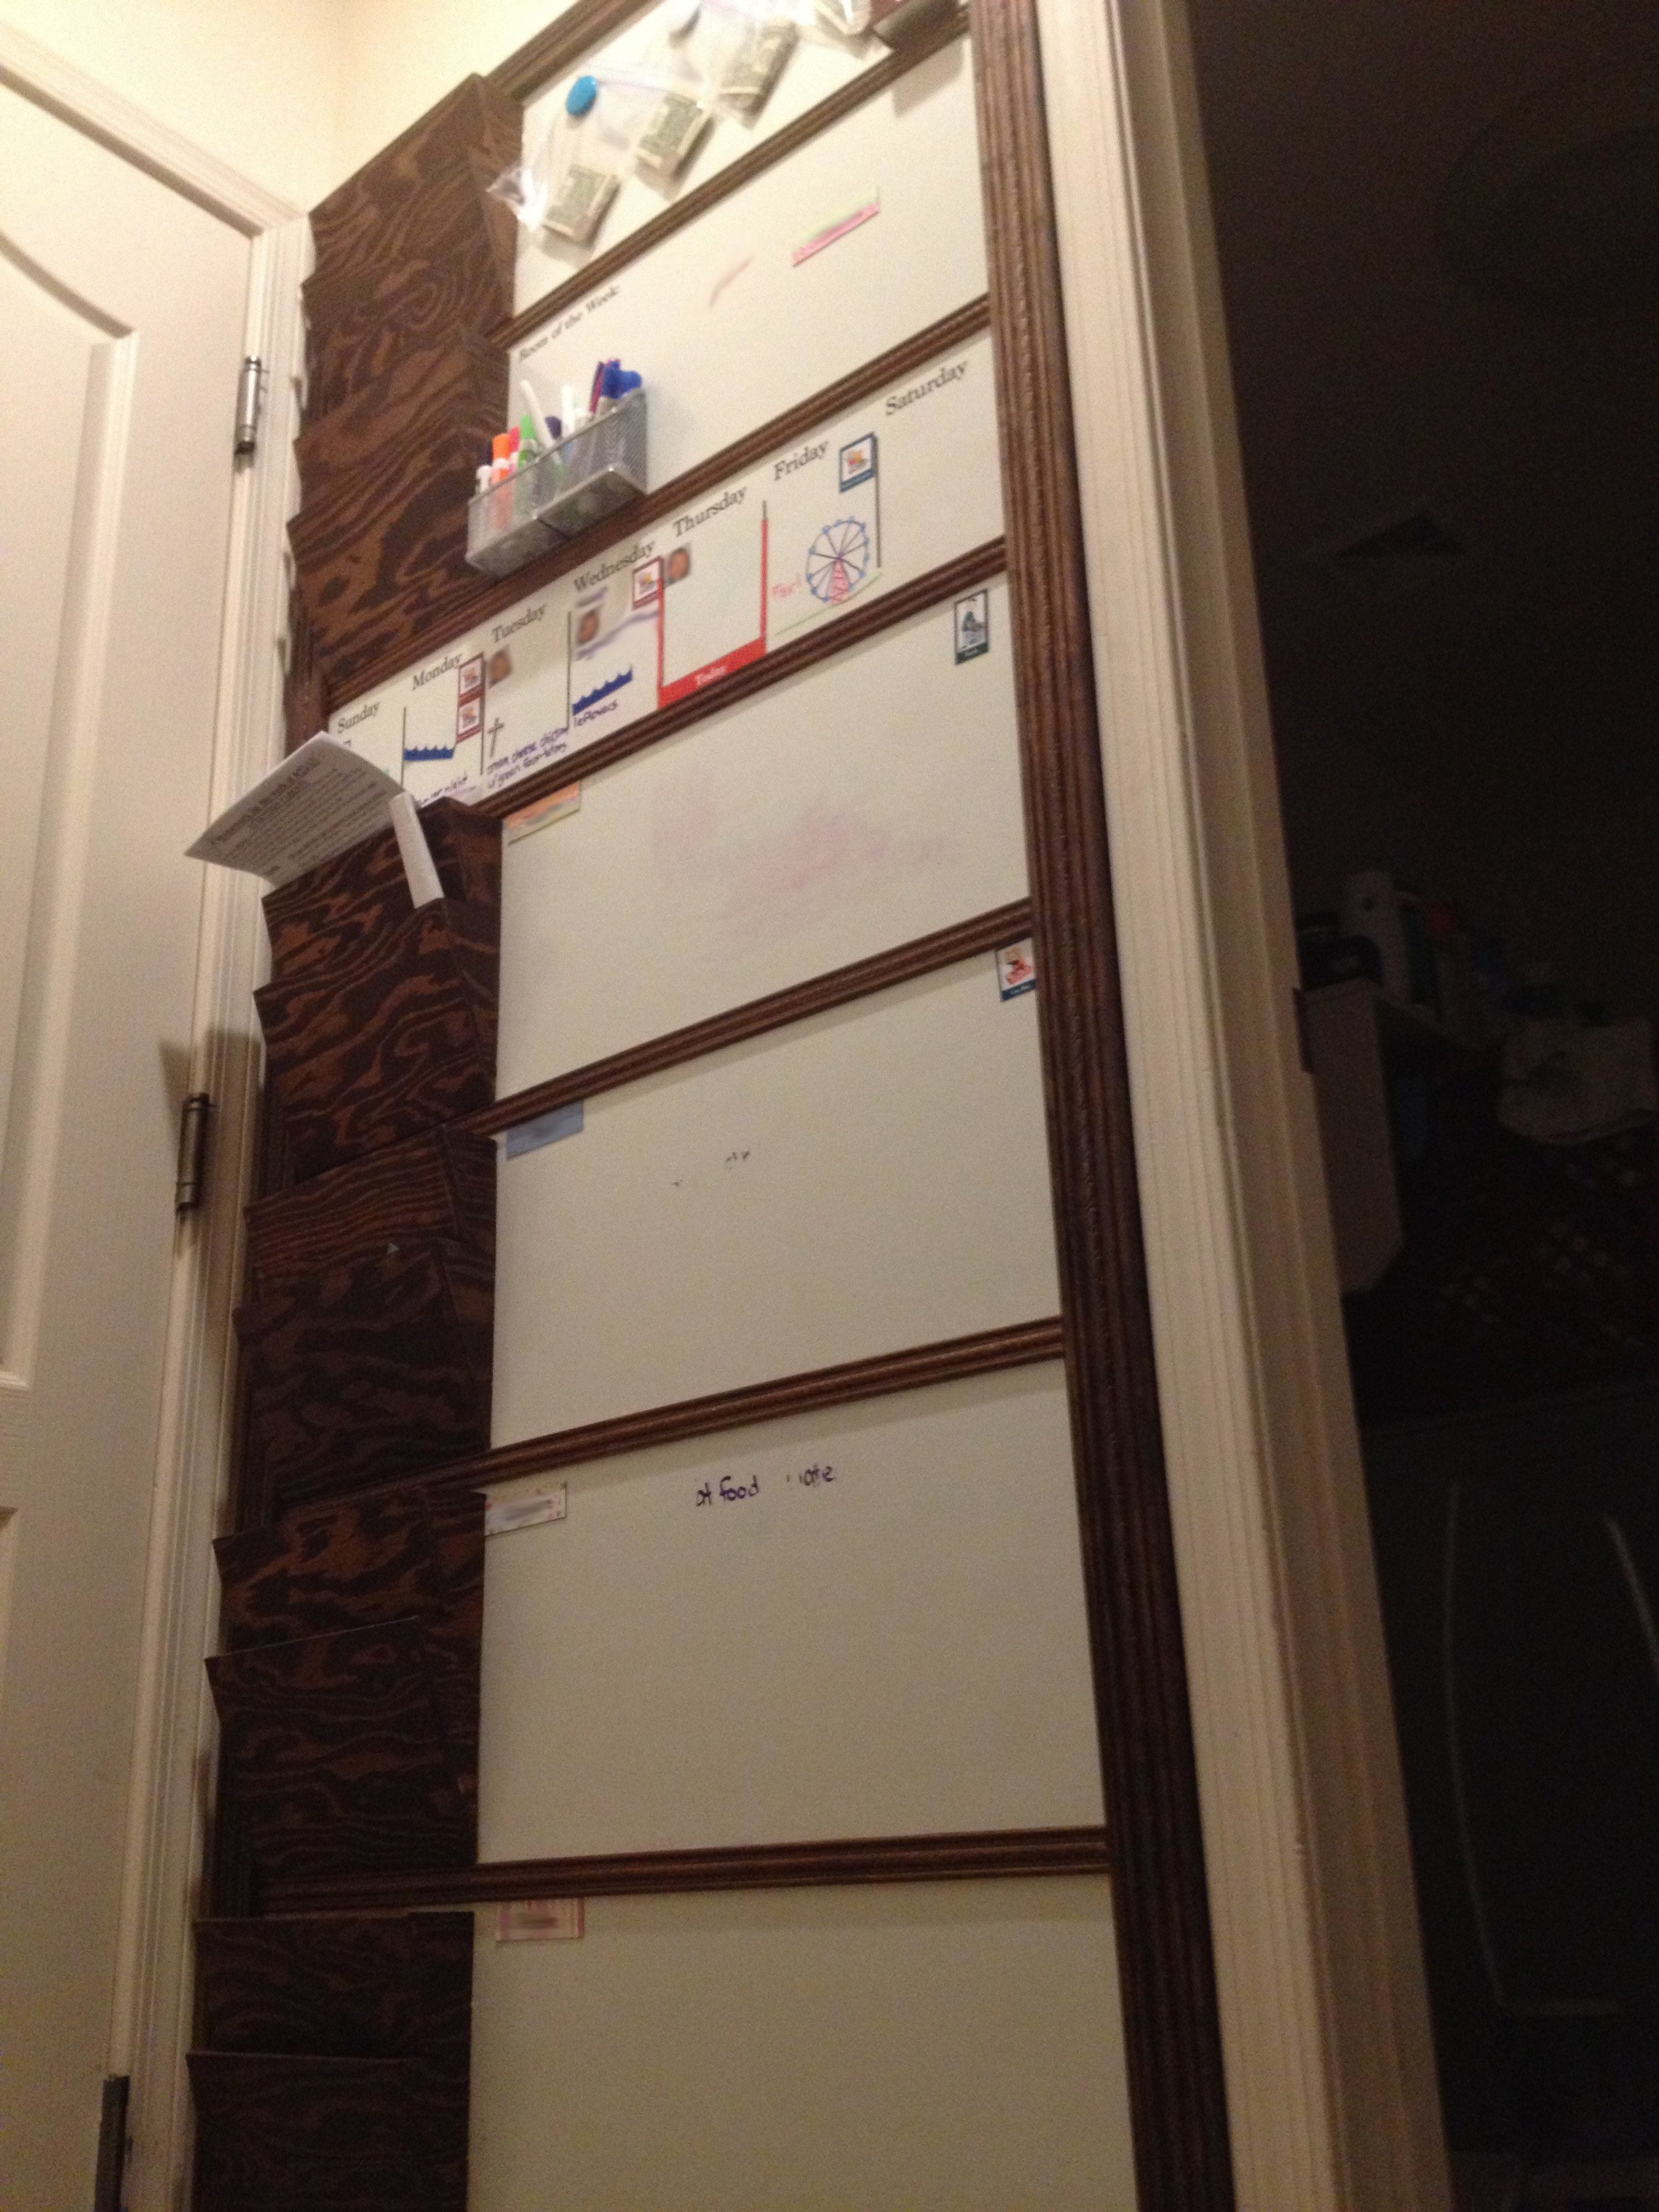
Easy project that has helped us stay more organized. We use Cozi to maintain the calendar, but this allows us to highlight things that the kiddos need to know during the week. We keep the chore schedule, laundry schedule, meal plan, and out of routine activities on the week calendar so the kids can tell what is going on at a glance. The allowance is also hanging up at the top as an incentive to get their respective jobs done for the week. I used galvanized sheet metal glued onto a 1/4 inch plywood base and coated it with whiteboard paint. This allows it to be magnetic and easily written on. Love the letter holder for homework and important paperwork.
Things we have used it for so far:
Activity schedule (swimming lessons, soccer practice, etc.)
Meal plan
Unusual activities (parties, movie night, etc.)
School stuff (project due, spirit week, etc.)
Chore schedule
Laundry Schedule
Room of the week: what part of the house gets a deep clean this week.
Servant of the week: which kid is the designated helper for non-chore activities when an extra hand is needed.
We are still figuring out all the ways to use this to good effect, but the kids really like being able to see what is coming up in the schedule for the week.
Built from Plan(s)
Estimated Cost
$100
Estimated Time Investment
Weekend Project (10-20 Hours)
Finish Used
Whiteboard paint
Minwax Walnut Stain
Spray Acrylic to whiteboard marker proof the wooden parts.
Minwax Walnut Stain
Spray Acrylic to whiteboard marker proof the wooden parts.
Recommended Skill Level
Beginner
farmhouse table
I made this table in a weekend, the plans made it so easy to do, thanks Ana for giving me the courage to take this on! I love building stuff!
Built from Plan(s)
Recommended Skill Level
Beginner
Comments
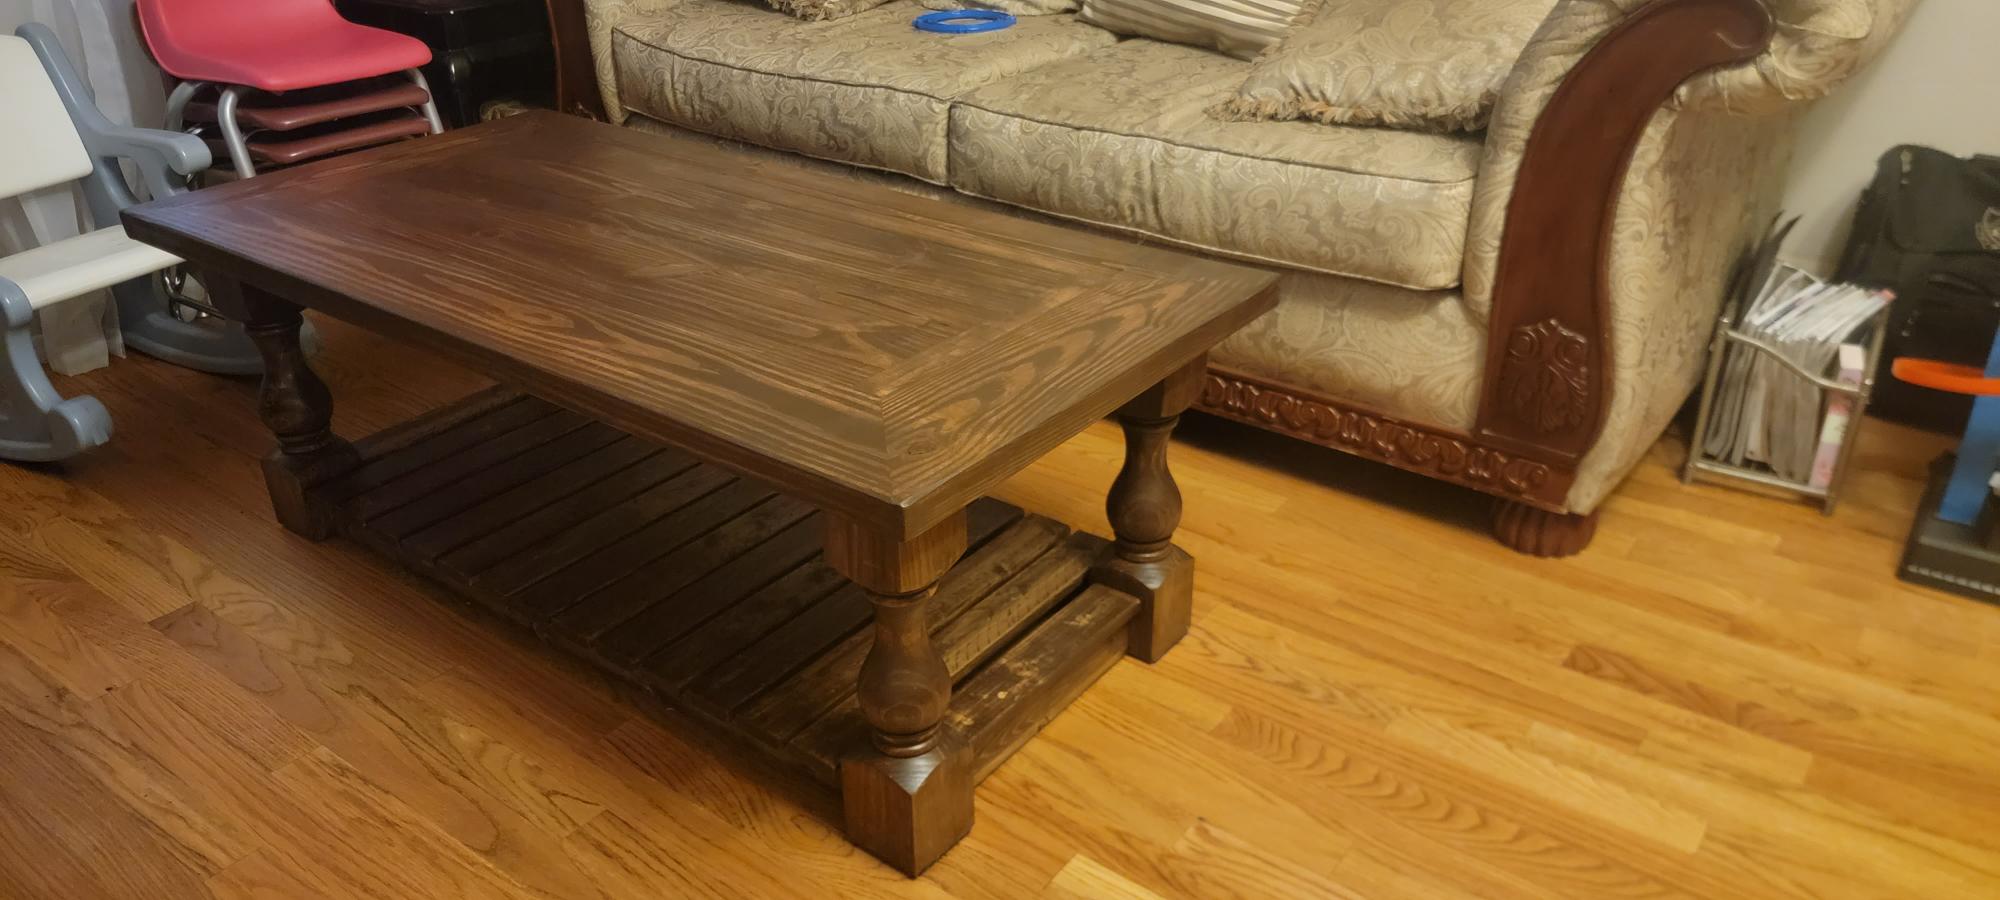
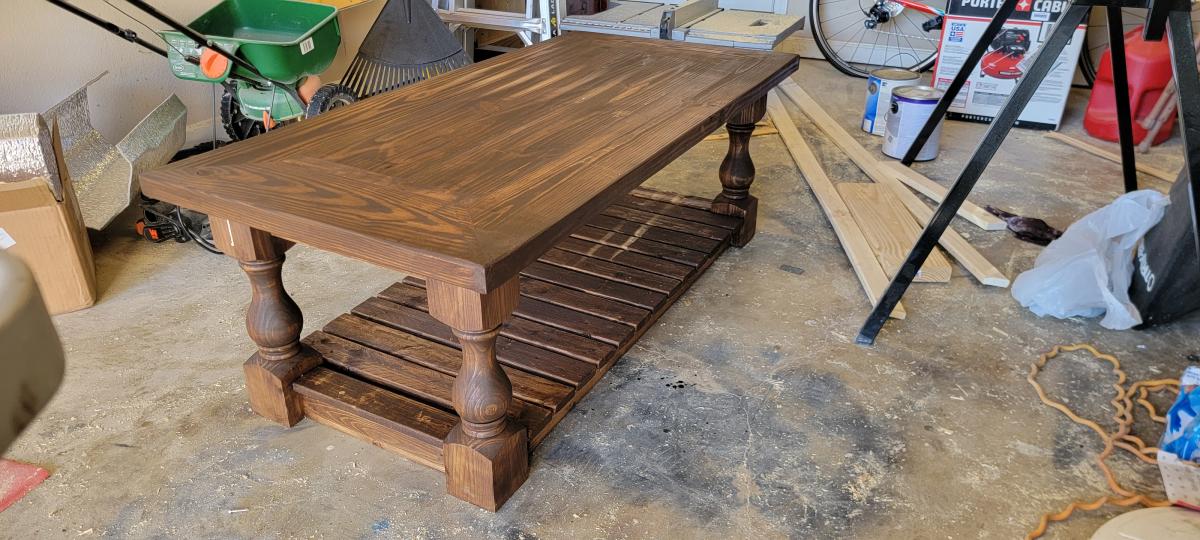
Chevron Coffee Table
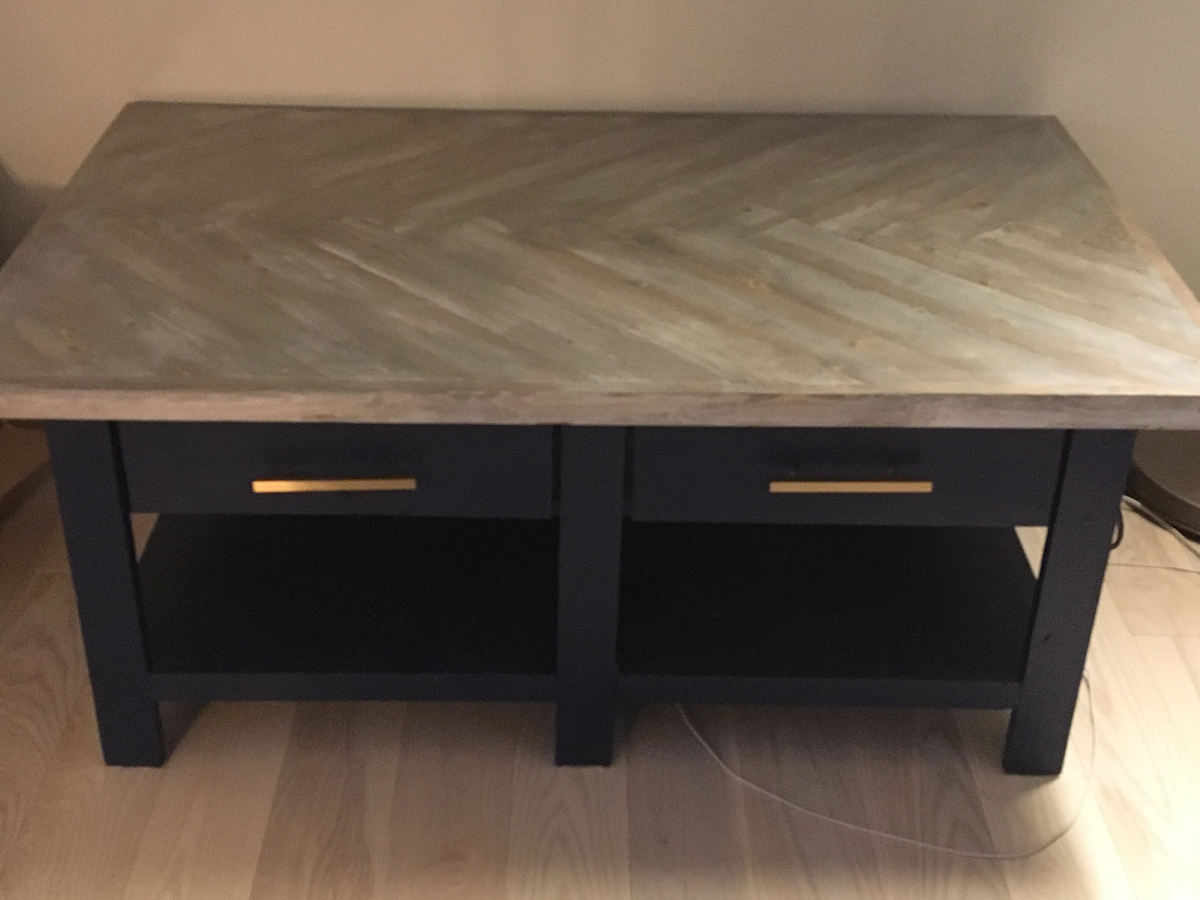
Based off of Ana Whi'te Benchright Coffee Table with a chevron/herringbone table top
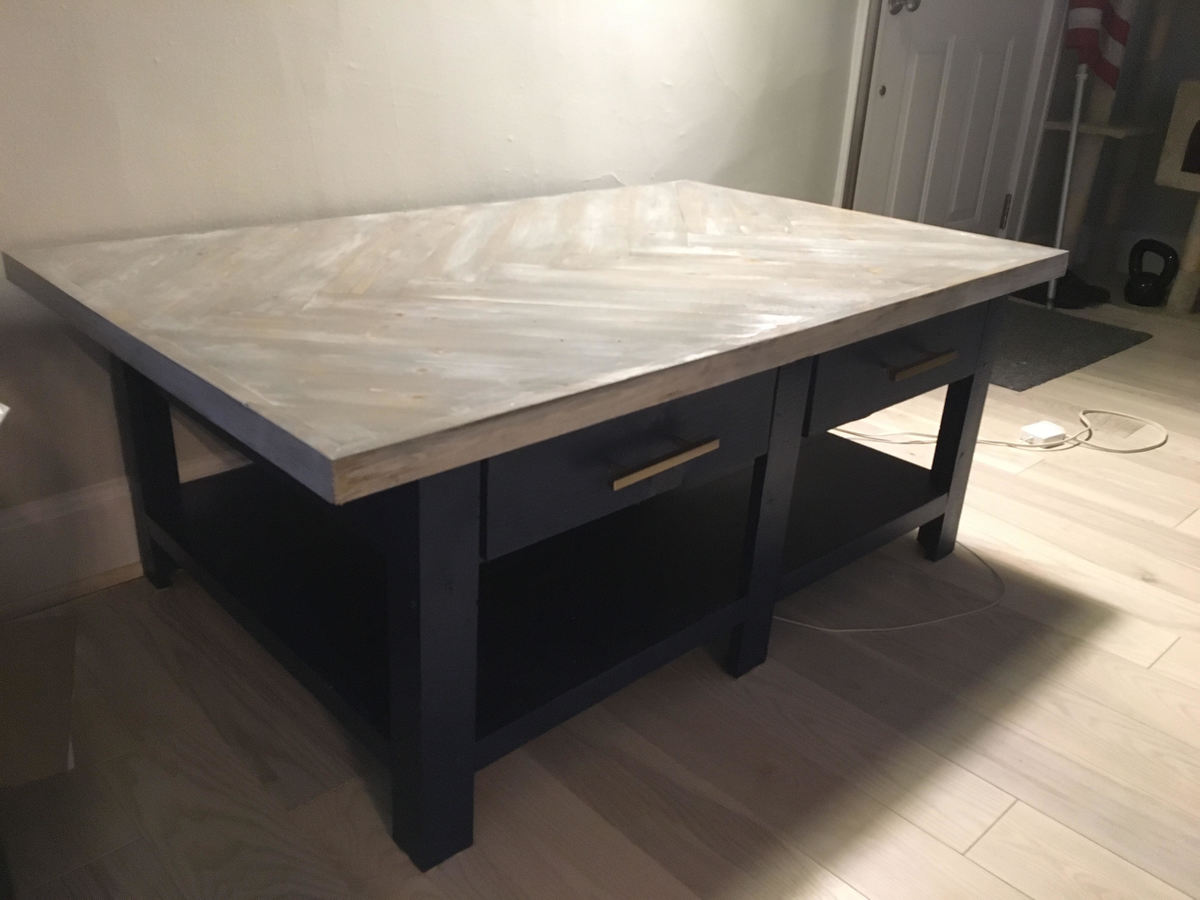
Built from Plan(s)
Estimated Cost
$200
Estimated Time Investment
Weekend Project (10-20 Hours)
Recommended Skill Level
Intermediate
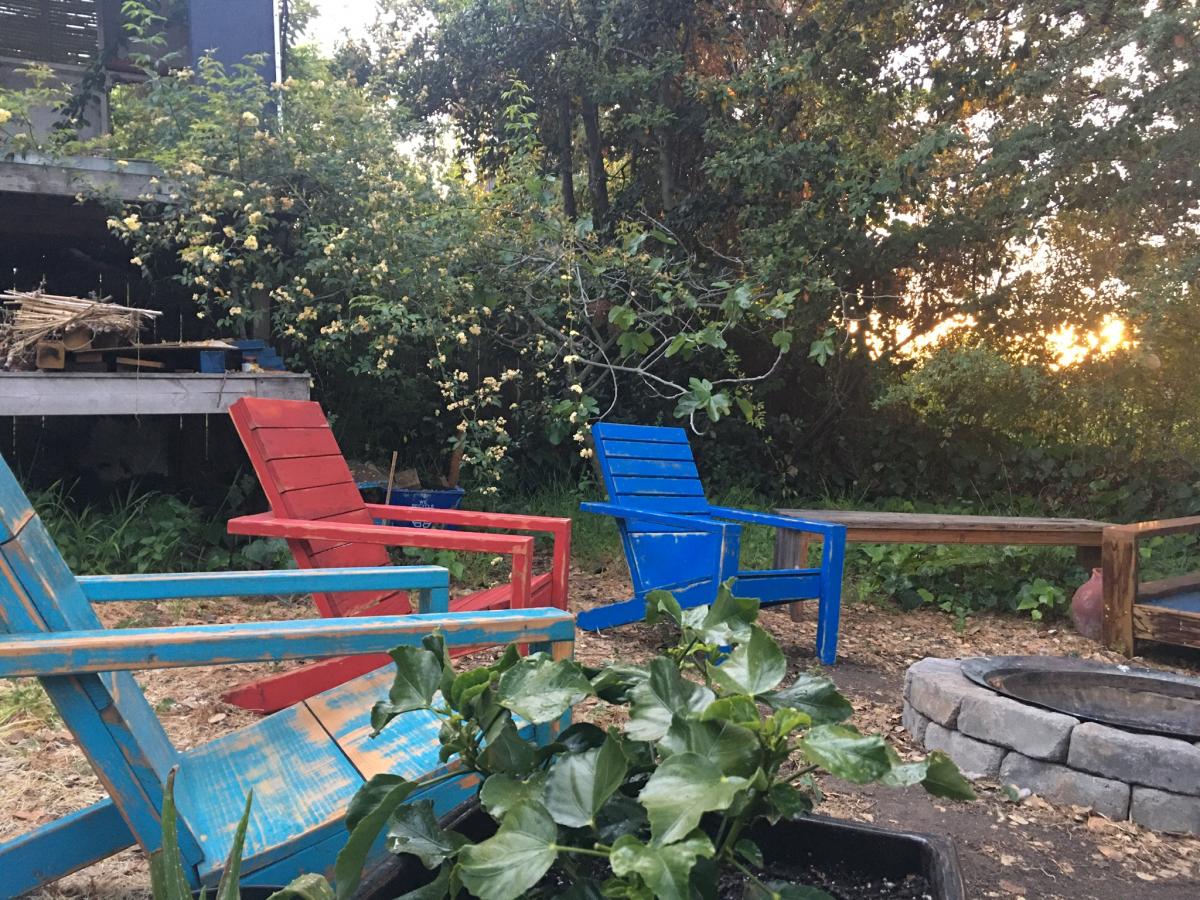
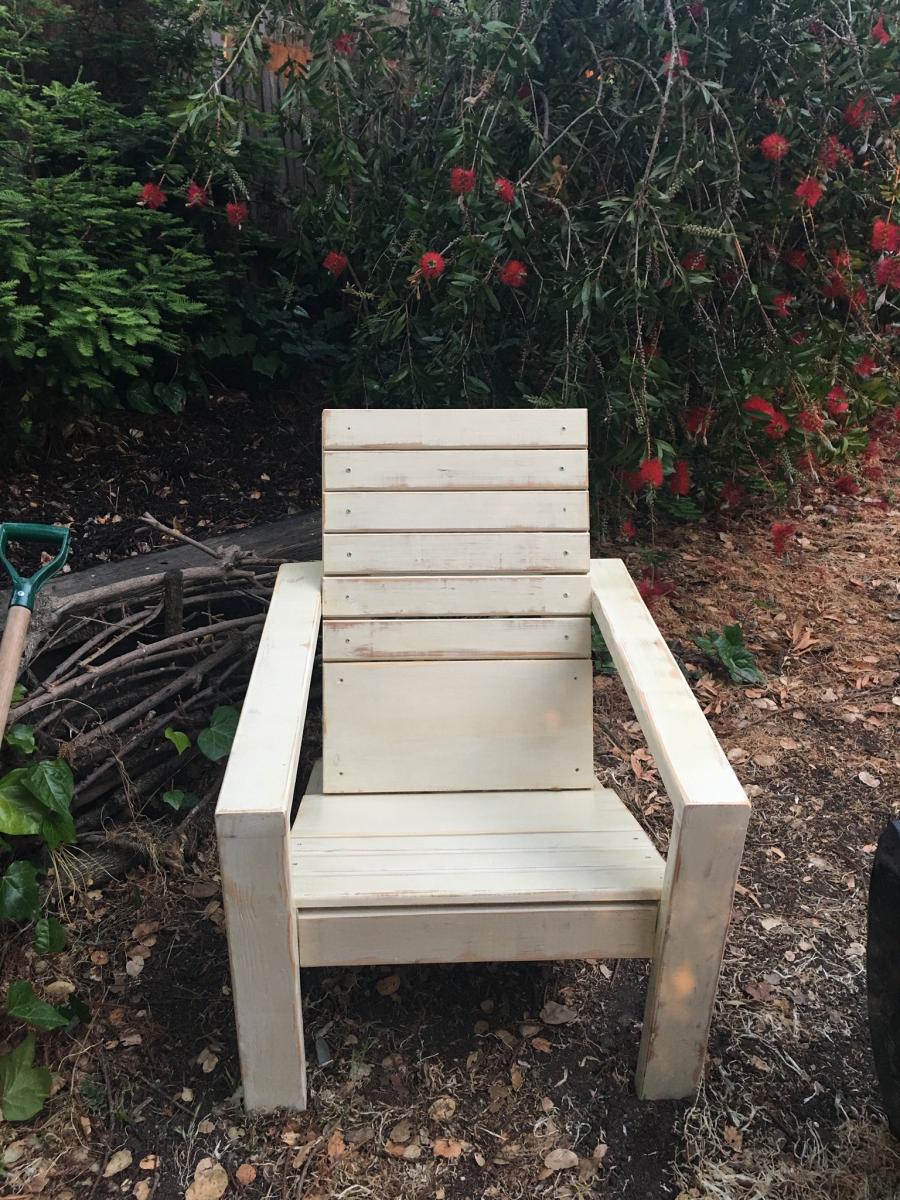
Adirondack chairs and bench
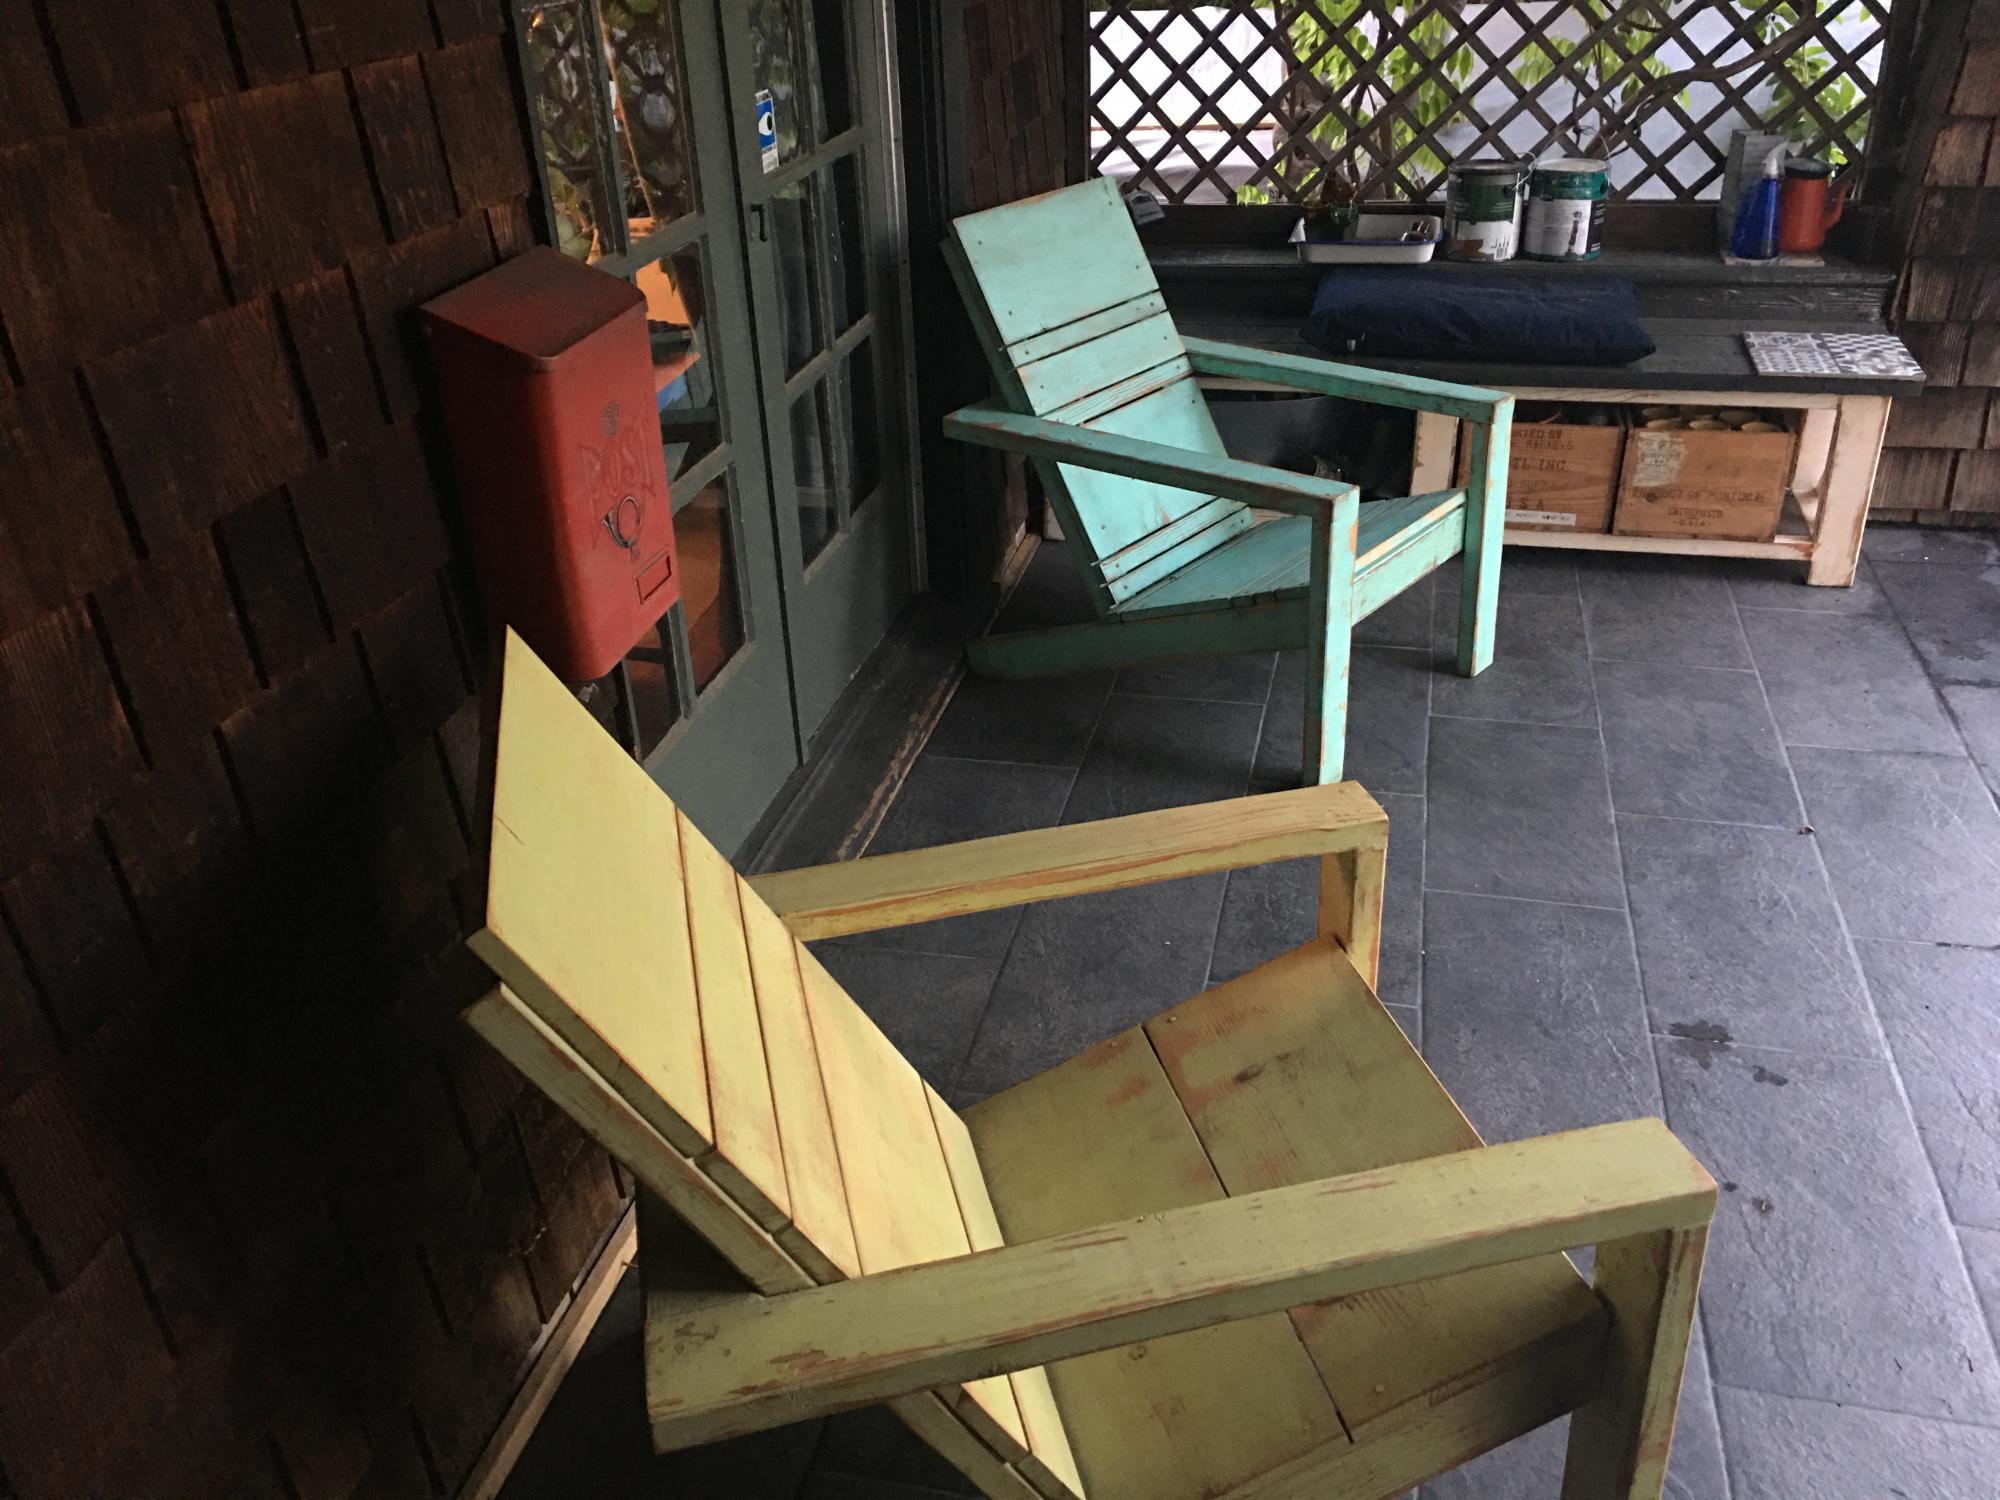
A year and a half long Covid at home and eating and entertaining outdoors encouraged us to transform our back yard into an outdoors living and dining room.
It was also the perfect excuse to finally use all the scrap wood we had lying around and turn it into these super comfy chairs. Add pillows and blankets and we have a cozy back yard that we love to spend time in.
We used this occasion to finish ends of paint cans to paint the chairs in different colors and scraped the paint down for a weathered look, then finished it all with a couple of coats of varnish. Each chair’s back is slightly different depending on scraps we had on hand. We love Anna’s simple and practical plans and instructions!!!
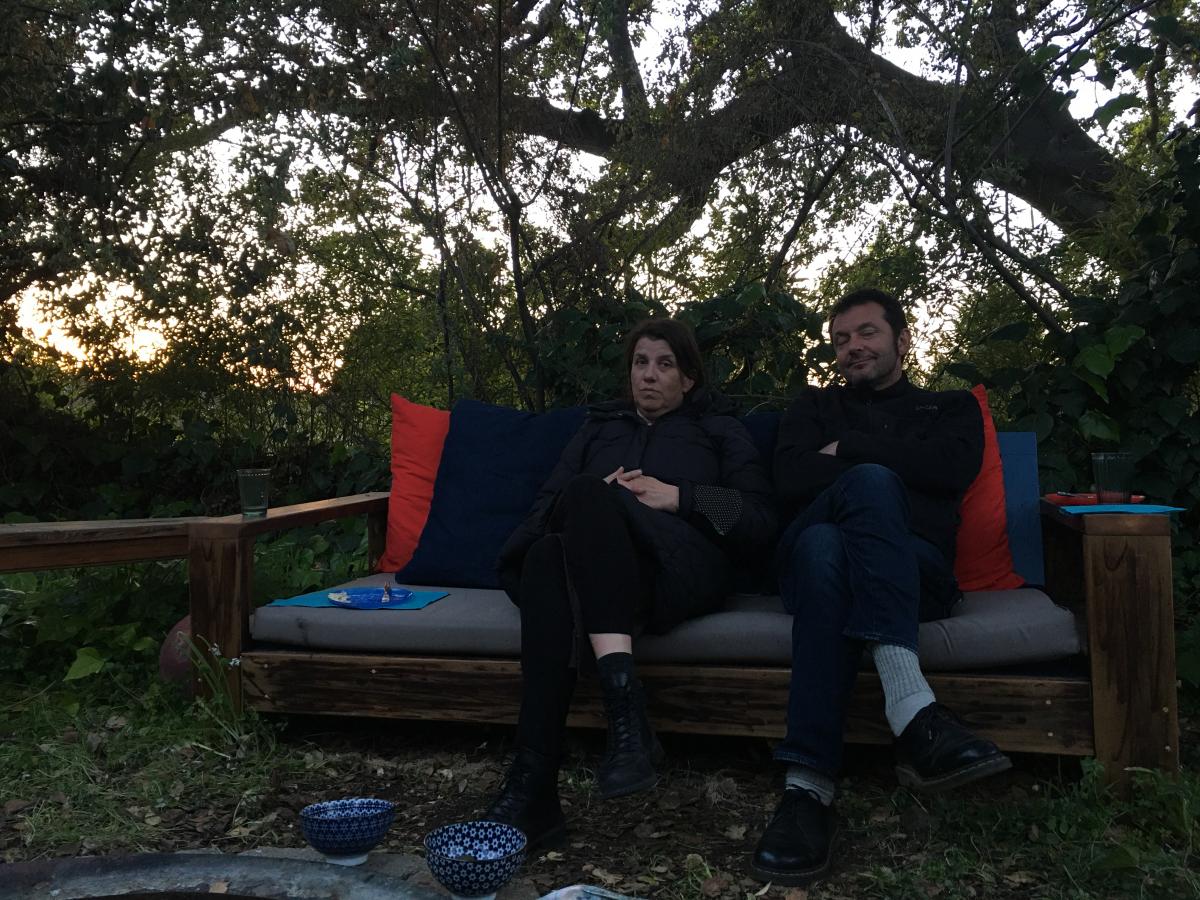
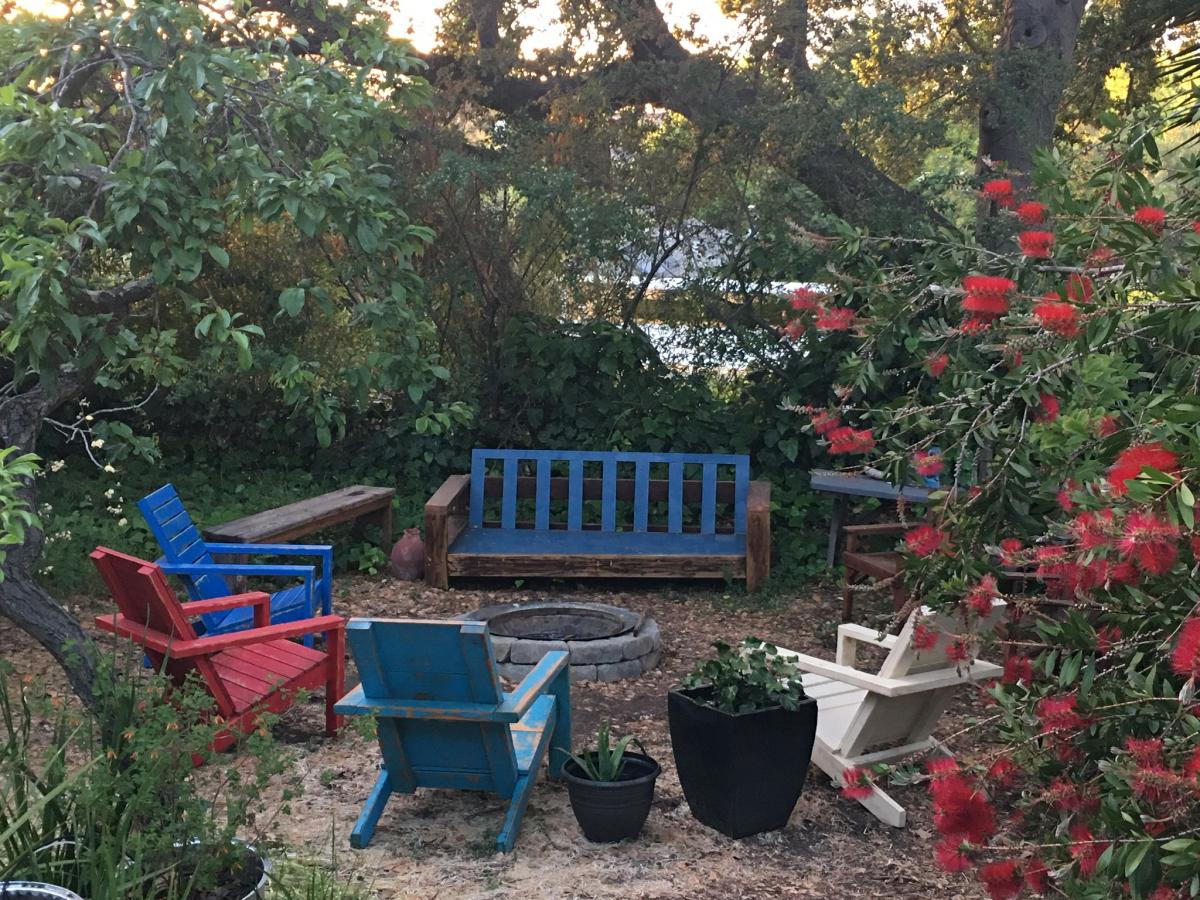
Built from Plan(s)
Comments
Tue, 10/05/2021 - 10:06
Wonderful use of material and extras!
Love the alternating look and colors, very attractive and inviting!
Comments
Ana White Admin
Sun, 03/07/2021 - 10:02
So awesome!
Love this and the cute inside additions!