Community Brag Posts
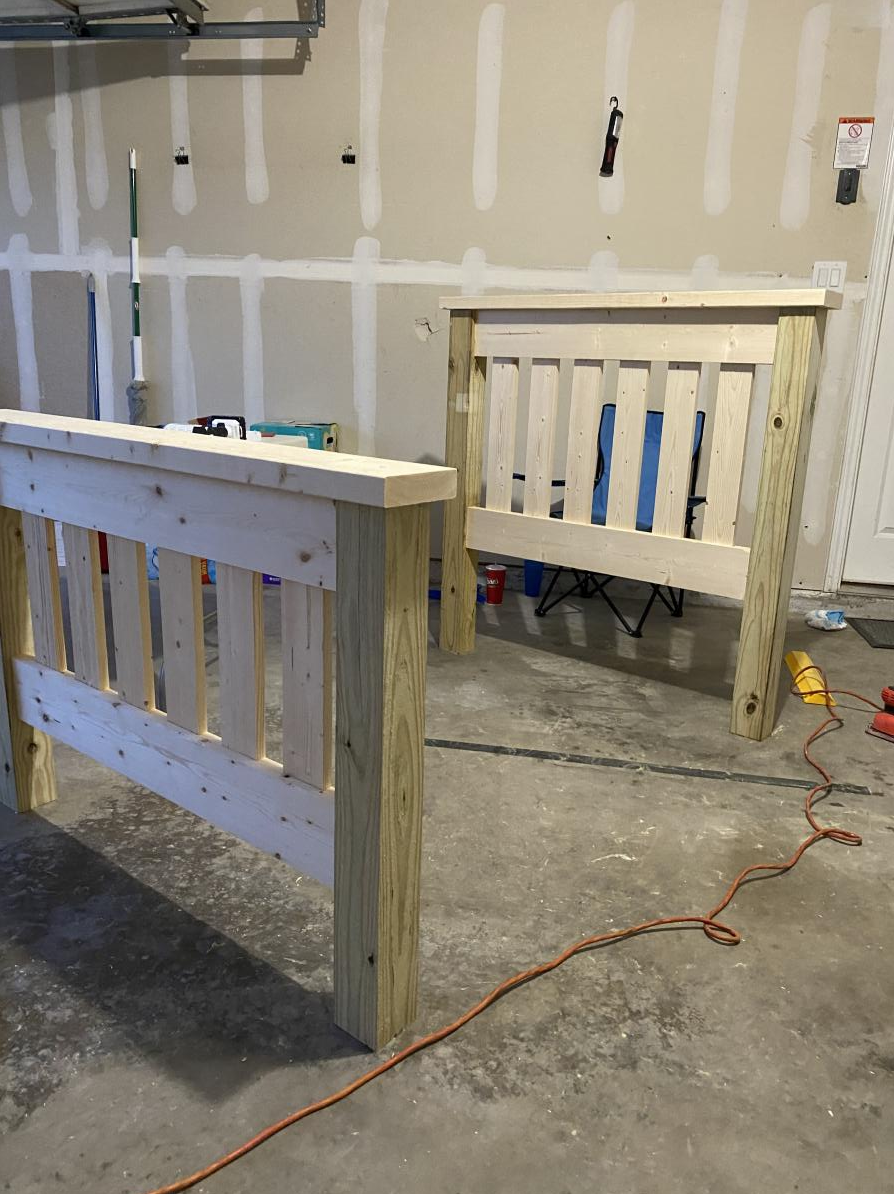
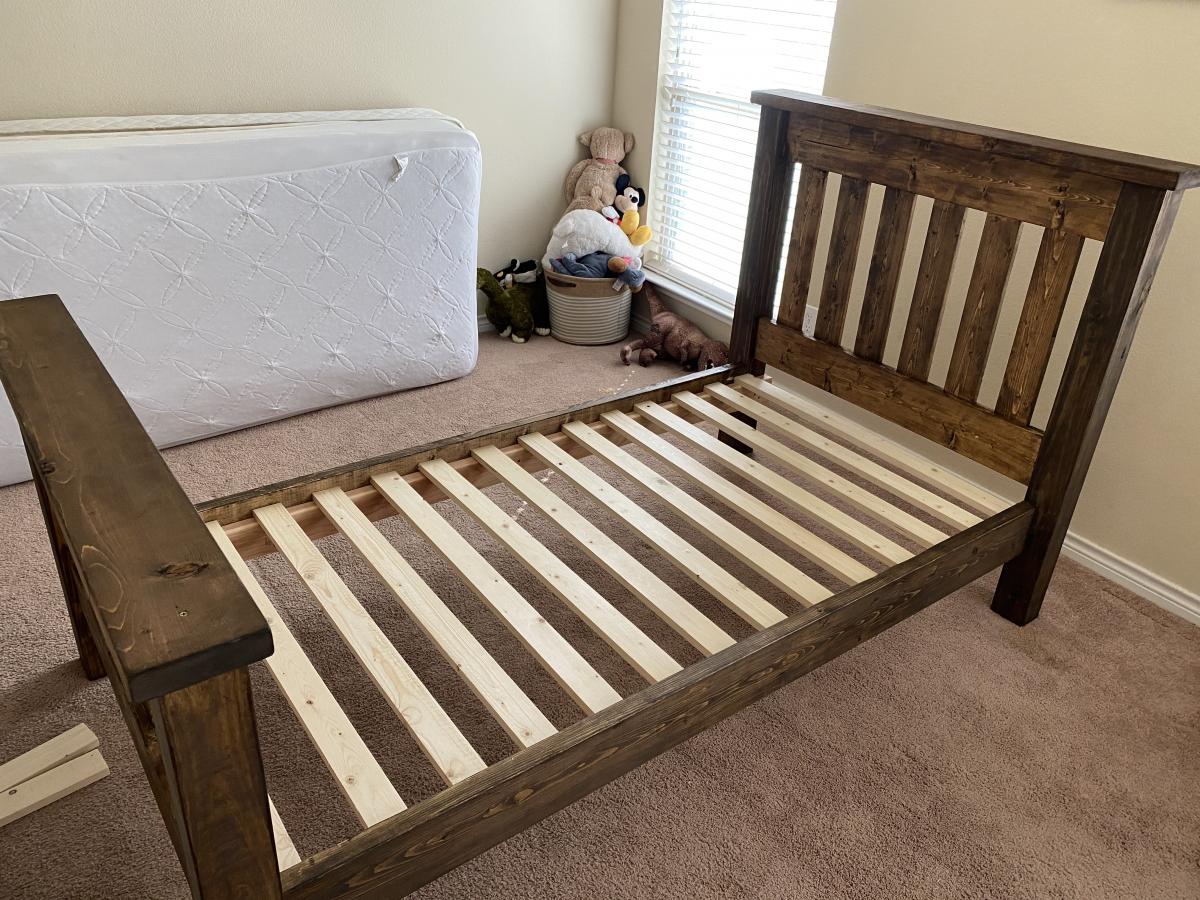
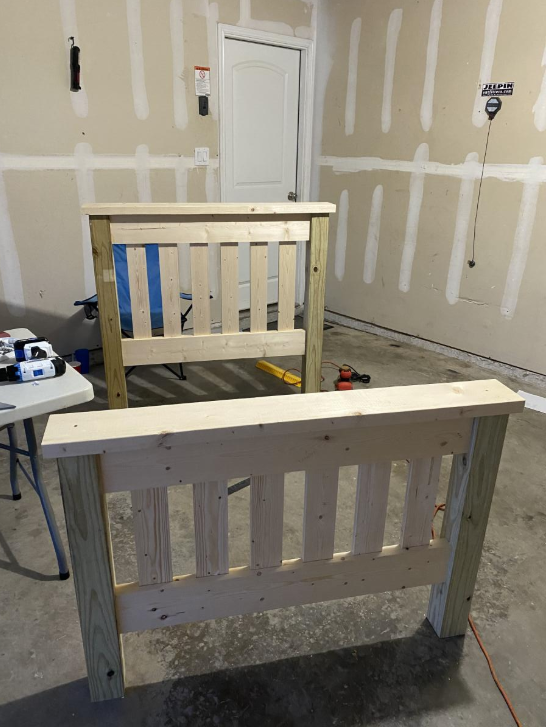
Kids Twin Beds
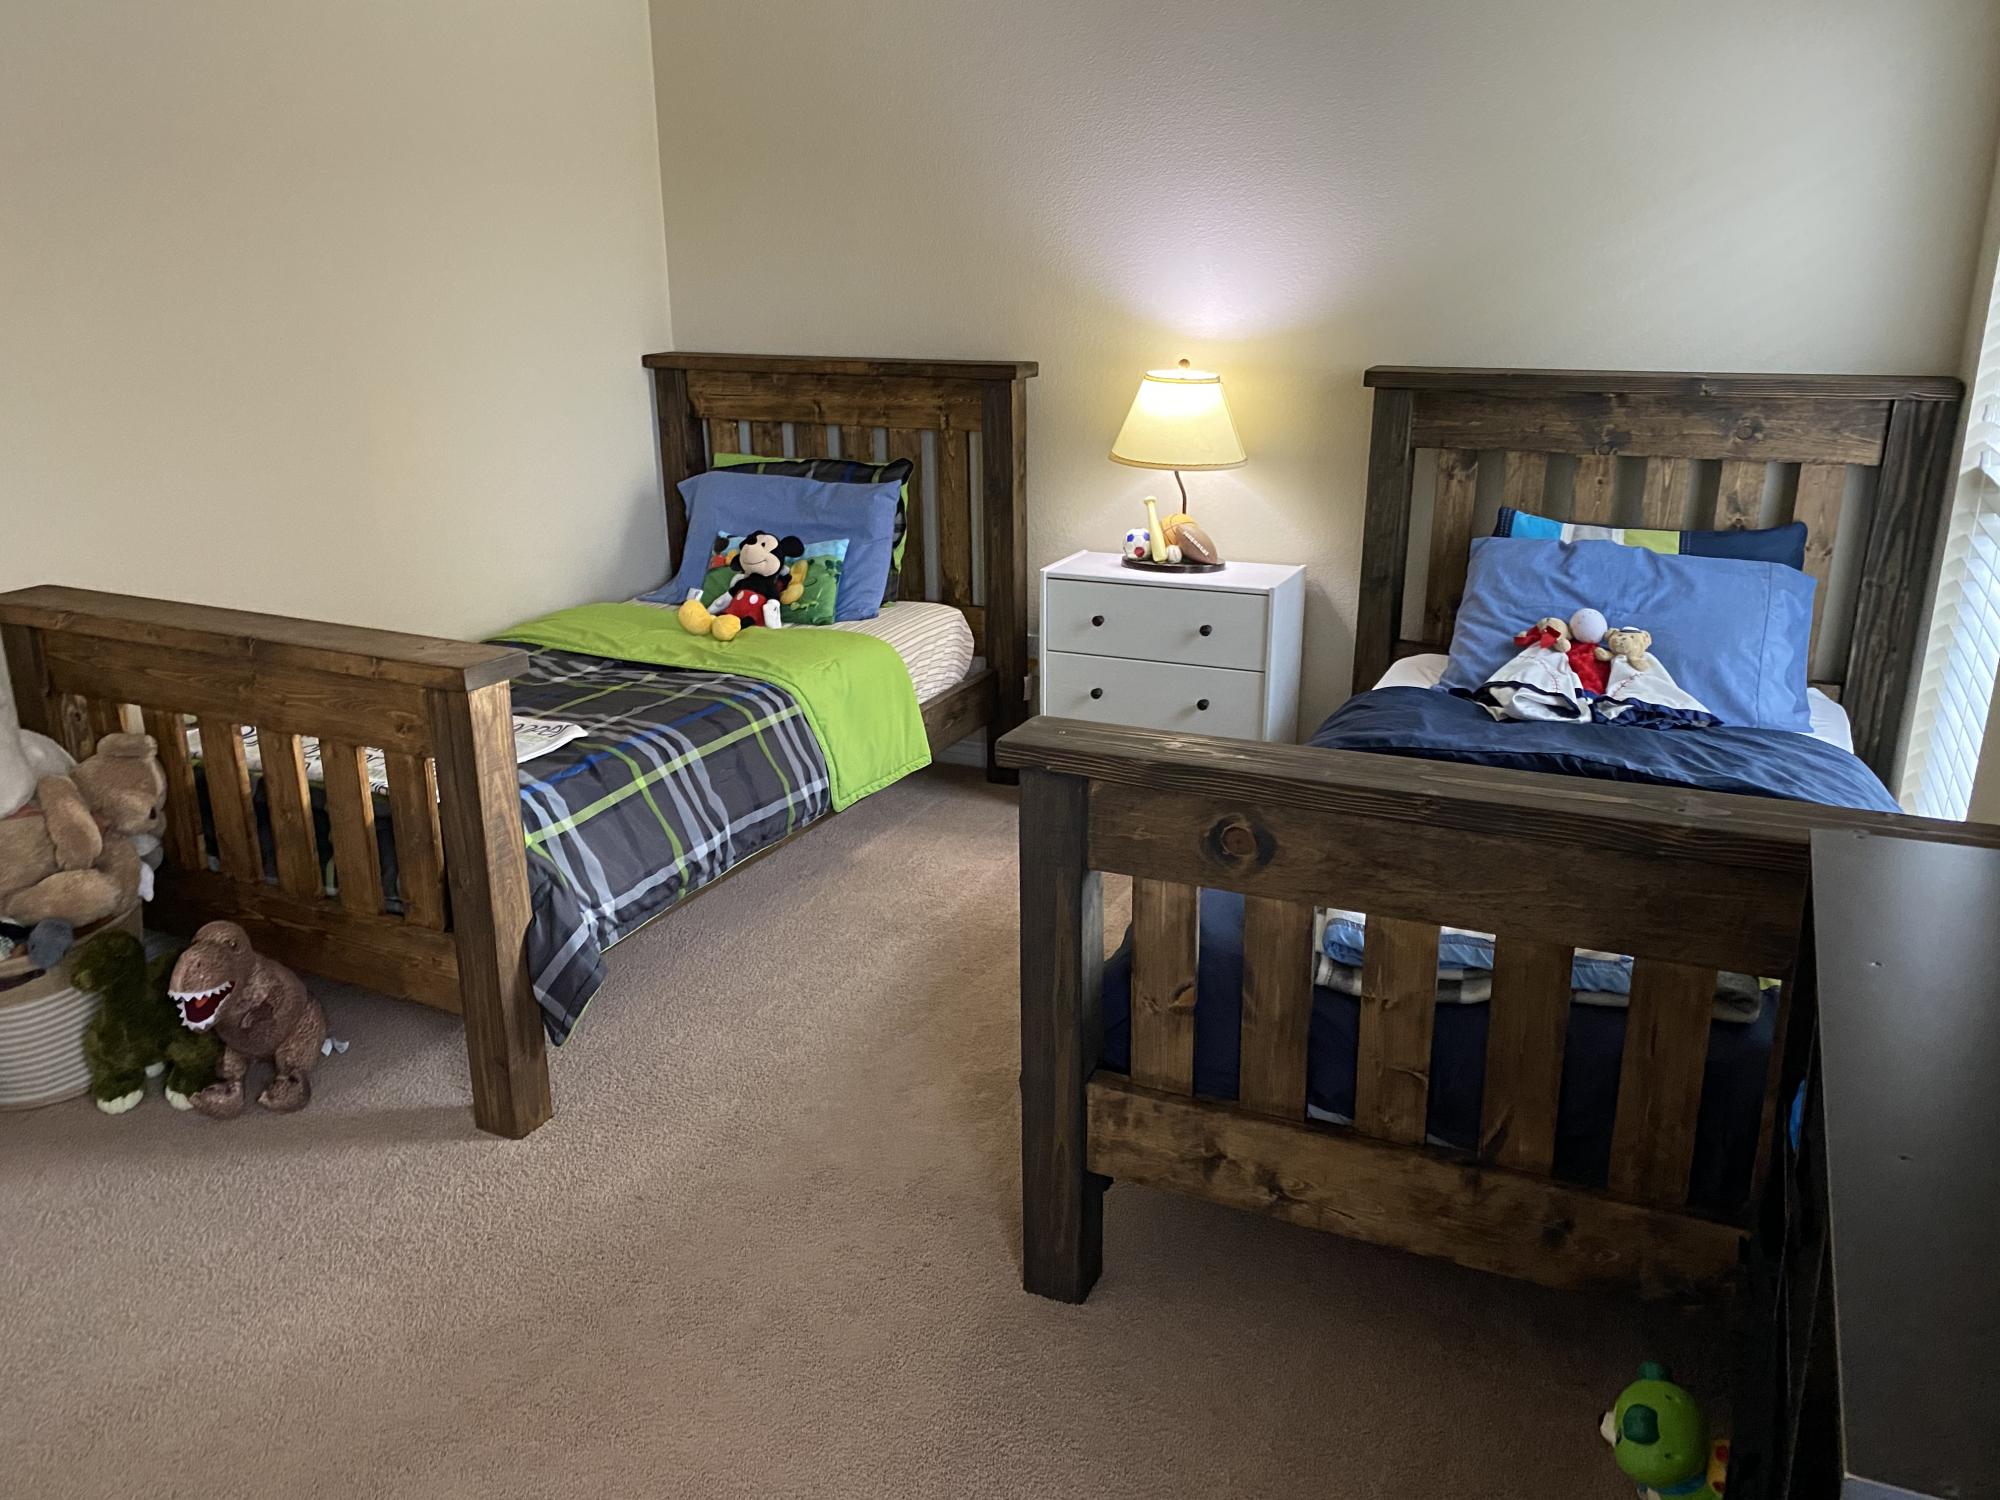
This is my first wood building project and I love the way they turned out. Took my about a week of work here and there on the first one and the second one I built from start to finish in two days. This is called the Simple Twin Bed and it's a great plan, very sturdy. Pocket holes work GREAT on this build. I added pocket holes to the side rails in to the posts for extra support.
Built from Plan(s)
Estimated Cost
$135
Estimated Time Investment
Week Long Project (20 Hours or More)
Recommended Skill Level
Beginner
Outdoor DIY Play Set
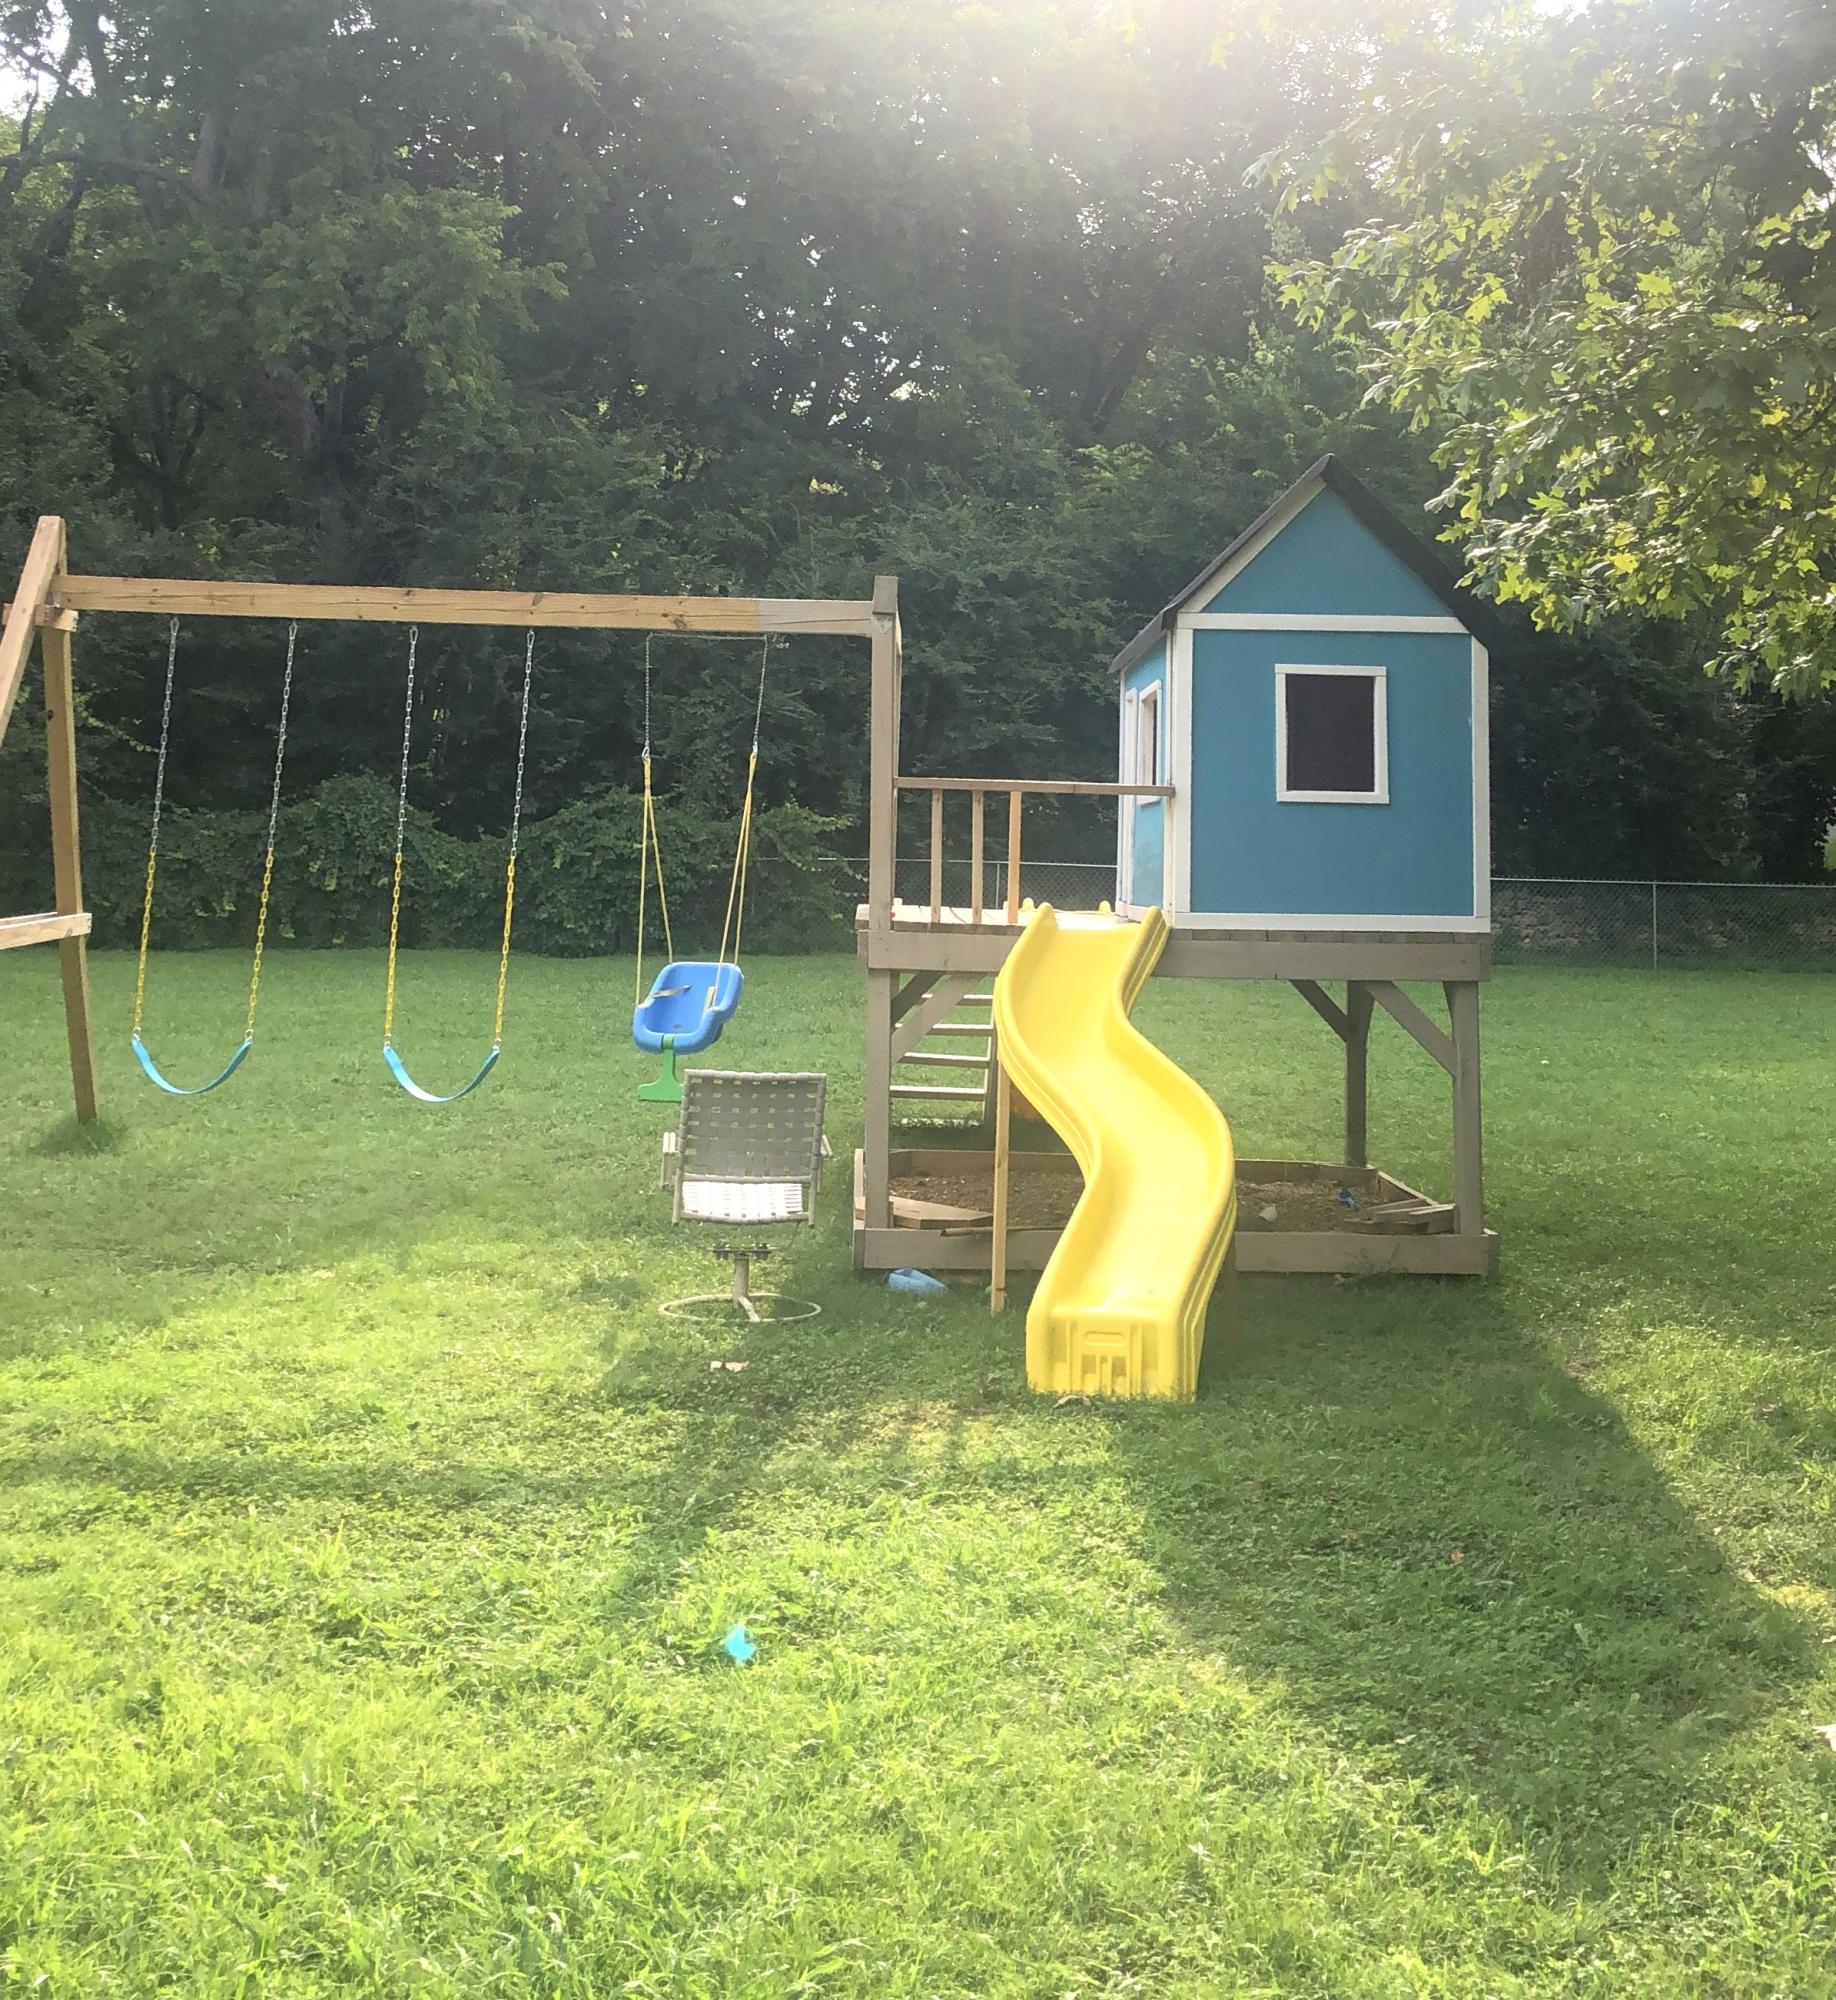
The one toy that we could not live without! Started this as a 2020 covid project and play on it everyday.
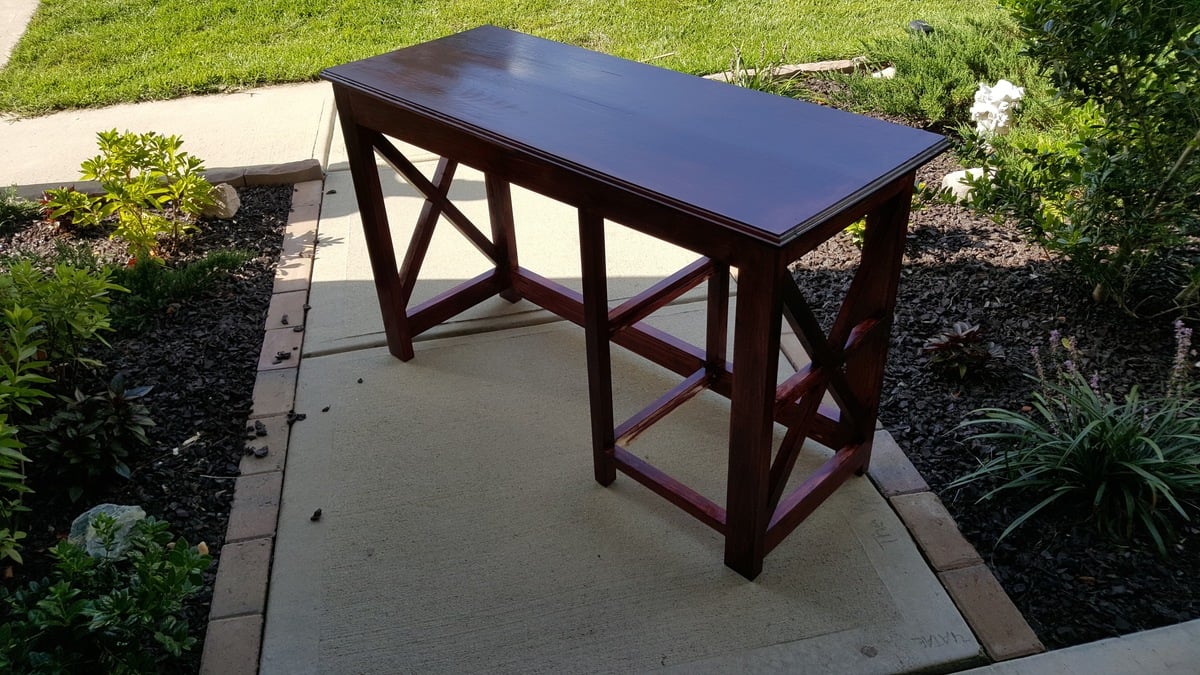
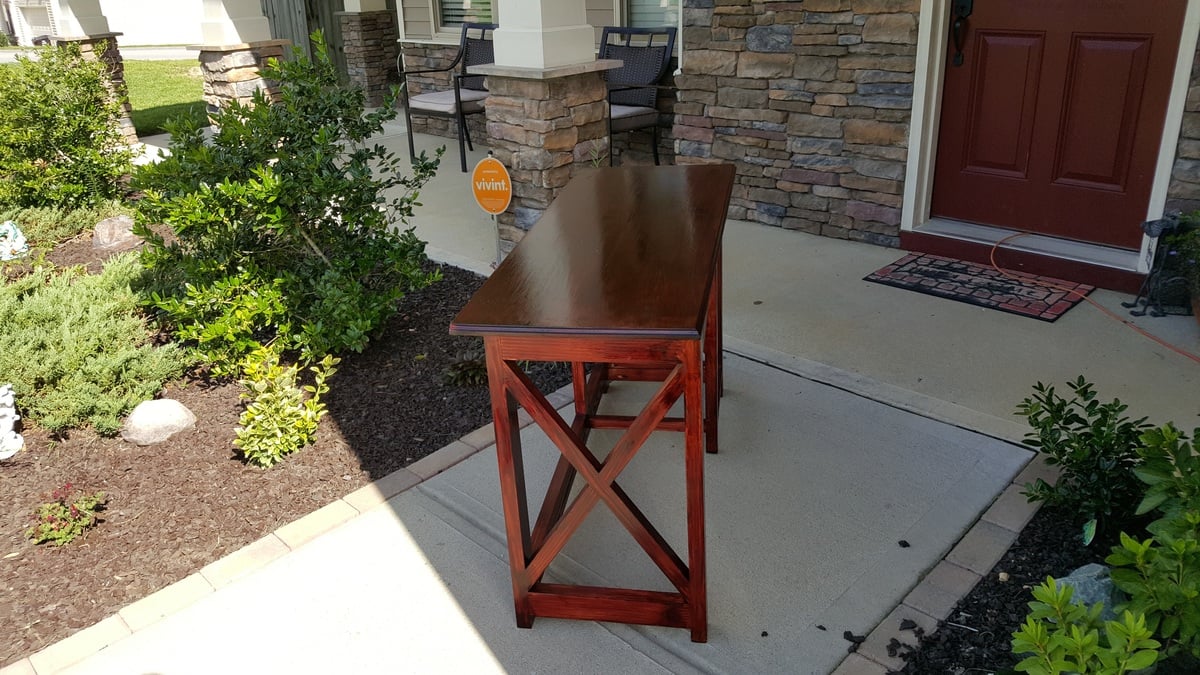
Rustic X Bench
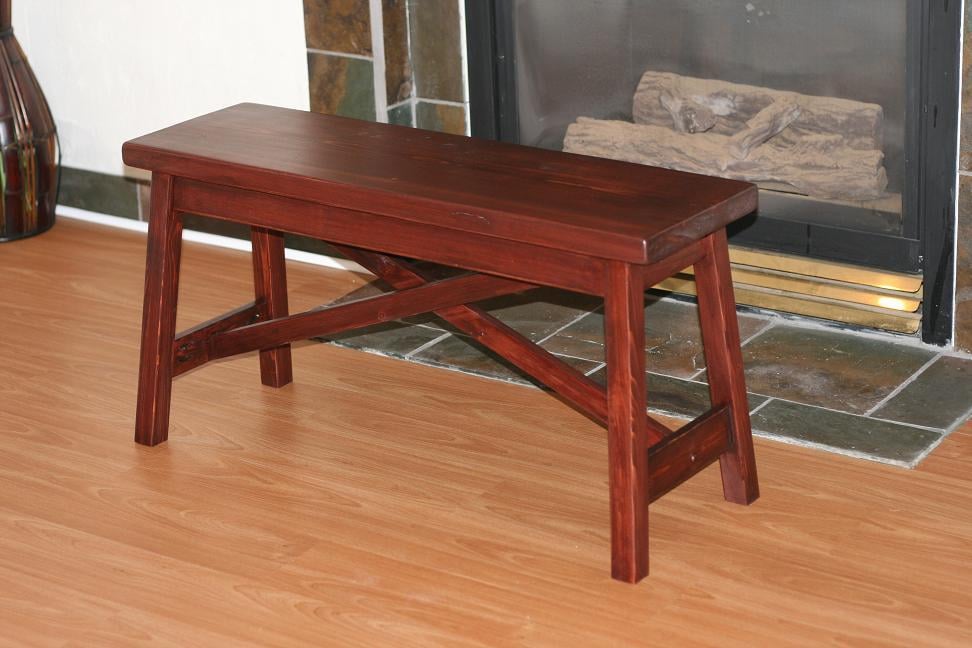
Created the small easy rustic x bench, it was super easy to build even with all the small angles. Very good plans, the video was also nice to watch before getting started especially since I made mine 36" long and the handy tip on how to cut the cross braces helped. I also decided to use a 2x12 for the bench top as opposed to the 1x12 because it felt even more rustic to me.
Estimated Time Investment
Afternoon Project (3-6 Hours)
Finish Used
One coat of Varathane's Red Mahogany and two coats of Poly.
Recommended Skill Level
Beginner
Farmhouse Table
This was my first woodworking project. Thank you Ana for providing the plan and making it easier for me.
Estimated Cost
60
Estimated Time Investment
Afternoon Project (3-6 Hours)
Finish Used
Minwax oak and fast drying poly.
Recommended Skill Level
Beginner
Comments
Thu, 05/15/2014 - 07:43
Farmhouse Table
This was a fairly simple plan and I'm thrilled about how the table looks.
Modern Adirondack Chairs
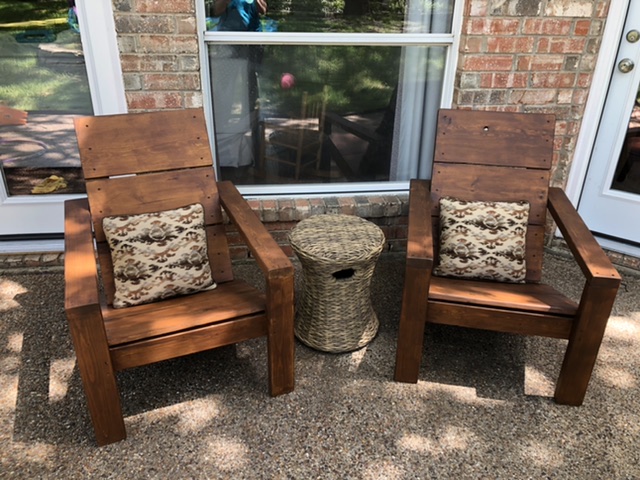
This was a fun project and the plans were perfect.
Built from Plan(s)
Estimated Cost
$60
Estimated Time Investment
Day Project (6-9 Hours)
Recommended Skill Level
Beginner
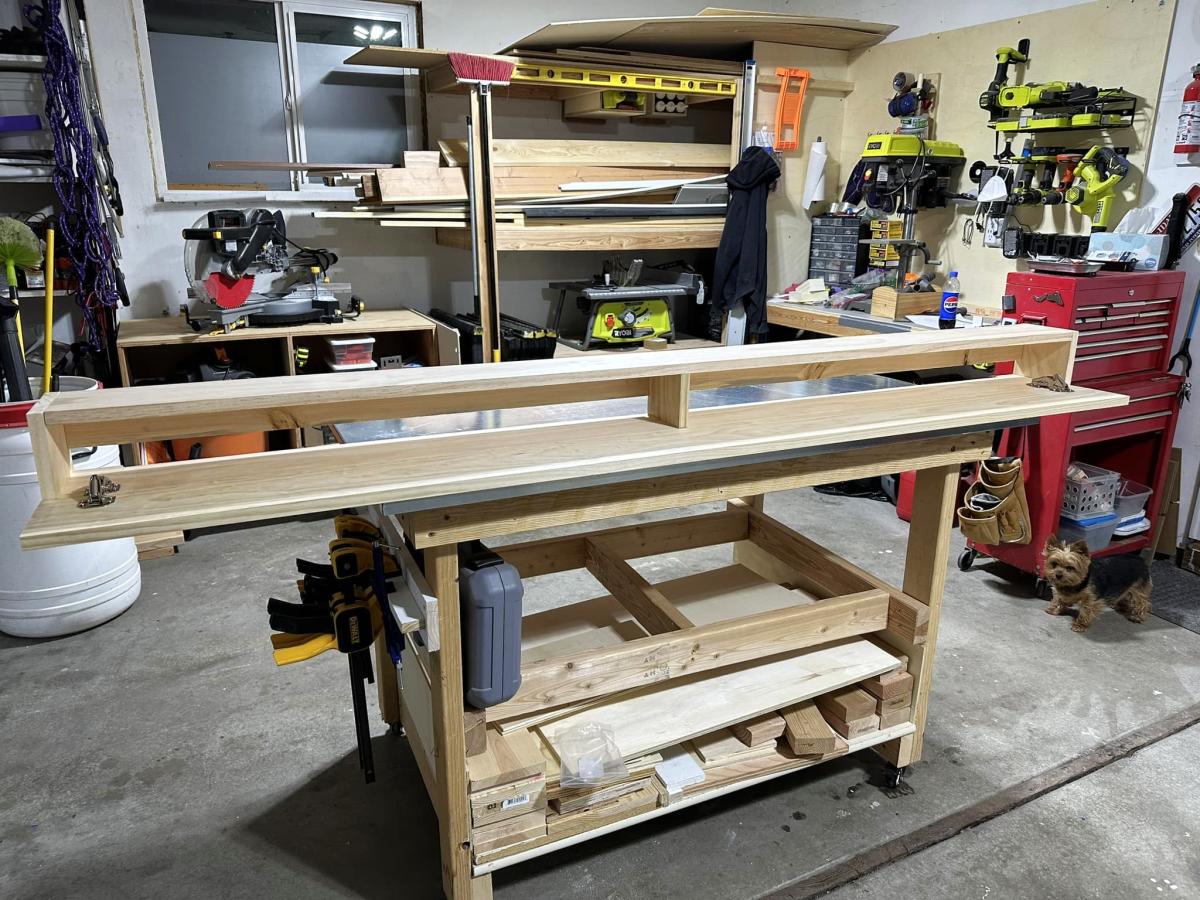
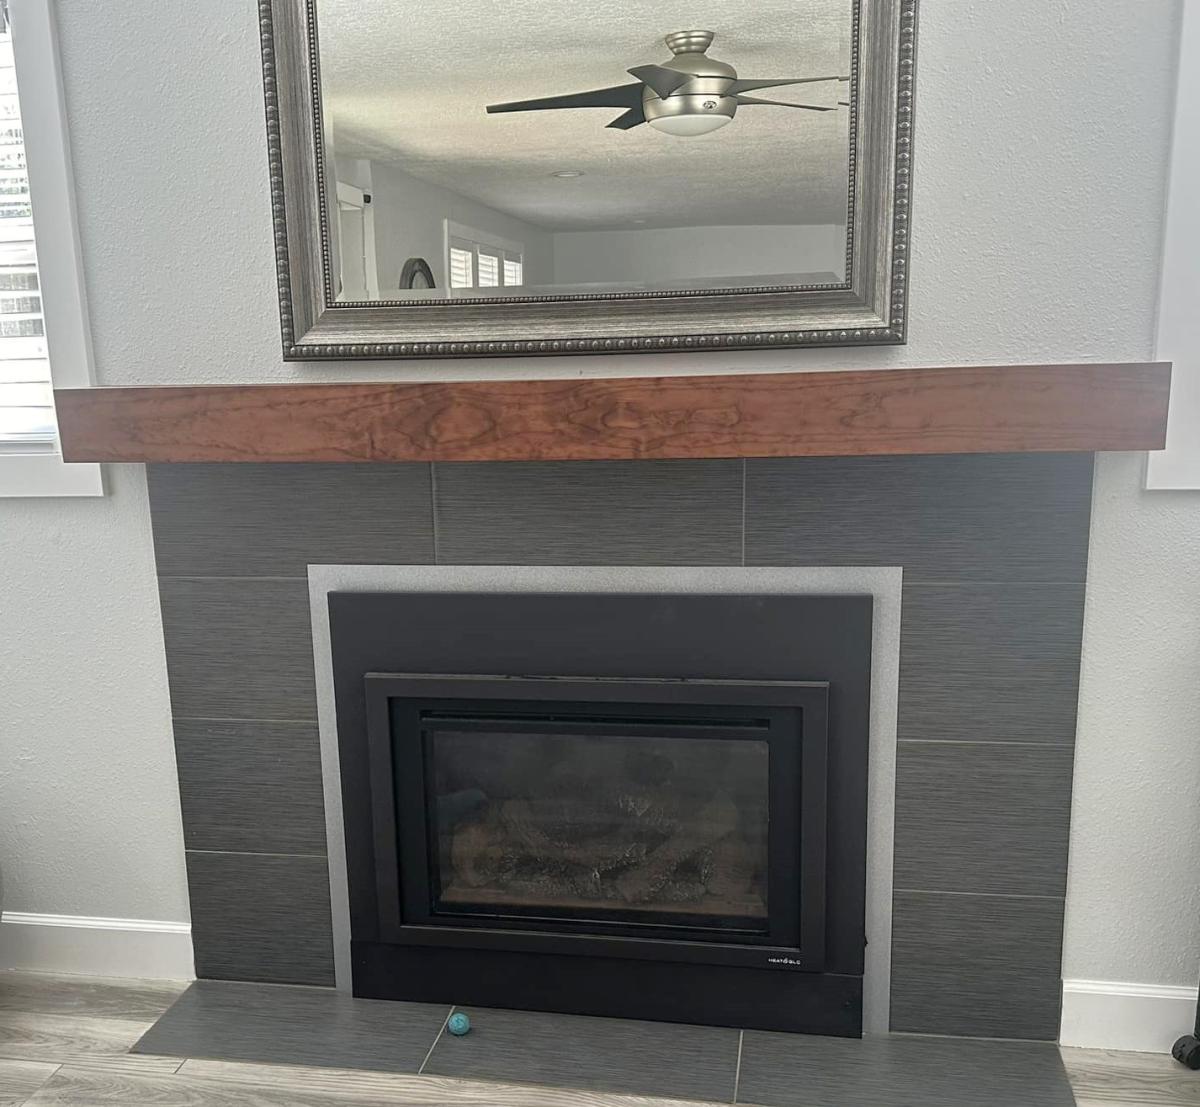
Wood Storage Mantle
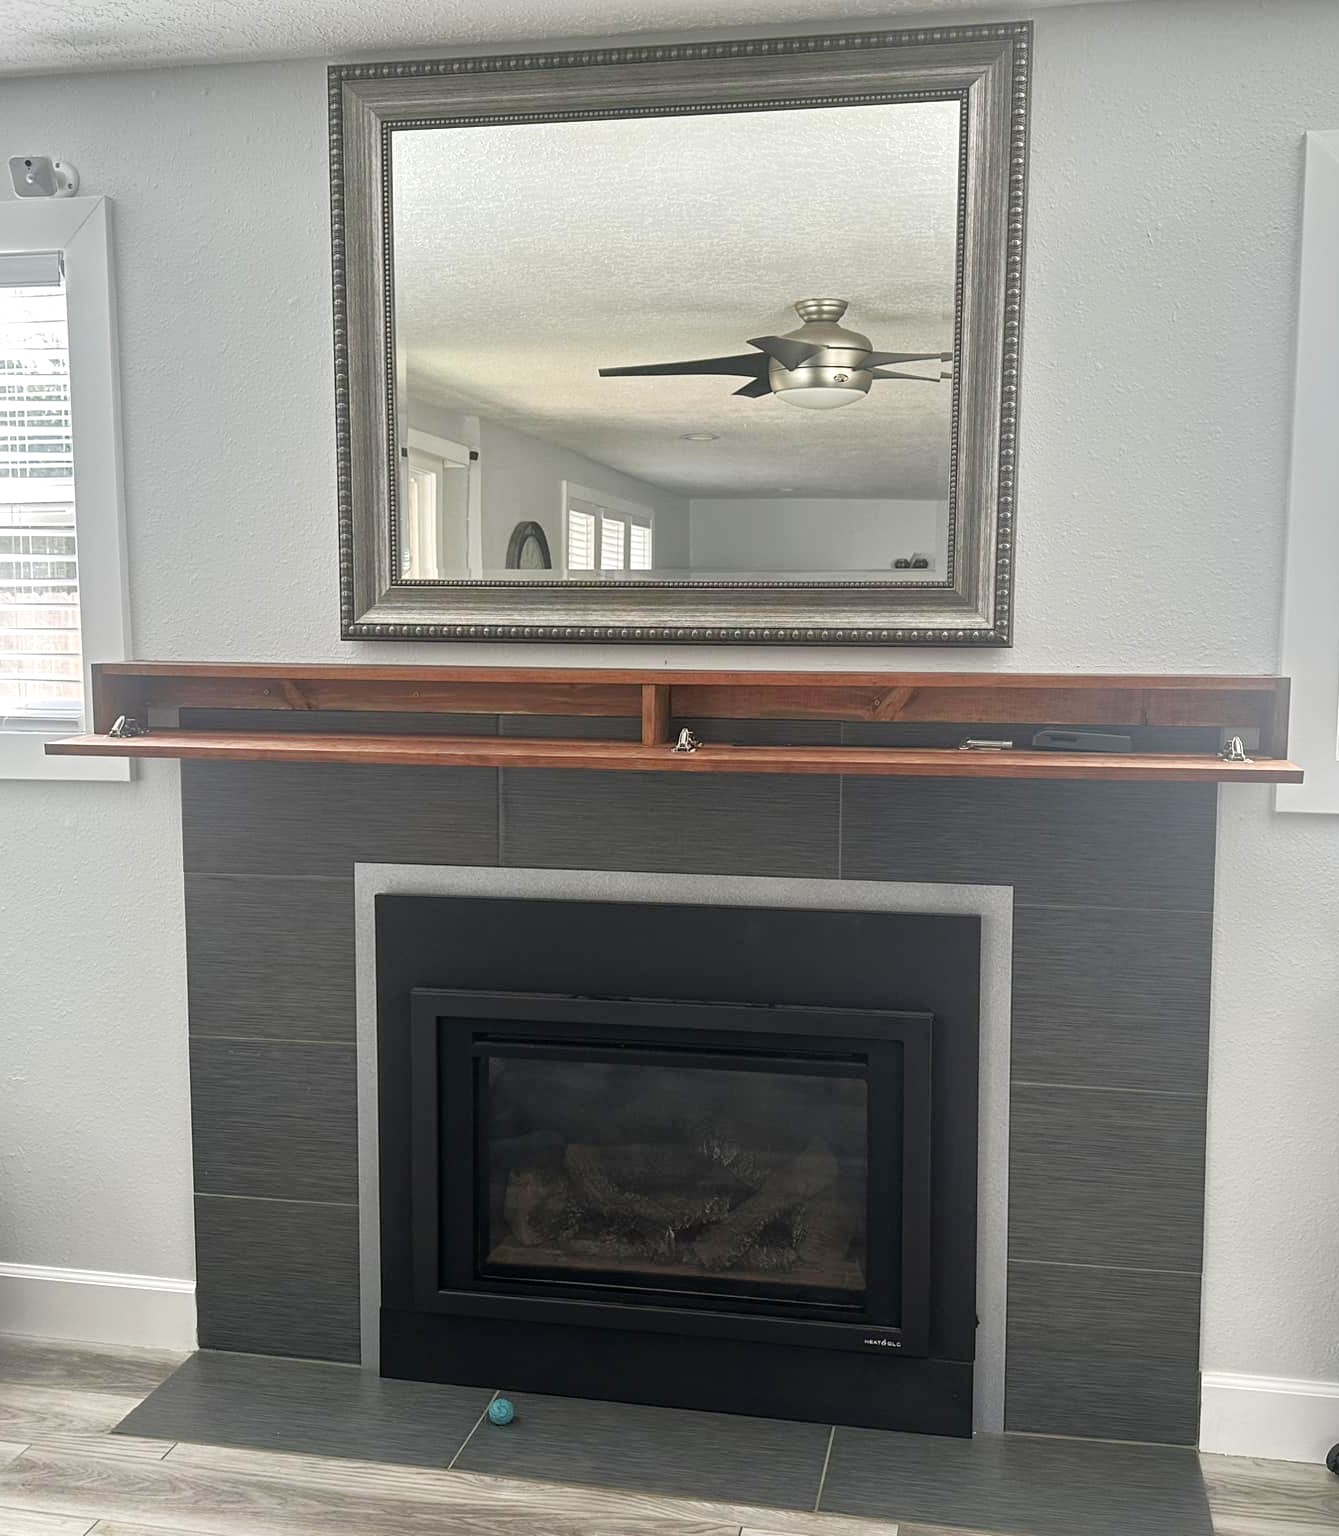
I had been wanting to build a mantle for quite a while but couldn't decide what I wanted it to look like, then I saw the wood mantle with hidden storage plans on Ana's website. I used a steel wool\vinegar mixture as a stain, 3 coats making sure it dried completely before applying the next coat. I finished it off with a beeswax & orange oil wood polish & conditioner. So far I'm storing the remote for the fireplace, the key to the gas for the fireplace and the tool that helps remove the front of the fireplace in there. I'm not sure what else will find it's way in there. I'm very happy with how it turned out.
Julie V.
Built from Plan(s)
Modern Outdoor Sectional
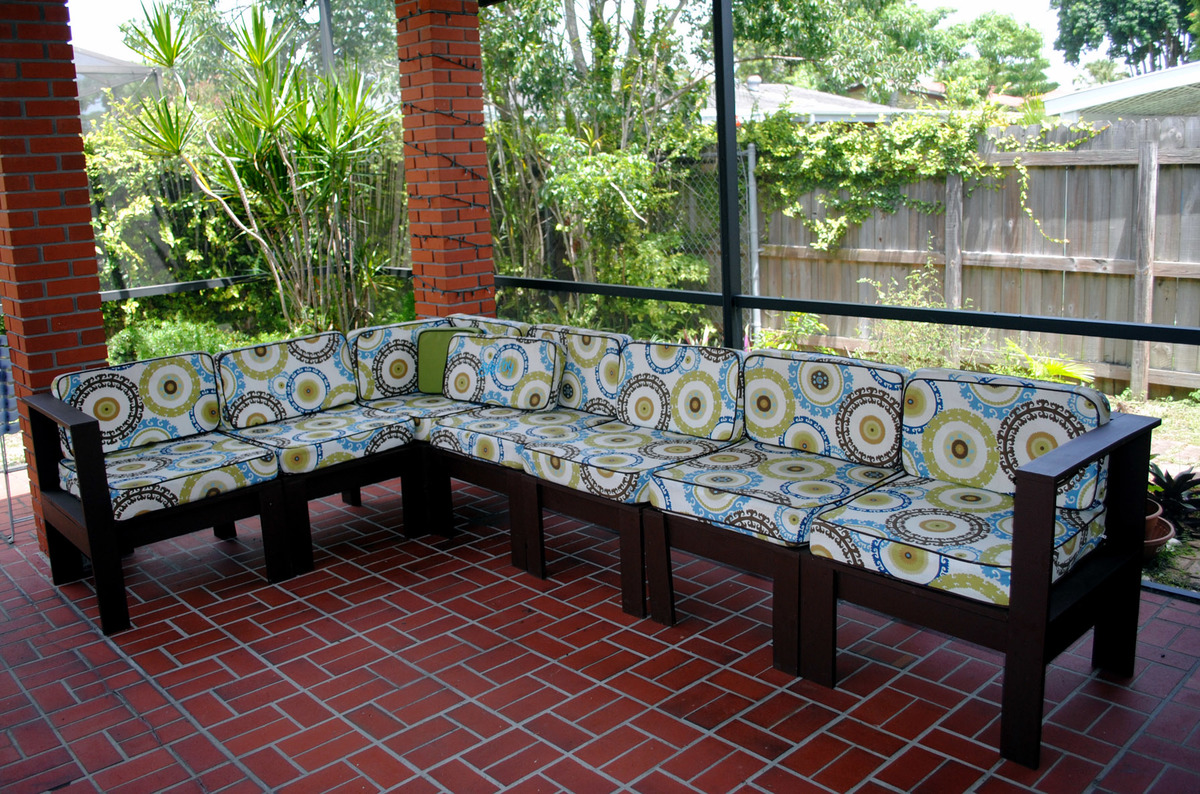
Loved doing this as my first ever building project. Ana's plans made it easy and I found a tutorial for making the cushions at Sew Mama Sew. It's not perfect but we love it because it seats so many people comfortably and is exactly the right size for our patio. (All of our friends have complimented it like crazy, too!)
Built from Plan(s)
Estimated Time Investment
Week Long Project (20 Hours or More)
Finish Used
Opaque stain
Recommended Skill Level
Starter Project
Comments


Thu, 07/26/2012 - 16:32
Spectacular!
You did such an awesome job on this. And it's your first project -- wow, it looks like it came right out of a furniture store and cost thousands! The piping on your cushions is a wonderful touch and it looks so flawless. Just beautiful!
Mon, 10/22/2012 - 08:15
Wow, this is really great. I
Wow, this is really great. I love that color - How did you do the stain/paint? Is it meant for outdoor use?
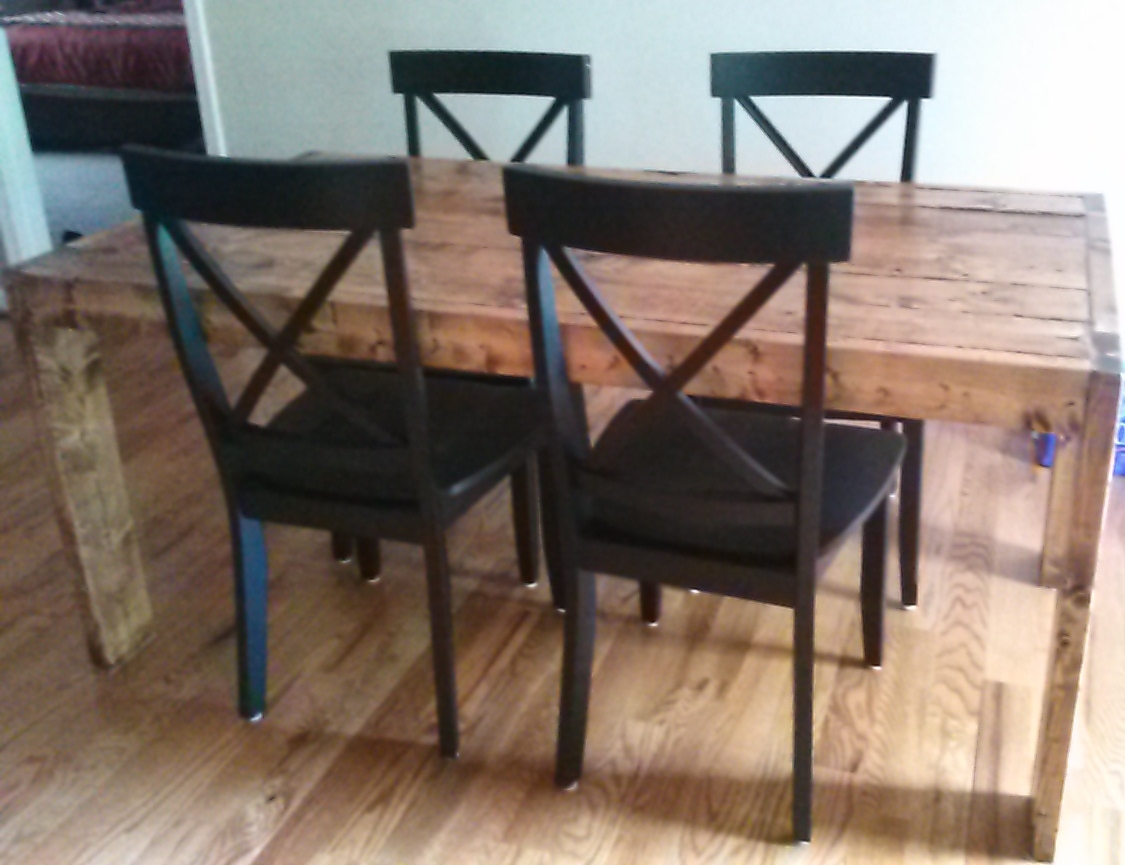
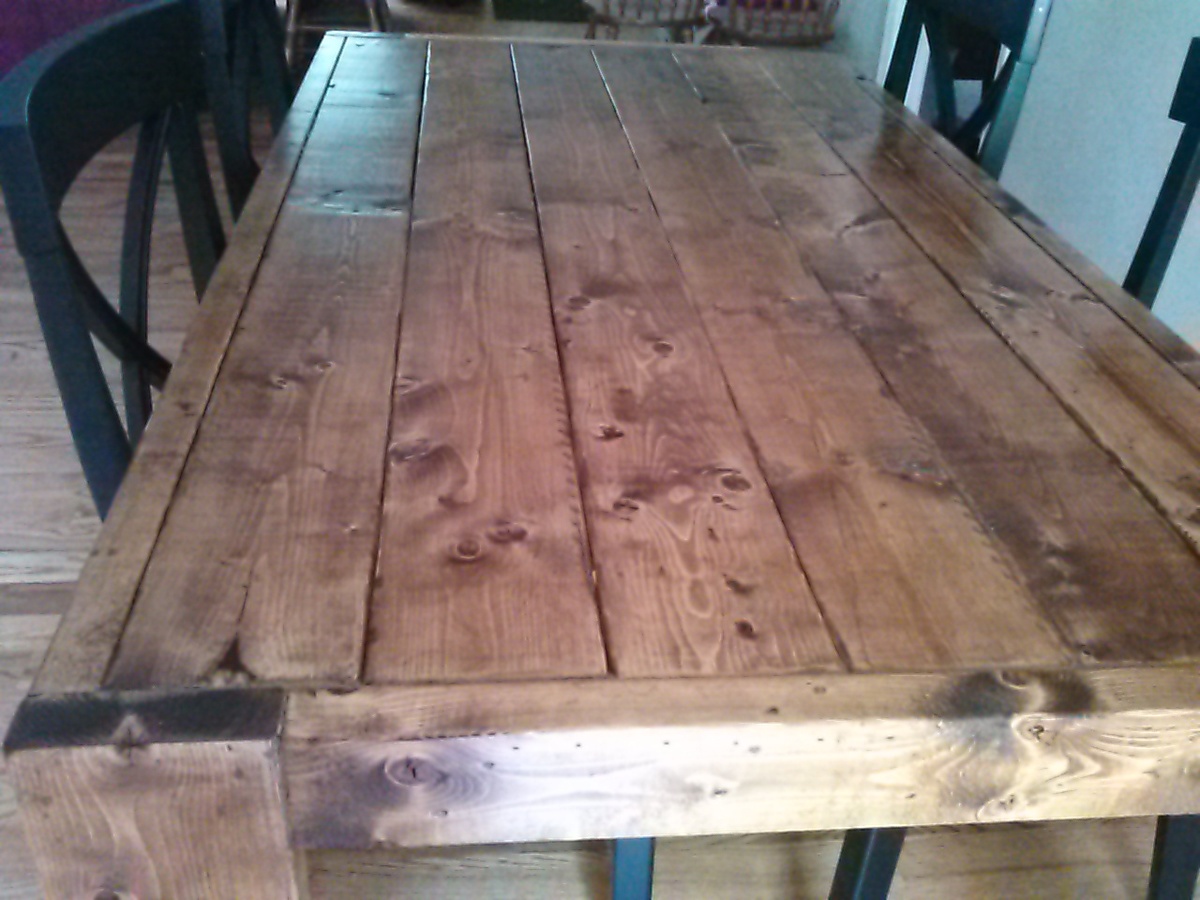
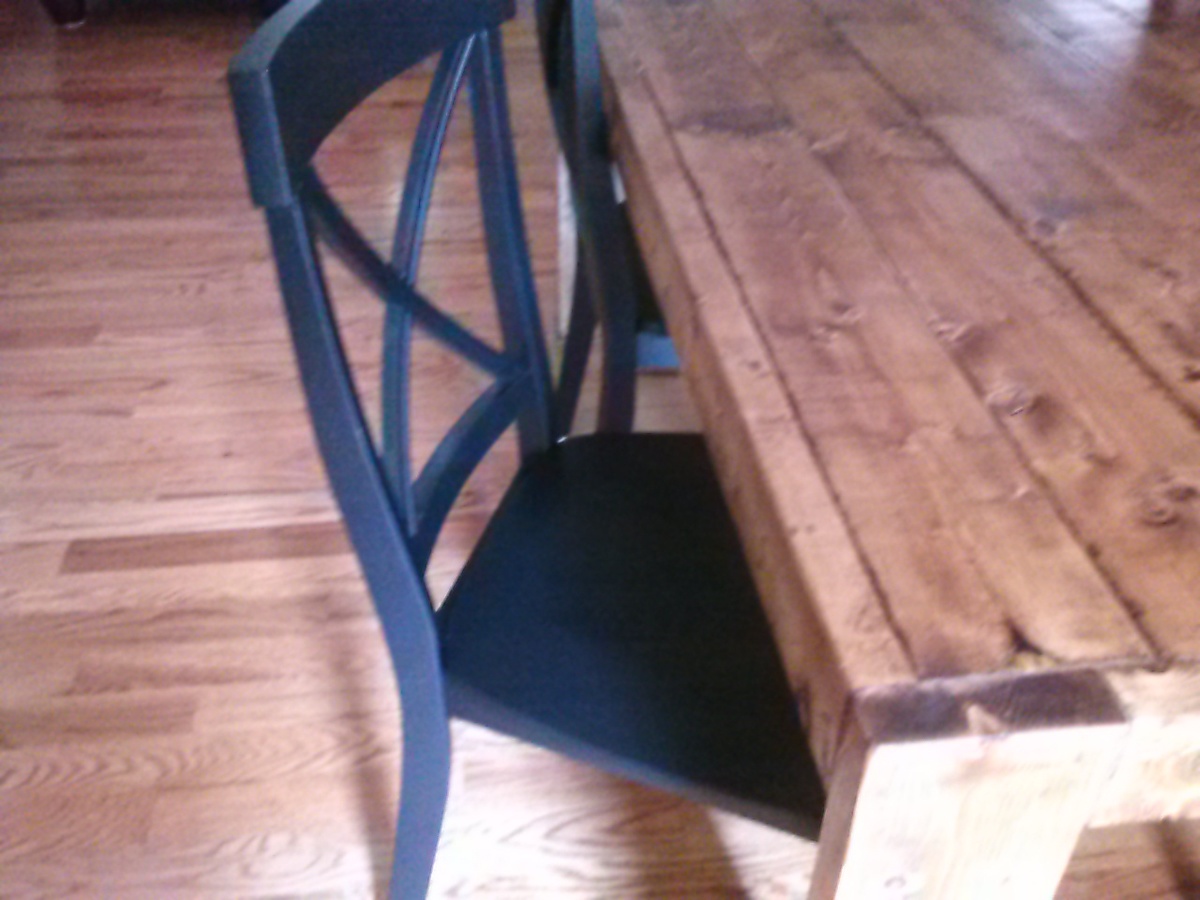
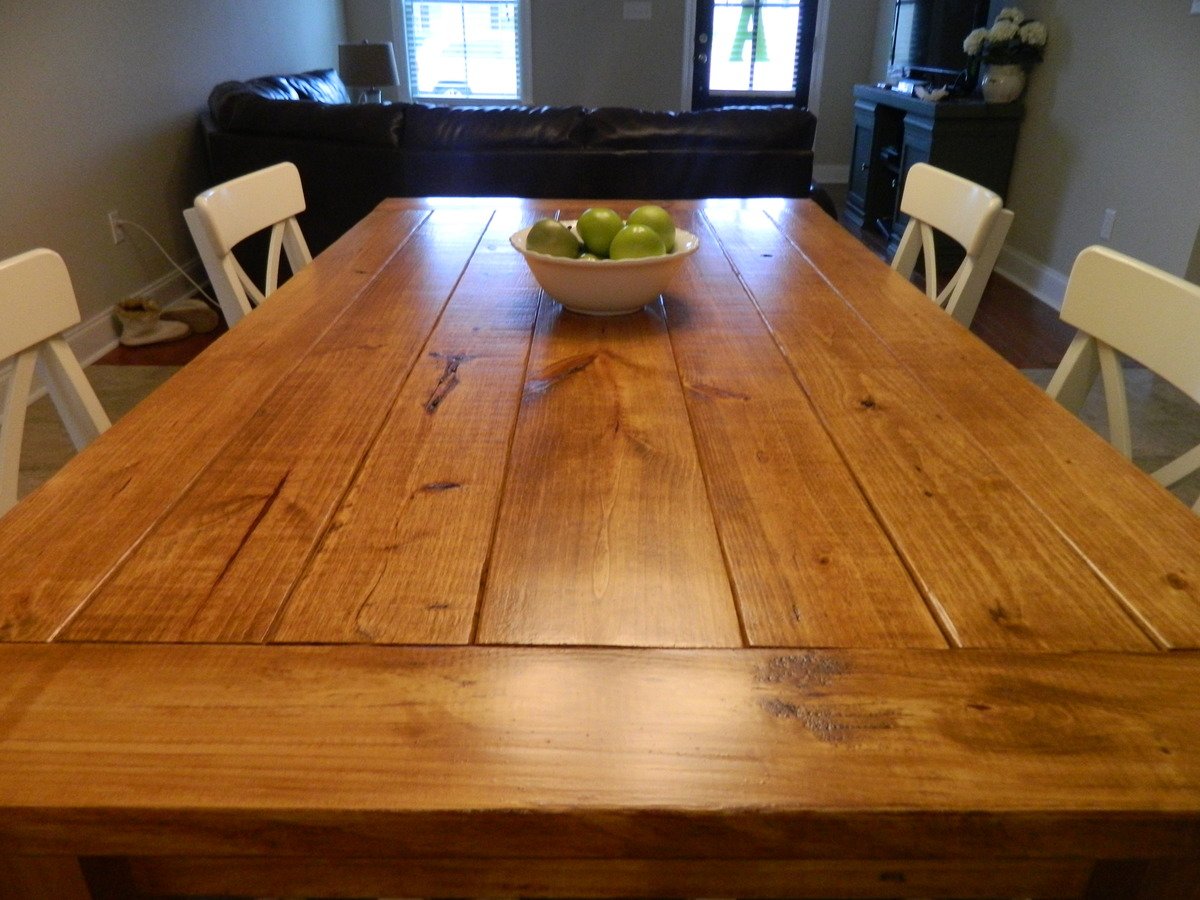
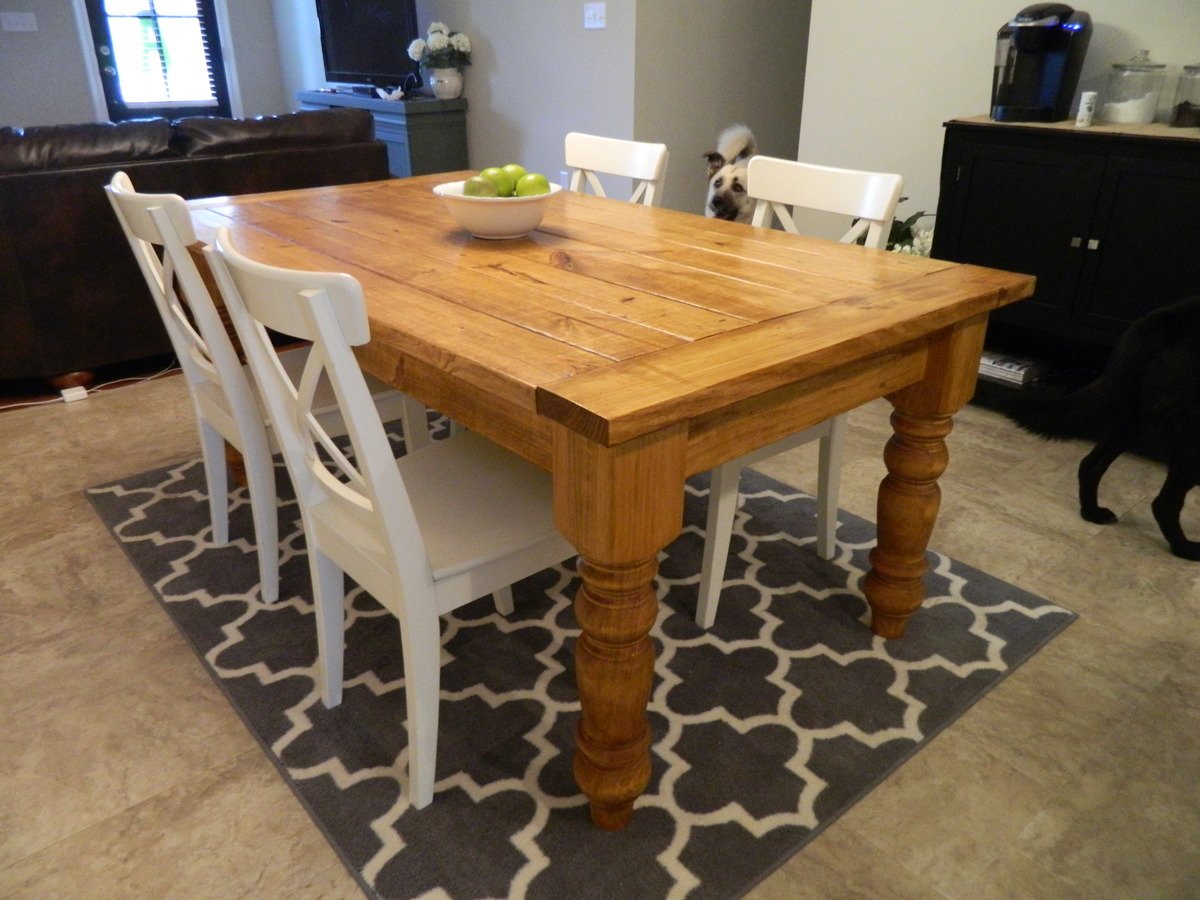
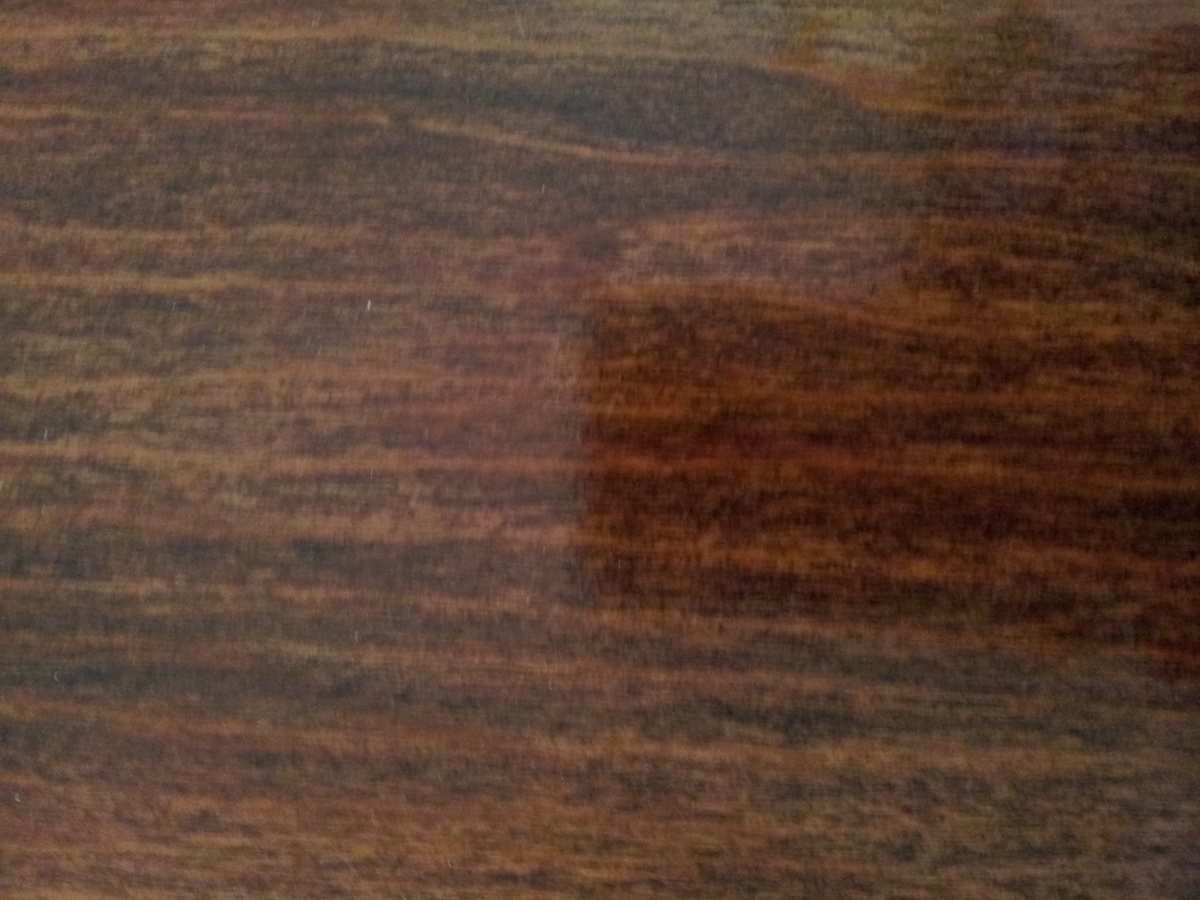
Husky Farmhouse Dining Table
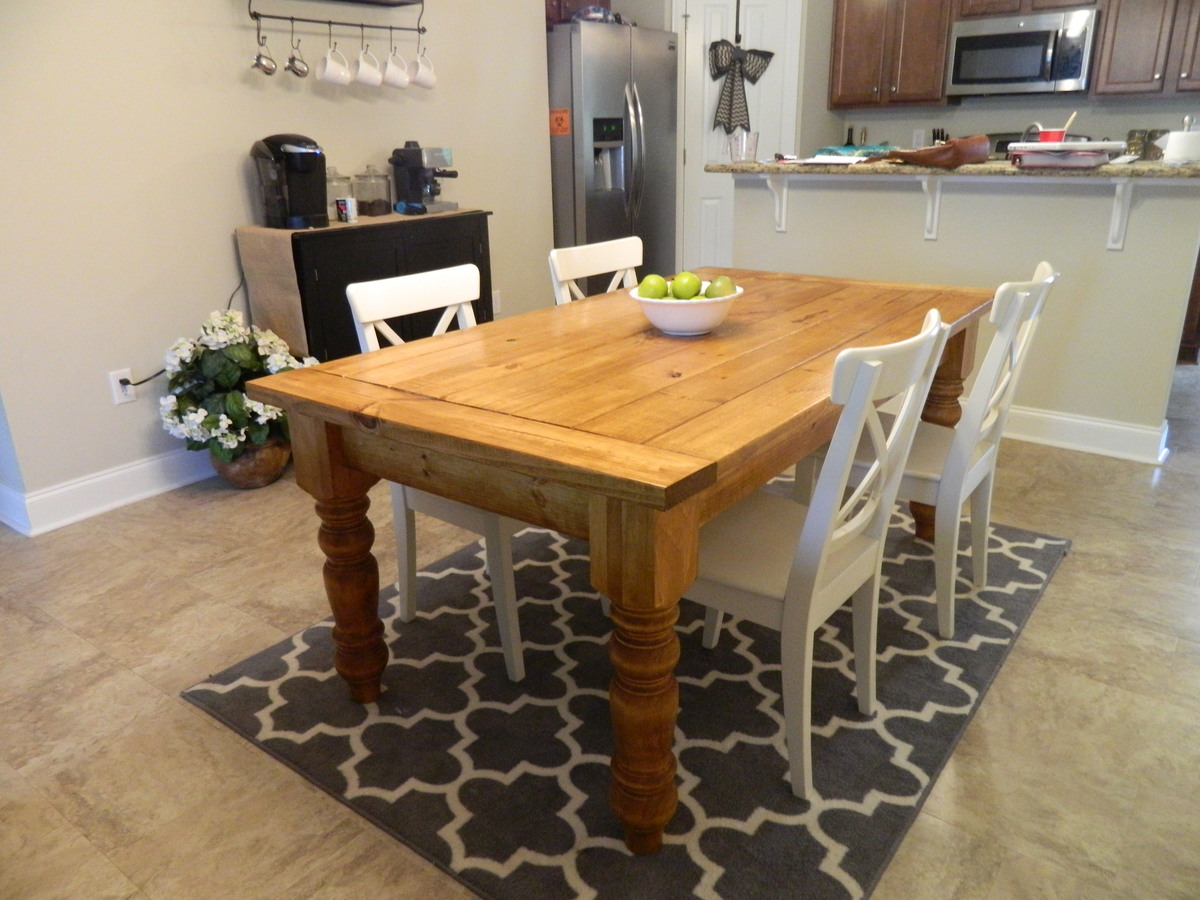
I love building my own wood furniture so that I can have beautiful pieces of furniture in my home while saving money! And while this project definitely cost more than the others I have done, I am so glad I splurged on the table legs. They ran me about $260 after tax and shipping costs, but I really think they give the table that extra OOMF! So a total of about $300 is nothing compared to a price tag at Pottery Barn or Restoration Hardware!
I chose this stain because I really wanted something to contrast with our dark leather couch and white dining chairs and this stain was even more perfect than what I expected it to be.
Built from Plan(s)
Estimated Cost
$300
Estimated Time Investment
Weekend Project (10-20 Hours)
Finish Used
Varathane Early American with Helmsman protective coating
Recommended Skill Level
Beginner
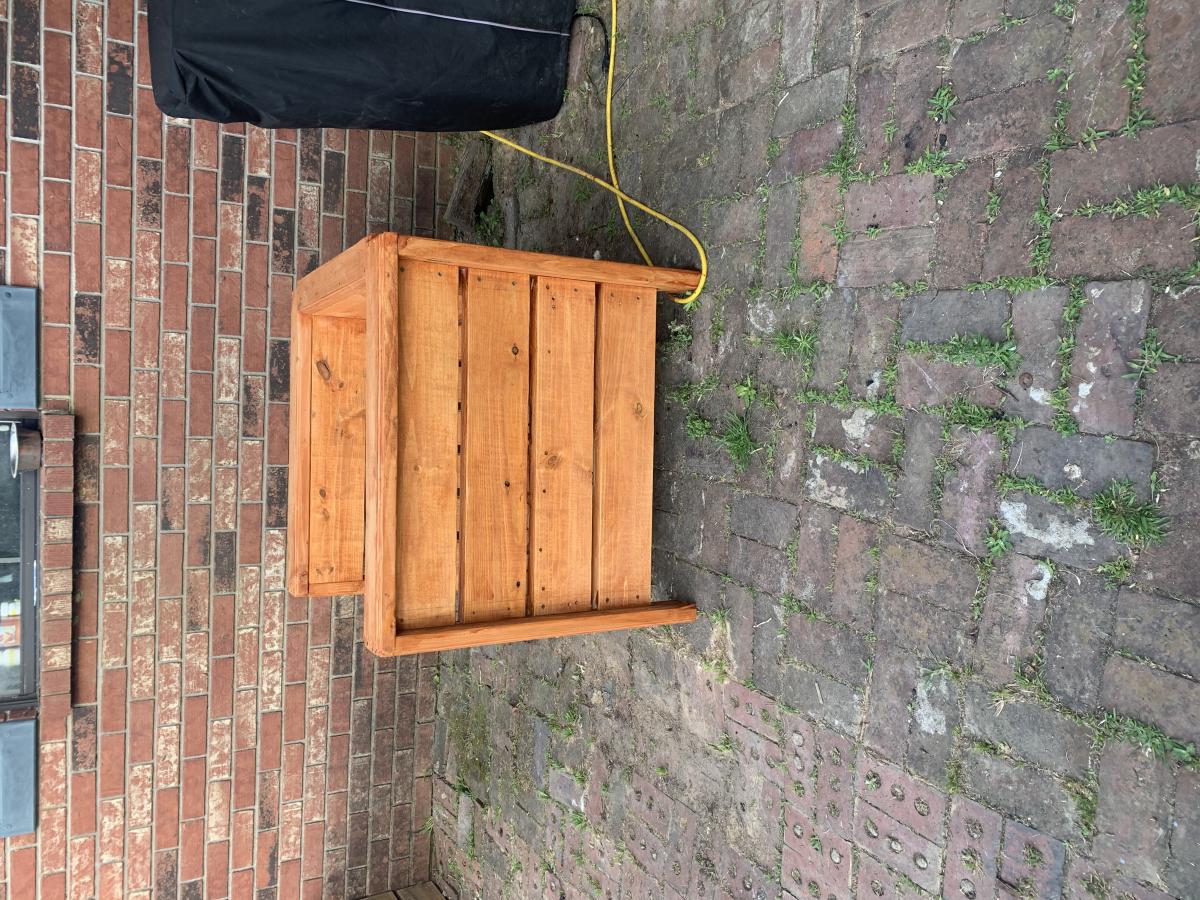
Modern Oversized Outdoor Chair
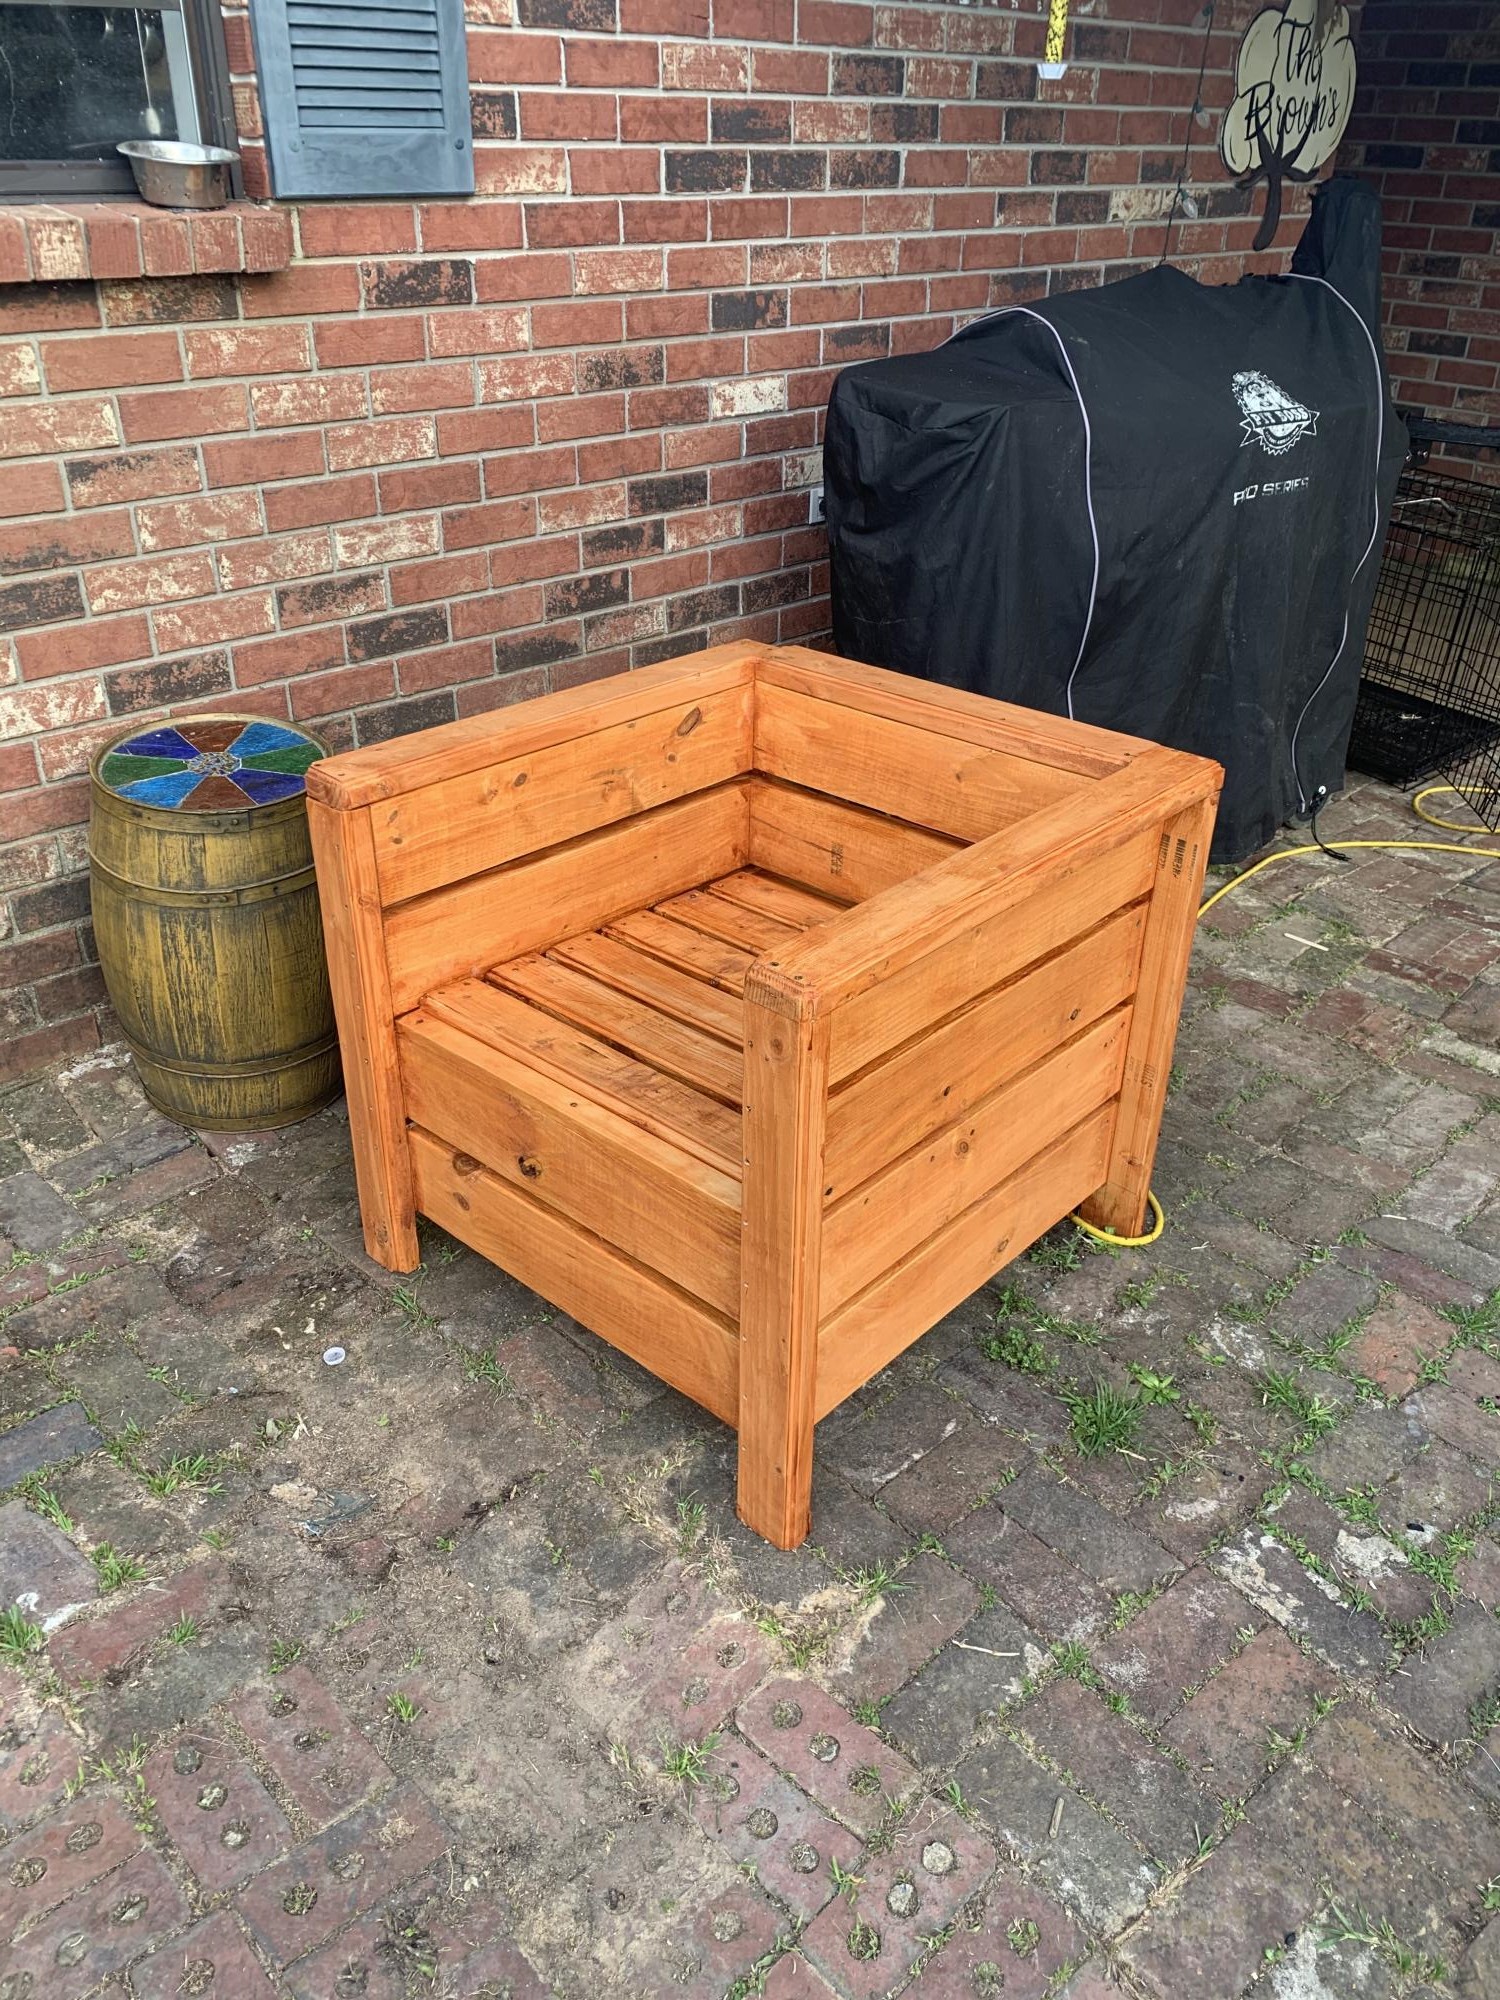
I made one of these chairs the the back hit me to low and was uncomfortable so this one I the legs 5 1/2” longer. This is my second project and took half a day but I am very happy with the outcome and started a second chair to match.
Built from Plan(s)
Estimated Cost
$50
Estimated Time Investment
Afternoon Project (3-6 Hours)
Finish Used
Valspar Transparent Redwood and I used a 1/4 Roman Ogee router bit on the arms and legs
Recommended Skill Level
Beginner
Cottage Hall Tree
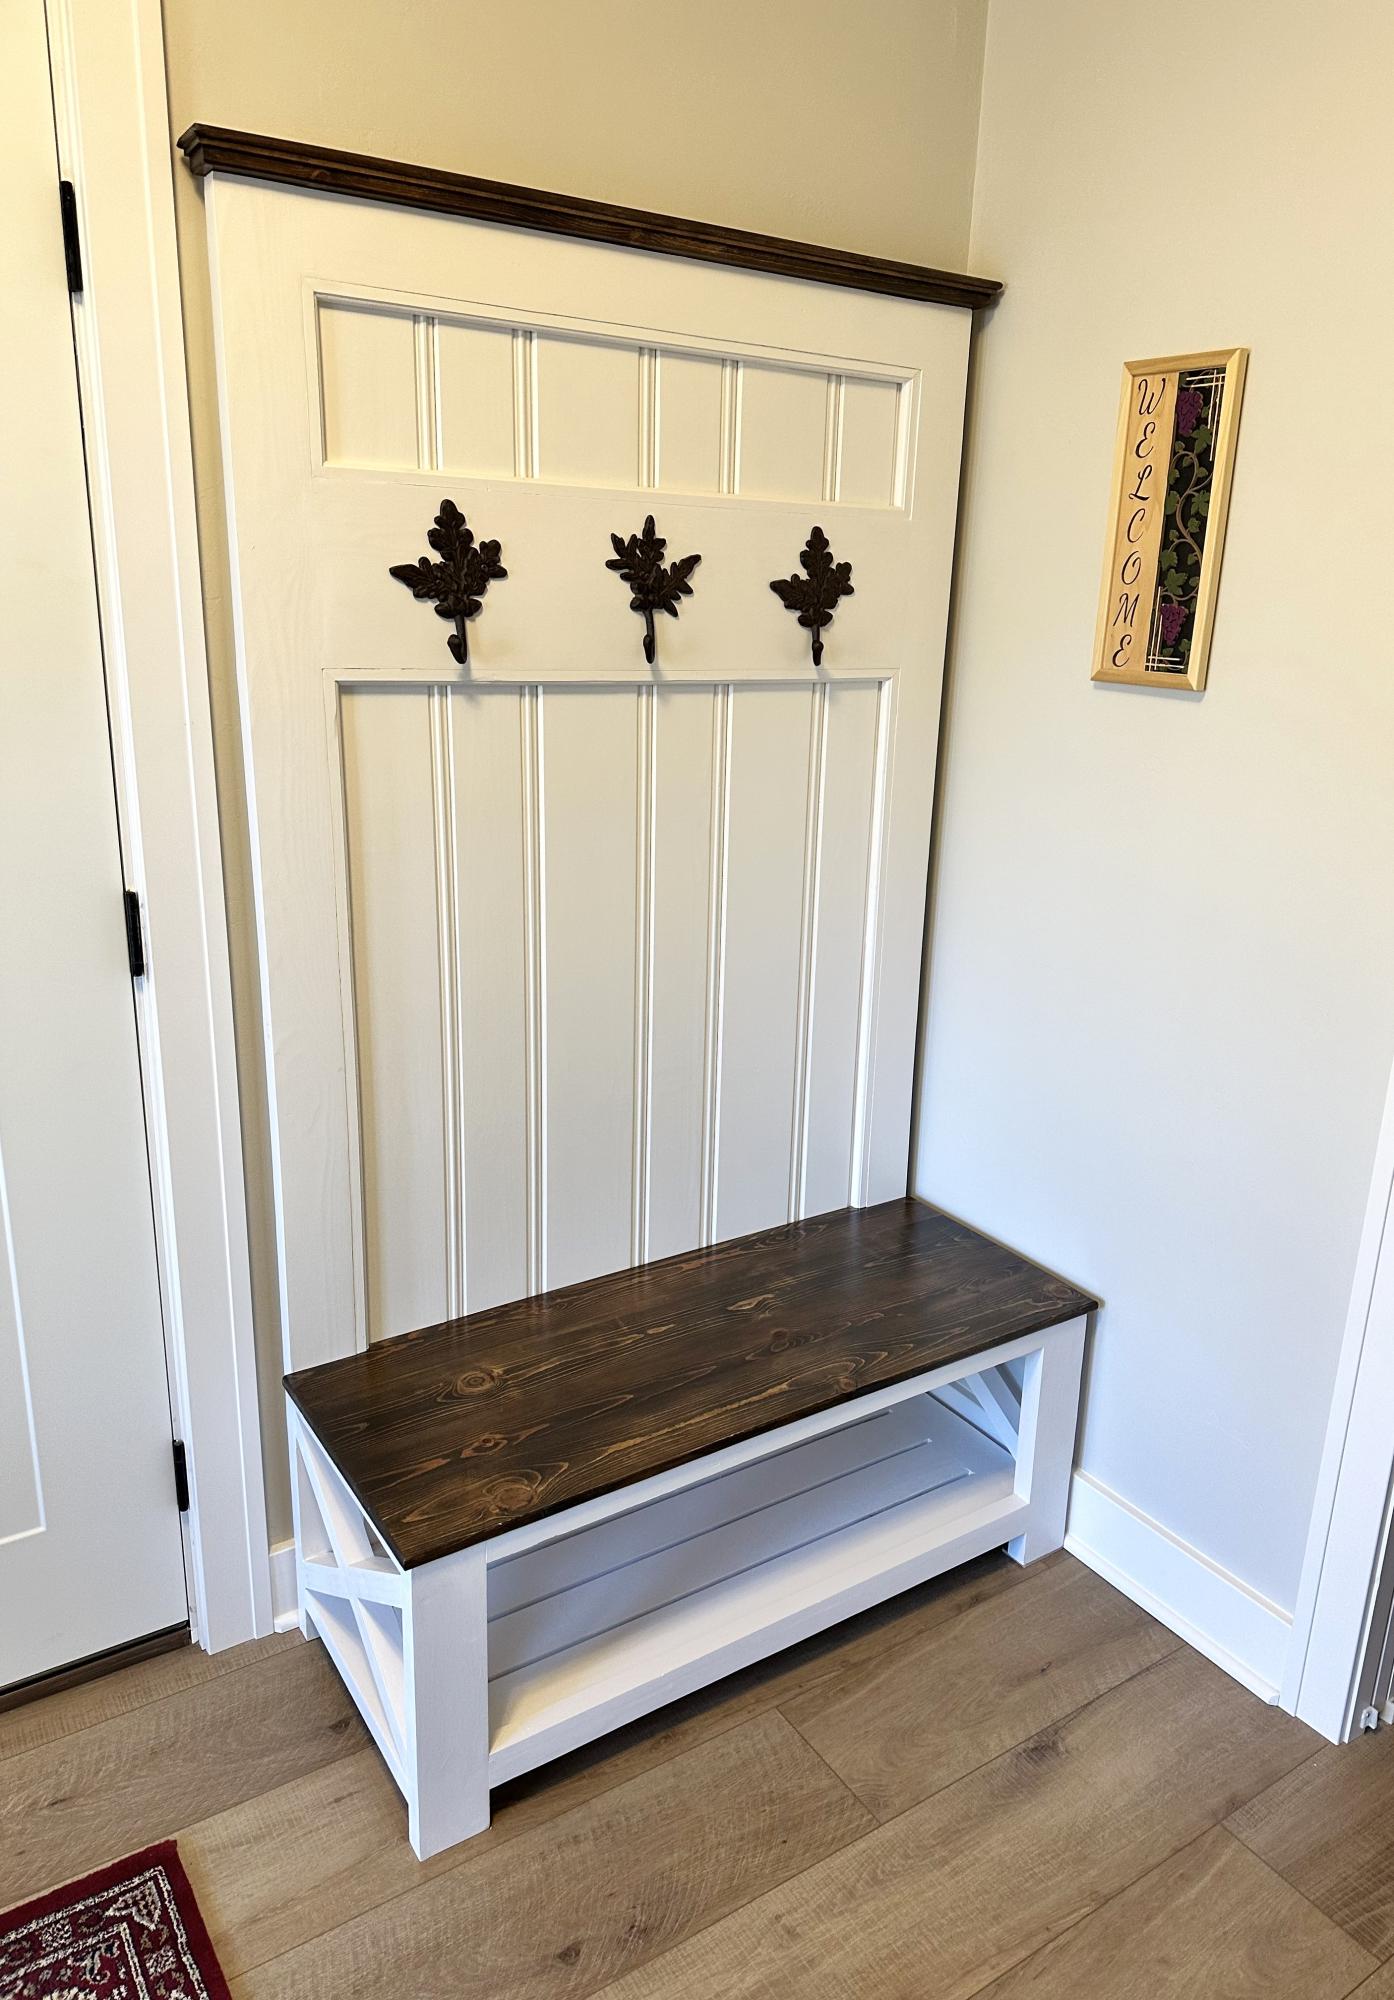
Great plan, I used knotty pine boards for the entire build, including glue up for 2x4 pieces. And the hooks came from a recent visit to England. The wood was reclaimed from a tear down of our family cottage. Using the material gives our new home a sense of history.
Built from Plan(s)
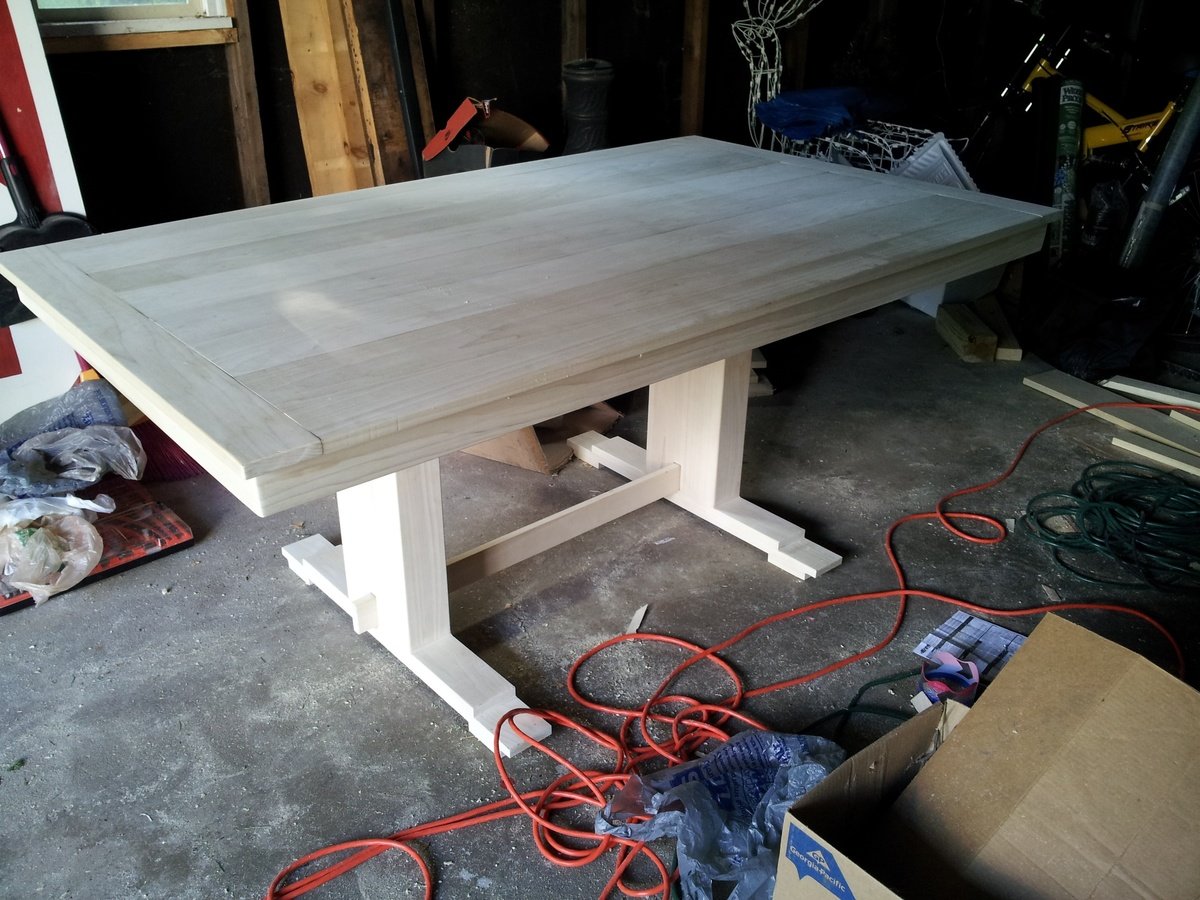
Modified Trestle Table
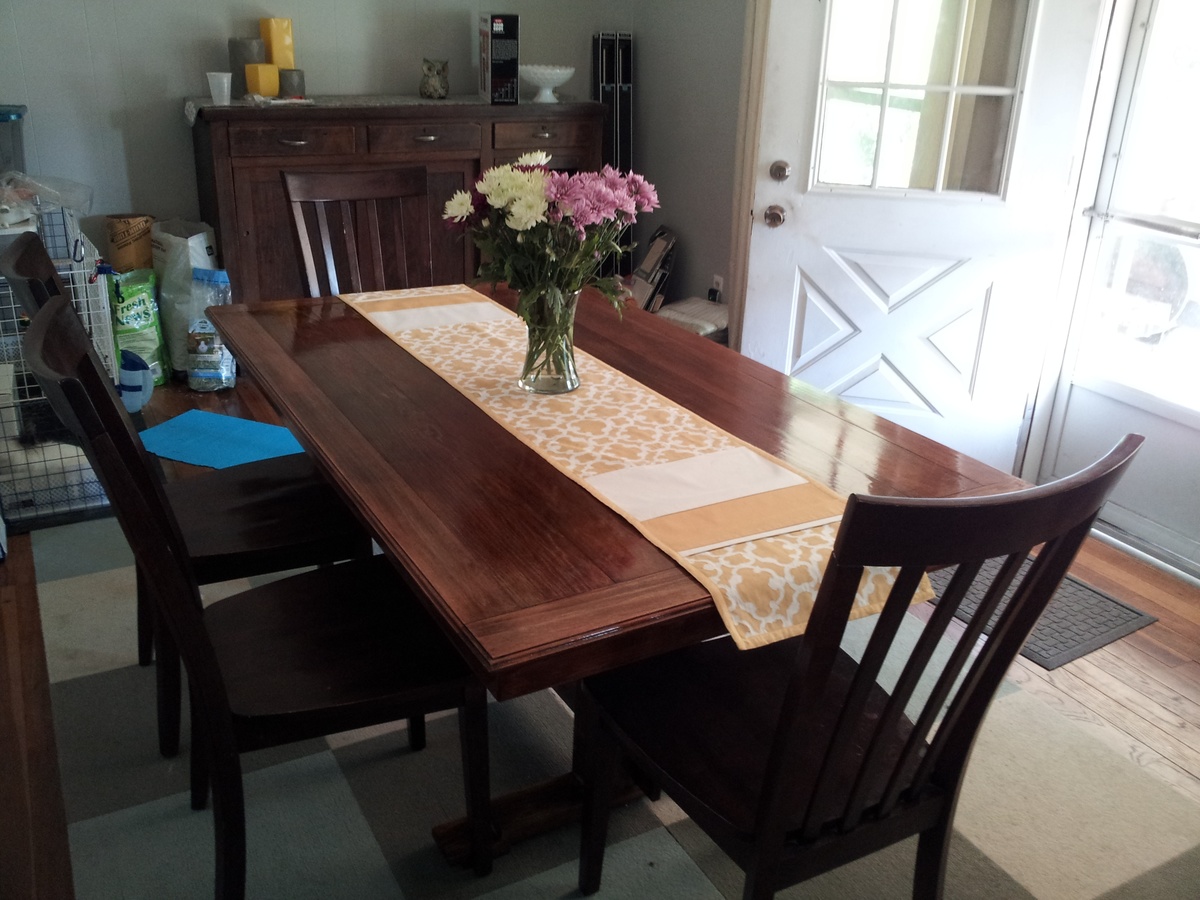
This is the kitchen table that I made when my wife said I "wasn't handy", I'm pretty sure she meant she wanted me to replace the ceiling in the dining room...
I took the Farmhouse Table plans and changed them a bit to create a true trestle table. I'm pretty happy with the results.
Unfortunately there isn't anywhere to put the Google SketchUp of this project.
Built from Plan(s)
Estimated Cost
$250
Estimated Time Investment
Week Long Project (20 Hours or More)
Finish Used
I used a cherry gel stain and a jacobean traditional stain, finished with poly. Two coats of cherry followed by the jacobean and three coats of the poly.
Recommended Skill Level
Intermediate
Comments

Tue, 07/31/2012 - 14:32
Is it possible to give
Is it possible to give details on the modifications you have done? This is the type of table I am looking for.
Wed, 09/05/2012 - 11:57
Changes
Basically I combined the farmhouse and trestle table plans that Ana has up here... I didn't want to use a metal bar to fasten the legs, so I used a wood cross brace. Though honestly with the large box legs, the table is very sturdy even without a cross brace. I have a Google SketchUp of this project if you want it.
Sun, 03/10/2013 - 14:09
I love it!!
Would it be possible to get your google
sketchUp of this table? Thanks!

Sun, 12/01/2013 - 20:05
I love the color of the
I love the color of the finish. I am just about ready to start building my farmhouse table and was looking for a nice color for the finish. Thanks for sharing!
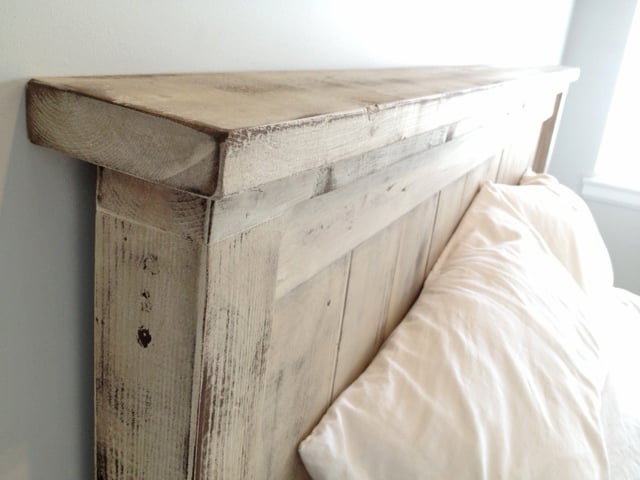
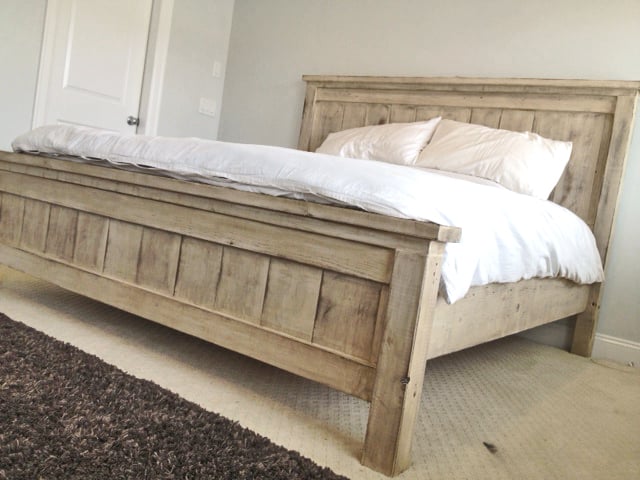
King Farmhouse Bed

Second project ive completed from Ana White, and I am very happy with how this bed turned out! The only thing I would fix would be the finish, I wanted it a bit whiter. not so creamy. Otherwise very quick and easy fun project to do. =)
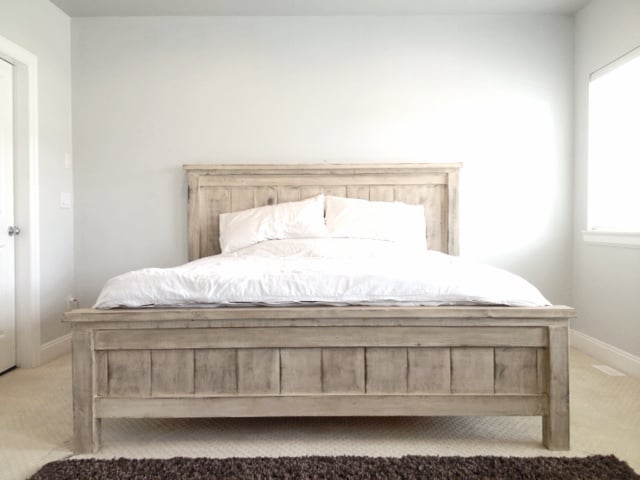
Built from Plan(s)
Estimated Cost
$300
Estimated Time Investment
Day Project (6-9 Hours)
Finish Used
1 coat of a basic latex white paint.
Then I sanded down just so raised grains would become exposed.
1 coat of dark walnut stain (wipe on with cloth)
Done.
Then I sanded down just so raised grains would become exposed.
1 coat of dark walnut stain (wipe on with cloth)
Done.
Recommended Skill Level
Starter Project
Comments
Thu, 05/22/2014 - 16:34
Thank You Ana.
Thank you for sharing all of these awesome projects. I was always hesitant when it came to wood, but now I cant seem to stop!
Tue, 06/10/2014 - 08:13
More about your finish
How exactly did you achieve this finish? sand first, paint second, sand again and then stain?
In reply to More about your finish by JGoates
Wed, 06/11/2014 - 13:43
How I got the finish!
(You can do all this before or after your project is put together or not.)
Be sure to do a test piece before hand so you can see exactly what your getting :)
The first step I did once the head board and foot board were put together, was to sand any sharp edges or corners. I liked mine rounded and worn looking. I did not sand anything else.
Second step is to paint 1 even coat of a basic white latex paint.
Third step is to sand away some white paint. because we didnt sand it before hand the grains in the wood will be very bumpy. so the paint on the grains will sand off while the paint lower than the grain will remain. makes sense? hopefully i explained that right!
Fourth step is to now wipe on the stain of your choice. I went with Dark walnut. It stains the paint a bit bringing the white to a gray/brown tone. and stains the wood dark walnut so the grain patterns show up dark.
Let me know if you have any other questions and good luck!

Thu, 01/29/2015 - 07:49
sanding
What grit of sand paper did you use to sand off the white paint? and did you sand it by hand? Also, for the dark walnut stain, did you wipe off immediately or leave it on for a bit before wiping? Beautiful bed, I want to achieve this look!
Fri, 02/06/2015 - 09:15
Hi jbogan15, thank you!
Hi jbogan15, thank you!
For sanding I used a palm sander with 120 grit to get the job done a bit quicker, than went over lightly with 220. When staining I actually just dipped a rag in the stain and would wipe the stain on. =)
Good luck!
Justin
Fri, 01/27/2017 - 11:05
SIde rails
Love this look! Exactly what I am trying to achieve...A few questions about the side rails. How high did you connect them to the 4x4 posts and exactly how did you connect them? Did you use brackets or screw right into the posts? Thank You!
Thu, 09/05/2019 - 15:07
Mattress height
I have seen several beds from Anna White. I was wondering if the frame require a box spring mattress or not. If not, are the beds lower than what a traditional mattress and box springs are. Thanks !
Emily's playroom chairs
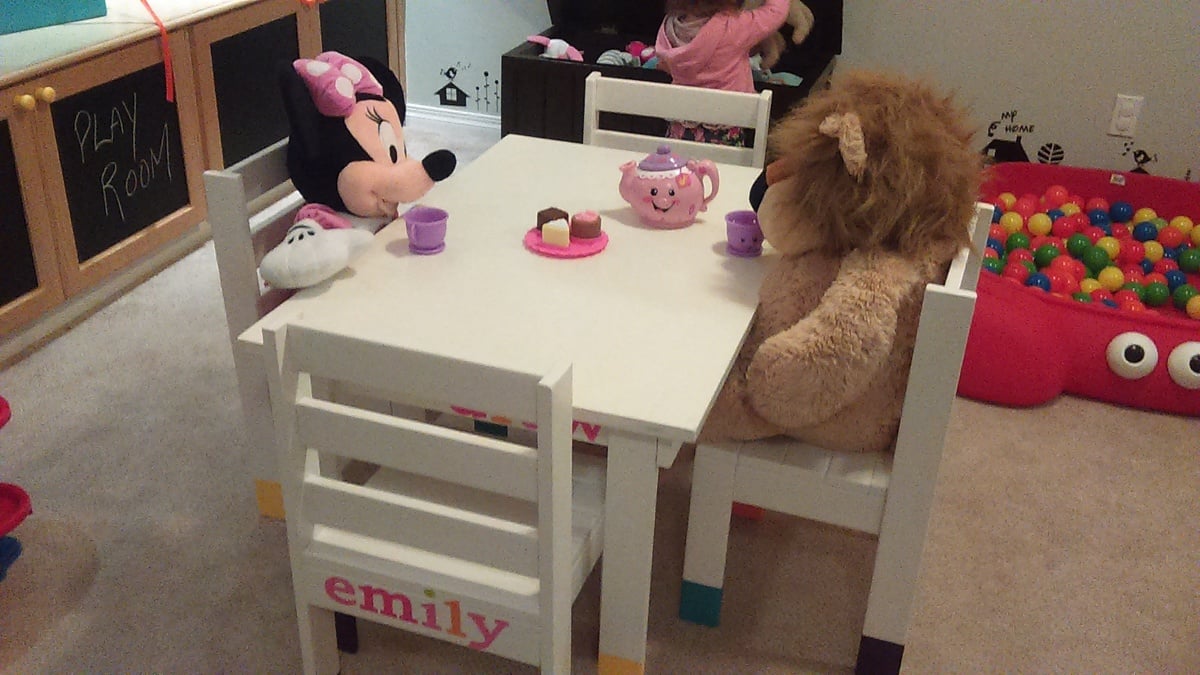
So we had our grandchild Emily needing a play table and chairs, a limited budget, an old play table but no chairs! Ana White to the rescue! We made 4 chairs and painted them and the table to match. As you can see Emily has made lots of new friends over tea!
Built from Plan(s)
Estimated Cost
$30
Estimated Time Investment
Weekend Project (10-20 Hours)
Finish Used
Enamel paint and clearcoat
Recommended Skill Level
Beginner
Modern Adirondacks UK
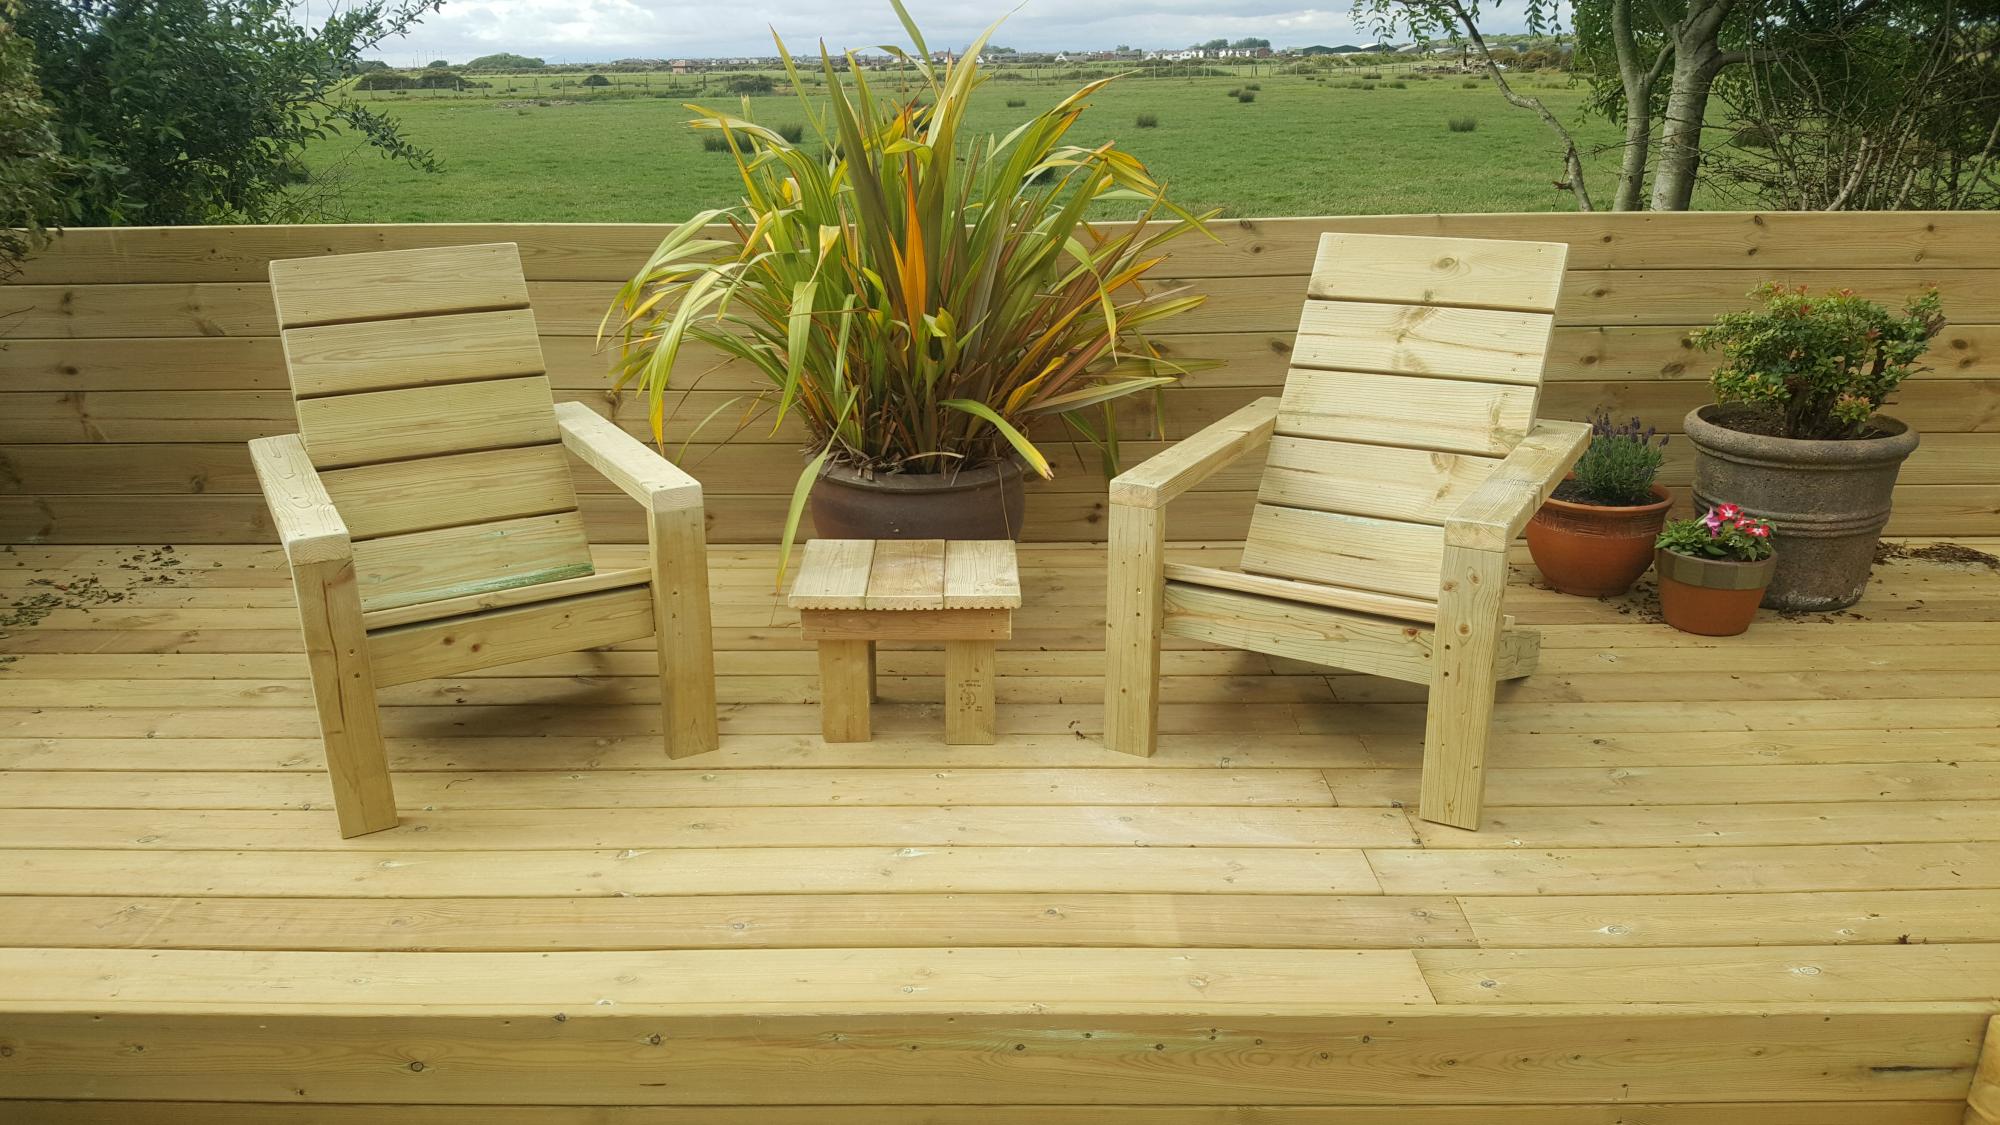
Hi Ana
Just wanted to say thanks for the plans. Here's how ours came out!
Ben.
Built from Plan(s)
Estimated Cost
£50
Estimated Time Investment
An Hour or Two (0-2 Hours)
Finish Used
Tanalised pressure treated timber.
Recommended Skill Level
Intermediate
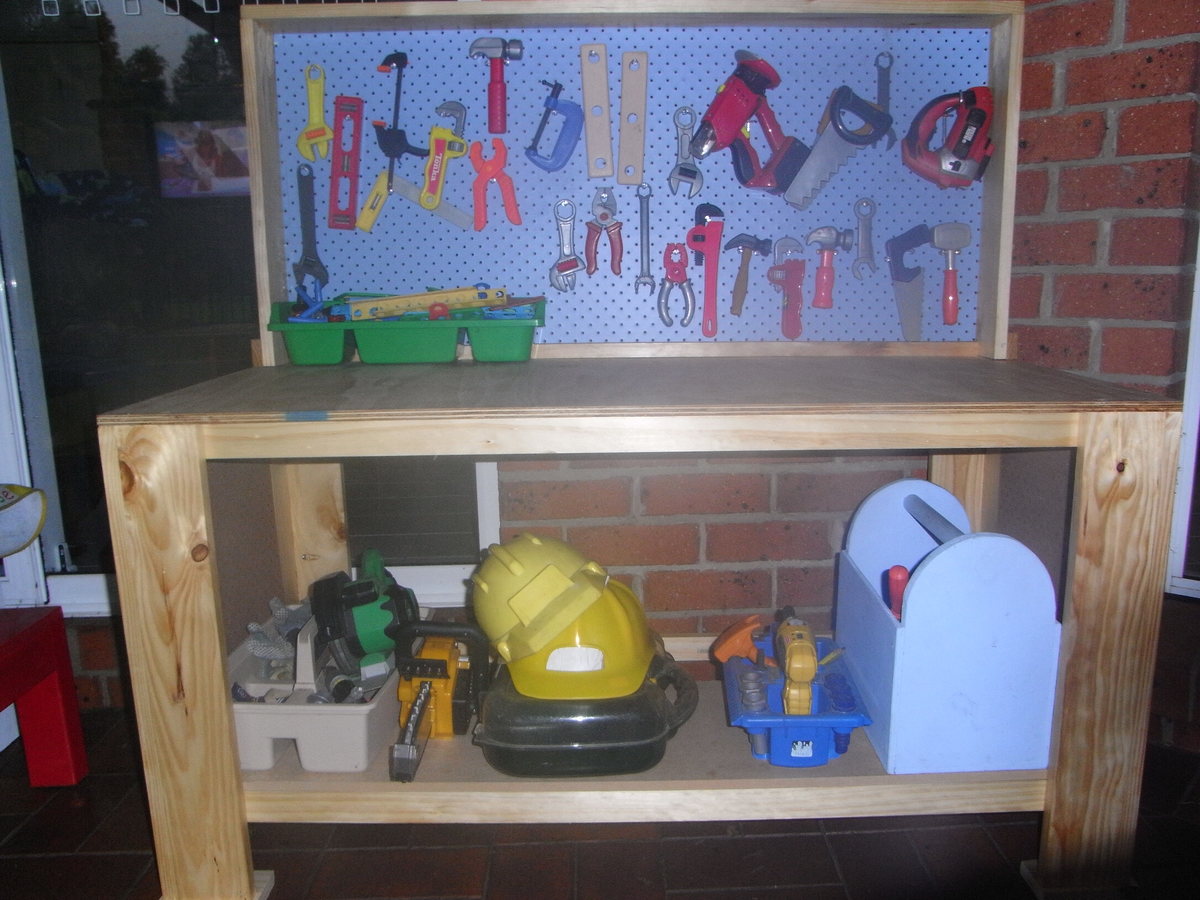
School Library Cart

My 11 year old son made this library cart for our homeschool books. He followed Ana's plans with a few changes on dimensions. I love how it turned out, and it is a perfect addition to our school room. We kept the cost low by using some wood and paint that we already had.
Built from Plan(s)
Estimated Cost
$23.00
Estimated Time Investment
Day Project (6-9 Hours)
Recommended Skill Level
Beginner
Shared room

We have 3 (almost) teenage boys and needed the storage of the Brookstone bed for their sport gear, etc. I built 2 of them and my 15 year old built his. I can't get over how easy they were to build! This was the first building project I ever made and they turned out beautifully! The headboard took about 2 hours to build and the bed about 5 hours. I was pretty slow though, checking and double checking measurements, glueing and clamping like crazy, being careful not to rush. Still, 7 hours to make the bed and a couple hours to paint, not a bad days work! The lumber cost $144/each so we were happy with the cost of the beds. I would highly recommend furniture movers underneath them. I used 4 huge ones under the ends of the 2x2 supports and small squares under the legs/headboard. They move so easily with them! Thanks, Ana, for a great plan!! We are so thankful and love our new beds!!
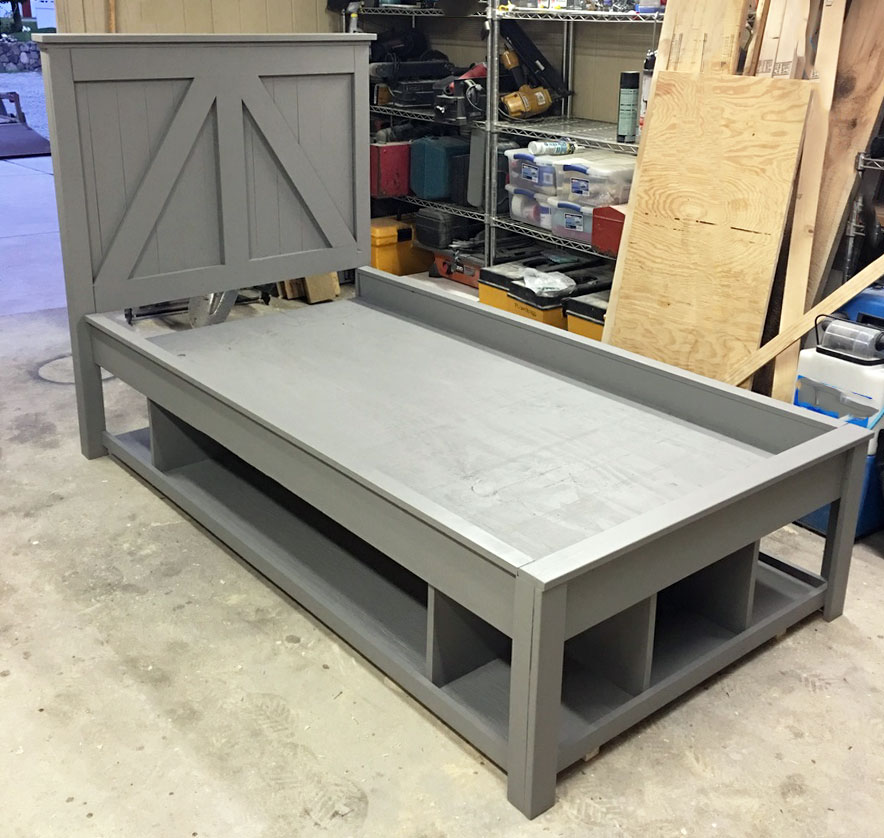
Built from Plan(s)
Estimated Cost
$144 for lumber
Estimated Time Investment
Day Project (6-9 Hours)
Finish Used
Grey paint. Wanted a grayish stain but couldn't get the pine to take it the way I wanted it to.
Recommended Skill Level
Beginner
Comments

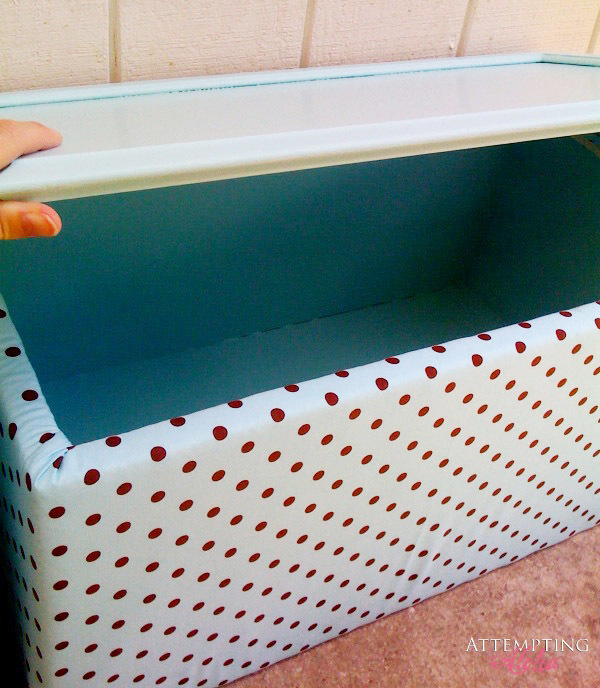
Toy Box
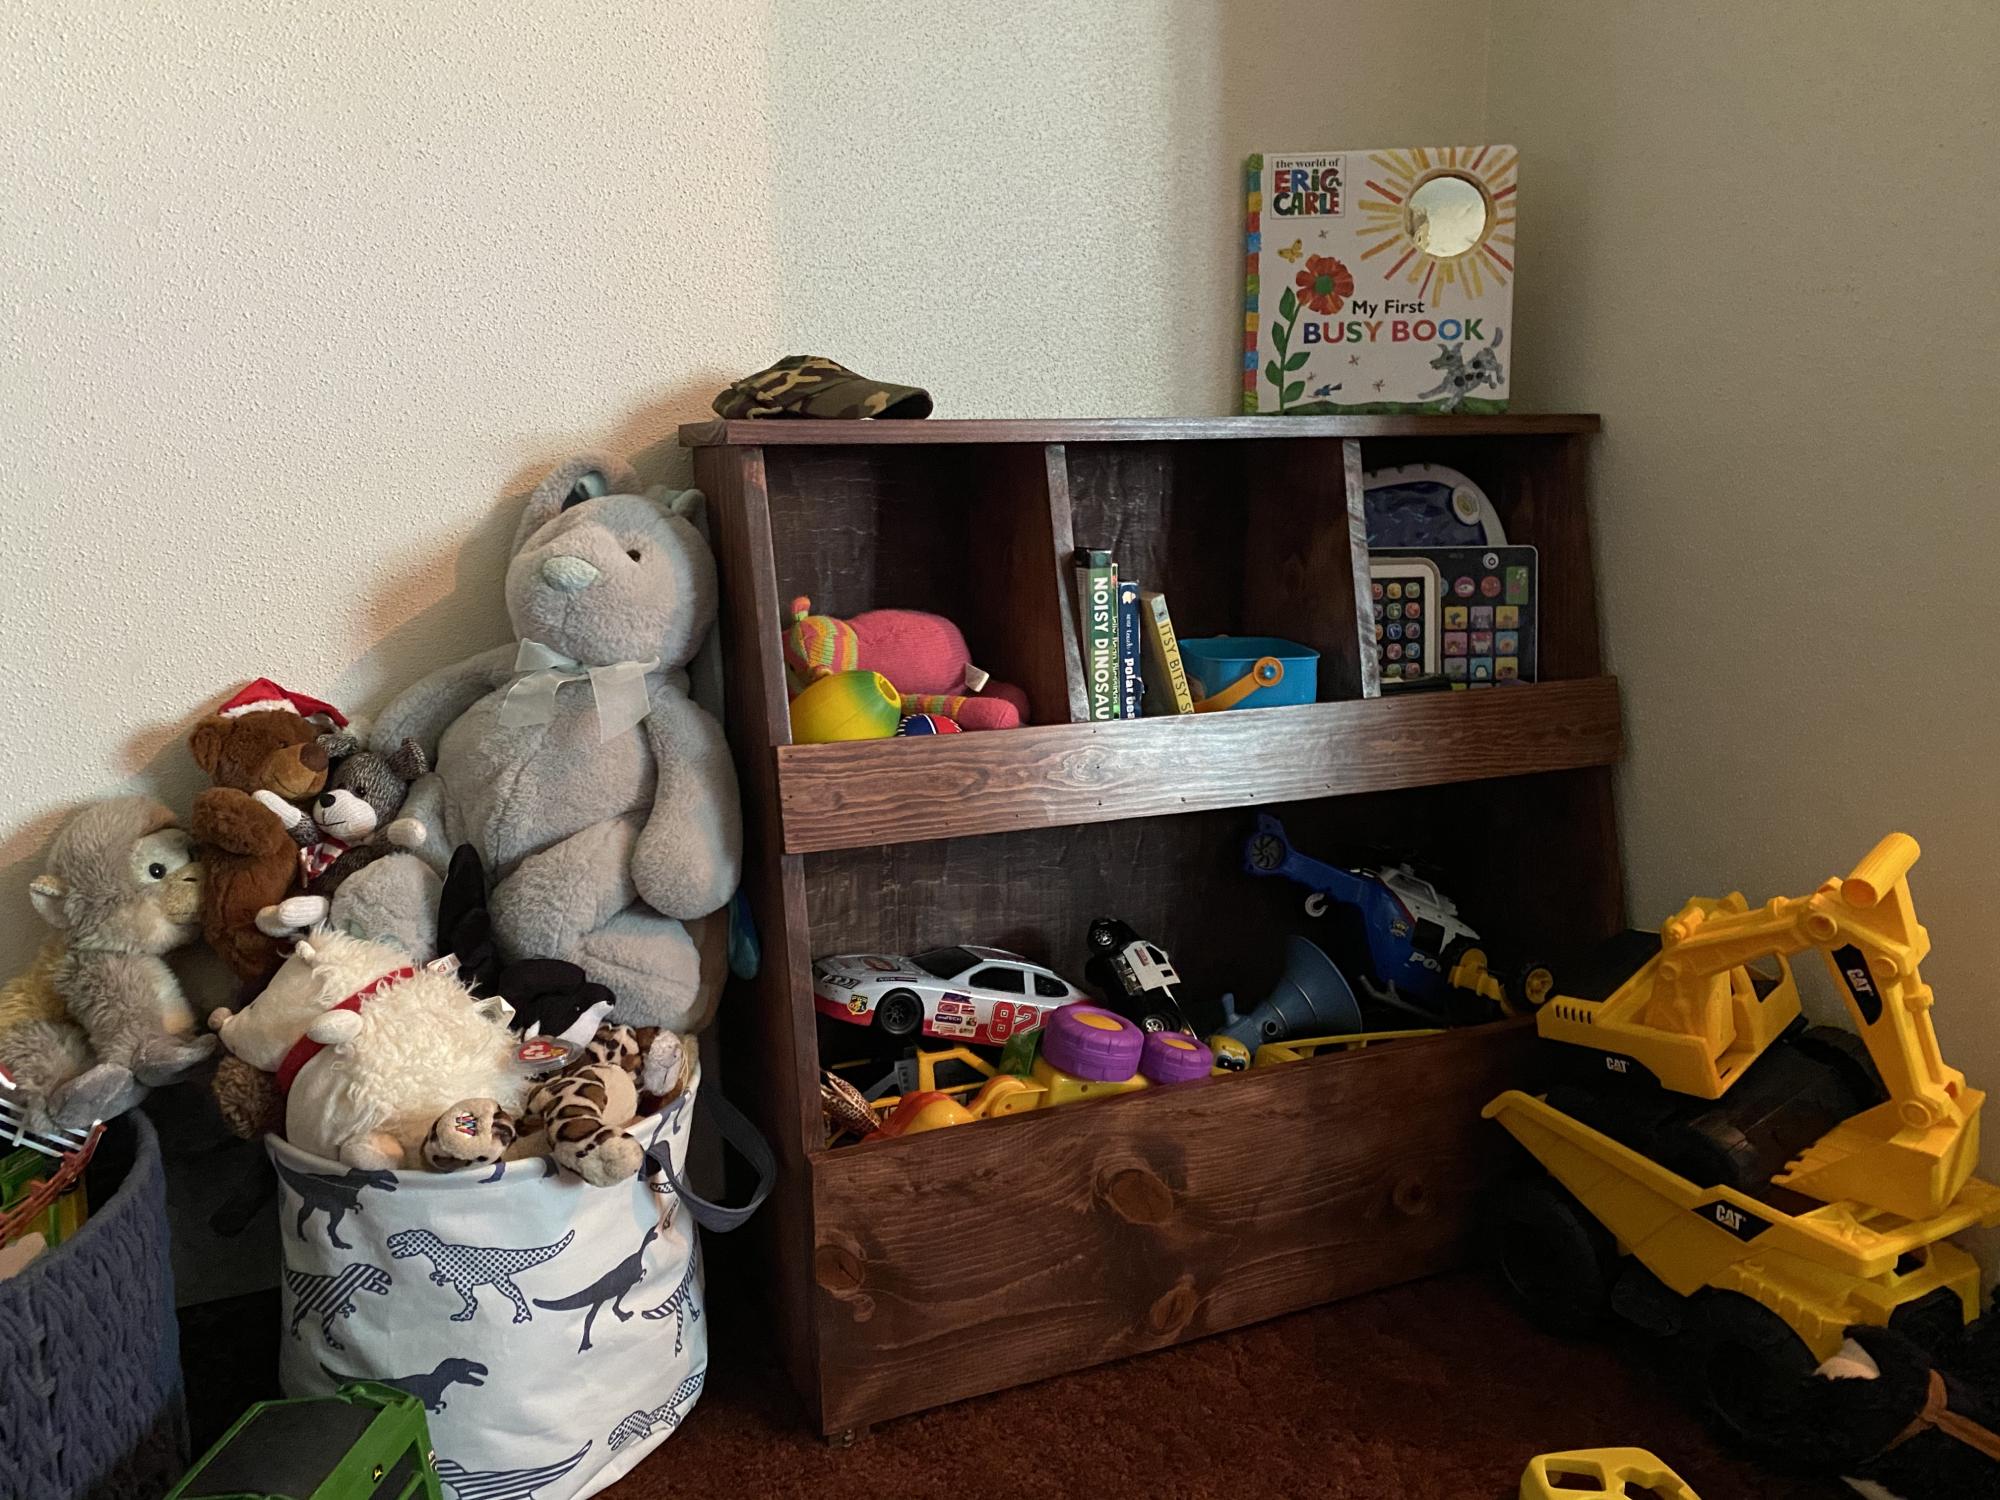
This design turned out to be perfect! It was super simple and easy to build! Easy to follow plans! Great beginner project!
Estimated Cost
Around $40 in lumber
Estimated Time Investment
Day Project (6-9 Hours)
Finish Used
Varathane Premium Wood Stain in Red Mahogany
Recommended Skill Level
Beginner
Comments
Simple Tall Dresser
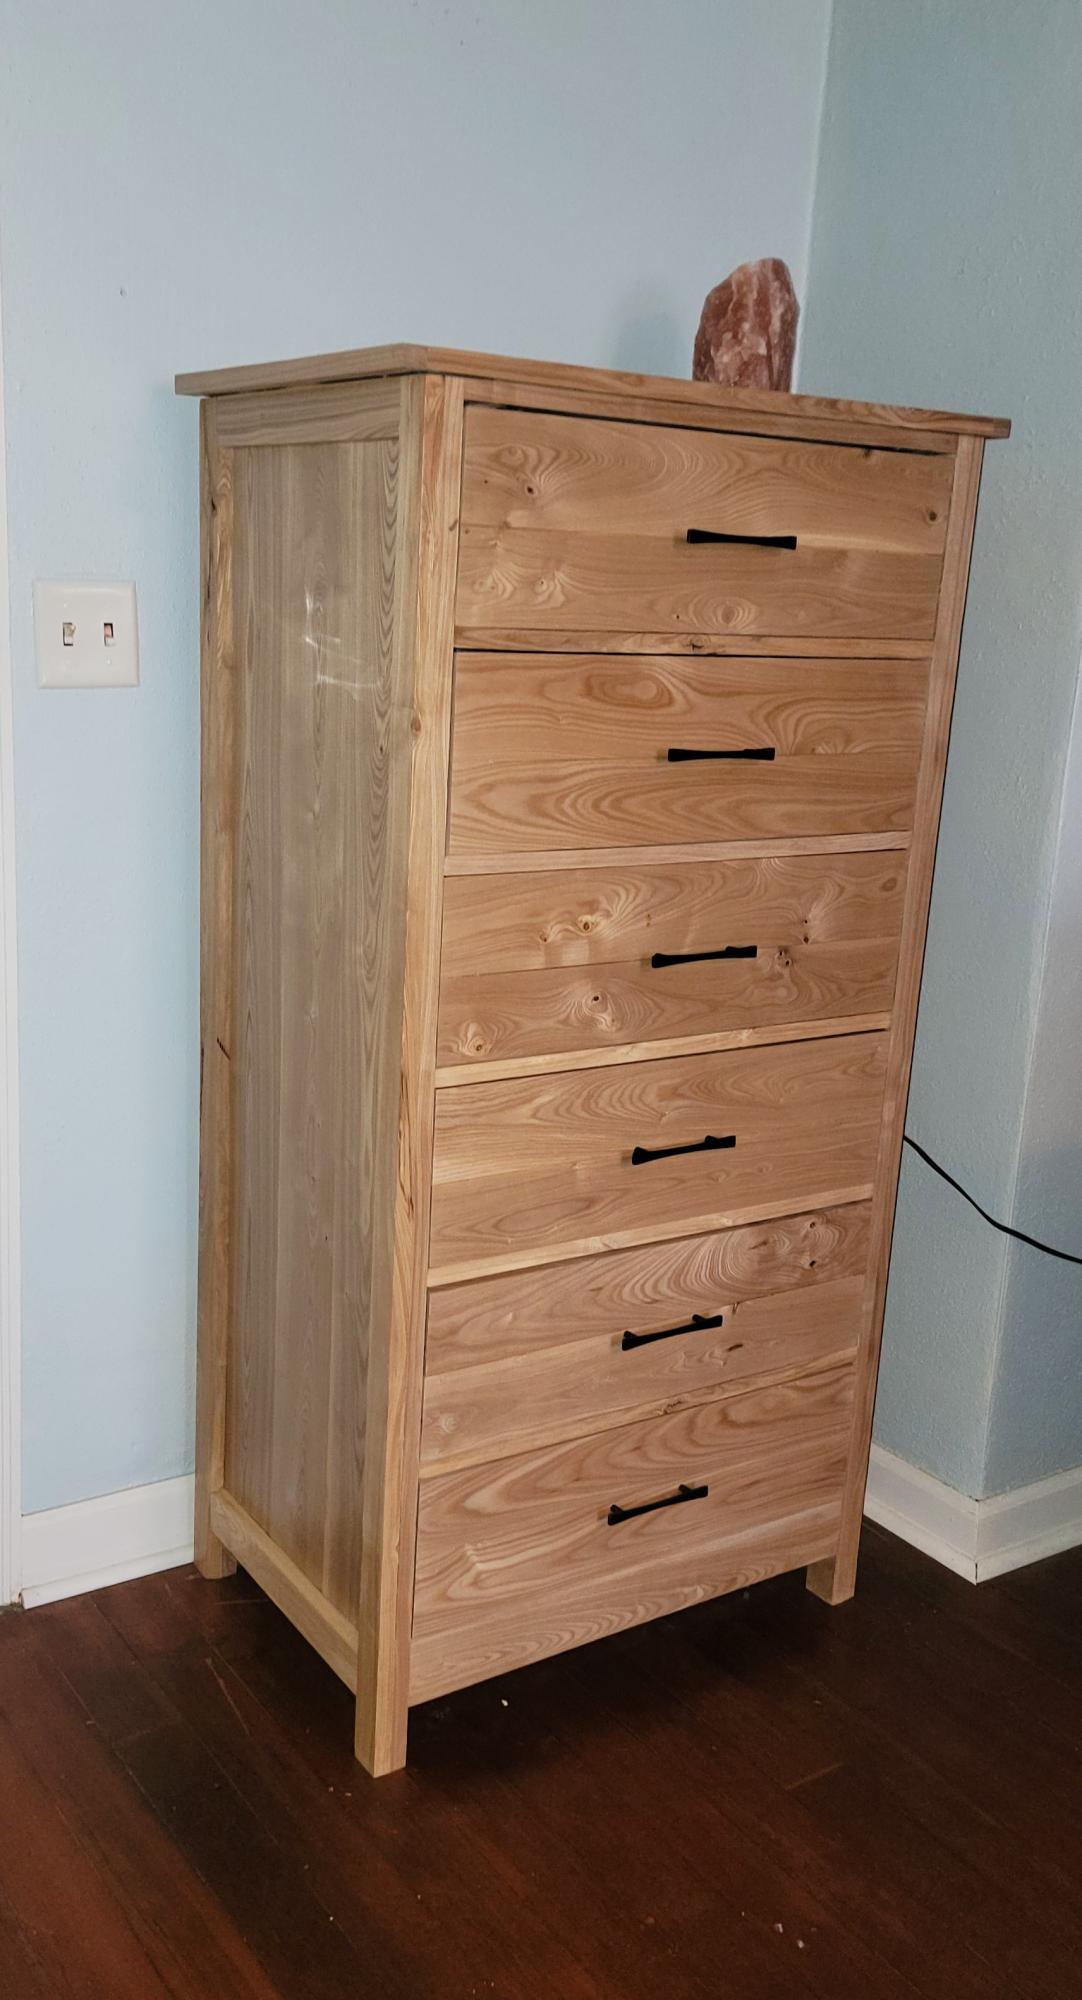
Simple dresser plans modified to use 6 drawers. Made with Ash wood and clear poly to finish.
Lori Tabor
Built from Plan(s)
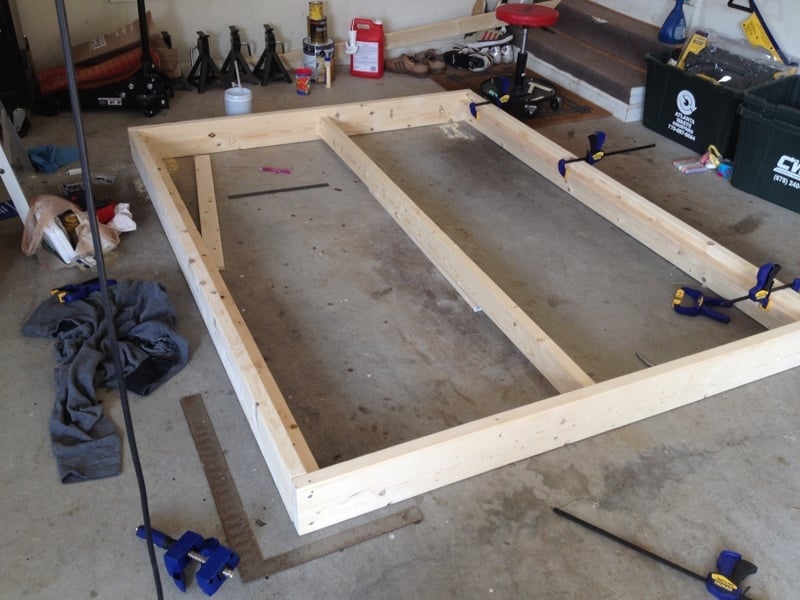
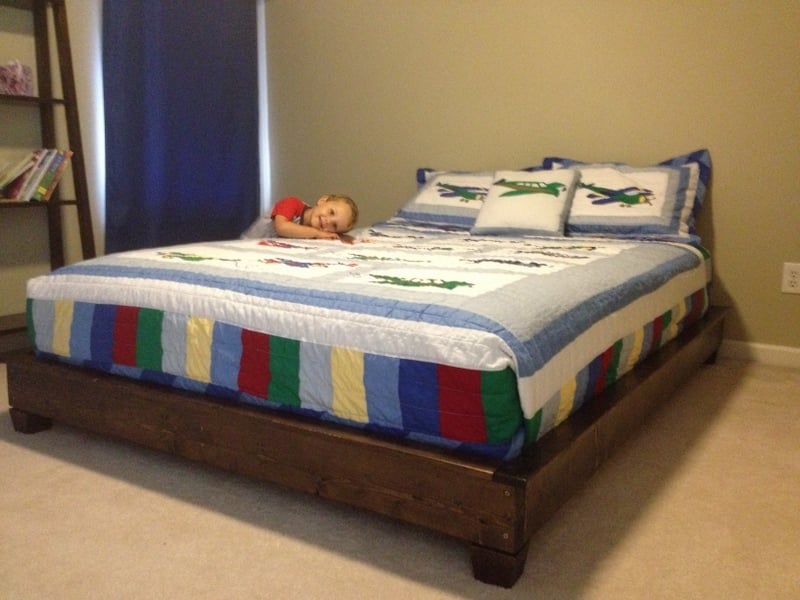
New Bed for my 3 year old!
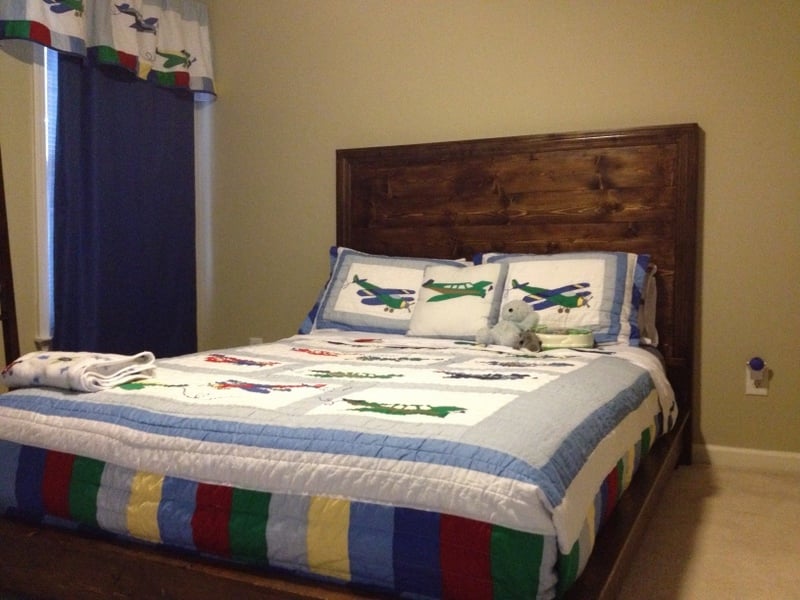
I had been on a search for a while for new furniture for my son’s new big boy bed room but couldn’t justify the money for new furniture and couldn’t find anything remotely nice on craigslist. I ran across this plan on Ana’s site and just had to have it so it became my first large furniture project.
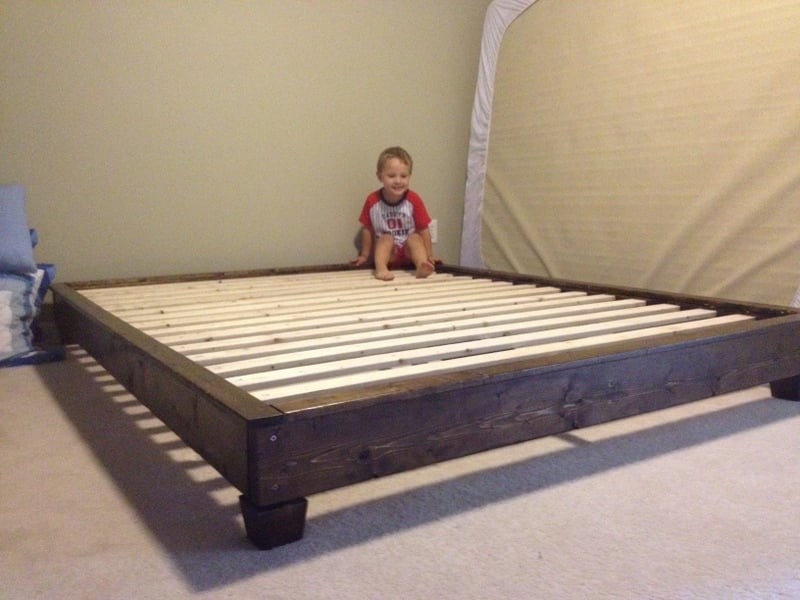
It was fun to build and very rewarding when my son told me he loved his new bed!
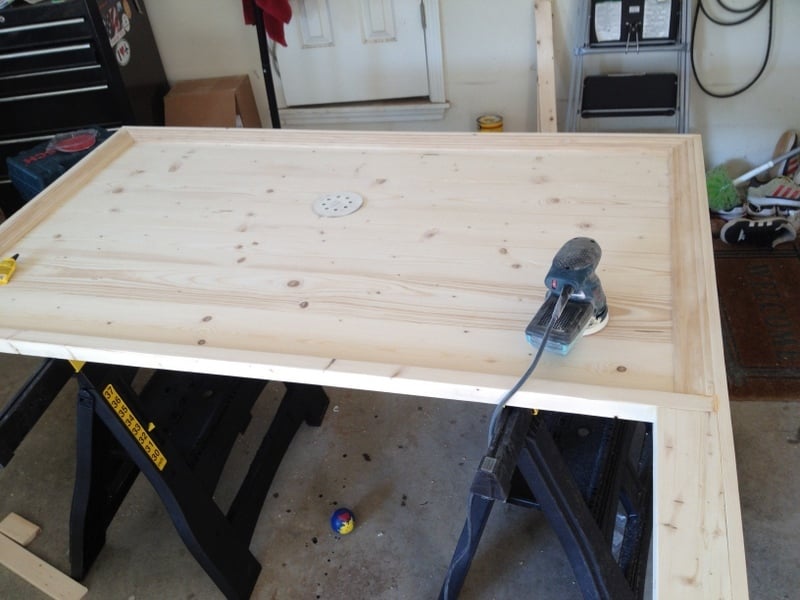
I did have some issues with using the kreg jig on the platform so I did use wood screws on the outside frame. I had better success with the kreg jig on the headboard, guess I just needed practice.
There were a few things I did to make it easier to move the bed if needed:
I did not attach the slats but I did lay them on a non skid grip (like you put under rugs on wood floors).
I attached the headboard to the platform using carriage bolts so it could be taken apart easily.
The plans were really easy to follow.
Built from Plan(s)
Estimated Cost
$170
Estimated Time Investment
Weekend Project (10-20 Hours)
Finish Used
Minwax - Jacobean, 1 coat
Minwax - Fast-Drying Polyurethane, 2 coats
Minwax - Fast-Drying Polyurethane, 2 coats
Recommended Skill Level
Beginner