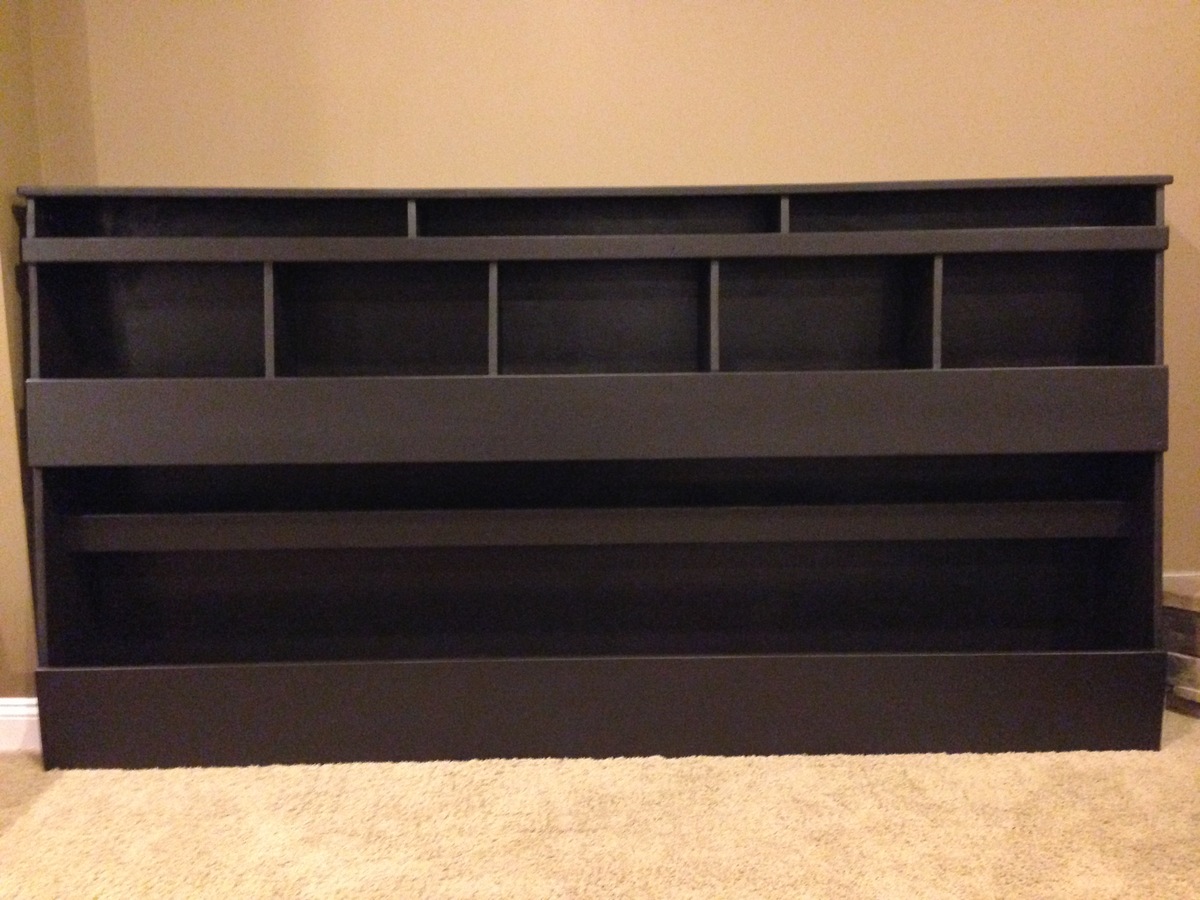
Large toy box
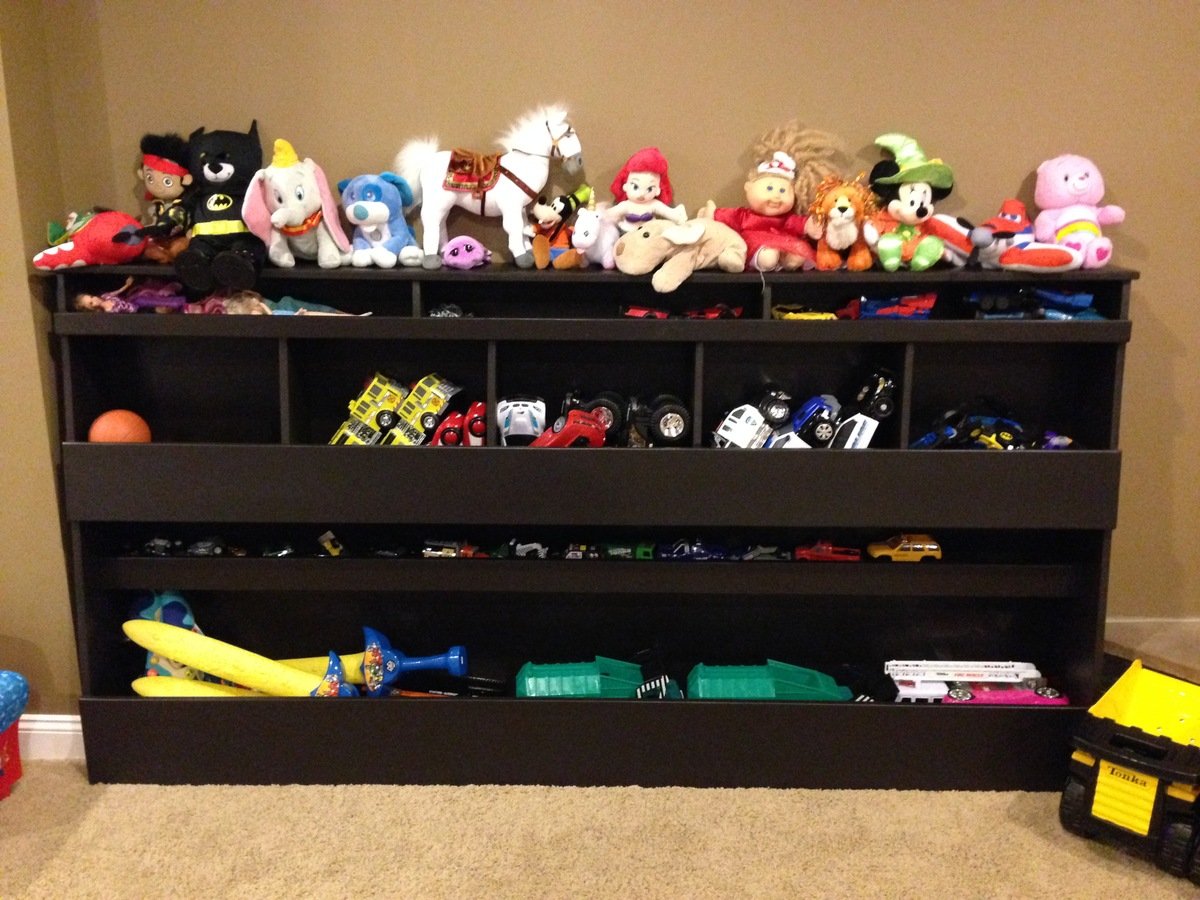
Large version of the toy box for the basement. Added a half shelf in the bottom row for small items (cars).
Built from Plan(s)
Recommended Skill Level
Beginner
Large version of the toy box for the basement. Added a half shelf in the bottom row for small items (cars).

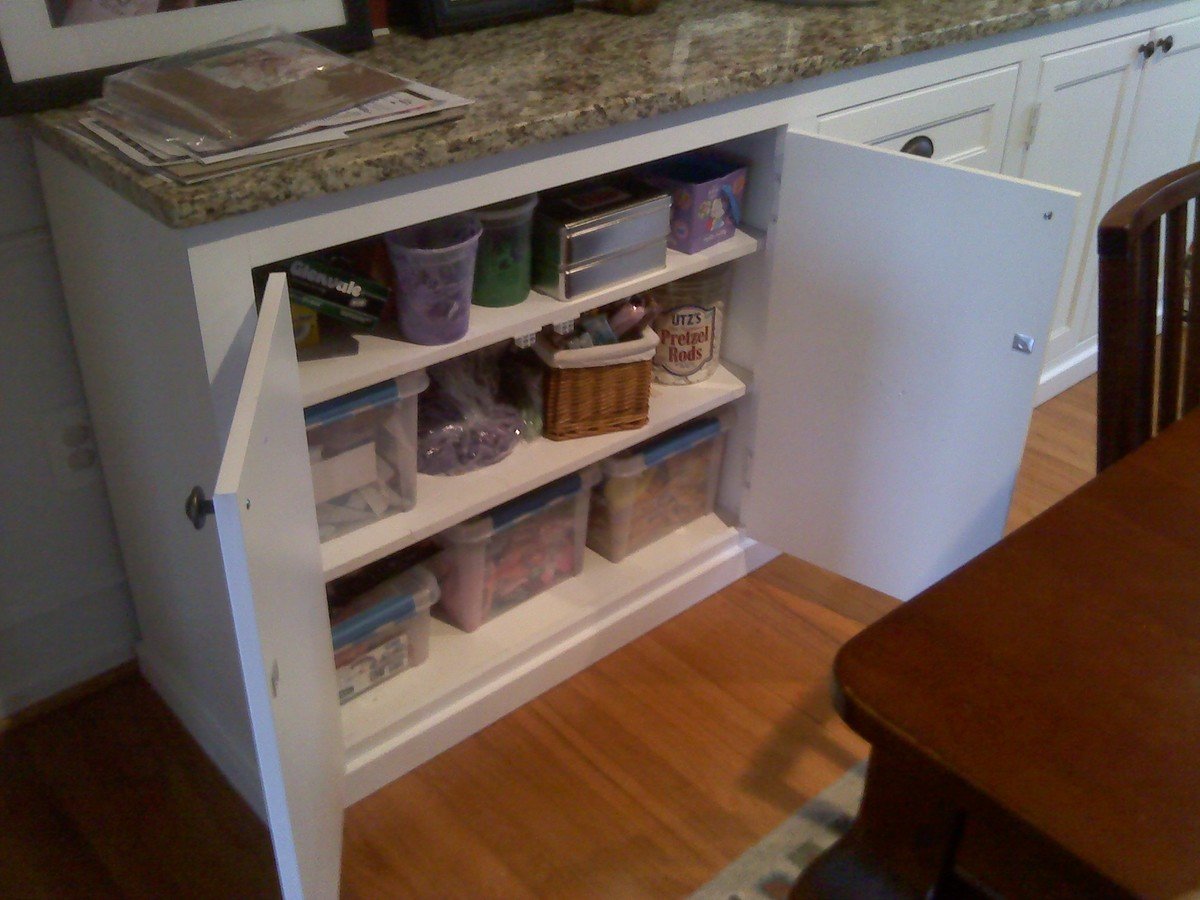
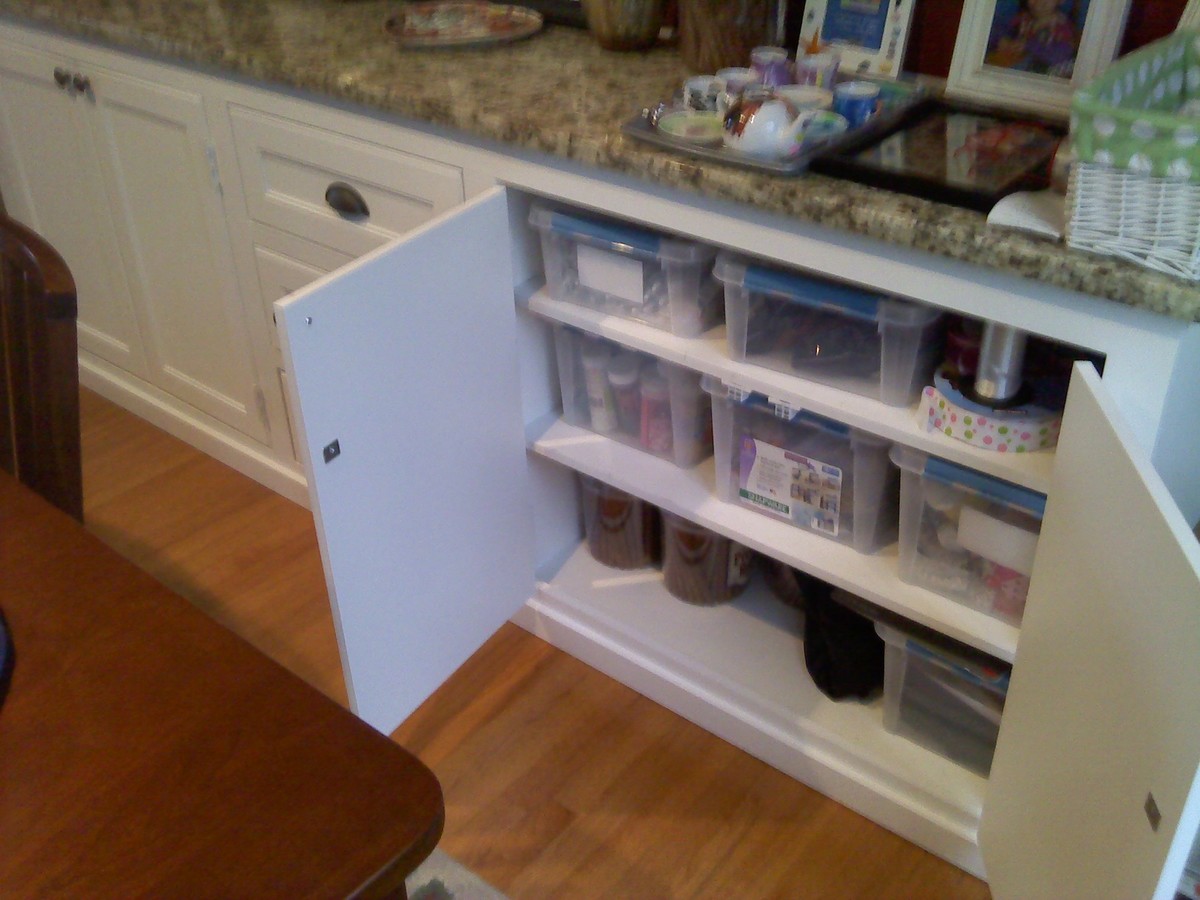
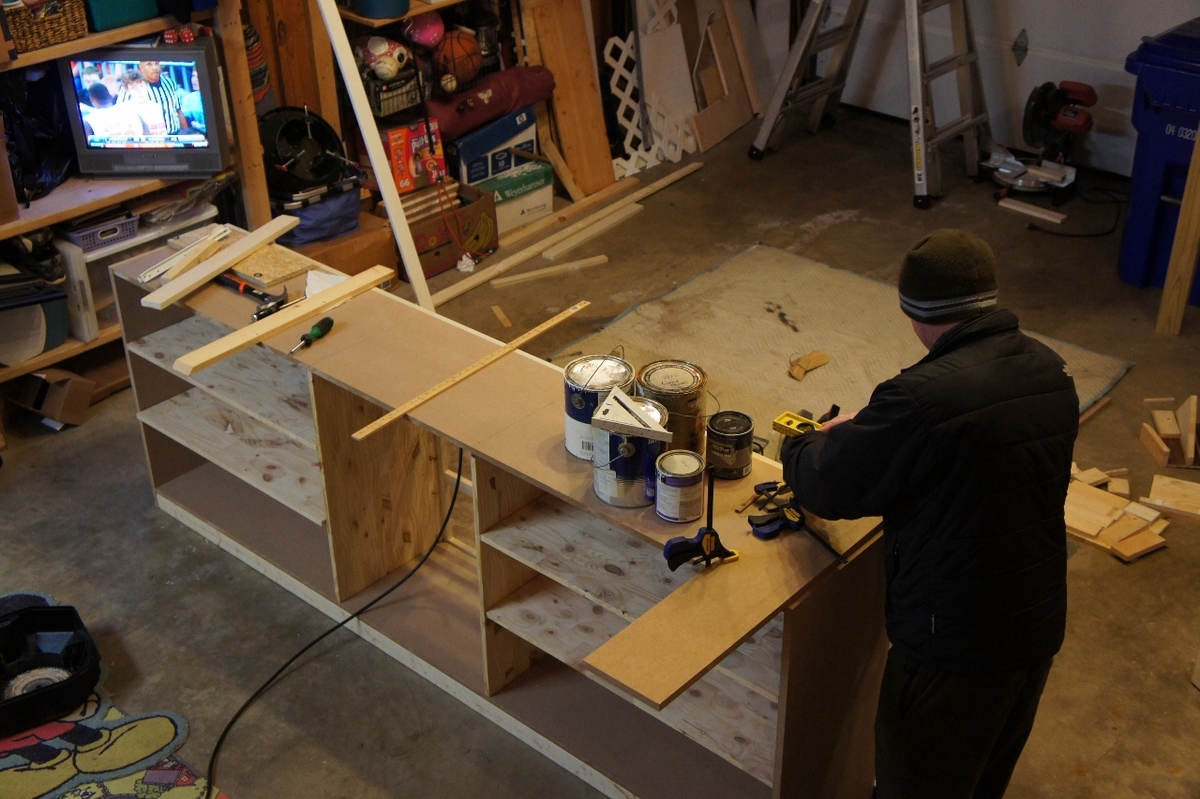
I scoured the web unsuccessfully for months trying to find a cabinet big enough to store everything we needed to store. I wanted something huge and bright and simple, and so I decided to just build away. It's 8'4" long, 18" deep and 36" tall. Topped with a slab of Giallo Napoleon granite and painted a nice plain white. Took me only a few nights to build and paint, thanks to my power nailer and power paint sprayer. Thanks to a great deal on a remnant granite slab, this was just about $400 total start to finish. I winged the entire plan and didn't really use any plans in particular, though I have gathered many great ideas and tips from this site.

Sat, 08/13/2011 - 14:51
Wow - looks great! You would think it was done by a pro! You should be very proud of your finished product.
Tue, 12/04/2018 - 06:43
Trying to find cabinets like this. Did you buy them or build them?
I made these adirondack chairs out of scrap 1 x4's I had left from another project. Along with the 2 x 4's. They came out beautiful. I plan to put them on my patio but they look so good by my shed. Thanks Ana for the easy plans to go by.
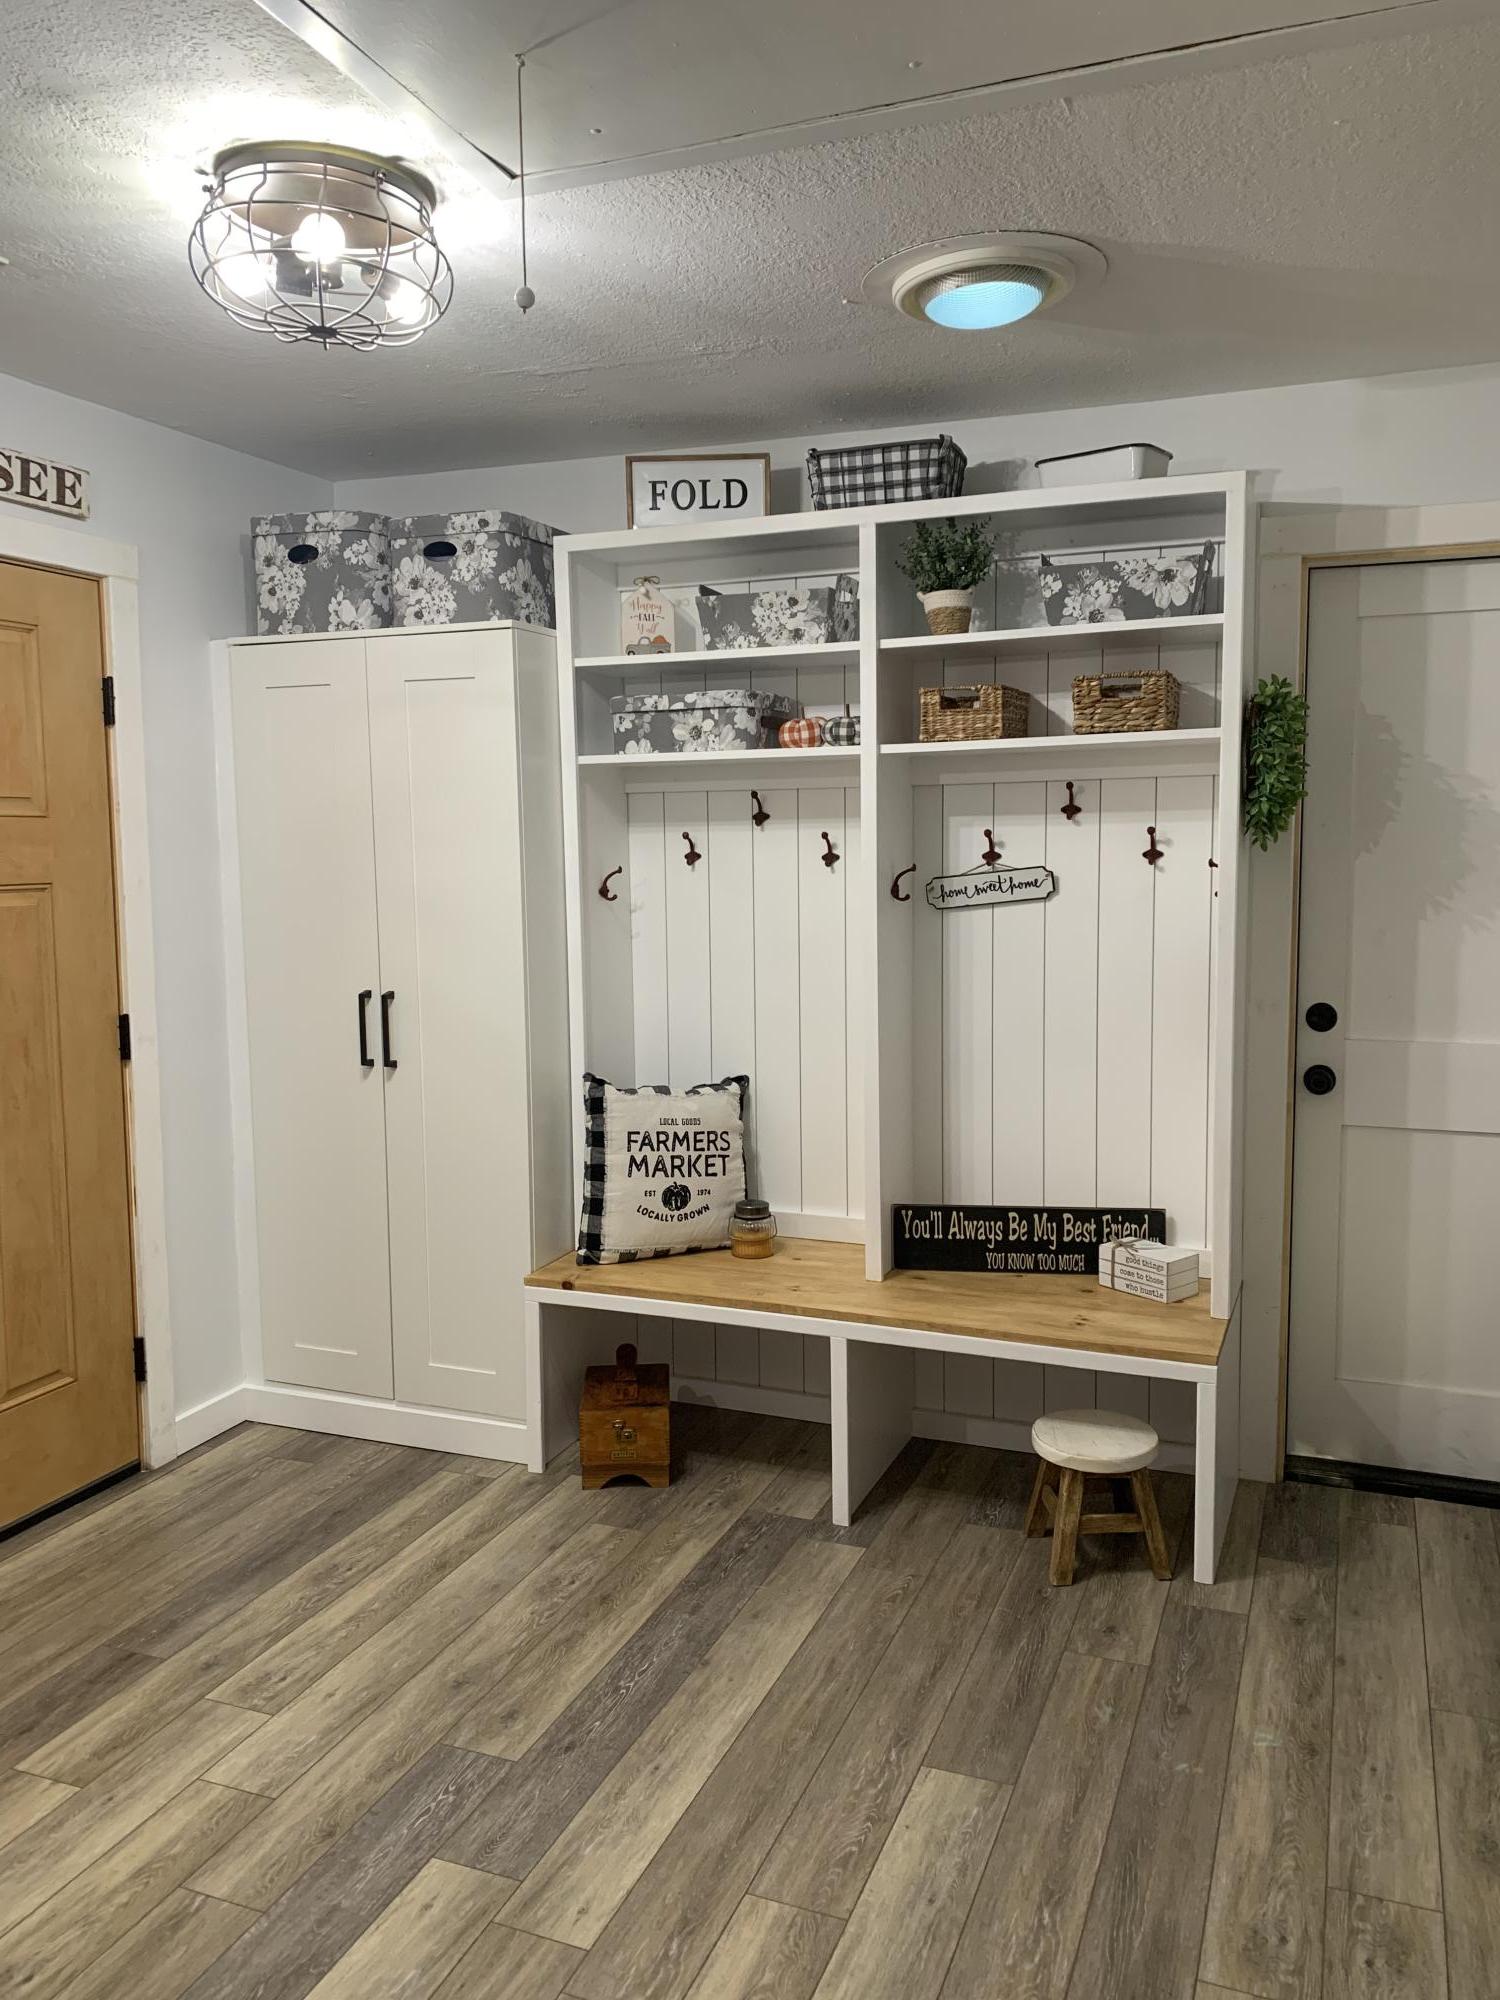
This was done with one IKEA shelf and Anna’s Shelf Help. It was my very first built in. I have a huge Laundry room and made half a mudroom.
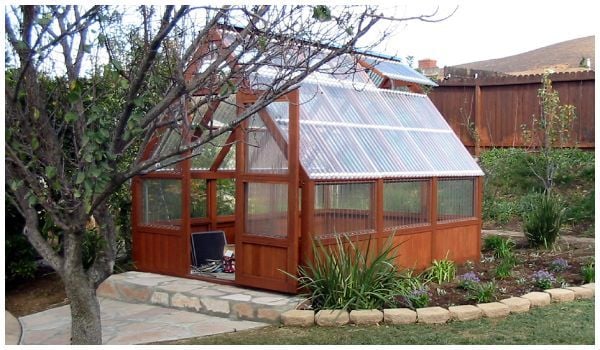
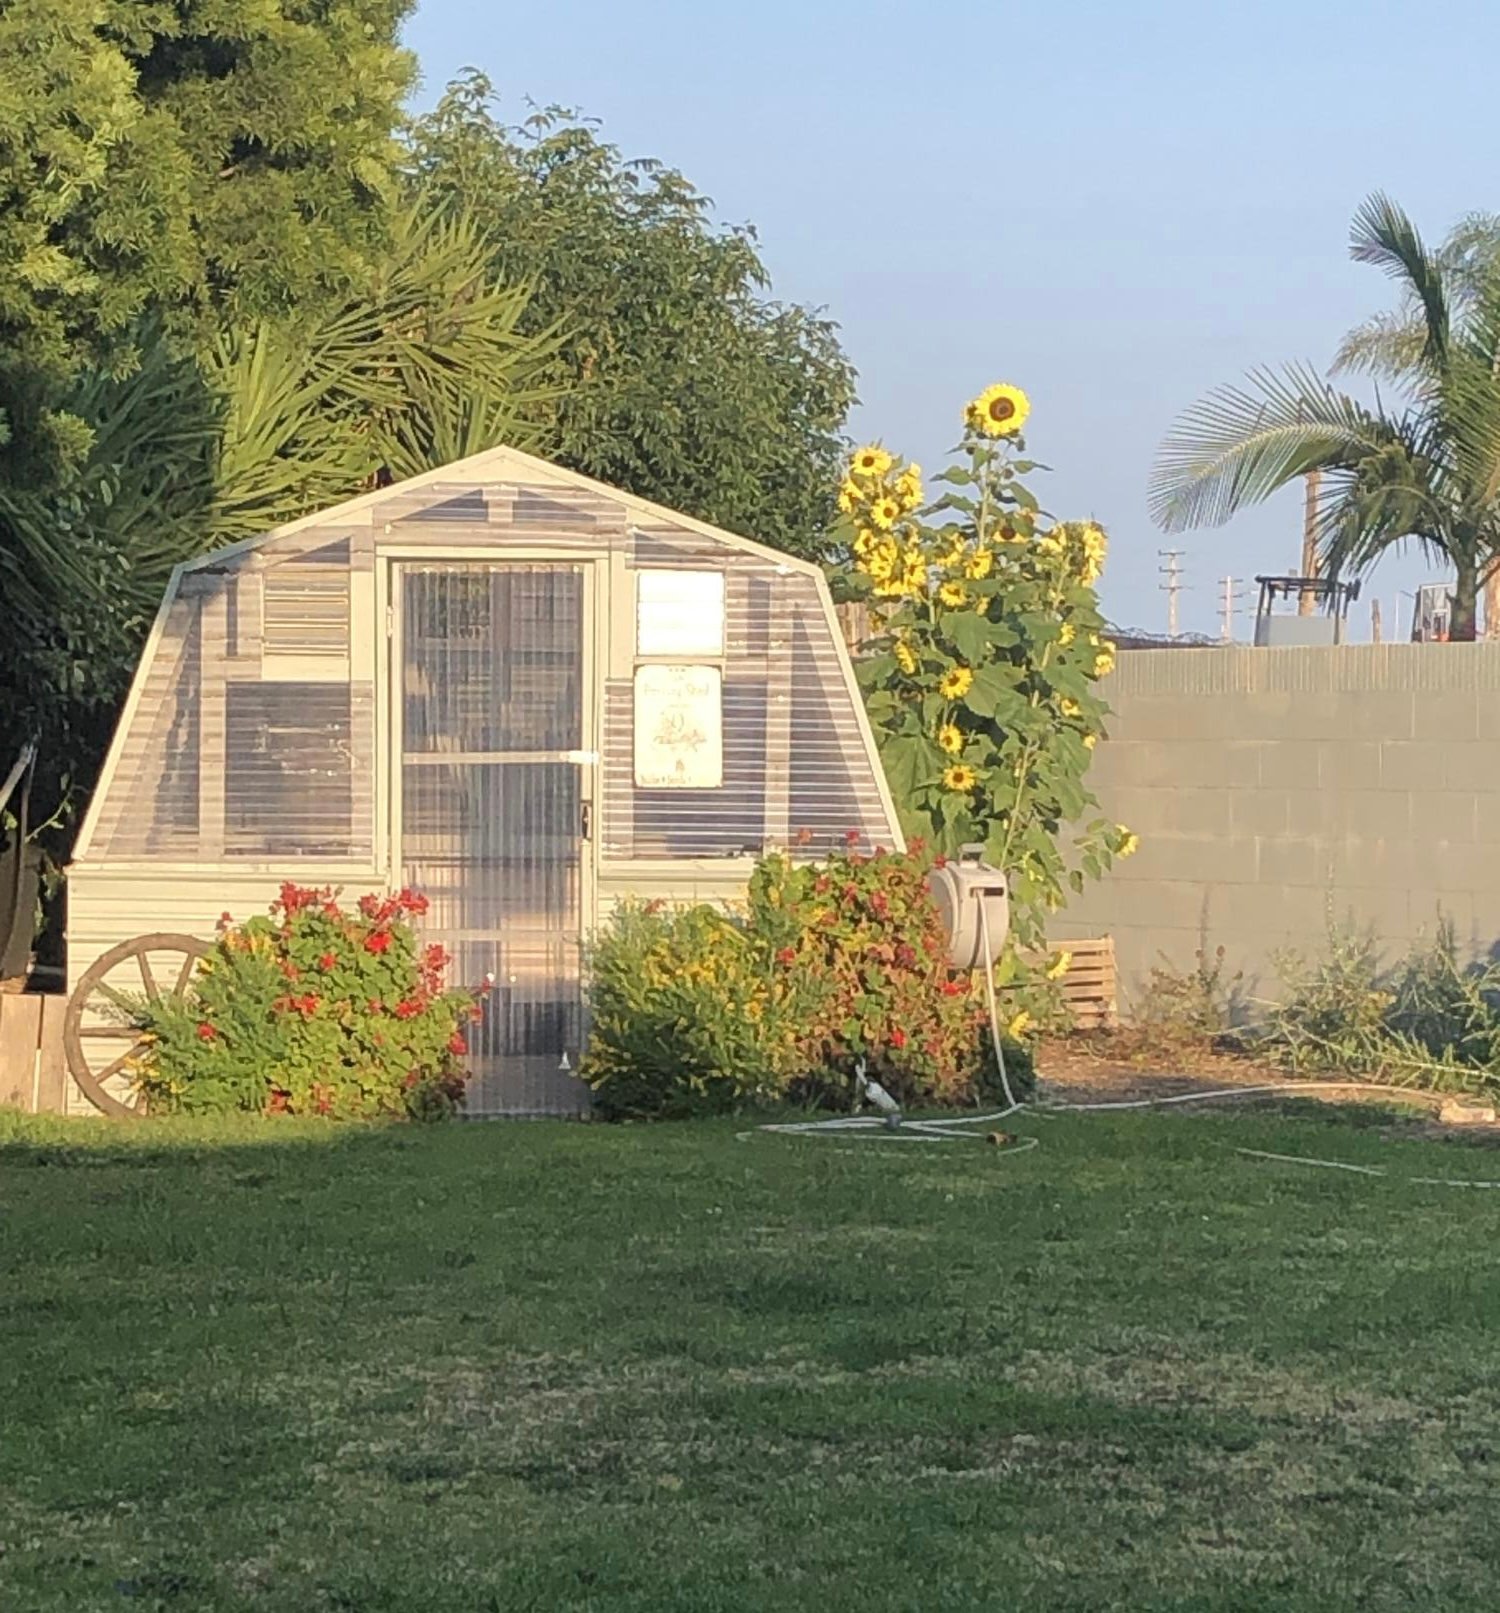
I saw the barn shaped greenhouse plan but preferred a regular roof pitch. I did however incorporate the corrugated polycarbionate as a covering. I find it odd that you guys installed the polycarbonate horizonitally instead of vertically.
Anyway thanks for the info on polycarbonate.
Tue, 09/01/2020 - 17:47
Love this! I really prefer the roofline on your greenhouse. Did you modify Ana's design, or did you get plans from another site? Would love to replicate your design if possible-very elegant.
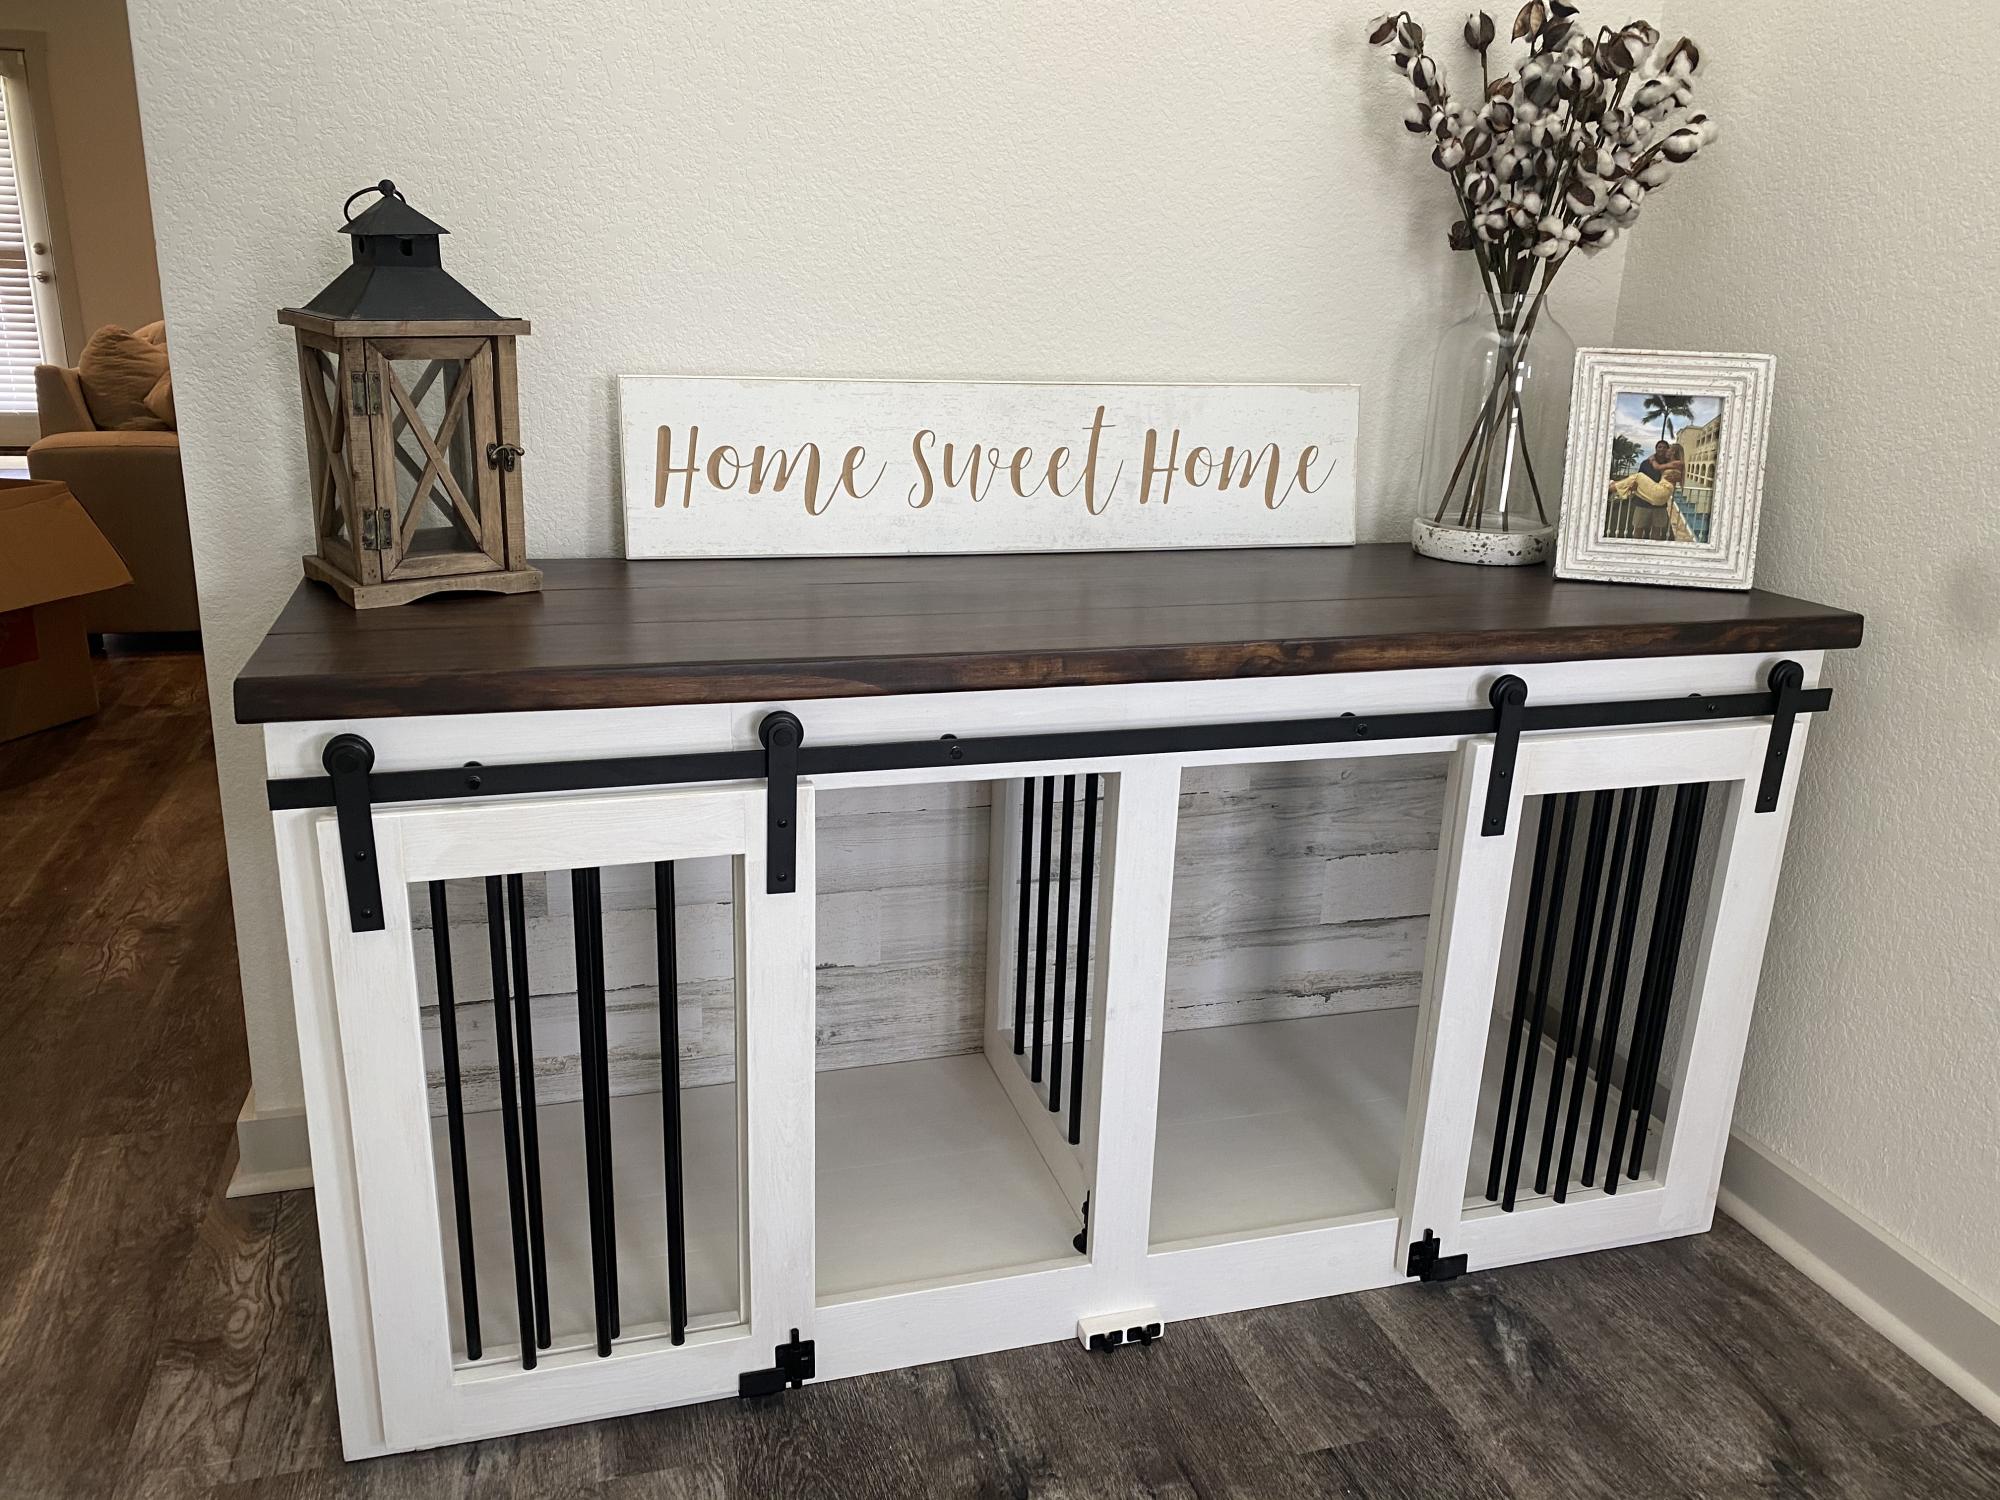
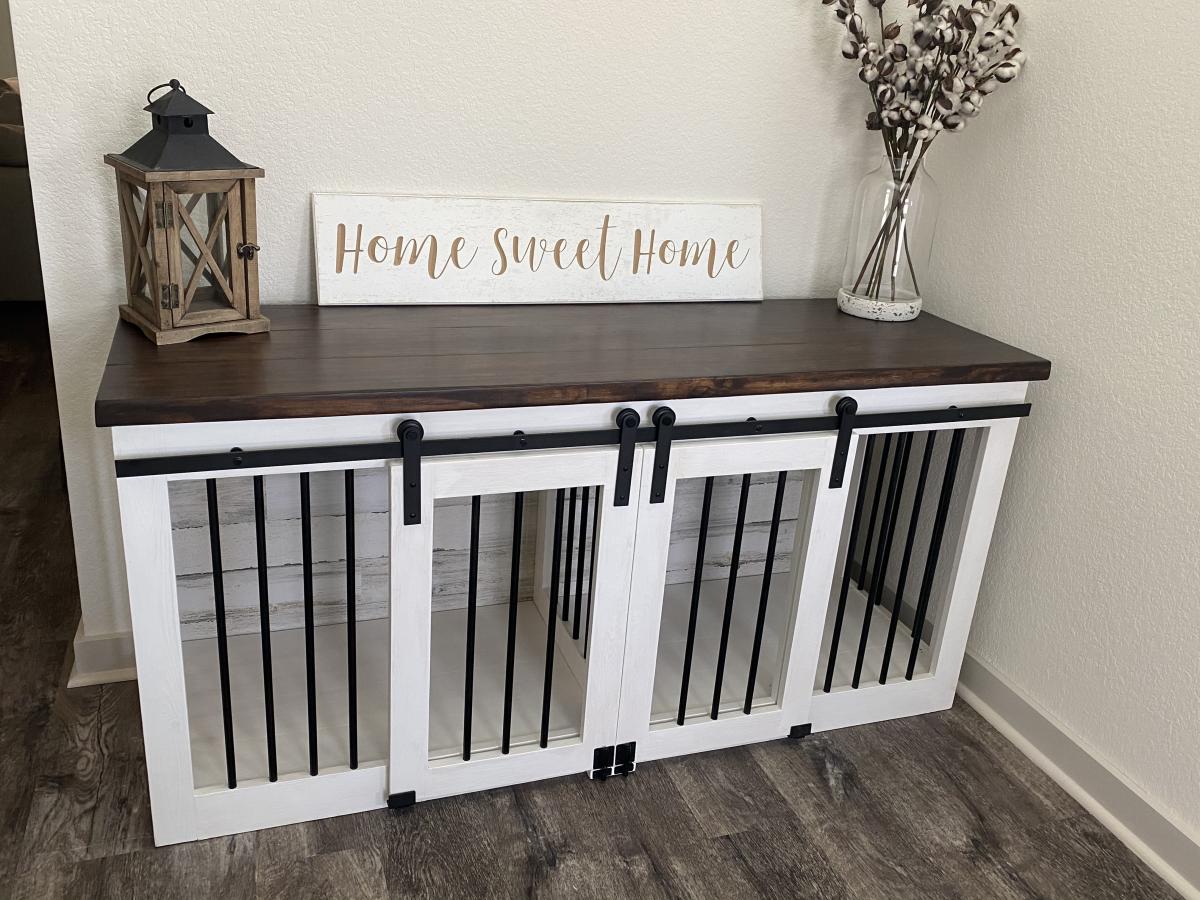
I modified the Grandy Console to be dog crates for my Grand Pups so we didn’t have to have crates set up in the house. Middle divider can be raised to make one big crate.
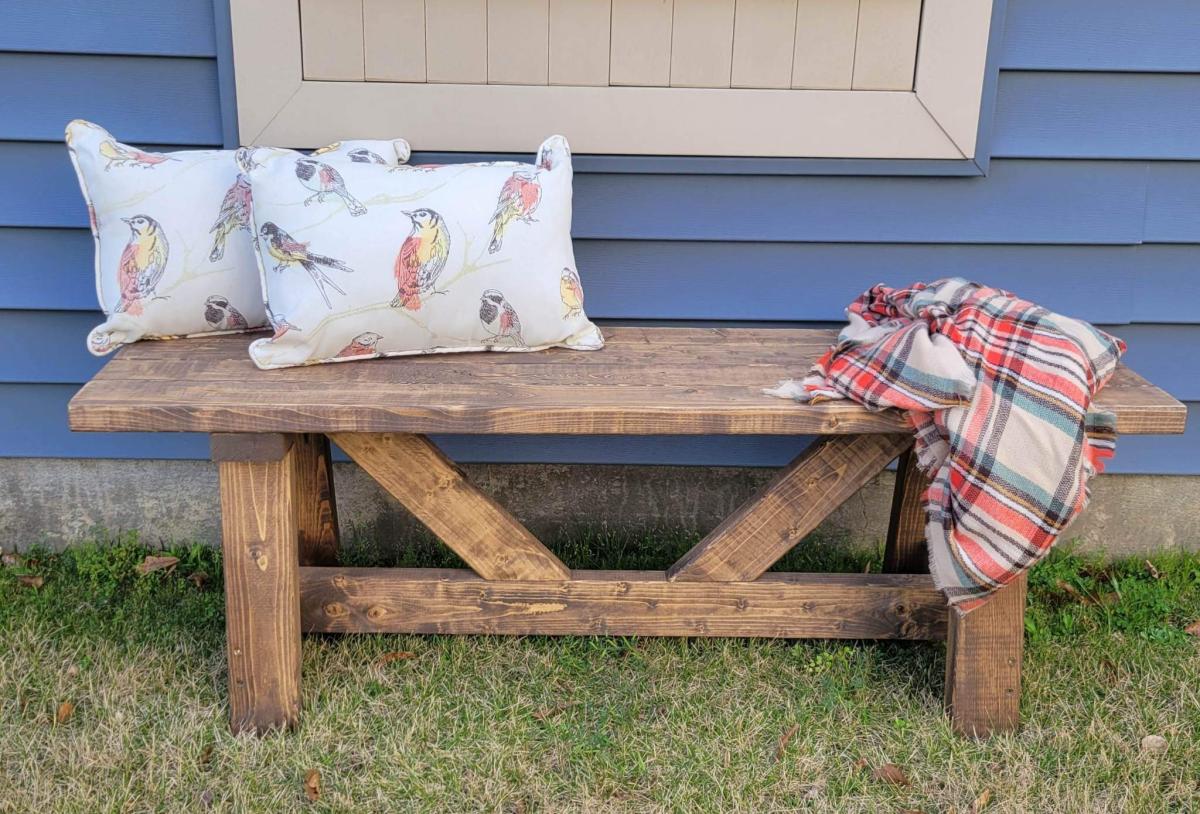
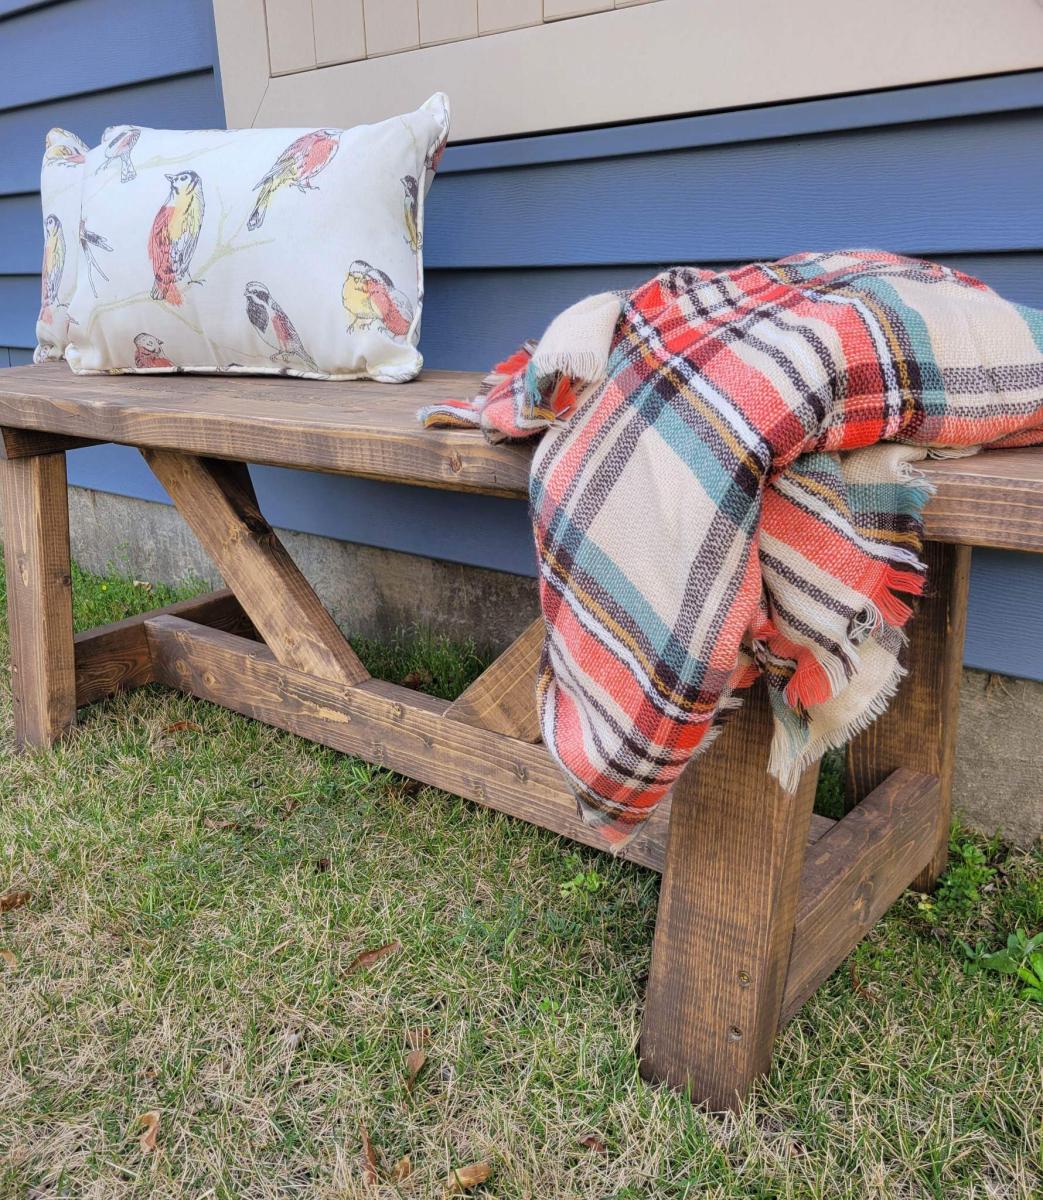
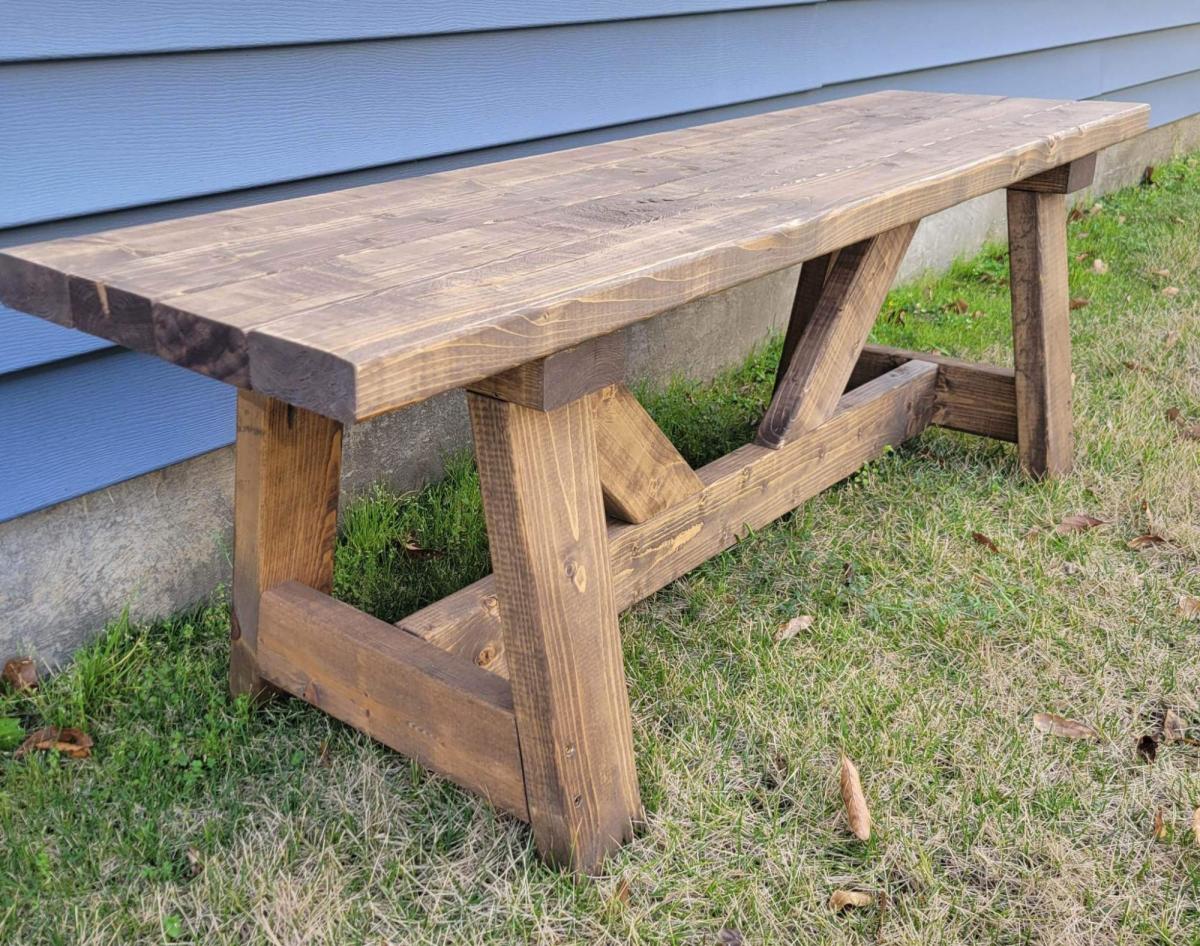
We've been eyeballing this plan since it was first posted. We tend to accumulate extra 2x4s from other projects. Great easy build, was able to knock it out in a morning. The finish is a custom blend.

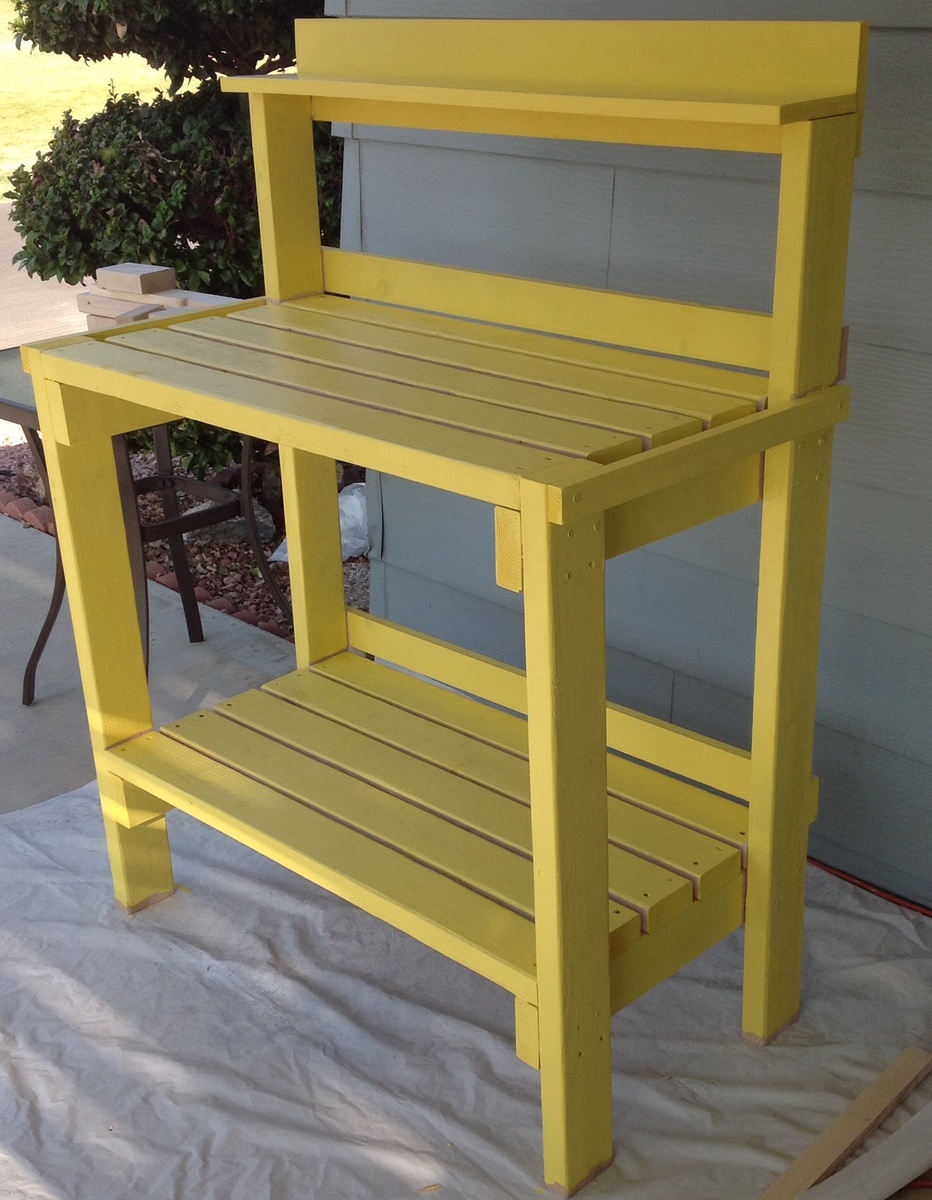
I'm so happy to have found your site! I've been wanting a potting bench for a while. Today the Hubs and I built this one in Daffodil Yellow! It is only partially painted, but I already love it! The hubs wants to build a modified one for his heavy electronics equipment. Thanks a Bunch!
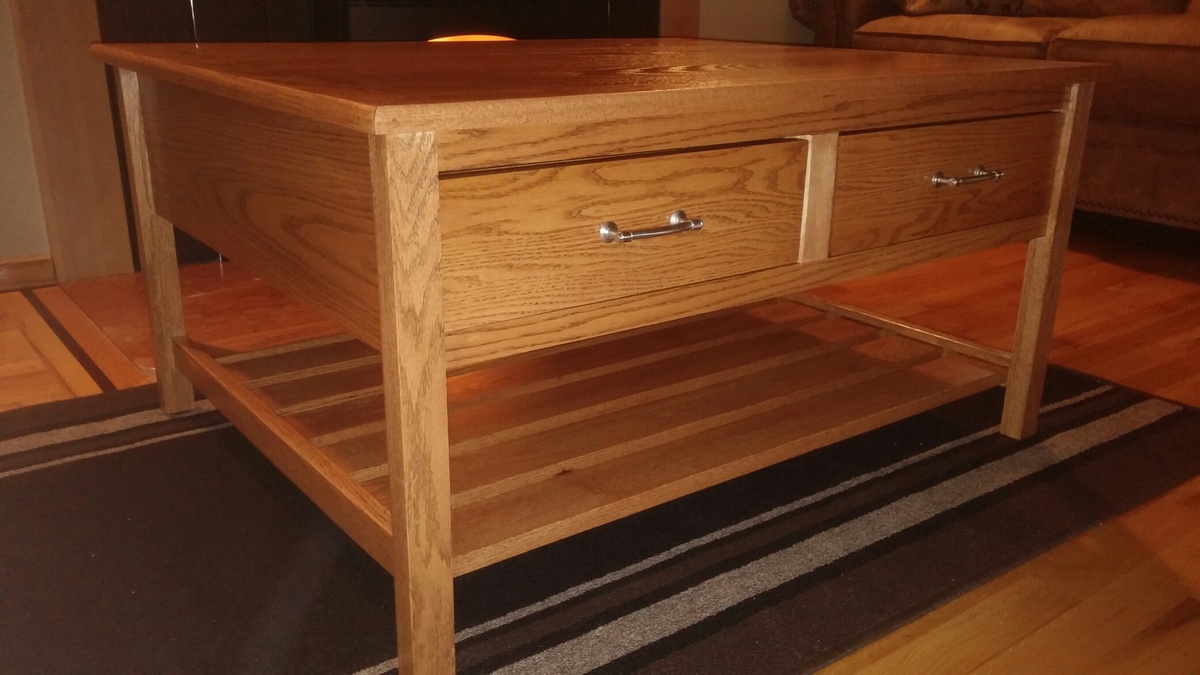
I made this table entirely from oak. It was somewhat more expensive than other projects I've done but my wife wanted a new coffee table so I thought why not go for it. I found hard wood to be much easier to work with than other wood. I like how it turned out. I used "Mom's Train Table" plan but added two 22 inch deep draws. A little extra storage is always a good thing!
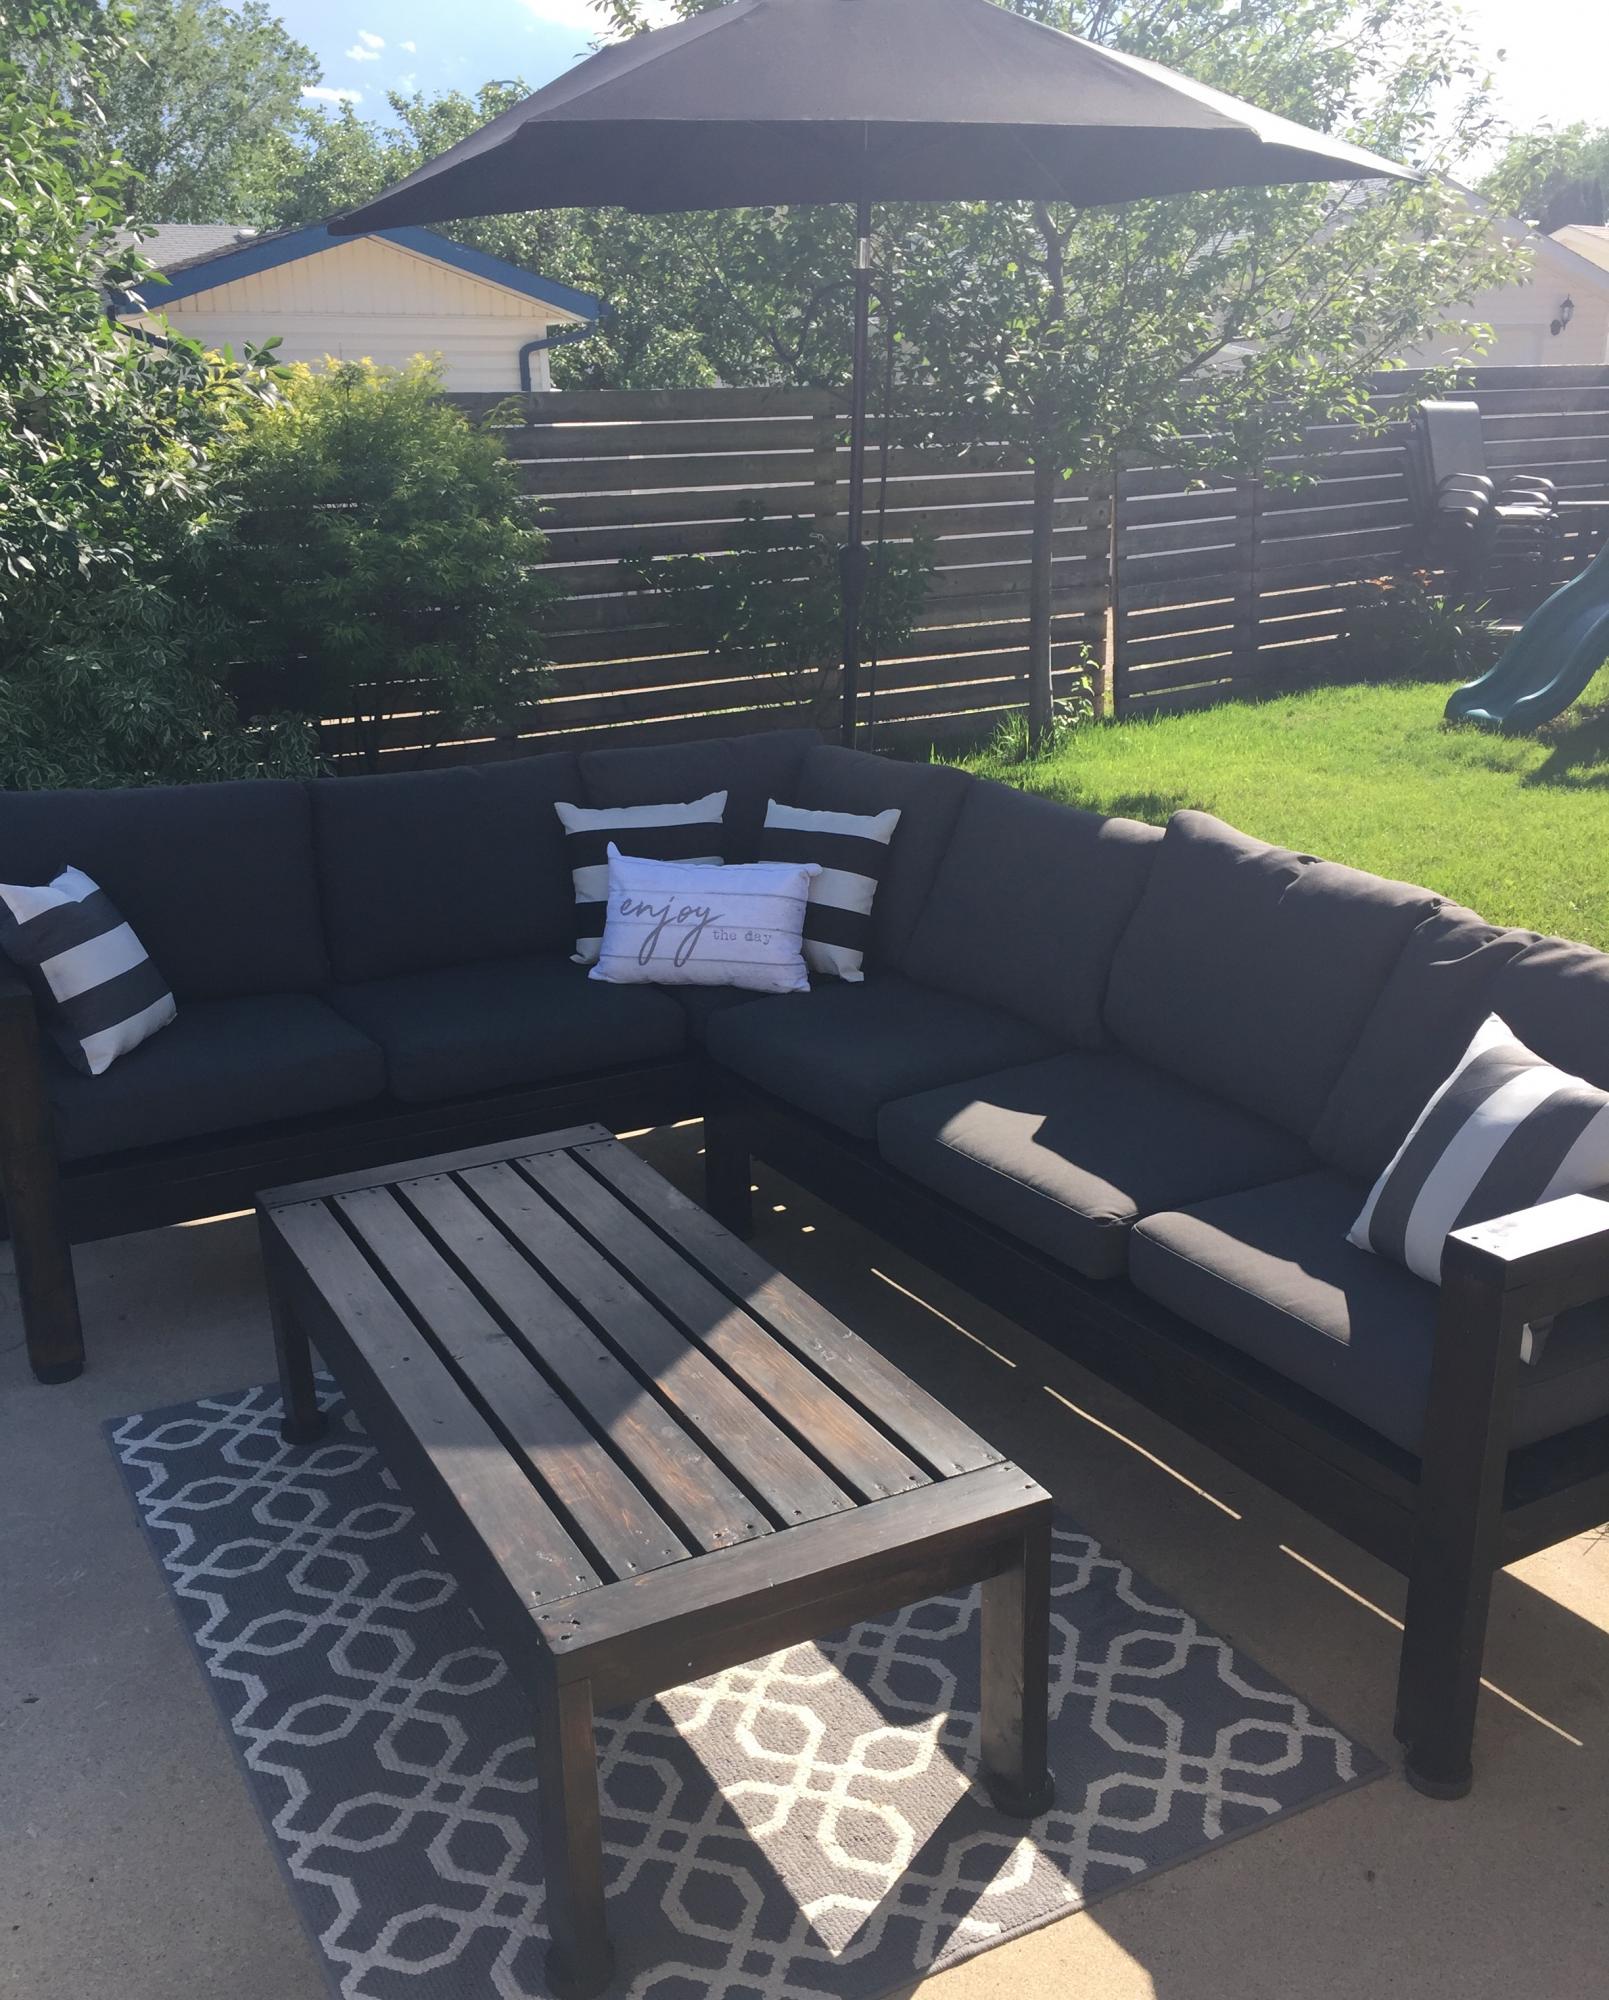
This was so fun to build!! We finished in two days and then I took many more days to stain and varnish🤪 The plans were easy to follow and the finished furniture was just what we’d hoped for. We bought our cushions from Ikea and they fit perfectly to Ana’s dimensions - we didn’t make any modifications.
Canadian DIYers - Hockey pucks under the legs of the furniture to keep all the rain we’ve had from soaking up into the wood 🇨🇦 🏒🇨🇦
Mon, 06/07/2021 - 21:39
Are these the 24 3/8 x 24 3/8 cushions at Ikea? I am just starting this project and was going to extend the length to 74" instead of 72". But yours seems to fit just fine as is.
Cheers!
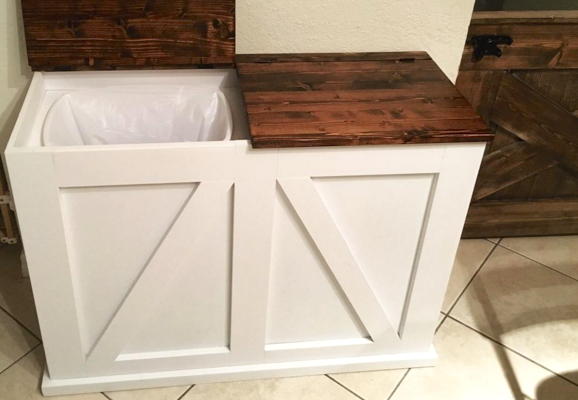
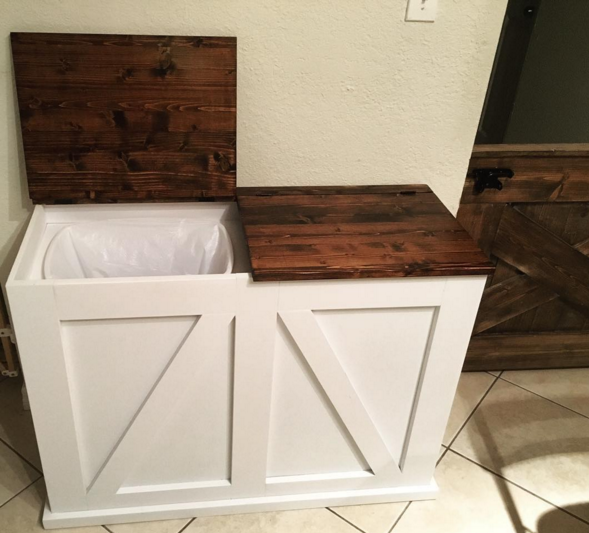
Modified the design a bit to be lift up lids instead of tilt out.
Fri, 02/16/2018 - 17:18
Can you post the specific plans for the lift up trash and recycle bin??
Sun, 05/26/2019 - 18:28
If you could post the plans for this, It would be nice. Great job!
Fri, 01/10/2020 - 05:16
I just love this and would love to have the specific plans for this project!!!

Fri, 01/17/2020 - 20:23
Thank you for the great idea. I’m going to add a third bin and use it for laundry in my bedroom.
Sat, 03/07/2020 - 02:29
I’d be grateful for details, plans, measurements for this project. This is an amazing build, nicely done.With green top looks fantastic and complements the white very well.
Thu, 01/11/2024 - 20:31
To everyone asking for the plans, it's a modified tilt out. It states right there under the pics that it was modified and the original plans are there in red, under "Built from plans"
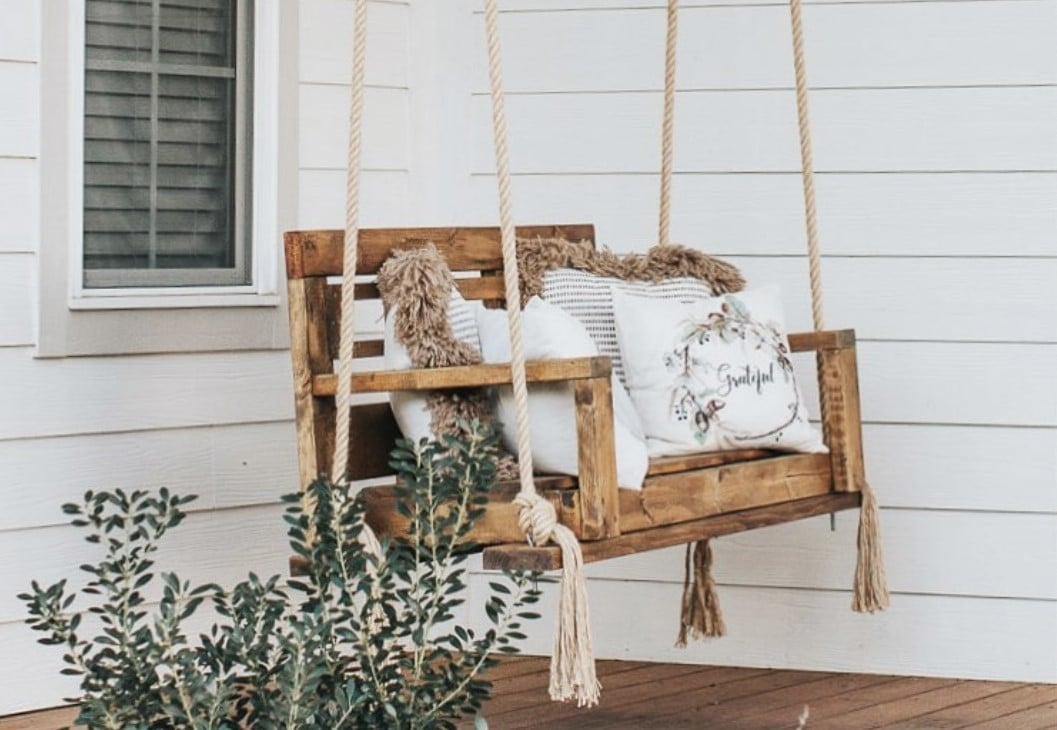
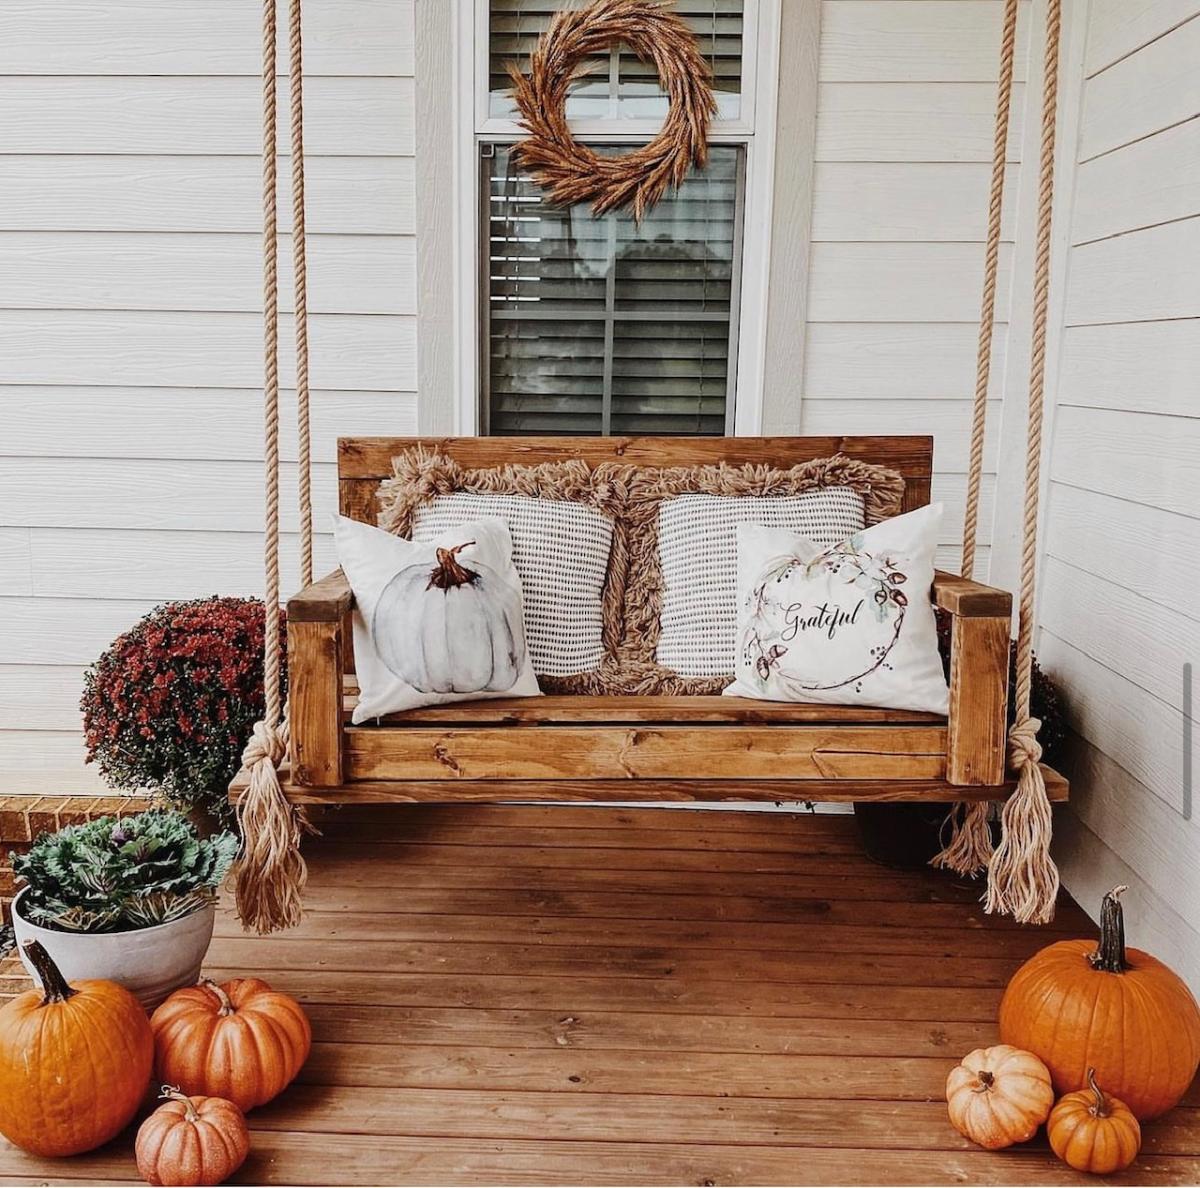
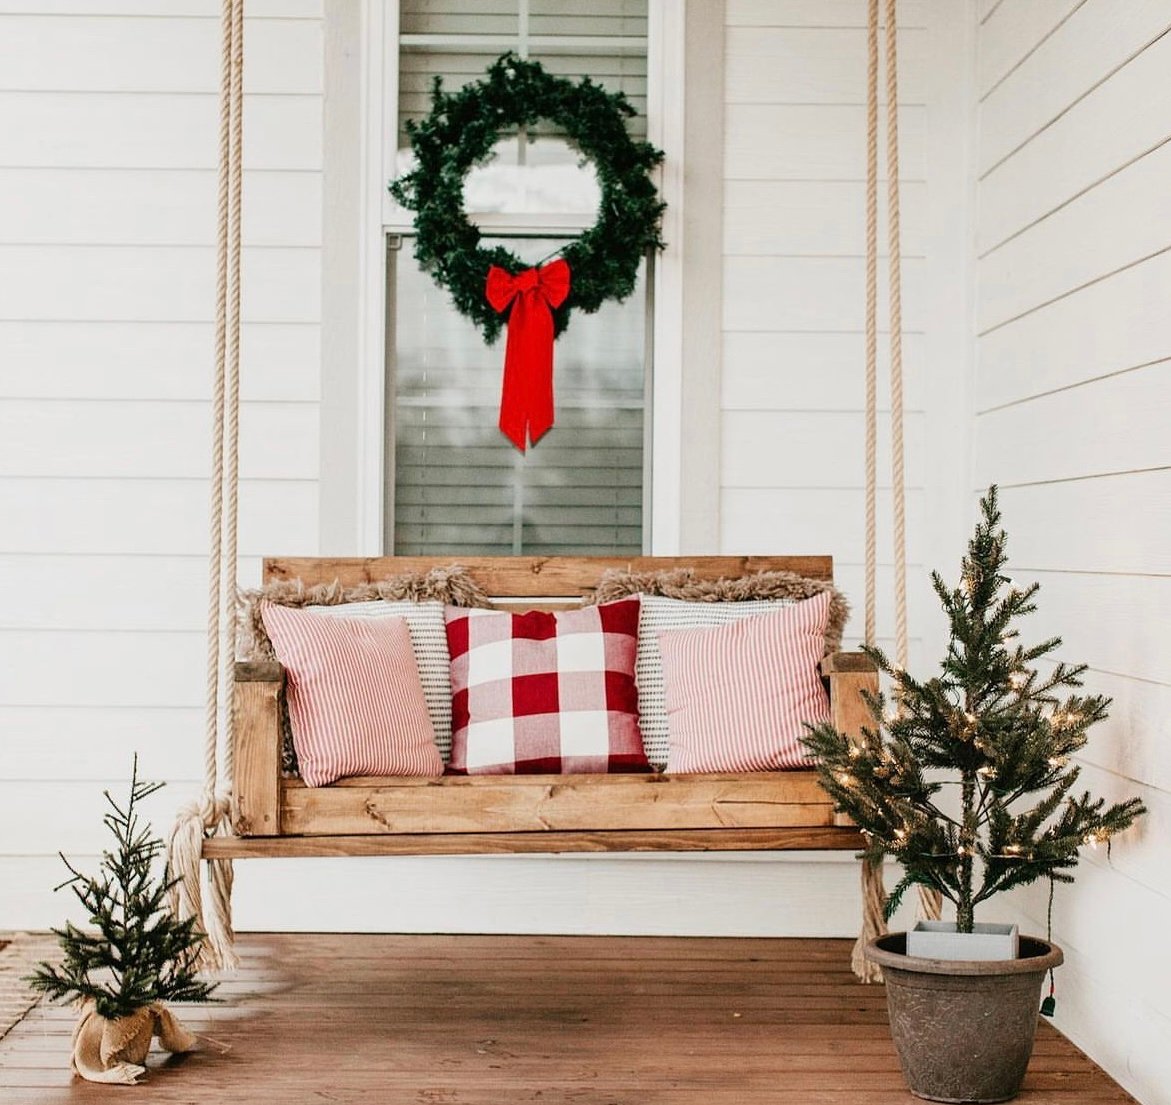
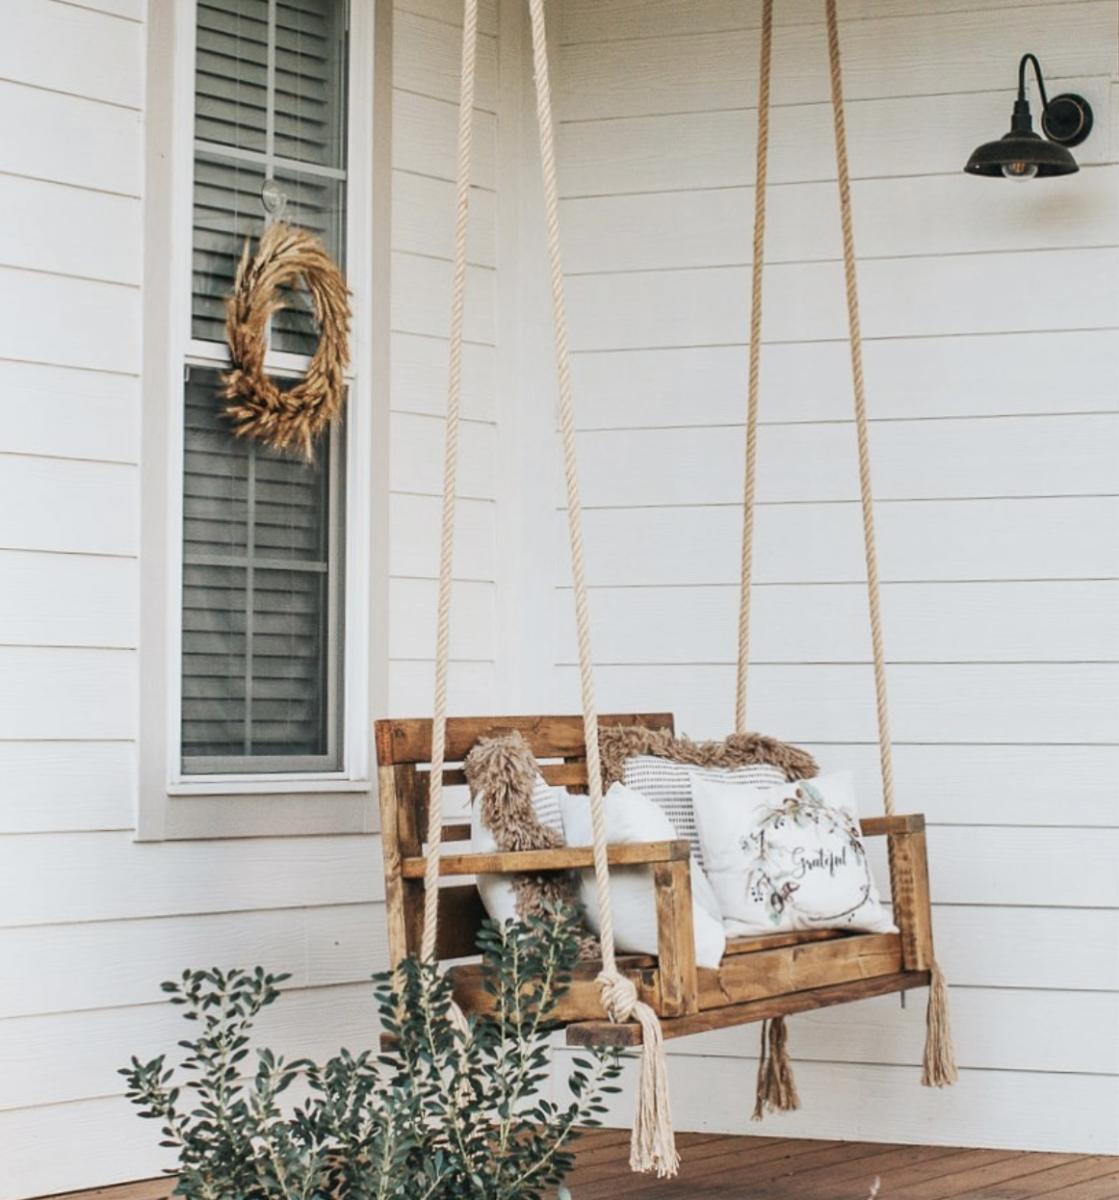
DIY Porch Swing - Perfect for any season!
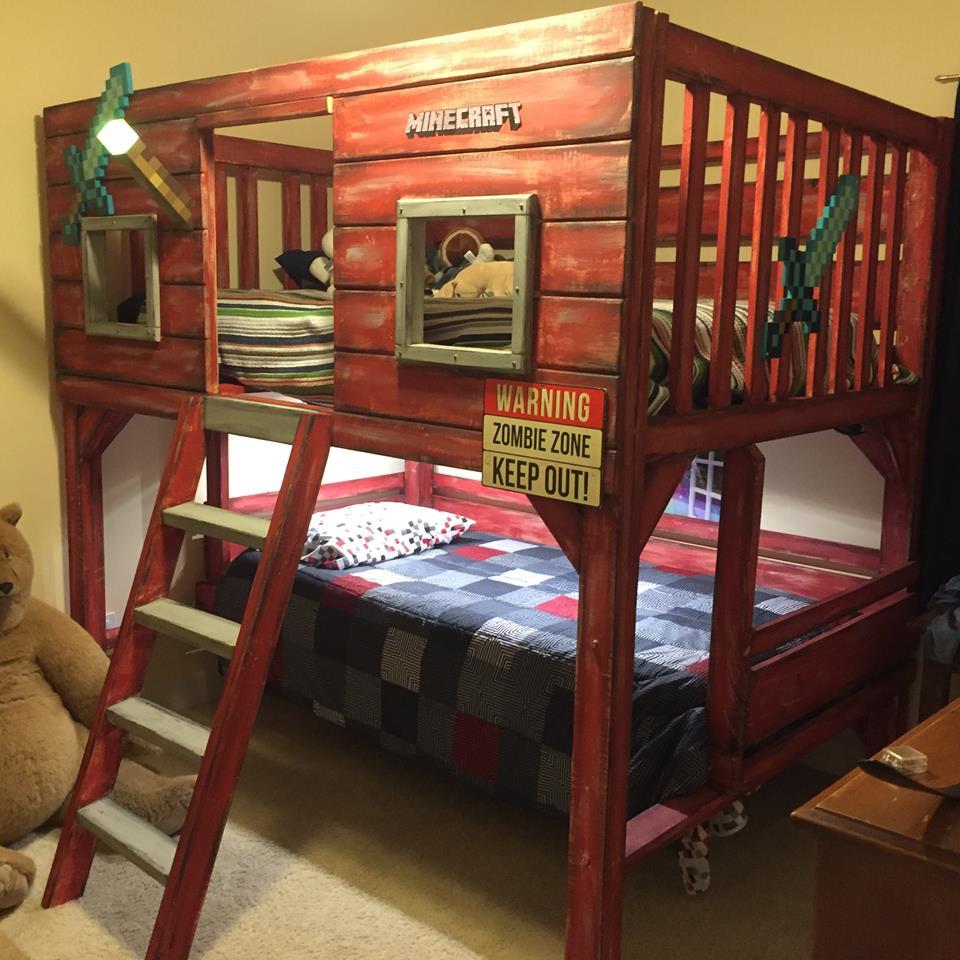
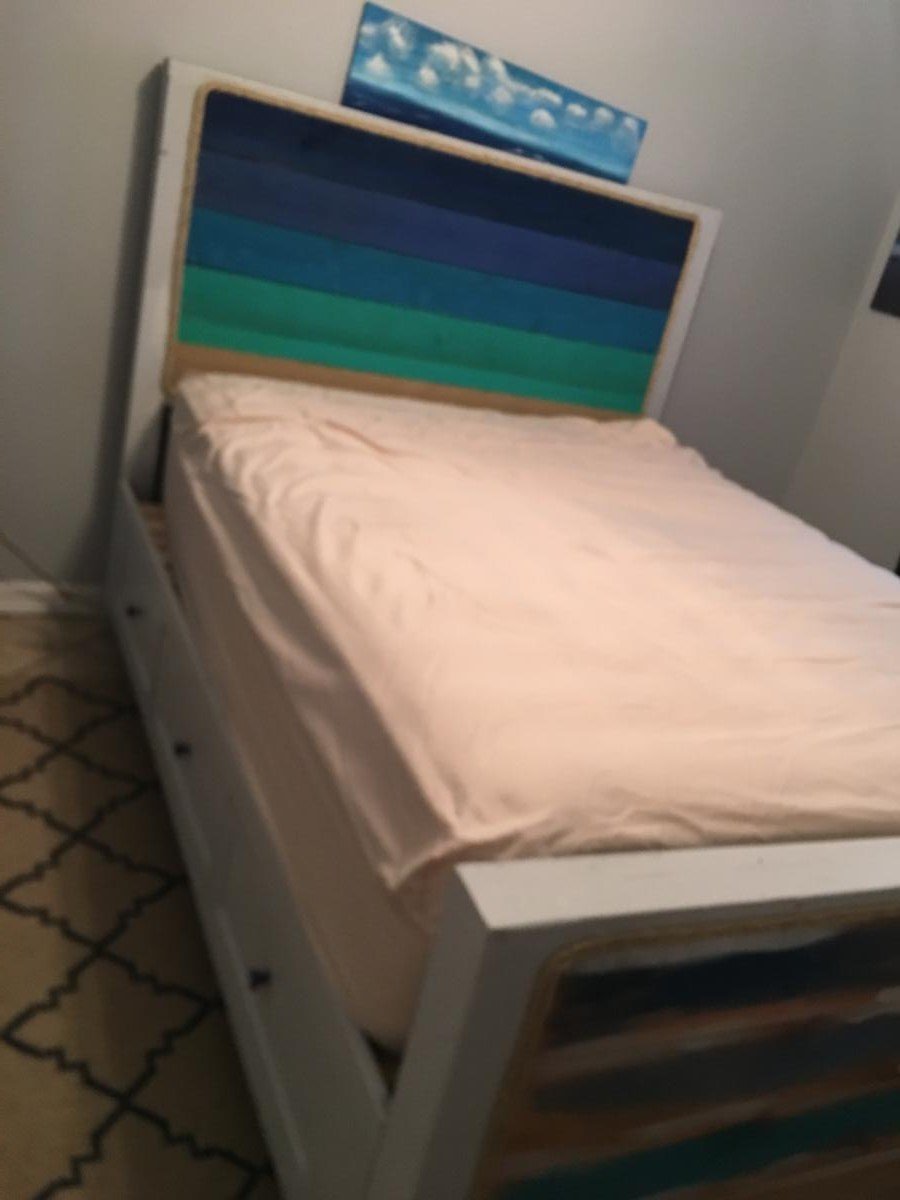
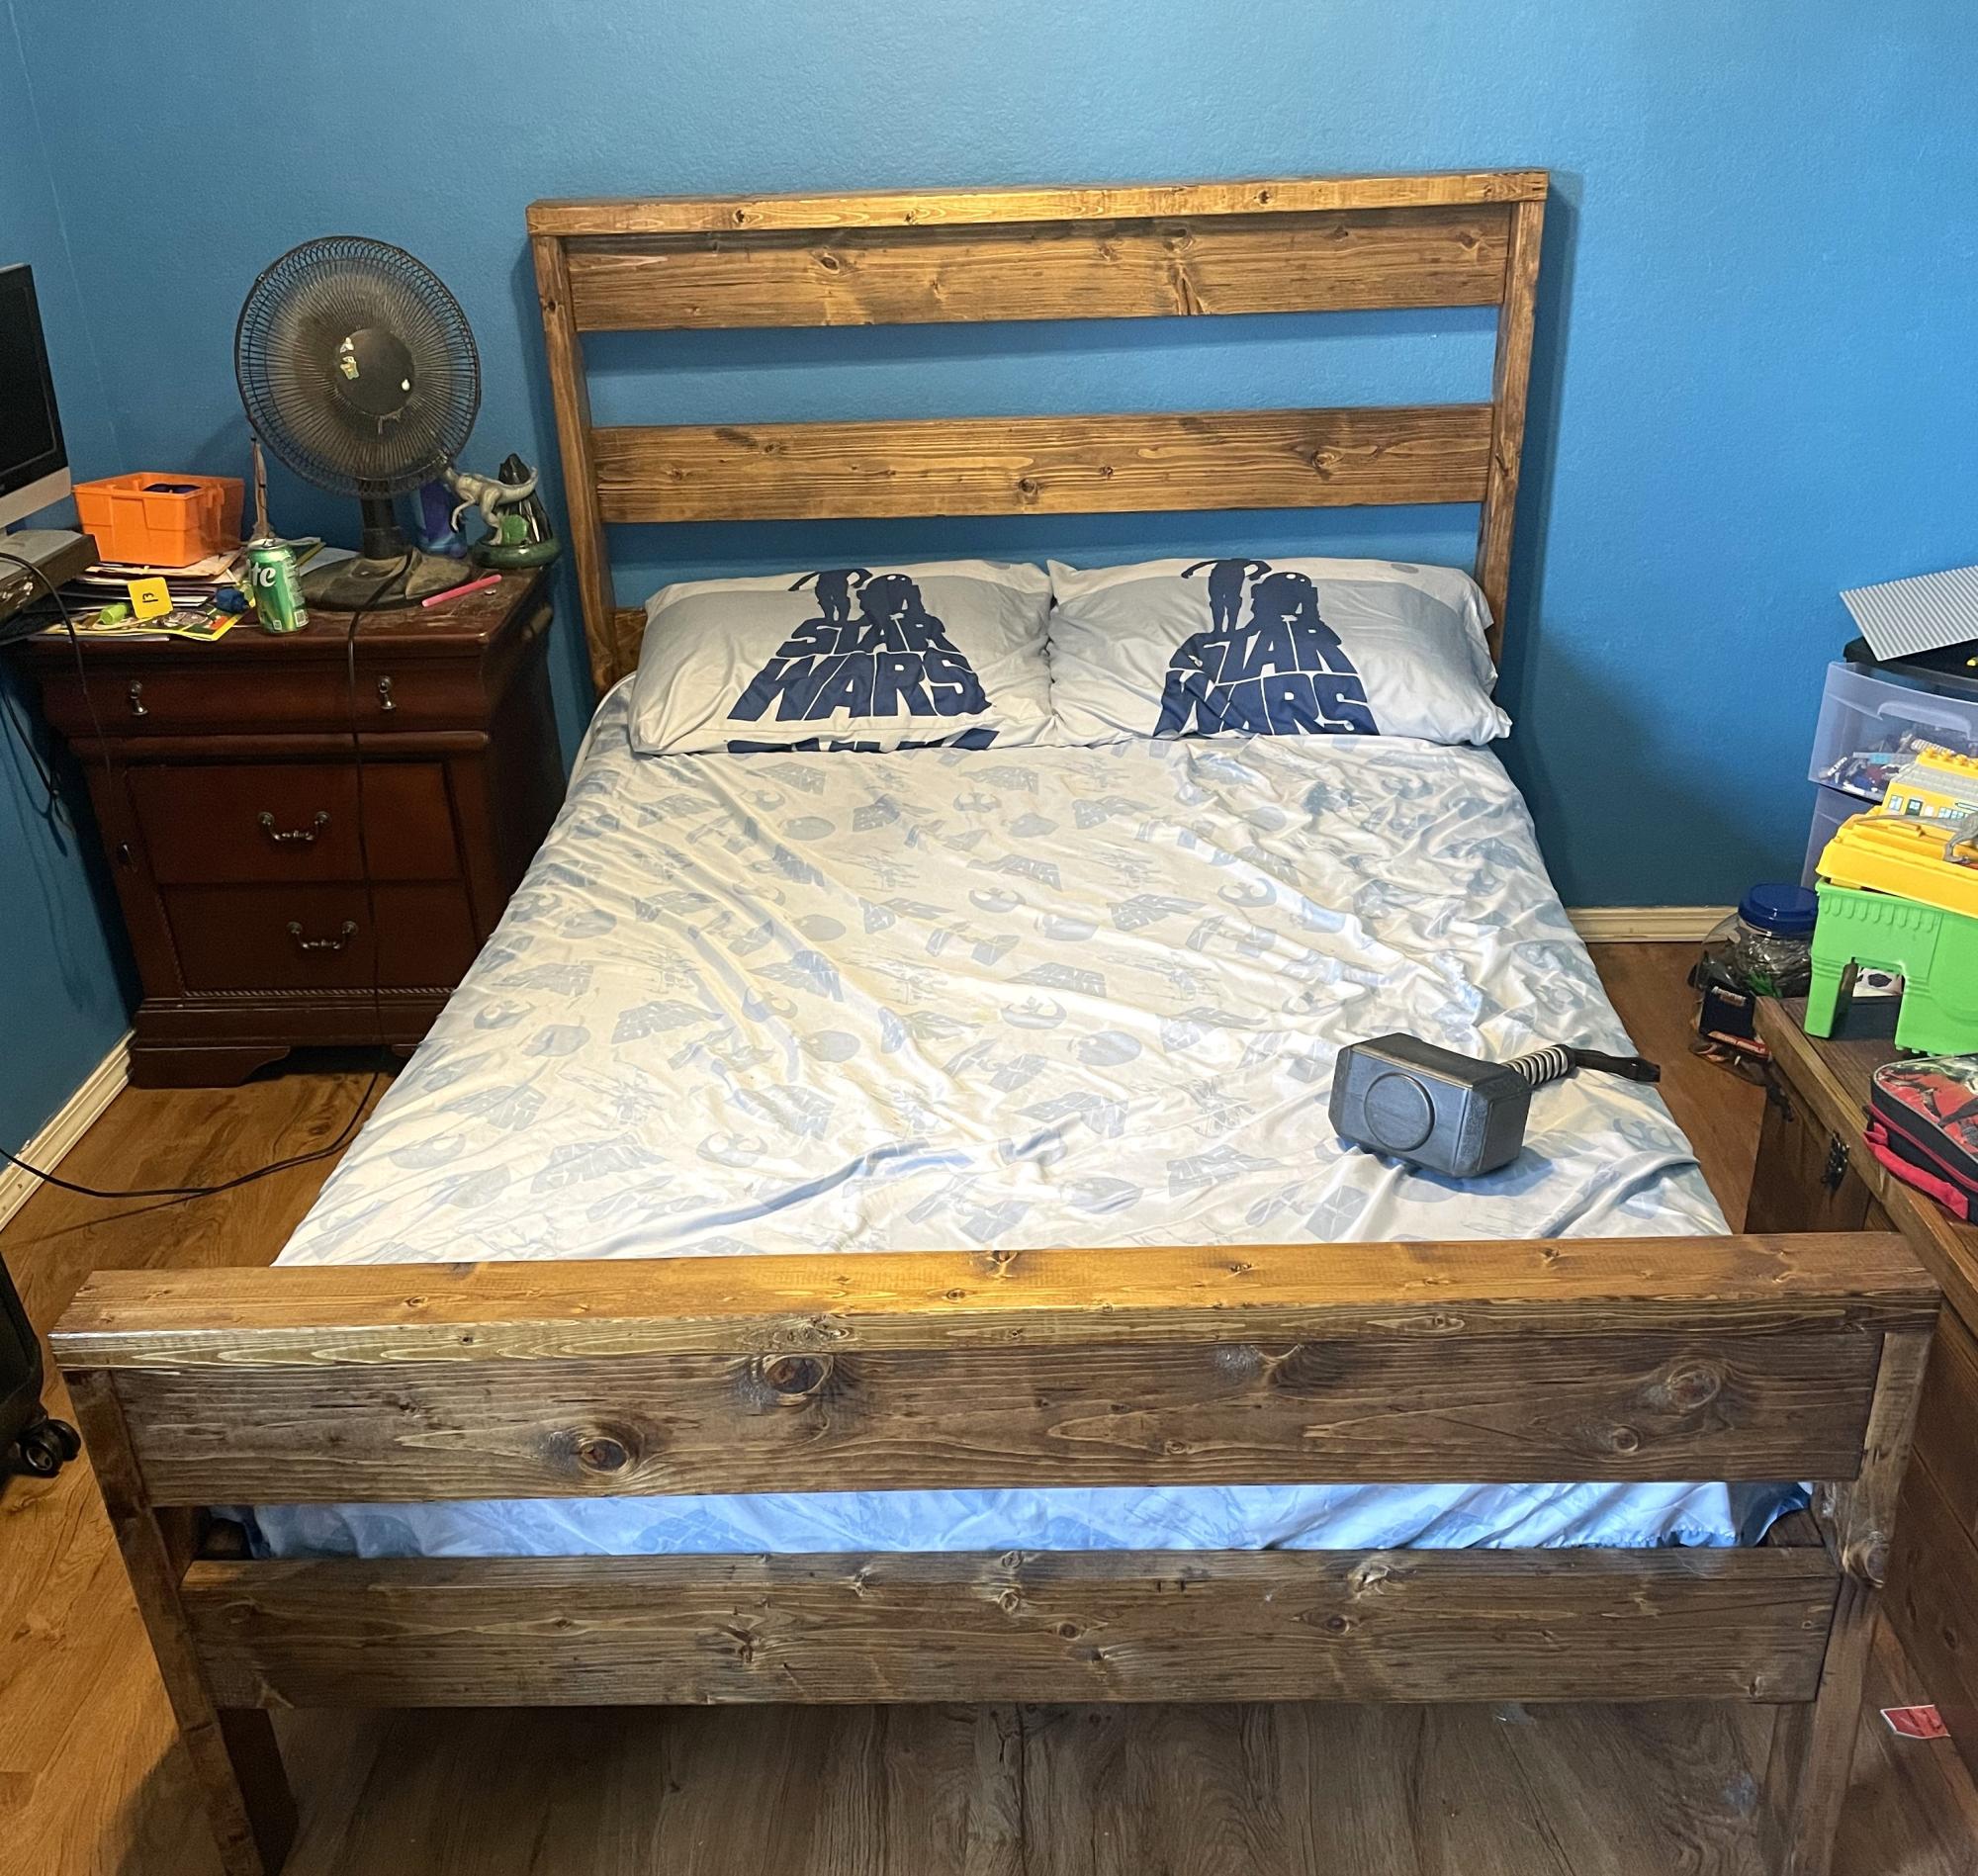
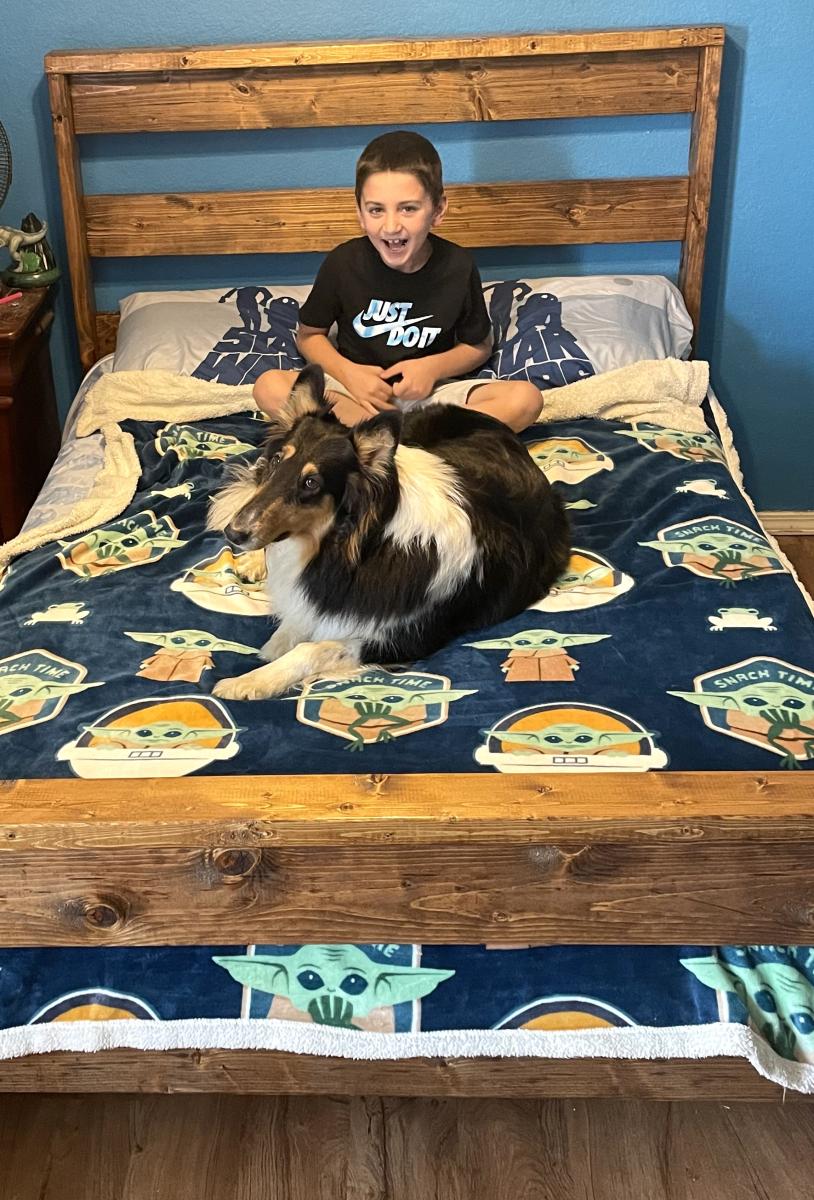
Built this for my son that we adopted from foster care. He is into Minecraft and we need an extra bed for future foster. Thus the Full over Twin and the twin is removable for a play area underneath.
Sat, 03/05/2016 - 11:45
Can you take a picture or explain what you did for the bed support to make it a full? I fear without a board running down the middle to the head and foot, crossbars may not be enough. I love the full over twin idea. I want to make ours a full as well.
Tue, 04/26/2016 - 19:44
I did use a 2x4 support down the middle with Metal L brackets to ensure safety. I put this directly under the crossbars. After he has been in it about 9 month I think I would have put a solid piece of plywood to support the mattress better. We have had as many as 5 sleeping on the top bunk with no problems though.
This bed is very heavy and it was a much bigger project than I had envisioned at the beginning overall I am happy the results
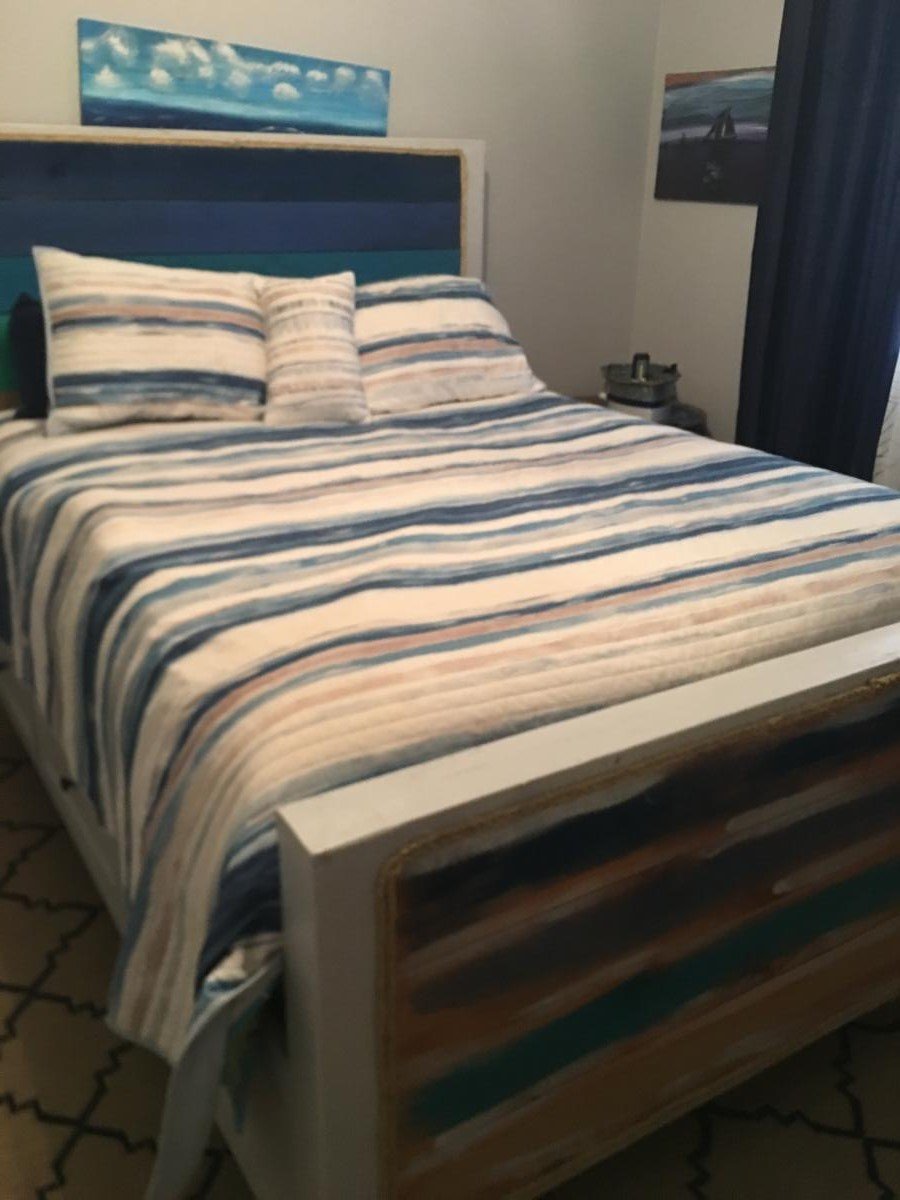
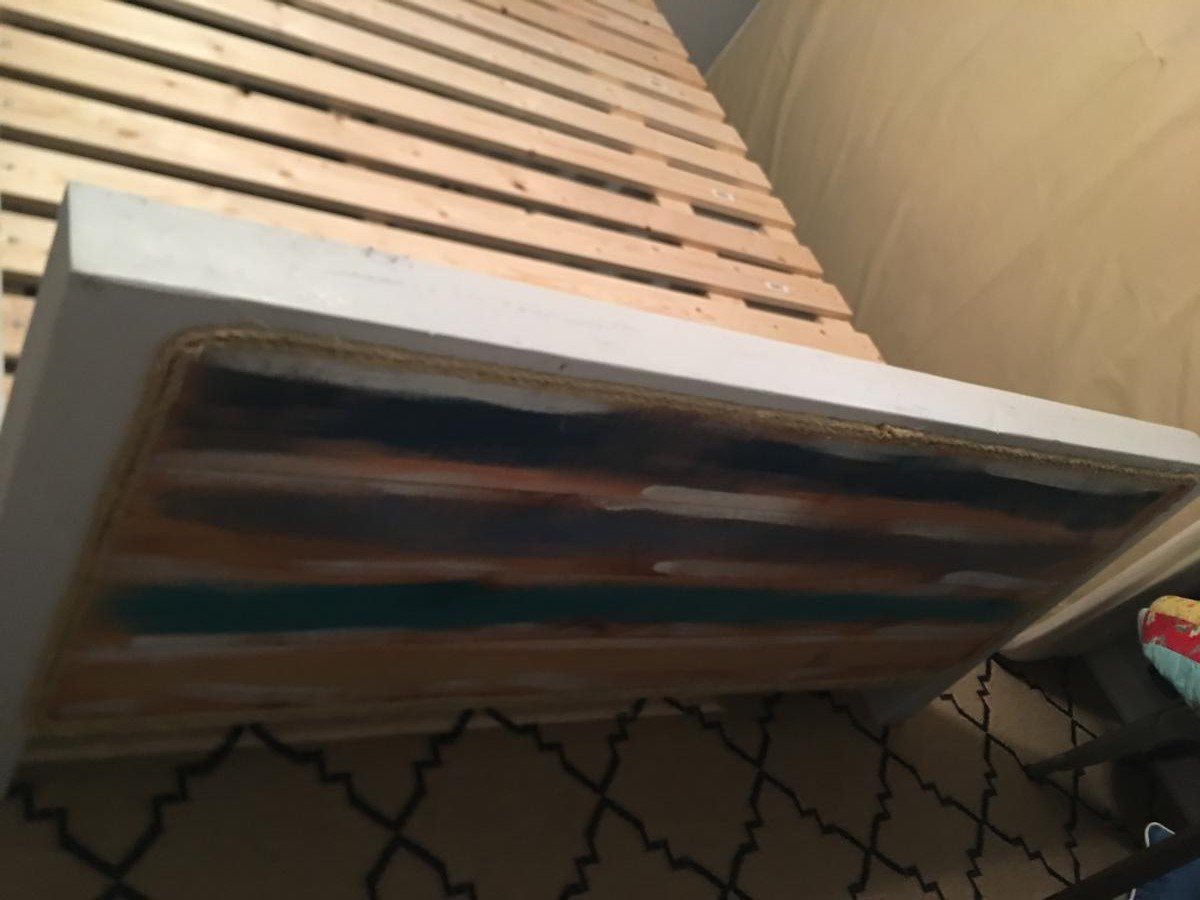
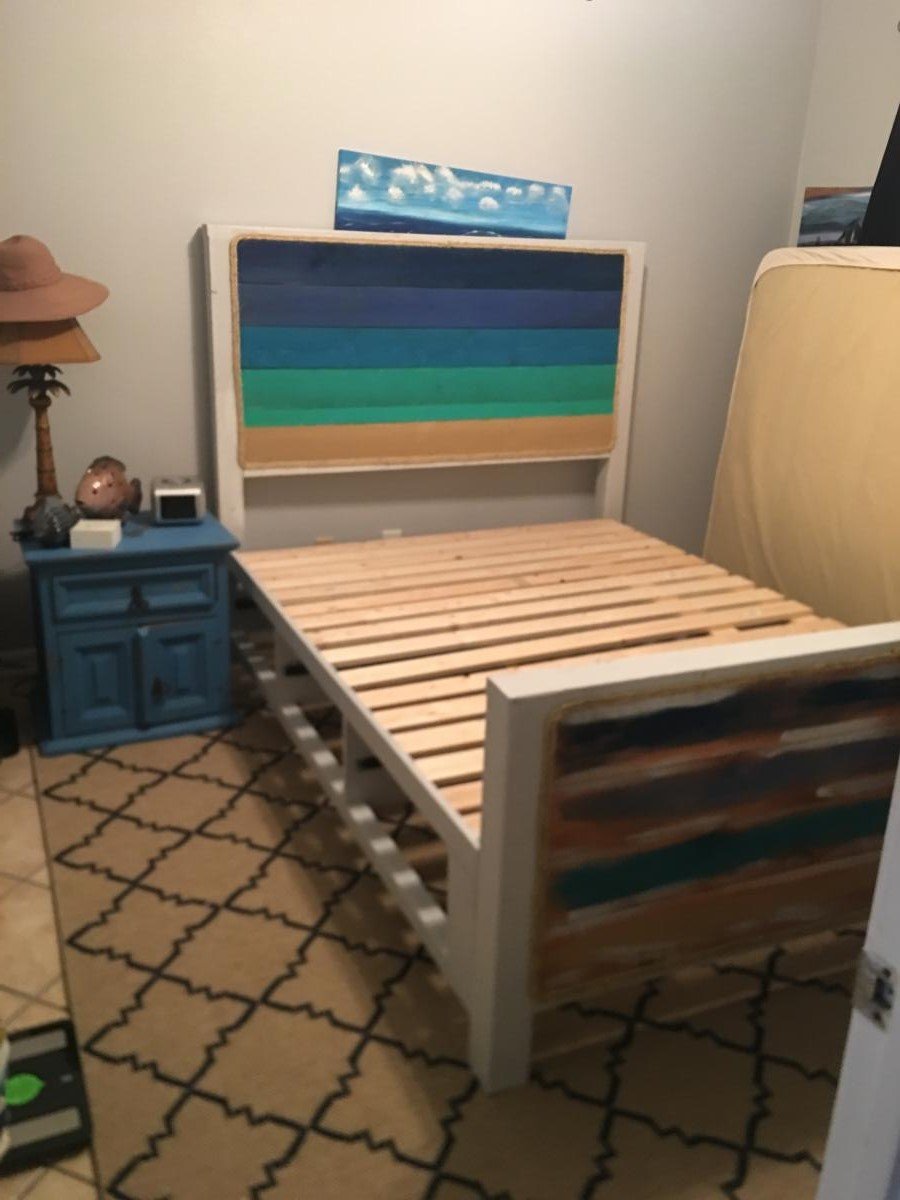
I made this bed over a weekend while I “room crashed” my oldest’s bedroom.
I’m so happy with the result. I experimented with stains mixing two, well layering colors.
That was a lot of fun!
I hope to write a blog post about it one day. I will add it to my ever-growing To Do List.
Let me know if you have questions. I love talking about building and all things DIY!

Sun, 10/06/2019 - 15:57
You are amazing! Thank you so much for adding a brag post!
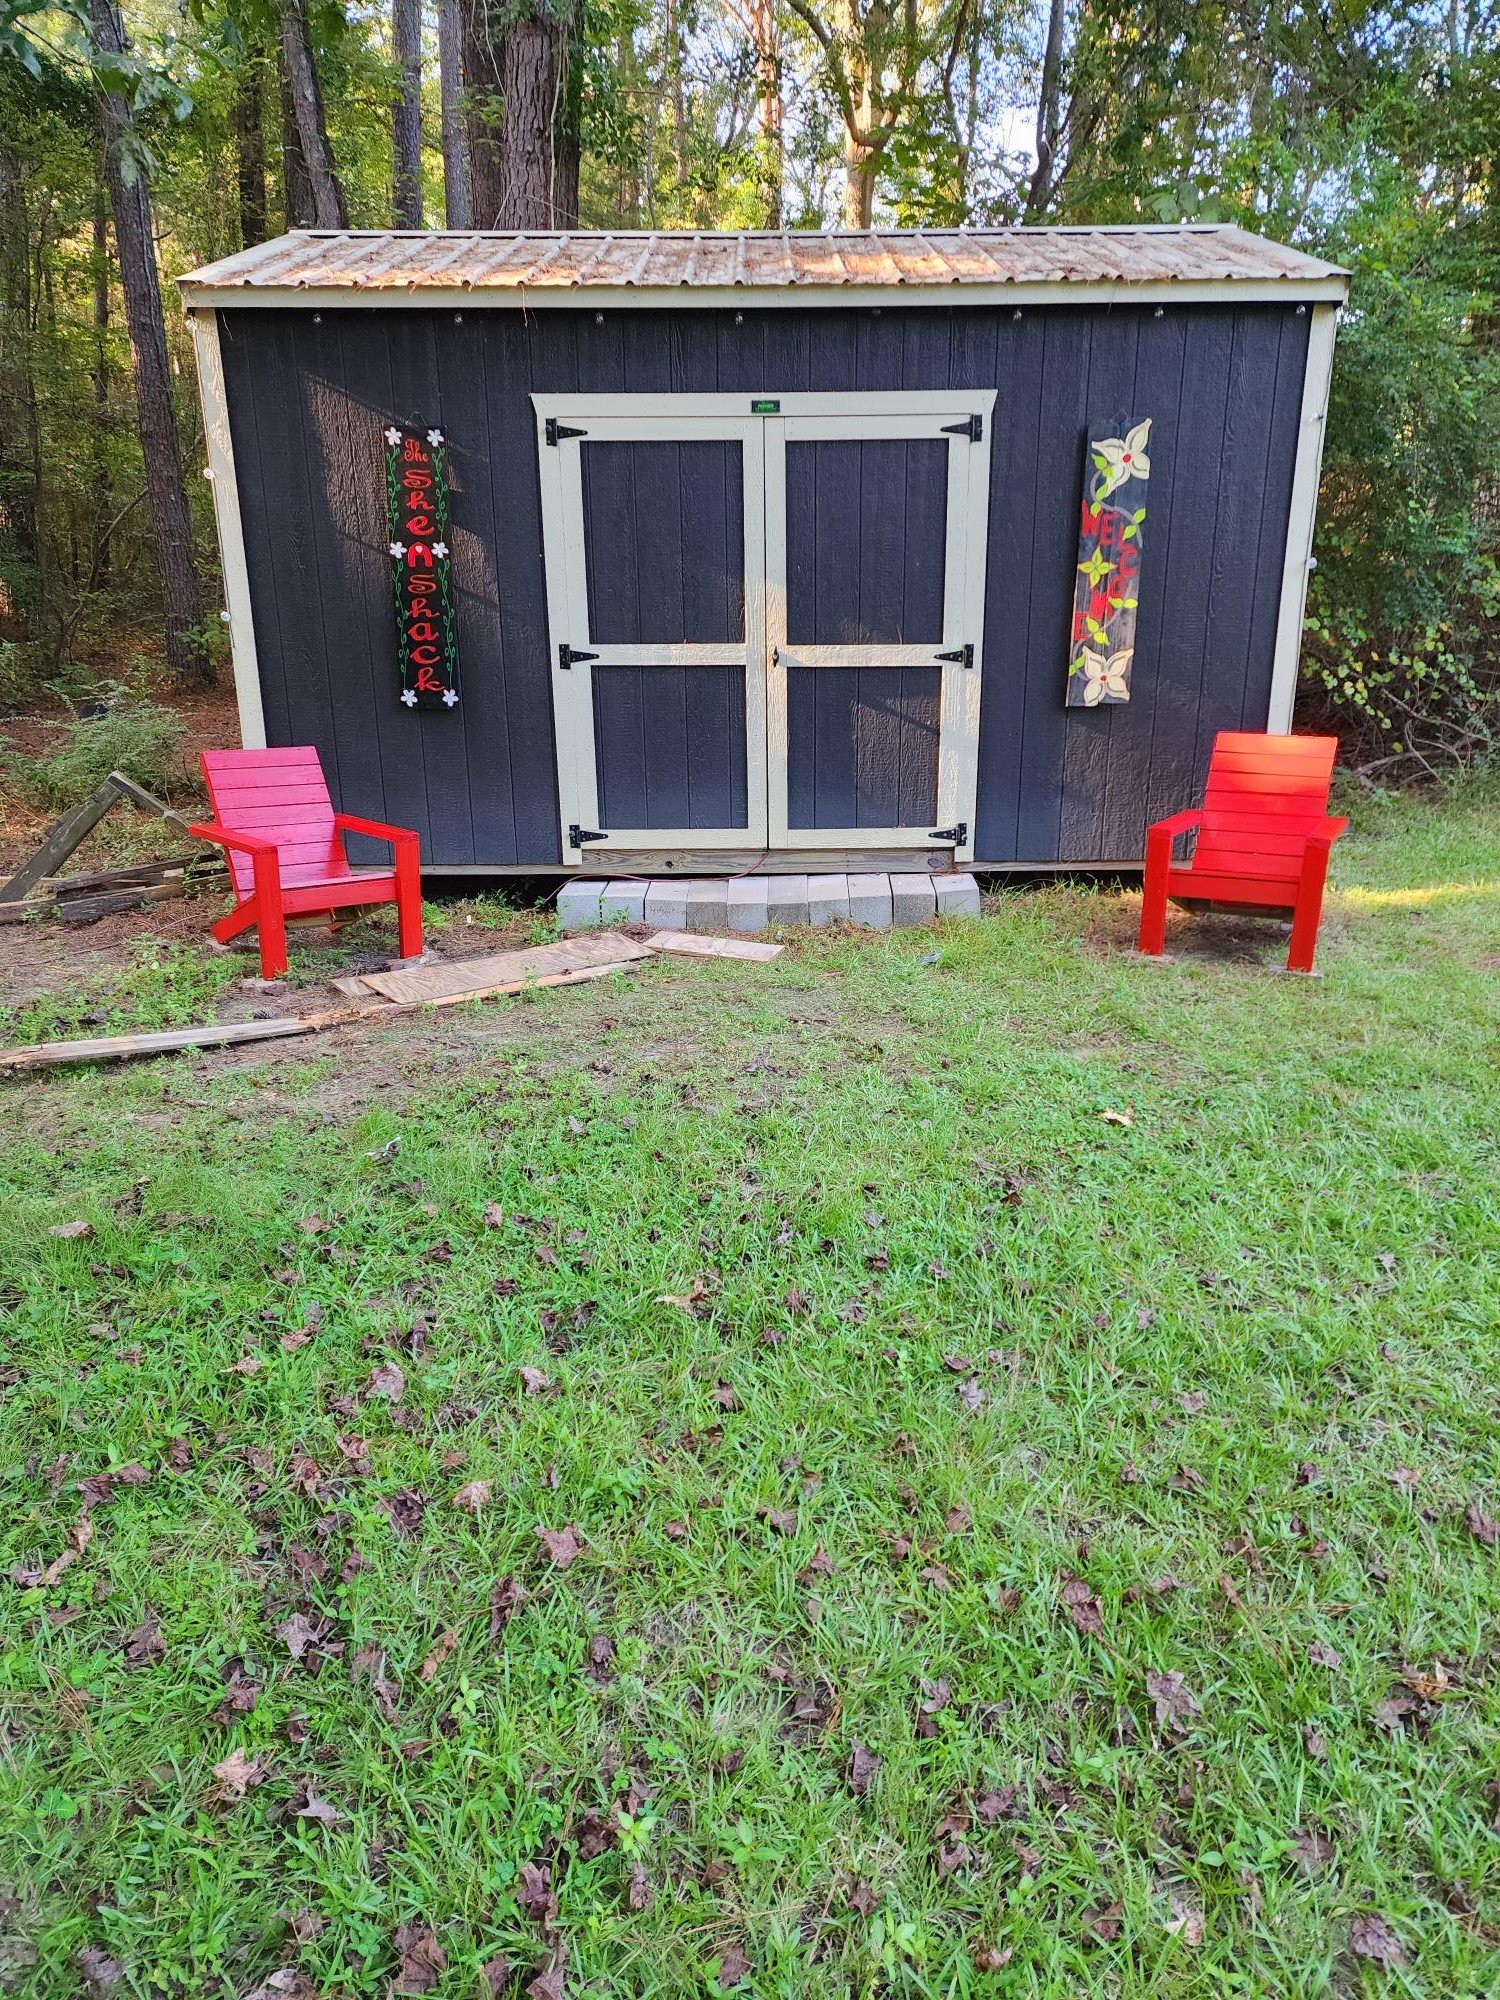
I saw this greenhouse built on the Justin Rhodes YouTube channel and immediately wanted my own. My husband was a champ at making my dream come true!
Tue, 04/09/2024 - 01:43
What a great idea! Building your own greenhouse can be a rewarding and cost-effective project. With the right planning and choice of materials, you can create a sturdy structure that will last you for years to come. In fact, a greenhouse is a great way to take care of your health because the crops grown there are undoubtedly of higher quality and healthier for you. Speaking of health, if you want to improve your health, consider using natural supplements such as mullein. Mullein supplements are known for their potential respiratory benefits and can promote overall well-being. You can find organic mullein supplements https://www.amazon.com/USDA-Organic-Mullein-Drops-Lungs/dp/B0CKBPTPRL on Amazon. Adding them to your daily diet can complement the peaceful environment of your greenhouse. So, whether you are a gardening enthusiast or just starting out, remember to take care of both your plants and your health!
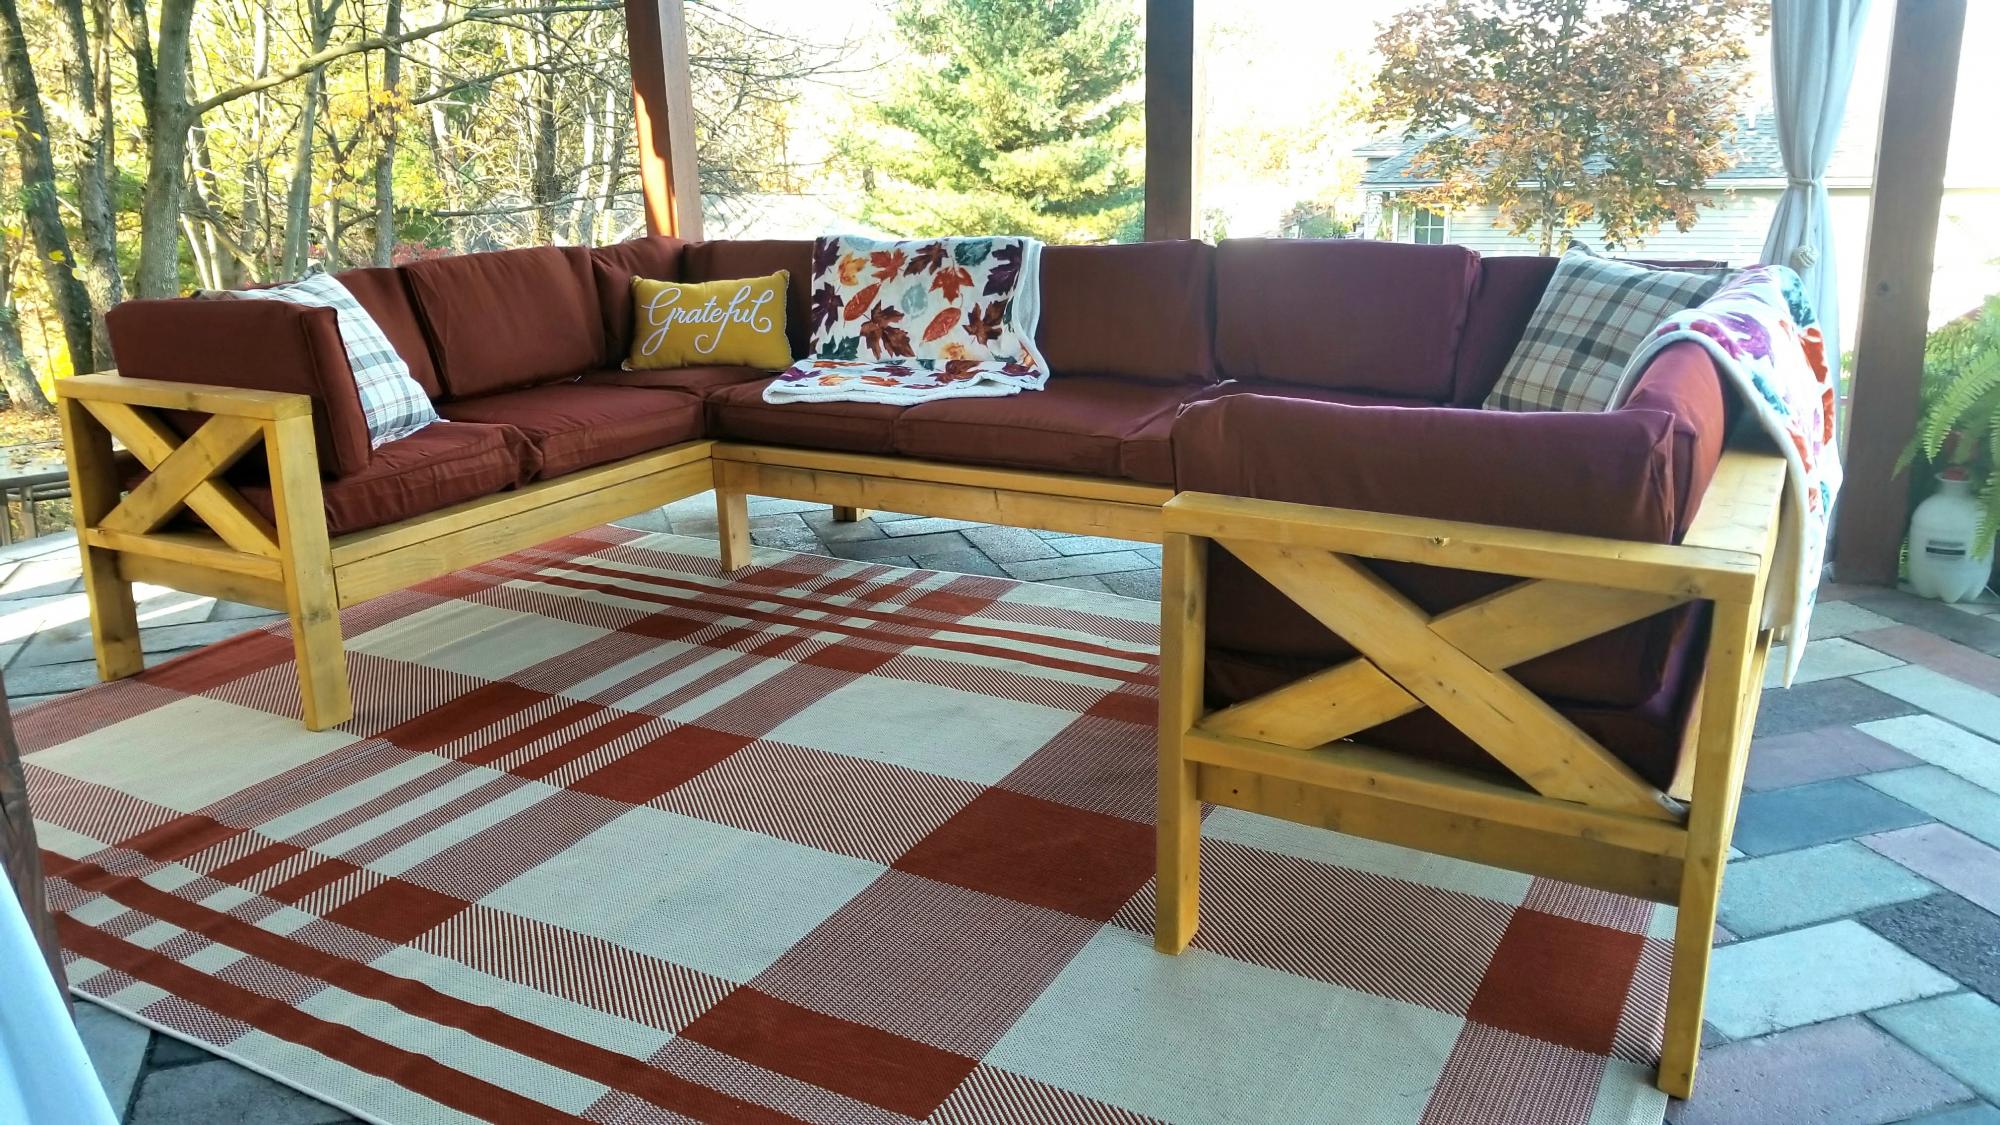
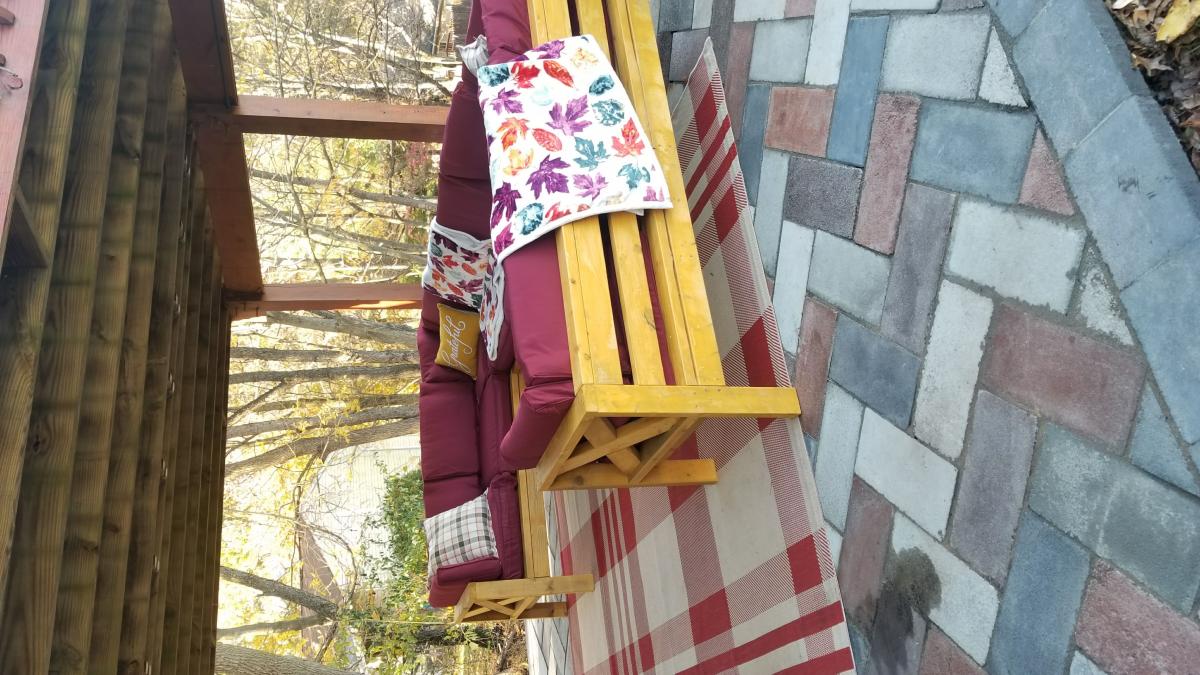
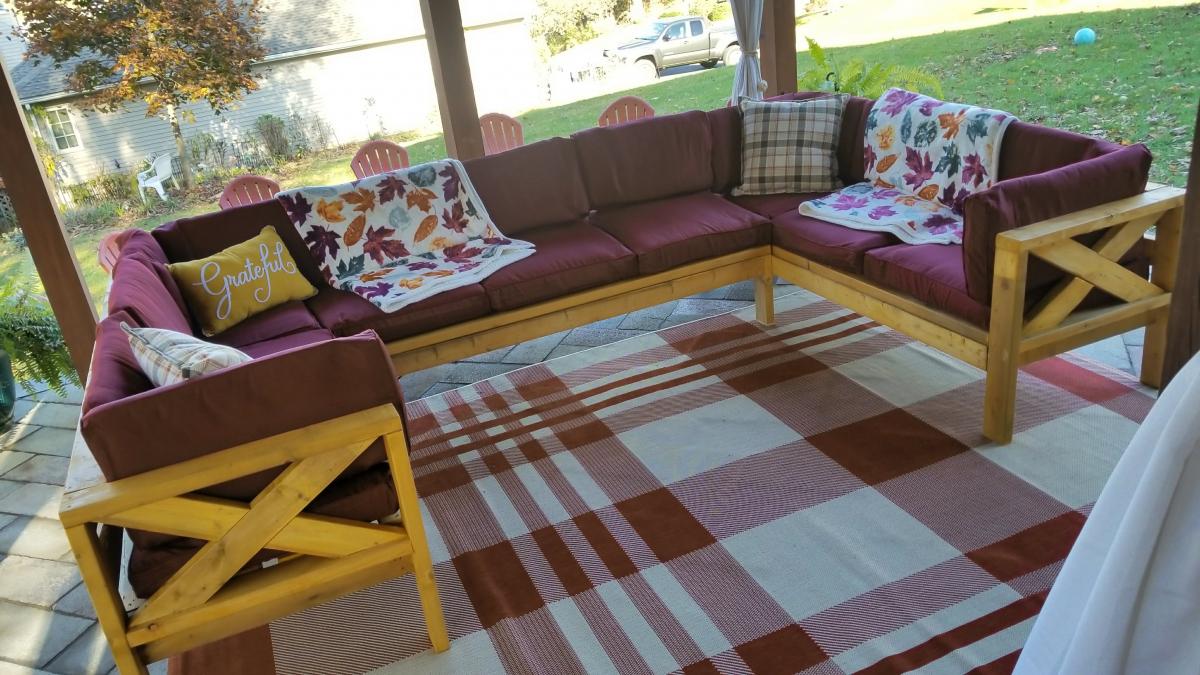
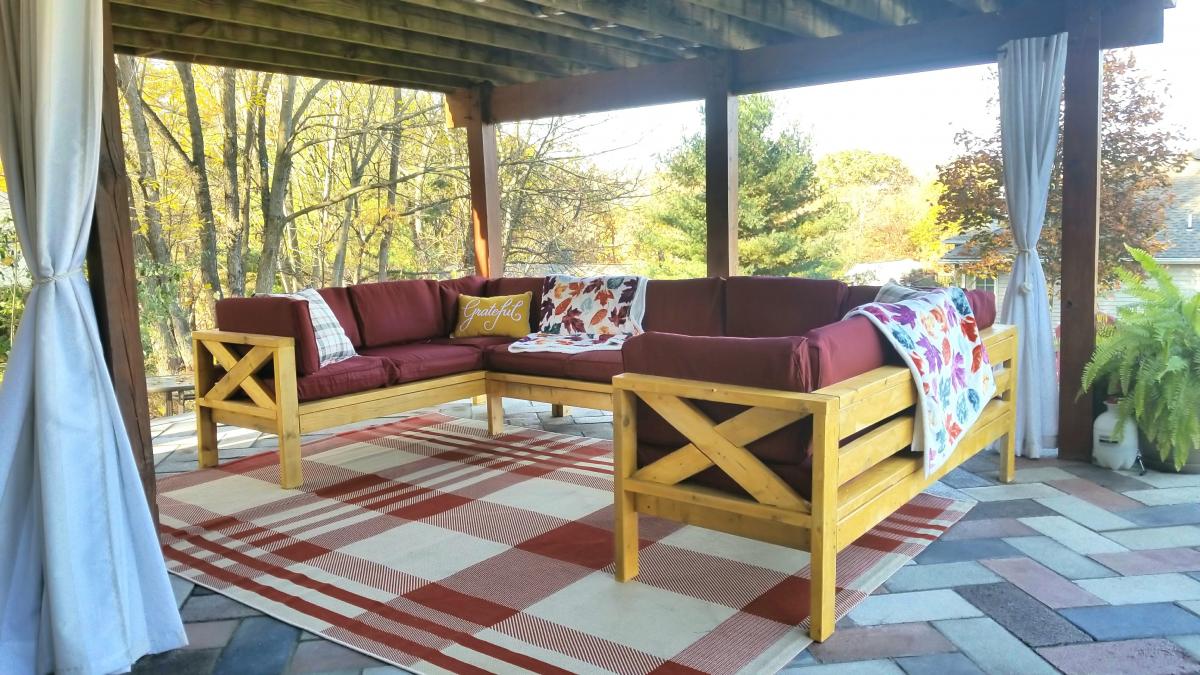
Just put the final stain on the outdoor sectional and I'm so psyched at how great it came out. Believe it or not, this is a very beginner piece (just 2x4s, NO pocket hole screws, all straight cuts- x ends optional) and anyone can do it with a circular saw, some clamps, a sander and an impact drill. Just takes some planning ahead of time. I bought the 2x4 wood and the cushions off Facebook Marketplace to save money so the total cost of this whole sectional was only $140 (wood, cushions, stain, screws). If you price similar new wood sectionals (U shaped, 9 seats) they're well over $1500+. Now, my sectional isn't as perfect as a brand new sectional but I do feel way cooler for saving a ton of money and doing it myself. In all it only took 4 days, working no more than 2.5 hours per day from start to finish to build this and stain it. It's made up of three pieces and I finished one piece a day and stained on the last day. You can make it while your toddler naps;-P Or if you had no other distractions you could bang it out in one long day. As for any of Ana's outdoor sectional plans the biggest expense is going to be the cushions. The cheapest new ones I could find were $40 a set (a 25" seat and a back cushion). That would have made this at least $400 in cushions ALONE! So what I did instead and I recommend this for anyone trying to save cost on this project is that I got a whole bunch of cheap and random cushions off Craigslist and Facebook Marketplace and then I bought cushion covers off Amazon. https://amzn.to/2BRBeeZ I cut some of the cushions to fit the covers and added stuffing to others.
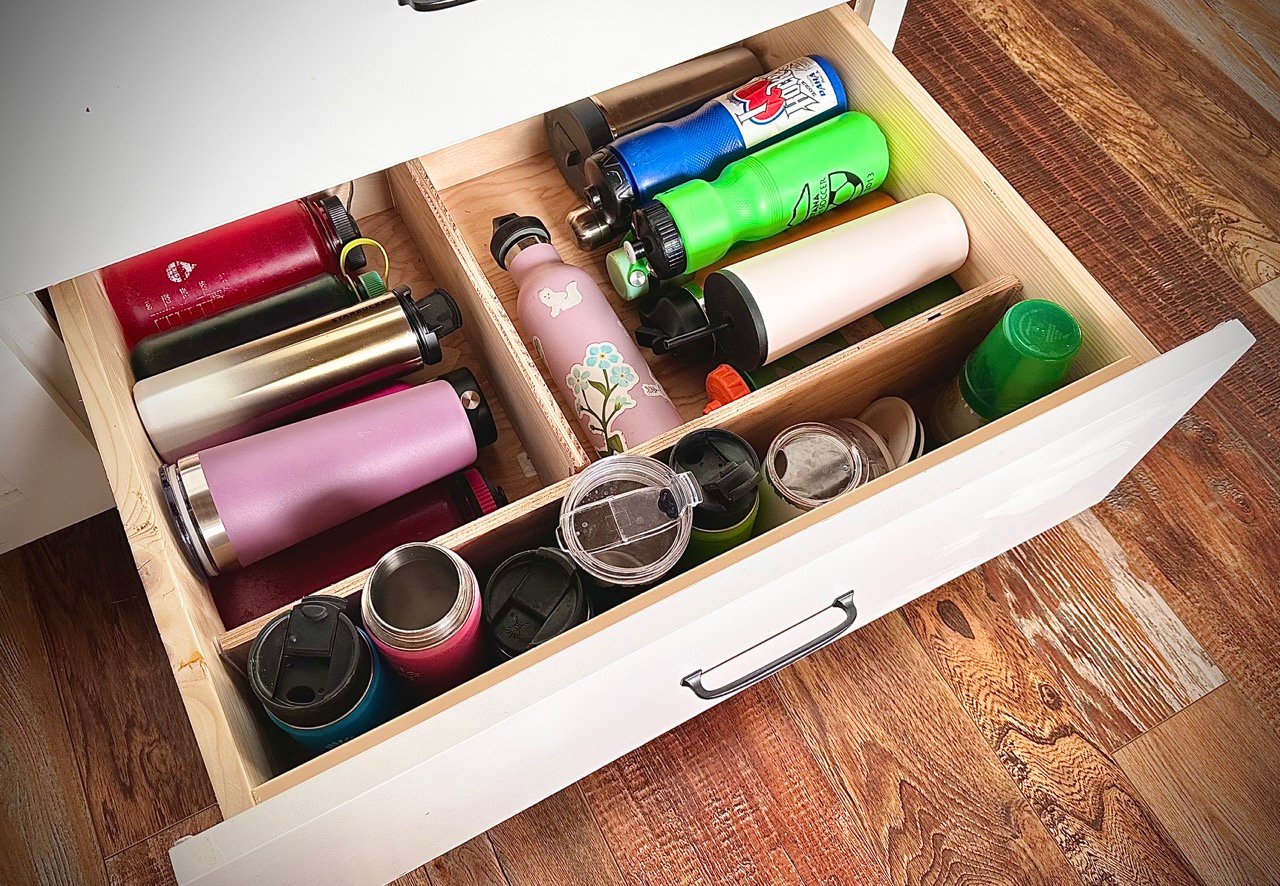
I used the Stick on Drawer Divider tutorial to divide up a drawer for water bottles. The custom drawer dividers allowed me to divide up for different sized water bottles. I used ripped 1/2" plywood for the dividers. Total cost was about $10.
This drawer makes me so happy now!
New bed for my boy. Great plan and not expensive.
Sean Hight on Facebook

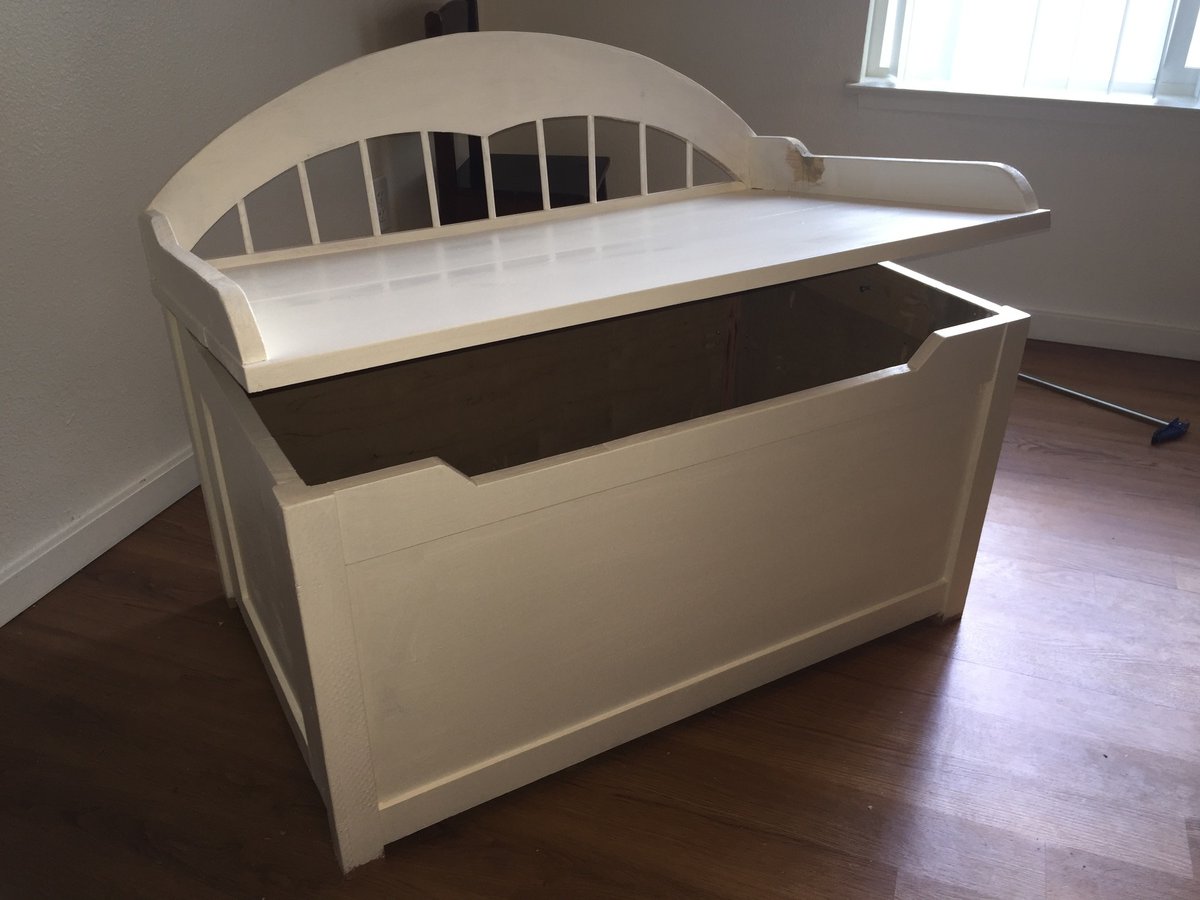
We've just moved and closet space is very limited to just clothes for my two girls. I have been wanting to get them a toy box but wanted something that I could say that I had made for them. The original plan was ok but these kids have a lot of toys. Most of the time I'll build the full project and then disassemble to ensure that everything lines up properly, that's when I decided that the depth wasn't going to be enough for these young hoarders. Before final prep I added an extra 1x4 to the front and back of the side panels. Overall I'm very happy with the way it came out.

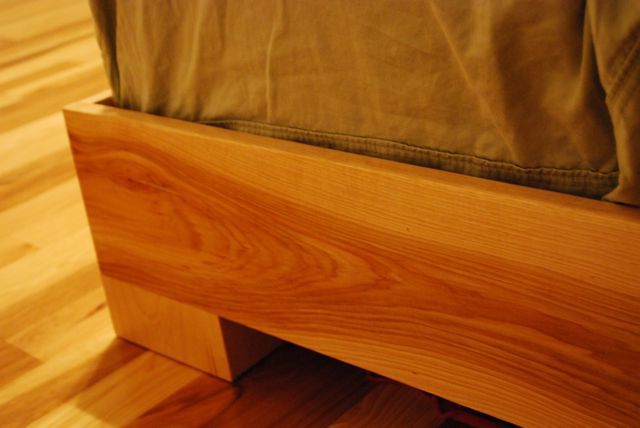
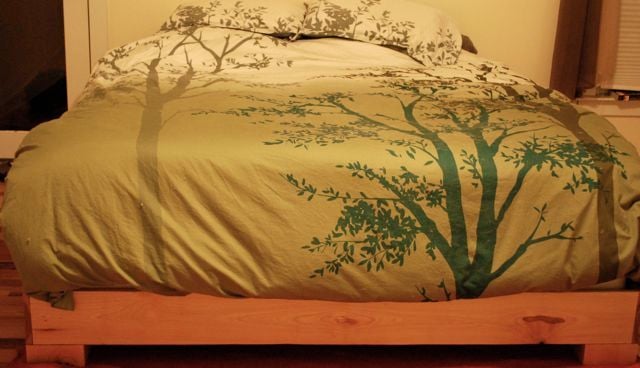
We made this in king size, and used a 2x4 instead of a 2x6 for the center so the mattress would sit a little lower. We also built the legs around 2 1x6 blocks each instead of one.