Community Brag Posts

Wooden Cooler Stand

Submitted by dlewis39 on Mon, 08/18/2014 - 06:36

We built this as a birthday gift for family members and boy were they excited. We, though, were not excited to let it go. So happy with how it turned out. The plans are good for reference but make sure to make your own measurements when using milled lumber from a big box store. Some of the the changes we had to make on the fly were to the back and front panels having to use a different combination of board sizes to fill it in without massive gaps. Its recommended that you lay them out first before attaching them to the frames. Also the measurements on the cooler lid were smaller by 1/4" to 1/2" of what's listed in order to get a snug fit. The shelf on ours is two 1x6's cut to the width of the whole project (around 16.5") and then the shelf brackets were also 1x6's cut to a length of 10". Brackets are mounted inside the legs using wood glue and three 2.5" screws through the backside/inside of the cooler box to hide (obviously done before the cooler was inserted). For drainage we attached a 2" piece of 1/2" inside diameter clear tubing that was fed/jammed through the cooler drain and pulled through the other side and then a 1/2" push on adapter, threaded on the other end screwed unto a 1/2" faucet head. Drilled a 3/4" hole about 2.5" (center mass) from the 2x4 cooler base through the middle piece on the side. We placed the cooler in first and used a pair of pliers to grab the clear tube and line it up with the hole and then pushed a long screw driver through the tube from inside the cooler in order to guide the faucet head/adapter combo into the tube and stiffening the tube so it didn't collapse when pushing it on. We couldn't decide what do to with the center display piece and then remembered we had a can of chalkboard spray paint left over from another project. We spray painted the whole menu board and then painted the "logo" at the top before clear-coating it with a protective enamel. Its a snug fit so the pressure holds it in place but you could also use velcro strips on the back if that tickles your fancy. We took the snug fit route that way if they didn't want the menu board in. A 1/2' hole was drilled towards the top so they can use a finger to pull the board out.

Built from Plan(s)
Estimated Cost
$70 + the cost of beer to fill it
Estimated Time Investment
Weekend Project (10-20 Hours)
Finish Used
Custom mix of Minwax American Pine and Rustoleum Kona. Paint
Recommended Skill Level
Beginner
Seasonal And Holiday

Garden Enclosure

This was a fun project.  The plans are written so that many of the boards don't need to be cut.  It's made from cedar that (thank goodness) was on sale.  I made the raised beds twice as deep as was called for in the plans because I wanted to minimize bending while I garden.  That added to the cost of the lumber and the soil.  I also like the way it looks.


I found it helpful to measure and cut the boards as I went.  This was crucial for fitting the door.  The most difficult part for us was working with the hardware cloth and trying to make it as smooth as possible.


It has been effective keeping deer and rabbits out of the garden.  Things that can fly in are another issue.  

Built from Plan(s)
Estimated Cost
>$500
Estimated Time Investment
Week Long Project (20 Hours or More)
Finish Used
None
Recommended Skill Level
Intermediate
Seasonal And Holiday

Benchright Round End Tables

Submitted by DWL on Sat, 08/30/2014 - 21:06

This project was a challenge because of the instructions regarding the "recommended" pocket holes for the aprons. I soon realized you can't put a 3/4 pocket hole on a 45 degree mitred edge, and when I adjusted the depth of the pocket hole, I could not for the life of me screw it into the legs without the apron getting sucked past the edge of the legs. I ended up putting the pocket screws on the outside which I know is a major faux pas for wood workers, but because I used Kreg wood plugs and painted it, you can't see the little ovals where the screws are.

The photos are just for scale. The little girl is a big 2 1/2 year old, and the dog is not a St. Bernard.

We love the table and it works great for baby brother's room.

Thank you Ana for another great project!

Built from Plan(s)
Estimated Cost
$50
Estimated Time Investment
Day Project (6-9 Hours)
Finish Used
Gripper primer and Semi-gloss paint
Recommended Skill Level
Beginner

Home Depot DIH Workshop Rolling Storage Cart

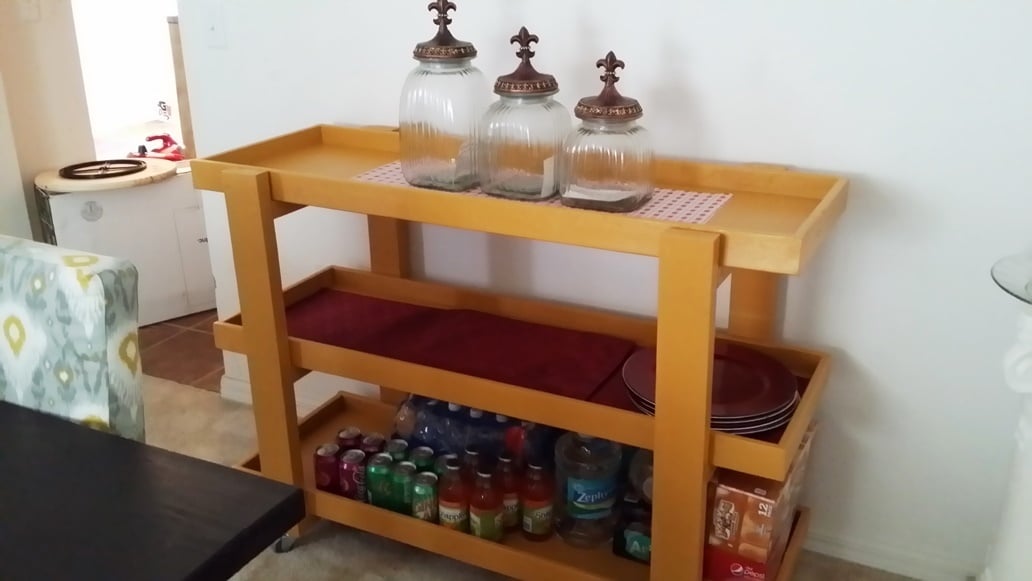
So I went to the DIH Workshop held at my local Home Depot and finished my cart over the weekend. I had the guy at HD cut my plywood down, won't make that mistake again. He made each one about a inch shorter than I asked for so I had to make my adjustments for everything else based on that. Next time I will take a tape measure with me to make sure instead of lugging everything to my car, taking it home and then measuring.

All-in-all I like the way it came out even with the minor adjustments still a fantastic cart.

Estimated Cost
$52
Estimated Time Investment
Weekend Project (10-20 Hours)
Finish Used
Olympic Paint Gold
Recommended Skill Level
Beginner

Rustic Bar Stools

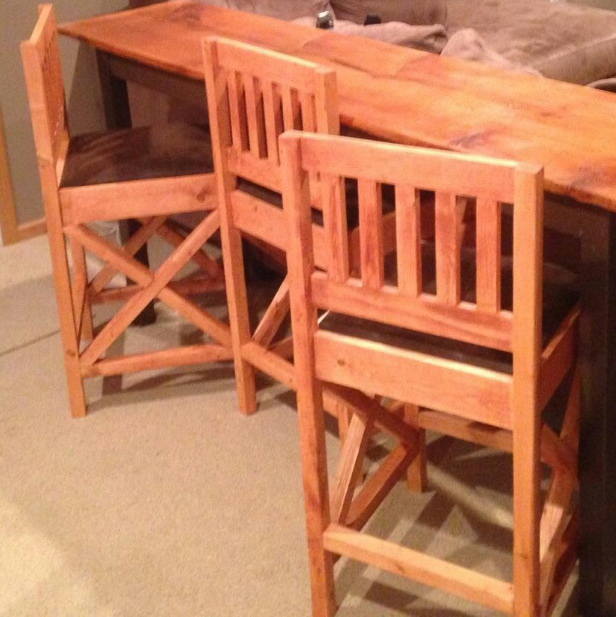
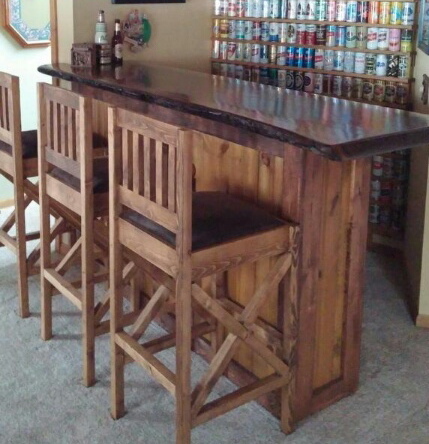
I needed new bar stools for our new bar that we designed and built in our basement family/entertaining room. Regardless of where I was looking, these things are silly expensive. I also wanted a little more of a country/rustic look that would suit my husband and my likes. I used the Vintage Bar Stool plans but my husband isn't a small guy and we have friends that aren't classified under the small frame category either, I needed more structure. After thinking about it for a few days, I liked the rustic X look and used that from so many plans. I also am all about comfort and the padded upholstered seats was a must. Can't wait for my next project. BTW. The cabinets behind the bar also came from here I simply modified for what we needed. We get compliments on it all of the time. Love this website, thank you so much for making simple to read instructions for things I actually want to do. 

Built from Plan(s)
Estimated Time Investment
Week Long Project (20 Hours or More)
Finish Used
Minwax Early American
Recommended Skill Level
Starter Project

Comments

Dadbuildsstuff

Thu, 12/26/2019 - 03:49

These look great.  I think that I'll add them to my build list that my wife seems to keep growing for me.  How did you attach the back pieces?  In the original design it showed pocket holes, but I don't see any on your work.  Thanks for the help.

Tim

2x4 Banquette Seat

Submitted by boyledover on Sat, 01/05/2013 - 16:47

I have been wanting a banquette for years and when I spied Ana's version in the post about Grace's birthday party, I knew I could do it. I waited for the plans, and yesterday, I got out the tools and in 6 hours (real time - including cooking meals for kids, potty breaks, and life in general) I had my bench done.

I am so pleased with it. I had all the fabric on hand already, and was able to buy batting, foam and pillow forms all 50% off at Joann's, plus 2 zippers for the blue cushions. The woman who was cutting my foam asked me what I was making, and I told her I was building an upholstered bench for my dining room. She said "wouldn't it be less trouble to just buy one already made?" Clearly she has no idea how much this would have cost me. As it stands, I had the lumber and fabric on hand, so my total purchase price was just over $95.00. I would estimate the cost to build to be about $200.00 for everything, depending on how expensive your fabric is.

I love to sew, so I had no problem with the fabric portion of the project, though I did as Ana did and did not upholster the back of the bench. Instead of adding a piece of fabric across the back of the frame, I extended the side fabric by about 6 inches on each side and stapled it to the back. I hope that makes sense. I used a metal cleat to hold the seat back in place. I also used 3 L-brackets to attach the bottom to the frame. I think people will slide into their seat and I didn't want the seat cushion to move.

Not bad for a few hours work!

This project would be an easy starter project for building, though it is a little more advanced when you factor in the sewing. Here is the tutorial I used for the toss pillow cushions: http://sewmamasew.com/blog2/2011/02/add-a-zipper-to-your-pillow/, and here is another from the same blogger for boxed cushion covers (just leave the bottom off of yours for this project, since it will be stapled to the plywood, skip the zipper and handle, and add piping if you want to fancy your cushion up): http://sewmamasew.com/blog2/2008/07/summer-sewing-perfectly-portable-cu…

Thanks Ana for the constant inspiration!

Built from Plan(s)
Estimated Cost
$200.00
Estimated Time Investment
Afternoon Project (3-6 Hours)
Recommended Skill Level
Beginner

Indoor Garden Boxes for Science Class

Submitted by Anonymous (not verified) on Thu, 02/16/2017 - 19:12

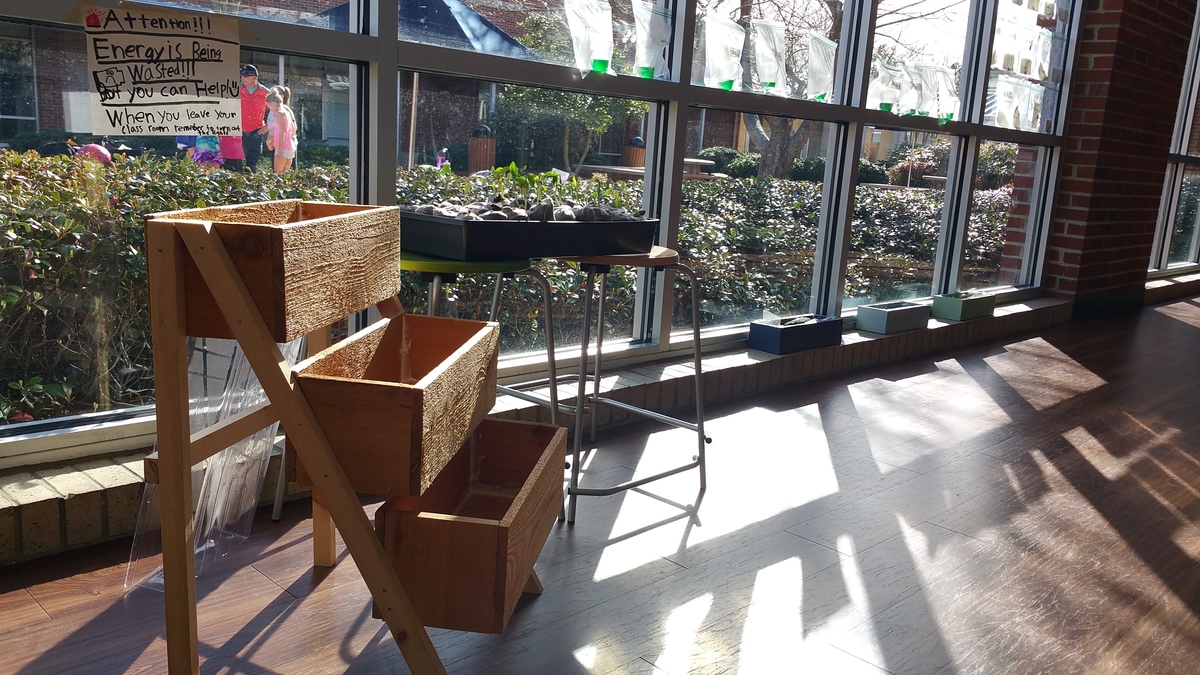
After doing some string art with the Kindergarteners in my class, the were anxious to pound some nails in "all the way." I remembered seeing this plan before on Ana's website, and earlier in the week our science teacher had been talking to the Kindergarteners about how the seeds they had planted were starting to get too big for their containers. The students themselves suggested a bigger box to put them in, and just like that... our next project was born!


The students did every part of this build, except for the cutting of the boards. They loved it, and couldn't believe how quickly they put it together. Here are a couple of tweets to show these little #elemakers at work!

https://twitter.com/JimTiffinJr/status/830163344057327617

https://twitter.com/JimTiffinJr/status/830164086847655936

https://twitter.com/JimTiffinJr/status/830164527304077313


Thanks for sharing some very simple projects and plans that even the littlest of builders can do!

Estimated Time Investment
An Hour or Two (0-2 Hours)
Finish Used
none
Recommended Skill Level
Starter Project

Shop Cart with inserts

Submitted by adecesare4 on Mon, 02/25/2013 - 08:05

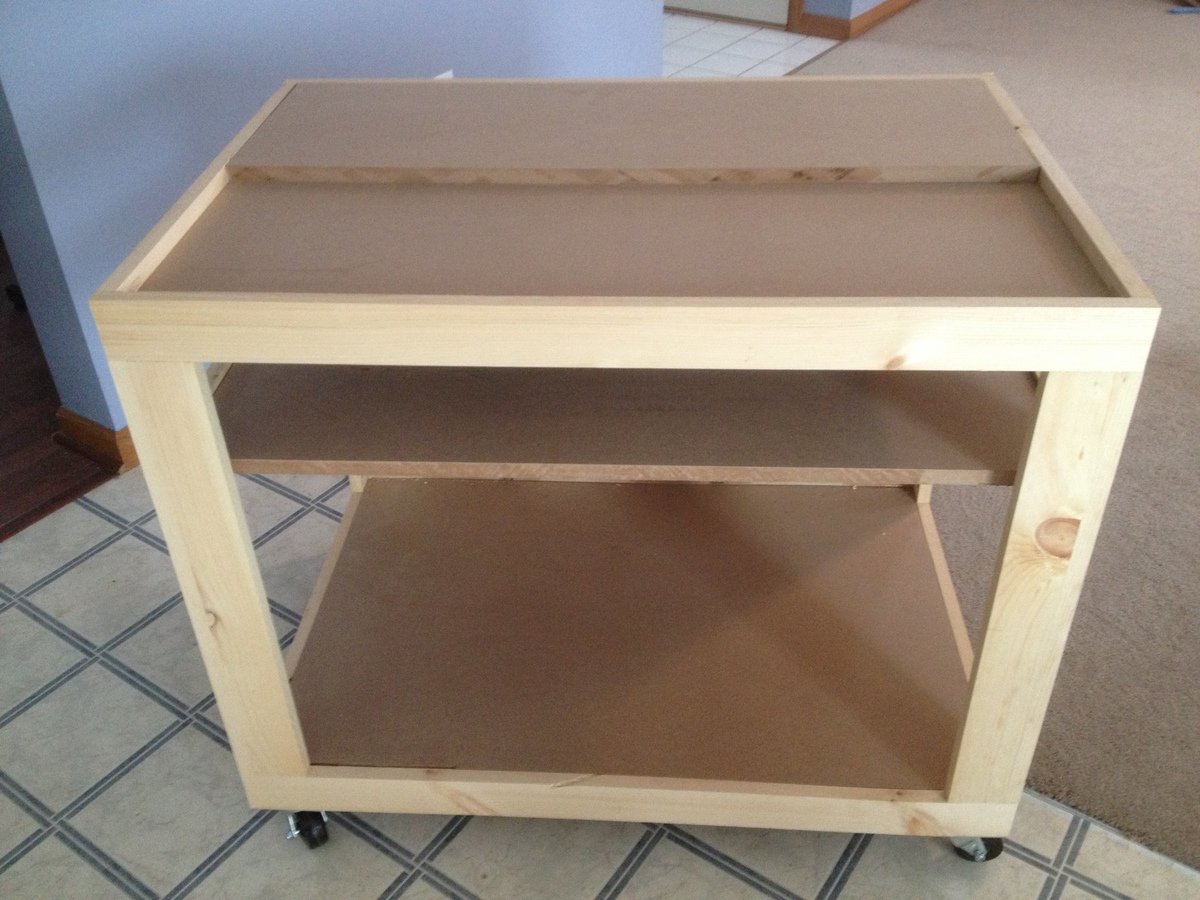
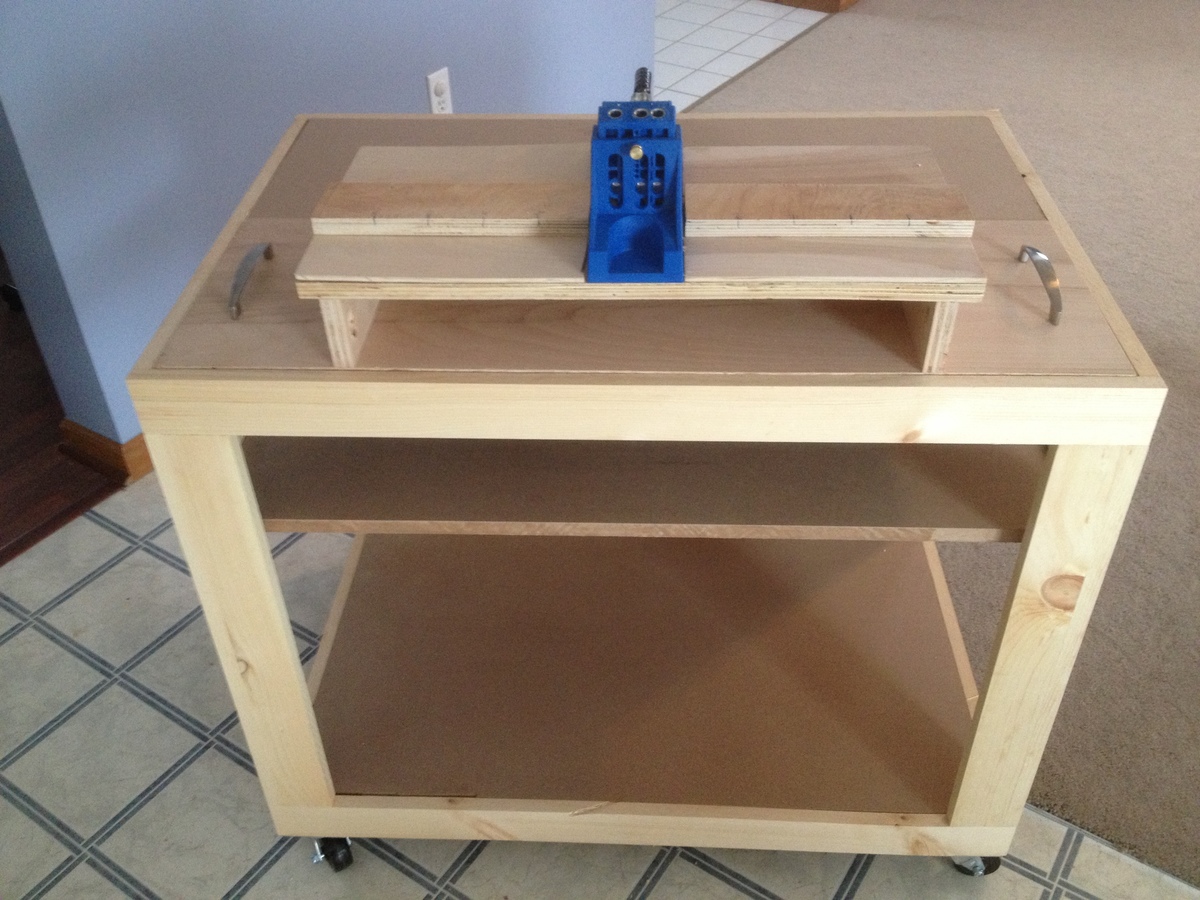
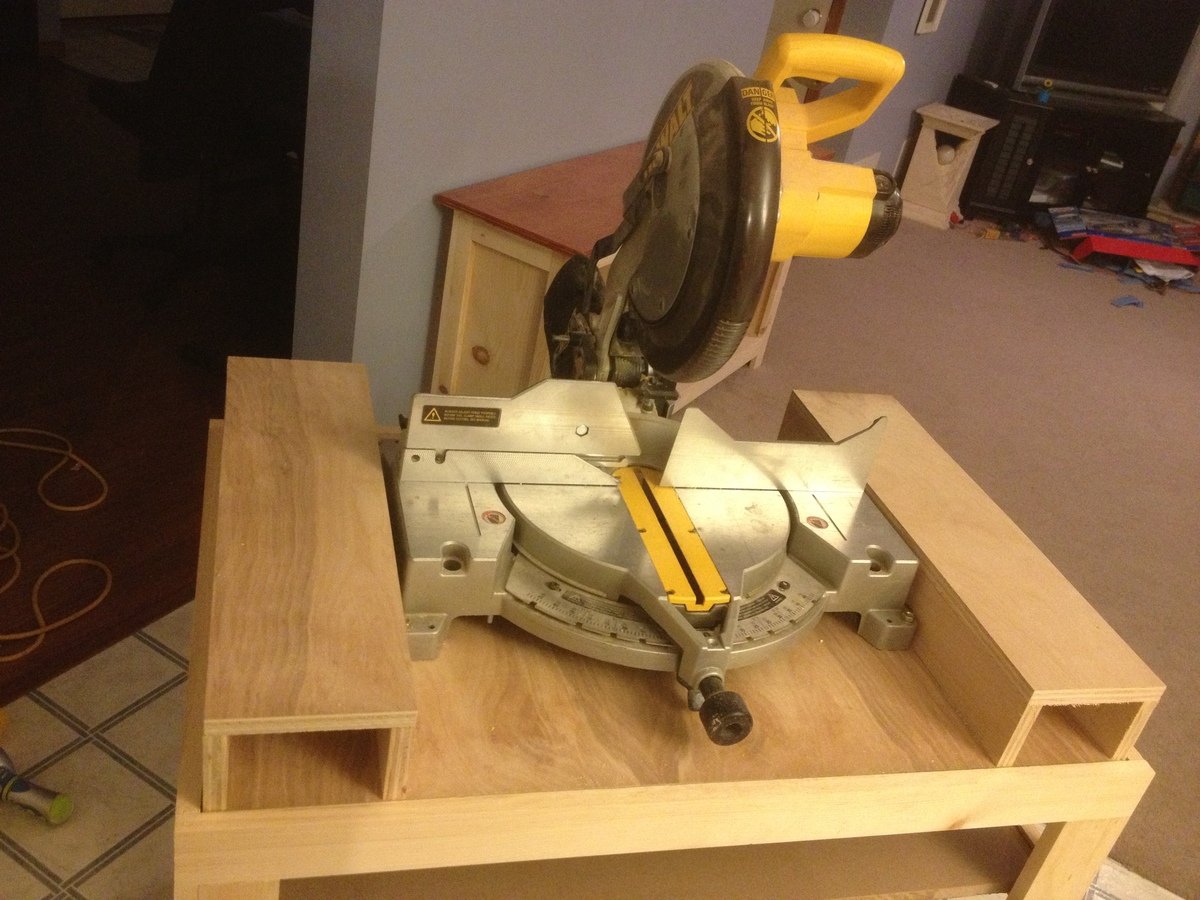
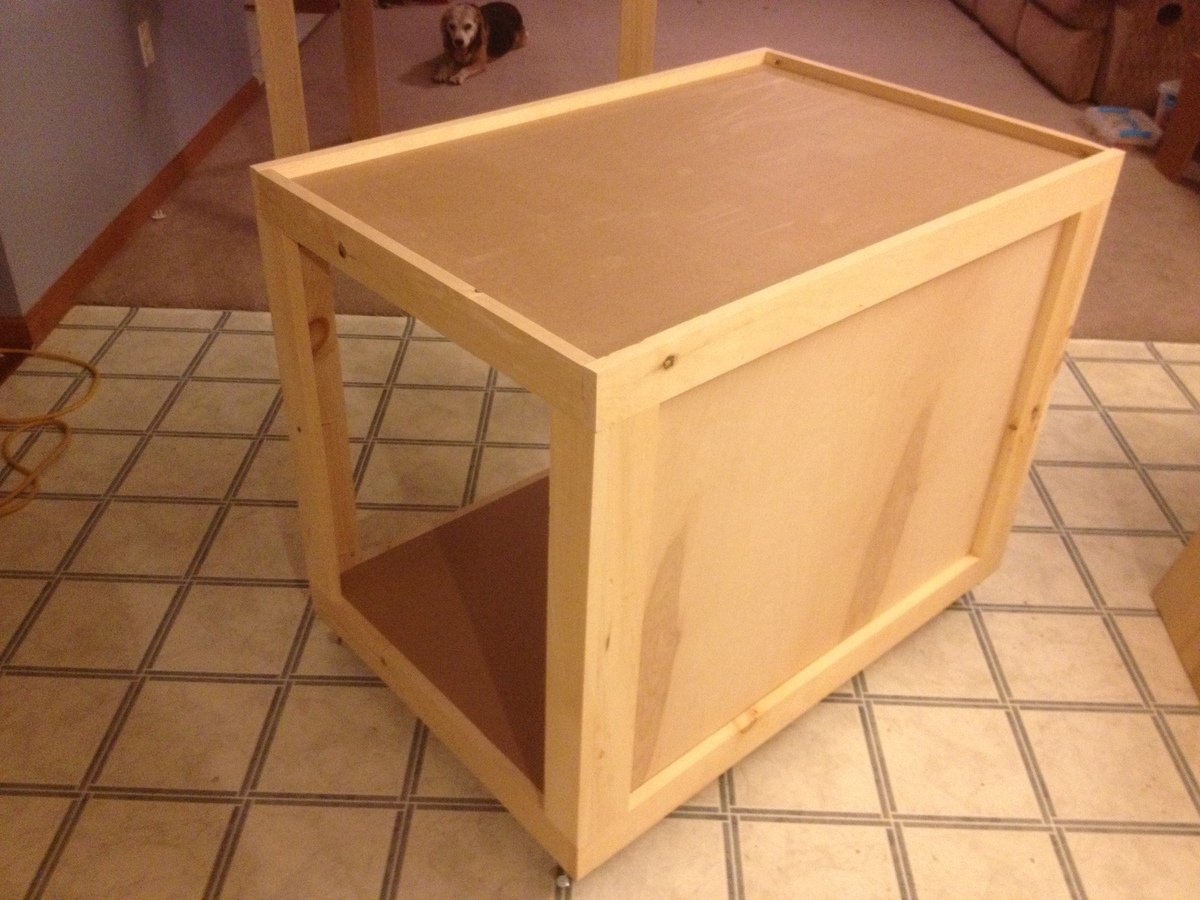
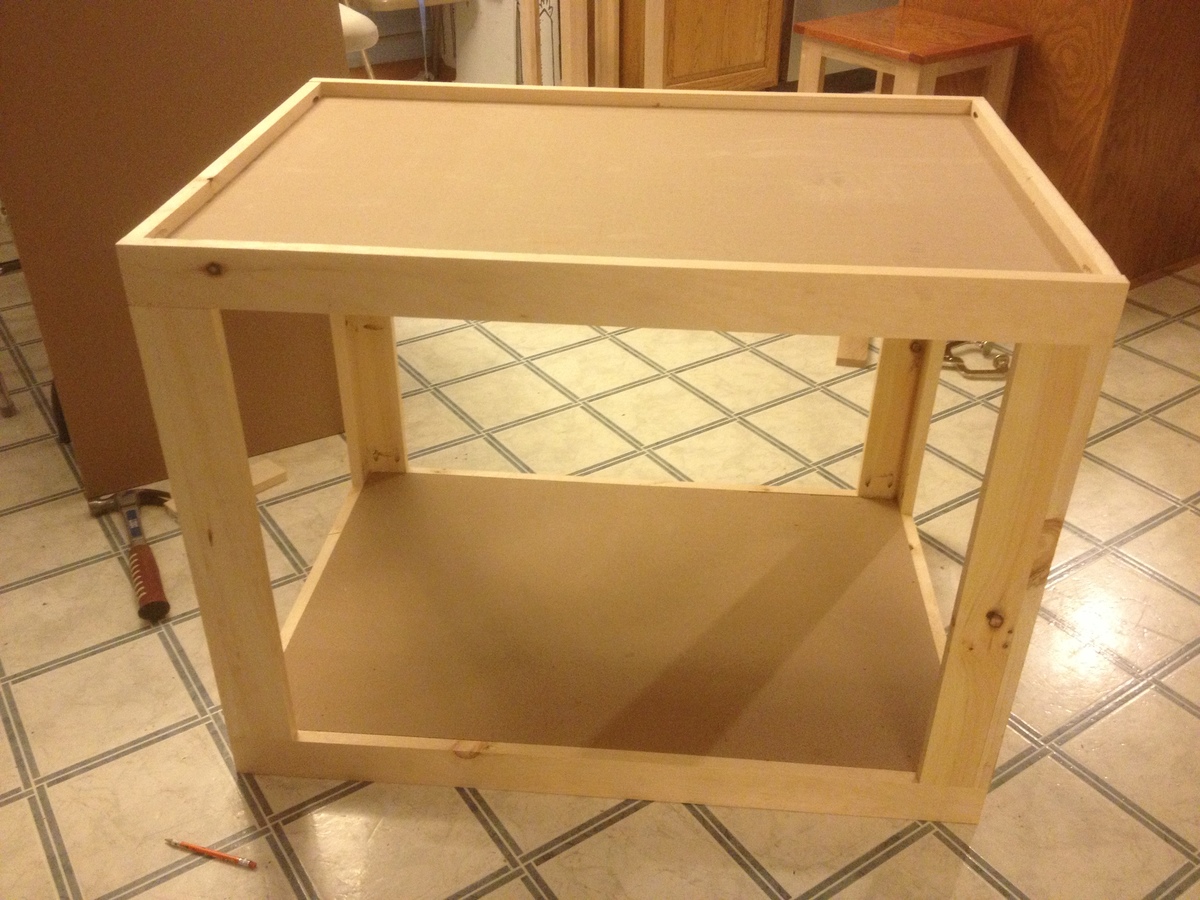
After browsing through forums I came up with this idea...a versatile shop cart that I can insert my kreg jig and miter saw into...a stable base at a great working height.

I created this design in sketchup as well and will work on posting it as a plan if people are interested.

basically, the top is inset 3/4" to make room for the inserts. I created a work table insert (well two I split in half, so the kreg insert can take up the front half if I wanted to insert that.

Then I made the kreg jig insert

and the Miter saw insert

let me tell you...this came in handy right away as each of those inserts I made can be used without the cart as well and both inserts work tremendously!

I am really really happy with this and it is so useful. Started making the loft bed playhouse last night and the miter say and kreg jig were extremely useful at a good working height.

Estimated Time Investment
Weekend Project (10-20 Hours)
Recommended Skill Level
Intermediate

Comments

adecesare4

Mon, 02/25/2013 - 08:07

My intention for the top shelf is to hold small tools that I am working with while using the cart and the bottom is to store the cut pieces of lumber I am using for the project

davidmauer14

Mon, 02/25/2013 - 10:33

Please post the plans. This thing would make a great shop cart or miter saw stand.
I have one other suggestion: you could also use it as a small assembly table. You have a 3/4" inset. Stick a piece of plywood inside the exactly fits inside. Then screw a larger piece of plywood to that one. (DON"T screw it into the top of the cart.) The larger sheet of plywood would overhand the shop cart edges by maybe a foot on each size, so you'd have a "small" mobile assembly table that might 3x4 feet or 3x5 feet across at the top.

rosenzzzz

Mon, 02/25/2013 - 11:20

I would also like to see the plans for this cart. It looks nice and compact and versatile.

adecesare4

Mon, 02/25/2013 - 12:10

@ david...I did make a workbench type top for it as well, just didn't post a pic of that.

I will get the plans together for this then and post it for everyone...I enjoy sharing with everyone so we all can learn and make quality things. I'll start working on that tonight.

Sewing Caddie

Submitted by JoeCandy11 on Sun, 01/04/2015 - 22:25

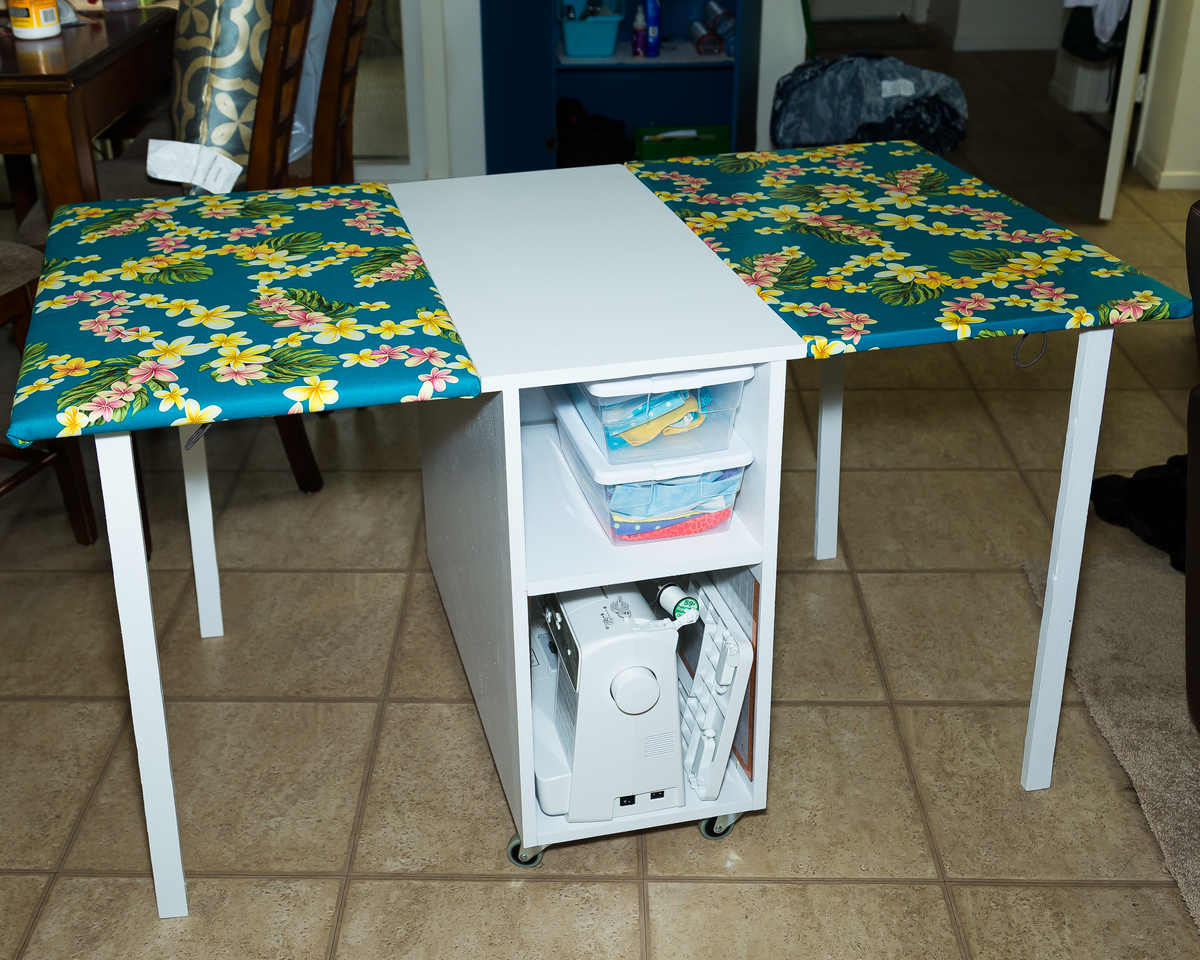
Thanks for the inspiration!  This was my first full blown creation and my wife loves it.  Cannot wait to do more!

Built from Plan(s)
Estimated Cost
$50 for birch plywood
$30 for wheels, hinges, paint, and accessories.
Estimated Time Investment
Weekend Project (10-20 Hours)
Finish Used
White paint with primer
Recommended Skill Level
Beginner

Convertible Shoe Rack

Submitted by tfox on Fri, 03/01/2013 - 15:41

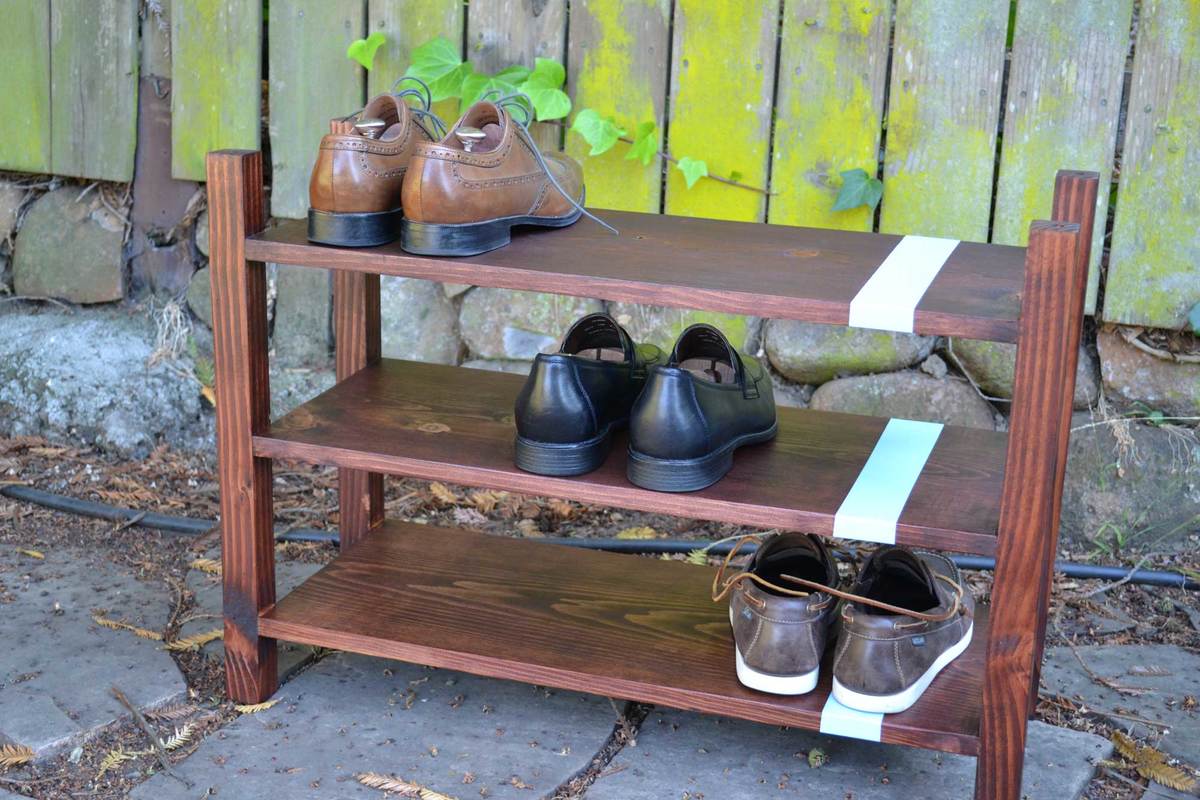
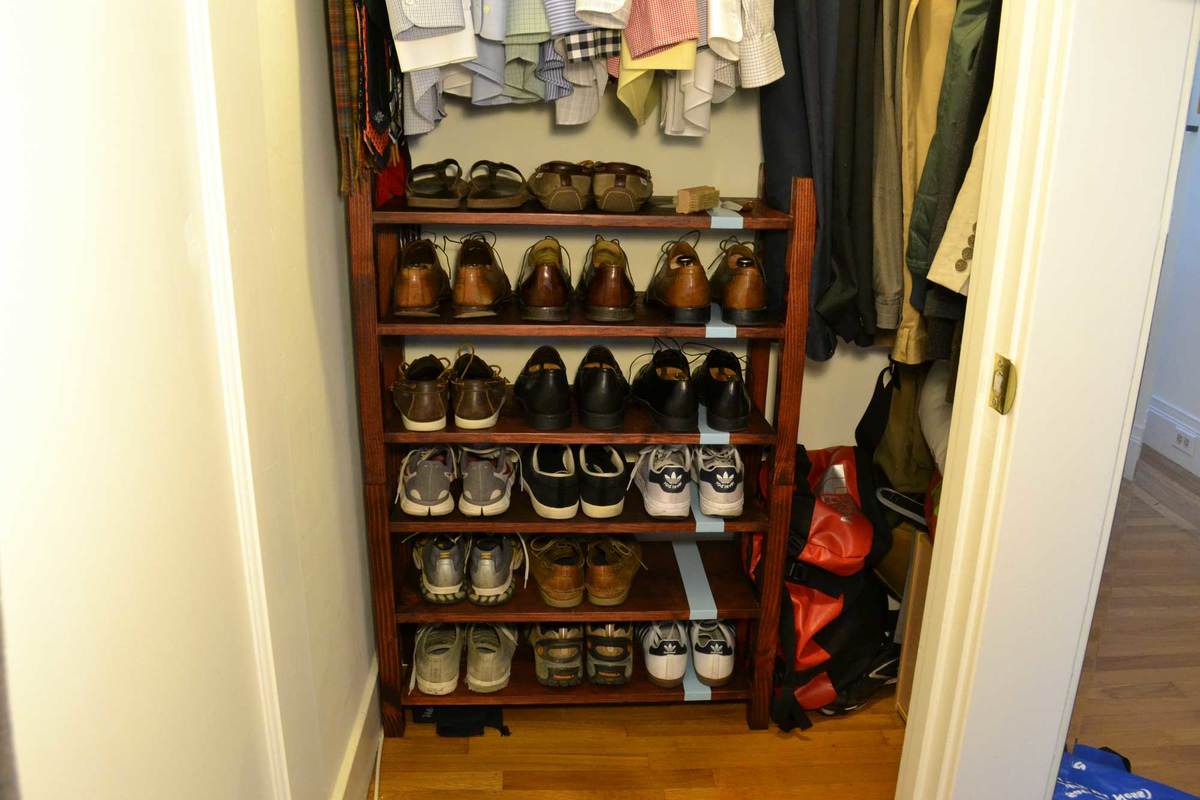
A few weeks ago I was getting ready for work and was excavating my shoe collection in search of my brown wingtips. Although I had managed to curate a pretty respectable collection of dress shirts, slacks, suits, and shoes, I still relied on a cheap coated wire shoe rack that could likely double as a grilling grate for my bbq. This was amplified by the fact that is was meant for about half the number of shoes I was using it for. I know, first world problems. It’s tough out there. So, I decided to build a two piece unit that I could stack atop one another or use it side by side in the future.

Estimated Cost
$50
Estimated Time Investment
Afternoon Project (3-6 Hours)
Finish Used
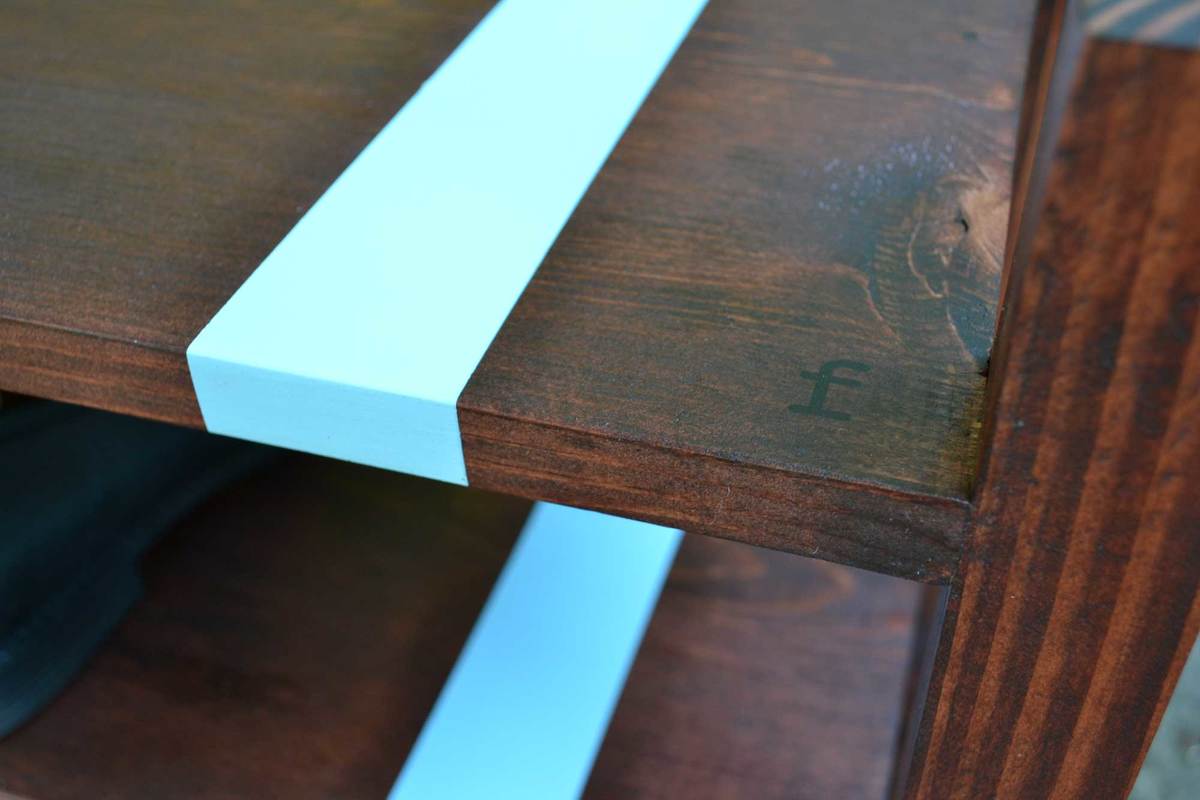
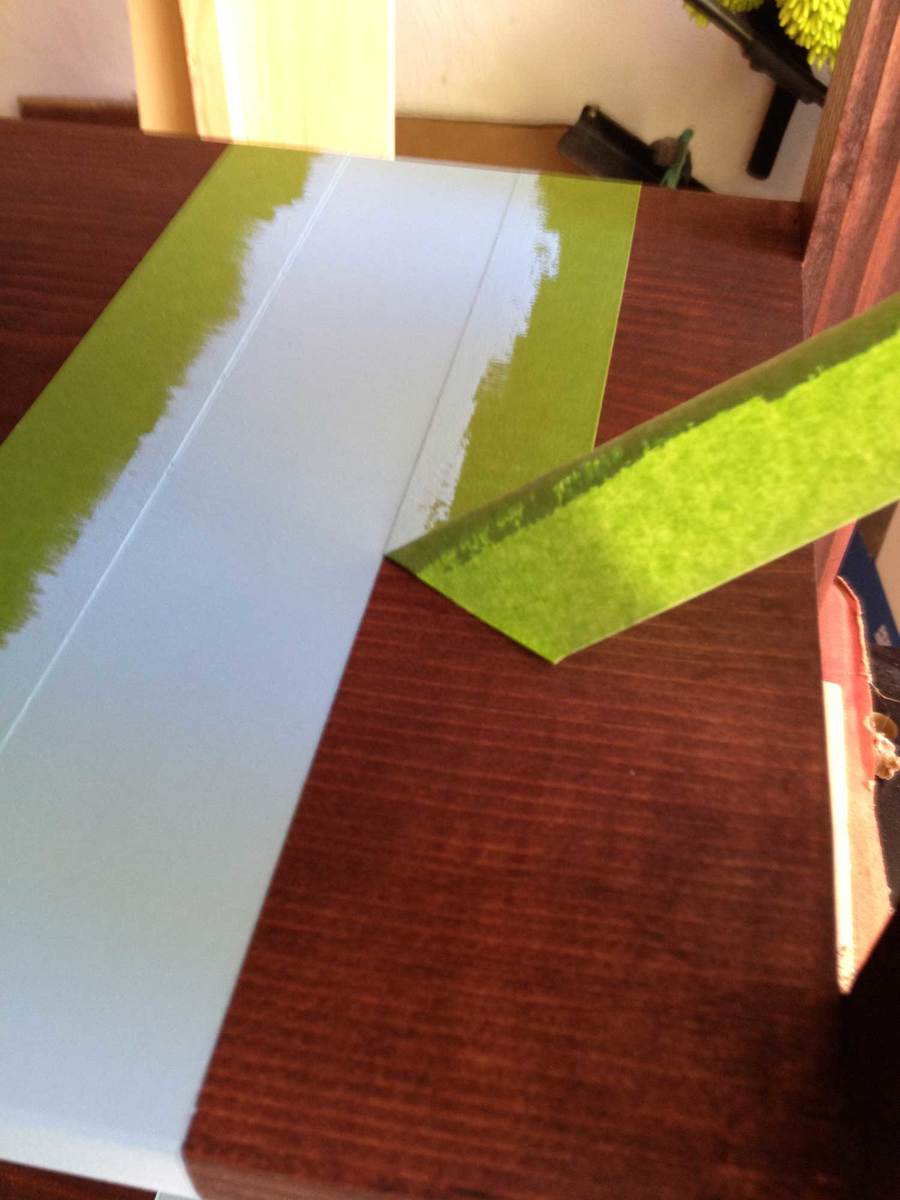
Minwax Red Mahogany Stain with Robin's Egg Blue stripe (in eggshell finish). Finished with three coats of Minwax Wipe-On Poly.
Recommended Skill Level
Beginner

Comments

zendup

Tue, 03/05/2013 - 09:12

That looks great! I need something like this in my front entry closet. I could probably use some in the master closet too. Thanks for posting!

Family Tree Nesting Birds sign

Hello There! 

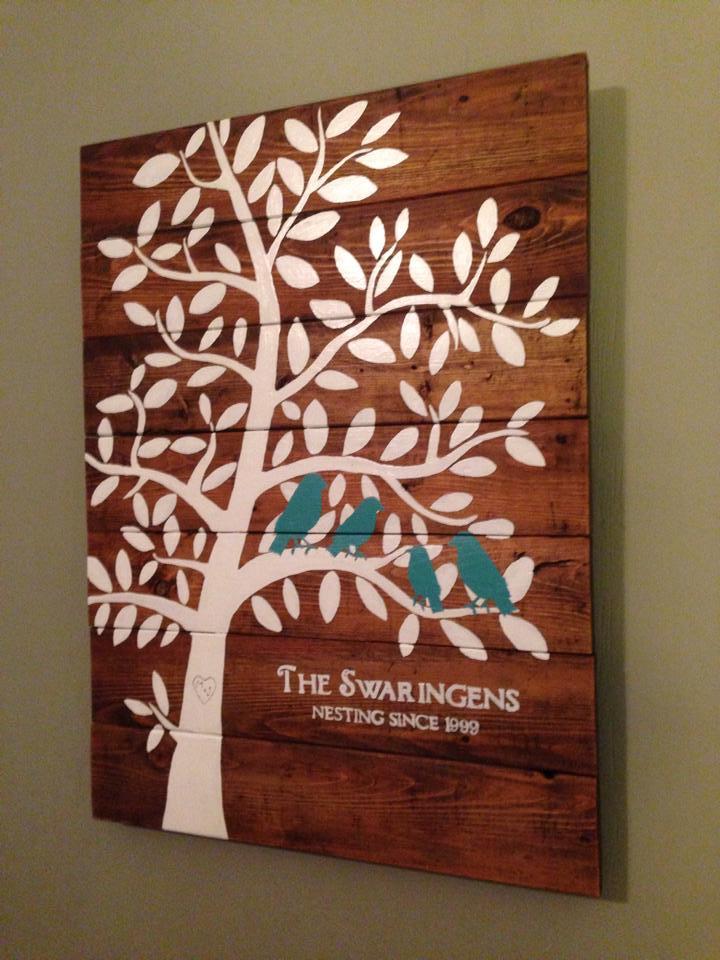
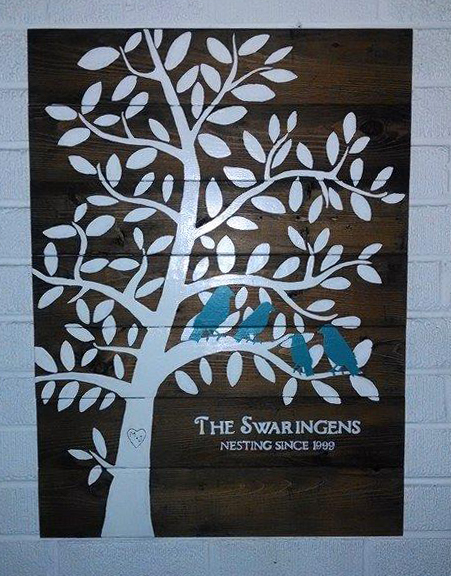
This was my attempt at the Family Tree Nesting Birds sign that Ana made. I ended up painting everything instead of doing the foam for the leaves, but I just love how it turned out! I used old pallet wood instead of new lumber and gave it a really good sanding before staining and painting.

Gave it to my brother and sister-in-law for Christmas, and it was a huge hit!

Thanks Ana!

Built from Plan(s)
Estimated Cost
Free Pallets and already had the paint!
Estimated Time Investment
Day Project (6-9 Hours)
Finish Used
Used Minwax stain for the base, then used primer and latex for the tree and birds.
Recommended Skill Level
Beginner

Loving These Shelves

Submitted by woody311 on Thu, 01/15/2015 - 18:51

I changed the plans a little bit to add on the extra shelf on top as well as making the shelves an inch narrower than the plans. The project was actually pretty easy and really only took me about a days worth of work.

Estimated Cost
$160
Estimated Time Investment
Day Project (6-9 Hours)
Finish Used
None
Recommended Skill Level
Beginner

Comments

Kerplunk Game for Outdoors

Submitted by thediyplan on Thu, 03/18/2021 - 13:54

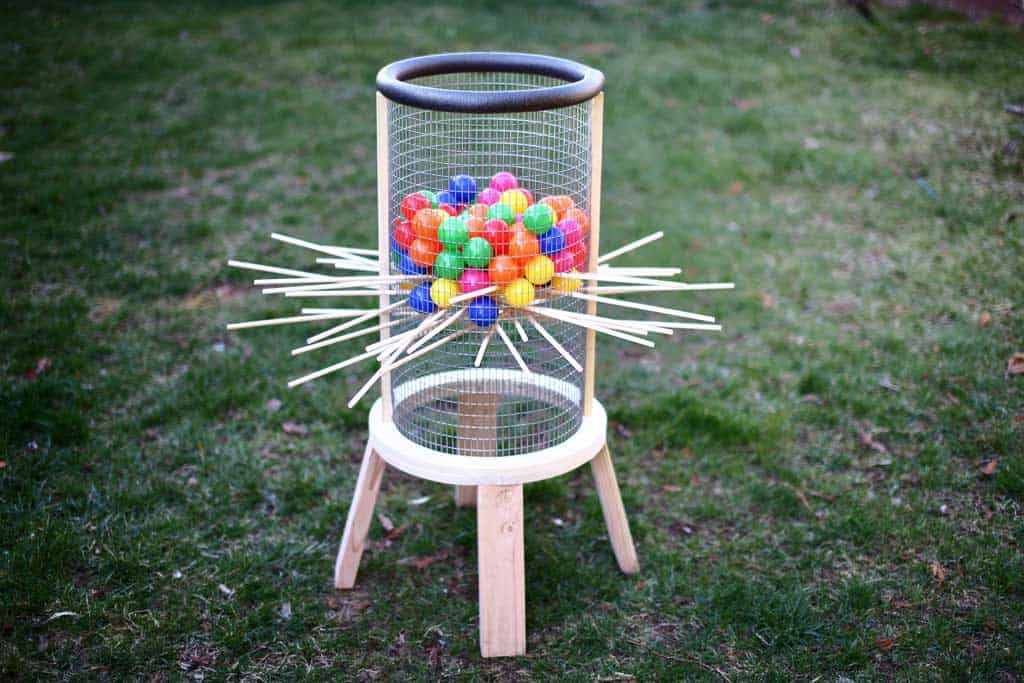
Here’s another fun game to play for all ages, especially for kids. It’s called a Kerplunk Game. The original Kerplunk game is small, made from plastic, and is mainly for indoor use. But to make it more interesting and to encourage kids to spend more time outdoors, I’ve built a Giant DIY Kerplunk Game with a wire mesh screen. This is a great backyard game for any occasion or a party.

See my website for additional pictures and how I've built it, TheDIYPlan.com

Estimated Cost
$70
Estimated Time Investment
Afternoon Project (3-6 Hours)
Recommended Skill Level
Intermediate

Comments

Potting Bench

Submitted by Anonymous (not verified) on Sun, 04/11/2021 - 13:47

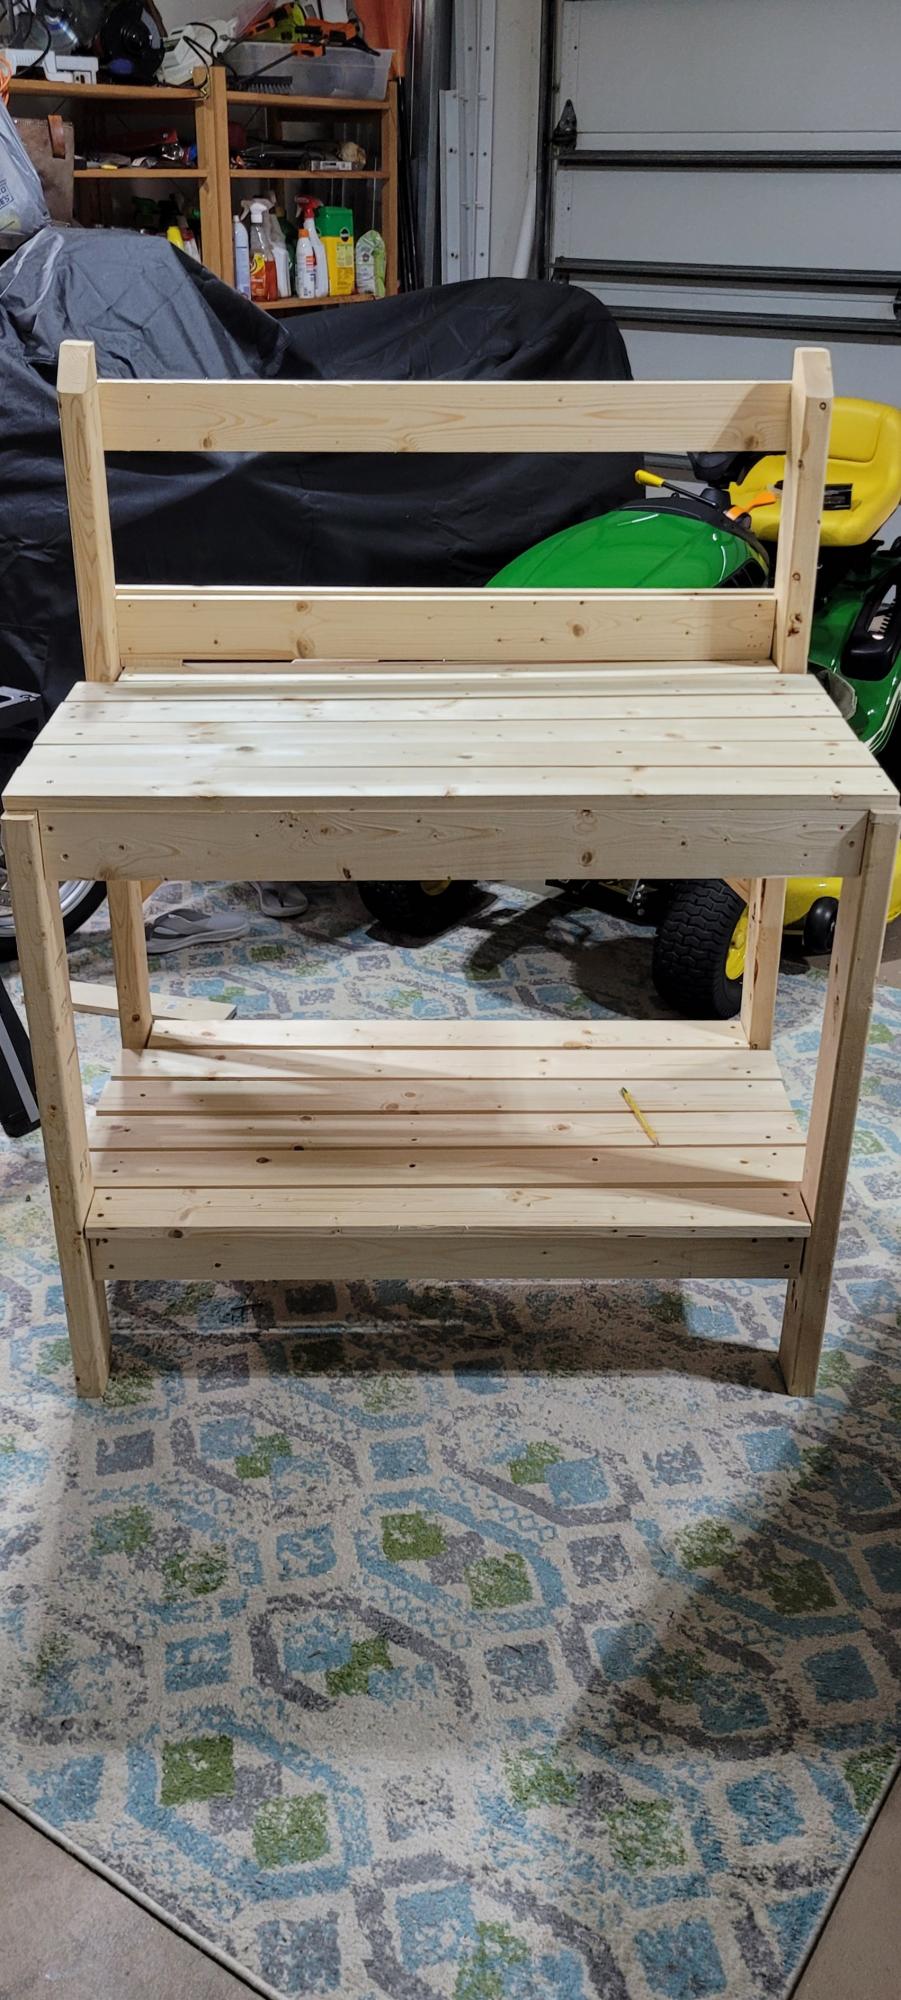
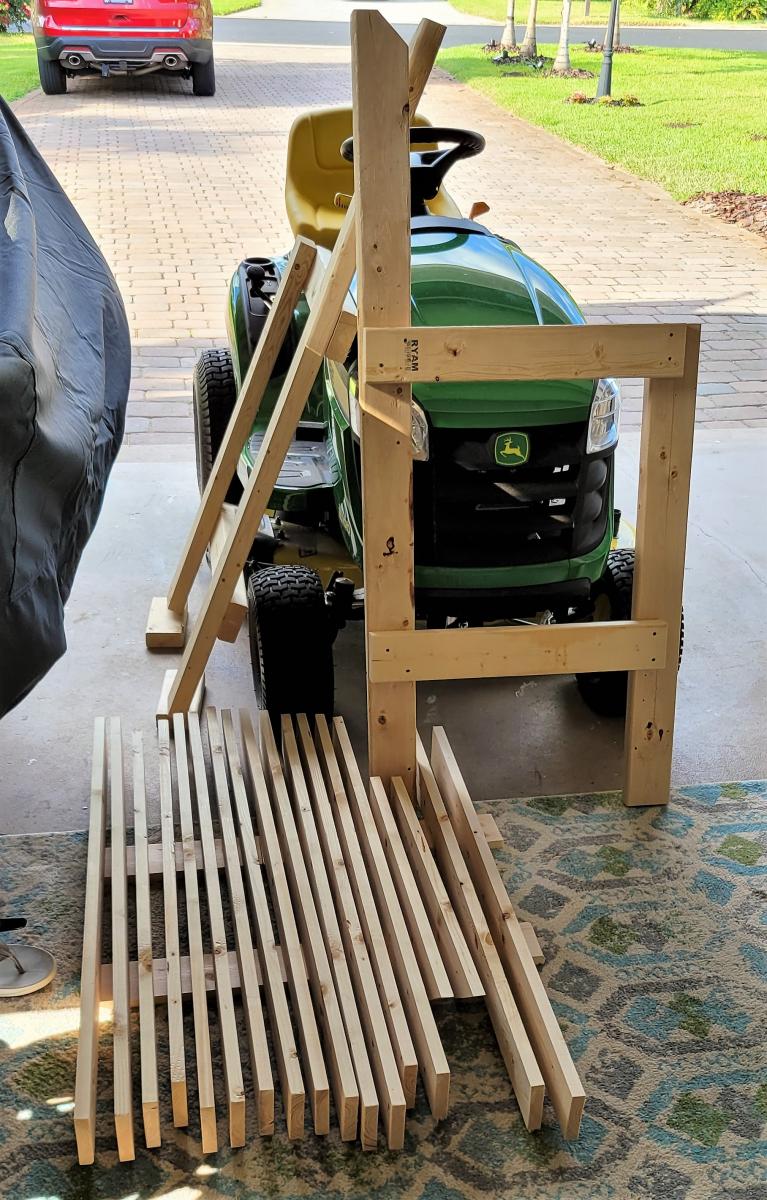
I slightly modified the project to suit my wife's request. One key note: Make sure the main frame pieces mirror each other. I missed that and had two identical pieces outlined in Step 1, versus where the inside aprons actually face each other to allow for the top and bottom rails to be secured to the frame.
Thompson's Clear stain protects the wood; one coat after cutting the pieces and a second one for good measure after assembly.

Estimated Cost
$50.00
Estimated Time Investment
Weekend Project (10-20 Hours)
Recommended Skill Level
Beginner

Comments

Recycling Center

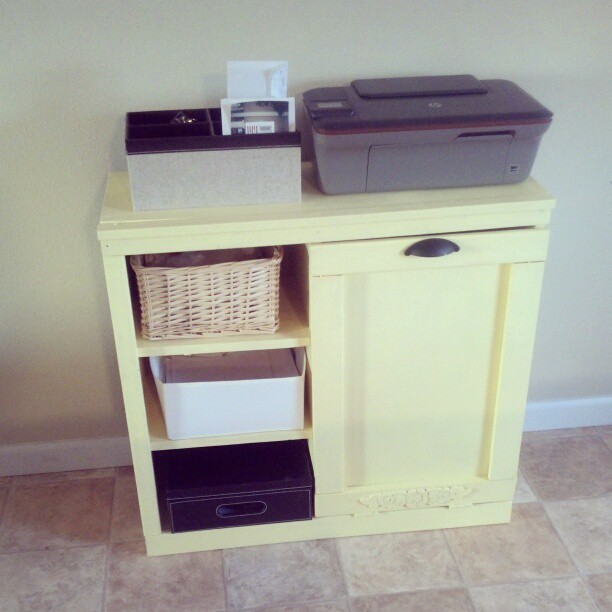
Well...this was pretty much all done by me.

I am really not liking how many bad boards there are at the store. It takes forever to find a decent board. I had some of my x12s measuring closer to 11 (yes I know they aren't 12 inches).

The door is a little wonky but if it bothers me too much I will just replace it with a curtain on a tension rod.

I love the yellow and I am very proud of myself :)

I didn't have a Kreg jig (too expensive for us right now) but it would definitely have been helpful...

Estimated Cost
100
Estimated Time Investment
Day Project (6-9 Hours)
Finish Used
I can't remember the exact color...yellow in Valspar satin.

Handpainted with brush
Recommended Skill Level
Intermediate

Comments

tommirhea

Sun, 03/31/2013 - 07:44

I run into that problem as well!!! And with two kiddos at my hip it gets more annoying to sift thru 5 boards before a good one comes up. But it's all worth it. I made this as well and and the magnetic closure made all the difference. This is really nice by the way. The color is fab!

Flipped Cedar Planter

Submitted by Marrero44 on Tue, 05/11/2021 - 04:20

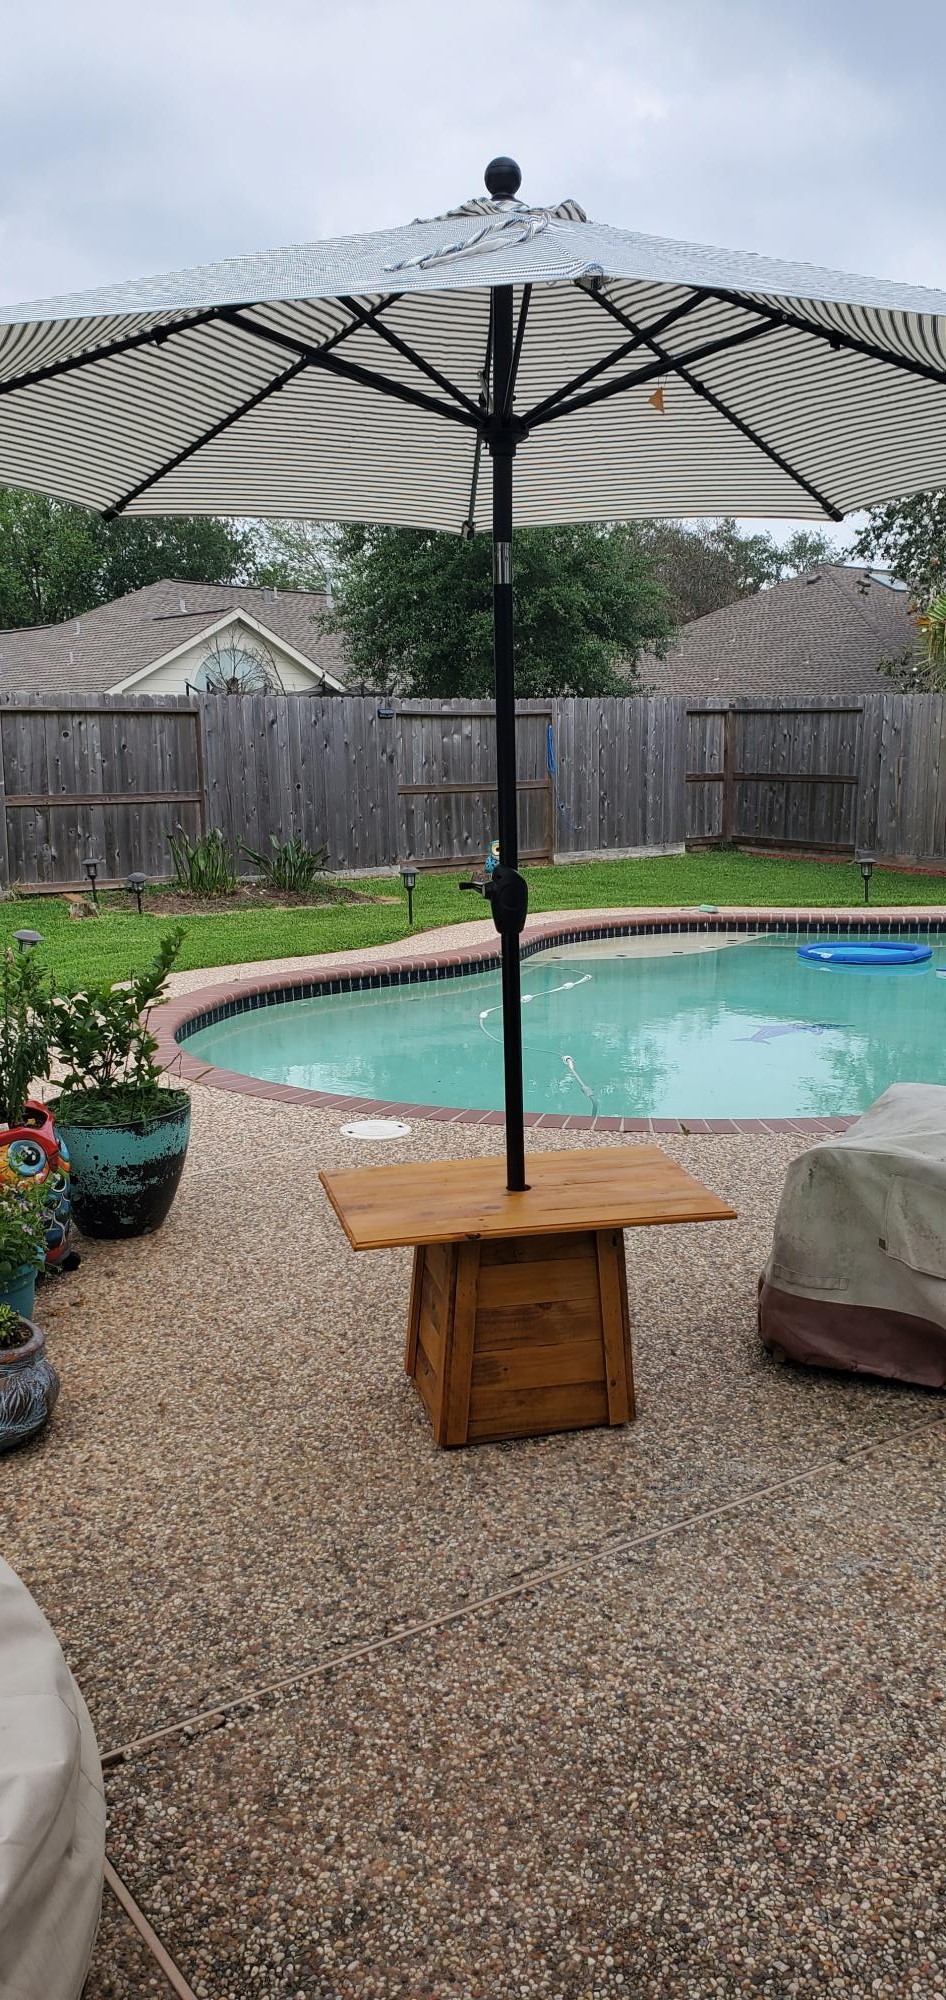
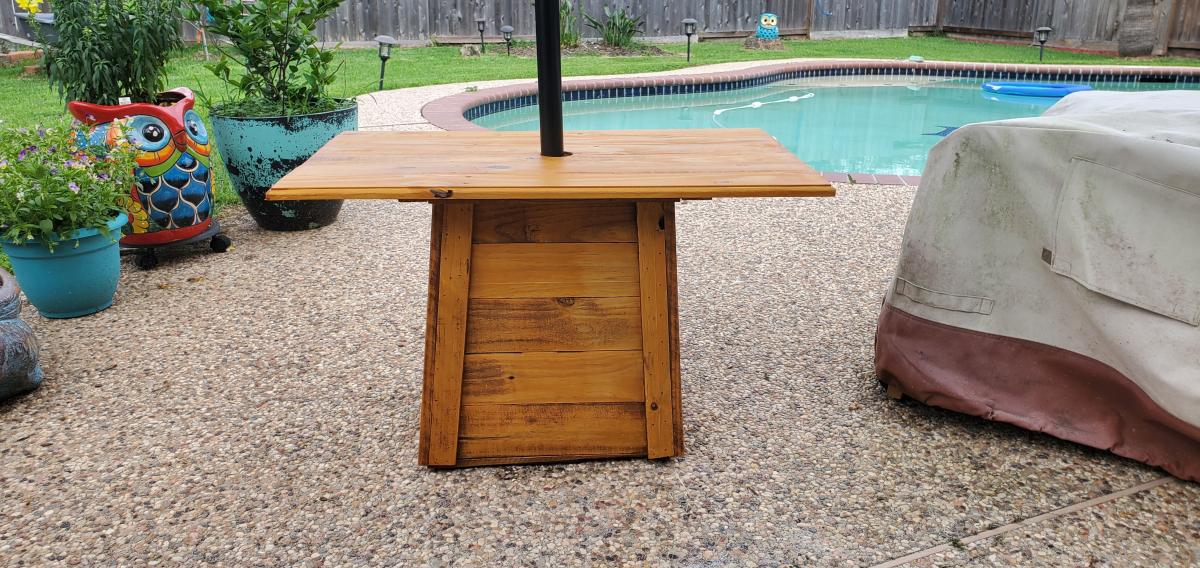
I used the Ana's Cedar Planter plans and flipped it, placed a bucket with cement inside to support umbrella and made a simple table top for drinks. Hope you like it ✌🏾

Built from Plan(s)
Estimated Time Investment
Day Project (6-9 Hours)
Recommended Skill Level
Beginner

Patio table with built-in cooler

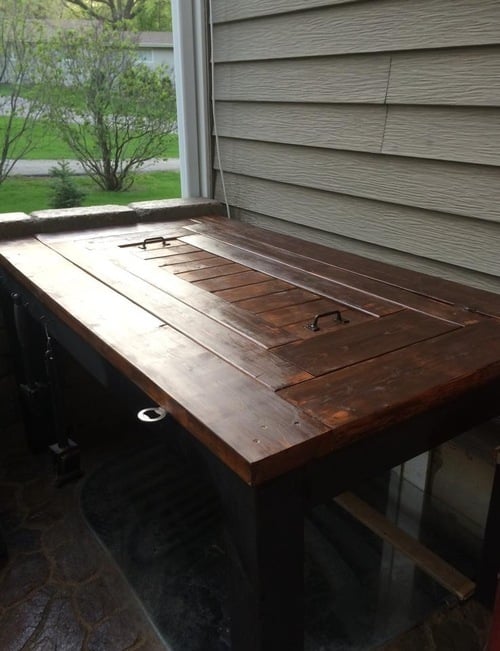
My husband wanted a table next to the grill and he wasn't going to build one after working on our deck for 2 weeks. I thought to myself maybe I could build one that had a built-in cooler. Of course, my source of inspiration came from Ana White. I had to detour a little from her exact plan to accommodate our need. We had a basement egress window coming right at that corner near the grill so we would need a table that cover that area perfectly to make a good use of space, hence the measurements and plan had to be altered a bit. Ana White’s plan has 2 built-ins, ours has only 1. It turned out great and we enjoyed it ever since. Now if only the weather just got warmer!

Estimated Time Investment
Weekend Project (10-20 Hours)
Finish Used
Dark walnut stain with outdoor poly.
Recommended Skill Level
Beginner

Comments

Rustic Desk

Submitted by frmoody on Sat, 09/11/2021 - 06:10

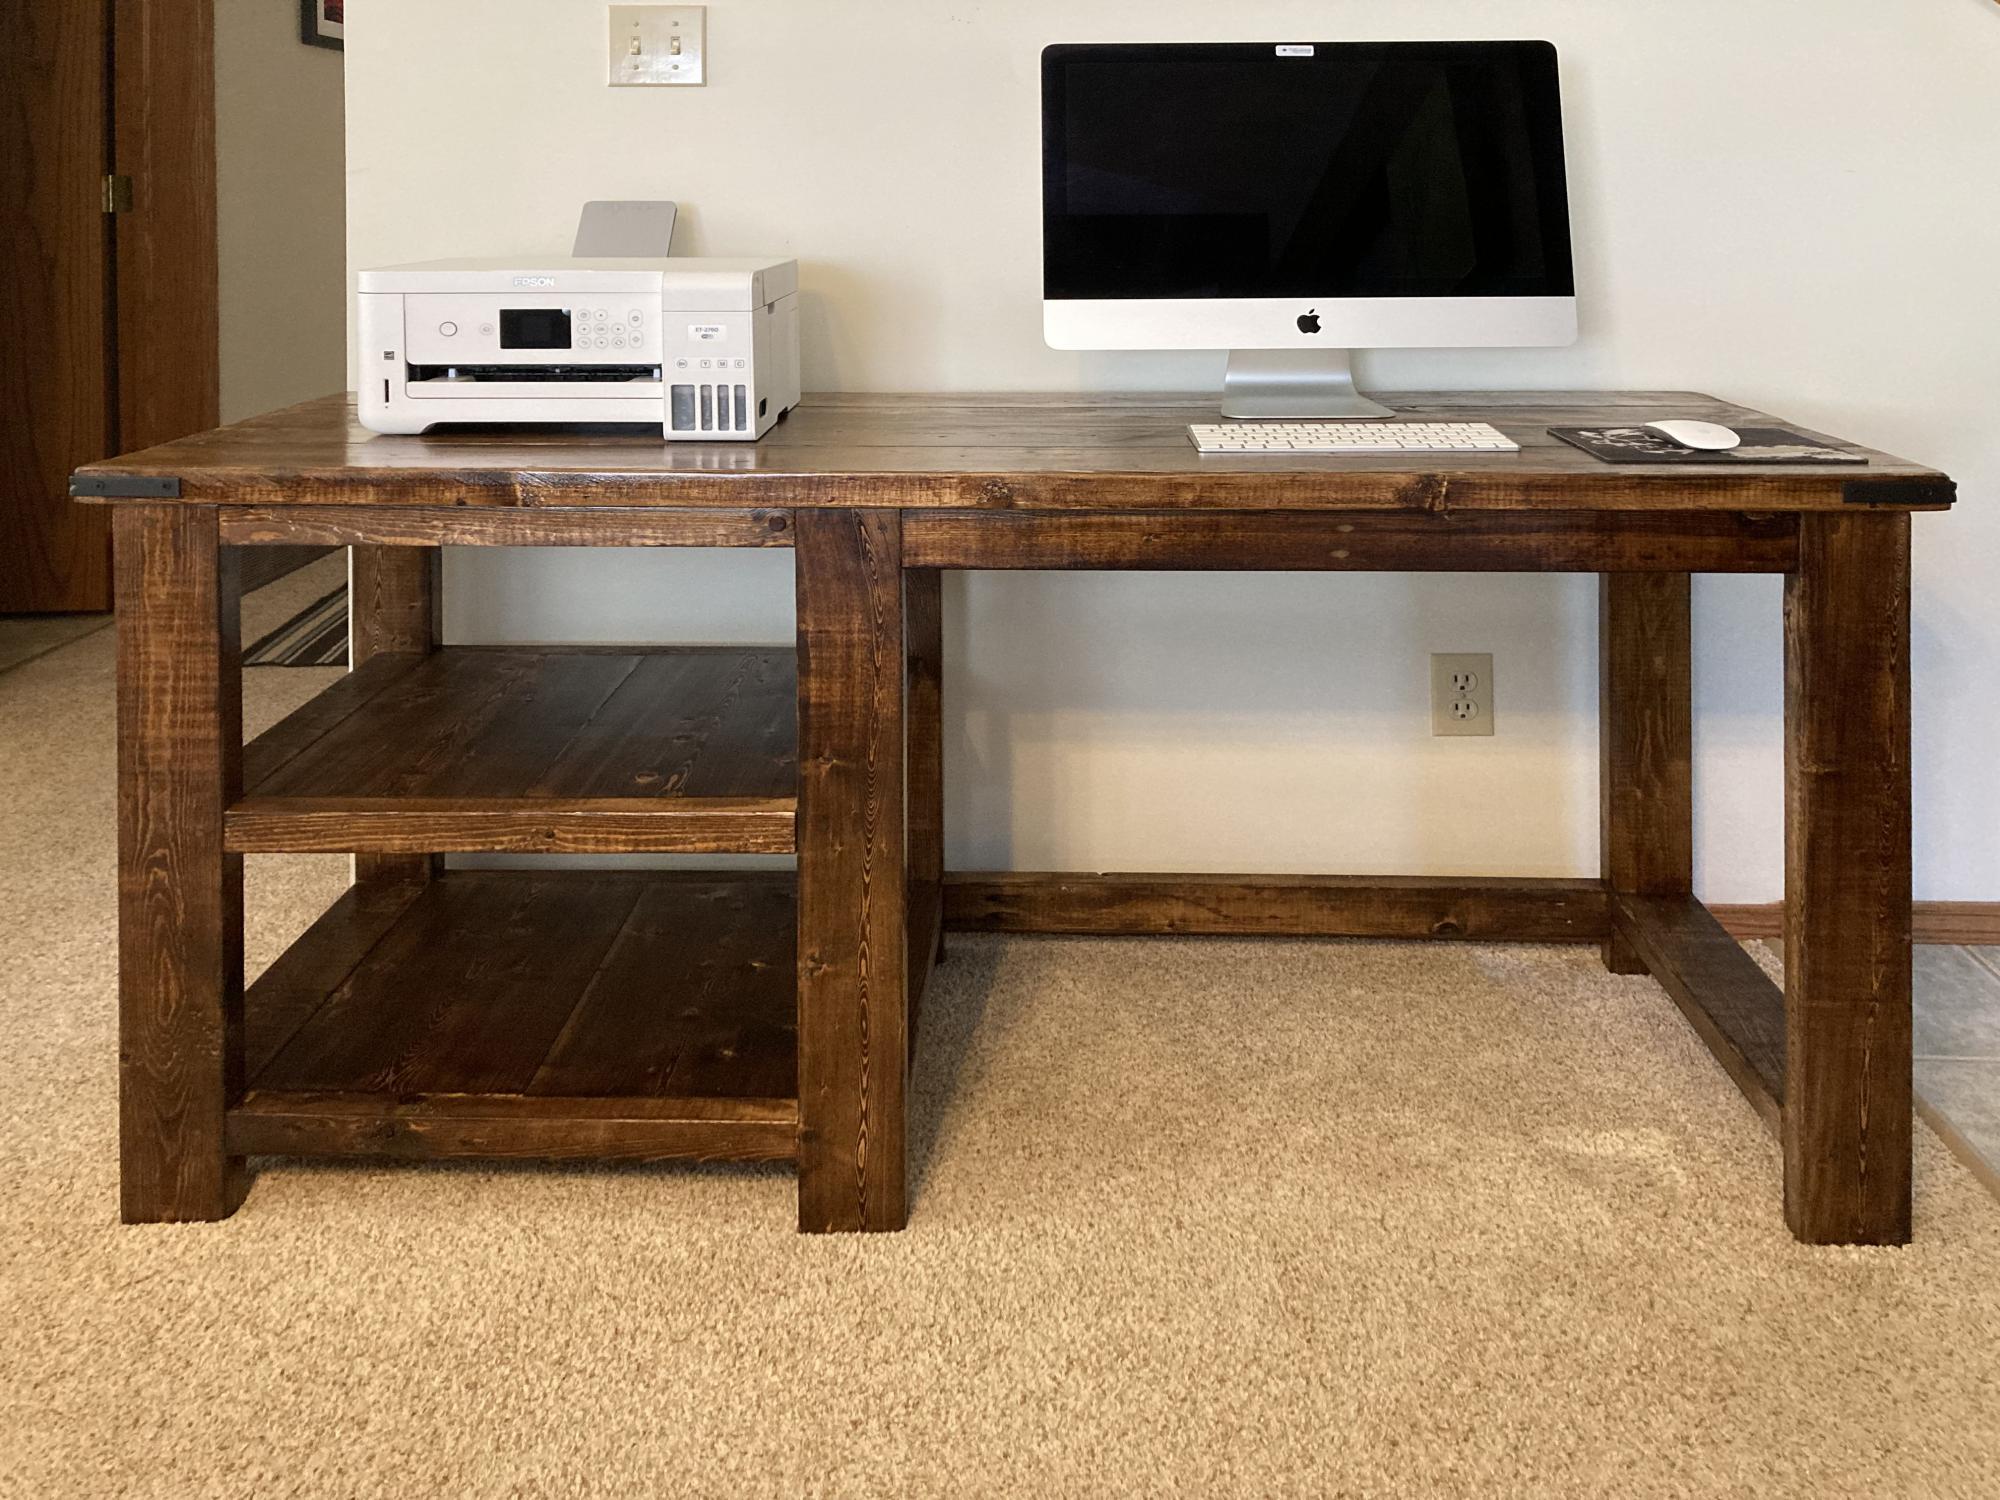
I have build several of these rustic desks. I left the "X" off of this one as I had trouble getting it to fit properly. My last desk I had no issues but not this time. I use MinWax "Provincial" stain followed by three coats of Varathan 3X glossy finish on the top and two everywhere else. I also added a cross piece between the two end sections to better secure the top to.

Built from Plan(s)

Comments

Outdoor Console Table

Submitted by scokenour on Wed, 05/01/2013 - 16:32

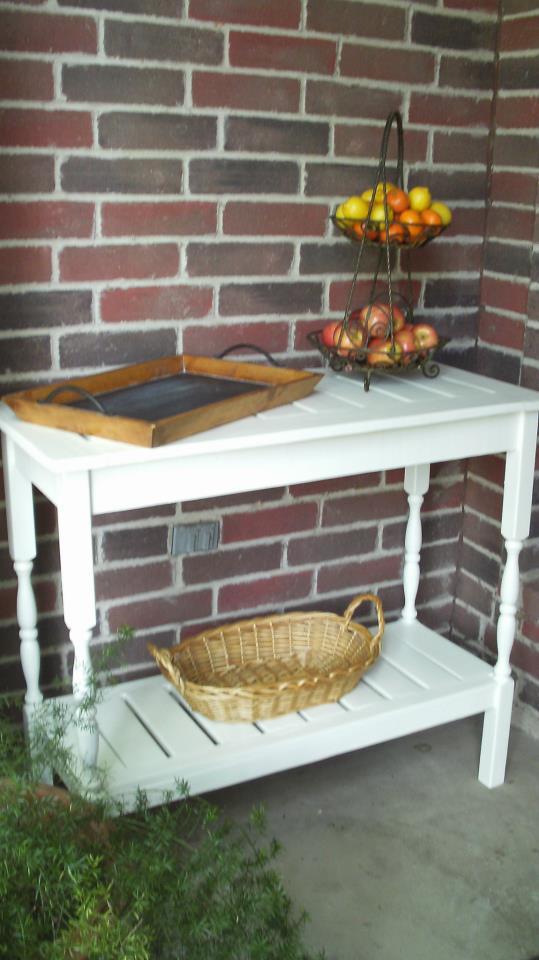
I have a small booth at a local Outdoor Market & a client asked if I had any outdoor tables - she needed some for an upcoming party. I tried convincing her that a potting bench would be perfect (since Ana already had plans for that), but she wanted something a little different. She shared a picture of a "Faraday" console table by Pottery Barn, so I used that as my inspiration. I opted for a counter-height table vs. a table height, but both can be easily achieved using the same size balusters, just cut accordingly. I did have a hard time finding "chunky" balusters with a "flat" section on both the top and bottom. I didn't want to use pre-made legs because they are too pricey. At both Orange and Blue they had "skinny" balusters, but at the Orange near my home I found 1 thicker baluster. I had to go to another store to find more in stock, so supplies may vary in your area. The balusters were less than $3 each. Ana was so kind to create plans and I hope you enjoy your table as much as my client enjoyed hers!

Estimated Cost
$40
Estimated Time Investment
Afternoon Project (3-6 Hours)
Finish Used
exterior grade semi-gloss
Recommended Skill Level
Intermediate

Comments

spiceylg

Thu, 05/02/2013 - 07:31

Really like this and love how you used balusters for legs for added detail.

4x4 Truss beam table and bench

Submitted by Anonymous (not verified) on Mon, 10/04/2021 - 13:42

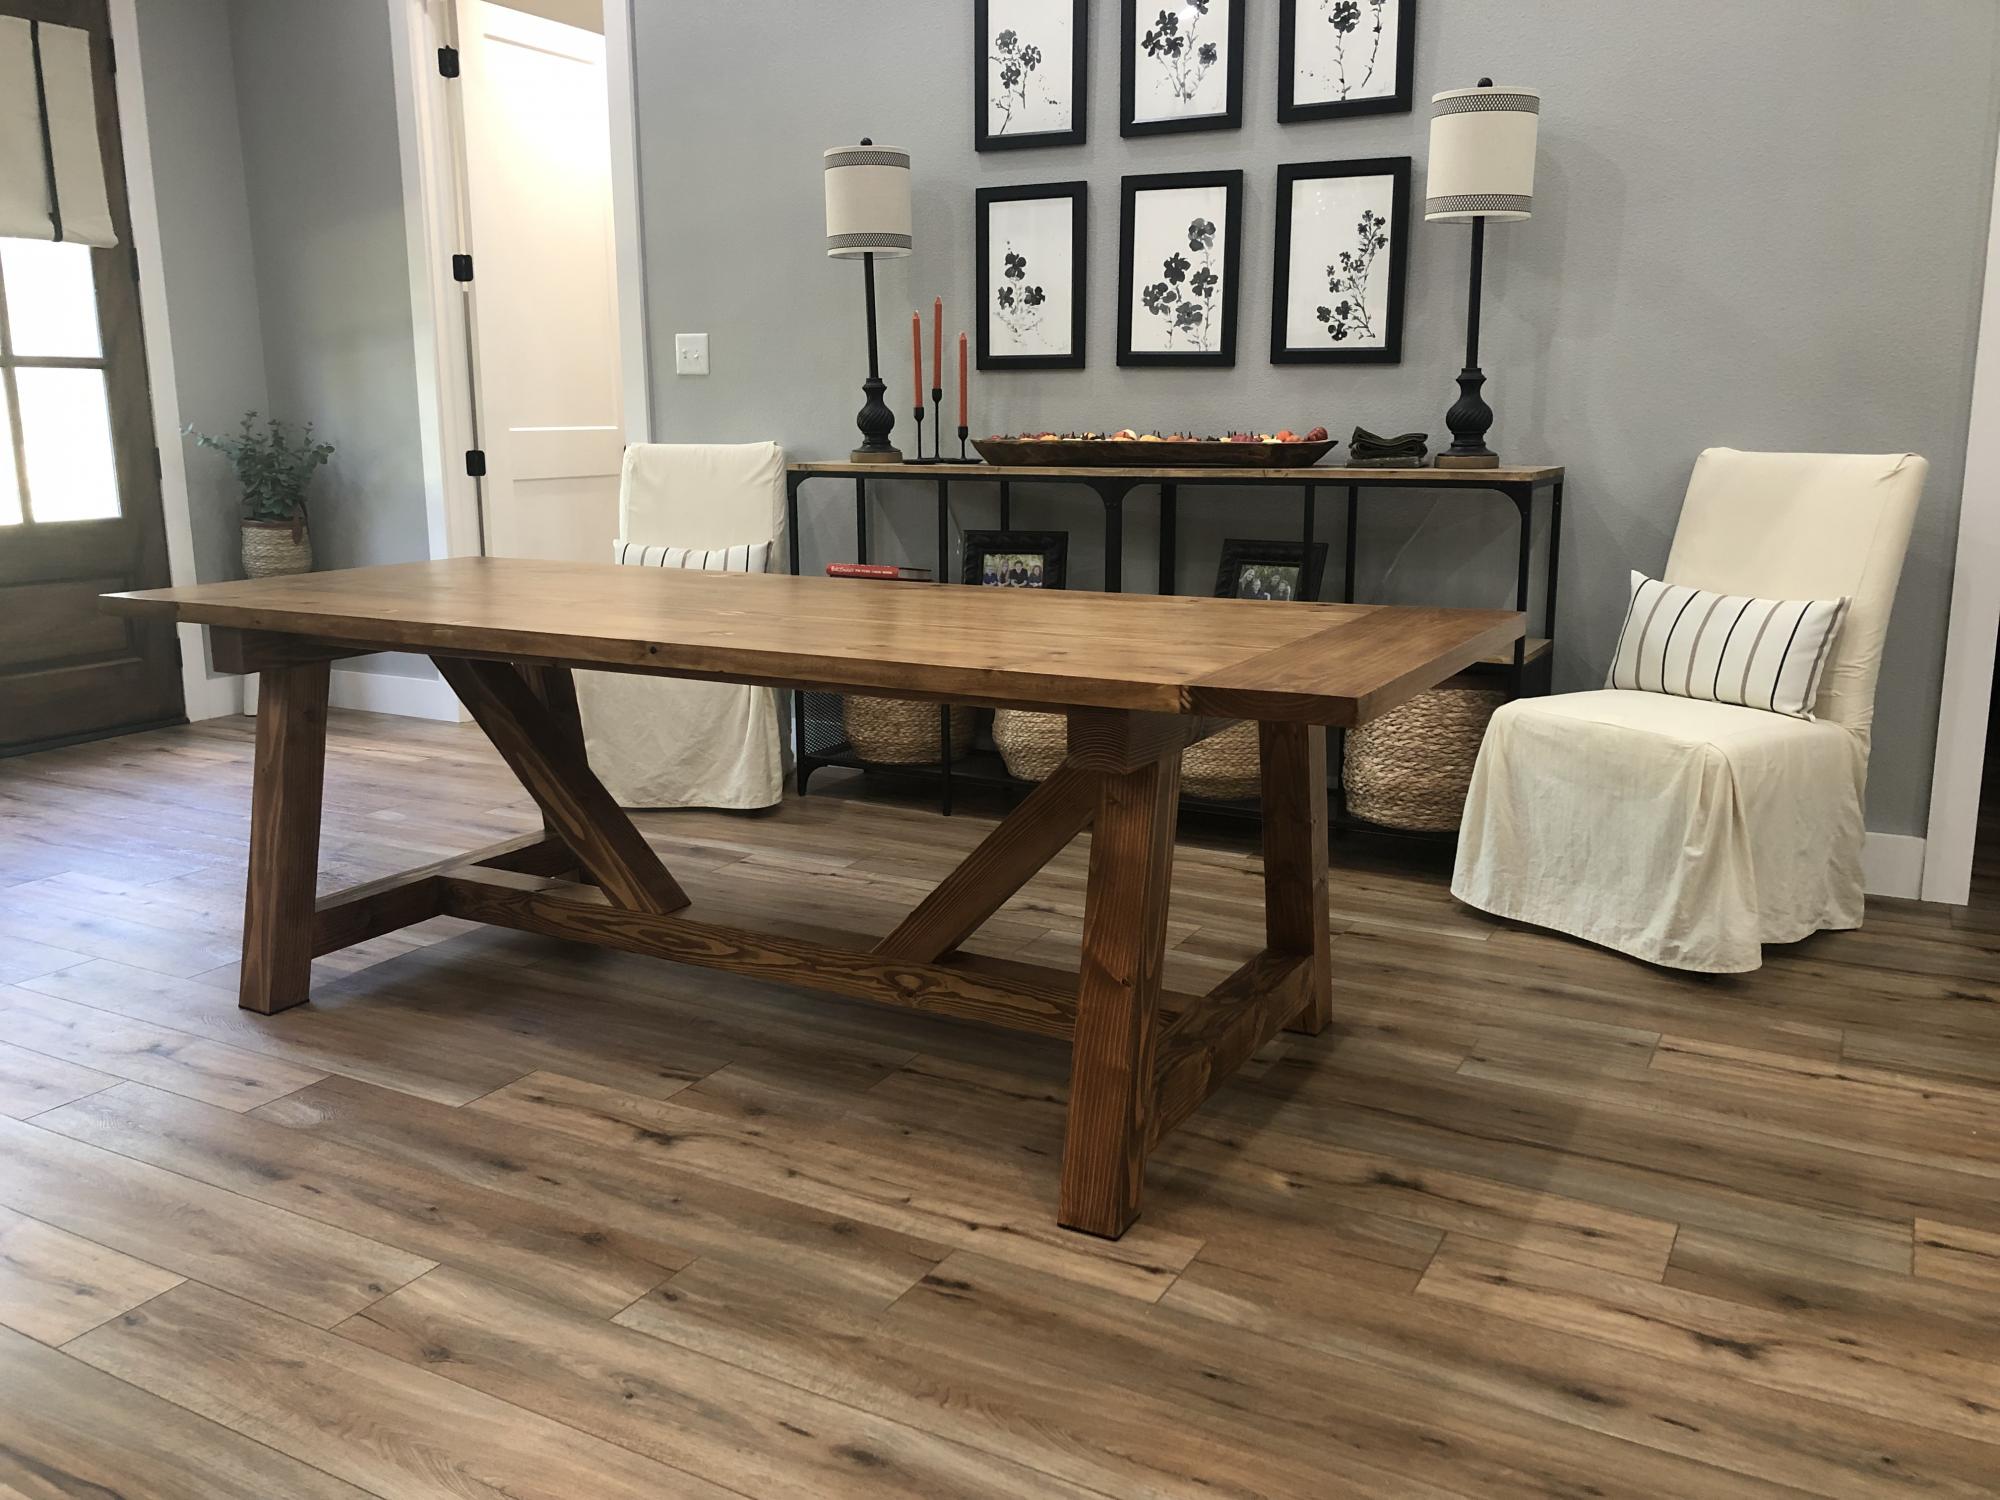
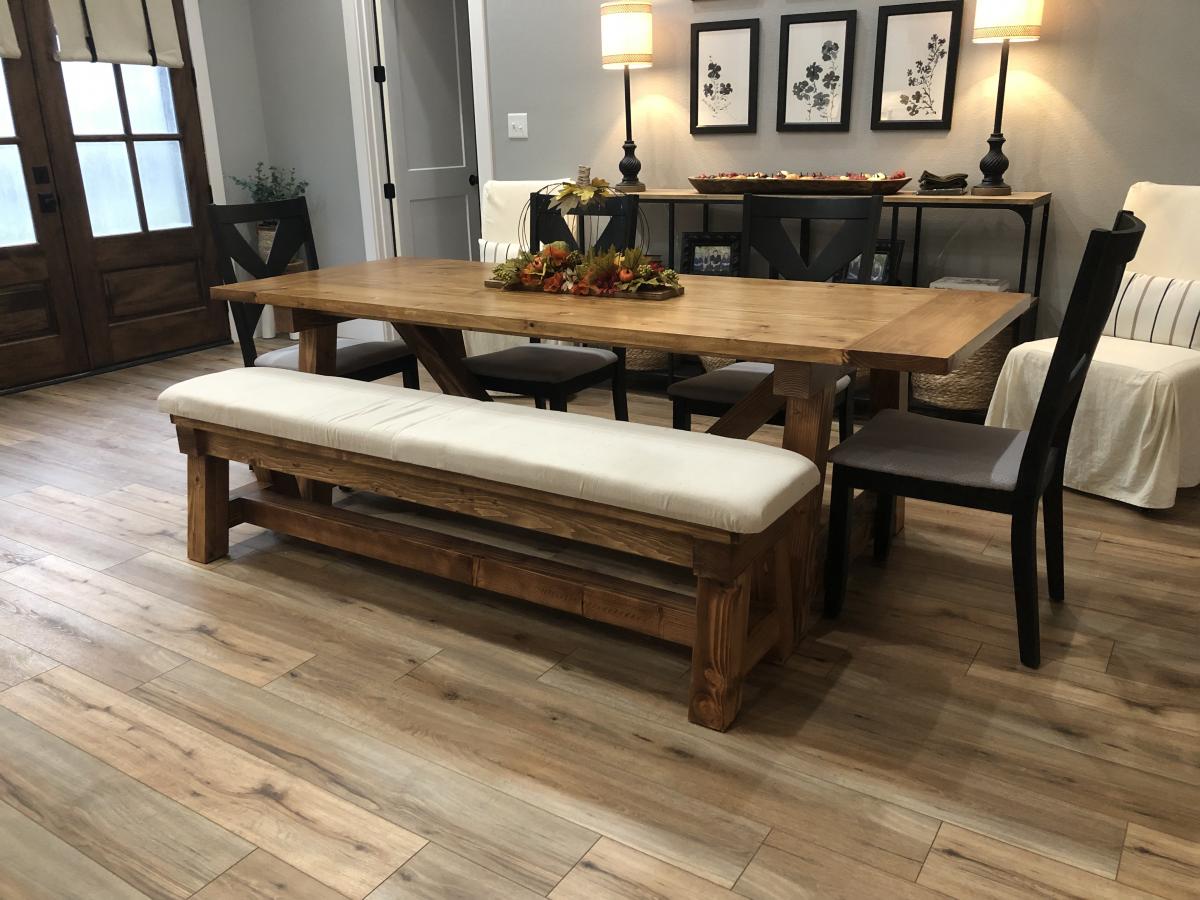
The plans were very easy to follow for non avid woodworkers. We decided to upholster the seat on the bench.

Built from Plan(s)

Comments