Modern Outdoor Chairs and Simple Seacoast Tables
Great sturdy outdoor furniture to spruce up a small deck space with lots of afternoon sunlight and coastal breezes!
Built from Plan(s)
Great sturdy outdoor furniture to spruce up a small deck space with lots of afternoon sunlight and coastal breezes!
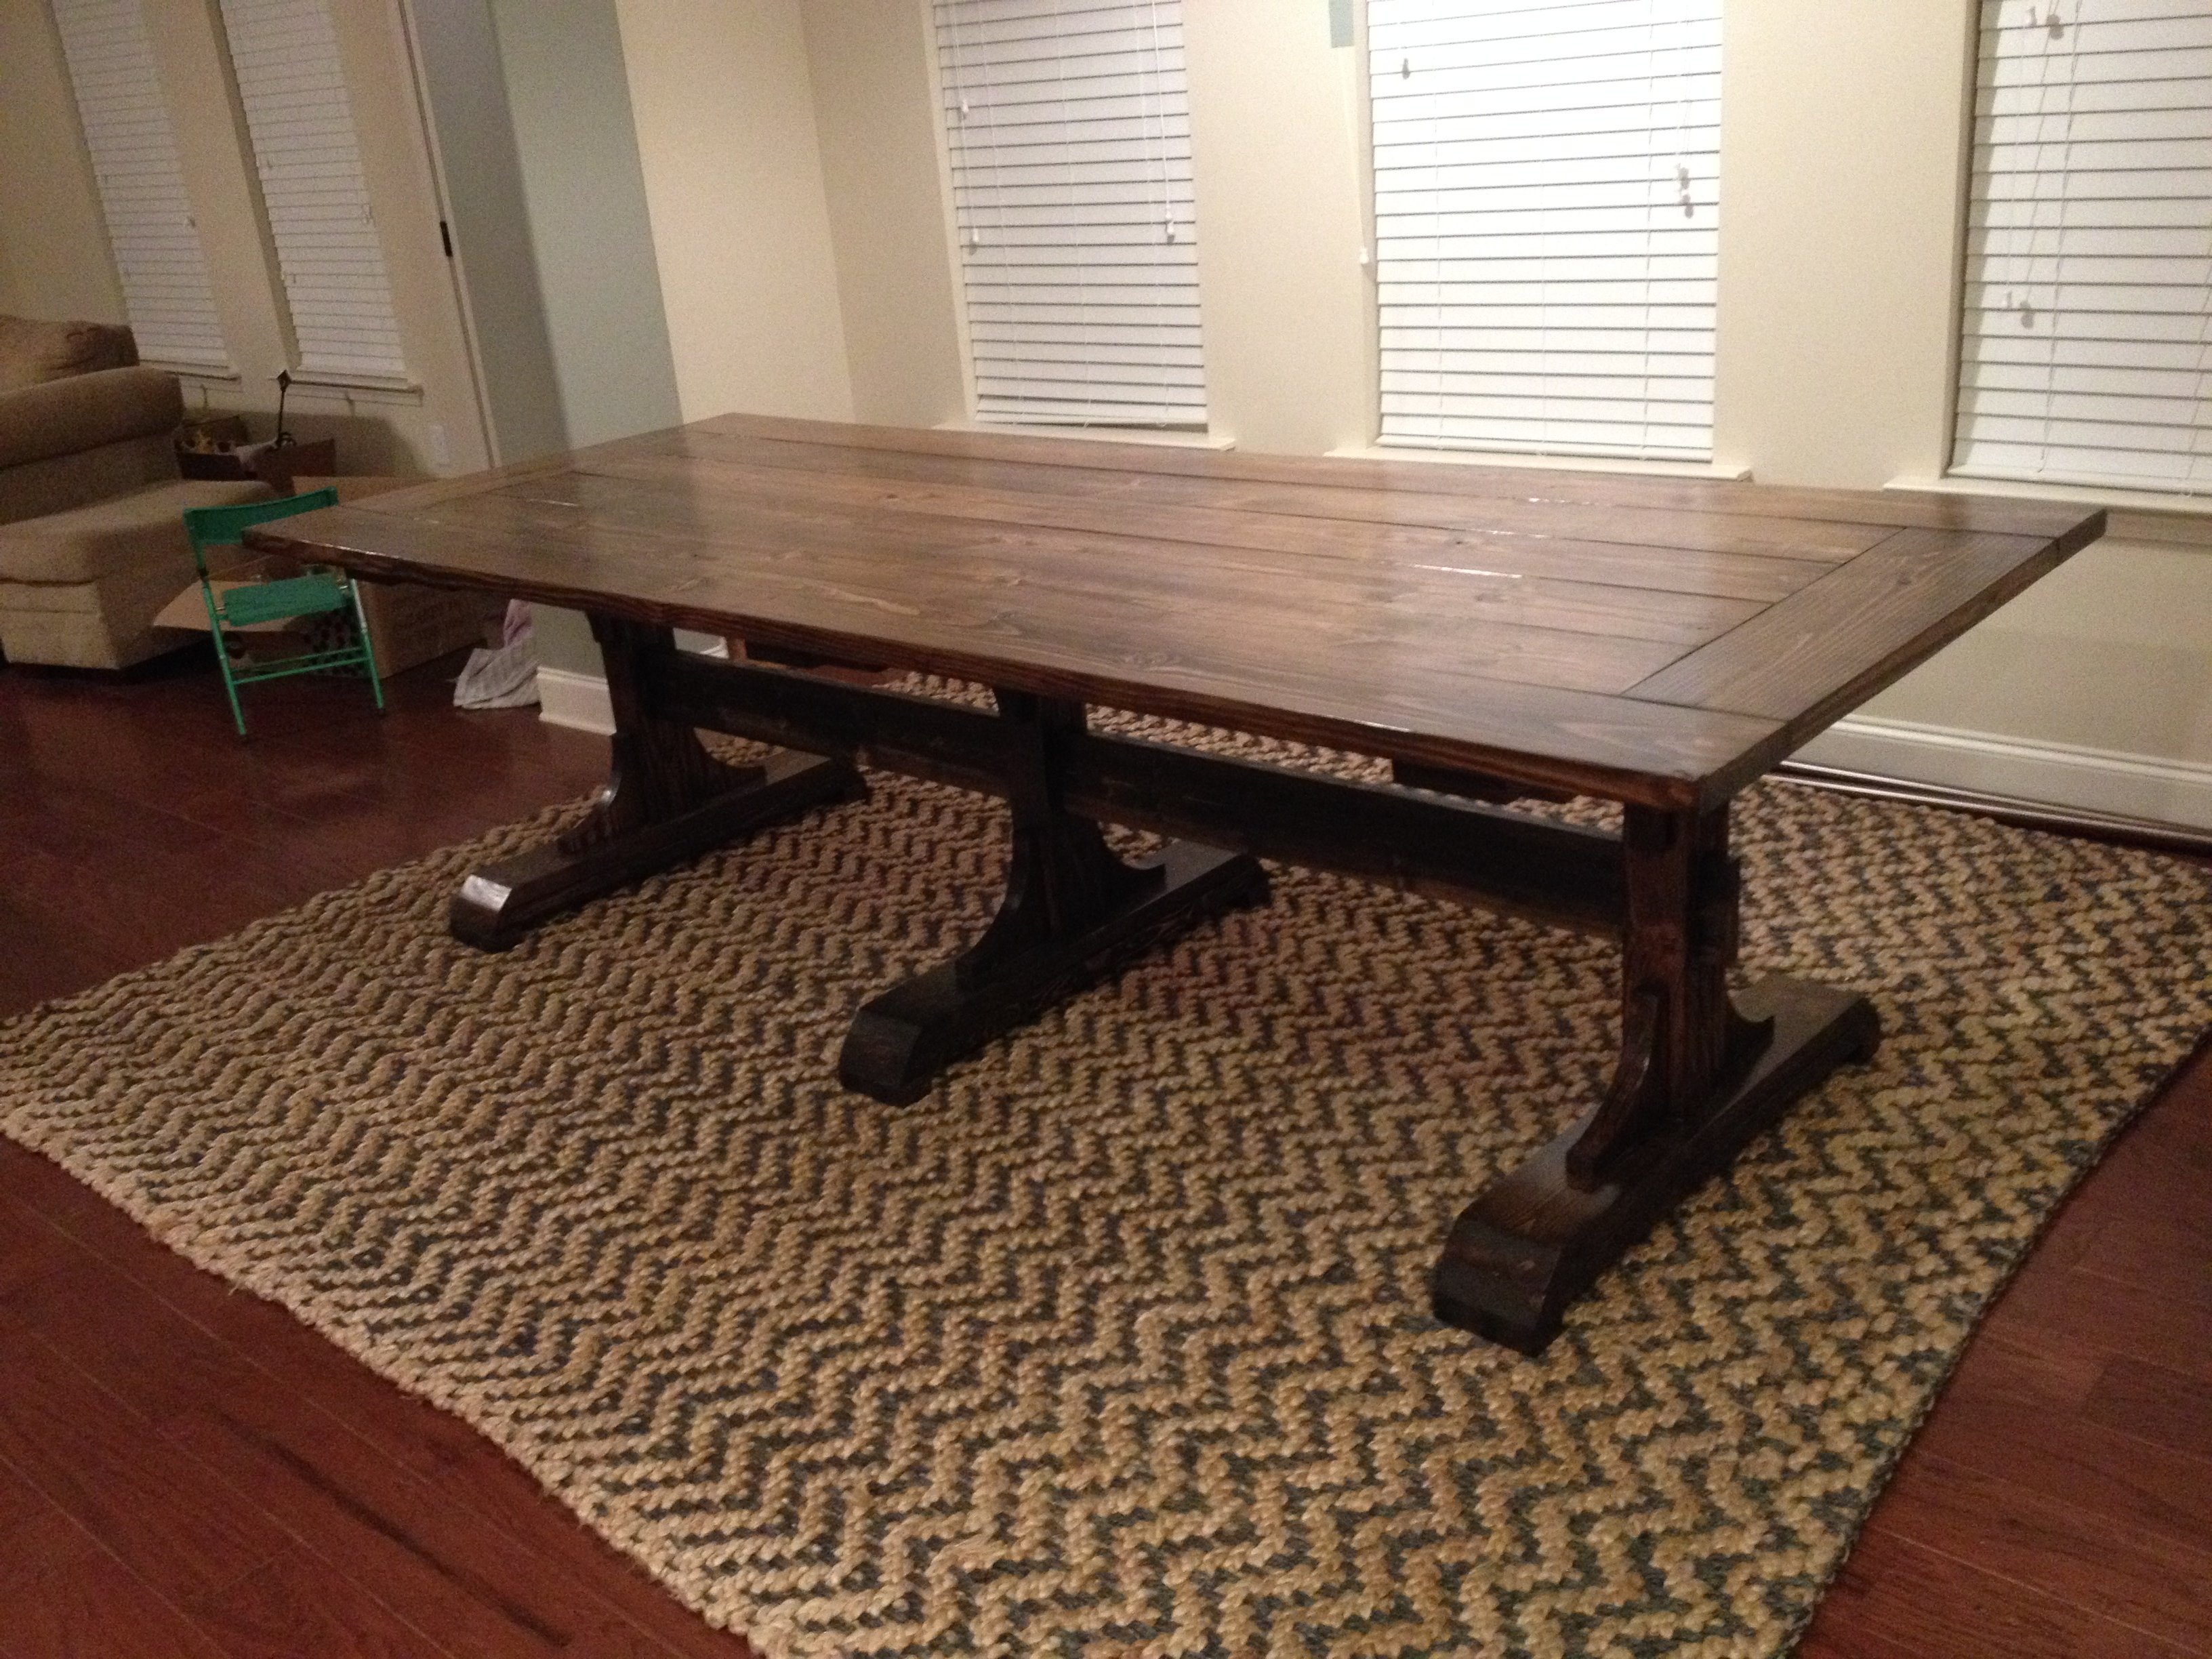
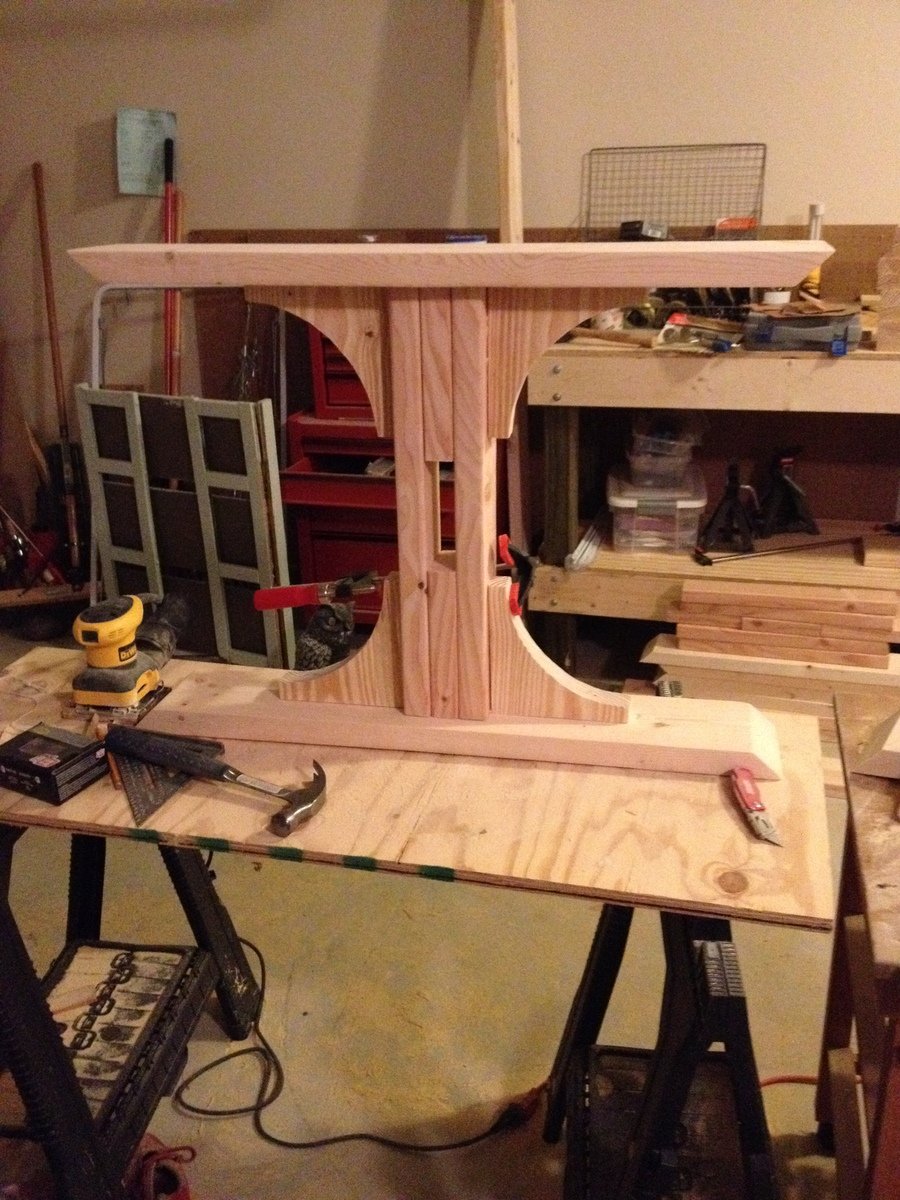
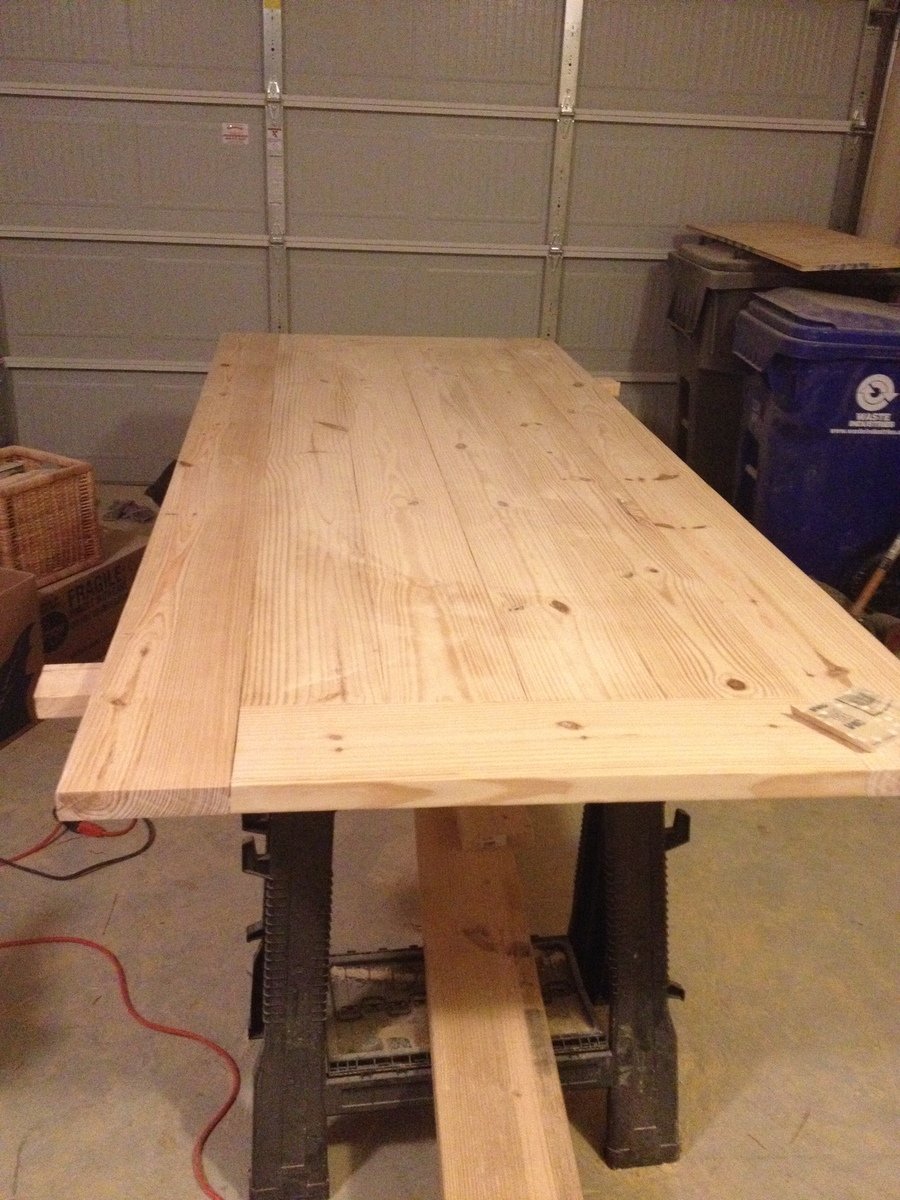
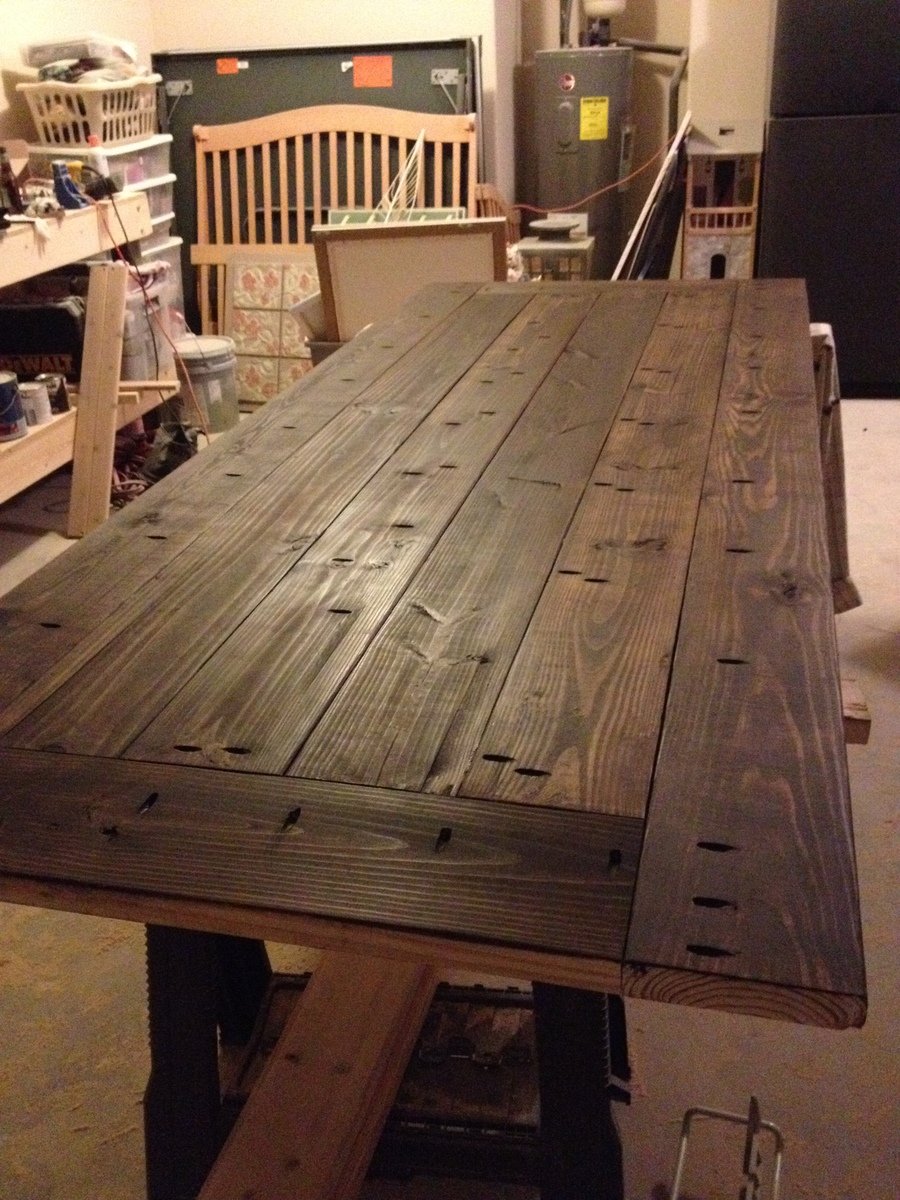
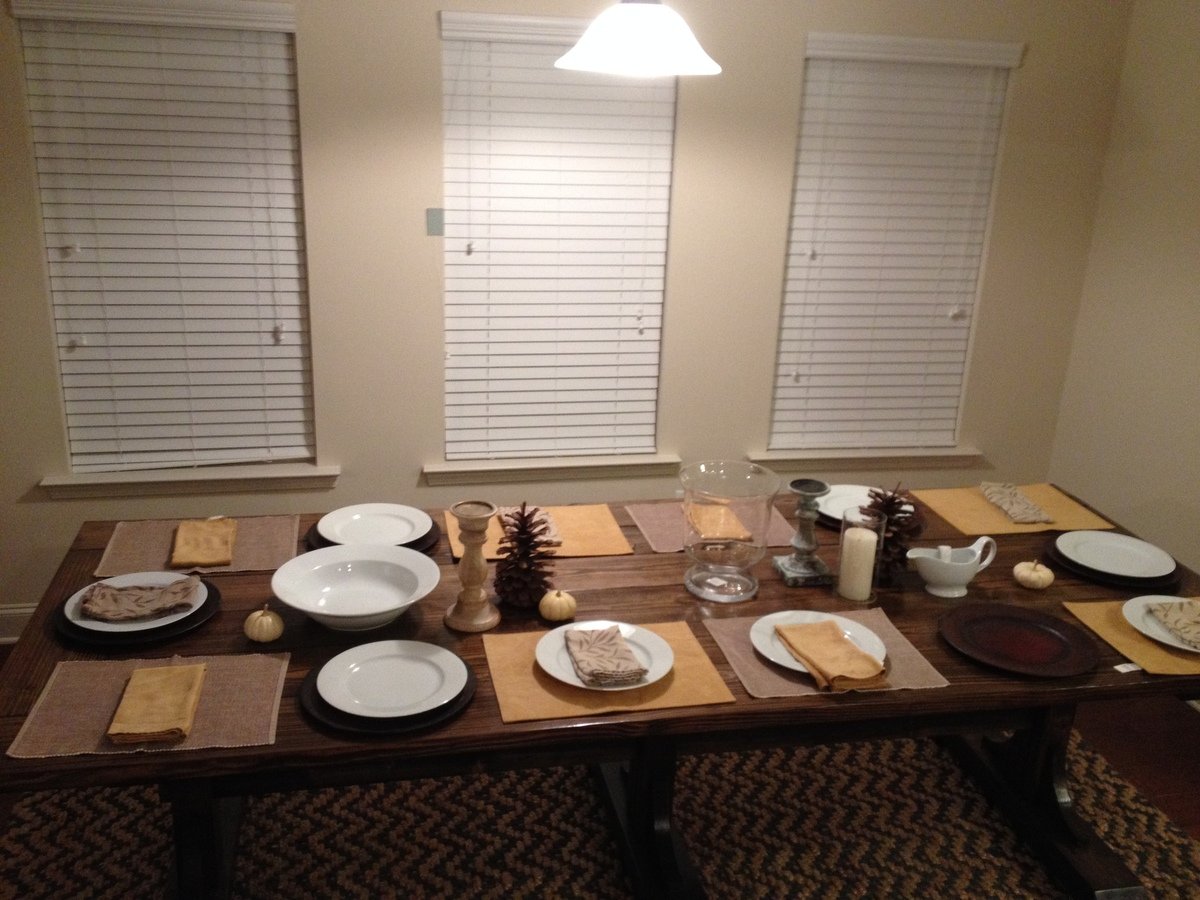
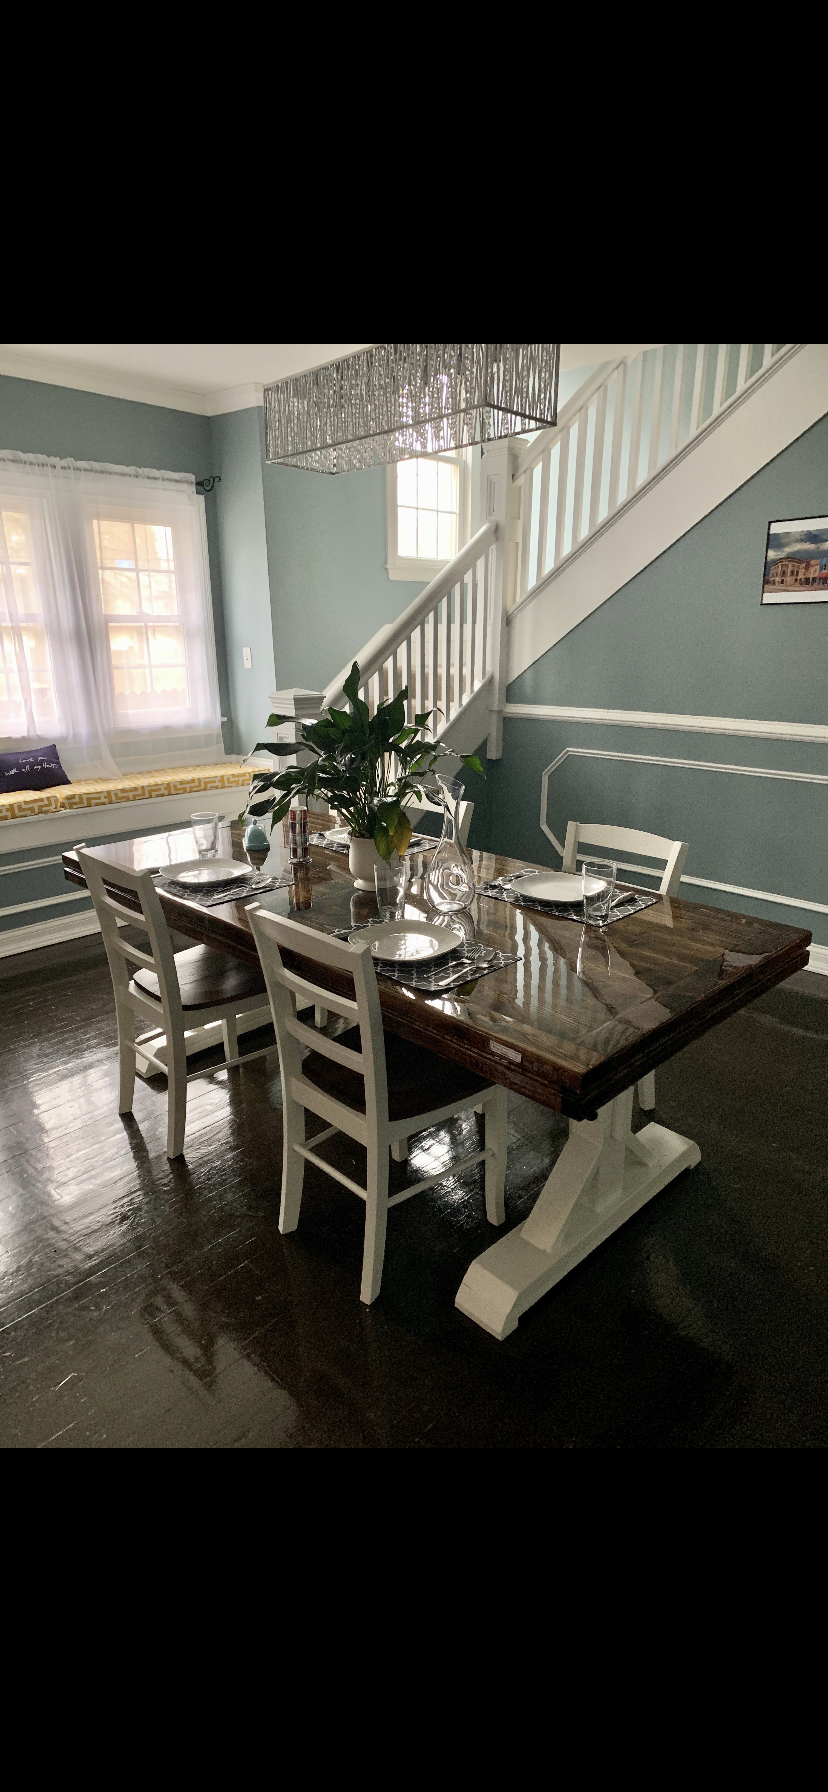
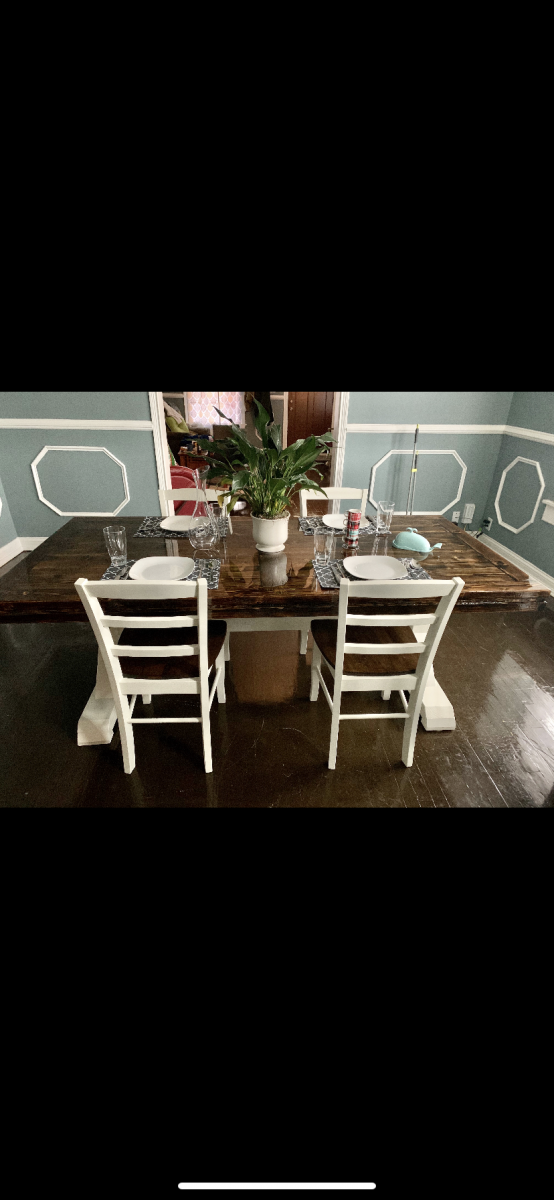
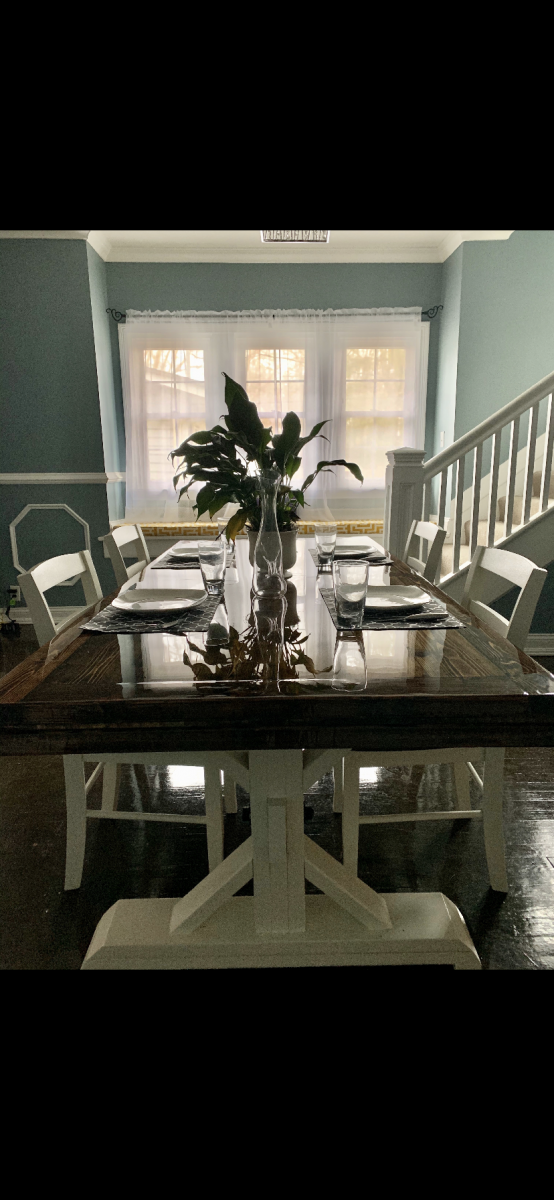
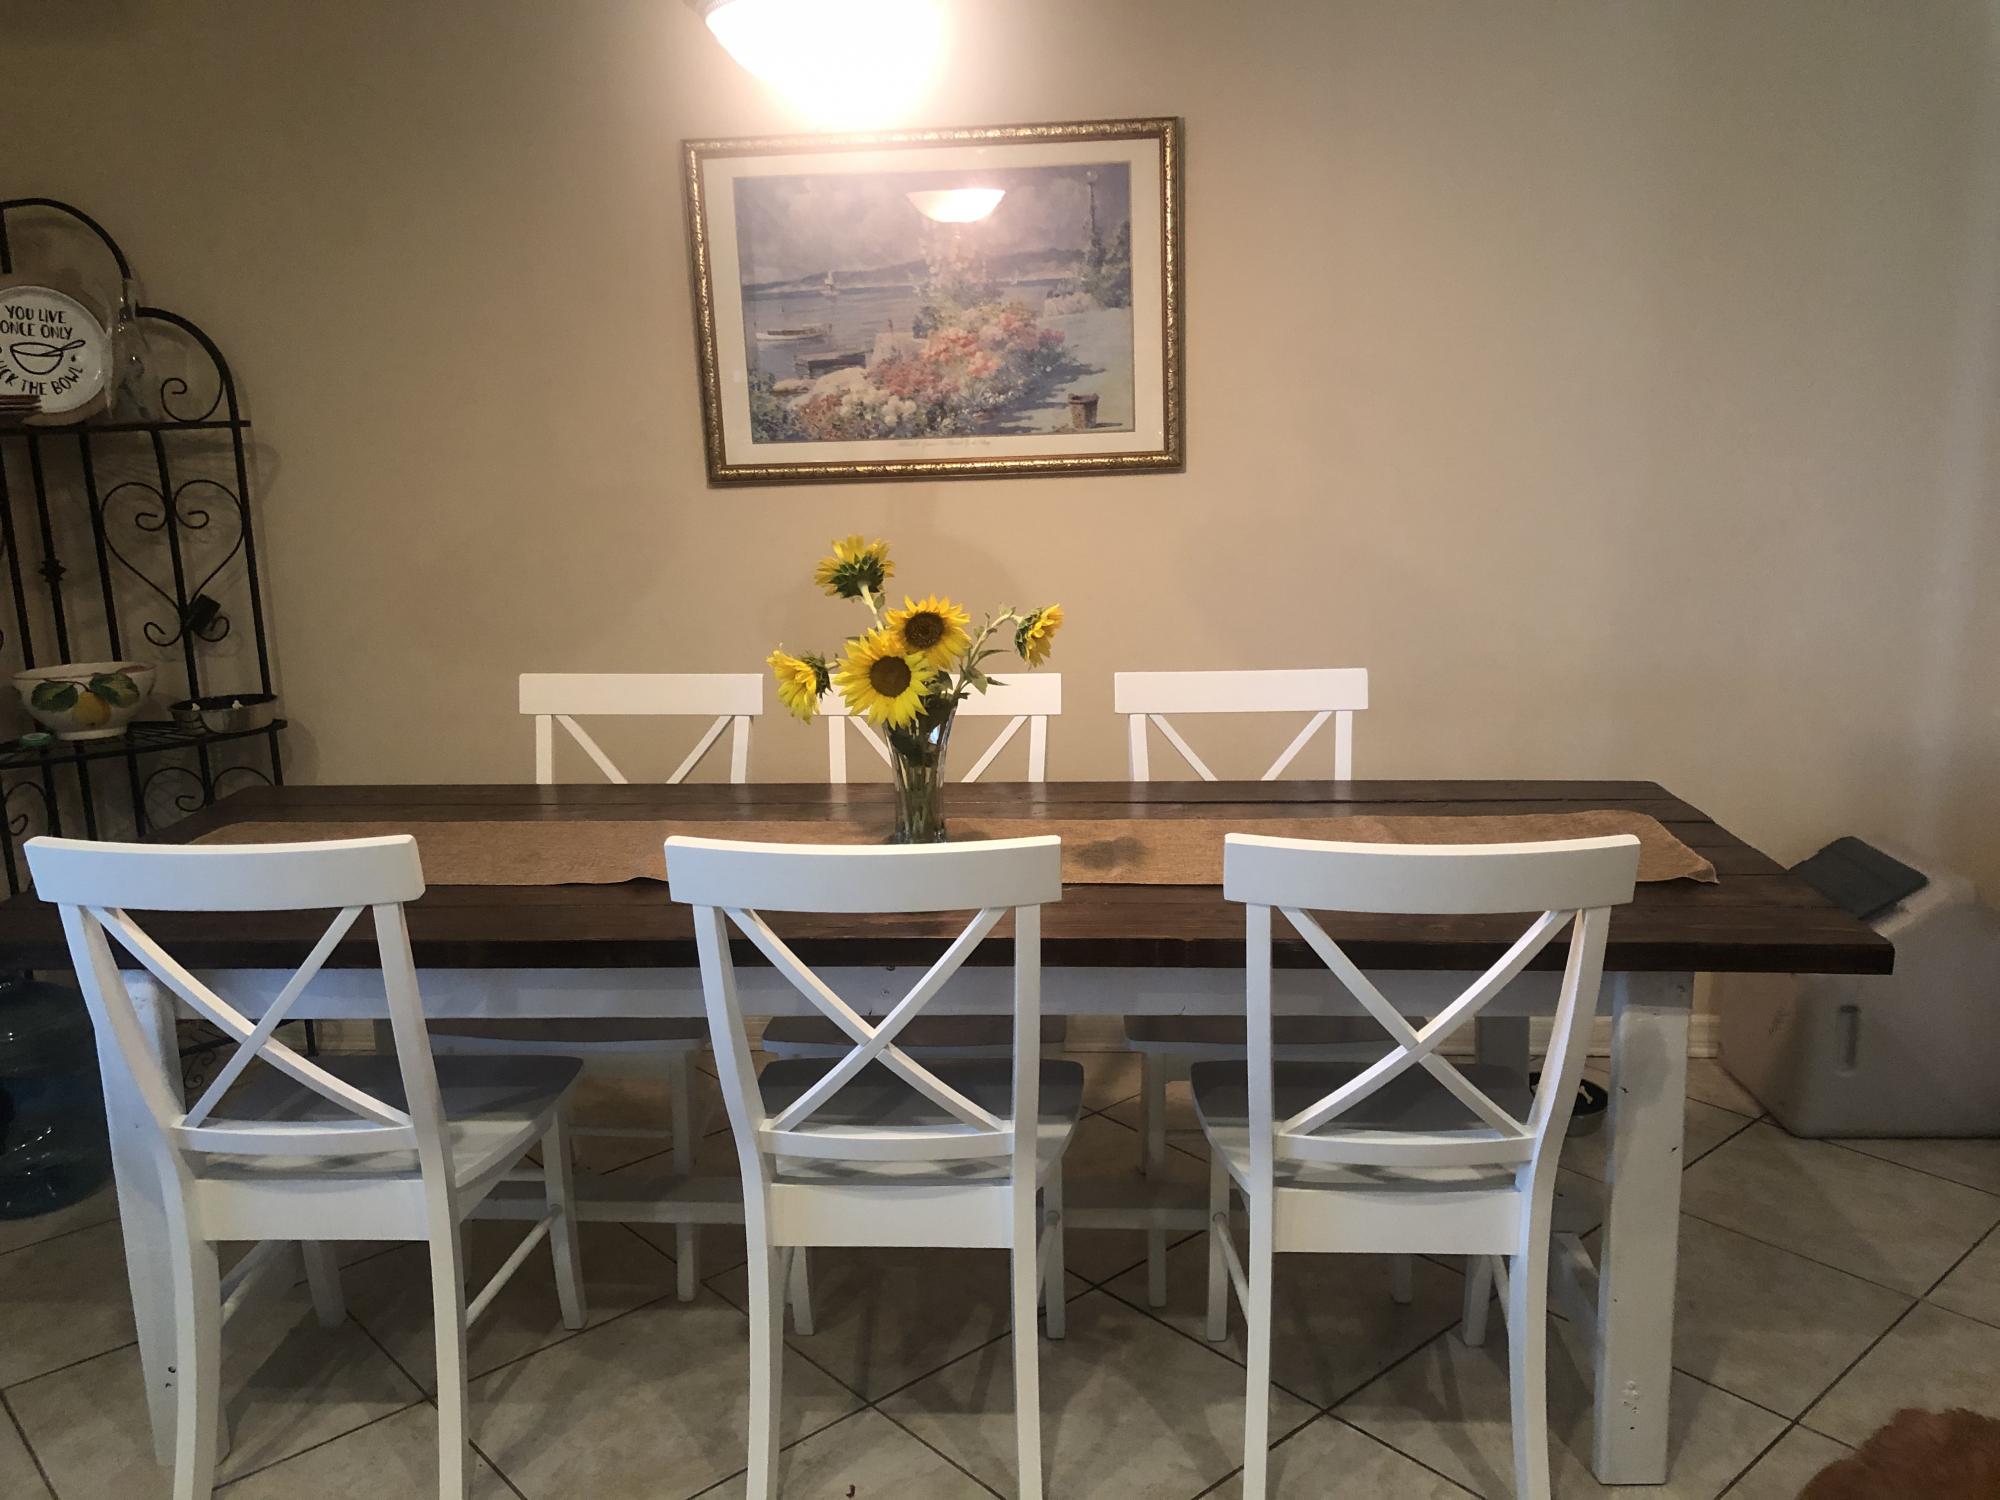
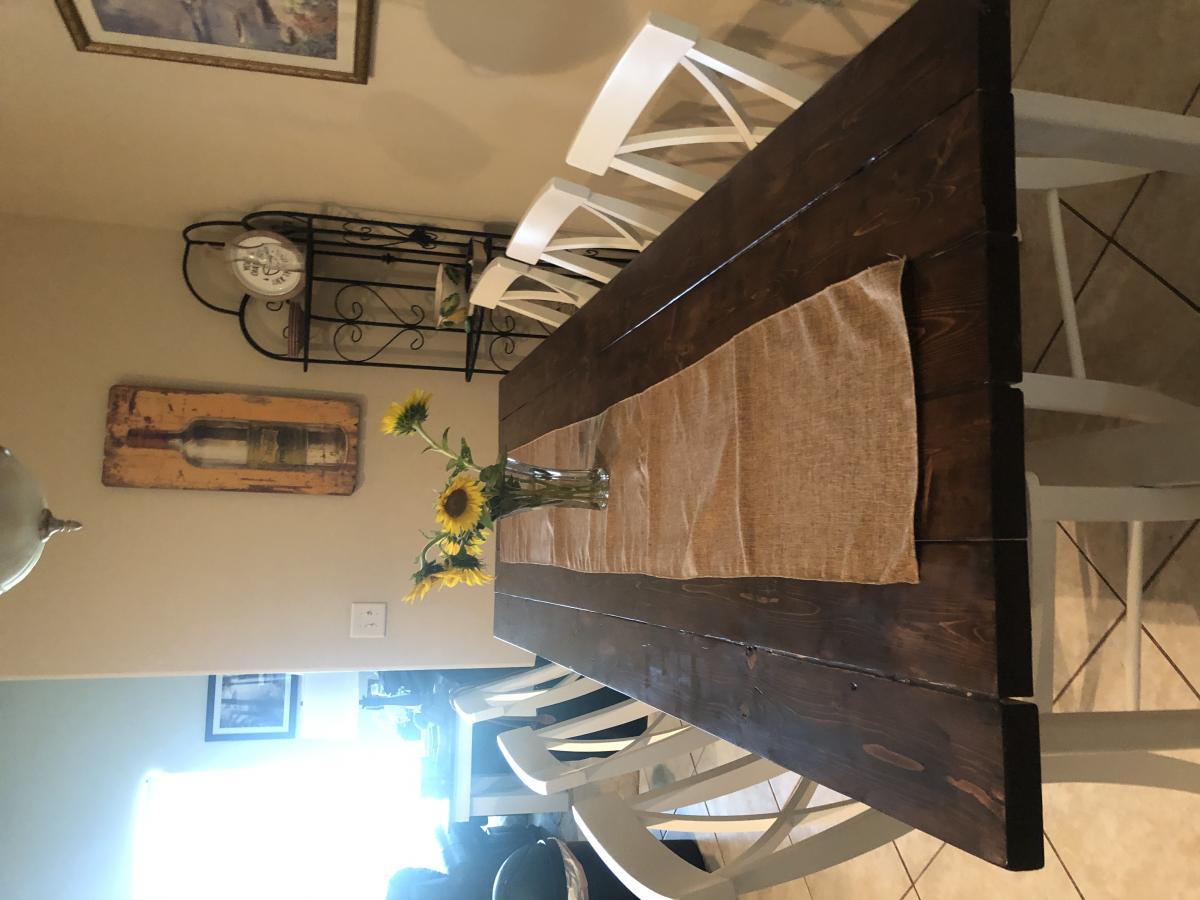
My wife and I built this table for our new home. It is a hybrid of the triple pedestal table and farmhouse table top. I modified the table top to give it a little more stability on the ends.


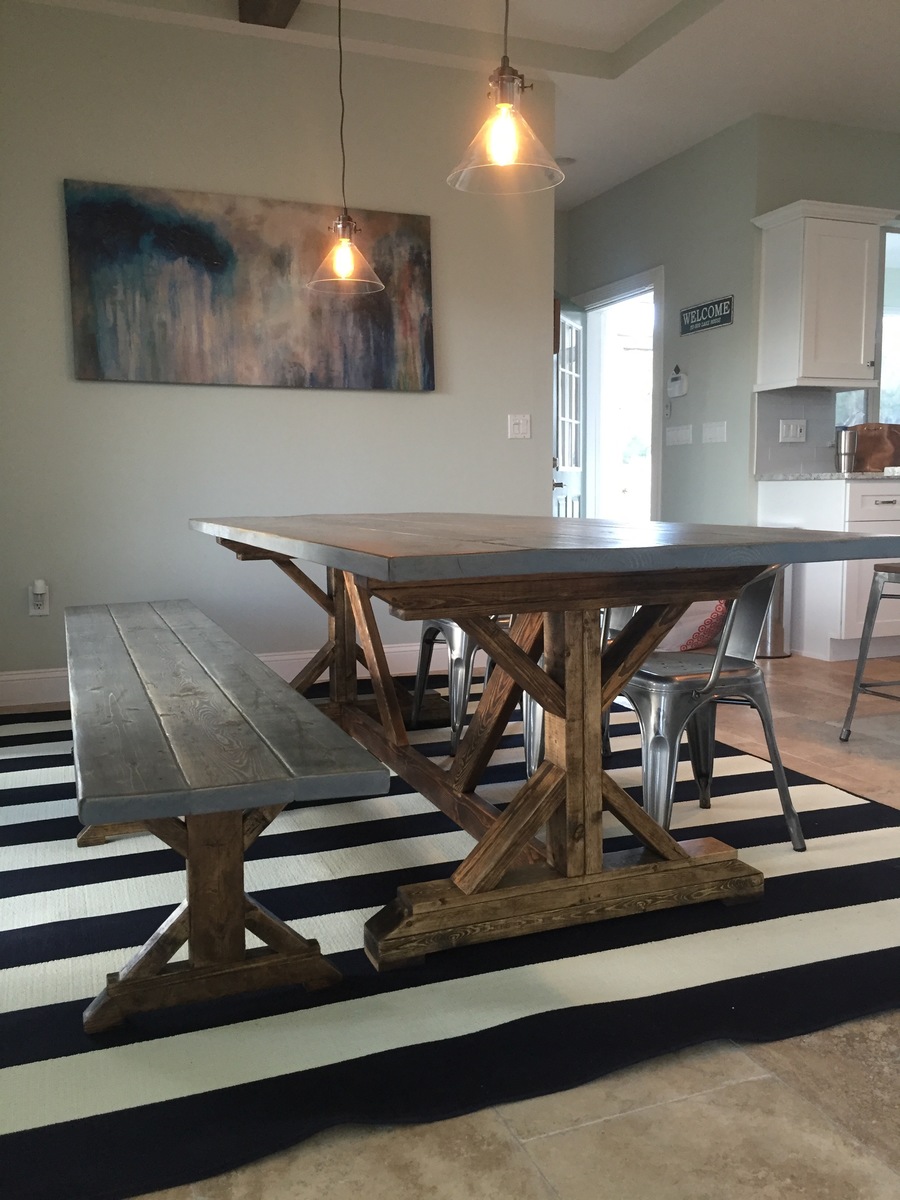
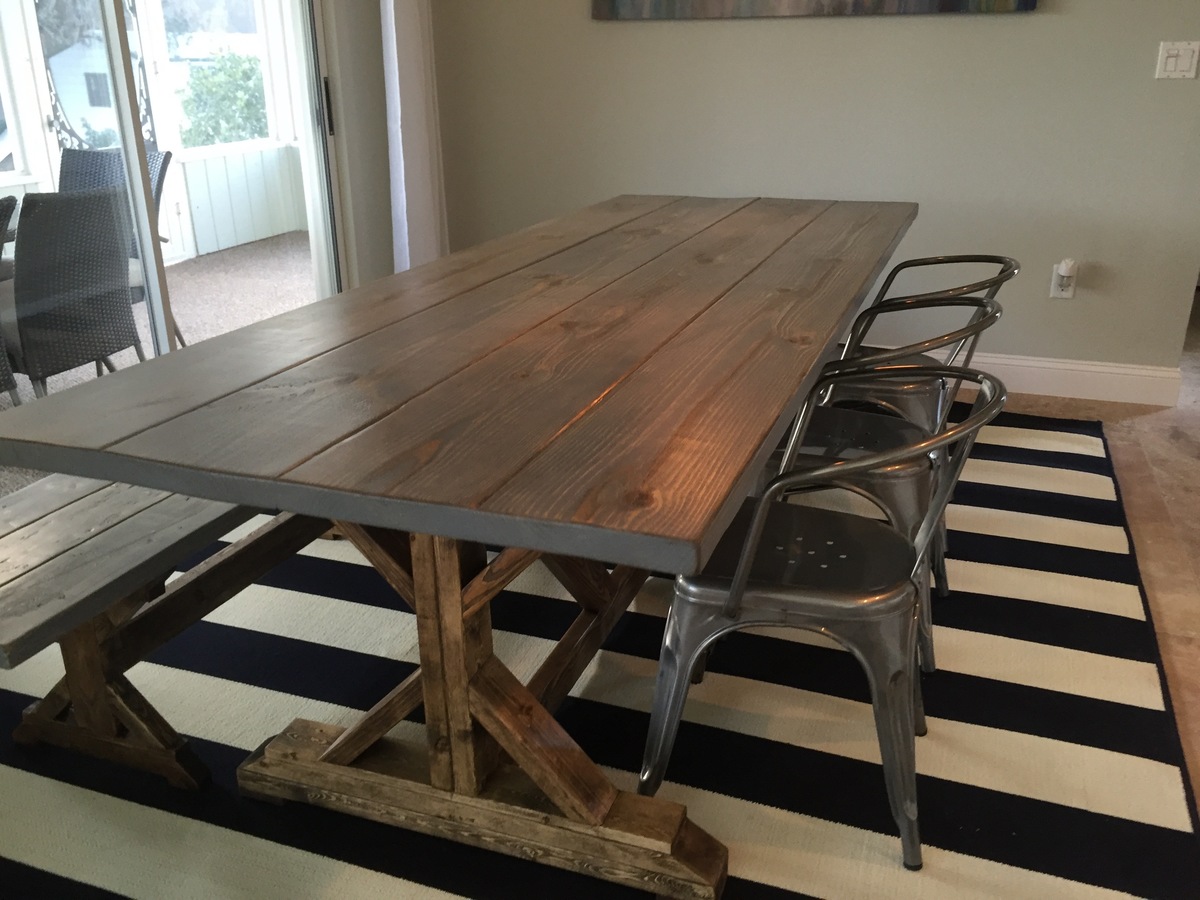
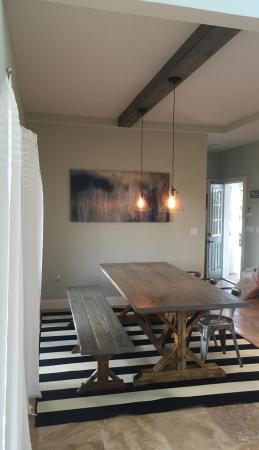
We used the Fancy X Farmhouse plans and matching bench to create a wonderful new farmhouse table and bench for the lake house. We distressed the tops of the bench and table and stained them Weathered Grey with the base of the table and bench stained Ash. We absolutely love it!
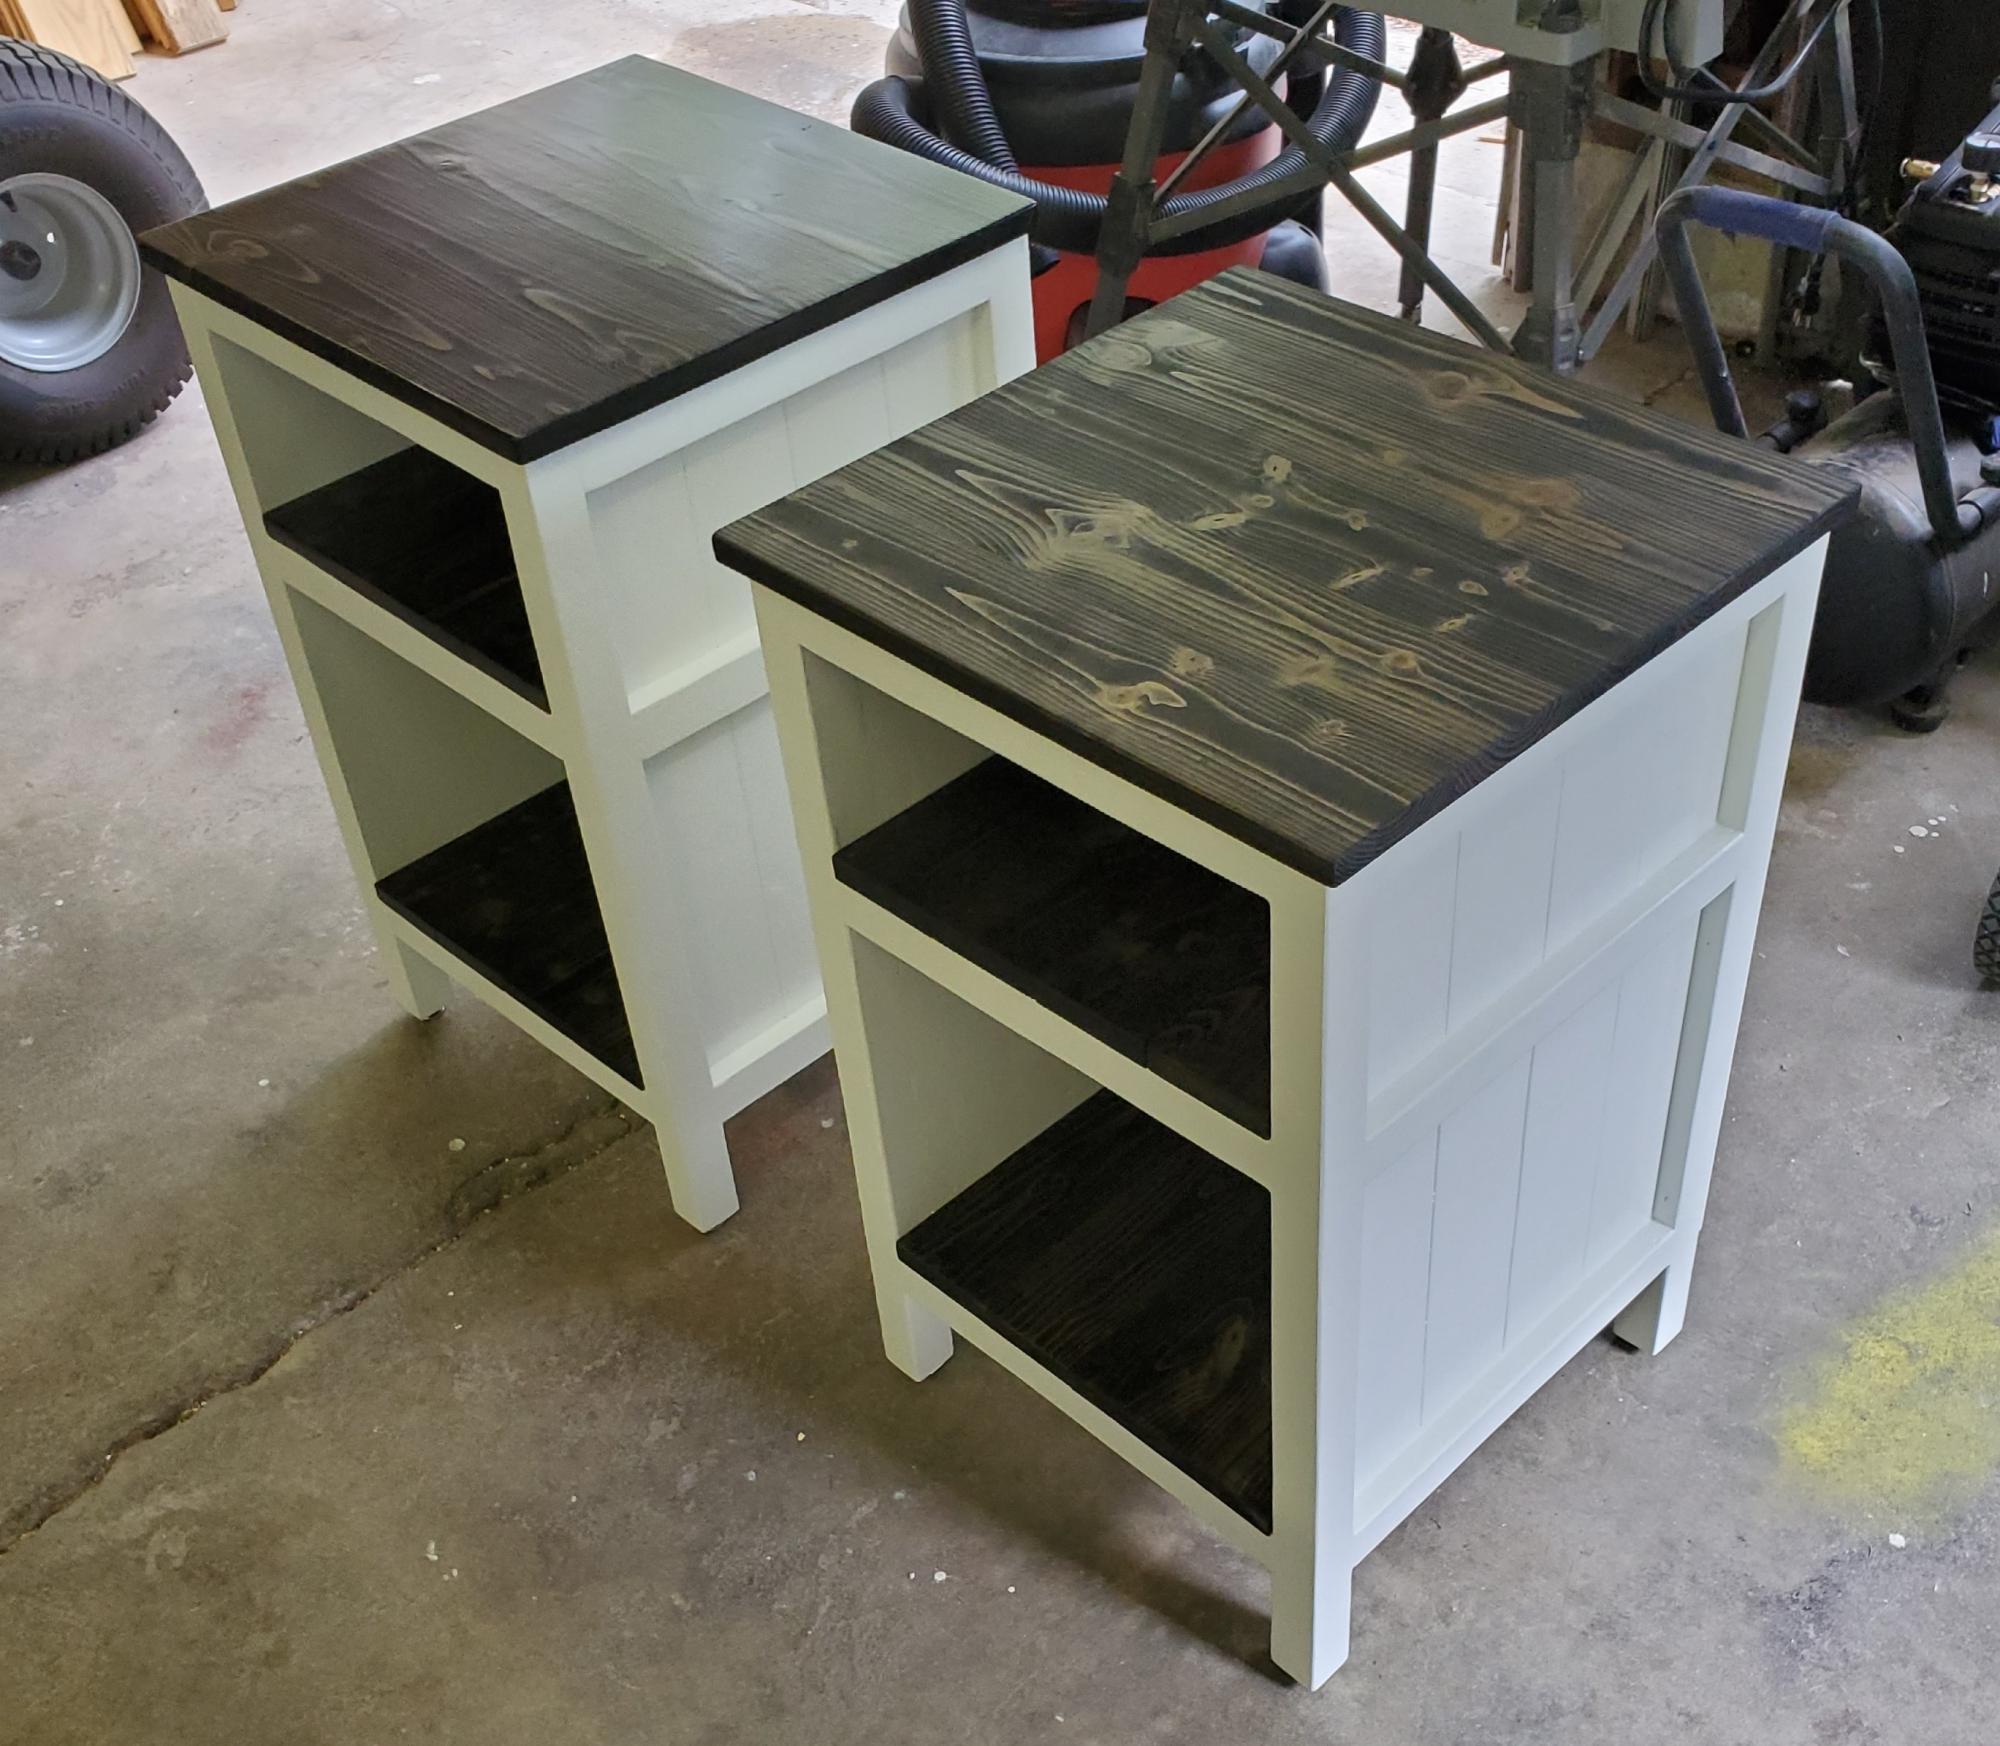
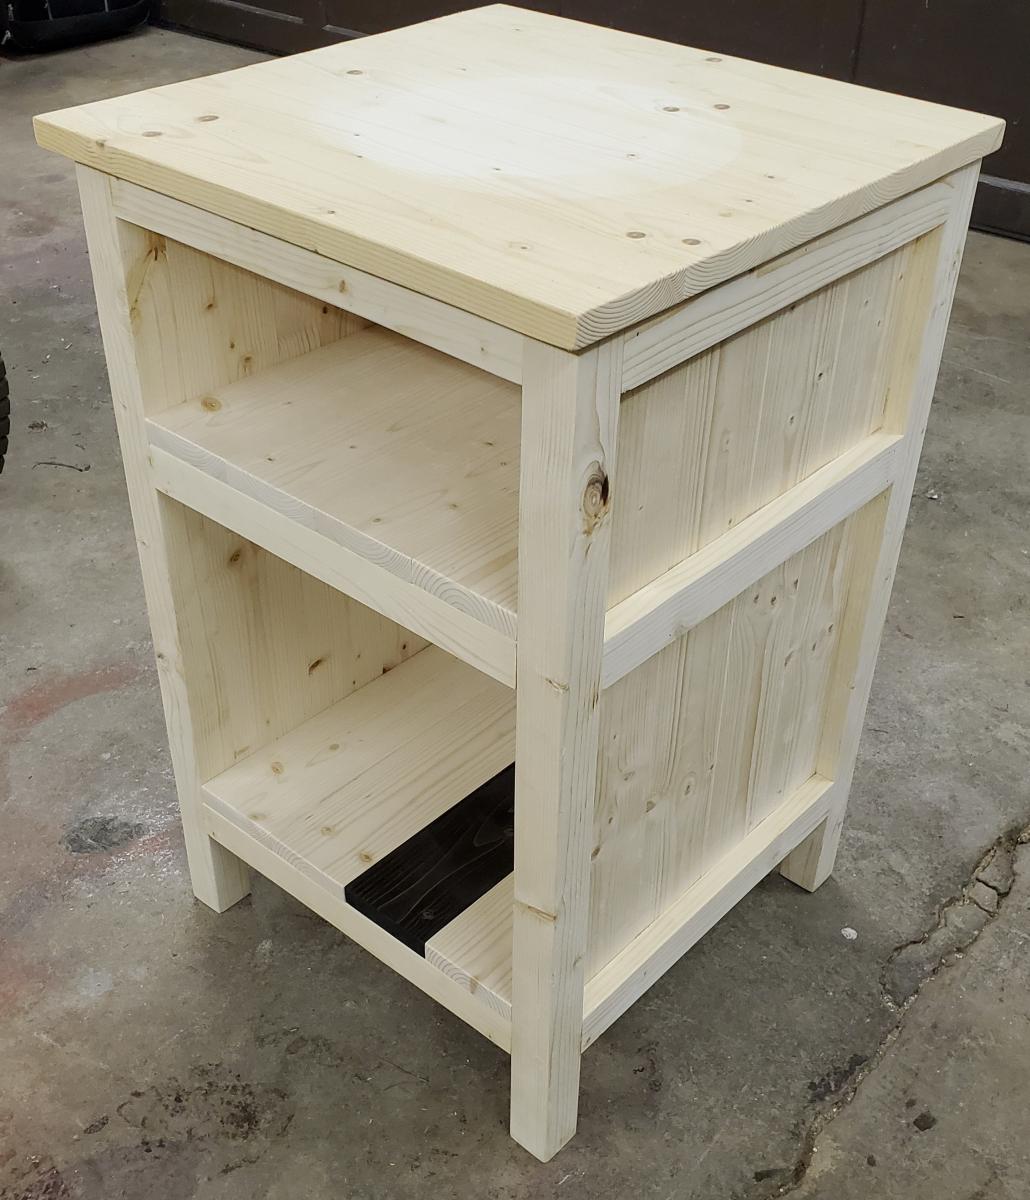
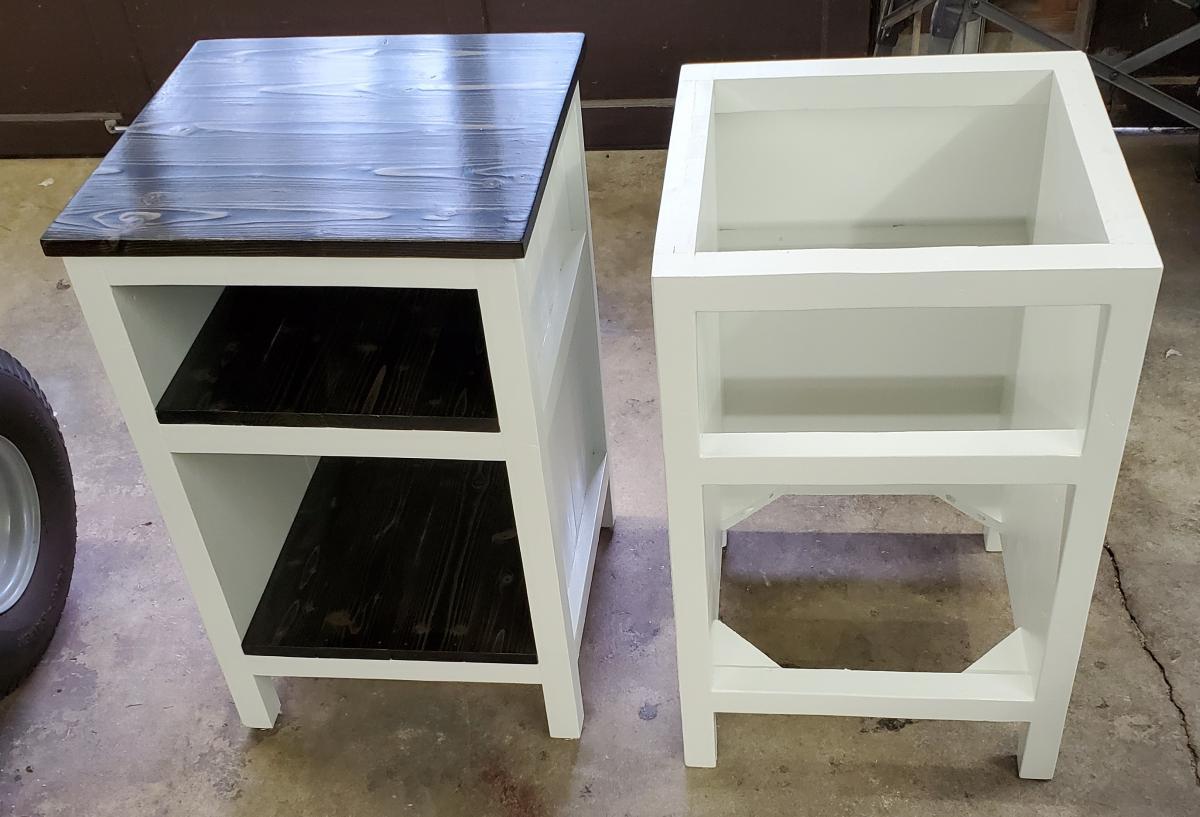
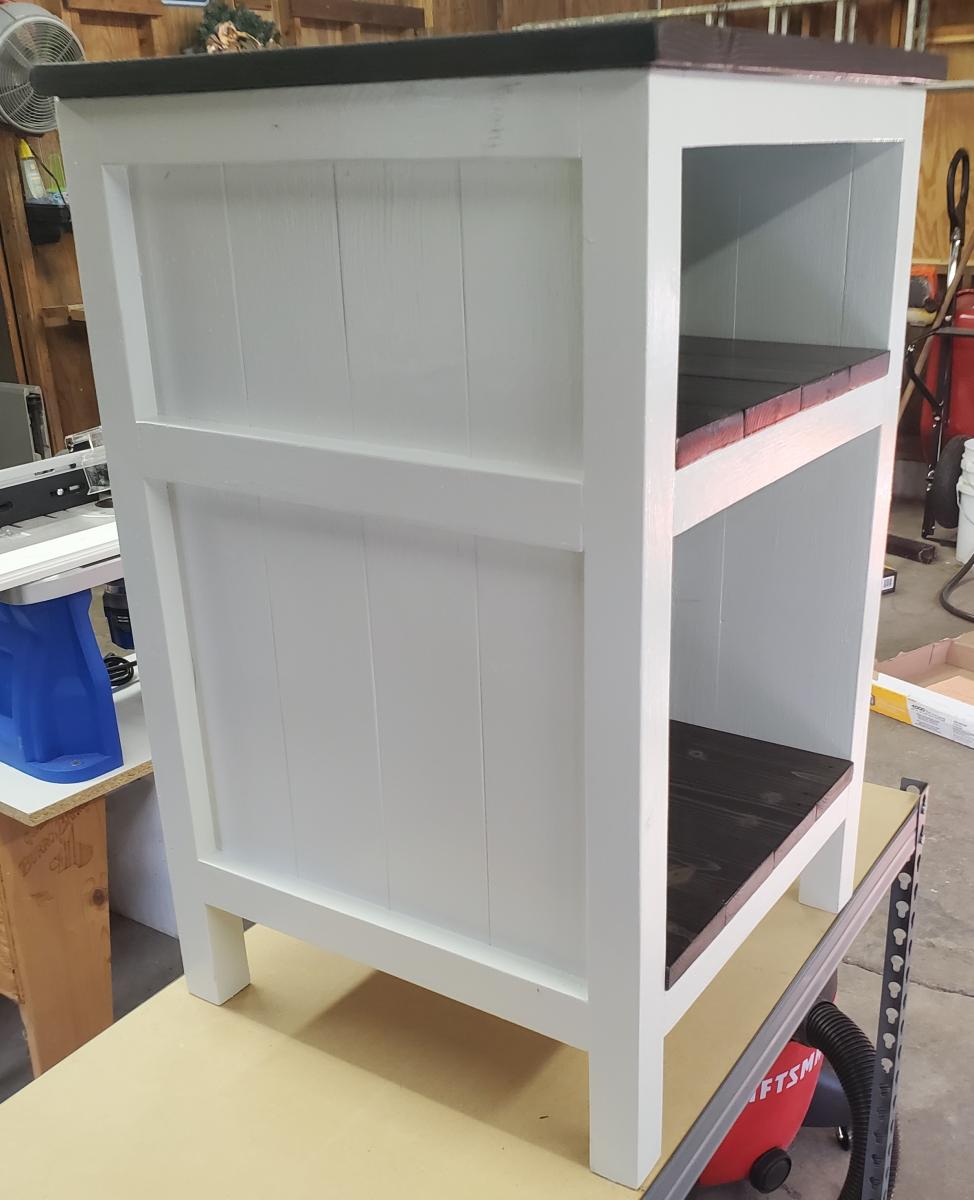
I built these for my daughter's 22nd birthday, after she showed me a set of night stands that resembled these from the site. They were my first furniture woodworking project I have ever done. I did add a set of gussets at the bottom, below the bottom shelf. I had to rip the 2x2's for this project, as I can't find any where around that sells them. I opted for a paint brush finish on the body to give it an antique look. I used 7 coats of polycrylic to give the shelves some depth. I just loved how the stain shows off the grain and knots in the wood.
My daughter loved them when I revealed them on her birthday.
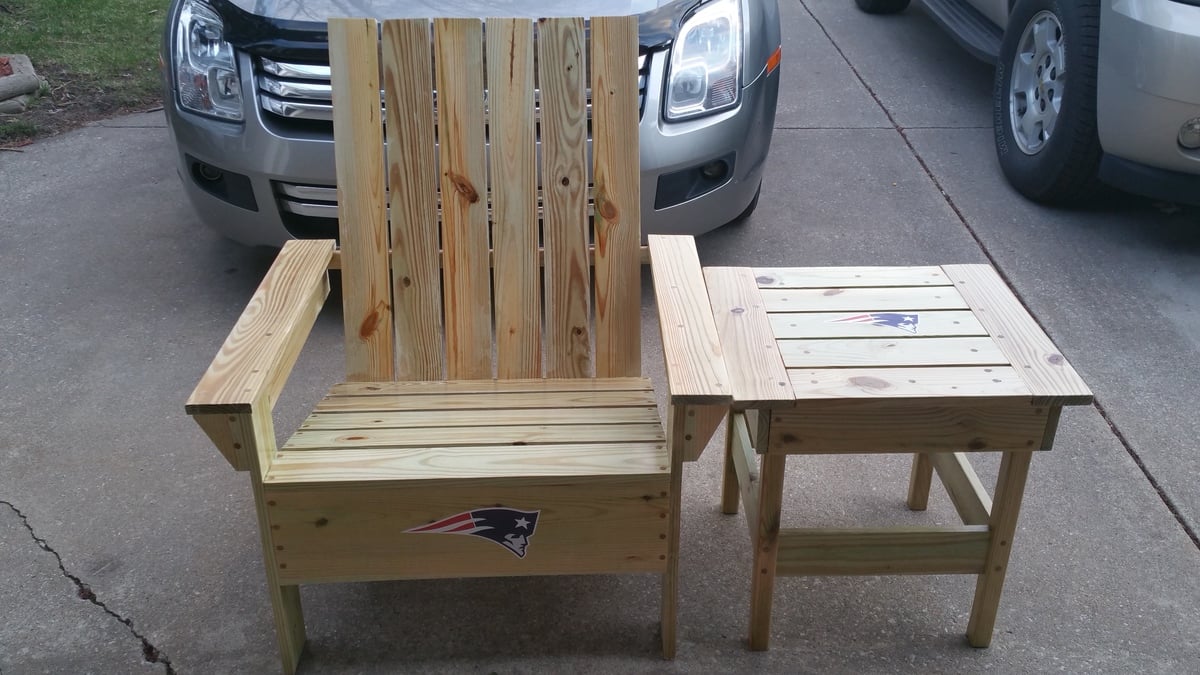
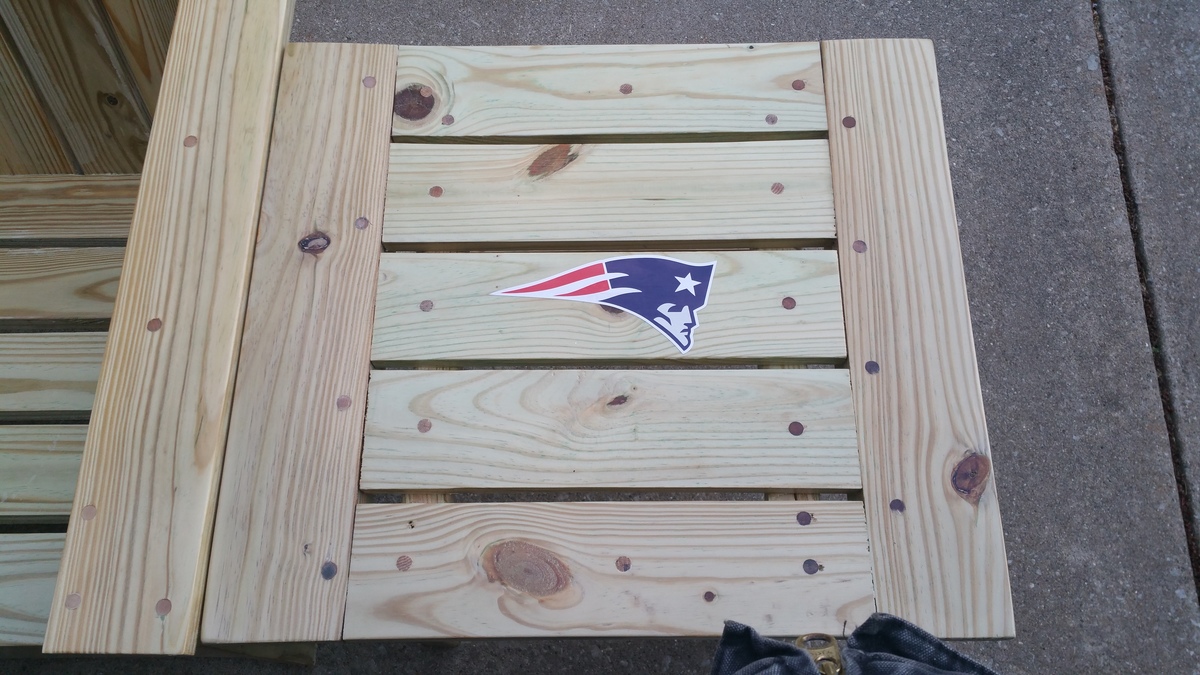
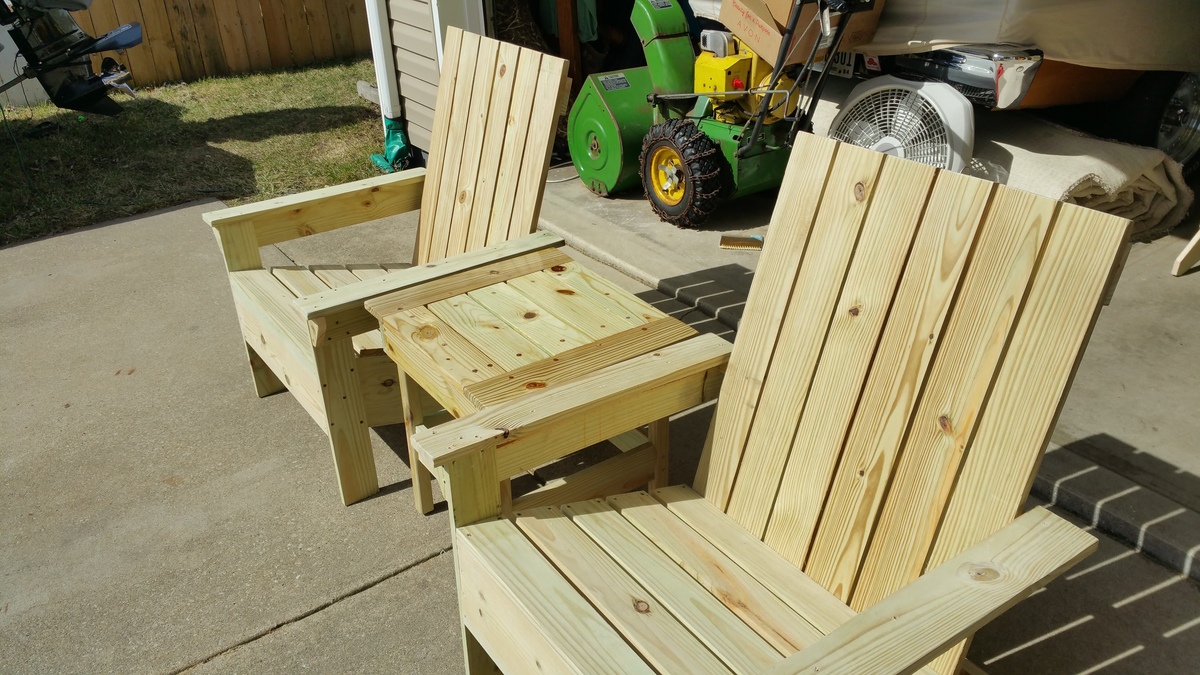
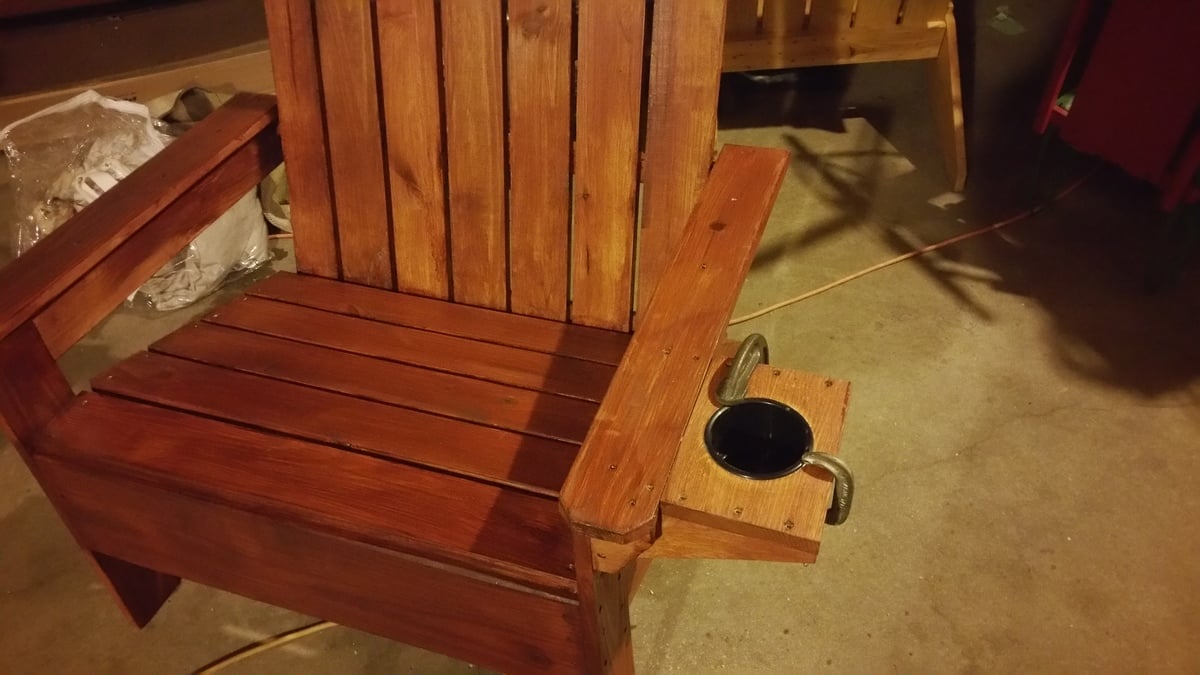
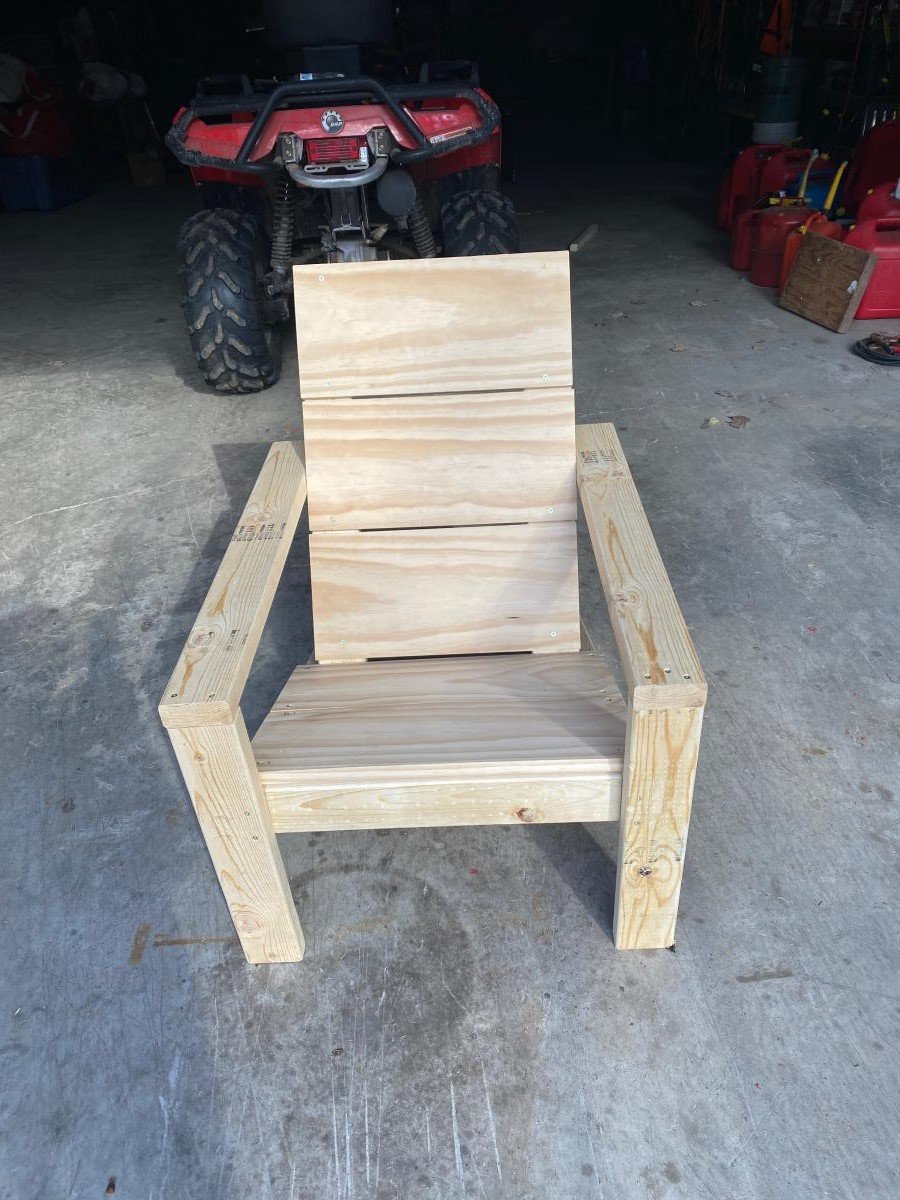
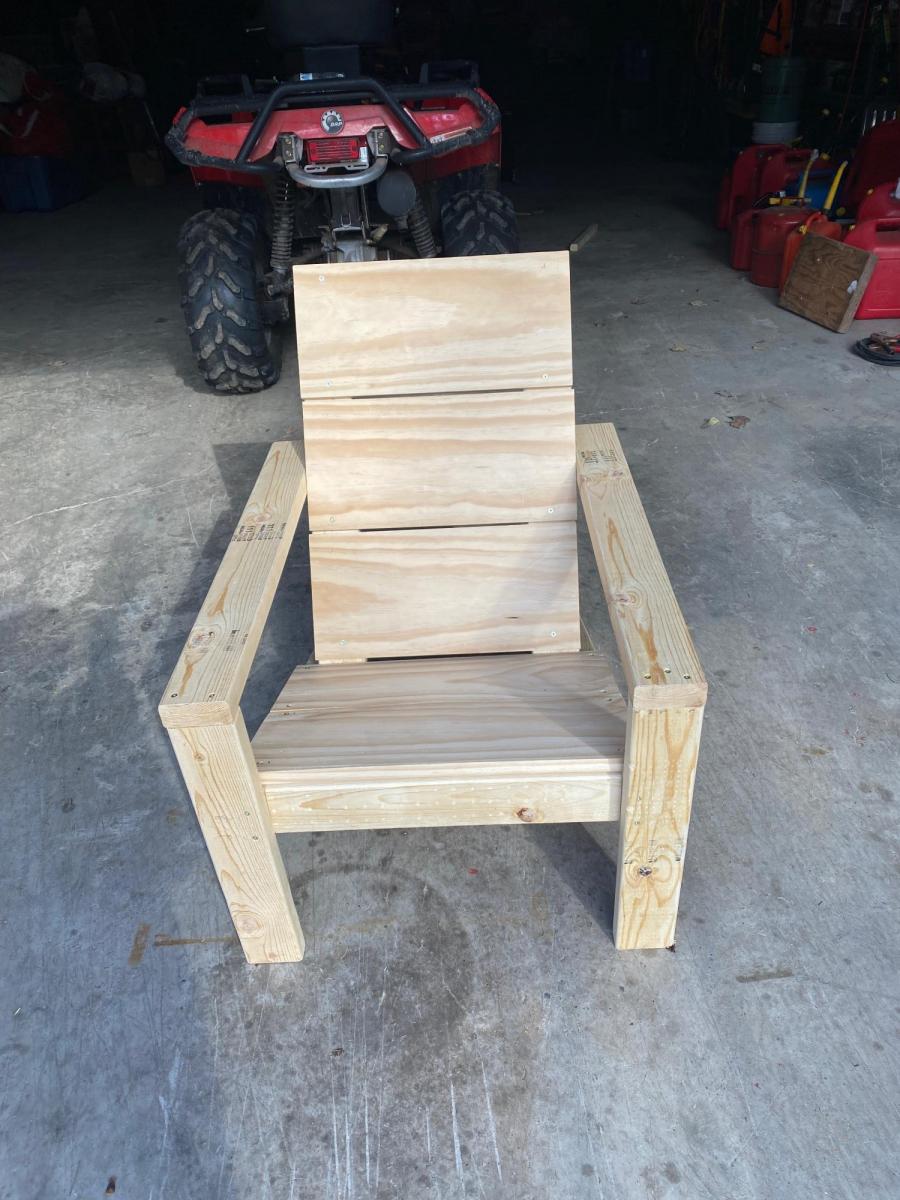
Easy project to build. I added a full board to make chair 4in wider. I also counter sank all screws and used wood plugs to cover screws. I also used 1x4's for all the slats and arm rests. Didn't use 1x3's at all. I added cup holders with some scrap left over wood. Got some plastic cup holder inserts.
Modified roof orientation and extended to 16
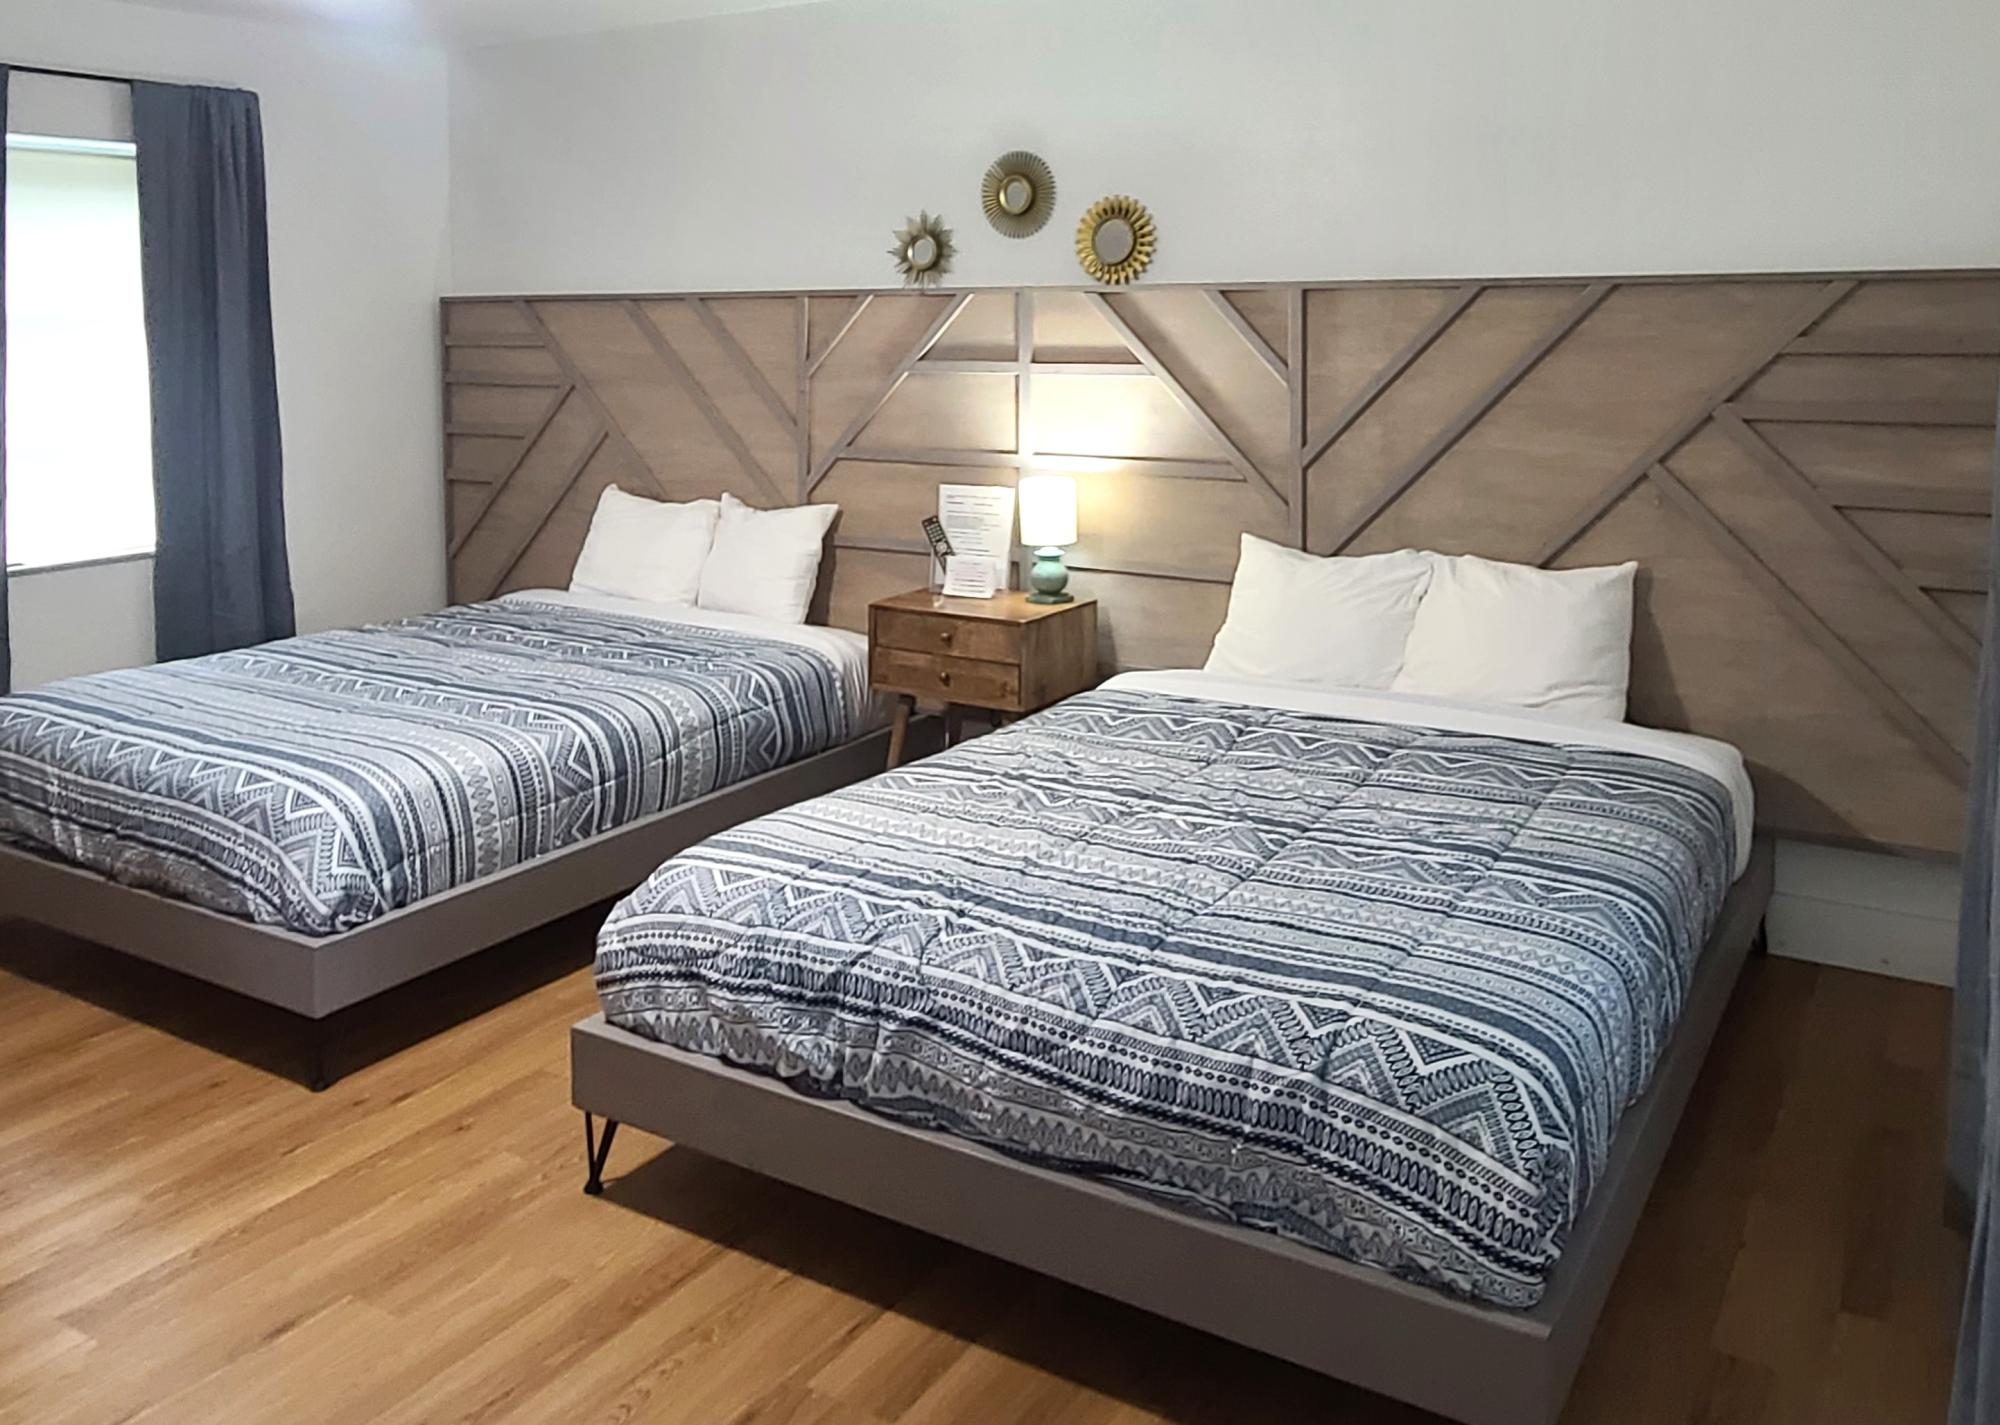
Built these bedframes and headboards for a local motel
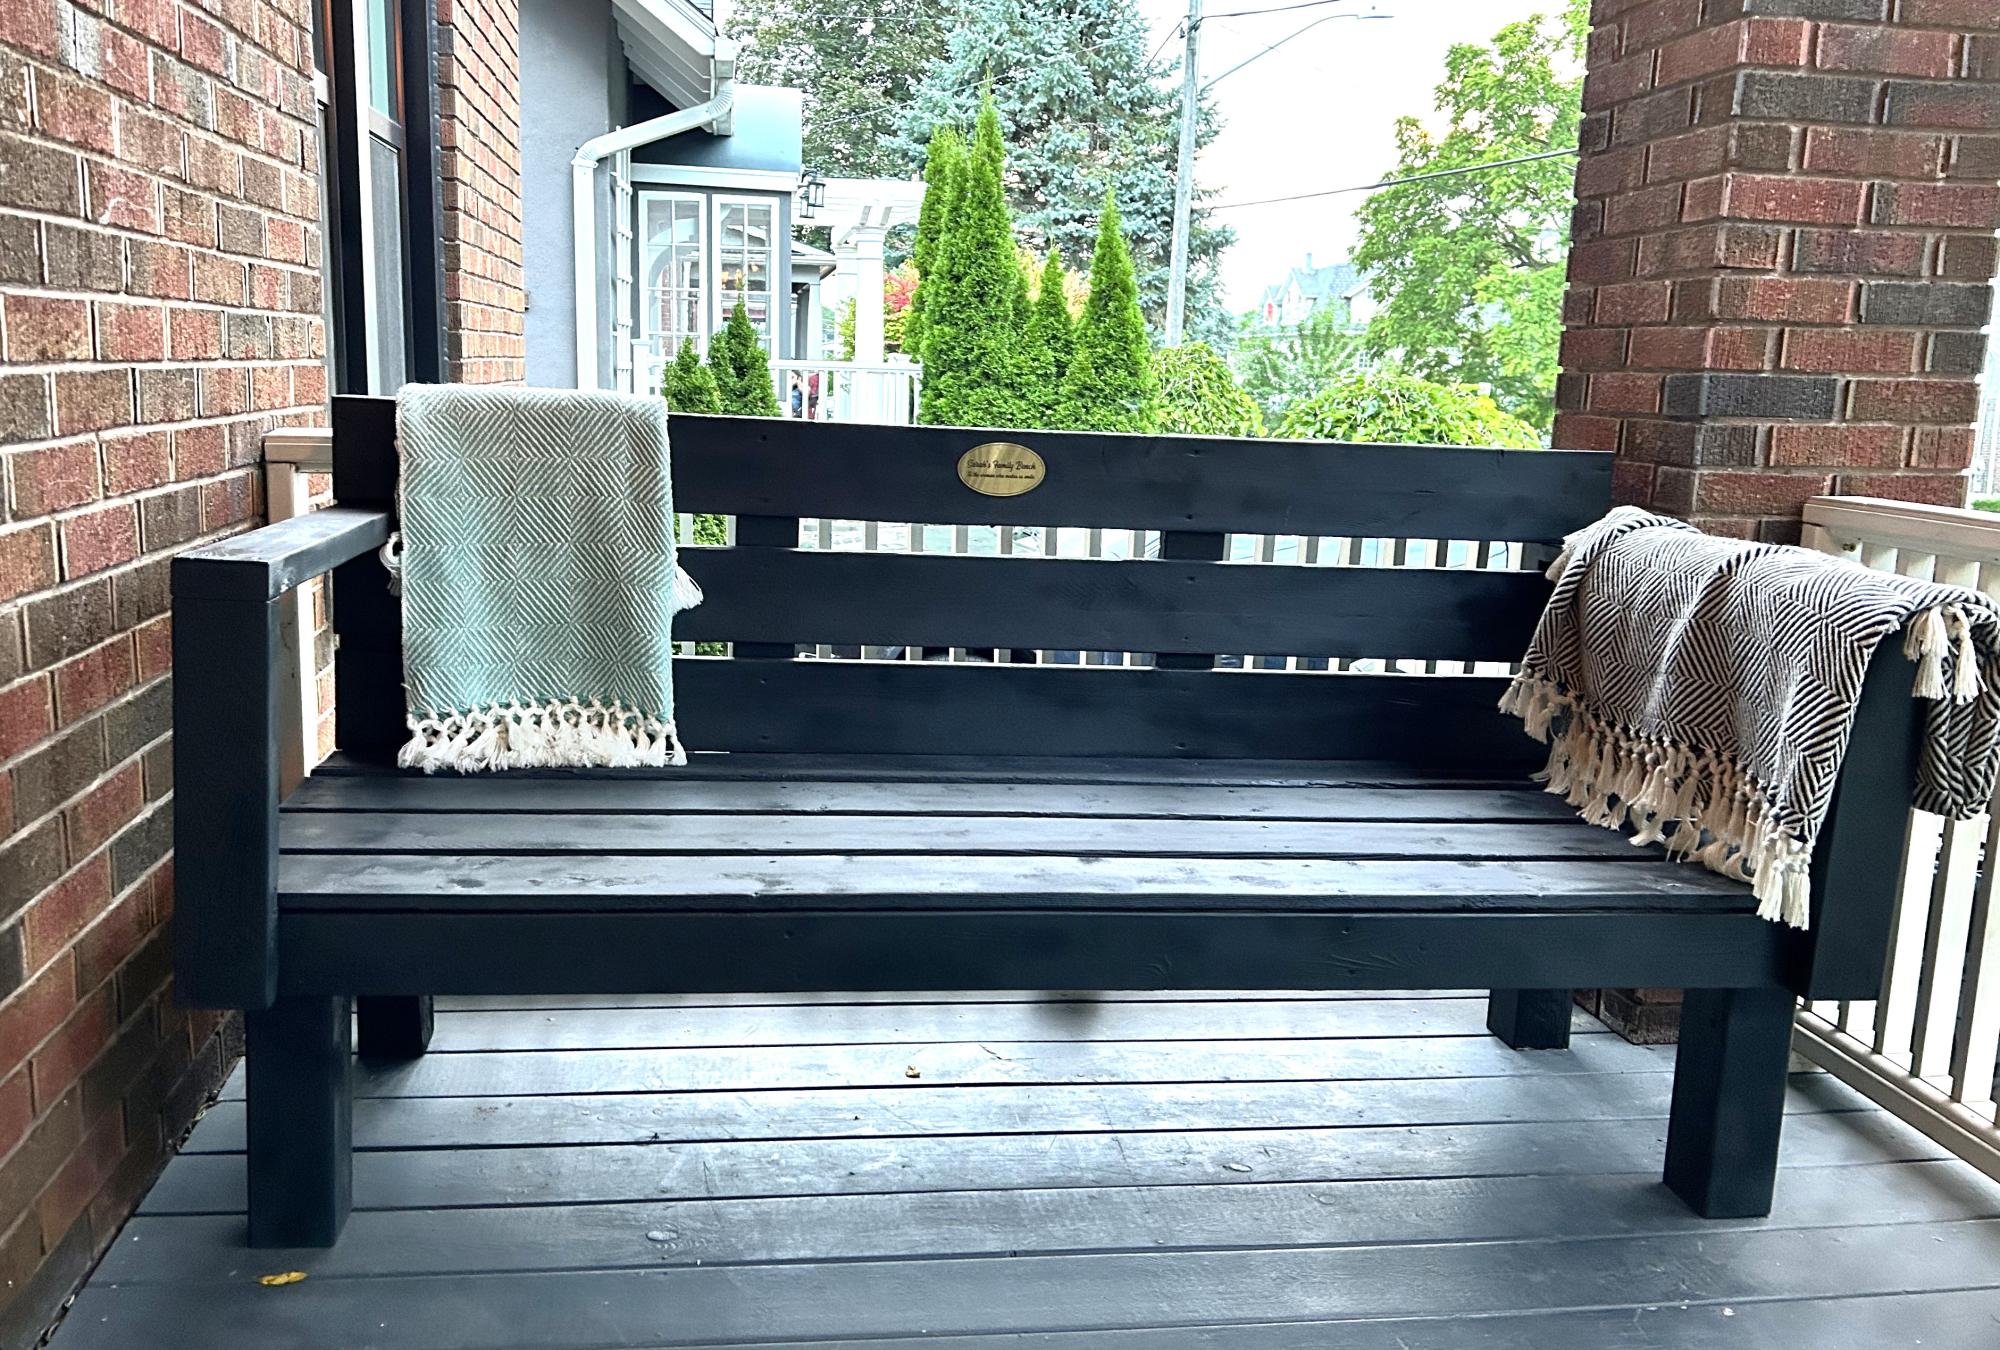
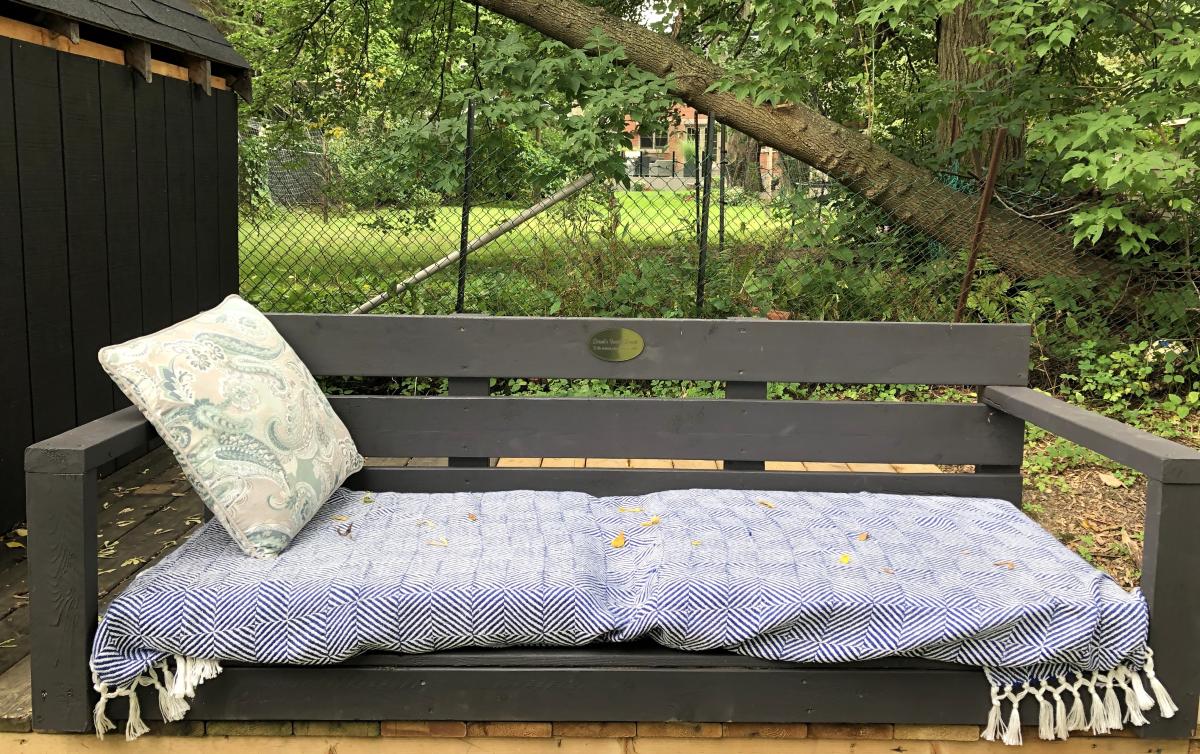
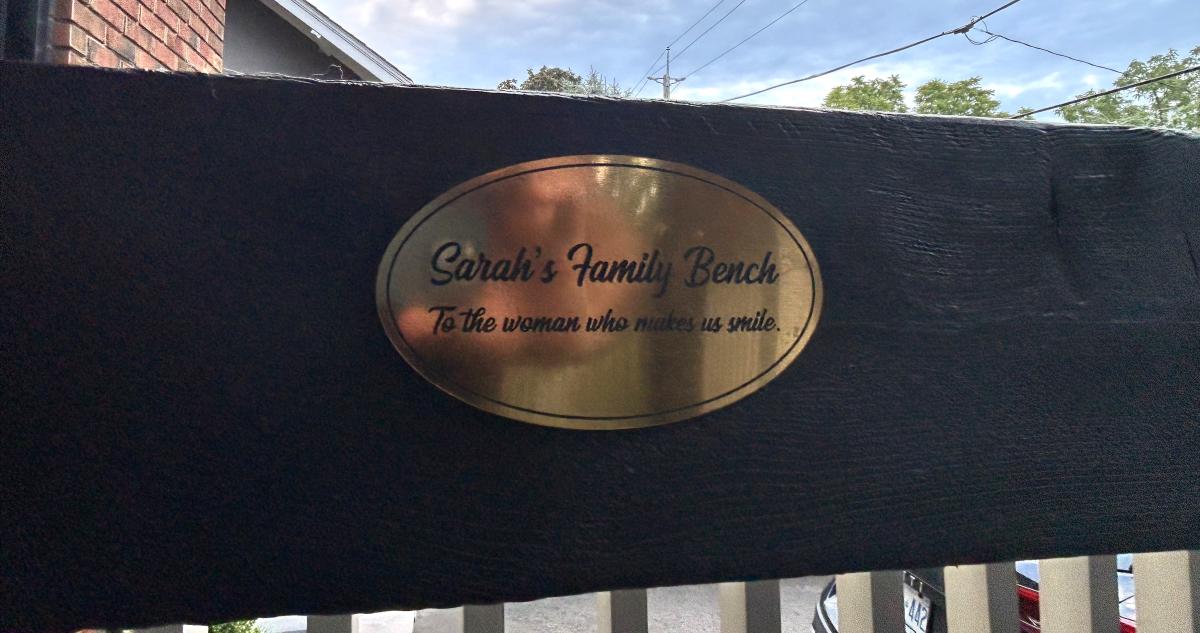
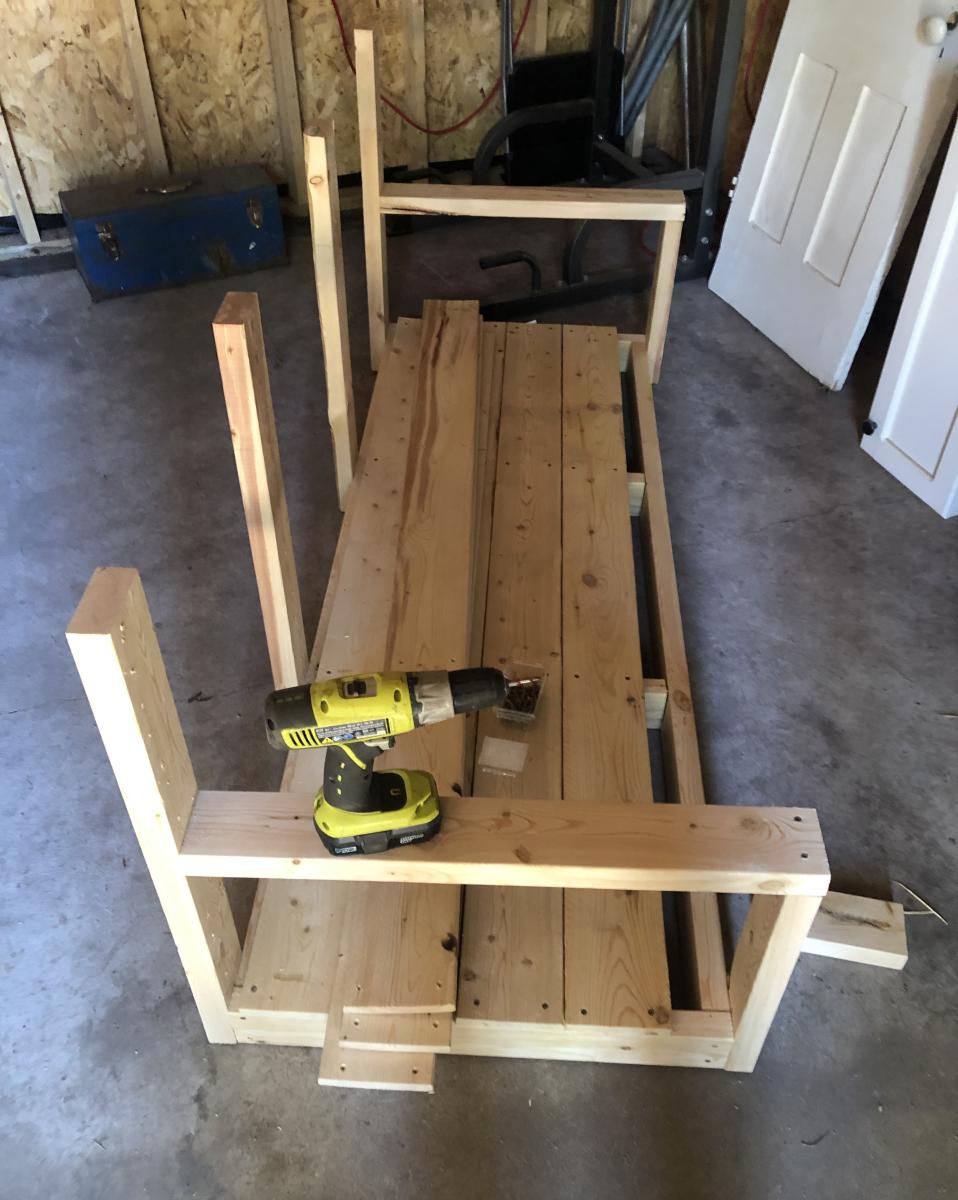
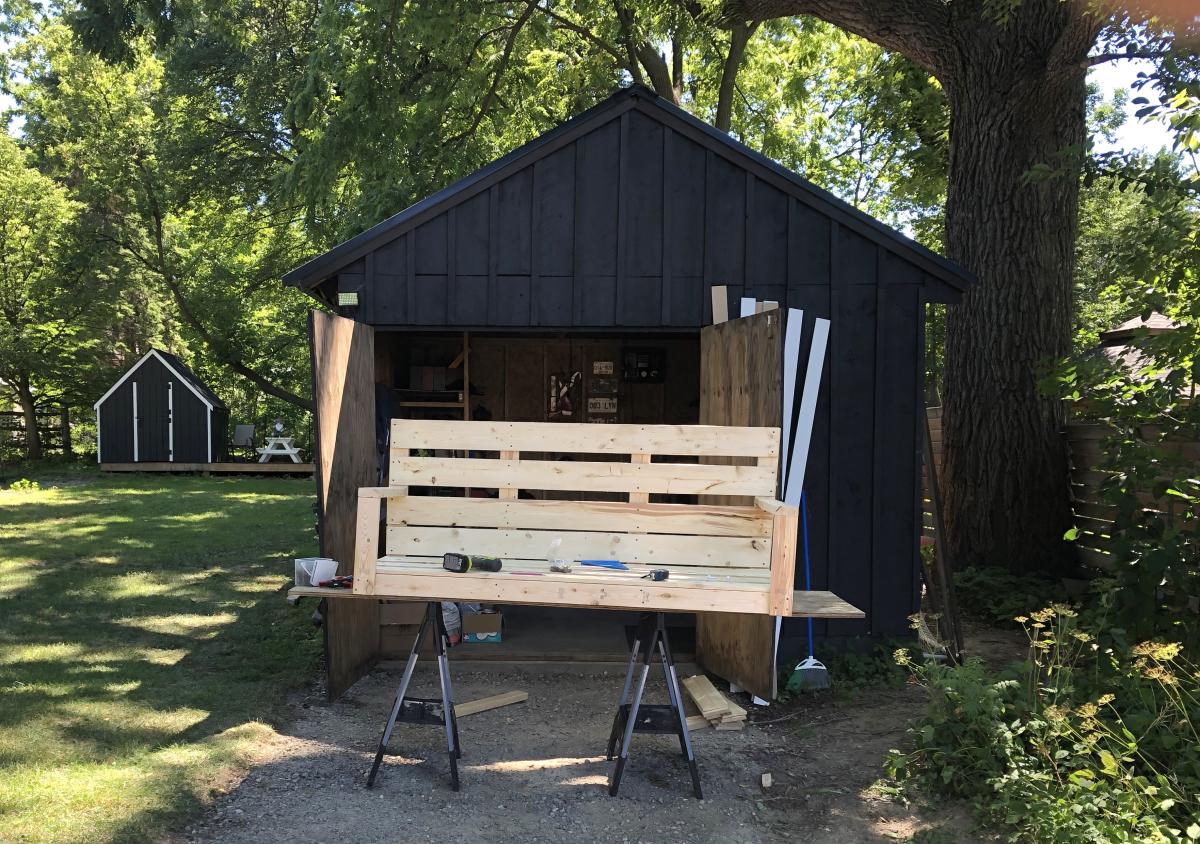
Made my wife a Ana White DIY porch bench for our 10 year wedding anniversary. Had a custom plaque made: Sarah’s Bench.
Looks beauty on our front porch.
Jesse Micak, Ontario, Canada
Wed, 08/30/2023 - 09:55
Beautiful bench and I'm sure your wife loves it! Thanks for sharing.
this table and chairs was a joint effort between my lifelong best friend’s son and I, his dad had just recently passed away and it was a good way for us to stay busy and also to help furnish his new house he’d just moved into, we used stock pine 2x and 1x lumber from the big box store and StoneCoat countertops epoxy resin on the table top.This was a lot fun and not too difficult to make and we were super happy with the way this project turned out!
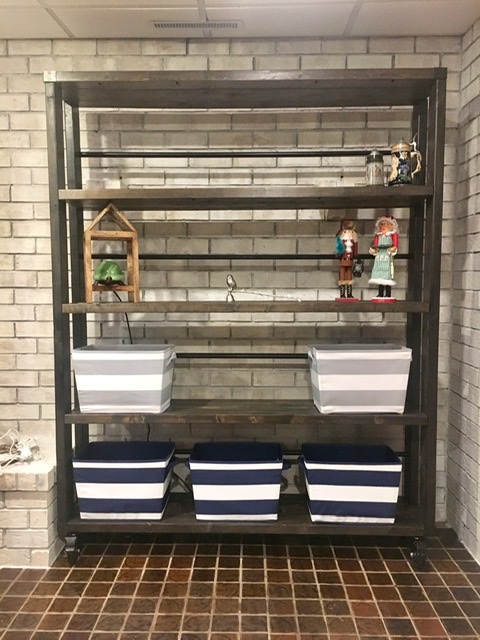
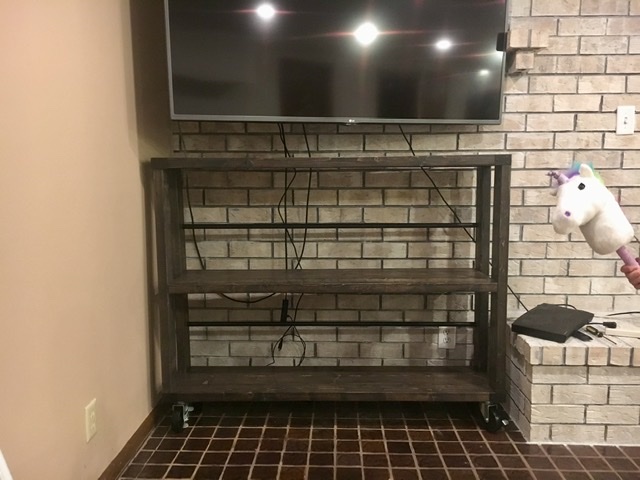
These were fun to make. They let me whitewashed brick show through while still being functional. I made a shorter one to go under my tv too. My advice is to secure them to the wall if they feel tipsy like mine.
Home Depot cut and threaded all my pipe. They were great!
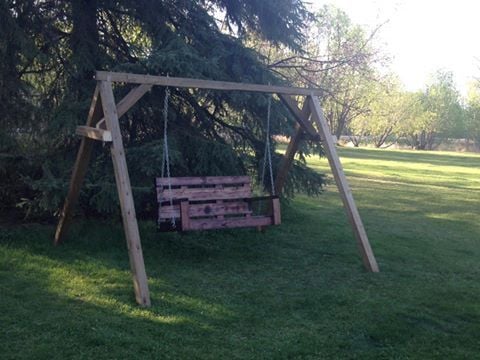
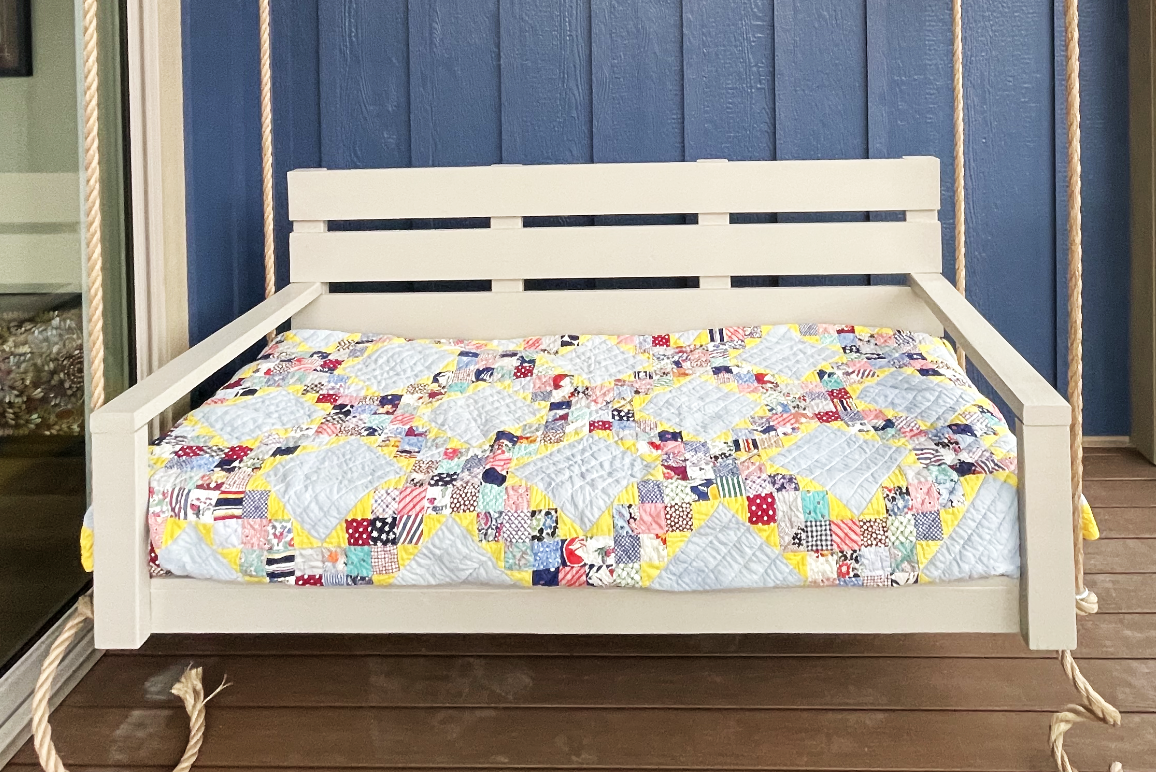
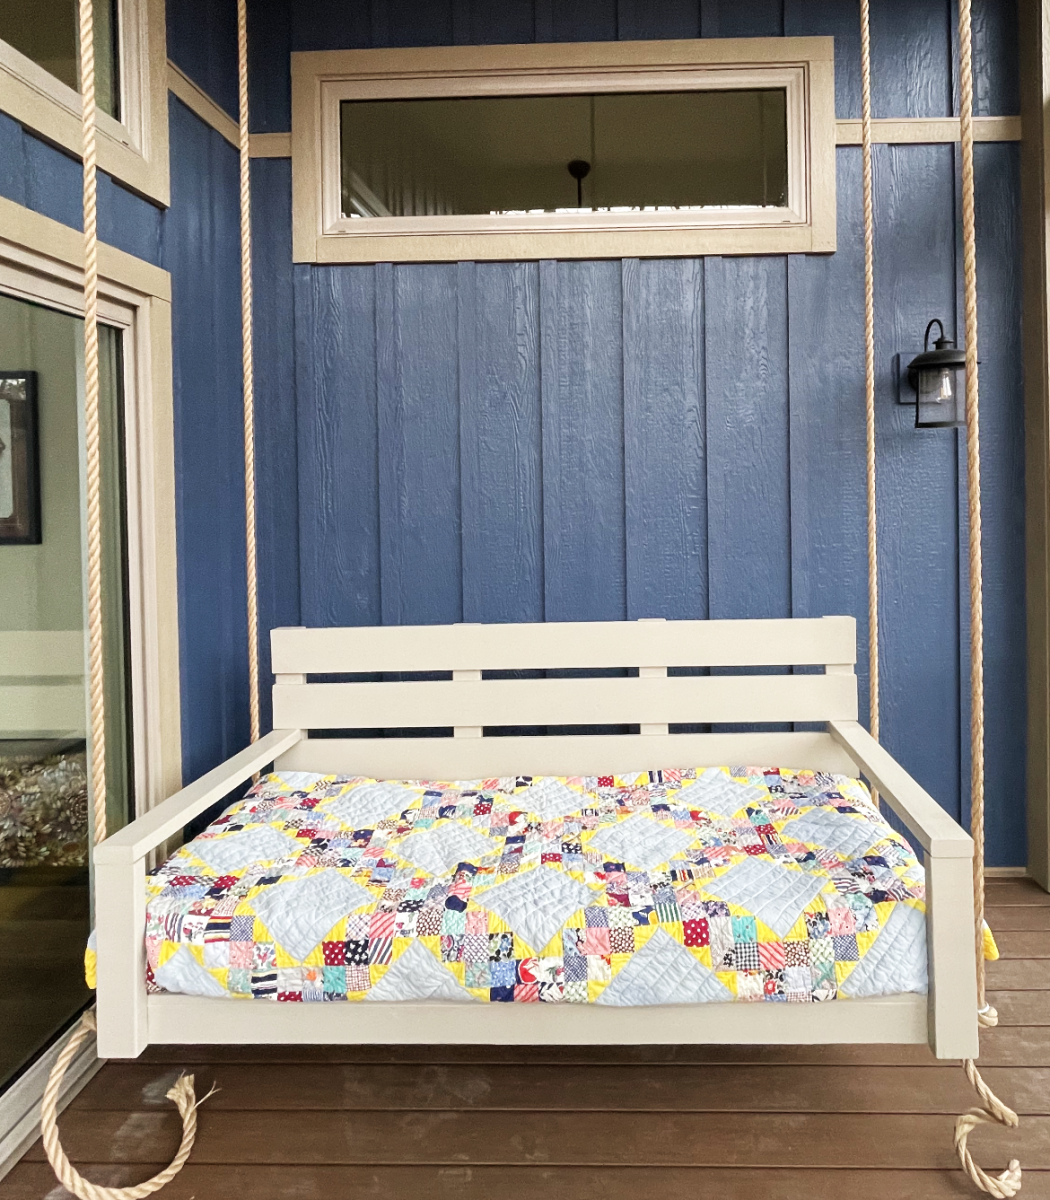
Perfect plan Ana , very easy to make. Swing hung on the A frame bulid with 4X4
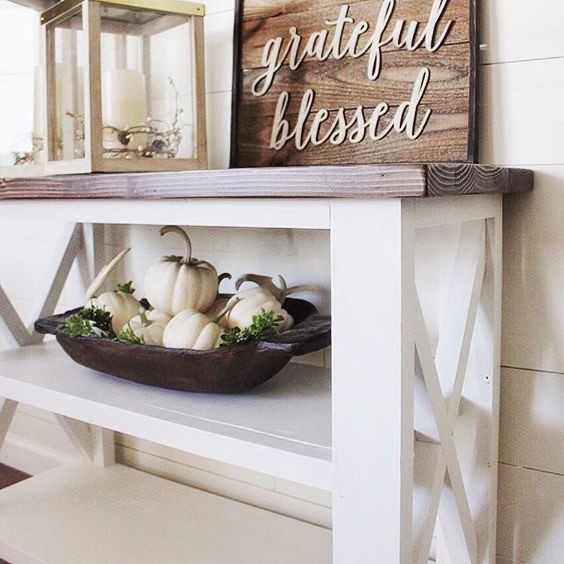
Beautiful fall decor console table.
Wed, 09/11/2024 - 13:44
Hi, this is beautiful!! Could you share the the modified plans you used to make this?
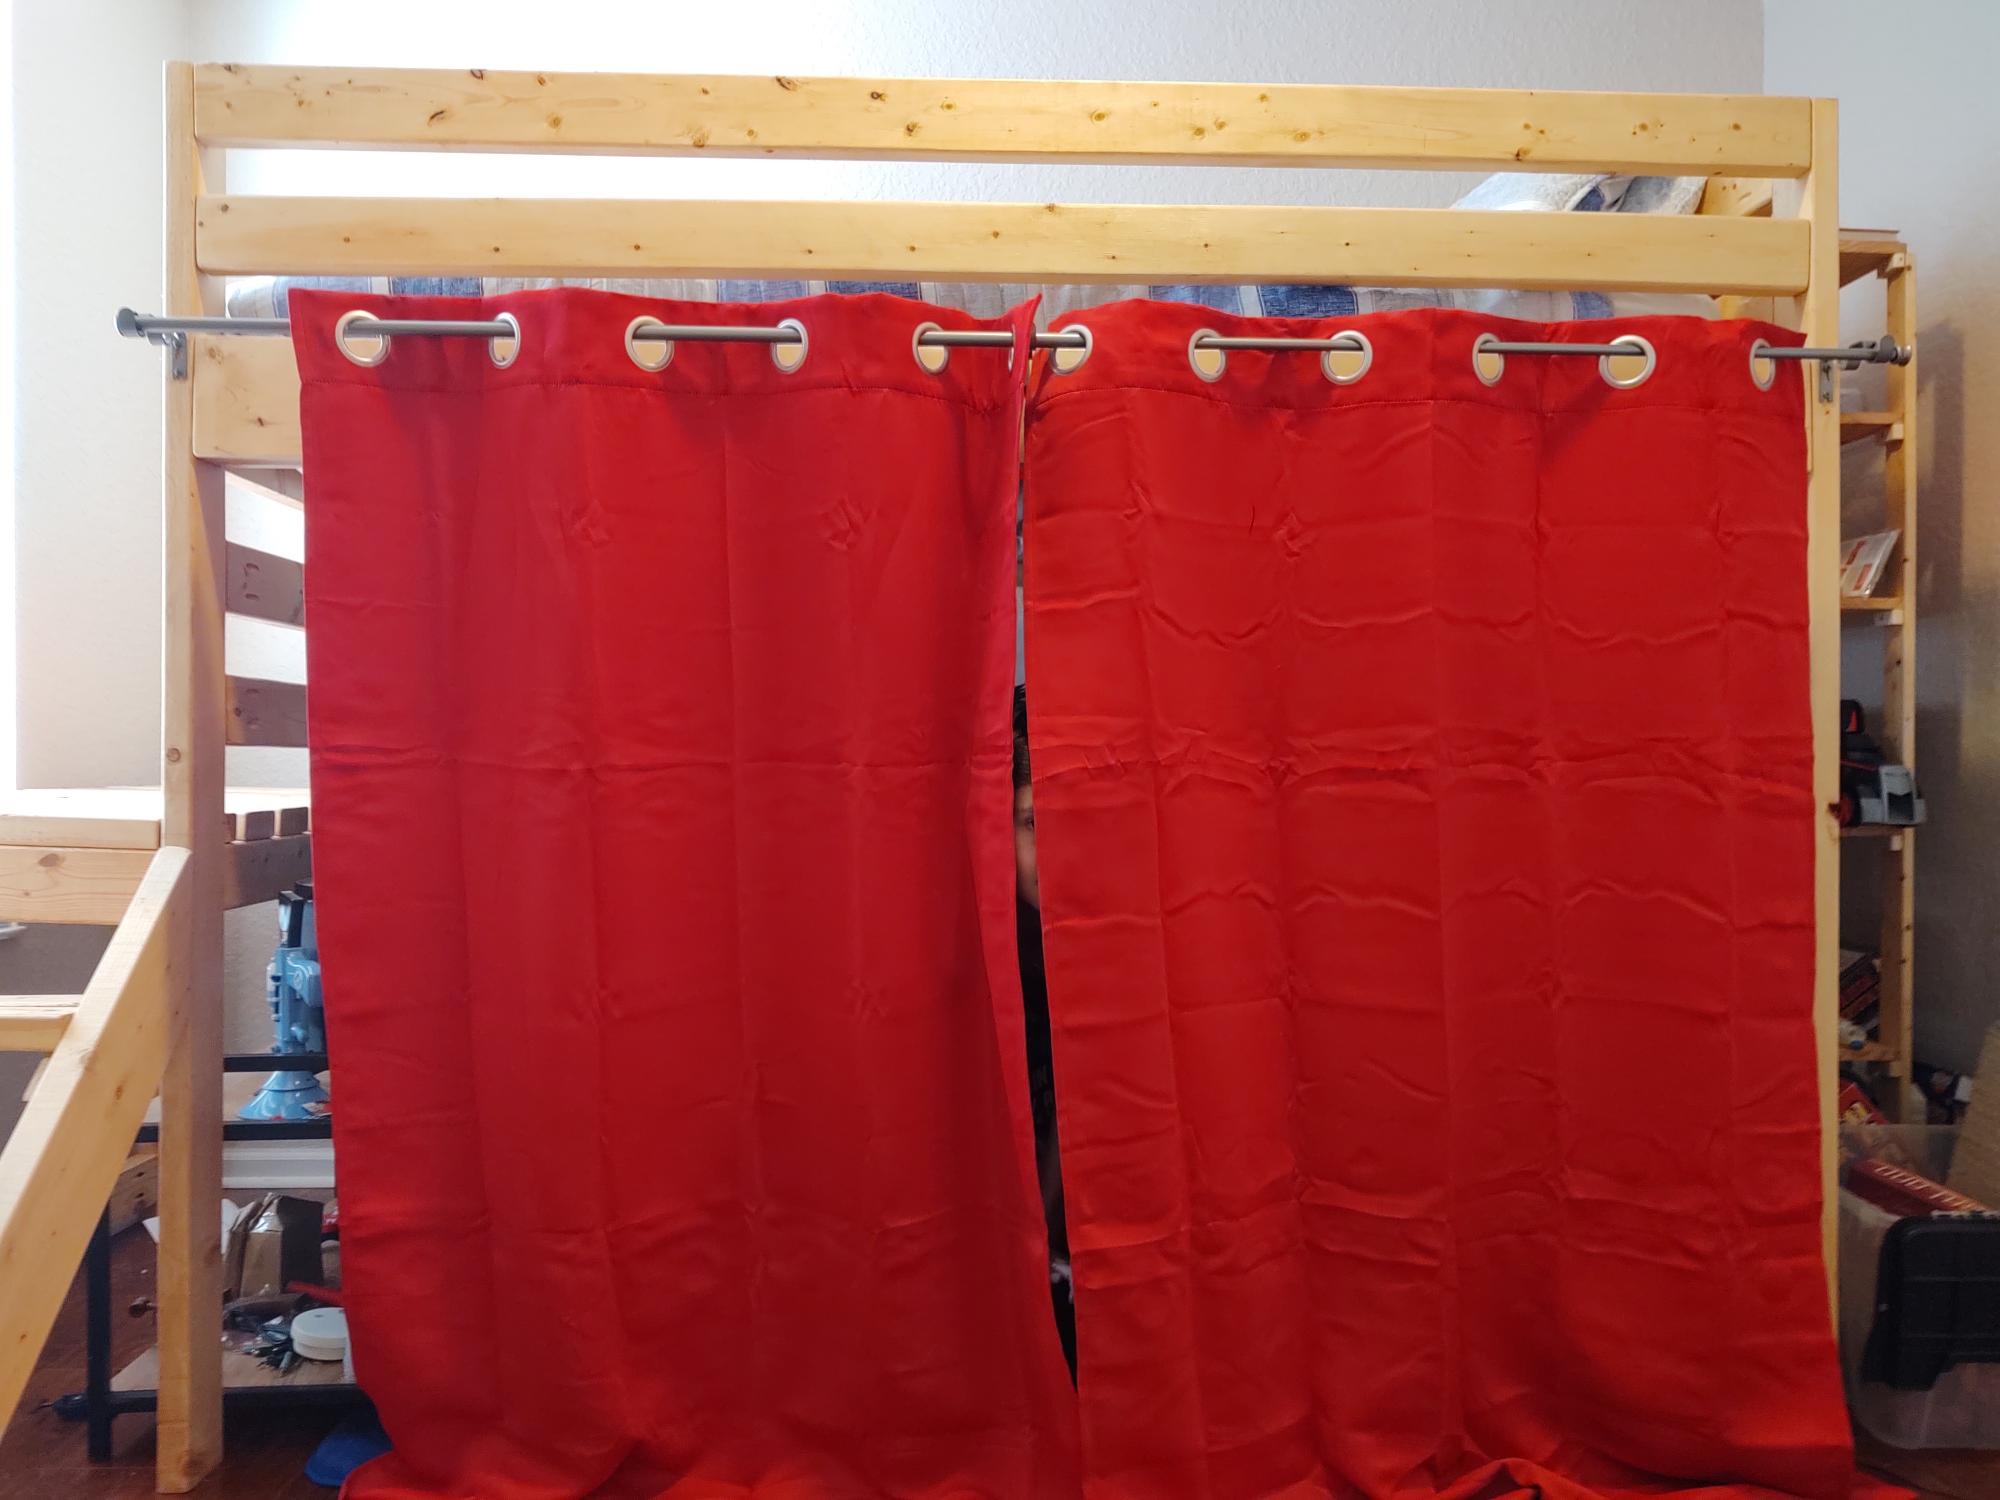
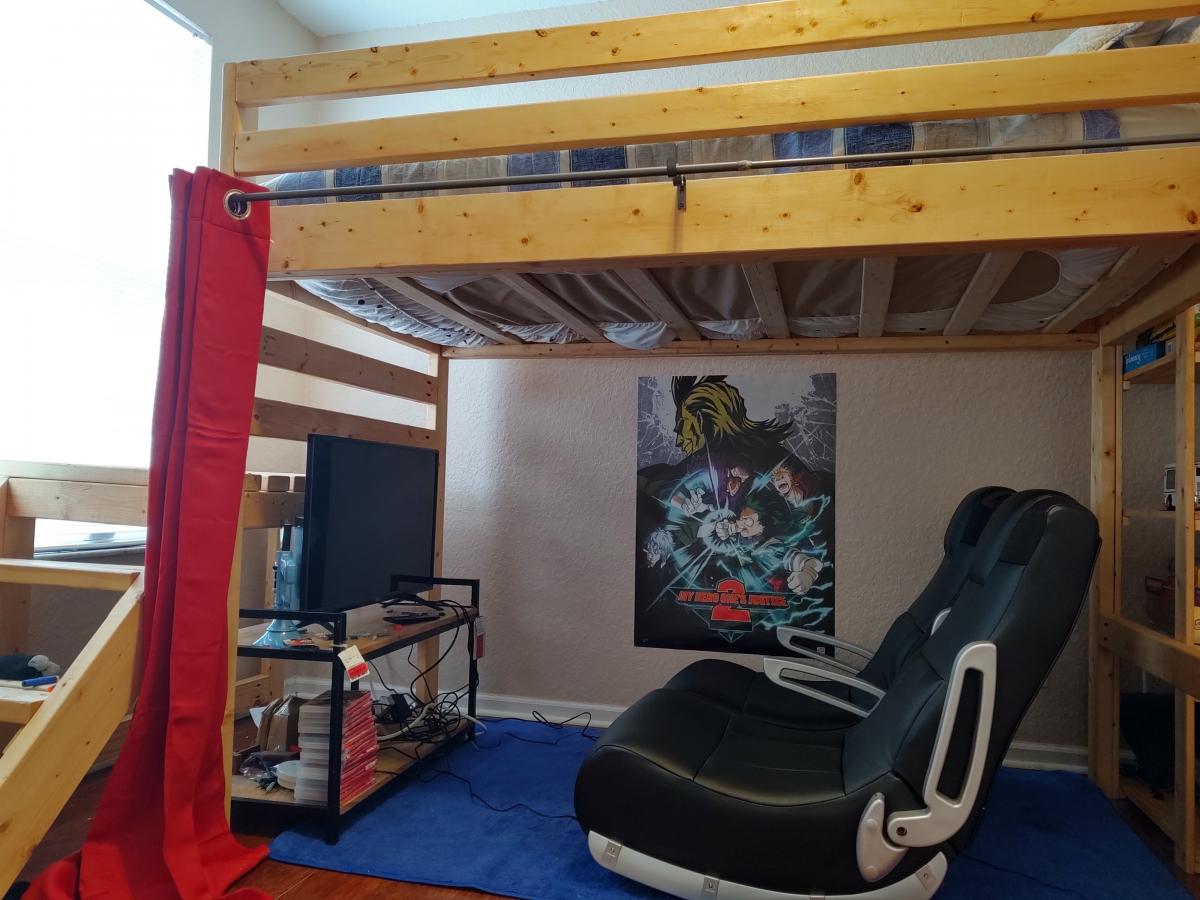
I built this for my 10 year old son. His room is not very big so this loft bed provides the perfect solution to freeing up floor space for playing.
I added some toy shelves to the side for additional storage.
The curtain, TV and gaming chairs turn the under the bed portion into his personal "boy-cave" gaming center.
Thank you for the easy to follow instructions. He loves it!
We are stuck at home for the Shelter-In-Place due to COVID-19 so we decided to use the scrap wood left over from our new deck. Because we didn't have the materials exactly meeting the specifications in the directions, we had to adapt the design significantly but we're really pleased with how it turned out. My 16-year-old daughter made it with me so it was a great to get her involved in building
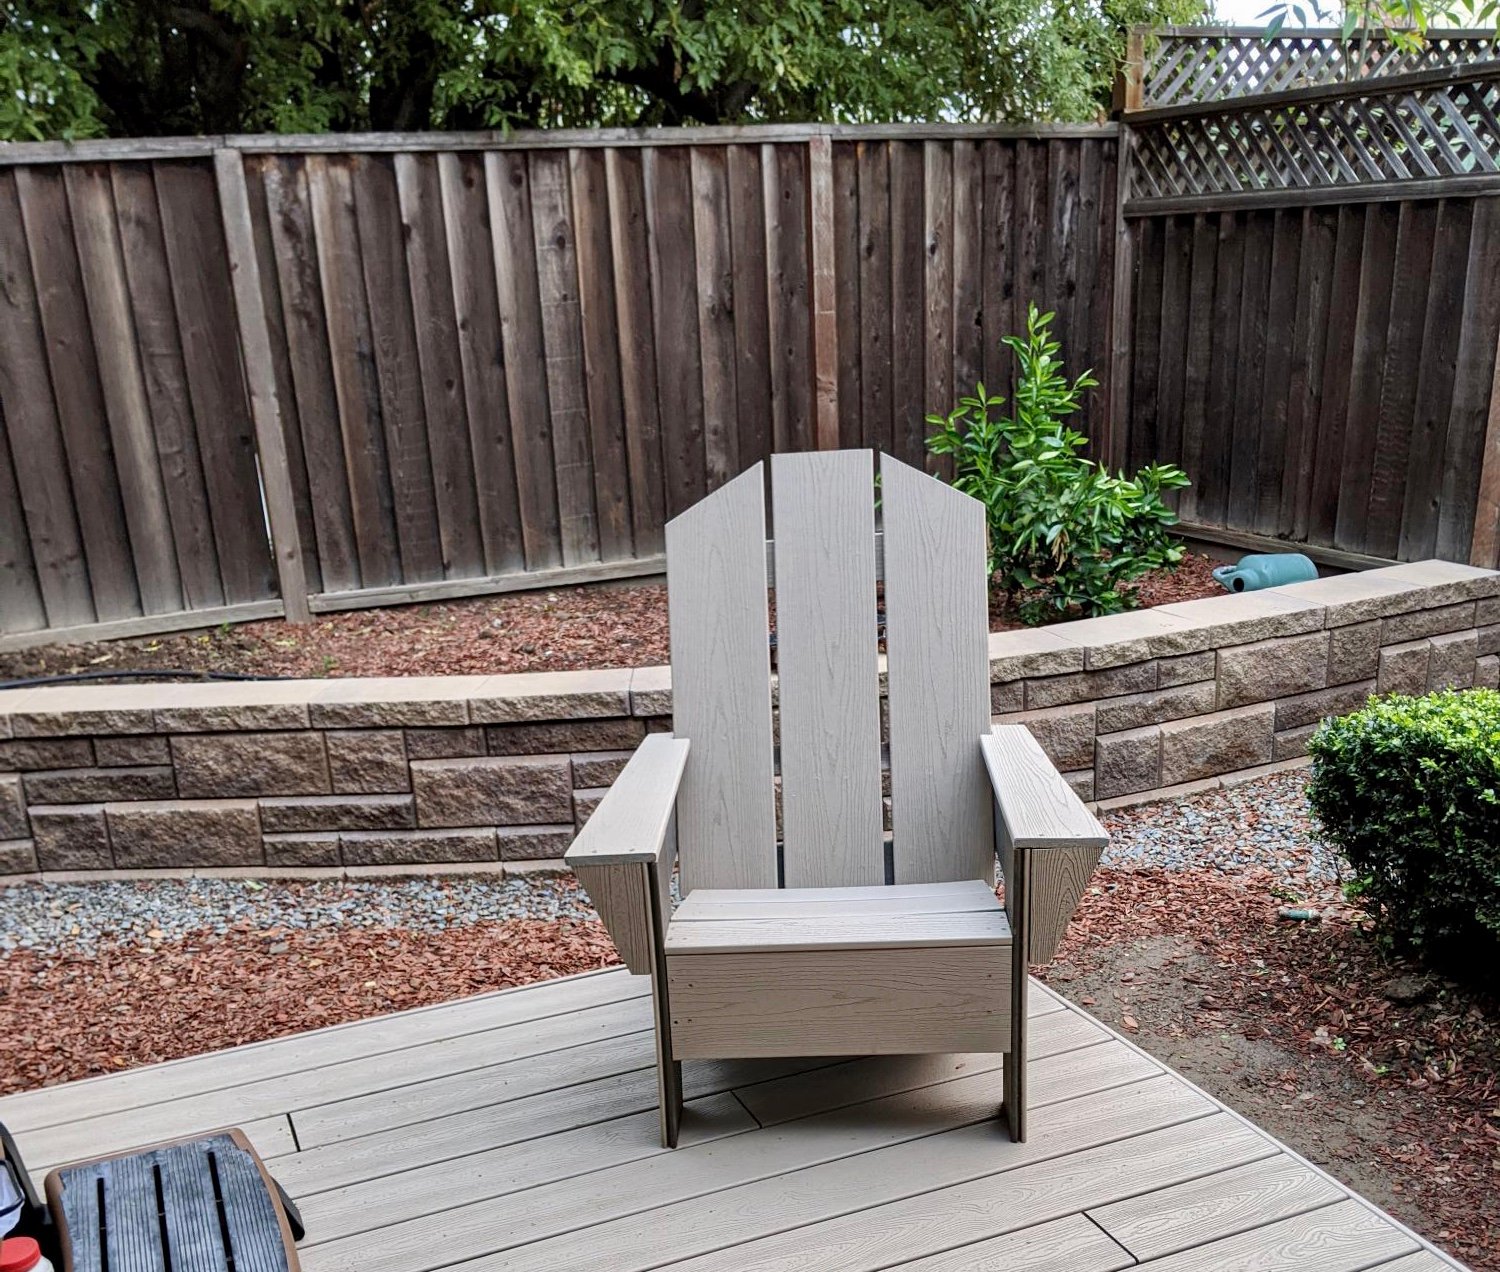
Thanks Anna, great design great plan. My first attempt at a chair. Was a lot of fun , just have to build 5 more, my wife loves it.
Bob
Duluth MN

Tue, 04/28/2020 - 09:21
Thank you so much for building and sharing a brag post! Looks great! Can't wait to see the other 5!
I altered the plans to fit a twin mattress. It’s a bonus sleeping area on the porch. My second project. I’m a 69 year old female and enjoying the building.
Lou Ann
Prior to making this table I had never used a power drill in my life, and I was scared to death. I was intimidated by the power and scared to death to mess up, and in making this table I messed up A LOT! It was a big undertaking but I was determined. It’s rustic and authentic and full of mistakes and I LOVE IT!! Thank you Ana for modeling how to make such wonderful things. Up next is the raised flower bed.
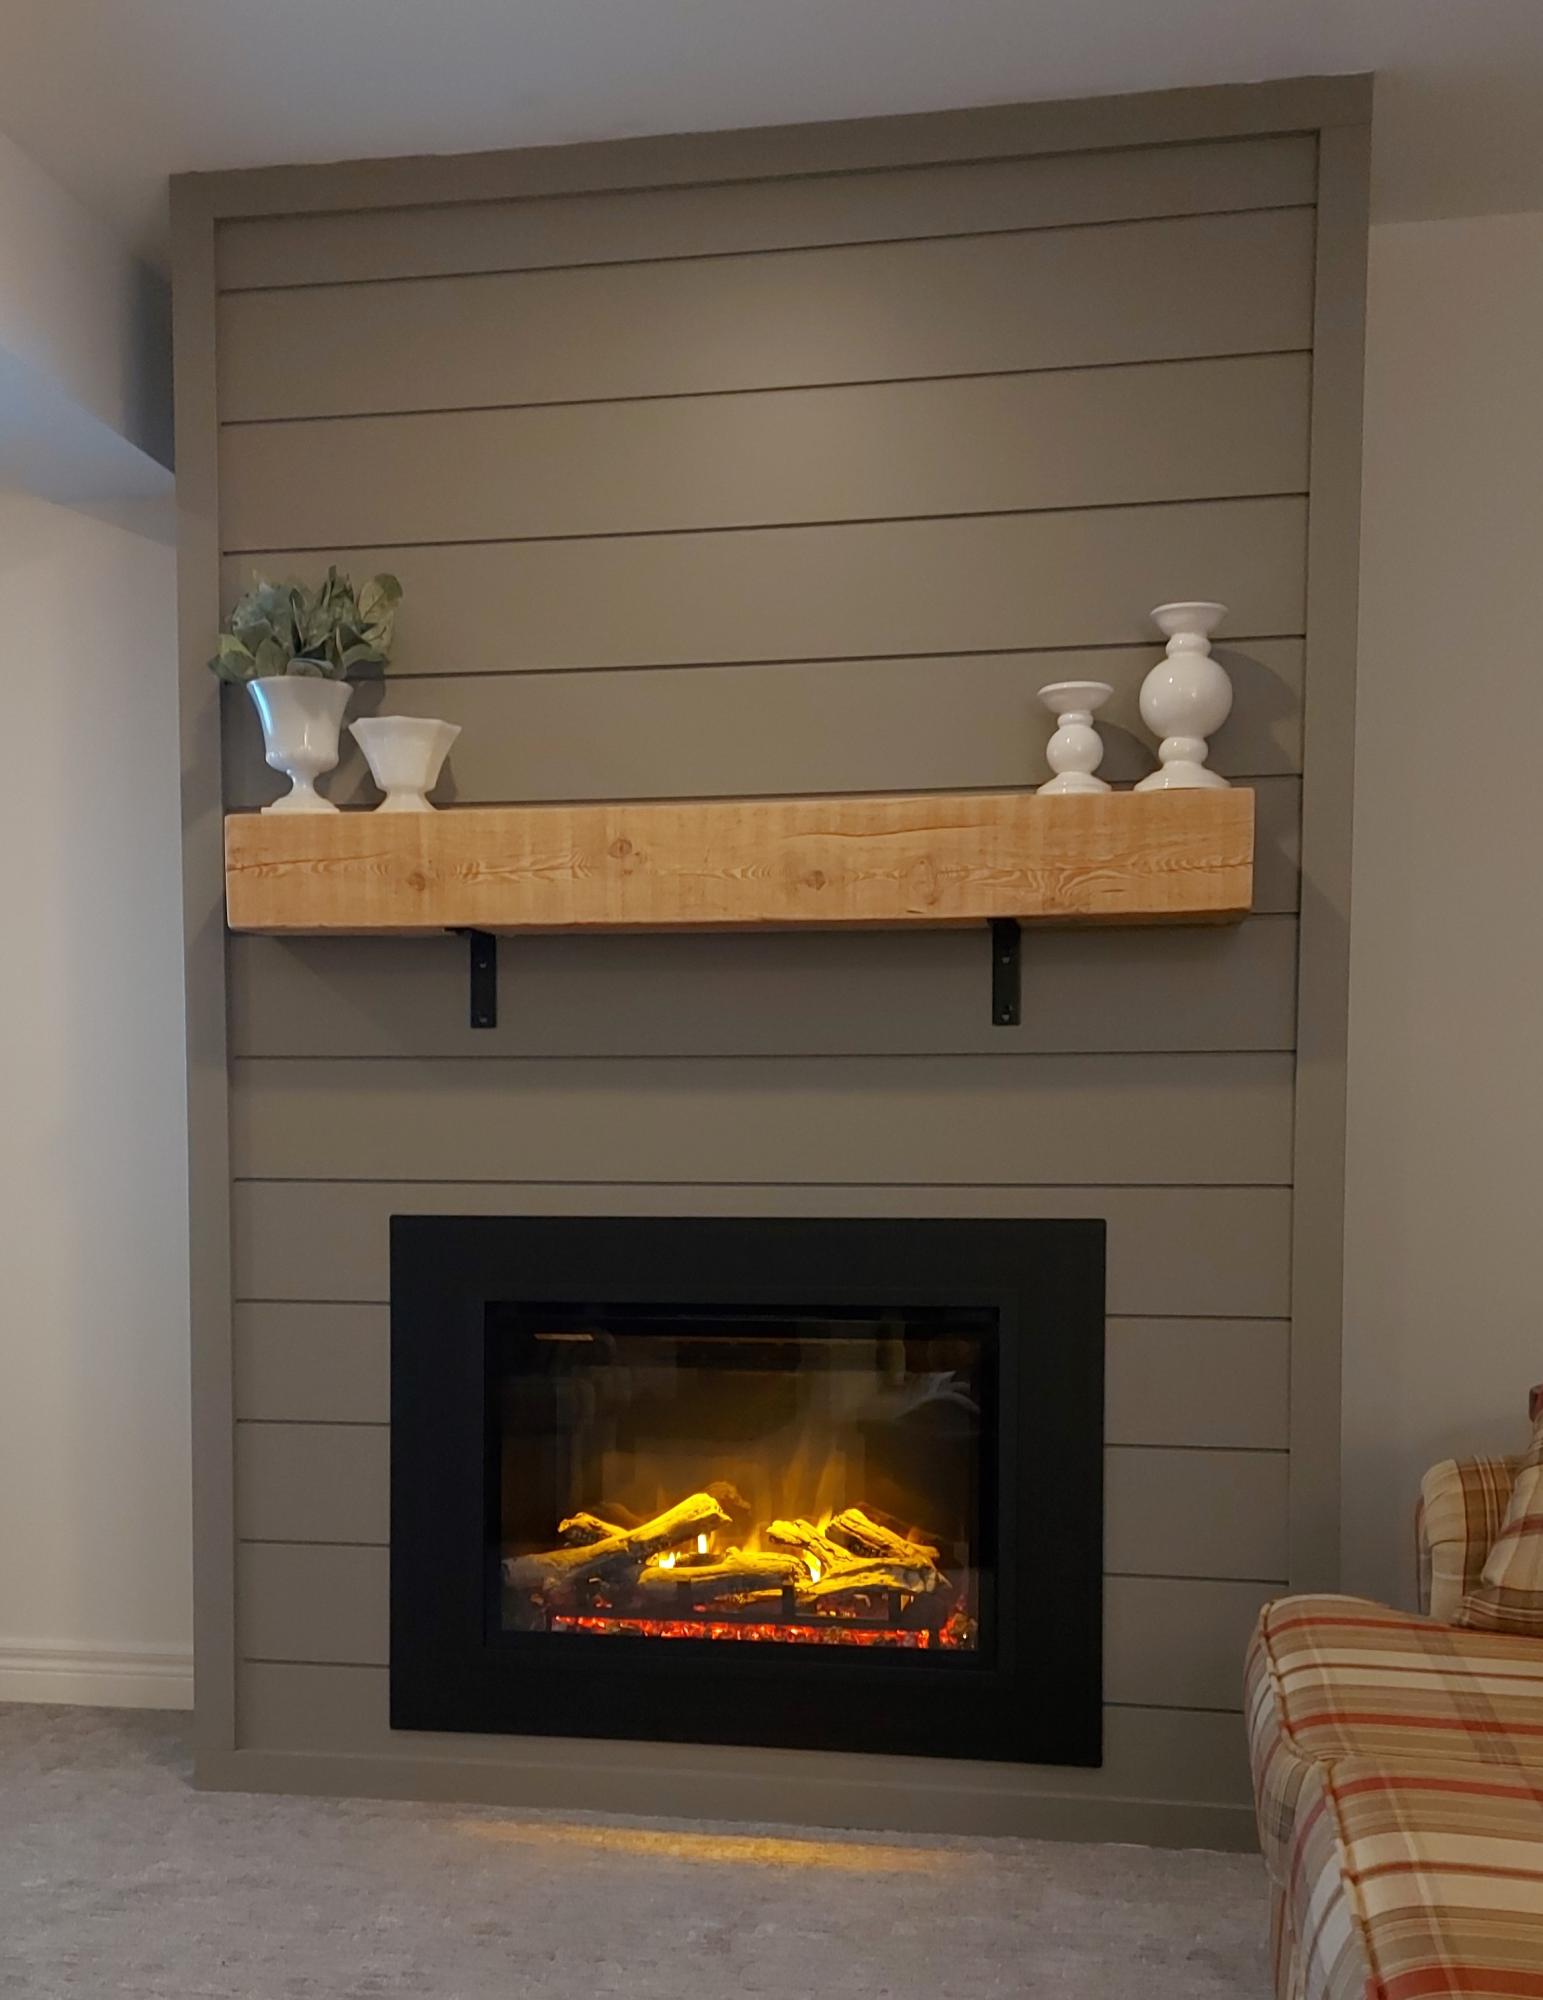
We built this fireplace where nothing existed before. The instructional video was very helpful. We are so proud of how it turned out.
Jim and Susie Jacob
Wed, 02/28/2024 - 19:20
Hello! I’m wondering if you think this could be built as a temporary piece that could be moved? I live in apartment and wouldn’t want to leave something like this behind after spending time and money to build it. Maybe if I built in some removable access panels (a few of the slats?) to be able to attach it to studs (and later remove it) after building the entire piece. Thoughts? TIA!
Directions were perfect! This is my 3rd project and I really enjoyed it! Fast and easy.
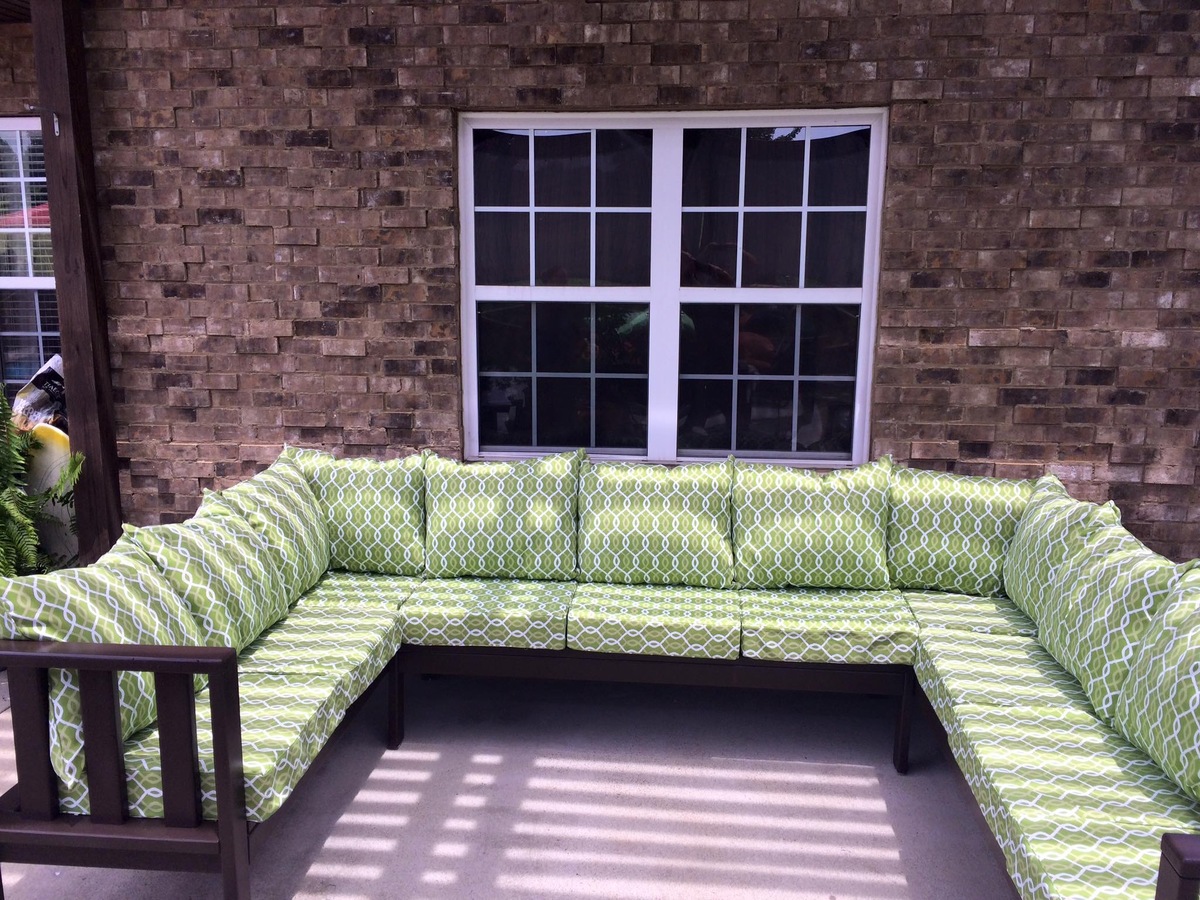
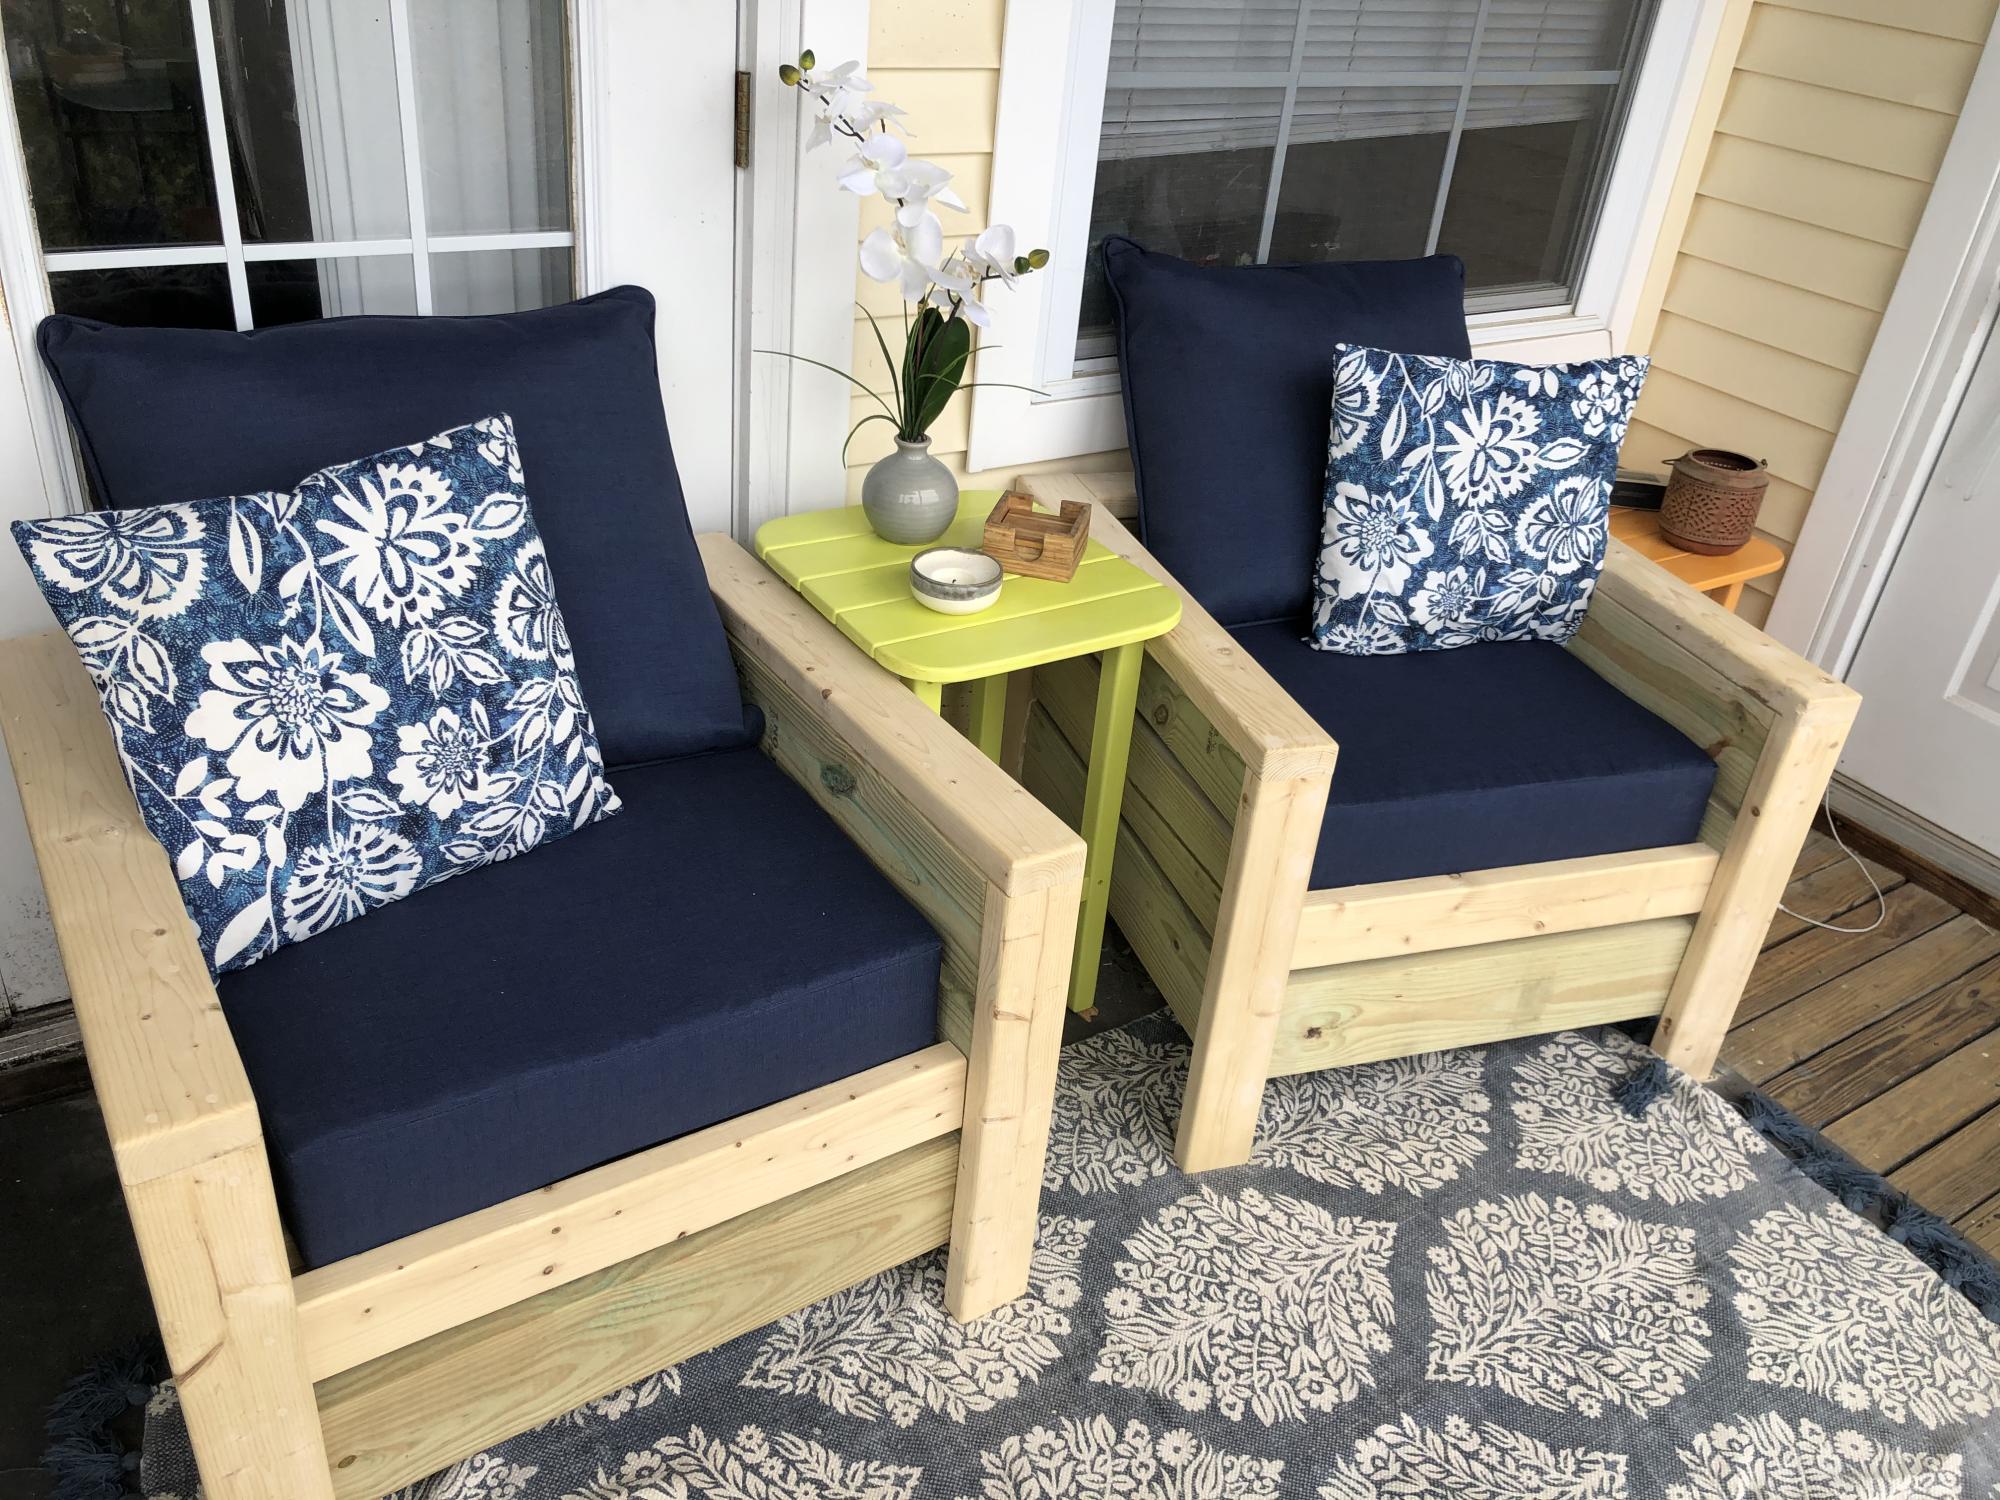
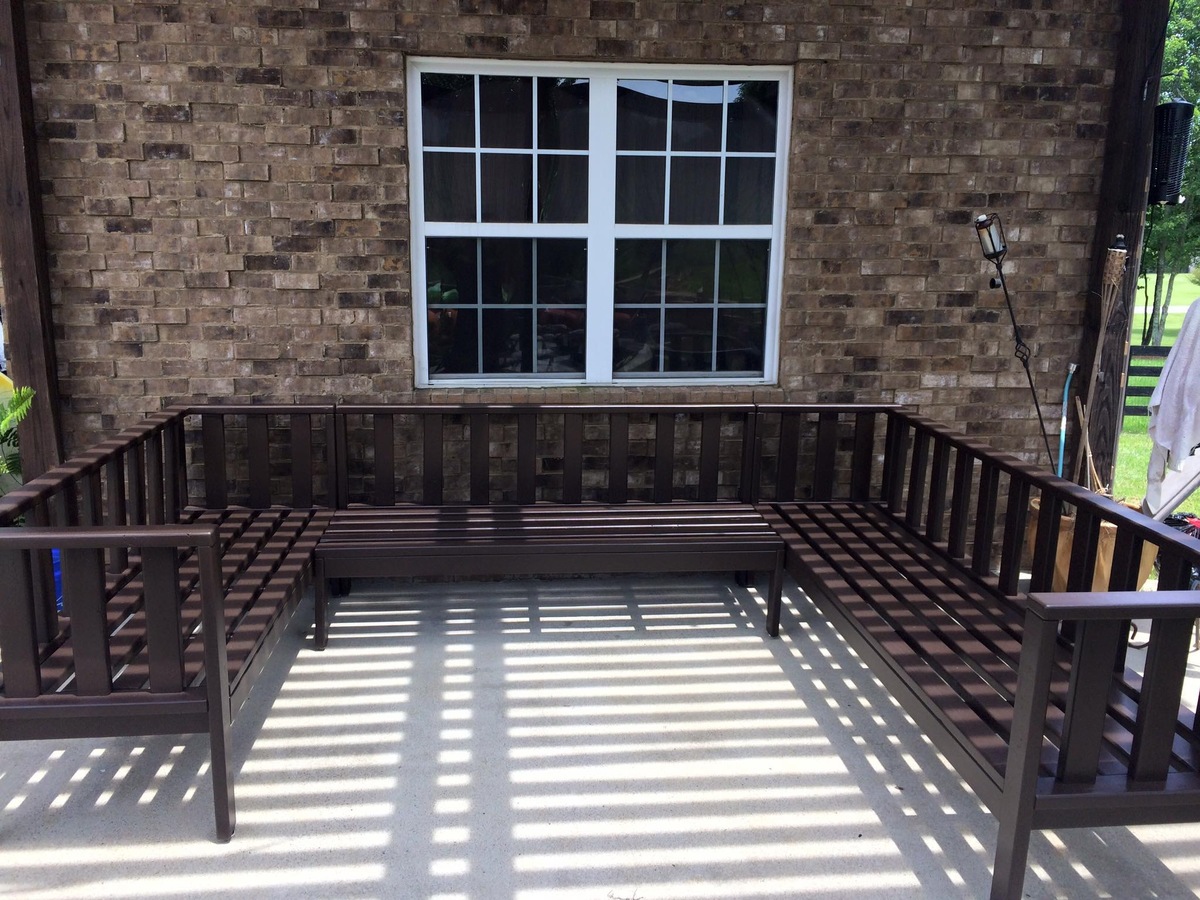
This was built off Ana's Outdoor Couch plans. I just made some additional things to it and made it larger.
I added the vertical back supports so the cushions don't slip out the back. I raised the seat height to 17".
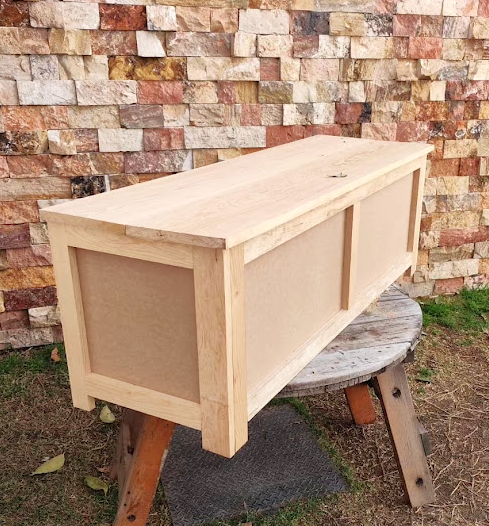
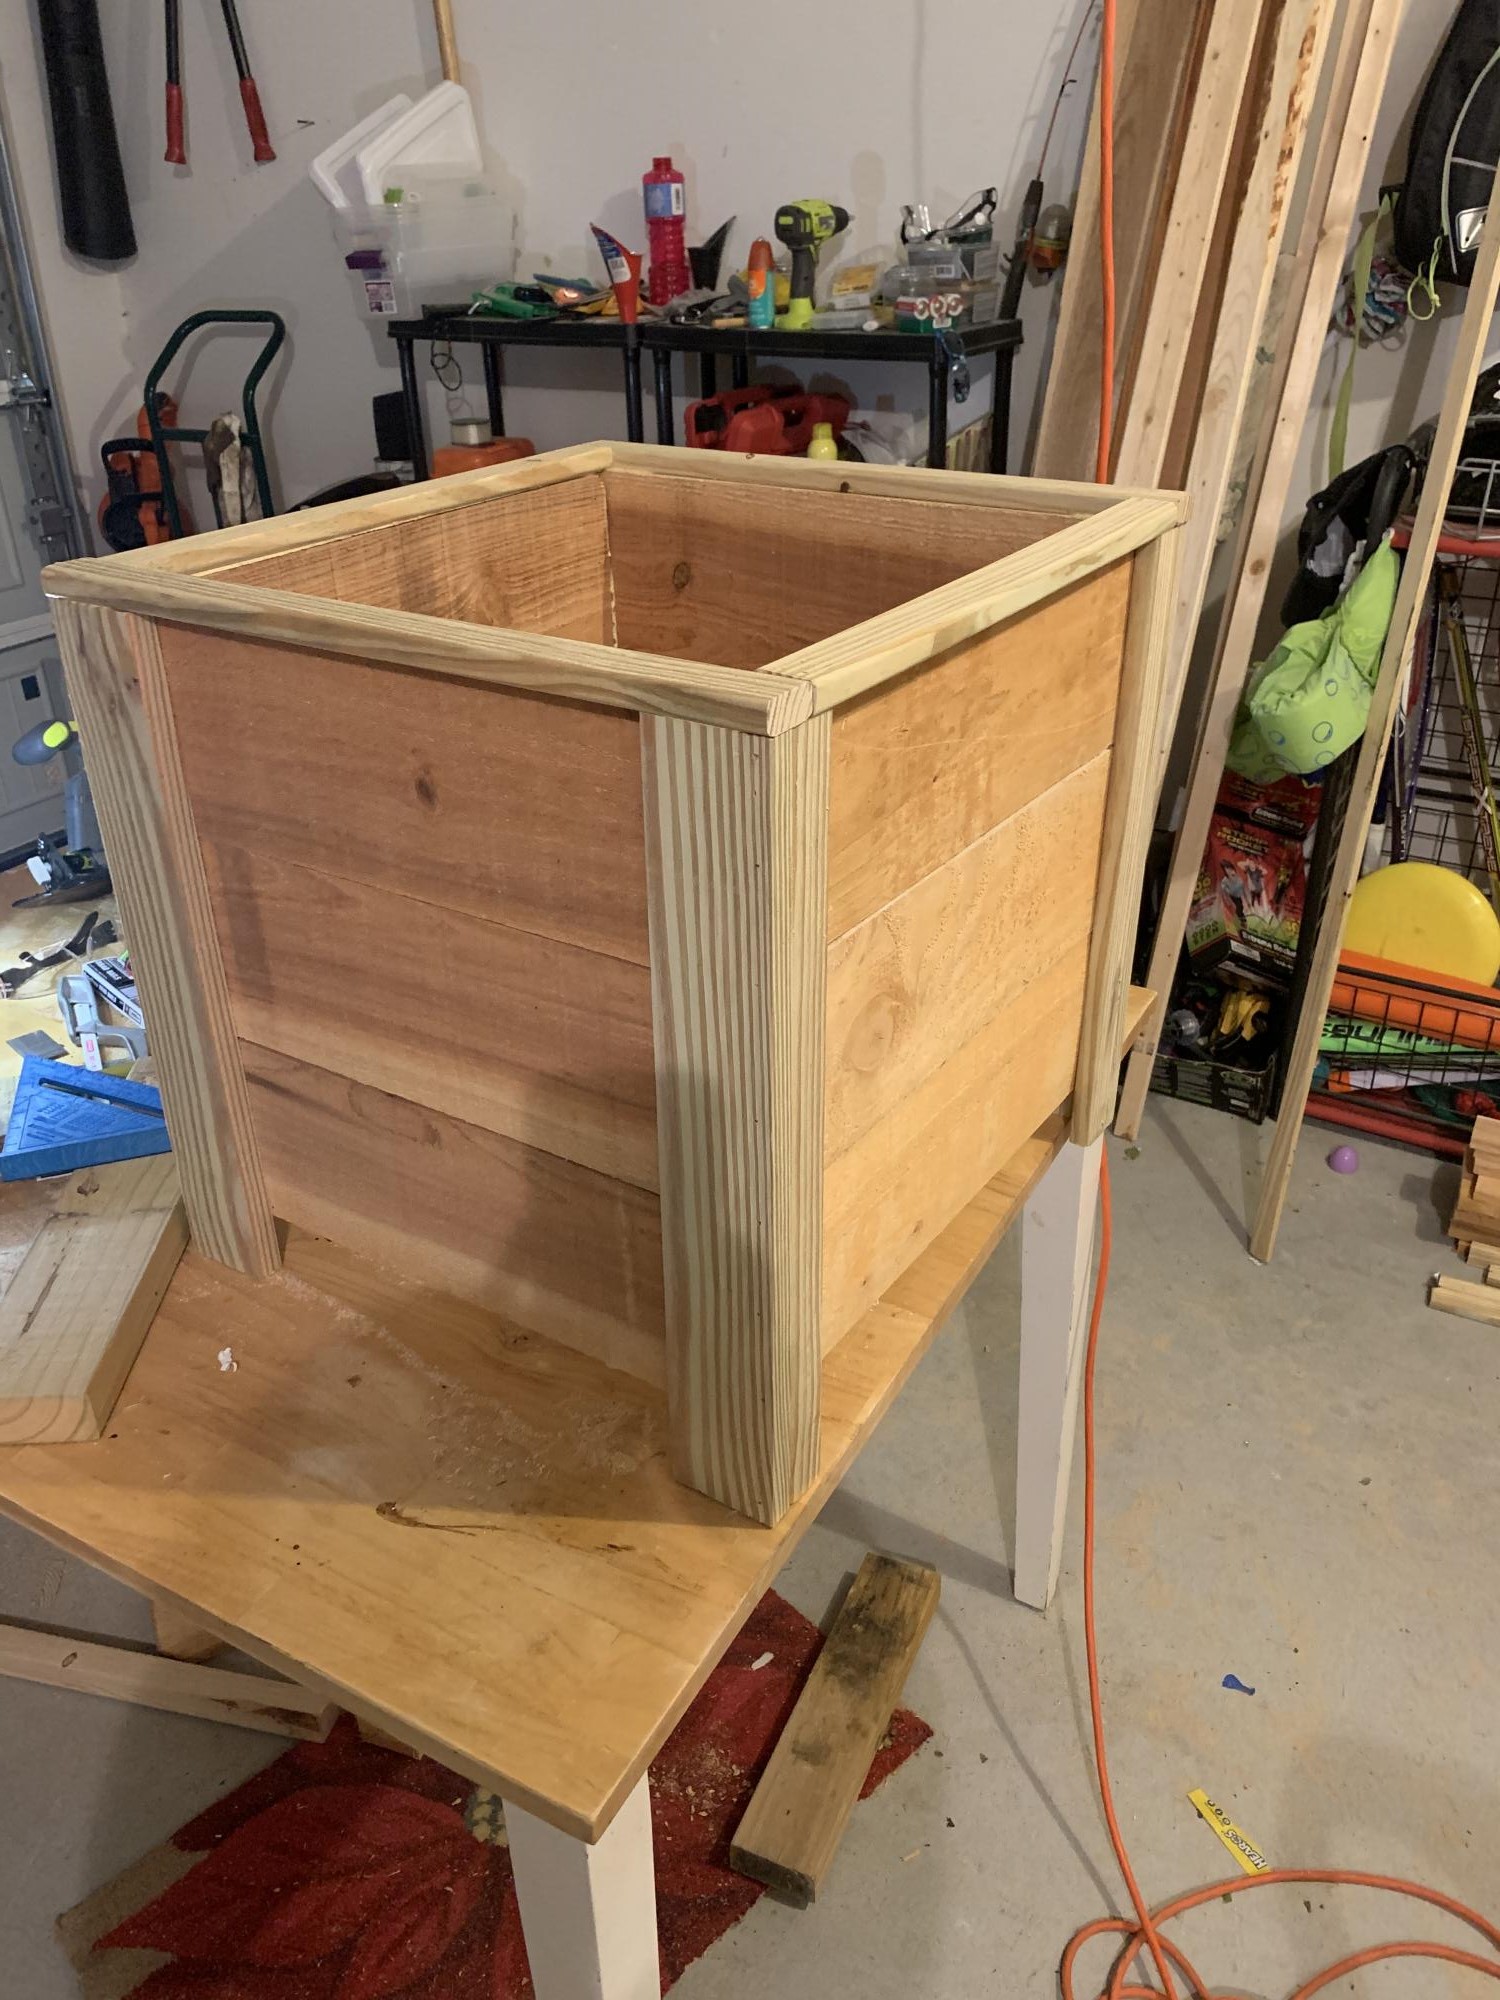
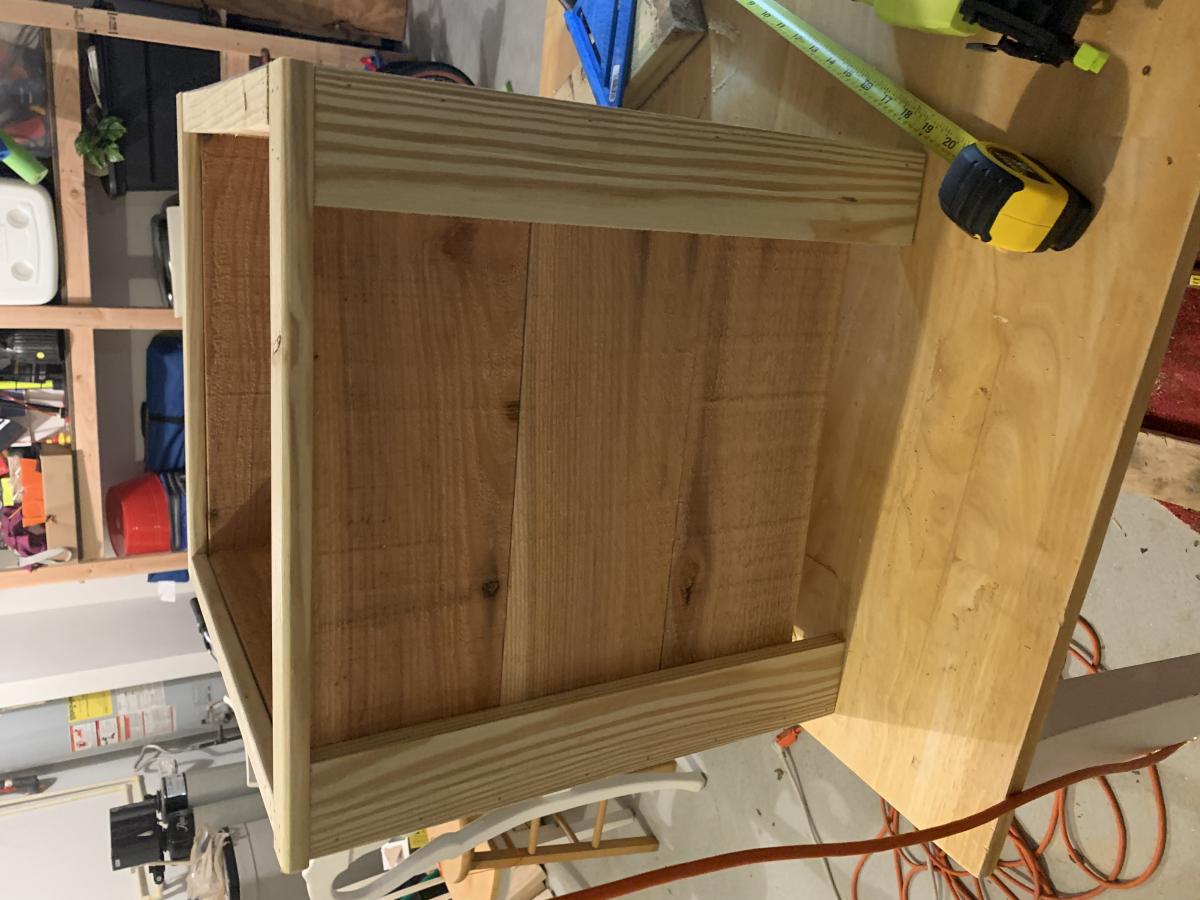
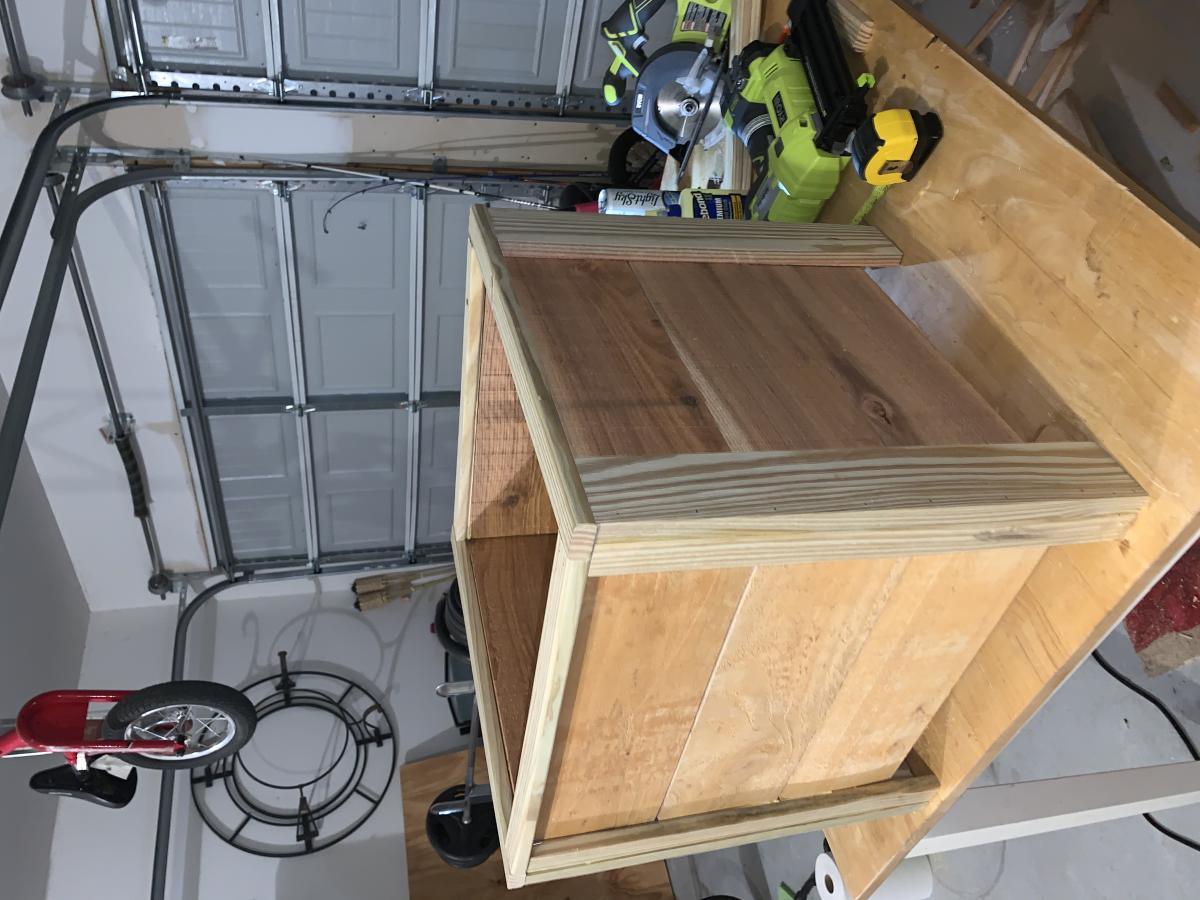
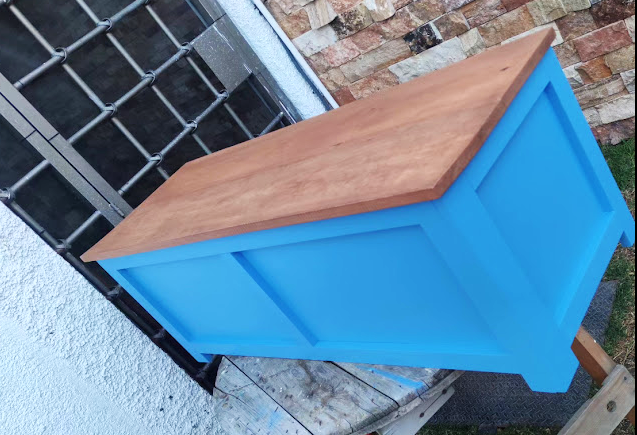
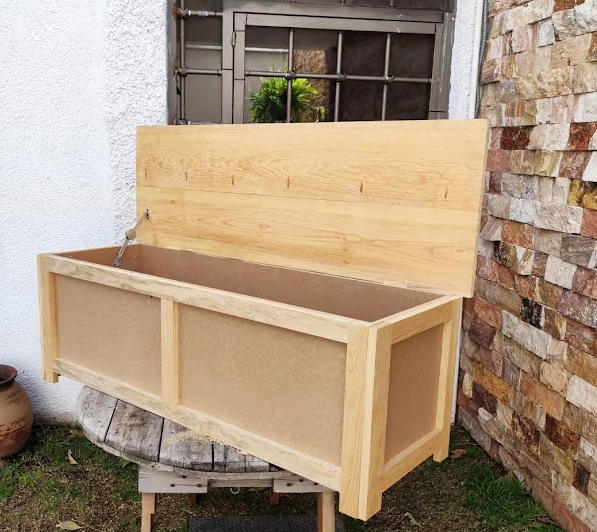
A toy box, im not a profesional, but its a grate hobby. Regards from Hidalgo, México.
Herwin

Comments
Ana White Admin
Mon, 05/22/2023 - 19:52
Cozy spot!
I can just imagine the relazation, it looks fabulous! Thank you for sharing.