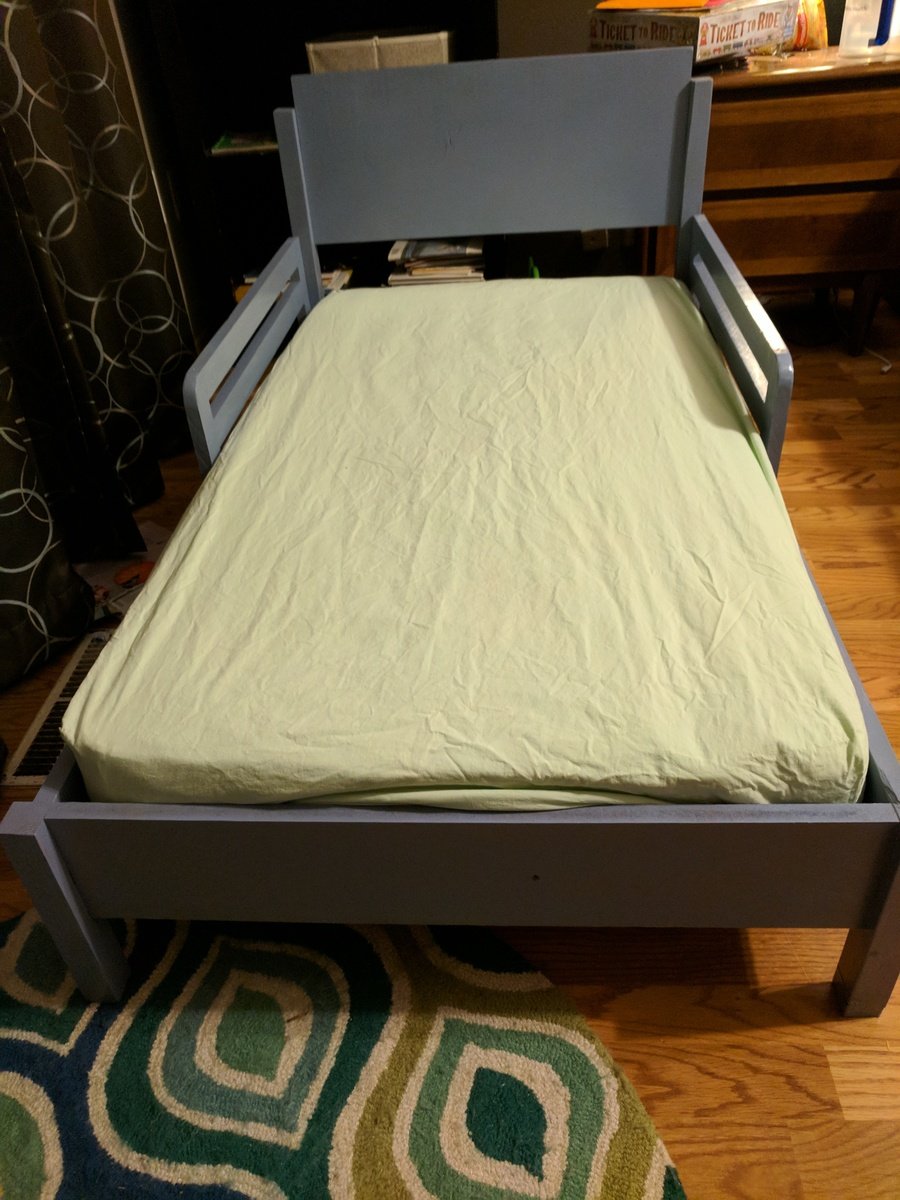
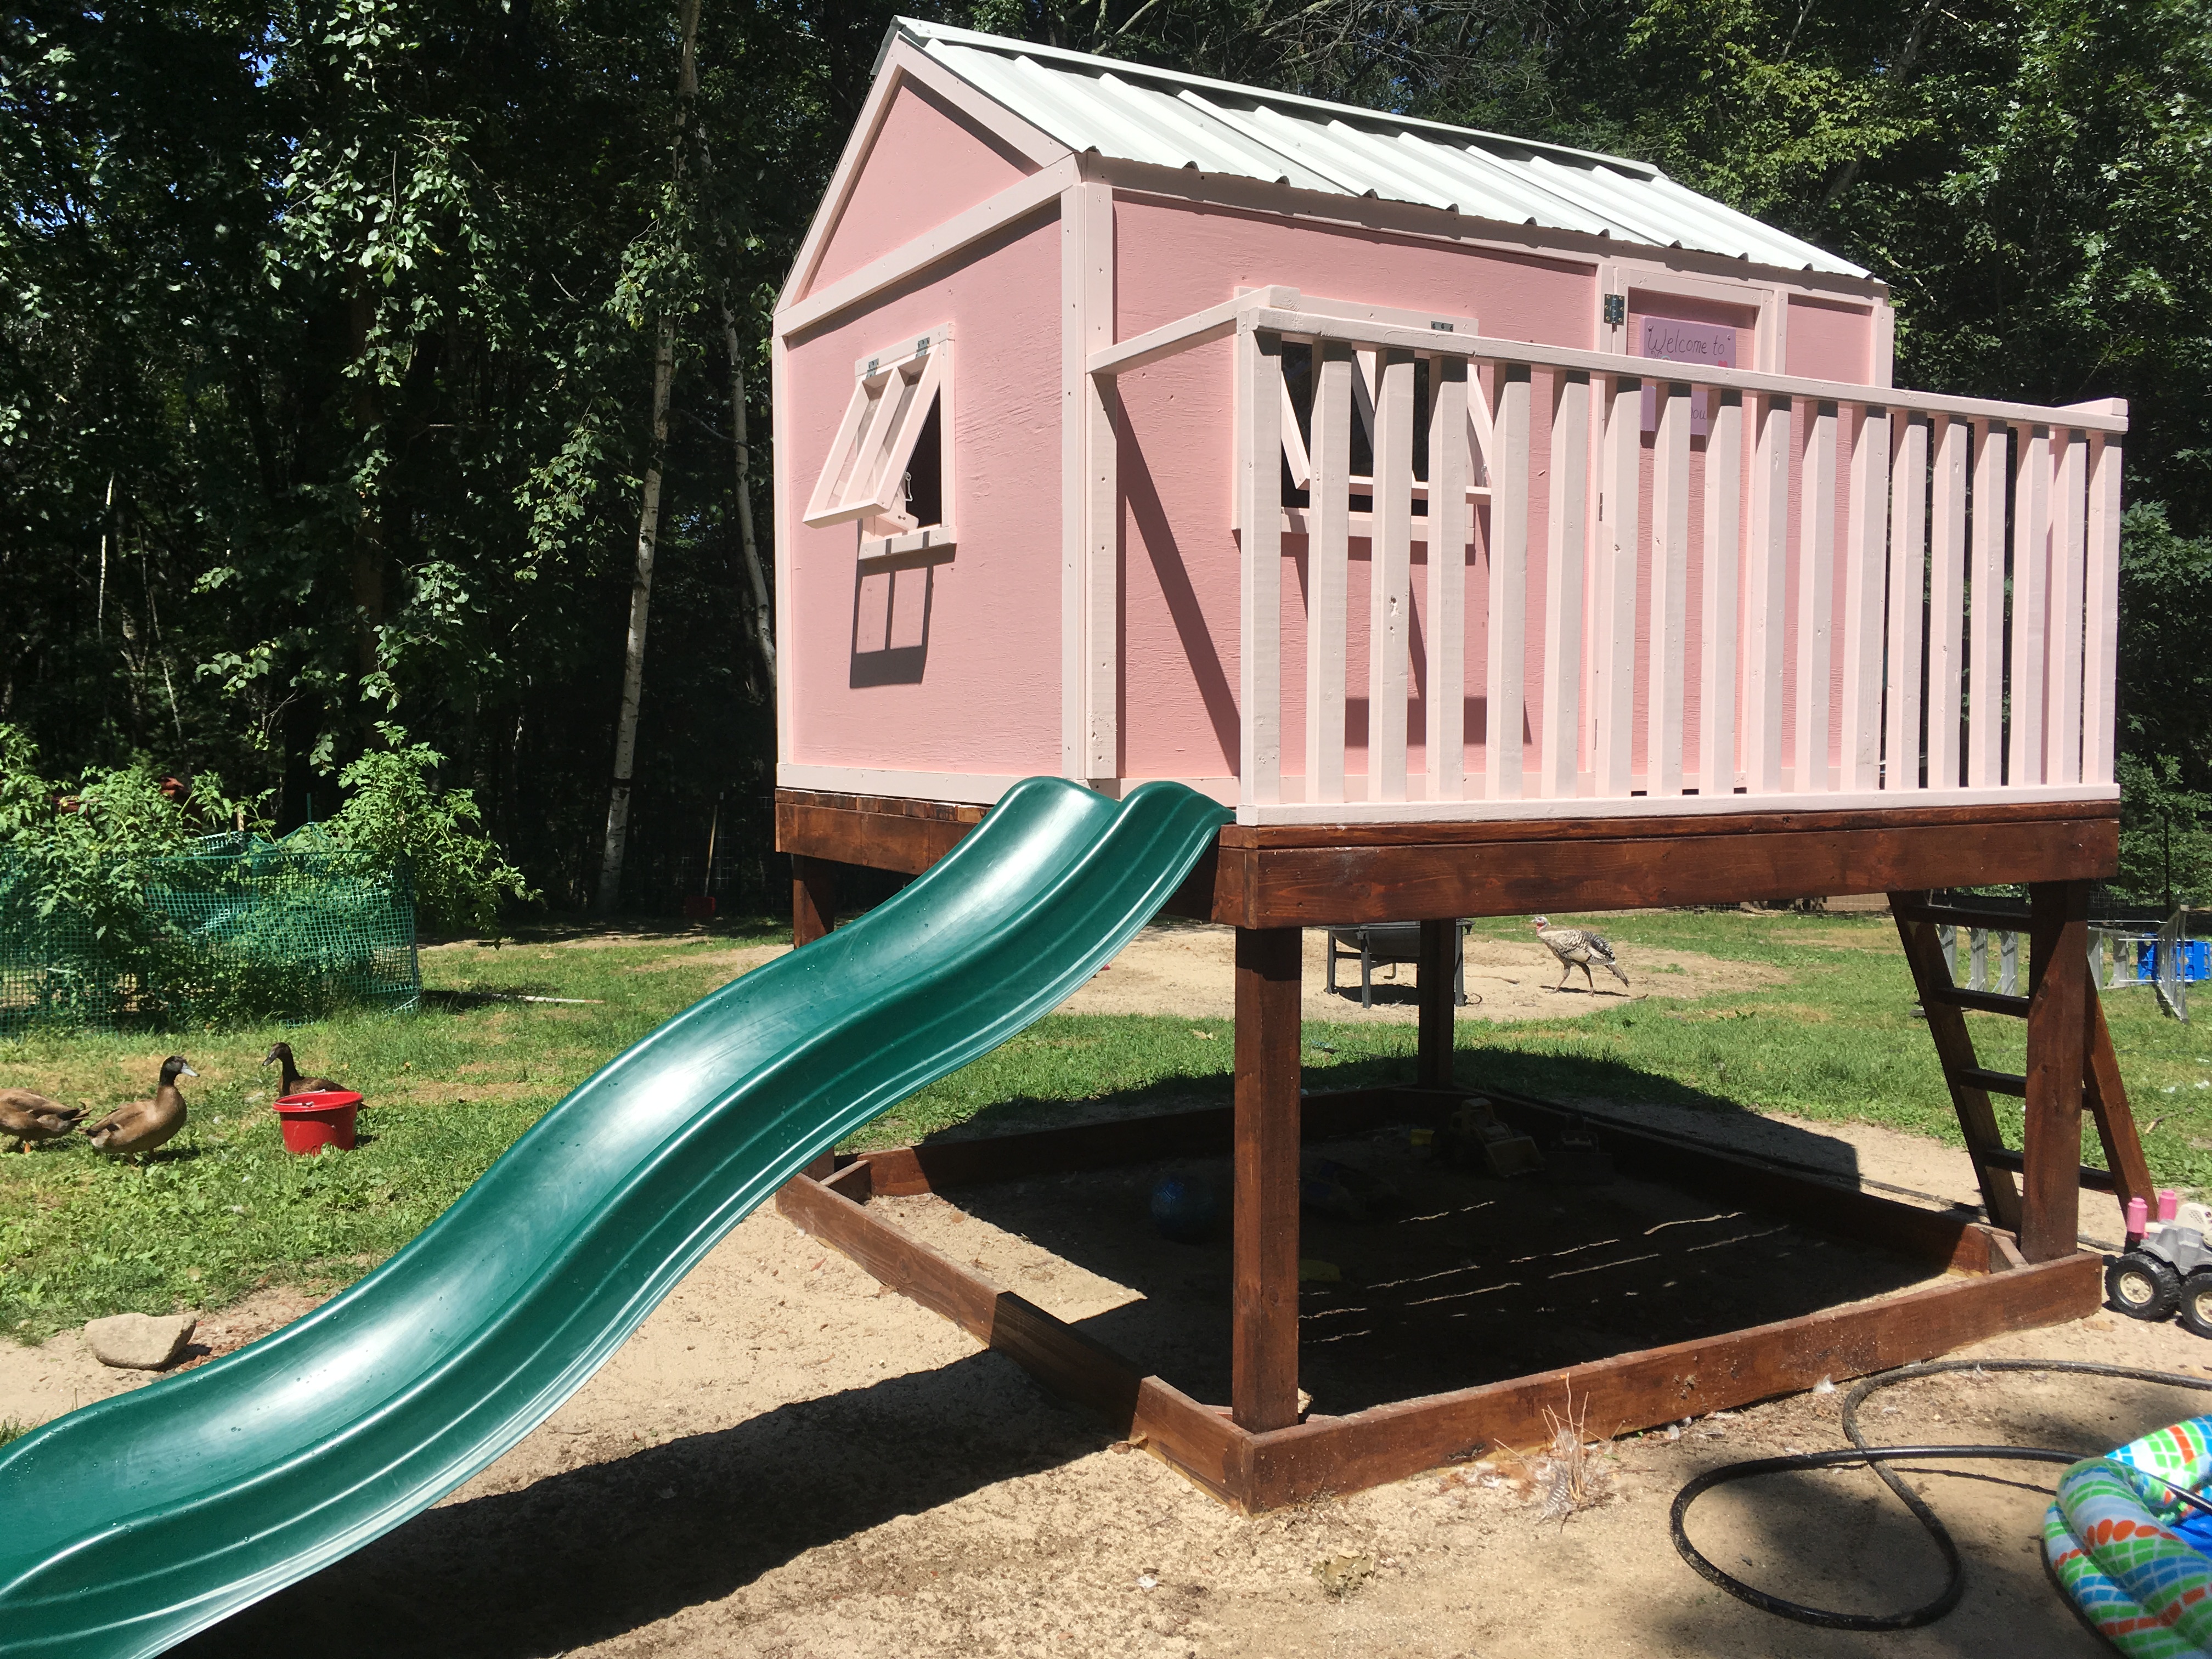
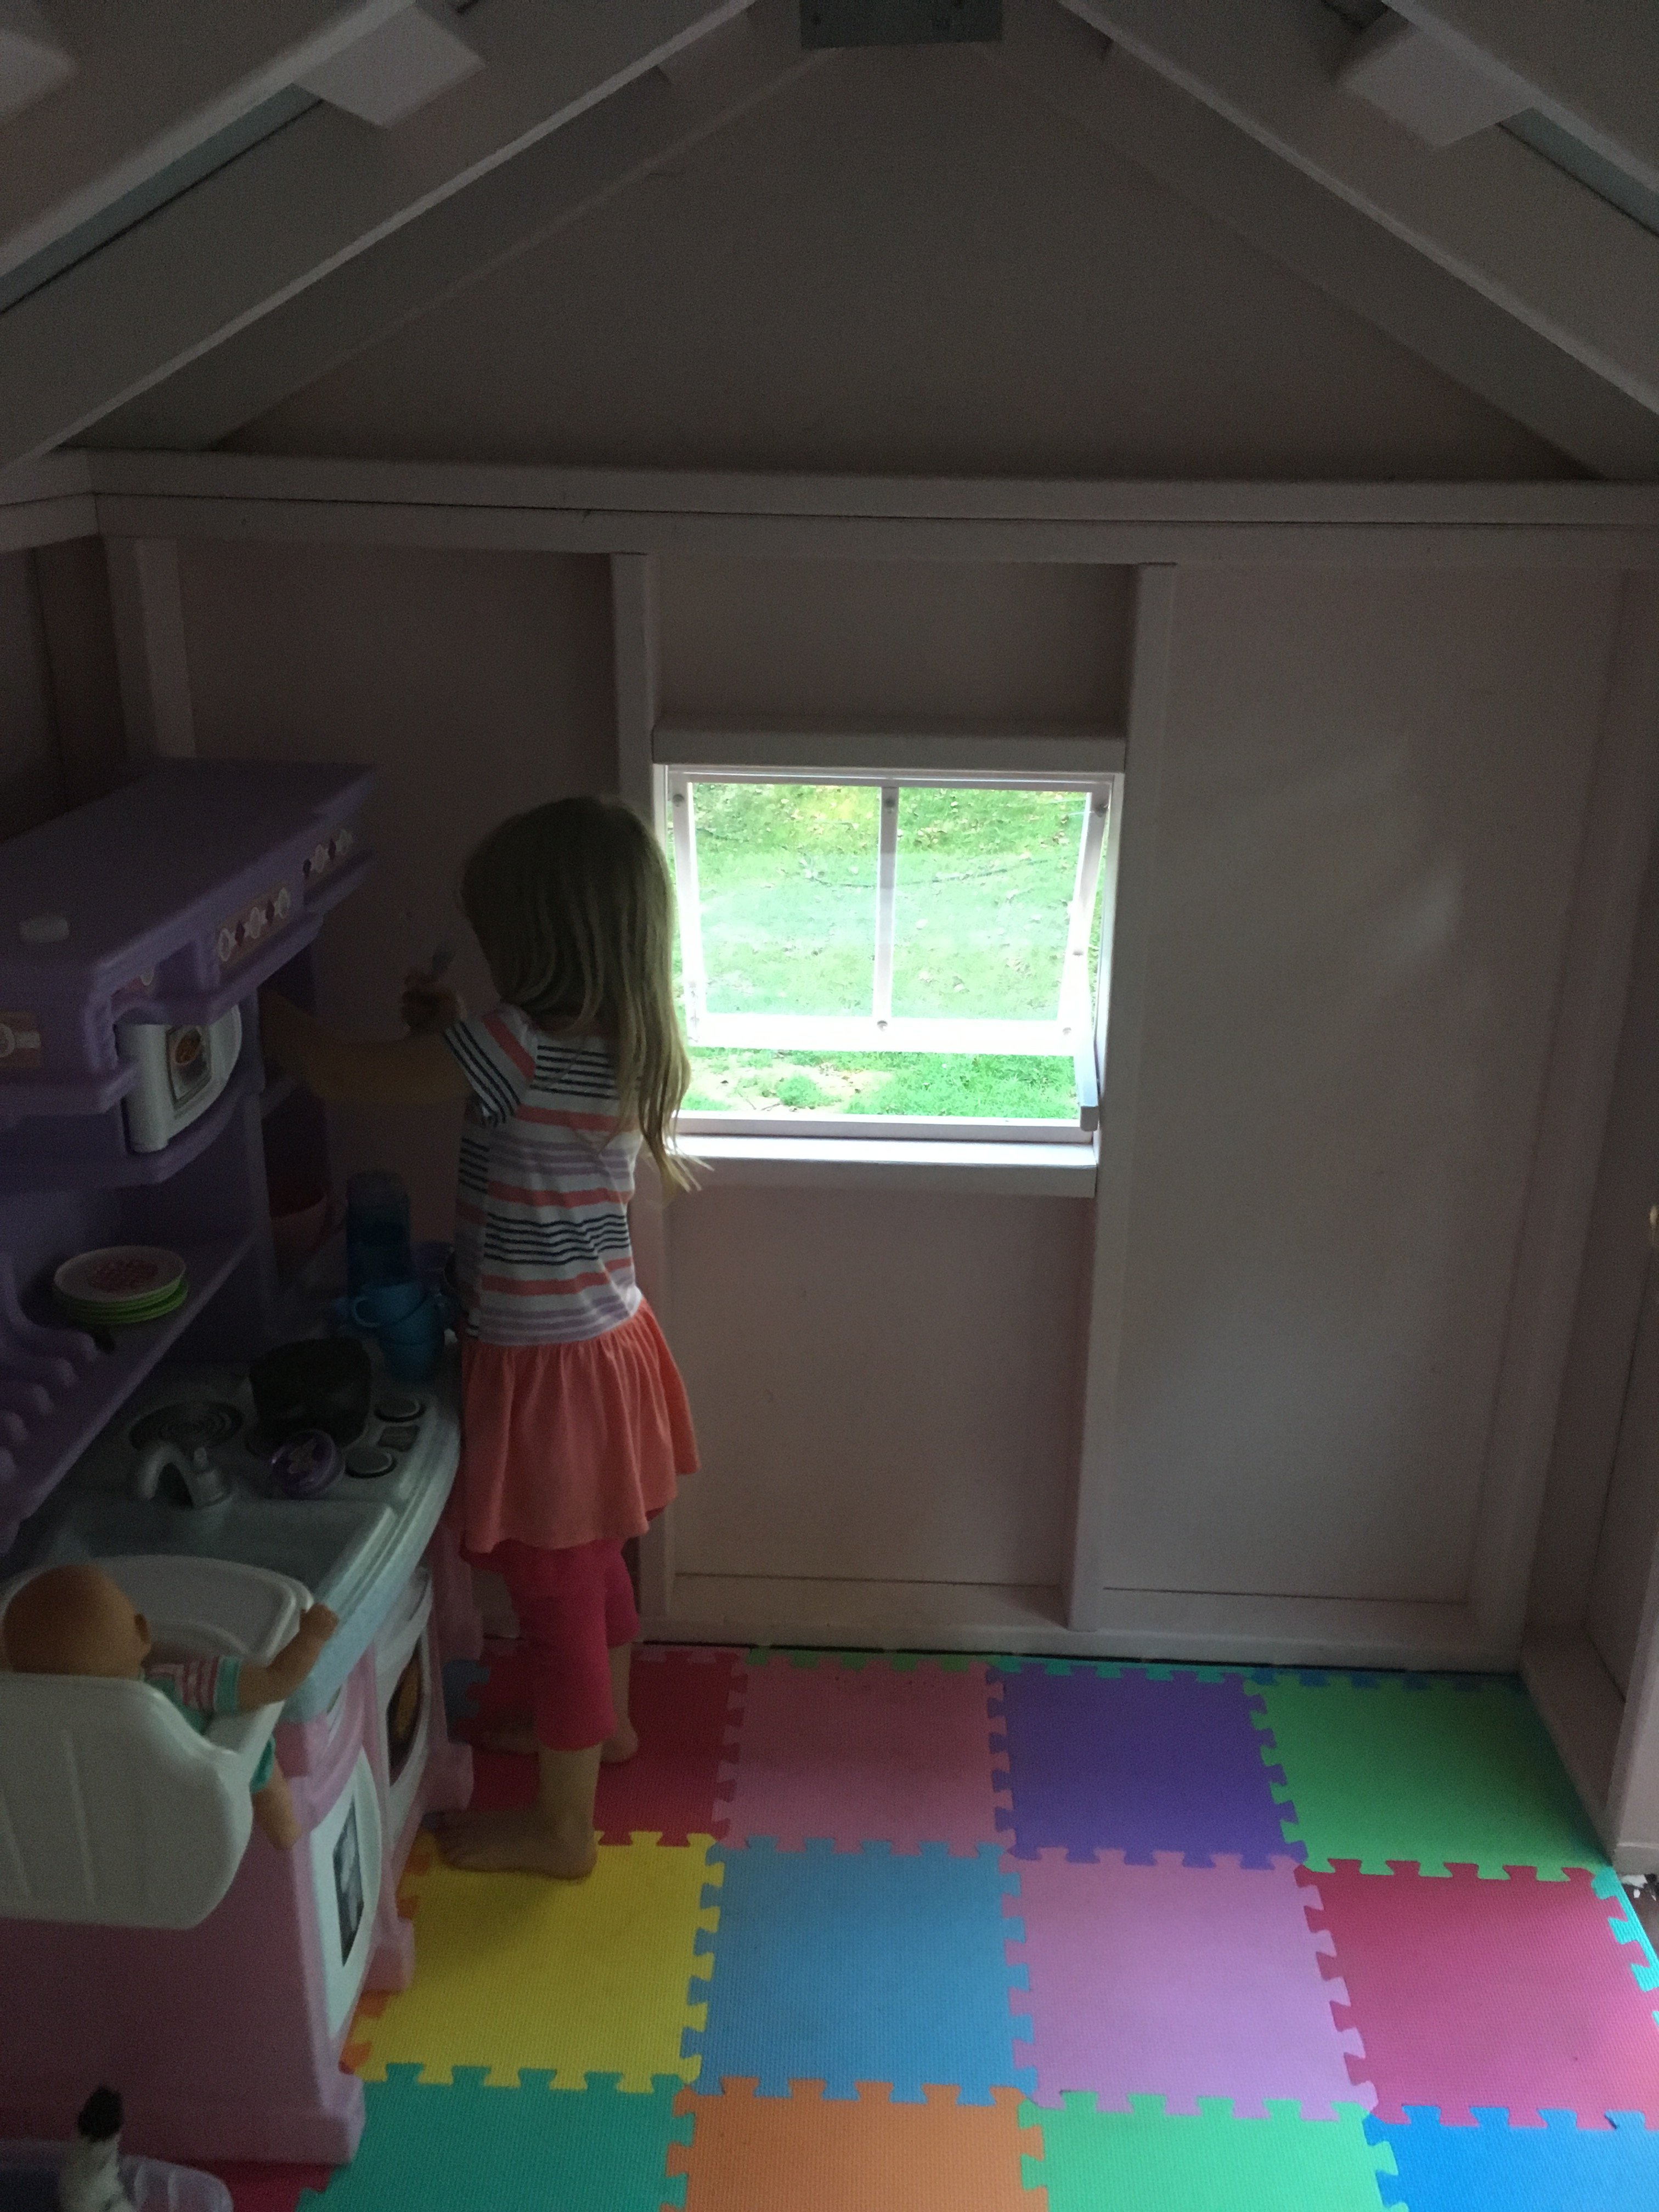
Community Brag Posts

Loft Bed

Submitted by Jenny Anne on Tue, 03/15/2011 - 08:43

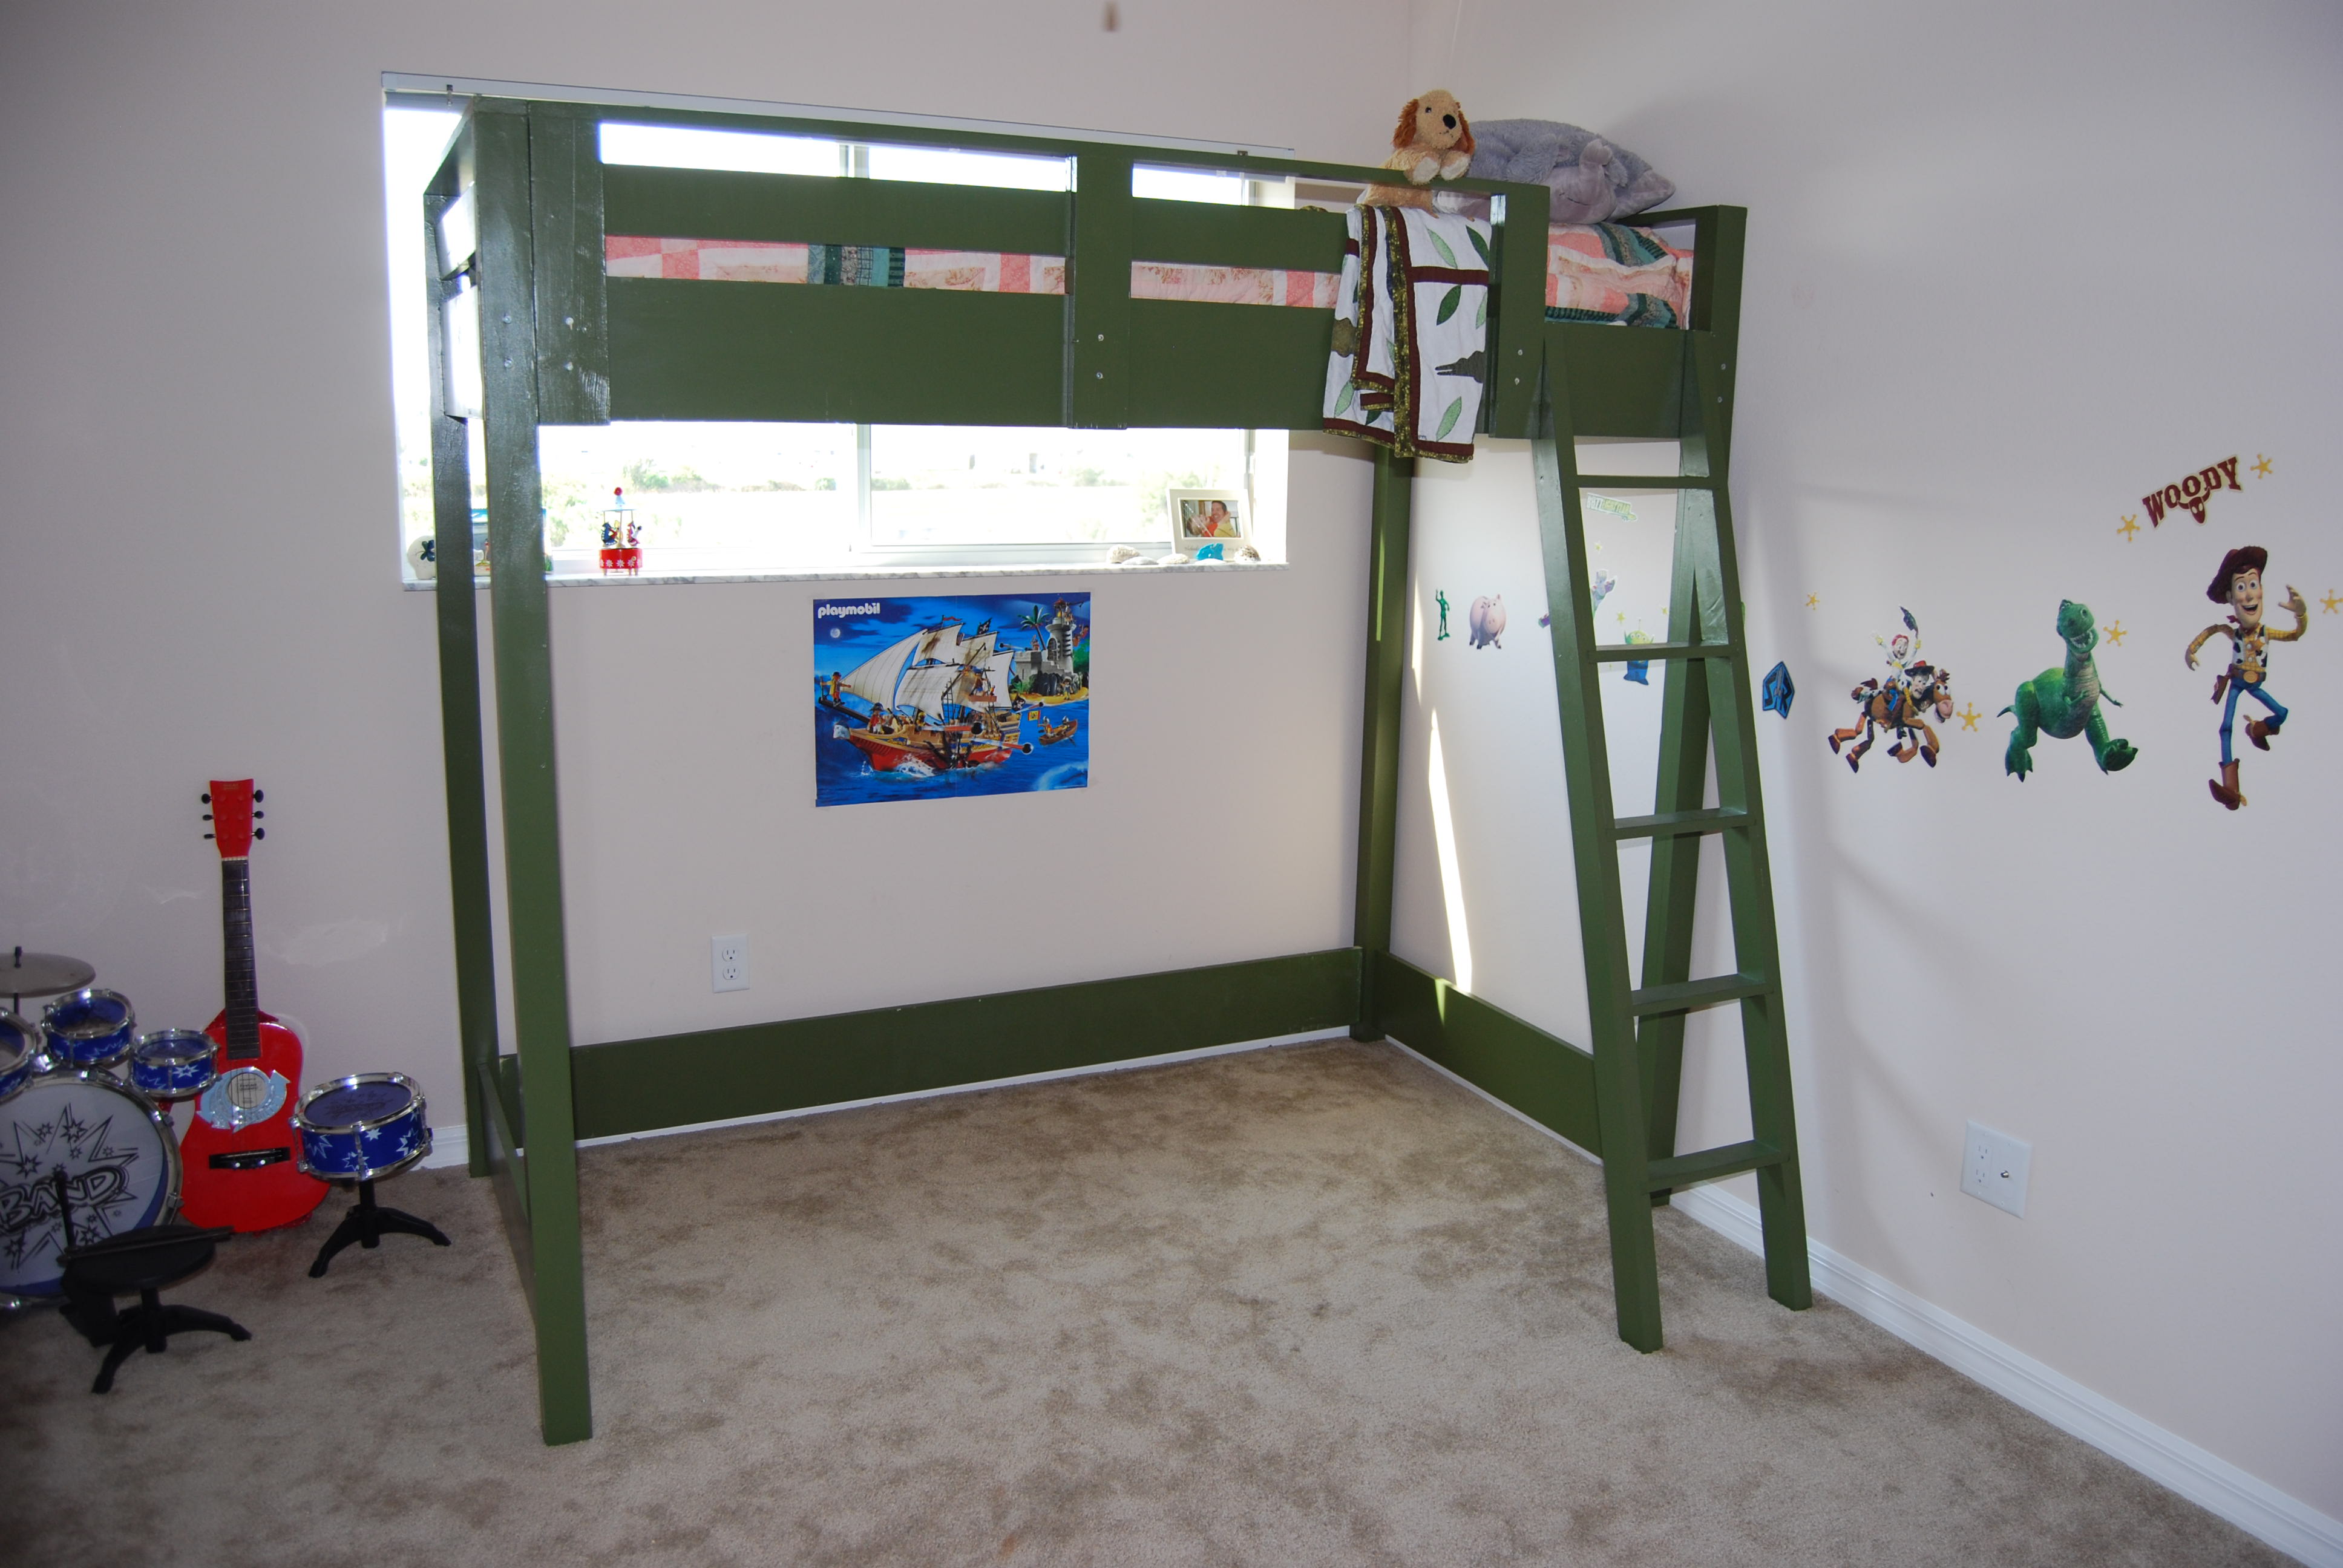
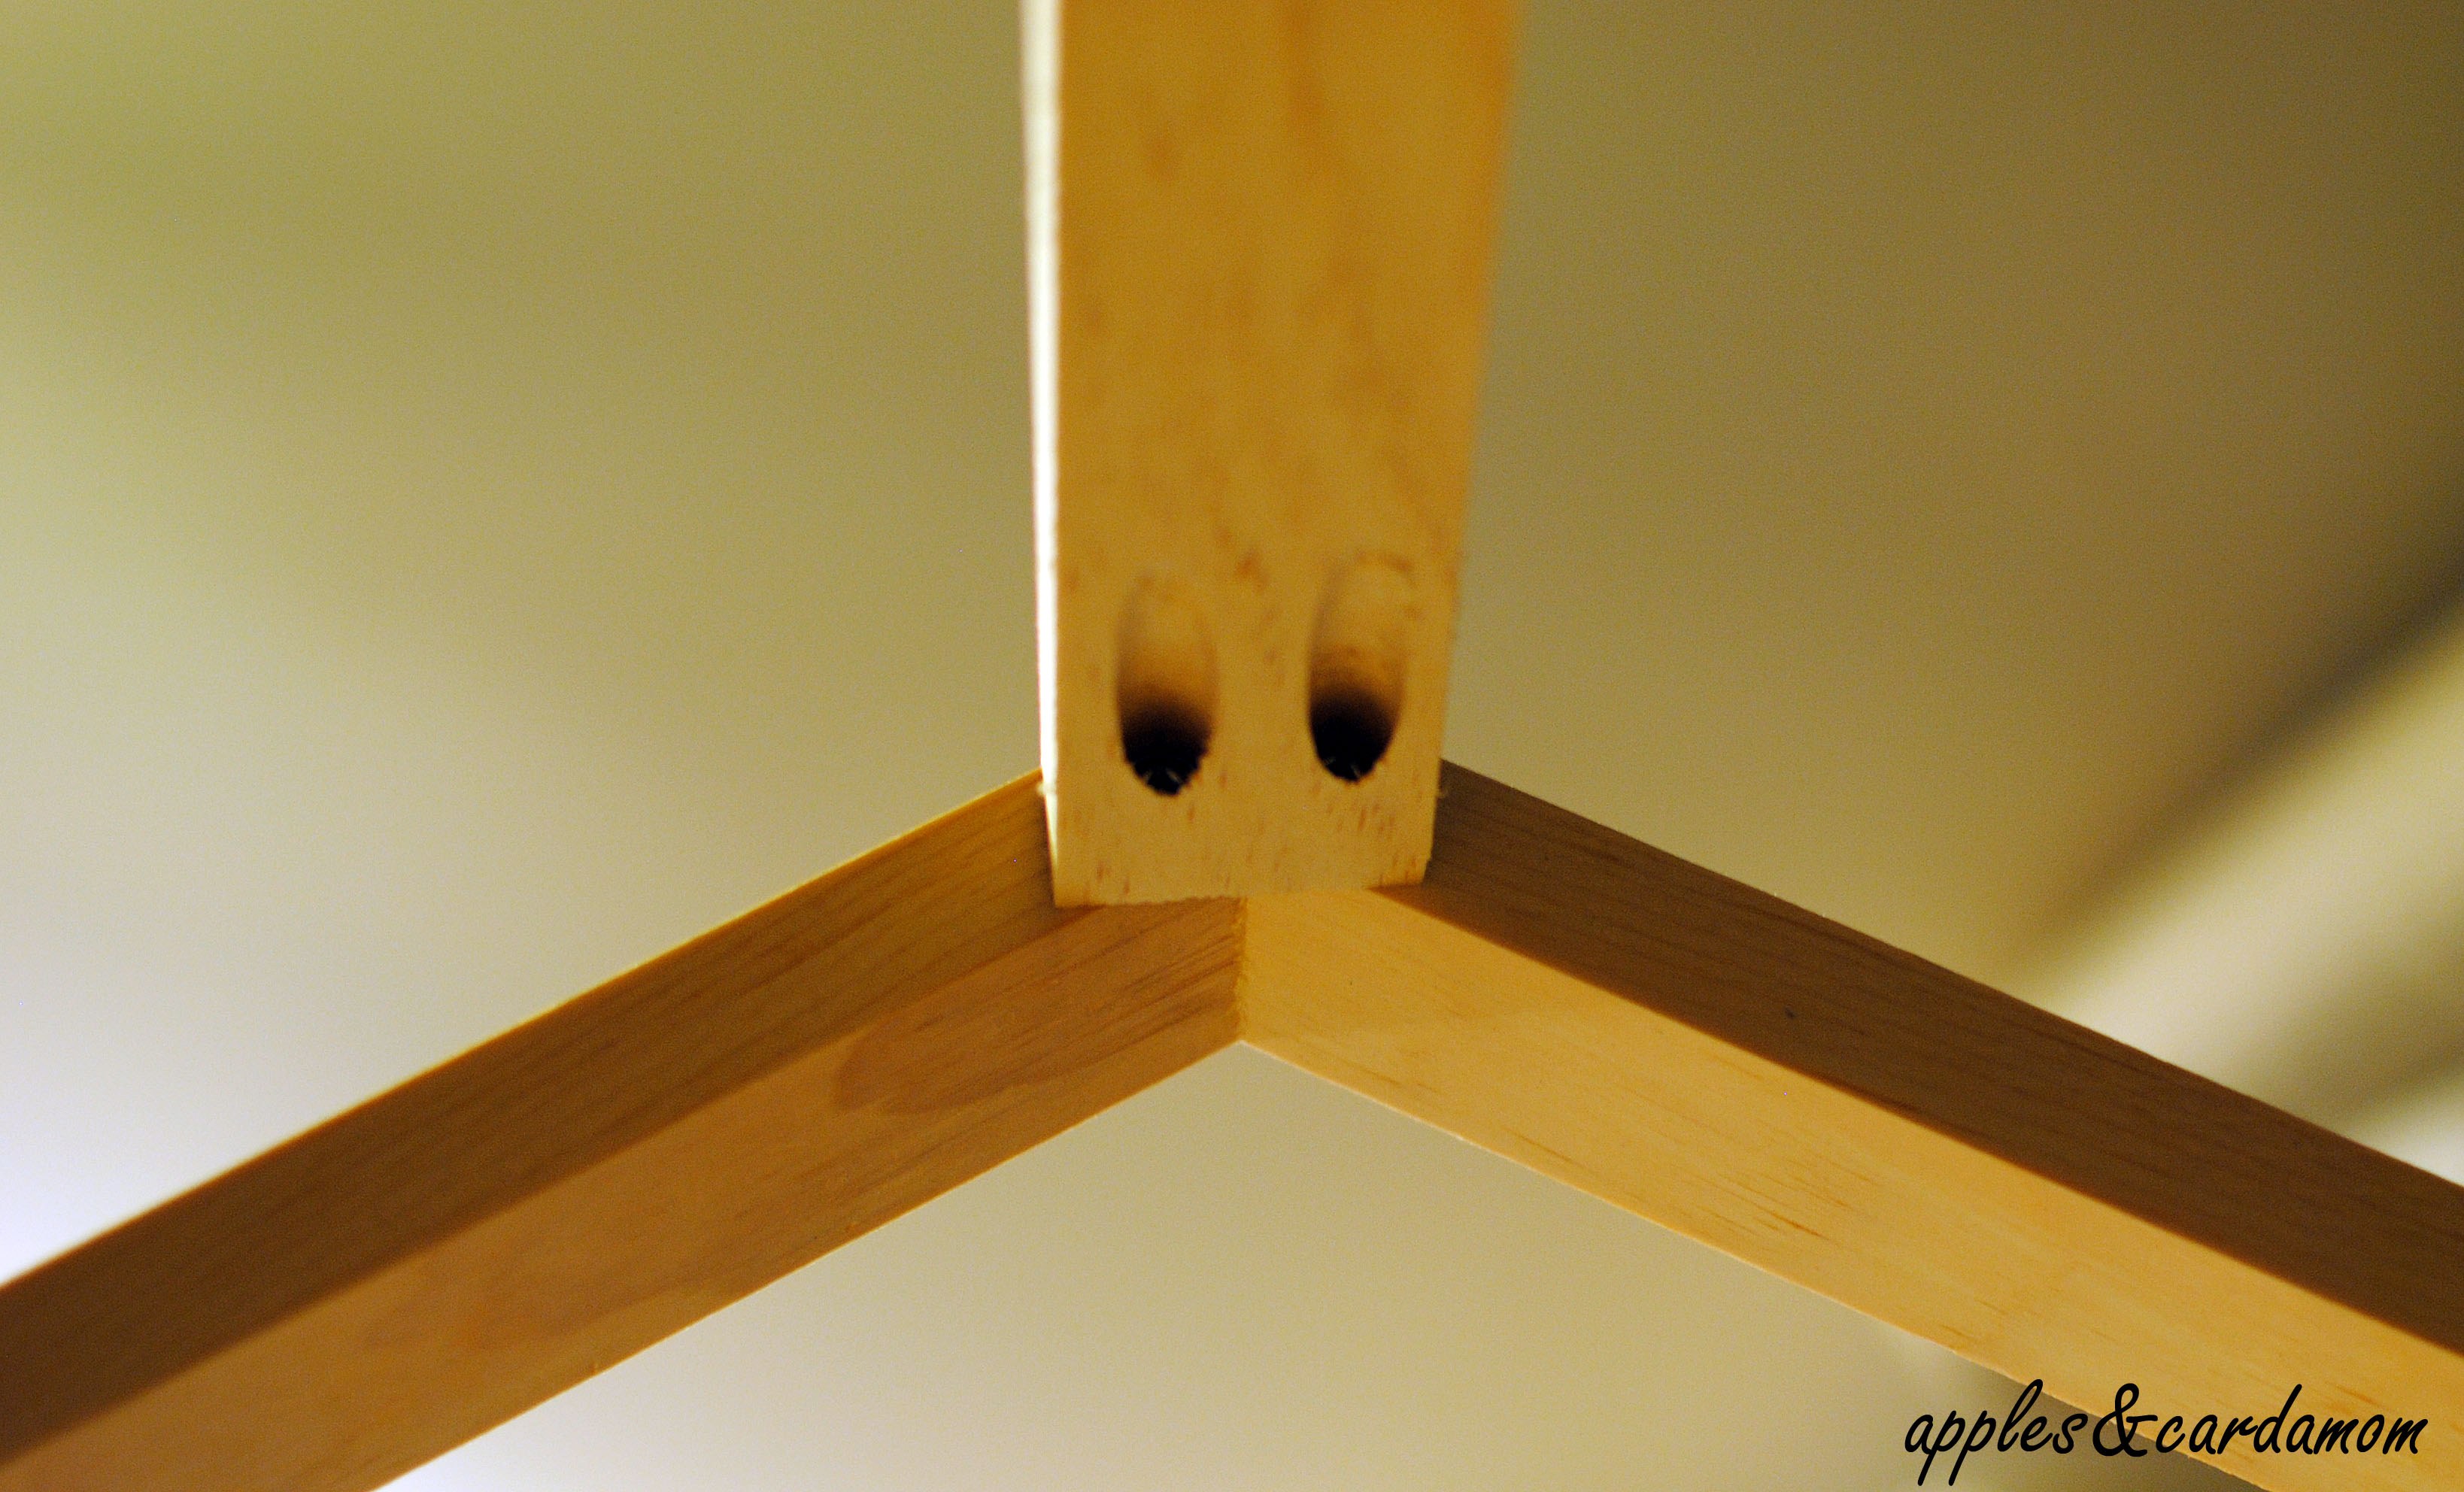
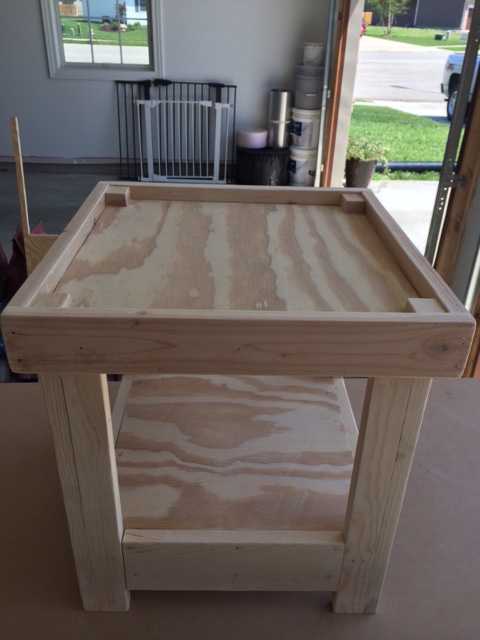
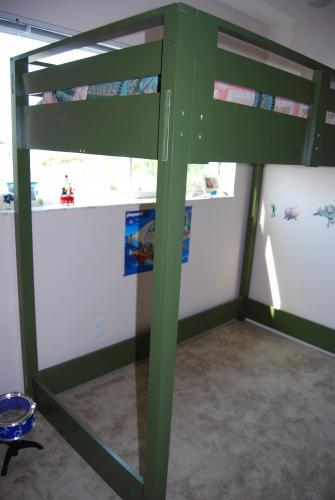
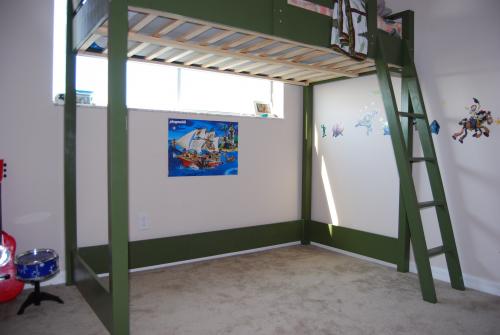
I made this loft bed for my 4-year-old son.  It is plenty strong.  It can easily hold him and his daddy for bedtime stories.  I followed the plans to the letter.  I found this a challenging but attainable second project and only needed help with final assembly.  I'll start working on some bookshelves for under it but need to figure out how to work around the supports I already added (that are omitted in the bookshelf plans).  

Now I have to finish the poor kid's quilt so he can stop using my pink one.
Built from Plan(s)
Estimated Cost
$300
Estimated Time Investment
Week Long Project (20 Hours or More)
Finish Used
primed and painted with satin finish. I still need to cover the final assembly screws and touch up some junctions. One note if you paint this, DON'T paint the sections of the long boards that you'll have to slide in on final assembly. We had to sand that paint off to get them to squeeze in.
Recommended Skill Level
Intermediate

outdoor sofa from reclaimed wood

Using Ana's plan as a guide, I built two of these sofas to fit an outdoor cushion I already had. I used wood from our old deck -- a great way to re-use and save money, too!

Estimated Cost
$110/sofa (lumber was free)
Estimated Time Investment
Weekend Project (10-20 Hours)
Finish Used
None, although eventually I will probably seal it with outdoor PolyWhey by Vermont Natural Coatings.
Recommended Skill Level
Intermediate

Conner Side Tables

Built a set of Conner Side tables for my Daughter and Son-in-law that live in Austin Texas. 

Estimated Cost
$100
Estimated Time Investment
Weekend Project (10-20 Hours)
Finish Used
Minwax Polyshield Ebony
Recommended Skill Level
Beginner

Comments

Toddler bed

Submitted by Bradnag on Wed, 09/13/2017 - 05:13

I made a loft bed for my 4-year-old son using Ana's Chelsea Loft plans. When I finished, I was able to build this toddler bed for my 1-year-old using almost entirely scraps left over from the loft (save for the 1x6 runners). I skipped the curved headboard design and went with a solid piece of 1x12. I was going to round the top edges or cut a more rounded design, but my wife said she liked the squared off look better (she has lots of ideas for painting various designs on it, apparently). Since we were going to use paint and not stain, I ripped some leftover MDF board for the 1x6 footers. The whole project took a single afternoon, including cutting, assembly, woodfill and sanding. The end result is pretty sturdy. My wife laid on it with both our small children and the slats hardly bowed at all.

Built from Plan(s)
Estimated Cost
$5
Estimated Time Investment
Afternoon Project (3-6 Hours)
Recommended Skill Level
Beginner

Garden Shed

Submitted by Anonymous (not verified) on Thu, 10/07/2021 - 16:20

This was my first big Build! Thank you Ana for the free and easy to read plans.

Built from Plan(s)

Comments

Coffee Table

My wife said she did not want anything for her birthday, so instead of buying her
something after she said that, I decided to try and make something.  We did not have a coffee table in our living room - when we hosted Christmas, we had a piece of plywood over boxes, covered with a table cloth.  So I decided to try and make a coffee table for her.

Made some mistakes sanding the top, so then had to spend a lot more time sanding out the gouges.I did not use a plan per se, but when I started looking here, it was remarkable similar to Clara's Table, with differeing dimensions.  The cost was a little higher due to the oak boards for the table top.  Those alone were $50.

Built from Plan(s)
Estimated Cost
75
Estimated Time Investment
Weekend Project (10-20 Hours)
Finish Used
I was tring to match the piece in the background as much as possible. For stain, the base was Minwax red oak and the top was Minwax gunstock. Sealed with 6 coats of Minwax wipe on poly - 4 clear, and 2 satin.
Recommended Skill Level
Beginner

Cedar Deck Box

Submitted by tsmonkey on Mon, 06/03/2013 - 19:09

I used cedar siding that was removed from a home remodel. I had to rip all the wood down on a table saw to work with the plan. I was glad to put this good wood to use for my recycle bin and it looks good on the back porch. I had to change the plan a bit to fit my bin.

Estimated Time Investment
Weekend Project (10-20 Hours)
Finish Used
Gloss Spray Varnish
Recommended Skill Level
Intermediate

Cedar Boxes made with Pallet Wood

Submitted by flashfire on Fri, 09/15/2017 - 22:19

Thanks for the plans, I was able to make this for a friend's birthday. I made it from pallet wood and it was so easy, I did a mitred top though because I wanted it to look neat and trim. .

Built from Plan(s)
Estimated Cost
Nil
I used pallet wood
Wood glue & screws I already had
Estimated Time Investment
Week Long Project (20 Hours or More)
Finish Used
Linseed oil
Recommended Skill Level
Beginner
Seasonal And Holiday

Cedar planters

Submitted by mmarsha9 on Sun, 10/10/2021 - 14:08

My wife wanted some planters for the front porch. Thanks to Ana whites page for these plans. Also loved the top modification that I think is a must.

Built from Plan(s)

Comments

Seasonal And Holiday

X end table

Submitted by Bergenj123 on Tue, 06/04/2013 - 19:52

Another project in keeping with my original theme of farmhouse style furniture. I liked the style of this table but wanted to make a smaller end table than the plans. So I scaled down a bit and used 1x4 for the top and bottom shelves and used 1x also for the X. It measures standard height for an end table but its only about 18 inches square. I added some hardware, but not the L brackets on the corners. I have young kids and was a little worried about the edges.

Built from Plan(s)
Estimated Cost
50.00
Estimated Time Investment
Afternoon Project (3-6 Hours)
Finish Used
Classic Gray by Minwax and a satin finish top coat.
Recommended Skill Level
Intermediate

Comments

cmaycock

Sun, 12/04/2016 - 18:21

Hi, 


I love the smaller table! what angle did you need to cut the x peices to? 

Modern Park Bench

Submitted by ylopresto on Tue, 05/05/2015 - 12:21

Our deck was lackluster to say the least.  It had been a while since we did anything with it and we didn't spend much time out there because of it.  I wanted to add something cozy to encourage us to hang out there more.  I searched the internet and came across this bench.  It was just the thing!  My son and I spent a couple of hours building it, and another day or two priming and painting.  Now it looks great!  We are out there all the time.  Thanks Ana!!

Built from Plan(s)
Estimated Cost
$90 (includes wood, screws, primer, and paint)
Estimated Time Investment
Afternoon Project (3-6 Hours)
Finish Used
Rust-Oleum Ultra Cover Gloss in Colonial Red
Recommended Skill Level
Starter Project

Comments

Afternoon farm table

Submitted by Lizzardt04 on Wed, 09/20/2017 - 13:24

I saw this super simple farm house table plan on my Facebook feed from Ana and I just had to do it !!$50 in lumber a Saturday afternoon and I was done!!!! Followed all her tips and it turned out great

Estimated Cost
$50 in lumber
Estimated Time Investment
Afternoon Project (3-6 Hours)
Finish Used
Danish oil medium walnut
Recommended Skill Level
Beginner

Factory Cart: How Low can you go?

Submitted by chjaway2 on Wed, 03/23/2011 - 08:15

The Factory cart was really easy to put together.

I used a pocket-hole jig to eliminate any screw heads on the exterior.
The wood I had was already distressed somewhat, but I figured that would add to the 'old' look when ultimately completed.
The most difficult part of this project was finding casters that I liked and that I could afford (those suckers are expensive!)  I'm still not 100% sold on the ones I purchased, but will keep my eyes open when out & about for replacements!
The plans posted on Ana-White.com could NOT have been easier to follow.
However, I should like to stress that this coffee table is EXTREMELY low to the ground.  One of the first lines on the plan page reads:  "This coffee table sits lower than traditional coffee tables." = understatement of the year!  (my fault, I should have compared the posted dimensions with an existing coffee table to get an idea before hand) 

The plans will make a awesome factory cart height factory cart, but a nearly-uncomfortable height coffee table (As is).  In the attached photo, you'll note a foot-rest in the upper left corner as compared to the finished factory cart.
 --again, the build was super easy & a LOT of fun because I intended the finish to look worn, I didn't have worry about scratching up the wood during the build.  In fact, the kids are looking forward to helping me distress it later!  I'll just have to increase the height of the sides to make it usable as a coffee table in our home.

Built from Plan(s)
Estimated Cost
$40
Estimated Time Investment
Afternoon Project (3-6 Hours)
Finish Used
(Will) Paint, distress & stain
Recommended Skill Level
Beginner

Providence Bench, Doll Chair and Adirondack Side Table

Submitted by Rose4You on Thu, 06/06/2013 - 23:26

Very excited to have our bench, table & doll chair out on our porch. Thank you so much for your great web-site and all of the wonderful plans. I have already put together a very long "weekend projects" list for my husband to work on.

Estimated Time Investment
Weekend Project (10-20 Hours)
Recommended Skill Level
Beginner

Calico Critter house

Submitted by bobaina on Sun, 05/10/2015 - 12:21

My husband and I made this for our daughters' calico critters, which they received for Christmas. We wanted a house with few walls, so that all 3 girls could play simultaneously. We used Ana's dream dollhouse plan, but scaled it down to half the size. We also modified it slightly to fit what we needed.

This is just the perfect size for smaller toys like Littlest Pet Shop or other 3 to 4" tall toys.

This was our first build together and so it took us a while to do. For someone with a bit more experience, who also has all their materials and tools ready, this could be finished in 1 day or a weekend.

Estimated Cost
Aproximately $30 for the pine. This is for Canadian lumber. It may be less in the USA.
Estimated Time Investment
Day Project (6-9 Hours)
Finish Used
We used clear poly urethane for varnish. We painted the roof shingles (jumbo craft sticks) with acrylic craft paint.
Recommended Skill Level
Beginner

Comments

bobaina

Sun, 05/10/2015 - 13:06

Ana's roof shingles, which are cut scalloped strips, are a better way of doing the roof. I didn't realize how difficult it would be to fix each craft stick 'shingle' to the roof, and manage to keep each line straight. For a beginner, it's not easy. My advice is try Ana's method or you could also just make the roof from 2 solid pieces.

bobaina

Tue, 05/12/2015 - 03:17

thank you for this plan Ana. My girls love their critter house. It's getting lots of use and I'm determined to build more stuff for my girls. I'm so tired of spending money on flimsy plastic junk!

nrc261

Wed, 10/07/2015 - 14:07

This was the plan I was going to use for the Critter's line at Target. I didn't want to buy the plastic houses that they sale so decided to try and build one. How did you scale the dimension? Just by half all the way around? I am a confident beginner so I am not sure how to scale down dimensions. 

Pink Playhouse

Submitted by DIYMomof4 on Sun, 10/08/2017 - 16:59

This is a great playhouse for kids and sturdy enough for adults too.  The plans are so well written and easy to follow. The deck was made exactly to her plan, but I made the playhouse a bit wider.  I also framed it with 2x4's and roofed it with metal.  Metal roofing is light and relatively easy to install.  It took me about 1-1/2 months to finish the playhouse.  The windows are hinged and can be propped open.  I used 2x3's for the railing and attached it to the playhouse for stability.  On the inside, I put down colorful foam mats to make it comfortable.  My daughter really loves having her own playhouse!  Thank you for the great plans!

Estimated Cost
$500
Estimated Time Investment
Week Long Project (20 Hours or More)
Finish Used
Cabot deck stain
exterior Behr paint-can't remember the names of the pink colors
Recommended Skill Level
Intermediate

My first build I Love this closet

Submitted by Anonymous (not verified) on Thu, 10/21/2021 - 11:32

When I wanted to unpack I found this amazing design by Ana White. I transformed my living room into my workshop. And voila my first build was accomplished
Thanks for all your amazing designs

Comments

Photo Gallery Ledges

I was always a fan of the gallery wall, but not having a big empty space in any of my main rooms I didn't think I could have one.  However, once I finally got my stairway and upper hallway painted, I realized the wall needed something and the gallery ledges would be perfect!  Save the old plaster walls from being bashed with picture hanging nails too!
I build them out've 1x3's and a small 1/4 round for the front edge instead of a 1x2.
I made 2 3' long and 2 4' long and staggered them on the walls, as the walls are at a slight angle to each other.
I decided to paint them the same colour as the walls so they would blend in and the picture frames would stand out.  All the frames are varying wood stain colours that go with the trim in the house.

I love having a place to put all the pictures I never find time to put up!

Built from Plan(s)
Estimated Cost
$24 for all 4
Estimated Time Investment
An Hour or Two (0-2 Hours)
Finish Used
Paint. Home Hardware 'Burnt Sugar'
Recommended Skill Level
Starter Project

Toddler Height Nightstand

I came up with a simple design to build a nightstand for my daughter's room to go with the platform bed that I had just built. The only problem was that my daughter is 3 and she isn't very tall. So I figured a 2ft tall nightstand will do!

Estimated Cost
$20
Estimated Time Investment
Afternoon Project (3-6 Hours)
Finish Used
Dark Walnut
Recommended Skill Level
Beginner