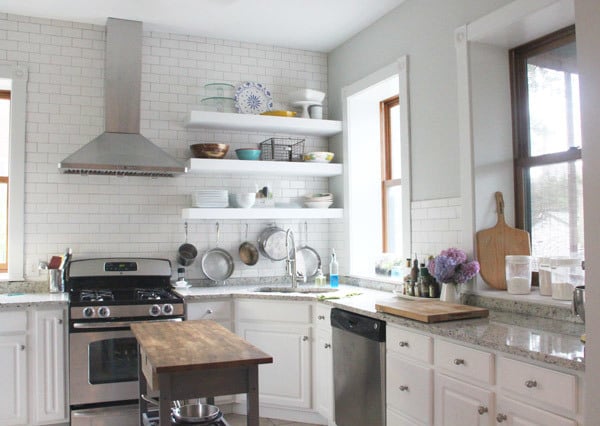
When we recently bought our 150+ year old house, we were pretty happy with just about everything (not stopping us from coming up with projects!) except the kitchen. This kitchen hadn't been updated in about 15 years, had dark brown walls, boring square white tiles with white grout, and TONS of cabinets. Everywhere. I felt like the walls were closing in!
So before we ever signed a piece of paper I had a vision of open shelving. Wide, white floating shelves to put our every day items at arms reach and display the few items we rarely use but think are beautiful.
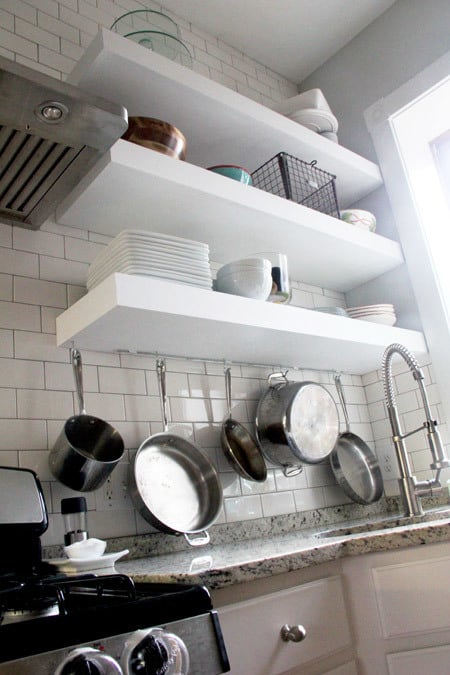
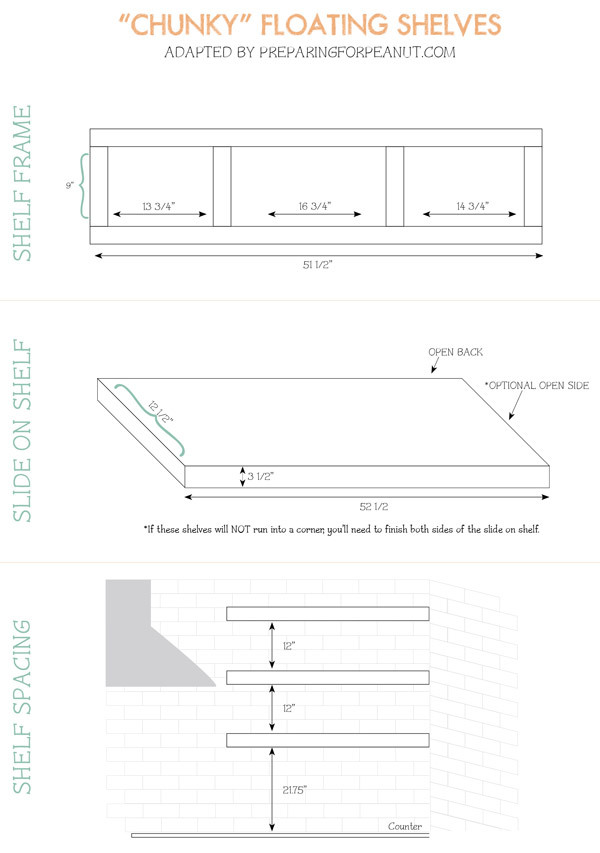
I loved Ana's plans, but I needed these shelves to hold 12 dinner plates, 12 bowls, 12 salad plates, 4 pasta bowls, and...well, right there that about 40 pounds of stuff. And the basic plans just didn't seem heavy-duty enough.
Enter our contractor, John, who I asked for help because, while they were my vision, they were his handy-work. My husband and I didn’t even attempt to build them on our own. John is a perfectionist and we knew he’d make this plan work…perfectly.
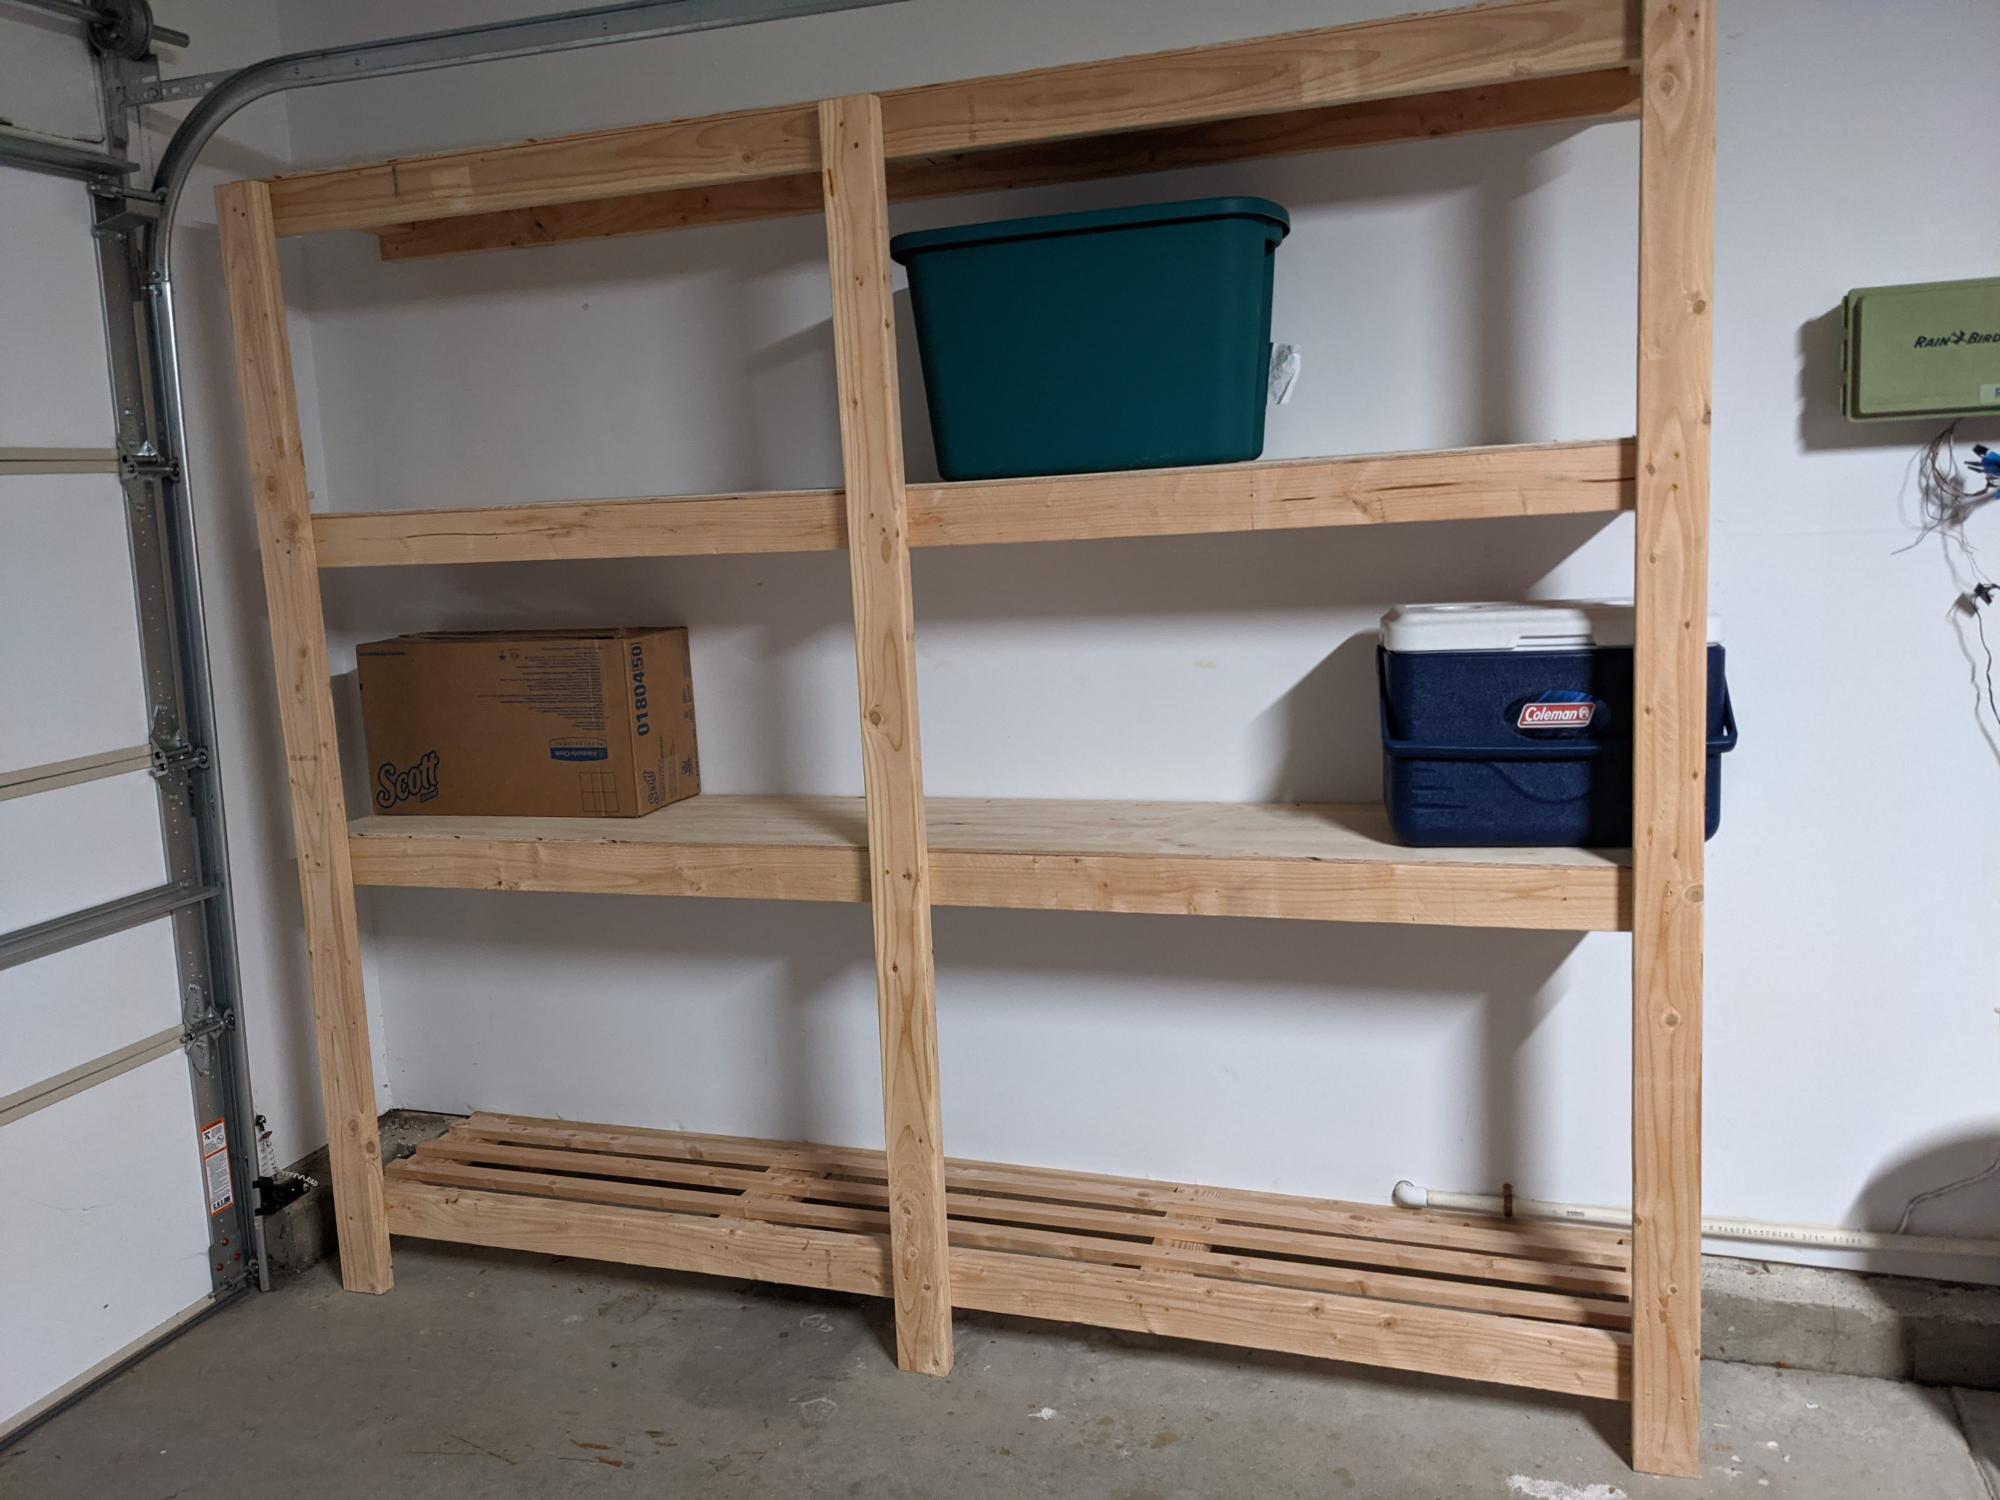
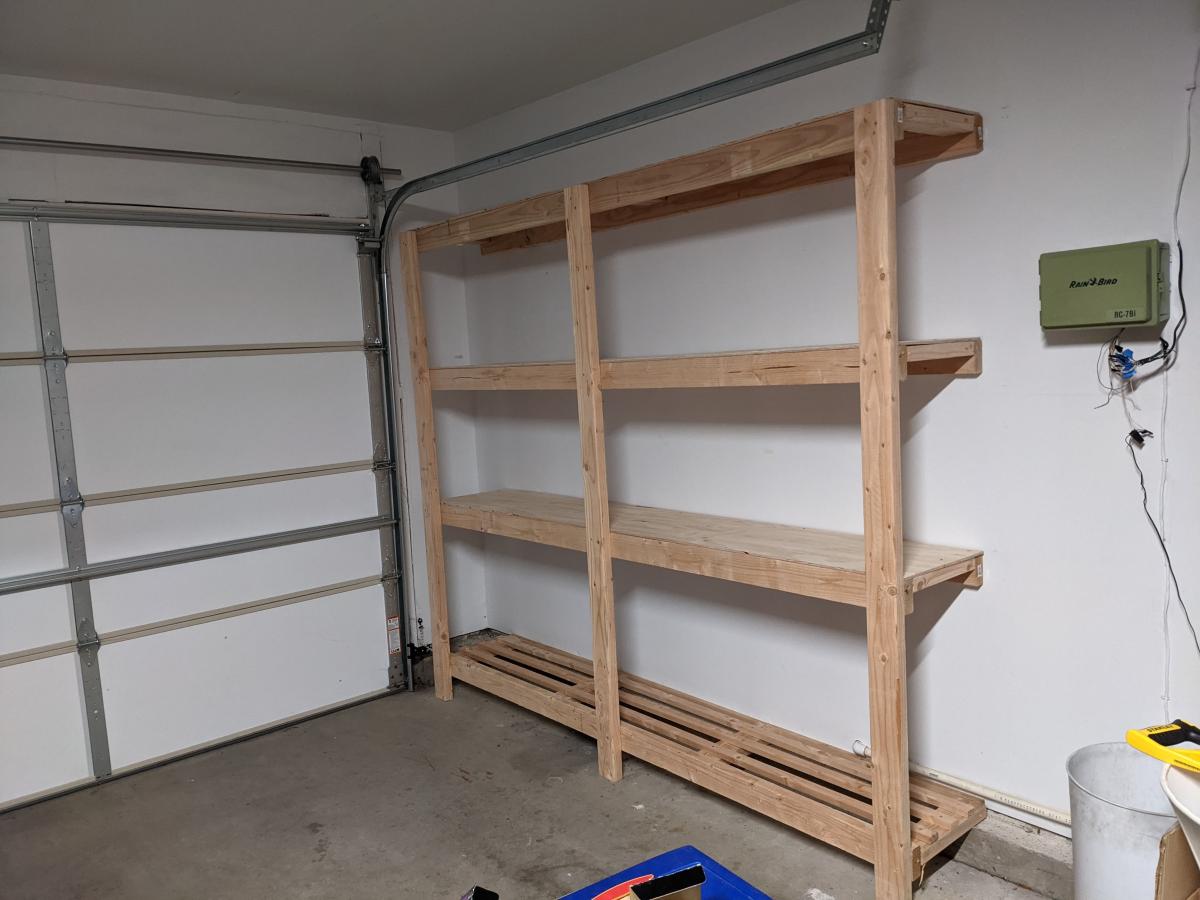
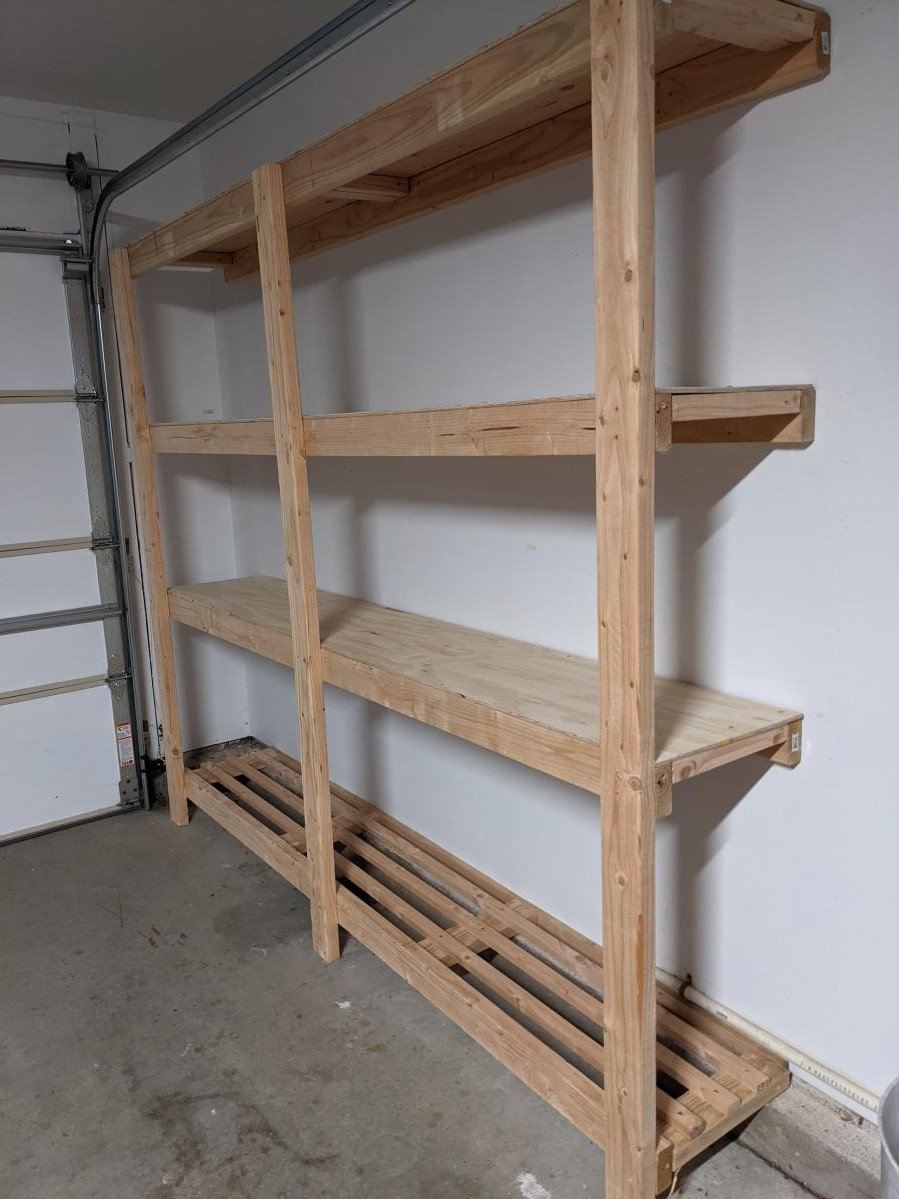
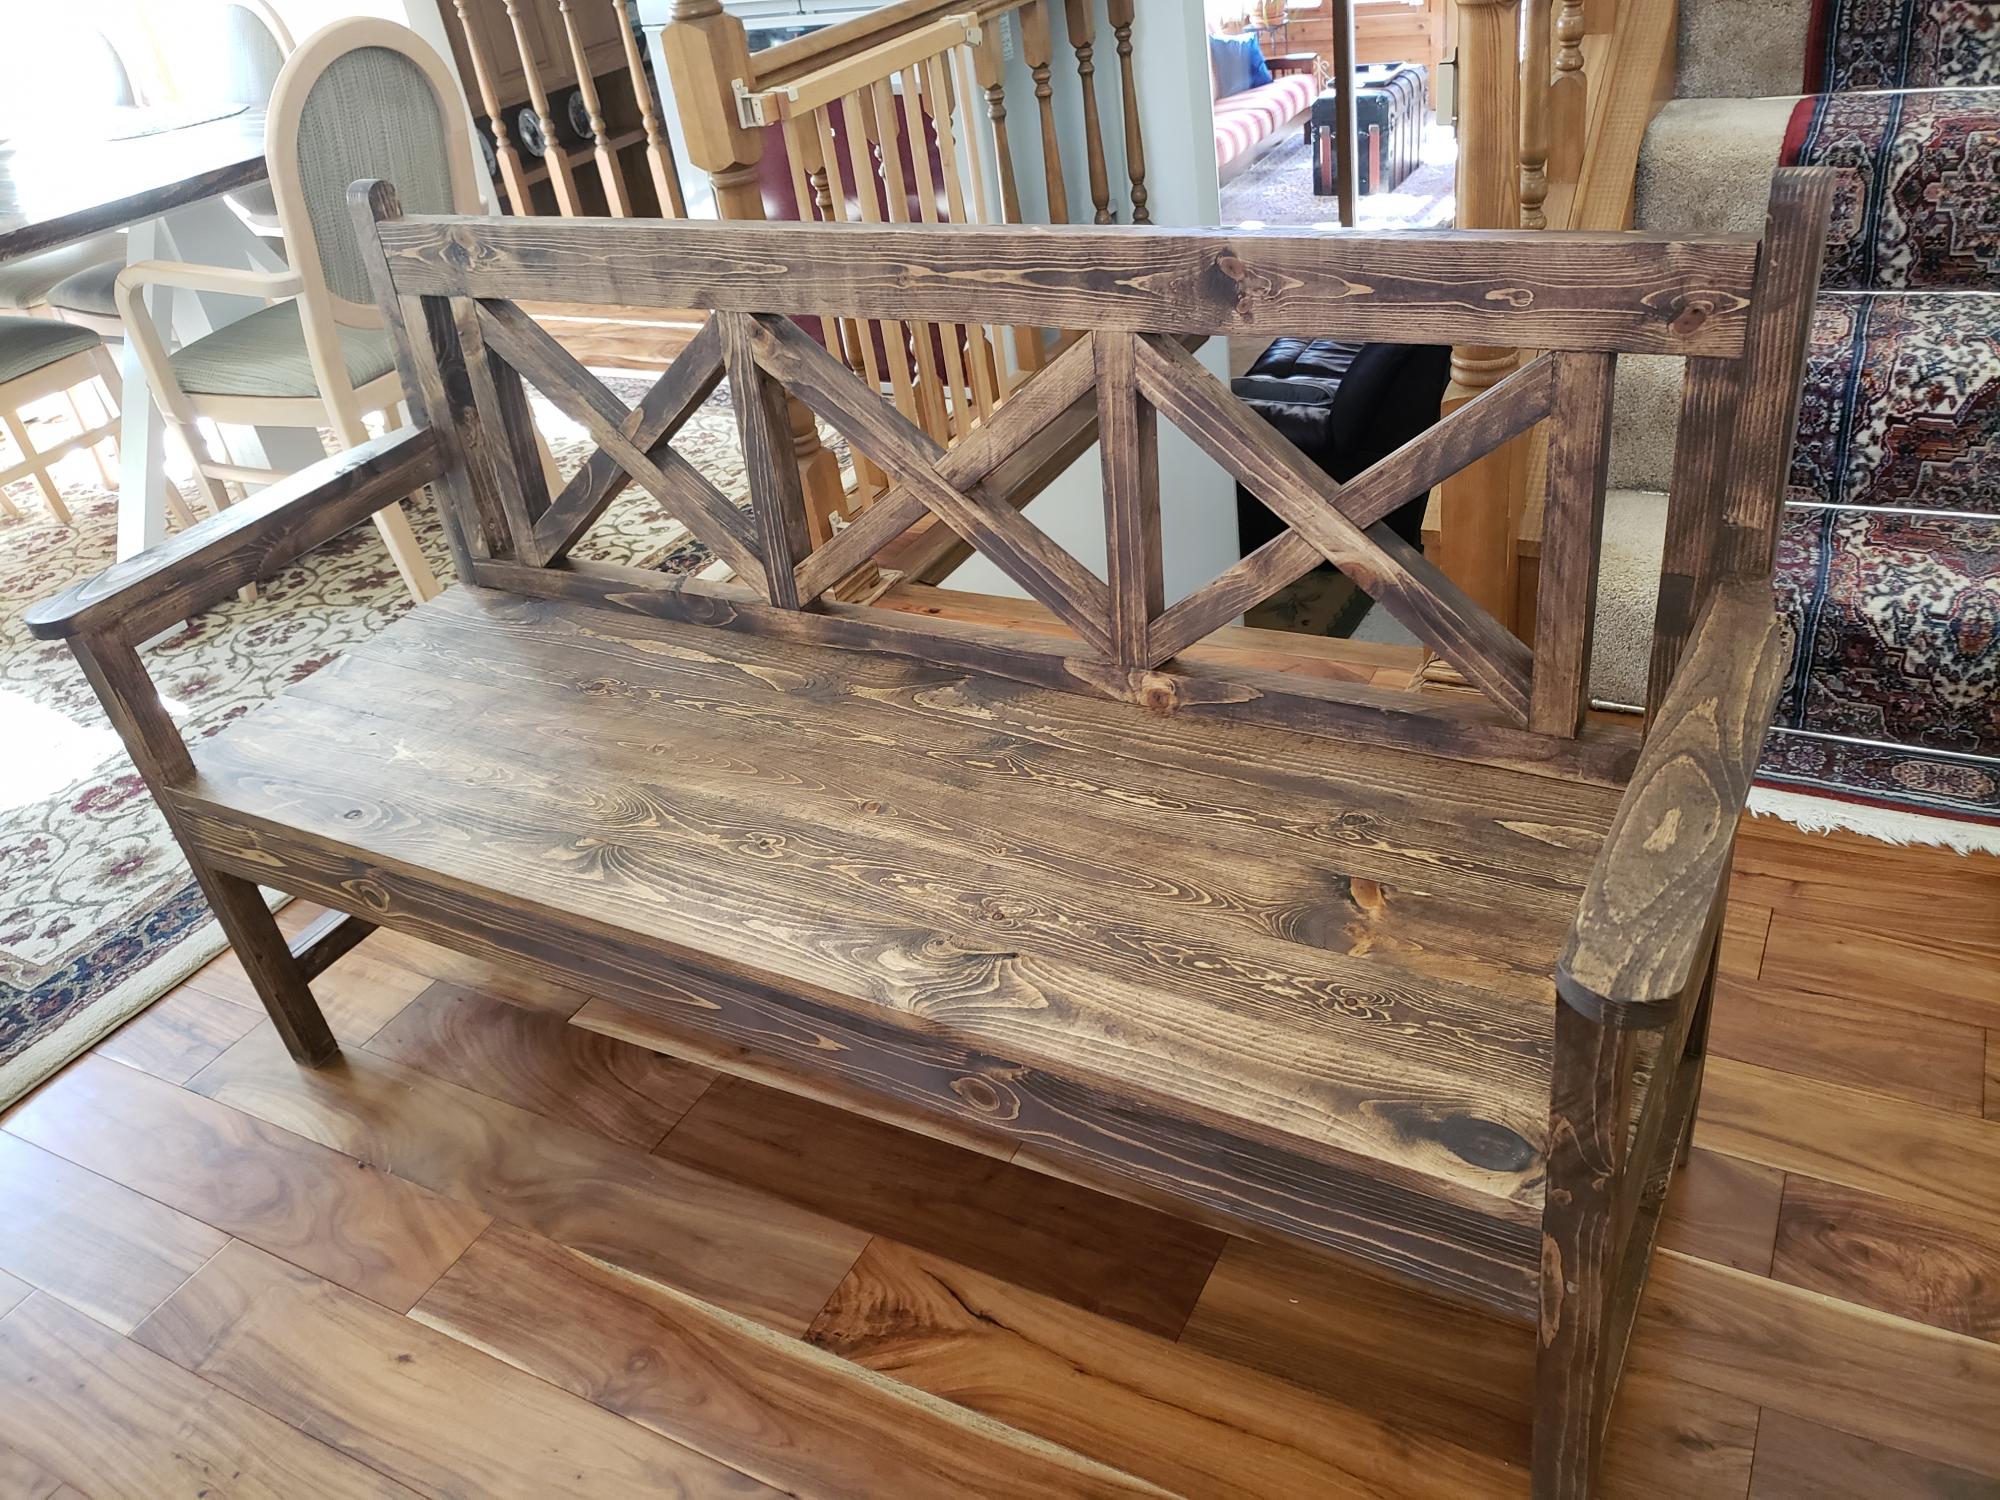
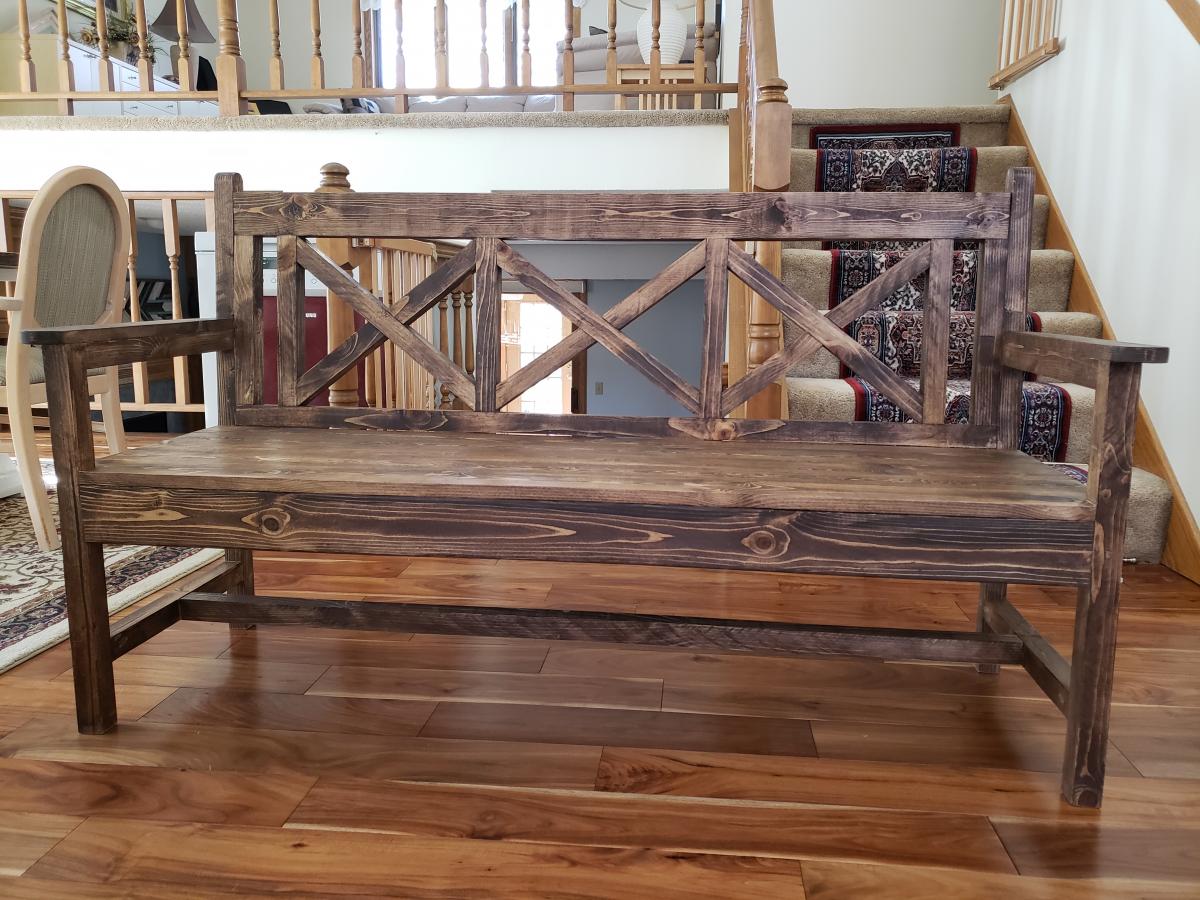
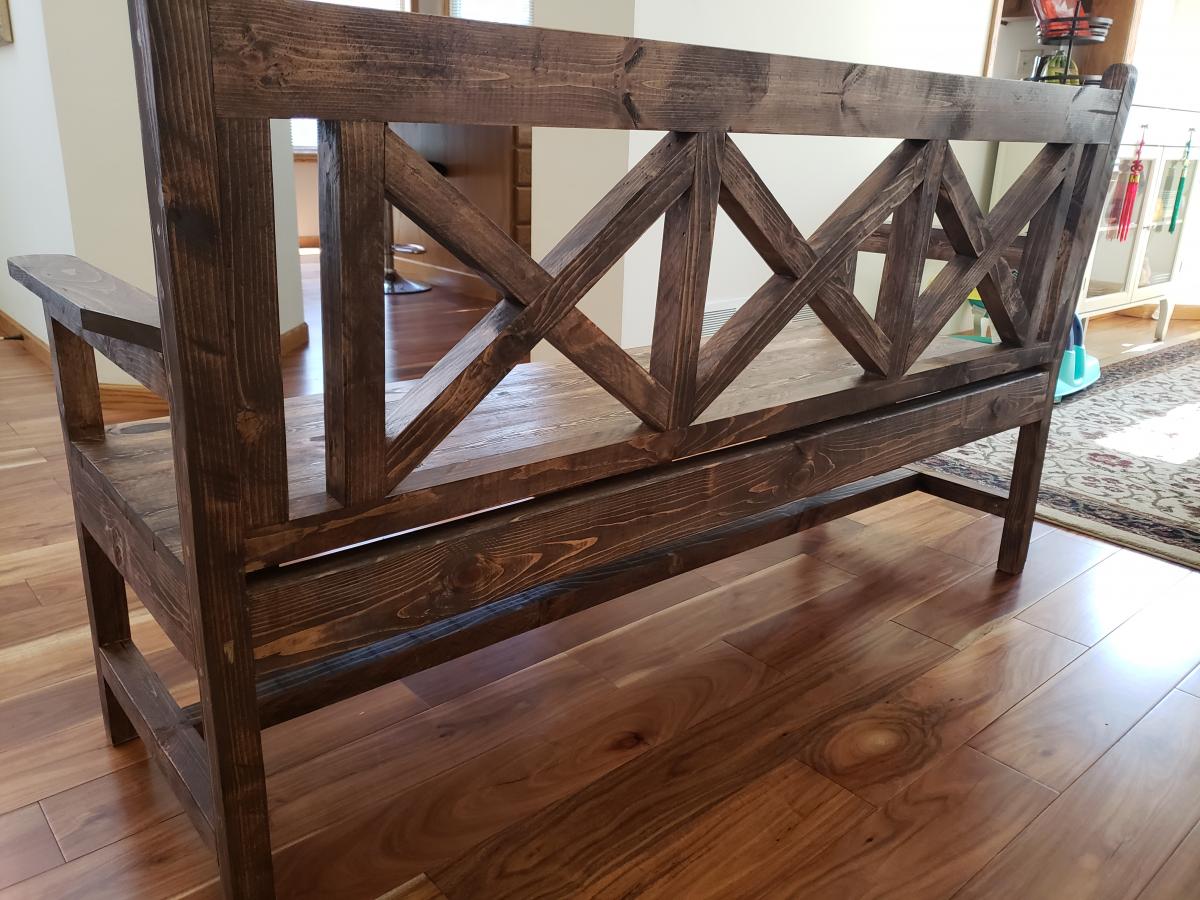
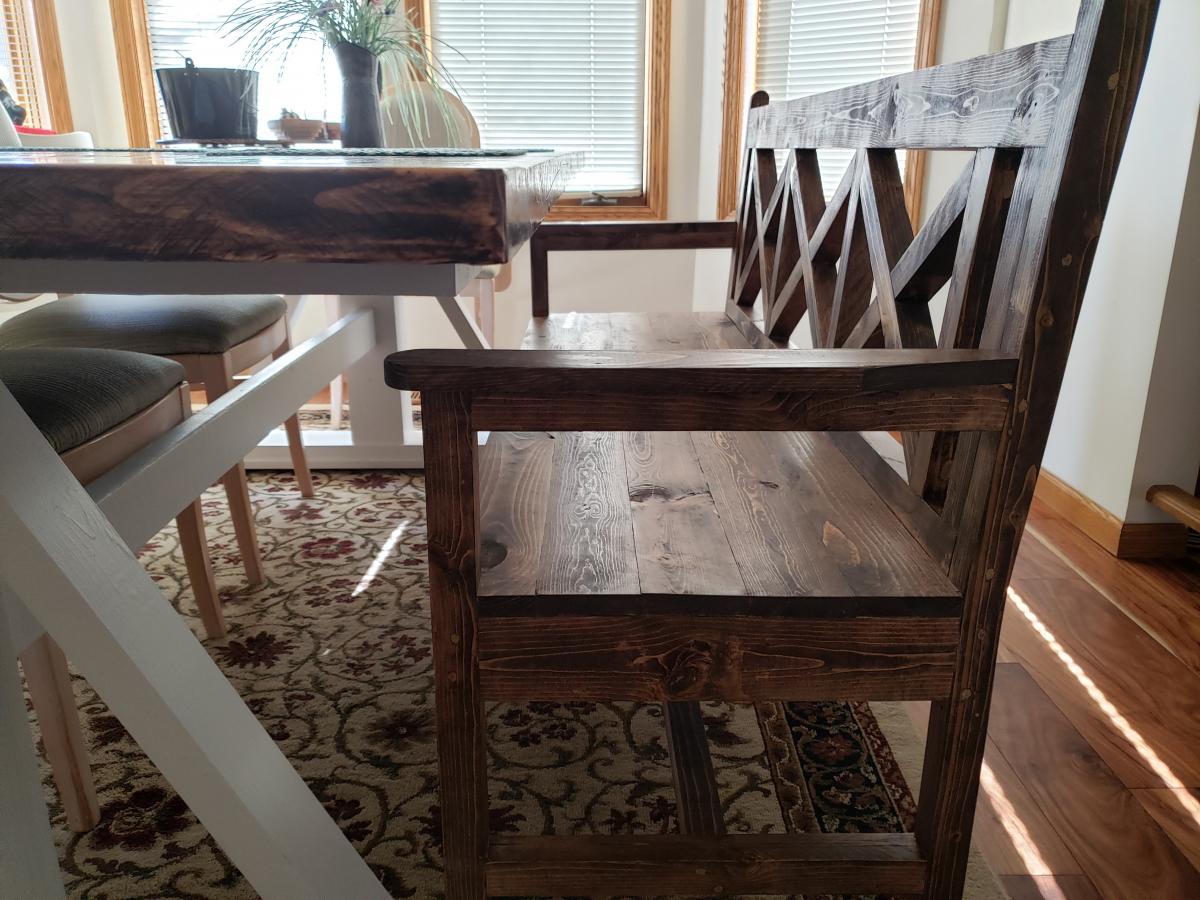
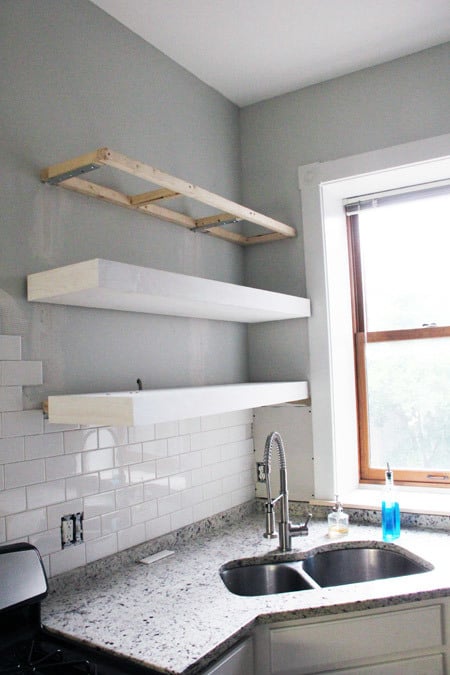
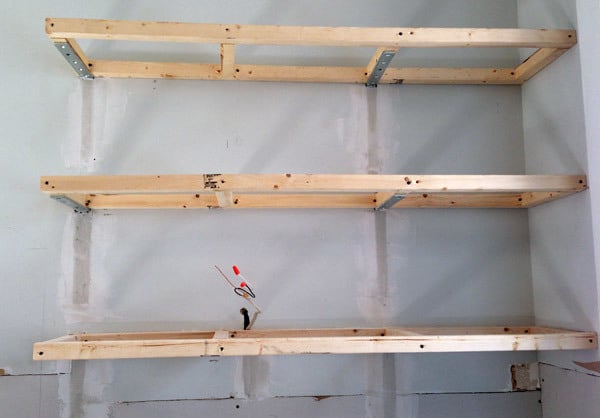
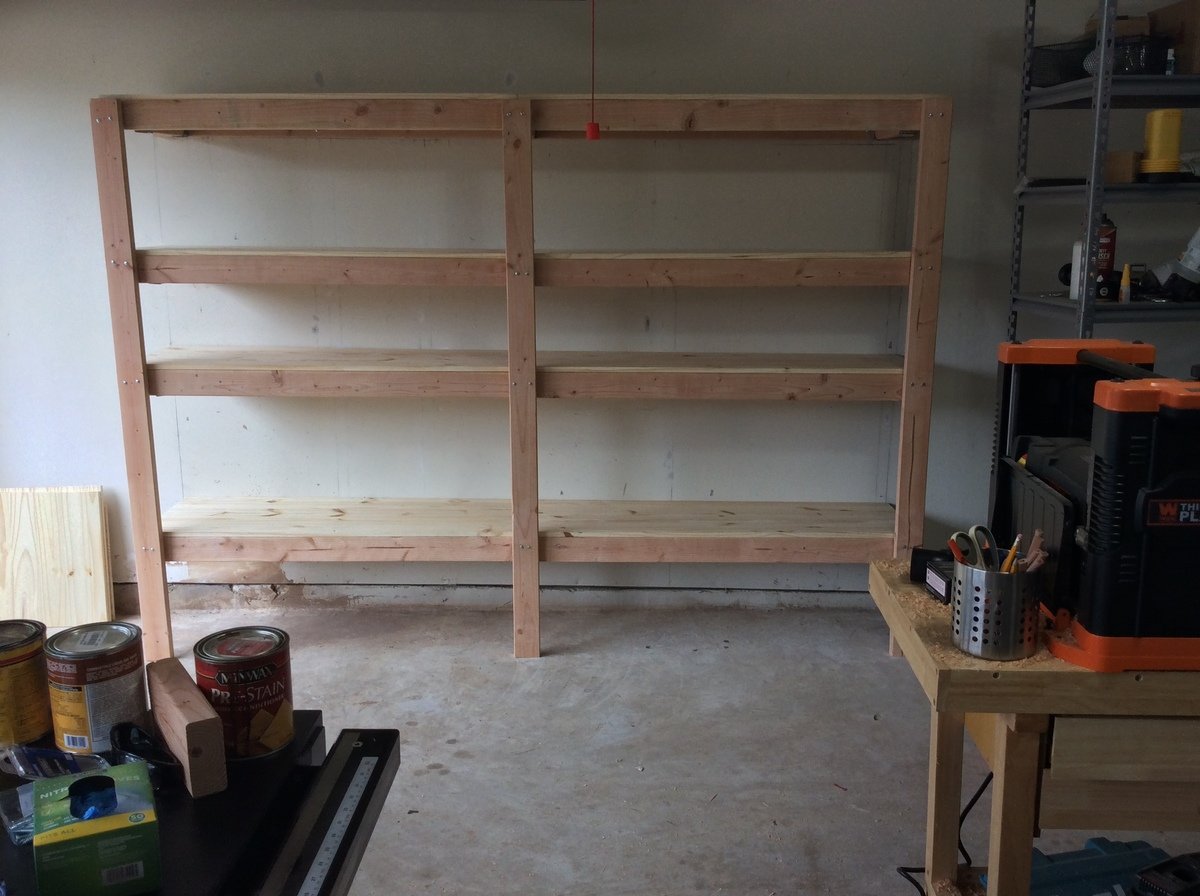
As usual, this was no sweat for John. To build the frames he used 2 x 2′s and secured them with 10 x 1 1/4″ angle brackets. During assembly, John made sure to position the center supports to match the wall studs in front of which the frame would hang. Once assembled, he removed some dry wall and attached the brackets directly to the studs.
We could store baby elephants on these shelfs, they wouldn’t budge.
Since I knew what needed to be stored on that first shelf (our every day items), we used the measurements to equally distance the three shelves (not including the first shelf of course—it needed more space above the counter top). Then we sealed up the dry wall. Another help with support was butting the shelves right up to the corner, putting another screw in another stud.
We moved the lighting electric up for new under cabinet lighting—so easy pre-tiling.
For the actual shelves—I like to think of them as “sleeves”—John used 3/4″ sanded plywood for the tops and bottoms of each shelf, then 1 x 6 clear pine ripped down to desired thickness for the fronts and one side (the other side is against the wall, so was left open). The primed sleeves spent a few days on the screened in porch while I tiled around the frames, they were pretty heavy and very solid.
I’ve made an attempt to lay out the measurements involving our floating shelf project. These are to scale and give a good idea of how our plans differed from Ana’s.
We LOVE our shelves and get so so many compliments. The seemingly small and simple changes (tile, shelves, new window trim, paint, and soon flooring) made a HUGE impact and not that huge of a cost. And we don't miss the upper cabinets at all.
Thanks for the head-start and inspiration Ana!


Comments
Ana White Admin
Sun, 03/15/2015 - 12:22
WOW!
That is one awesome build! Thanks for sharing!
handmadewithash
Mon, 03/16/2015 - 20:39
this is really awesome! What
this is really awesome! What a cool work area :)
diannaj
Tue, 07/28/2015 - 16:50
great idea but...
your wesite is not user friendly
lklima
Sun, 08/02/2015 - 11:39
four station desk
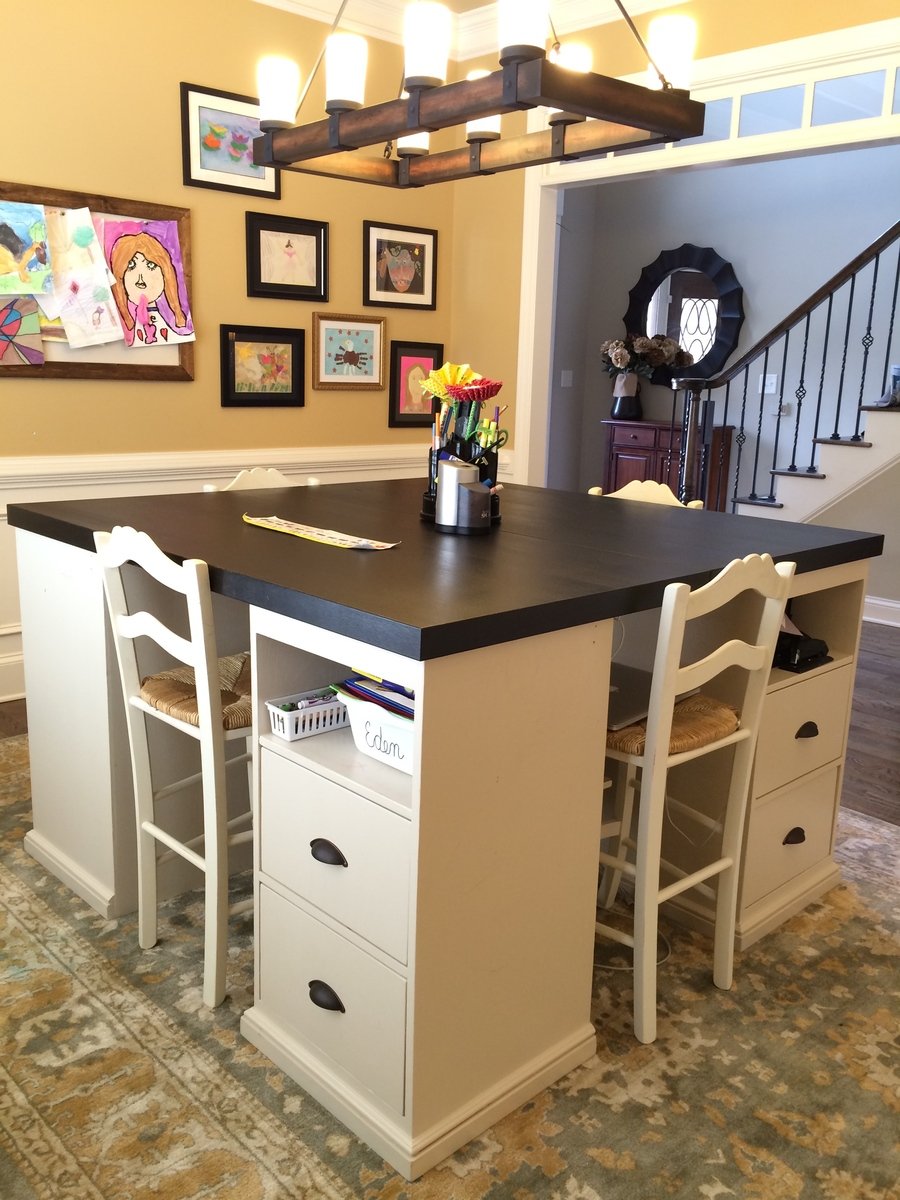
Where did you get the chairs to complete your project? And how much were they?
monty742
Sat, 08/15/2015 - 04:33
Stools from Ballard Outlet
Just seeing your comment...sorry for the delay! I got the stools and the light fixture at a Ballard Backroom (outlet) store near me. 3 of the stools ended up being about $40 each with the sale they had at the time, and the 4th was $60? - bought at a later time than the first 3.
steveoatilla
Sun, 08/30/2015 - 13:54
Could we get more detail on
Could we get more detail on how this was built? The base units, for instance.
Thanks!
AlisaH
Wed, 11/04/2015 - 07:40
Connecting Table Tops
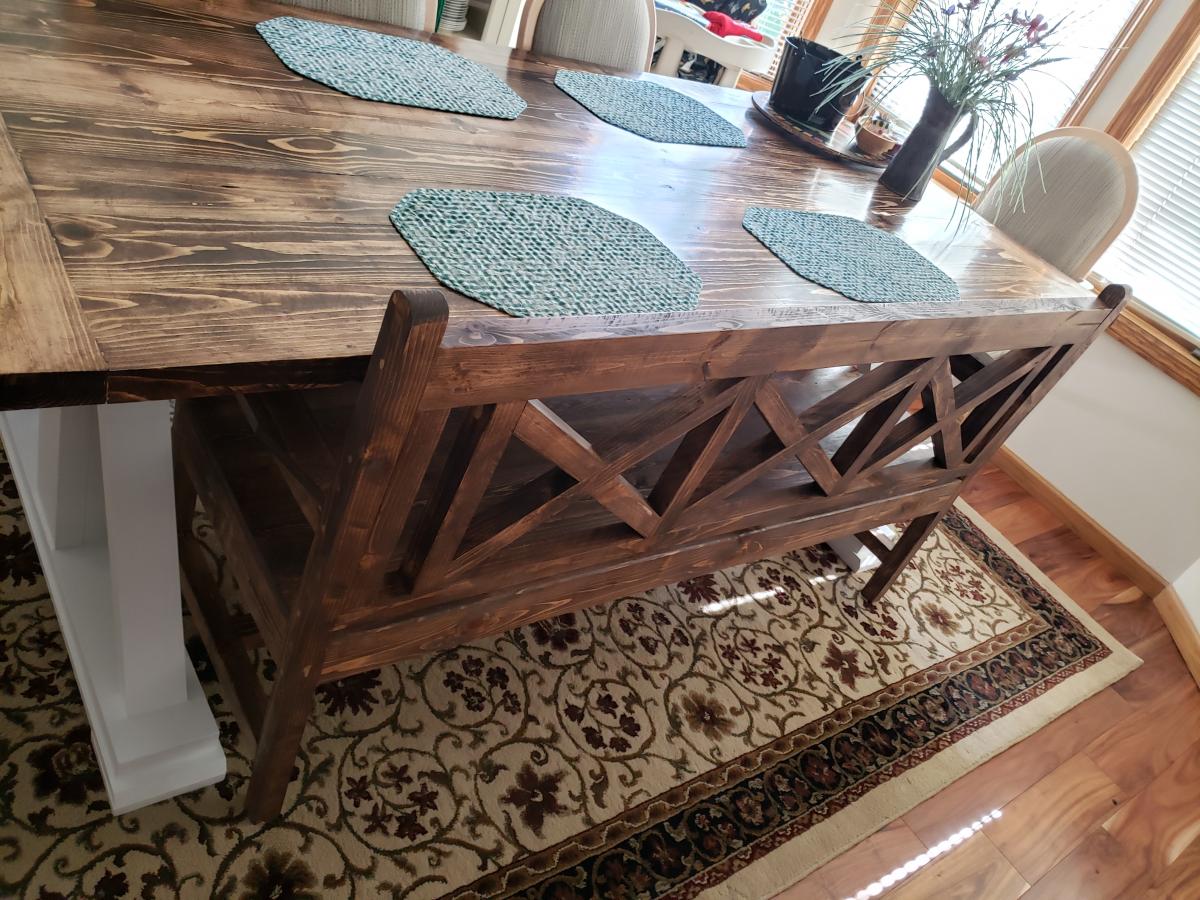
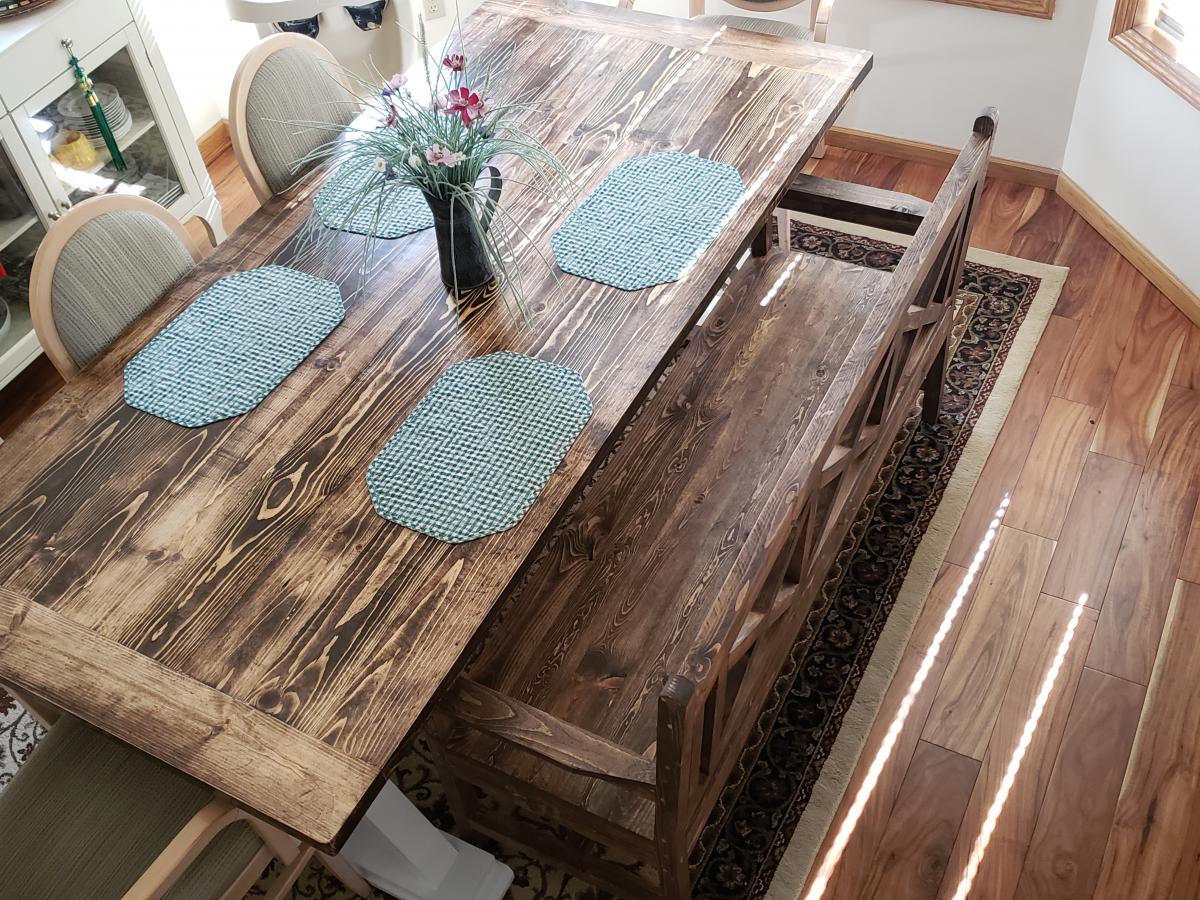
How did you connect the table tops from the bottom so that the tables were secure together? I'm curious what's the best way to do this. Since two of the four seats will be where the seam is, I want to make sure I secure it properly so it's not wobbly. Thanks so much.
monty742
Sat, 01/09/2016 - 05:06
connecting table tops
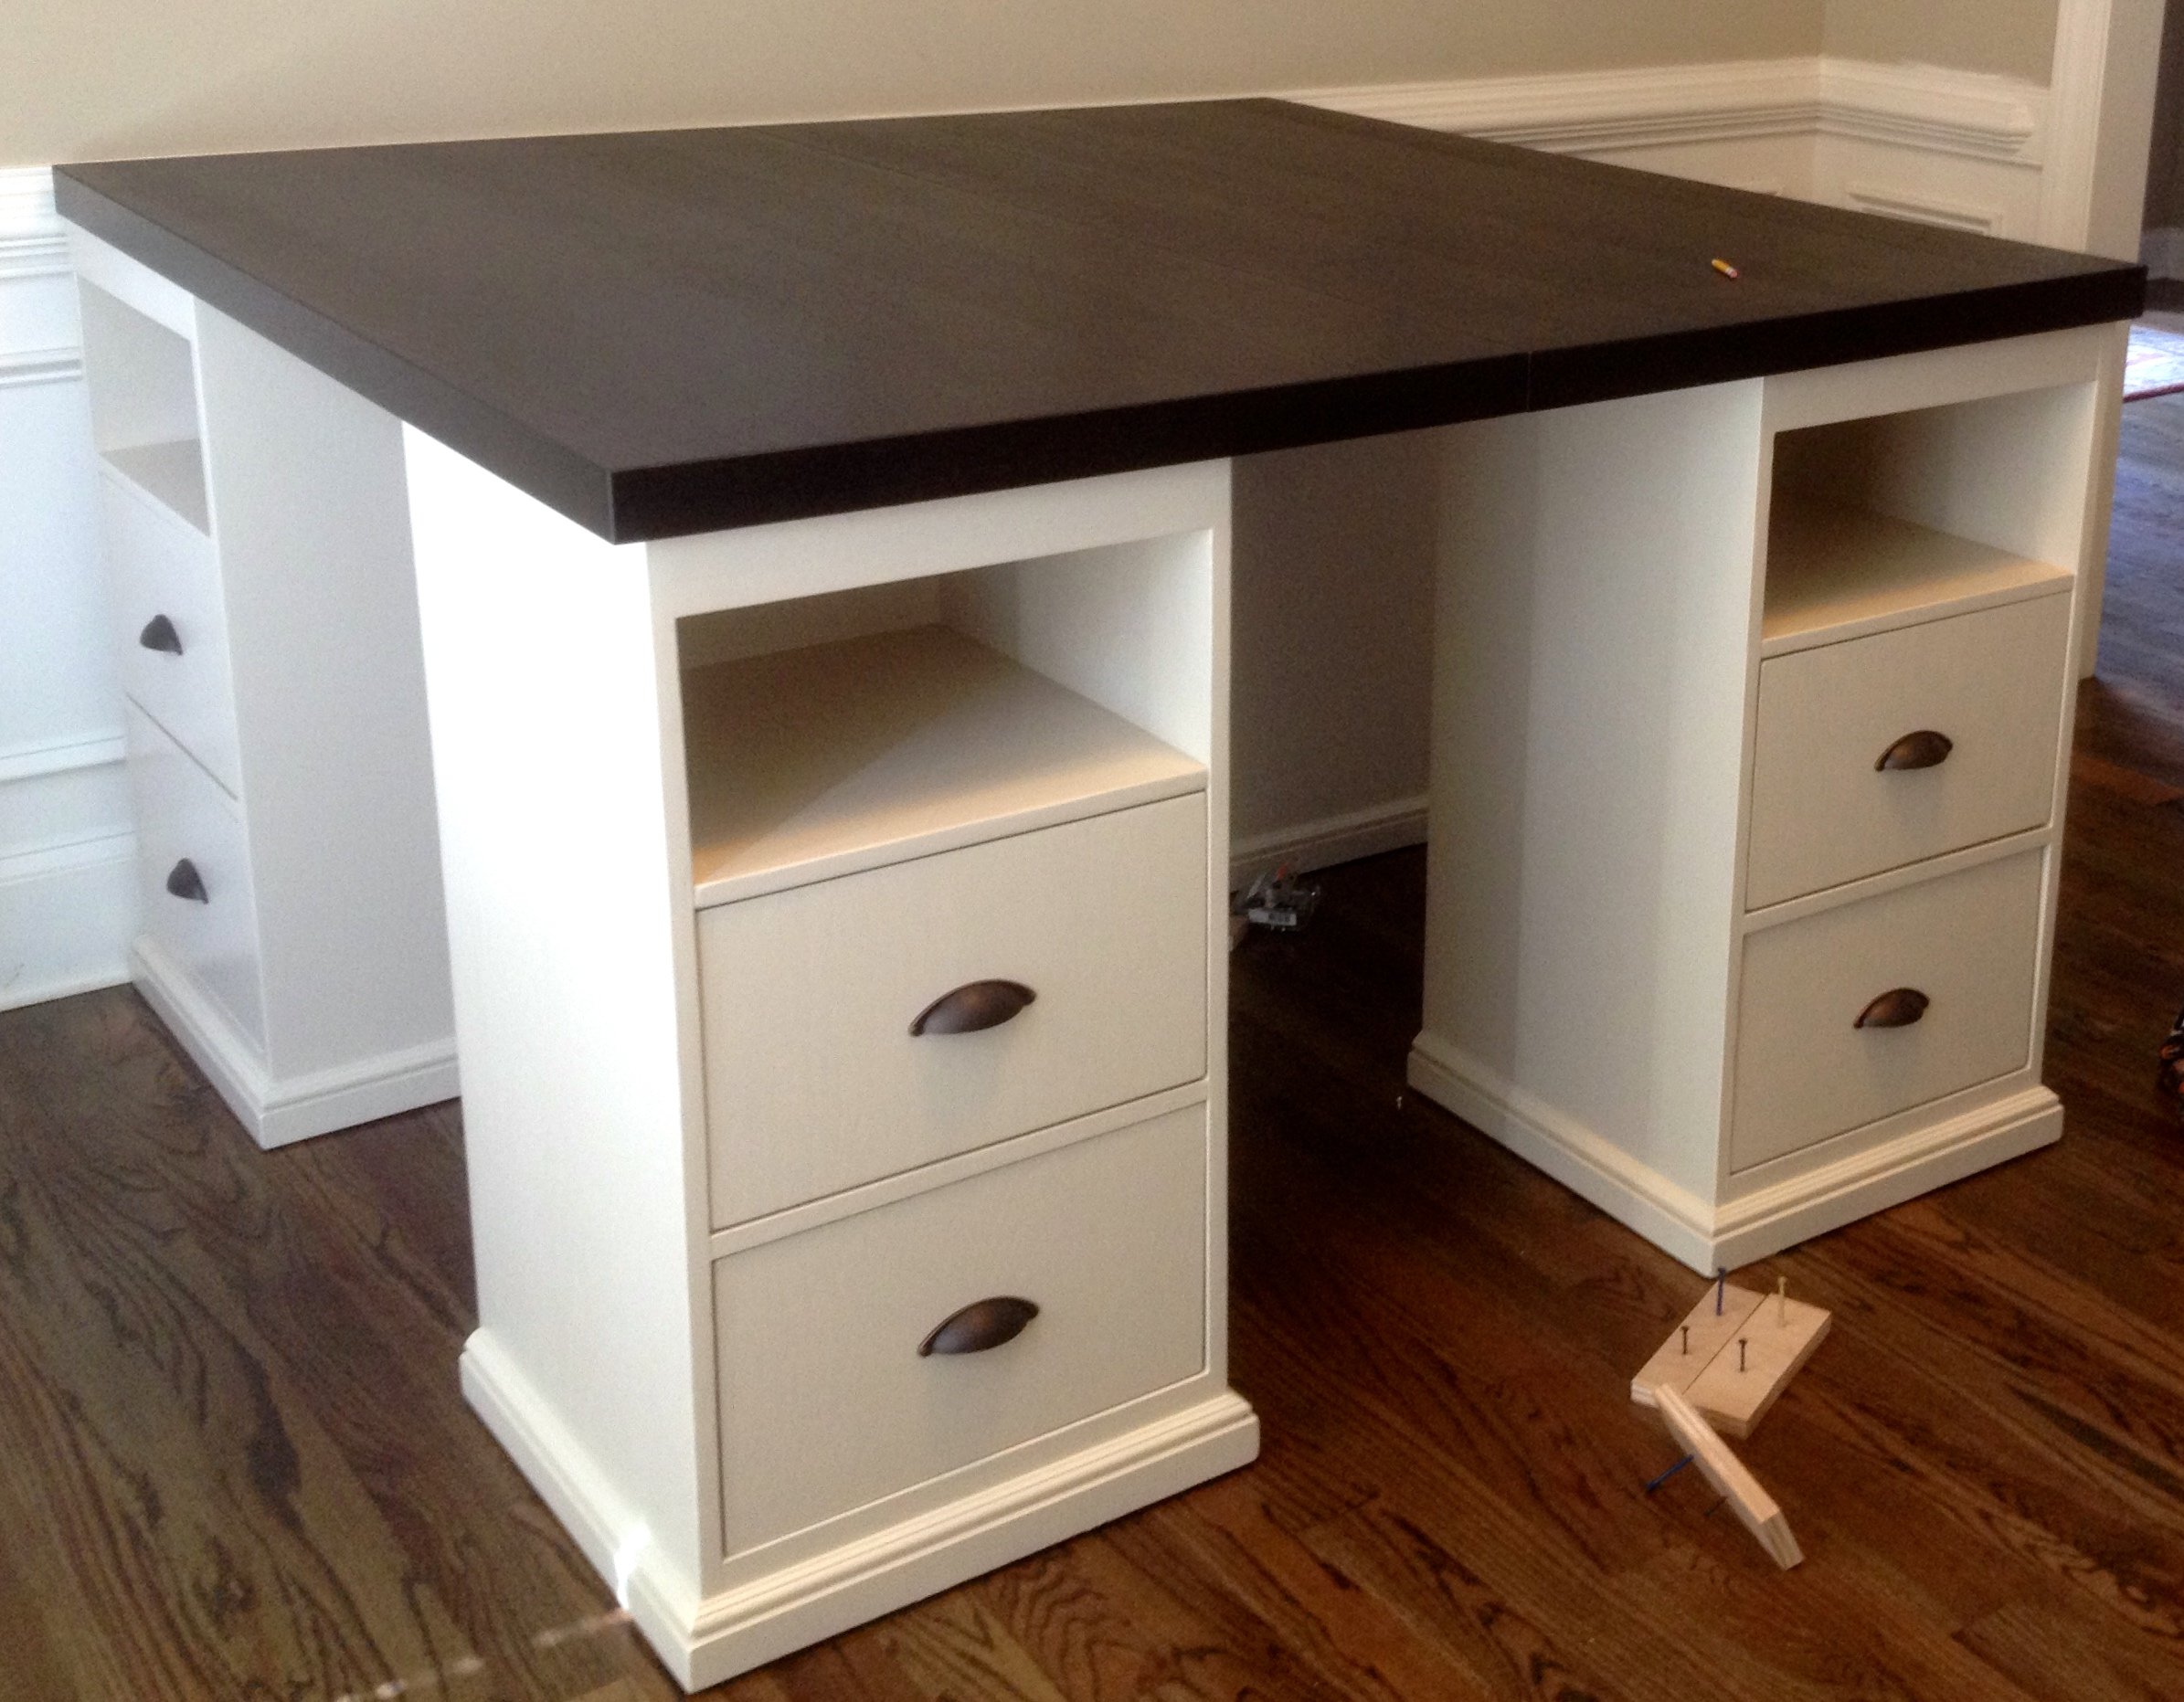
I'm just seeing these latest comments for the first time, so you may have long finished this project already! The tops were surprisingly sturdy but I did reinforce them. I placed the tops on the floor upside down and screwed some metal brackets (about 12" long each) across the joint in four places. I just screwed them in through holes already in the brackets. This wasn't the most stable because those tops are particle board and don't hold screws very well... But since it was already pretty sturdy, I figured it would do. It has been fine, even with standing on the top (kids who get up there and me hanging the light fixture above).
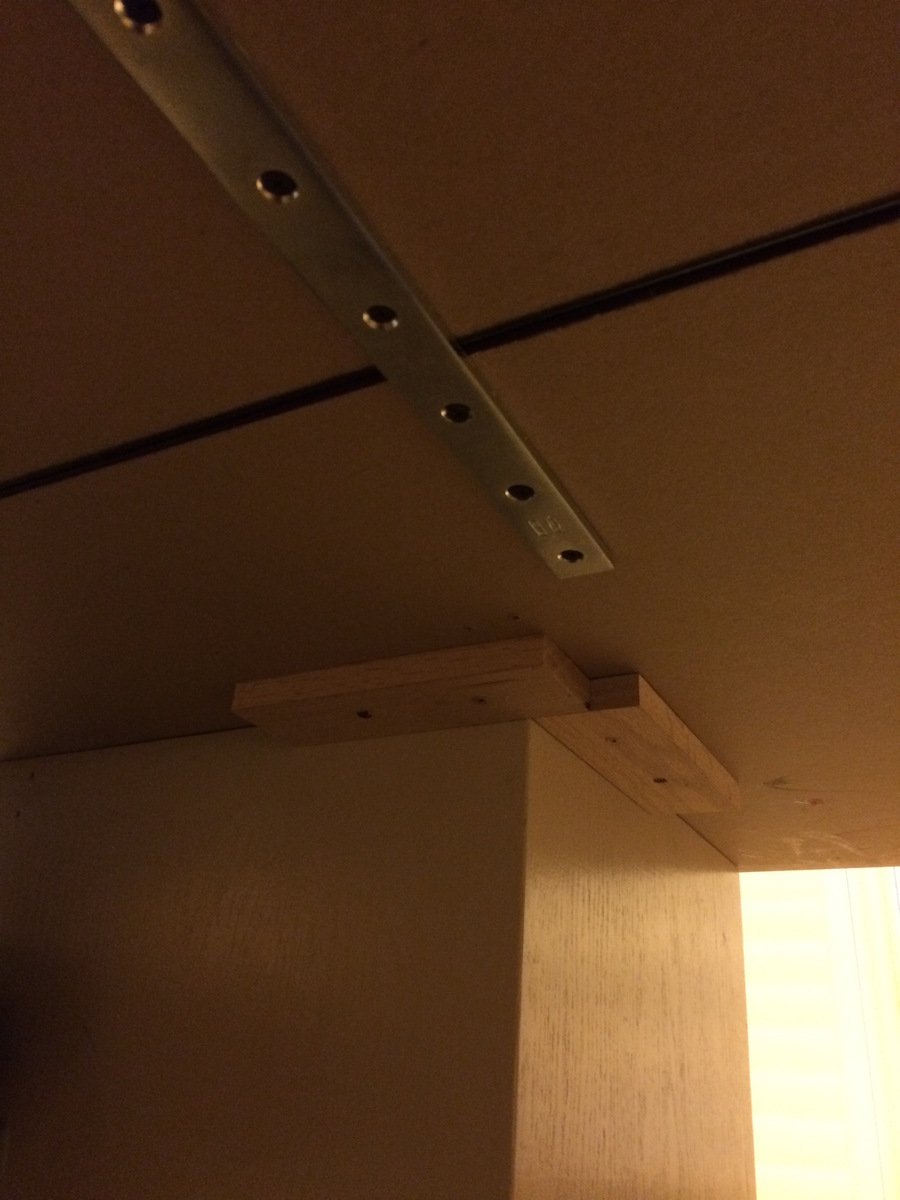
Once the tops were joined, I placed the bases so there was about a 1" overhang on the top. To hold the top in place, I used small pieces of wood screwed to the underside of the top at the inside corner to act as a placement stop. The top is pretty big and heavy even though they are IKEA tops, so they don't have a tendency to move or slide at all anyway. I'm going to try to figure out how to post another picture of the braces and corner stops...we'll see if I can do it! Let me know if you have any more questions...again, sorry I didn't see this in a more timely manner!
Pmprdwife
Sat, 01/02/2016 - 05:55
Photo
Is the photo above the Pottery Barn version or your product result? I'm trying to figure out the dimensions for the drawer and shelf configurations. Thanks! BTW, I'm totally addicted to your style and personality...my husband loves the productivity inspiration I've received. :-)
monty742
Sat, 01/09/2016 - 10:17
more detailed measurements
Hi!
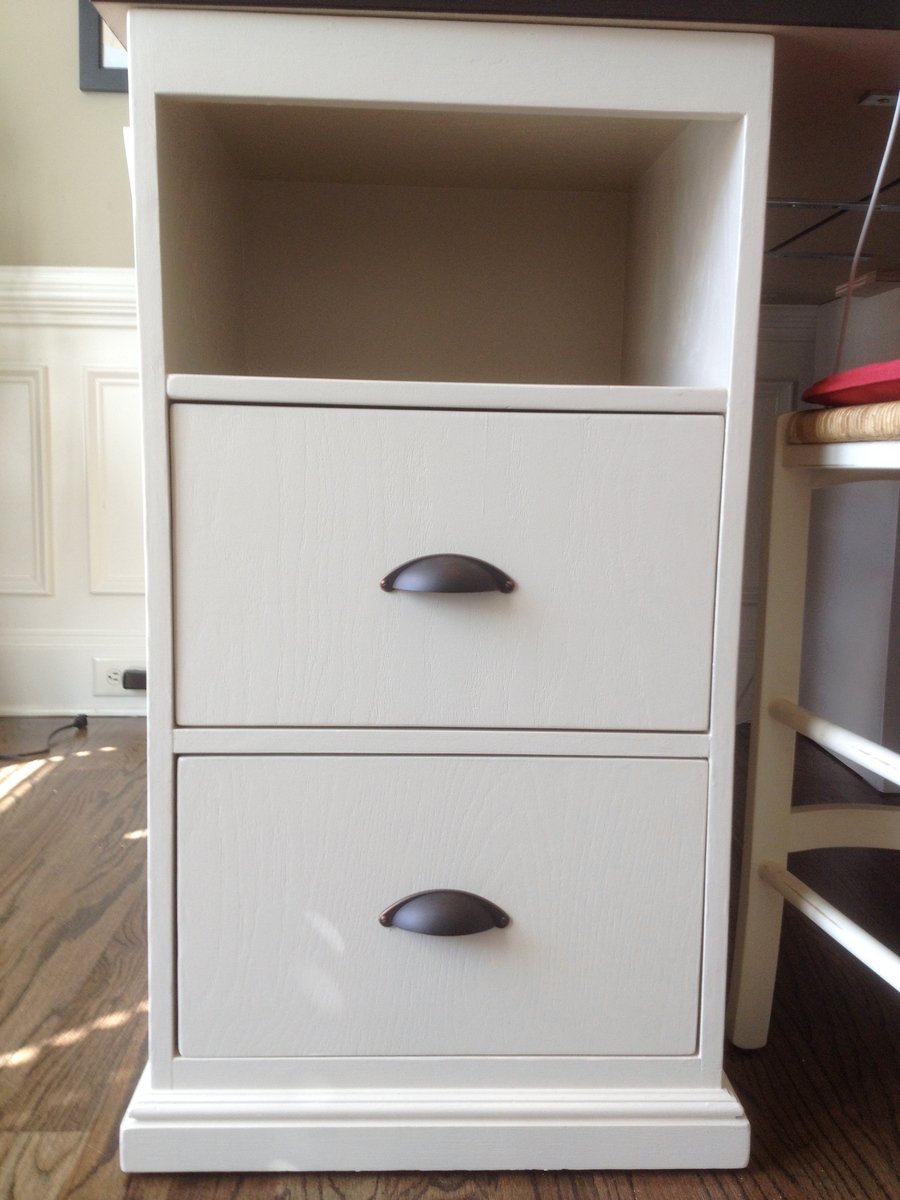
I'm glad you like the desk! The one in the picture is the one I built, not the pottery barn one! My dimensions were a good bit different than the PB desk - square bases instead of rectangular and counter stool height instead of desk/table height. So, I have no idea if I have my plans for this anymore, so I went and measured it again for you!
So each base is 18" x 18" square and 34" high so that with the 2" top the total height is 36".
Each base was made of oak plywood that made with 3 sides, a top and a bottom. All edges were rabbit joints (3/8" deep in thickness of boards and probably 3/8" wide - not 100% on width of rabbits). It's kind of a pain to do rabbit joints if you don't have a dado blade for your table saw, so you could use pocket hole screws instead. I glued and nailed these joints with a finish nailer, I believe.
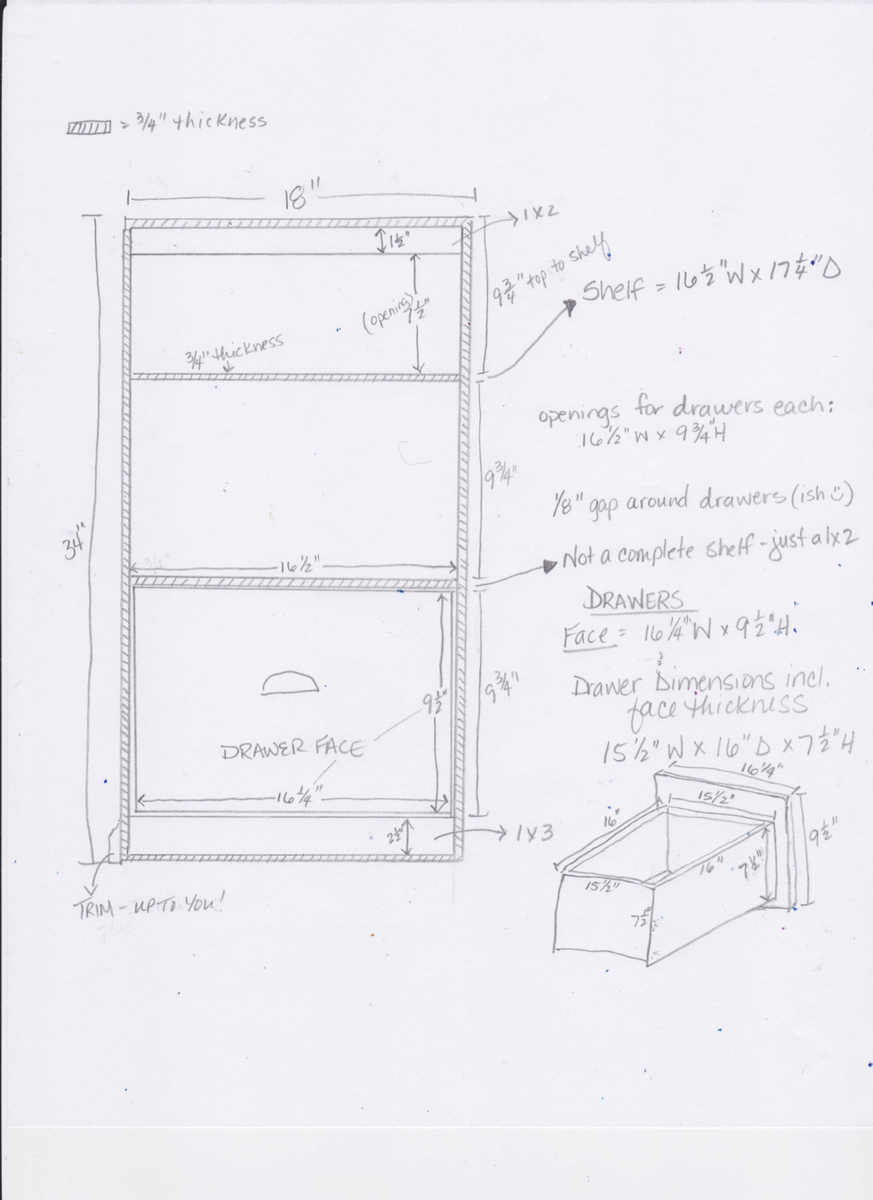
I figured a diagram with measurements would be easier than trying to write descriptions...so I'm adding another pic with the dimensions outlined. Drawing is NOT to scale, so sorry about that! I really need to learn to use SketchUp. Let me know if you have any questions!
monty742
Sat, 01/09/2016 - 07:57
more detailed measurements
Hi!
I'm glad you like the desk! The one in the picture is the one I built, not the pottery barn one! My dimensions were a good bit different than the PB desk - square bases instead of rectangular and counter stool height instead of desk/table height. So, I have no idea if I have my plans for this anymore, so I went and measured it again for you!
So each base is 18" x 18" square and 34" high so that with the 2" top the total height is 36".
Each base was made of oak plywood that made with 3 sides, a top and a bottom. All edges were rabbit joints (3/8" deep in thickness of boards and probably 3/8" wide - not 100% on width of rabbits). It's kind of a pain to do rabbit joints if you don't have a dado blade for your table saw, so you could use pocket hole screws instead. I glued and nailed these joints with a finish nailer, I believe.
I figured a diagram with measurements would be easier than trying to write descriptions...so I'm adding another pic with the dimensions outlined. Drawing is NOT to scale, so sorry about that! I really need to learn to use SketchUp. Let me know if you have any questions!
ecmc226
Wed, 06/22/2016 - 15:26
Can you buy the bases from
Can you buy the bases from ikea? or did you build them from scratch?
monty742
Thu, 07/28/2016 - 14:13
No you can't buy them from
No you can't buy them from Ikea. I bought the table tops from Ikea, but I built the bases. The dimensions for the bases are in one of the additional pictures with the post if you want to see them!
treverandamber
Mon, 10/10/2016 - 07:41
Table top size
What are the total dimensions of the table top? Thinking of building something like this, but want to make sure it will fit in my space.
Simgre81
Thu, 12/28/2017 - 07:00
Drawers
Are these just slide in drawers, or did you use some sort of hardware to have them slide in and out?