Community Brag Posts

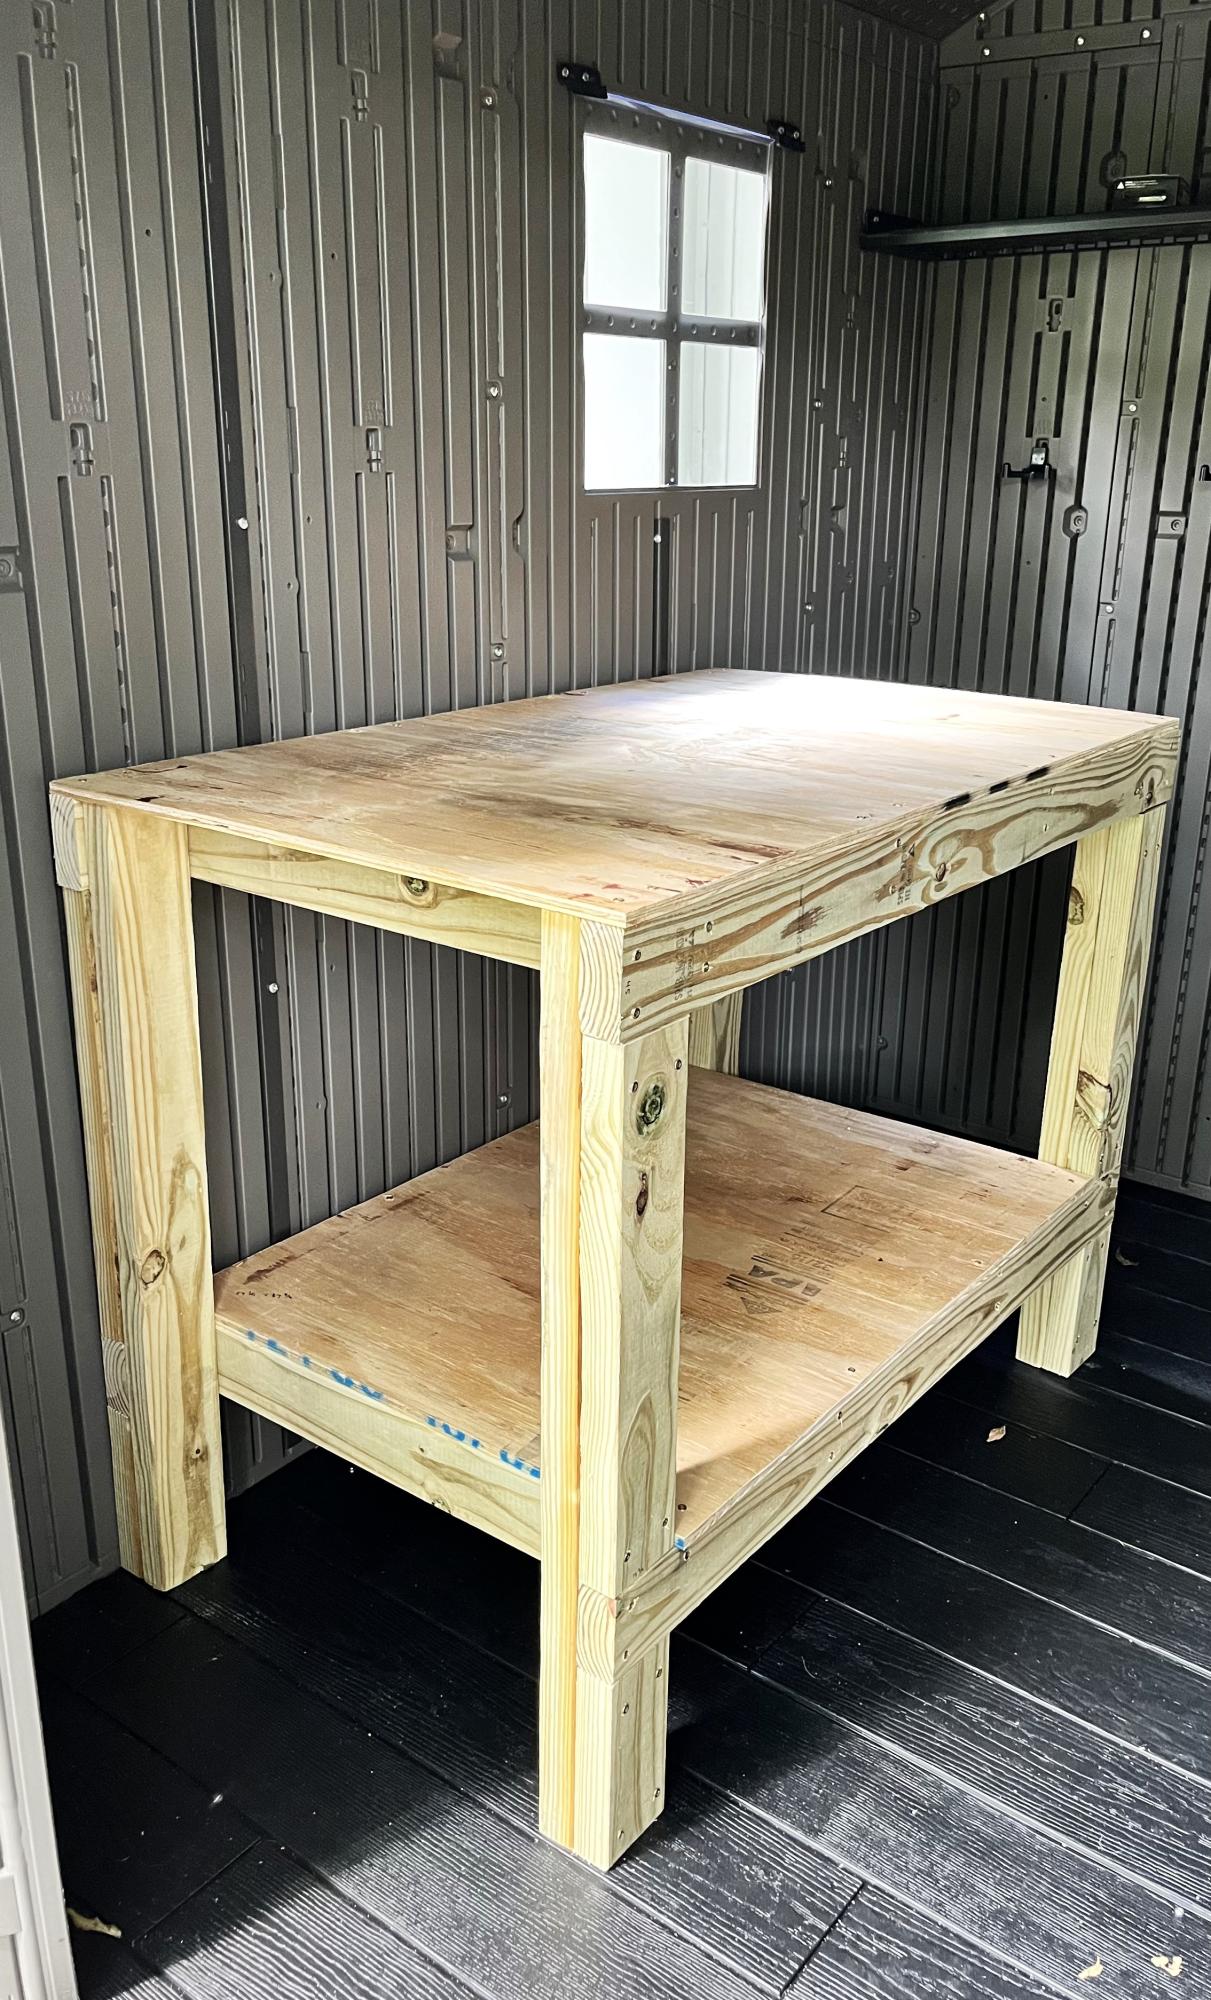
Easy to Build Workbench

Submitted by Anonymous (not verified) on Wed, 09/06/2023 - 09:09

I was wanting a work bench for my outside shed to work on occasionally and help keep organized. This is the first piece of furniture I have built totally on my own! The plan was easy. I sized it down a little with no problem. I'm a little off on a couple of the cuts but will practice more! Overall, thrilled and extremely proud of it!

Lori B

DIY Grow Light for Starting Seeds

Submitted by lbrown on Sun, 04/15/2012 - 08:31

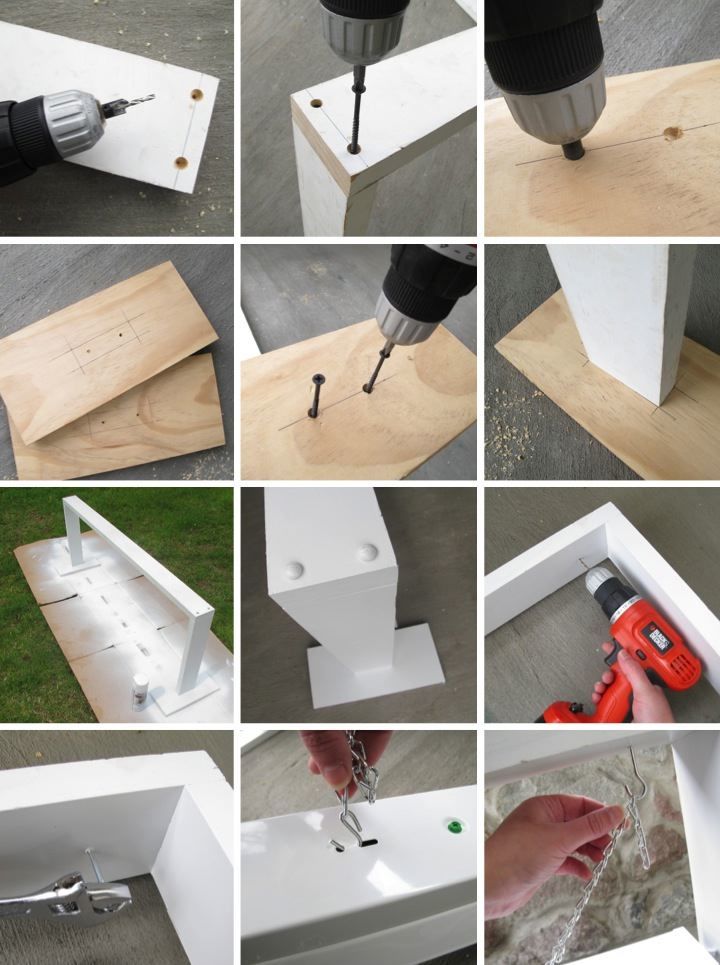
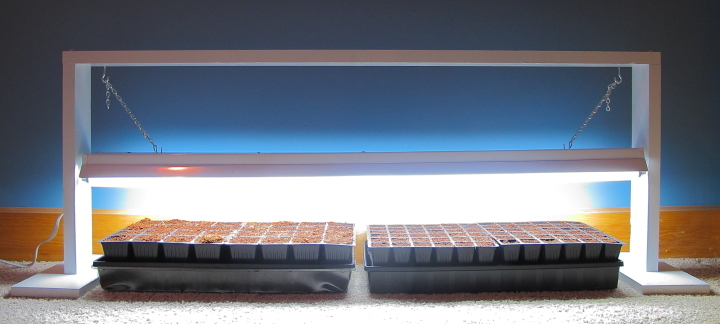
I wanted to start some seeds indoors this year but I couldn't find a reasonably priced grow light that I liked so I decided to make one myself. With some wood scraps and a 48" fluorescent work light I came up with an easy design that was inexpensive, too. For details: http://www.homeandawaywithlisa.com/blog/2012/4/15/diy-grow-light-for-st…

Estimated Cost
$15
Estimated Time Investment
An Hour or Two (0-2 Hours)
Finish Used
Spray paint primer followed by a few coats of white spray paint
Recommended Skill Level
Starter Project

DIY Sauna

Submitted by Anonymous (not verified) on Thu, 02/15/2024 - 10:17

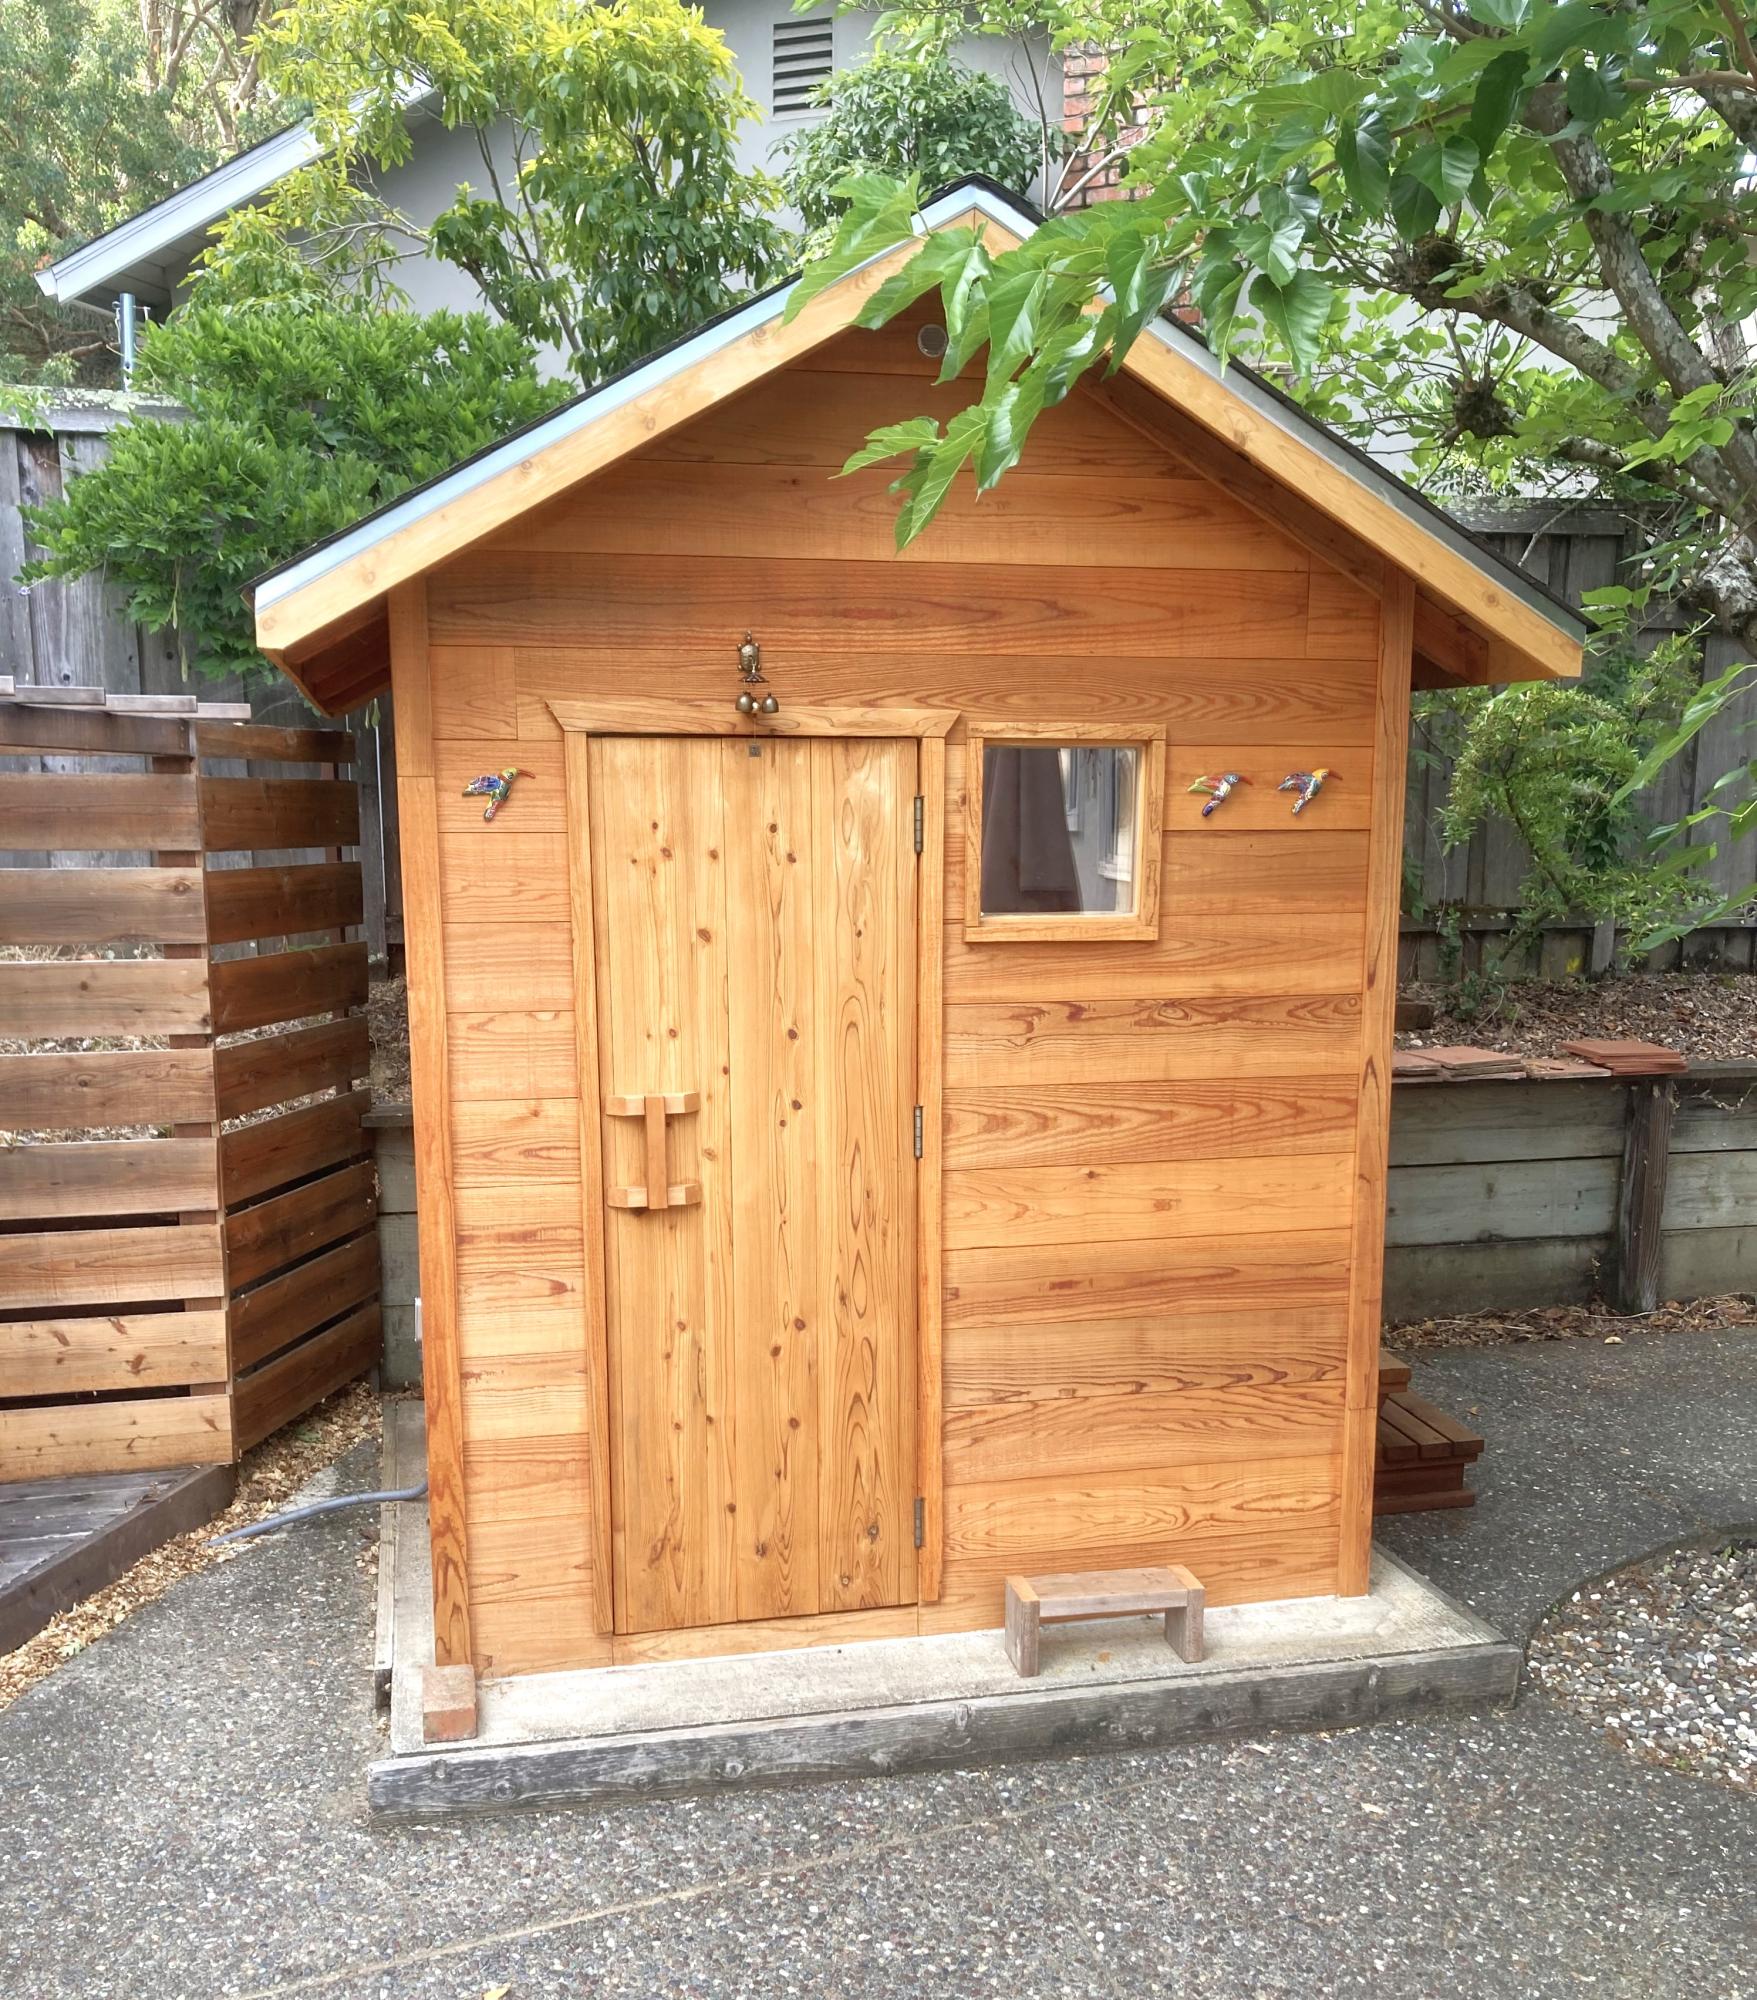
Outside sauna.

Charles

Modern outdoor chairs

Submitted by Anonymous (not verified) on Tue, 06/08/2021 - 08:01

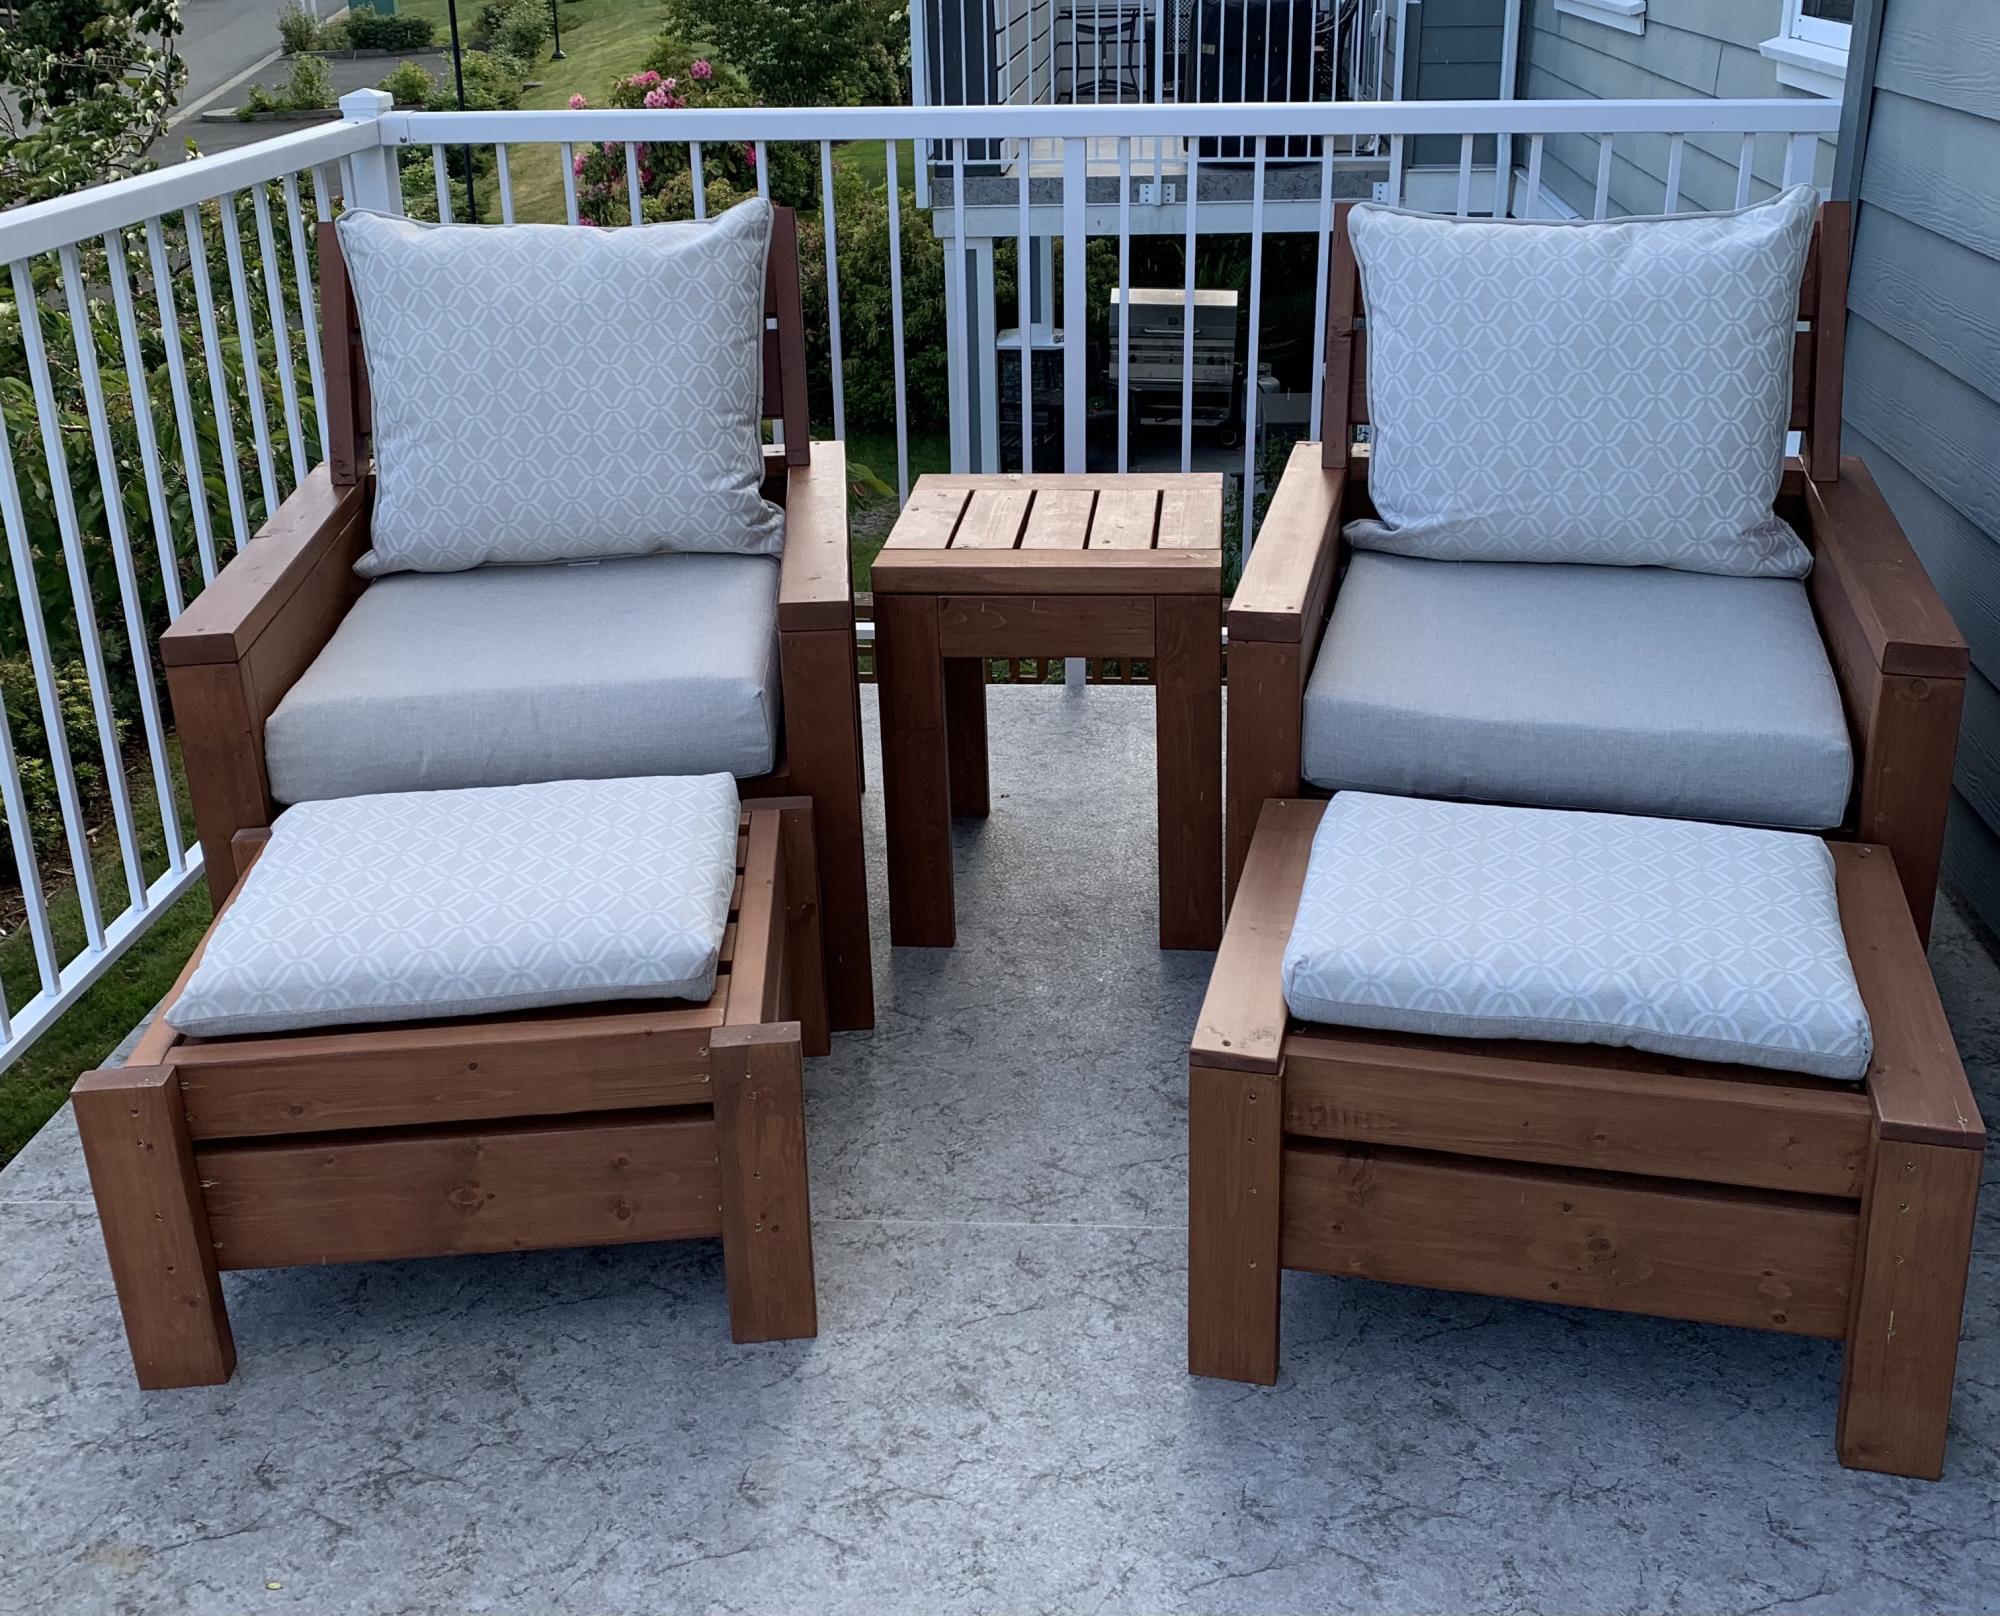
Love these plans! Made a modification and added backs to the chairs. Also, built ottomans to match the chairs which can also be used as additional seating.
Many compliments on the set. Thanks Ana!

Comments

Bathroom corner vanity

Submitted by Anonymous (not verified) on Mon, 06/12/2017 - 12:49

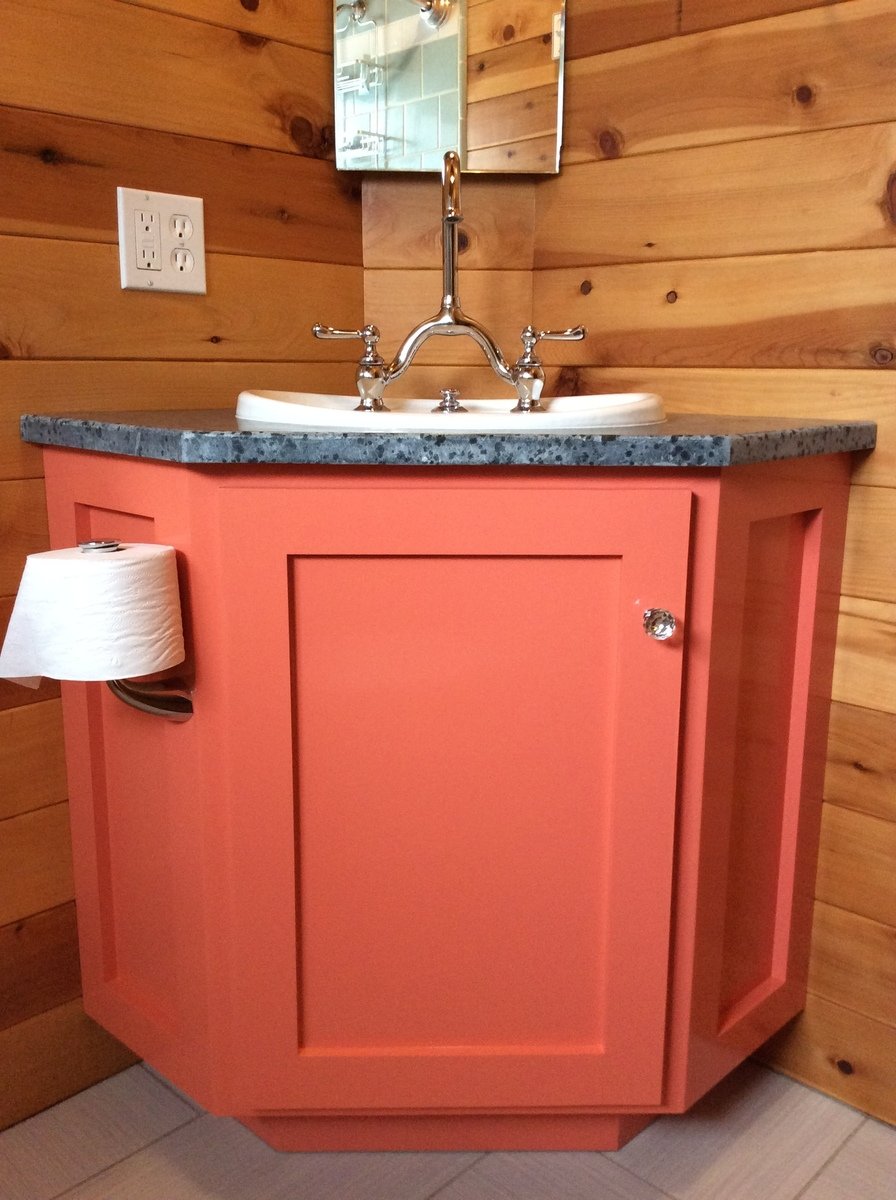
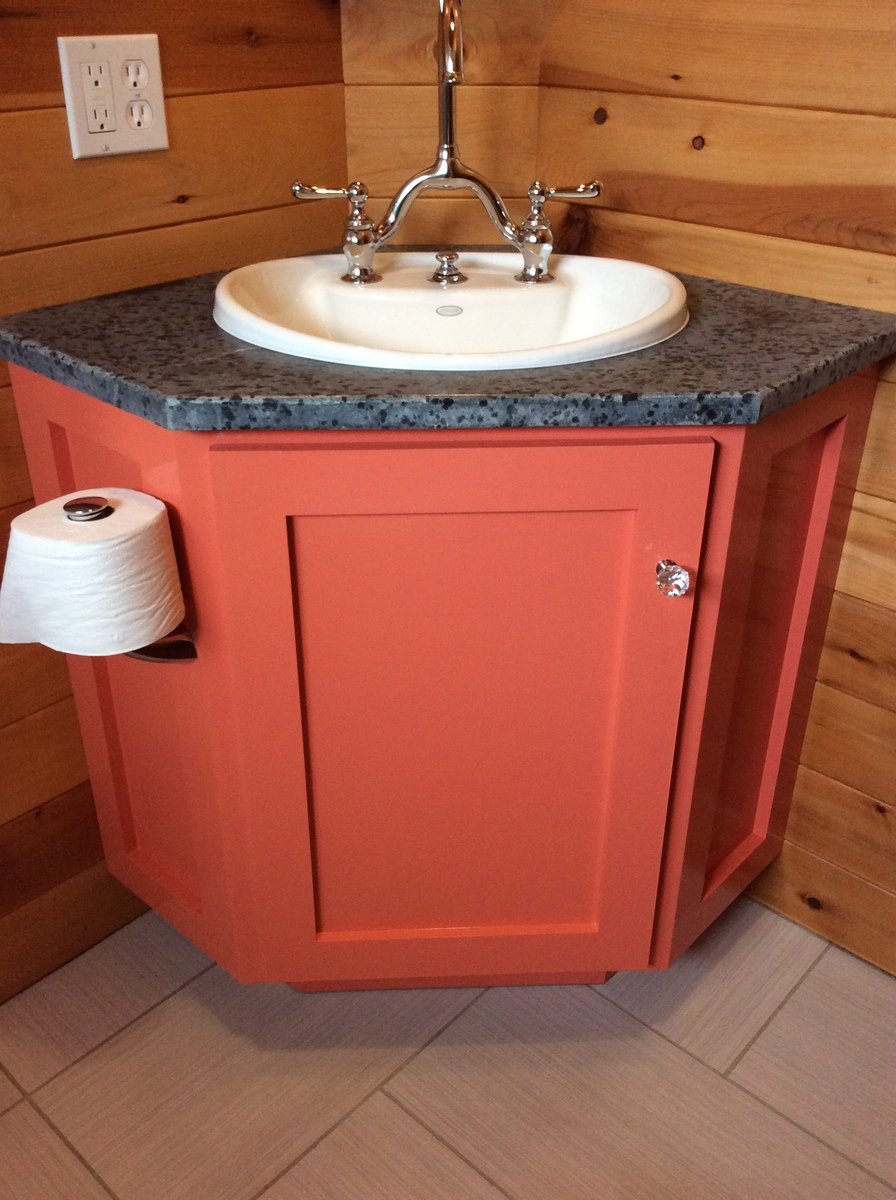
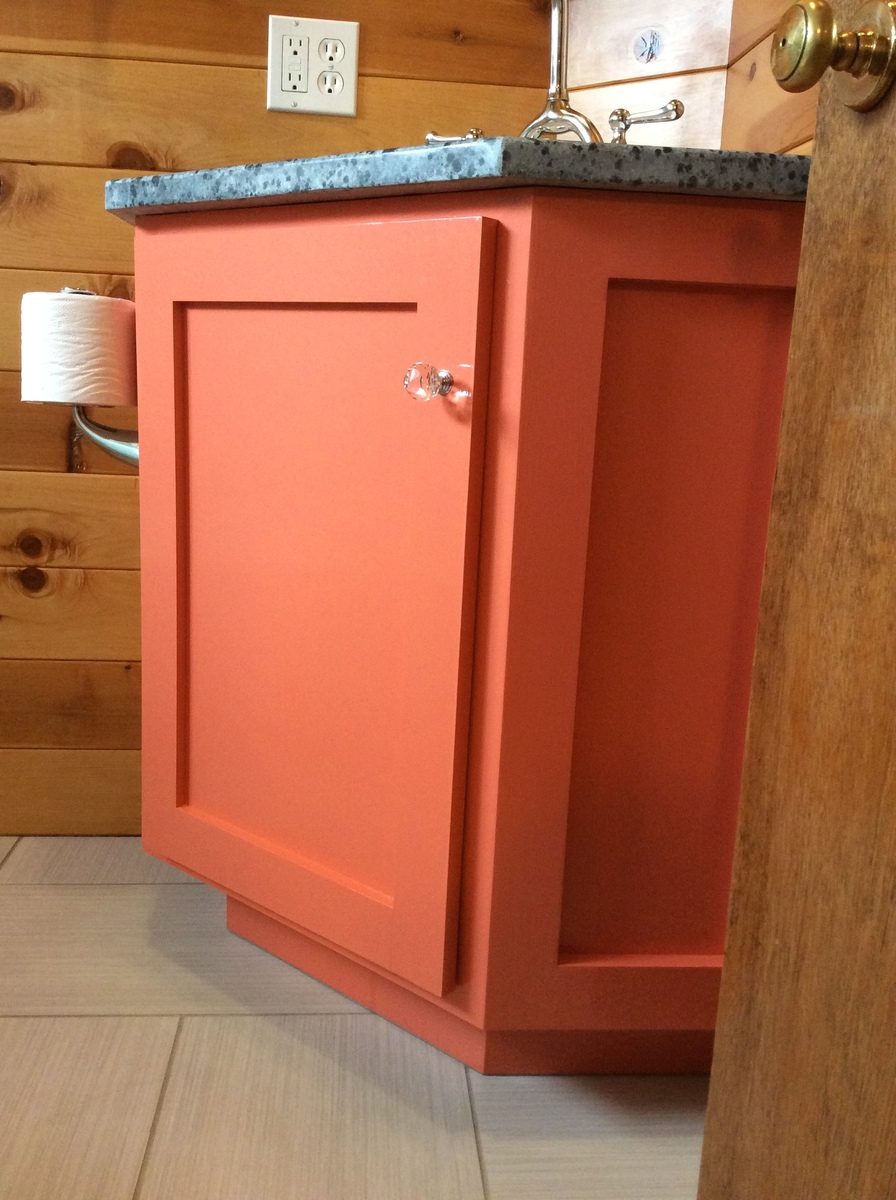
This project started because a corner bathroom vanity that fit my space requirements and budget did not exist. A plan specific to what I exactly needed also did not exist. After combing through what plans I found online, the Wall Kitchen Corner Cabinet best matched what I wanted. I modified it with the Momplex Sink Base Kitchen Cabinet in order to turn it into a sink base.


But, there was a problem. I hadn't actually built anything before. In order to get at least one project under my belt, I built the Vintage Step Stool. It turned out great, so I figured I was ready to go! Strangely enough, after spending about $100 and several weekends picking away at this project, it was done! It looked great, even. Then, I moved the vanity into the bathroom and realized that, while it may have looked great, it wasn't very square. Lesson learned was that this is a two person project. It is too difficult to keep things square and screw at the same time when there is only one person.


At this point, everyone was tired of having to use the kitchen sink to brush their teeth and wash their hands, so we needed to get this project done. $100 later, we had more material. Since I had figured out what needed to be done with the first vanity, let's call it our prototype, the second vanity went together REALLY quickly. 


Within a few hours, it was pieced together. Since it was going to be painted, we used Bondo to cover up our imperfections. Yes, of course there were imperfections. While much better than the prototype, it still was only my third woodworking project. Sanding, caulking, and priming took another hour or so. A few coats of the finish paint went on, followed by a couple more coats of a clear sealer, and it was done.


We moved it into place, screwed it to the wall, put the soapstone countertop on along with the sink and faucet, and it truly was complete. Sink is Kohler, faucet came from our local Habitat for Humanity store and I'm not sure what brand it is, and the soapstone came from soapstones.com. If we had oiled the soapstone with mineral oil, it would be a very dark gray.

Estimated Cost
$100-$150 for the wood, screws, caulk, primer, paint, and clearcoat.
Estimated Time Investment
Weekend Project (10-20 Hours)
Finish Used
Pratt & Lambert Azalea 5-12 and Designer White 33-1 for the colors. After each application dried, I sanded it with a very fine grit sandpaper to make the finish silky smooth. I also used our air compressor to blow the dust off, and then used a damp cloth to wipe it down before applying more coats. That worked better for me than using a tack cloth. Then, I added a few coats of a water based, heavy duty floor finish, meant for wet areas. I don't recall what brand it was.
Recommended Skill Level
Intermediate

Window bird feeder

Submitted by CSaintD on Mon, 04/18/2016 - 08:22

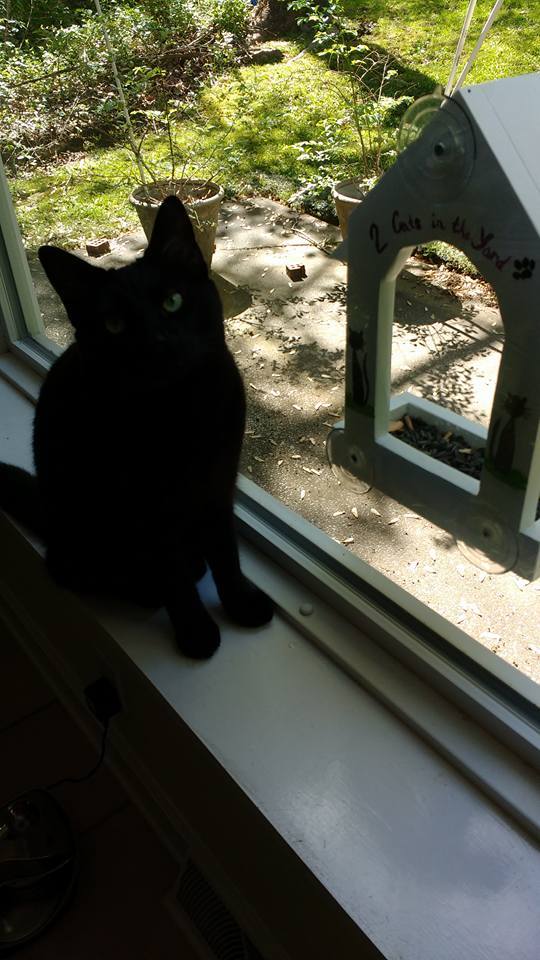
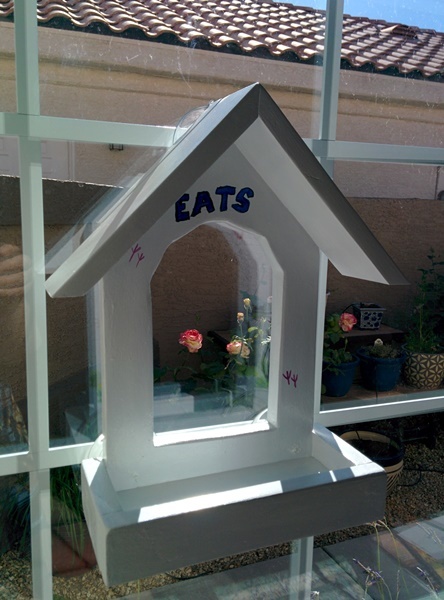
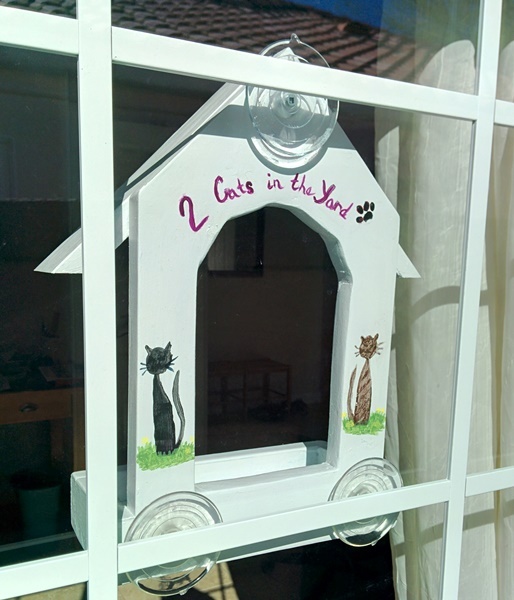
Made the birdfeeder by Ana for my Daughter in-law's birthday. She loves it and so does her cat. My bandsaw stopped working, so had to cut the center out with an oscilatting saw. Surprisingly it worked really well.
The hardest part was figuring out where to get suction cups without the hooks on them. Ended up at Michaels where I found some rated for 7 pounds of weight. They seem to be holding up well. I ended up screwing them into the back of the birdhouse. Tried construction adhesive and it just did not hold.

Estimated Cost
Used all scrap, but had to purchase suction cups which were about $6 total.
Estimated Time Investment
Afternoon Project (3-6 Hours)
Finish Used
painted with indoor/outdoor paint, then decorated with craft paints and spar varnish to protect finish.
Recommended Skill Level
Beginner

Comments

CSaintD

Mon, 04/18/2016 - 08:34

I always have such trouble posting brags to this site. It takes about 7 tries to do it. You have to have the exact URL of the plan you are basing your brag off of, and then it loses the links to the pictures. Finally got this one posted and now it doesn't show up on the front page in the brag area. I have tried viewing it with both Chrome and Internet Explorer. Really frustrating.

Corner Headboard Storage for Twin Beds

Submitted by Anonymous (not verified) on Sun, 05/08/2016 - 18:27

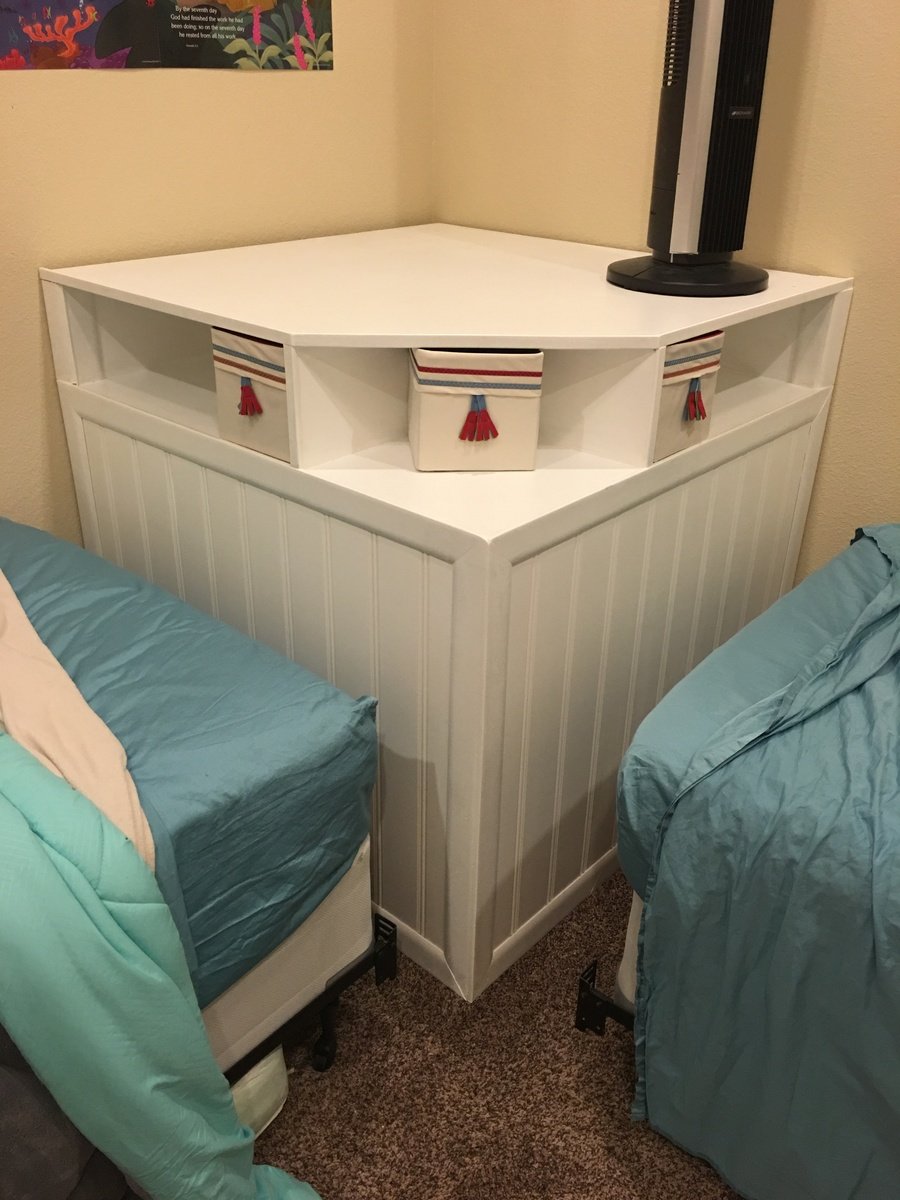
Corner unit for kids bedroom. Added fabric boxes from ikea. The fit perfectly 

Estimated Cost
$200.00. All the materials are from the Home Depot
Estimated Time Investment
Day Project (6-9 Hours)
Finish Used
Behr. Polar bear white
Recommended Skill Level
Beginner

DIY Bar Cabinet

Submitted by Anonymous (not verified) on Mon, 02/24/2020 - 16:27

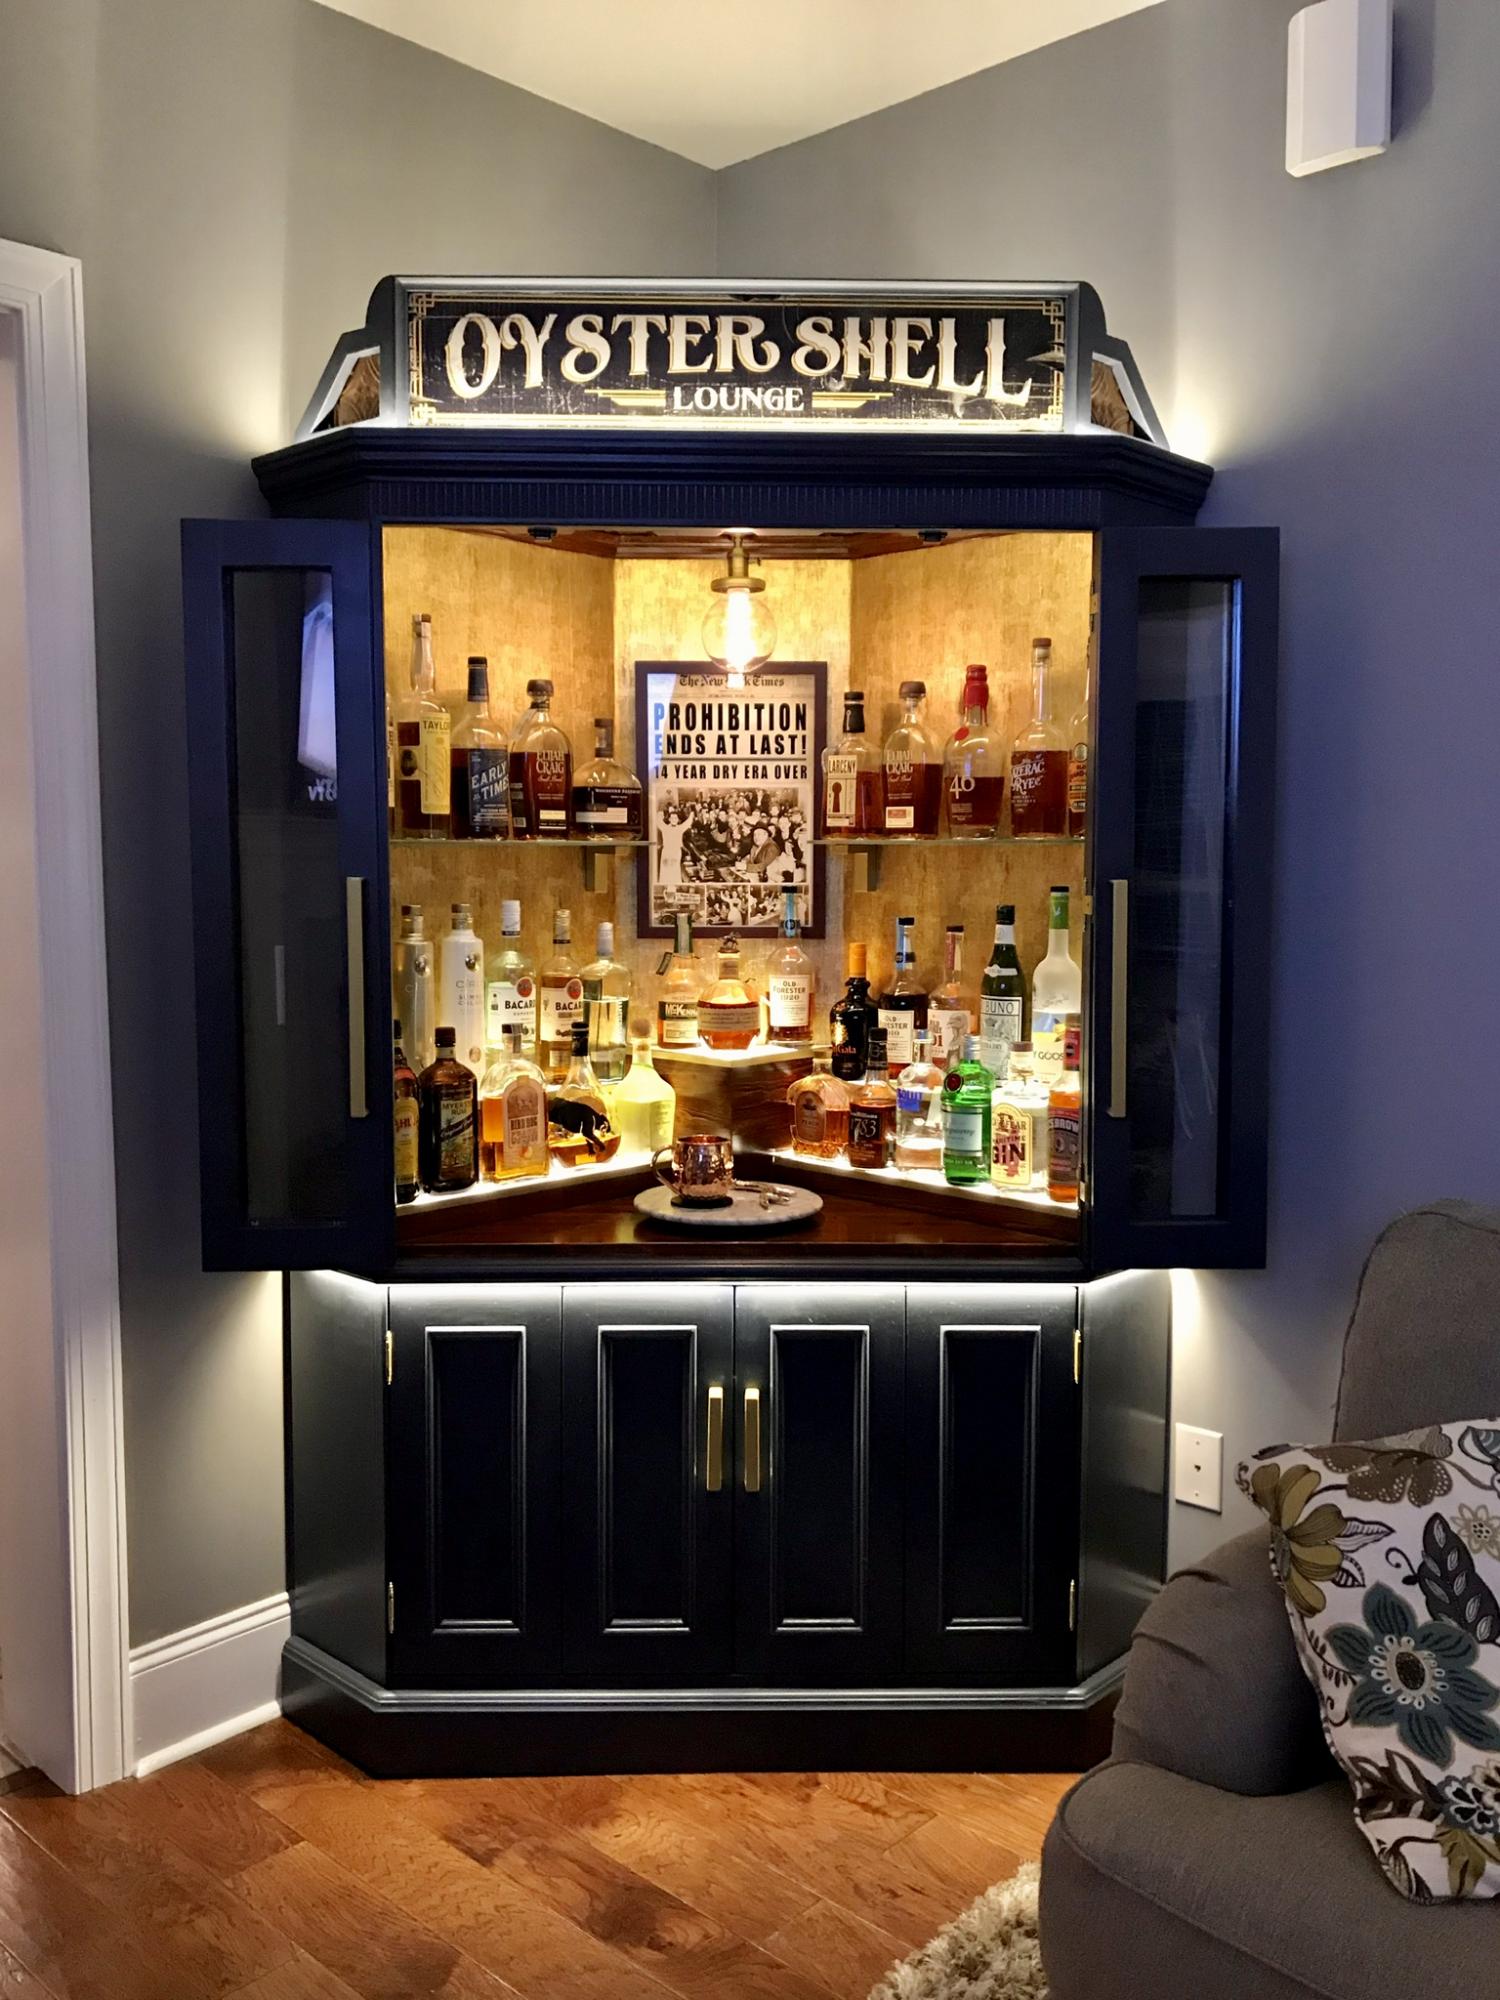
I bought this tv corner cabinet for $40. I spent many hours turning into my perfect bar cabinet. I built a custom lighted liquor display. I have posted photos of the transformation.

Estimated Cost
$1000
Estimated Time Investment
Week Long Project (20 Hours or More)
Finish Used
Benjamin Moore- hale navy
Recommended Skill Level
Intermediate

Comments

frendlygrl

Tue, 07/06/2021 - 19:04

So this is not your project? Because there isn't much information or a before and after picture. This gave me an idea for our home.

Play Deck/Fort

Submitted by seeca13 on Sun, 06/01/2014 - 10:06

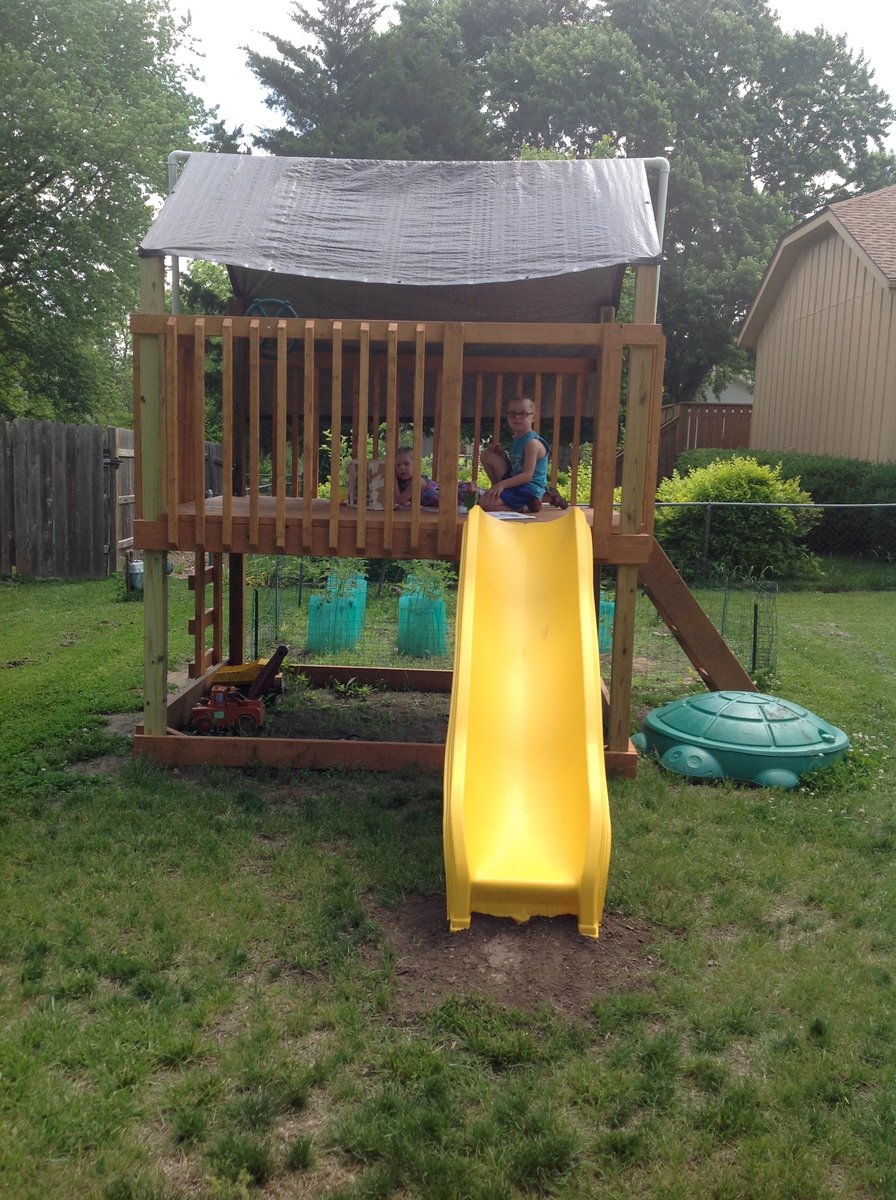
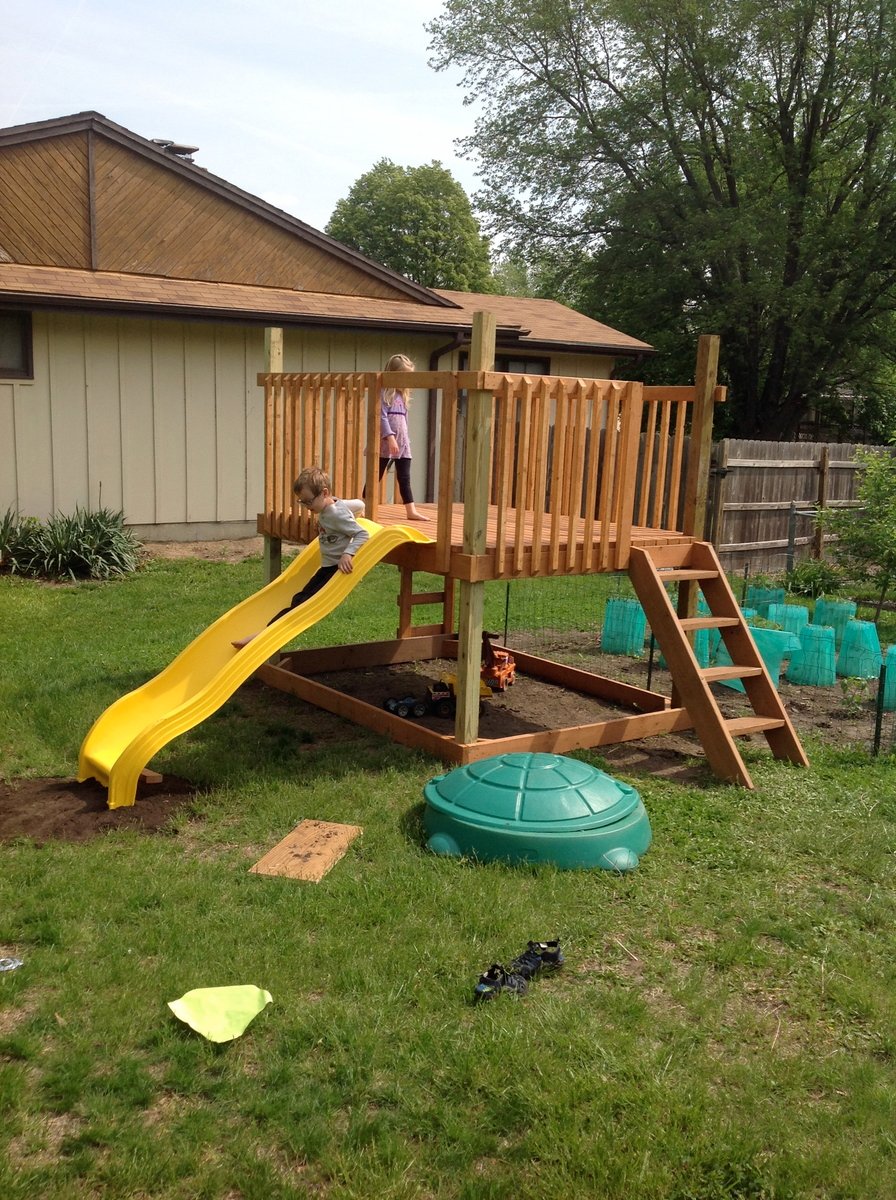
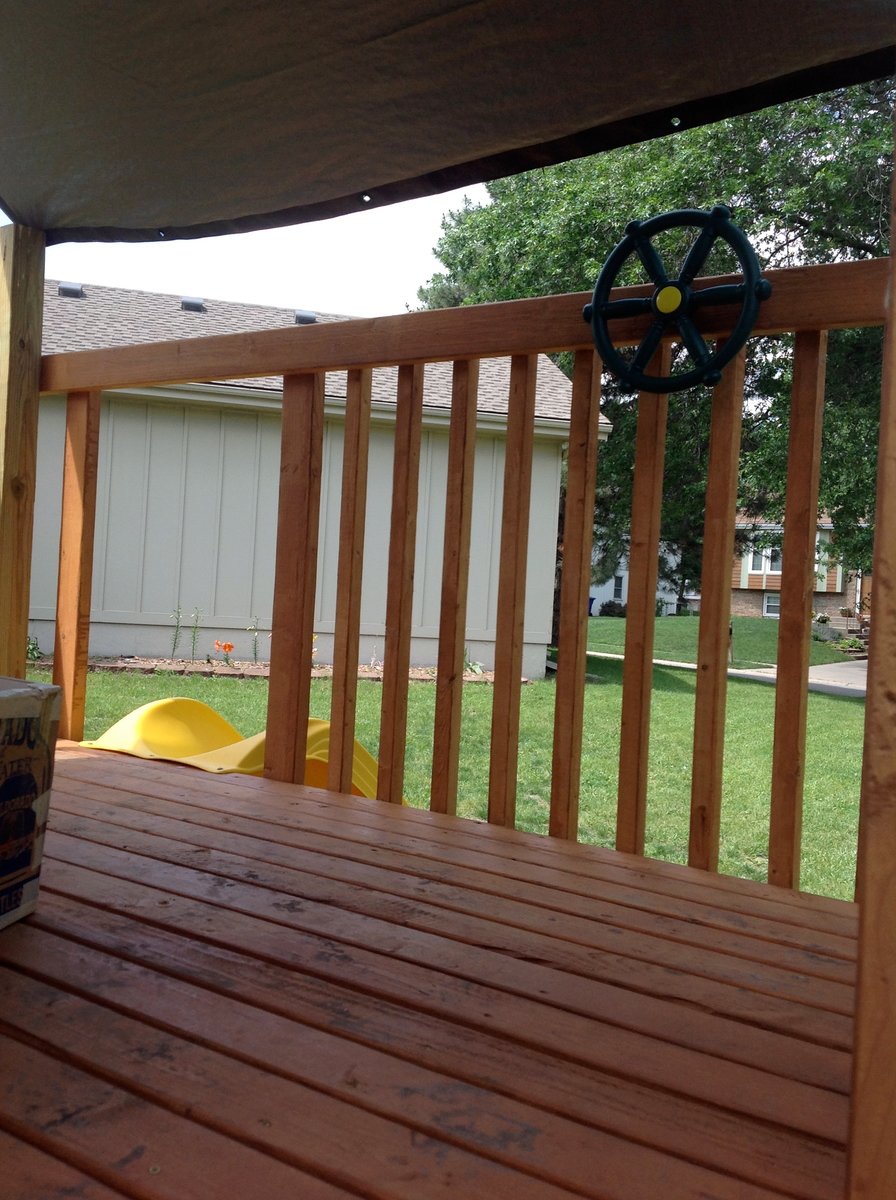
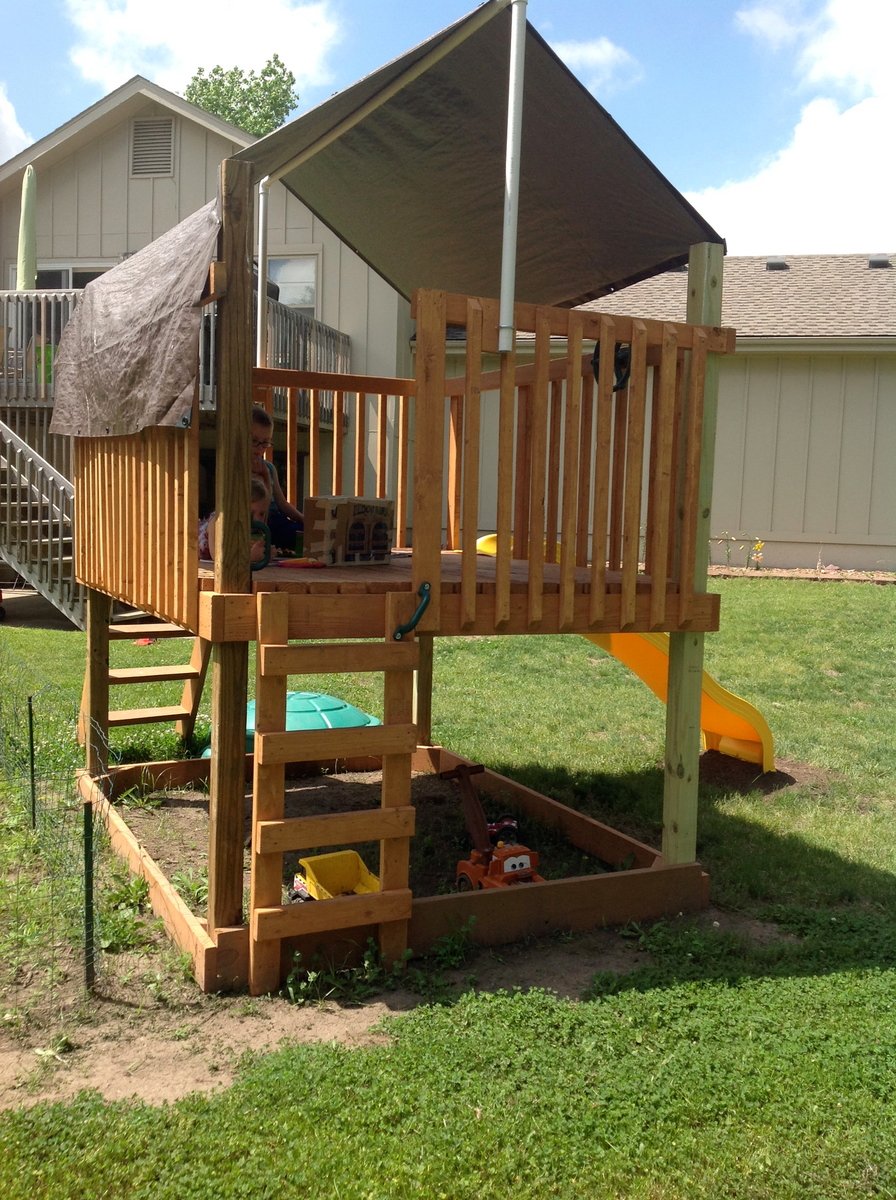
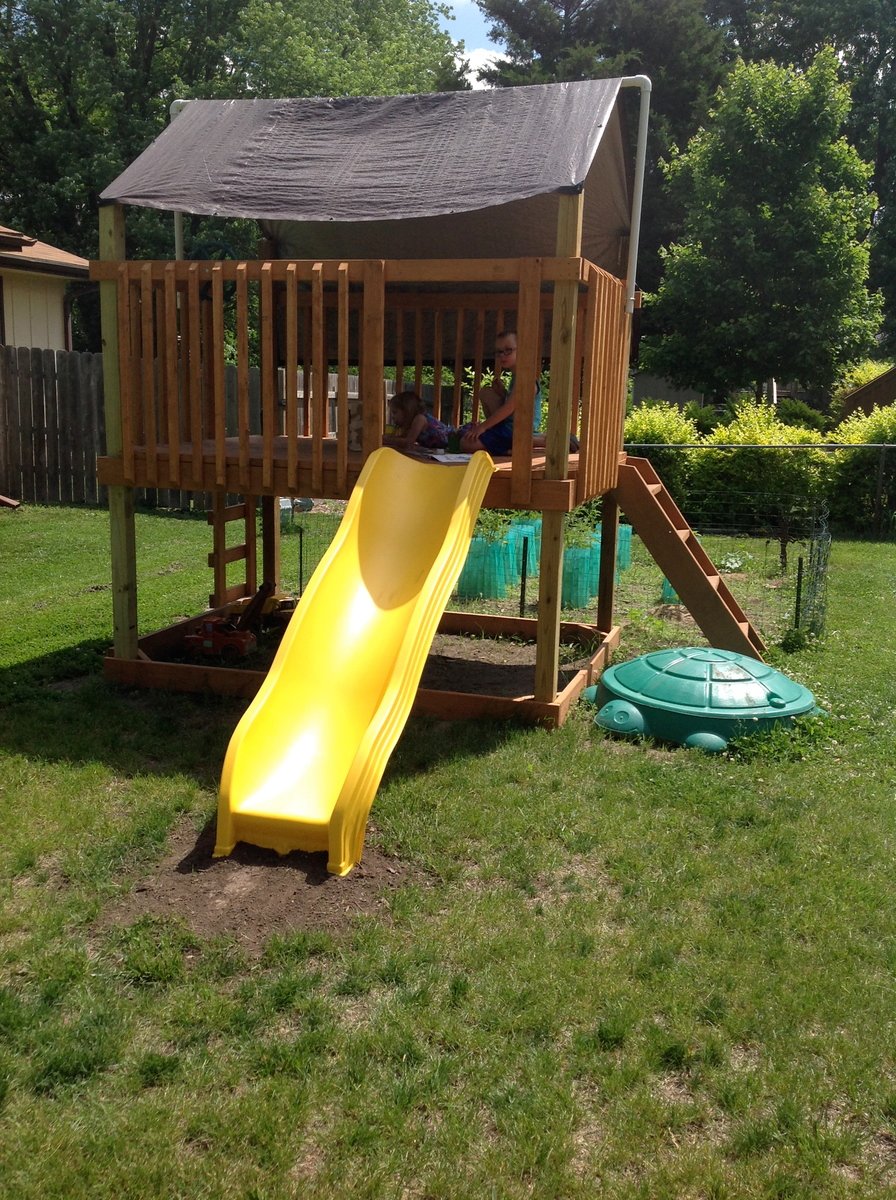
I wanted to build a structure for the kids to play in, but not include a playhouse. I used the playhouse deck design and made it slightly smaller (6 feet by 8 feet). The "roof" is removable to provide shade when it's sunny. It's just PVC and a tarp - pretty simple, but it does the job. I used treated posts and untreated lumber for the rest of it. I painted everything in my garage before assembling it. Once all of the wood at been painted, but came together pretty quickly!

Estimated Cost
$300 (including screws and paint)
Estimated Time Investment
Weekend Project (10-20 Hours)
Finish Used
Thompsons deck stain
Recommended Skill Level
Intermediate

Love our new greenhouse!

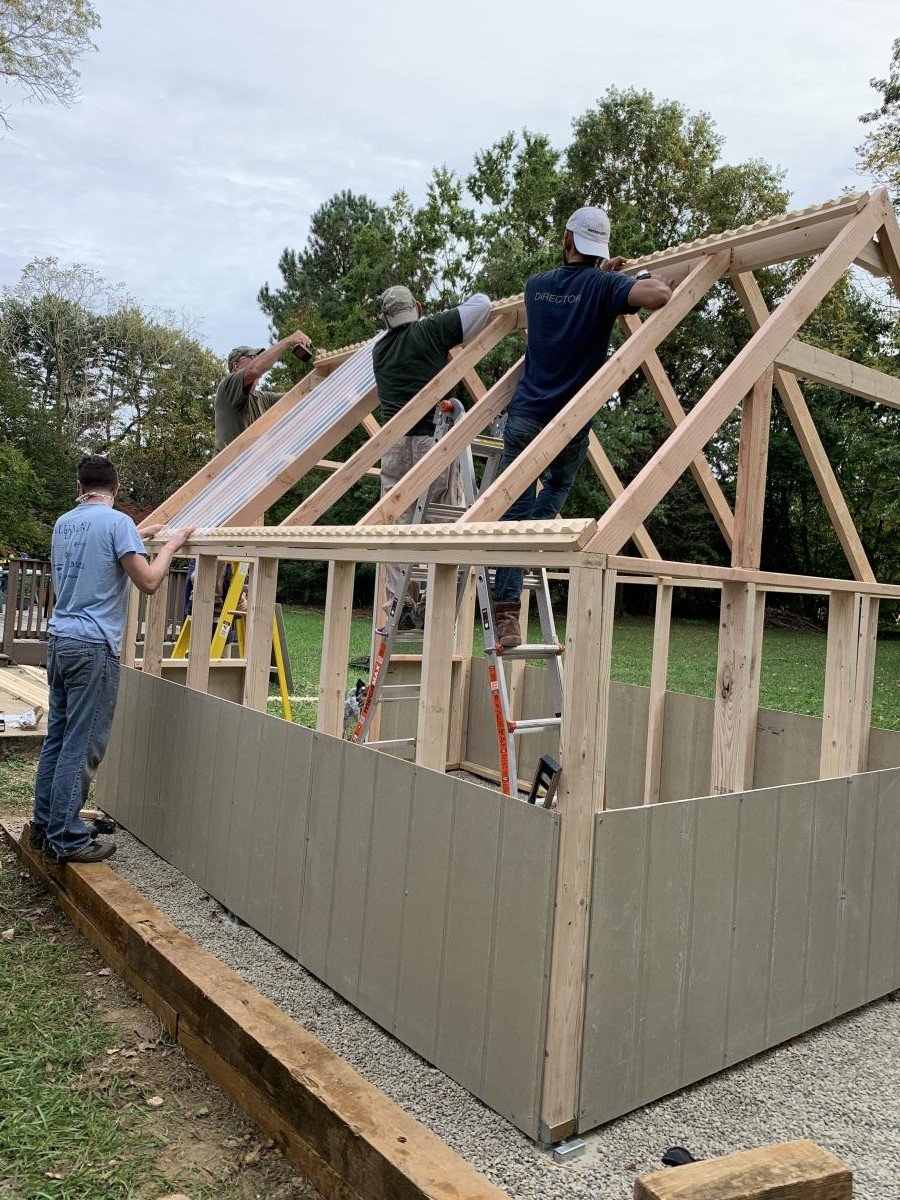
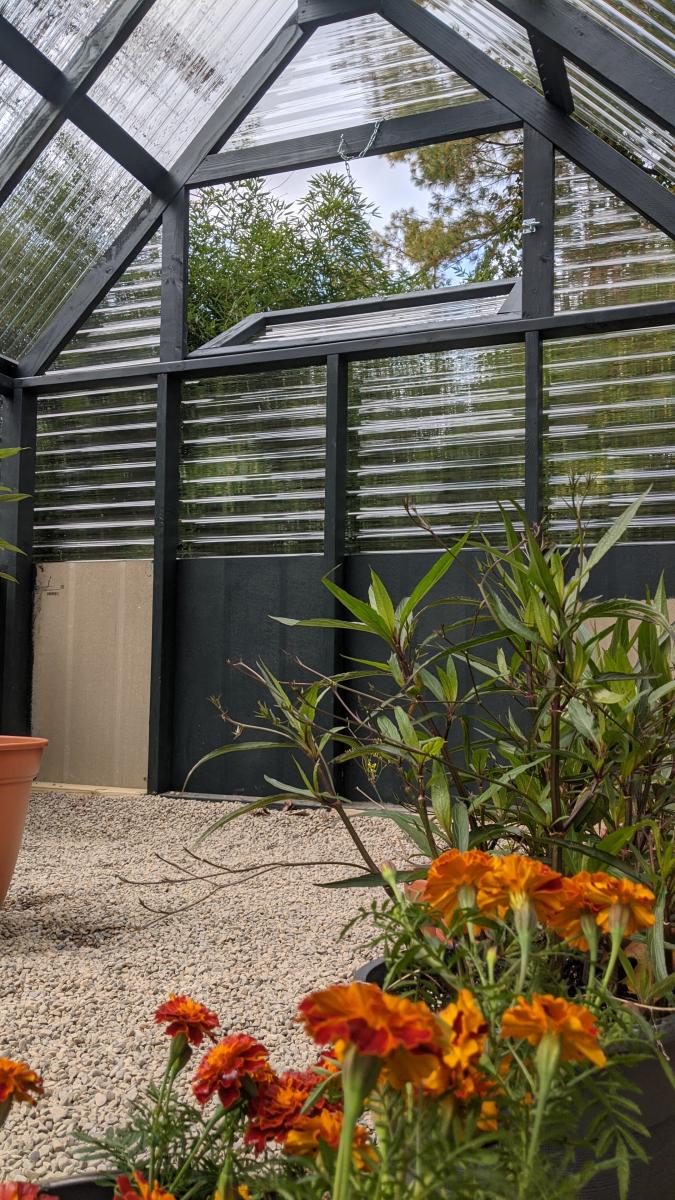
With the help of friends and family, we managed to build this greenhouse rather easily. We had to start with the foundation since the spot we chose was not an even grade. We did this by filling sono tubes with cement and leveling each off so the greenhouse would have a solid place to sit. We then built out a frame around the outside of the cement tubes with some reclaimed 6x6's. After that, we filled the space with 5 tons of river rock and then got to work! After the foundation was ready putting the rest of the house together was a piece of cake. The frame was so easy to put together. We had a few minor kinks to work out here and there, I won't say this house came out 100% perfectly, BUT I am so happy with the end results. We chose to paint it a deep green color as a final touch. So far we just moved a few potted plants from our deck to the greenhouse for the winter. It has been working very well to keep the plants cozy during the colder days we've had. Eventually, I plan to build a potting station, shelving, and most likely a garden bed for winter harvests.

Built from Plan(s)
Estimated Cost
$2000
Estimated Time Investment
Weekend Project (10-20 Hours)
Recommended Skill Level
Intermediate

Comments

Ana White Admin

Mon, 11/09/2020 - 09:52

The foundation looks great the greenhouse looks amazing! I'm sure fun was had building it too:) Thanks for sharing.

Seasonal And Holiday

Master Bath Barn Door

Submitted by Anonymous (not verified) on Fri, 03/17/2017 - 16:34

Created this door with pine wood tongue and groove lumber and pine wood planks. Purchase barn door hardware / track from Jet.com and door handles from Hobby Lobby. 


This replaced my Master bath door and I think came out pretty good. Thank you for the ideas!!!  Jeff M.   Brownstown, Mi

Estimated Cost
Wood 55.00
Handles 2 for 8.00
Stain ( left overs)
Barn door track 54.00

Total $117.00 and 10 % Military discount at lowes
Estimated Time Investment
Weekend Project (10-20 Hours)
Finish Used
Minwax. Mix of Kona and Driftwood Grey
Recommended Skill Level
Intermediate

Counter Height Craft Desk

Submitted by Stockweb on Mon, 09/28/2015 - 07:39

This was pretty easy for my first build!  Don't look too closely though....  I raised thedesk to counter height to adjust for working while standing and add a bar stool.  The hardest part was adjusting the angle of the diagonal braces.  For the desktop I found a 2' X 6' piece of aspen at the blue big box store.  Sanded well, grey "whitewashed" it and sealed with paste wax. 

Built from Plan(s)
Finish Used
Base painted with satin interior in revere pewter. Made my own grey wash for the desktop and sealed with paste wax.
Recommended Skill Level
Starter Project

Comments

Bigger, Stronger, Kitchen Floating Shelves

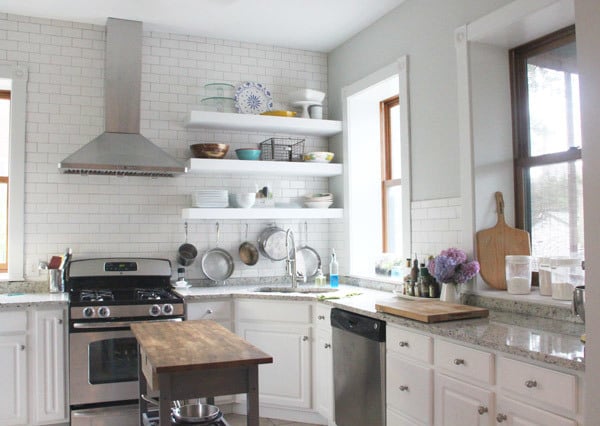
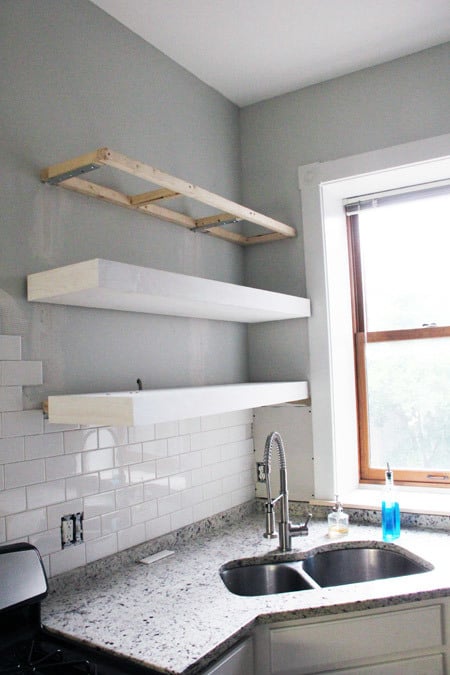
When we recently bought our 150+ year old house, we were pretty happy with just about everything (not stopping us from coming up with projects!) except the kitchen. This kitchen hadn't been updated in about 15 years, had dark brown walls, boring square white tiles with white grout, and TONS of cabinets. Everywhere. I felt like the walls were closing in!

So before we ever signed a piece of paper I had a vision of open shelving. Wide, white floating shelves to put our every day items at arms reach and display the few items we rarely use but think are beautiful.

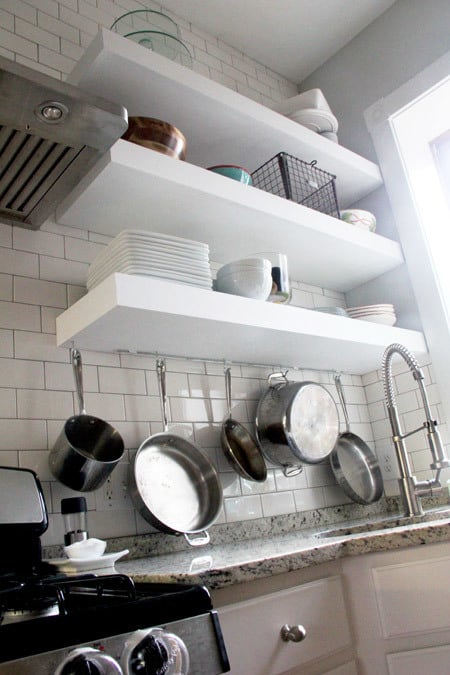
I loved Ana's plans, but I needed these shelves to hold 12 dinner plates, 12 bowls, 12 salad plates, 4 pasta bowls, and...well, right there that about 40 pounds of stuff. And the basic plans just didn't seem heavy-duty enough.

Enter our contractor, John, who I asked for help because, while they were my vision, they were his handy-work. My husband and I didn’t even attempt to build them on our own. John is a perfectionist and we knew he’d make this plan work…perfectly.

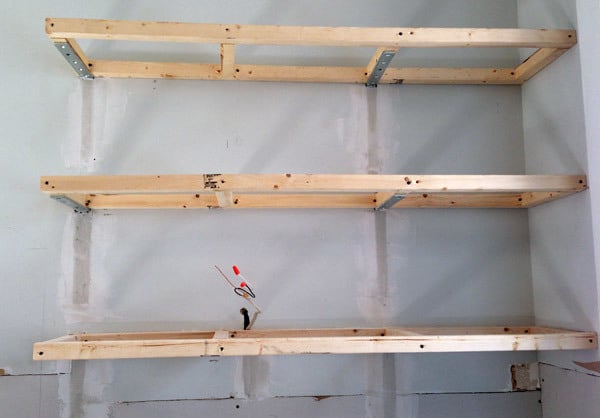
As usual, this was no sweat for John. To build the frames he used 2 x 2′s and secured them with 10 x 1 1/4″ angle brackets. During assembly, John made sure to position the center supports to match the wall studs in front of which the frame would hang. Once assembled, he removed some dry wall and attached the brackets directly to the studs.

We could store baby elephants on these shelfs, they wouldn’t budge.

Since I knew what needed to be stored on that first shelf (our every day items), we used the measurements to equally distance the three shelves (not including the first shelf of course—it needed more space above the counter top). Then we sealed up the dry wall. Another help with support was butting the shelves right up to the corner, putting another screw in another stud.

We moved the lighting electric up for new under cabinet lighting—so easy pre-tiling.

For the actual shelves—I like to think of them as “sleeves”—John used 3/4″ sanded plywood for the tops and bottoms of each shelf, then 1 x 6 clear pine ripped down to desired thickness for the fronts and one side (the other side is against the wall, so was left open). The primed sleeves spent a few days on the screened in porch while I tiled around the frames, they were pretty heavy and very solid.

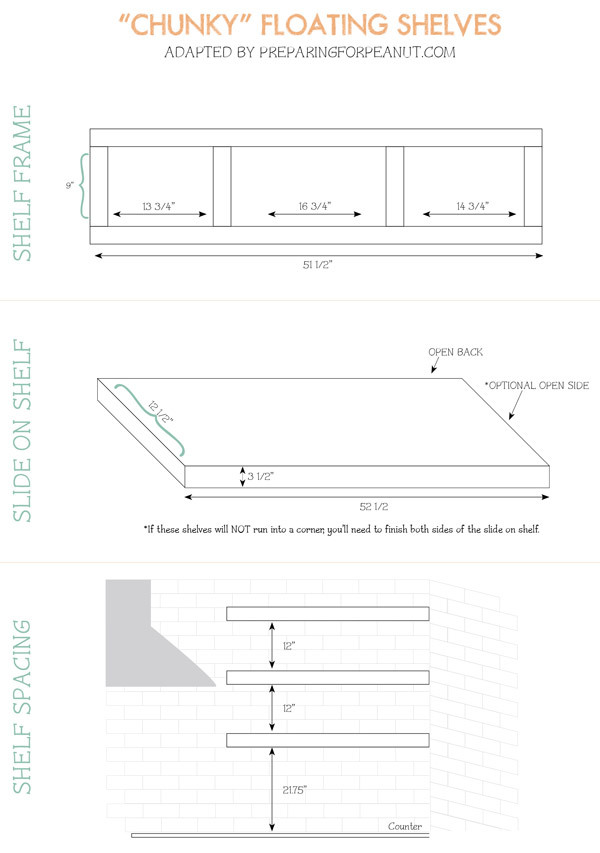
I’ve made an attempt to lay out the measurements involving our floating shelf project. These are to scale and give a good idea of how our plans differed from Ana’s.

We LOVE our shelves and get so so many compliments. The seemingly small and simple changes (tile, shelves, new window trim, paint, and soon flooring) made a HUGE impact and not that huge of a cost. And we don't miss the upper cabinets at all.

Thanks for the head-start and inspiration Ana!
Built from Plan(s)
Estimated Time Investment
Weekend Project (10-20 Hours)
Finish Used
Primer and white paint
Recommended Skill Level
Advanced

Comments

claydowling

Mon, 10/21/2013 - 08:41

I'm not sure where to get big angle brackets like that, but you might want to try a local lumberyard instead of a home center. Even when they don't have a product they often know who does. The angle brackets embedded in the drywall is a clever idea I never thought of using.

Melissa015

Tue, 11/25/2014 - 20:08

What city was this work done in?  I live in Seattle and I am looking for a contractor.

Raised Wood Planters by Urban Wood Solutions

Planters build by Urban Wood Solutions

Comments

Playhouse with Swing Set

Submitted by Anonymous (not verified) on Wed, 06/01/2016 - 12:48

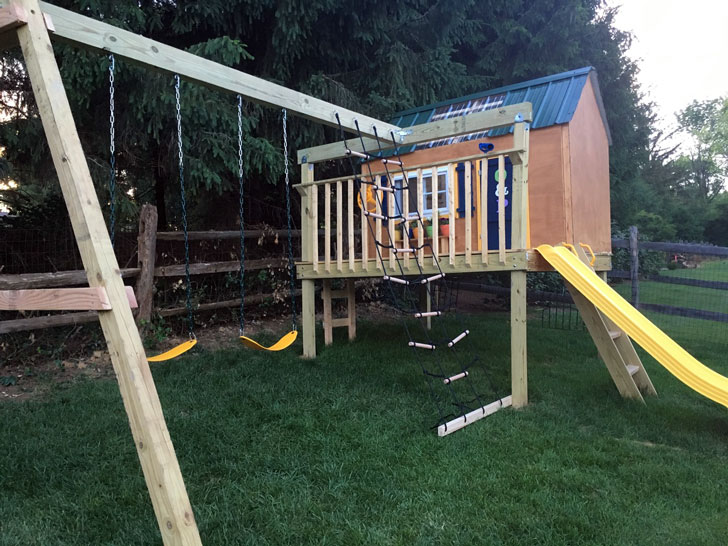
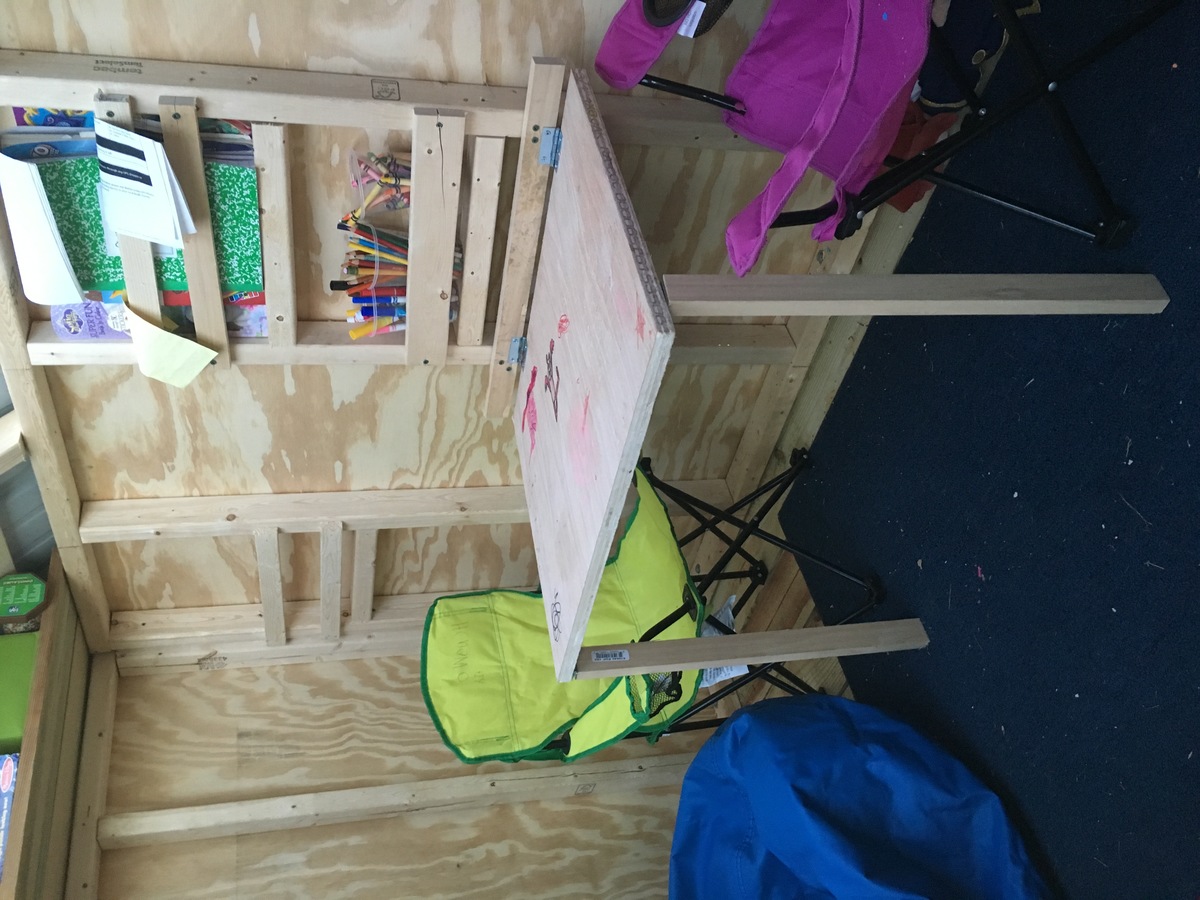
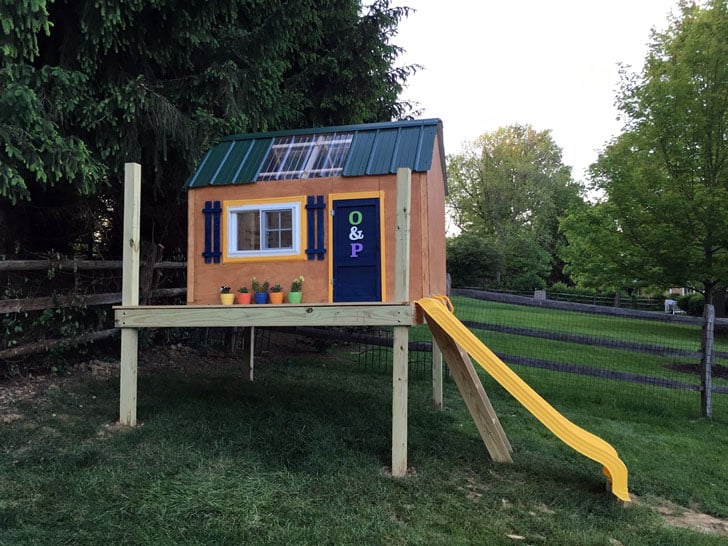
We really enjoyed building this playhouse swing set for our kids.  We have a decent slope to our backyard, so we needed to sink our posts, which required a bit more work thank Ana's plans.  We also used a real window (my dad just happened to have in his garage) instead of the 3 open aired windows Ana's plans called for.  Inside we built a fold under table, shelf, and a chalkboard for thier entertainment.  

Estimated Cost
$800
Estimated Time Investment
Week Long Project (20 Hours or More)
Recommended Skill Level
Intermediate

2x4 sectional outdoor sofa

Submitted by Anonymous (not verified) on Tue, 05/12/2020 - 08:10

My first Ana White project. My friend Shelley and I are RN's, and she got me hooked on woodworking. I started with cushions from Lowes ( in the sizes that you recommended)to see if I loved the sectional for a few years. I loved it so much I decided to have custom Sunbrella fabric ones made. Even though the custom ones were more expensive, it has been worth it. They go perfect with my California Mission style home. Now I want to add the armless one and make it a U-shape. I did add a piece at the bottom back of each sofa to hold the cushions in. The seat cushions would slide out the back when sitting on the sofa. I made the coffee table to match. Our family loves it!

Estimated Cost
building materials for sofa $250. Custom Sunbrella Fabric cushiosn $2000
Estimated Time Investment
Weekend Project (10-20 Hours)
Finish Used
Stained with Carrington Minwax and sealed with spray Shellac
Recommended Skill Level
Beginner

Comments

Kendal Dresser

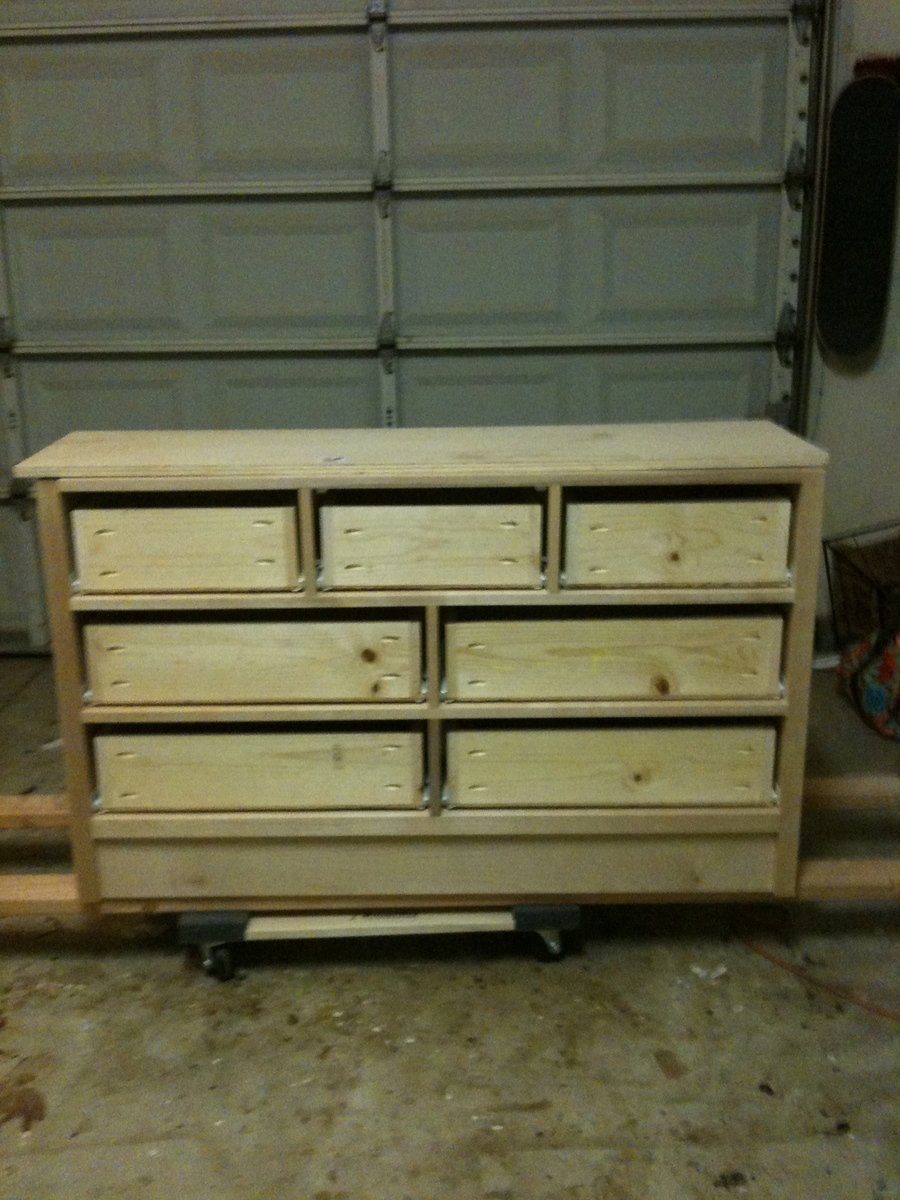
My cousin is having a baby boy and needed a dresser for the little guy. I made this for her as a shower present. I love that it was made to fit her needs and that it is made out of solid wood. Not at all like the cheaply made dressers costing much, much more in the retail stores.
The blog from Katie and John from Sew Woodsy was not only helpful but very cute. Kudos to Katie for attempting a large project while prego. It couldn't have been easy.
The only change I made other than the color was covering the space under the dresser. She didn't want to have to collect toys from underneath the dresser or clean dust.
The plans were awesome and I would recommend reading the blog from Sew Woodsy. Their comments were helpful and so were the pictures.

Built from Plan(s)
Estimated Cost
300.00
Estimated Time Investment
Weekend Project (10-20 Hours)
Finish Used
ZAR Wood Stain in Moorish Teak and ZAR clear stain finish
Recommended Skill Level
Intermediate

Comments

DIY everything

Wed, 08/20/2014 - 20:49

My cousin likes dark stain but after I finished the dresser I became a fan of the color too. I'm thinking of making myself one since it went together so well.

dhendy13

Sat, 01/03/2015 - 19:38

Congrats, your piece is a beauty. Please, can you tell me what type of wood you used for the drawer fronts.
They seem so clear. AKA Knot Free. I have done a work up on material costs and have not come close to the estimated 300.00. So I was thinking that maybe you splurged on "Clear" Pine boards for the front facing elements. Thanks in advance for your answers.... Happy New Year!

tylerrencher

Tue, 01/06/2015 - 12:44

$300 is the number I'm coming up with for #2 or better S4S pine boards plus stain and clear coat. #2 graded pine is definitely not clear. I'd like to know what kind of wood you planning to use and where you are getting it because this is the cheapest I can find in the Pacific Northwest.

DIY everything

Sun, 07/12/2015 - 20:00

I've checked out Frost Hardwood and I love their products.  They have clear wood that they can mill down to size but it is very pricey.  I'm saving up for a really nice dresser but until then I'm gonna stick to the birch plywood at home depot and birch boards that I get from my local specialized lumber houses.  Thank you for your comment and I hope your turns out to your liking.  I think what really makes this dresser is the stain and finish I used.  That was recommended by a professional painter friend who does this kind of thing everyday.  The info for that is on my post. 

DIY everything

Sun, 07/12/2015 - 19:54

I'm so sorry I didn't know there were questions on this post.  The dresser did cost me a little over $300.00.  The whole thing was made out of birch which I got at a local lumber house that specializes in furniture grade wood.  This probably doesn't help you anymore since I'm sure you've already made your dresser. 

john2090073

Fri, 09/11/2015 - 09:59

This looks really nice. Could you please let me know what wood you used for the frame and the outside of the dresser? 

4x4 Truss Beam Table

Submitted by CJaq7 on Wed, 10/29/2014 - 18:56

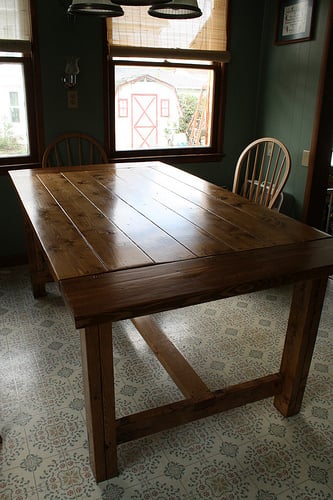
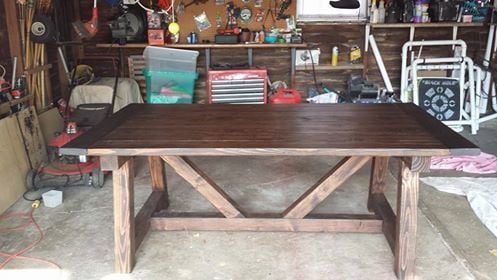
Built for my son and daughter-in-law. Love it

Built from Plan(s)
Estimated Time Investment
Week Long Project (20 Hours or More)
Finish Used
Minwax Dark Walnut with Minwax Ultimate Poly Matte
Recommended Skill Level
Intermediate

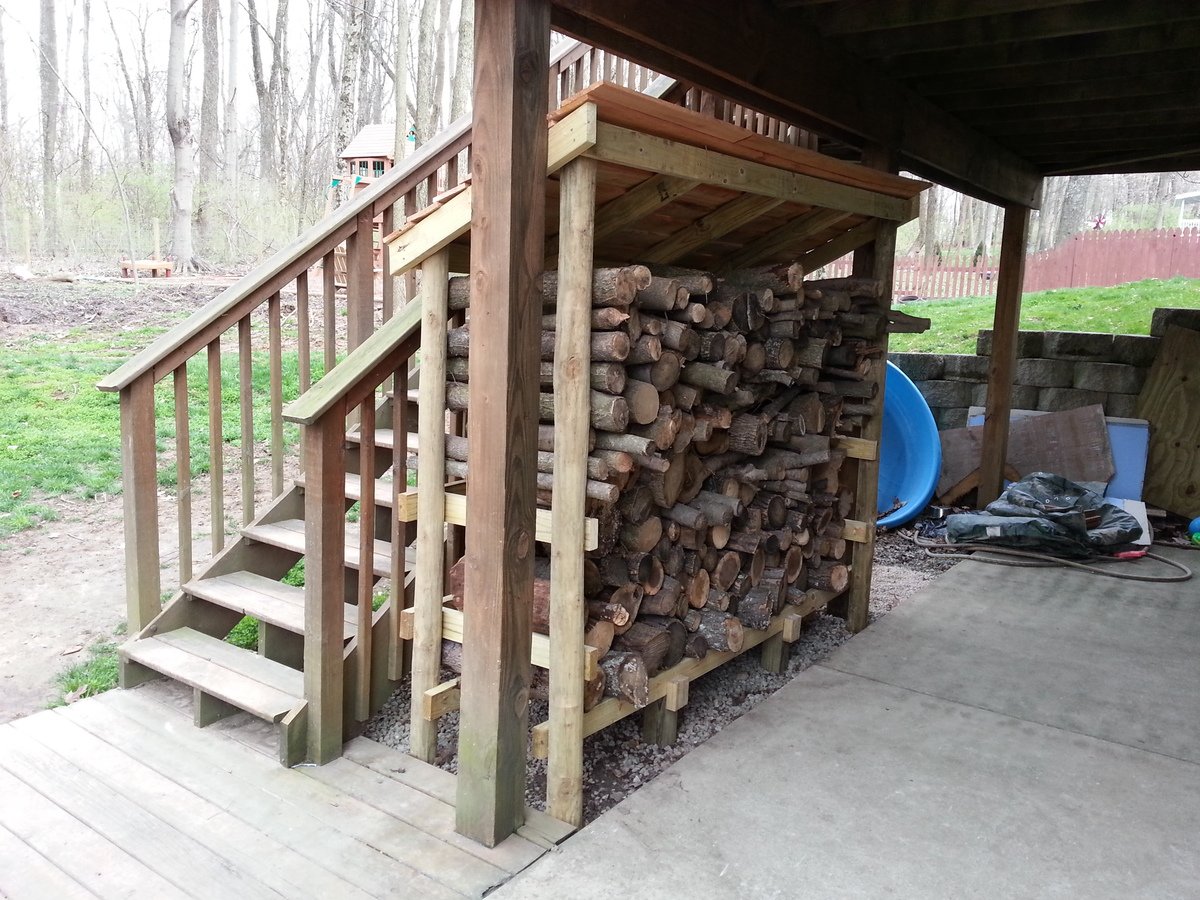
Firewood Shed using Round Posts and 2x4s

Submitted by tommybo76 on Mon, 04/15/2013 - 15:50

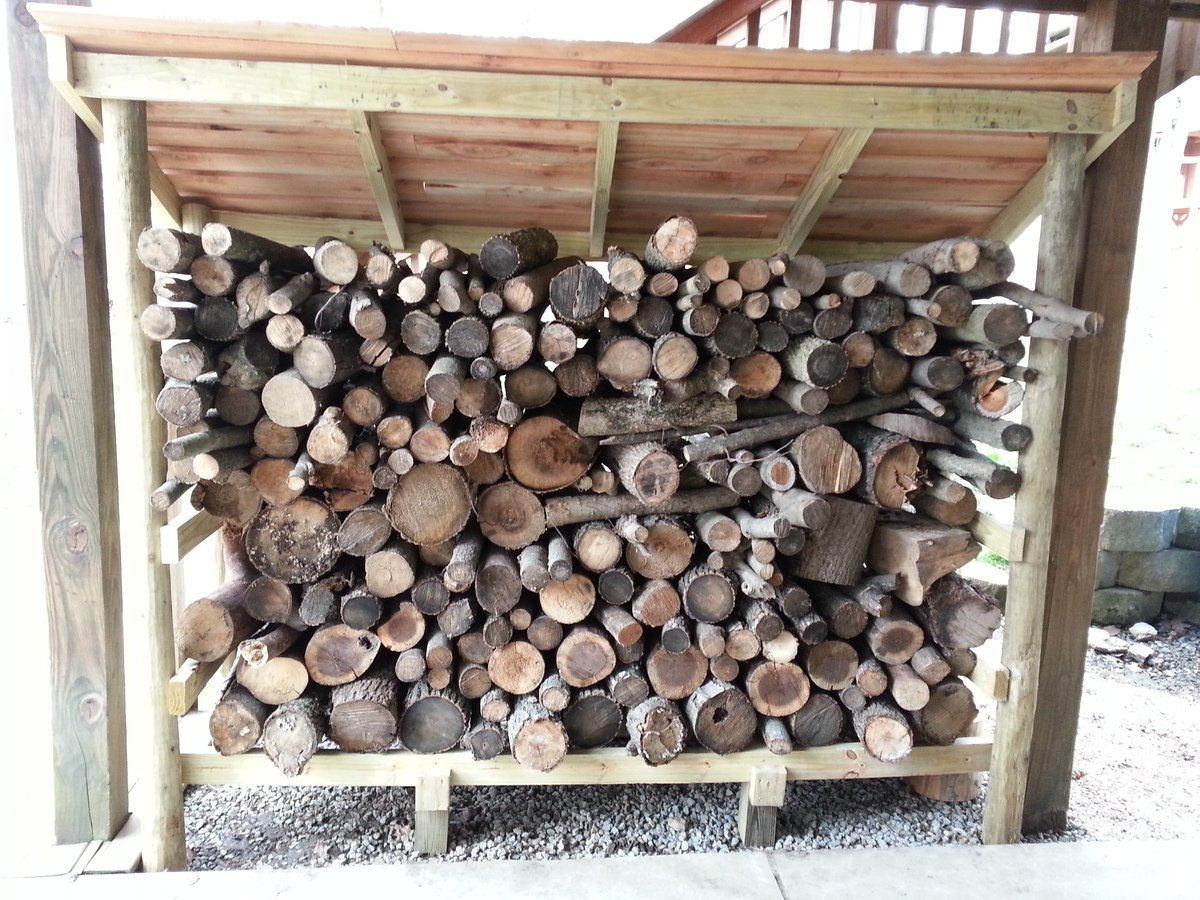
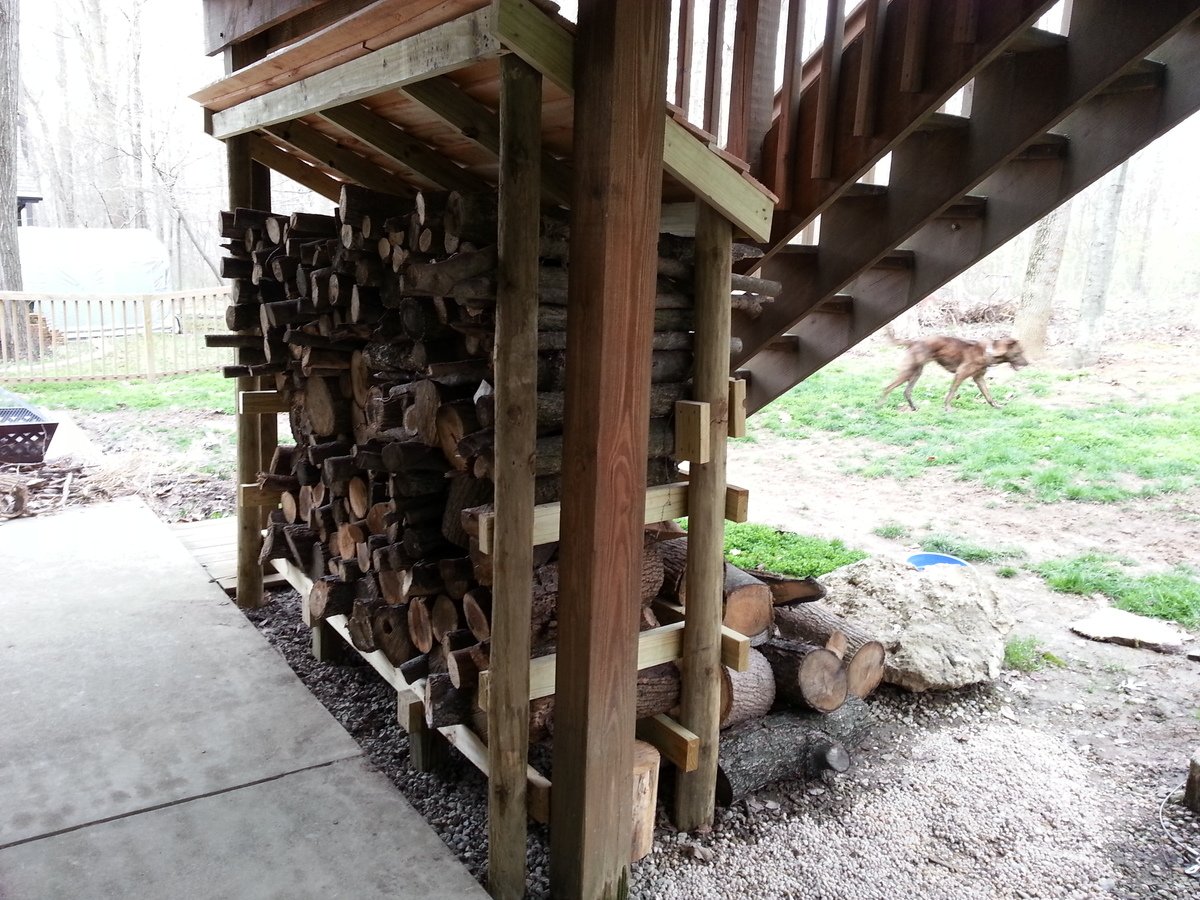
I used the basic design principles from Ana's site but decided to use 3.5x6.5 round fence posts (purchased at my local Tractor Supply Company) for a different look plus they are a little cheaper than 4x4 posts. I also used pressure treated 2x4s for some added strength and perhaps longer durability. I used Ana's cedar fence pickets idea for my roof (these pickets are used as walls on one of the other shed plans on this site). I didn't need a very robust roof as my firewood shed sits underneath the deck which provides a lot of protection from the rain. I attached the structure using 3 inch deck screws and the roof with 1.5 inch deck screws (nails would have been more than adequate for the roof but I had the screws on hand).

I did run into some problems due to my design changes. Most of my issues involved attempting to square up the round posts which are much closer in shape to a jagged stick than dimension lumber such as a 4x4 post. If I had to do it over again I would not have used the round posts. Constant tweaks and adjustments to the posts significantly delayed my build time and frustrated me at times. I was just barely able to wedge my woodshed in between the 2 deck posts which actually came in handy as I was able to secure the shed to the deck posts with 3 inch screws...making the shed very solid! The final issue I discovered after loading up my wood shed. The 2x4s at the bottom of the structure began to sag. I fixed this by using my floor jack to raise them up and placed 8 inch tall 4x4s underneath (2 in the front and 2 in the back).

Overall I'm happy with the way it turned out and I really love all the plans on this site...GREAT ideas!!

Built from Plan(s)
Estimated Cost
$90
Estimated Time Investment
Day Project (6-9 Hours)
Recommended Skill Level
Beginner
Back