Beetle Kill Farmhouse Bedside Table
This is our take on the Farmhouse Bedside Table made from beautiful beetle kill wood. :D
Made out of spruce to keep the cost under fifty dollars.
This was my first AW Buid and I loved it! I am a beginner and the video was so easy to follow. The only thing I needed (and still need) is how to do the off cut angles. I've made several since this one. Love the modern design too. Thank you Ana!
Mik da Builder
@harlemcrafted
Thu, 04/21/2022 - 12:01
Thank you so much for sending in a photo! I'm so glad to hear the chair plans worked out well for you. This is one of our most favorite chairs too!
We have a room in our basement that has very dark paint on the walls and NO windows, so we were looking for options to add lamps, as well as brighter colors to offset the darkness. I built two modified cabin collection end tables (no doors and the tops overhang by about an inch) for the lamps we already had. Once the tables were done, I saw the plan for the squared headboard and decided it would make an awesome large scale wall decor for cheaper than anything I could buy at the store. I modified the plan but cutting the "legs" down to 34.5 inches, but otherwise followed the plan pretty closely, laying out the pattern completely before I began assembling. It was a tedious process, but well worth it! (I used my kreg jig on both.)
As a side note, our 2x2's are NEVER straight, so I usually glue 2 1x2's together and sand the seam so it appears as one piece of wood.
Fri, 06/10/2011 - 12:09
This my dear is the basement that Ana White wishes she had! Love the wall decor! Adds just the right touch! And cute little end tables! The wall color is perfect too!
Just added my own twist to awesome project!
Built in an afternoon. I built them from a picture on Ana White website and modified a bit with both planes. Roll Tide was routed into a piece of wood and glued to the sides of the plane. The "A" was cut out on the band saw and finished on the scroll saw. The "T" on the orange plane was painted on The tri plane is the favorite. Roll Tide !
Live edge Christmas tree shelf.
This was an easy build and after 2 months I am still in LOVE with it:)
Fri, 12/16/2011 - 10:59
We have a HE front-loading washer and because of the power of the spin cycle, it vibrates/moves a lot. Anyone who has these pedestals have problems with that? I don't want a very expensive washer to take a tumble. :)
When I saw this project on Ana's site I had to make it. It turned out great and get's compliments from all my friends.
The only modifications I made were to the top. I used 2x6 boards and did breadboards on each end.
I documented my build with photos and did a 10 minute video tutorial showing the whole process of building Ana's table.
Mon, 02/09/2015 - 02:57
I really like the stain you chose and the overall project! The breadboard ends adds a little something more...I may do the same when I get around to making this desk!
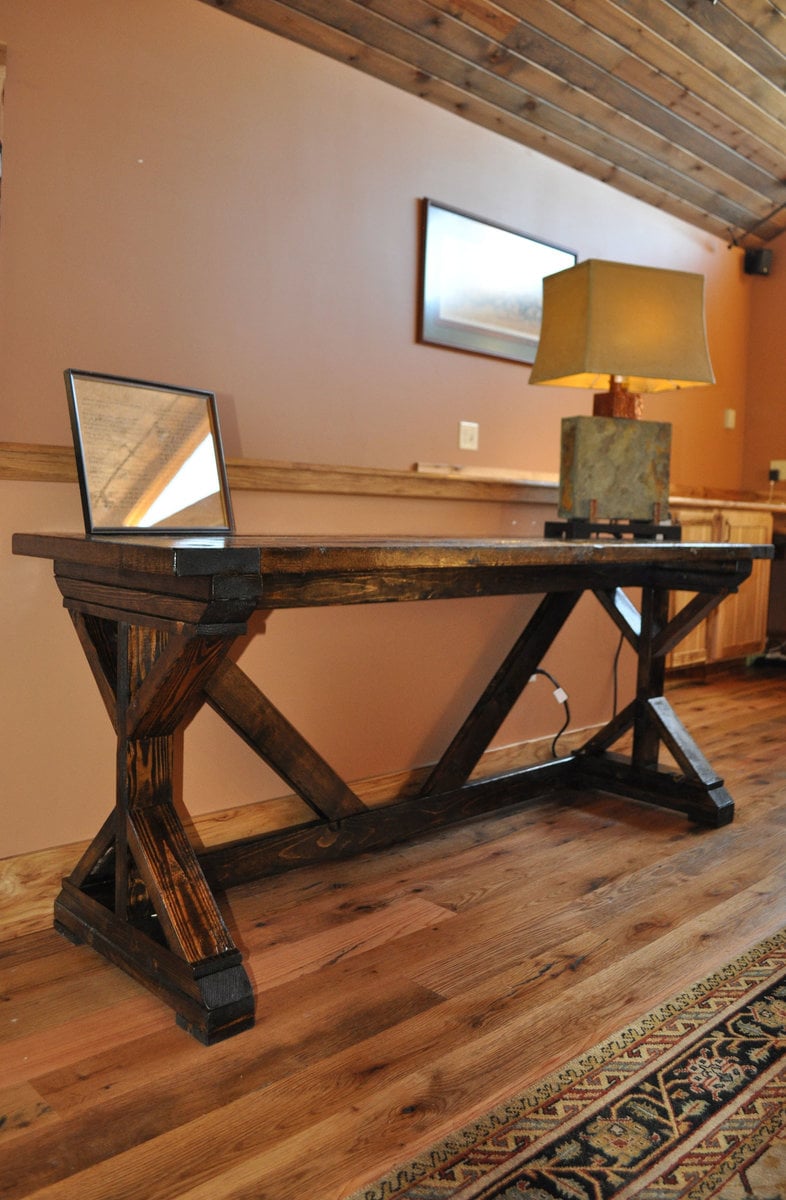
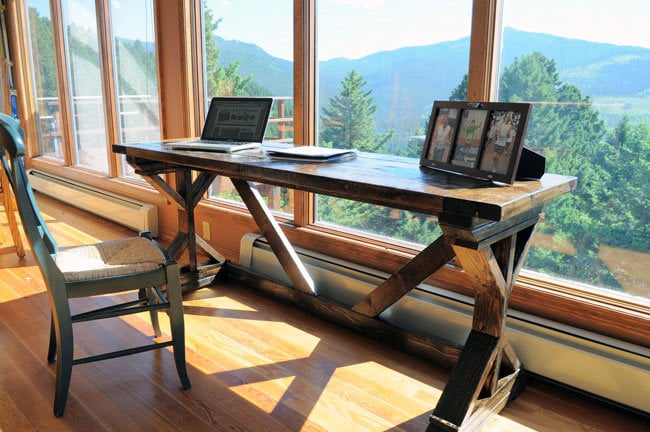
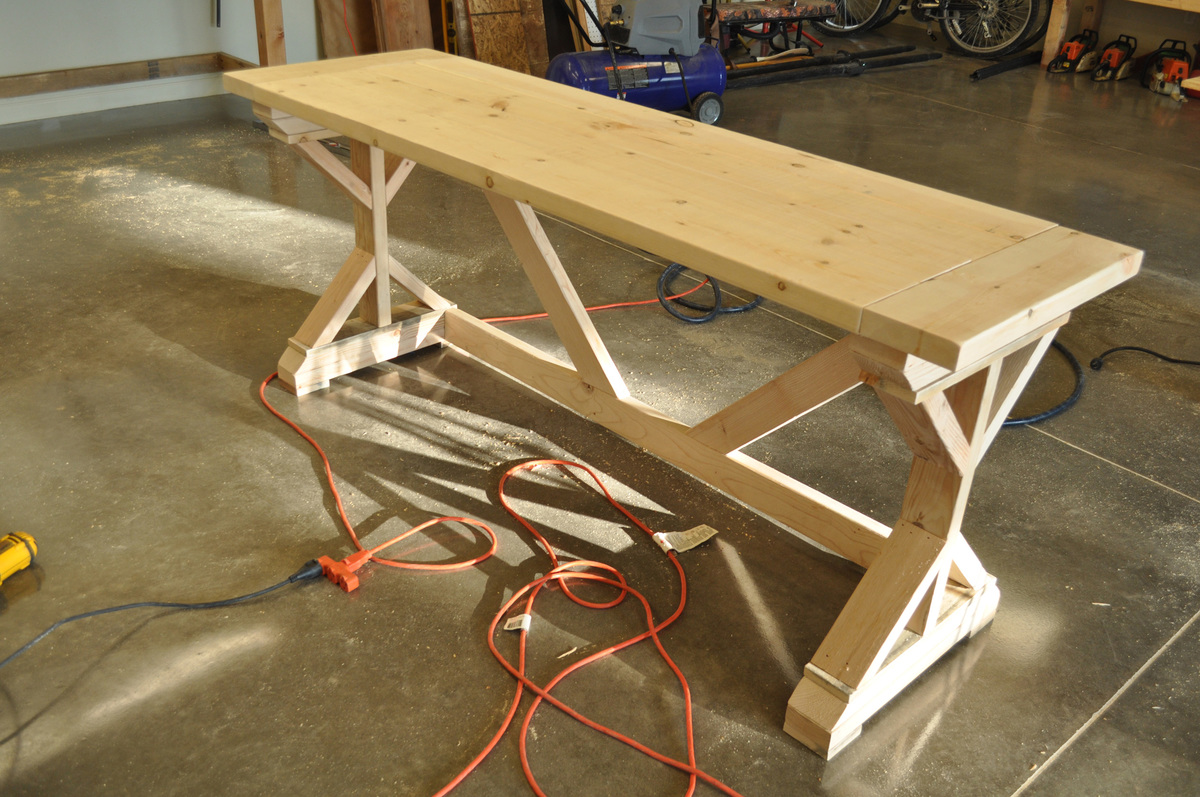
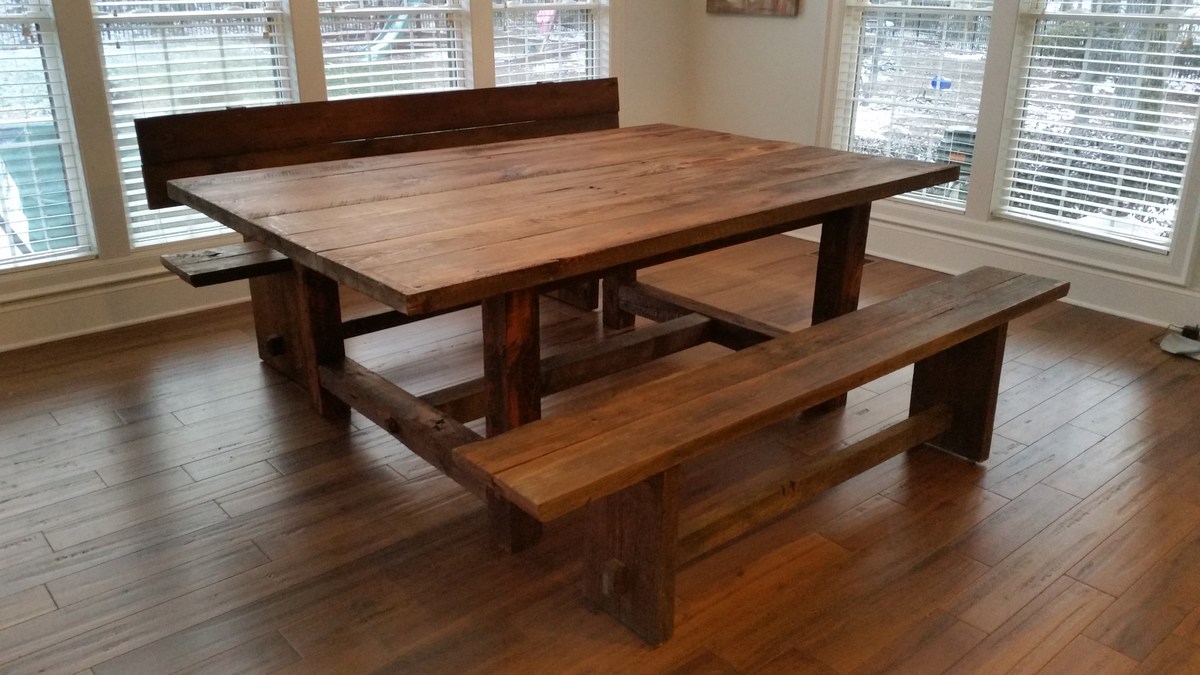
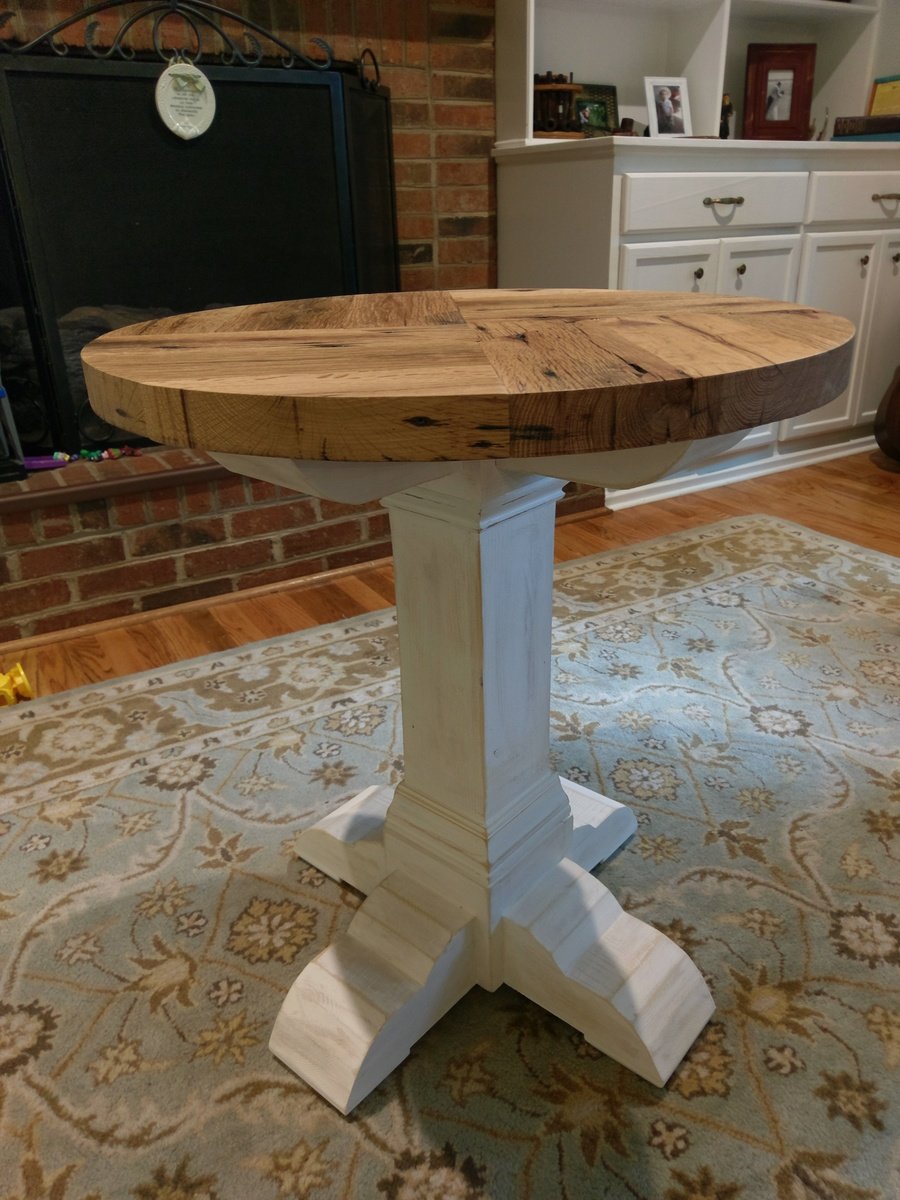
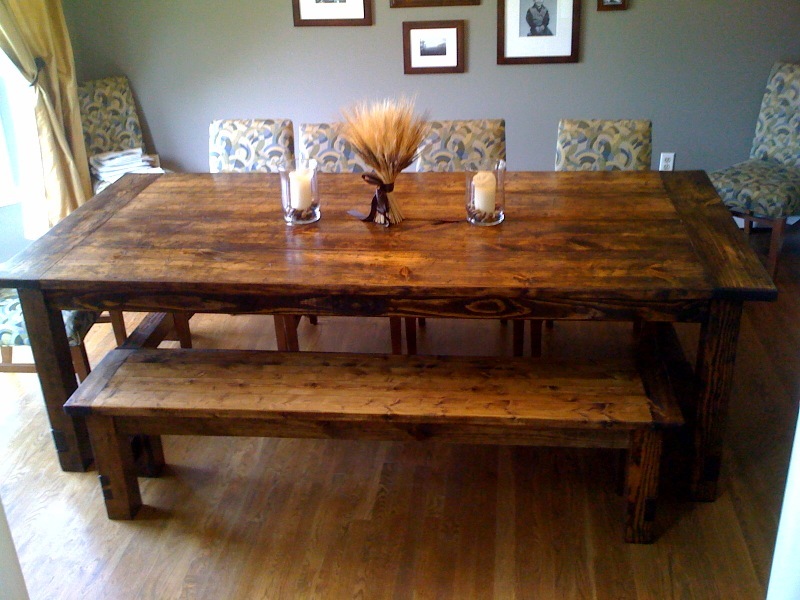
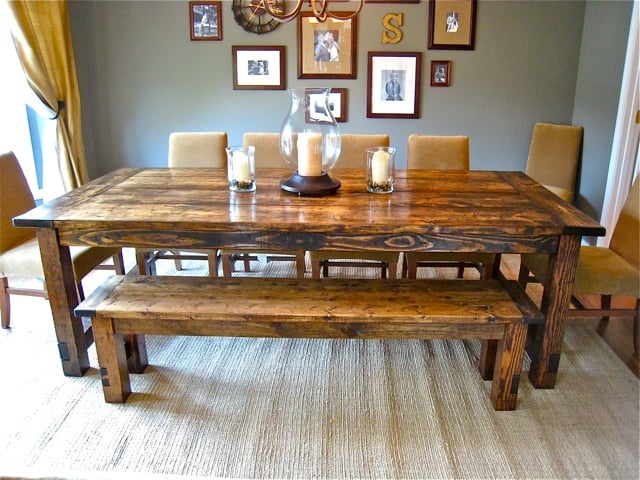
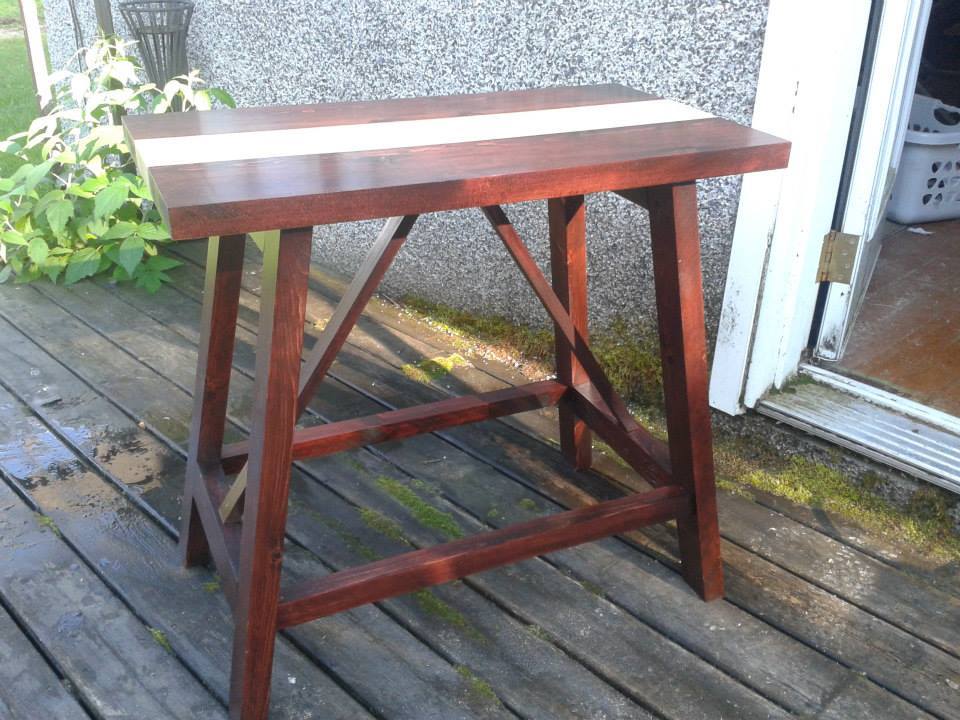
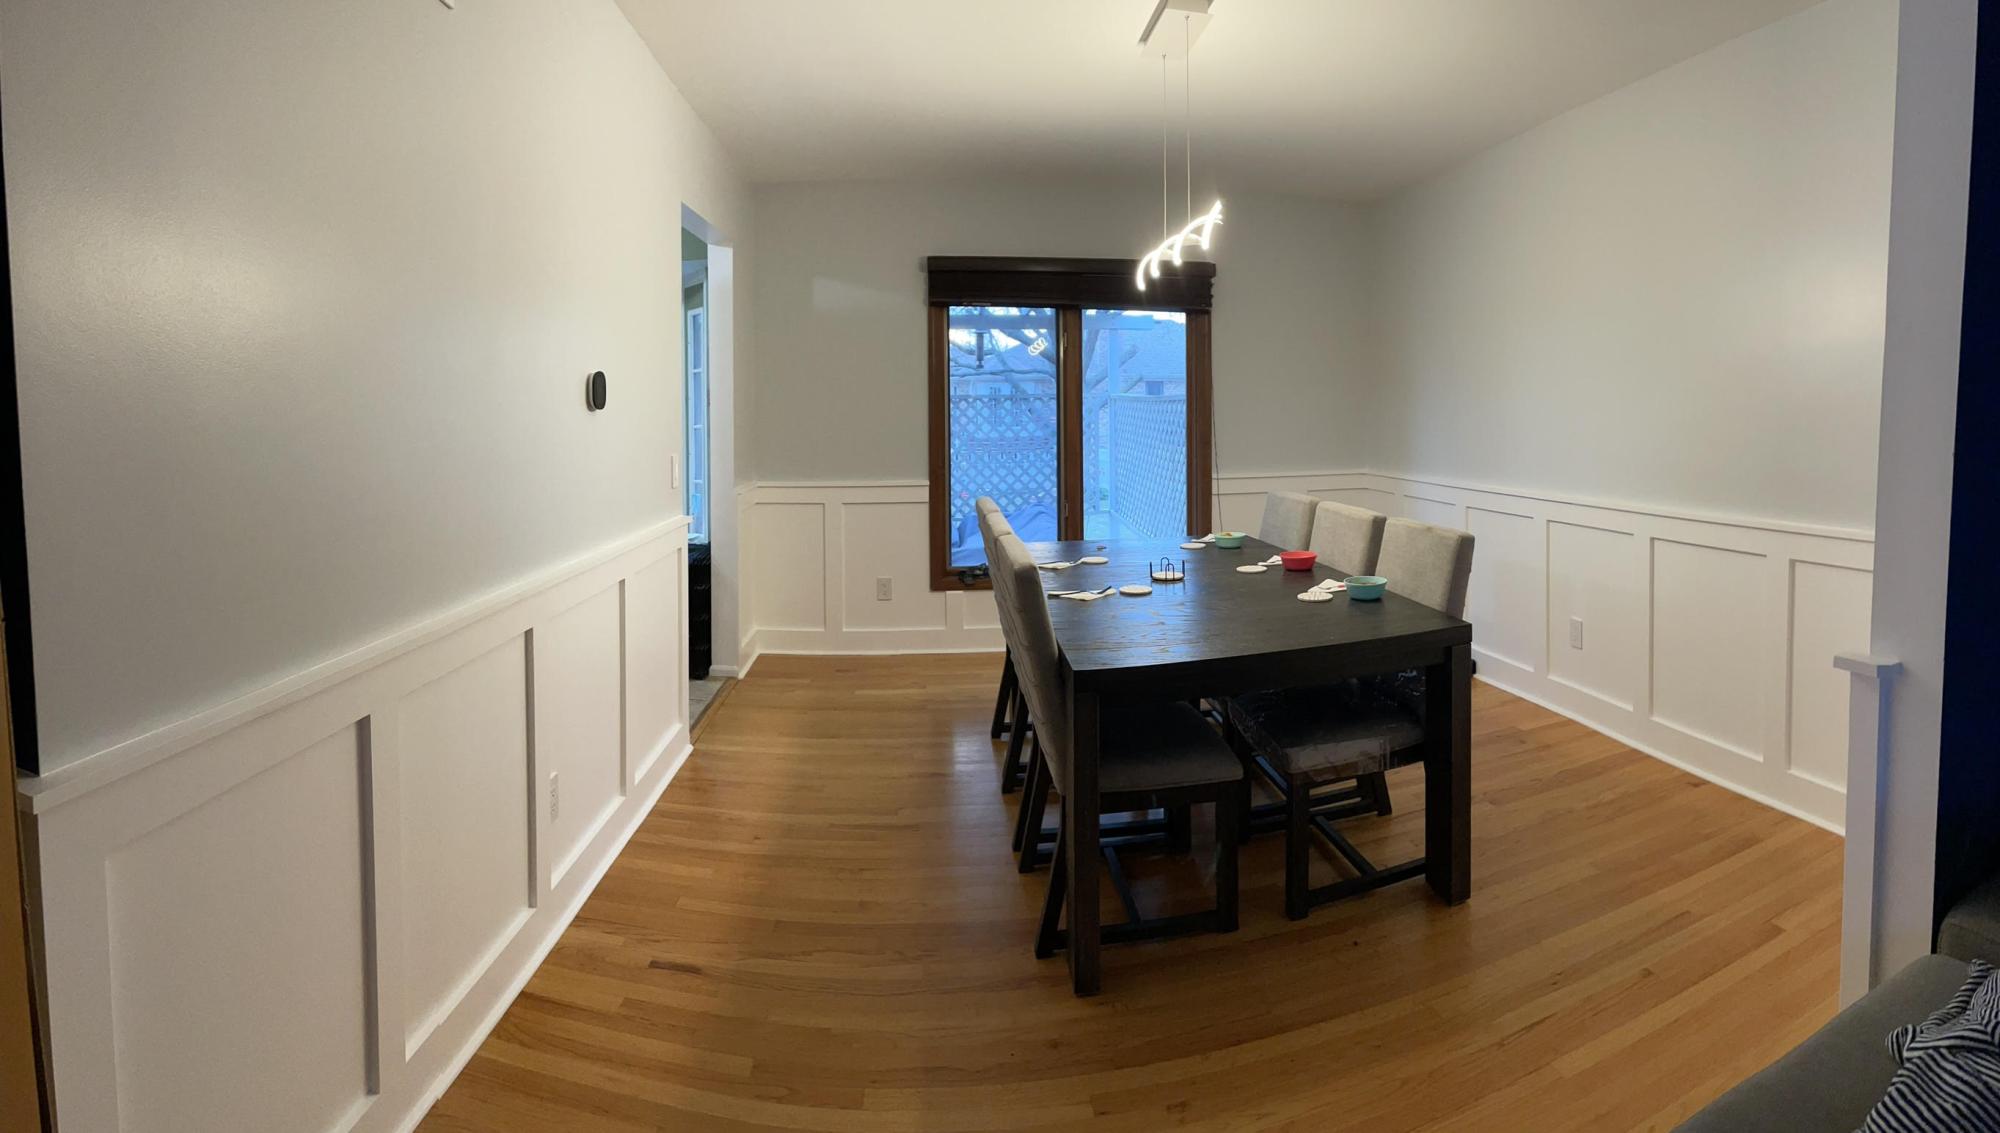
This oversized reclaimed barn wood dining table measures a whopping 96″ by 54″ – that’s quite a dining room table, with seating options to easily fit ten people. You can comfortably sit three adults on each side of the table, while also accommodating two adults on each end. In a pinch, you could actually fit four adults on each side of this table while having the two still sit at the ends; having four kids on the sides would not be a problem at all.
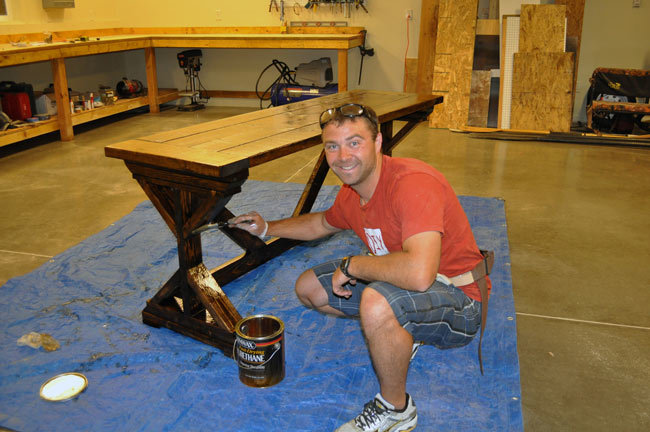
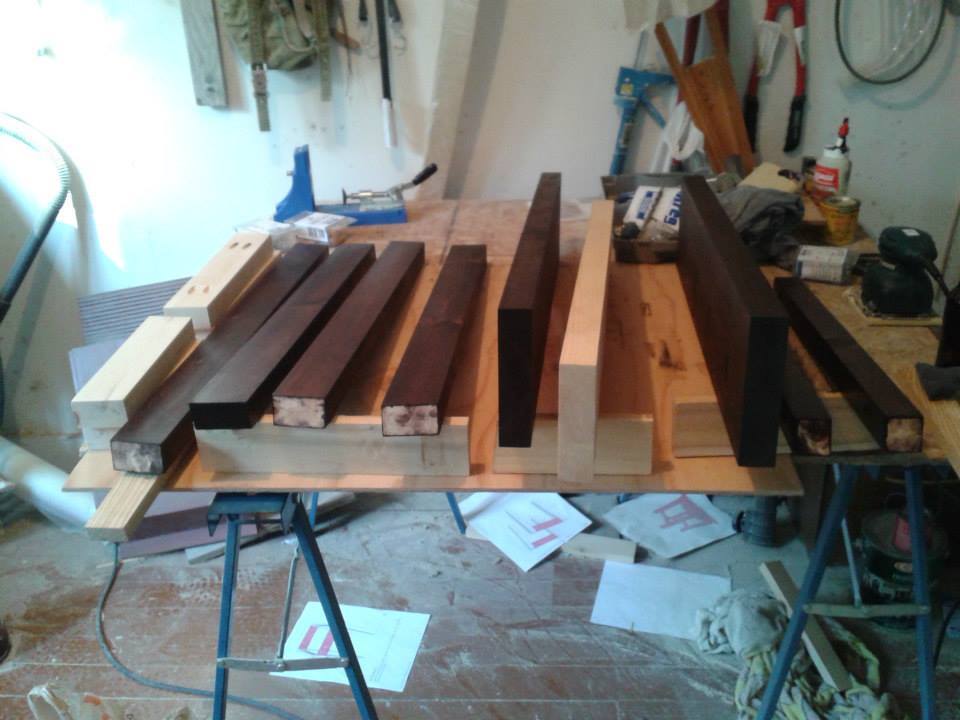
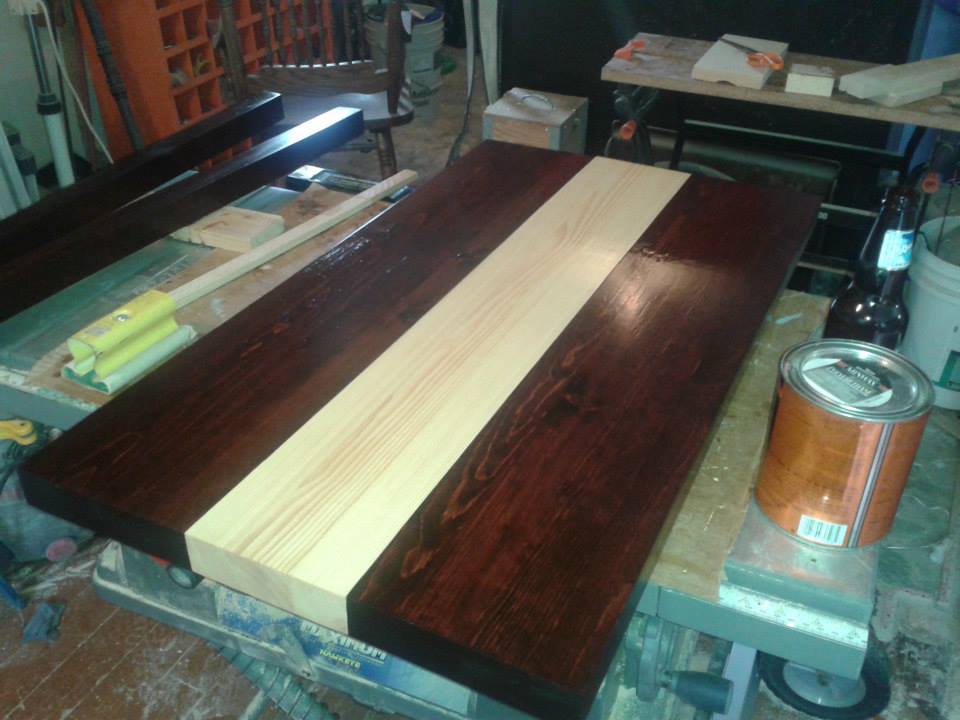
This table top was constructed from 2×6 and 2×8 beams, while the base was built out of 4×6 and 4×4 posts. I believe “behemoth” may be a proper word to describe it, as I even had to deliver the top in multiple pieces and assemble it on site. The benches were also constructed mostly from 2×6 beams harvested from the same barn as the material used in the table itself. We added a light coat of Provinicial stain to help bring out some uniformity in the color, and finished with a few coats of liquid wax to help protect the table. We informed the client of the trade offs of using a wax instead of a polyurethane, but they really preferred the “softness” of the wax finish and understood that they will have to reapply every year.
More pictures are available on our blog: http://famousartisan.com/oversized-reclaimed-barnwood-dining-room-table/
I used Ana's changing table plans to build this for my new granddaughter. I modified it to be more like a dresser that she will be able to use for many years.
When one of our bushes died, we replaced it with this planter. It compliments our yard and the neighbor's fence nicely.
Here's a round top side table I built. The top is made from reclaimed red oak barn wood, sourced from a barn right here in Charlotte, NC. The base is made from standard 2x6s and trim.
More pictures and information is available on my site at http://famousartisan.com/reclaimed-red-oak-barn-wood-side-table/
This is the first building project that I've tackled and it's all thanks to Ana-White. I did lots of things different than the building plan but it was definitely my inspiration and extremely useful. I loved the Restoration Hardware table and so I went to the local store to put my eyes on it for myself. Some of the things that I noticed, liked, and included in my design are; I used 4-2x12"s for the tabletop, I used 2x8"s as the breadboards, I used 4x4"s for the legs as well as the side stretcher, I used 2x4"s as the undertable supports, I built two 15" extensions using 2x8"s and 2x2"s, and I attempted to distress the wood yet stain it to match our dining room as best as I could.
I've documented the build and you can check it out yourself at: http://tommyandellie.com/?p=14
I've revised the plans with even more details here; http://tommyandellie.com/index.php/2012/01/13/new-and-improved-farmhous…
Hope it helps.
Mon, 06/20/2011 - 15:06
This is stunning! I'm working on this table right now, but it's no where near as good as yours. I'm jealous. I love your extensions. I'd love to see a tutorial on adding extensions..
Tue, 06/21/2011 - 05:16
It looks beautiful. Did you attatch the 2x2 to the underside of the extensions and then notch out a place on the support for them to slide into? Can you please take a photo of the underside with the extensions on?
Tue, 06/21/2011 - 14:42
That's exactly right. Here's a link to the picture you asked for; http://www.tommyandellie.com/Site/Home/Entries/2011/6/10_Farmhouse_Tabl…
There's some more details and info specifically about the extensions on my blog at; http://www.tommyandellie.com/Site/Home/Entries/2011/6/10_Farmhouse_Tabl…
It's a super simple addition to the design and can take my table from 96" to 126"!!! Or take it from a 8-10 seat table to potentially 16 seats available for those Big thanksgiving meals.
Wed, 06/29/2011 - 15:41
Hello,
I was just wondering that since your table is a bit wider than Ana's table, did you make the support for the stretcher wider? As in, did you increase the length at all (in addition to making it stick out a bit at the ends? If so, what did you extend it to? Thanks and gorgeous job!
Wed, 06/29/2011 - 18:49
Hello,
I followed Ana's example and allowed for a 1" overhang on both sides. So the tabletop is actually 44" wide and the stretchers are approximately 42". The long 2x4" stretcher is approximately 88".
Hope that helps. Thanks for the positive comments.
Thu, 06/30/2011 - 04:43
For the table legs, I set my table saw blade to a height of approximately 1.5". I then made a first cut at 3.5" from the bottom, then made a cut at 7", and then made several subsequent cuts in between those two cuts. After it was all slivered, I used a hammer to knock it all out, and then swirled the opening all around on the table saw (blade still at 1.5" tall) to smooth out all the cuts. I used the same technique for the stretcher as well.
Sat, 08/06/2011 - 21:36
Hi Tommy, I tried clicking on your site and was told the site could not be found. Last week, I saw it fine and showed my hubby our next project, but now it's gone. Help!
Mon, 08/08/2011 - 13:25
It may have been bad timing when was updating the site or I may have changed something.
Try this out and let me know if it works;
http://www.tommyandellie.com/Site/Home/Entries/2011/8/4_Farmhouse_Table…
Or go to our main site www.tommyandellie.com
Mon, 11/14/2011 - 12:31
We've switched over our entire website and have had some issues.
Here's the new updated version; http://tommyandellie.com/?p=14
Here's the old one in case that doesn't work; http://web.me.com/tomsibiga/Site/Home/Entries/2011/8/4_Farmhouse_Table_…
Tue, 01/24/2012 - 03:37
Good job publishing this post. I would like to learn more about this subject.
Thu, 03/01/2012 - 07:17
What inspiring pictures! Apparently everyone agrees, because I just "pinned" one of these pictures to Pinterest and it was immediately repinned 27 times and counting. So nice work! I hope to make mine this weekend.
Sun, 04/29/2012 - 06:29
She and her boyfriend would like to build it using lumber i cut from my mill. They are thinking walnut, hickory or maybe ash but im not sure how that will work out with being distressed. And your extentions, do you have a 2x4 or two that slides out from under the table to help support them on each end ? Are there pics of the under side of the table as well? This is a great table and i think they will have fun as a family assemblimng and finishing it.
Thank you. DesII
Sun, 04/29/2012 - 07:38
Here's a link to how I make the extensions; http://tommyandellie.com/index.php/2012/01/17/farmhouse-table-extension…
And this post has a ton of pictures to see how it all works.
With the harder wood like walnut, hickory, or ash......it'll definitely be harder to distress but I think it makes for a really neat/unique piece.
Hope that helps!
Thu, 10/11/2012 - 12:52
Bench Plans can be found here; http://tommyandellie.com/index.php/2012/03/17/farmhouse-bench-plans/
A spreadsheet for the bench plans can be found here; http://tommyandellie.com/index.php/2012/06/28/cut-list-and-shopping-lis…
Tue, 04/14/2015 - 13:31
Hey Tommy, I saw the Farmhouse table design with extensions, I don't have Excel to open the cut list and need the buy list and cut list to complete the project, I am really short on time and need to start this project tomorrow. Please if you can, do you have a word document or a PDF that shows the page for those?
In reply to No Excel Please help by James Groover
Tue, 04/14/2015 - 16:47
Oh my God! I found the cut list I had misplaced it in my folders, dude, sorry about that. Never mind.
We adapted these plans to build our tree house, I hope it's not too much of a stretch for brag posts! Every kid seems to have two wishes: a fort or tree house and a secret passage way. Or is it just my kids? Turns out we live in the desert and trees are hard to come by. Our solution? Build a tree house in the house. Why not!? Our magic tree house is well used and well loved. This is one of those projects that simmered and in my mind trying to think of the perfect way to build the thing. The stuff our parents built and played in was a hodge podge of left over wood and their own creations, crooked construction and messy paint. So, I set the perfect aside and dove in. The only things our tree house really needs to be is safe and fun. Most families try to find indoor activities for the winter, but in the desert it is so blazing hot we need indoor retreats in the summer. This tree house is the solution a gagillion times over! Thank you Ana!
A modified version of the Truss End Table. I used select pine instead of construction grade 2x4s. Also, I laminated the table top together seamlessly instead of using 5 separate boards.
The legs were also increased to 28.5" instead of 27".
Comments
renae1223
Thu, 03/31/2016 - 07:51
I Love it!
I love the beetle kill pine, that is what I picked up last night from HomeDepot to make mine with. Great Job!