I'm not a trained carpenter.
I am a mom.
I am a girly girl.
I am what my brothers would call a chicken.
But I build furniture.
I use saws.
I use nailers.
Guess what? It's really not that difficult.
And if I can do it, so can you.
And if thousands of other people, just like me can do it, so can you.
And here is everything you need to know to get started. So you can learn from my hard lessons and lucky breaks (and everyone else's!).
1. Do your homework. There is an amazing amount of information and resources available to you through this site. There are 20,000 Facebook Friends that are generous, helpful, smart, and many, just like you. Take a second to read through some of their comments, introduce yourself and ask questions. Visit our own Community and read through the threads. Read comments on the posts. Introduce yourself and ask, "Is it really that easy?" . Go through our Bragging Board posts. In other words, I'm encouraging you to know what you are getting into.
And for those of you who have already been through this process, please add comments to this page to encourage others. Any tips and tricks also greatly appreciated.
2. Pick a Plan. I've created a special section of plans that are perfect for getting started. Of course, there are hundreds of plans available online, and you can choose anything that you want, I'm just suggesting these plans because they are inexpensive, many people have had success with them, and they require the most basic tools and knowledge.
3. Go Shopping. The lumber aisle is huge, and everything might look the same. I highly suggest working with pine or whitewood boards for a first project because these boards are cheap, easy to work with, and readily available. Plan to paint your first project too, as you have to be more perfect with a stained finish. Ask an associate to send you to the "whitewood or pine board section". Also ask where the 1x2, 1x3 and 2x2 furring strips are located (as these boards are the exact same species as the whitewood boards but much much cheaper, but you will need to dig through to find good boards). If you are looking of 2x4s and 2x6s, ask where the studs are.
Choose your boards by pretending that the board is an arrow on a bow, and you are shooting the arrow. Look down the length of the board to make sure it is straight. Rotate the board to check all sides. Inspect the board for cracks or other imperfections. You may want a rustic finish, so some knots or rough patches are fine - it's the straightness and cracks that you need to discard.
About Boards
I like to use standard width boards, even when we use plywood, because it saves materials and it saves cuts. Also, your scraps will be useful for other projects. You'll notice this throughout all of my plans. But here's the major problem with using dimensional boards . . . the widths can vary depending on where you live. I live up in Alaska, and most of our lumber is milled in Canada. Most of the 1x12s I get are 11 1/2" wide, but others say theirs are 11 1/4". This does matter. What you need to do is measure the widths of all of your boards and adjust the plans according to your boards (if necessary). Here is a table of the sizes that I go off of.
- 1x2 measures 3/4" x 1 1/2"
- 1x3 measures 3/4" x 2 1/2"
- 1x4 measures 3/4" x 3 1/2"
- 1x6 measures 3/4" x 5 1/2"
- 1x8 measures 3/4" x 7 1/2"
- 1x10 measures 3/4" x 9 1/2"
- 1x12 measures 3/4" x 11 1/2"
- 1x16 measures 3/4" x 15 1/2"
- 1x24 measures 3/4" x 23 1/2"
For the 1x12, 1x16, and 1x24, I give these measurements because you can rip a standard 48" wide sheet of plywood into 4 1x12s conserving the most material. You can also get 3 - 1x16s or 2 - 1x24s. As a builder on a budget myself, I get the need to minimize waste and maximize material.
Ask an associate if the store does complimentary cuts. Take advantage of this for a first project if you don't have access to a saw at home. If not, you gotta get a saw.
4. Cutting Boards. Depending on the project, you are going to need a saw. Instead of splurging on an expensive compound miter saw (start saving, you will want this saw) for the first project, purchase either a jigsaw or a round or circular saw.
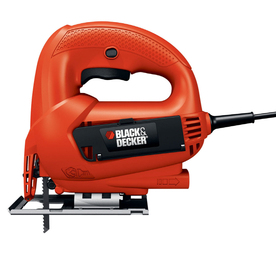 Jigsaw. This is a jigsaw, and it's primarily used for cutting shapes out of wood. But it could be used to cut straight lines too. However, a jigsaw is difficult to get precise cuts with. Jigsaws start at $25. I think a jigsaw is less intimidating than the circular saw.
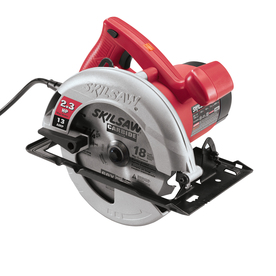
- Circular Saw. This is a circular saw. It is used for making long straight cuts. It can also be used for making short straight cuts with more precision than a jigsaw. Circular saws start at $50. Purchase this saw if you intend to make a lot of plywood cuts.
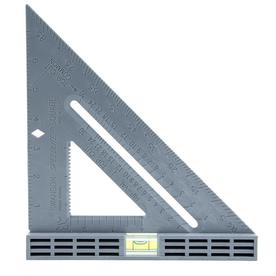
- Carpenter's Square. These start at around $5. Use a square to mark a straight line on your boards so you know where to cut your board.
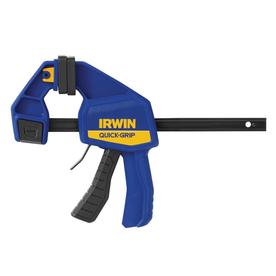
- Clamps. These are awesome if you are working alone. You can clamp your board to a table, mark the board with the square and then cut it. They start at around $10.
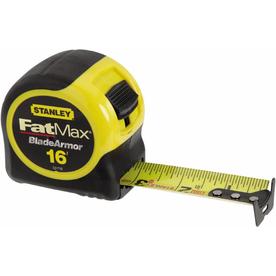
- Measuring Tape. Your gonna need a measuring tape.
- Safety. Don't forget to purchase safety glasses and hearing protection too.
Okay, so here's how to cut. Clamp your board down. Use your square to make sure that the end of the board is square (you'd be surprised at how many boards don't come straight). If the end is not square, mark it with the square (I like to use mechanical pencils, but any real carpenter will tell you to get a carpenter's pencil :) ). Then cut it square, taking great care to cut on one side of the line. Cut slow. Respect the saw. There is no hurry. Measure the length of your board and make another cut. One board down!
5. Building. So once you've got all of your boards cut, it's time to actually build the piece. Before you begin building, make sure you are working on a clean level surface. Vacuum any sawdust. You will be surprised at what the tiniest bit of sawdust can do to your projects. Make all efforts to keep edges flush. Be careful. Go slow.
There are a couple of different options to joining boards the easy way, but let's start with the absolute most basic and inexpensive - countersinking screws. You can go here to see me demonstrate how easy this is to do.
 Drill. You are going to need a drill. I highly recommend splurging on a good drill - you'll use it for everything from hanging pictures to hanging closet doors, fixing toys to build sheds. You can save money on a good drill by purchasing a refurbished one (often refurbished drills are brand new and were just part of a kit where another tool had issues) or purchasing a corded drill.
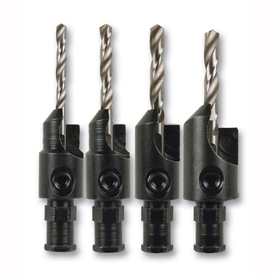
- Countersink bit. The top part of the bit drills a hole for the screw shaft, the black part drills a hole for the screw head so your screw is hidden under the surface of the wood. Choose a countersink bit that matches your wood screws.
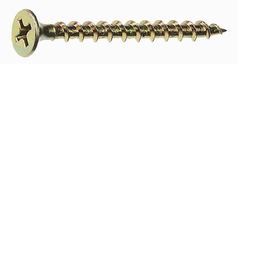
- Screws. Most of the plans will call for 1 1/4" and 2" wood screws. I like the gold screws for limited budgets, but if you can afford them, self tapping wood screws can eliminate the need for countersinking screws. You will also need to purchase a drill bit that fits the screw head (expect these to be under $1)
- How to attach with Screws. So you got your drill, bits, and screws. Practice drilling a hole with the countersink bit. Apply pressure and you will notice that the bit drills a small hole for the screw shaft, followed by a larger hole for the screw head. With a countersink bit, take great care to keep the drill positioned at the same angle - busting a countersink bit is easy to do.
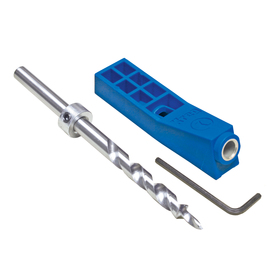
- Pocket Holes. Okay, so you are also going to read about pocket holes on this site, most often referred to the Kreg Jig. The image above is a Kreg Jig, starting price of $20. You can use the Kreg Jig to build just about everything, and I highly recommend using it as your preferred joining technique. However, if you can afford it, I highly recommend spending $100 for the full size Kreg Jig. That's why I'm recommending for the very first project, you just stick with a countersink bit, and then when you find out you love building stuff, you can buy the Kreg Jig. You will still use your inexpensive countersink bits here and there, so your investment in them is not lost.
- Building 101. Mark out the joints on both sides of the joint on the board. Predrill your holes with the countersink bit. You most likely will only need to predrill in the first board, and your screws will not split the second board, but do some practicing to make sure. Some boards are drier than others, thus splitting easier. Insert the screw into the predrilled hole, apple glue, and line up the two boards to join. Don't worry about getting the entire joint precise, you can rotate the board after you get the first screw in. Screw it together!
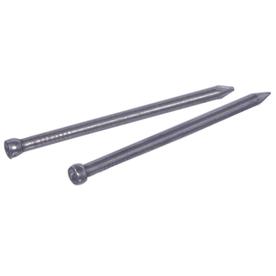
- Nails. Some of the plans might call for finish nails. If you don't have a nailer, a hammer and individual nails as shown above will do the trick. Just make sure your hammer has a smooth head. Most plans call for 1 1/4" and 2" finish nails. Always use glue with nails.
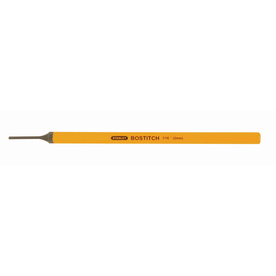
- Nail Punch. This one is $3. It's a good idea to use this to get the nail to go below the surface of the wood. That way you can fill the hole with wood filler and you will never know there is a nail in there.
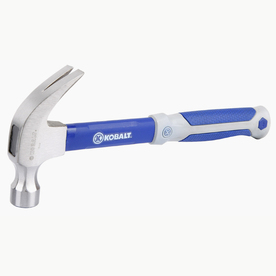 Hammer. Don't forget your hammer. The start at around $6.
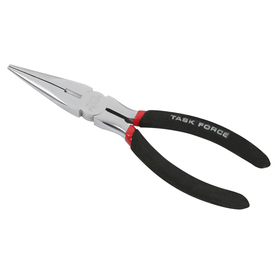 Needle Nosed Pliers. It's good to have these around just in case a nail goes the wrong way and you can't get it out with the hammer. Don't try and cut the end off, you will never get it close enough to the wood. You can try backing the nail out with the hammer. If that doesn't work, grap the very tip of the nail (the sharp point) and wiggle the nail in all directions. The nail should break off flush with the wood. Hopefully, you won't encounter this on a first project, but for $3, it's good to have a pair of needle nosed pliers around.
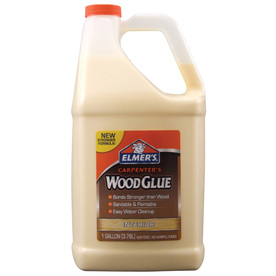
- Wood Glue. You will need to use glue for all nail joints. For unfinished wood, I love Elmer's glue. If your wood has been treated or painted, you will need to use a different type of glue for treated surfaces. Something like Gorilla glue. Oh, and be careful when applying glue on stained projects - areas that have glue dried to it won't take stain!
- Nailing. We most commonly nail pieces that are low use or parts of pieces that are low use. I like to build the box with screws, then nail the trim boards on. Screws are more difficult to disguise but stronger than nails.
Finishing. Finishing is likely the par that you are already good at and don't need a ton of help. The most important part of finishing is preparation.
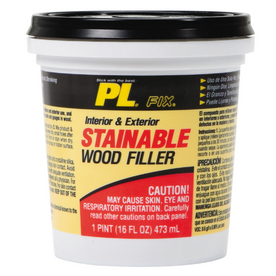
- Wood Filler. The thing about wood filler is you can't let it dry out, so DO NOT leave the lid open. And also, it may say stainable, but in my experience, it doesn't stain the exact color. You are better off going with wood filler color matched to your stain (available in the stain aisle). Overfill all holes with wood filler because it tends to shrink when dry. I like to apply two coats of wood filler. I use a putty knife (less than $1 for a plastic one) but for years, just used my fingers.
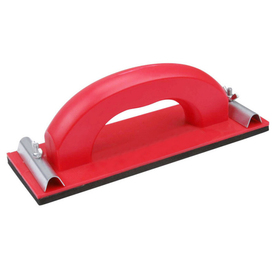
- Sanding. A hand sander is a good workout and can be effective. This one is less than $5. I use 120 grit sandpaper and sand only in the direction of the wood. Sand all joints so that the wood filler disappears. Sand any rough patches or differences in joints. After you finish sanding, vacuum the project and the entire work area. Wipe the project clean with a damp cloth - if you have sanding residue, the paint won't stick to these places.
- Primer. Primer is the bridge between paint and wood. It seals the wood, preventing your piece from "yellowing" (if it's white) and also makes the paint "stick" to the wood. I like to use spray on primer.
- Paint. I <3 Flat Paint. I know you are going to read everywhere to use high gloss enamel cabinet paint, but here's what I've discovered in my years of painting furniture. It's better to layer paint. That way a scratch doesn't peel off a huge section. And flat paint dries well. And it's thin, so it will allow some of your wood grain to show through. Just put enough layers on until you are satisfied with the color. You can mix different colors for added depth. Also, with flat paint, I find you don't need to sand as much between coats, but it's never a bad idea to sand between coats. TIP: Buy some ooops paint for a few bucks to save on your first project. The paint counter might even be kind enough to retint it for you :) Brush in the direction of the wood. Oh, spray paint is marvelous too!
- Easy Distressed Finish. For an easy distressed finish, sand edges of the piece with your hand sander. You can then apply a stain or glaze over the paint to stain any exposed wood.
- Top Coat. If you used flat paint, you will need to add a top coat to seal the deal. I like to use spray on top coat. Top coats are just clear paint.
- Note About Board Widths - Measure you board widths first, board widths can vary up to half an inch. I use the widest possible widths - 1/2 less than the name. For example, a 1x6 would be 5 1/2" wide.
Good luck with your first project!