

Free plans how to build vegetable bin cupboards from ana-white.com

Hello there!!! Happy Monday!!!
We are continuing our New Blogger Feature Series this Monday with a brand new plan and awesome new DIY blogger to follow!
Meet Jeanna, who blogs at Barefoot in Blue Jeans.
I am a work at home mom, with too many hobbies. I got into blogging about a year and half ago and love it, I meet awesome people. I got into building things about 6 months ago, and I love that too. I like to learn new things and I love the feeling I get when I can stand back and say, wow I made that! My blog is a reflection of myself. DIY, recipes, music, and ramblings. Its light and fun with nothing to serious. How I wish all my days (and yours) are lived out.
And here's a few of Jeanna's amazing projects -
 Rustic Console Table with planked top. How beautiful is that?
 $200 Planked Herringbone bed, wow!

DIY Nail Polish cabinet - what a great idea!!!
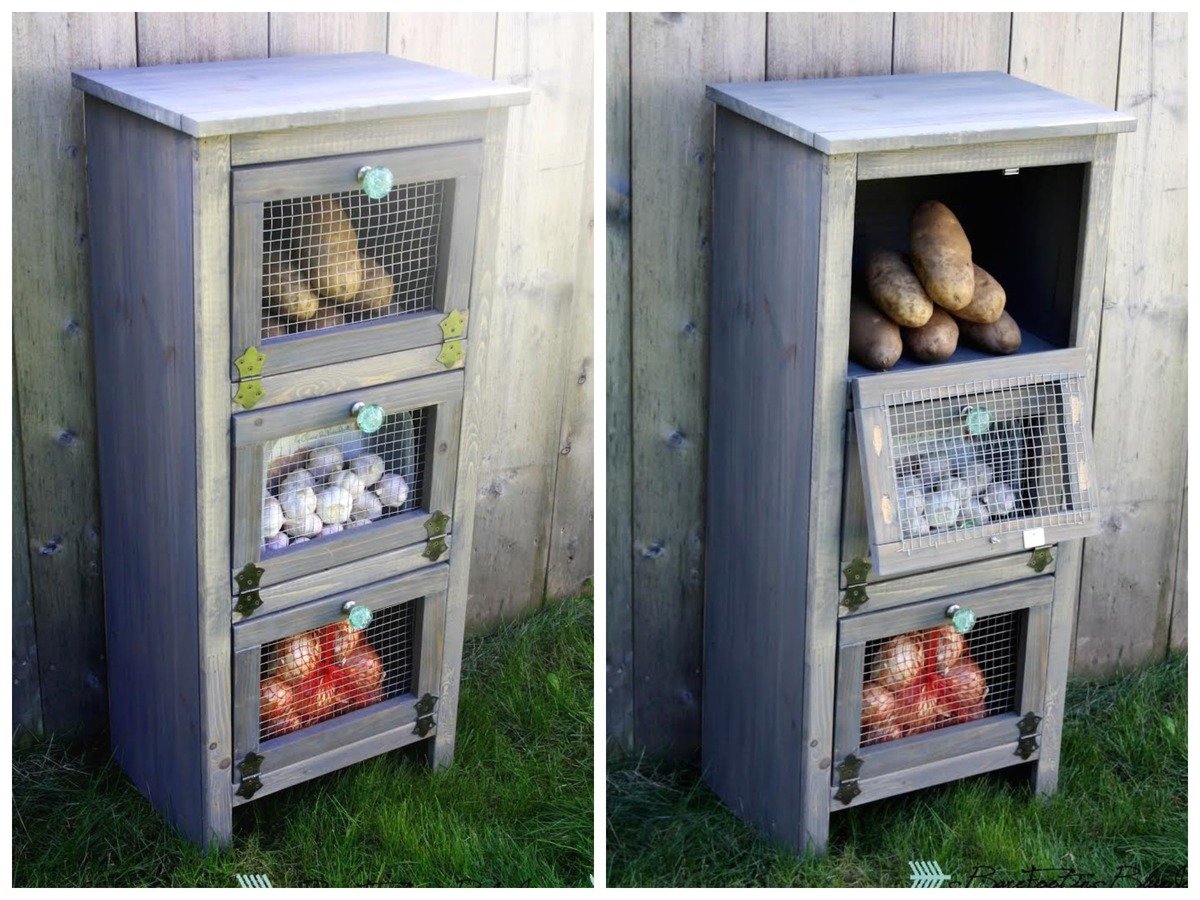
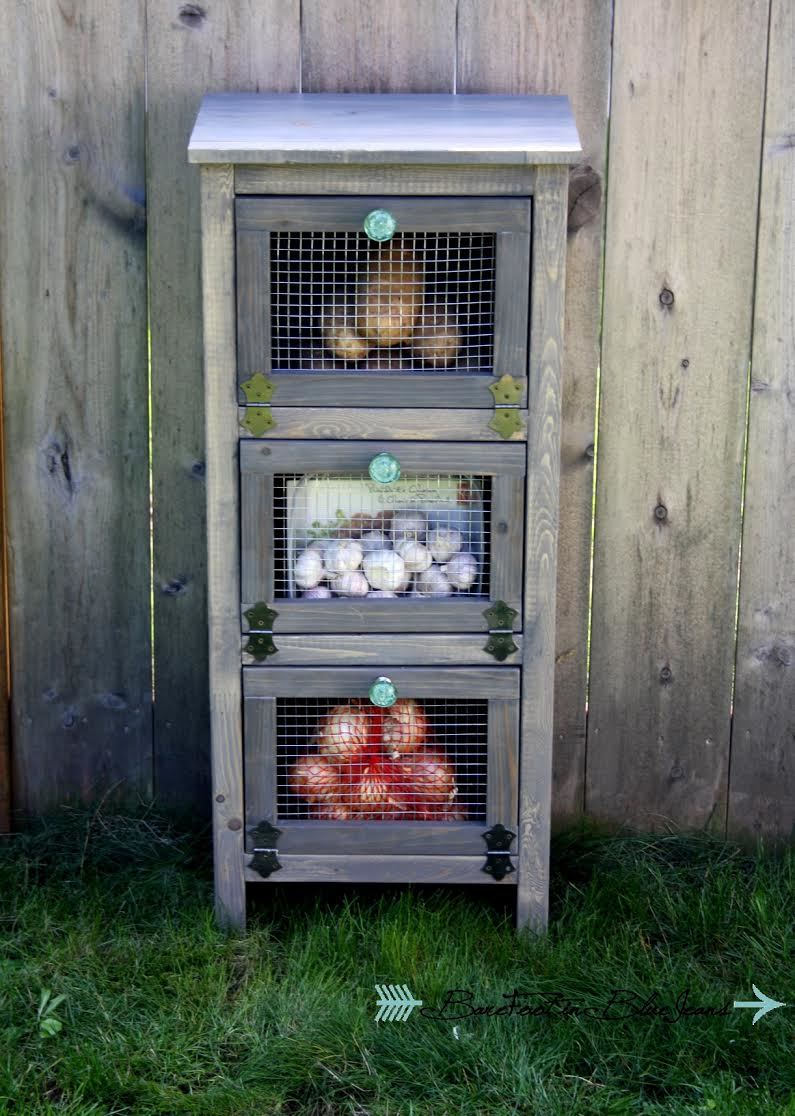
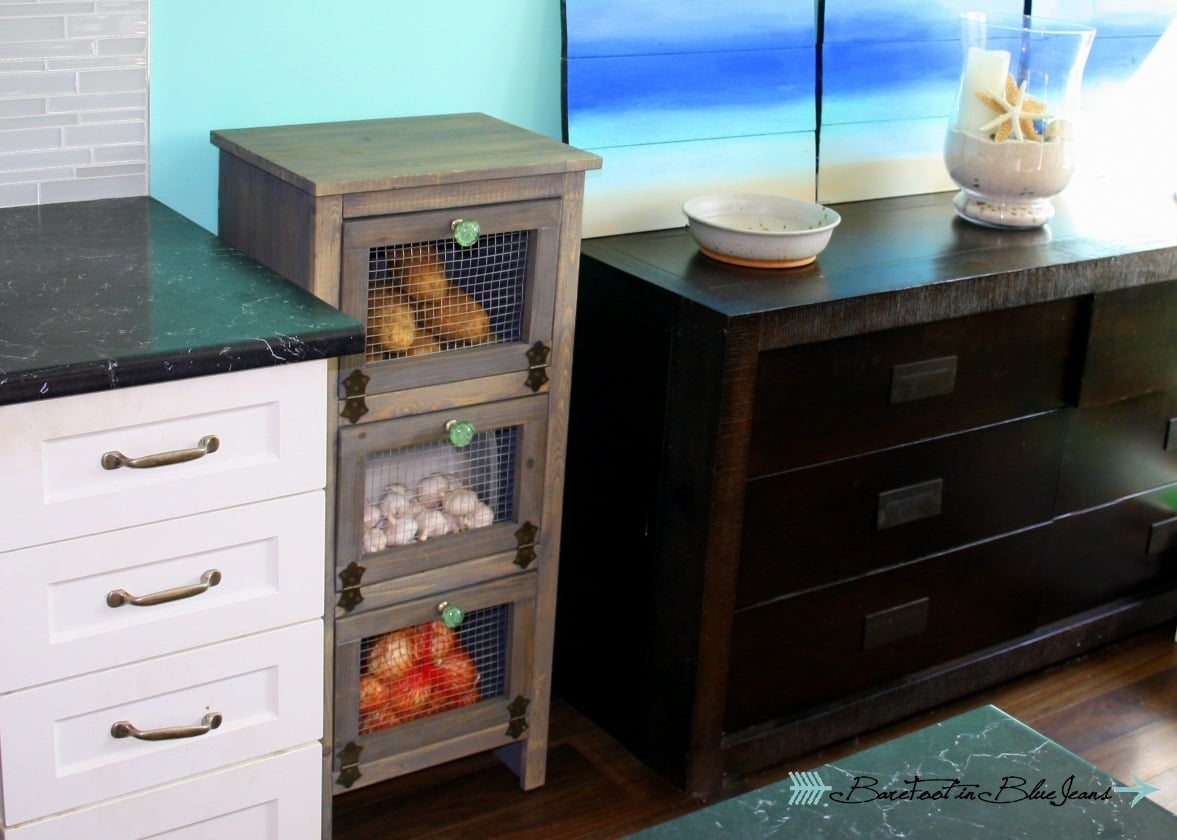
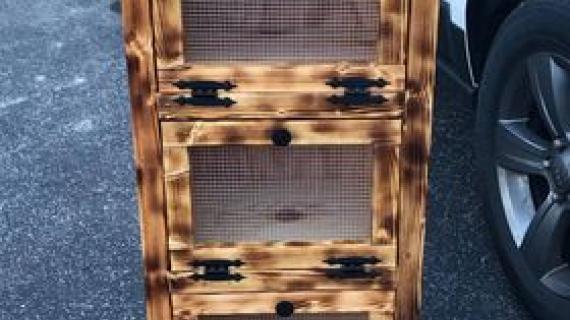
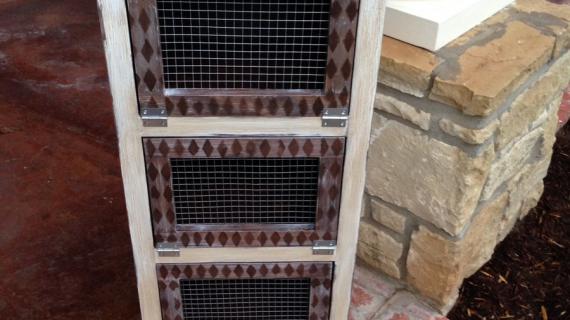
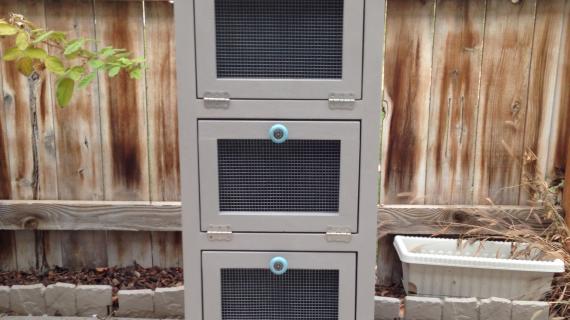
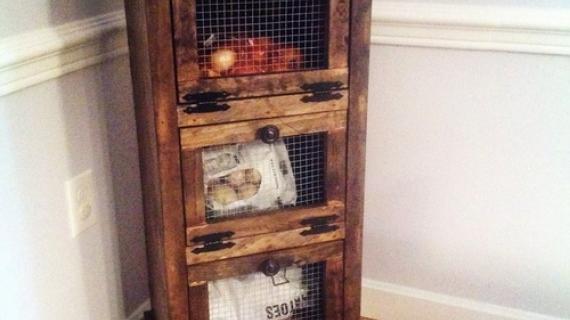
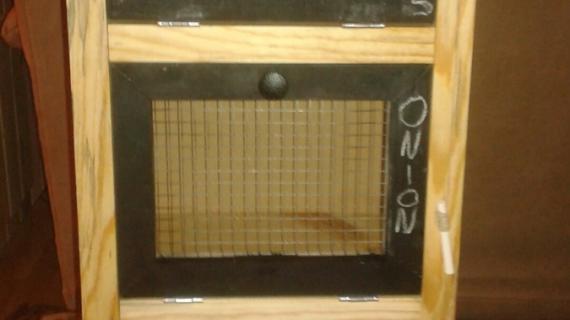
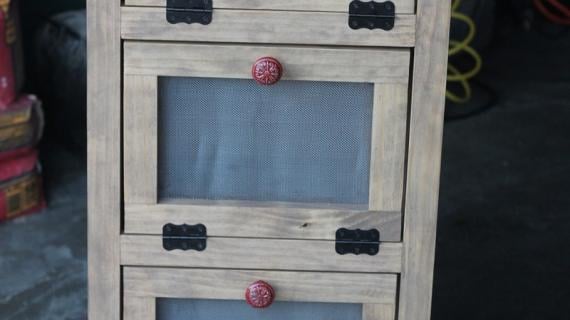
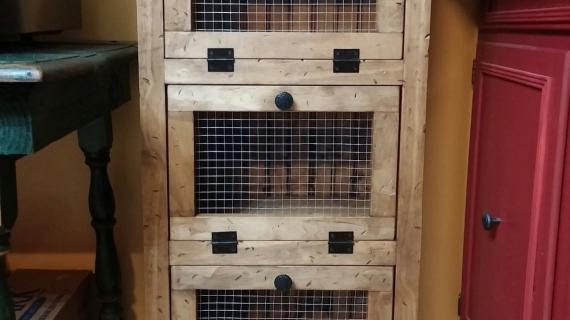
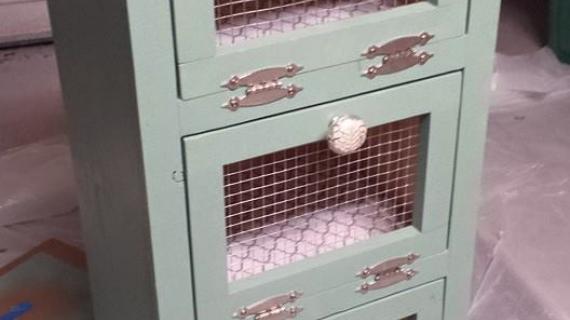
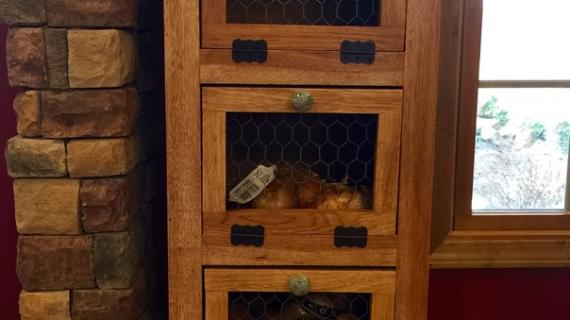
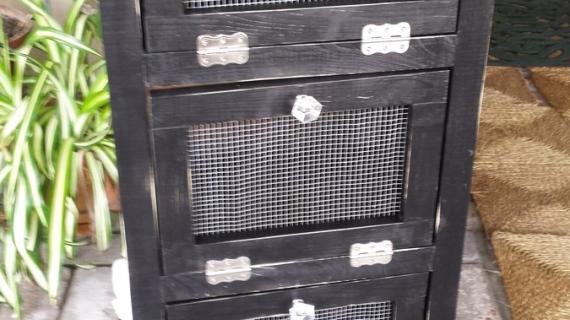
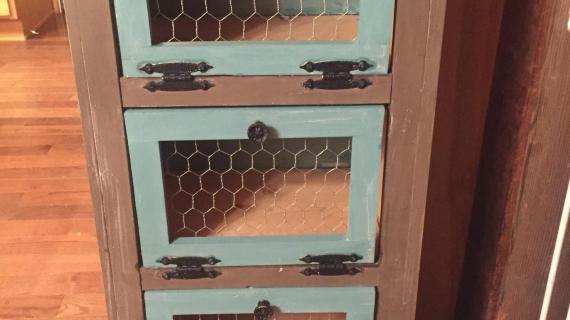
And of course, today's project - a Produce Cupboard!

Here's from Jeanna about the Rustic Produce Bin project:
If you are anything like me, then you are always in need of more storage. These veggie bins are so awesome to look at and so functional at the same time. Dont be fooled by the name though. These beauties could be used for any number of things, they have a lot of room in each cubby. It was a very easy build with minimal cost. I love these things to bits.
You can follow Jeanna at Barefoot in Blue Jeans here to never miss a new project post from her:
Thanks Jeanna!
And of course, the plans for this project follow -

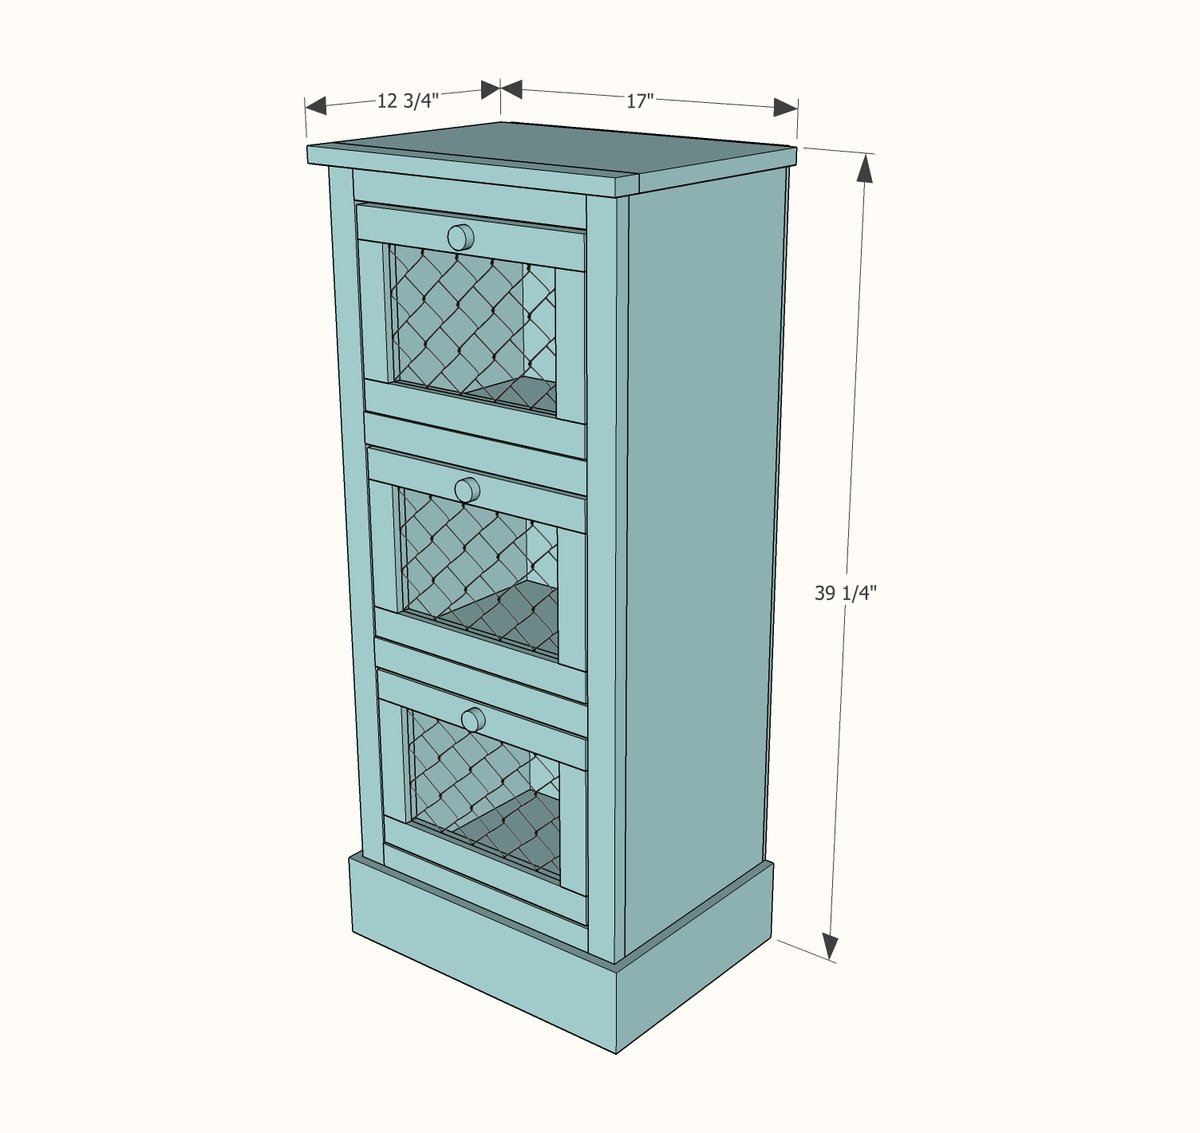
Preparation
1 - 1x12 @ 12 feet long
3 - 1x2 @ 8 feet long
4 feet of 4-1/4" tall base moulding
1/4 sheet (2' x 4') of 1/4" thick plywood, beadboard or other backing material
Chicken wire or wire mesh and staples for attaching the chicken wire
3 sets of surface mount hinges (can also use basic butt hinges)
3 clasps
3 knobs or handles
1-1/4" pocket hole screws
1-1/4" and 1" finish nails
CARCASS
1 - 1x12 @ 17" (top)
2 - 1x12 @ 38-1/2" (sides)
3 - 1x12 @ 14-1/2" (shelves)
1- 1/4" plywood @ 16" x 39-1/4" (back)
4-1/4" base moulding cut to fit
FACE FRAME
1 - 1x2 @ 17" (top)
2 - 1x2 @ 38-1/2" (Sides)
4 - 1x2 @ 13" (shelf trim)
DOORS - CUT TO FIT, 1/4" less in height and width than opening
6 - 1x2 @ 6-1/4"
6 - 1x2 @ 12-3/4"


Please read through the entire plan and all comments before beginning this project. It is also advisable to review the Getting Started Section. Take all necessary precautions to build safely and smartly. Work on a clean level surface, free of imperfections or debris. Always use straight boards. Check for square after each step. Always predrill holes before attaching with screws. Use glue with finish nails for a stronger hold. Wipe excess glue off bare wood for stained projects, as dried glue will not take stain. Be safe, have fun, and ask for help if you need it. Good luck!
Instructions
Step 1

Build the basic carcass out of the 1x12 boards. You can use 3/4" pocket holes and 1-1/4" pocket hole screws to make.
Step 2

Build the face frame with 3/4" pocket holes and 1-1/4" pocket hole screws first. Then attach the completed face frame to front of project with 1-1/4" finish nails and glue.
Step 3

Attach back 1/4" plywood with 1" finish nails and glue.
Step 4

Cut 4-1/4" base moulding to fit, mitering front corners. Nail on with nails long enought to pass through moulding into 3/4" thick sides and front (most likely 1" long nails). Use glue.
Step 5

It is always recommended to apply a test coat on a hidden area or scrap piece to ensure color evenness and adhesion. Use primer or wood conditioner as needed.

Comments
fortasha
Mon, 10/06/2014 - 19:42
Did I miss something
When I bought and cut these boards tonight, I found that I needed 3 1"x2"x8' not 2 becuase you need 21+ feet for all the cuts. Also I count that you need 4 13" cuts of 1x2 not 3. Did I miscalculate or do something wrong?
In reply to Did I miss something by fortasha
Ana White
Tue, 10/07/2014 - 09:33
Hi - I am so sorry, it was me
Hi - I am so sorry, it was me that missed something, not you. I have updated the cut list and materials list per your comment, thank you for taking the time to let us know.
woodnutbob
Mon, 10/13/2014 - 10:38
just wanted to know the stain finish
just wanted to know the finsh on your vegetable bin I usually use golden oak but I like that stain
DraakUSA
Tue, 07/21/2015 - 23:36
PDF issue
I am unable to download the PDF. Could you check to make sure everything is fine on your end?
DLadle
Tue, 08/11/2015 - 09:16
Attaching the magnetic clasps?
How did you attach the magnetic clasps to the inside of the frame? I'm assuming that the clasps were added at the very end of the project, which makes for a tough angle to screw them in. Any advice you can offer would be really appreciated!
Debi60
Mon, 12/14/2015 - 09:58
I'm looking for something
I'm looking for something like this, only the 2nd and 3rd sections are actual bins that open, not doors. Does anyone have plans for making the bottom sections pull out bins?
brianakins83@g…
Fri, 01/29/2016 - 23:06
pdf?
For whatever reason, I get an error when I attempt to view the pdf. FYI.
Ana White Admin
Wed, 07/05/2017 - 12:31
PFD Fixed
Thanks for your patience, the pfd version is back up and working!
bhfrankel
Tue, 05/19/2020 - 12:48
I know it's been a few years…
I know it's been a few years but is this plan available as a pdf? None of the existing links work.
Ashley sis
Mon, 08/29/2016 - 04:18
Cost
Around about give or take how much did this project cost? I'm looking forward to trying these plans myself. It's beautiful what you have done!