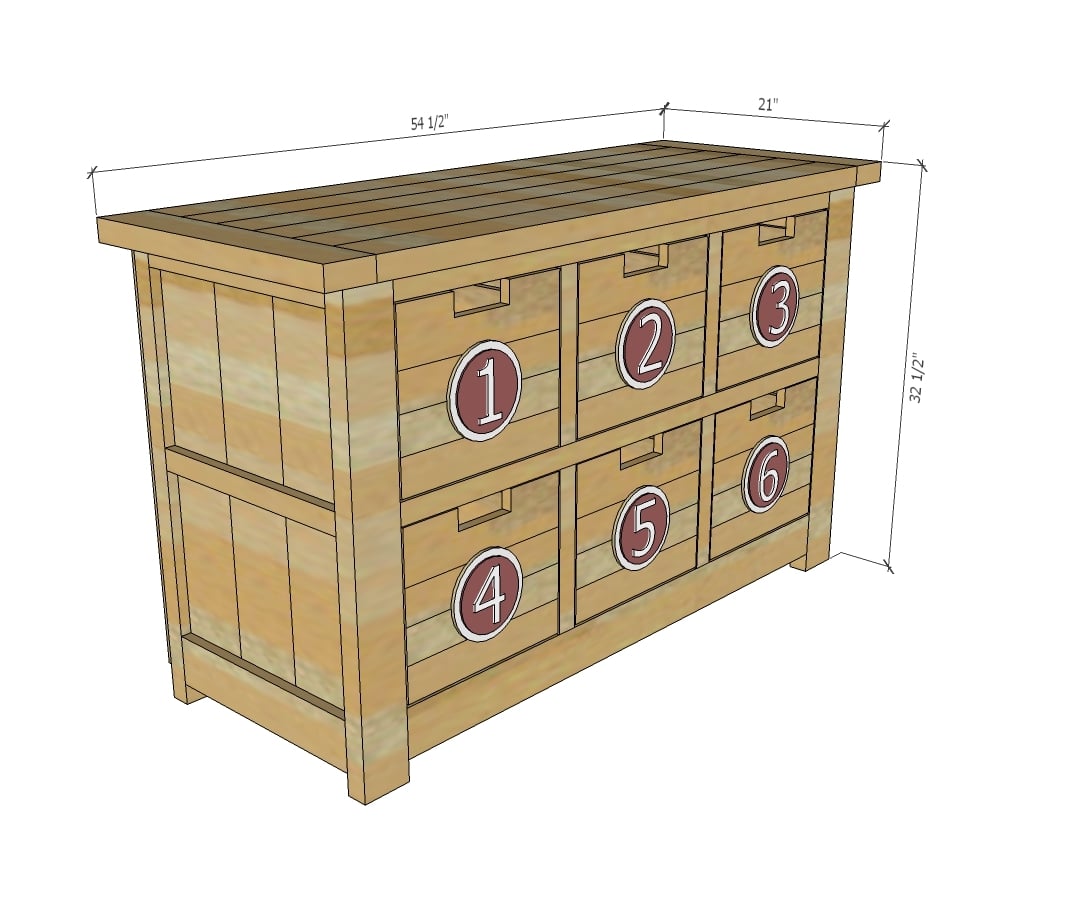
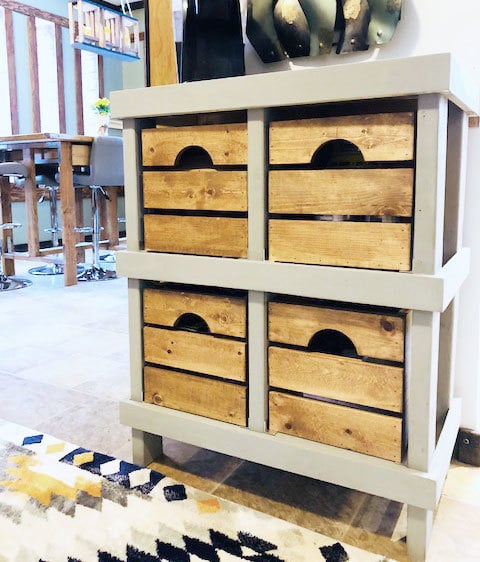
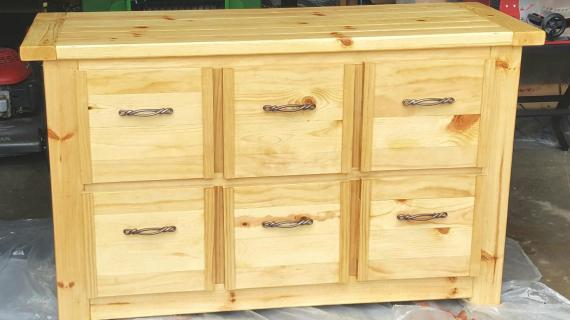
DIY dresser free tutorial with no drawer slides! This plan uses basic lumber, no plywood, and is easy to build. The boxes fit in the openings. Free step by step plans with diagrams and shopping and cut list from Ana-White.com
Preparation
- 8 - 2x4 @ 8 feet long
- 3 - 2x2 @ 8 feet long
- 3 - 1x2 @ 8 feet long
- 1 - 1x4 @ 3 feet long
- 2 - 1x6 @ 8 feet long
- 24 feet of 1x10 boards or other boards for drawer boxes
- 1 - 1x12 @ 8 feet long
FACE FRAMES
- 4 - 2x4 @ 31"
- 4 - 2x2 @ 43-1/2"
- 2 - 2x4 @ 43-1/2
- 4 - 2x2 @ 11-1/2"
REMAINDER OF CABINET
- 10 - 2x4 @ 16-1/2" (should be equal in length to the width of three 1x6s (see step 6)
- 8 - 1x2 @ 16-1/2" (drawer guides)
- 6 - 1x6 @ 29-1/2"
- 4 - 1x2 @ 16-1/2" (cut to fit)
- 2 - 1x4 @ 16-1/2" (cut to fit)
DRAWERS
- 6 - 1x10 @ 12-1/4"
- 12- 1x10 @ 17"
- 6 - 1/4" plywood @ 17-3/4" x 13-1/4"
- 6 - 1x12 @ 13-1/4"
TOP
- 6 - 2x4 @ 47-1/2"
- 2 - 2x4 @ 21"
This plan is designed to work with standard lumber dimensions as follows:
- 2x4 - 1-1/2" x 3-1/2"
- 1x12 - 3/4" x 11-1/4"
- 1x6 - 3/4" x 5-1/2"
If your lumber differs in dimensions, you will need to modify the plan.
Please read through the entire plan and all comments before beginning this project. It is also advisable to review the Getting Started Section. Take all necessary precautions to build safely and smartly. Work on a clean level surface, free of imperfections or debris. Always use straight boards. Check for square after each step. Always predrill holes before attaching with screws. Use glue with finish nails for a stronger hold. Wipe excess glue off bare wood for stained projects, as dried glue will not take stain. Be safe, have fun, and ask for help if you need it. Good luck!
Instructions
Step 1
Step 2
Step 3
Step 4
It is always recommended to apply a test coat on a hidden area or scrap piece to ensure color evenness and adhesion. Use primer or wood conditioner as needed.




Comments
carongirls
Wed, 10/15/2014 - 17:23
Love it!
I really really love this! I have been wanting to make a dresser for sometime now but all the plans were to difficult or required a small fortune in wood. This is pefect.
Bige
Sat, 05/09/2015 - 12:42
Drawer
I'm building the drawers now. The back measure is not adding up. The fronts are 13 1/4. The sides are 3/4 thick. So the backs should be 11 3/4 not 12 1/4? What am I missing?
pattiemelt
Thu, 08/24/2017 - 08:38
Just what I was wanting.
I love this dresser. It is exactly what I was thinking of buying/building for the house I am looking at to buy. I would much rather build it so I am glad I found this post. I am thinking of using 3/4" prefinished T&G hardwood flooring for the drawer fronts, sides & maybe the top. We'll see how it goes.
AhmaNaz
Tue, 07/05/2022 - 13:16
Face frame cuts
Clarifying question: For the face frame is it only the front that needs the 11.5 inch 2x2?The cut list only called for 4.