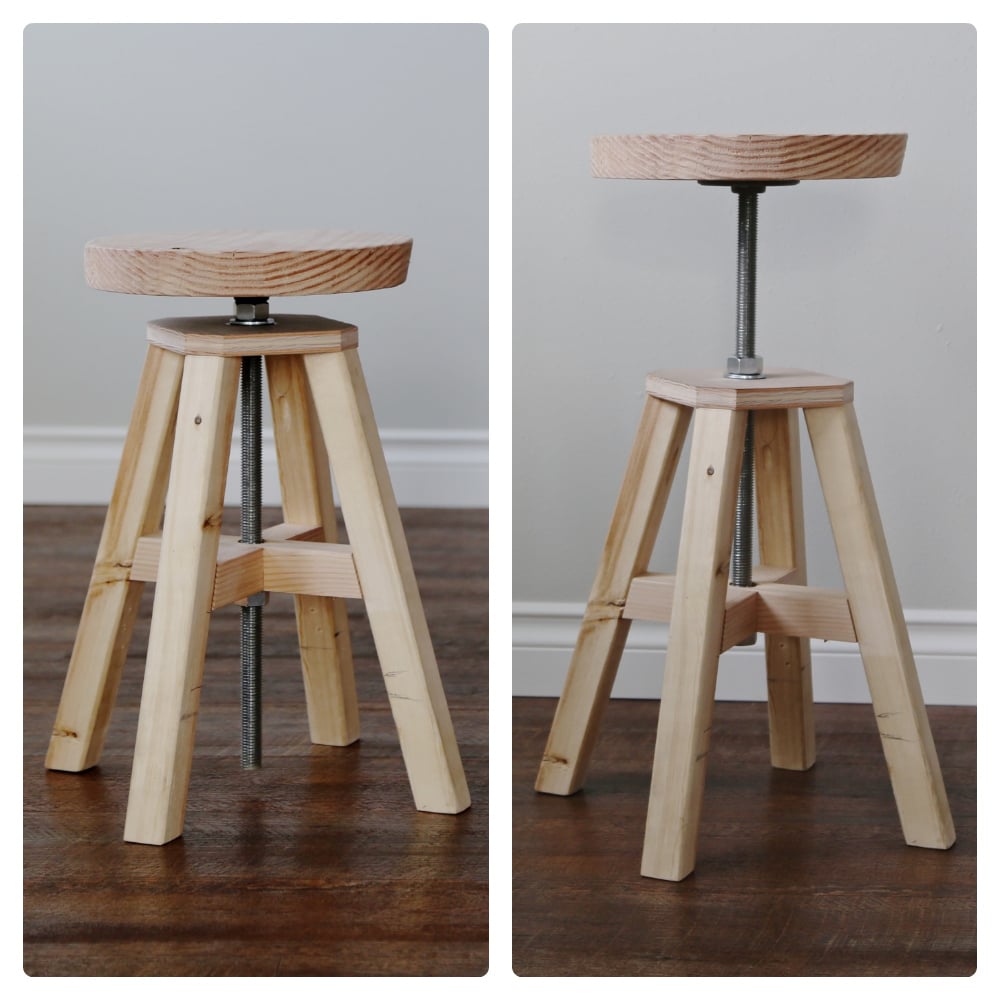
DIY Adjustable height stool made of hardware store parts and 2x2s. Free plans from ana-white.com
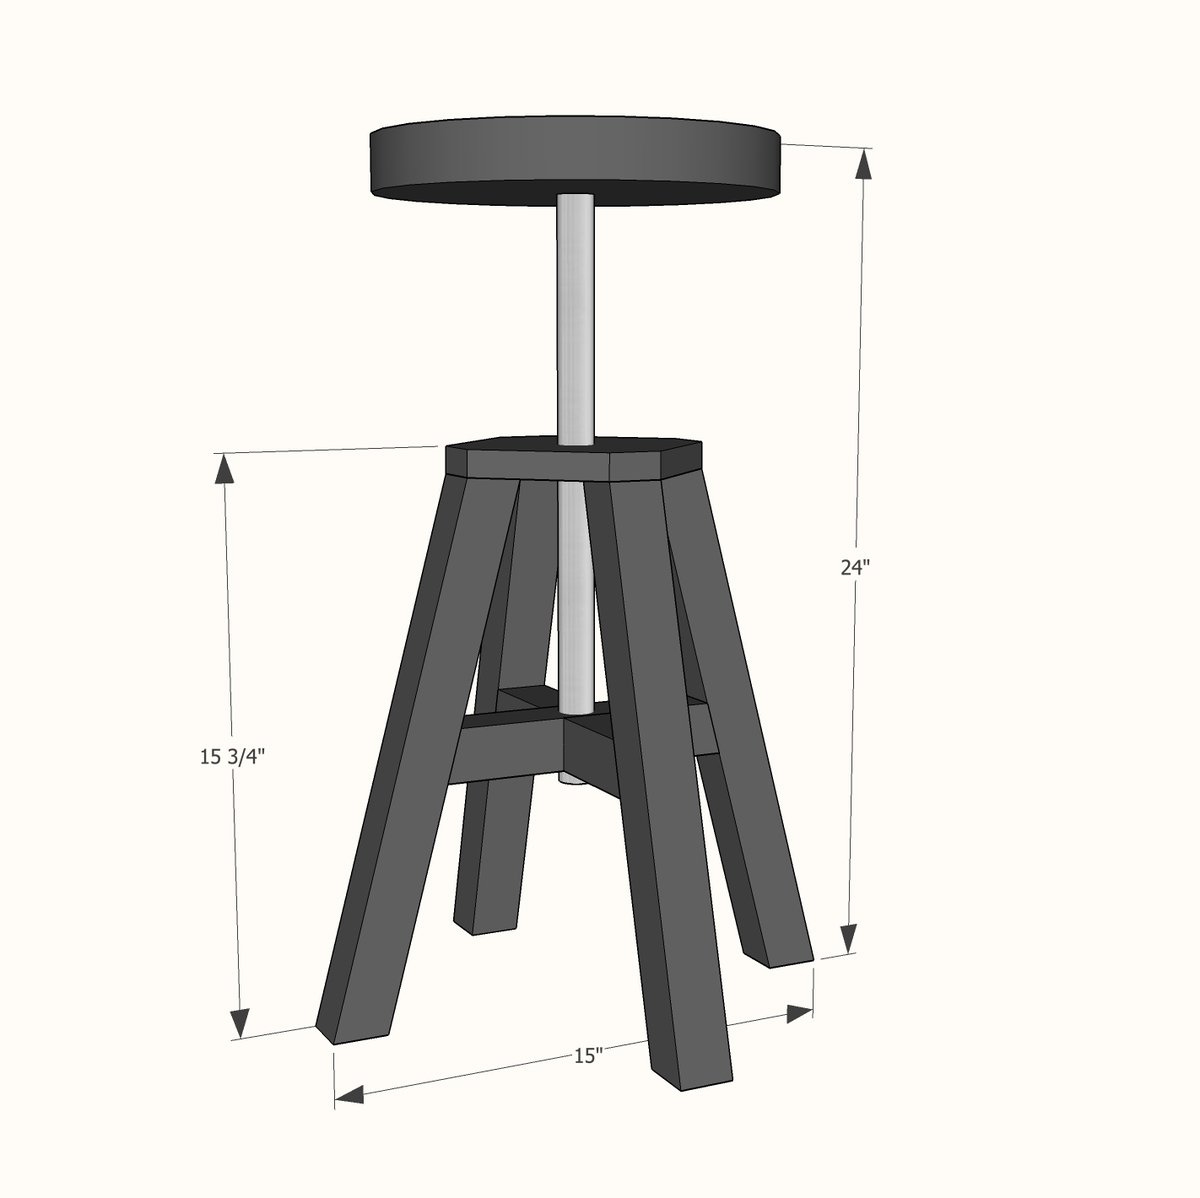
Preparation
1 - 2x2 @ 8 feet long
1 - piece of scrap plywood 6" x 6"
1 - 2x12 or 1x12 cut into a round circle (you can also buy a plywood round for a stool top at most hardware stores)
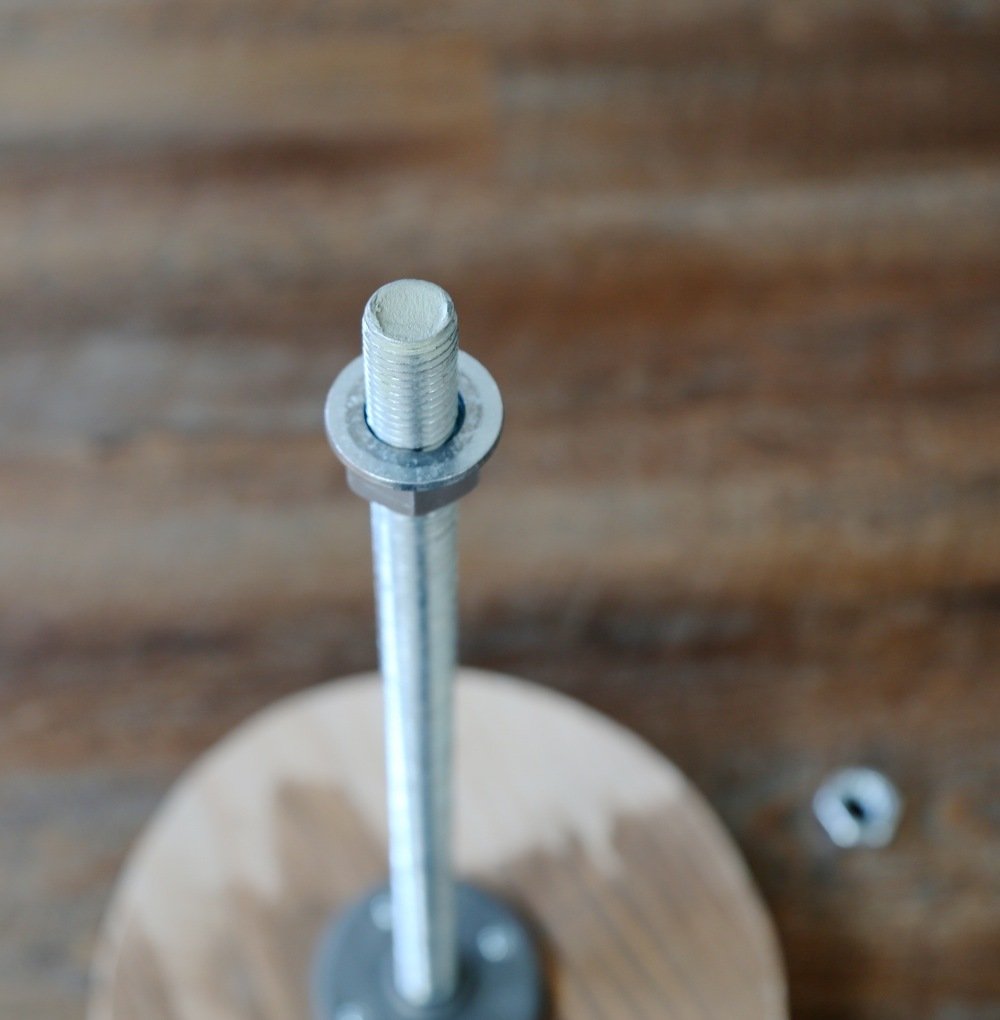
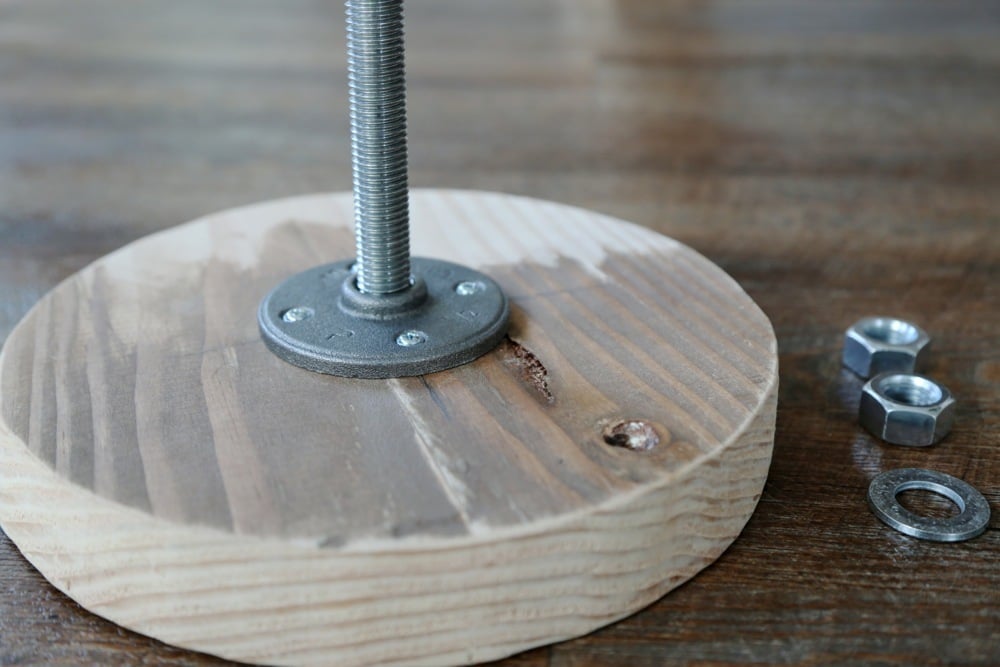
1 - 3/4" All-Thread 16" long (if you can't find 16" all-thead, you can cut it down easily with a jigsaw or handsaw with a blade designed to cut metal)
1 - 3/4" Floor Flange to match all thread (also recommend pipe thread tape for securing all-thread into the flange)
2 - bolts and washers to match the all-thread
2-1/2" pocket hole screws
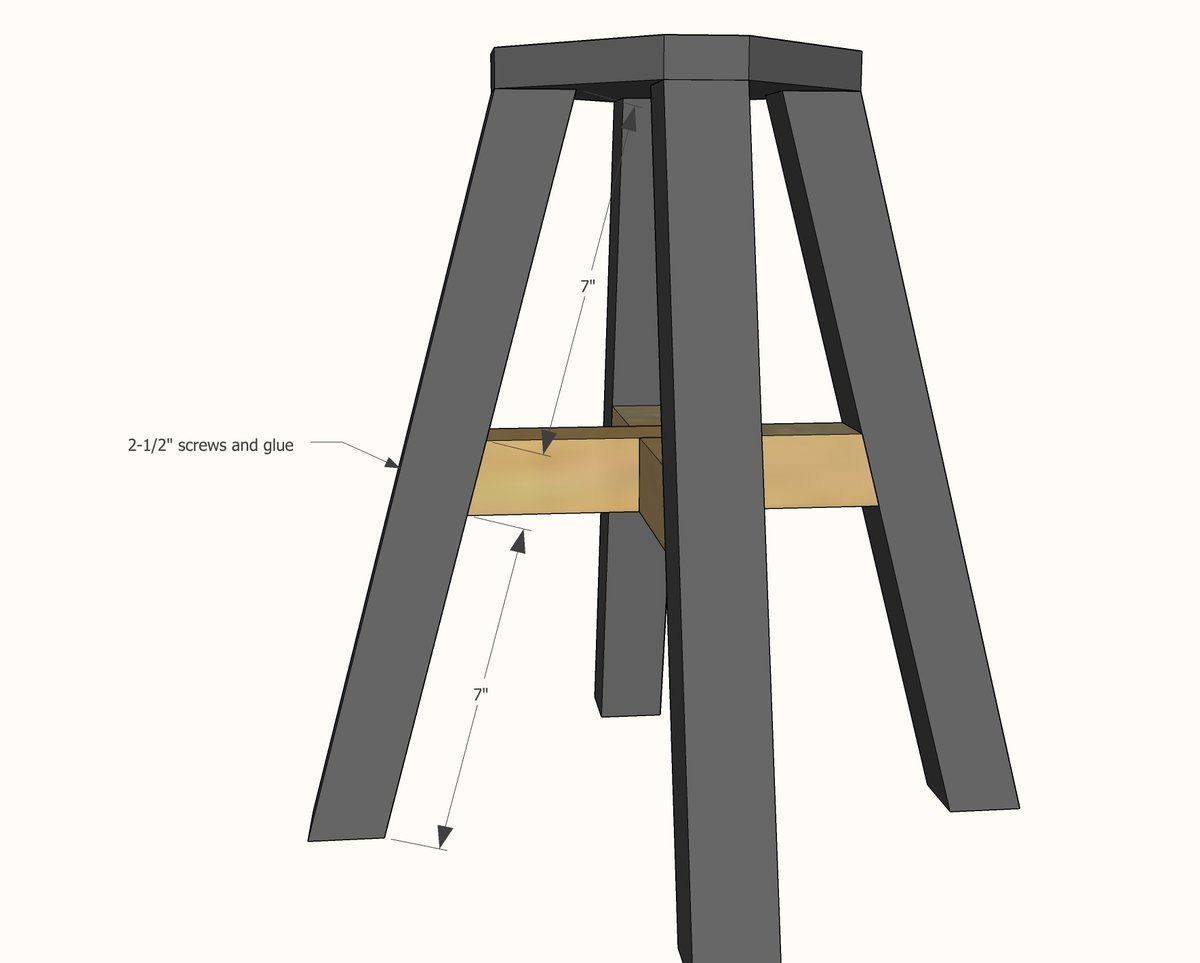
3" screws or lag bolts (heads will be visible) for attaching cross supports to the legs
1 - 3/4" thick plywood, 6" x 6"
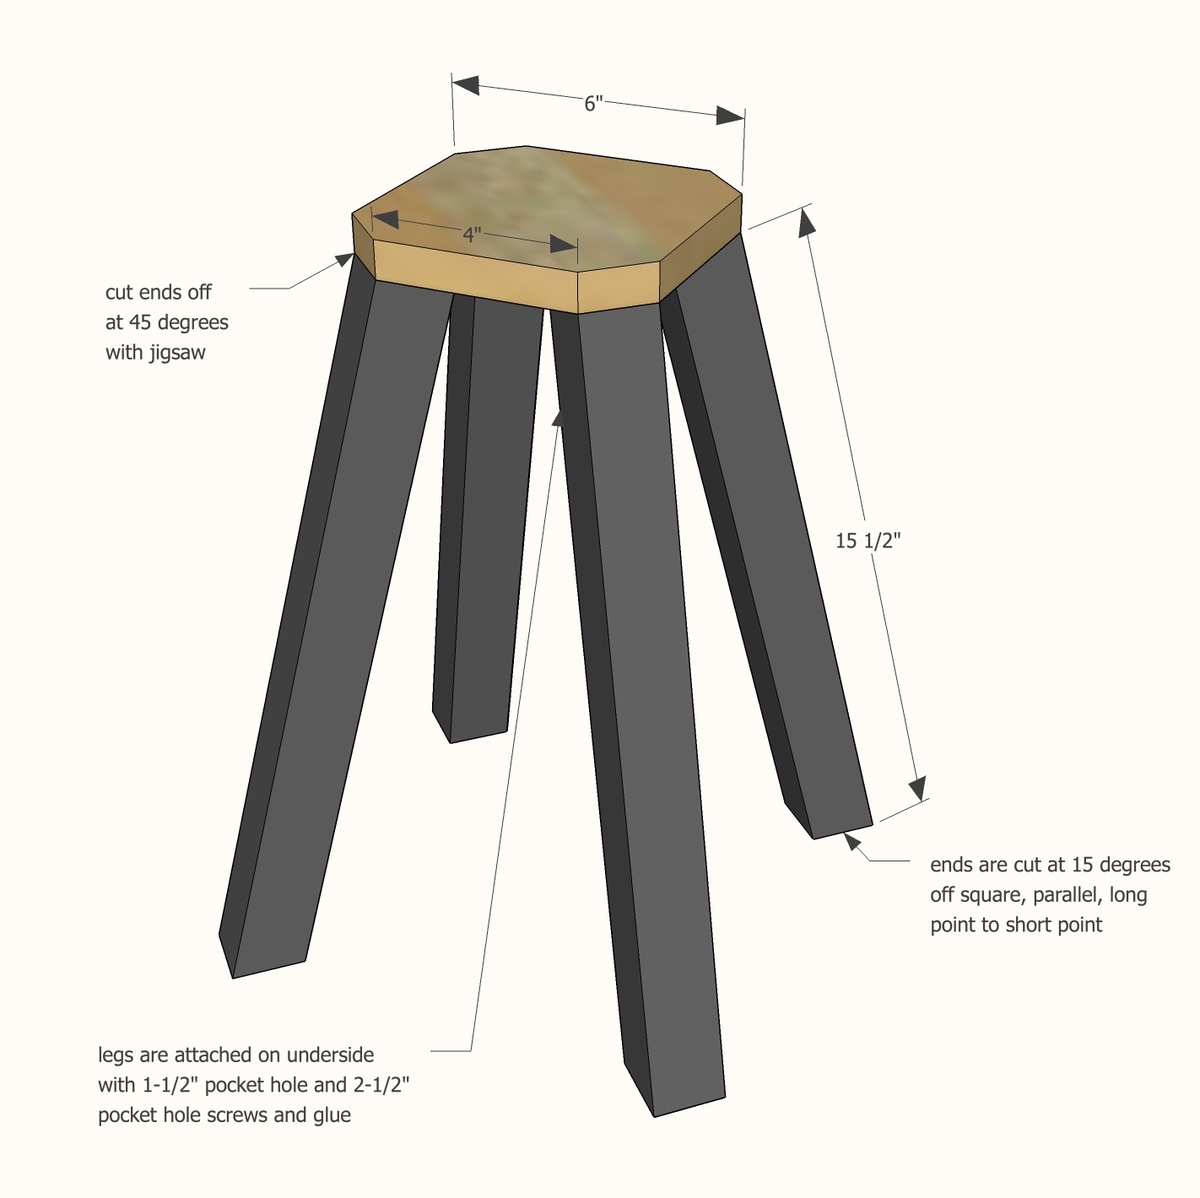
4 - 2x2 @ 15-1/2" long, long point to short point, both ends cut at 15 degrees off square, parallel to each other
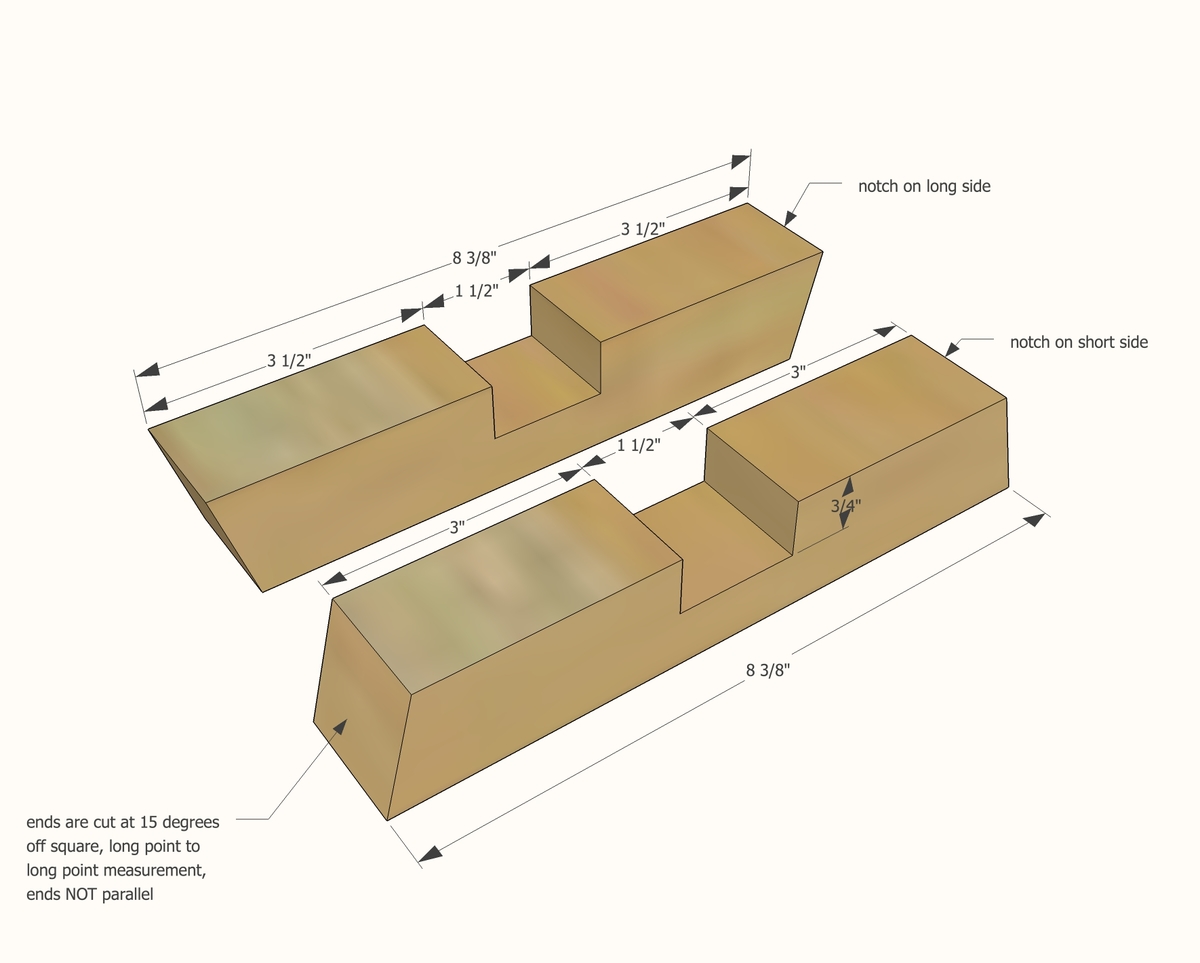
4 - 2x2 @ 8-3/8" long, long point to long point, both ends cut at 15 degrees off square, ends NOT parallel to each other
Please read through the entire plan and all comments before beginning this project. It is also advisable to review the Getting Started Section. Take all necessary precautions to build safely and smartly. Work on a clean level surface, free of imperfections or debris. Always use straight boards. Check for square after each step. Always predrill holes before attaching with screws. Use glue with finish nails for a stronger hold. Wipe excess glue off bare wood for stained projects, as dried glue will not take stain. Be safe, have fun, and ask for help if you need it. Good luck!
Instructions
Step 1
Step 2
Now this is the harder part of making this stool. There are easier ways but we felt that this was the right balance between difficulty and getting a nice looking project in the end.
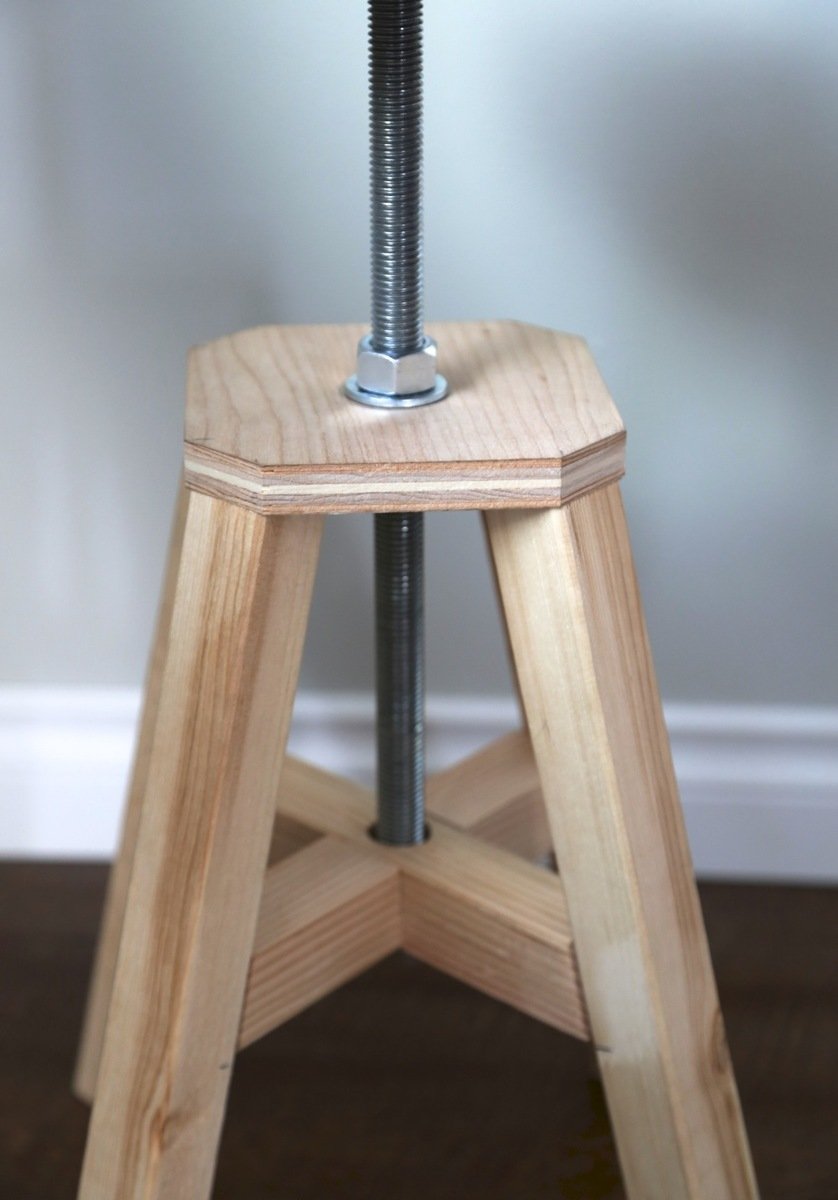
Use either a tablesaw or circular saw to notch out the cross support pieces (note that you notch one on top and one on bottom), 3/4" deep. You can do this by making multiple cuts with saw blade set at 3/4" in the area to notch out, and then remove any excess material with a chisel.
Test the pieces to make sure they fit together.
Step 3
Step 4
It is always recommended to apply a test coat on a hidden area or scrap piece to ensure color evenness and adhesion. Use primer or wood conditioner as needed.







Comments
katherinecm
Tue, 09/23/2014 - 11:06
Cost?
Hey Ana,
Can you ballpark the cost of this stool?
Thanks,
Katy
Pam the Goatherd
Tue, 09/23/2014 - 12:01
I love this! Now to figure
I love this! Now to figure out where I could use one or two of these in my home...
Geri-Anne Zubich
Wed, 09/24/2014 - 18:01
I would like to see a taller
I would like to see a taller stool. Thanks for all the great plans!
jkread
Thu, 09/25/2014 - 08:02
Yep for a taller version
I'd love to see a taller version I could make for use in the shop.
Locism
Mon, 01/19/2015 - 05:56
3/4" Floor Flange
We can you find 3/4" floor flange? I've seen1/2" but no 3/4".... people keep showing me floor flange for piping, Grrr!!!
AlexO
Mon, 01/19/2015 - 06:39
Floor Flange
Locism, It is a floor flange for piping... you can get them at Homedepot or lowes... I just bought 12 3/4" flanges for an entry table I am working on. For large projects I will be going to Essential Hardware online.. much cheaper
Locism
Tue, 01/20/2015 - 05:05
Floor Flange
Thanks AlexO. I'll need to look again... will try lowes this time.
I thought the 3/4" piping was to large because the 3/4" measurement was for the inside diameter an not the outside ie 3/4" threaded rod.
danielm05
Wed, 09/30/2015 - 07:51
Floor Flange
Locism - were you able to find a solution to this? I'm having the same issue with the 3/4" floor flange being too large.
Thanks
TamT
Thu, 02/04/2016 - 12:35
I have found that a 1/2" pipe
I have found that a 1/2" pipe floor flange is the closest to fit a 3/4" thread. Not sure how they are measured though.
asisk
Tue, 02/09/2016 - 10:01
I would love to see plans for
I would love to see plans for a taller stool!
Dsfcoex
Tue, 06/07/2016 - 02:35
Embedded nut
How practical would it be to embed the nut into wood so that when spinning the seat the nut would stay in place when raising or lowering stool seat
Dirk Medema
Tue, 06/07/2016 - 22:31
Embedded Nut
Embedding the nut could be a challenge to get the hexagonal hole. Once you get it, the wood would have a tendancy to deform and morph towards a round hole thereby wasting all your hard work. They do make a "nut" with teeth that are poke into the wood to anchor the nut when tightened. Sorry, can't remember the name.
Dirk Medema
Tue, 06/07/2016 - 22:37
T-nut
A threaded insert nut would work also.
nafzimo
Sat, 10/10/2020 - 18:02
why do I need 4 - 2x2 @ 8-3…
why do I need 4 - 2x2 @ 8-3/8" long? It appears that only two are used. Also, the plans call for 2 bolts but I think you meant nuts. Finally, why not use a second floor flange instead of nuts?
lewincd1@gmail.com
Thu, 09/09/2021 - 11:34
Tall Adjustable stool plans- Please
Would love plans for a taller r stool but, this was a fun build