


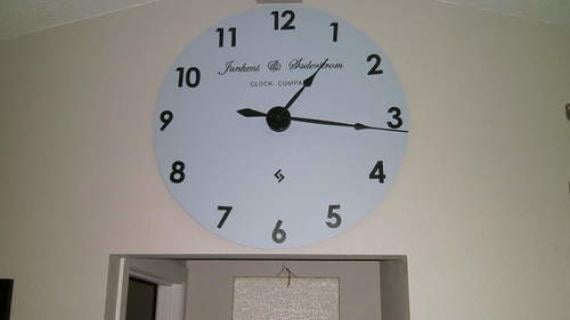
This clock is 40 inches in diameter. I used 1x8s to make the clock face, with about 1/2 inch between each of the planks. I secured the planks with two 1x1s screwed into the back of the planks (you can see bits of them in the picture). This also provided enough room in the back of the clock for the clock mechanism to sit without hitting the wall.
We set up the boards, traced out a circle on the boards and then separated them to cut the curves with a Jigsaw (I think- my husband did that part). Put the boards back together with the correct spacing and screwed the 1x1s into the back to hold the clock together.
To make this clock I ordered the KIT37 Clock Kit from Coastal Tide Clocks ($30). The clock mechanism is a little big thicker than we had hoped so we ended up having to chisel out a space for the mechanism in the back of the clock so that the hands of the clock would come all the way through. But now it works great!
I painted the clock the blue color, sanded it to give it a distressed look. I then used Roman Numeral stencils from Home Depot (made for mailboxes) and painted on black numbers. Sanded the whole thing again to distress the numbers. Stuck on a picture hanging kit and put the clock over the fireplace!
We love it and my mom asked me to make her a smaller version in cream for above her fireplace!
All in all it cost me less than $50 and maybe 3 hours of work (not including drying time). Quick and easy!

Preparation
Coastal Tide Clocks Kit
3- 1x8's at 8 feet long
1- 1x1 at 8 feet long


Please read through the entire plan and all comments before beginning this project. It is also advisable to review the Getting Started Section. Take all necessary precautions to build safely and smartly. Work on a clean level surface, free of imperfections or debris. Always use straight boards. Check for square after each step. Always predrill holes before attaching with screws. Use glue with finish nails for a stronger hold. Wipe excess glue off bare wood for stained projects, as dried glue will not take stain. Be safe, have fun, and ask for help if you need it. Good luck!
It is always recommended to apply a test coat on a hidden area or scrap piece to ensure color evenness and adhesion. Use primer or wood conditioner as needed.

Comments
Ana White Admin
Mon, 12/01/2014 - 13:50
Looks Great!
Thanks for sharing!