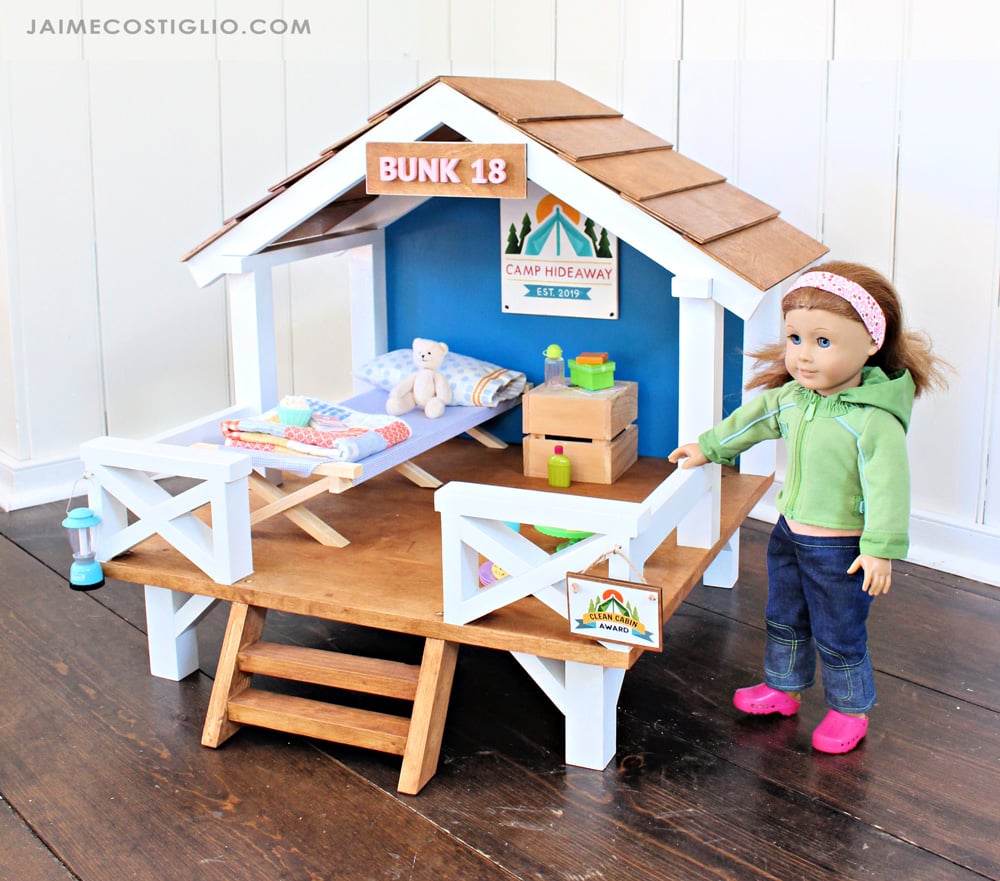


Free plans to build your own camp hangout for 18" or American Girl dolls. Uses standard off the wood lumber and just a drill and brad nailer or stapler for assembly.
Step by step plans with full diagrams, cut list and shopping list.
For the past seven years, Jaime Costiglio and I have collaborated on our Handbuilt Holiday series in the 12 weeks leading up to Christmas.

You can see all the plans in this collection here.
This week's Handbuilt Holiday is for the 18 inch doll fans - if your child loves American Girl, My Life or Our Generation dolls, here's an amazing gift that you can build for much less!
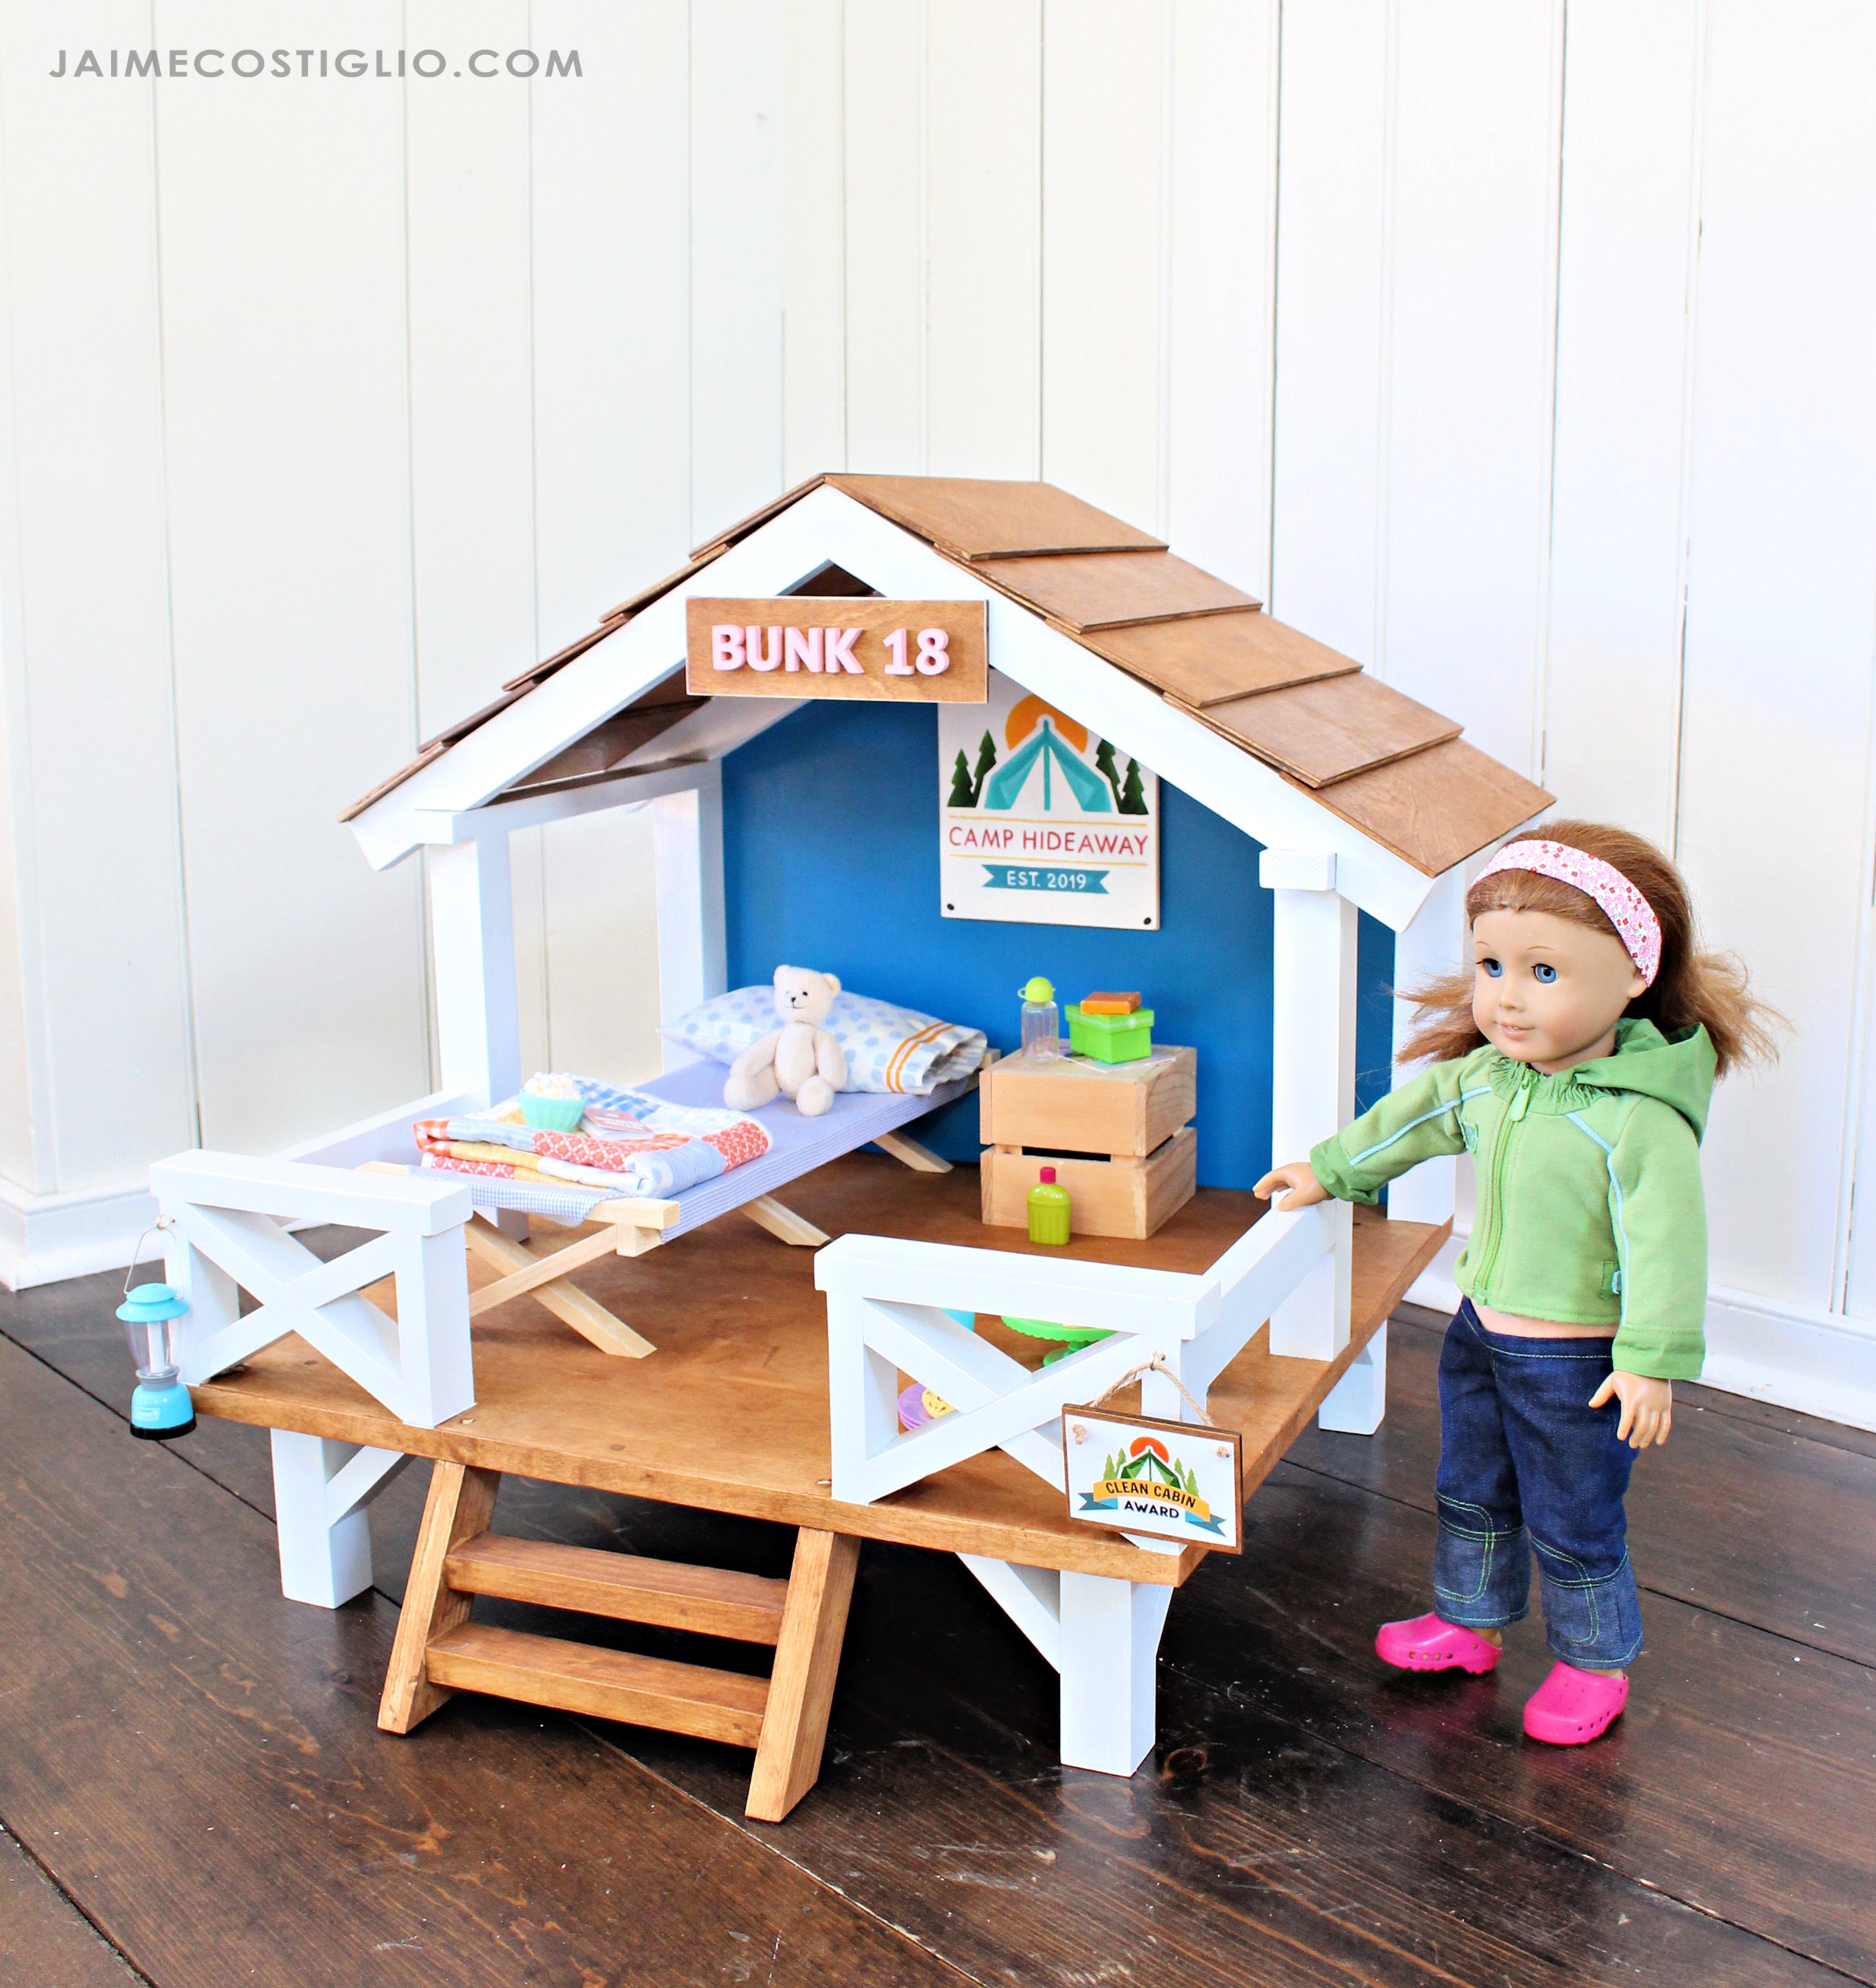
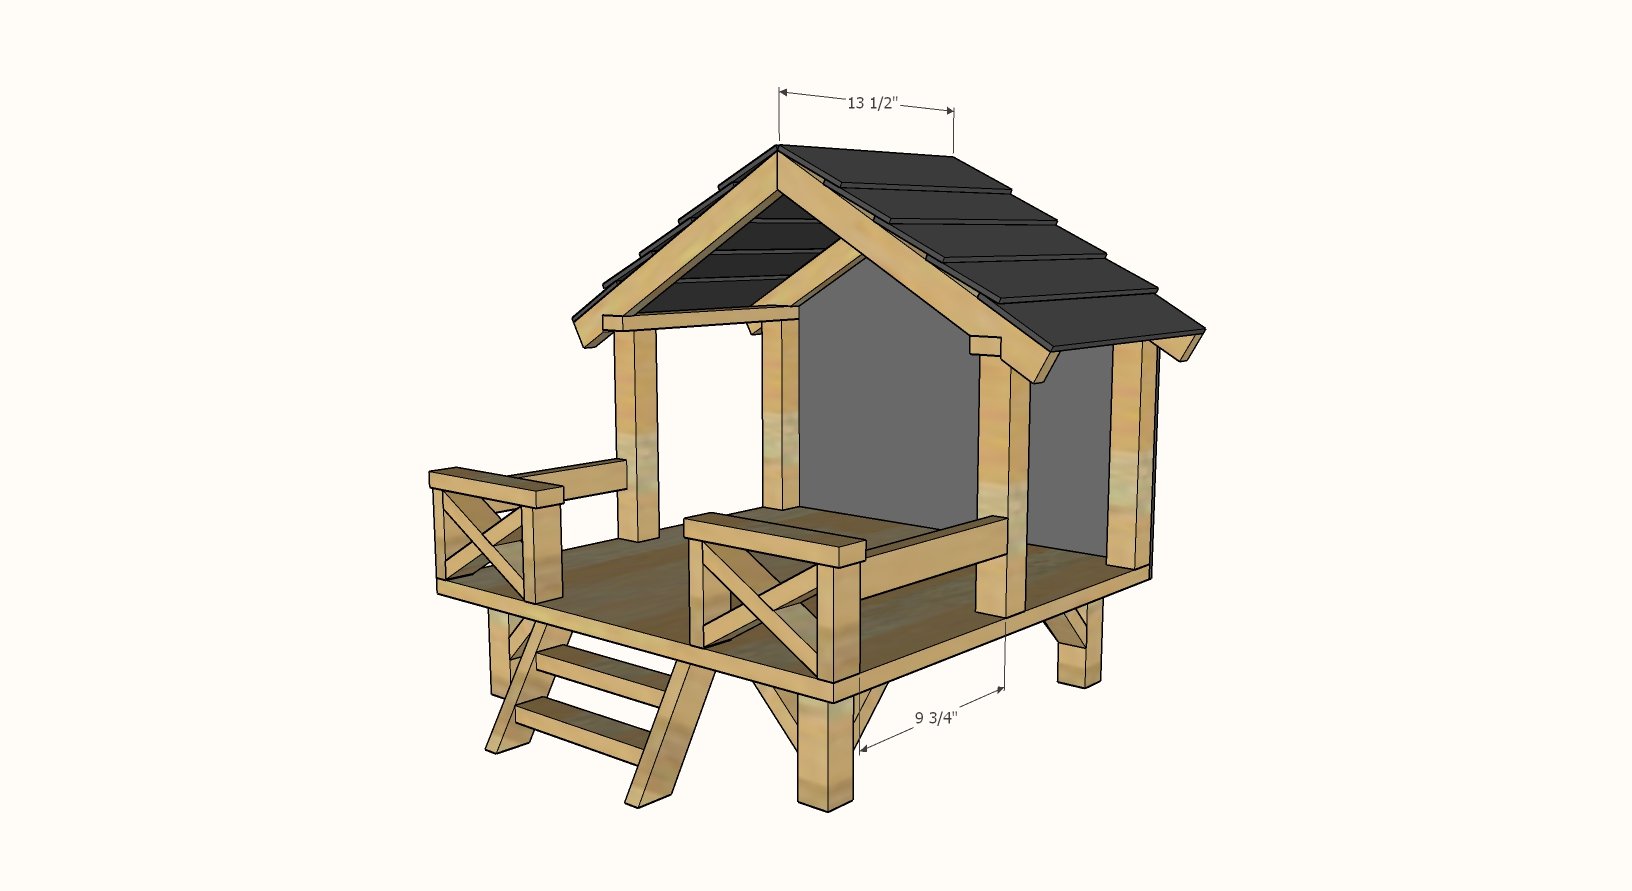
It's a camp hideaway playhouse set that fits 18" dolls! We were inspired by the American Girl Camp Hideout (retail $185) which was inspired by The Handmade Home's Kid Sized Hideaway. You can build it for MUCH less and WAY cuter.
Wood vs Plastic
Our DIY version is made from wood - so it is biodegradable so will eventually go back to nature (instead of filling a landfill indefinitely). Wood is easy to repair, and repaint or refinish, should you want to update or remodel for the next generation.
We also love the look and feel of wood too! You can use scrap wood to really cut the cost down and clean up your shop.
Accessories
The accessories are what make this playset so beautiful! Jaime created many of these herself using scrap wood pieces! Please visit JaimeCostiglio.com for more information on the accessory creation.
More American Girl Plans
We have lots more American girl plans, everything from huge dollhouses to doll bunk beds and playsets.
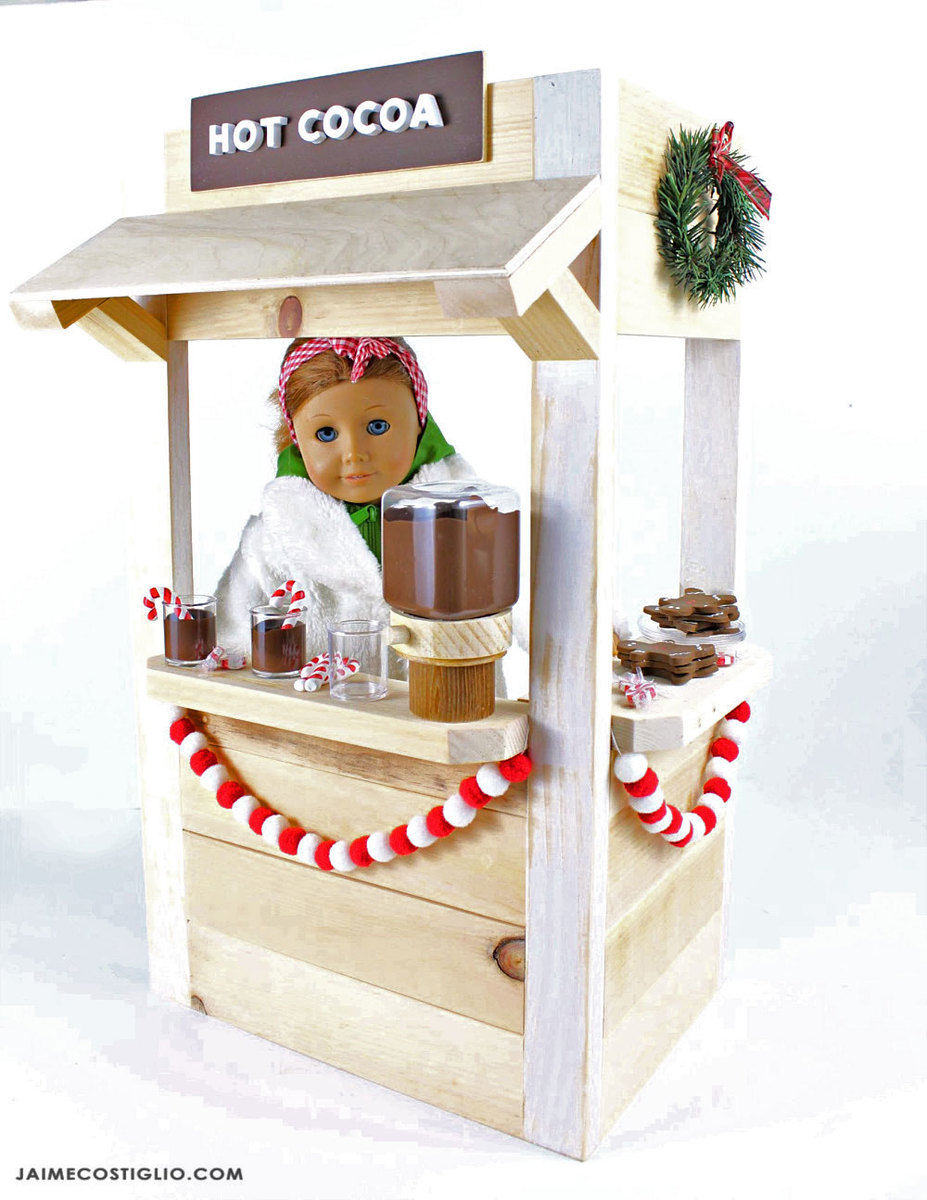
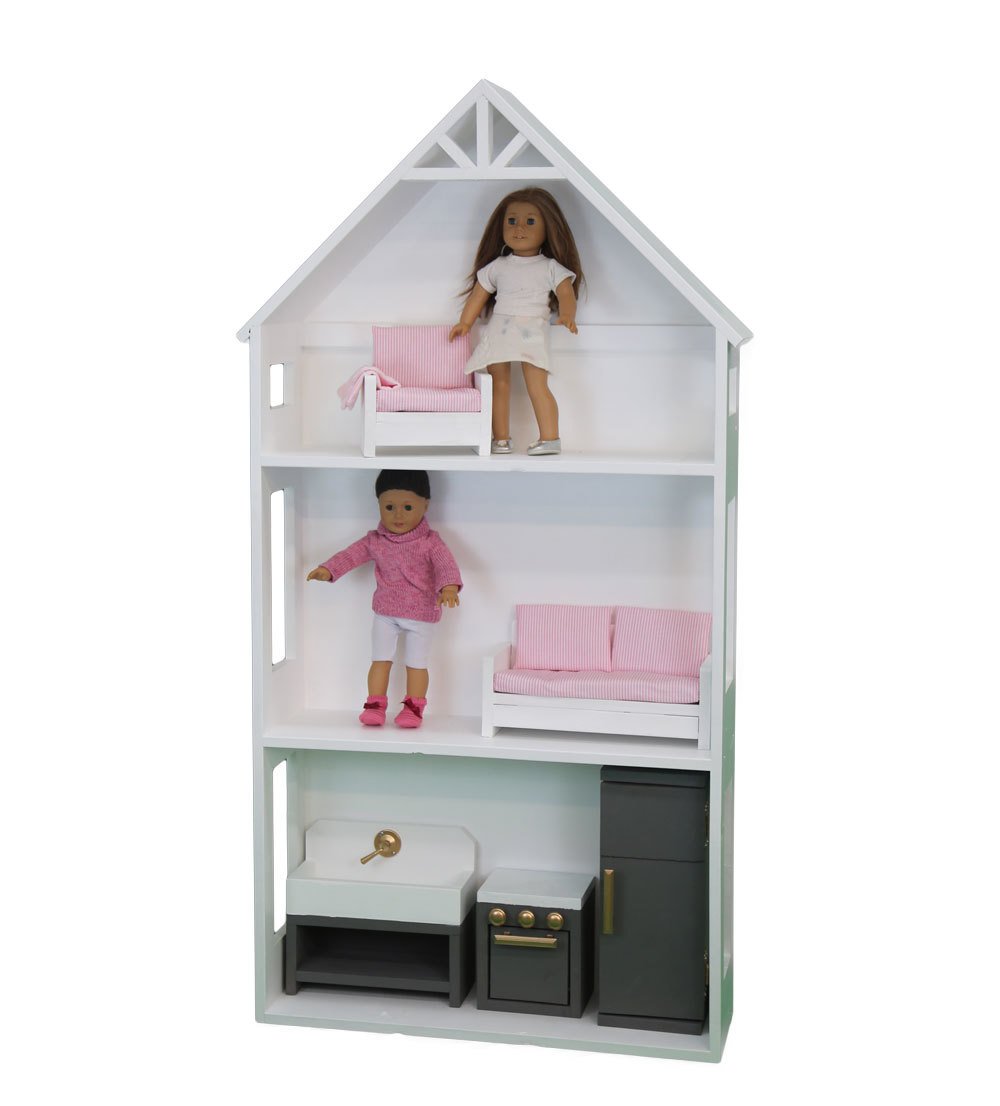
A few of our favorite American Girl plans are the market stand and the small space dollhouse. You can find all these plans and much more here.
Plans for the Camp Hideaway
The free plans for this camp hideaway follow. If you build, we ask that you submit a brag post so others can see how your project turned out. Please include any helpful insights and photos.
Please take a second to hop over to read Jaime Costilgio's build post with lots more photos.
Pin For Later!

Preparation
1 - 3/4" plywood @ 24" x 24"
1 - 1/4" plywood, 24" x 48"
1 - 2x2 @ 6 feet long
3 - 1x2 @ 8 feet long
1-1/4" and 3/4" brad nails
2" self tapping wood screws (Spax or similar, #7 preferred but #8 is ok - can be slightly longer or shorter depending on what is available at your hardware store)
Base
- 1 - 3/4" plywood @ 24" x 24"
- 4 - 2x2 @ 5"
- 8 - 1x2 @ 4-1/4" - long point to long point, both ends cut at 45 degree bevels, ends NOT parallel
House
- 2 - 1x2 @ 13-1/2" (shown in plans as 17")
- 4 - 2x2 @ 11"
- 4 - 1x2 @ 16-1/2" - one end cut at 30 degrees off square, longest point measurement
- Back plywood is 24" x 20-1/4" - cut angles for roof off
- 8 - 1/4" plywood pieces @ 4" x 13-1/2" - first cut the scrap from the back plywood into strips 4" wide x ~27-1/2" long, then cut into the 13-1/2" lengths
Railing
- 4 - 1x2 @ 4-1/4"
- 2 - 1x2 @ 7-3/4"
- 2 - 1x2 @ 6-5/8" - both ends cut at 30 degrees bevel, ends ARE parallel, long point to short point measurement
- 4 - 1x2 @ 3-3/8" - both ends cut at 30 degree bevel, ends are NOT parallel, long point to short point measurement
- 2 - 1x2 @ about 9-3/4" - railing sides, should be cut to fit the width of the opening
Stairs
- 2 - 1x2 @ 5-3/4" long - both ends cut at 30 degrees off square, long point to short point measurement
- 2 - 1x2 @ 8" long
This plan has many small cuts at angles. Do not cut small pieces from small pieces. Instead, cut a small piece off a long board to avoid an injury.


Instructions
Step 1

Attach legs to the 3/4" plywood base using the 2" screws.
Set in as shown in diagram.
Step 2

Attach cross bracing to legs with 1-1/4" brad nails and wood glue.
Step 3
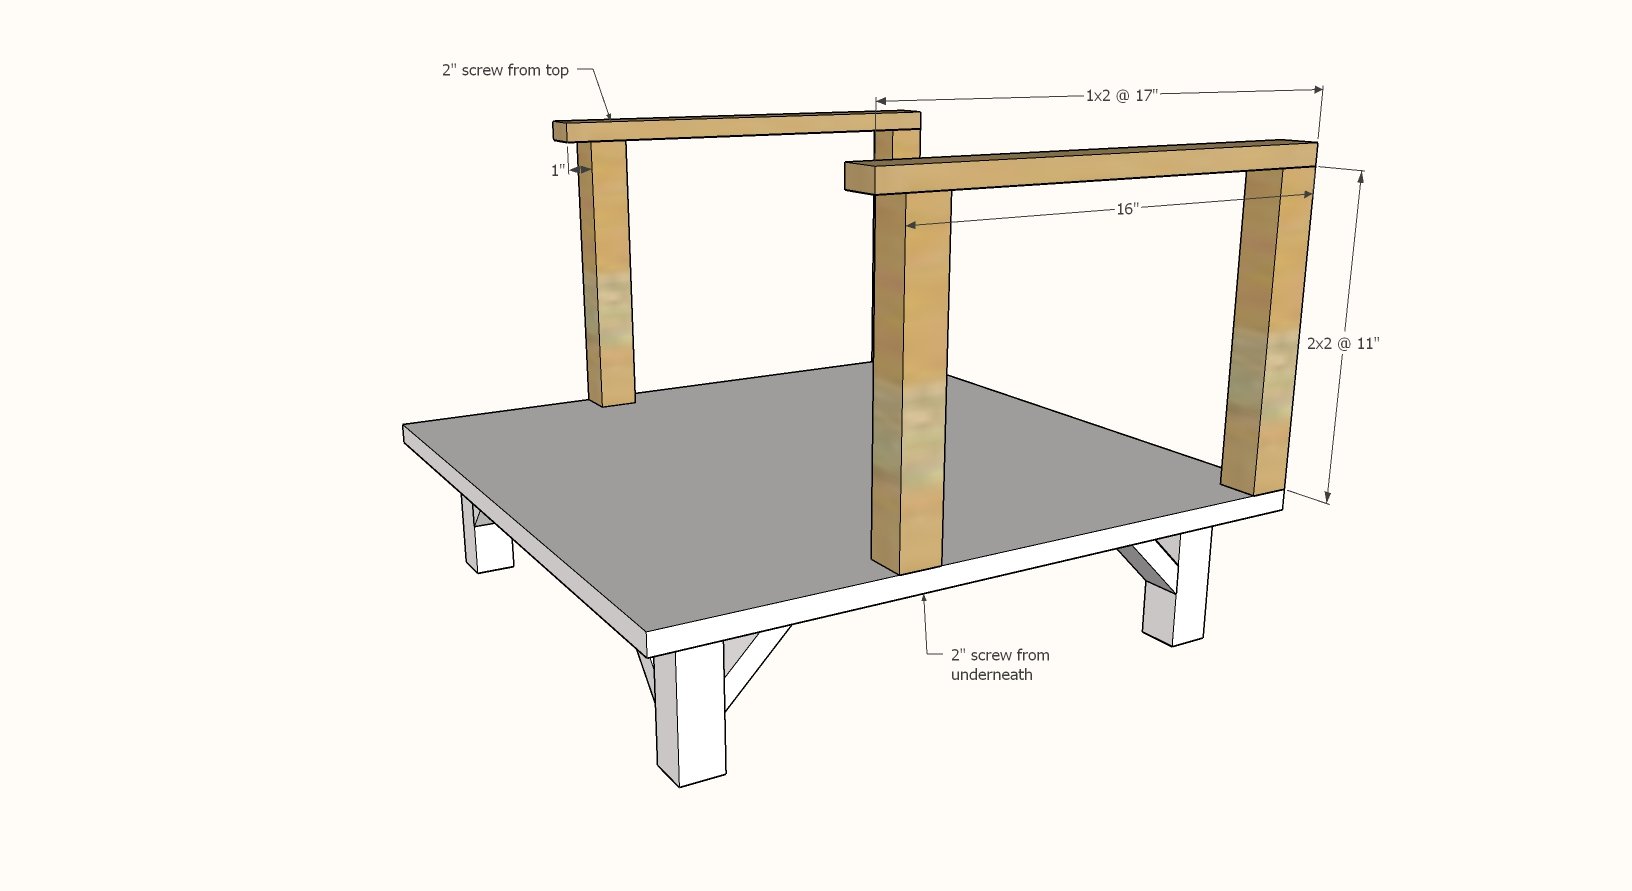
Attach 1x2 to top of 2x2. You can overhang the front slightly to create more detail in the finished product.
Attach walls to base from underneath.
PLAN NOTE: As shown in photos, we shortened the top 1x2s to 13-1/2" long to allow for easier access inside the "cabin" and to make the plywood roof pieces fit from the scraps from the back.
Step 4
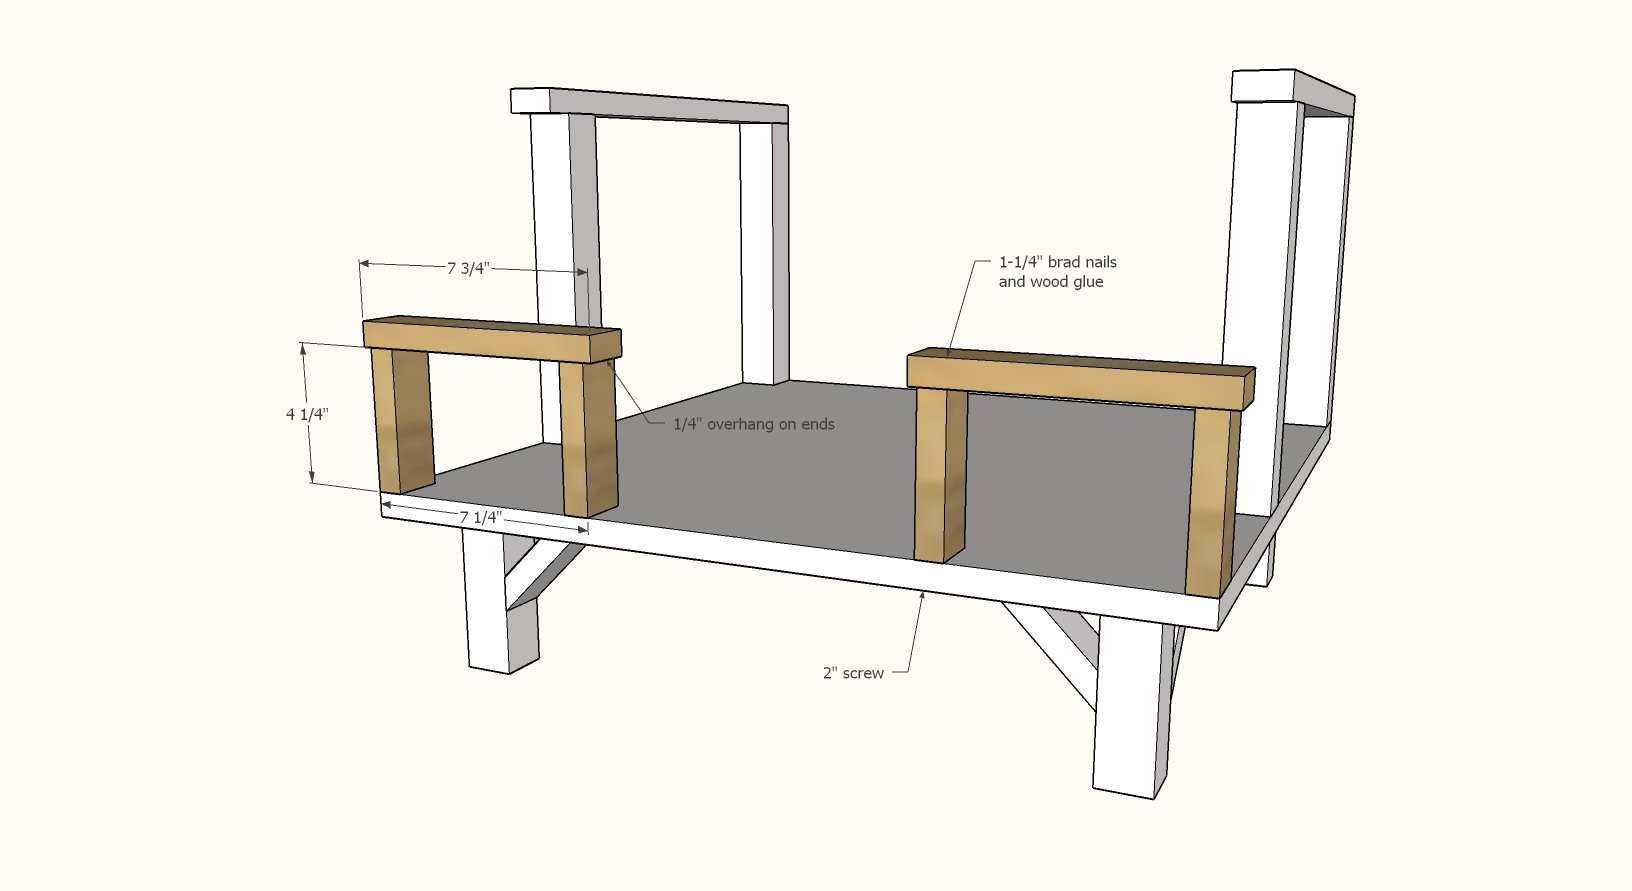
Build railing by nailing pieces together with glue. Clamp the pieces to a workbench when attaching.
Note overhangs.
TIP: Wait until after you add the X detailing (next step) to attach to the 3/4" plywood floor.
Step 5

Cut railing detailing inside the railing frames. Make sure they fit.
Glue and nail pieces together inside the frames.
Attach railings to the 3/4" plywood floor.
Step 6

Measure the distance from the railing to the 2x2 "wall" piece. Cut two 1x2s to this measurement.
Attach with glue and predrilled holes and 2" screws. You can also use 2" brad nails and glue or hot glue.
Step 7

Use a jigsaw to cut out the birdsmouth in the rafter tails.
Attach two rafters together at the top.
Then attach rafters to the roof.
You can set back from the front of the 1x2 to add some detailing.
Step 8
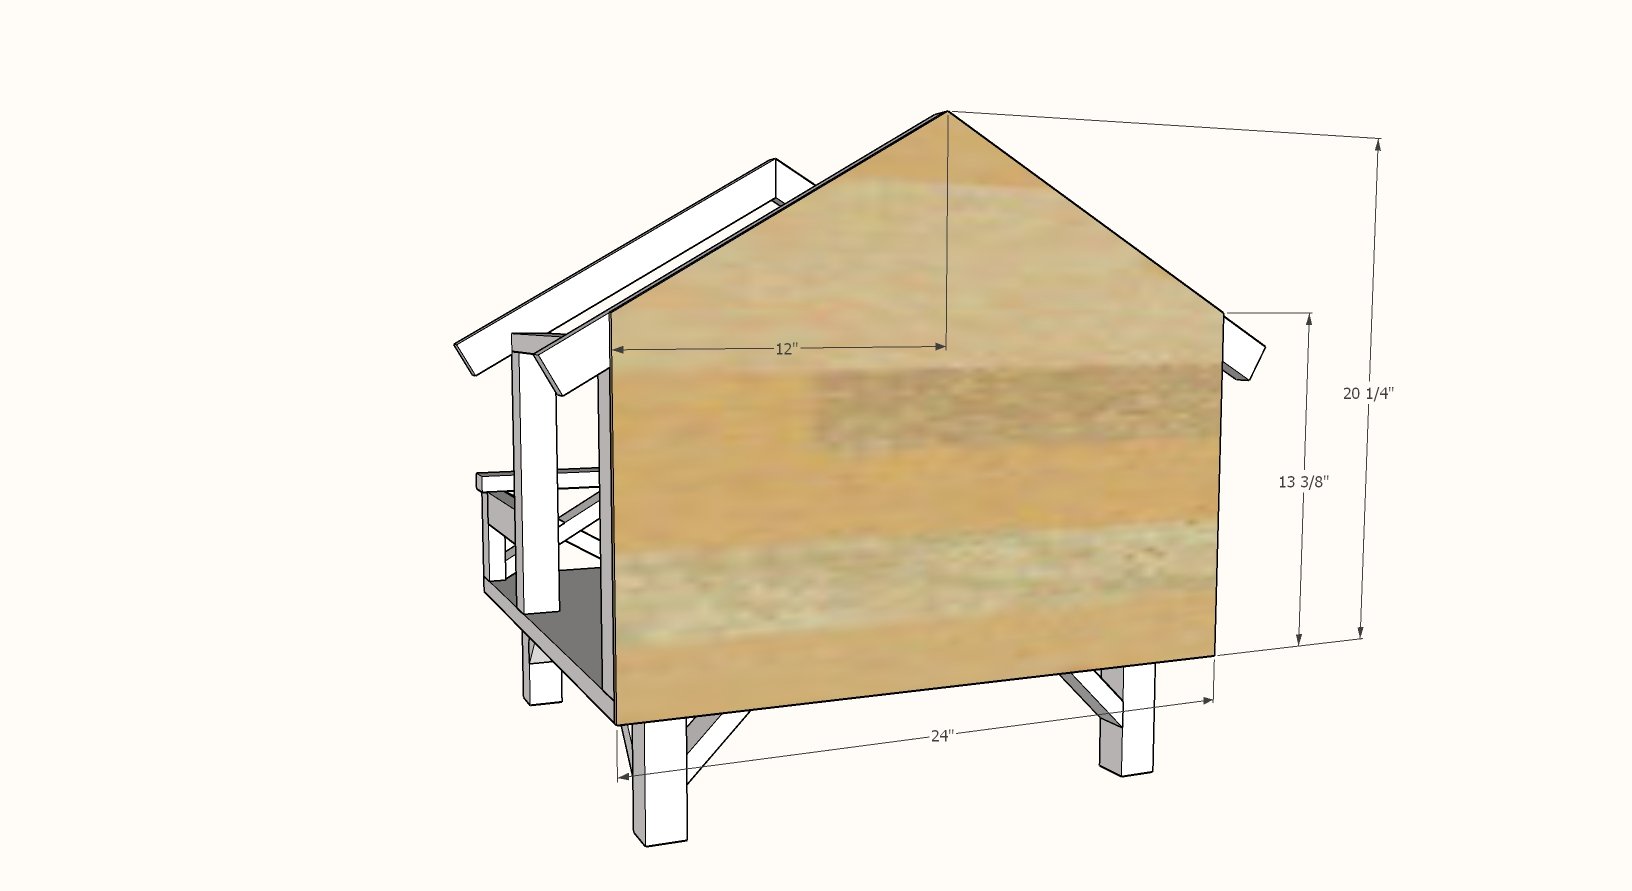
Cut 1/4" plywood 24" wide x 20-1/4" tall.
Place on back of cabin and trace outline of the rafters.
Cut on traced lines with either a jigsaw or circular saw.
Attach with 3/4" brad nails and wood glue.
Step 9
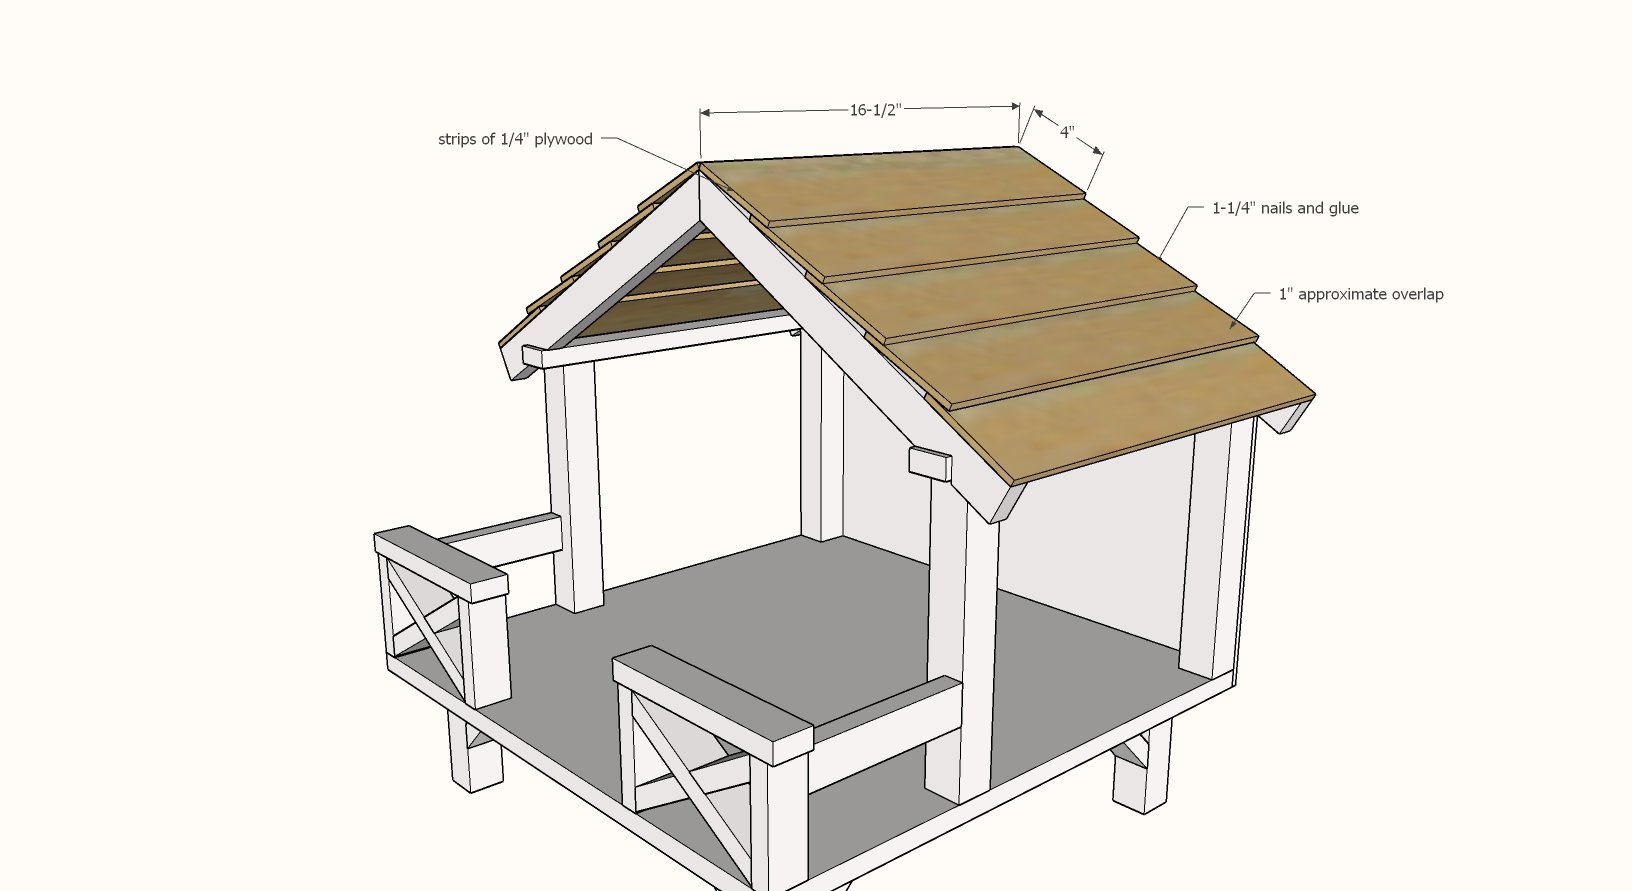
From remaining 1/4" plywood, cut into strips 4" long by about 27-3/4" long.
Then cut those strips to 13-1/2" long.
Attach working from the bottom up to the rafters, with about a 1" overlap.
Step 10
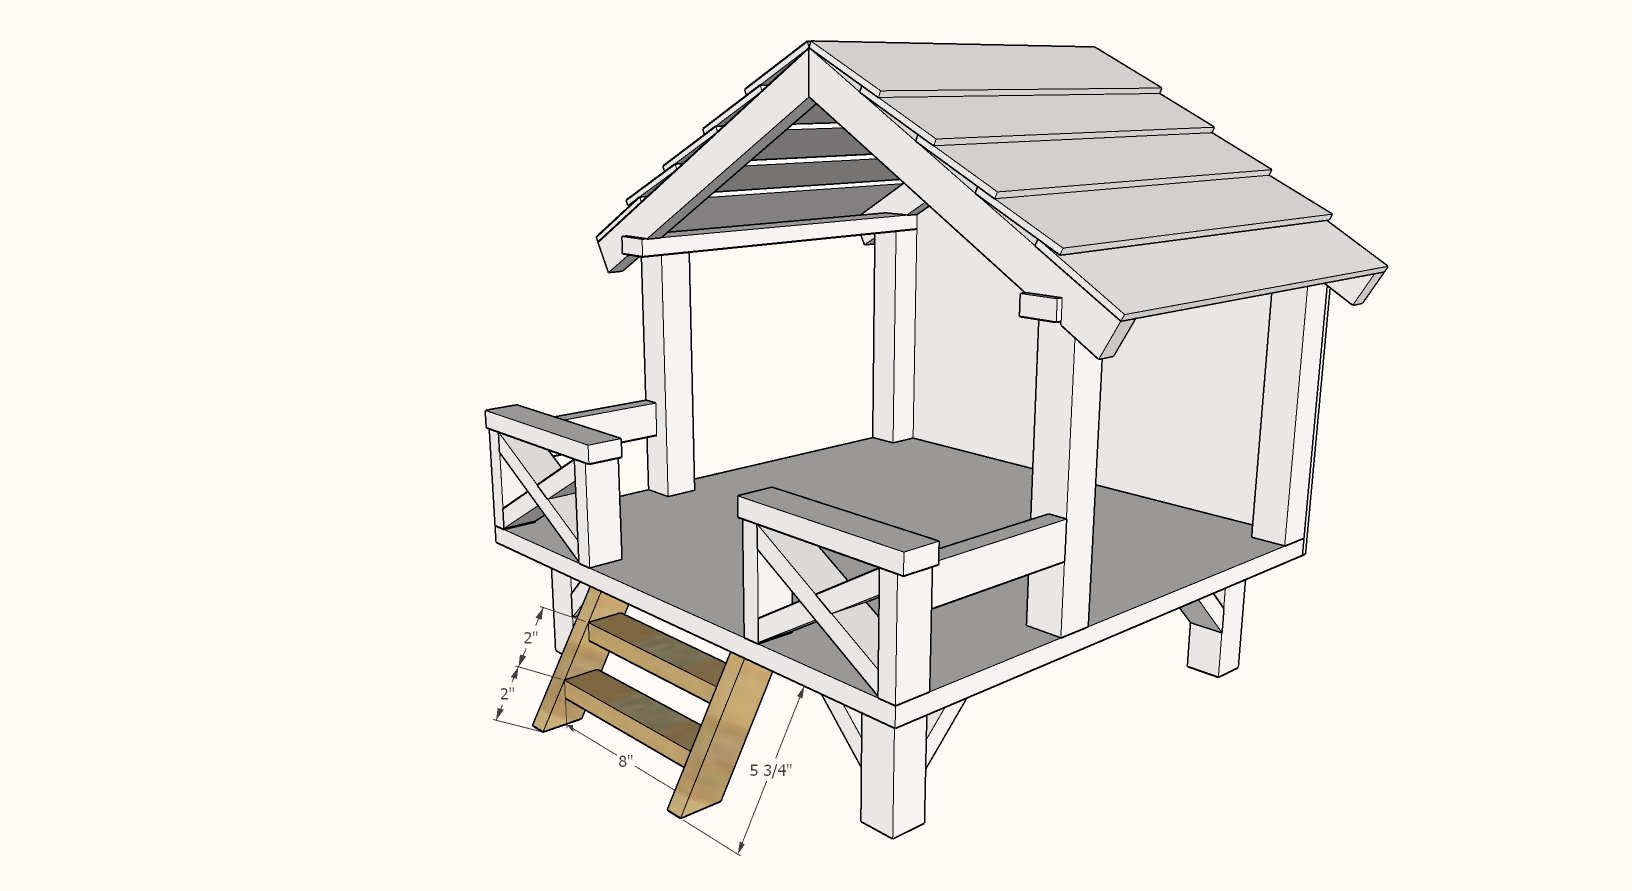
Attach the stair treads to the stringers with 1-1/4" brad nails and glue.
Then attach to the plywood floor with 2" screws and glue.
