Easy to Build Small Modern Desk or Modern Keyboard Stand

The free plans on this website are supported with advertising and affiliate revenue.  When you click some links in this plan, you may be helping us earn a small commission.  Thank you for supporting this website.


diy keyboard stand
Difficulty
Starter Projects
| Print this plan

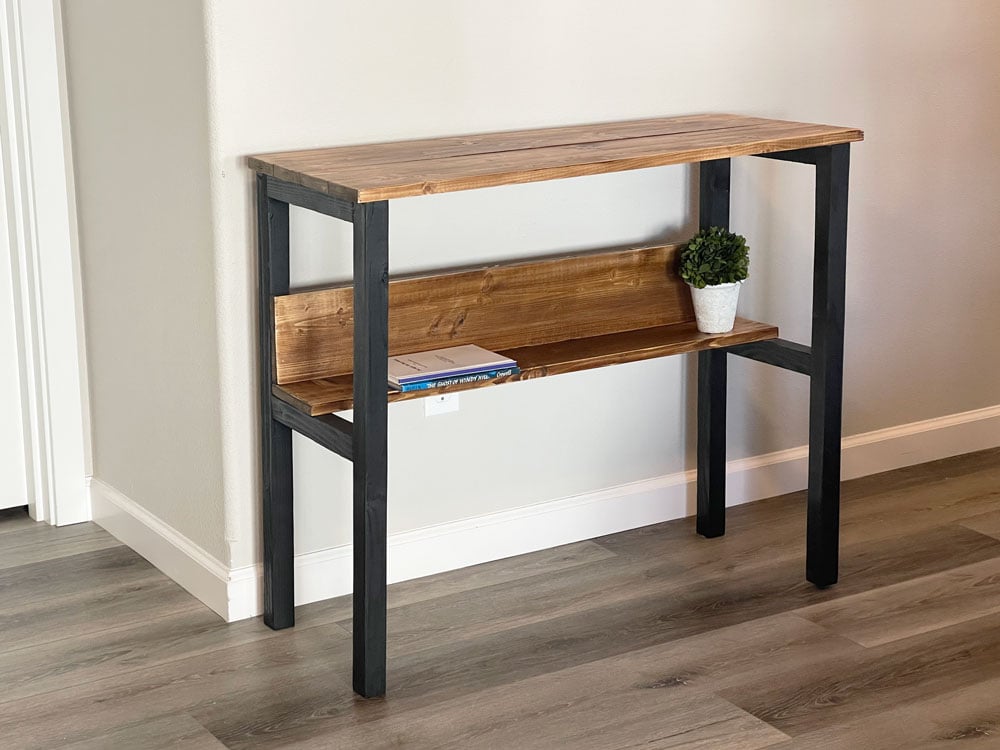
Build your own keyboard stand.  This is a free tutorial using off-the-shelf lumber and basic tools to help you build your own keyboard stand.  Step by step diagrams, shopping and cut lists make it easy - all free from Ana-White.com.

Keyboard Stand Features

  • SUPER easy to build!
  • Inexpensive
  • Solid wood can be stained or painted any color
  • Can be customized in height and length
  • Simple modern design blends with almost any decor style
  • Compact and perfect for small spaces
  • Can be used as a console table or desk

Keyboard Stand Build Video

This keyboard stand was built by our Ana-White.com video editor for her family, Jen.  Jen was kind enough to put a quick video together showing the steps to build it.  Jen considers herself a beginner woodworking.  Take a second to watch!


Pin for Later!

Easy to Build Modern Keyboard Stand

Dimensions
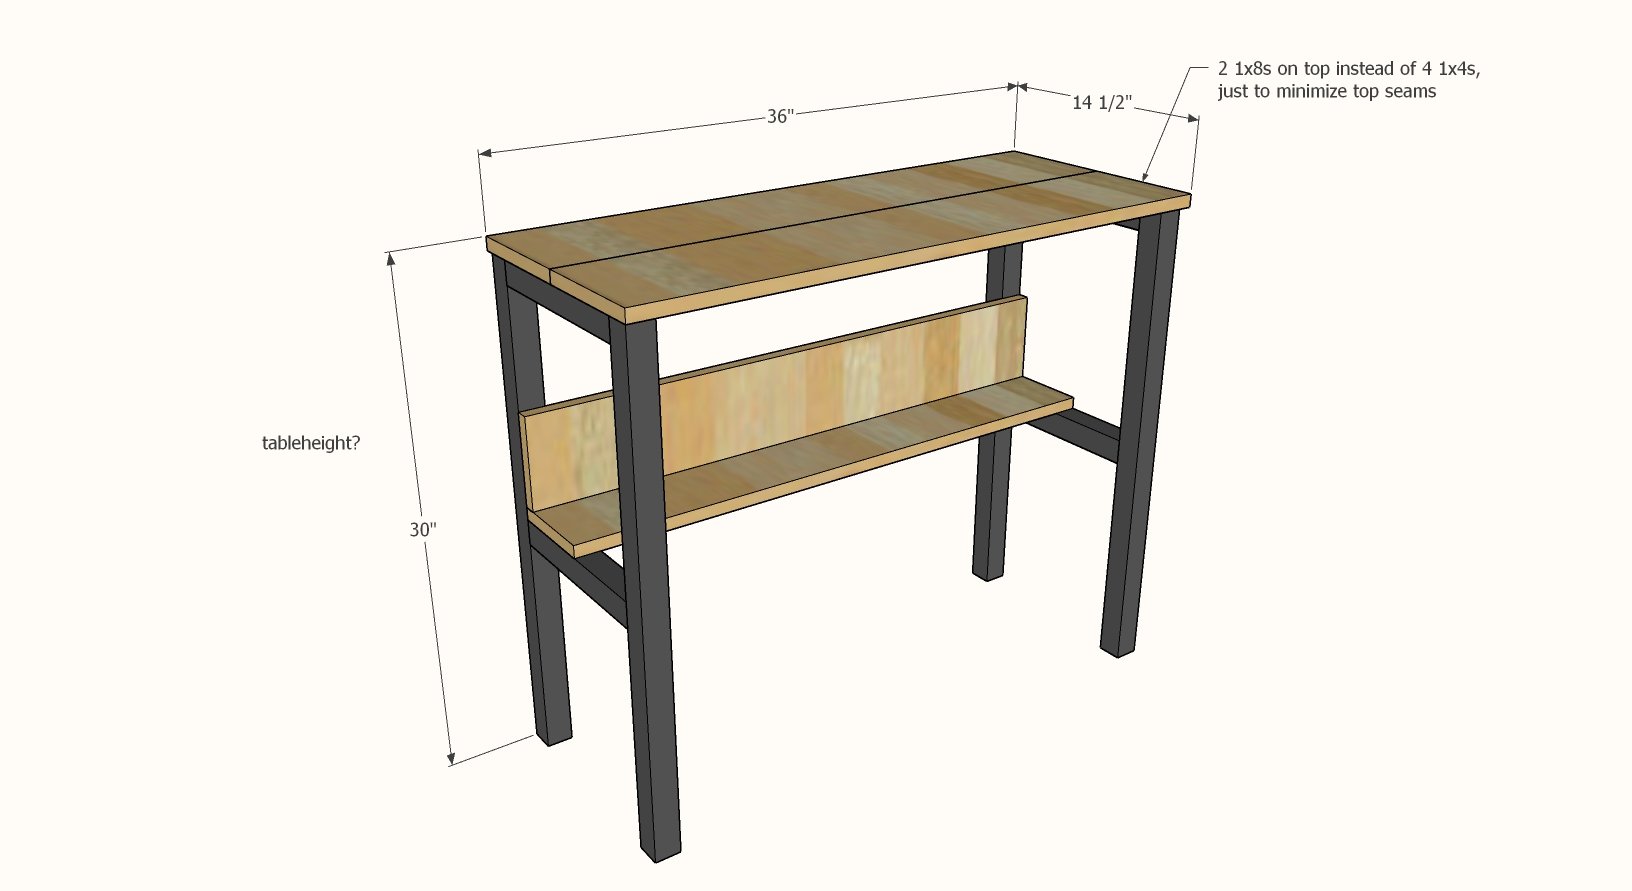
Keyboard stand dimensions diagram
Keyboard stand dimensions shown in diagram, table height

Preparation

Shopping List
  • 1 - 1x6 @ 6 feet long
  • 1 - 1x8 @ 6 feet long
  • 3 - 2x2 @ 8 feet long
  • 2-1/2" pocket hole screws (recommended) or 2-1/2" self tapping star bit construction screws (spax or similar)
  • 1-1/4" brad nails
  • wood glue
Cut List
  • 4 - 2x2 @ 29-1/4" long - legs
  • 4 - 2x2 @ 11" long - leg aprons
  • 1 - 2x2 @ 32" - center support
  • 2 - 1x8 @ 36" - top
  • 2 - 1x6 @ 35" - bottom shelf
Tools
Tape Measure
Speed Square
Pencil
Safety Glasses
Drill
Miter Saw
Brad Nailer
Power Sander

Instructions

Step 1

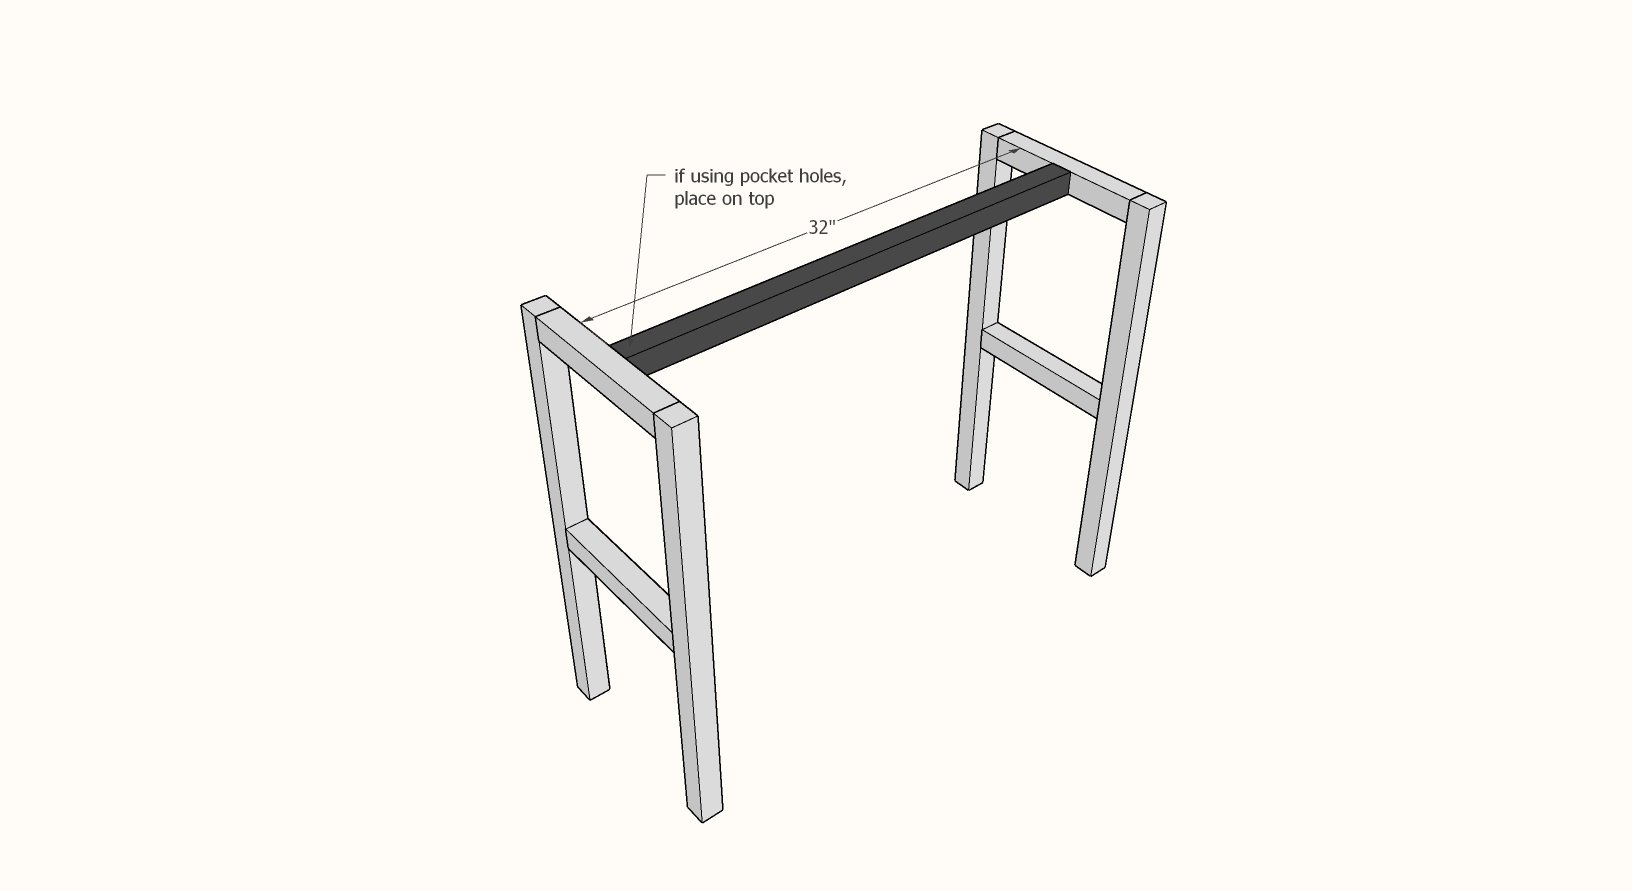
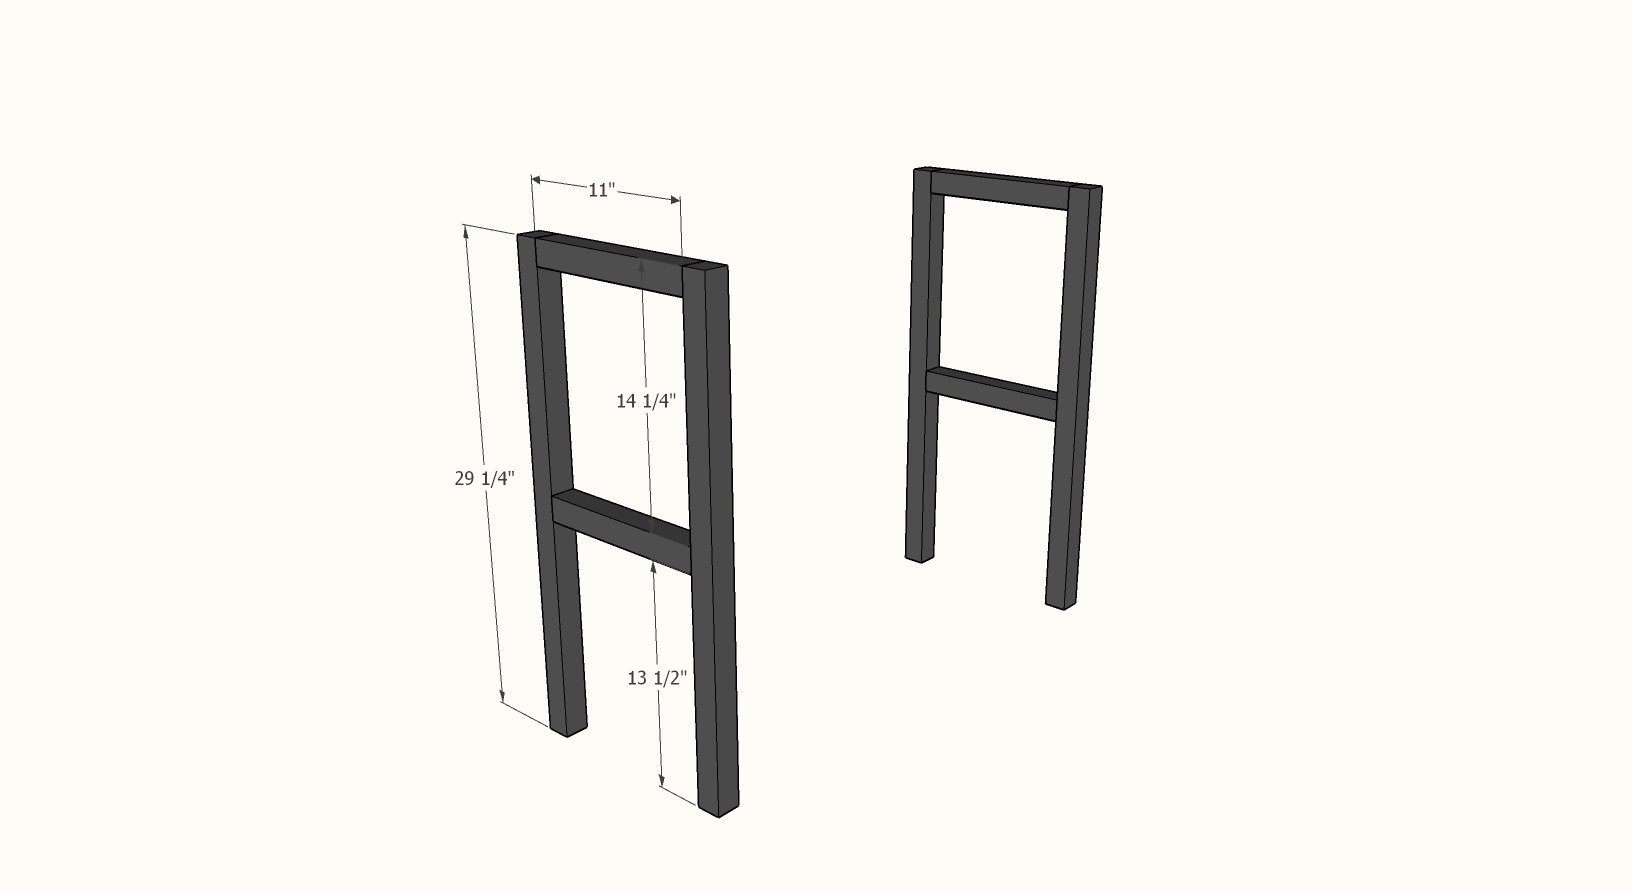
Build two leg sets as shown .

If using pocket holes, set pocket hole jig for 1-1/2" thick material and use 2-1/2" pocket hole screws.  Place pocket holes on top for top rung, on bottom for bottom rung.

If using self tapping screws, apply glue and screw together from outside.

Step 2

Use same method to add the top center support.

Step 3

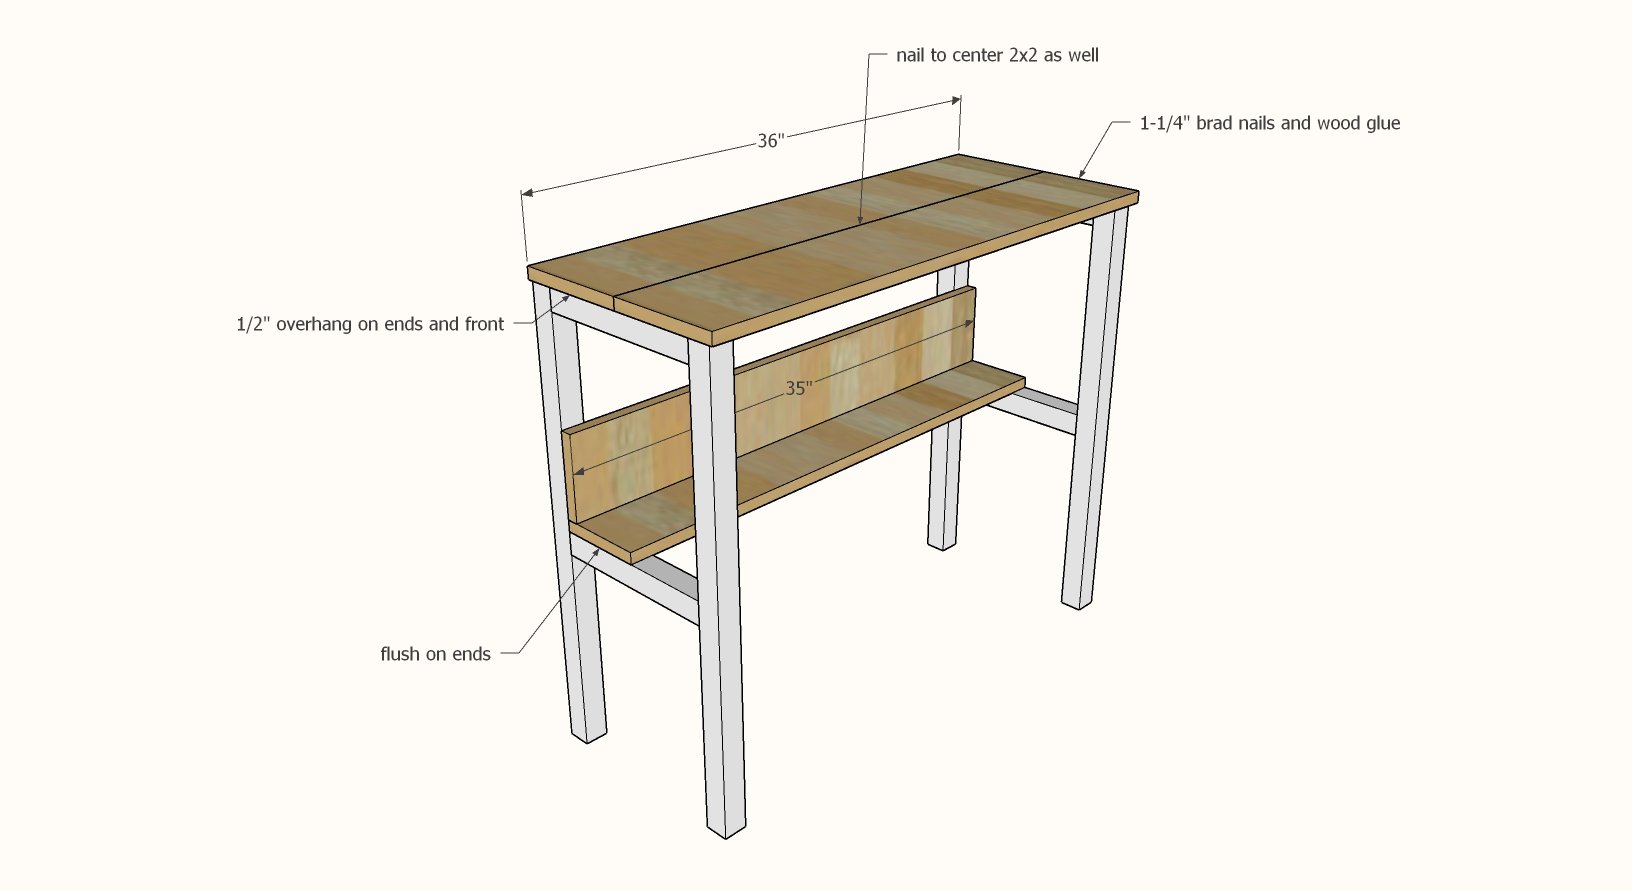
Glue and nail the 1x boards to the bottom shelf.  Then glue and nail the top boards down.

Comments