

DIY modern desk

We are finally home!!! Four different rental cars, six different hotel rooms, over ten thousand miles of air travel .... I can tell you, down coats, snowpacked roads and the joy of plugging in your car have never been so welcoming. We had a great trip, but there's nothing like that crisp coldness that says Sweet Home Alaska. I'd give you a big wet smooch, Alaska ... if I wasn't afraid of getting stuck to you.
It'll take us a bit to catch up on all the things we haven't been doing over the past couple of weeks - like laundry and kid's homework and someone's gotta pick the Cheerios out of the baby's car seat (sometimes you gotta do what you gotta do to keep them in the car seat just a little longer on those long trips, please don't judge) - so I thought today would be a great day to share with you the final plan (so far!) in the "Build Your Own Study Desk" collection of plans -
For those of you new here or haven't check in a bit (missed you!), I put together a collection of plans so you can build your own desk to suit your needs and space. It started with this easy to make desktop -

I love how simple this desktop is to make. It's just two 24" x 48" panels of plywodo with 1x3 frames sandwiched in between. You can get the full details on how to make this desktop here.
 For those of you just wanting a simple base with a footrest, you can find plans for a 2x4 truss style base here.

If you love sawhorses and need a little more storage, try these storage sawhorses as a desk base.
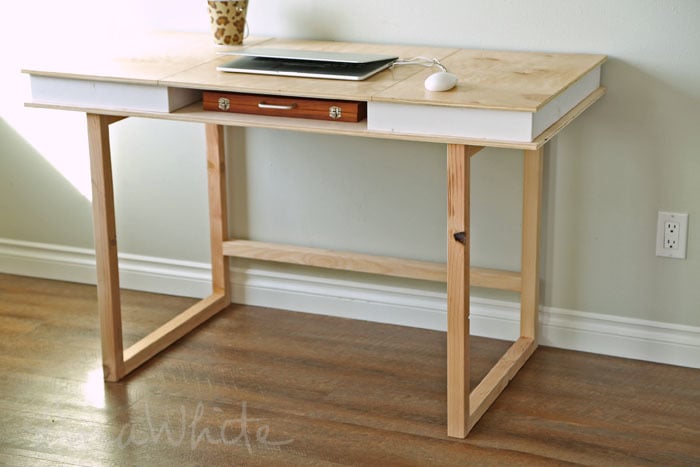
For another simple base, but a little more modern and masculine, you can find this 2x2 desk base plans here.
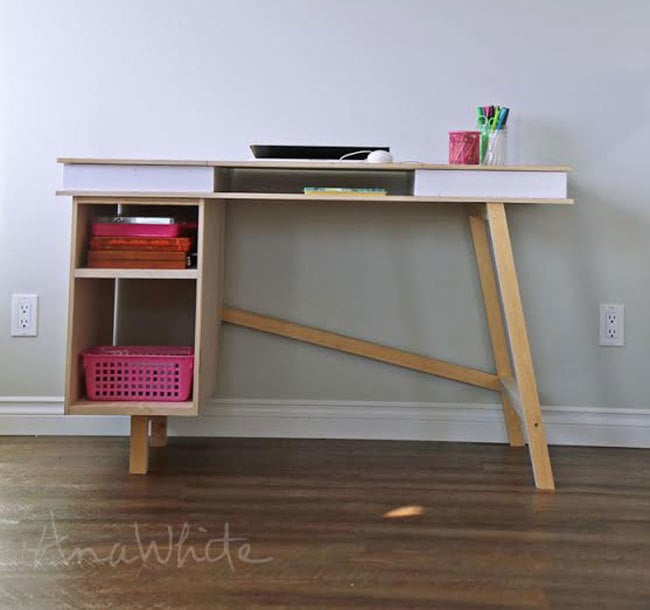
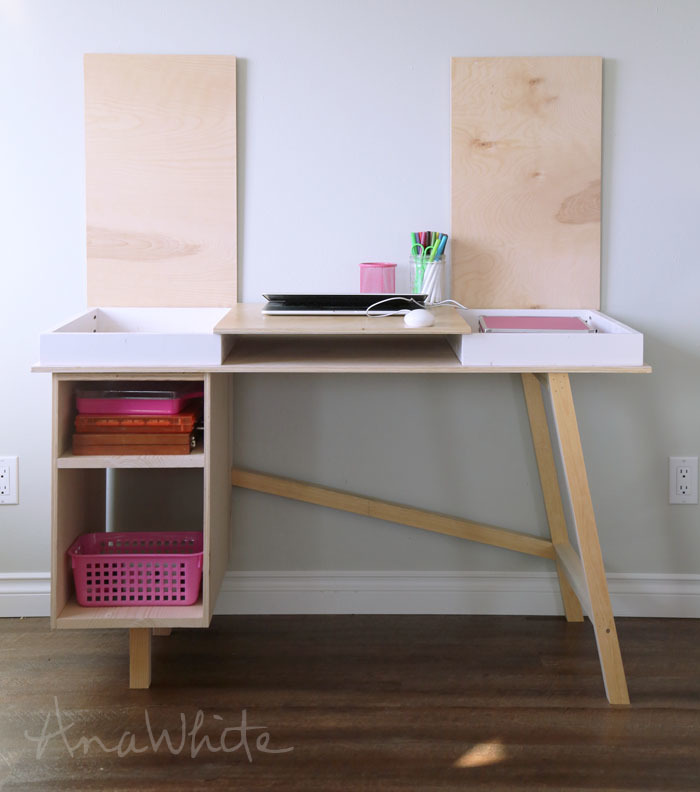
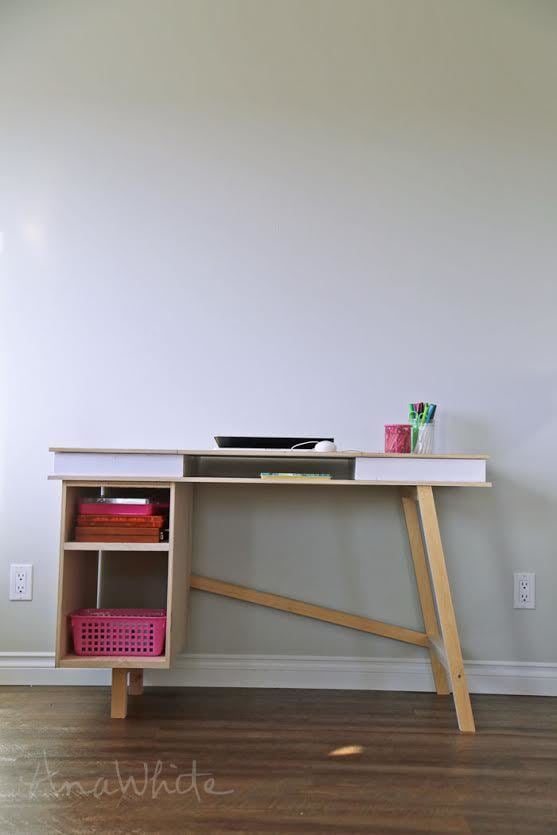
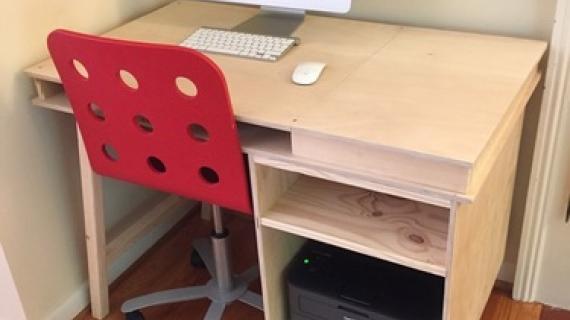
And finally, something just a little crazy, and a litte fun -

A little storage, a little modern, a little whimsical - I love this "grasshopper" base plans!
Plans follow!
Have an awesome weekend!!!
XO Ana
PS - Hope you get tools for Valentine's Day. Or lumber.

Preparation
1 - 1/2" plywood panel 24" x 48" 1 - 1x12 @ 6 feet long 3 - 2x2 @ 8 feet long
3 - 1x12 @ 23" long (shelves) 2 - 1/2" plywood @ 21-1/2" x 23" (sides of storage area) 1 - 1/4" plwyood @ 21-1/2" x 12-1/4" (back of storage area - optional) 2 - 2x2 @ 5" (legs under storage area) 1 - 2x2 @ 14-1/2" (support for legs under storage area) 2 - 2x2 @ 27" long both ends cut parallel at 10 degrees off square (legs) 2 - 2x2 @ 20" (leg supports) 1 - 2x2 @ 27 - 5/16" with one end cut at 10 degrees off square, shortest point measurement (top back support) 1 - 2x2 @ 34" long to be cut to fit in later steps (bottom cross support)


Please read through the entire plan and all comments before beginning this project. It is also advisable to review the Getting Started Section. Take all necessary precautions to build safely and smartly. Work on a clean level surface, free of imperfections or debris. Always use straight boards. Check for square after each step. Always predrill holes before attaching with screws. Use glue with finish nails for a stronger hold. Wipe excess glue off bare wood for stained projects, as dried glue will not take stain. Be safe, have fun, and ask for help if you need it. Good luck!
Instructions
Step 1

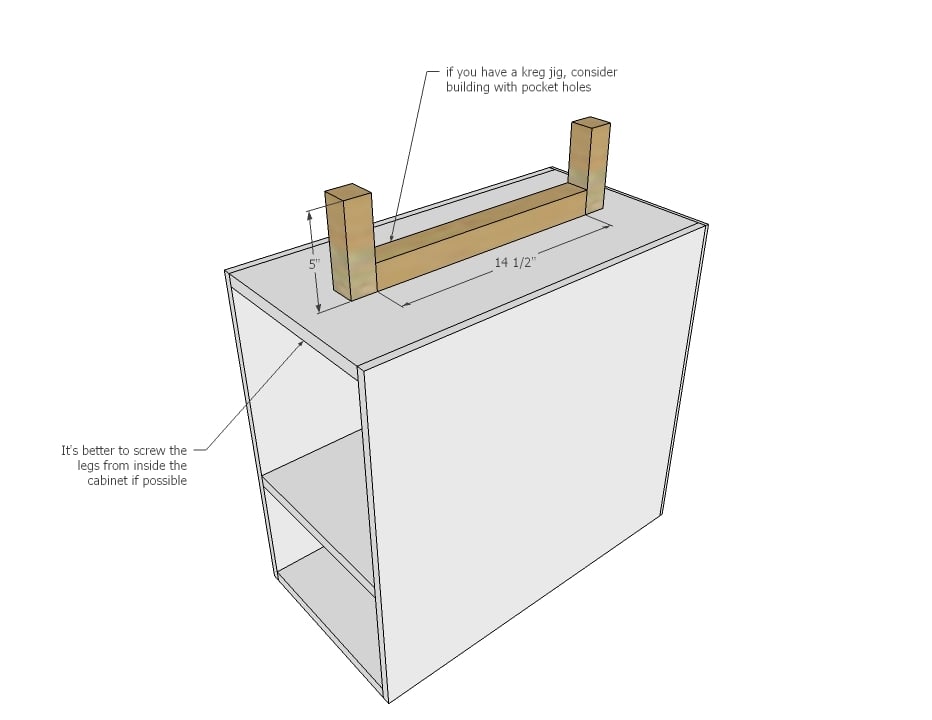
First build the storage box. You can just nail the 1/2" plywood to the shelves with 1-1/4" nails and wood glue, or use pocket holes. If using pocket holes, drill 3/4" pocket holes, but use 1" pocket hole screws. Place top pocket holes on top (will be covered by the desktop in later steps. One challenge with pocket holes is it will be hard to fit the drill in for the shelf, so you may wish to just attach top and bottom shelves from outsides, and nail the middle shelf in place. You may wish to leave the back off until after the back cross support is attached.
Step 2
Build the leg set separately, then attach from bottom shelf with 2" long screws, centered on bottom shelf.
Step 3
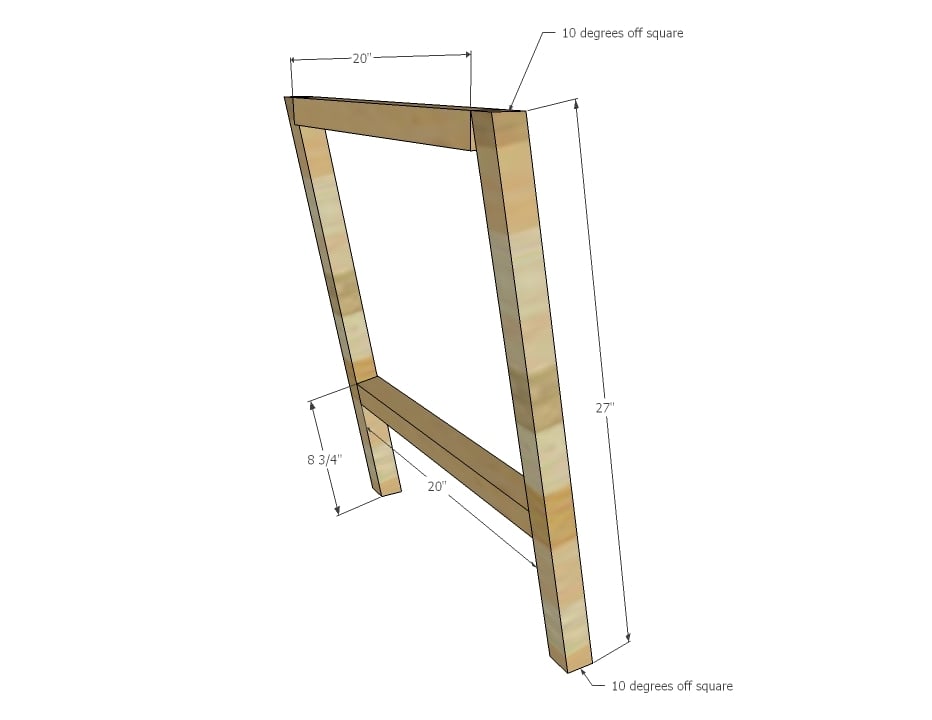
Build the remaining leg set, recommend with 1-1/2" pocket holes and 2-1/2" pocket hole screws. You could also use predrilled and countersunk 2-1/2" long screws from outsides.
Step 4
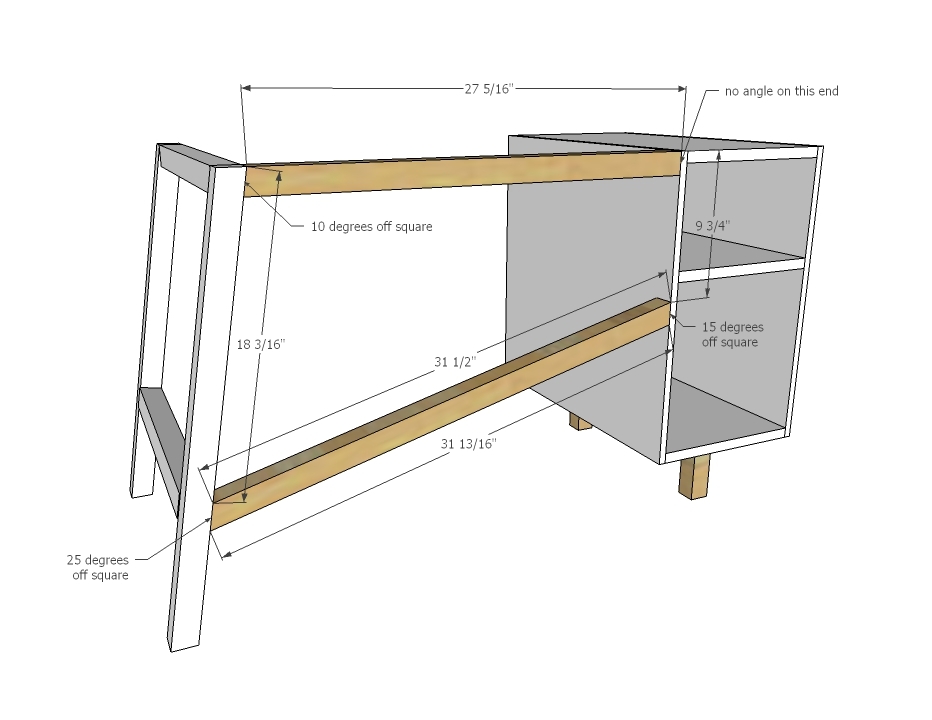
Attach leg to storage area with top support. Place bottom support in position, and mark with a pencil. Cut marks and attach to shelf area and leg. You can use pocket holes for the 2x2 to 2x2 joint, but I'd recommend just a countersunk screw from the storage area to the leg end.
Step 5
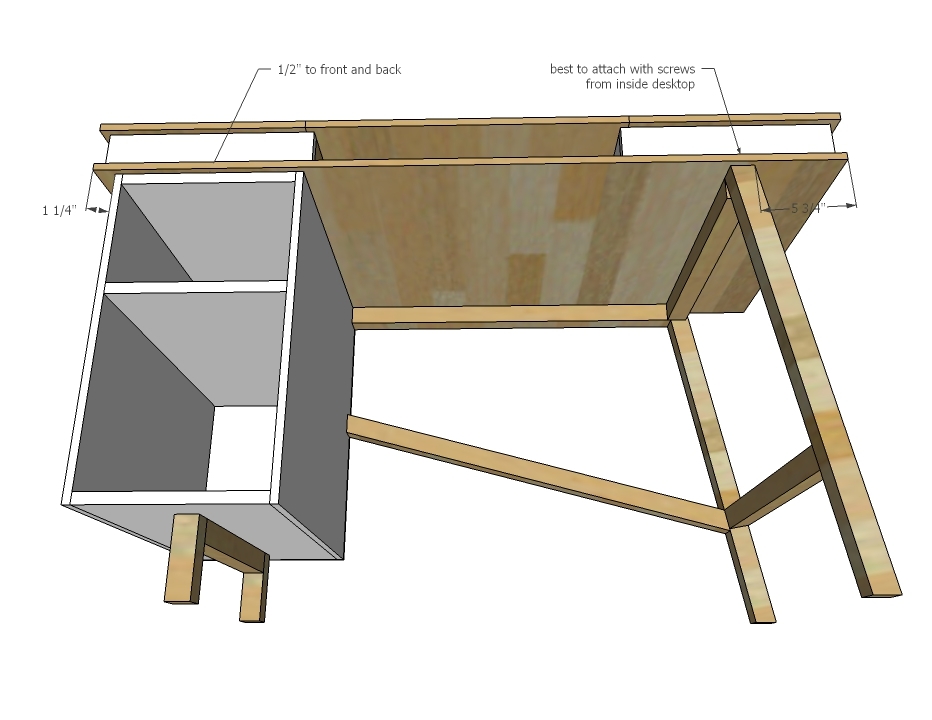
It is always recommended to apply a test coat on a hidden area or scrap piece to ensure color evenness and adhesion. Use primer or wood conditioner as needed.

Comments
kxm198beach
Thu, 08/20/2015 - 09:38
Desktop Storage Compartment Plans
The link to the desktop doesn't seem to work. Thanks!
In reply to Desktop Storage Compartment Plans by kxm198beach
Ana White
Thu, 08/20/2015 - 11:30
http://ana-white.com/2015/01
http://ana-white.com/2015/01/free_plans/desktop-storage-compartments-bu…
Sorry about that
bgab
Sun, 03/07/2021 - 20:20
I just finished building one…
I just finished building one of these for my daughter. Used doubled up 3/4” plywood for the legs. Looks really sharp.