
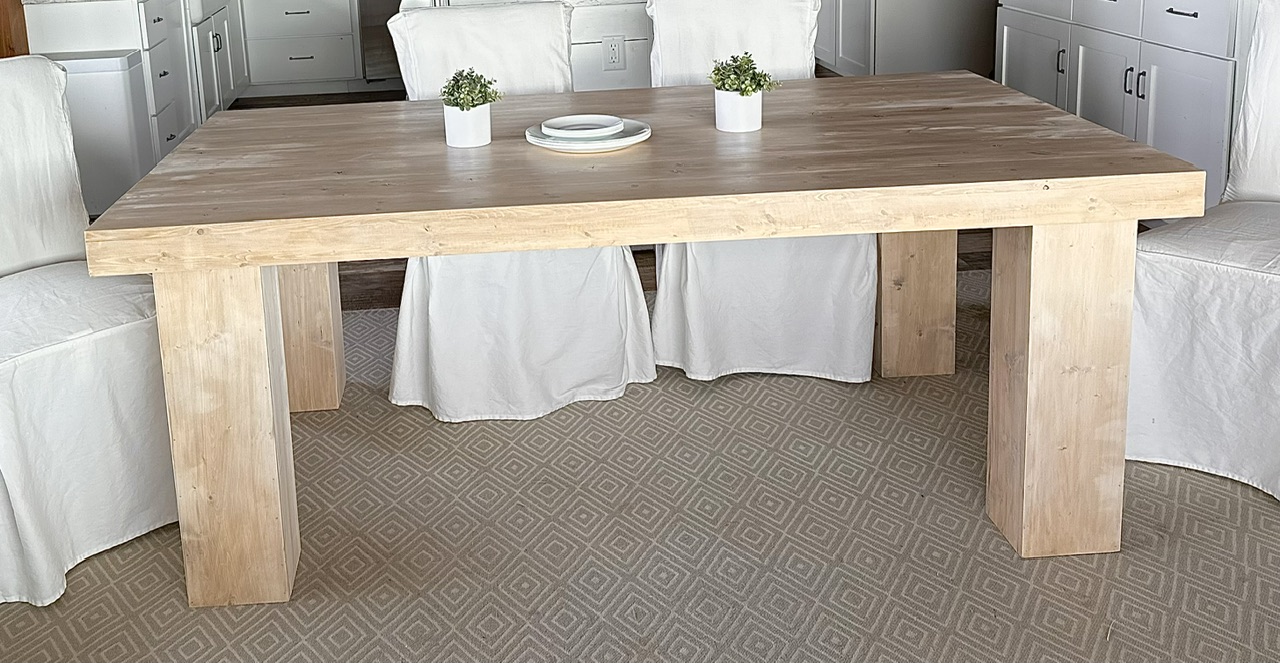

I spent about $250 building this beautiful designer table! It is solid wood, super sturdy and the perfect size to comfortably seat 6.
I'm sharing in this post free plans with step by step instructions, shopping and cut list and video tutorial.
Why You'll Love This Table!
- Modern style paired with rustic wood creates the most beautiful table
- Super sturdy and solid
- Perfect family table seats six comfortably
- A wider top allows for tabletop decor or serving dishes, with still plenty of room to dine
- Solid wood can be painted or stained any color, can be refinished
- Lightweight and easy to transport with legs removed
- Made locally with locally harvested spruce wood
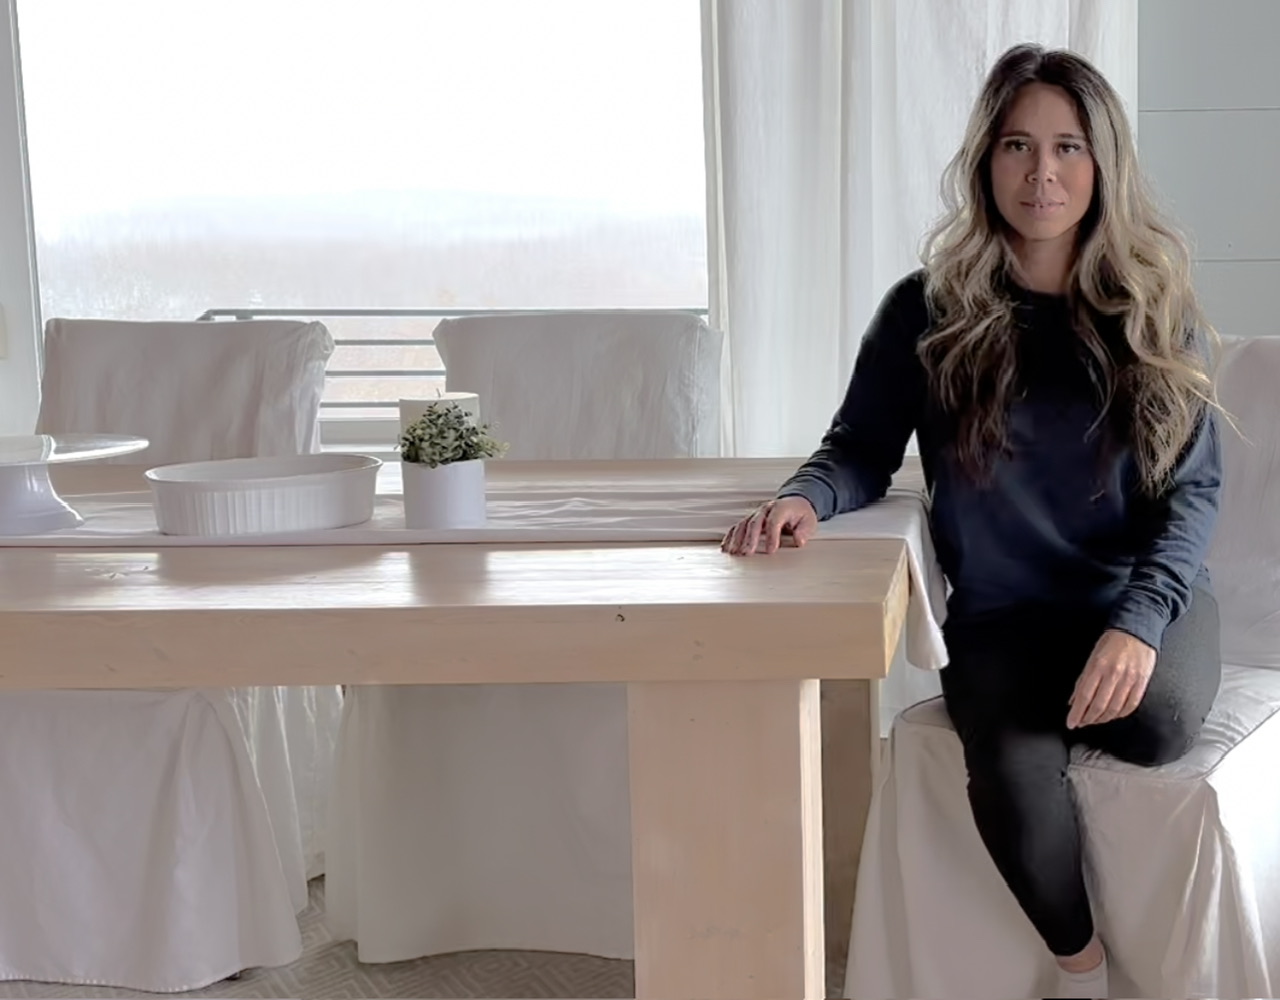
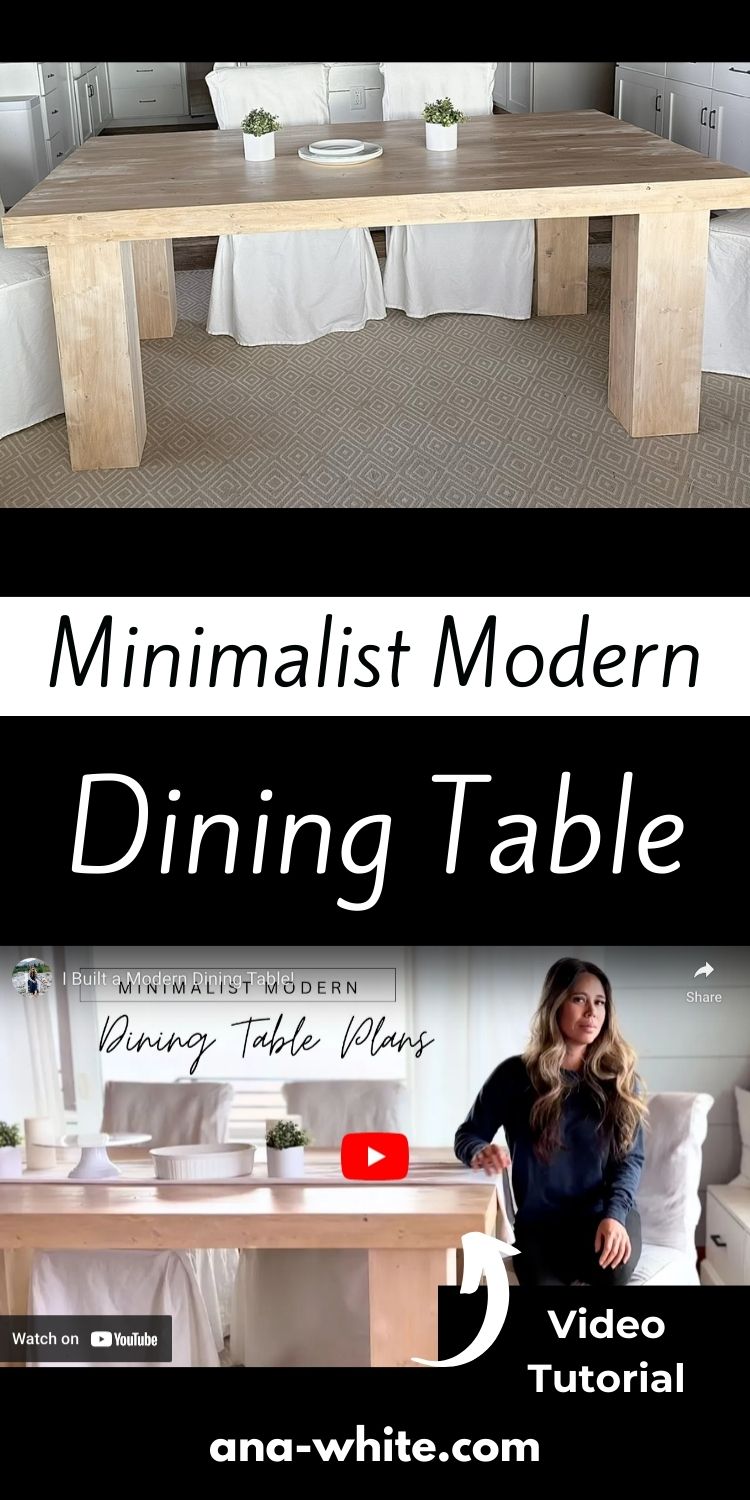
Watch! Video Tutorial of Building this Table
Want to see how this table was put together? Make sure you watch the quick build video -
Other Free Plans that Match this Table Style
I have been building alot of furniture lately with this style. Here's plans that you might like that match:
- Minimalist Modern Nightstand Plans
- Minimalist Modern Bed Plans (all mattress sizes)
- Minimalist Modern Tall Dresser
- Minimalist Modern Standard Dresser
Pin For Later!
Preparation
- 8 - 1x6 boards, 10 feet long
- 2 - 1x8 boards, 10 feet long
- 5 - 1x3 @ 8 feet long
- 125 - 1-1/4" pocket hole screws
- 1-1/4" brad nails
- wood glue
I used kiln dried spruce for all of my boards. You can use pine whitewood boards, make sure they are kiln dried.
IMPORTANT: Bring your boards into a dry, humidity controlled environment for a few days before beginning to build.
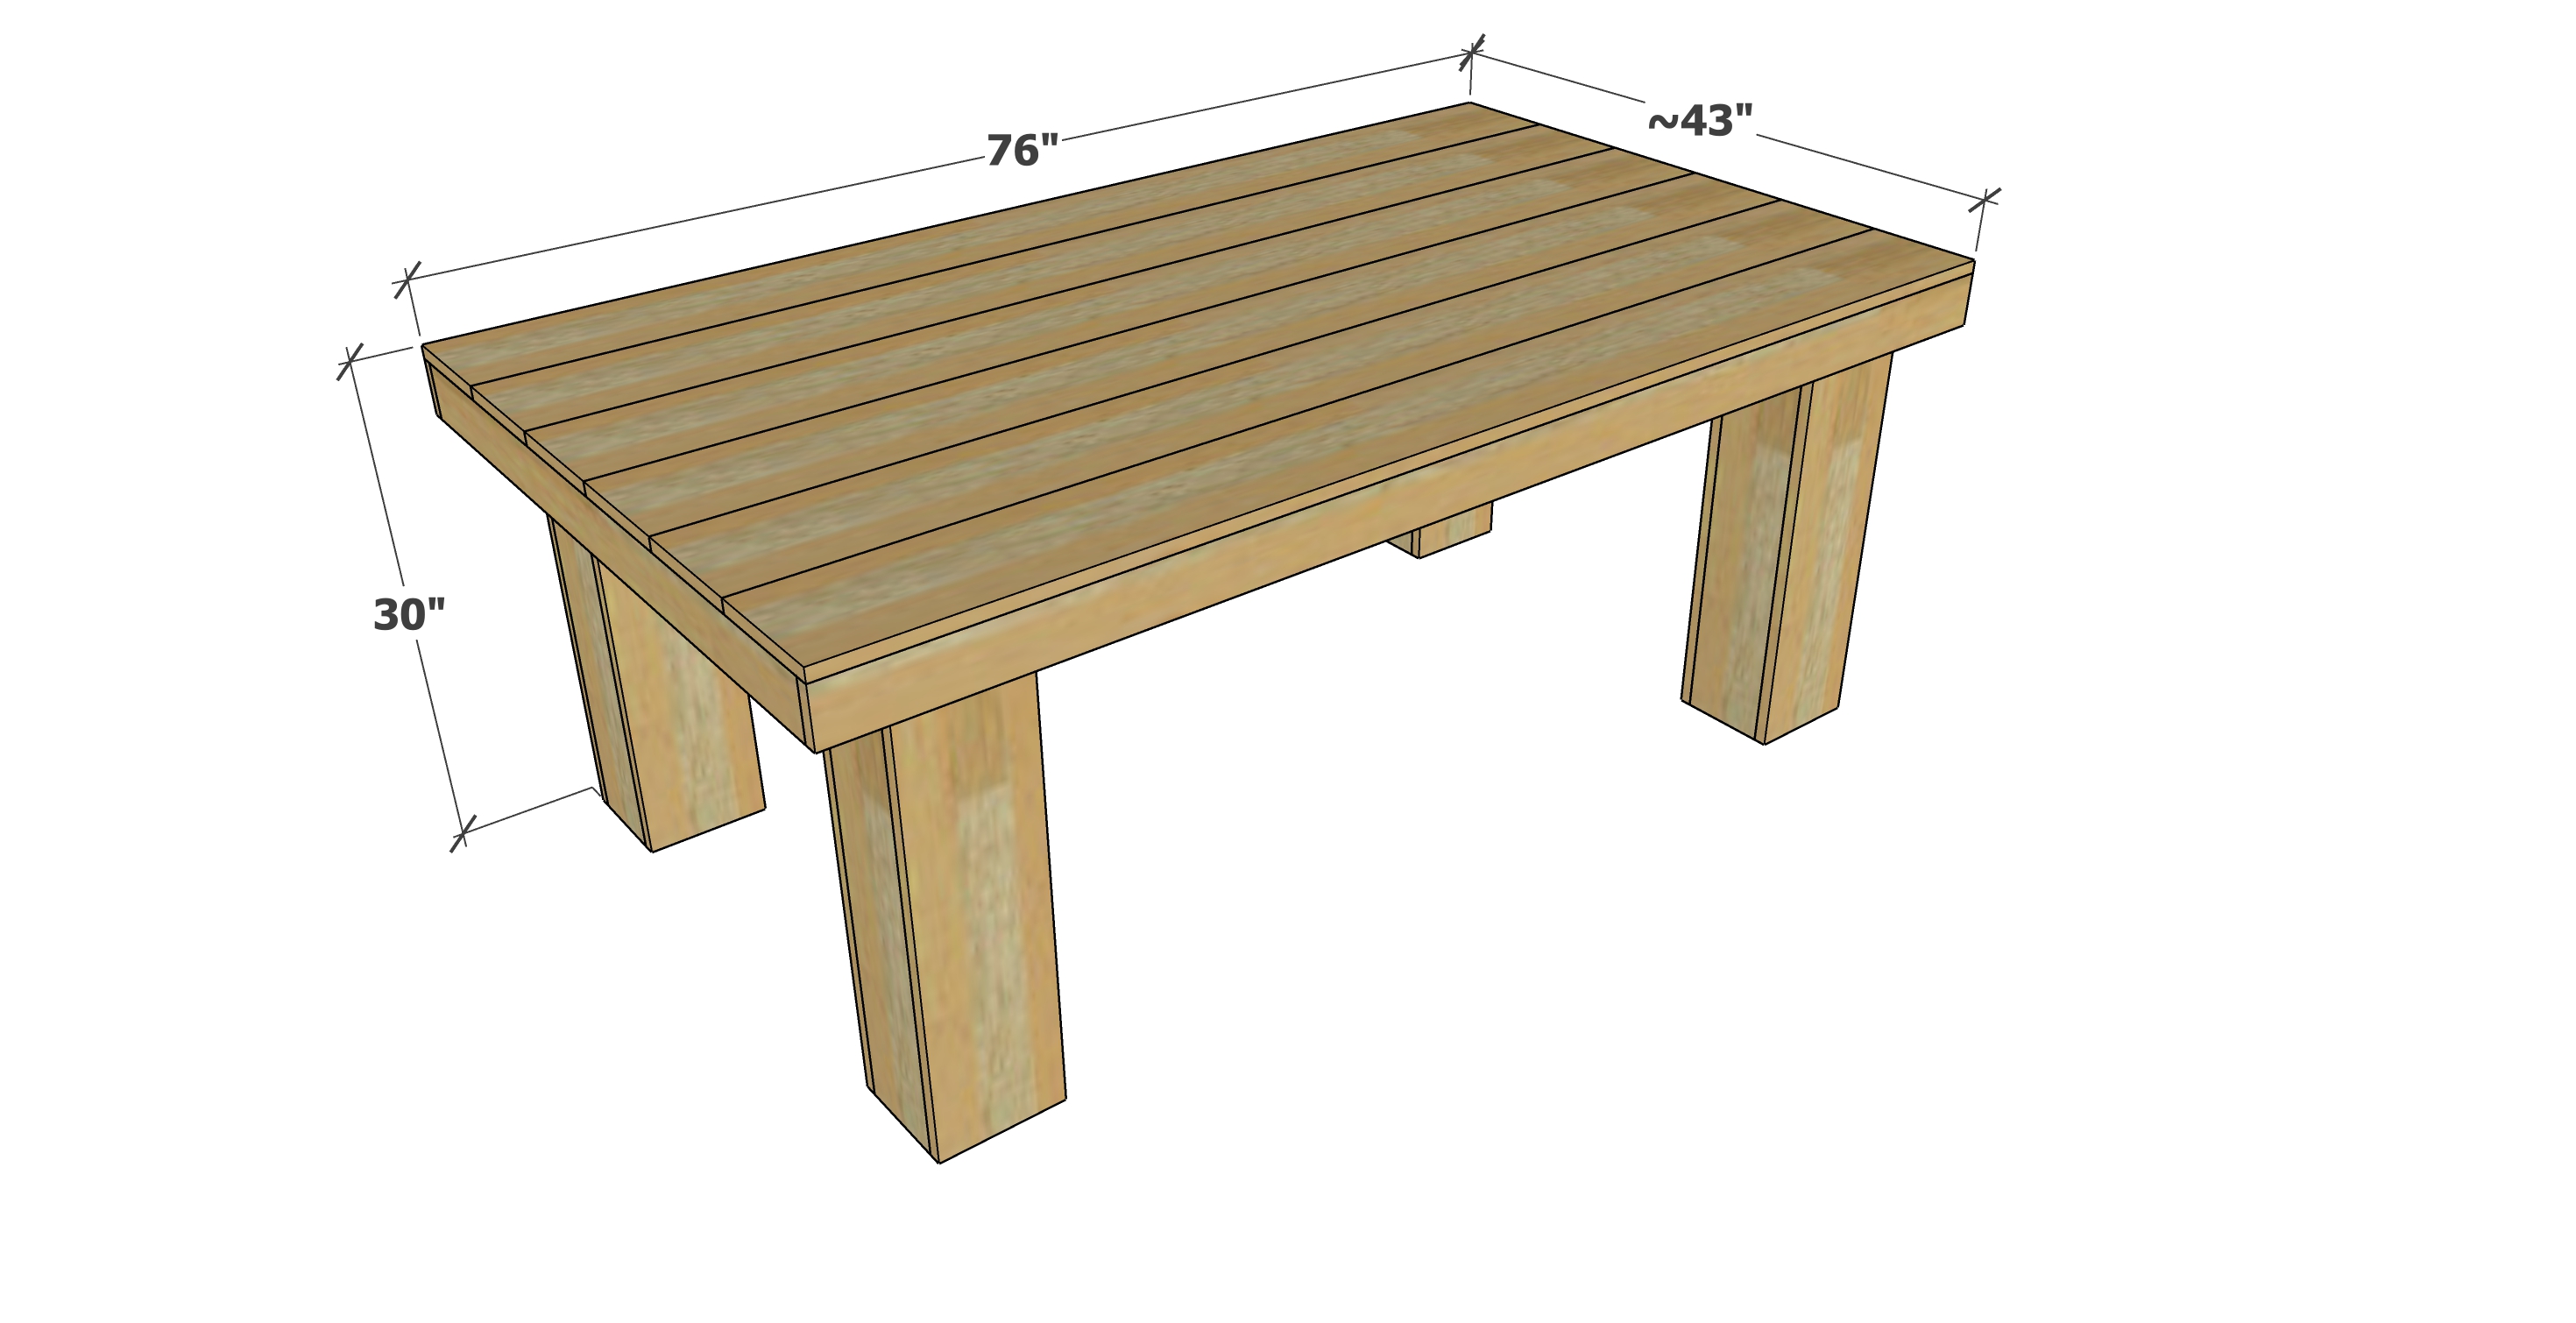
- 8 - 1x6 @ 77" long - tabletop boards
- 8 - 1x6 @ 29-1/4" long - legs
- 8 - 1x8 @ 29-1/2" long - legs
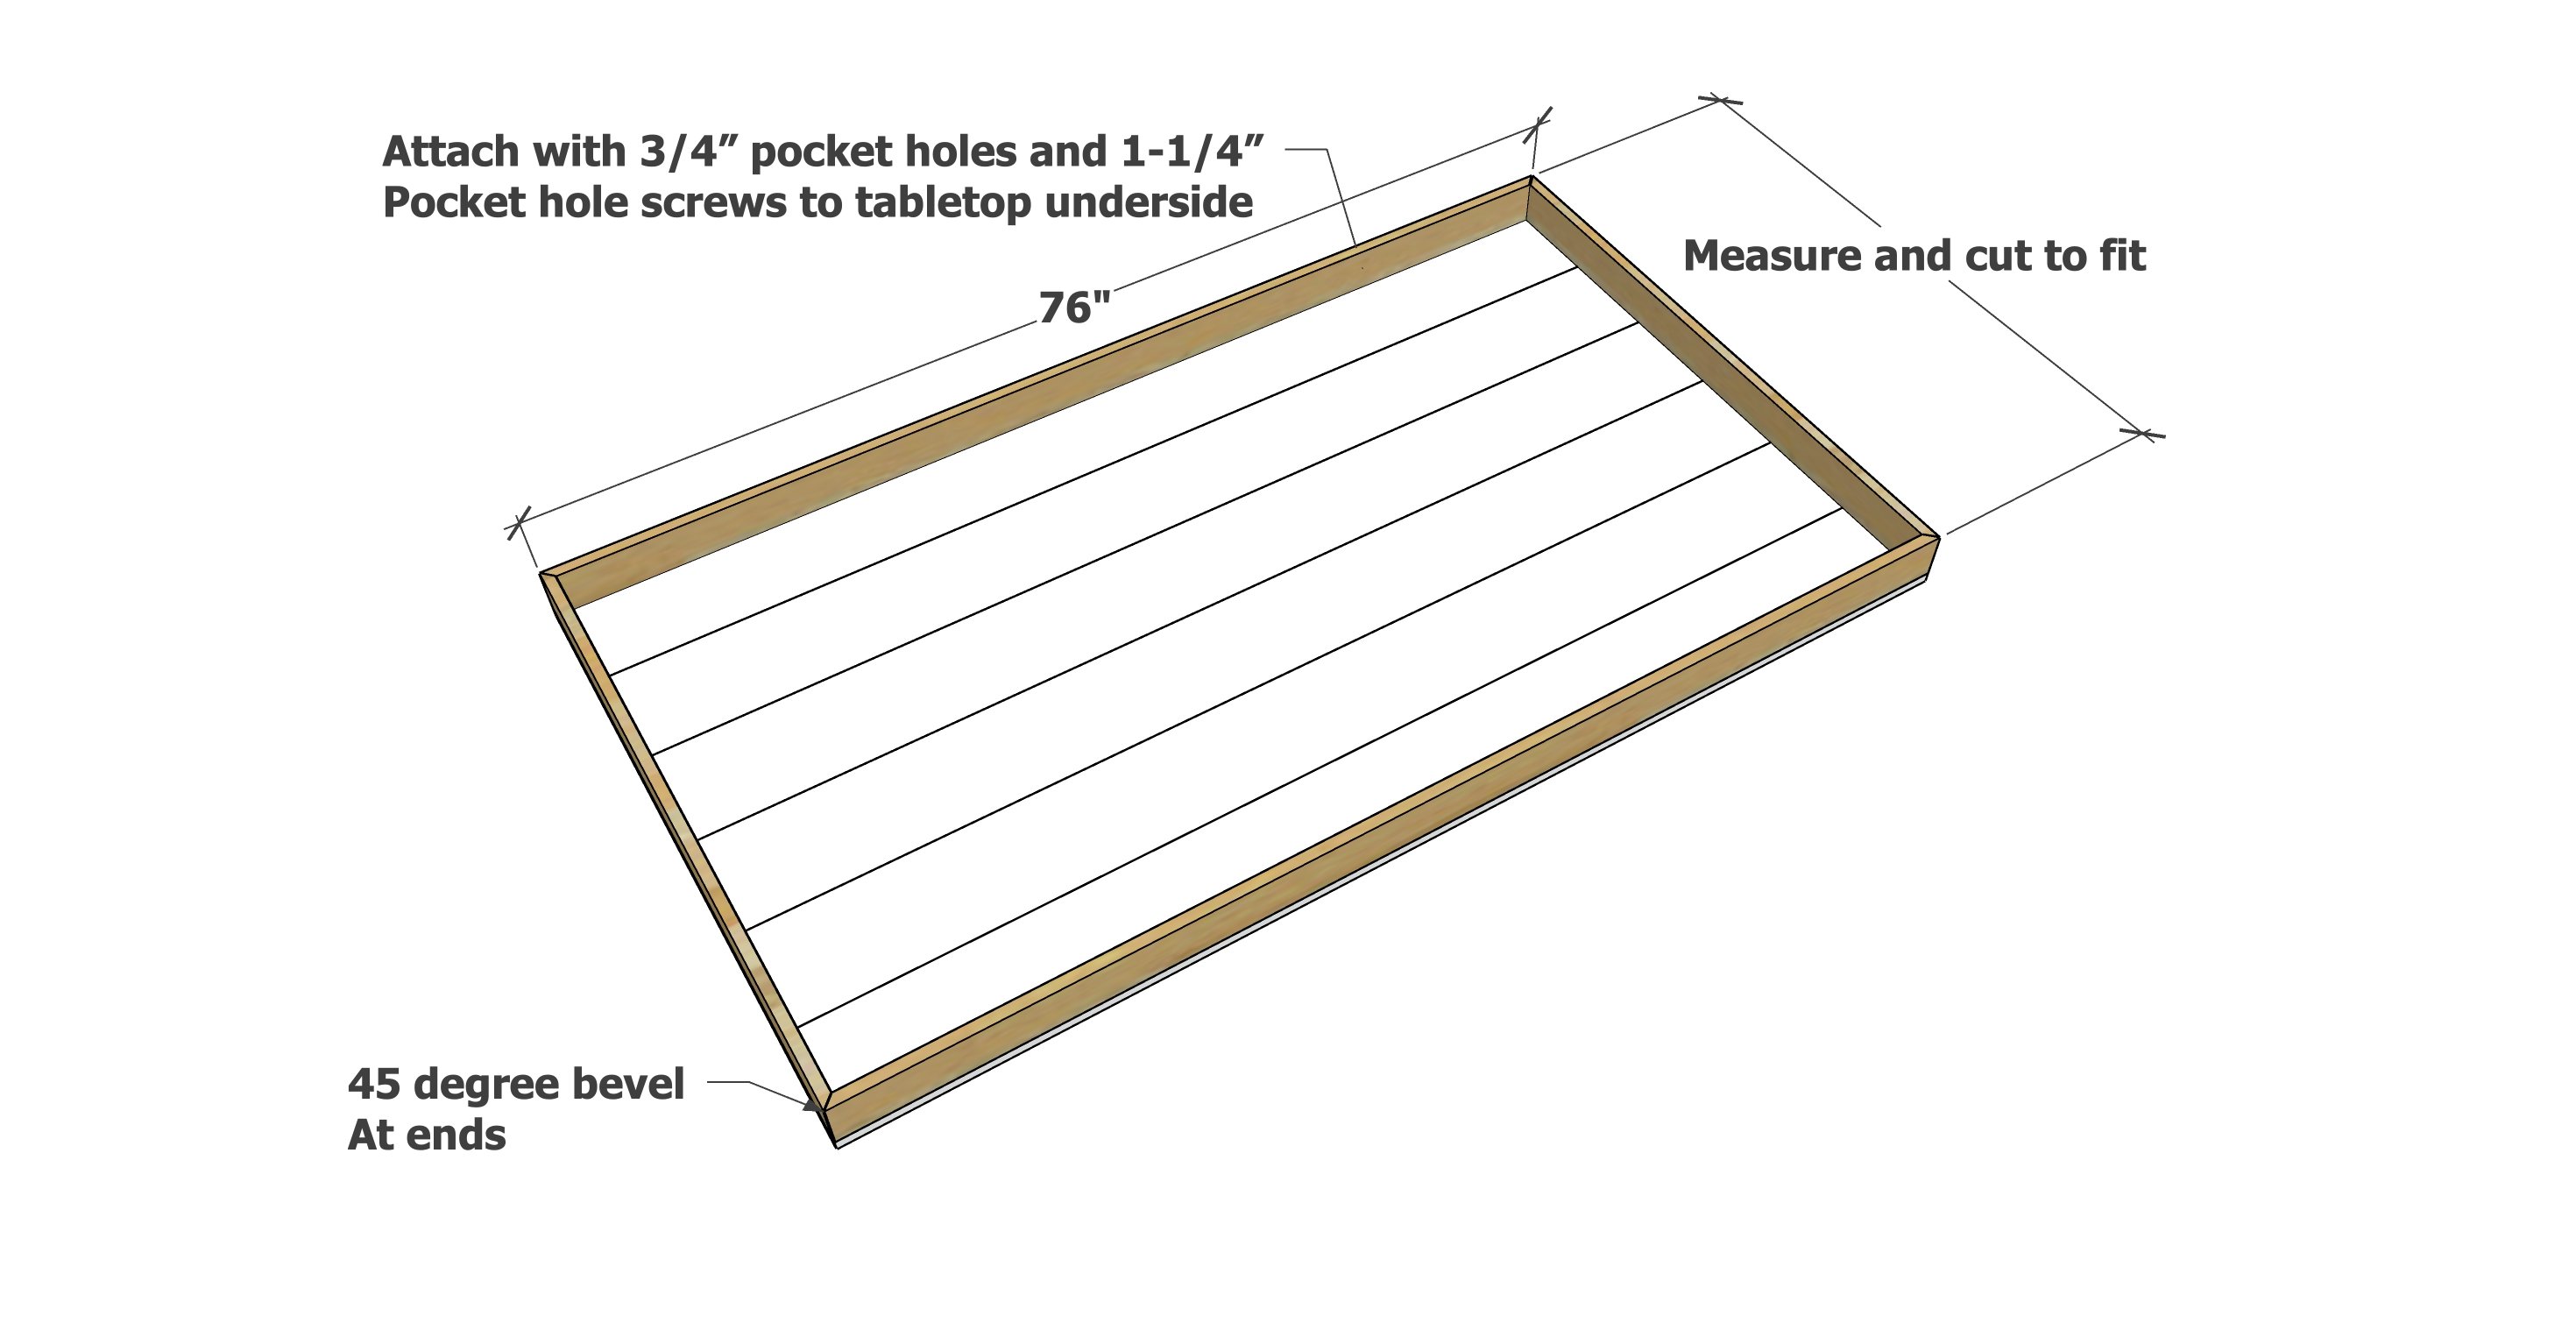
- 2 - 1x3 @ 76" long - longest point measurement, both ends cut at 45 degree bevel, ends NOT parallel - apron sides
- 2 - 1x3 @ ABOUT 43-1/2" long - Measure and cut to fit - longest point measurement, both ends cut at 45 degree bevel, ends NOT parallel - apron ends - this length will change if tabletop boards are ripped down
- 2 - 1x3 @ 74-1/2" long - inner supports
- 4 - 1x3 @ 14" - leg supports
For a smooth tabletop and hidden seams on legs, rip the 1x8 and 1x6 boards edges down on both sides to create a square edge using a table saw. I took 1/8" off each side. Make sure the final rip widths are consistent.
I also ripped my 1x3 apron boards out of 1x6s, so the edges were square.


Instructions
Step 1

Tabletop Building
Start by drilling 3/4" pocket holes in 7 of the 8 tabletop boards, spaced along one long edge about 8-10 apart, drilling pocket holes on the less favorable side of the wood.
Attach together with 1-1/4" pocket hole screws, using a flat surface and clamp to make sure the tabletop boards are joined perfectly.
Keep boards flush to one end, leave discrepancies on cut lengths all on the other end.
ALTERNATIVE METHOD: If you don't have a clamp table, you can build upright like I did in this video.
CUT THE END WITH DISCREPANCIES: Once the tabletop has been built, measure 76" from the straight end and cut the tabletop end down to 76". This is done in the video.
Step 2
Aprons
The aprons are made out of 1x3s, with the ends mitered to 45 degrees.
Start with the long side aprons first, cut to match the tabletop length at longest point, beveled in at 45 degrees.
Attach with 3/4" pocket holes and 1-1/4" pocket hole screws.
Then measure the shorter aprons and cut. Fit first. Then attach with pocket holes.
NOTE: You can attach the corners together with glue and 1-1/4" brad nails. I opted to not attach 1x3s together at corners, in case my tabletop boards expanded or contracted.
Step 3

Legs
Build the legs with 1-1/4" brad nails and wood glue.
Alternative method - if you don't want any nail holes on the outsides of the legs, first attach the 1x6s to on of the 1x8s using 3/4" pocket holes and 1-1/4" pocket hole screws on the insides. Then attach the remaining 1x8 with 1-1/4" brad nails and glue. When you assemble the table, leave the side with the nail holes to the inside of the table.
TIP: At this point, I decided to finish the entire tabletop and all the legs.
Step 4
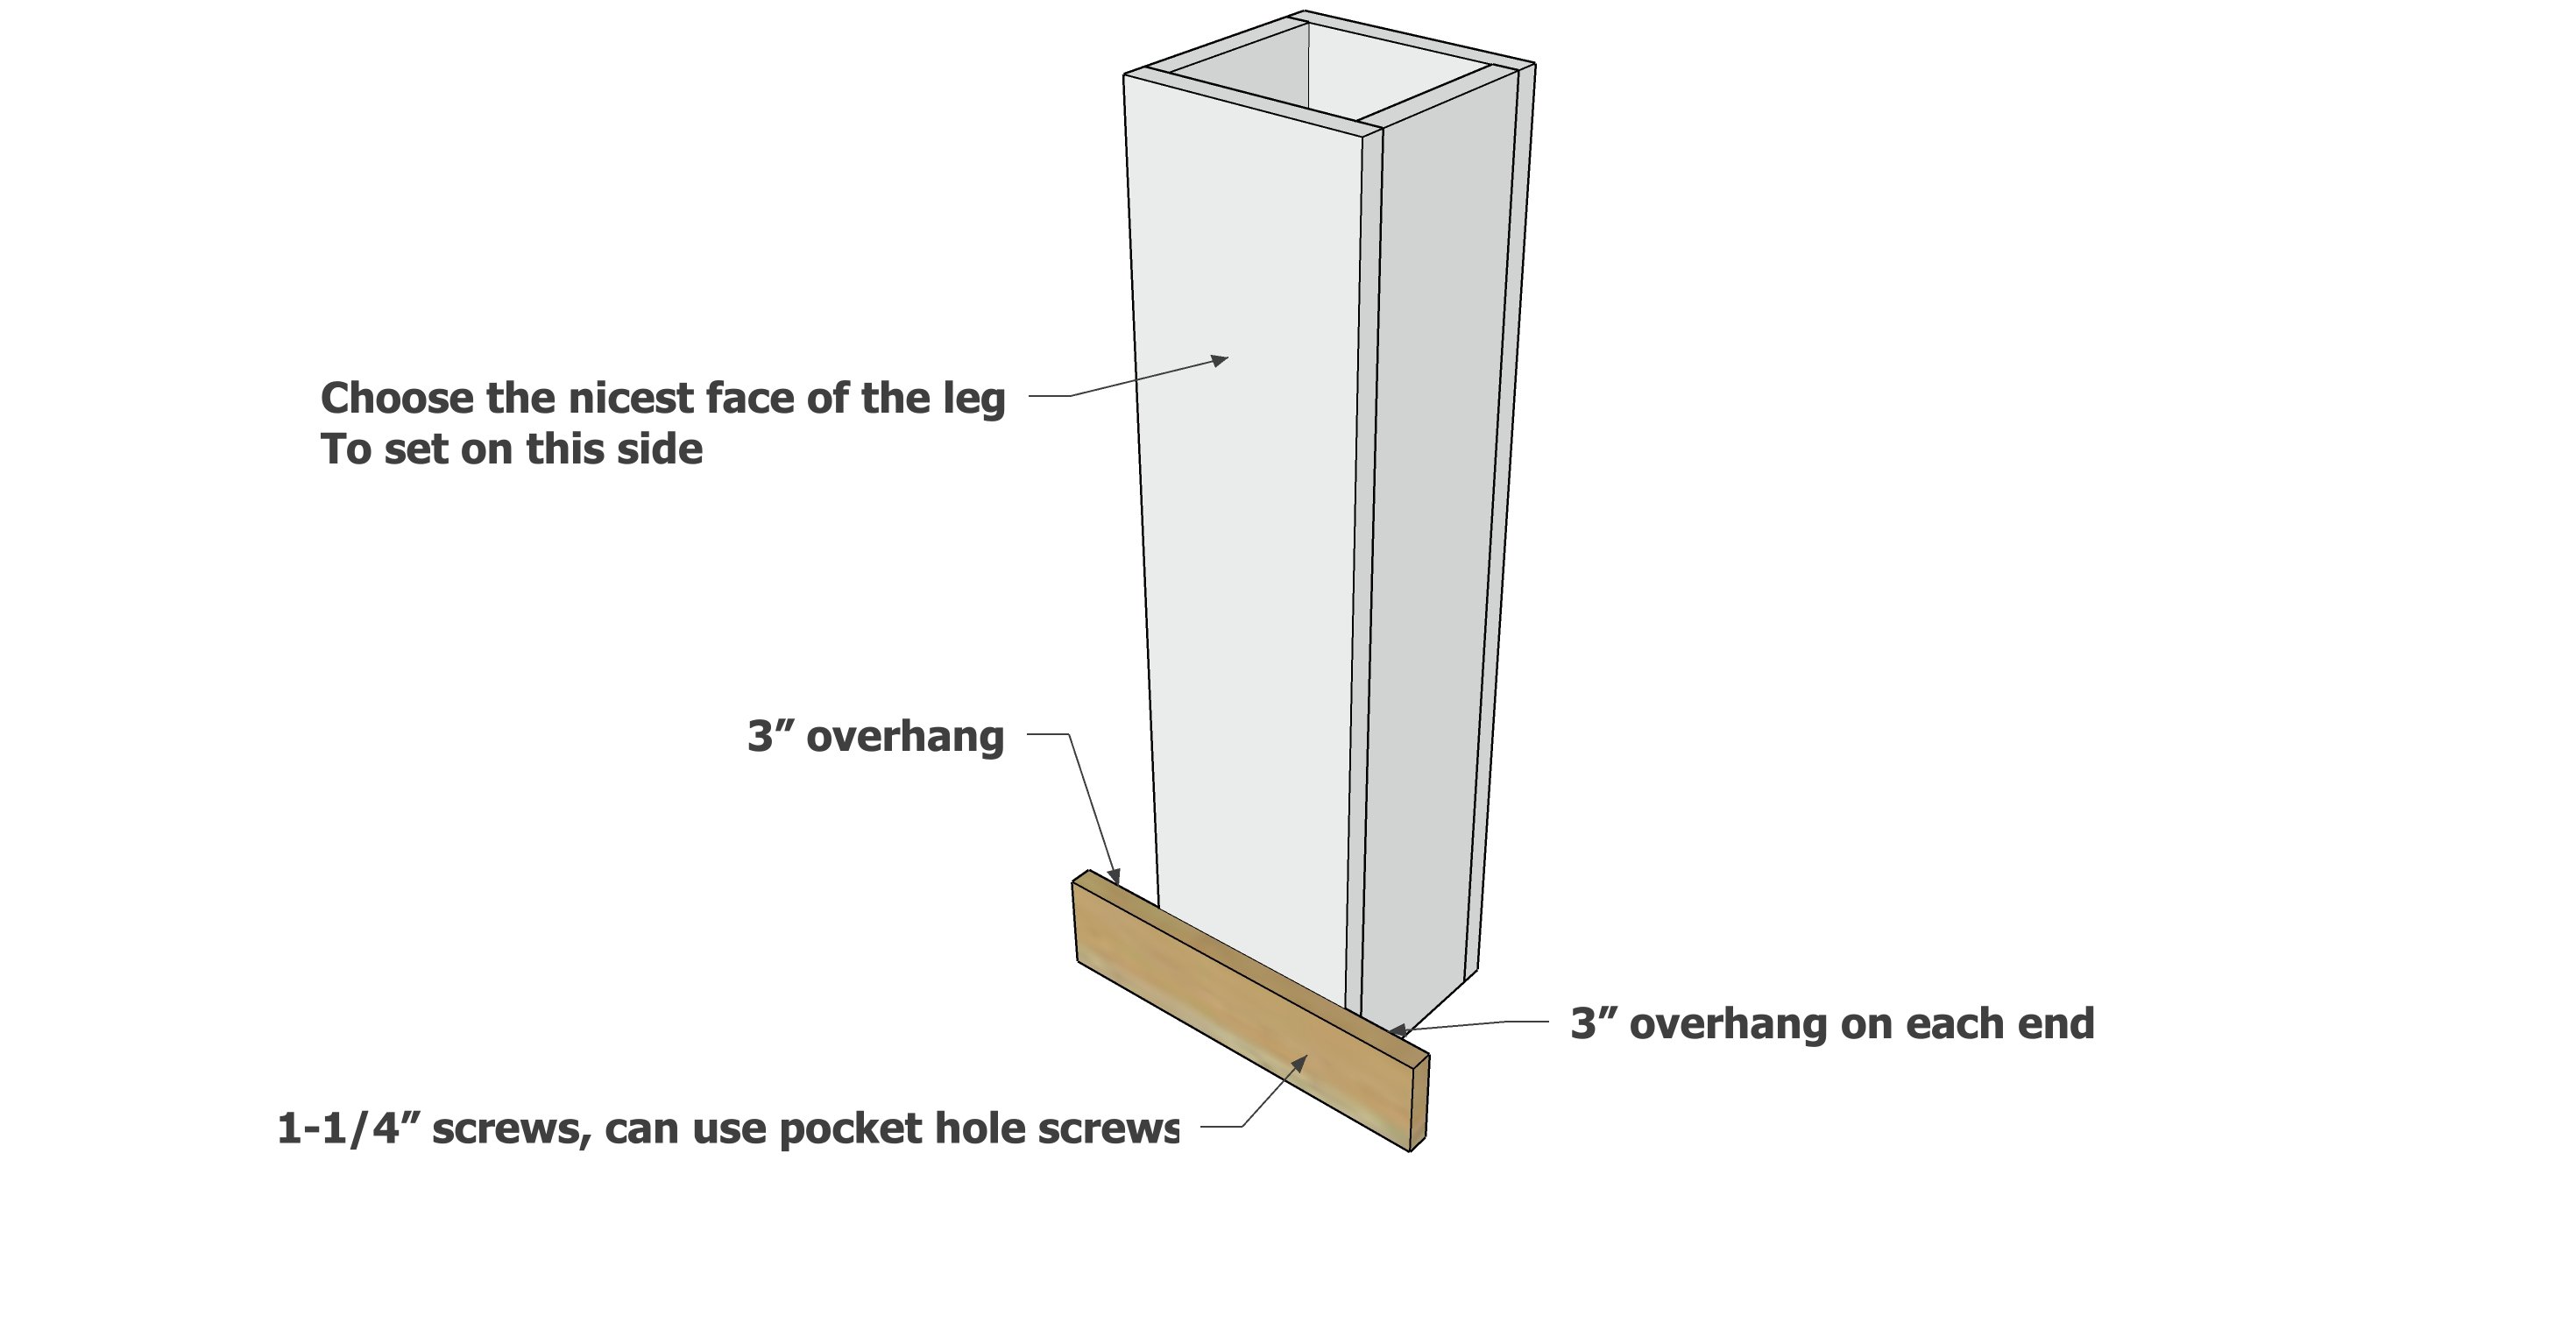
Measure and cut the 1x3 leg support piece so it is 6" wider than the 1x8 width of your legs.
Choose the most favorable 1x8 side of the leg.
Attach the 1x3 flush to the bottom, 3" overhang on each side, to the bottom of the leg, using glue and 1-1/4" screws (can use pocket hole screws)
Step 5
Leg Supports and Assembly
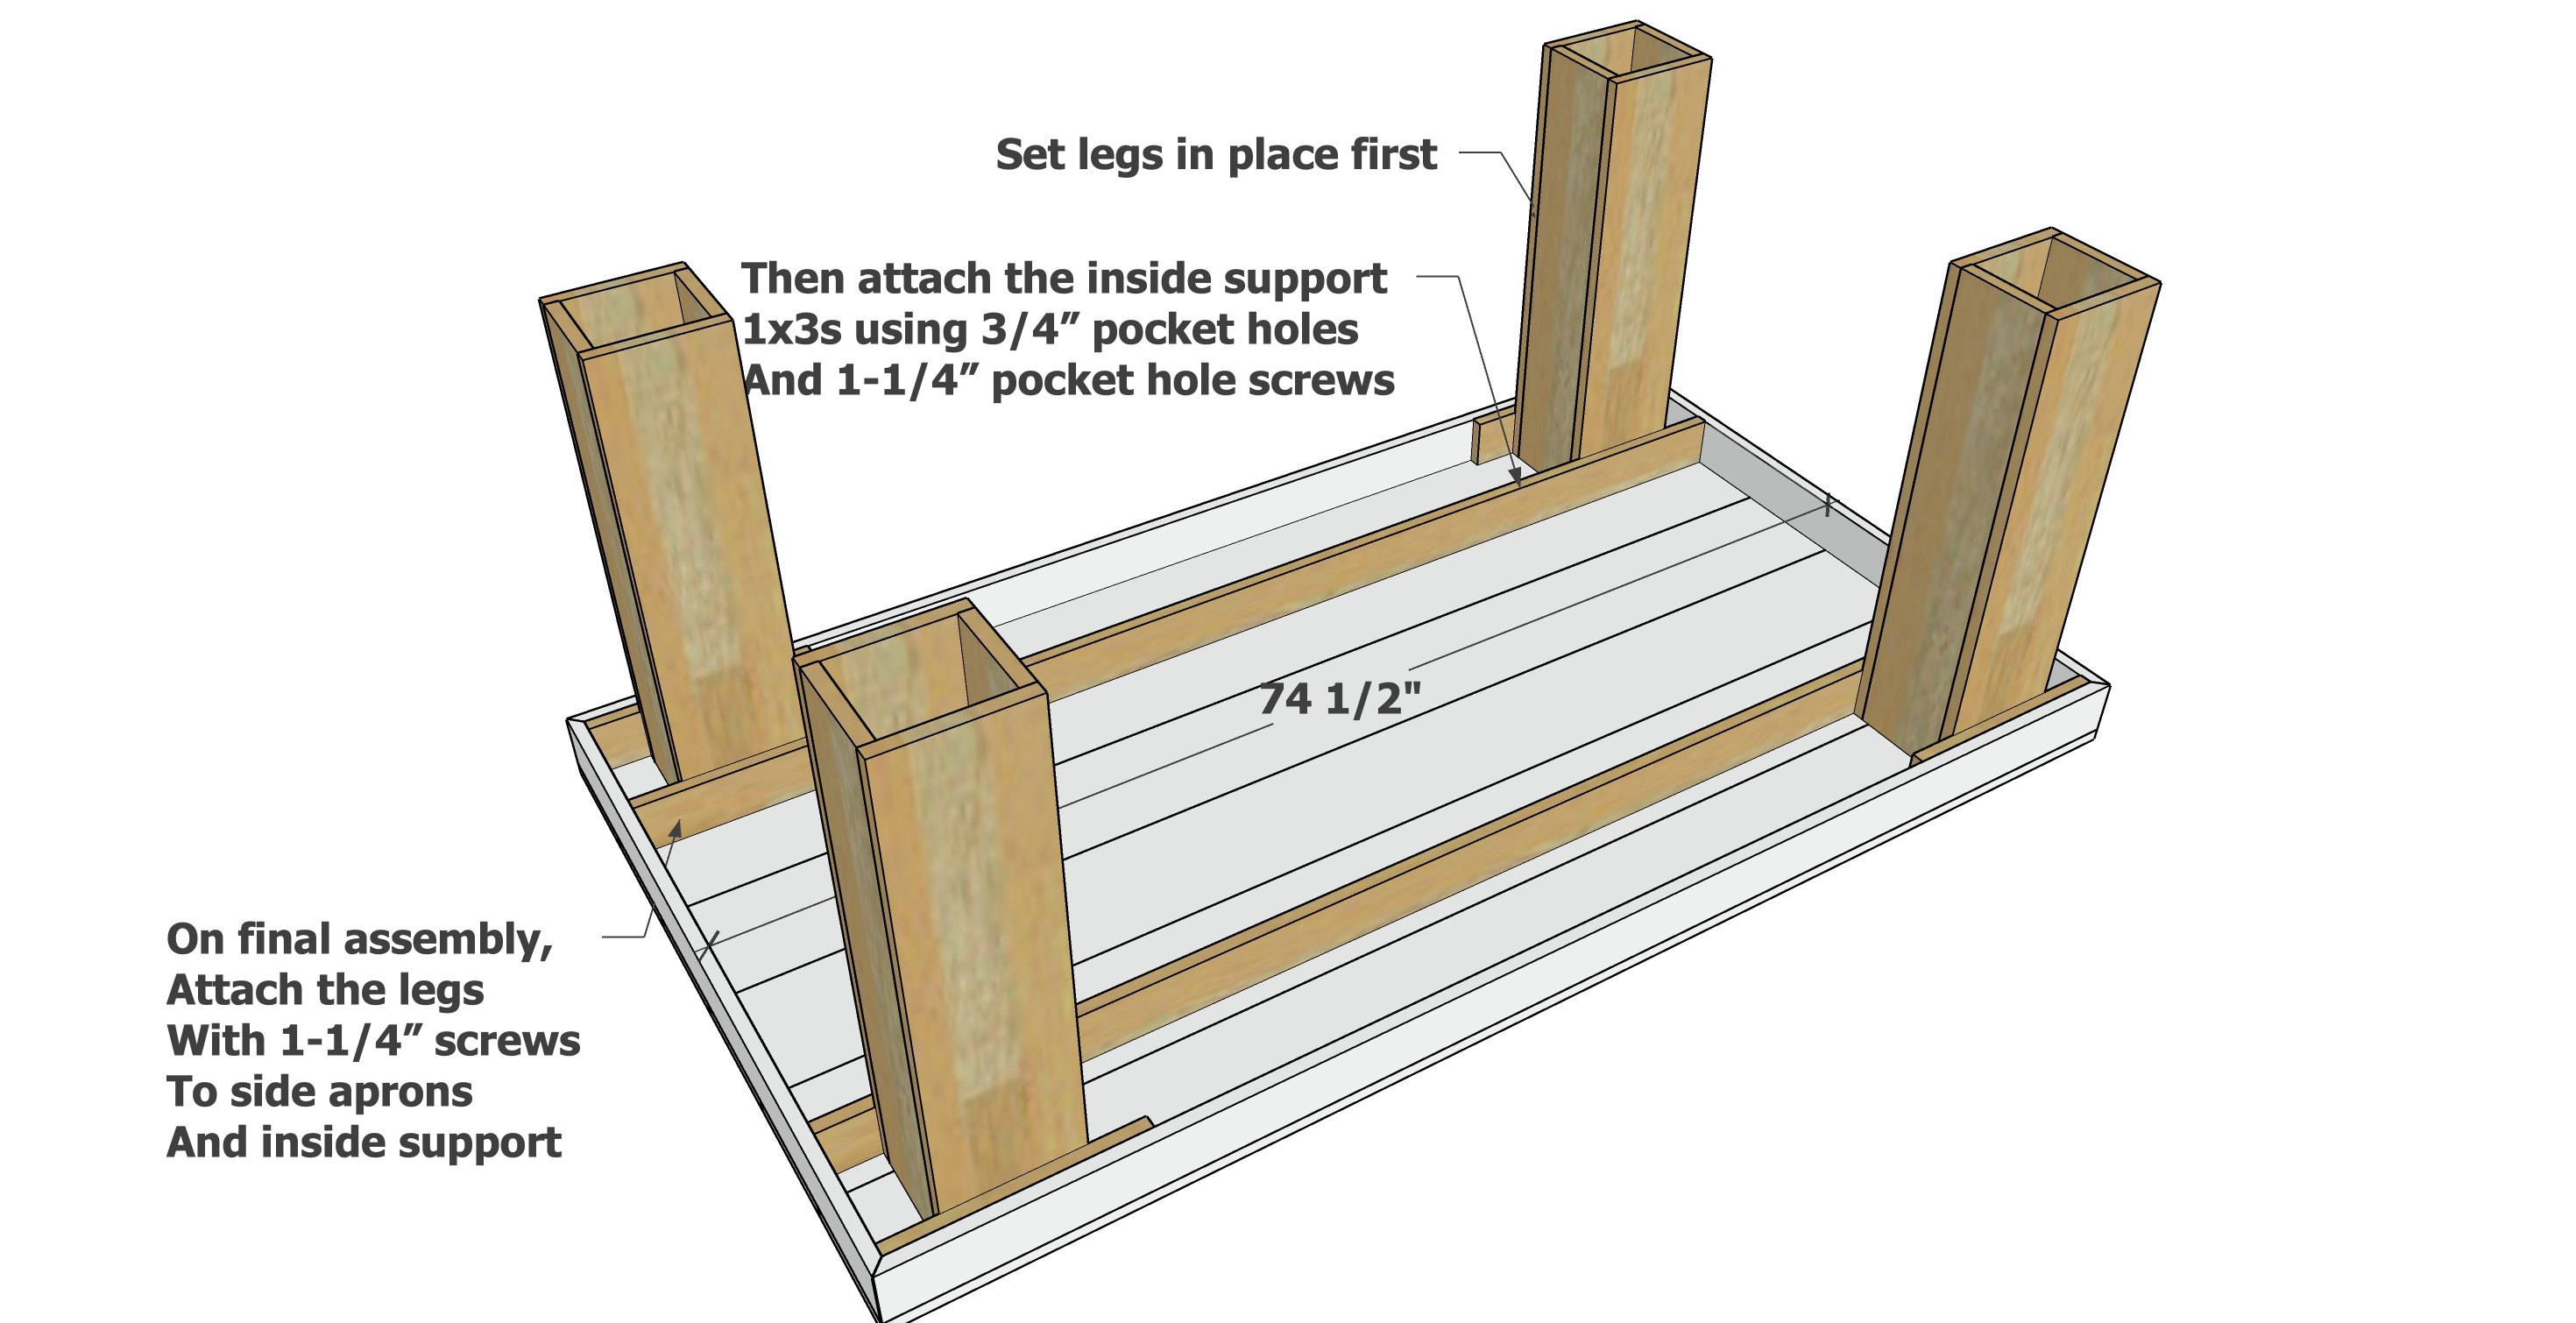
Position the legs inside the table. You can attach now if you are ready for final assembly.
Position the long leg support pieces inside the table, flush to the legs, and attach with 3/4" pocket holes and 1-1/4" pocket hole screws to the underside of the tabletop and to the end aprons.
On final assembly, attach the legs to the inside support as well.
After the wood filler dried, I sanded well, using 120 grit sandpaper, working in the direction of the wood grain with a power sander. I sanded smooth the top, and the leg seams.
I removed all sanding residue with a vacuum and then wiped with a damp lint free cloth.
I stained "golden oak" in a gel stain, working in the direction of the wood grain. I let that dry overnight.
I applied a whitewash of about 1 part paint to 2 parts water, over the stain wiping off excess, to create the muted affect.
On the tabletop, I applied polyurethane.
After dry, I ligthtly sanded top with 220 grit sandpaper for smooth finish.
