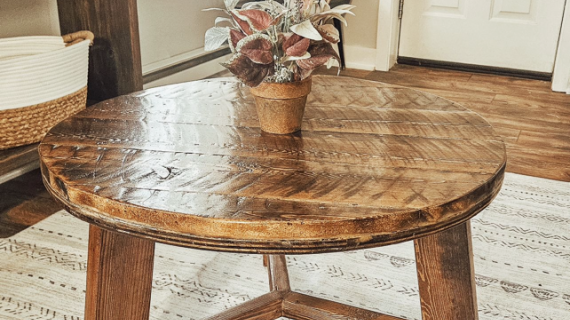
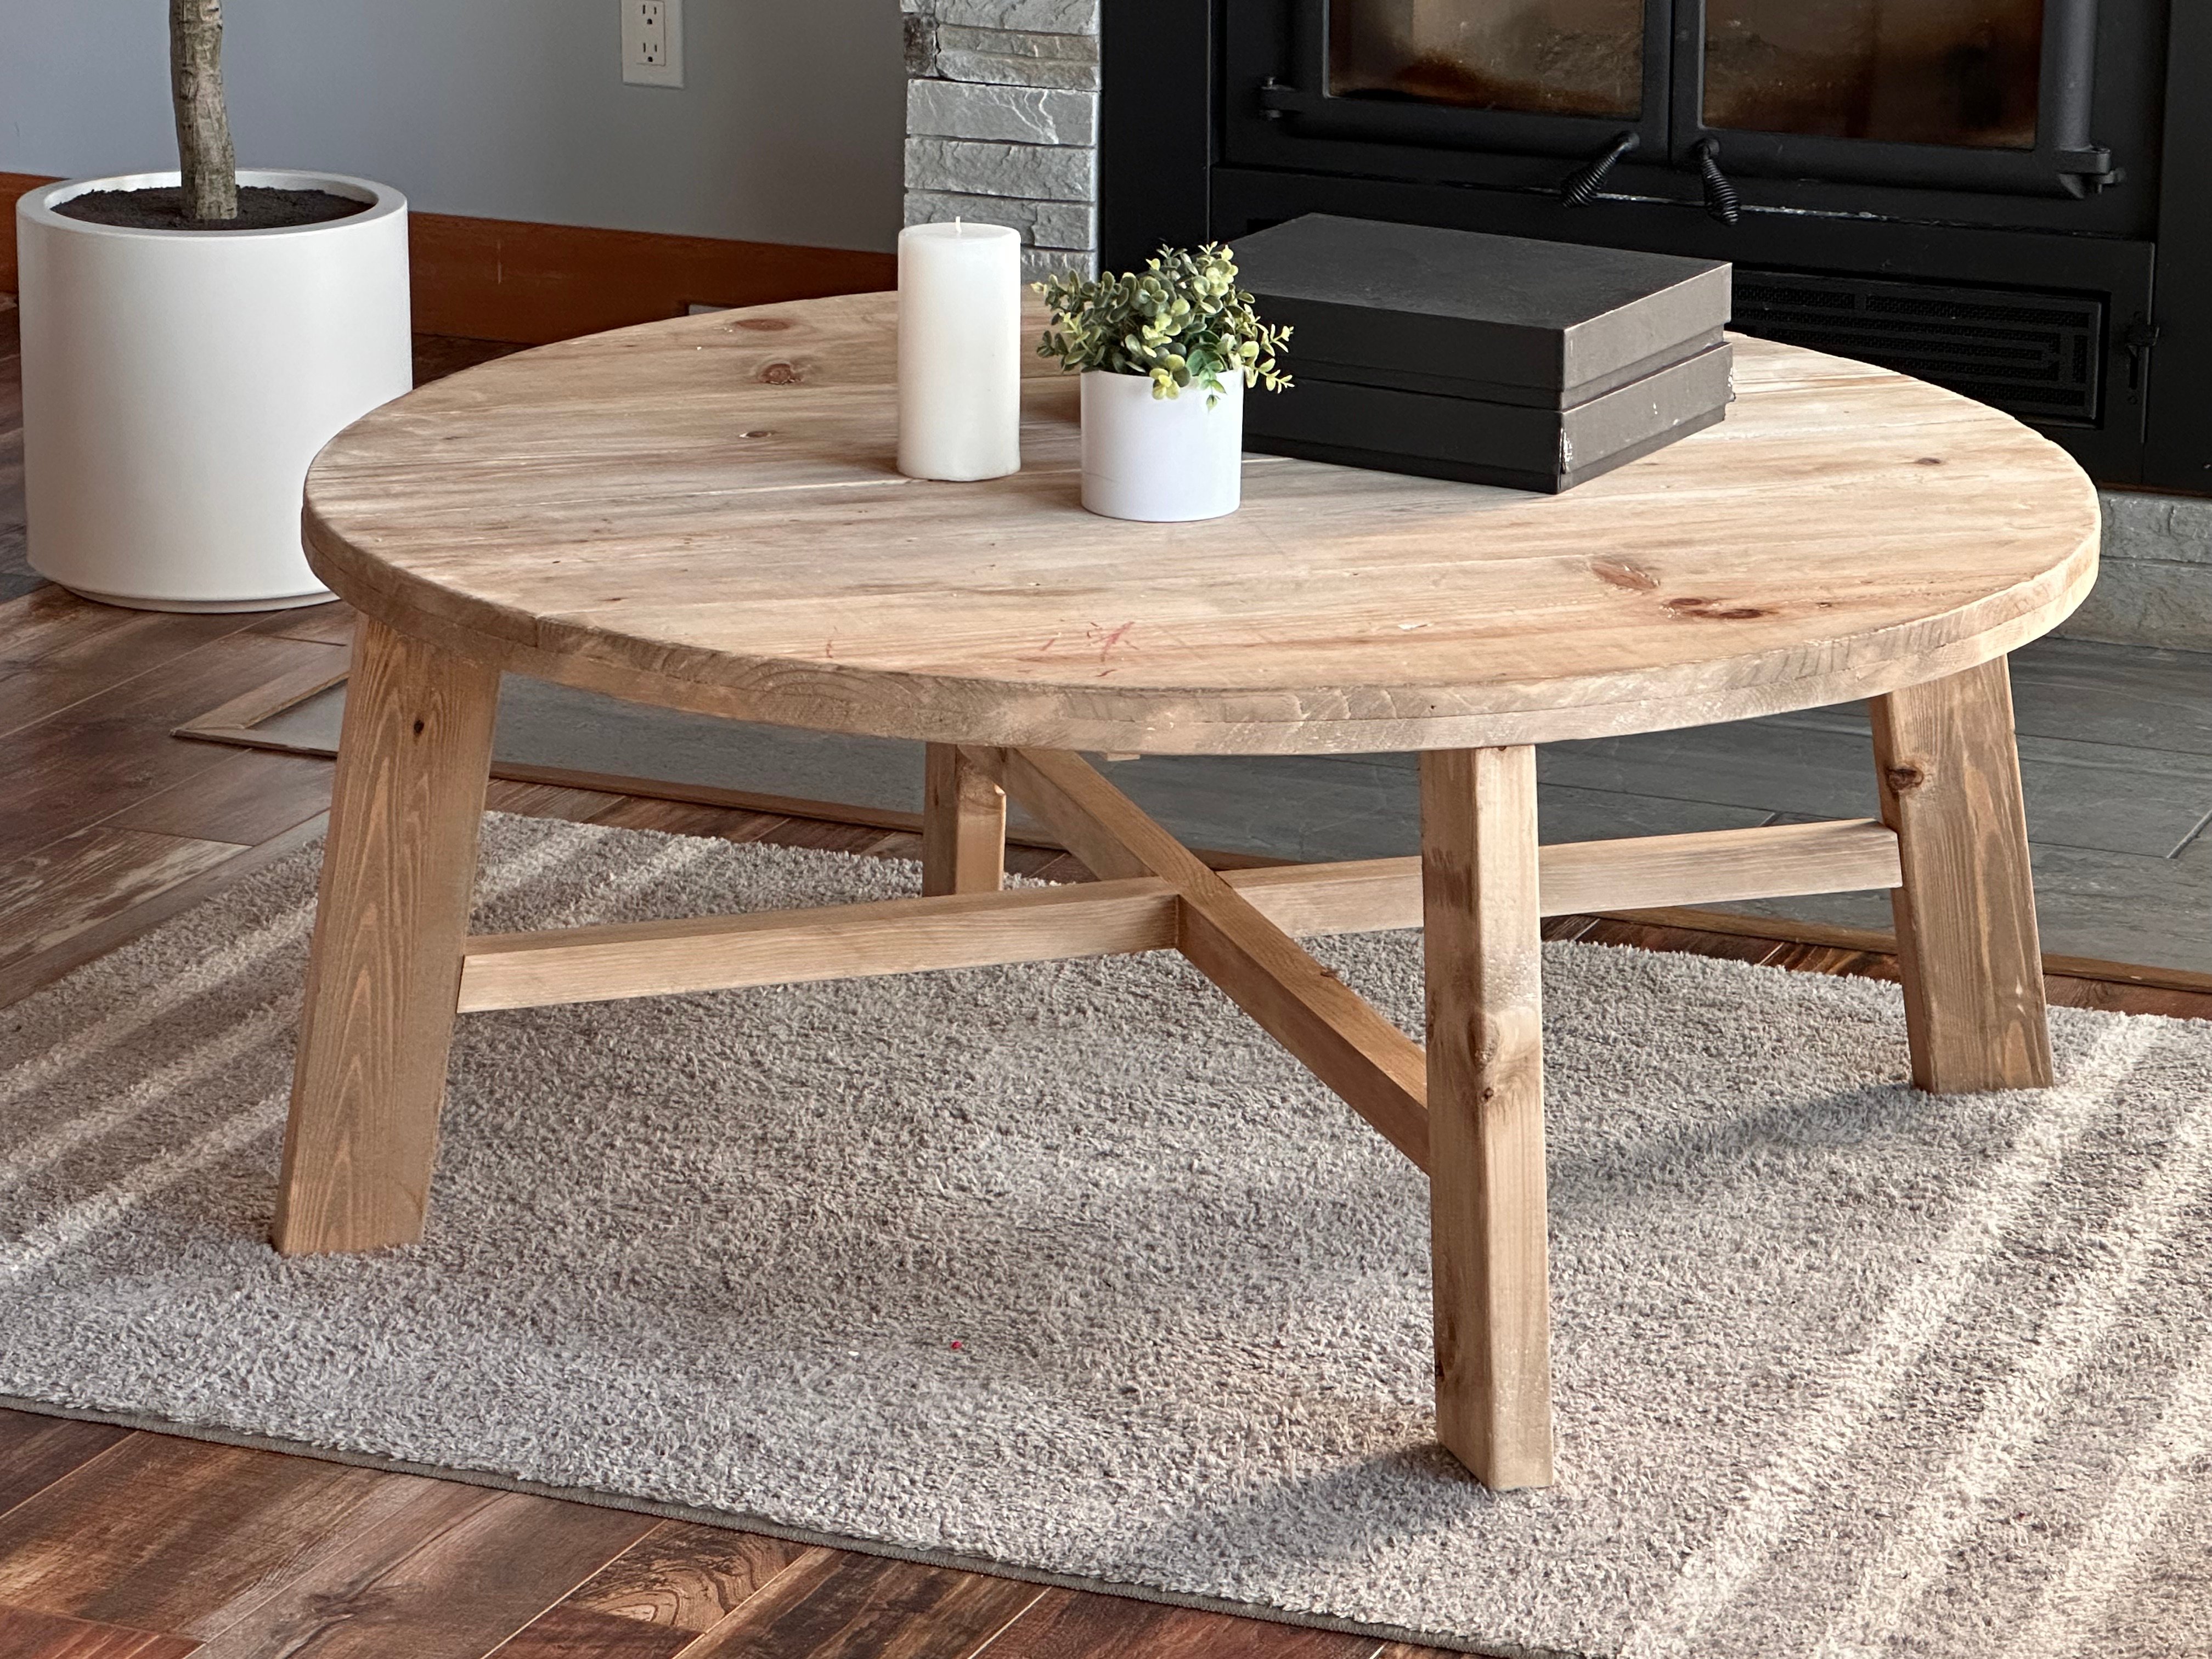
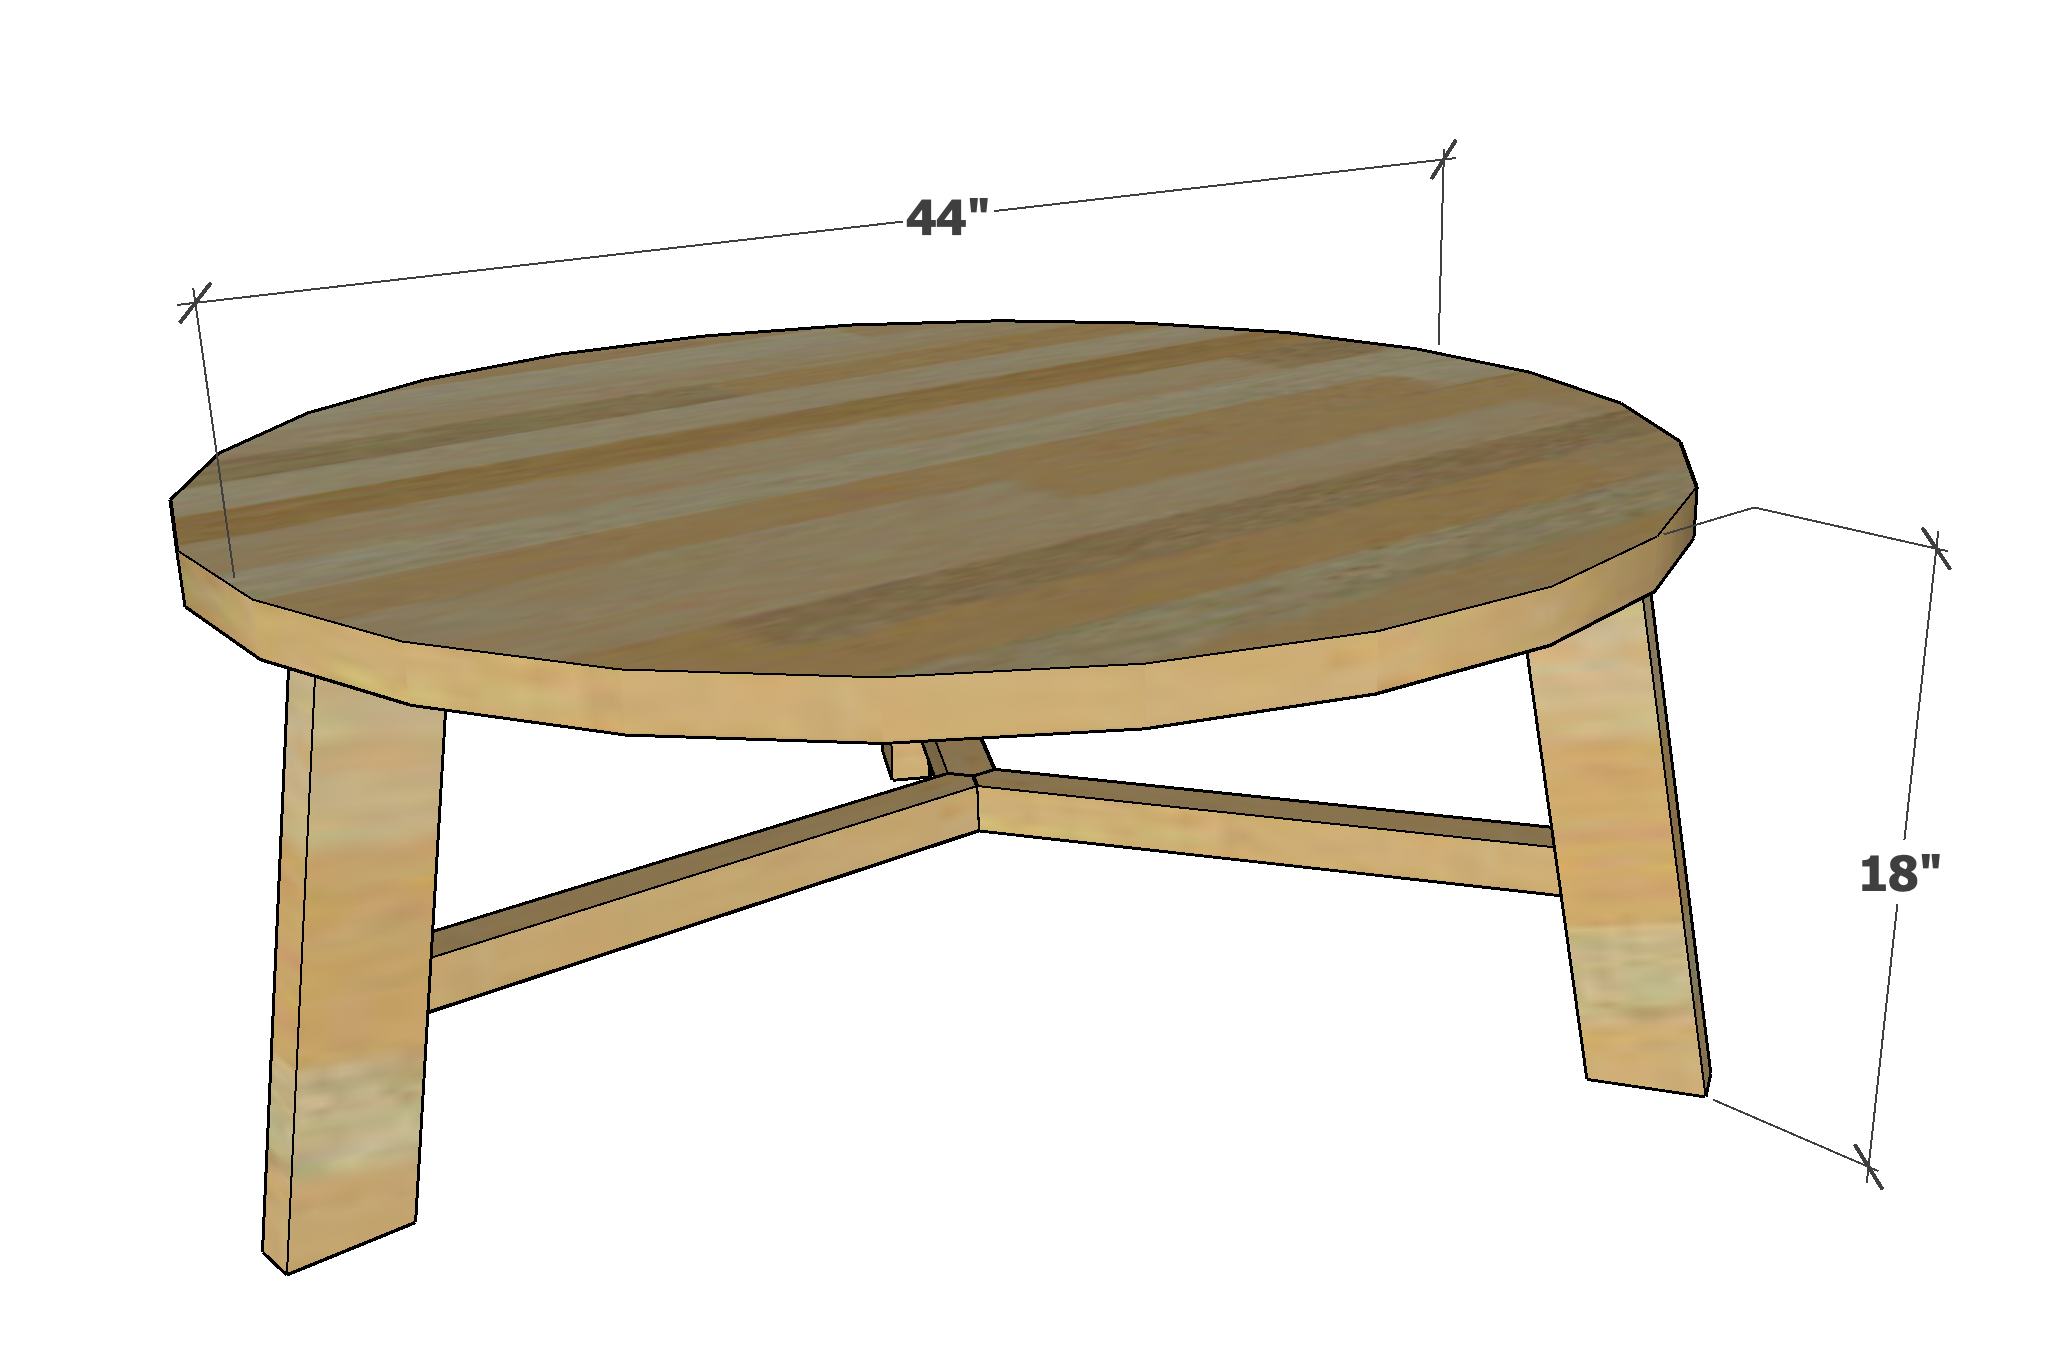
Free plans to build your own rustic farmhouse round coffee table. With a pine planked top and splayed legs, this beautiful, lightweight coffee table adds character and functionality to your living space. Free plans include video tutorial, step by step diagrams and shopping list, all built using minimal tools and simple techniques.
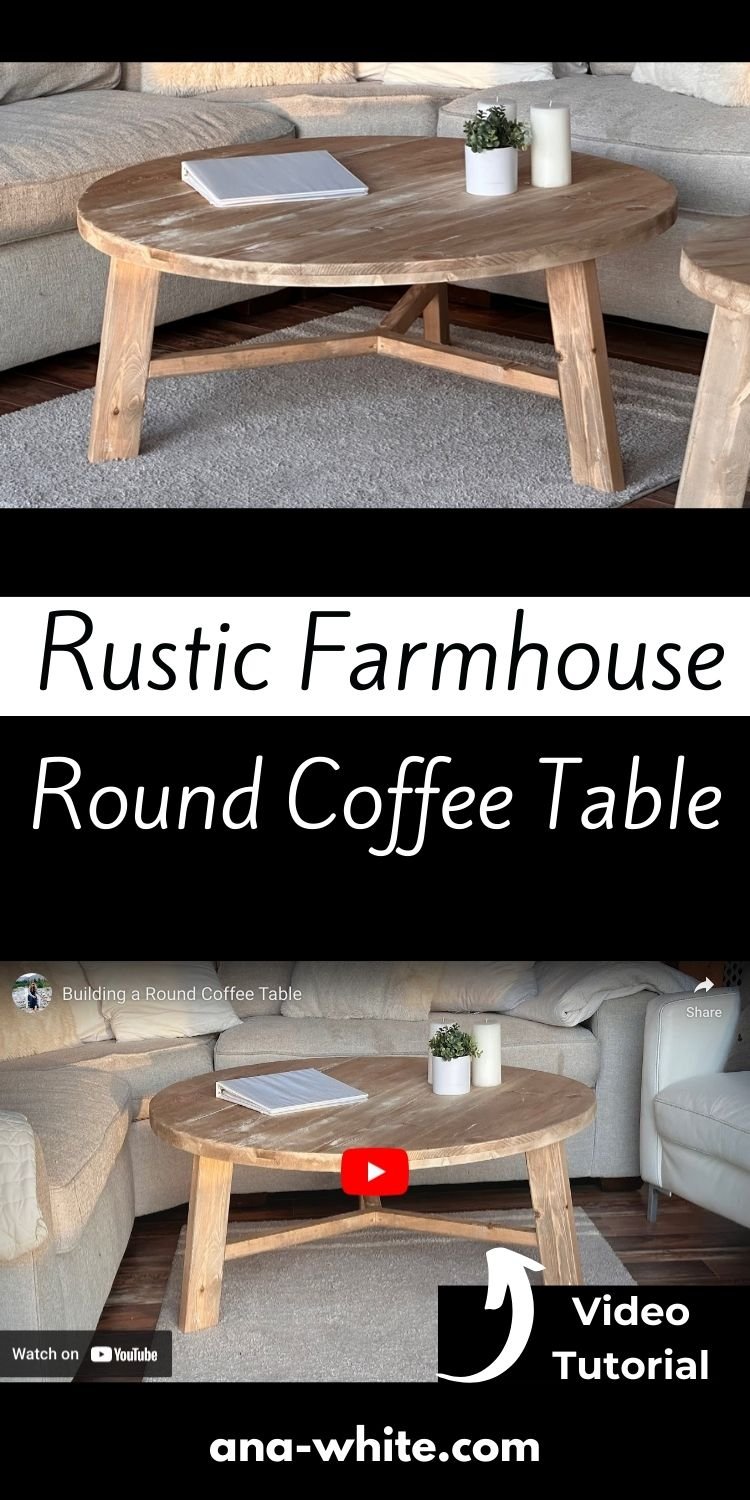
Watch - How I Built this Coffee Table
From cutting the round tabletop to making the angled base, in this video you'll see how this rustic farmhouse coffee table is built.
More Plans in this Collection
I liked this coffee table so much, I went on to build the end table, and hopefully more plans in this collection!
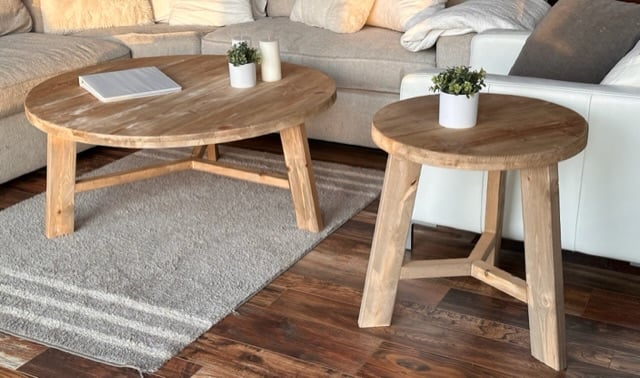
Here's the plans I've built so far:
Free Plans to Build Your Own Round Rustic Farmhouse Coffee Table
Pin For Later!
Preparation
- 2 - 1x12 @ 8 feet long
- 2 - 1x6 @ 8 feet long
- 1 - 2x4 @ 4 feet long
- 1 - 2x2 @ 6 feet long
- 12" of 1x2 boards
- 1-1/4" pocket hole screws (about 25 needed)
- 2-1/2" pocket hole screws (3 needed)
- 2" trim screws (about 20 needed)
- 1-1/4" brad nails
- wood glue
- sand paper
- wood filler
- Stain and topcoat as desired
- 4 - 1x12 @ 48" long
- 8 - 1x6 @ 18-3/8" - both ends cut at 22-1/2 degrees off square, ends NOT parallel, long point to long point measurement
- 3 - 2x2 @ 19" - one end cut at 10 degrees off square, long point measurement
- 3 - 2x4 @ 16-1/2" - both ends cut at 10 degrees off square, ends ARE parallel, long point to short point measurement
- 3 - 1x2 @ 4" long


Instructions
Step 1
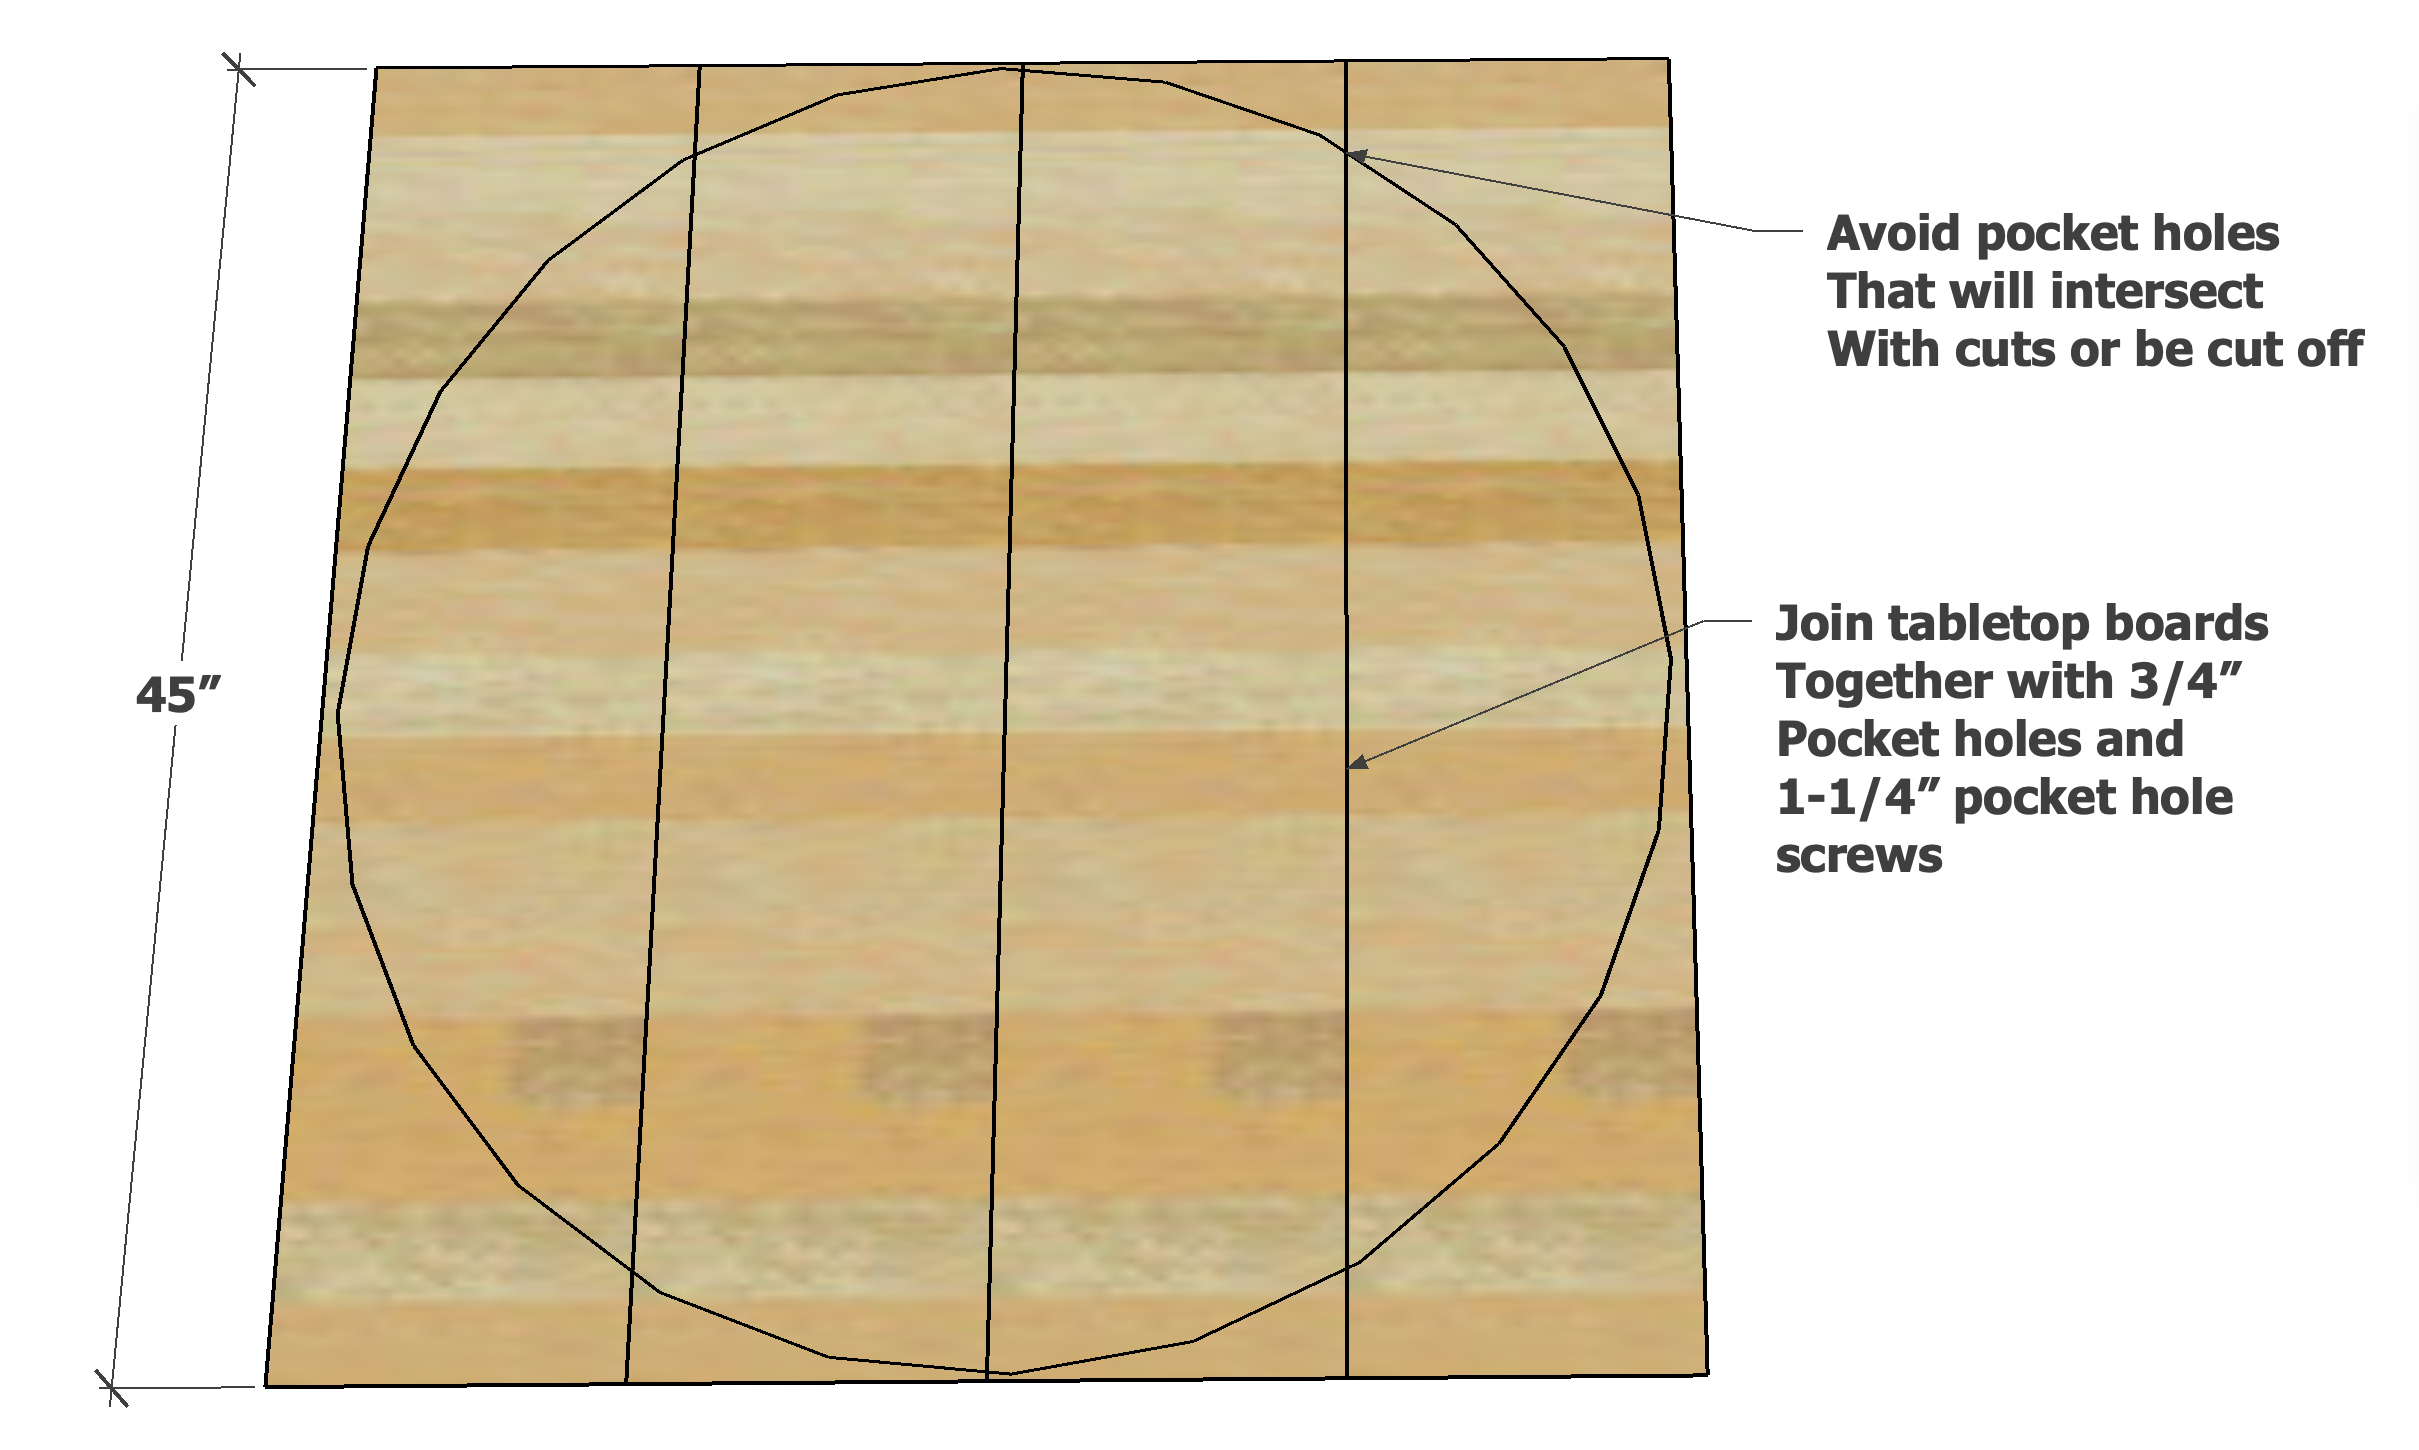
Layout the 1x12 boards and roughly sketch out a 44" diameter circle. Mark pocket hole locations inside the circle. Drill 3/4" pocket holes and join together with 1-1/4" pocket hole screws.
Step 2
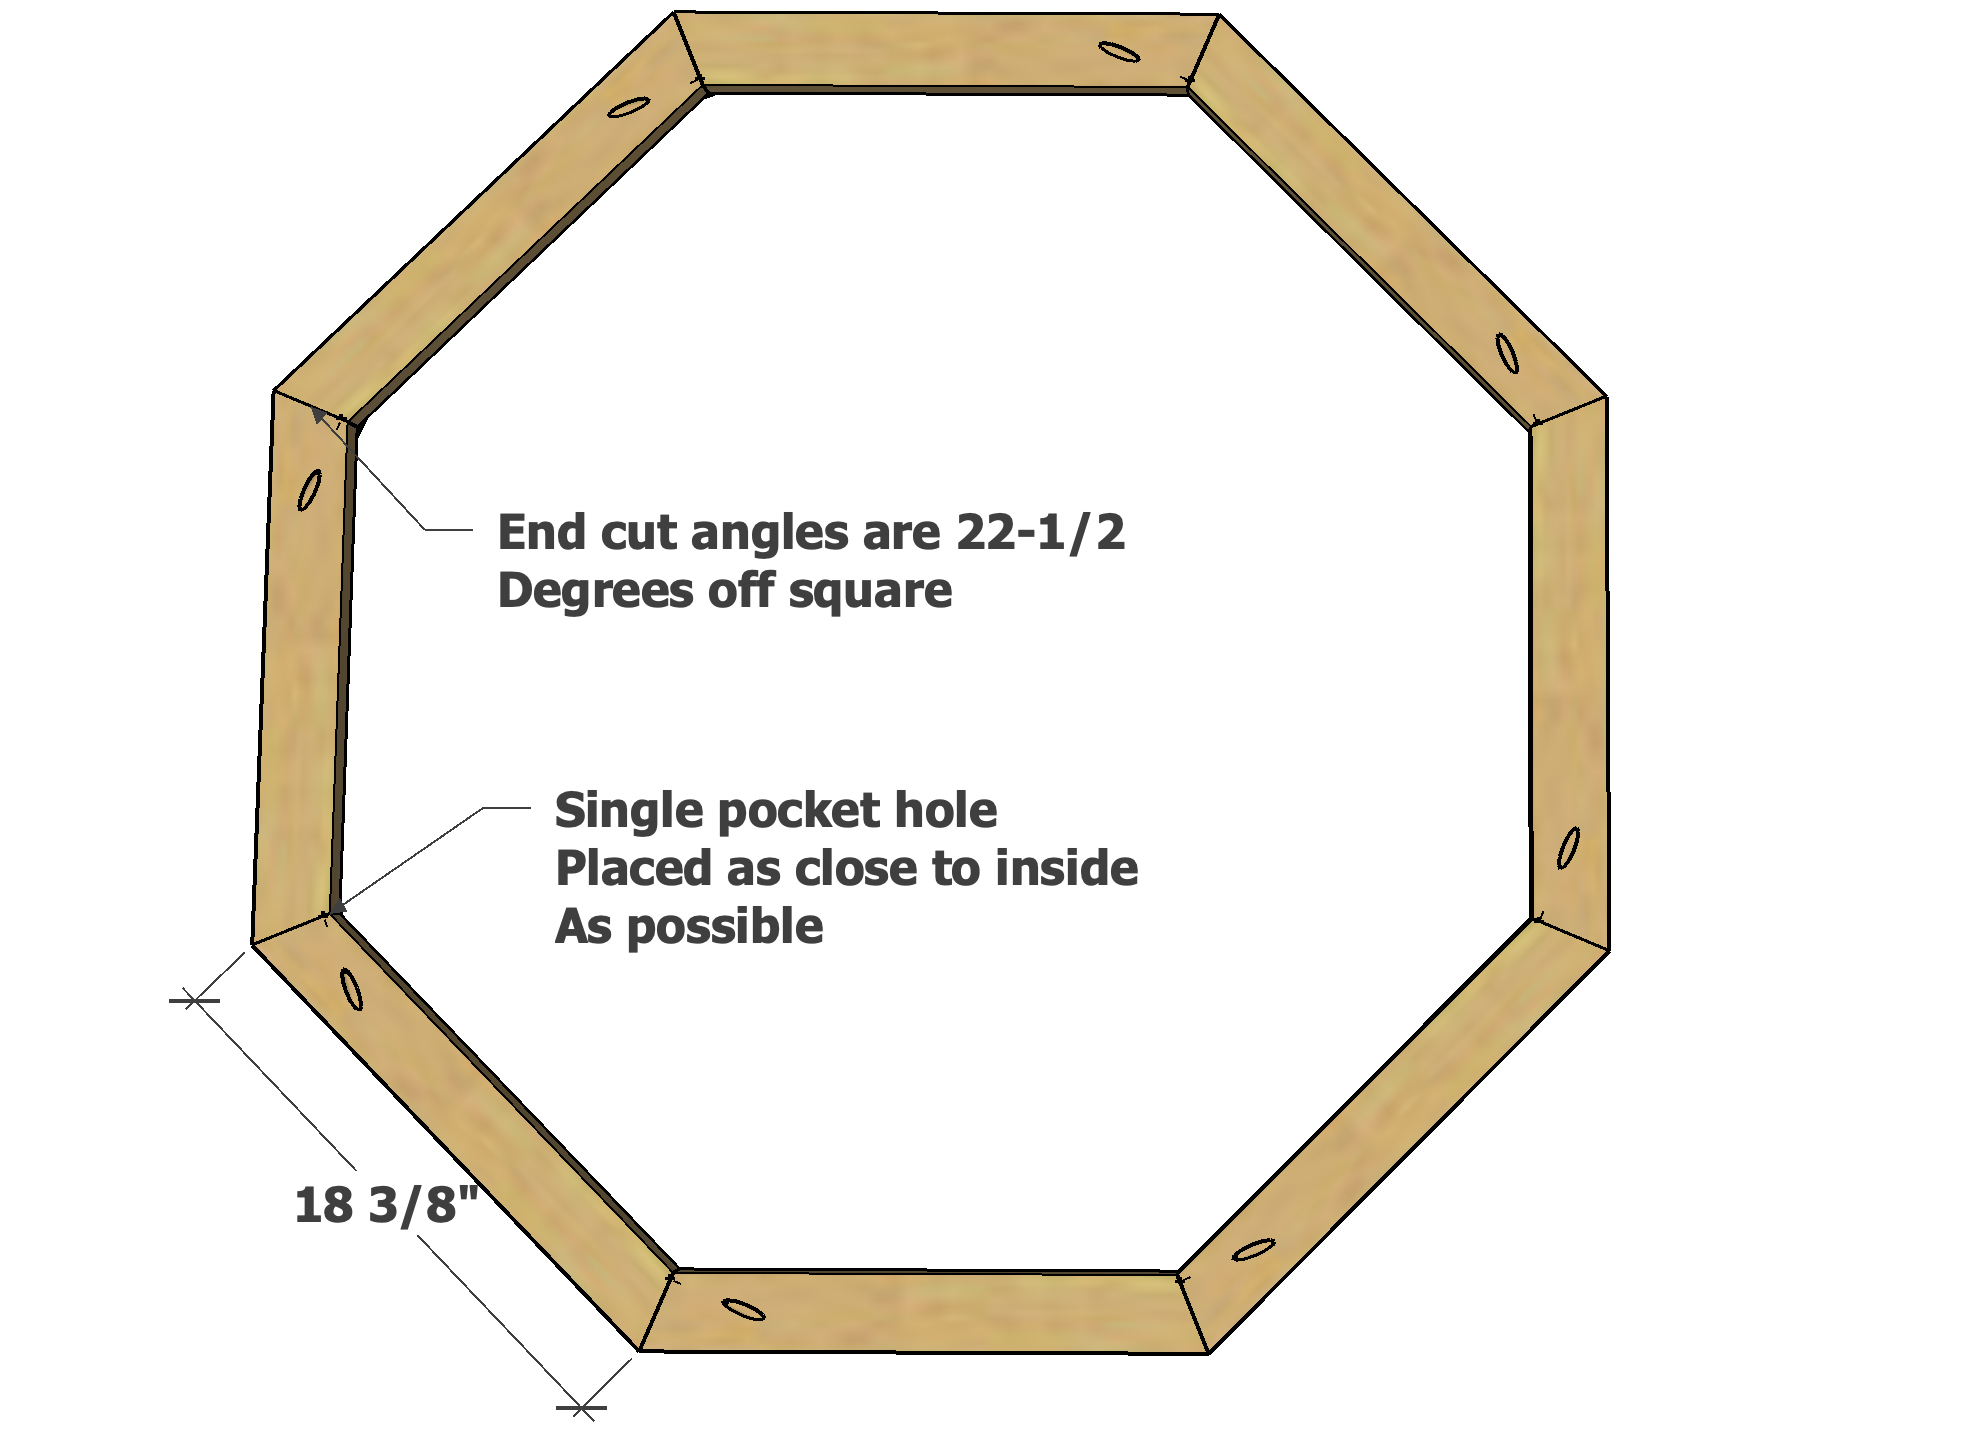
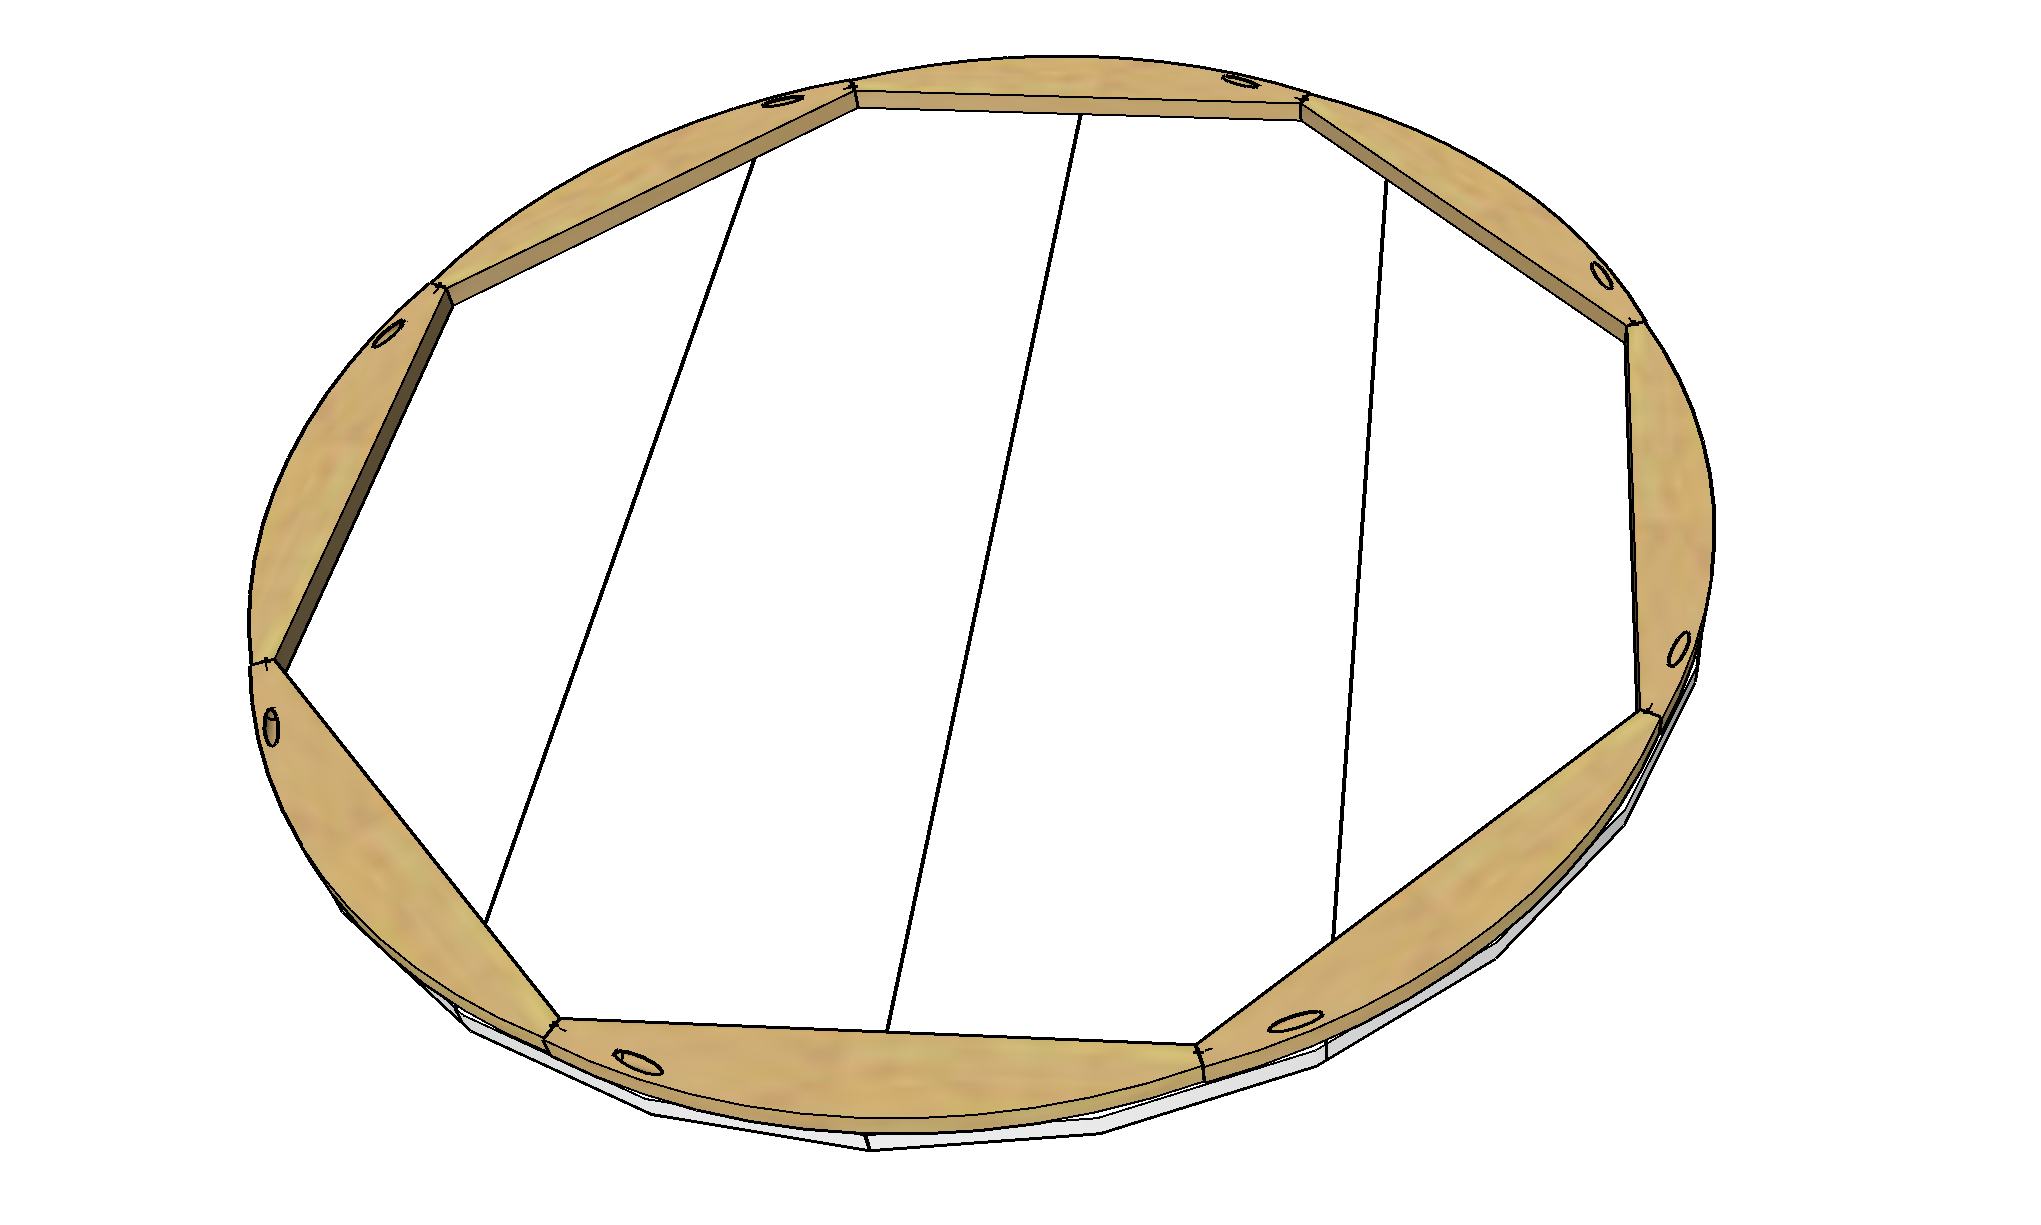
For the octagon apron under the tabletop, drill one 3/4" pocket hole on the inner side of the boards as shown in the diagram, one pocket hole drilled per board. Attach together to create an octagon.
Step 3
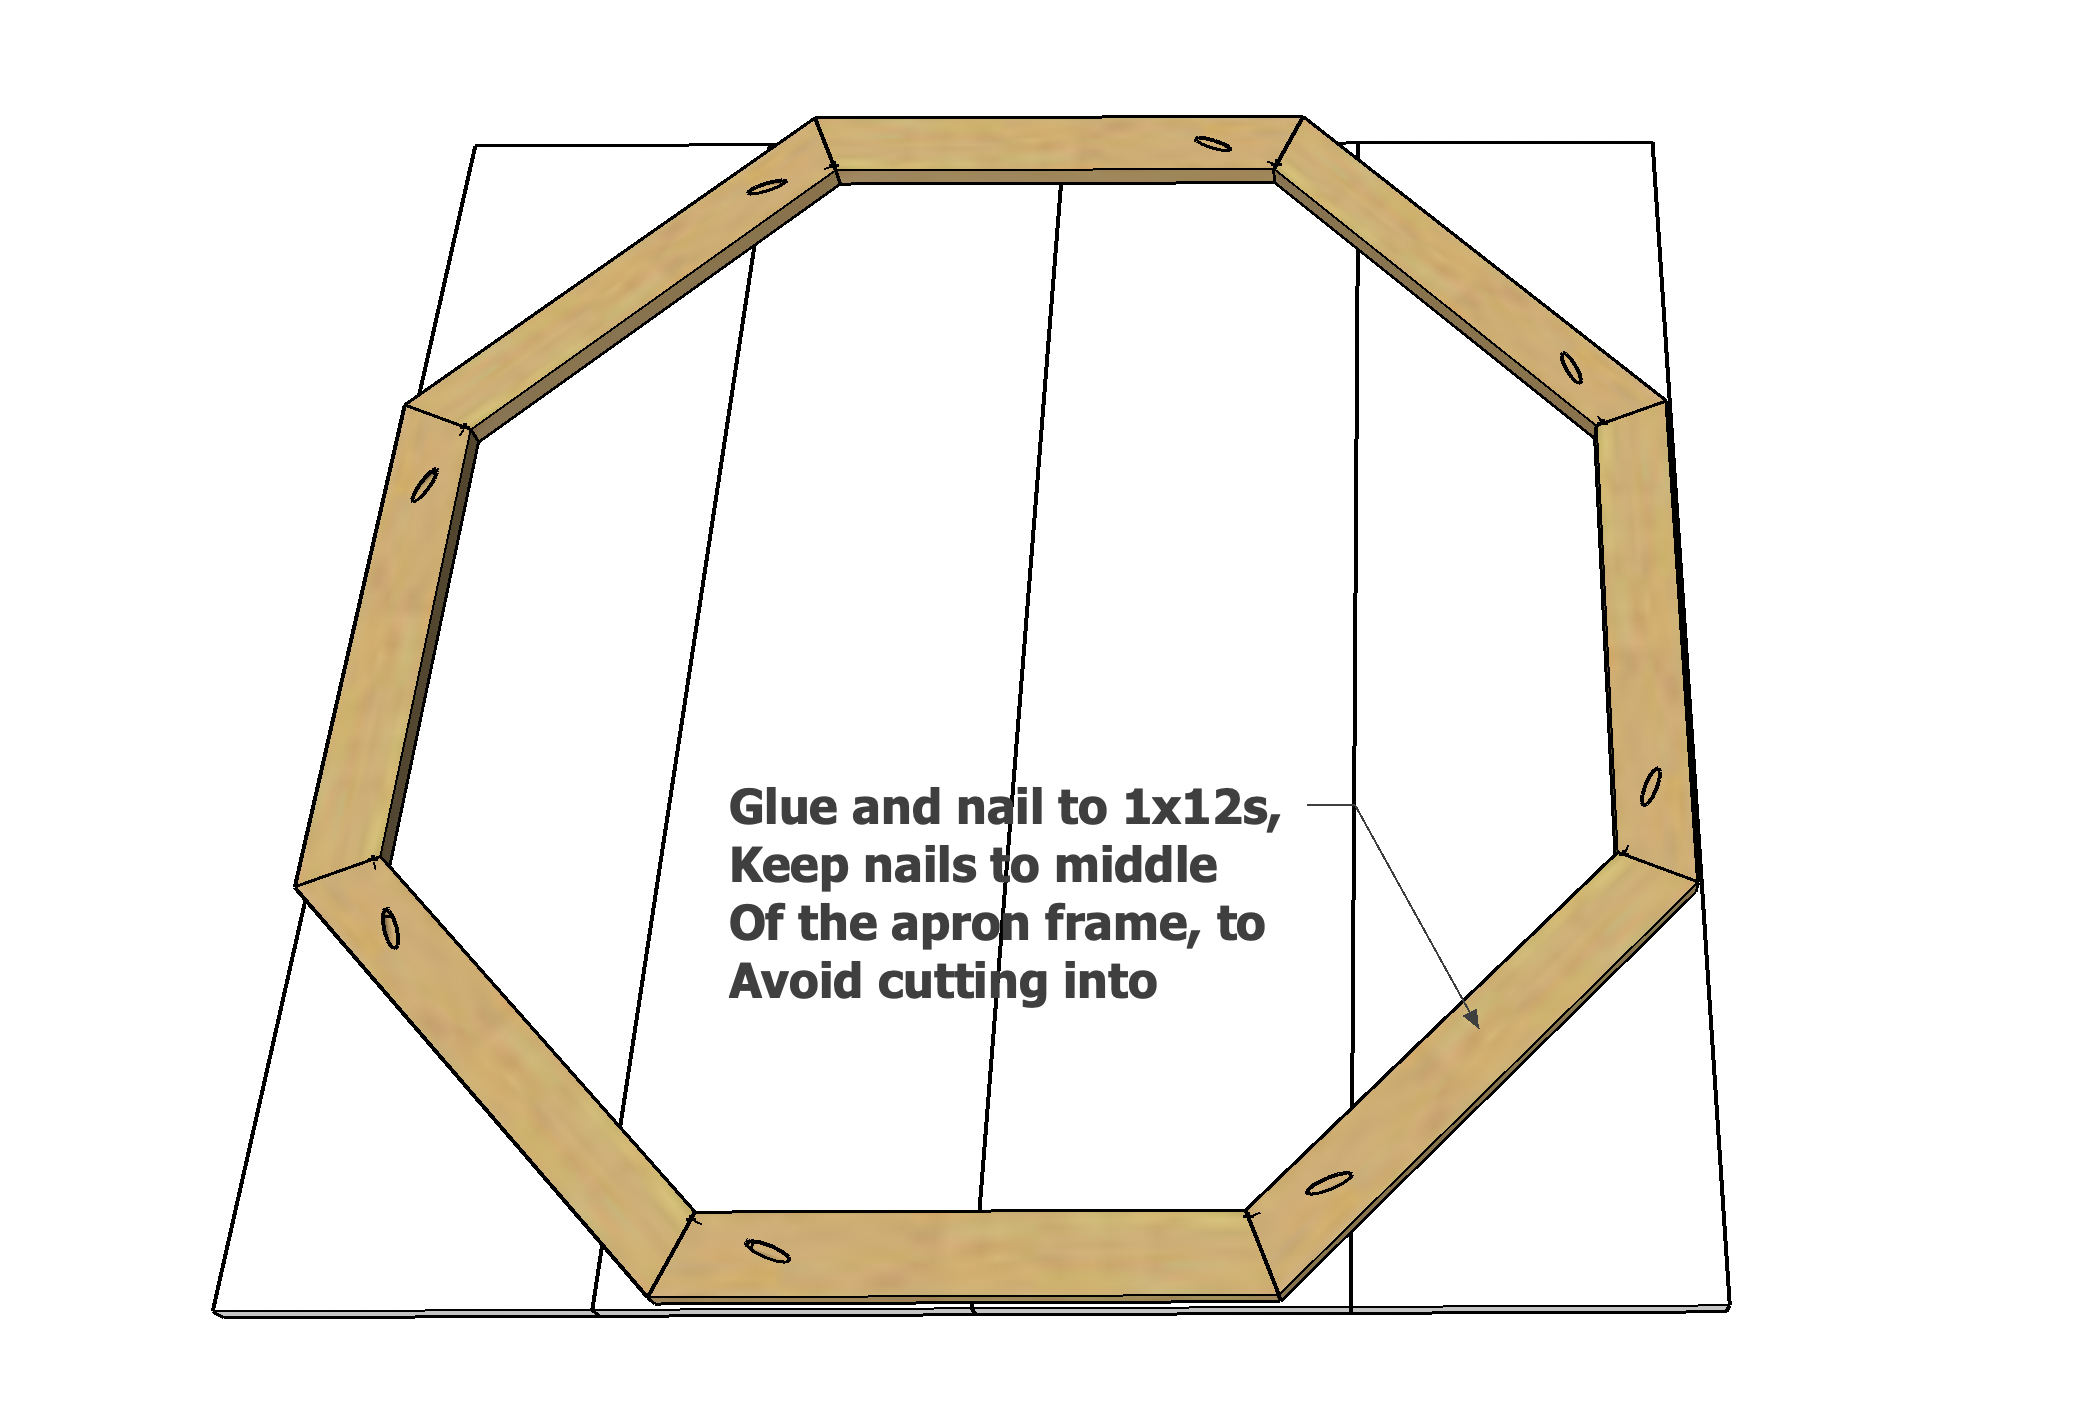
Place the octagon on top of the 1x12 tabletop boards and attach with glue and 1-1/4" brad nails.
Avoid nailing for now where the circular saw may cut into.
Place the pocket holes facing upward so you can remove a pocket hole screw if needed when cutting.
Step 4
Cut the tabletop down into a circle. Here's how to make the circle jig.
Step 5
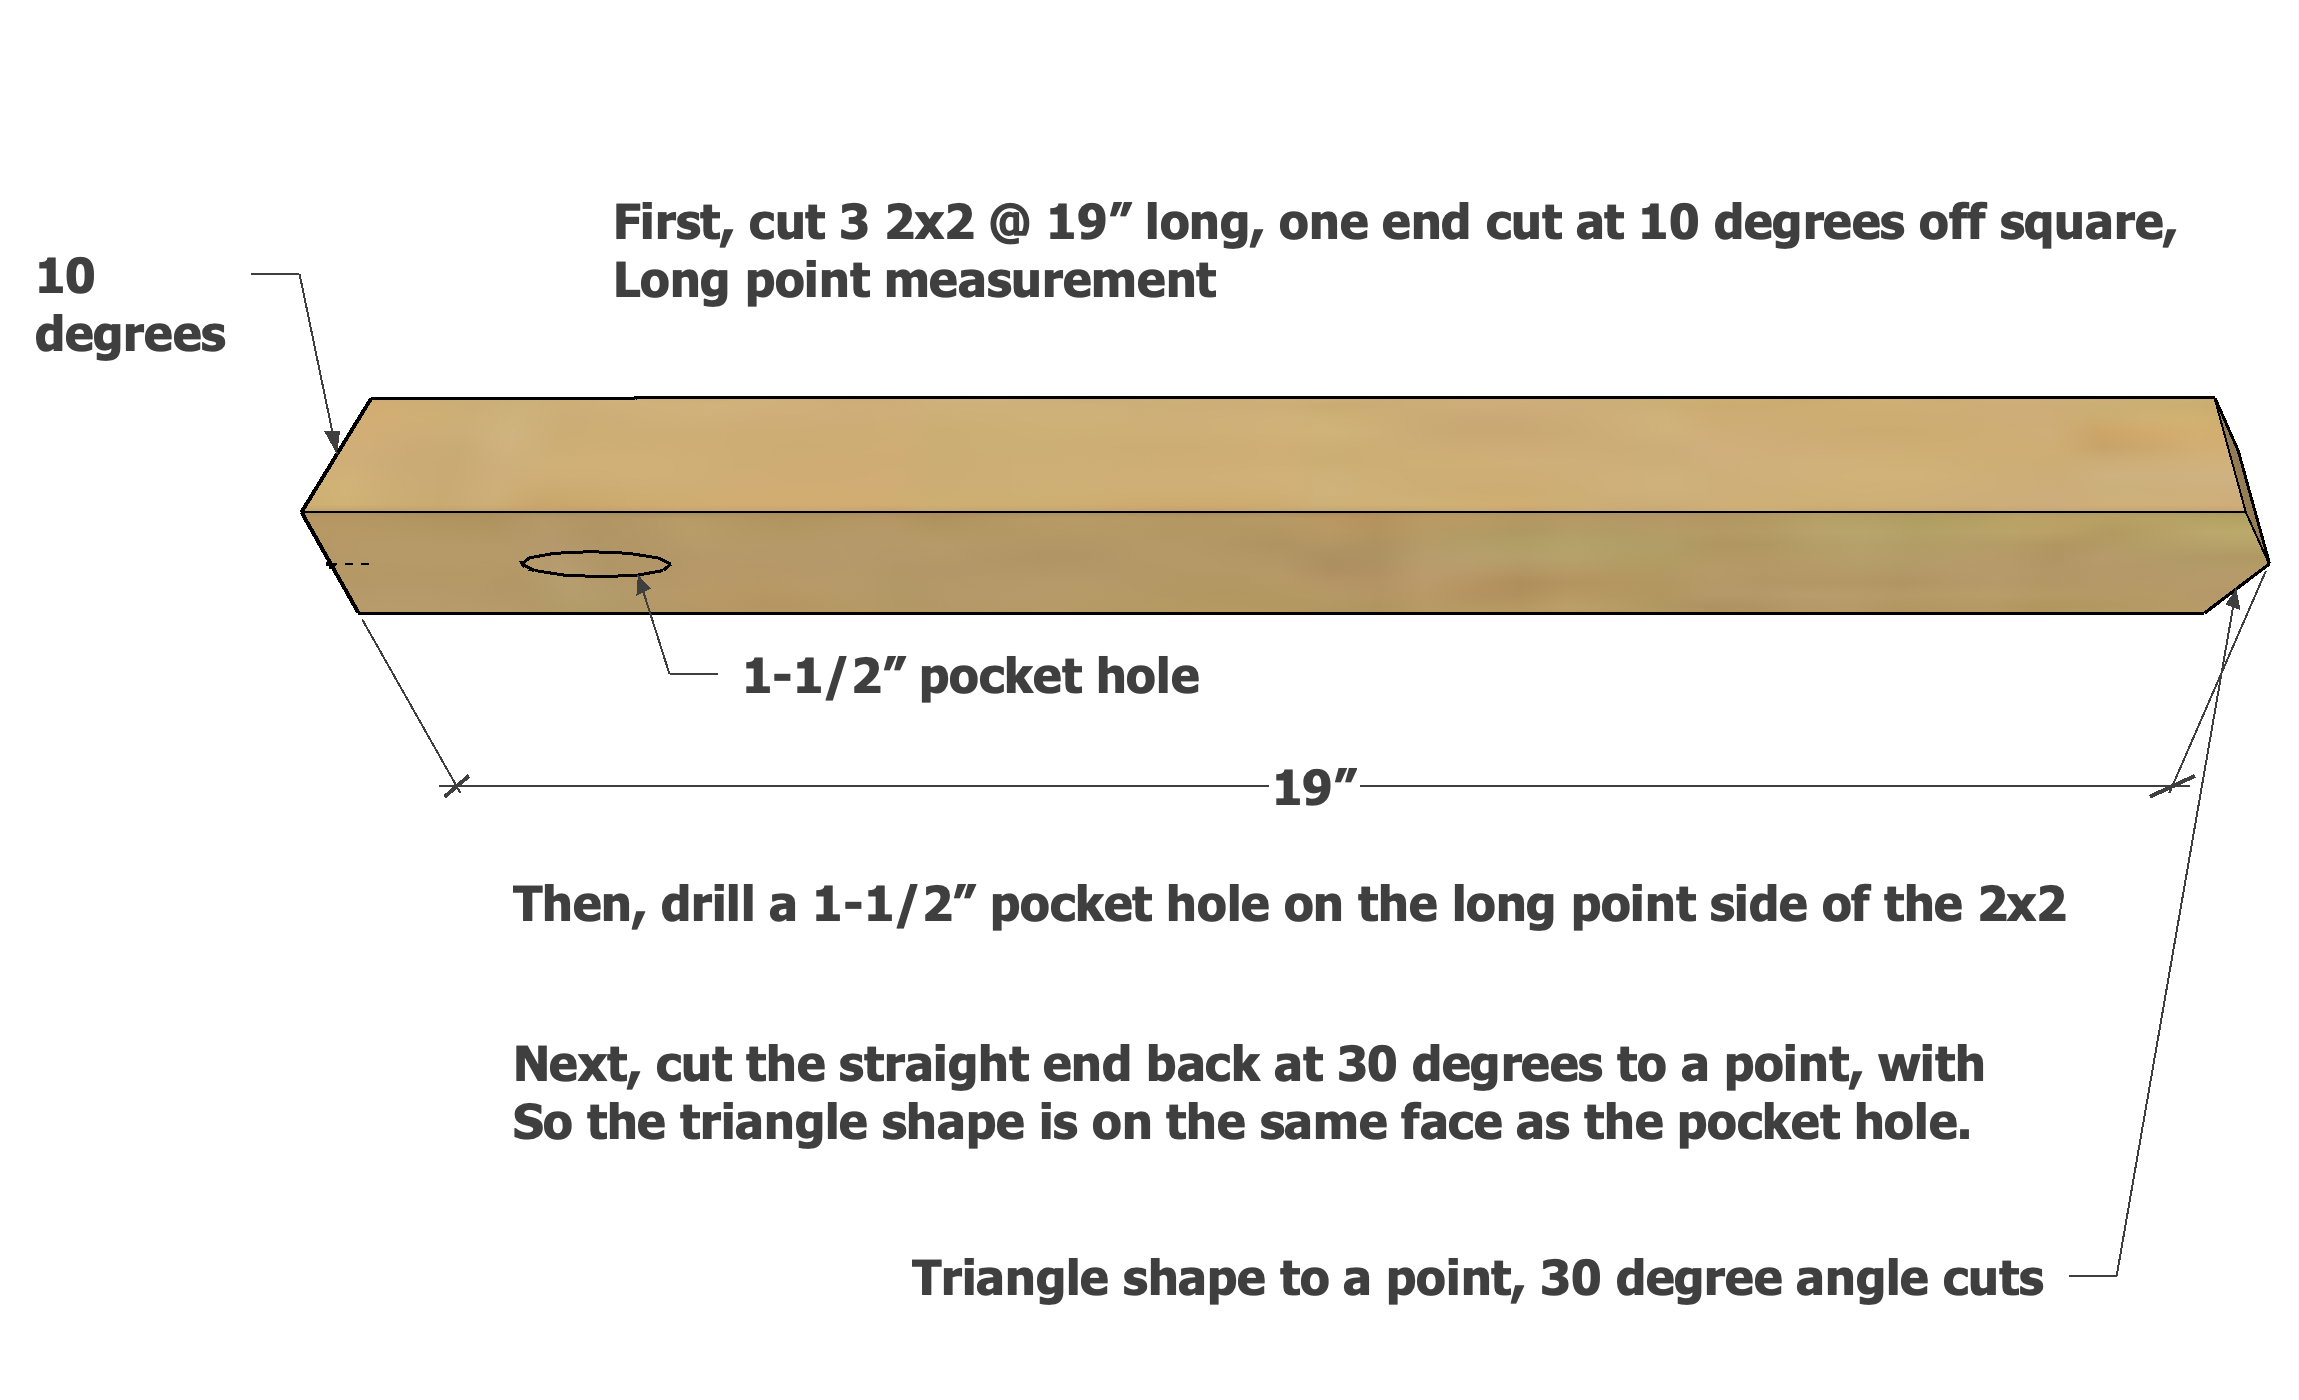
Prepare the three stretcher pieces from the 2x2s.
First, cut the 2x2s as directed in the cut list.
On the angled end, long point side, drill a 1-1/2" pocket hole.
On the opposite end, cut to a point, with saw set at 30 degrees off square.
It is easiest to mark first the pocket holes and cuts, to avoid mistakes.
Do this on all three of the 2x2 stretcher pieces.
Step 6
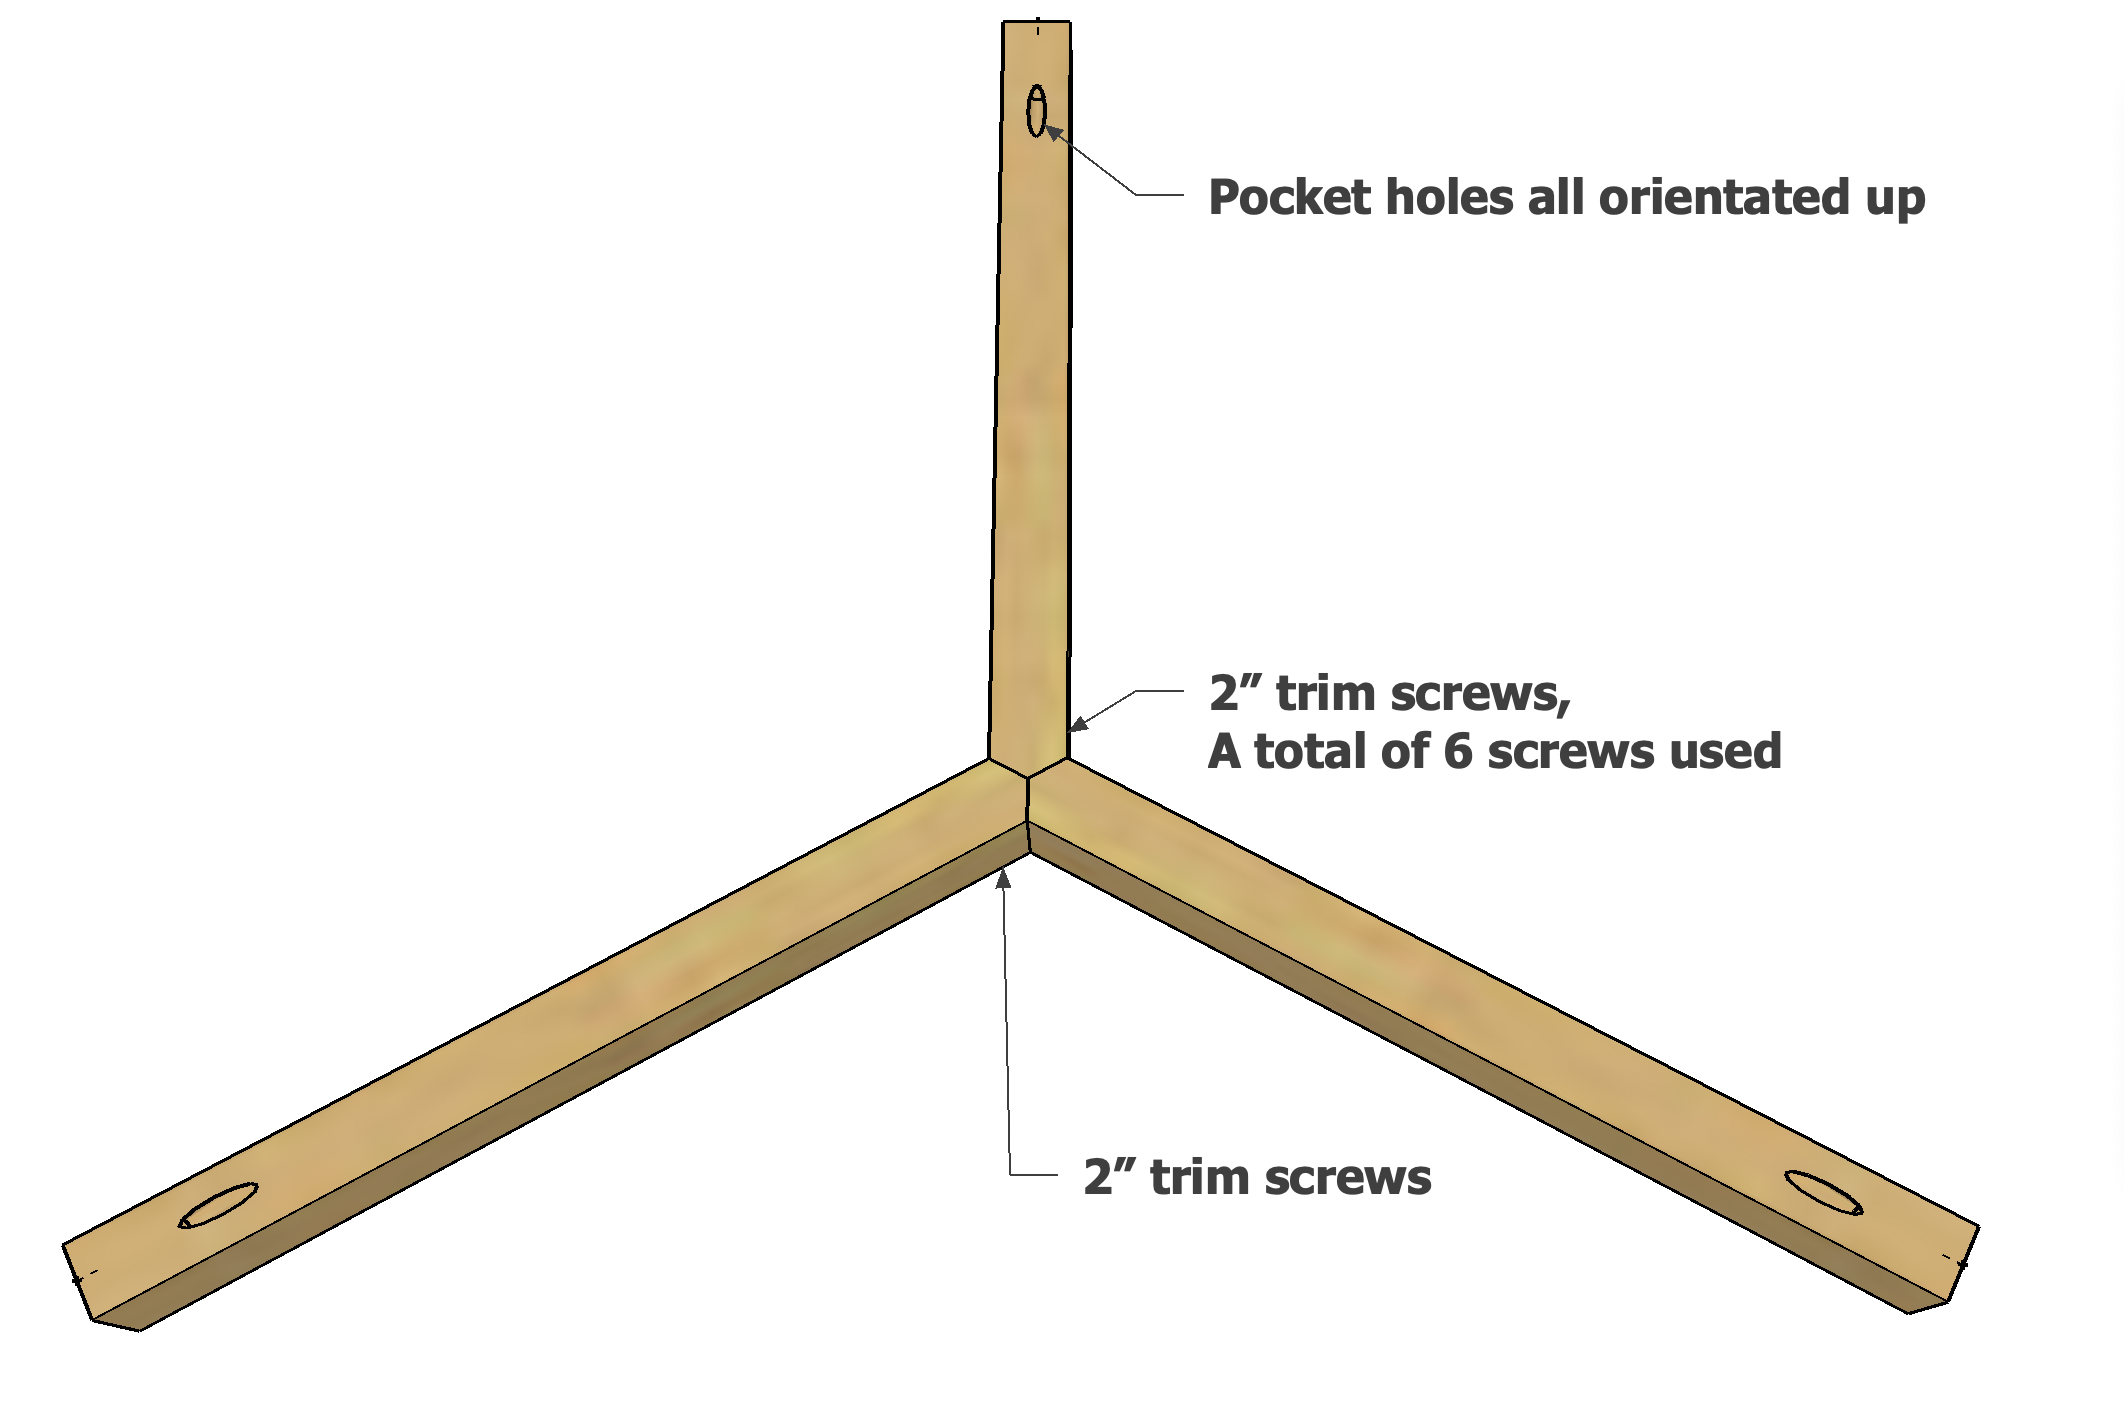
Attach the three stretcher pieces together with glue and 2" trim screws at the center. Make sure all the pocket holes are orientated up.
Step 7
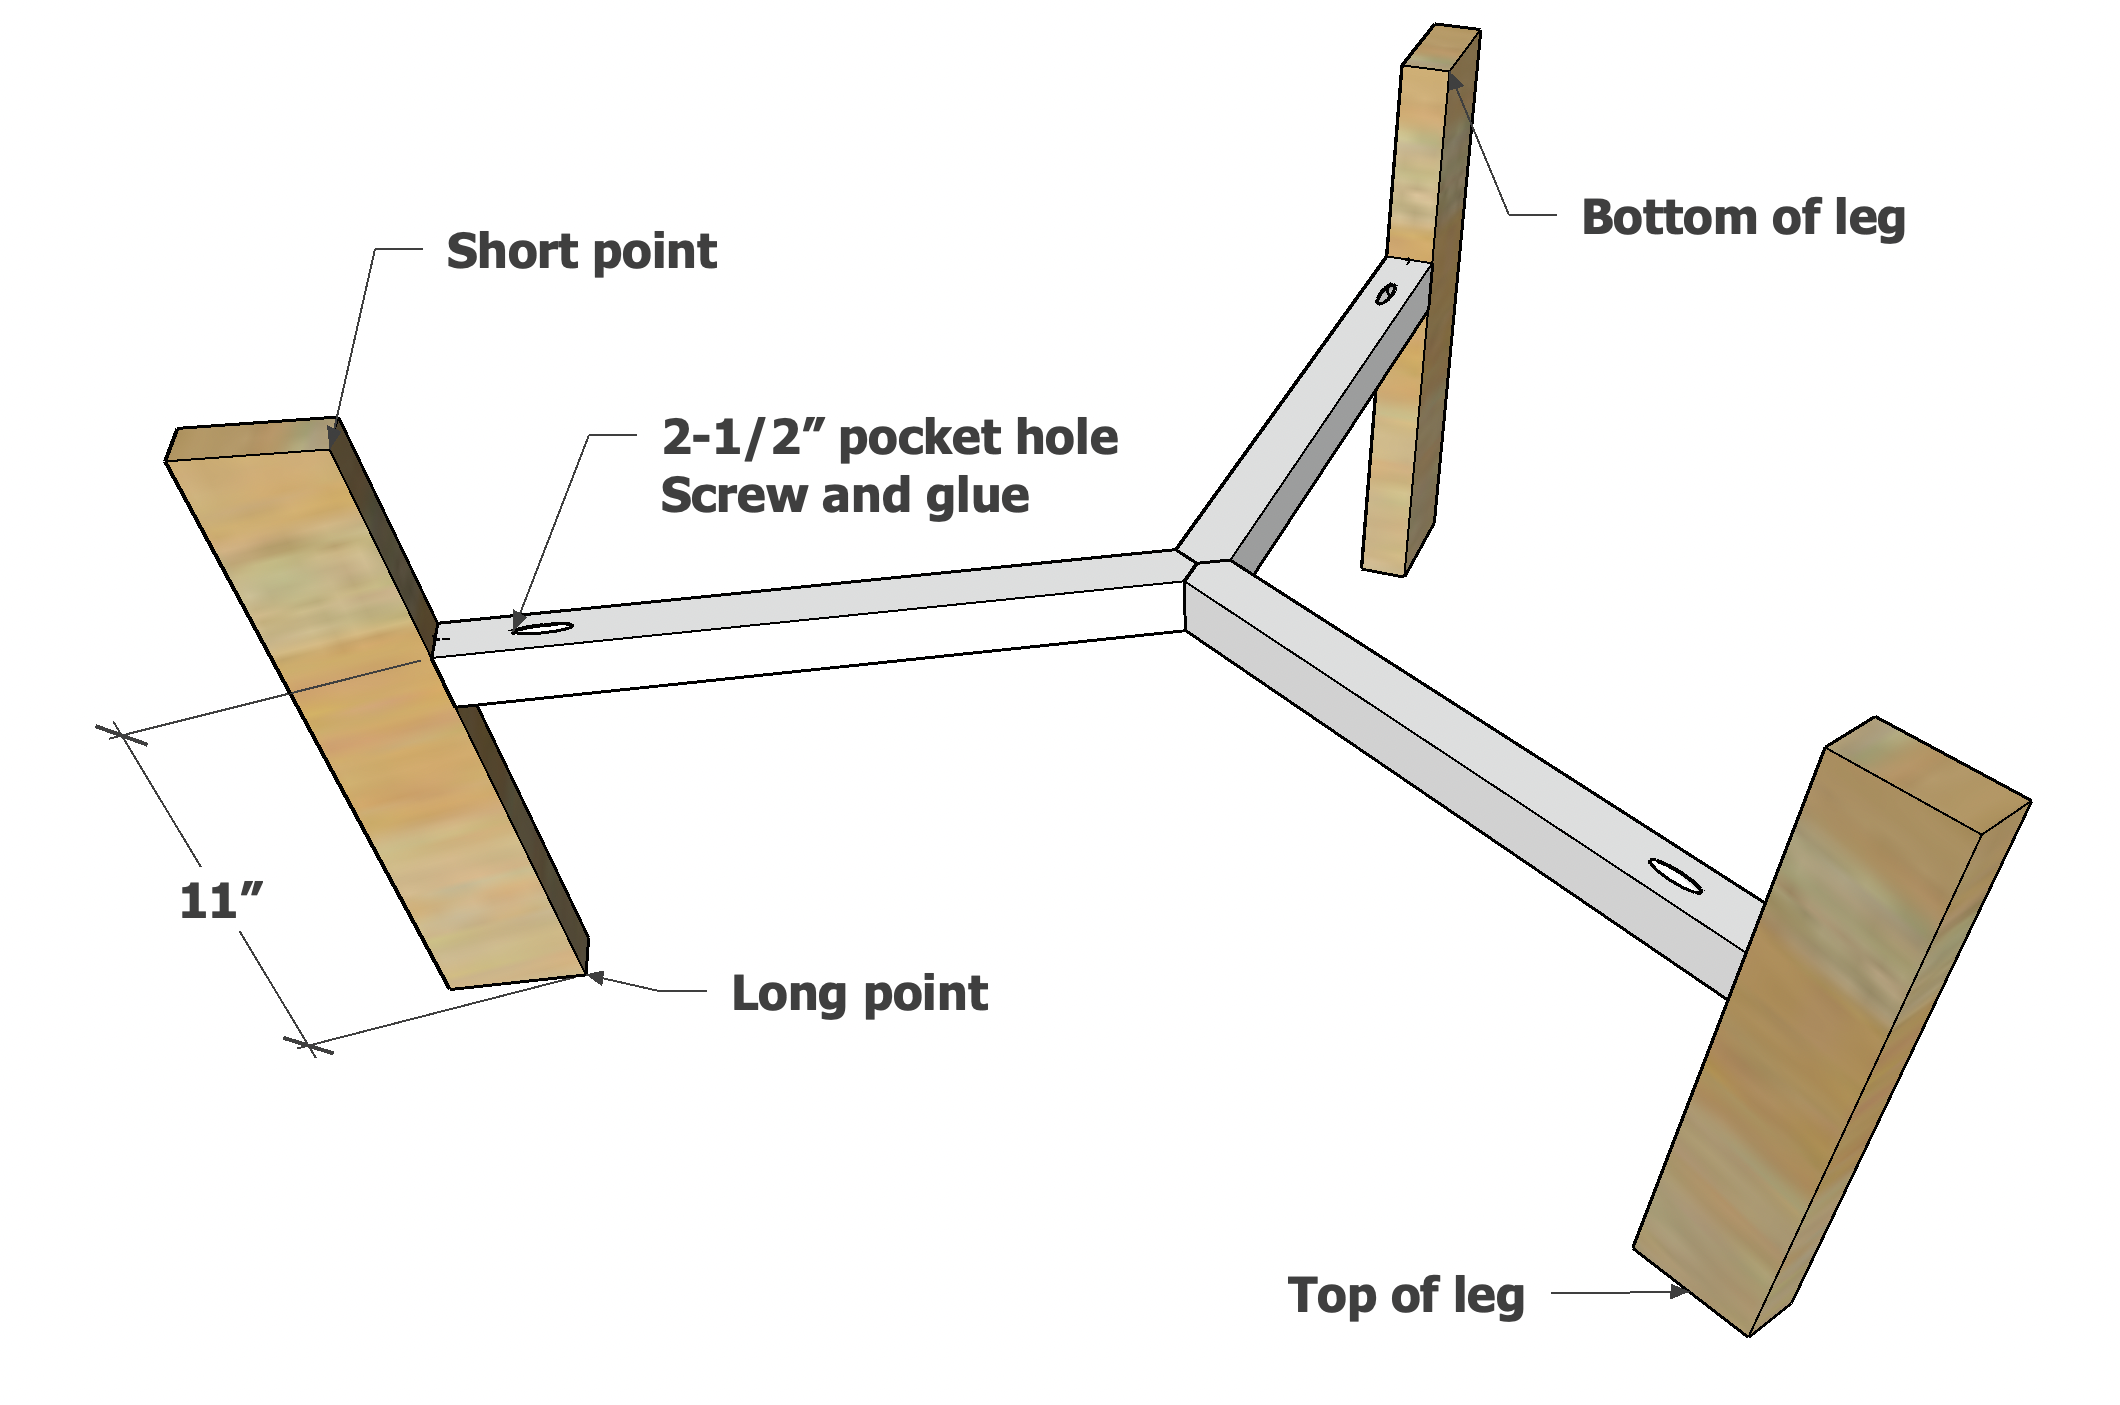
Attach the triangle stretcher piece to the 2x4 legs with glue and 2-1/2" pocket hole screws.
This step is a little challenging to balance and drill - an extra hand would be helpful here.
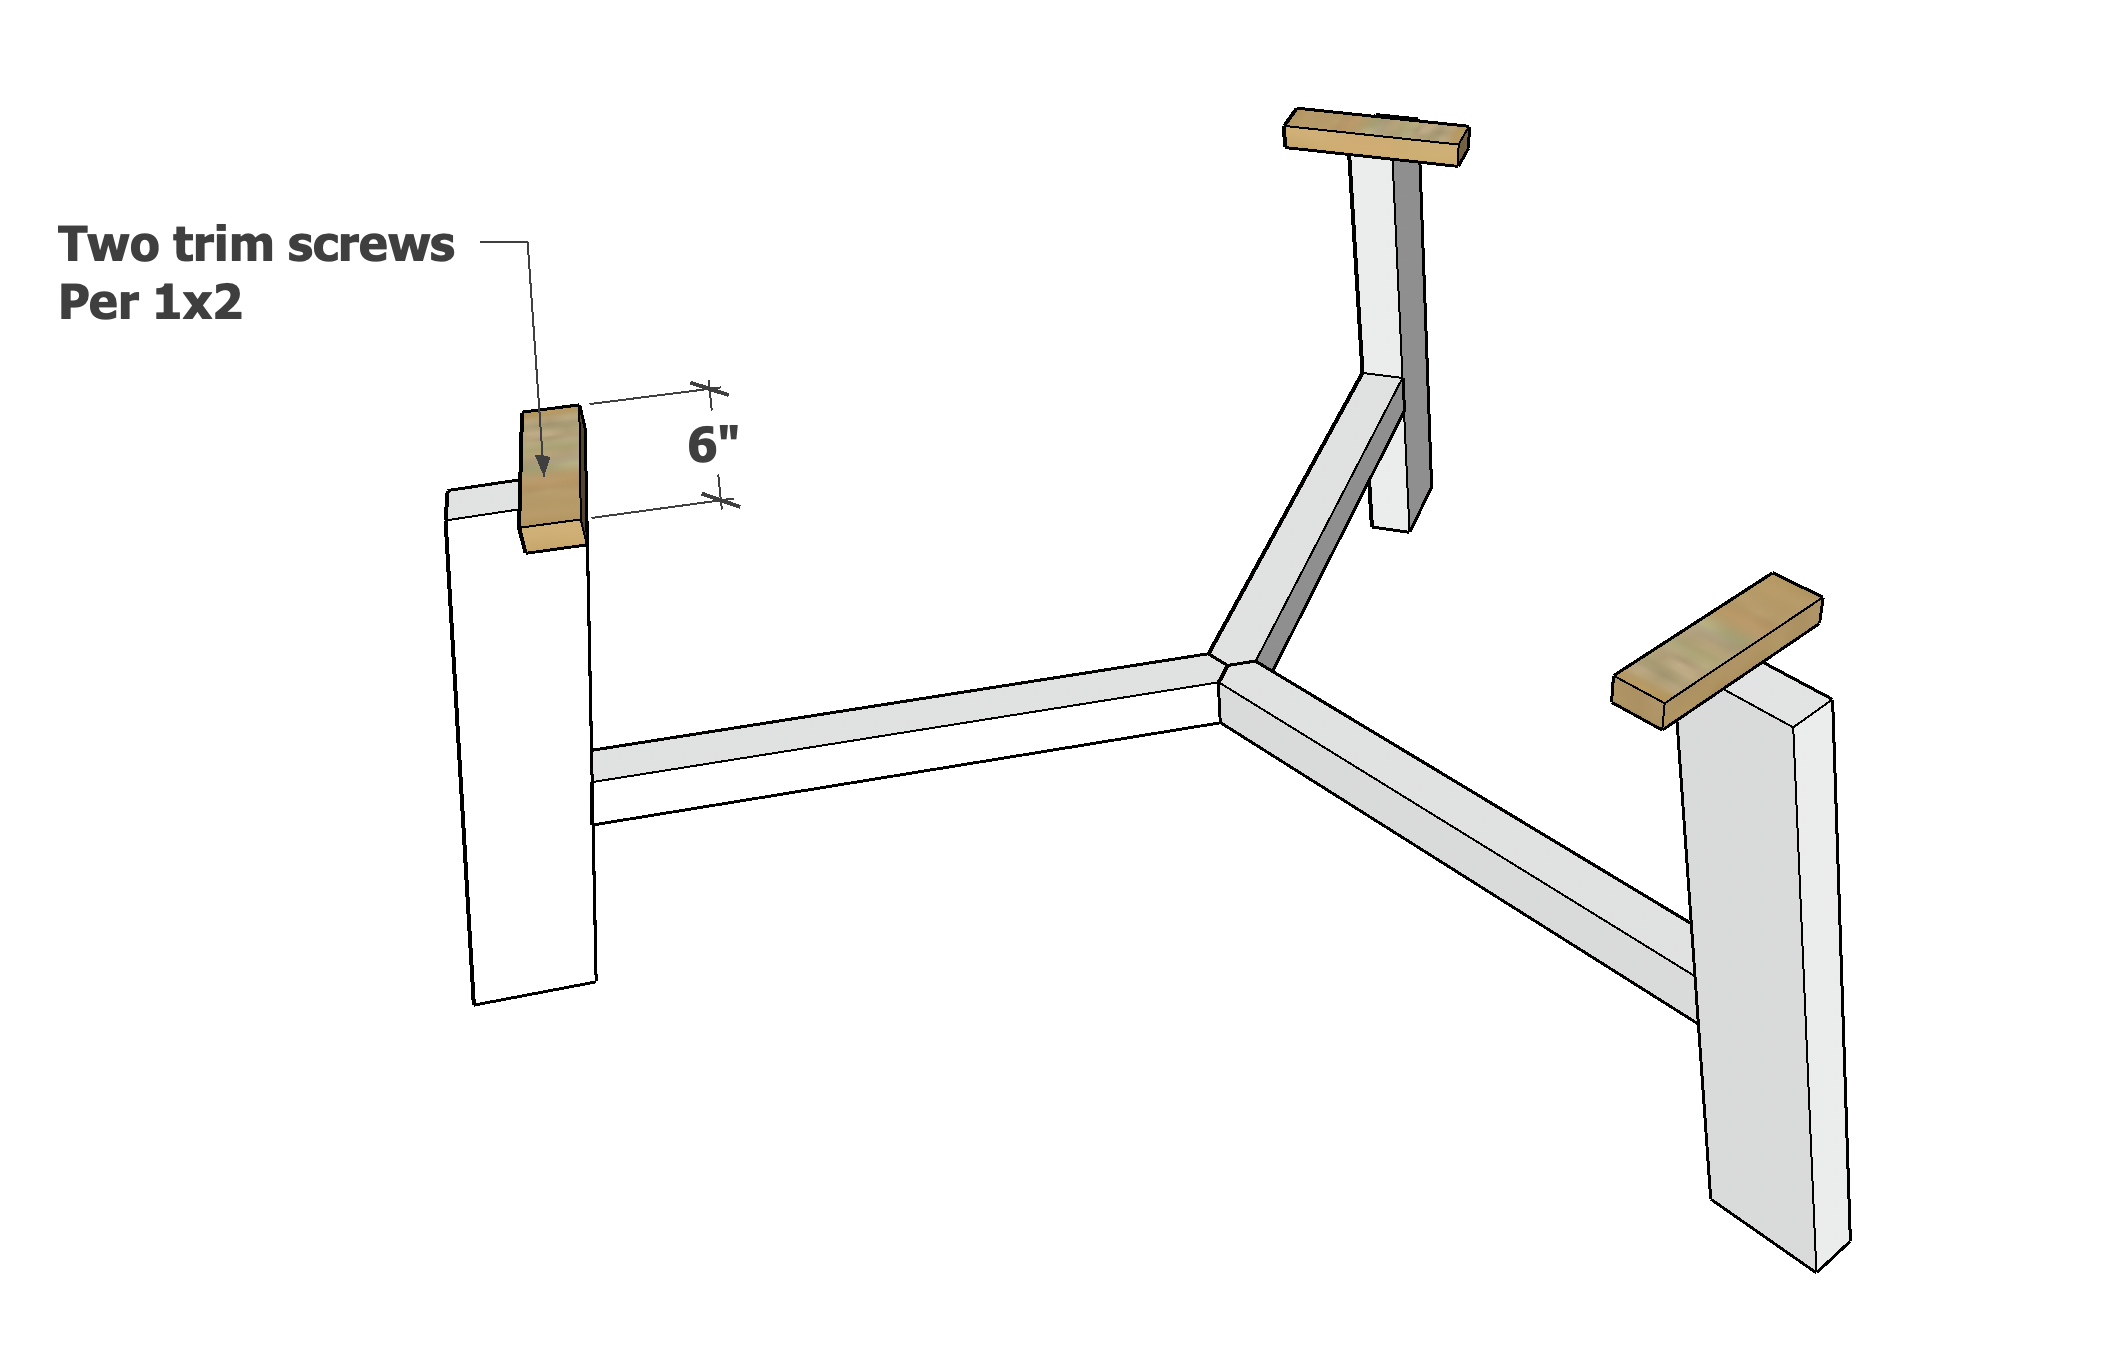
The 2x2s are attached to the 2x4 legs 6" up from the bottom of the 2x4 leg. The diagram here is shown upside down.
Step 8
Set the coffee table base on a flat, level surface and make sure it sits evenly before glue dries up.
Attach 1x2 scrap wood pieces on the insides as shown in the diagrams, for attaching to the tabletop in next step, with two 2" screws and wood glue per leg.
TIP: Angle the trim screws in different directions as you drive them, so the joint is less likely to pivot.
Step 9
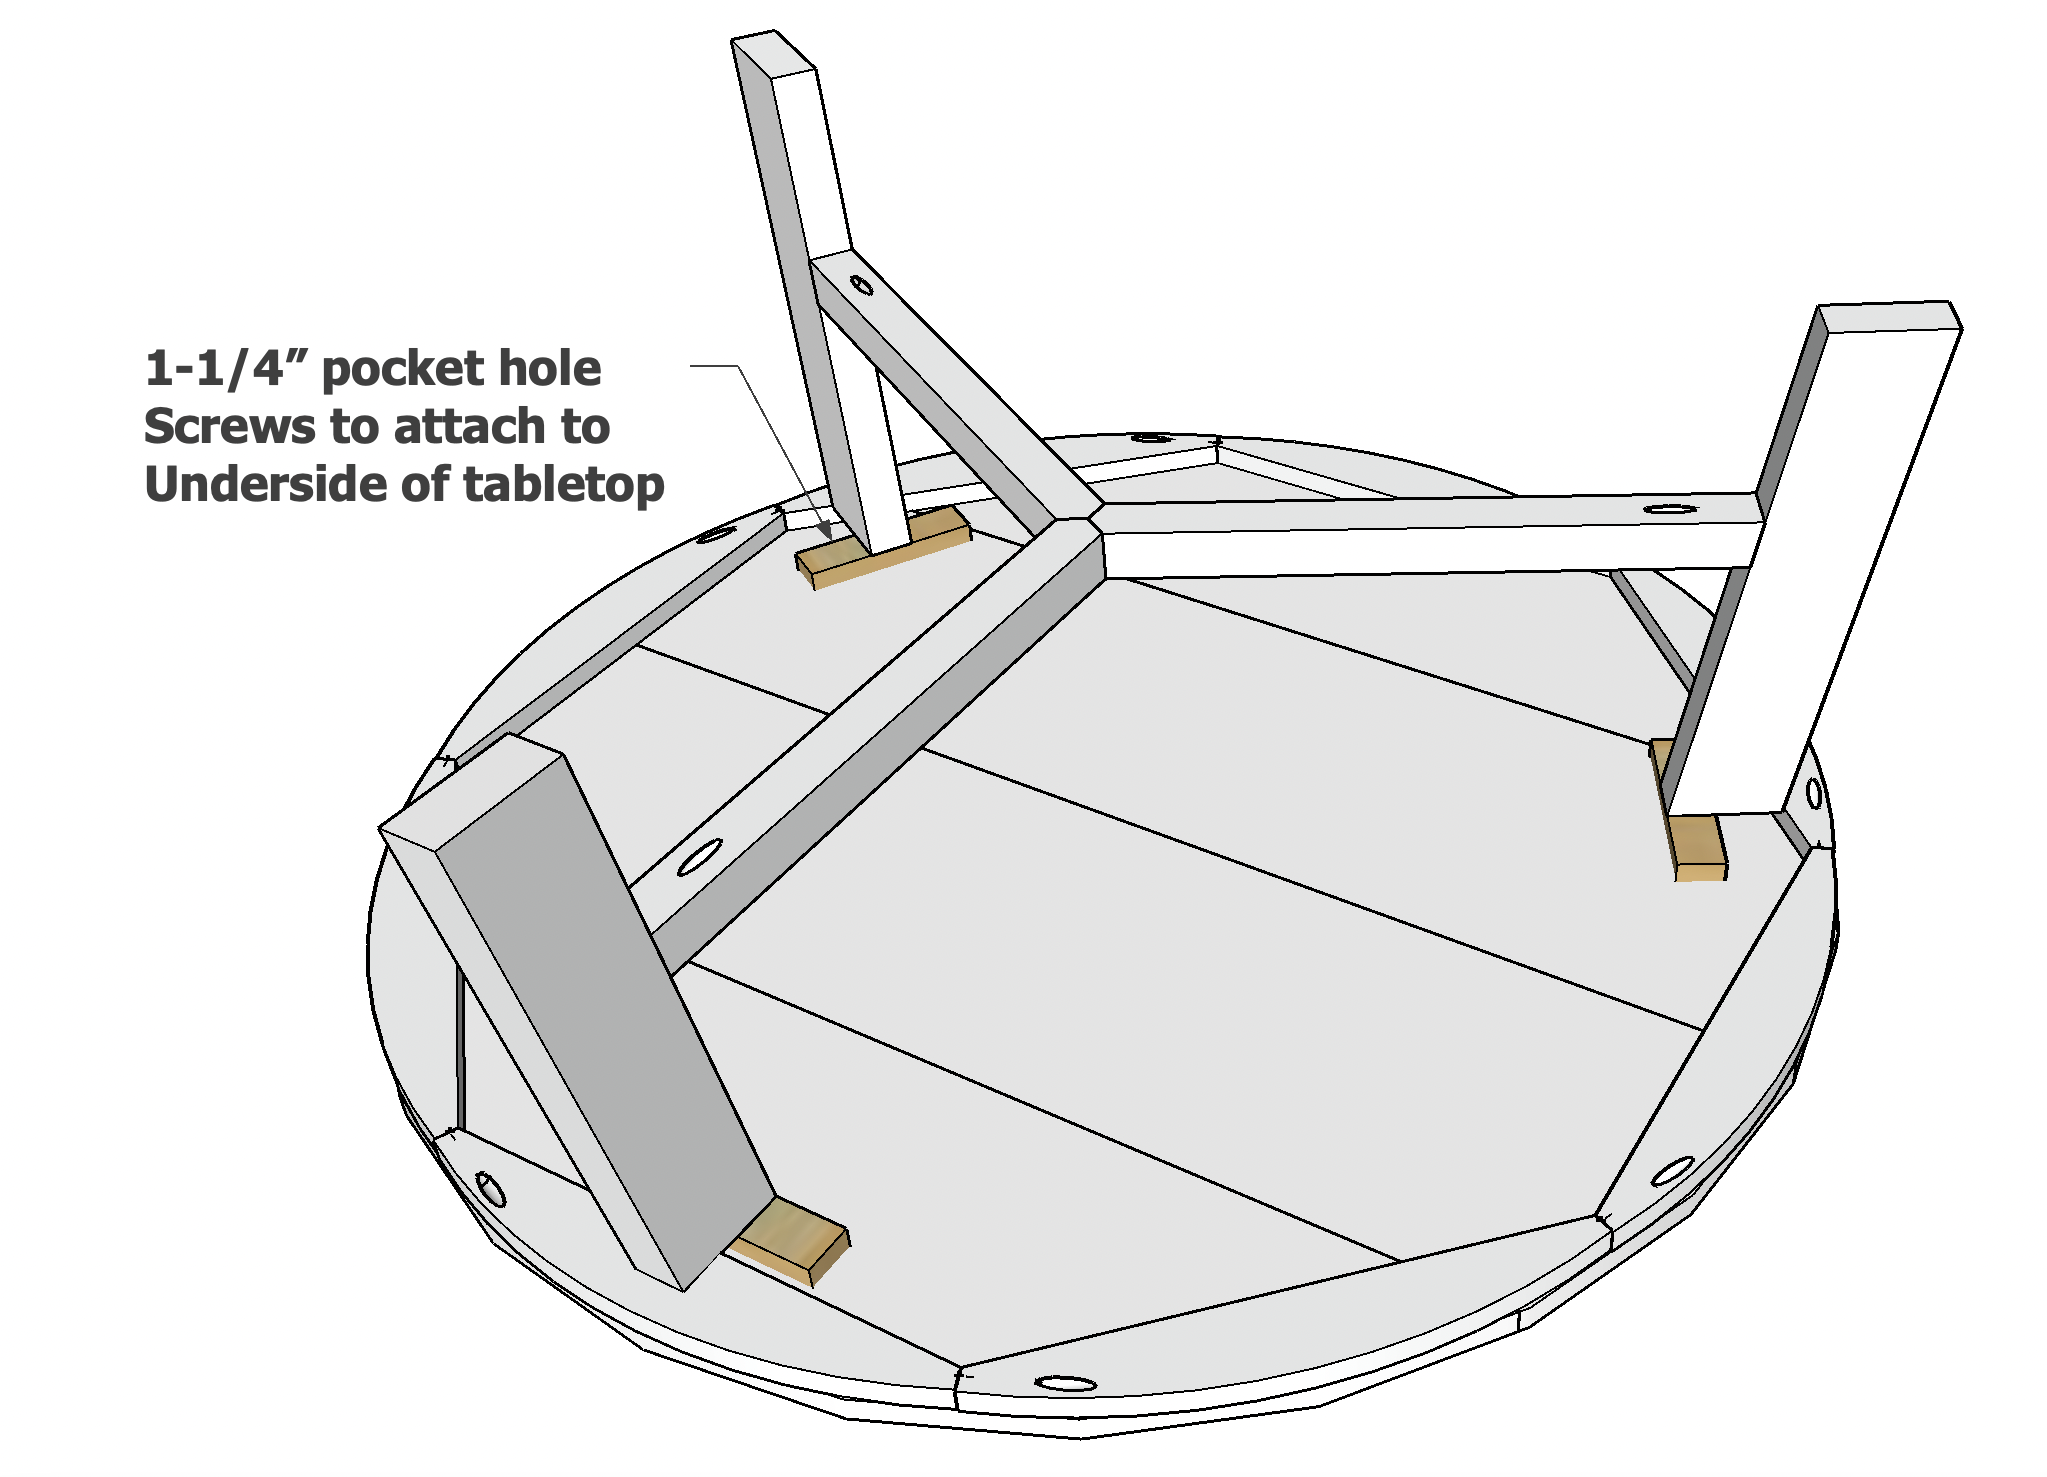
Place the base on the underside of the tabletop and attach through the 1x2s to the underside of the tabletop with 1-1/4" pocket hole screws, two per joint.
Step 10
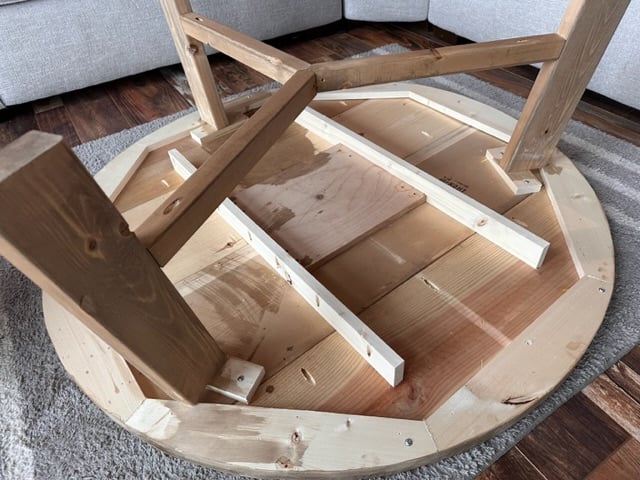
Update- I added two 40” 1x3 boards underneath the tabletop with pocket holes to add support to the middle of the tabletop. I attached with seven 3/4” pocket holes and 1-1/4” pocket hole screws per 1x3.
I used a wire brush attachement on an angle grinder to create grain texture. Then I lightly sanded with 120 grit sandpaper.
After that dried, I added a clear poly coat. I used a fine paint brush.