

Build the best off-grid outhouse with this beginner-friendly, budget-conscious plan! Designed for remote cabins, campsites, or emergency use, this compact outhouse is optimized to save you time, money, and materials—while still being super functional and easy to build. Free plans by Ana White include step by step build plans, materials list, LOTS of brag posts and photos, and photos of the build process.

Why This is the Best Outhouse Plan on the Internet:
-
🪚 Optimized for materials – Designed to use full sheets of plywood and a single piece of tin roofing, which means way less waste and lower cost.
-
💰 Budget-friendly – Fewer materials = less money spent. No specialty tools or expensive hardware needed.
-
🚛 Portable or permanent – Build it on-site or pre-build and move it into place. Great flexibility depending on your needs.
-
🔨 Beginner-approved – Step-by-step plans make this totally doable for DIYers with basic tools and skills.
-
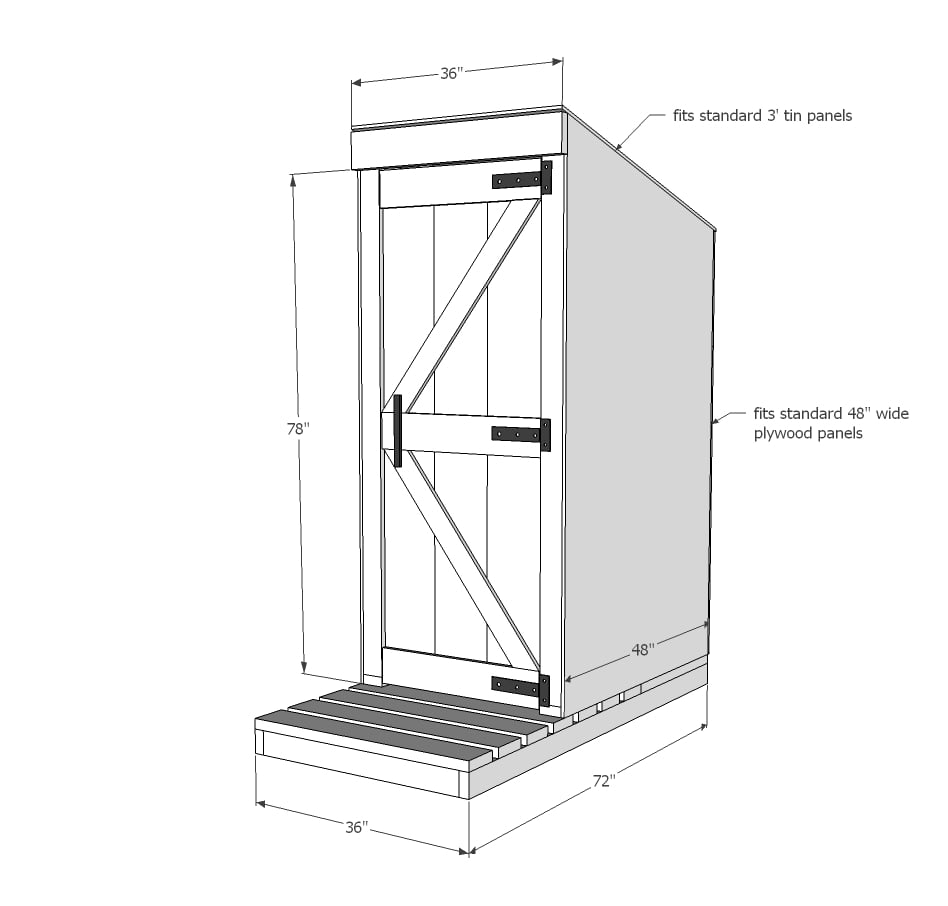
📏 Compact & efficient – Similar in size to a powder room, this outhouse fits well in tight spaces without sacrificing comfort.
-
🧼 Clean and dry floor design – The built-in deck-style flooring keeps dirt and moisture from collecting inside, making it easier to maintain.
-
🌲 Perfect for off-grid living – Whether you’re at a cabin, campsite, or homestead, this outhouse is built to last in the outdoors.
Why I Built this Outhouse
In Alaska, where temperatures get so cold, composting toilets don't work unless you supply heat to them constantly. So the great majority of cabins and second homes are dry, freeing the homeowners up from wasted heat and frozen water lines through the cold months of the winter.
There are a lot of outhouses in Alaska - even our rest stops, bathrooms at the city park, and the majority of remote cabins have outhouses.
I needed an outhouse for a remote project, but didn't want to build it in the sticks with the bugs and mosquitos. So I designed this outhouse to be built in my workshop, move it out the garage door, and haul it to the work site.
Video of the Outhouse Plan Being Built
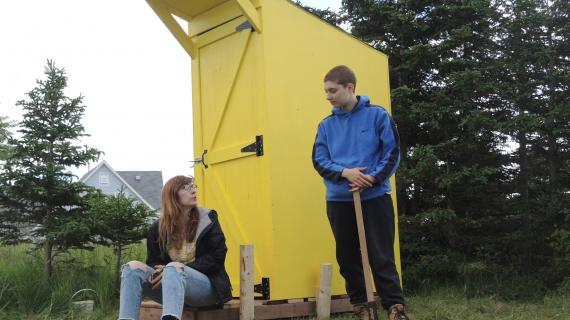
We love this video by Girl in the Woods of building this outhouse plan!
How I Built this Outhouse
I built this outhouse entirely by myself. Here's how:
I framed up two walls using 3" self tapping star bit screws.
I attached 1/2 inch sheathing plywood to the outsides of the walls.
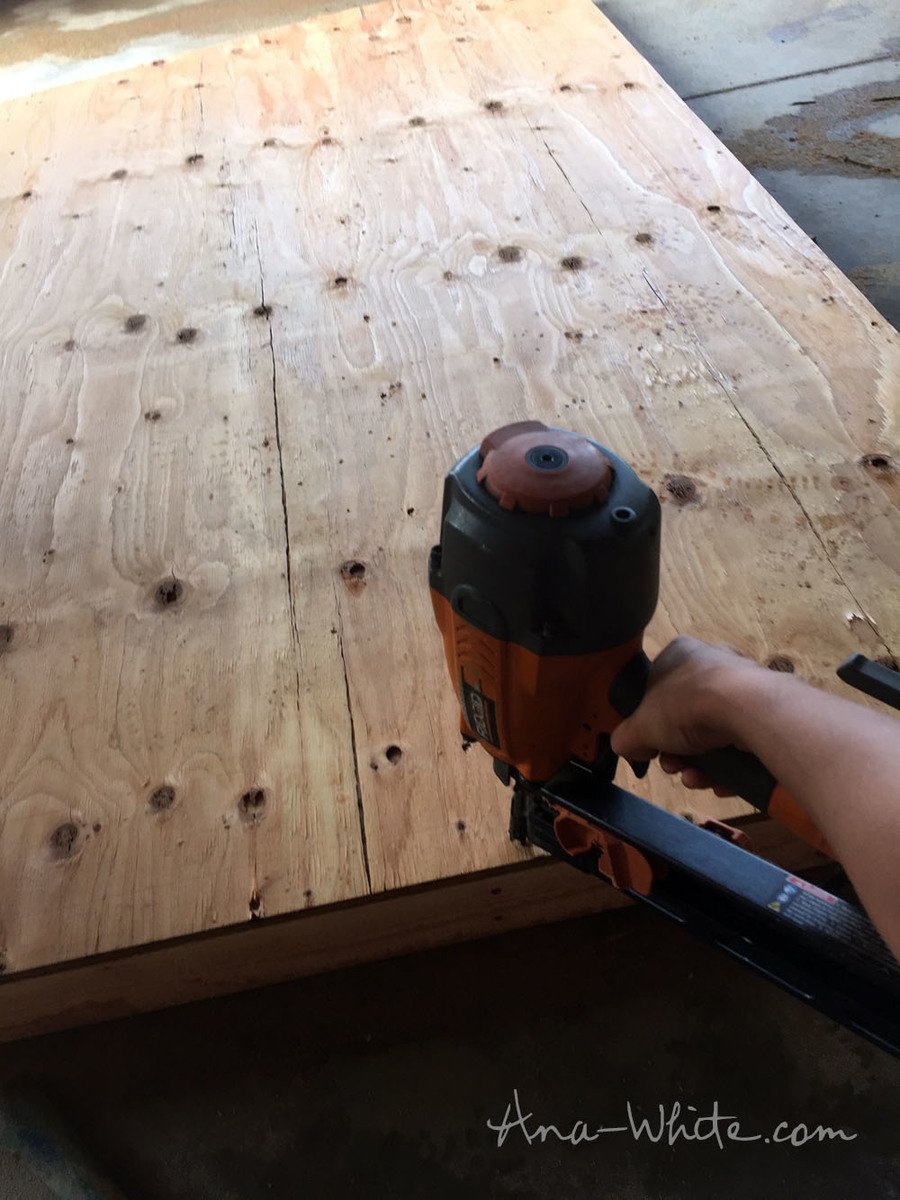
The framing nailer was handy as I built this up at the new house site, so I just used it to attach the plywood to the framing. The nails are 8D 2-3/8" - I'd recommend galvanized if you aren't siding it, as non galvanized nails will bleed when wet.
Bam, bam, bam, done.
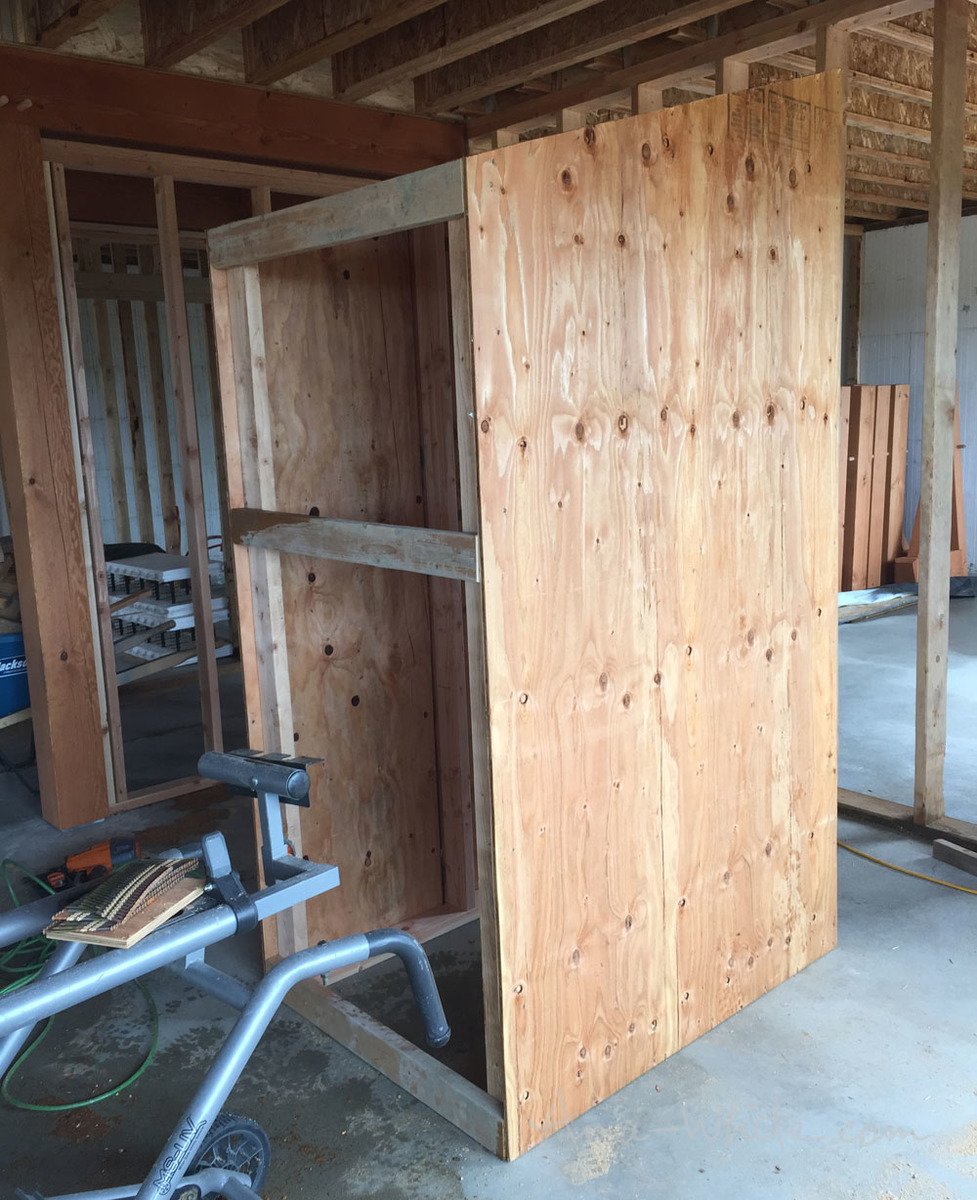
Then I just tied to two side panels to together with back pieces and too pieces.
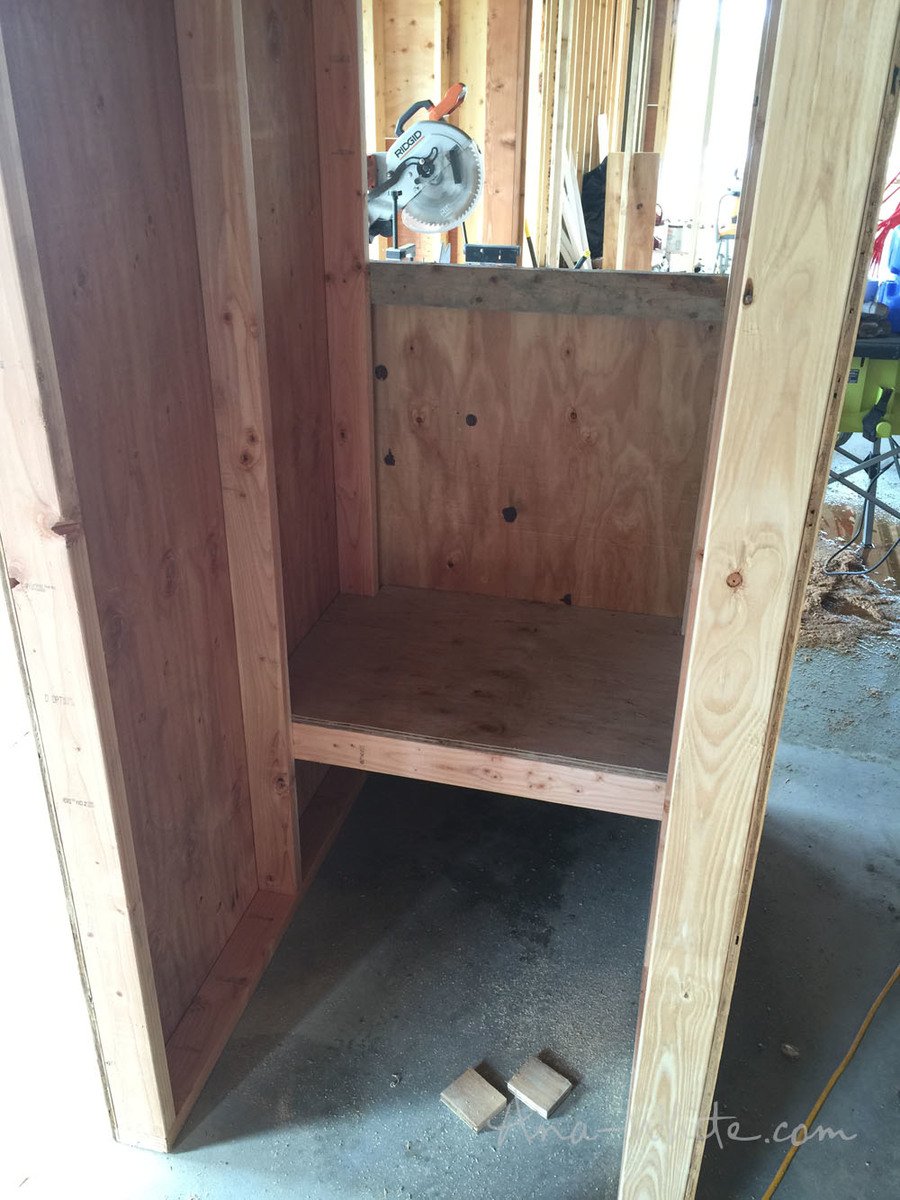
Then I just added sheeting to the back. For the seat, I just tied in a board across the two walls, and put plywood on top.
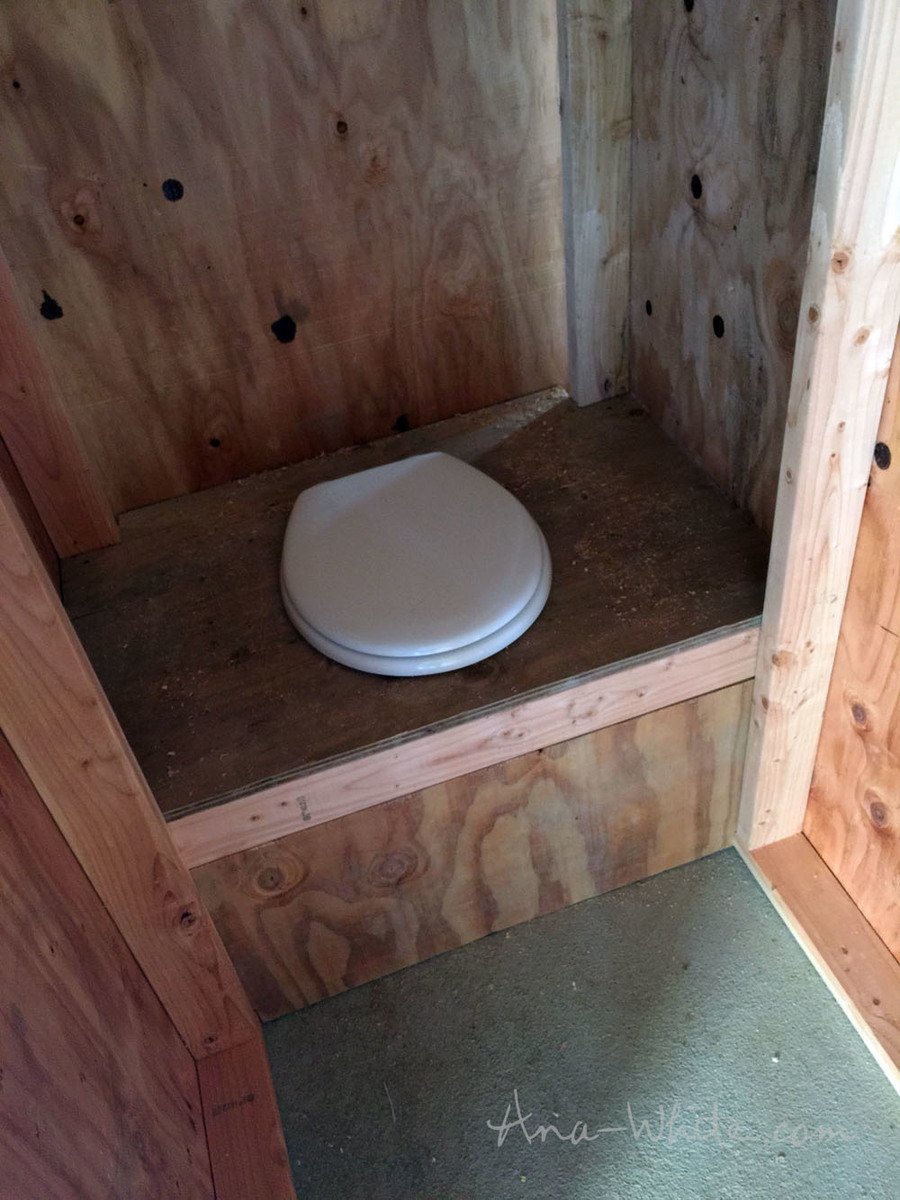
Then used my jigsaw to install the toilet seat.
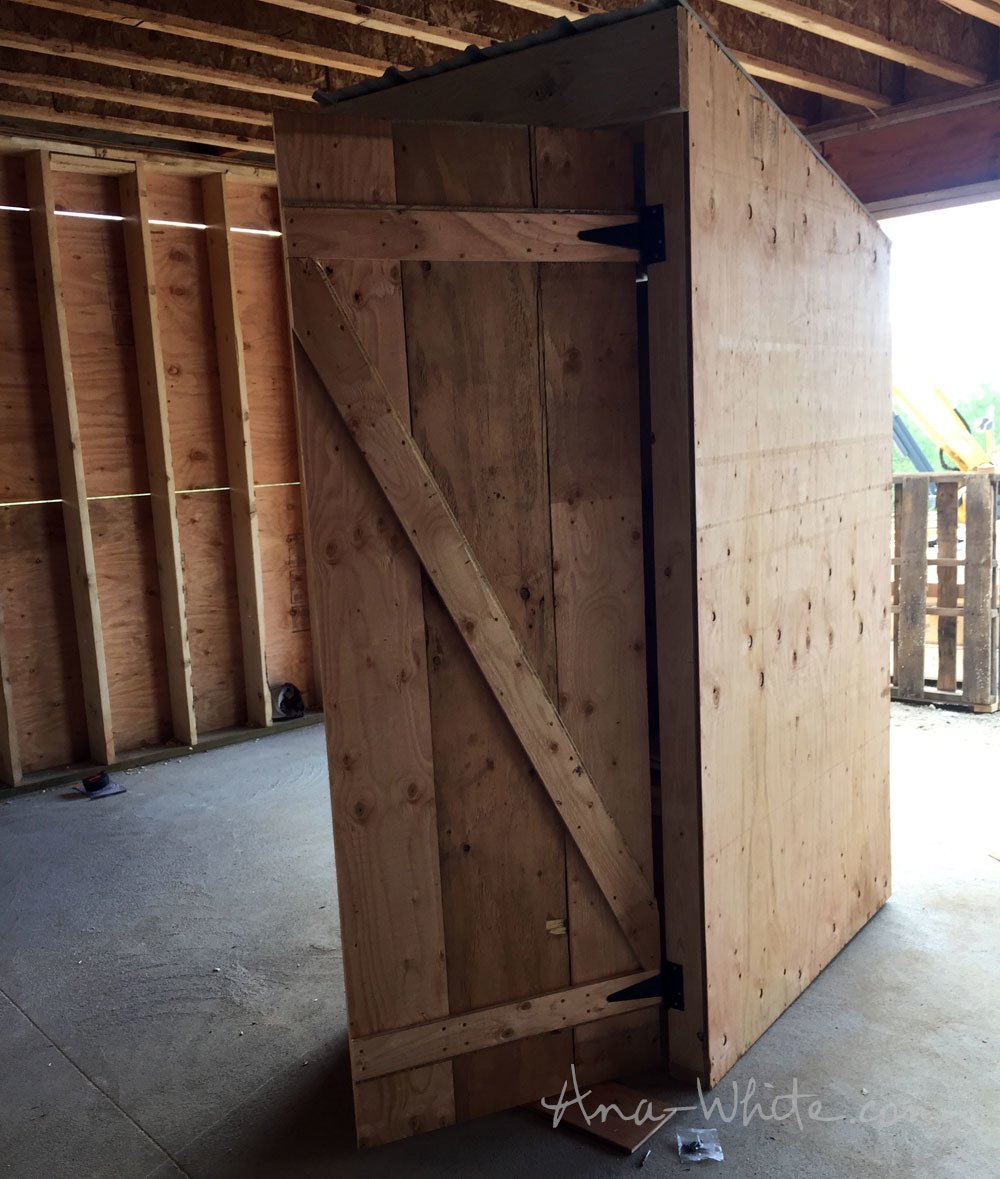
I built the door using 3/4" plywood scraps and set the hinges. My theory is doing this now on a level surface with access to tools and electricity is much easier than doing this in the wood, in the dirt, with the bugs biting me.
I also put plywood on the roof and added tin to the roof (this outhouse is designed to fit a 36" tin roofing panel).
Then the hubs came home and I showed him the outhouse before I started disassembling it for transport, but he had a different idea ....
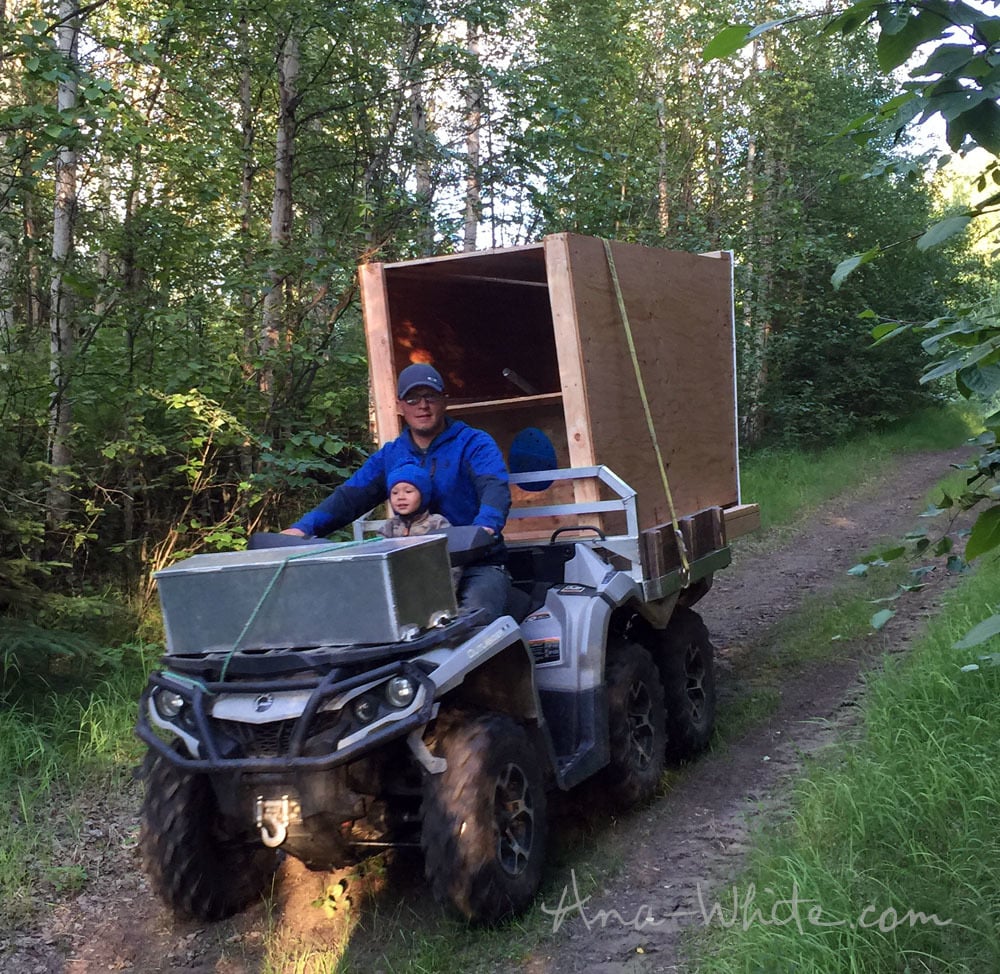
My brother helped up get the outhouse somehow on to the back of the ATV - it weighs a ton a this point and is very cumbersome.
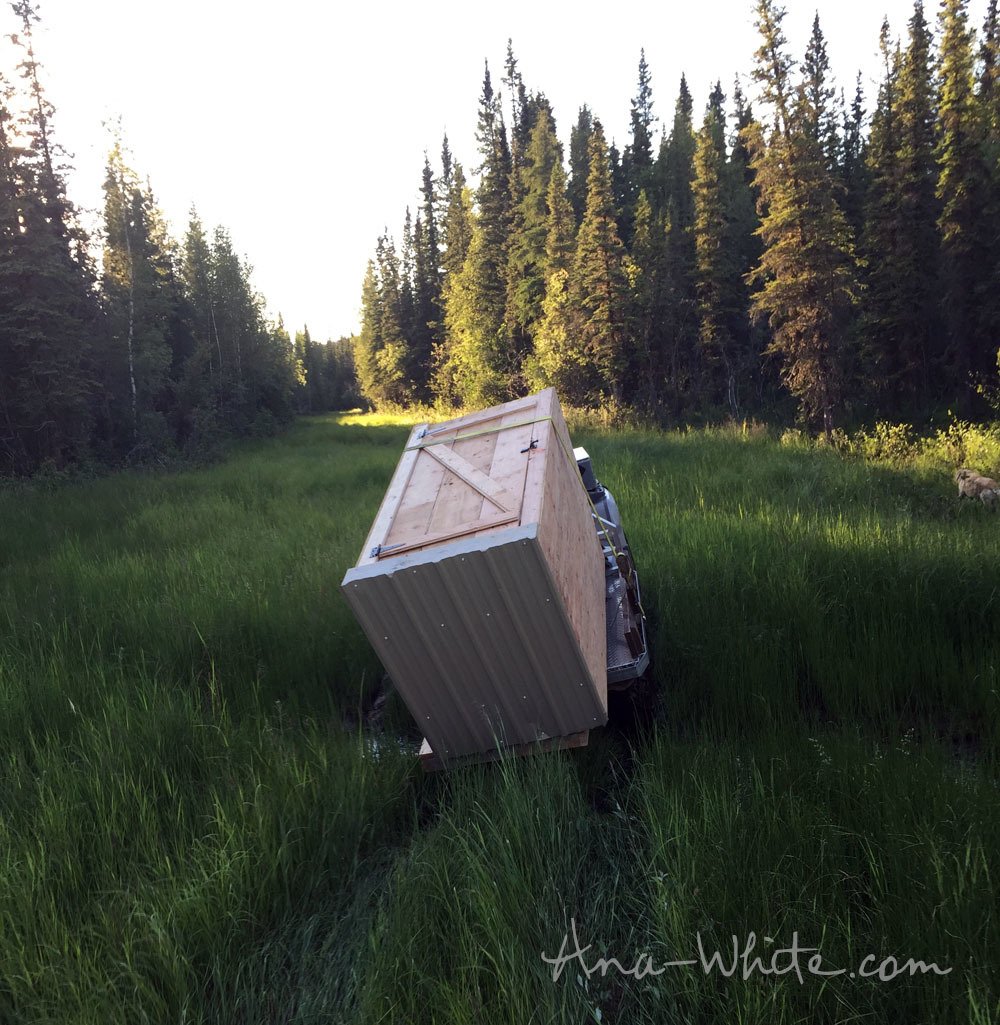
Down the trail, through the mud,
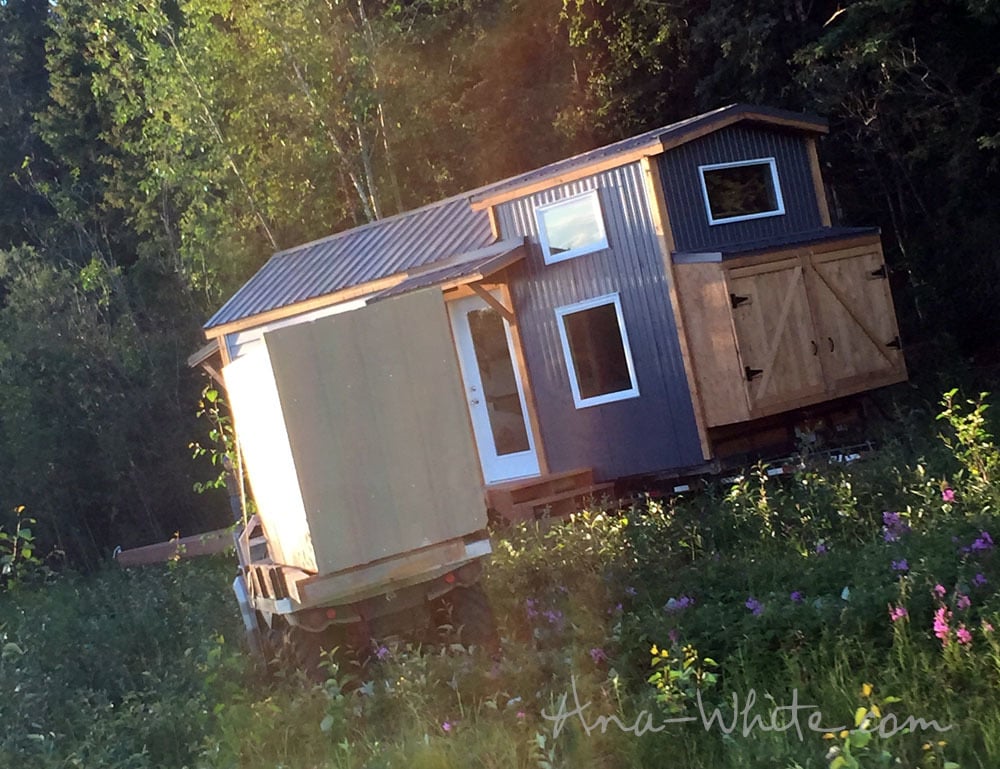
And to the tiny house.
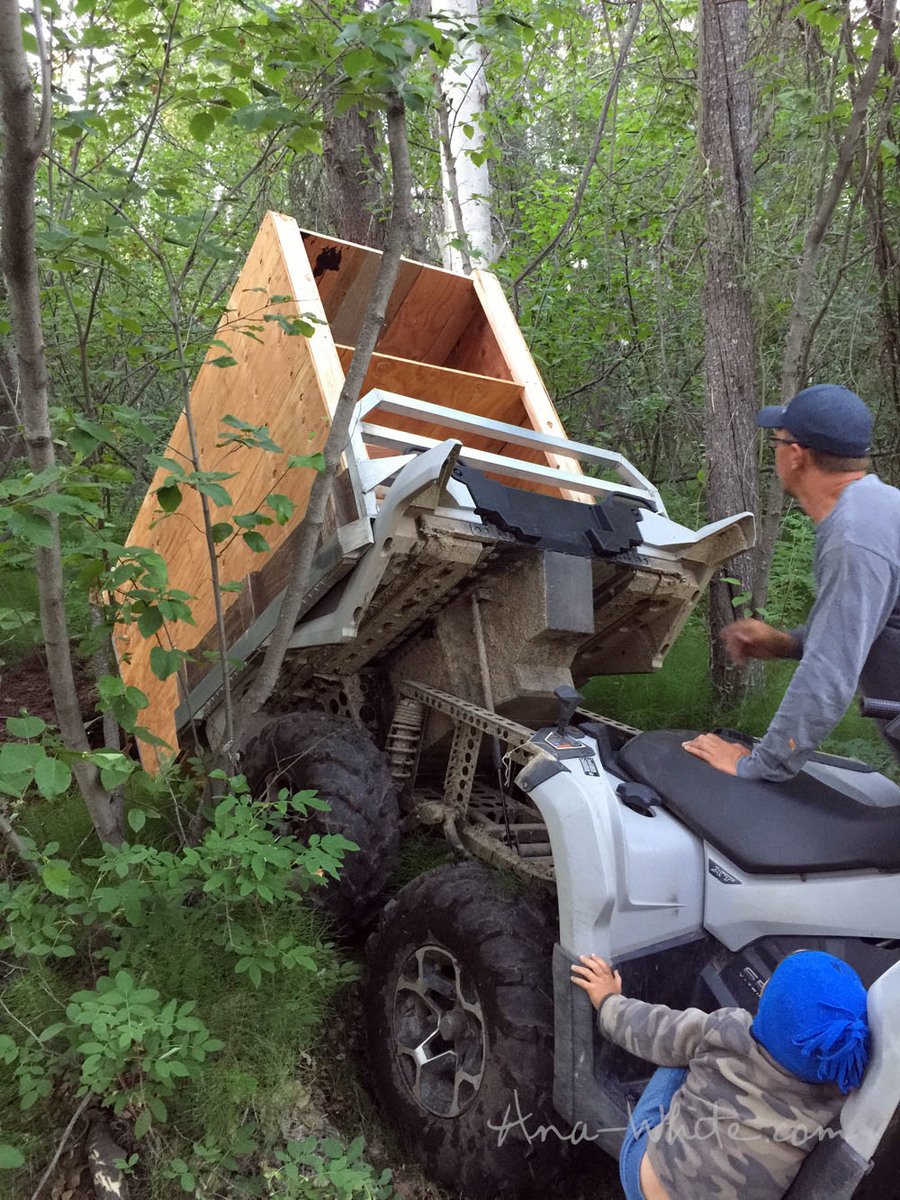
My carefully constructed outhouse just got dumped off the ATV. Thankful I went a little generous on the wood screws right now.
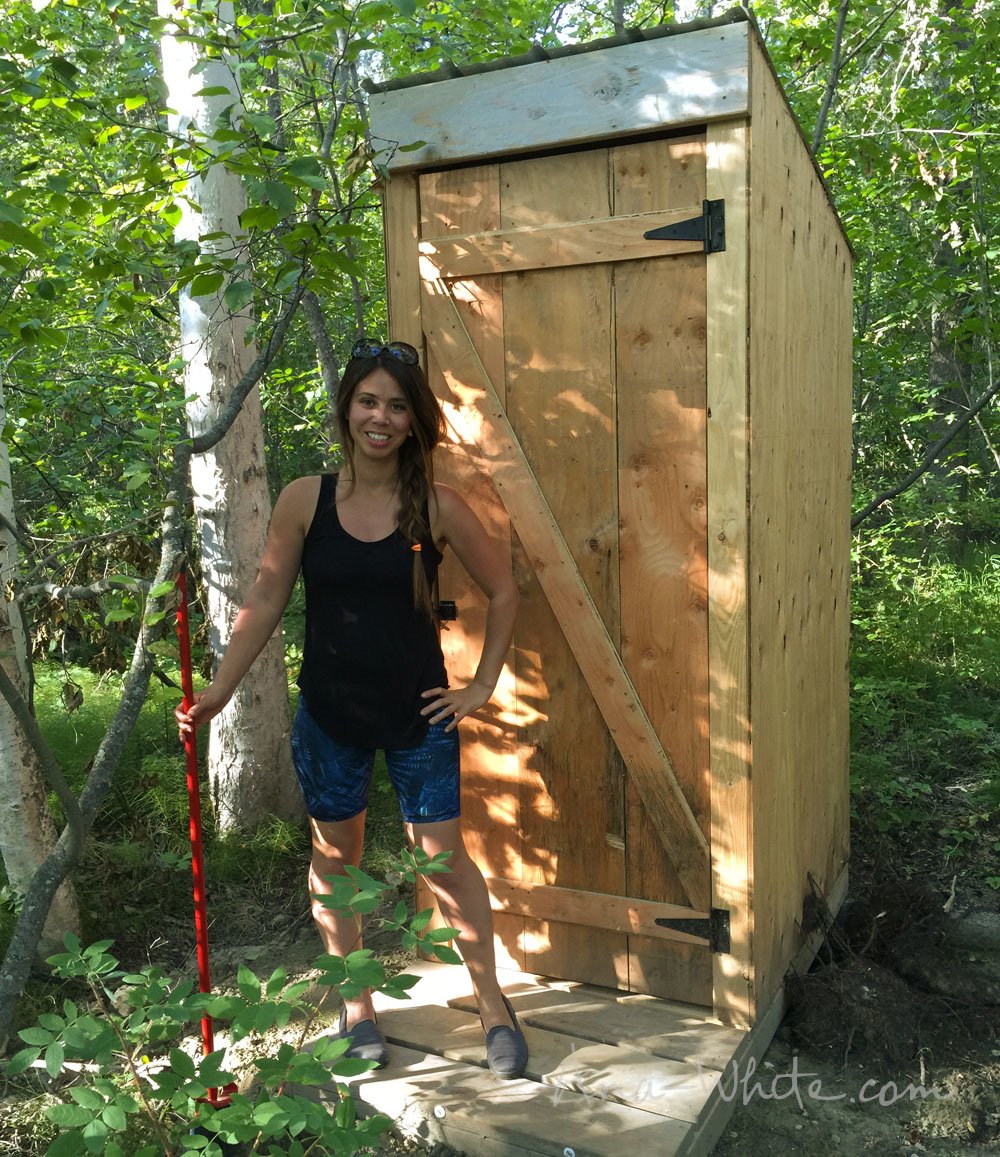
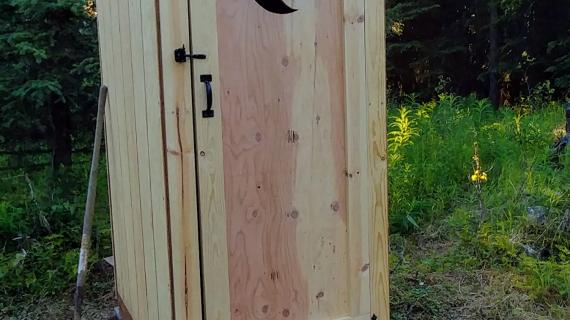
After a little clean up, we've got a bathroom finally!!!
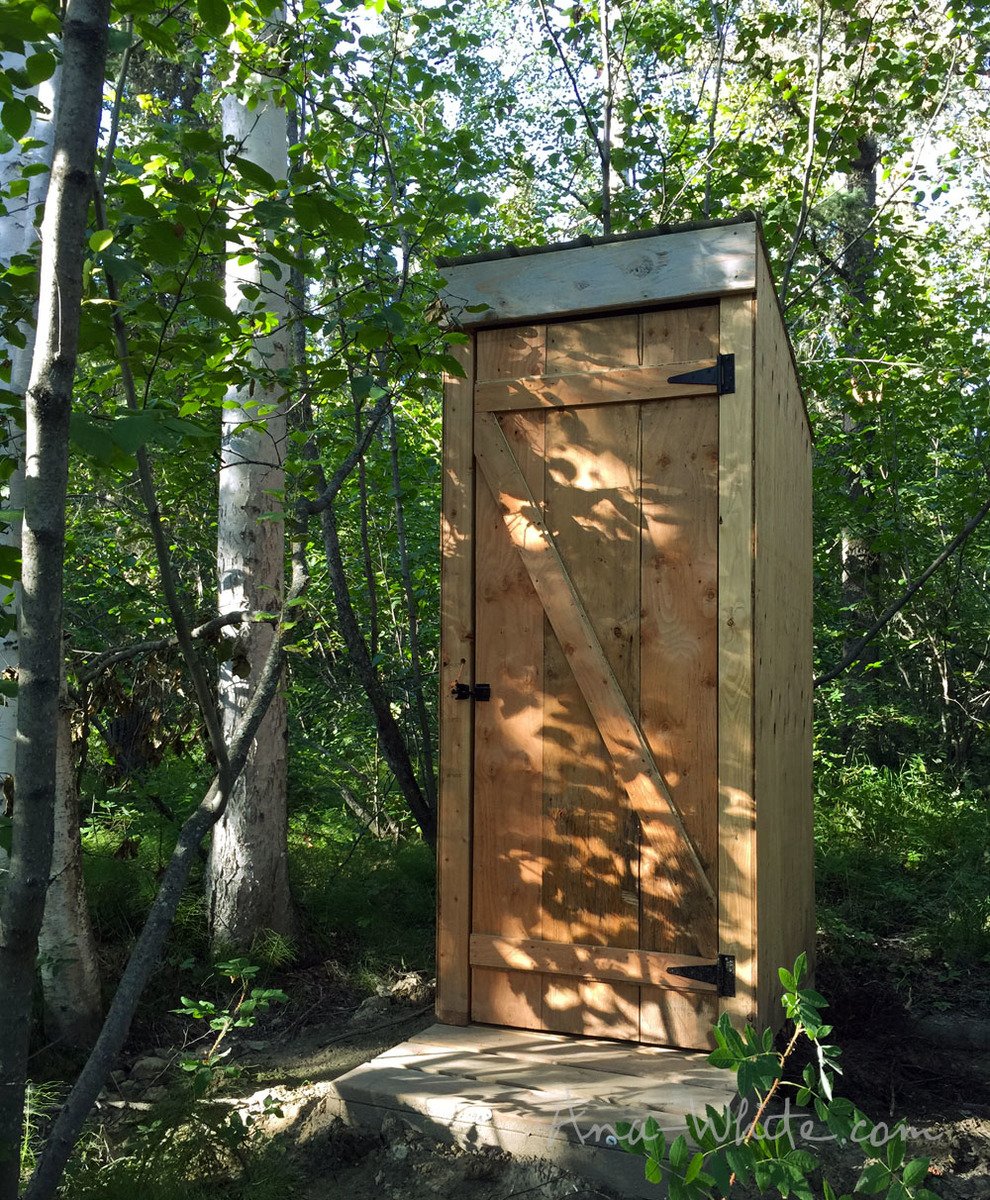
It's simple. It's functional. It's all we need.
Happy to share these plans with you today. If you do build, please share, I'd love to see how your project turns out too.
XO Ana
Preparation
- 3 - sheets 1/2 exterior plywood
- 1 - 12' treated 2x4
- 1 - 10' treated 2x4
- 4 - 2x6 @ 6 feet long (recommend treated or weather resistant)
- 1 - 2x2 @ 29" (recommend treated or weather resistant, try using a railing spindle)
- 11 - 2x4 @ 8 feet long
- 3 - 1x10 @ 8 feet long
- 1 - 1x6 @ 8 feet long
- 1 - 1x4 @ 8 feet long
- 3 Gate Hinges
- Gate Latch and Handle
- 54" piece of 36" wide tin
- Roofing screws to match, roofing screws can be up to 2" in length
- 3" decking screws, self tapping
- Nails or staples for attaching plywood to framing (I used 8D galvanized but you can also use a finish nail, brad nail or staple or screws, depending on your tool)
- 1 - 1/4" exterior screws for buiding the doors
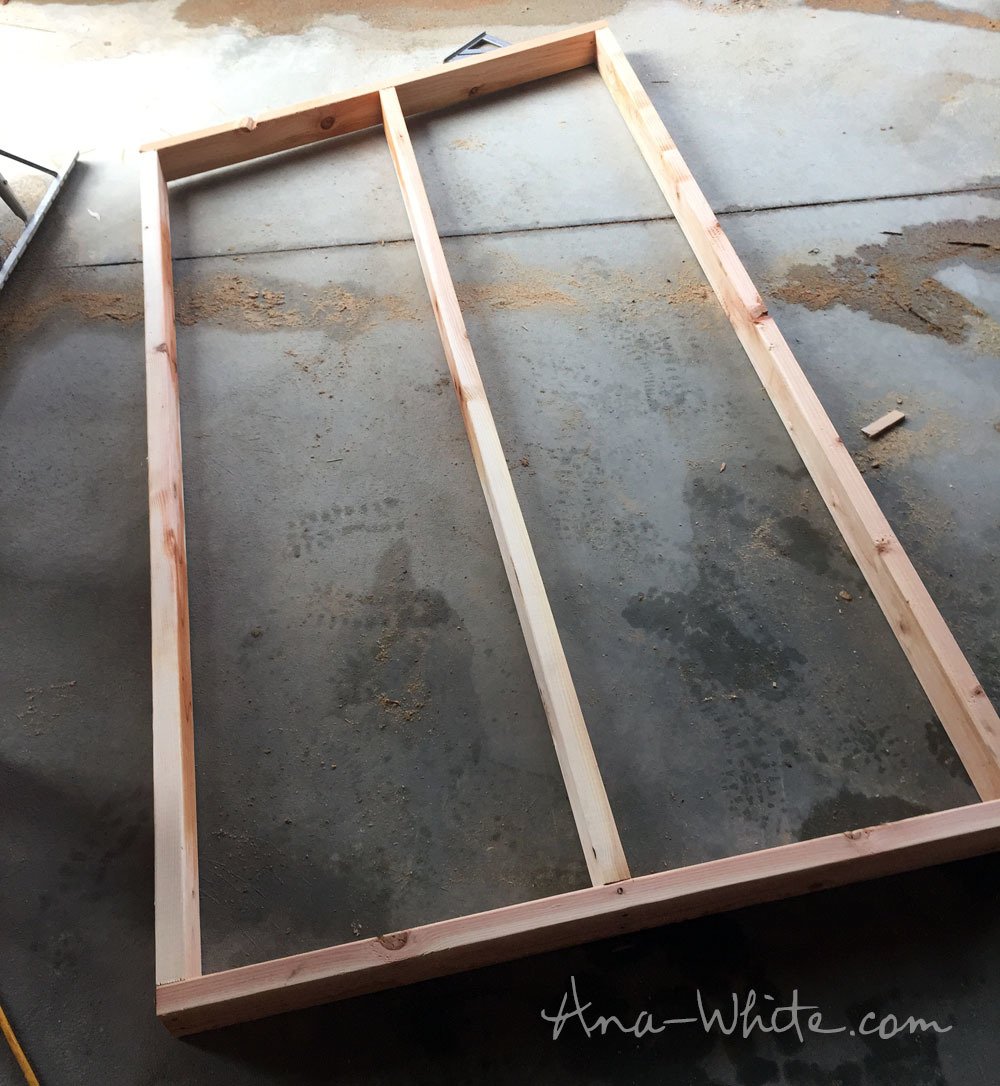
BASE
- 2 - 2x4 @ 72"
- 3 - 2x4 @ 33"
- 7 - 2x6 @ 36" long
- 1 - 2x2 @ 29" long
- 2 - 2x4 @ 24-1/2" long
WALLS
- 2 - 2x4 @ 48-1/8" (long point to short point, ends cut parallel at 15 degrees off square)
- 2 - 2x4 @ 80-1/4" ( longest point, one end cut at 15 degrees off square)
- 2 - 2x4 @ 74-1/4" ( longest point, one end cut at 15 degrees off square)
- 2 - 2x4 @ 68-1/4" ( longest point, one end cut at 15 degrees off square)
- 2 - 2x4 @ 46-1/2"
- 2 - 1/2" plywood @ 48" x 83-3/8" (longest point) cut down to 70-1/2" (shortest point)
TIE IN
- 1 - 2x6 @ 36"
- 4 - 2x4 @ 35"
- 2 - 2x4 @ 28"
- 1 - 1/2" plywood @ 36" x 52" (roof plywood)
- 1 - 1/2" plwyood @ 36" x 44" (scrap from roof piece)
- 1 - 1/2" plywood @ 36" x 26-1/4" (may have to piece to use scraps)
DOOR
- 3 - 1x10 @ 77"
- 3 - 1x6 @ 27-3/4"
- 2 - 1x4 @ 38" - long point to short point, both ends cut at 37-1/2 degrees off square, end are parallel


Instructions
Step 1
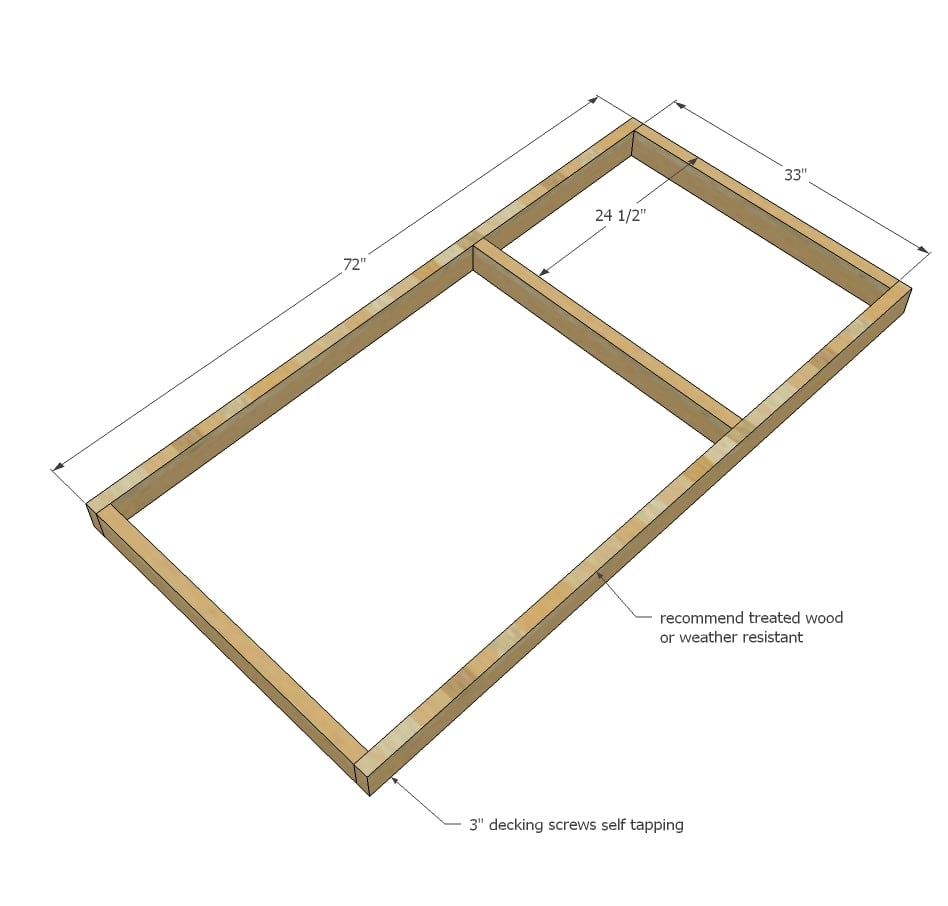
Build the base with treated or weather resistant 2x4s. If the base isn't fully supported on the ground or with beams, consider using 2x6 or larger boards for additional support.
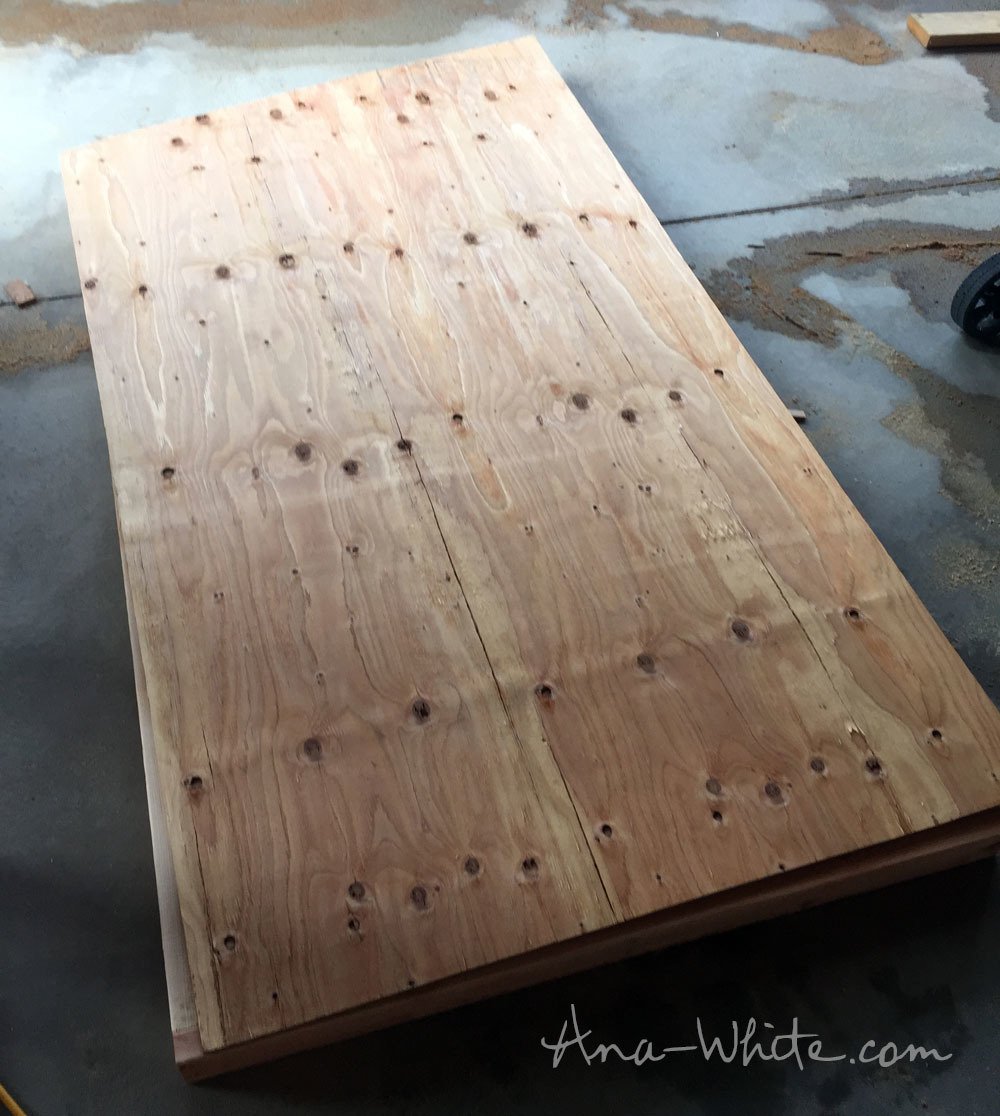
Step 2
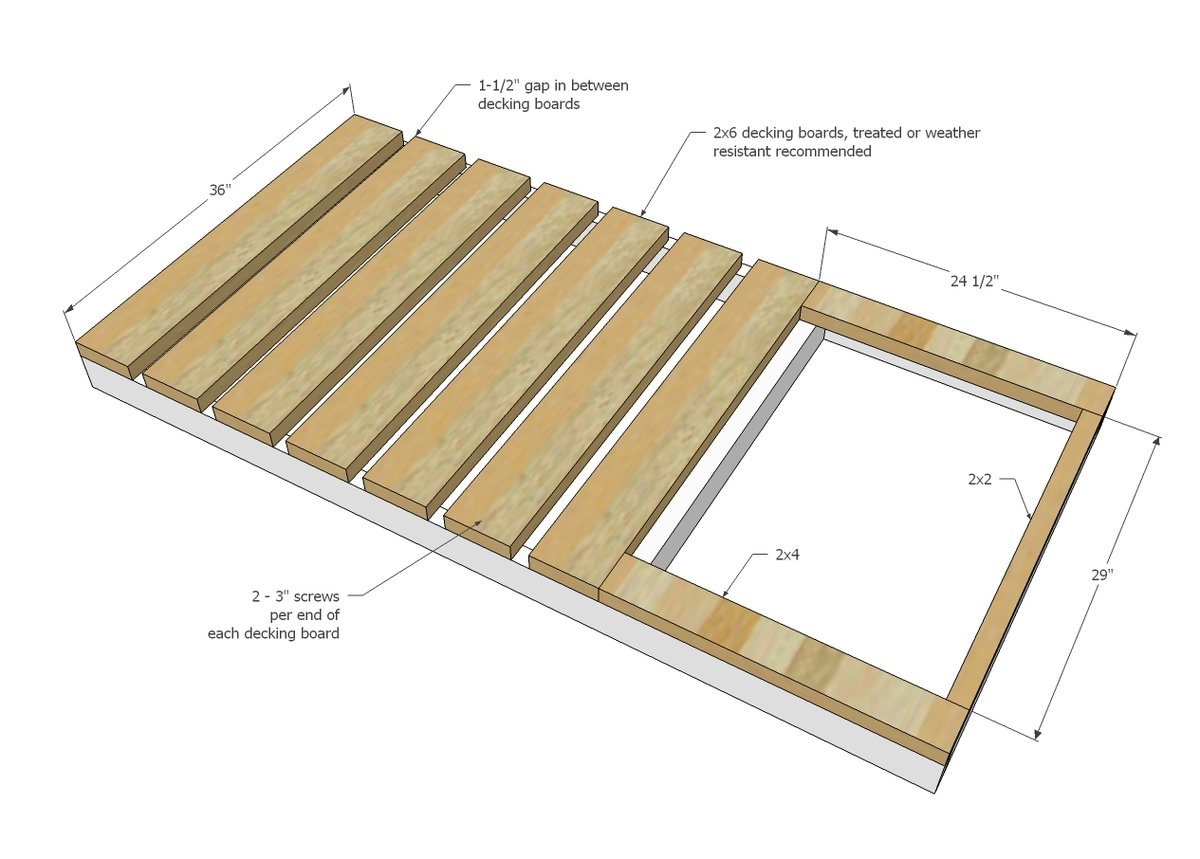
Screw decking to frame. I recommend weather resistant or treated wood for the decking, as the front decking is exposed to to weather.
Step 3
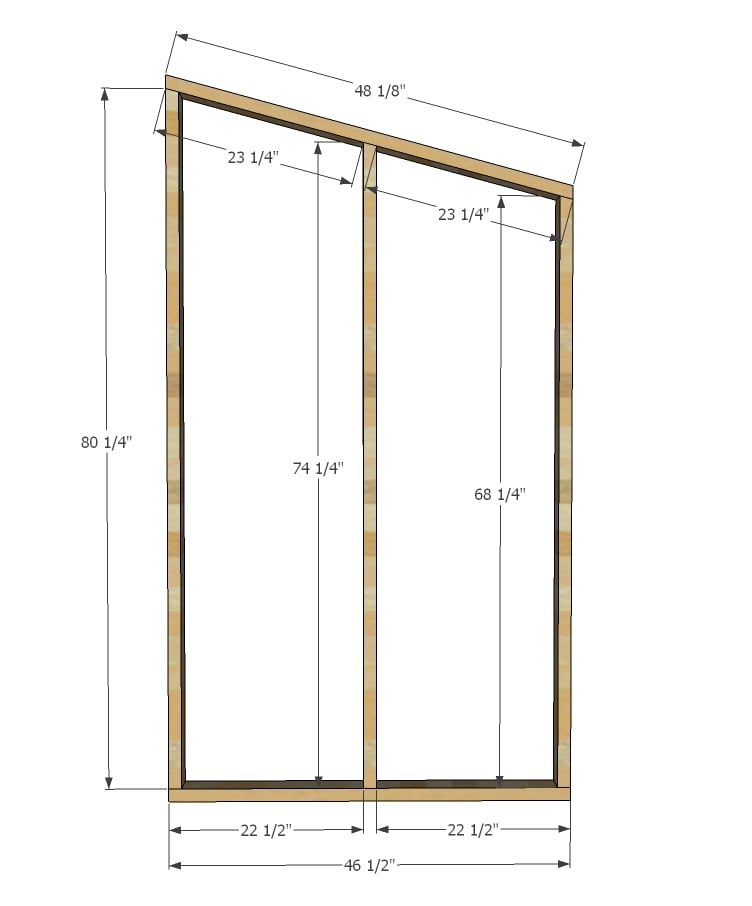
Build two of the walls.
Step 4
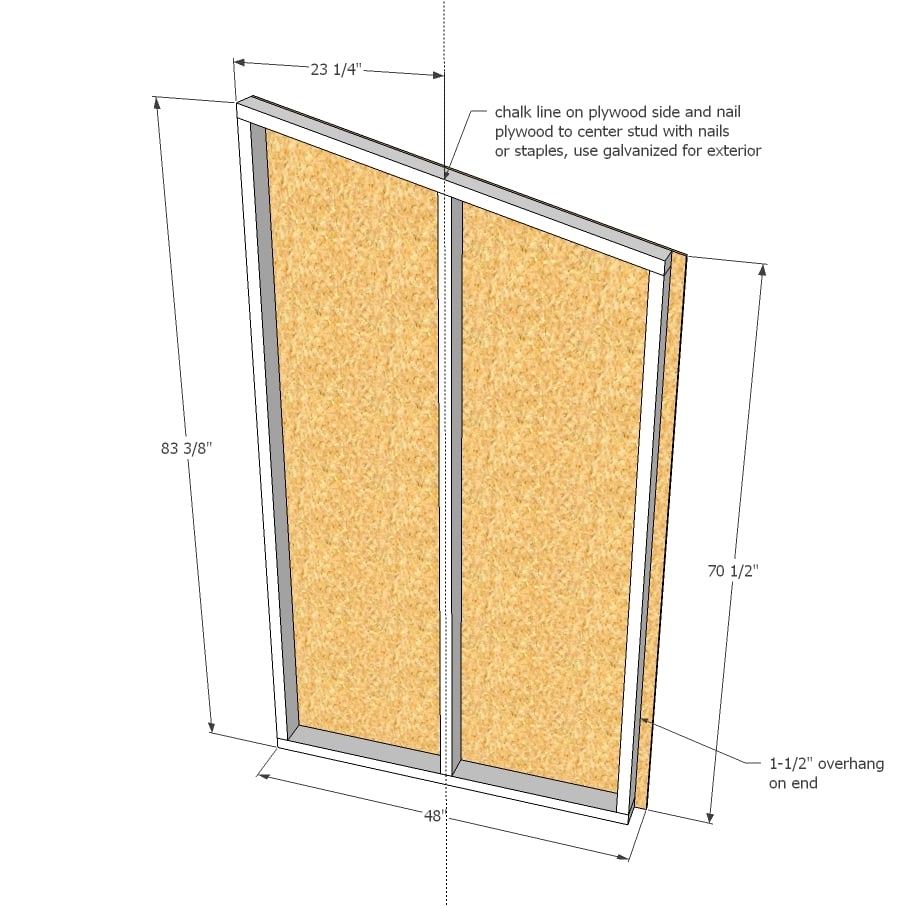
Attach plywood to the outsides of the walls, considering walls are to be built in mirror. On the short side of the wall, the plywood overhangs the back by 1-1/2".
Step 5
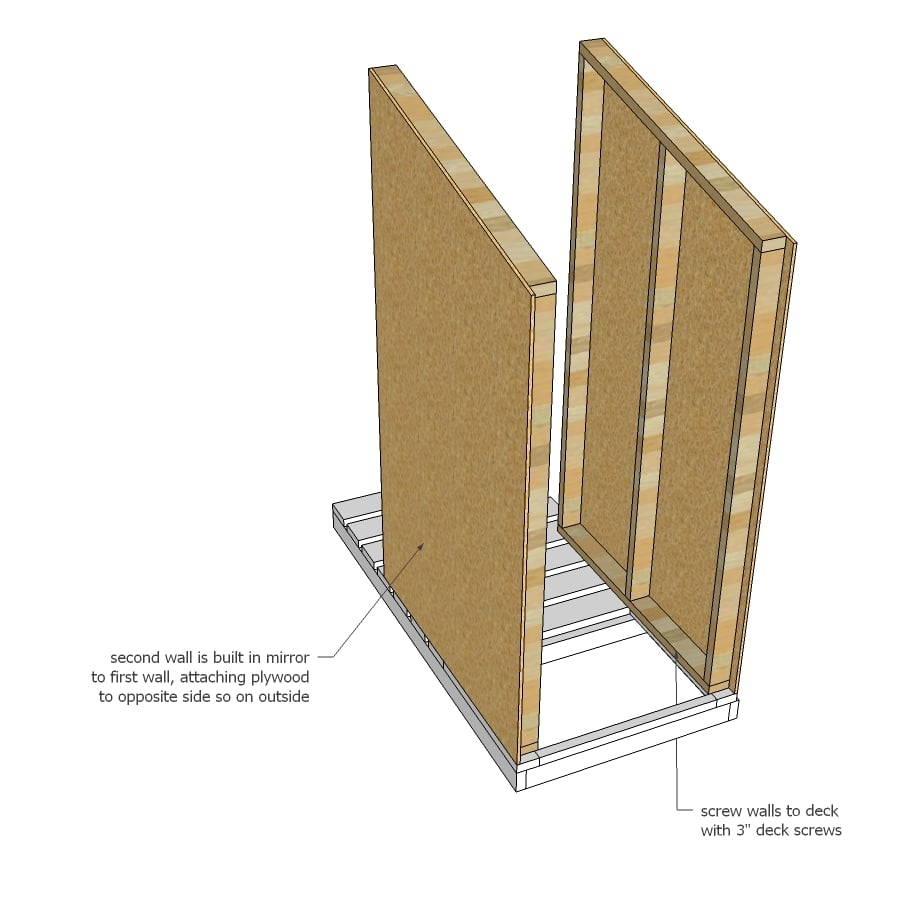
Step 6

Attach 2x4 and 2x6 boards to walls to tie in the walls at the front and back.
Step 7
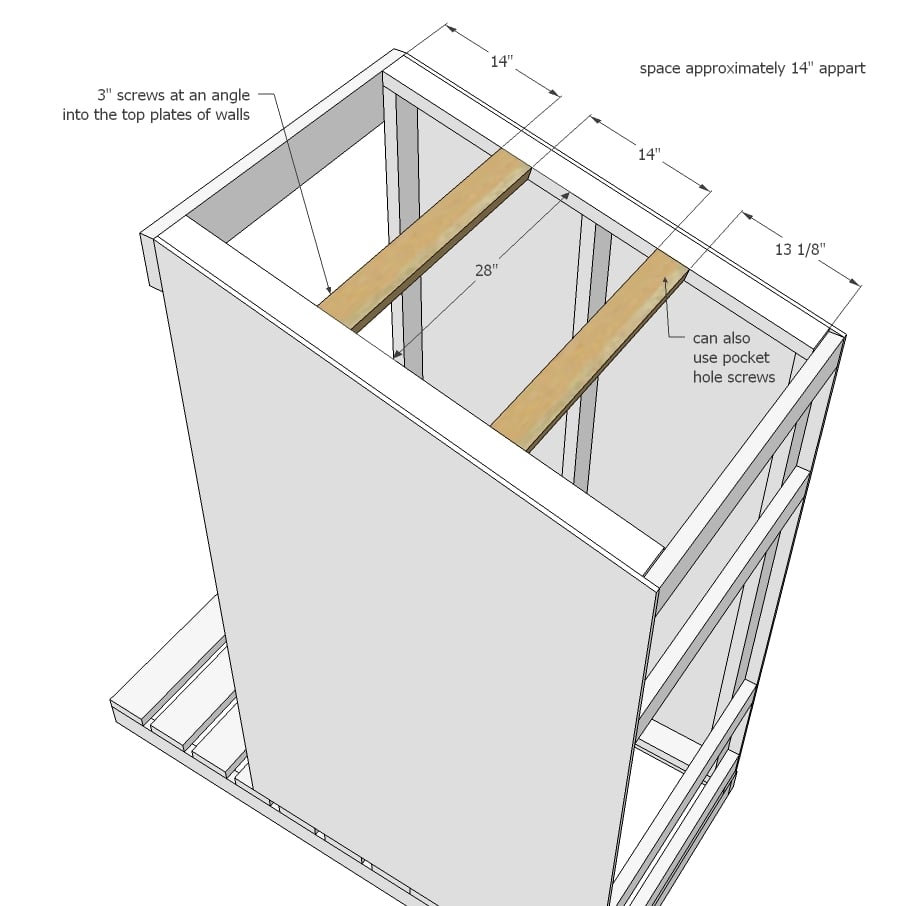
Additional supports recommended for supporting the roof.
Step 8
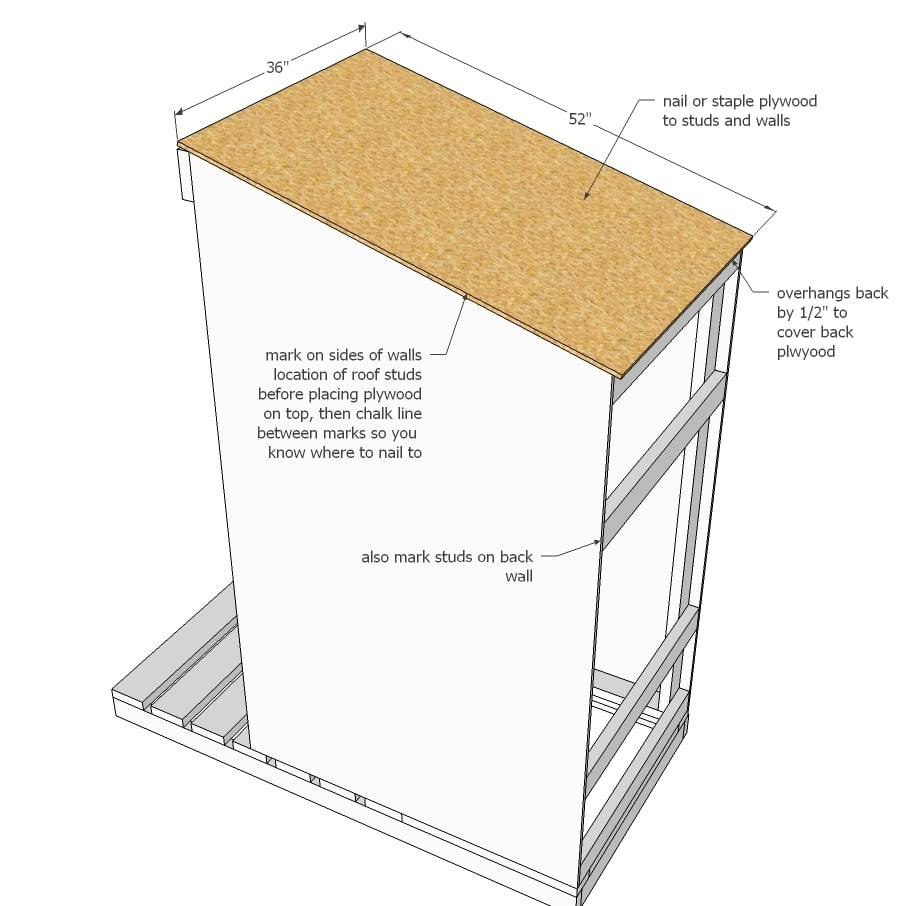
Attach plywood to roof, nailing or screwing to all availabe tie in points.
Step 9
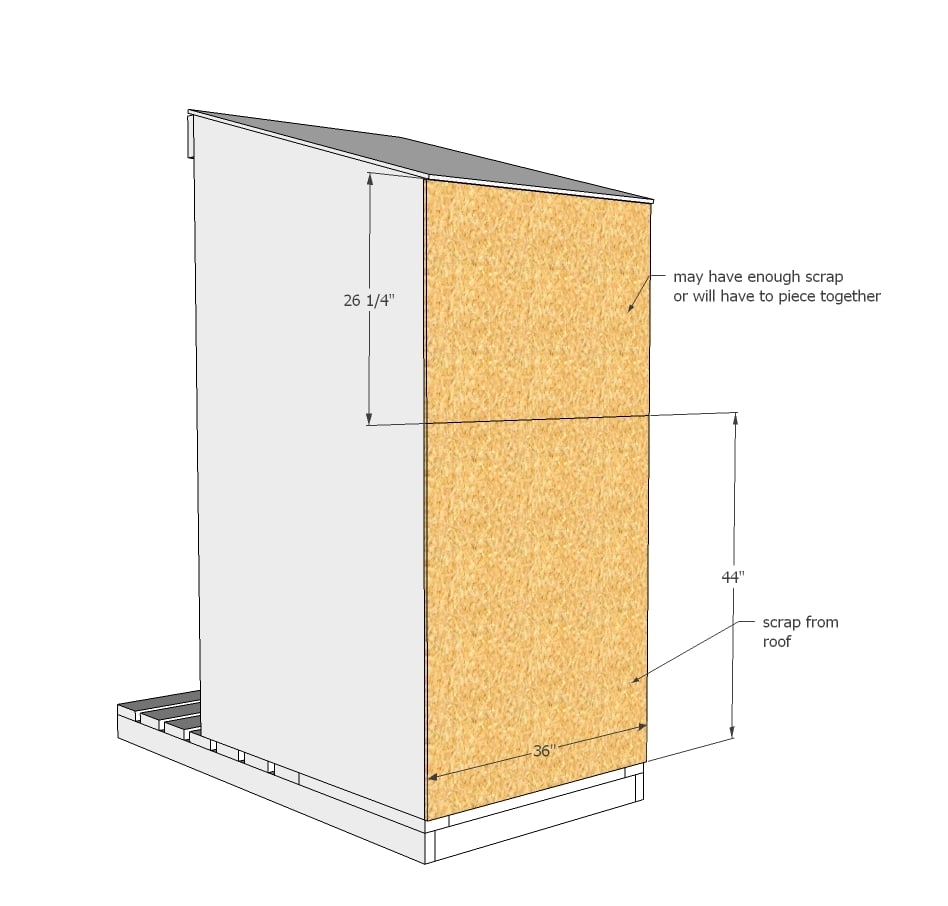
Use scrap plywood pieces to cover back. I considered leaving the top panel open and covering with acrylic glass as well but ended up using plywood.
Step 10
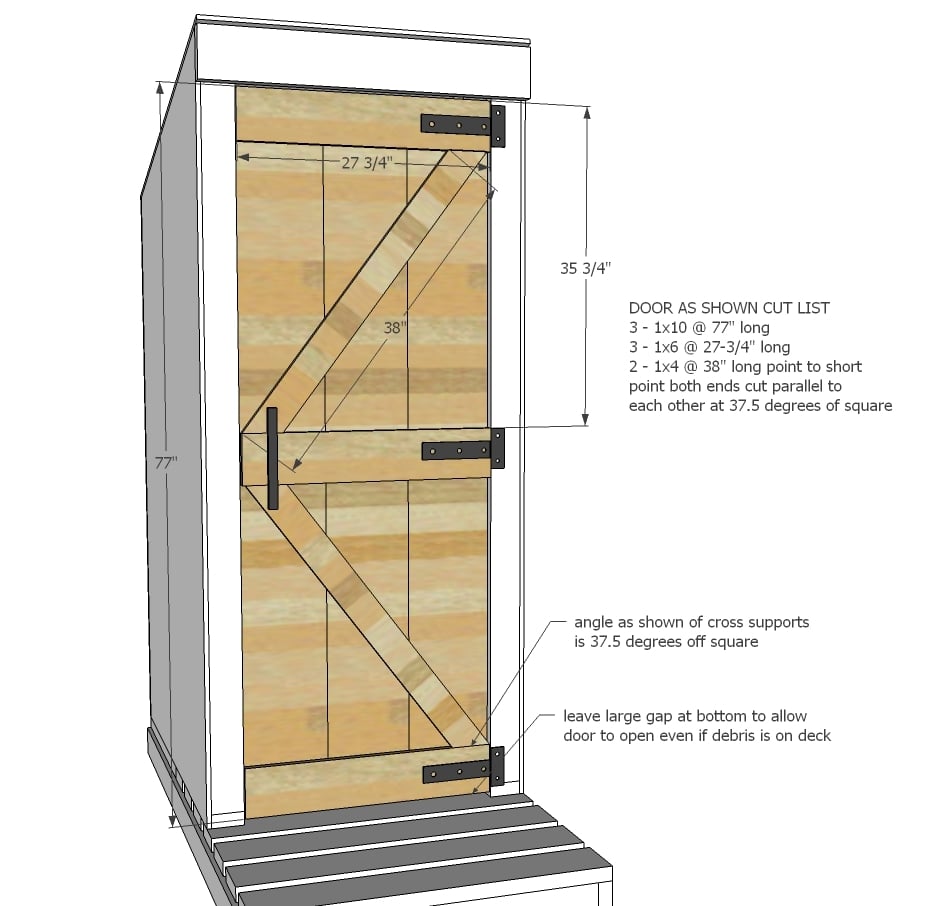
Build the door and attach with gate hinges. If using a gate clasp, make sure there is a way for the door to be opened from the inside. We did this by drilling a hole and attaching a string to the clasp so it can be opened from the inside.


Comments
Jolene H.
Tue, 07/30/2019 - 10:46
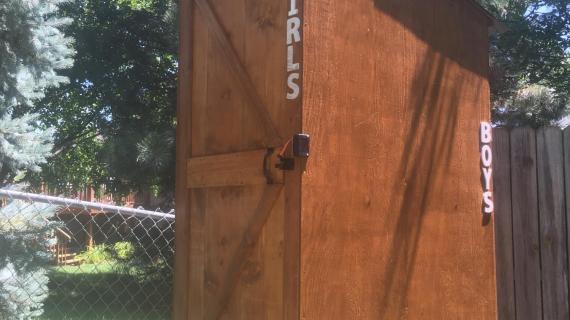
Love my outhouse!!
I used your plan and did a couple a couple modifications to suit my needs better, but I am in love with my outhouse!!
https://www.facebook.com/1399152267/posts/10220557417630957?s=1399152267&sfns=mo