
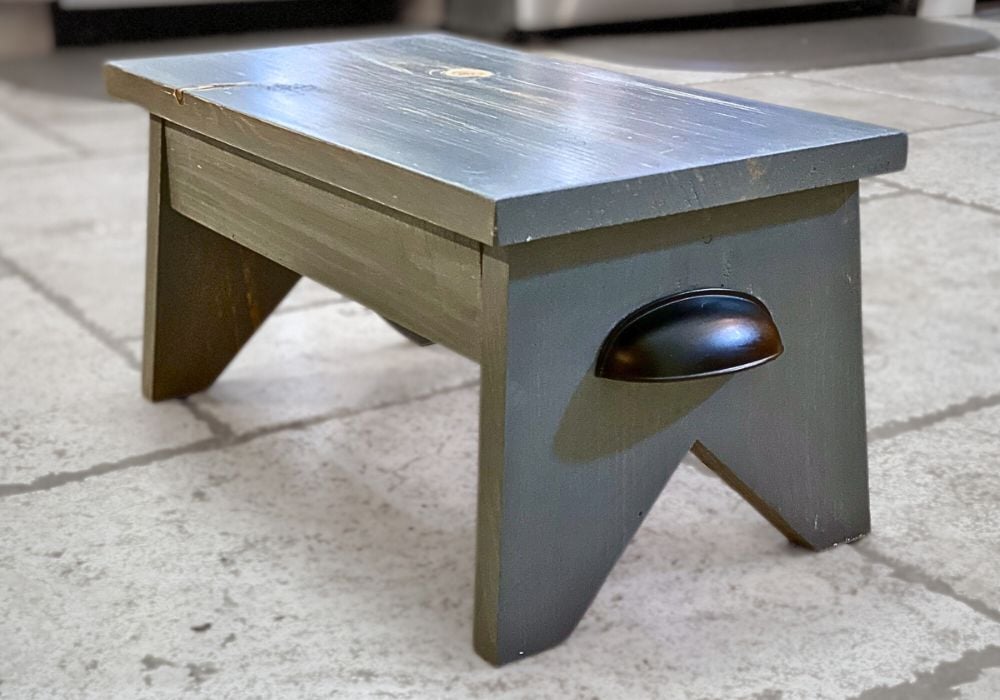

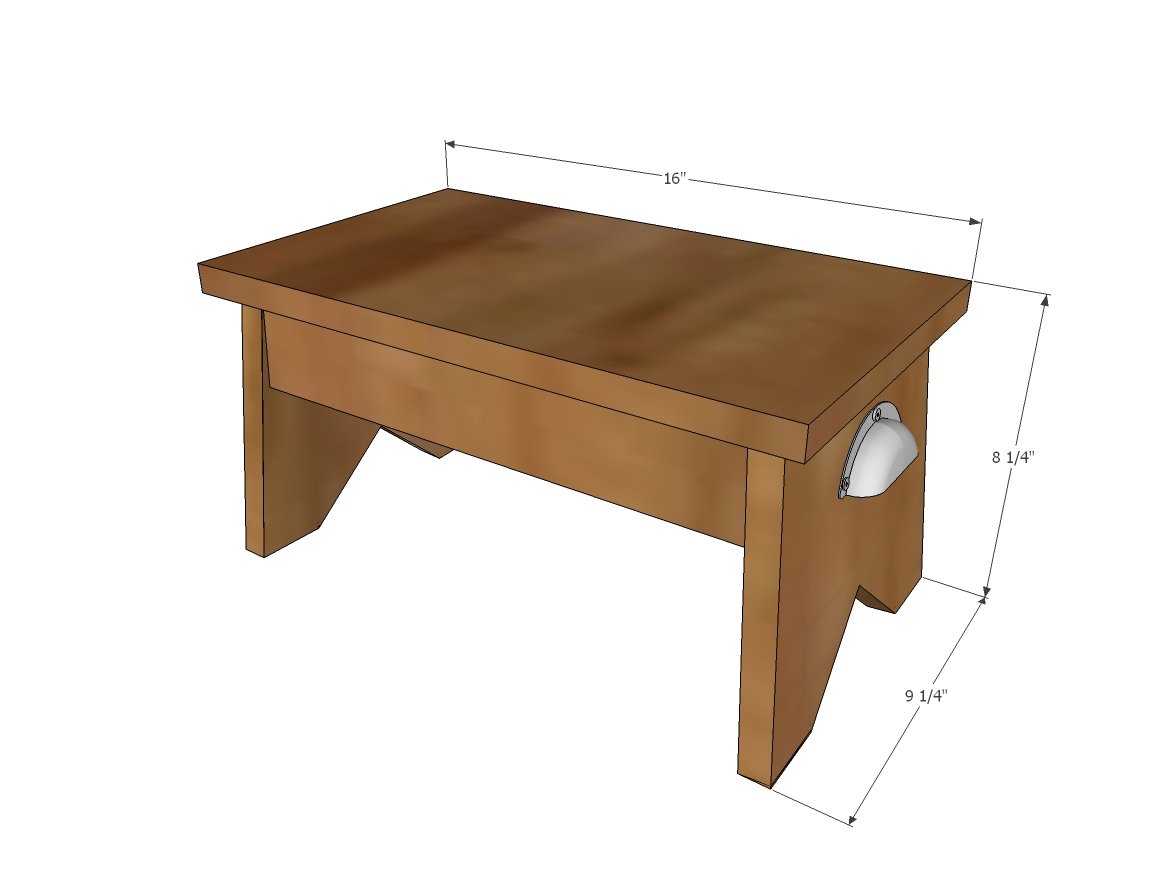
Build your own wood step stool with our free plans. Features angled legs for added durability and stability. Solid wood design is easy to stain or paint and will last and last (ours is still going half a decade later).
Build with just 1x10s and 1x3s for about $15. Step by step plans with diagrams, shopping and cut list from Ana White
Photo by By: stonejamie
Why I Built This Simple Step Stool
I've been helping my sister turn her bathroom from boring beige into glamours guest worthy ... and it's almost done!
You remember the mirrors that we DIYed for about $10 -
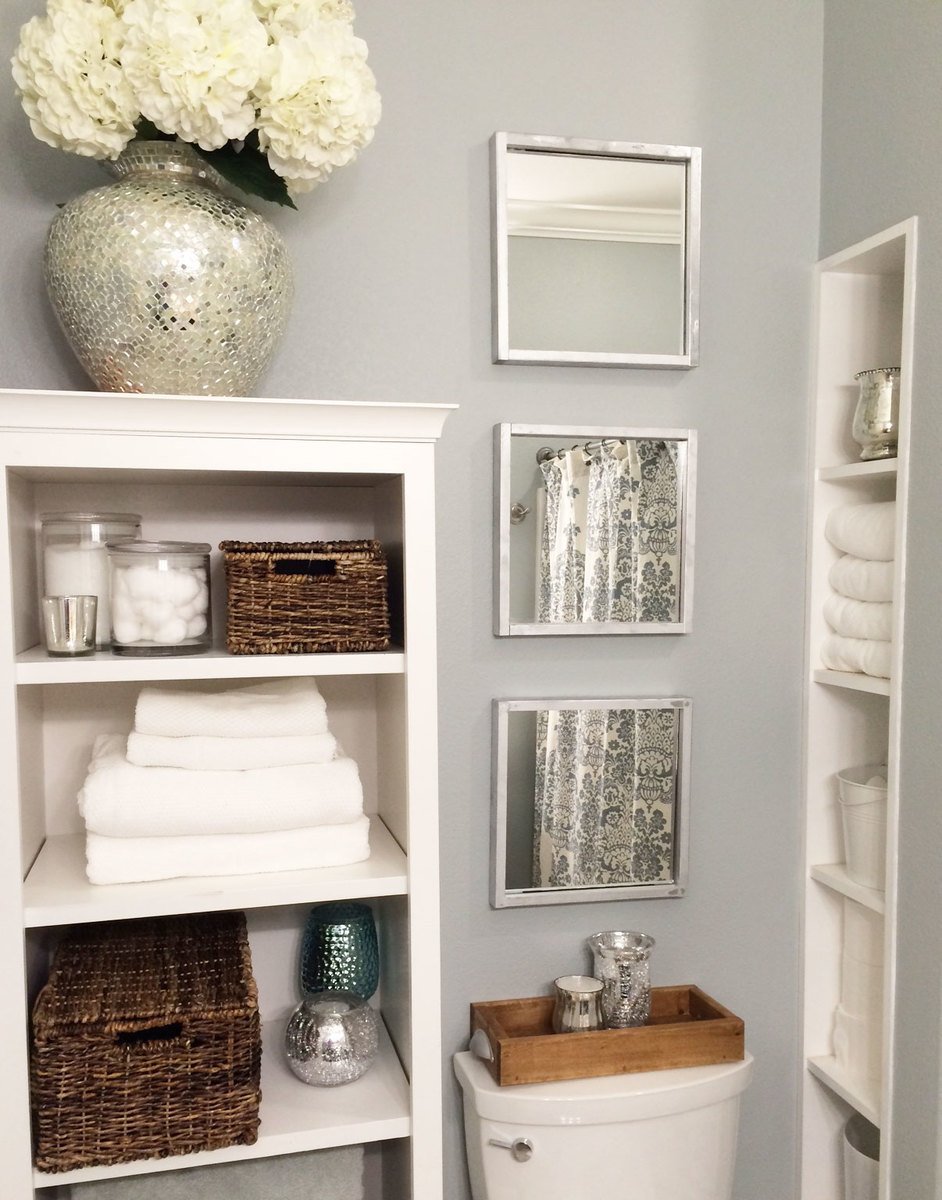
Yep, three mirrors for $10! It had such a huge impact on the bathroom!
Today's project for this bathroom isn't as glamourous, but it's very essential in this bathroom -
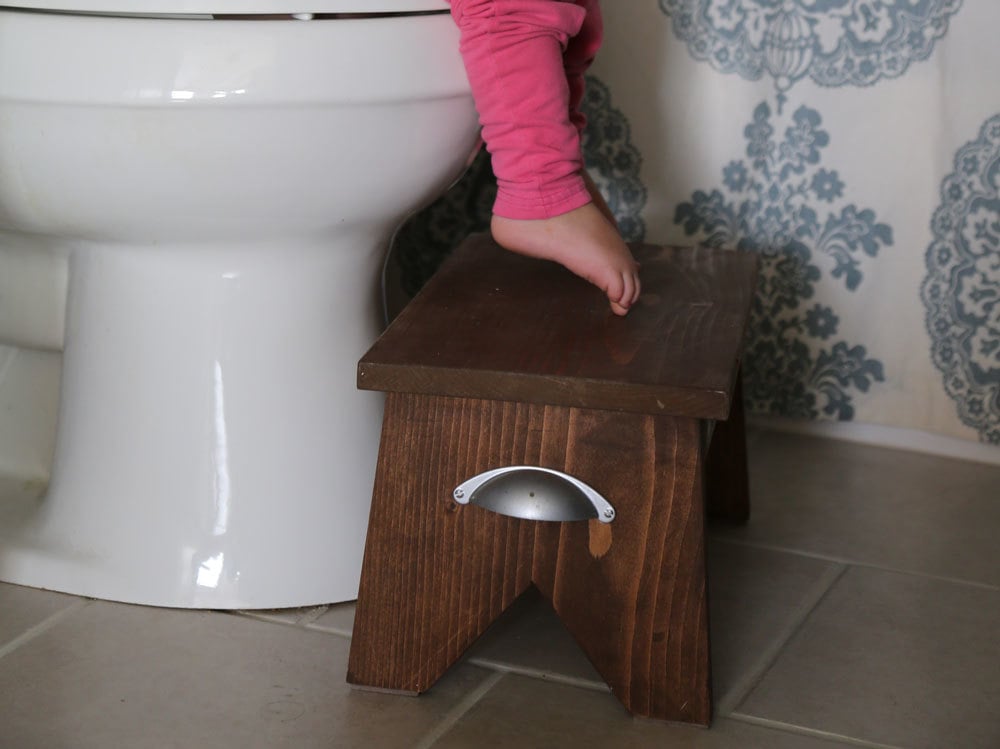
Where at least one of the main users of this bathroom needs the extra height boost.
Step Stool Plans
This step stool is an easy build if you can use a miter saw. After you get the cuts done, it's seriously like five minutes to complete this project.
Here's a quick video showing the steps
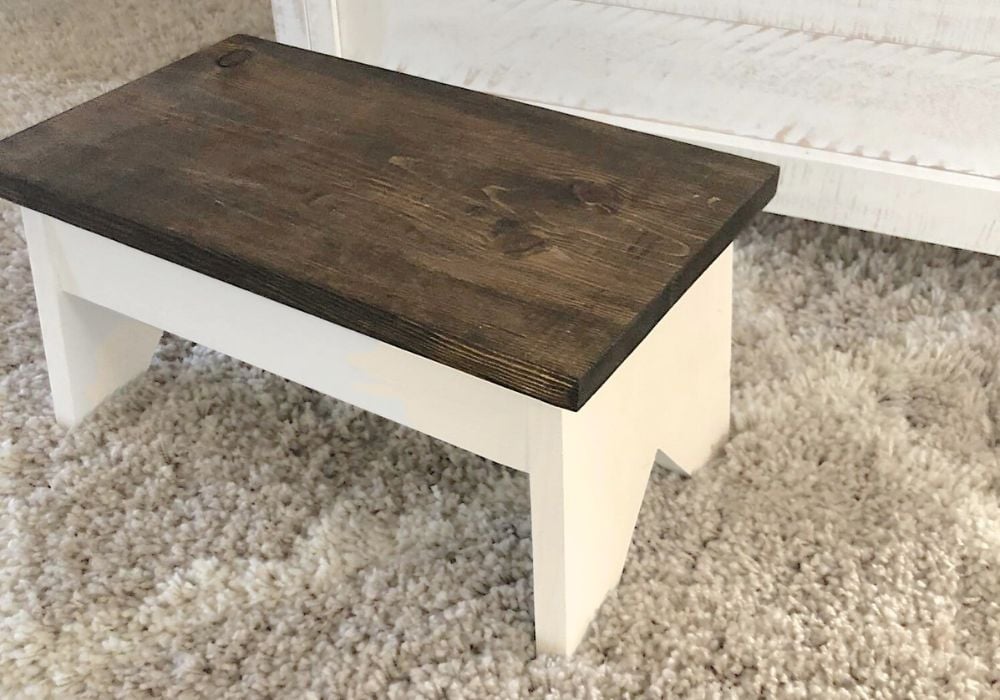
How has this Step Stool Held Up?
Well, after nearly a decade of use, countless moves, I'm excited to report, this step stool is still being used and is not wobbly or broken!
Plans for Similar Step Stool with Straight Legs
Do you love this stool, but don't want to take on the splayed leg angles? I have a very similar plan available for free with straight legs:
Click here for straight leg step stool plans.
Free Plans for Splayed Leg Simple Step Stool
The plans follow. Please share a brag post when you are done!
Preparation
- 3 feet of 1x10 boards
- 3 feet of 1x3 boards
- knobs or handles (optional)
- 2 - 1x10 @ 7-1/2" long, both ends beveled at 5 degrees off square, long point to short point, ends ARE parallel to each other
- 2 - 1x3 @ 13" long, both ends cut at 5 degree angles, shortest point measurement, ends NOT parallel
- 1 - 1x10 @ 16"
Cutting details for each board are in build steps


Please read through the entire plan and all comments before beginning this project. It is also advisable to review the Getting Started Section. Take all necessary precautions to build safely and smartly. Work on a clean level surface, free of imperfections or debris. Always use straight boards. Check for square after each step. Always predrill holes before attaching with screws. Use glue with finish nails for a stronger hold. Wipe excess glue off bare wood for stained projects, as dried glue will not take stain. Be safe, have fun, and ask for help if you need it. Good luck!
Instructions
Step 1
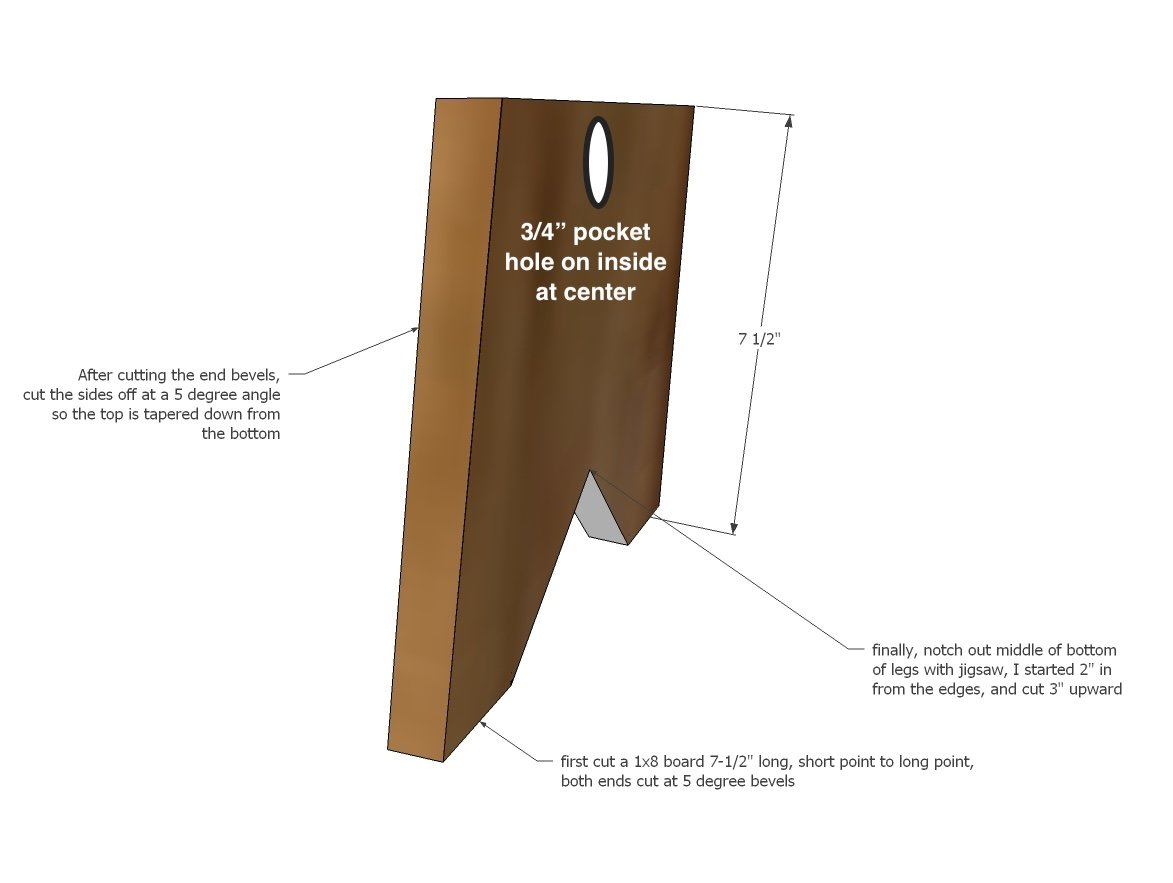
Set your miter saw to a 5 degree bevel cut, and then cut two 1x8 board pieces, so the ends are beveled at 5 degrees and parallel to each other, with a long point to short point measurement of 7-1/2".
These are your side pieces of the step stool.
Now use a jigsaw to cut a triangle out of the bottom.
Then mark inward at the top 1/2", and draw a line at a diagonal to the bottom outside corner, so the two sides are tapered as well, so the sides become a trapezoid shape. Cut with a jigsaw along your lines.
Then drill a 3/4" pocket hole on the INSIDE of the leg as shown.
Step 2
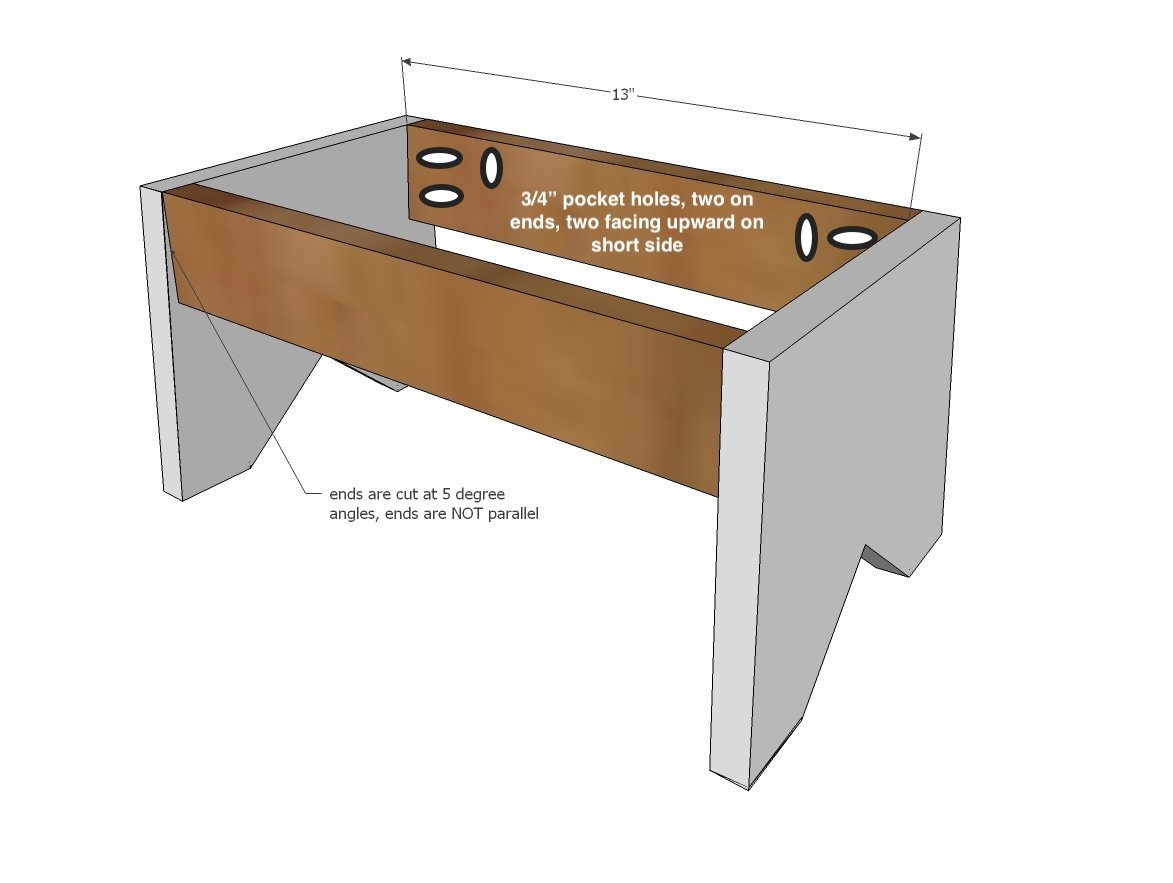
The two apron pieces are 1x3s, but this time the ends are cut at an angle, so the 1x3s are actually a trapezoid shape.
Adjust the miter saw so there is no bevel, but the blade is at a 5 degree angle off square.
Cut the 1x3s to 13" long at the short point to short point measurement, ends are NOT parallel.
Drill 3/4" pocket holes on the ends as shown, and then two pocket holes facing upward for attaching the top in later steps.
Attach the 1x3 aprons to the sides as shown, the sides will bevel out past the 1x3s as shown in the diagram, but the top will be flush.
Step 3

Attach the top 1x10 piece to the base using the pocket holes, with 1-1/4" pocket hole screws and glue.
It is always recommended to apply a test coat on a hidden area or scrap piece to ensure color evenness and adhesion. Use primer or wood conditioner as needed.

Comments
DIYer
Fri, 04/24/2015 - 16:33
Nice Project
Going to try it this weekend. Just what we needed.
carolyn-m-t
Tue, 07/21/2020 - 10:34
Kreg Nails not digging into the top of this step stool.
I'm feeling very frustrated right now. I've cut everything out and started screwing it together but the 3/4th inch Kreg screws I always use keep spinning and is not digging in deep enough.
mr5drums
Mon, 08/17/2020 - 16:40
Hey there The pocket holes…
Hey there
The pocket holes themselves are 3/4”. The screws should be 1-1/4”. Ive built two of these and the screws are perfect