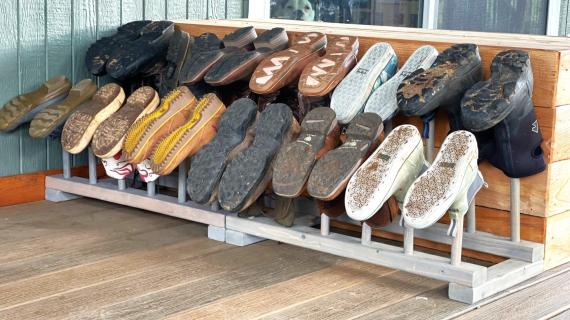
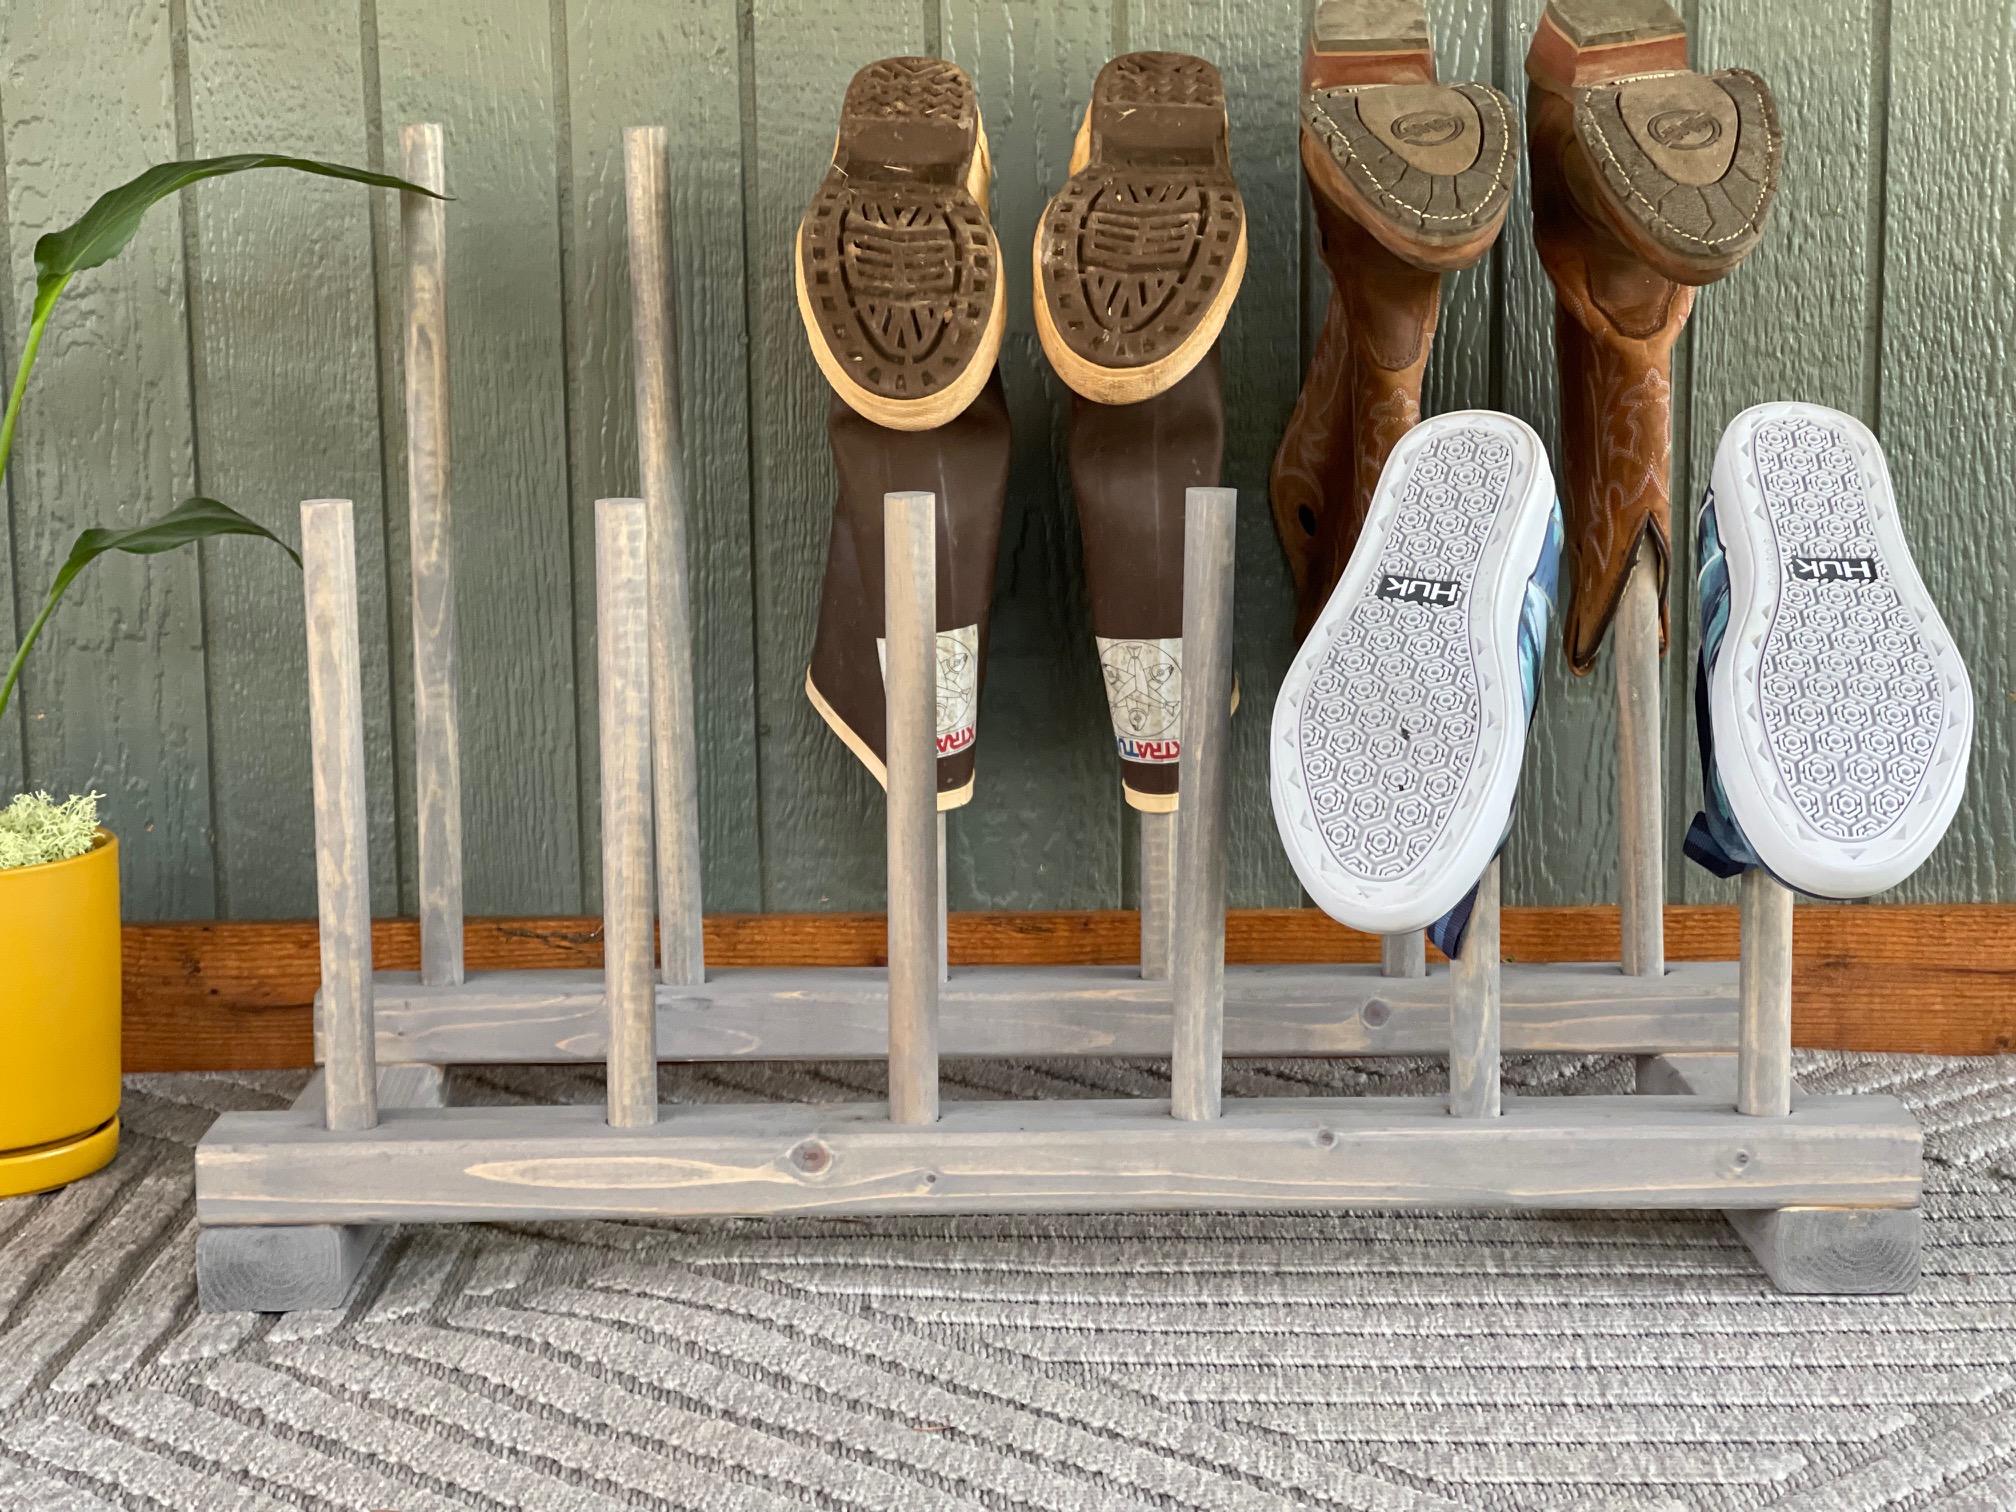
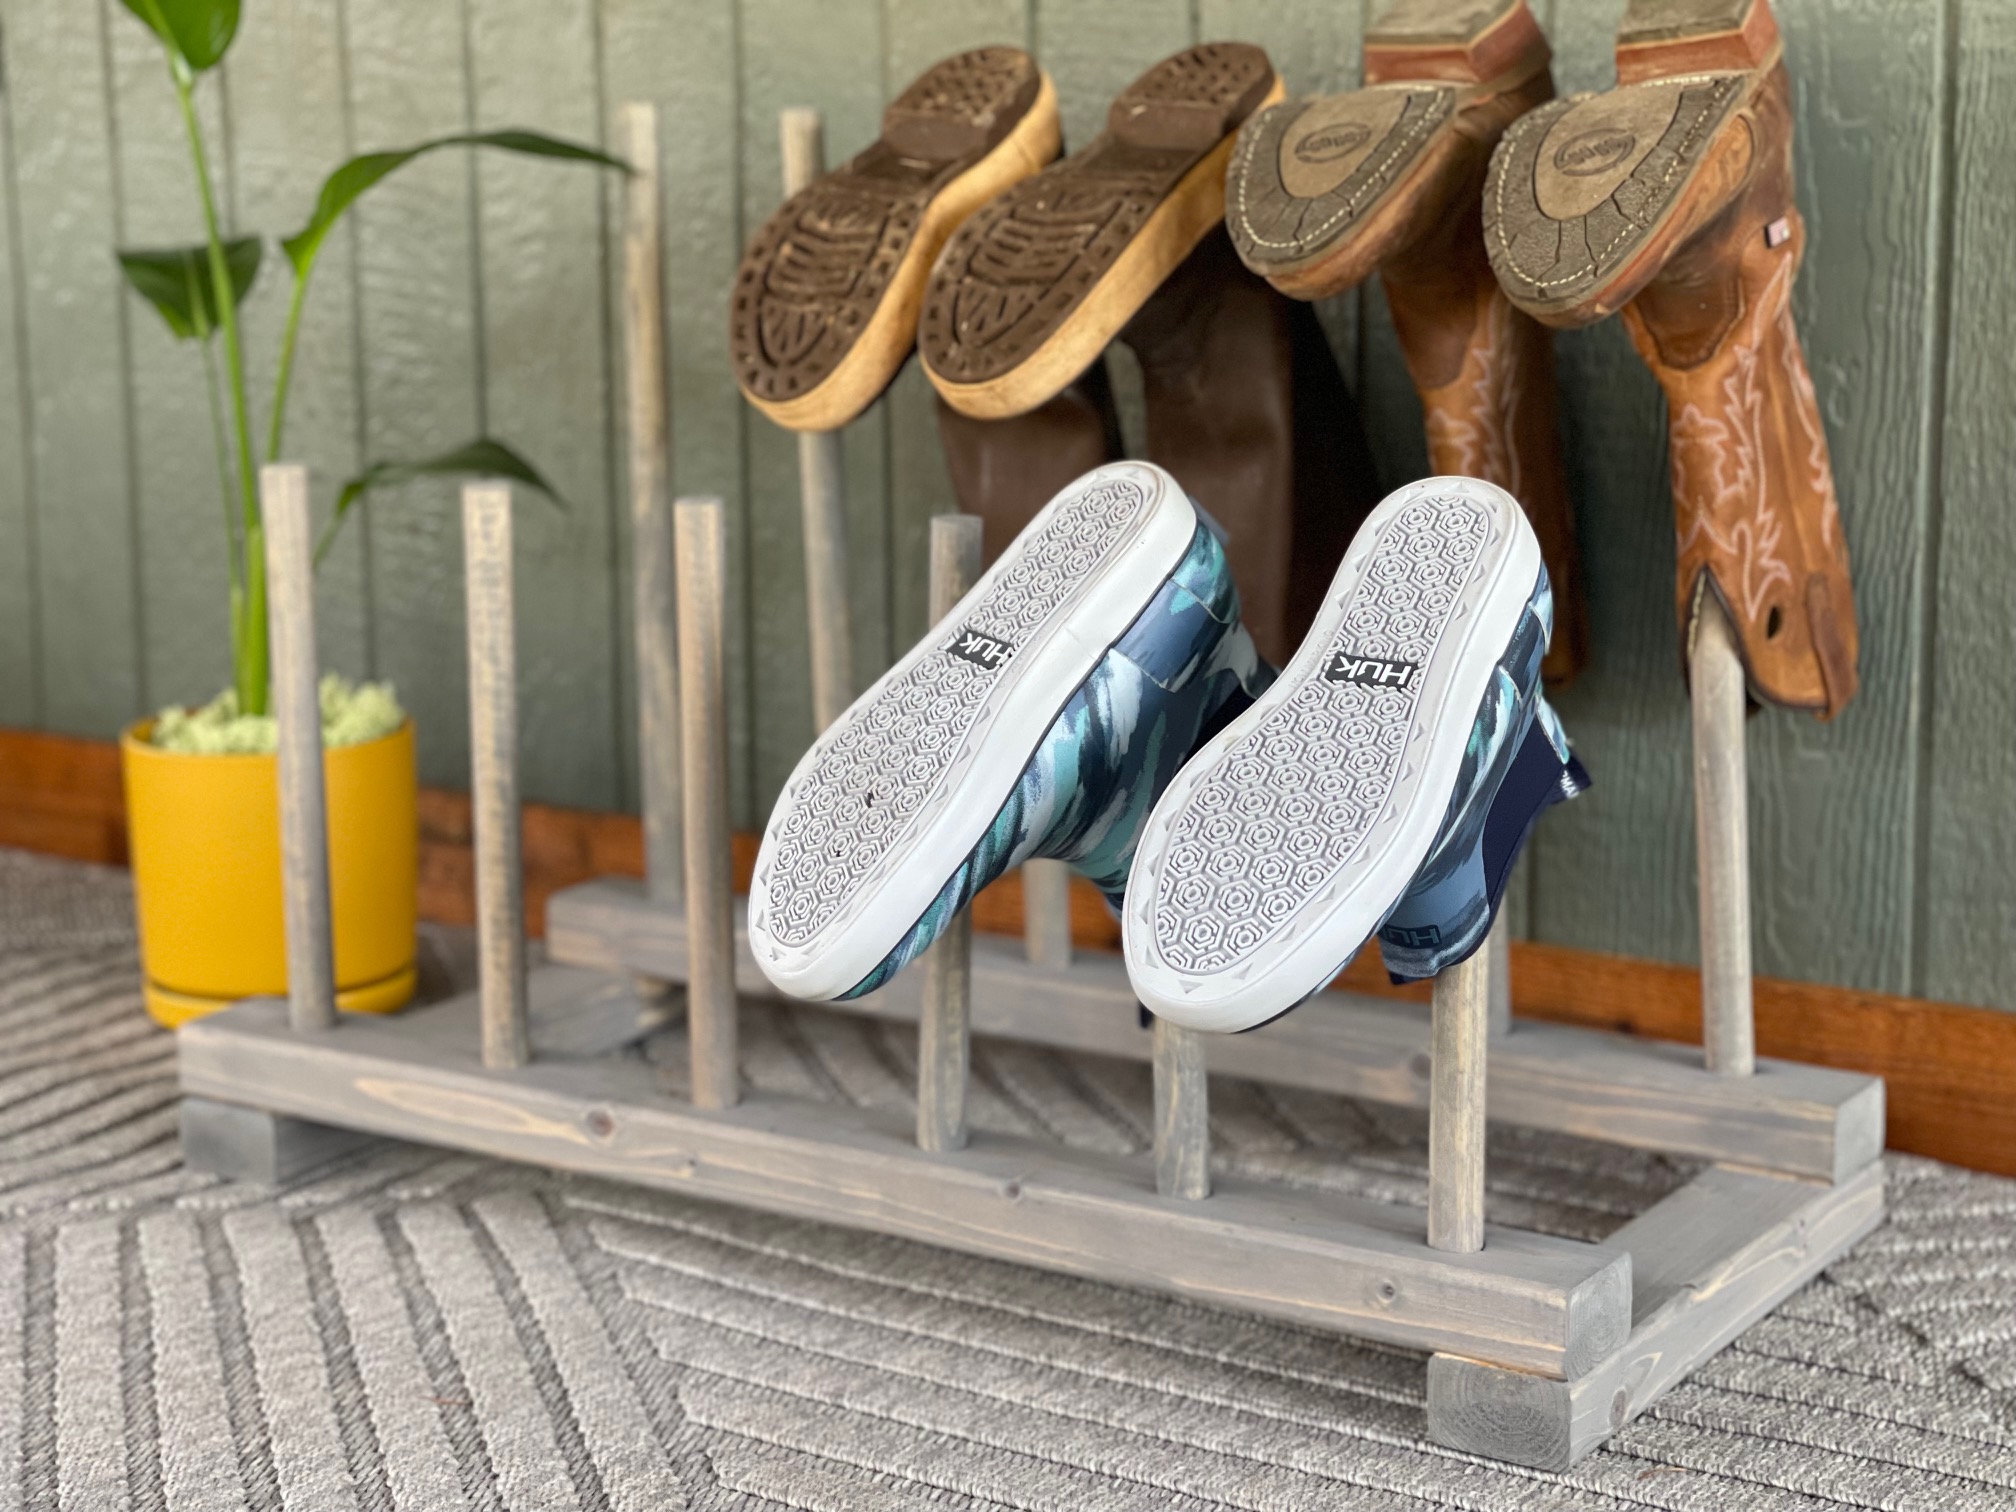
If you're tired of messy and disorganized wellington boots cluttering up your space, you're in the right place. Our step-by-step guide will help you create a practical and stylish boot rack that keeps your boots neatly organized.
With this easy-to-follow tutorial, you'll learn how to construct a welly boot rack using simple materials and basic tools. Not only will this project save you time and frustration, but it will also add a touch of charm to your home. So, let's dive in and get those wellies organized!
This free step by step tutorial has a shopping list, cut list, diagrams and lots of photos to guide you - Designed and built by @family_diynamic
Here's How We Built this Welly Boot Rack
First, cut the boards using a compound miter saw or circular saw, following the cut list.
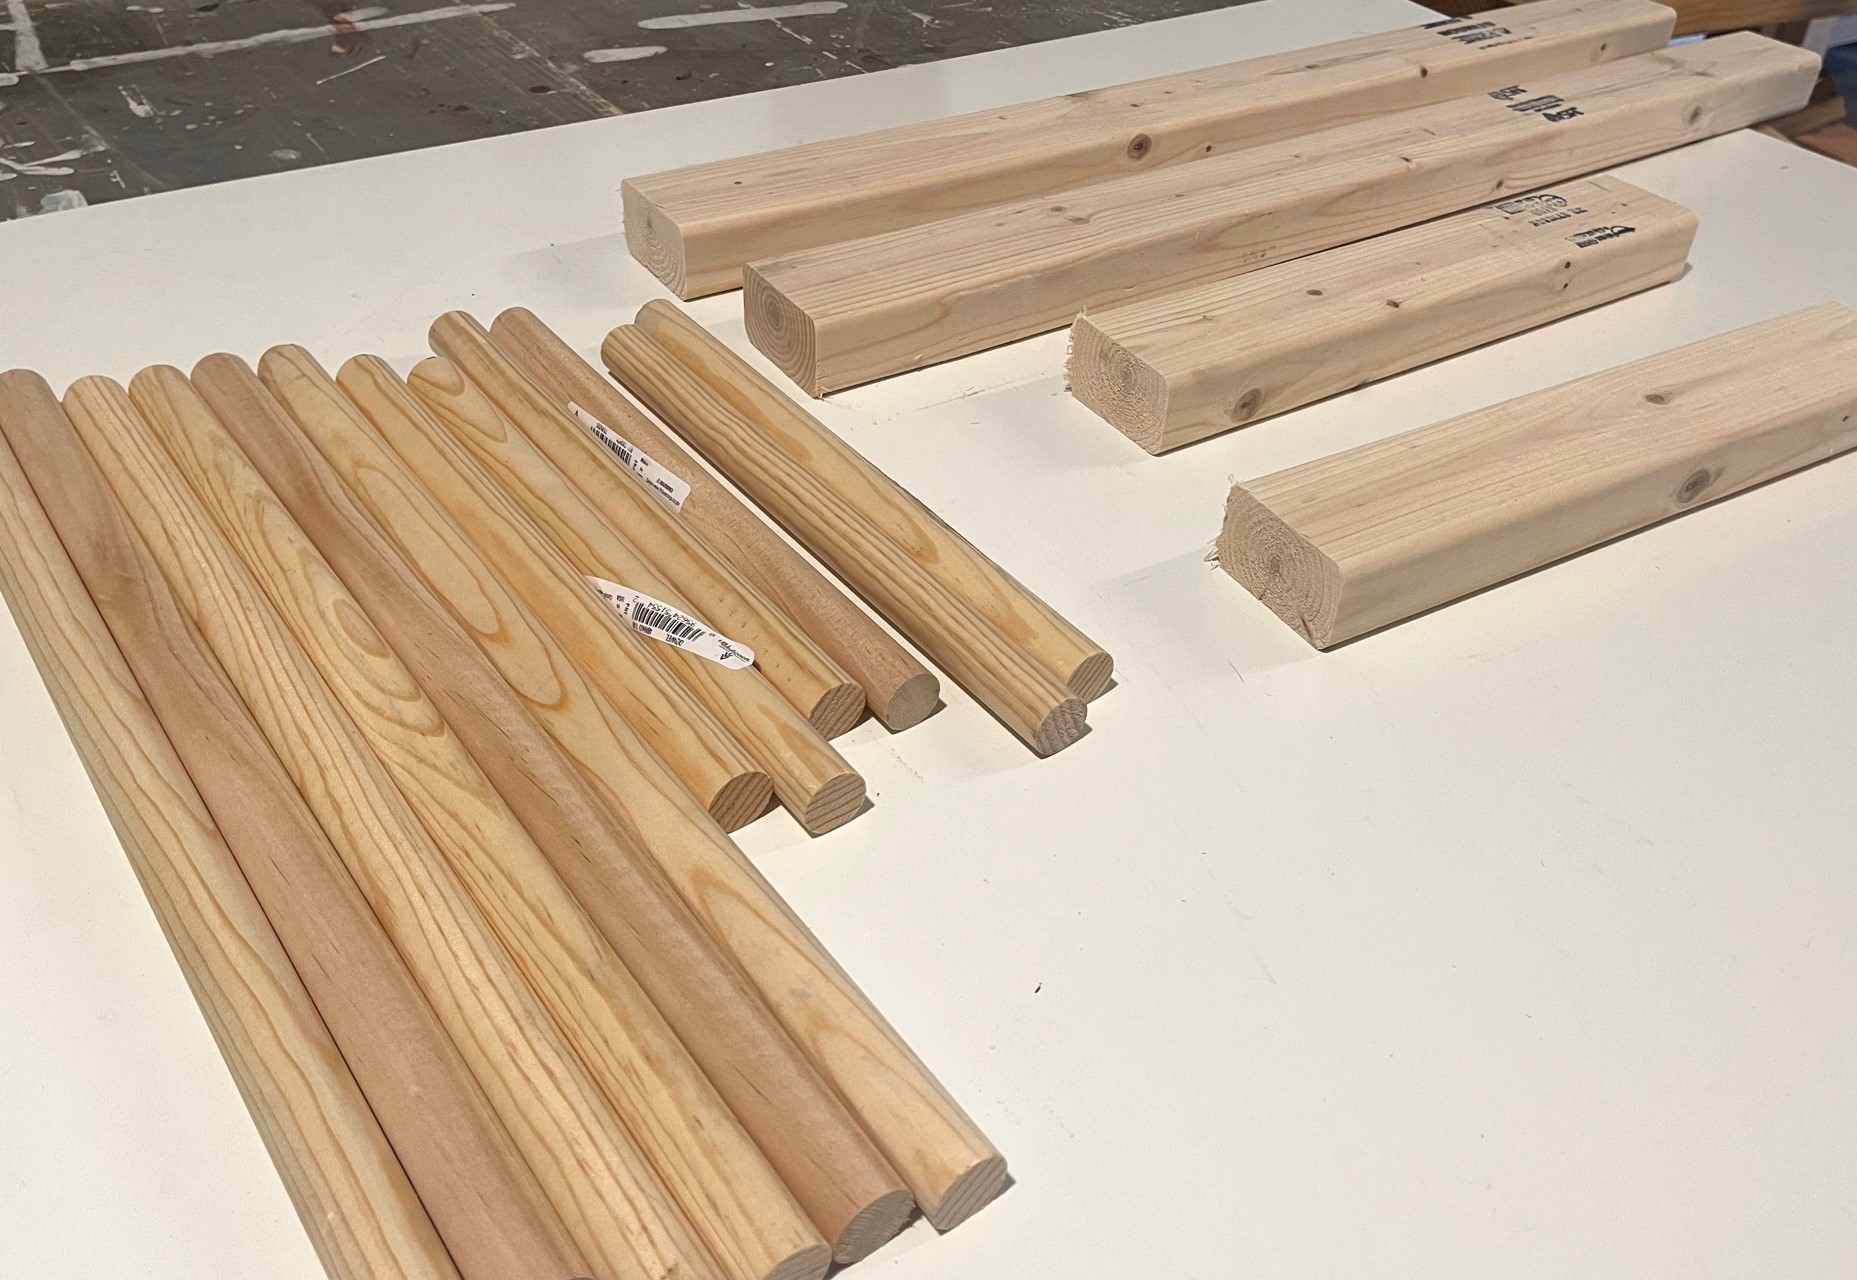
Cut the longest cuts first, to maximize material use.
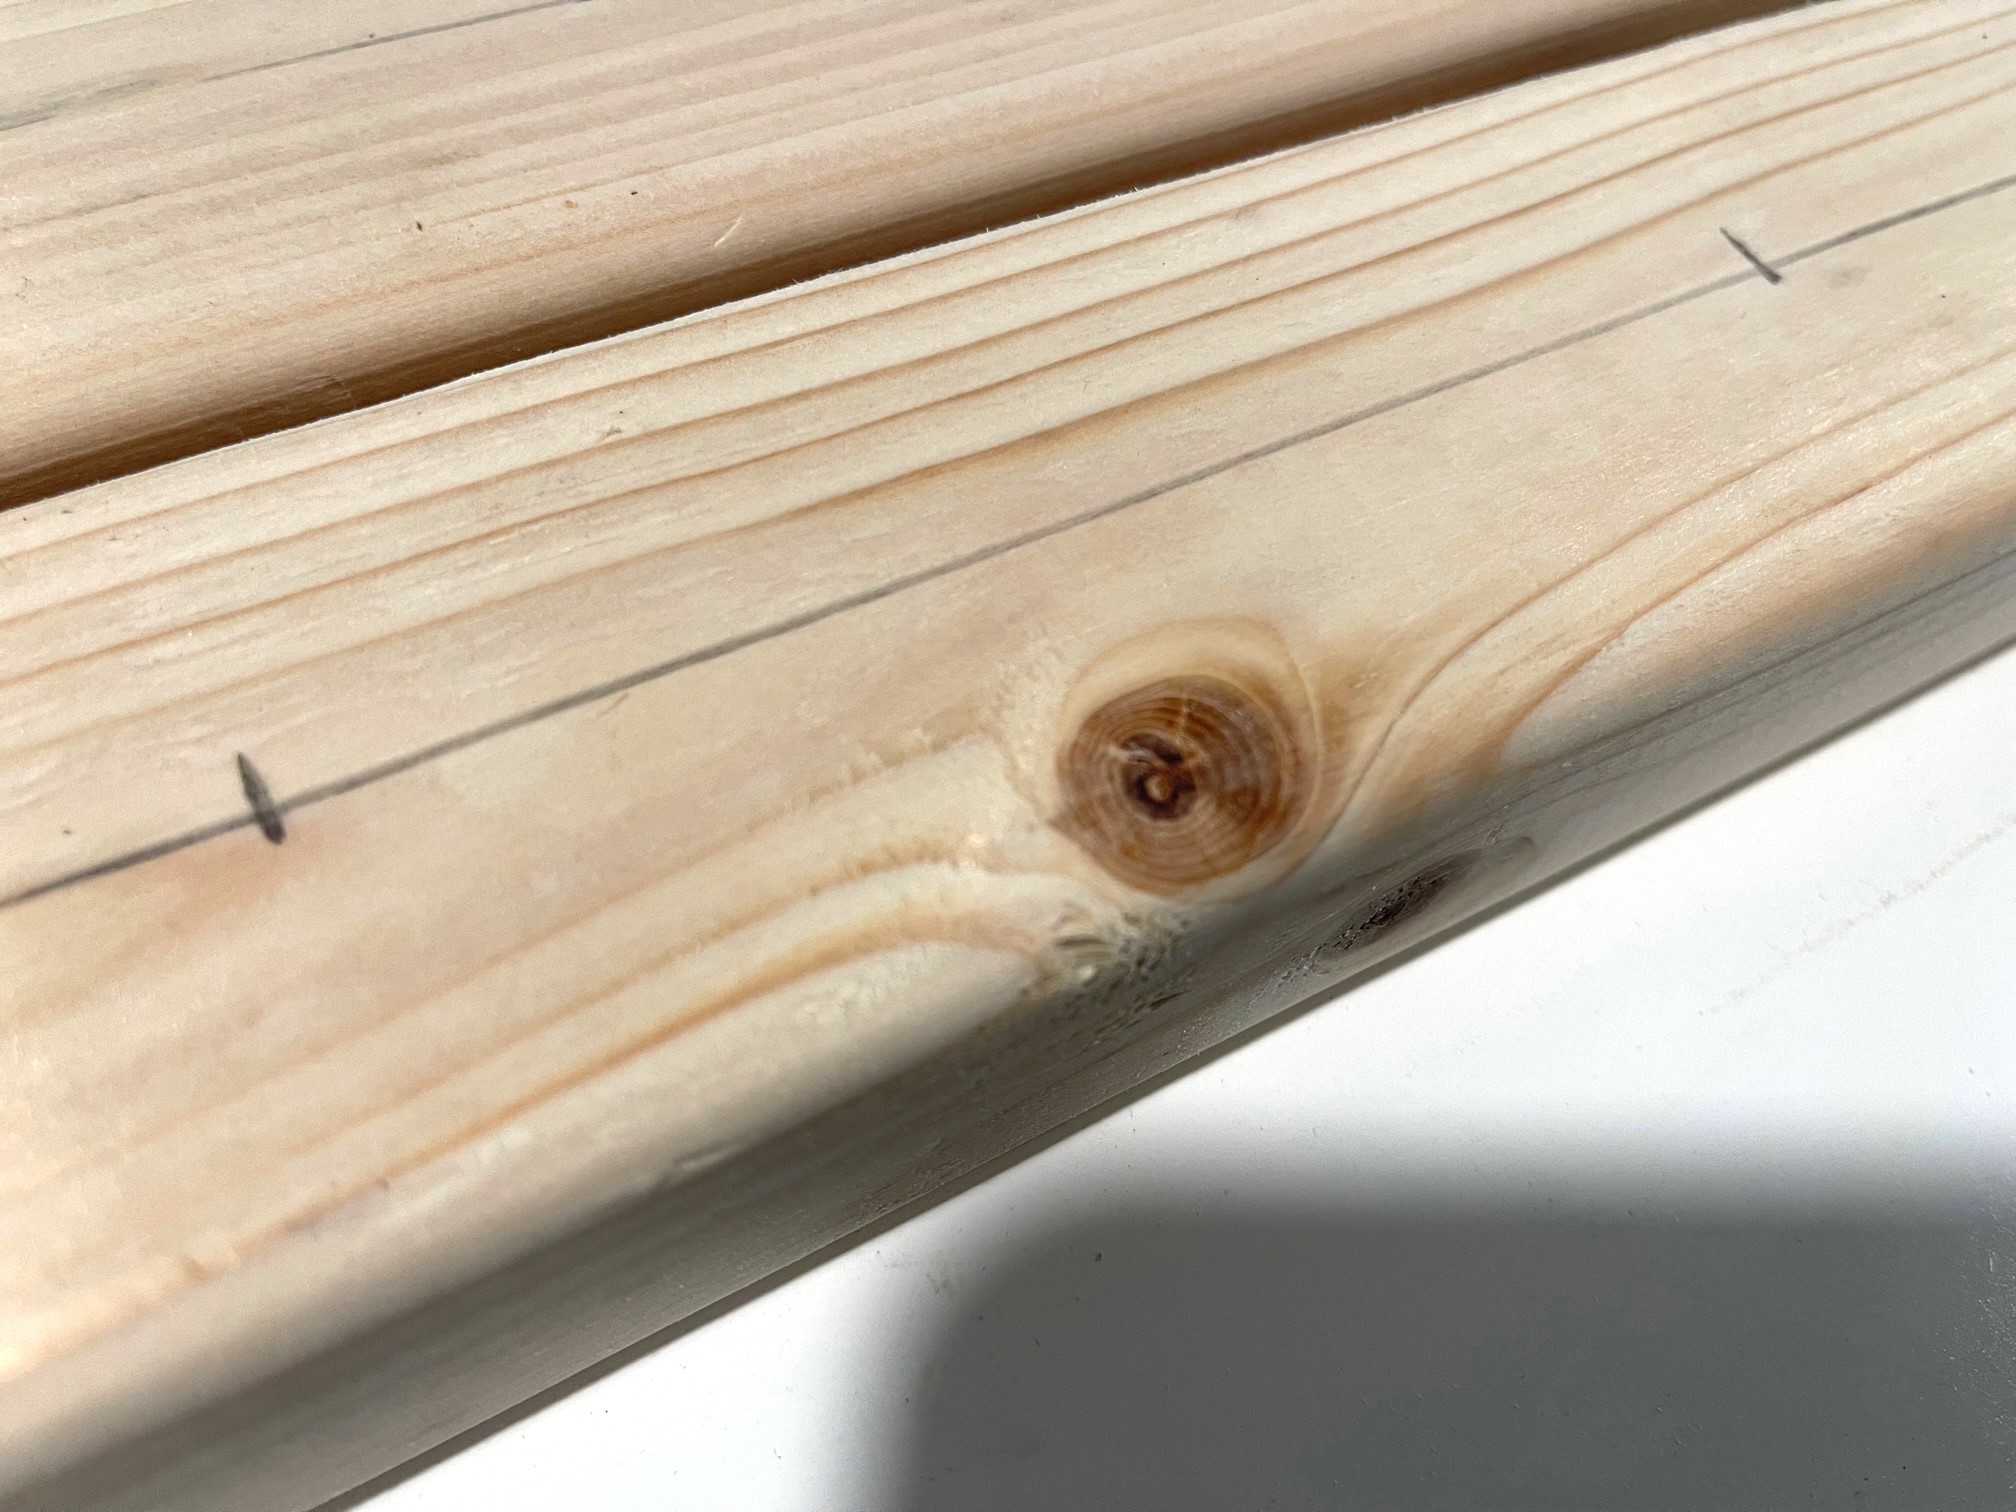
Then, mark location of holes to drill on the longer 2x3 boards. Drill a pilot hole all the way through at the marks.
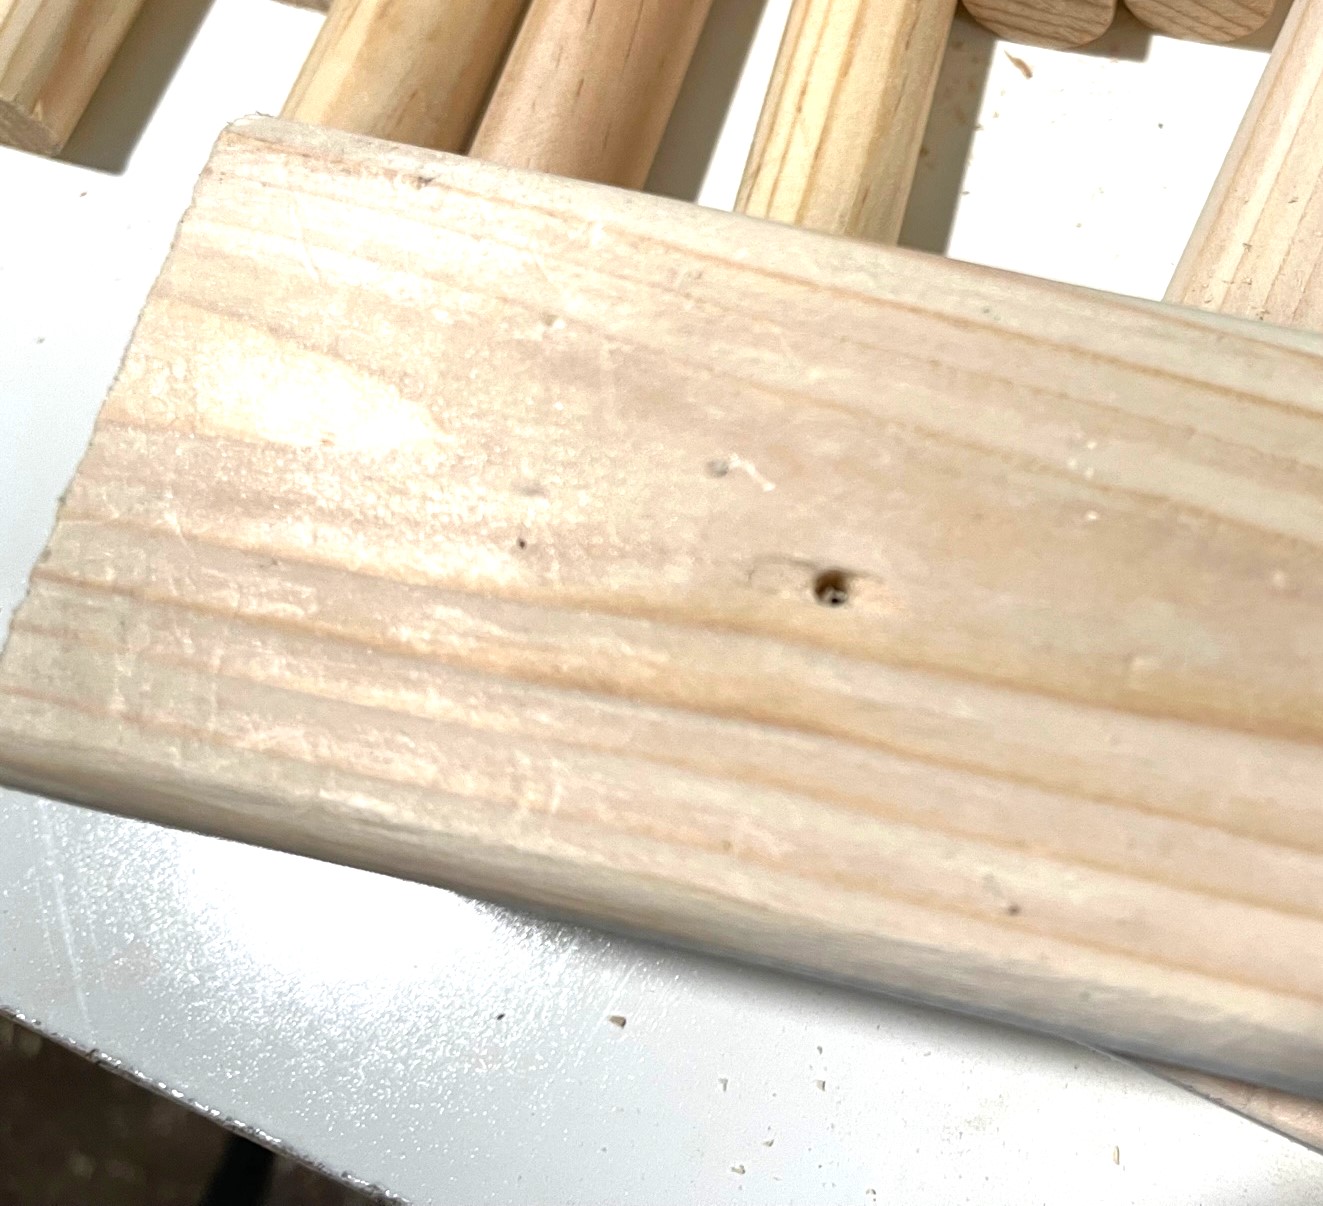
Then, using a 7/8" spade bit, drill halfway through the same pilot hole. TIP: Tape the drill bit to guide the depth of hole you are drilling.
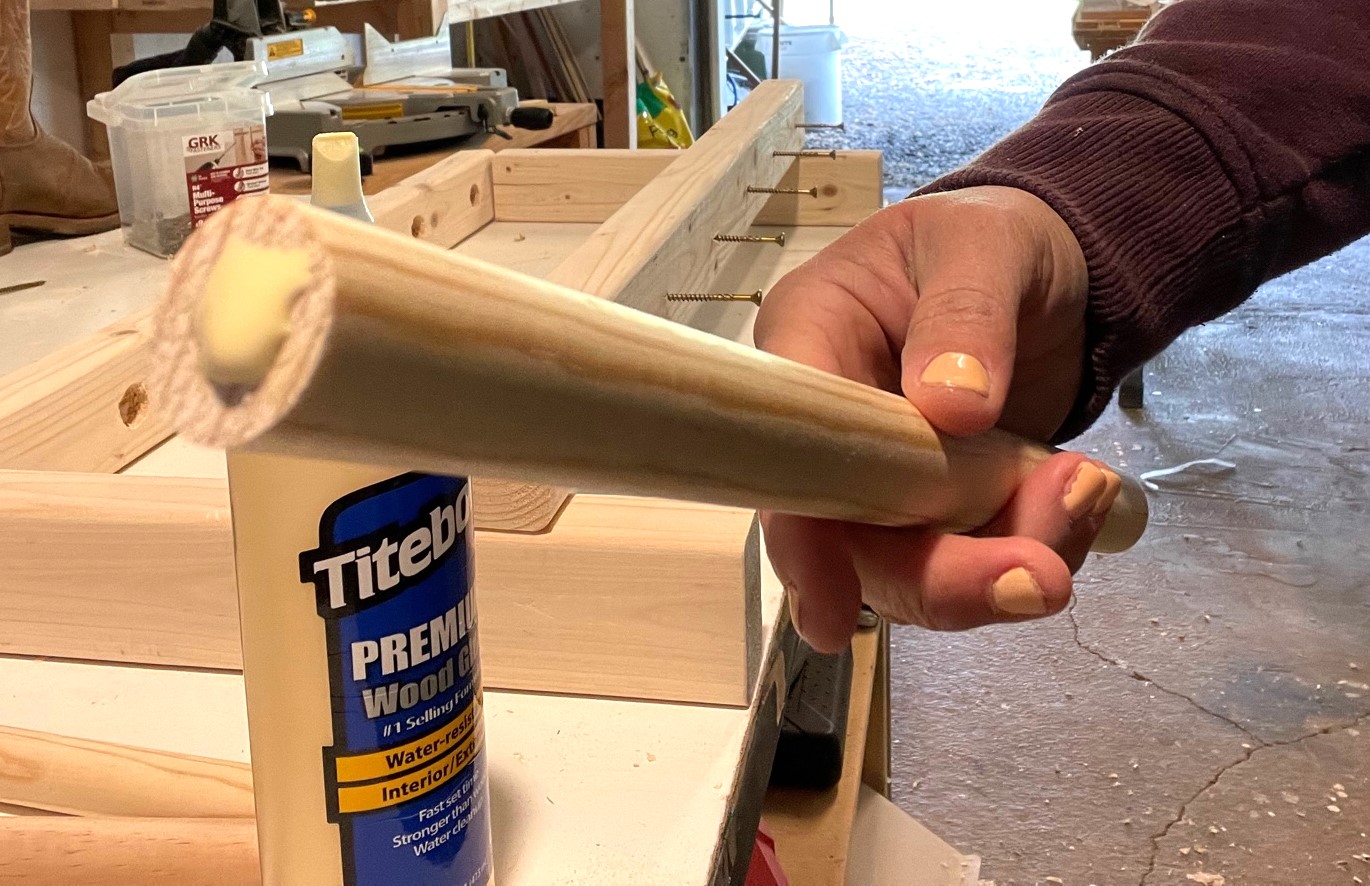
Apply glue to bottom of the dowels.
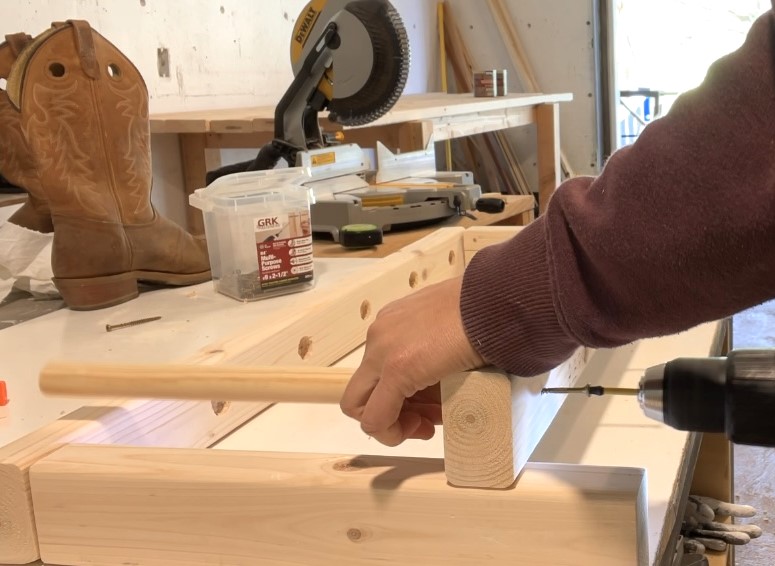
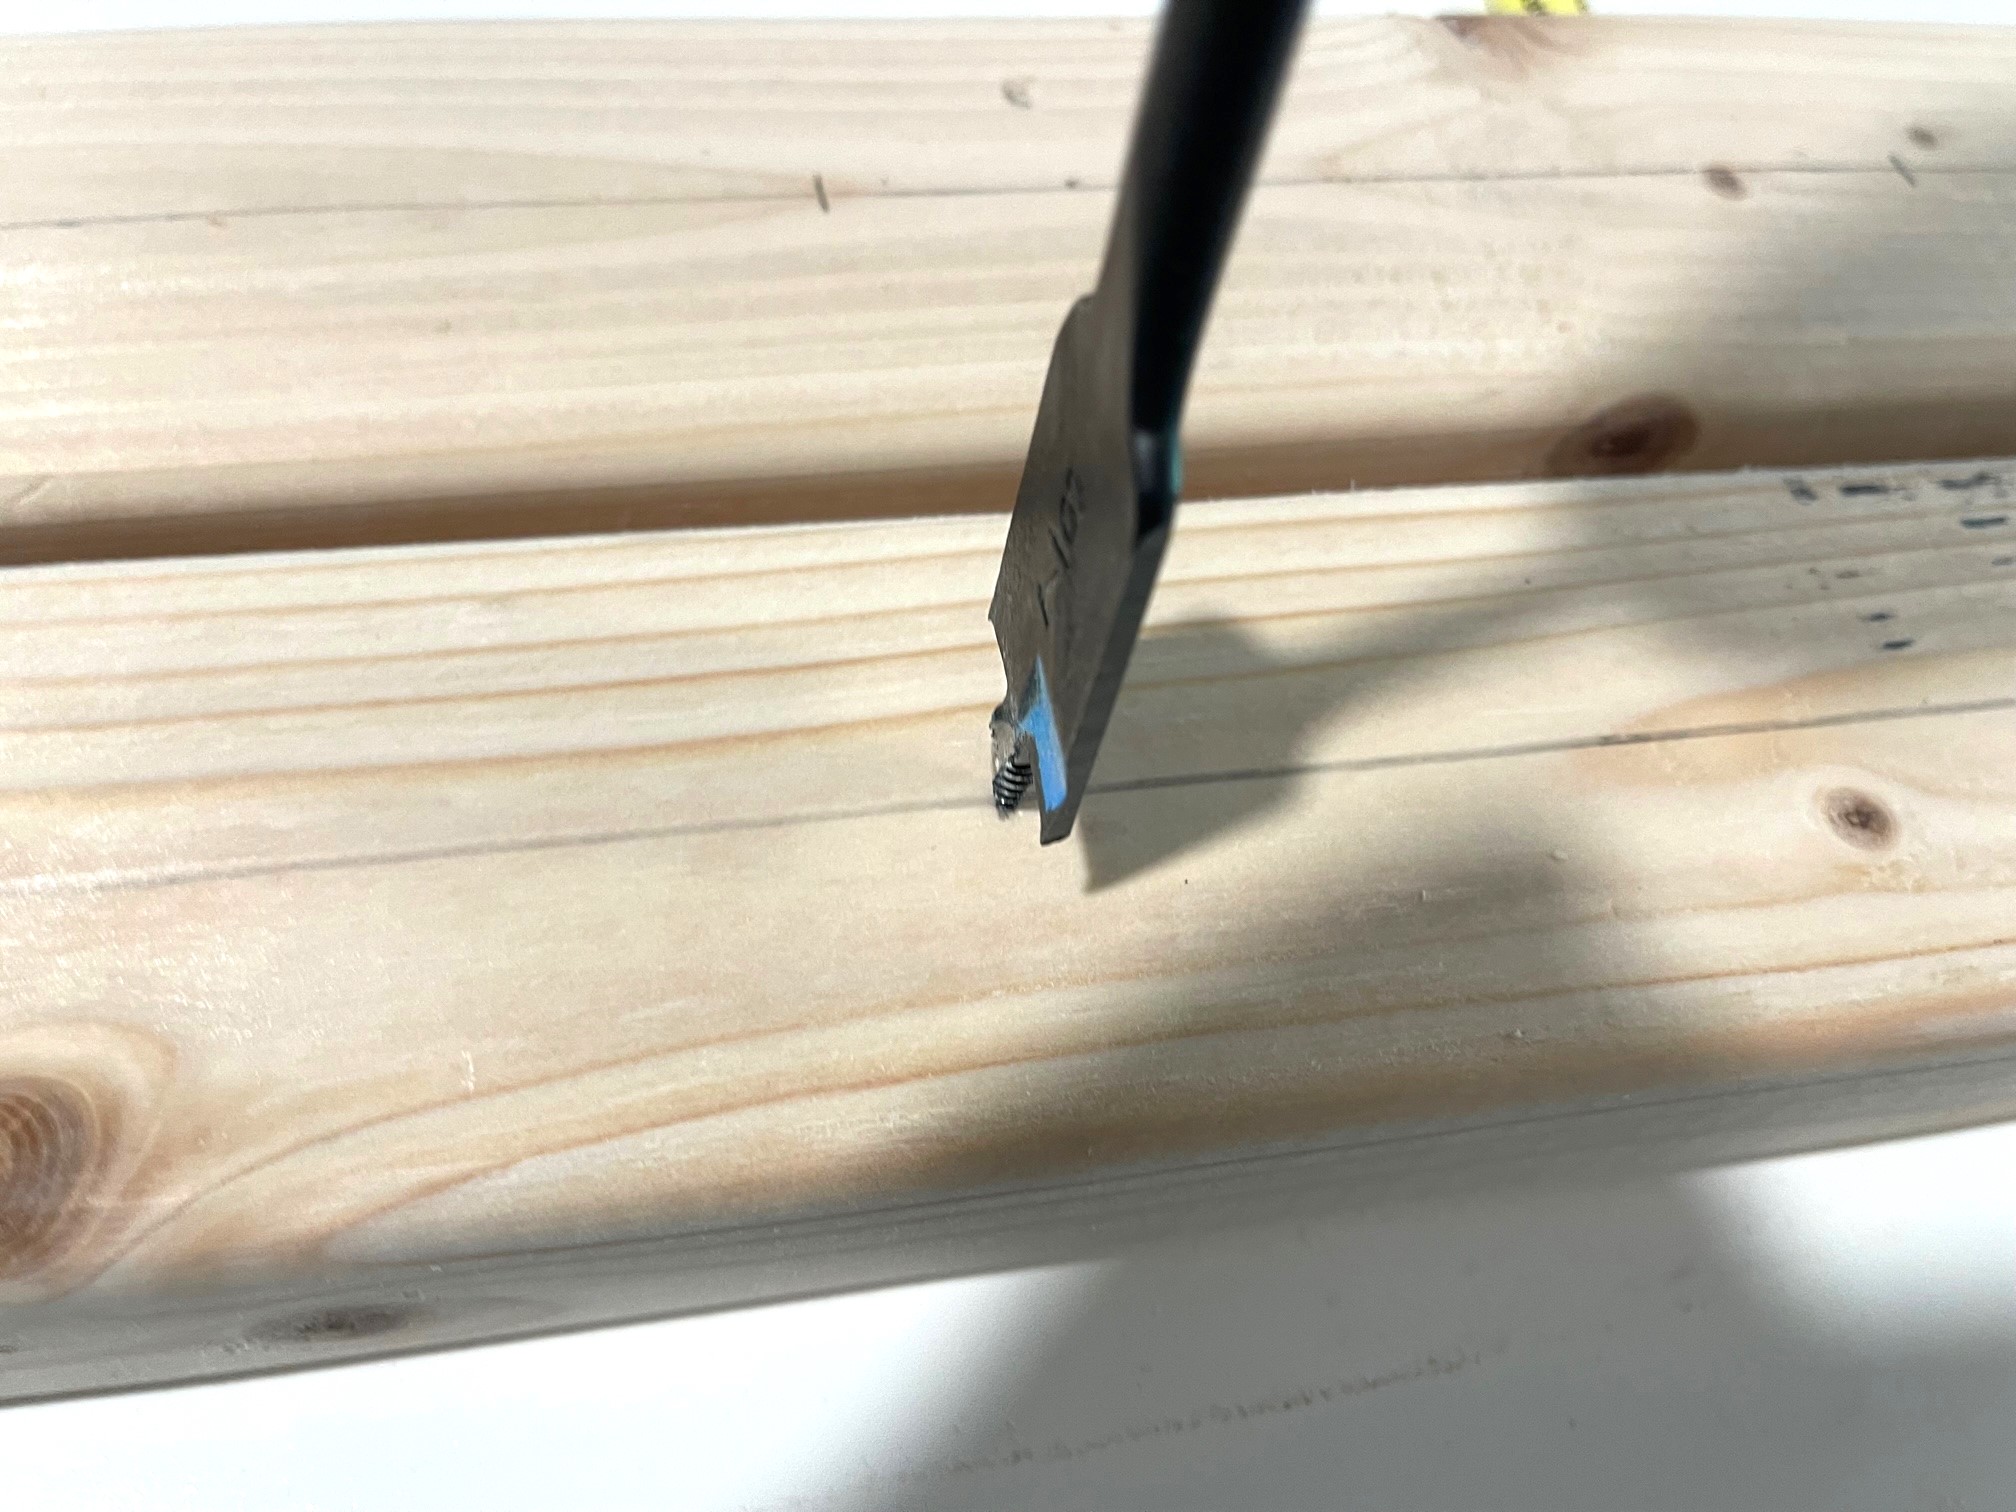
Place dowels in the holes and screw from bottom through the predrilled pilot hole to secure.
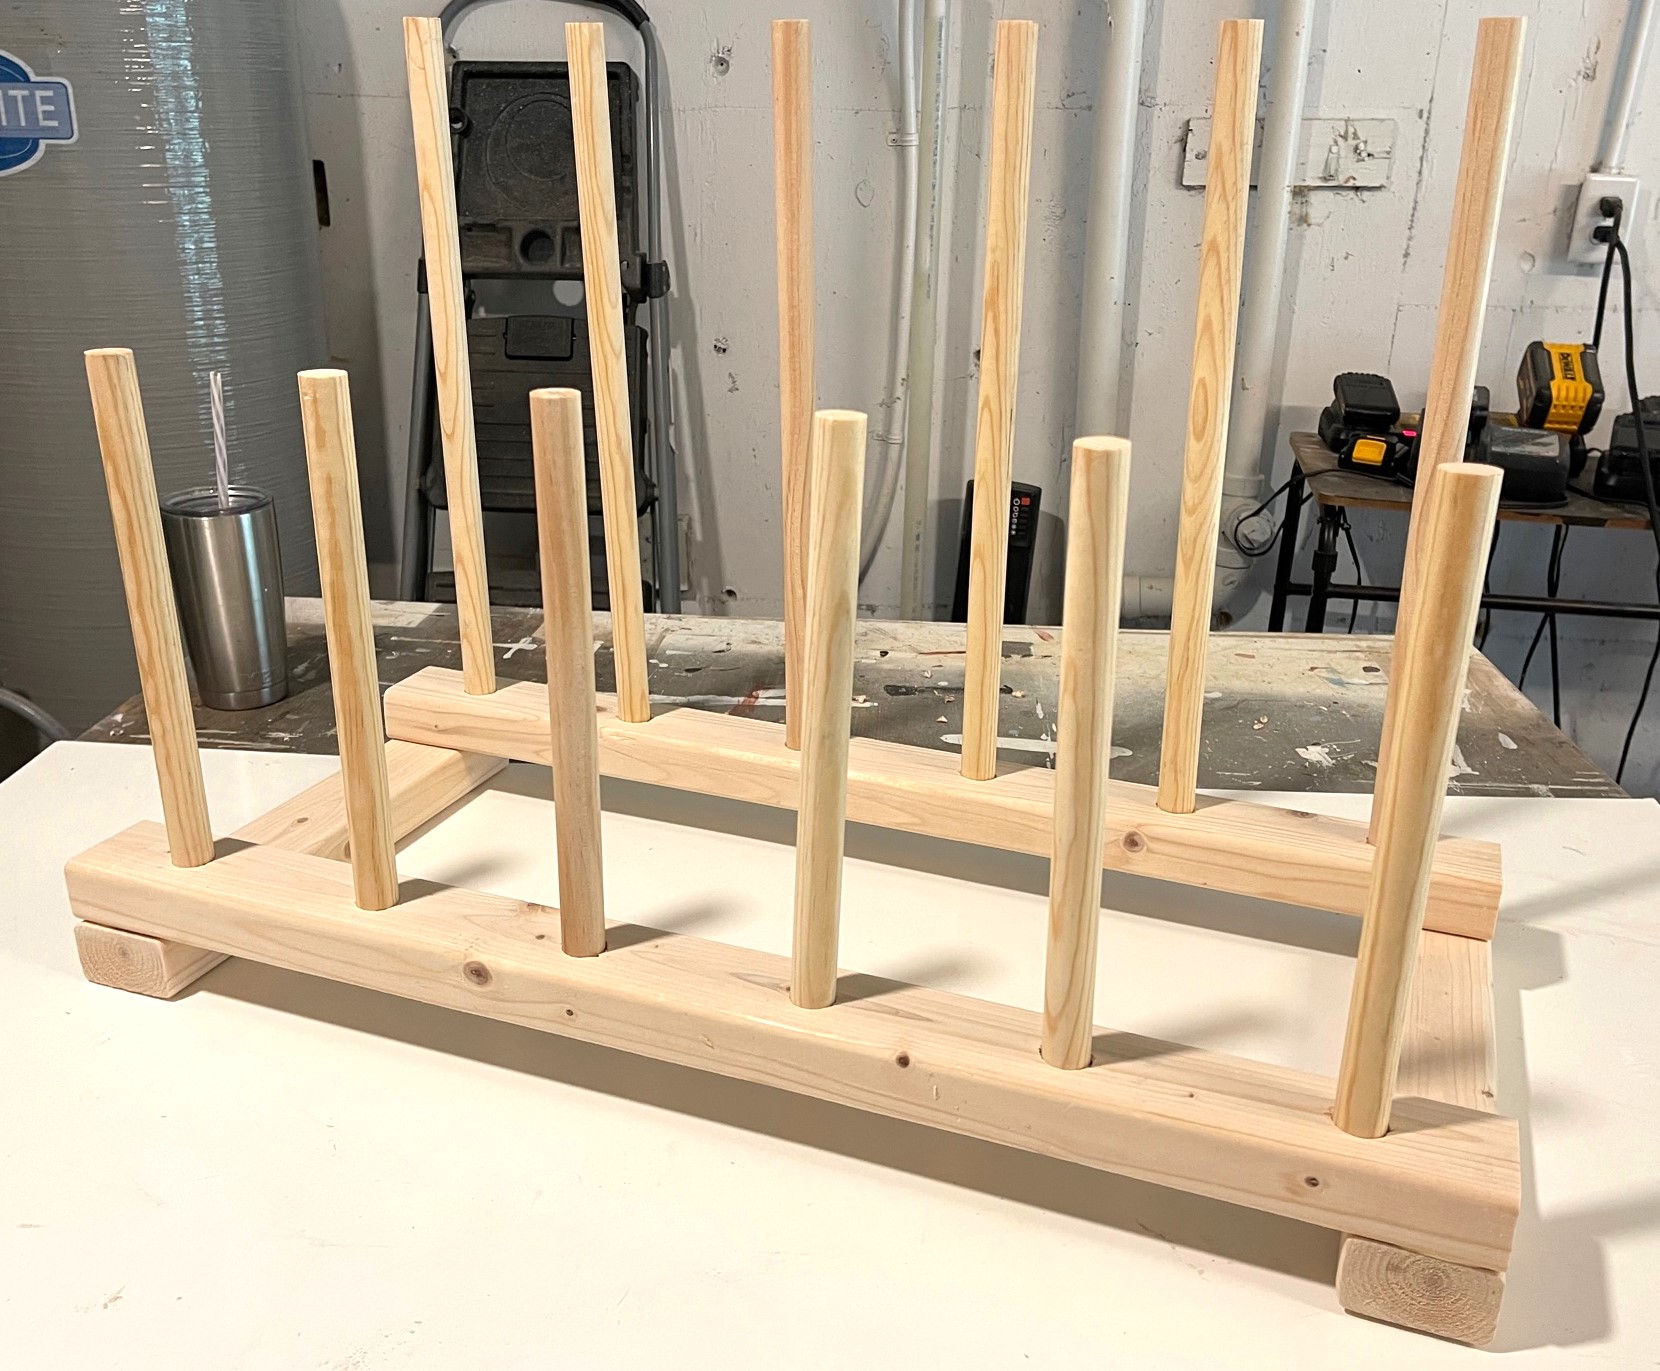
Attach the two rows of dowels to the bottom 2x3s with screws.
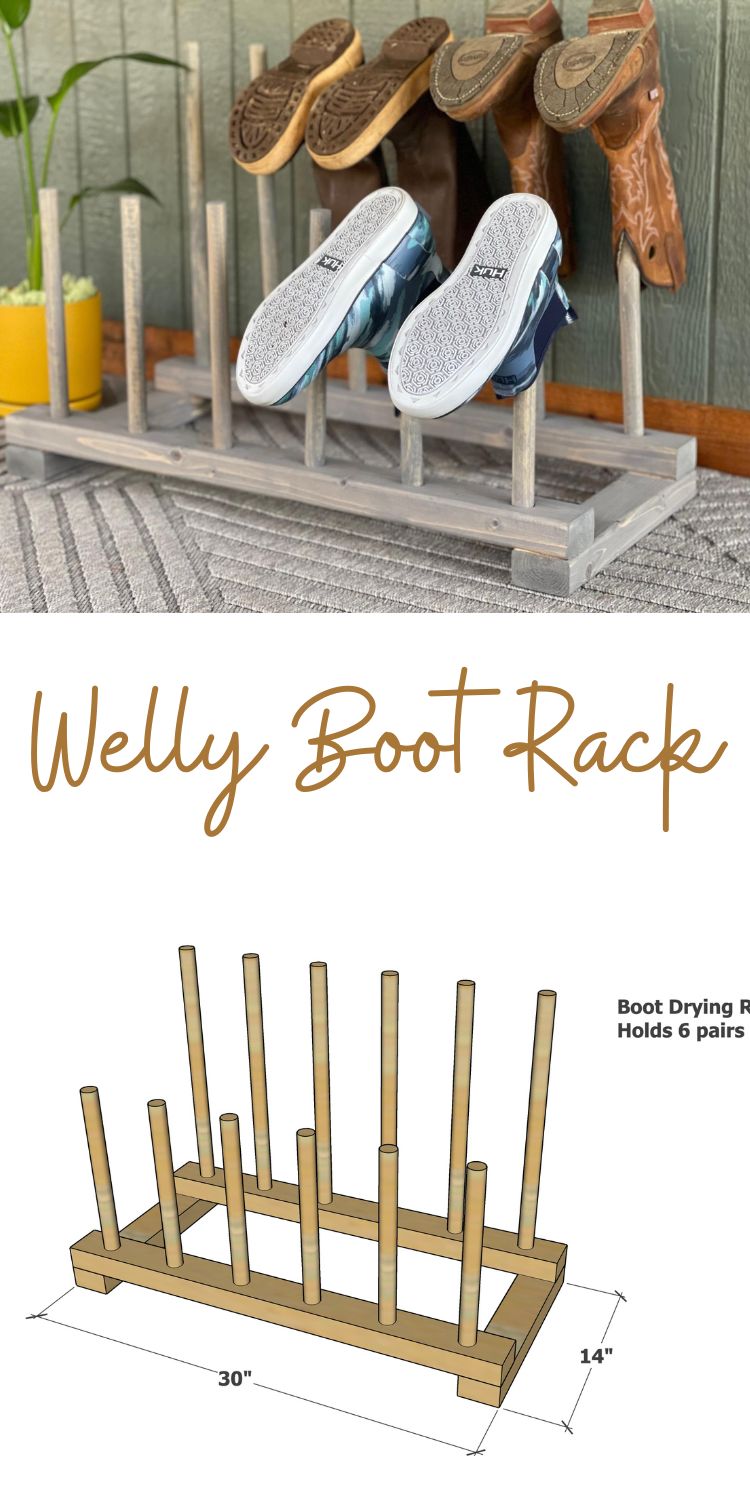
This welly boot rack really is that simple to build! It makes a great gift or for sale item too! Here's the free plans with diagrams and cut list
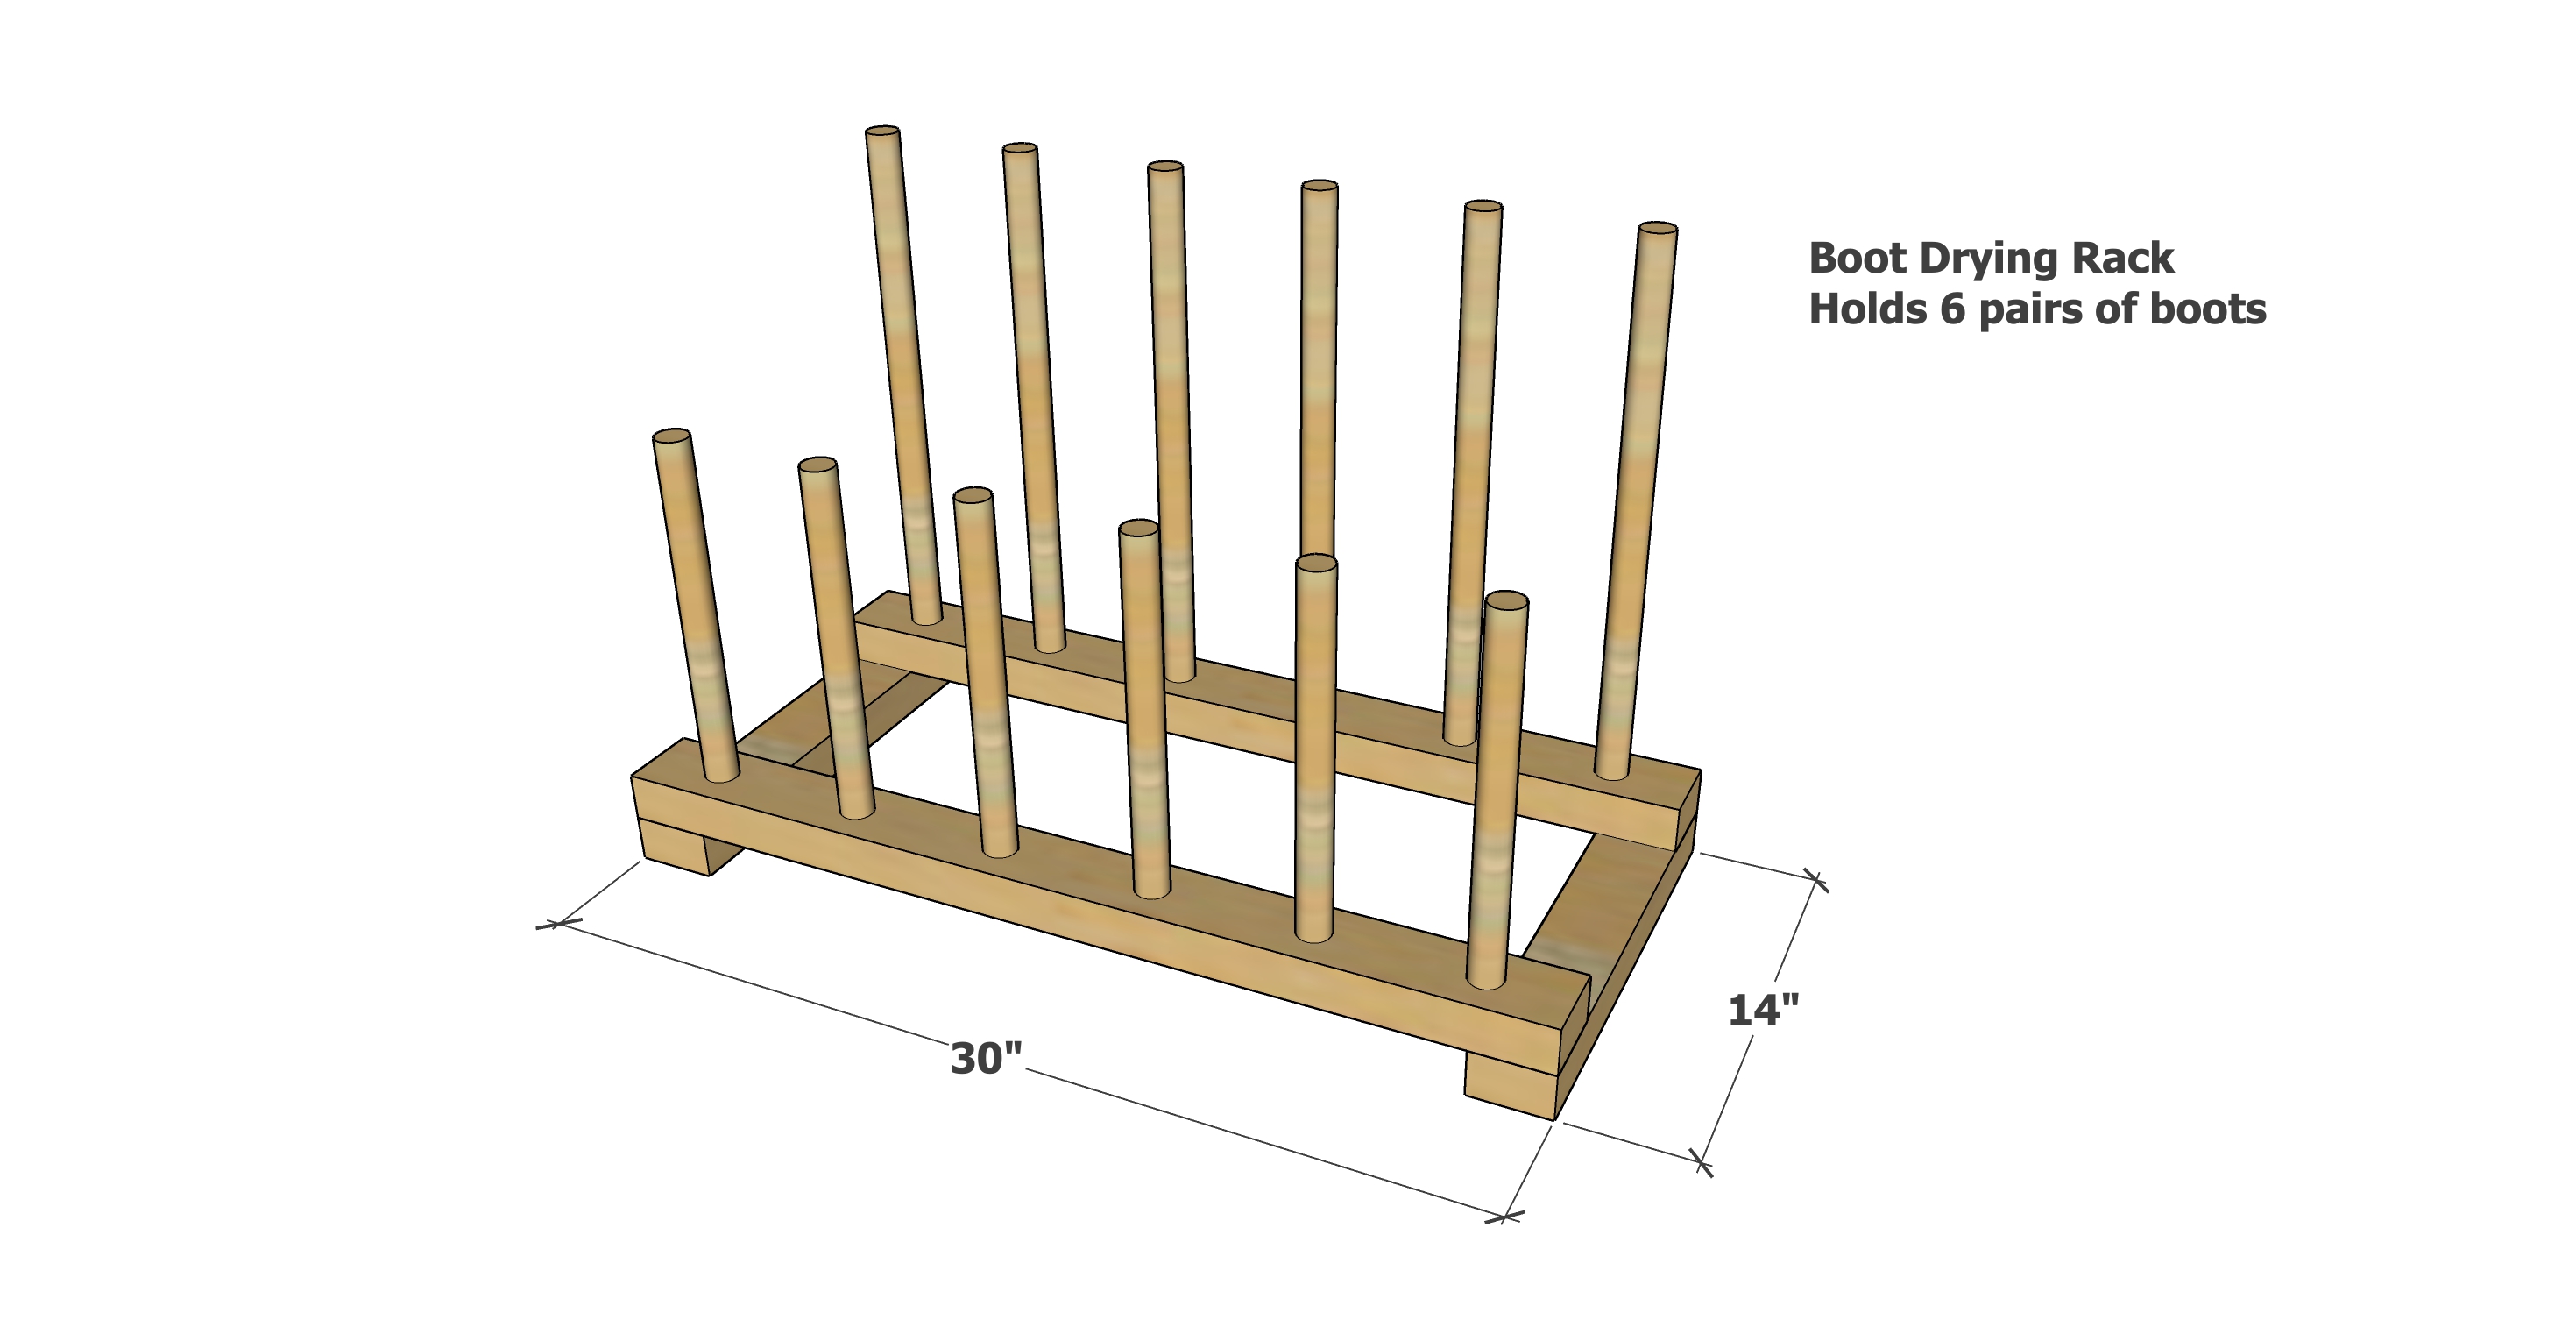
Welly Boot Rack Plans
Pin For Later!
Preparation
- 4 - 4 foot long dowels in 7/8" diameter
- 1 - 2x3x8'
- 7/8" spade bit
- pilot hole drill bit
- 2-1/2" self tapping star bit screws (about 20 per boot rack)
- wood glue
Dowels - You'll get 3 cuts out of one dowel at 18", 18" and 12"
- 6 @ 12"
- 6 @ 18"
Frame - cut from 2x3s
- 2 - 2x3 @ 30"
- 2 - 2x3 @ 14"


Instructions
Step 1
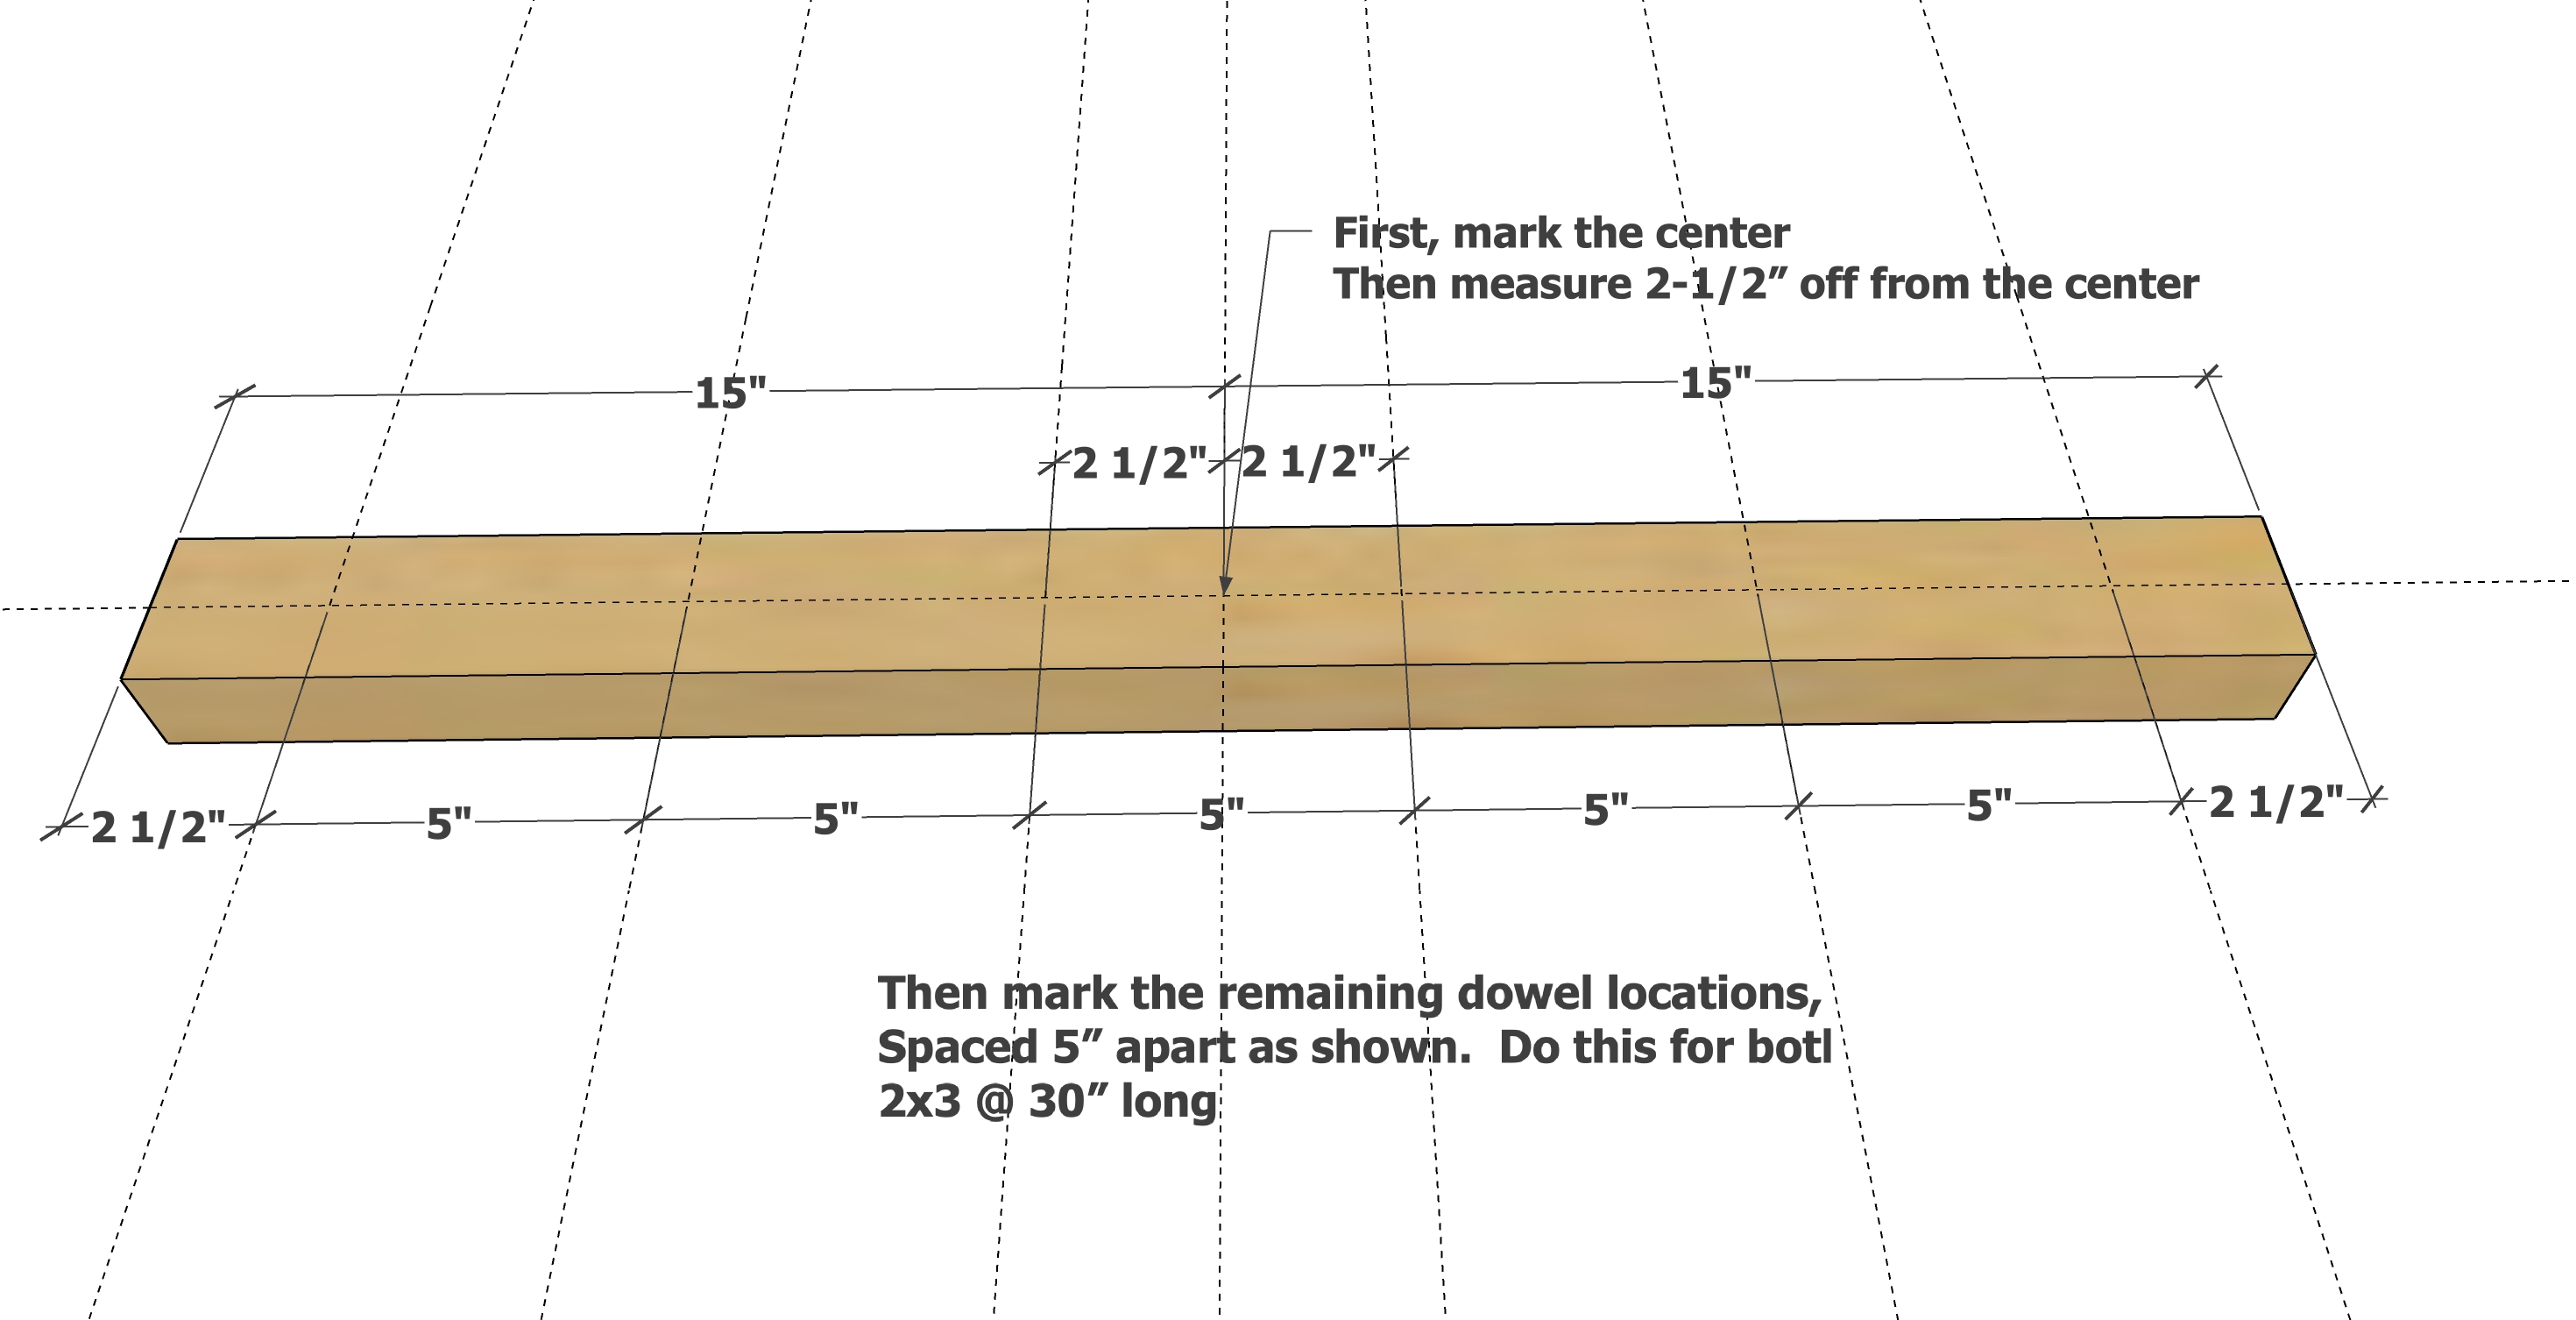
Mark the location of the dowels on the 30" 2x3s.
Step 2
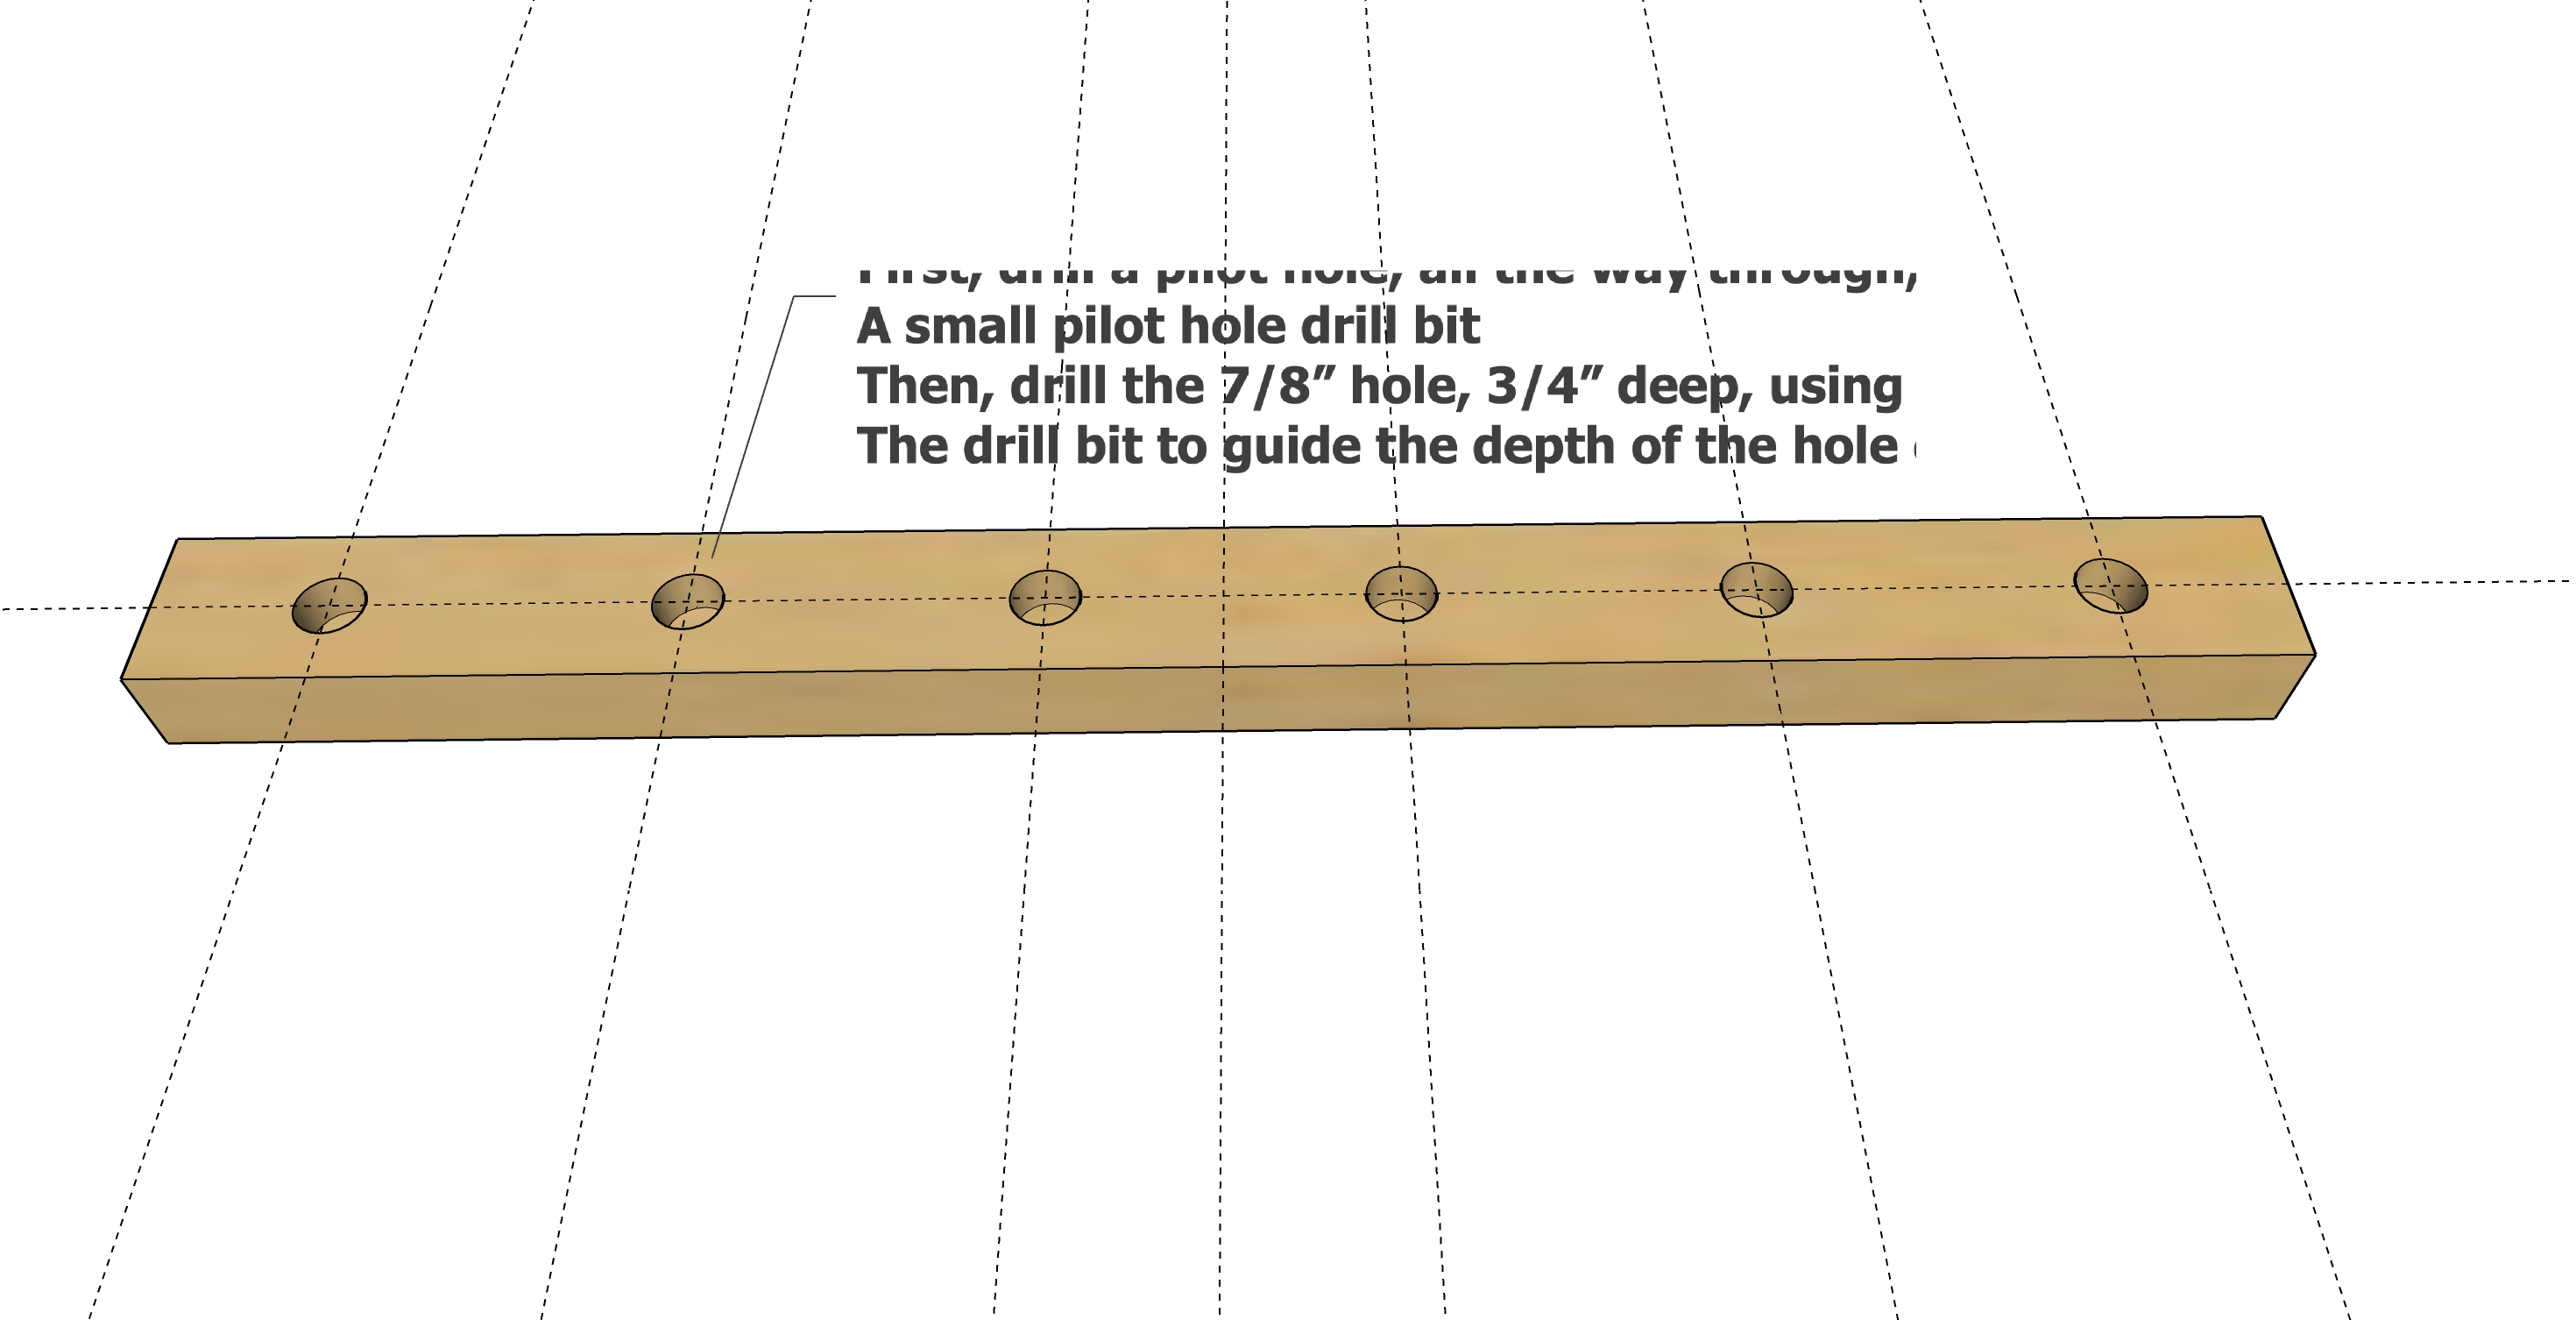
Drill pilot holes all the way through.
What is a pilot hole? It's just a small hole drilled for screws, the hole diameter should be about the size of your screw shaft.
Then tape your 7/8" drill bit 3/4" up from the tip, and drill over the pilot hole, 3/4" deep.
Step 3
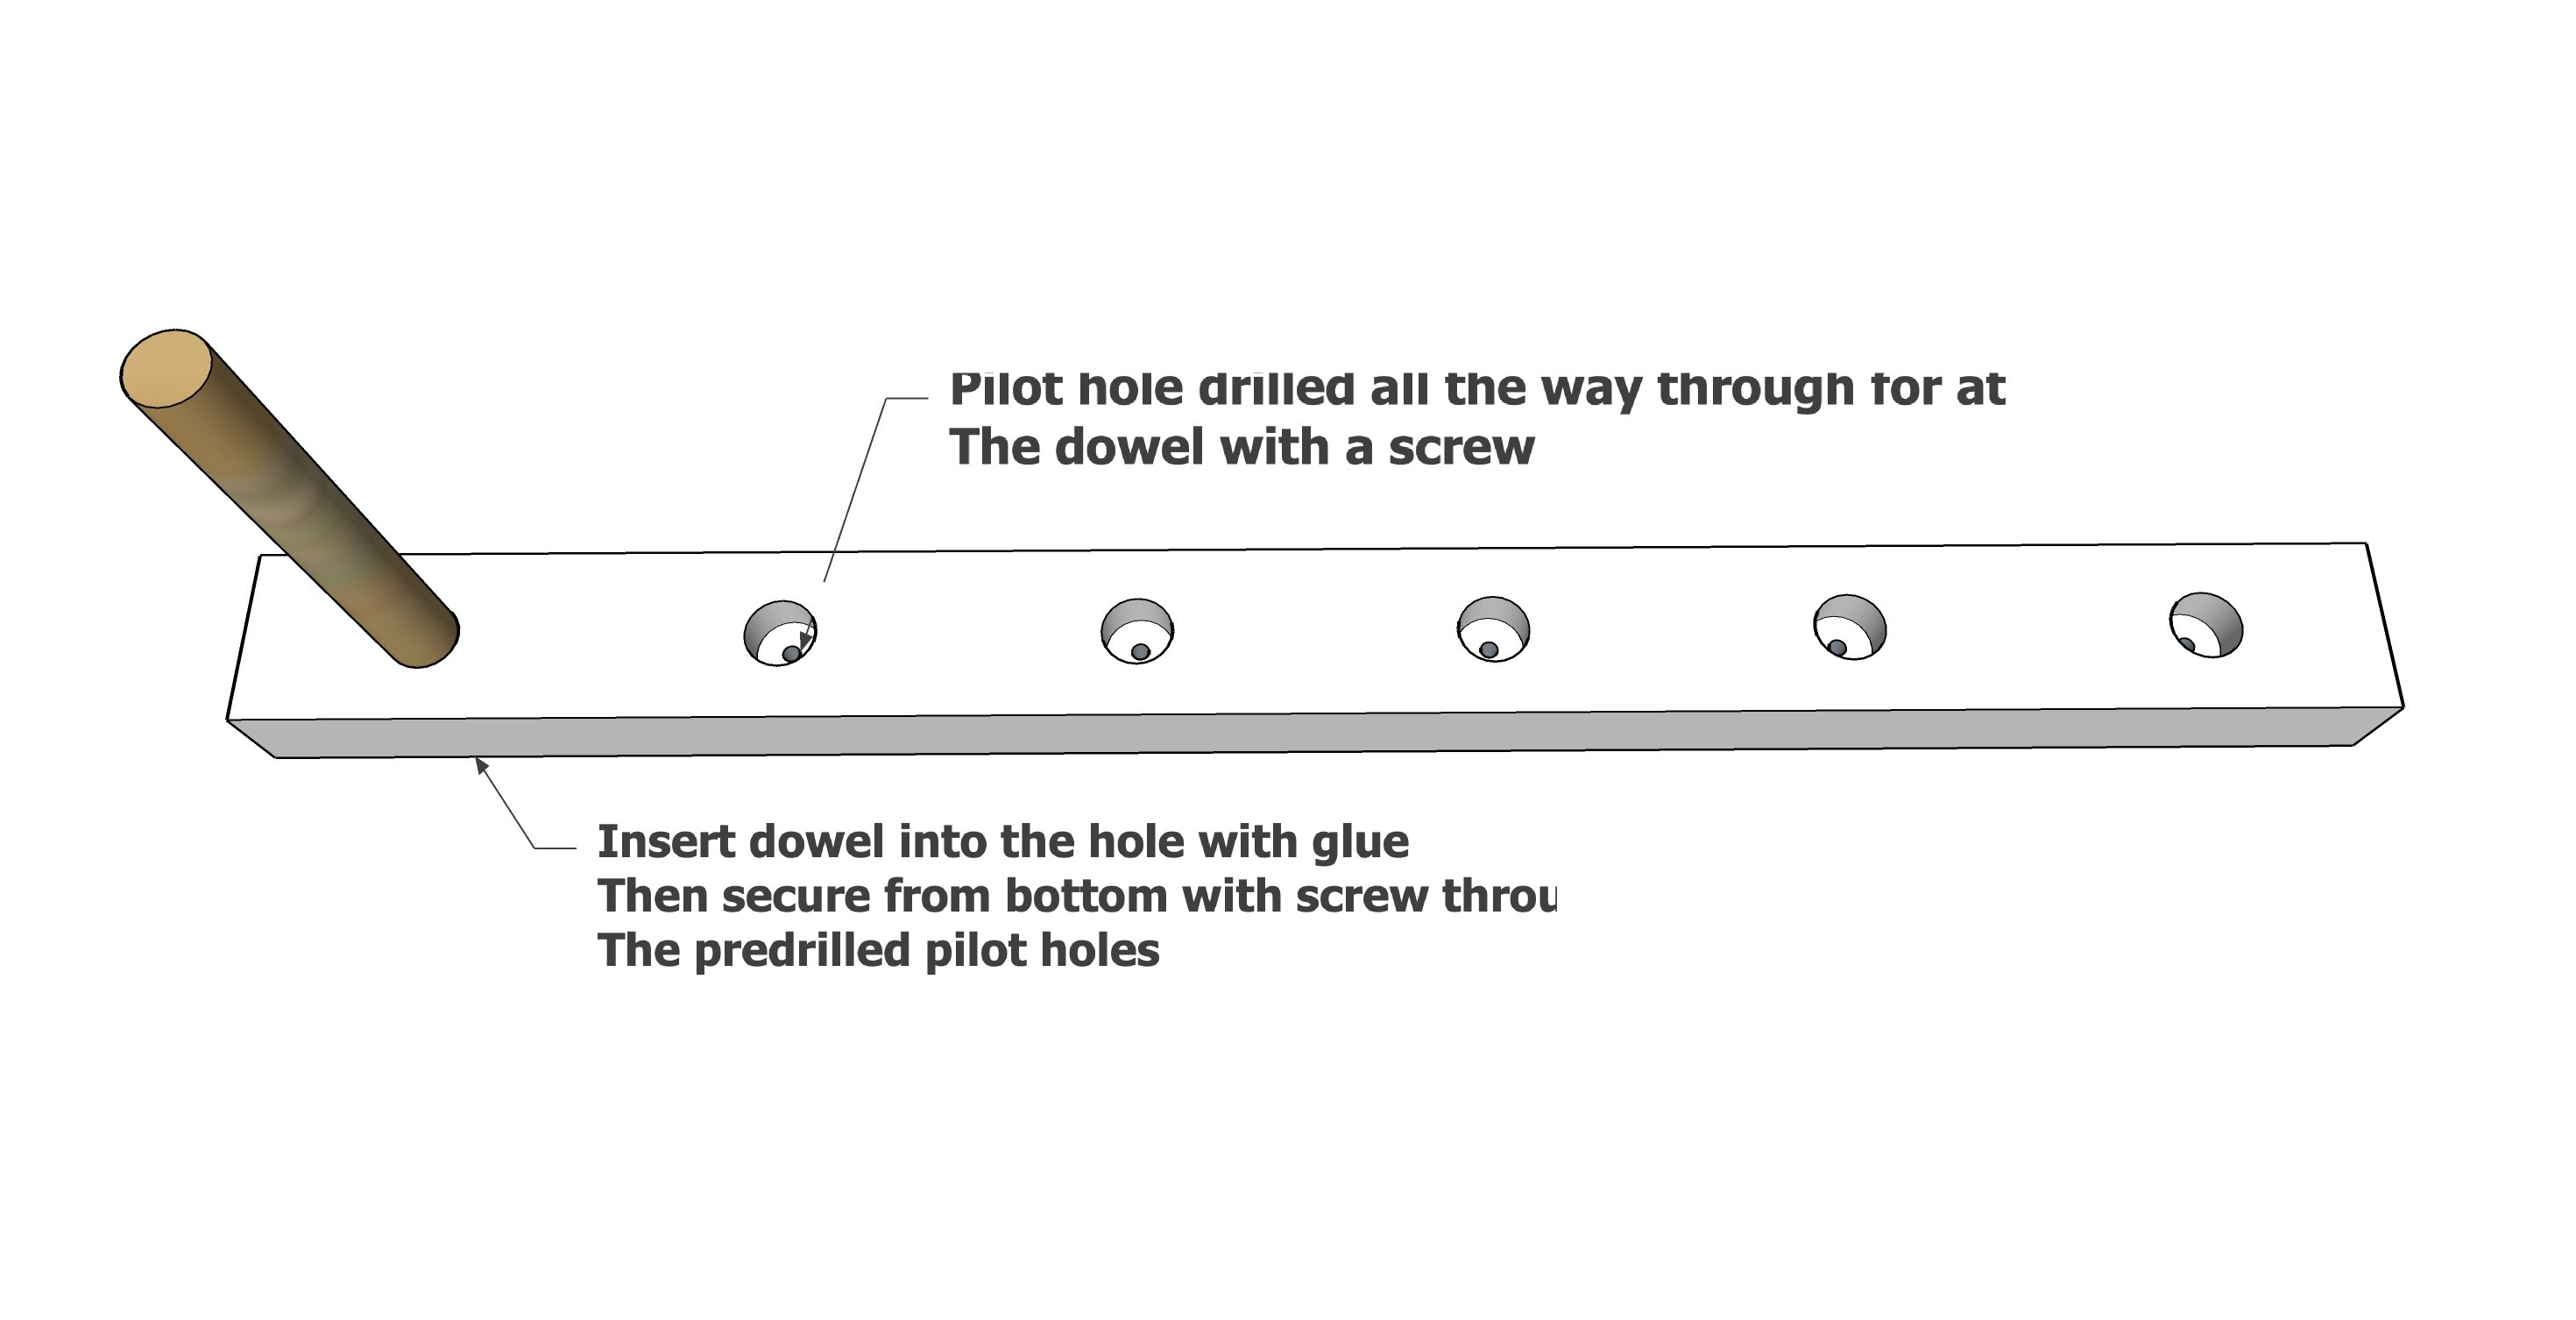
Apply glue inside the hole and insert dowel.
Secure from bottom with screws through the pilot hole.
Step 4
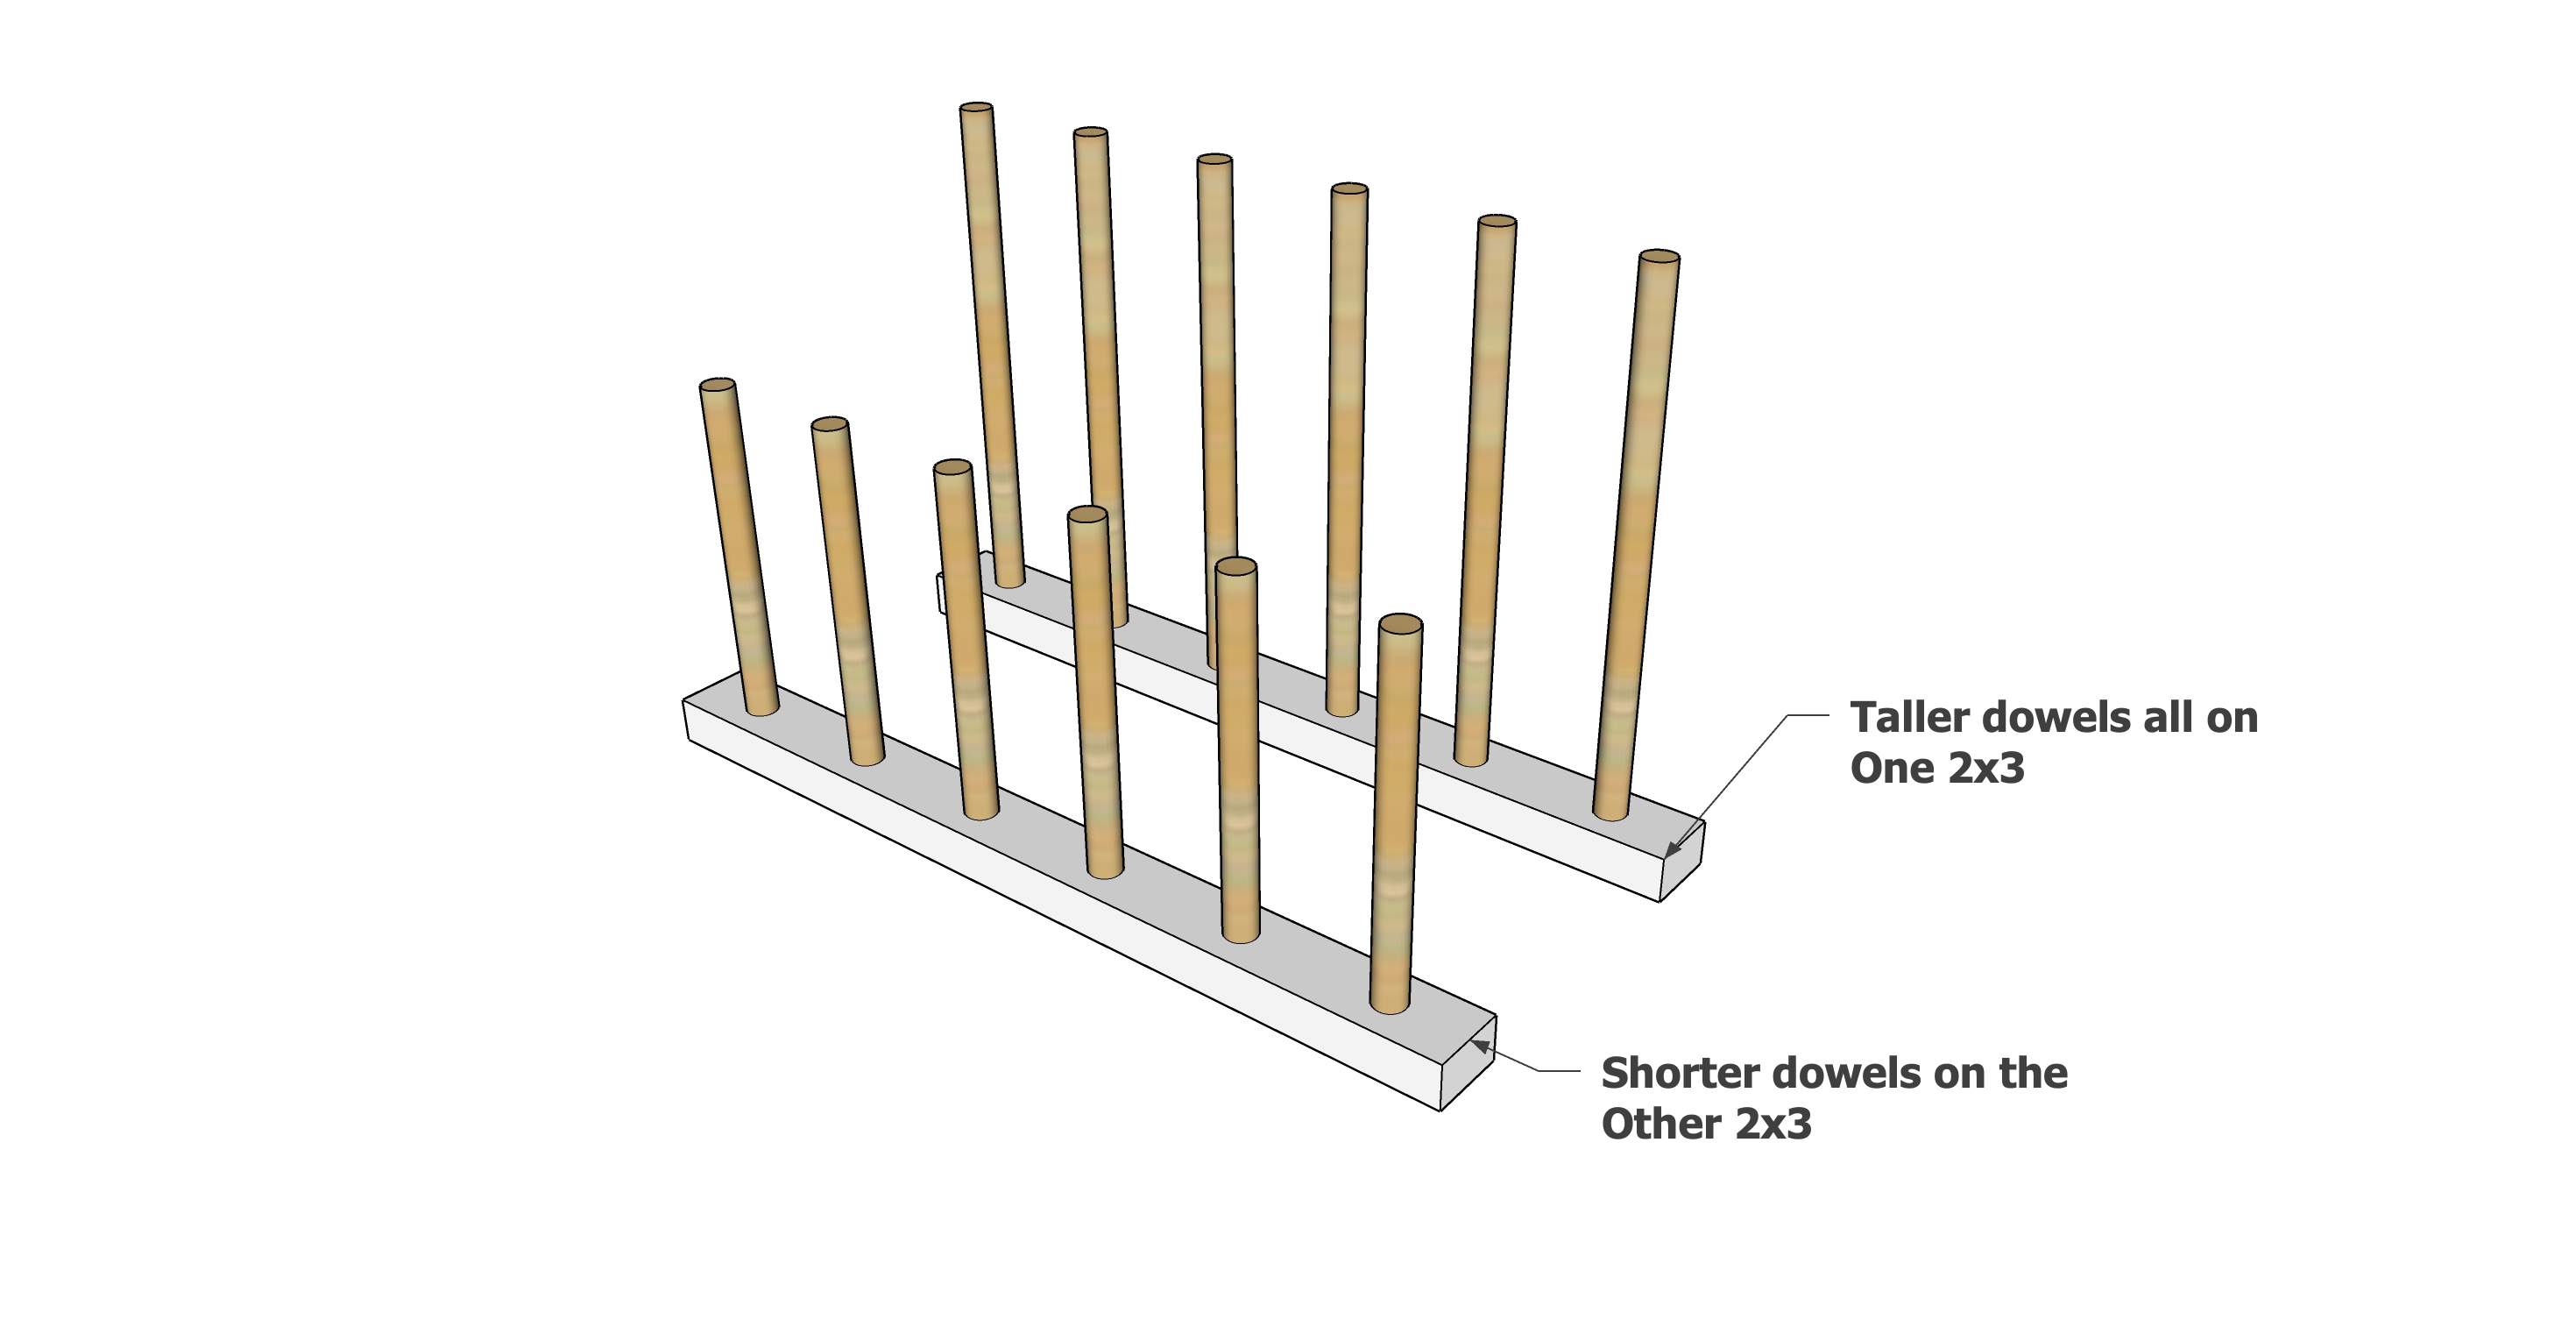
Here's the two rows of dowels prepped - the longer dowels are all on the back row, the shorter dowels are on the front row.
Step 5
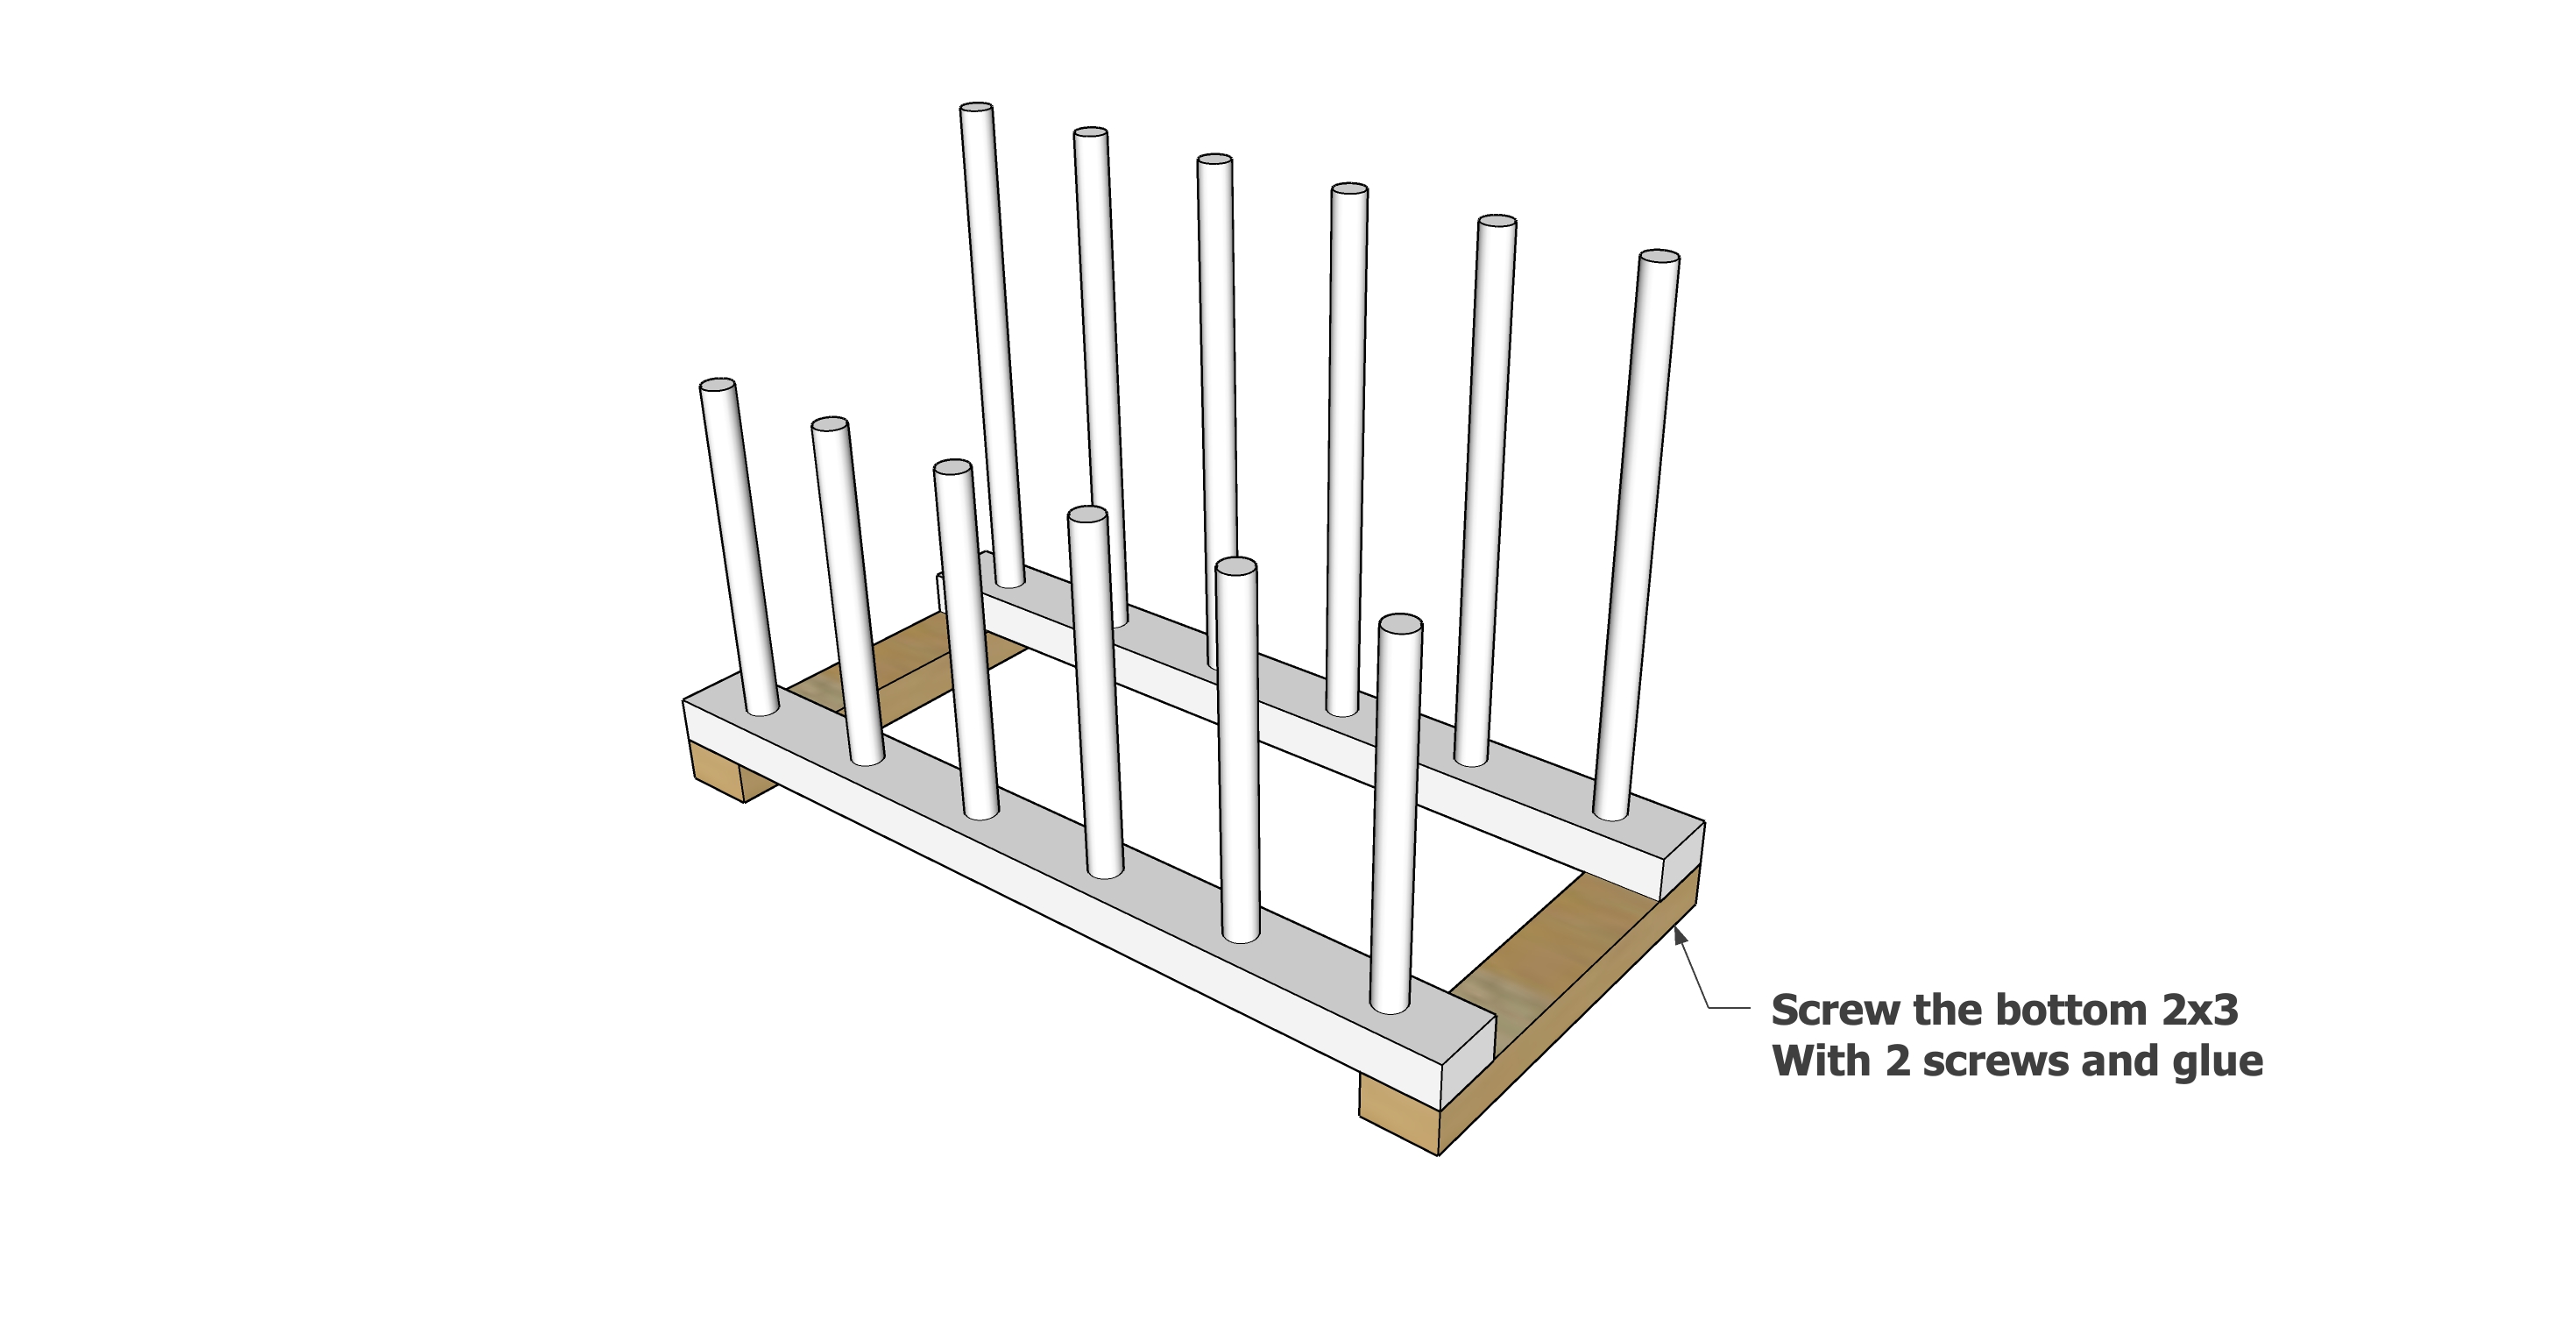
Attach the two rows of dowels with the remaining 2x3s as shown.