Community Brag Posts


Modified Outdoor Storage Bench
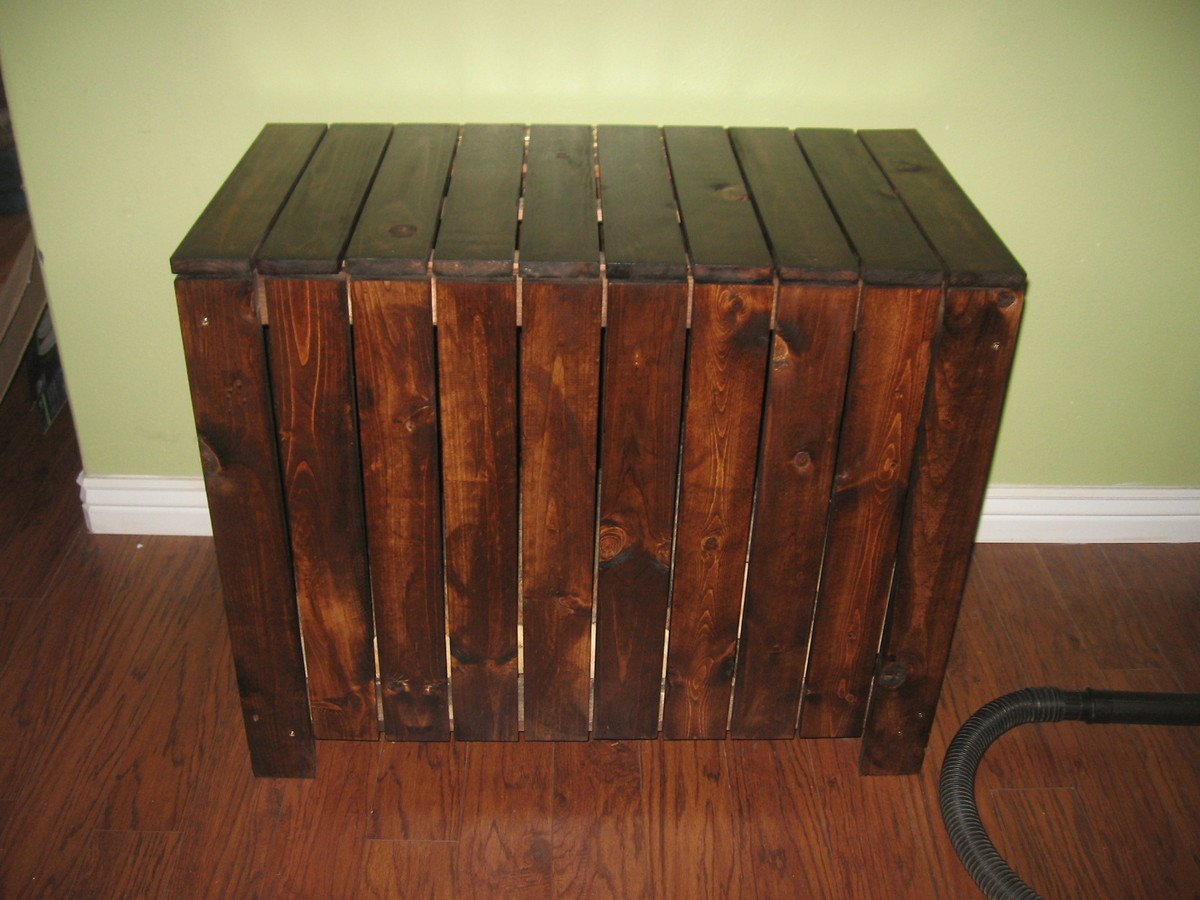
My first project based on the Outdoor Storage Bench. We will use it indoors for firewood.
Built from Plan(s)
Estimated Time Investment
Weekend Project (10-20 Hours)
Recommended Skill Level
Beginner
Comments
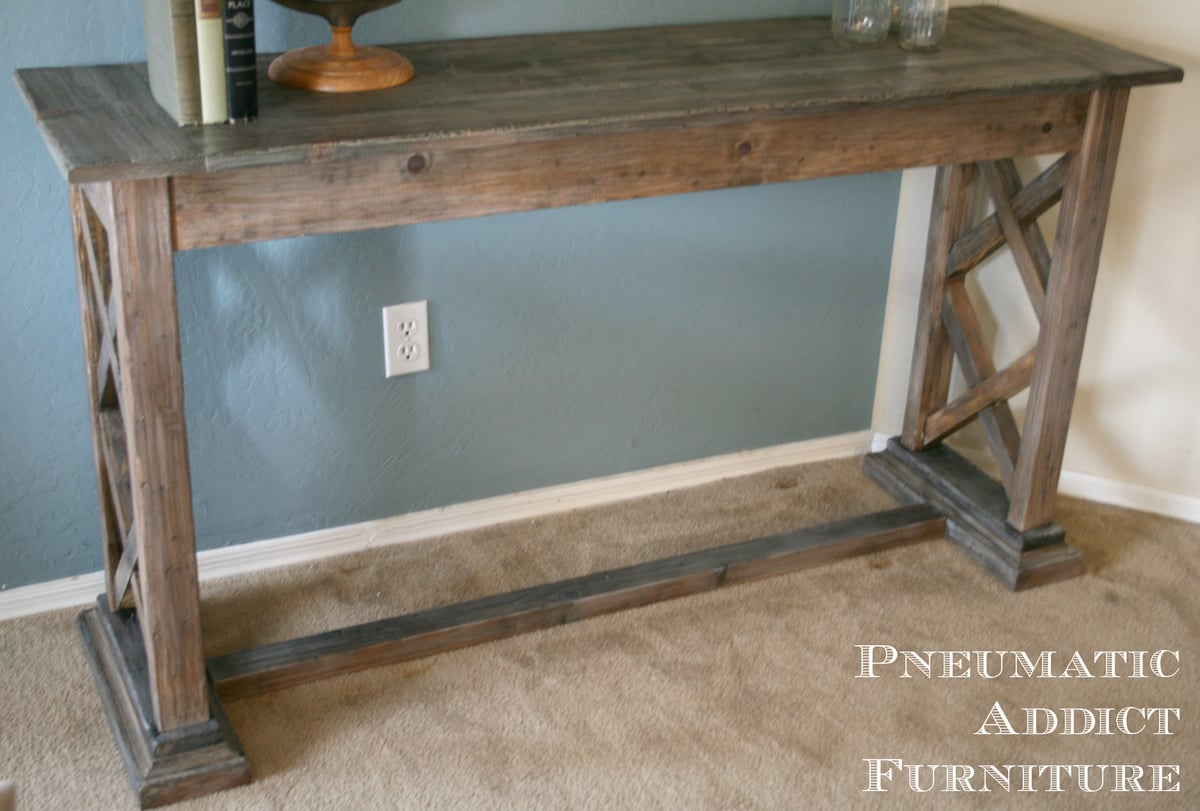
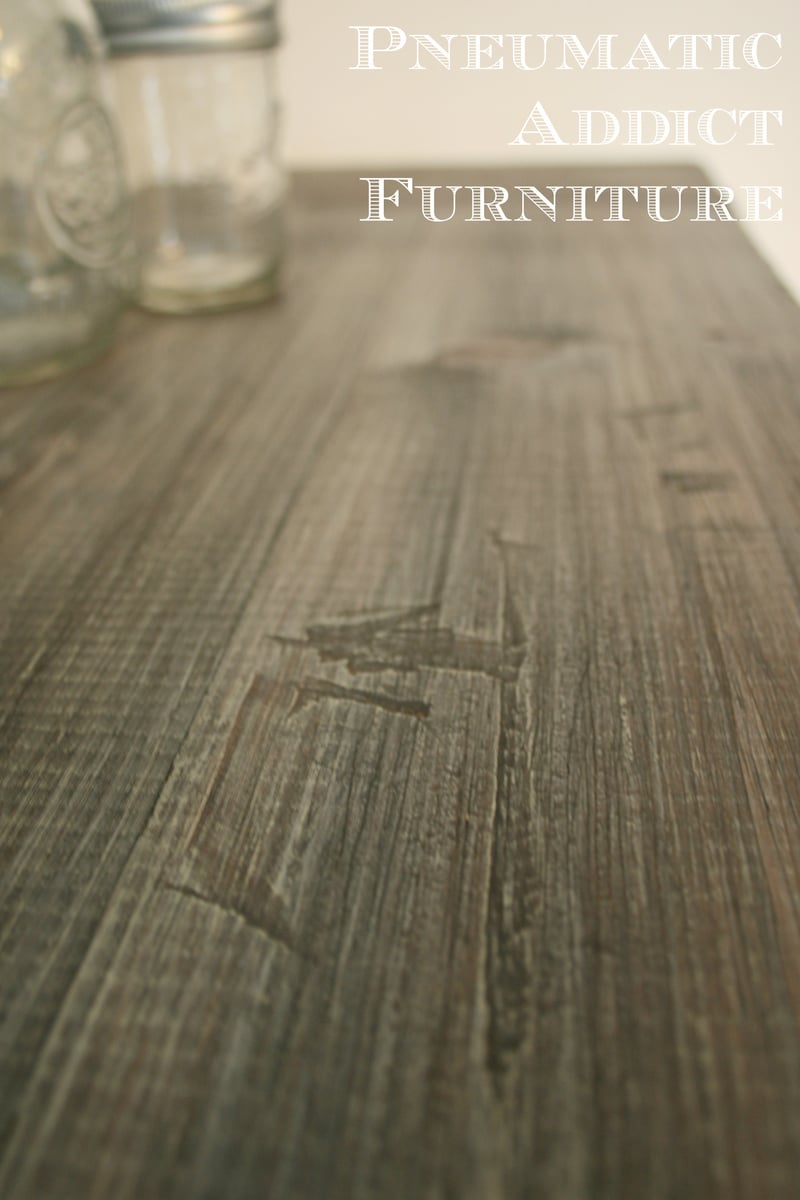
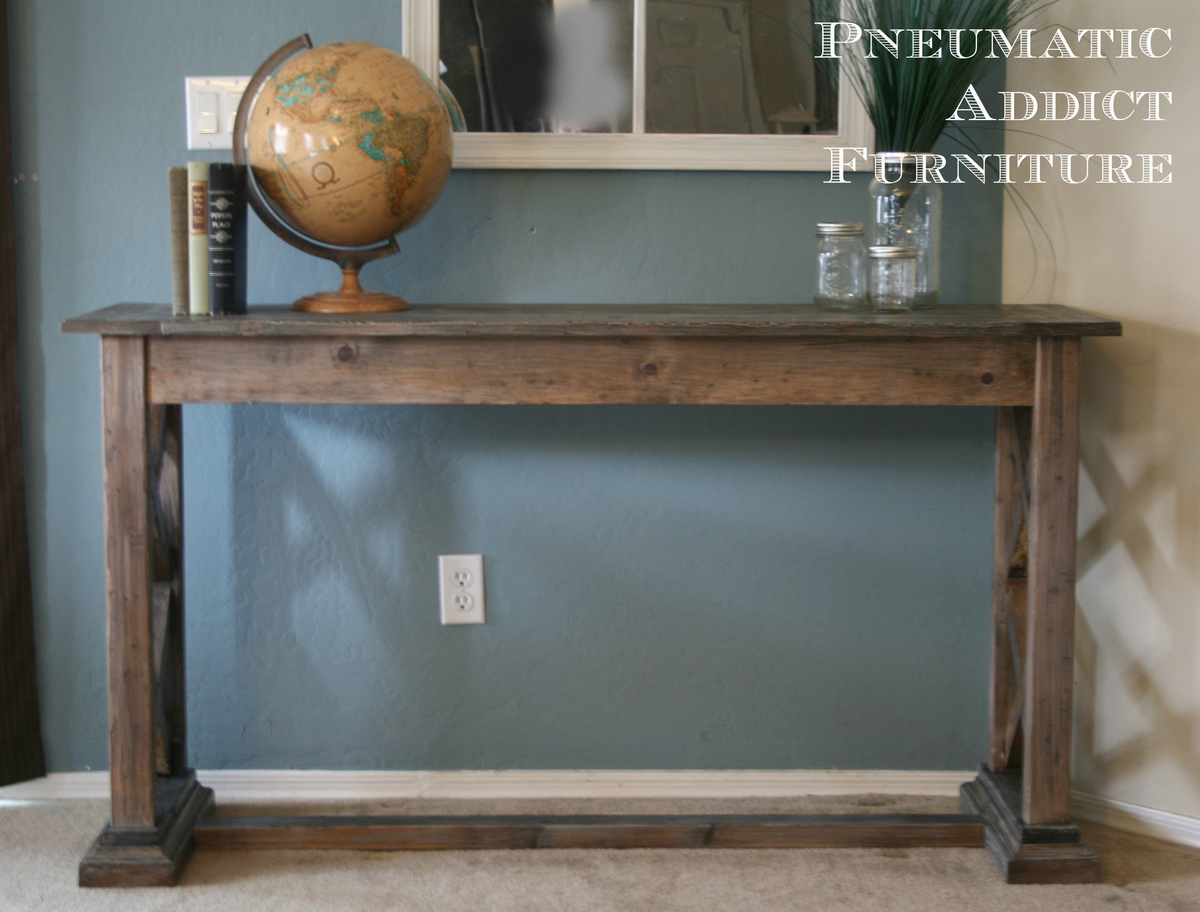
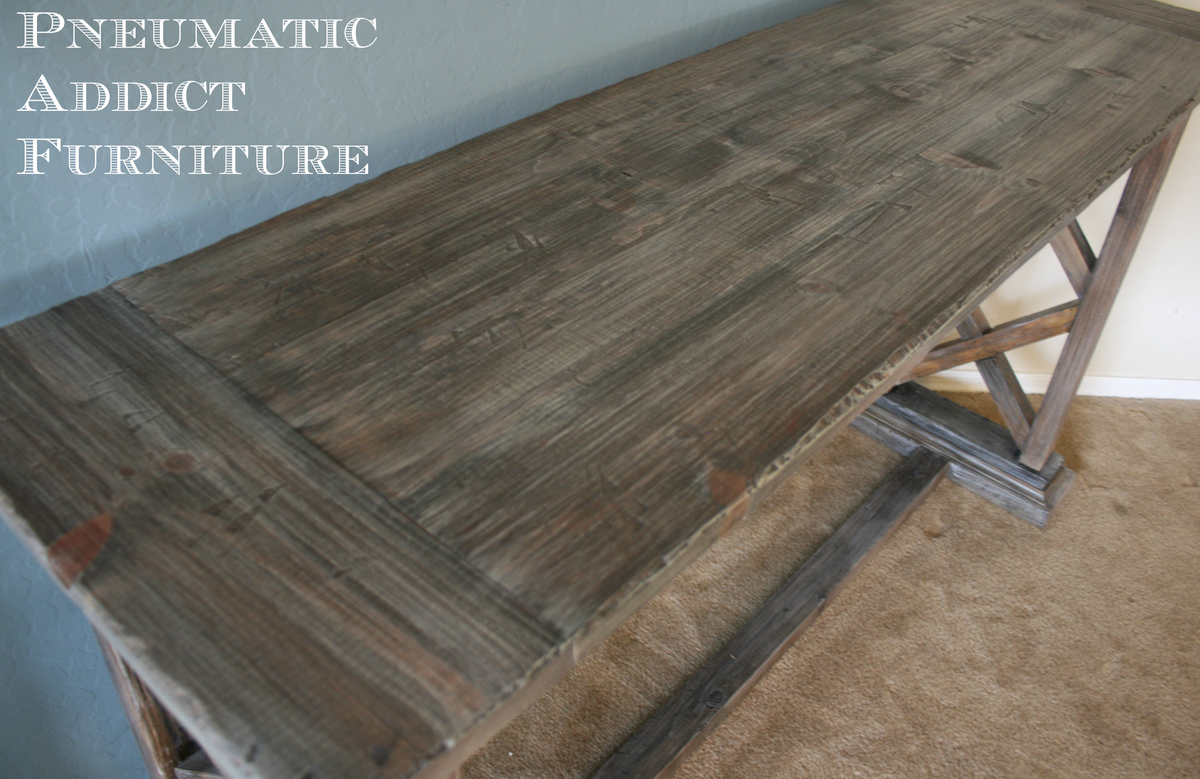
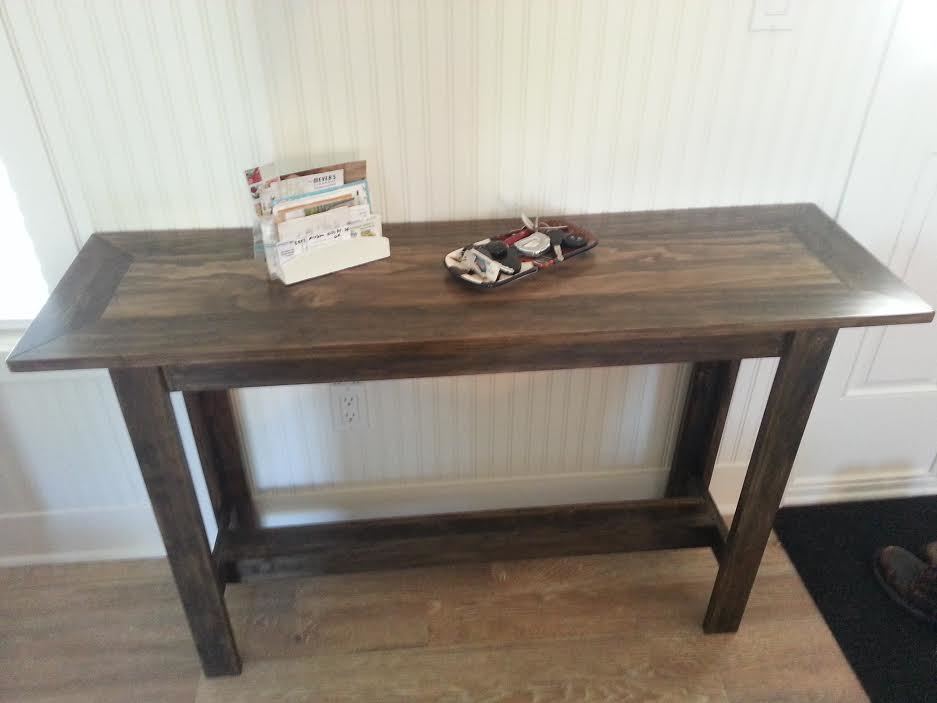
Double-X Trestle Console
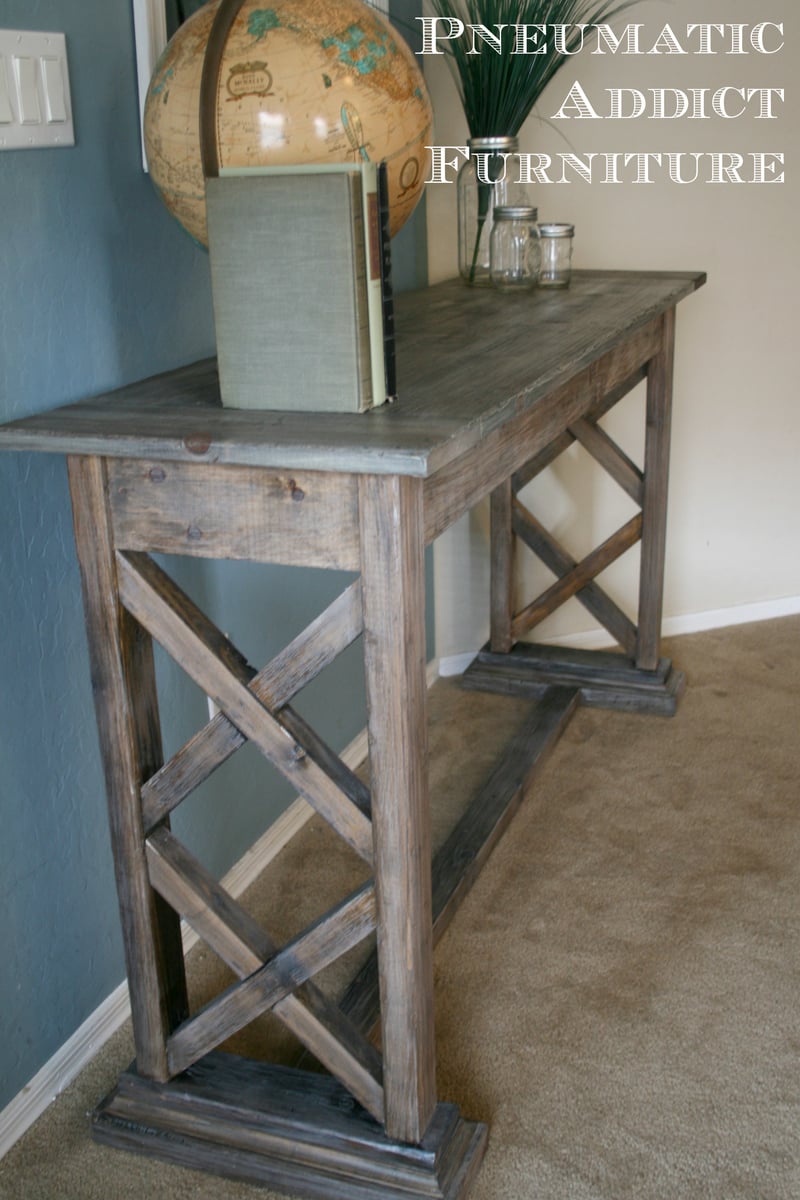
This console table was actually pretty easy to make. The top was constructed with 1 x 6 pine boards, and assembled using a Kreg jig and pocket hole screws.
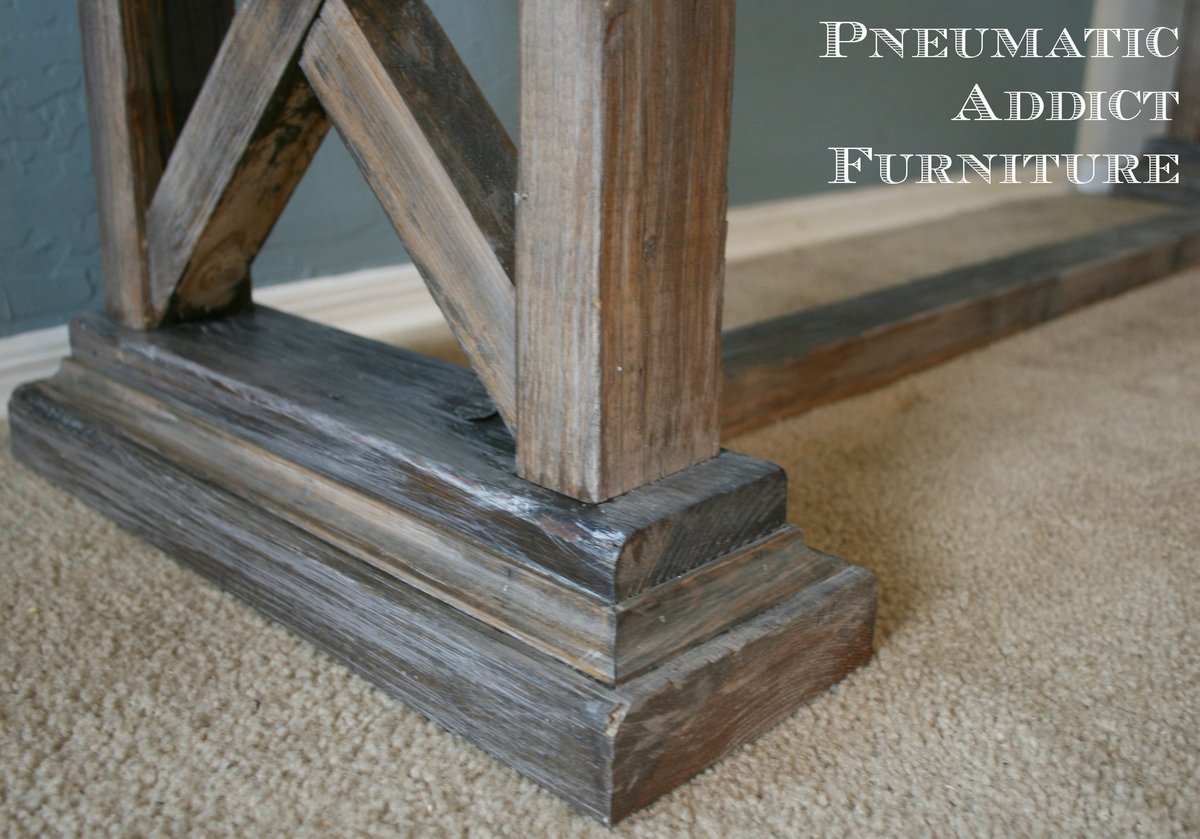
For the base, I used 29" long, 2 x 3 legs attached together with 1 x 4 aprons. To make the platform, I cut 2 pieces of 2 x 6 the width of table top, and 2 pieces of 2 x 4 , two inches shorter. I stacked the 2 x 4 on top of the 2 x 6 and attached them with glue and screws. I then ran 3/4" cove moulding in the corner between the two pieces.
Using my Kreg jig, I drilled 2 pocket holes on the inside of each table leg, and attached the platforms. I then cut and mitered 4 pieces of 2 x 2 for each end, notching them in the middle to create X's. I attached the X's with glue and finish nails.
The last step before finishing was to distress the wood. In addition to hammer, chains and nails, I skipped a hand planer along the edges to create a "hand hewn" look.
Estimated Cost
$50
Estimated Time Investment
Day Project (6-9 Hours)
Finish Used
Steel wool/vinegar oxidizing solution, white dry-brushing, and matte polyurethane
Recommended Skill Level
Intermediate
Comments

Wed, 04/16/2014 - 05:30
double x trestle table
Nice job on the table!! Are there plans for this anywhere?? I'd like to make one.
Debbie.
Thu, 08/20/2015 - 13:20
Miter measurement for X's?
I think I can put this together, but I am trying confirm the length and angle of the X's. Drawing this up with exact measurements the X's wouldn't line up using 45 degree angles. There is a 5/8" overlap. Would that be accounted for using the "true" measurement of a 2"x4" 2"x6" etc? (I have a SketchUp file if someone wants to double check me!)
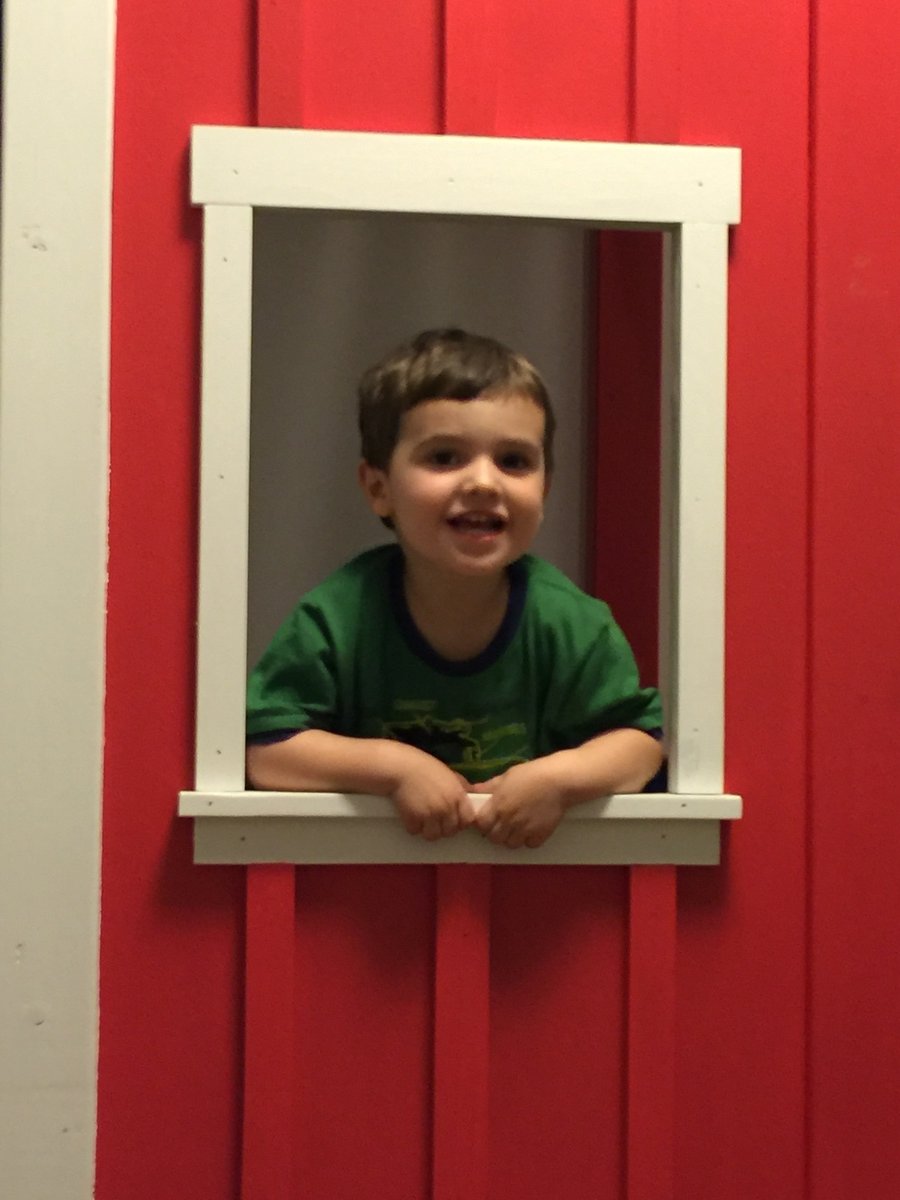
Mikey's Barn Bed
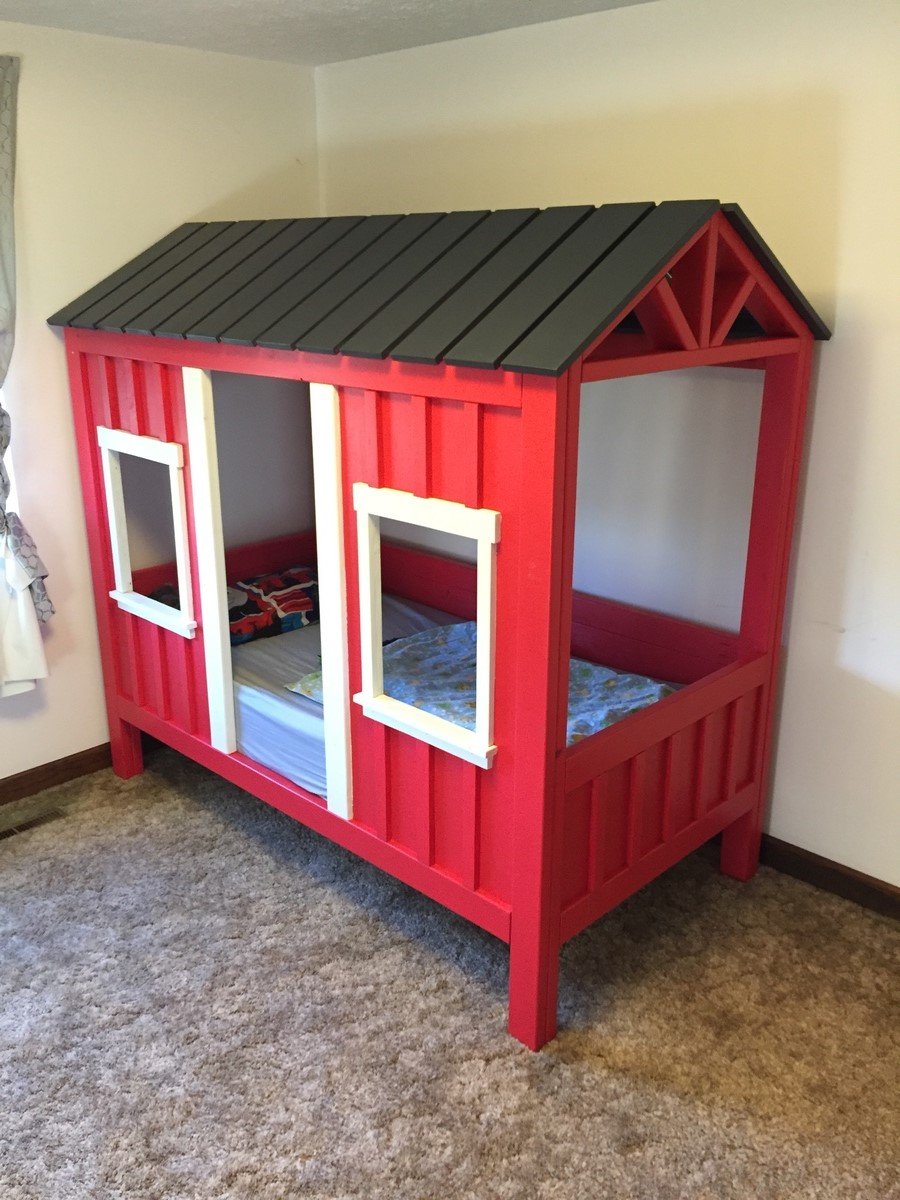
Cabin bed made into a barn for a 3 year old birthday boy! He. Was. Pumped!
Built from Plan(s)
Recommended Skill Level
Intermediate

Kids Picnic Table
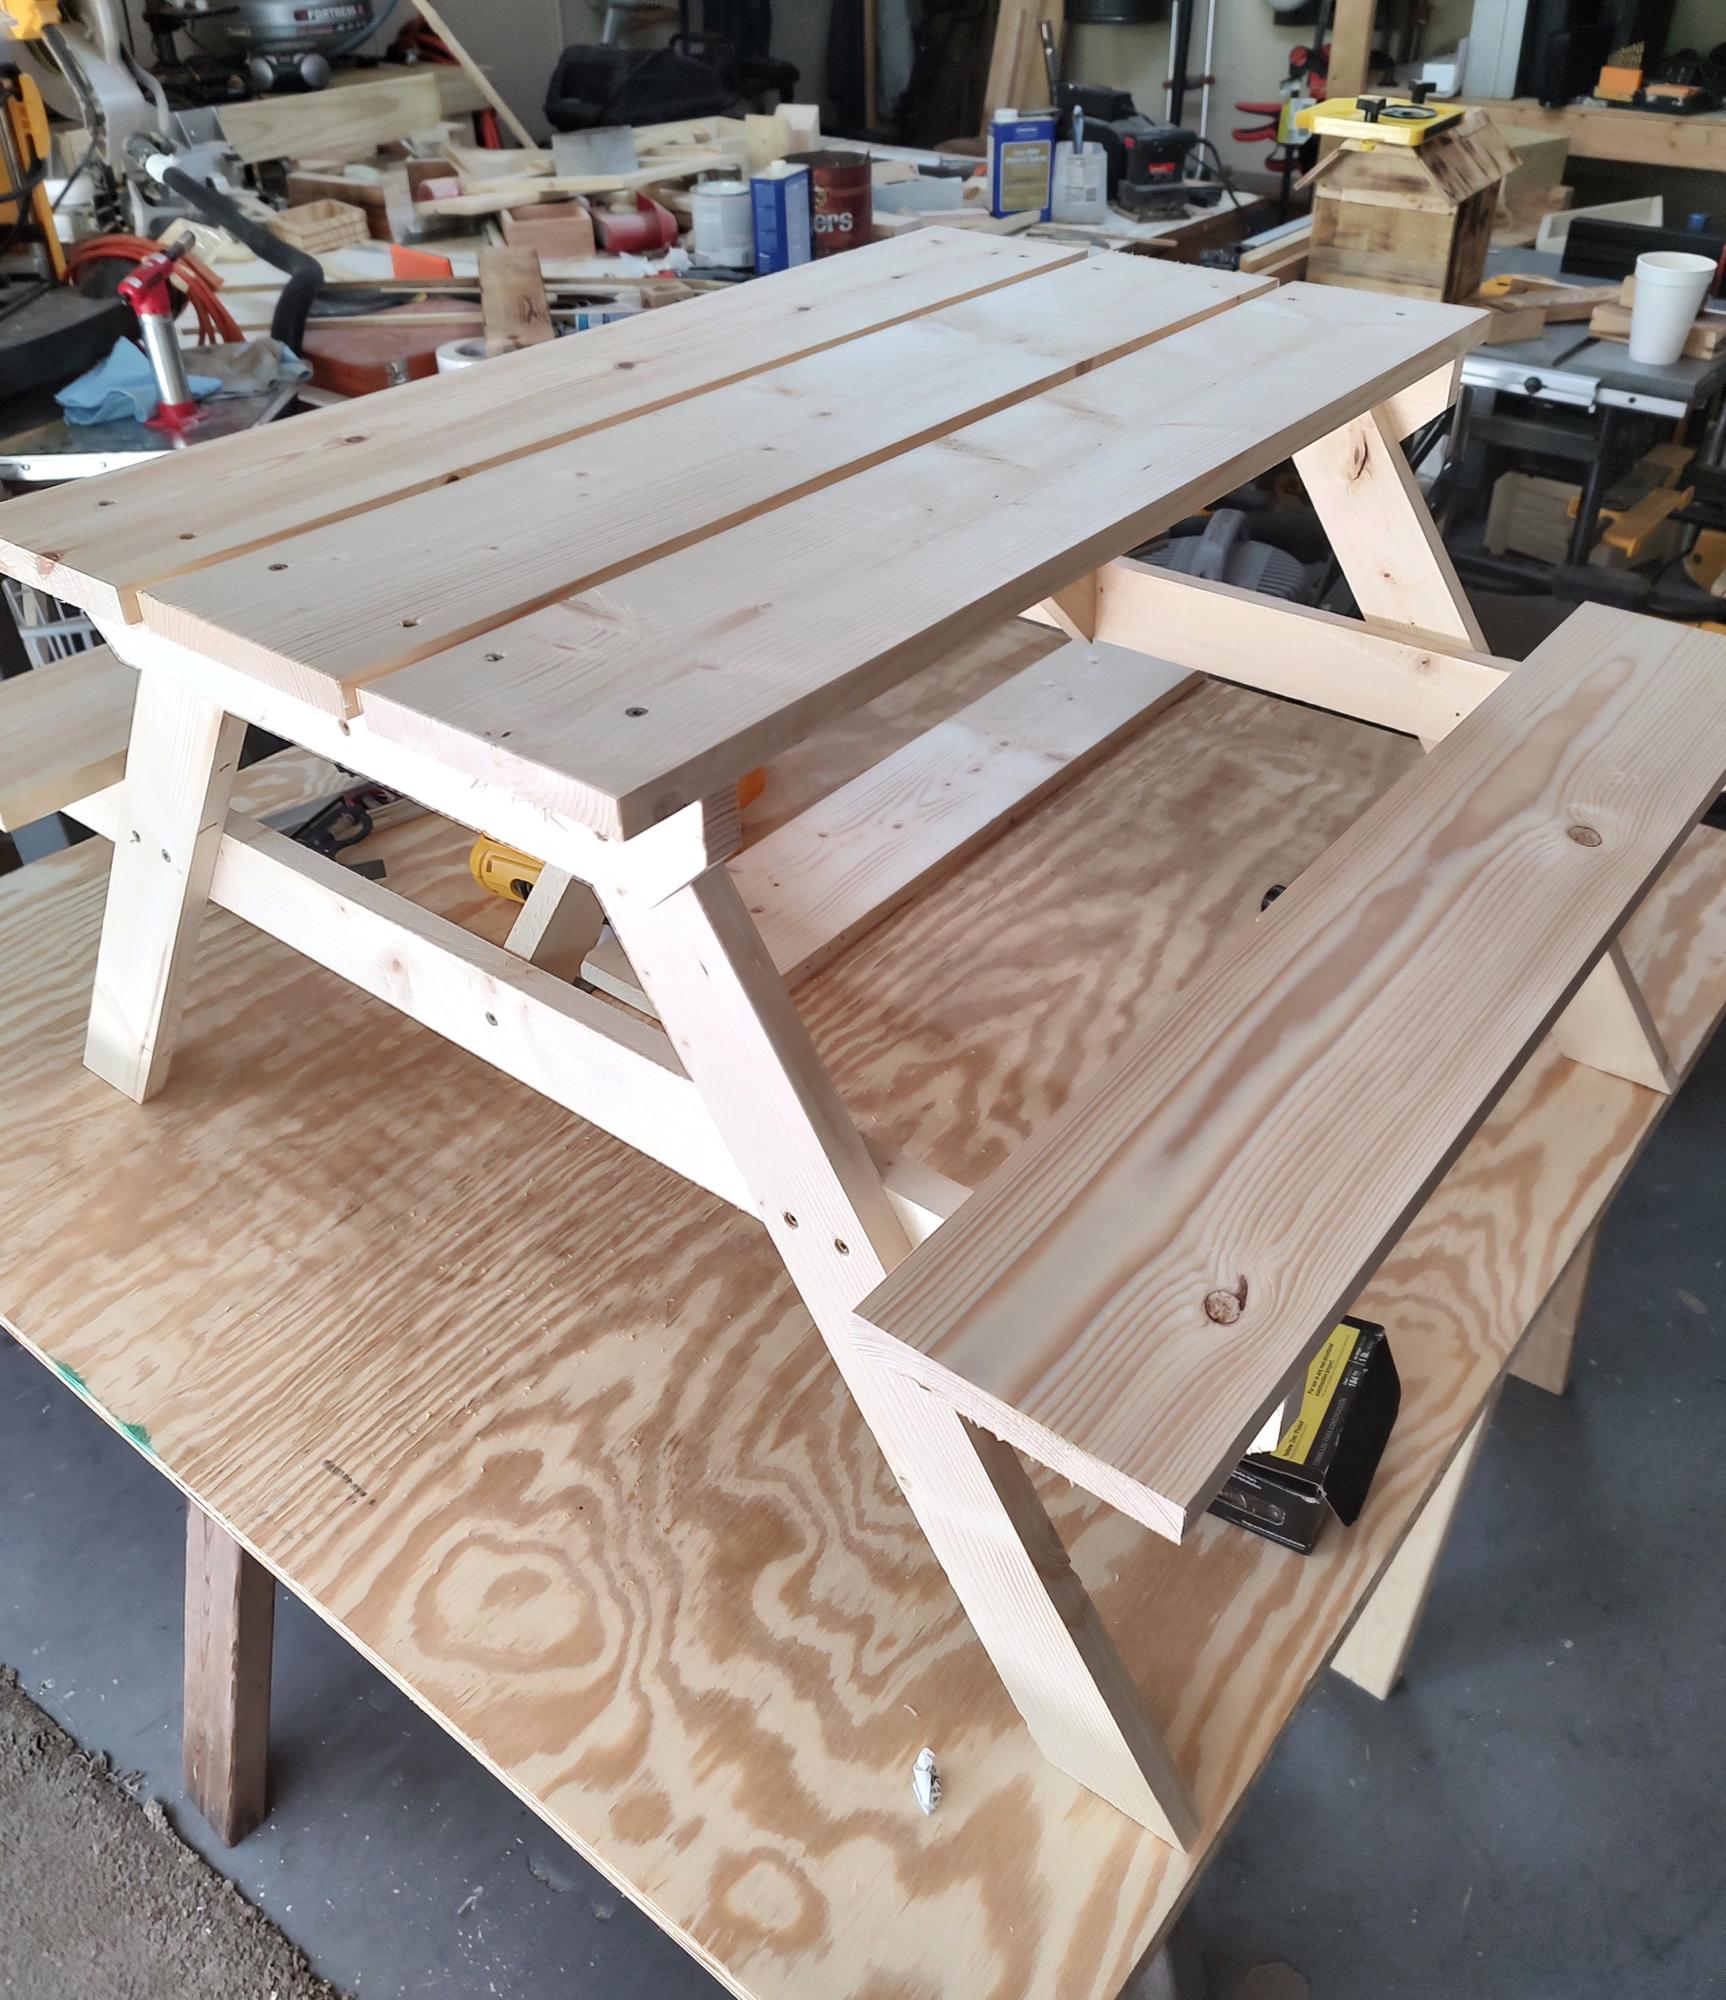
Made this for my grandson, didn't take to long. Now him and his dad are going to paint.
Joe the retired firefighter
Built from Plan(s)
My Storage Sofa!
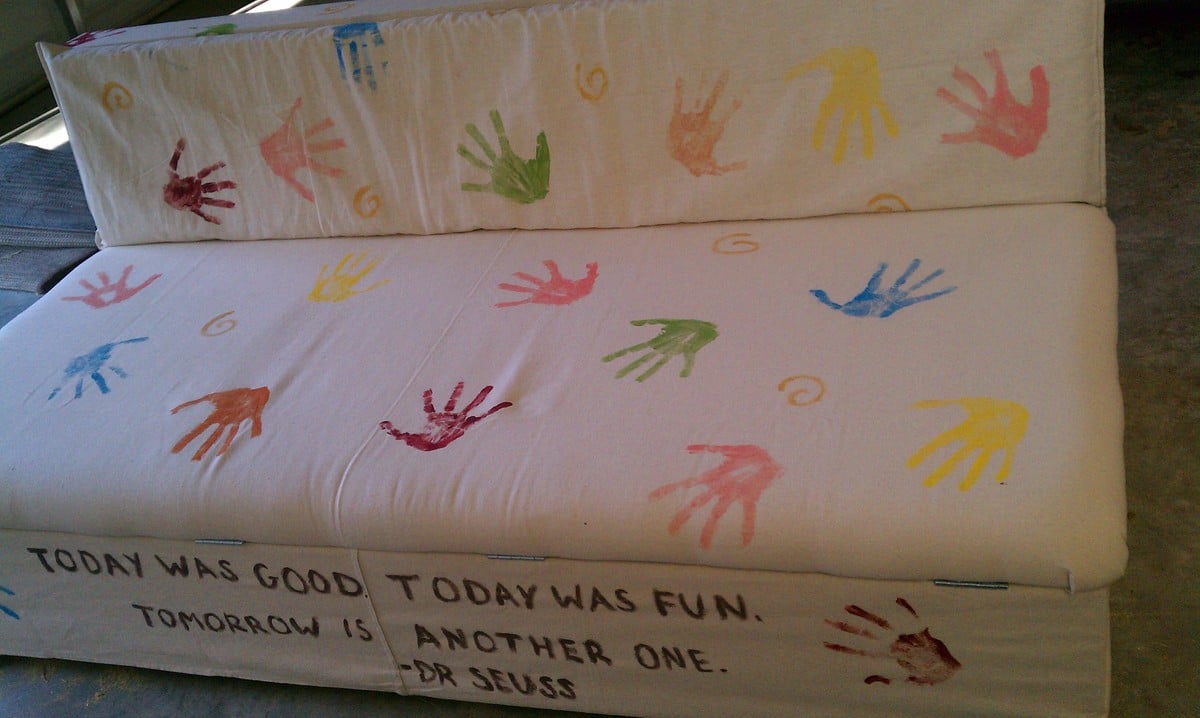
This project was lots of fun. Made it for a college apartment- it is perfect.
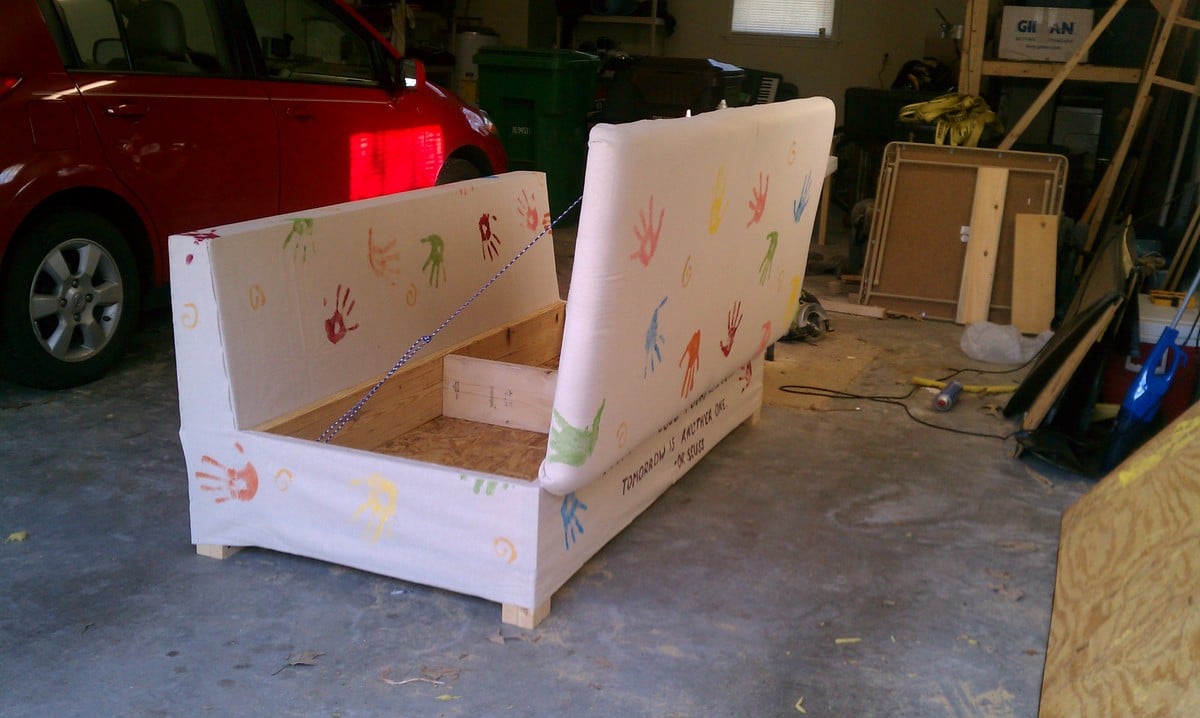
Built from Plan(s)
Estimated Time Investment
Weekend Project (10-20 Hours)
Recommended Skill Level
Intermediate
My plane old shelf
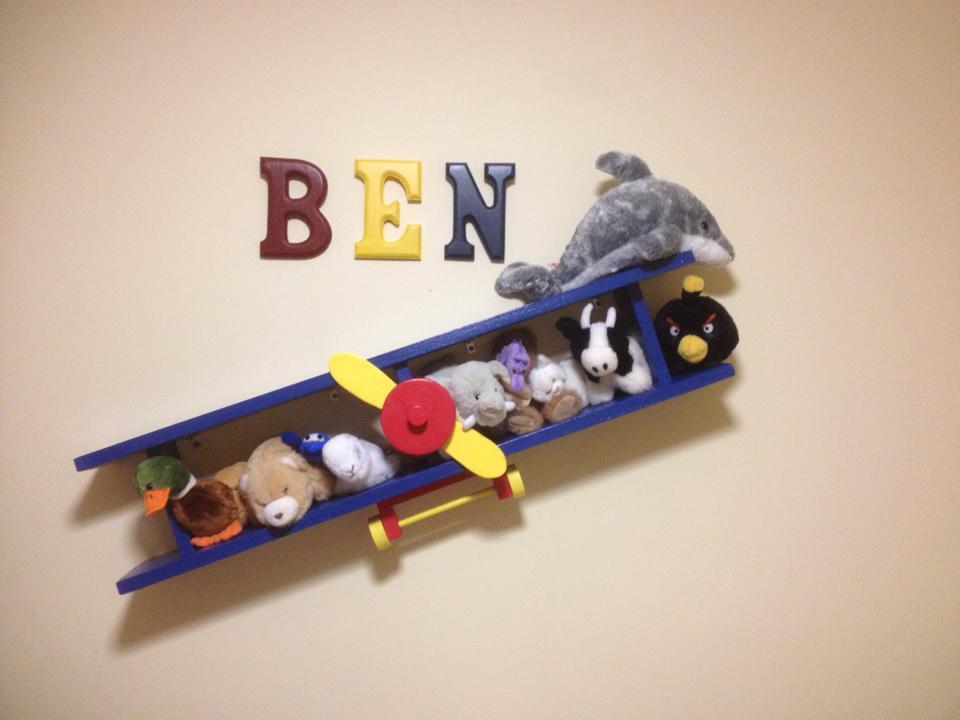
Made using the plane old shelf plan.
Built from Plan(s)
Estimated Time Investment
Day Project (6-9 Hours)
Finish Used
Craft paint and varathane
Recommended Skill Level
Beginner
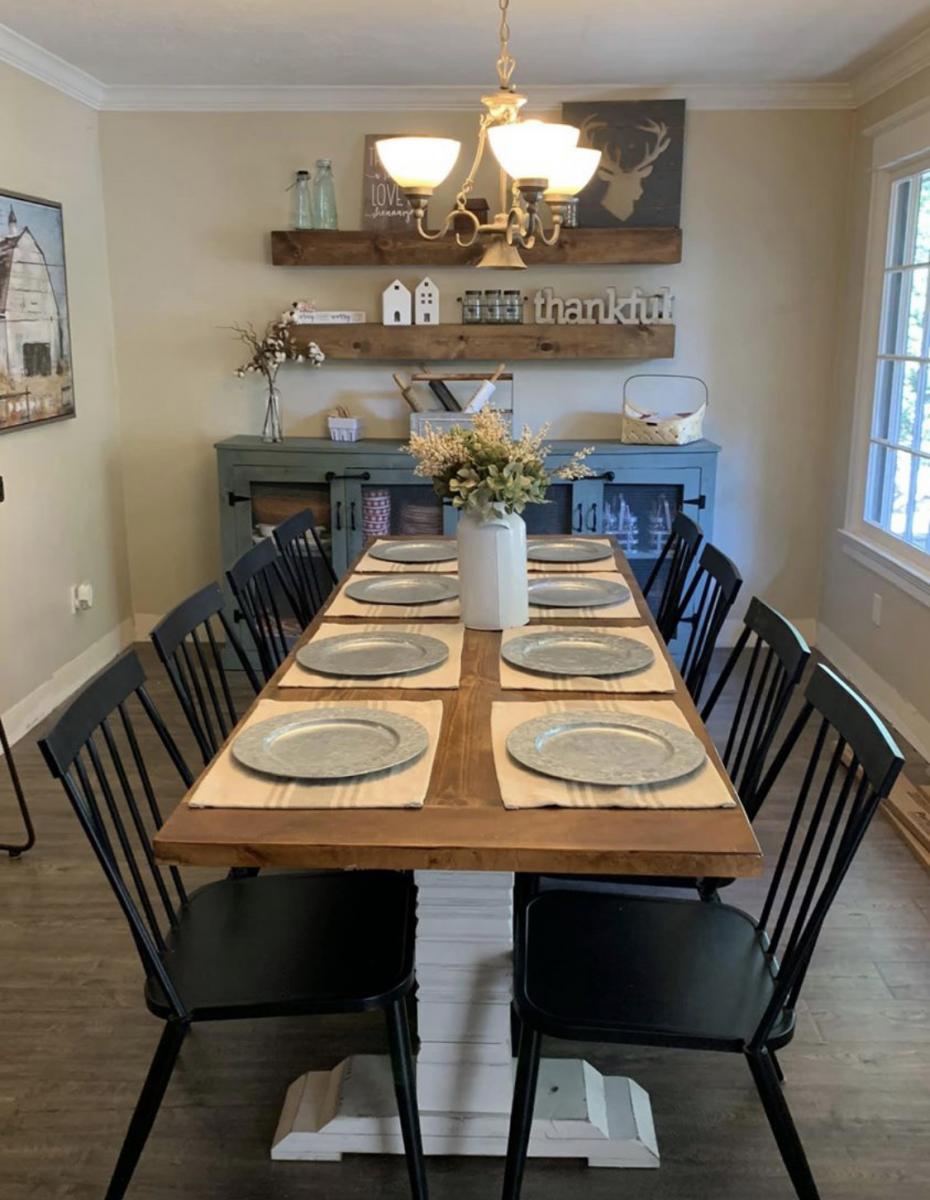
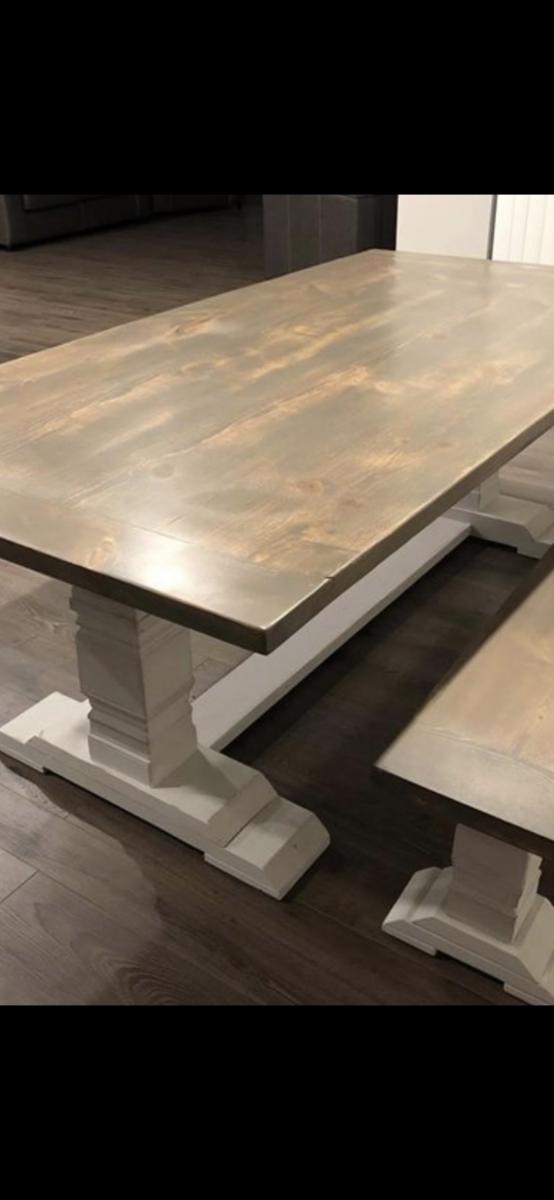
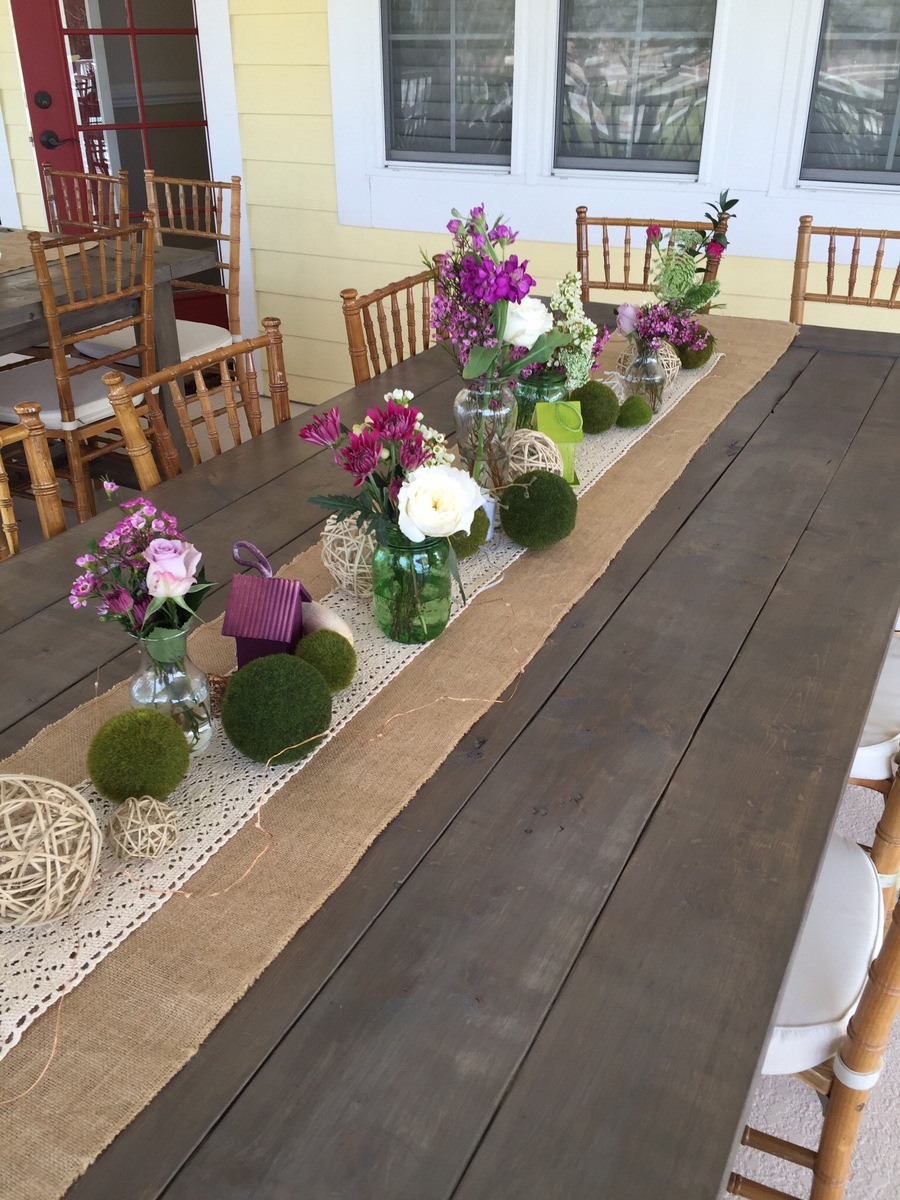
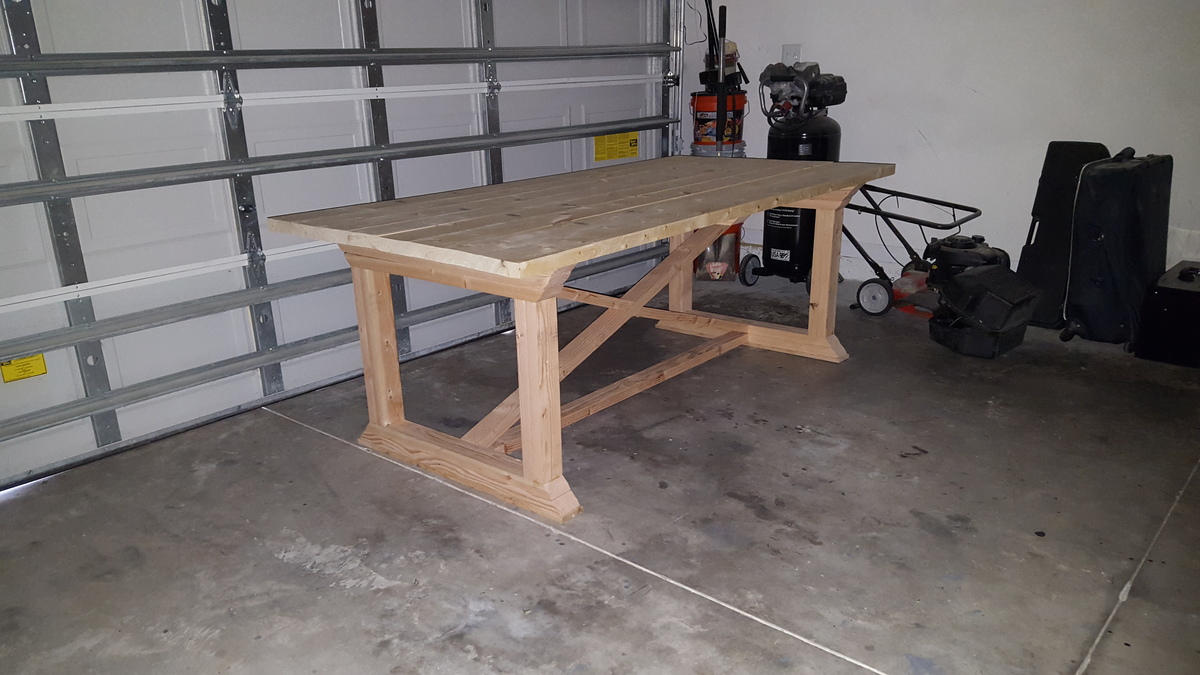
Farmhouse Tables for a wedding
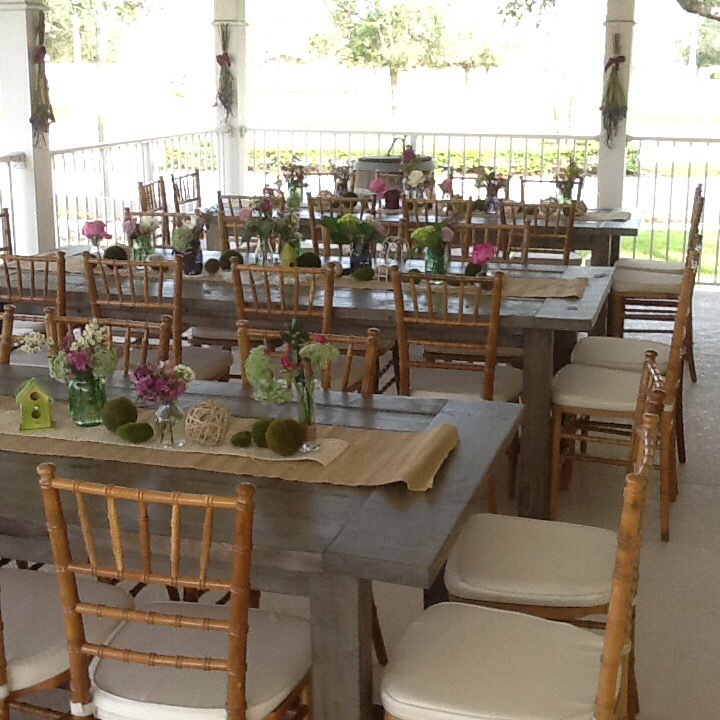
We were going to rent 5 farmhouse tables but the cost of renting was more than double the cost of building them myself plus by building them myself I could finish them the color that I wanted. We were then able to sell 4 of the 5. I kept one for my self. I also was able to build a smaller size one to custom fit my son and daughter in-law new house. Nothing like the satisfaction of building something for something so special.
Built from Plan(s)
Estimated Cost
Roughly 125 per table.
Estimated Time Investment
Week Long Project (20 Hours or More)
Finish Used
Base coat heavy Varathane Weathered Grey
Once that coat was dry I used a thin coat of minwax Jacobean to get in the cracks and holes and a layer of depth.
Topped it with minwax polycrylic matte finish.
Once that coat was dry I used a thin coat of minwax Jacobean to get in the cracks and holes and a layer of depth.
Topped it with minwax polycrylic matte finish.
Recommended Skill Level
Intermediate
Comments
Sat, 04/02/2016 - 16:31
How long...
...did it take to complete all of those tables?!? That was such a special thing to do for your son's wedding...and then for them to have a smaller version for themselves, I'm certain it will become a family heirloom passed down through the years! Those tables "made the look" for that entire setting! Just gorgeous! :)
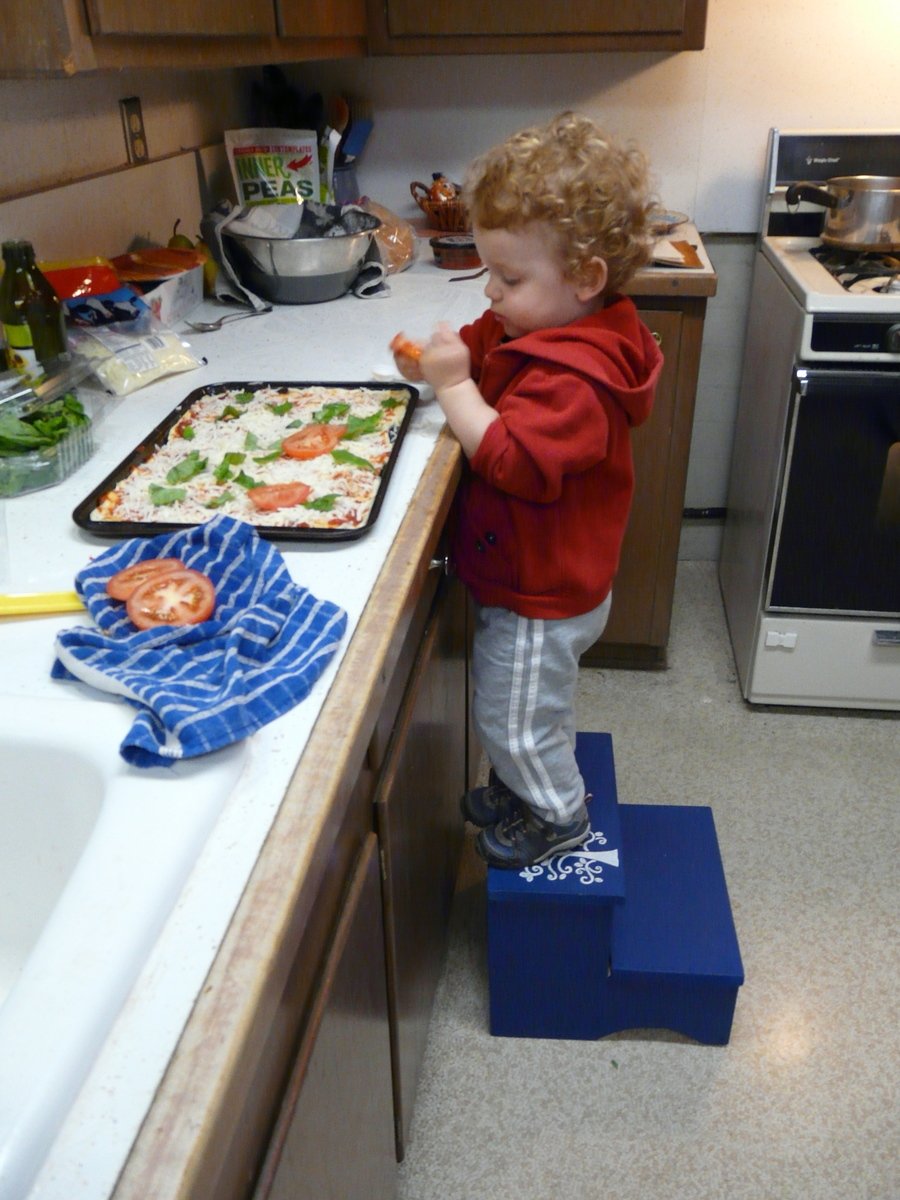
Toddler Step
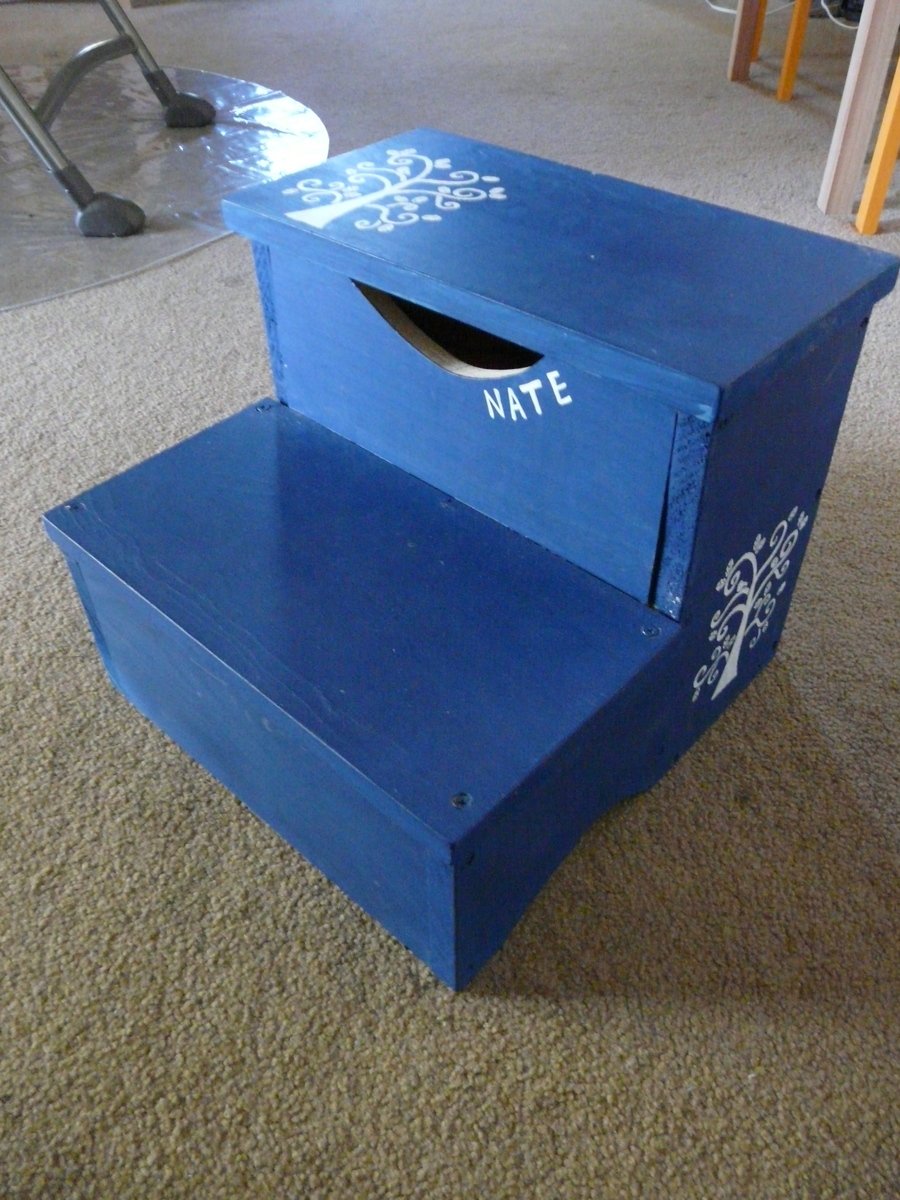
Though I've built a lot of kids' furniture now, I think this is my son's favorite item. He requests it constantly. I built two more for friends and even a tiny play one for his toy house.
This was my first attempt with a jig saw, and my biggest advice is to be sure the trigger is pressed all the way in and to go very very slowly. Also, when you are cutting the straight edges on the side, you can clamp a guide on just like with a circular saw. That helped a lot. By the time I made my second and third it was easy.

Built from Plan(s)
Estimated Cost
$40
Estimated Time Investment
Afternoon Project (3-6 Hours)
Finish Used
Two layers of paint and a stencil in white son the top and side.
Recommended Skill Level
Beginner
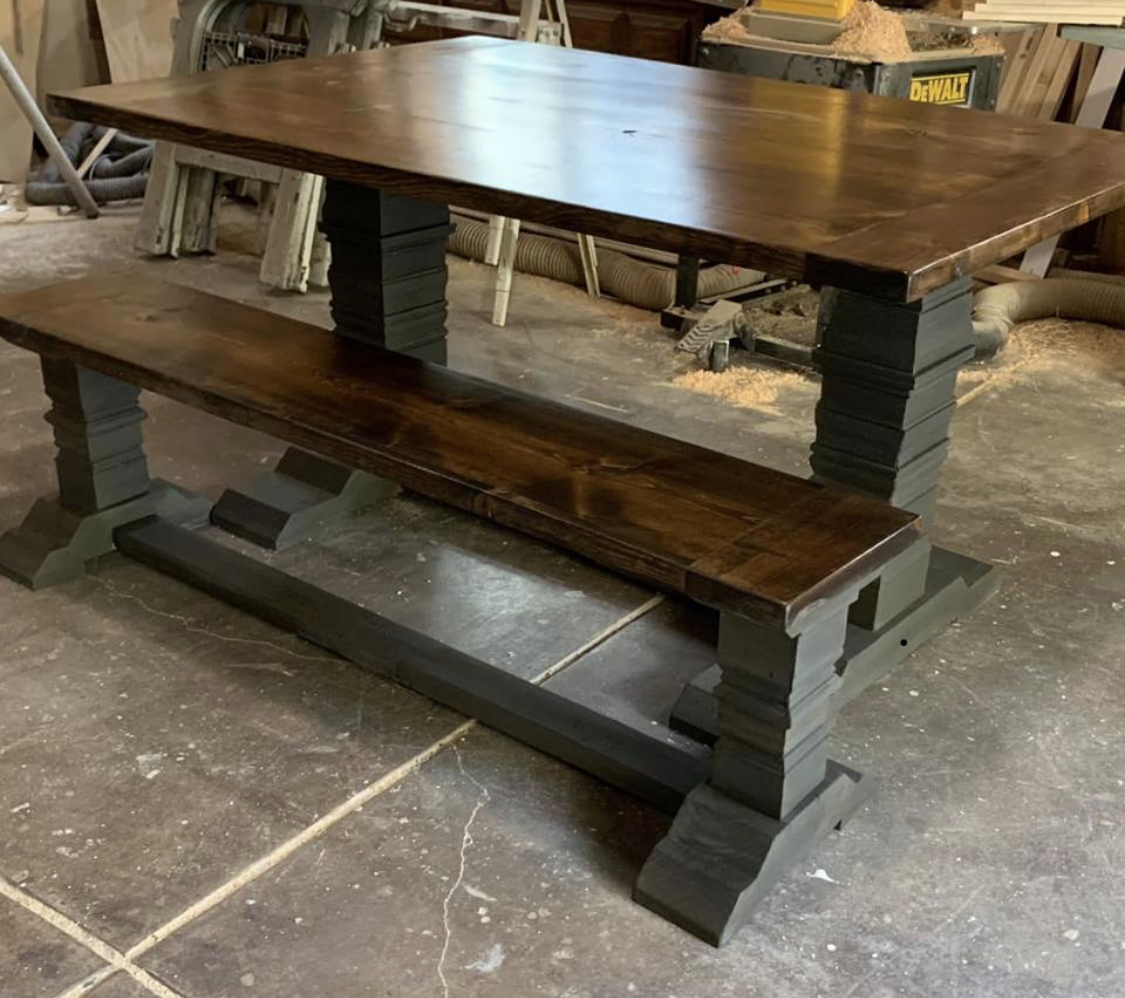
Rustic X Dining Table and Bench
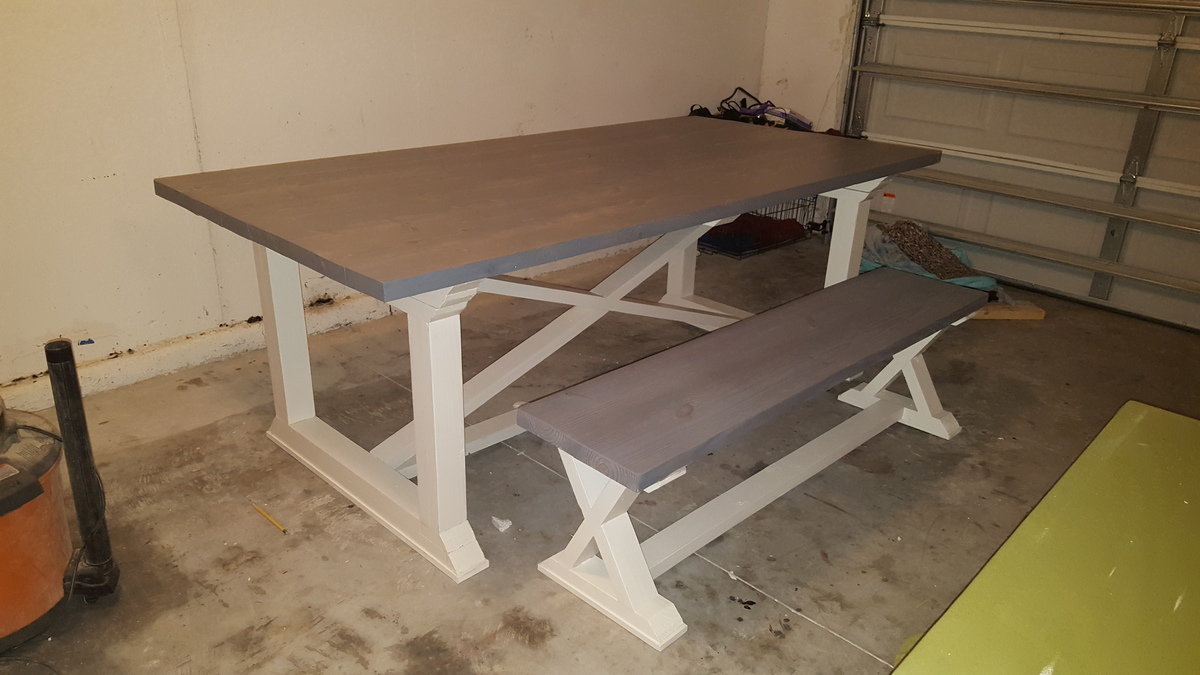
Rekourt dining room table with bench
Built from Plan(s)
Estimated Cost
80
Estimated Time Investment
Weekend Project (10-20 Hours)
Finish Used
Varathane weathered grey top and white paint
Recommended Skill Level
Intermediate
Ultimate loft bed
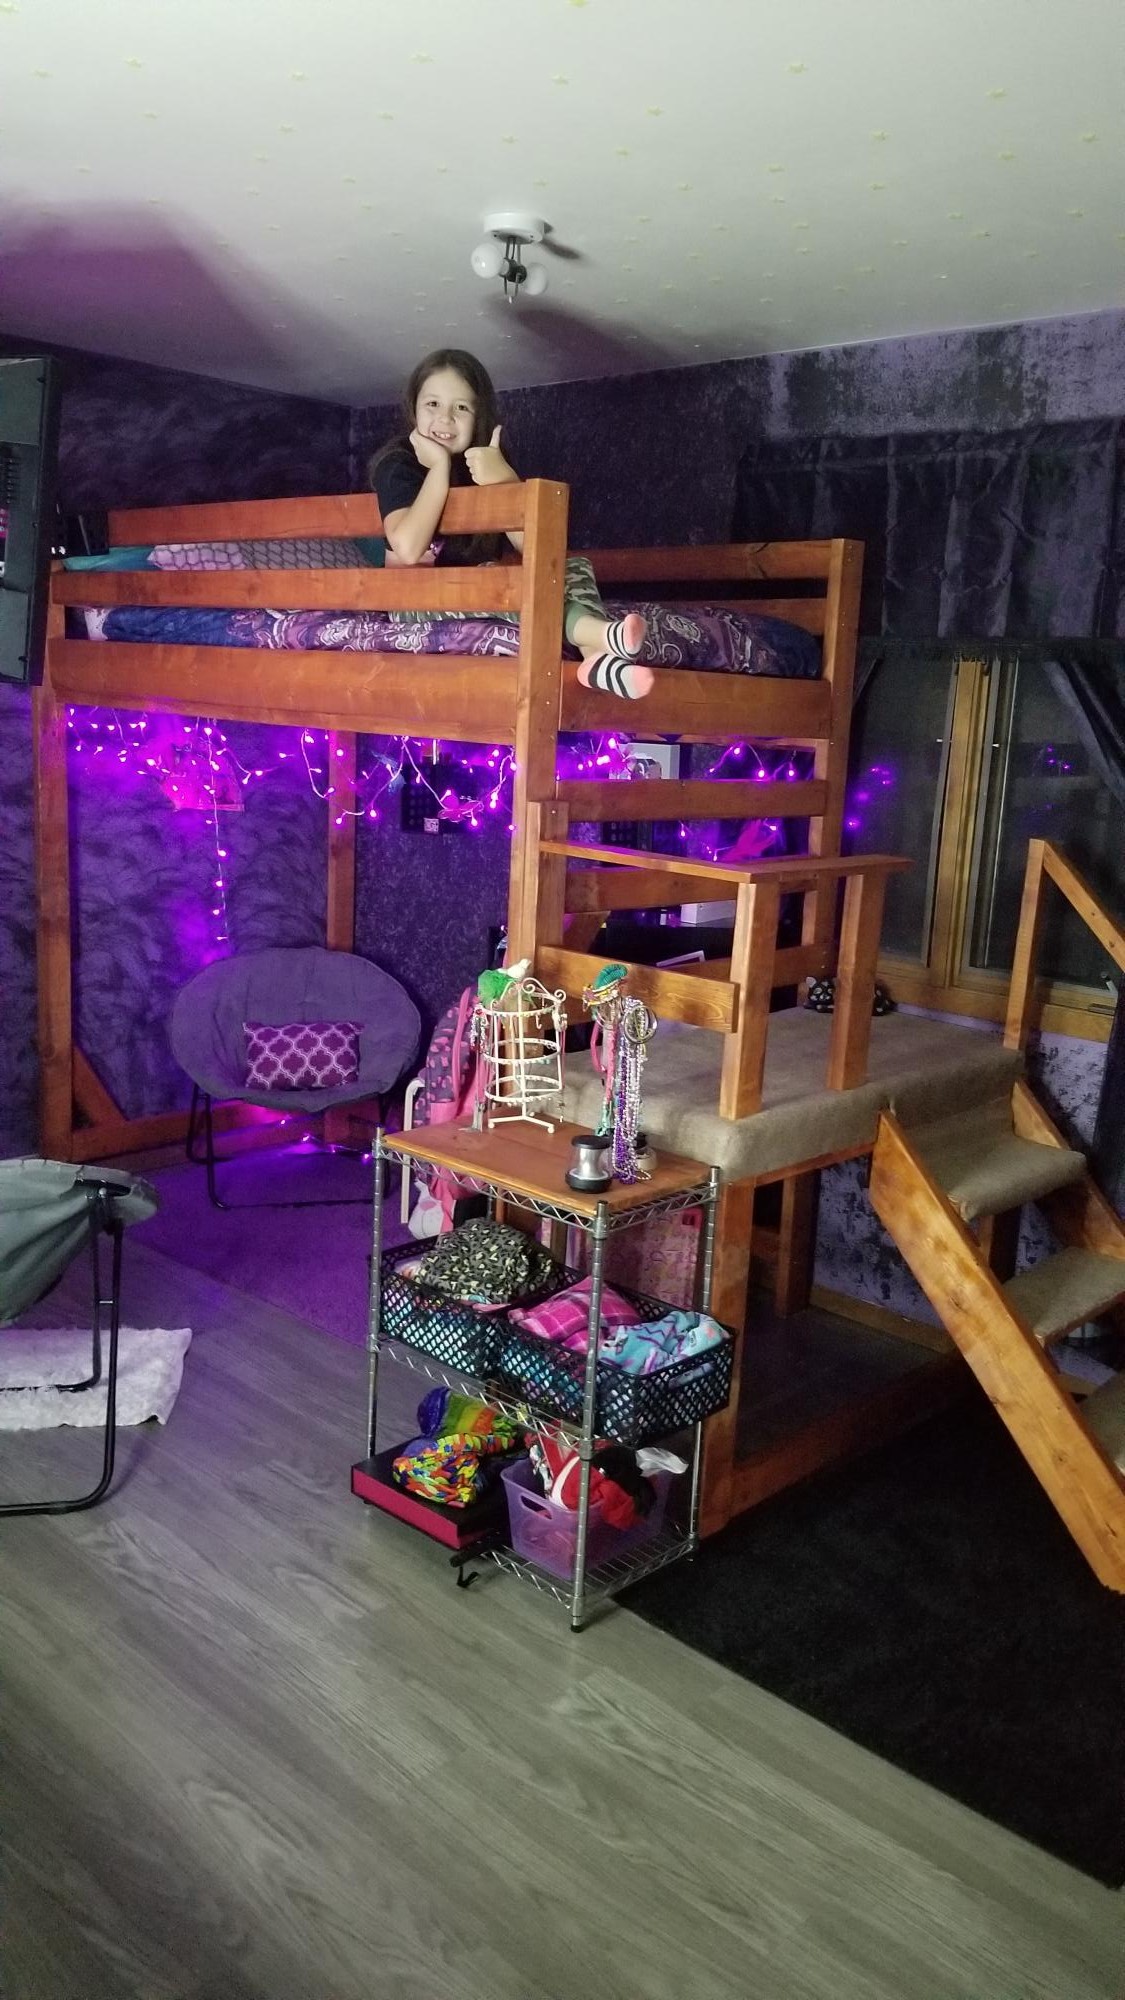
Extremely easy with Ana's plans. Under $100.
Built from Plan(s)
Estimated Cost
100.00
Estimated Time Investment
Weekend Project (10-20 Hours)
Finish Used
Redwood stain
Recommended Skill Level
Beginner
Comments

Wed, 11/06/2019 - 10:52
Wow this turned out really…
Wow this turned out really great! I love the carpeted stairs, what a great idea!
Round Pedestal Table
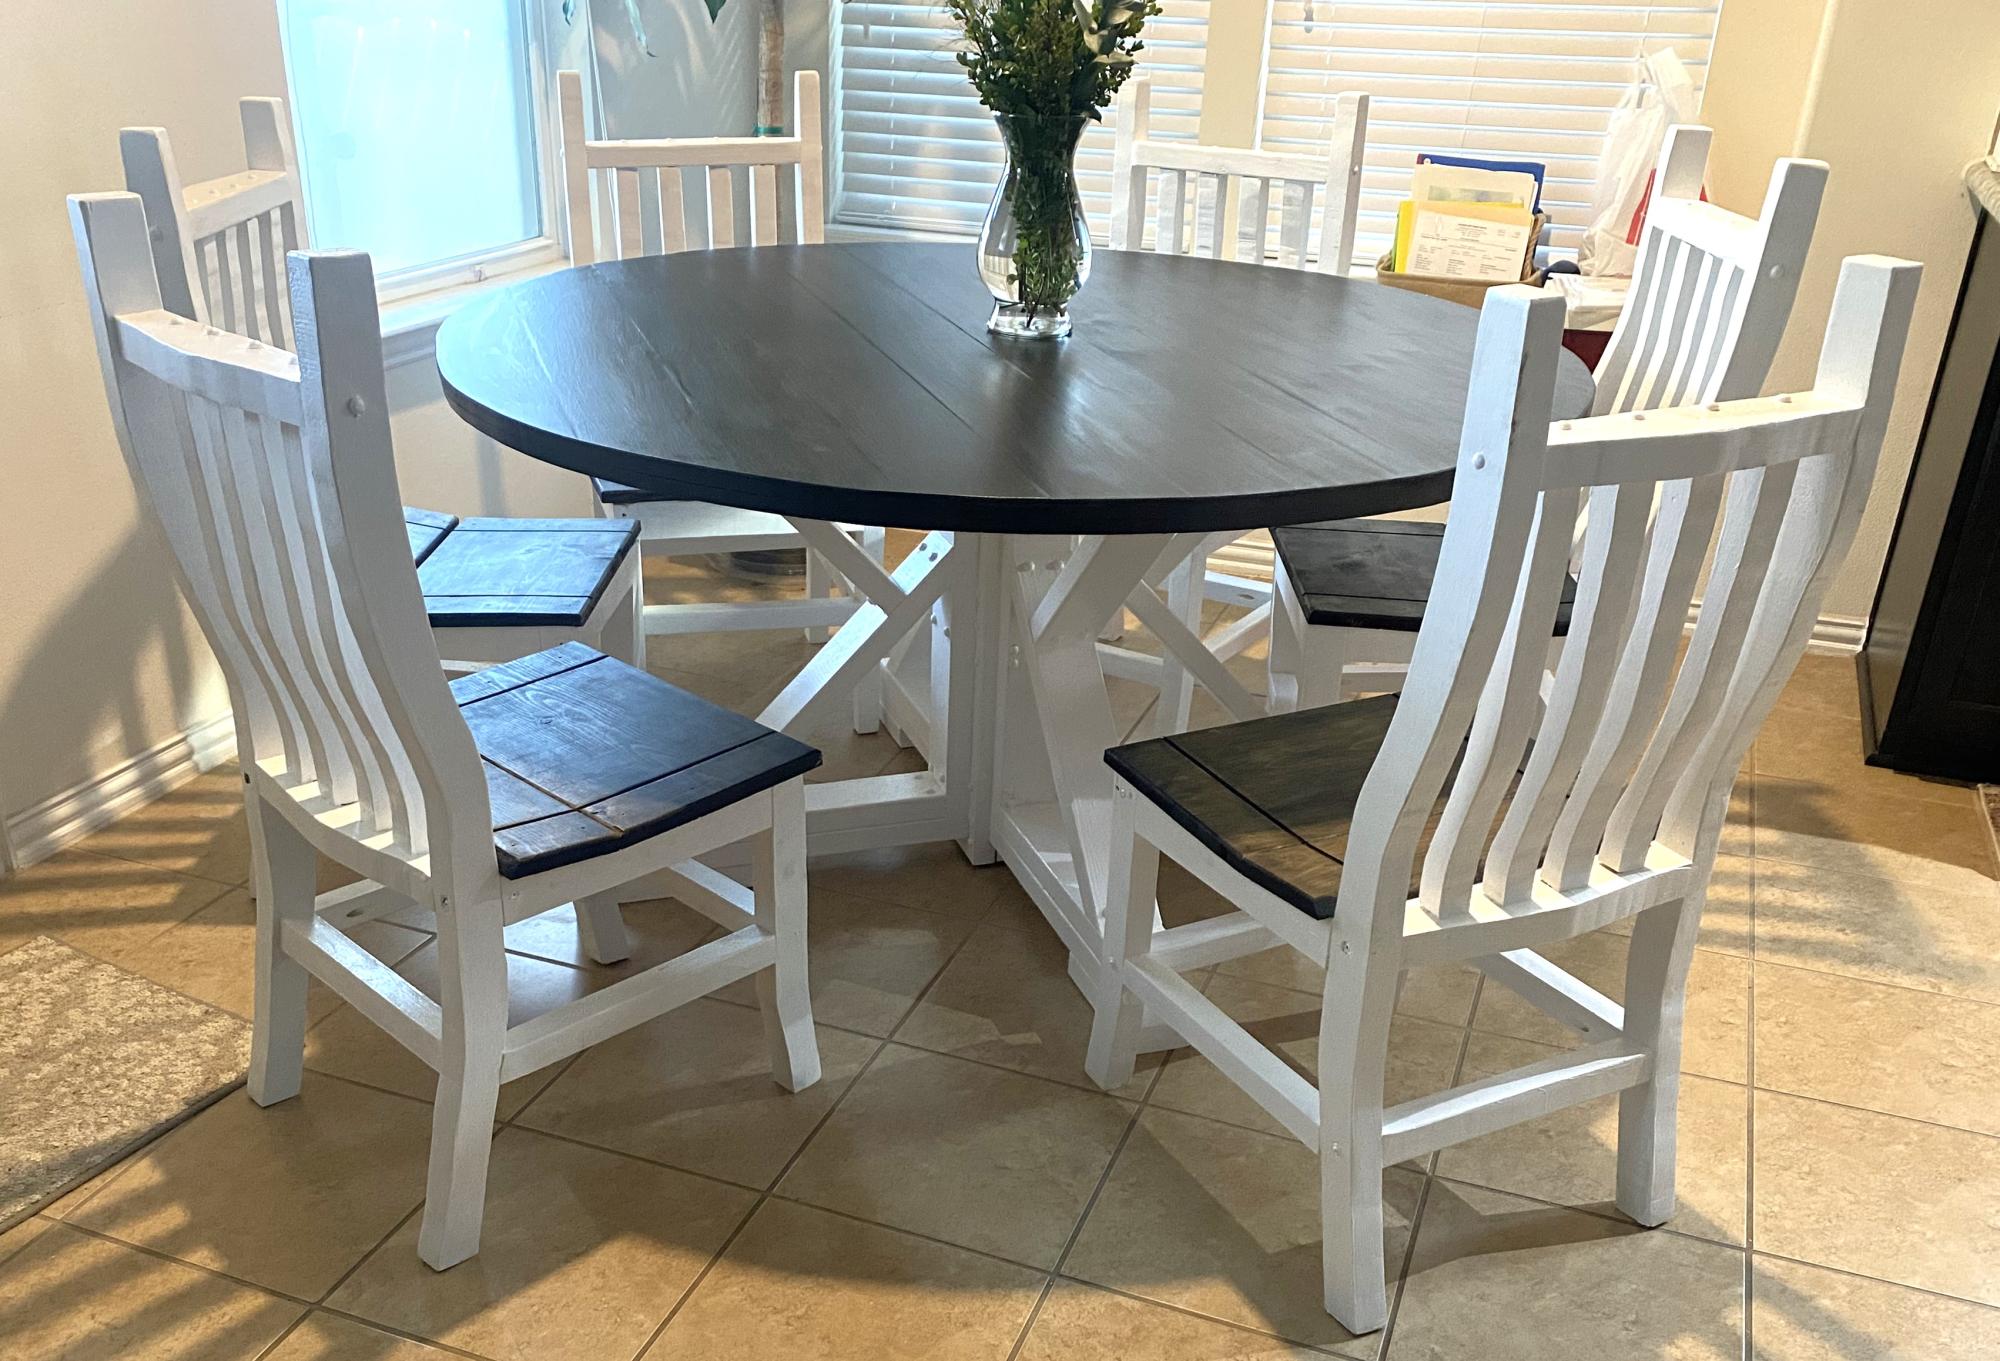
Built this for my wife for our anniversary. Plans for the table was easy to follow. Used poplar for the table top. I copied the chairs from our large dining room table that we purchased so the two sets would match. I’m an Ana White follower looking forward using more plans. I used a jig saw to cut the circular table top instead of the skill saw using a fence.
James / League City Texas
Built from Plan(s)
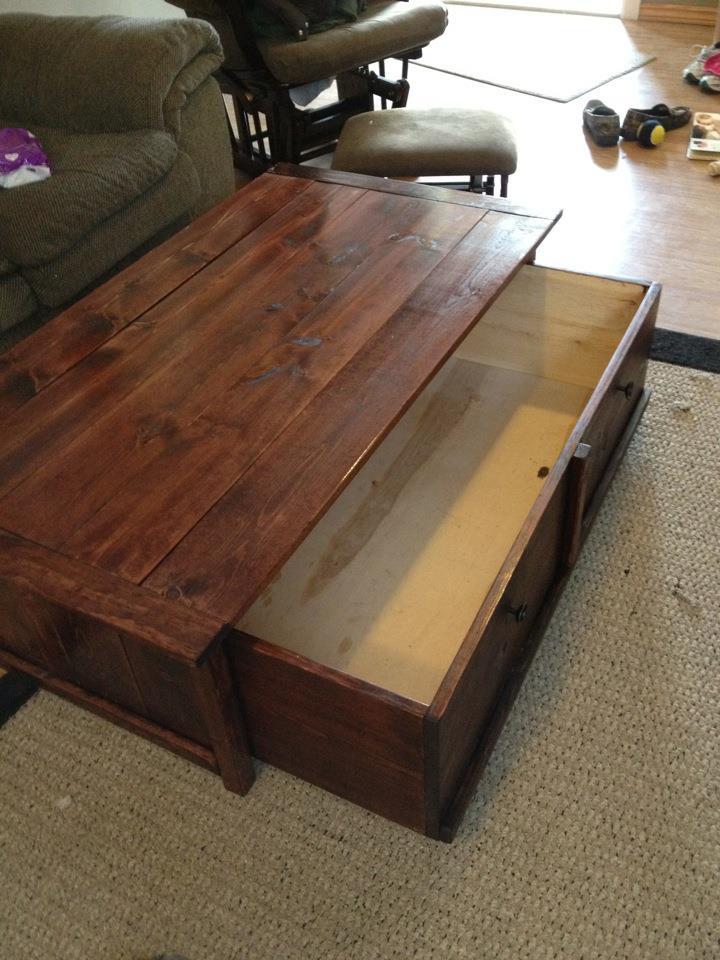
20 sec tidy up coffee table with trundle toy box/storage
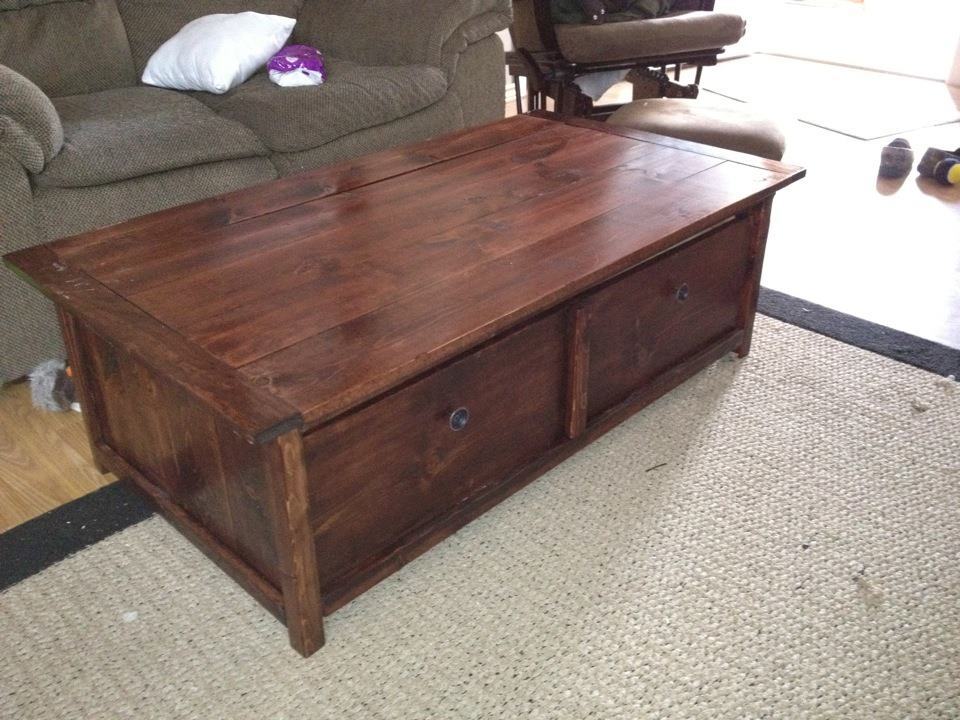
This is a project we built this weekend. My husband and I desperately needed some sophisticated storage space in the living room that is kid friendly, so we accepted the challenge. We together built a coffee table with trundle storage inspired by a plan on ana-white. We are truly inspired by her designs and plans help a LOT! Check out our work!
Built from Plan(s)
Estimated Cost
$100
Estimated Time Investment
Day Project (6-9 Hours)
Finish Used
We used one coat of red oak minwax stain with a layer of red mahogony stain over top. We finished with clear polyurethane.
Recommended Skill Level
Beginner
Comments
Tue, 03/13/2012 - 07:11
Nice
That looks very nice. This is the next project on my list I think.
It's really great to see the project with a different kind of finish also. How do feel about the functionality of it now that you have it "up and running" in your living room?
And... how do your kids feel about it?
Any drawbacks to this design for your needs, or tips that you can give me for building it over the next couple weeks?
In reply to Nice by Bunnie1978
Tue, 03/13/2012 - 07:53
Thank you!
Thank you for the compliments! So far we absolutely LOVE the functionality! It really is made for easy clean up, slides back and forth nicely (we used wheels that only go one way, not swivels.) and our one year old seems to enjoy it. The table and storage compartment are just short and sturdy enough that she can pull herself up on them and because the storage compartment is not on swivels it doesn't move when she does. She is the first grand-baby on both sides of the family so she has approximately 175 toys that we have to find a place for and they all fit very nicely. With the large storage we have noticed that she is pulling out and playing with different toys that she could never get to or find before. As far as design is concerned we did have to modify it a little bit to work with the tools that were available to us. We wish the side legs were sturdier, even with 6 screws in each side they are still a bit wobbly. With the storage box underneath it helps to support it from swaying but we are still talking about ways to make it better. A possible support beam on the bottom of the back side? All in all we love the piece it fits perfectly into our space and offers a LOT of storage that we didn't have before. My husband and I had tossed around the idea, before we started, of making the piece smaller but we are glad that we didn't.
Suggestions: if you are going to buy based off of the shopping list provided make sure you also buy 2" screws. They forget to include that in the shopping list but include that in the directions. If you have any other questions feel free to ask. It was a really really fun project for us.

Tue, 03/13/2012 - 09:10
Added Stability
I just finished my Tidy Up Table too (brag post coming!) and I decided to add one L-bracket to each corner because of the wobble. I've also got a baby (7 months) and it's nice to have that added stability just in case. Now the sides are solid as a rock!
Tue, 03/13/2012 - 13:08
Yes...
A little bit of medal support would probably be really good... I was actually thinking of modifying the design a little bit already, which will probably serve the end result to provide better stability. I think I'm going to make the storage trundle a little shallower, and put a row of small square drawers above it on each side. That is of course, much more complex, and then detail the trundle with the small squares so it looks like a cabinet of drawers all the way down...
What do you think of that idea? I mentioned that on the plan post too... still kicking it around a bit.
New Bed for my tween: chestwick platform bed full
After searching for a bed for our tween we found that we couldn't find the bed we wanted for the price we wanted to pay. I'd been eyeing this site for months and finally decided to take the plunge. The Shanty-2-Chic blog really motivated me to get this going.
This was our first (and arguably most expensive) project ever- husband ended up acquiring new tools to make the job easier, haha.
We followed the tutorial from the site with modifications for a full size mattress. (Just substituted 53x75 for the queen measurements and adjusted cuts accordingly.)
Used furring strips (1x3) for mattress support to save money.
Finished with zinsser primer (bought a quart for all our future projects)- this stuff is awesome!
Picked a flat white paint in a color that matched her dresser.
Cost of Daughters New Bed:
Lumber $120,
Kreg jig clamp $29
Air compresser with nail gun $150
Learning how to construct furniture ourselves: Priceless
Built from Plan(s)
Estimated Cost
$120 or so- I don't recall exactly
Estimated Time Investment
Day Project (6-9 Hours)
Finish Used
Zinsser primer (2 coats brush on)
white paint- flat finish
white paint- flat finish
Recommended Skill Level
Beginner
Modified Top on Console Table
Used the Ana White plans for the console table but omitted the 1x12 and used 1x4 45' for the perimeter and ran anothe 1x4 up the middle. We added cross supports under the top to attach the top to, eliminating the second layer on the top.
Built from Plan(s)
Estimated Time Investment
Afternoon Project (3-6 Hours)
Recommended Skill Level
Beginner
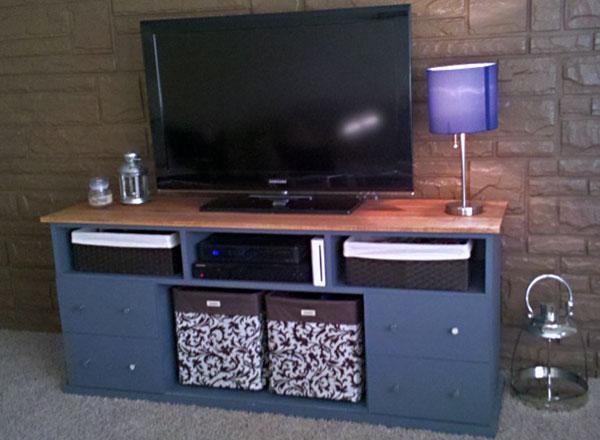
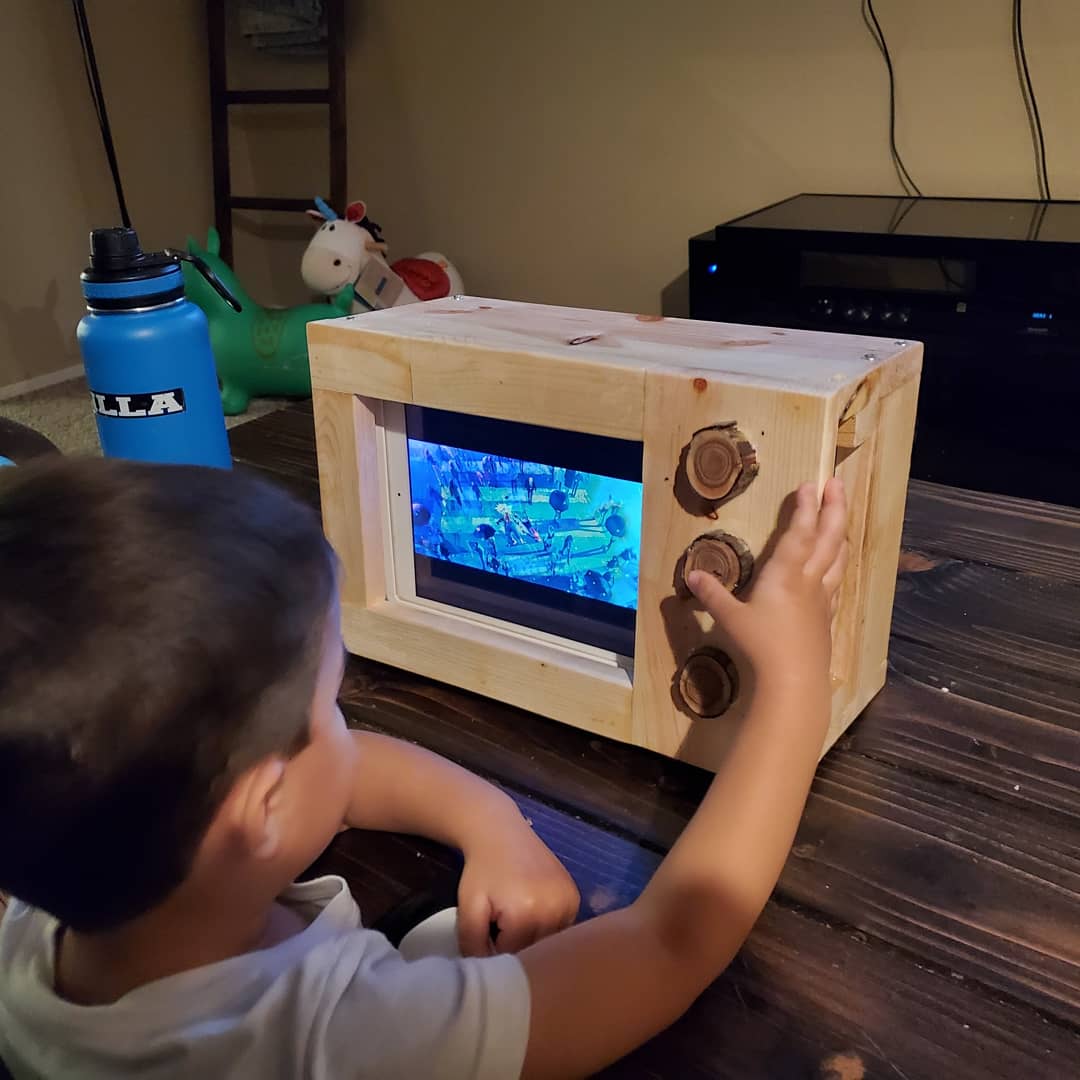
Tablet retro holder TV set
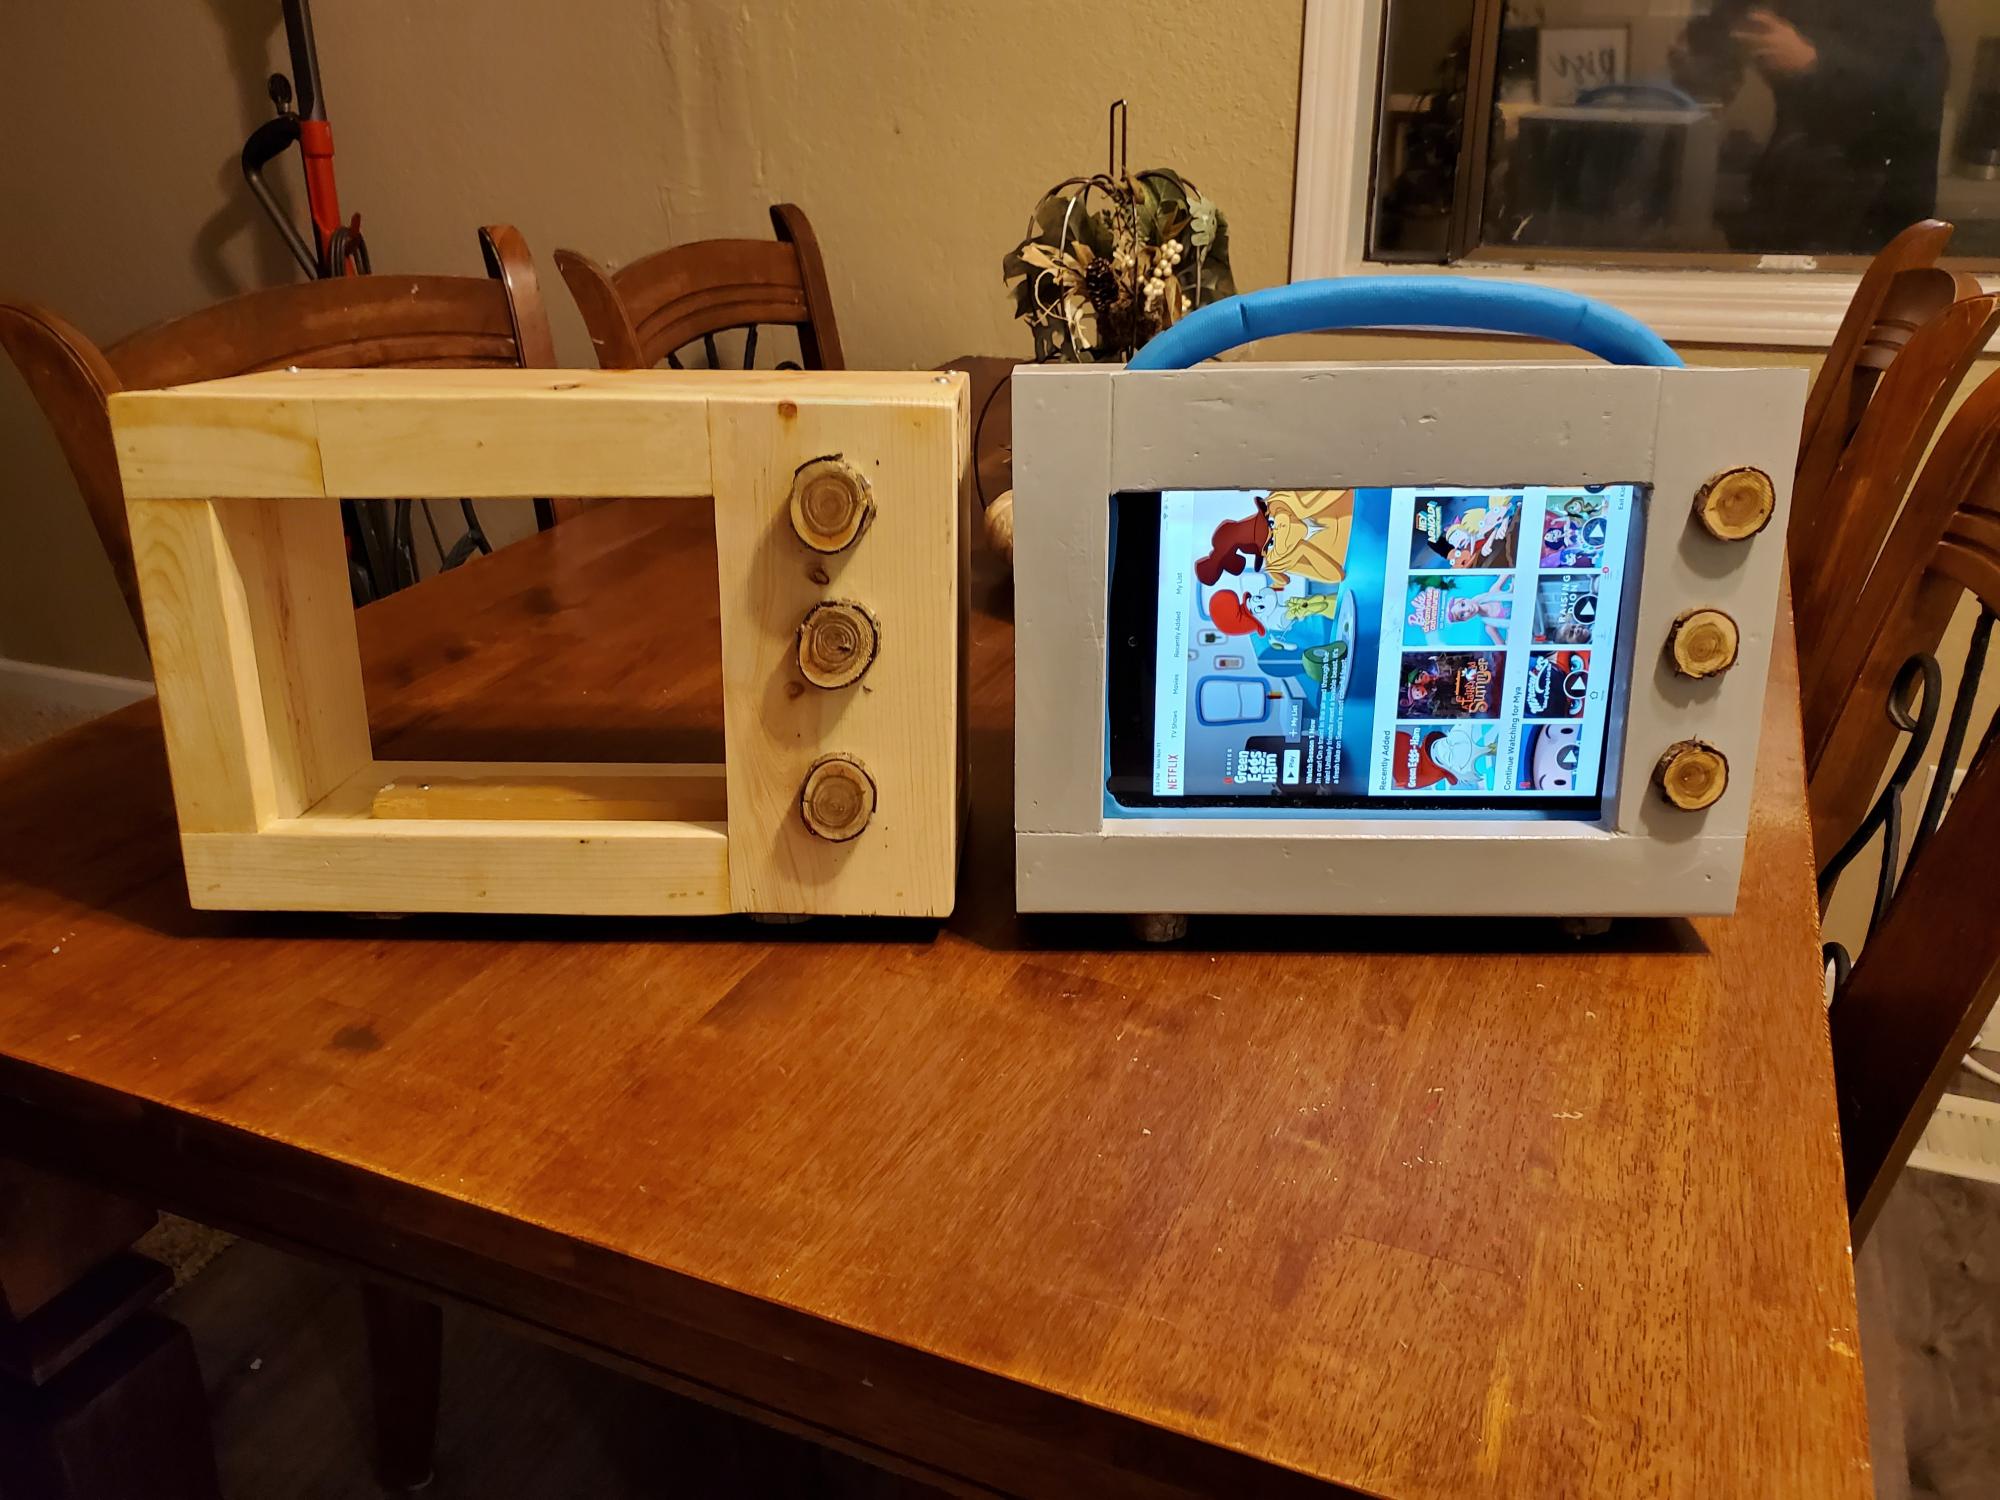
Made a mini TV set for my son and as soon as my older daughter saw that she had to have one too.

Built from Plan(s)
Estimated Time Investment
An Hour or Two (0-2 Hours)
Recommended Skill Level
Beginner
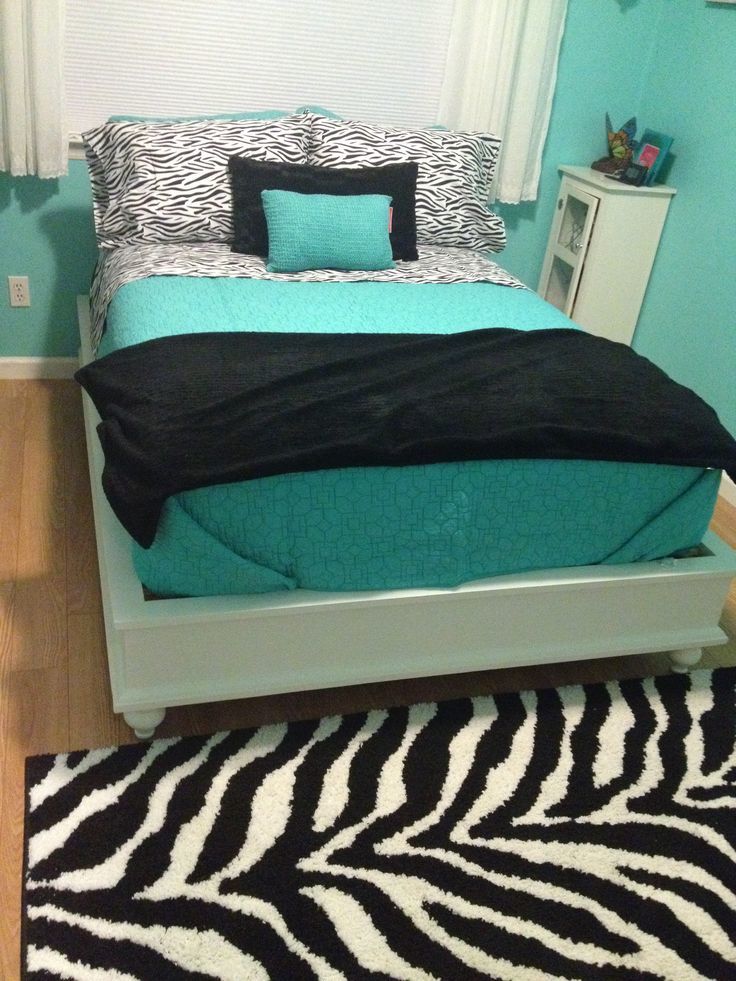
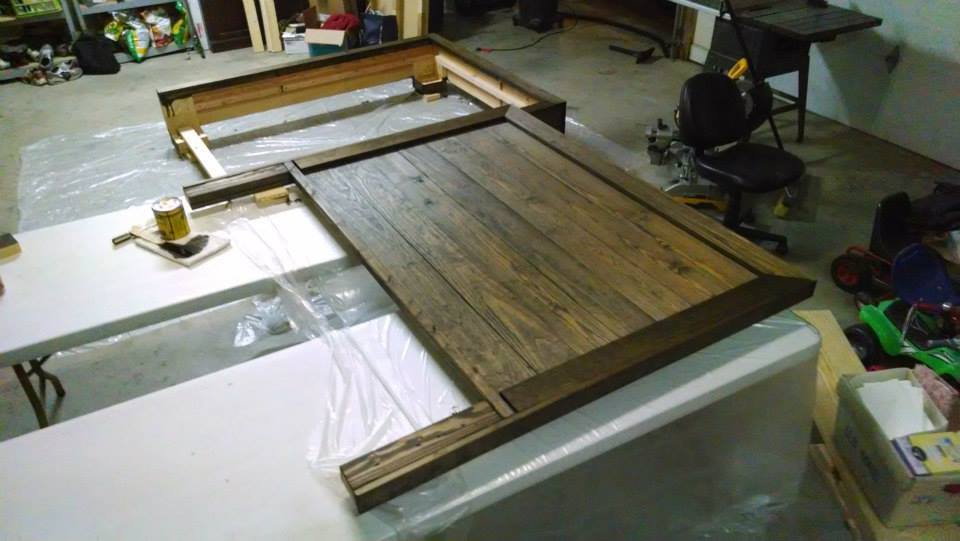
First Build - "Platform" Bed and Hailey Headboard
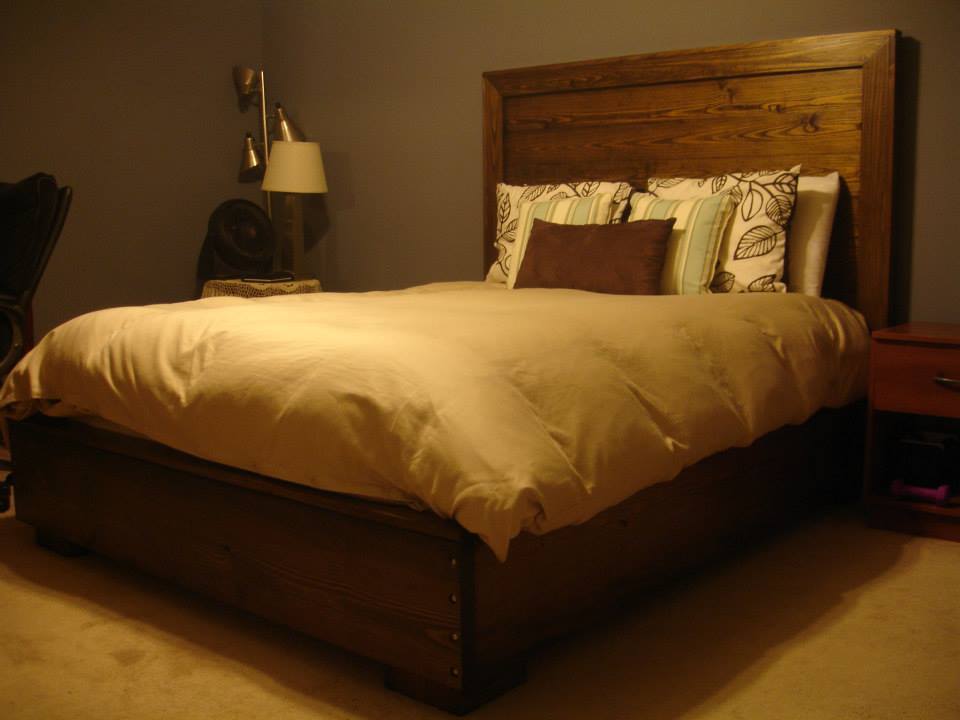
After finally getting fed up with having our mattress on one of those cheap metal "frames", and no headboard, I decided to try my hand at a platform bed and plank headboard.
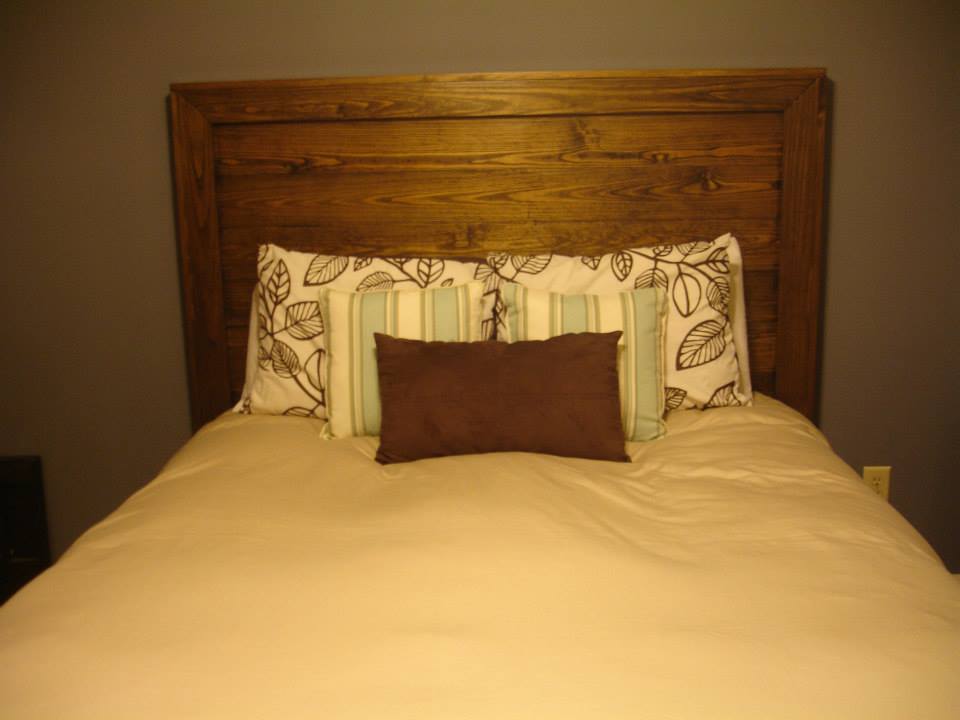
I followed the headboard plans to a T, with the exception of using 1x4's for the front trim instead of molding (at HD/Lowe's, the cheapest option would have set me back $40), and making it higher and wider to fit my bed plans. Everything came together very easily.
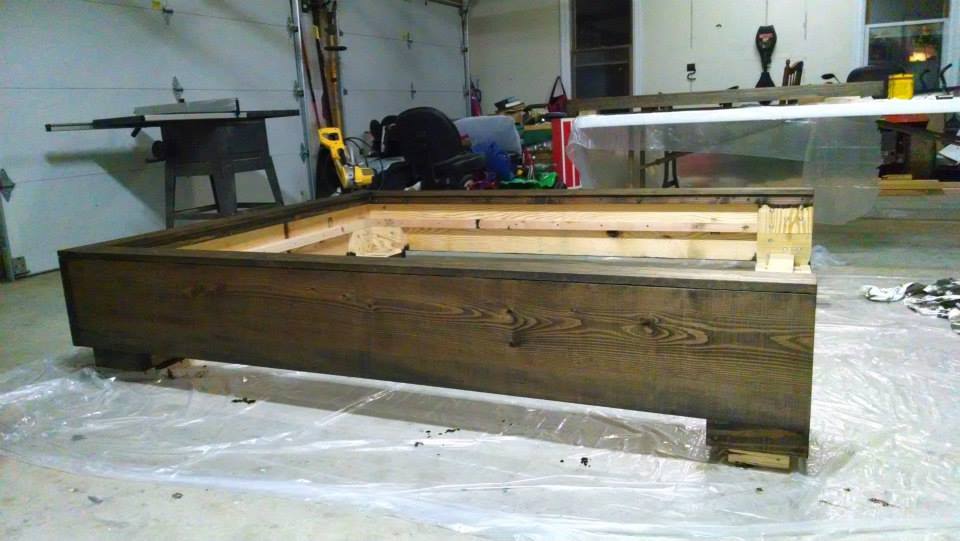
For the bed, I drew up the plans myself. I wanted clean lines and a modern look, with short wide legs. Instead of having the mattress rest on slats, I elected to hide the box spring within the wood frame, with the mattress sunk down 4" below the lip of the frame.
Total cost for headboard: $100
Total cost for bed: $80
Do NOT waste your time going to Lowe's or HD to buy any of the 1x's. The only frustrating part of this project was finding un-warped wood, and the big box stores had me pulling my hair out. Find a local wood place in your area, give them a call, and ask if they sell to non-contractors. My local yard was actually cheaper than the big box stores, and their wood was straight as a board, as it should be.

Built from Plan(s)
Estimated Time Investment
Weekend Project (10-20 Hours)
Finish Used
Stain: Minwax Jacobean
Clear: Minwax Satin Polyurethane (3 coats)
Clear: Minwax Satin Polyurethane (3 coats)
Recommended Skill Level
Starter Project
Comments
Mon, 03/10/2014 - 04:29
This looks great! Can I ask,
This looks great! Can I ask, is it a solid board at the bottom, or two boards? What did you use for the nail heads that you can see connecting the bottom boards? I'm fairly new at this. Is that just decorative or are they the screws holding it together? How do you get that look?
Thanks! I am going to try to do something like this.
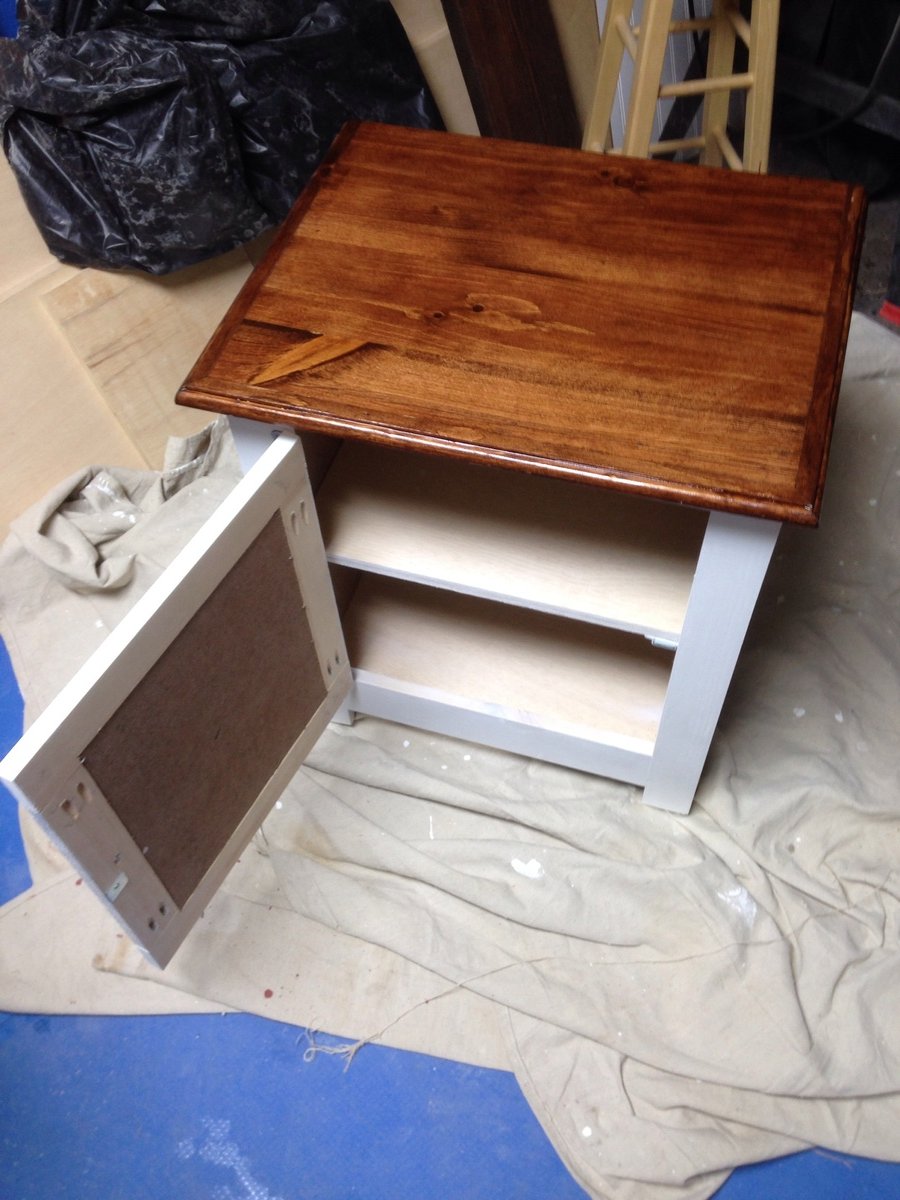
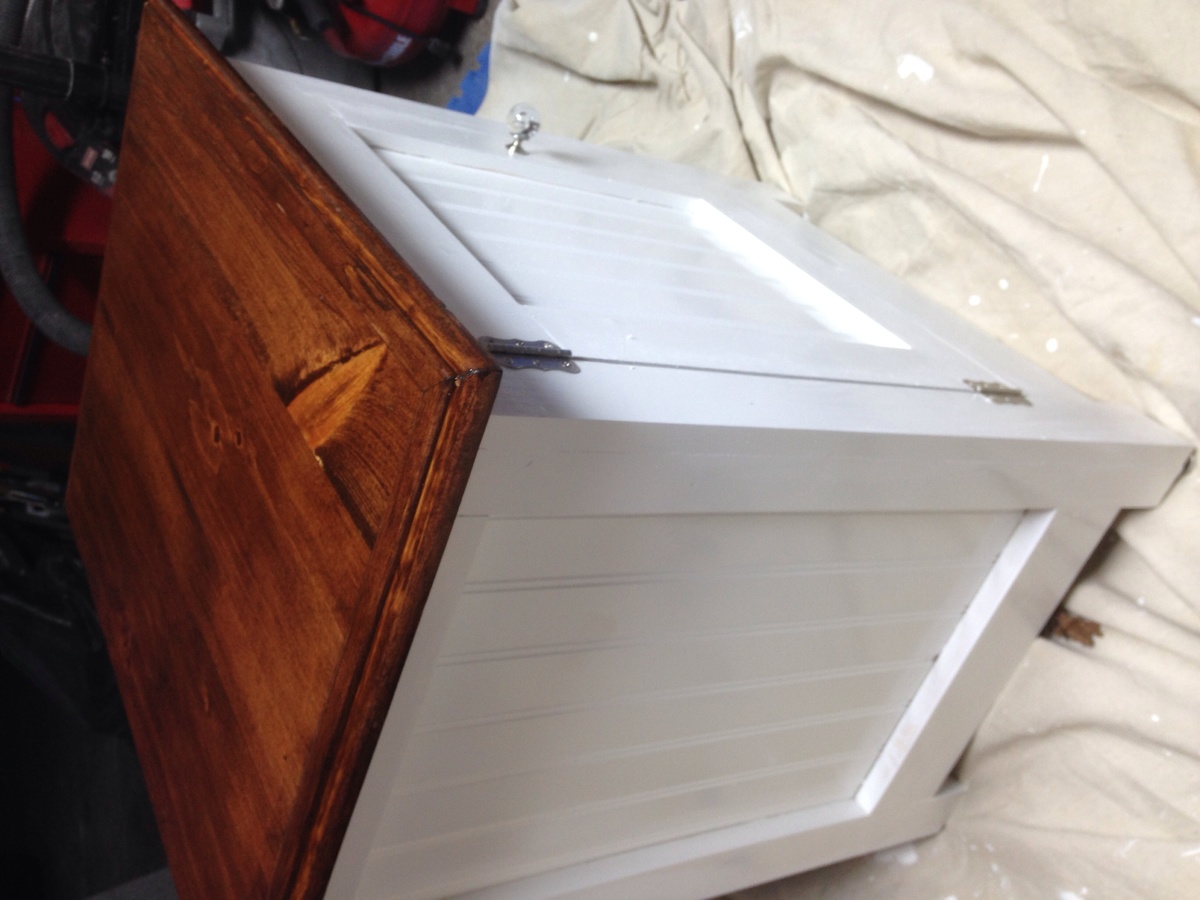
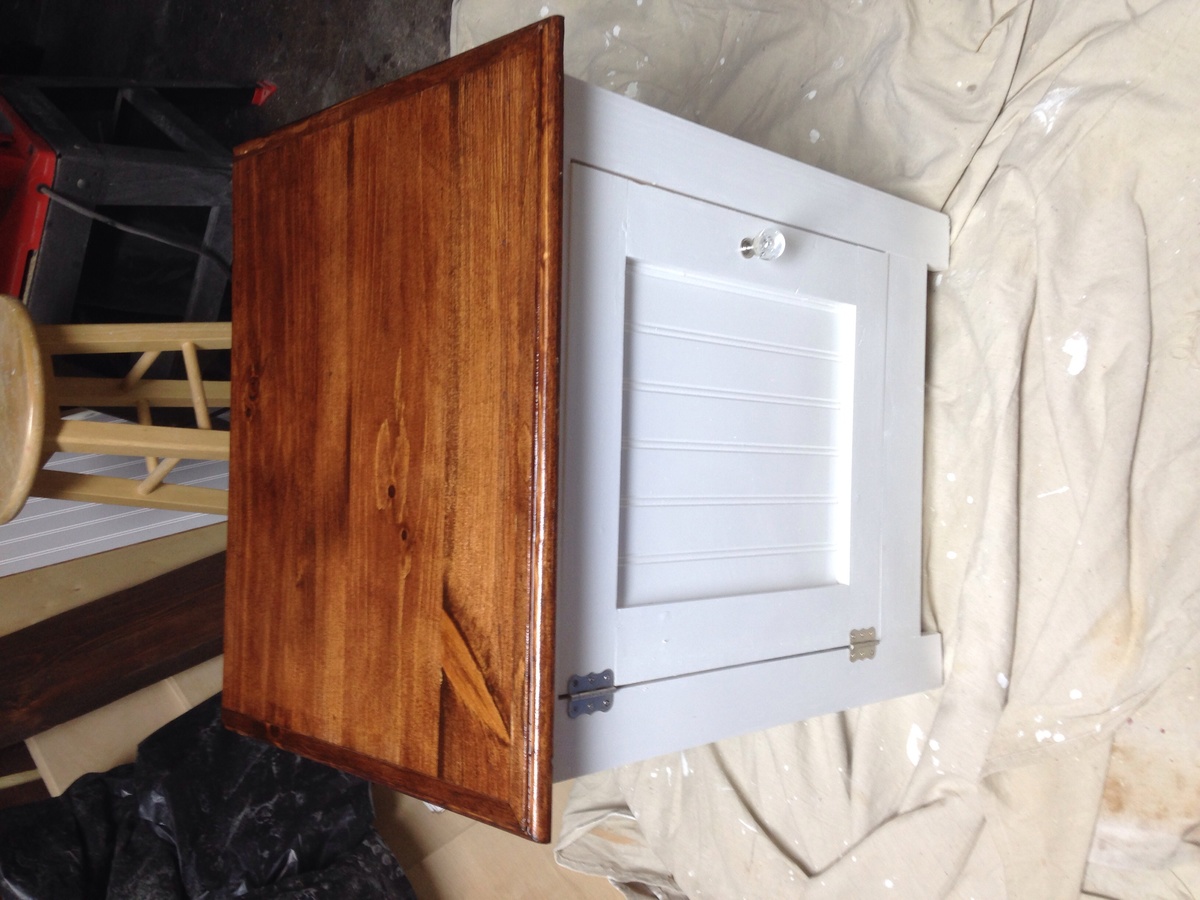
Kentwood Night Stands
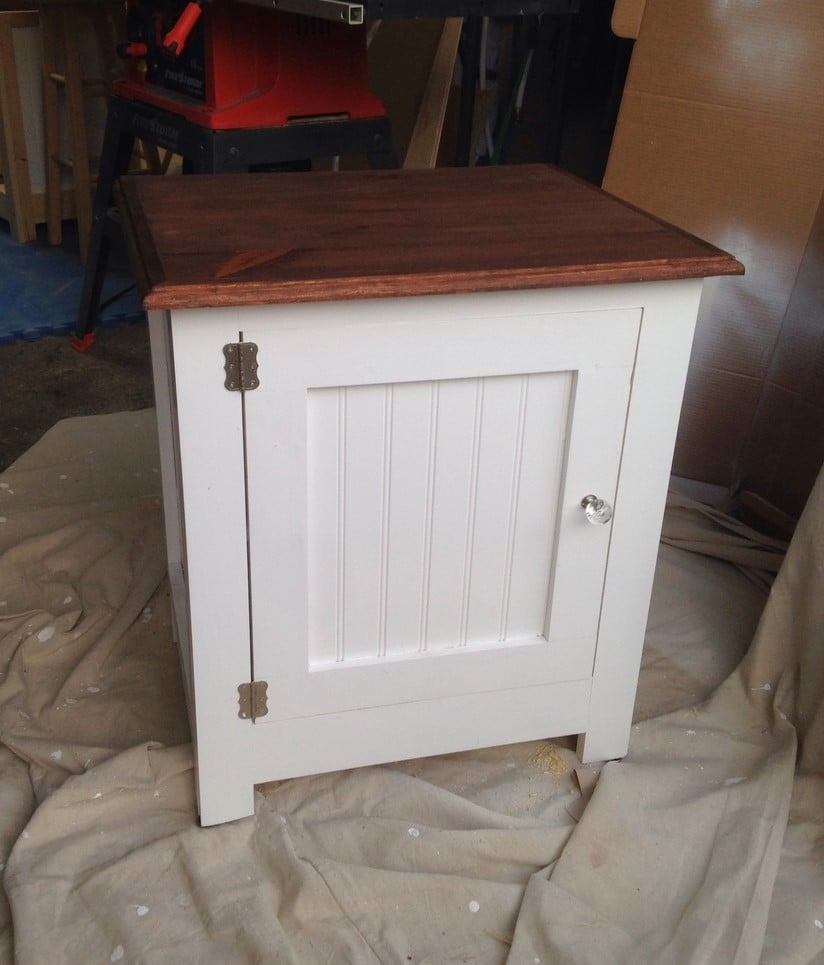
Made these for my both my daughters and they love them. I think I may make some to sell as so many people seem to like them. I used a routered edge on my tops which deviates from plans a bit. I also used a biscuit jointer and glued in some biscuits to create my top made from 1x6 and 1x4 boards. Great plans and thanks for doing what you on this amazing website.
Built from Plan(s)
Estimated Cost
50$ with paint and hardware.
Estimated Time Investment
Weekend Project (10-20 Hours)
Finish Used
Min Wax Honey, white semi gloss gloss and primer from Rustoleum
Recommended Skill Level
Beginner
Comments

Fri, 10/21/2022 - 05:44
Great design! Adapt into cat litter box cabinet?
These are really beautiful. I love the white wainscot (?) in contrast with the natural wood top. I wonder if this design can be stretched upward and elongated into a cat little box cabinet enclosure? My mom could use one that's easy to open up to clean tall enough for a bit of enclosed storage, and a table top height for a place the cat can relax away from the dogs.
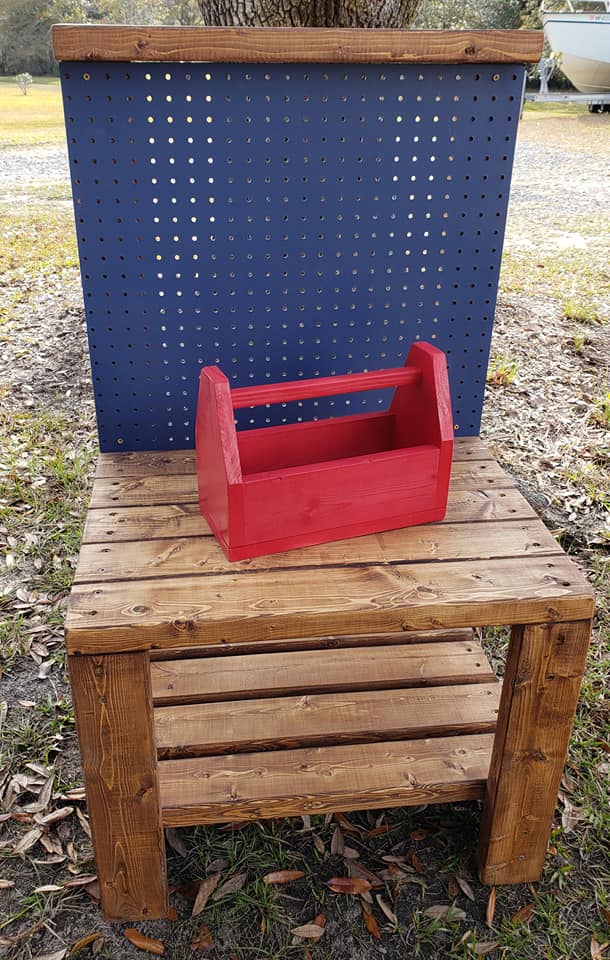
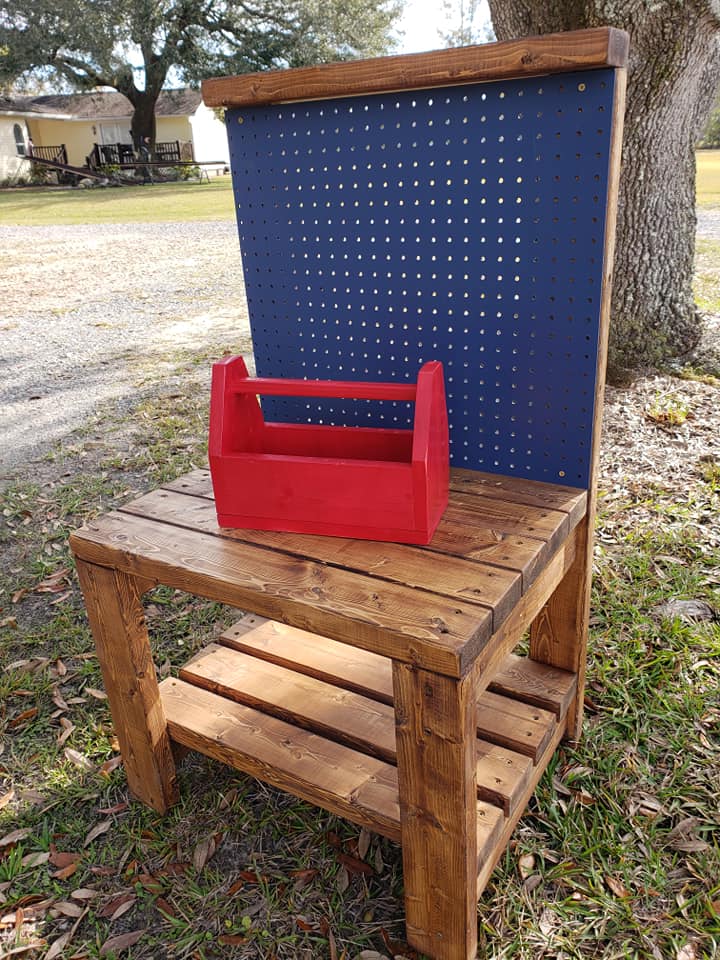
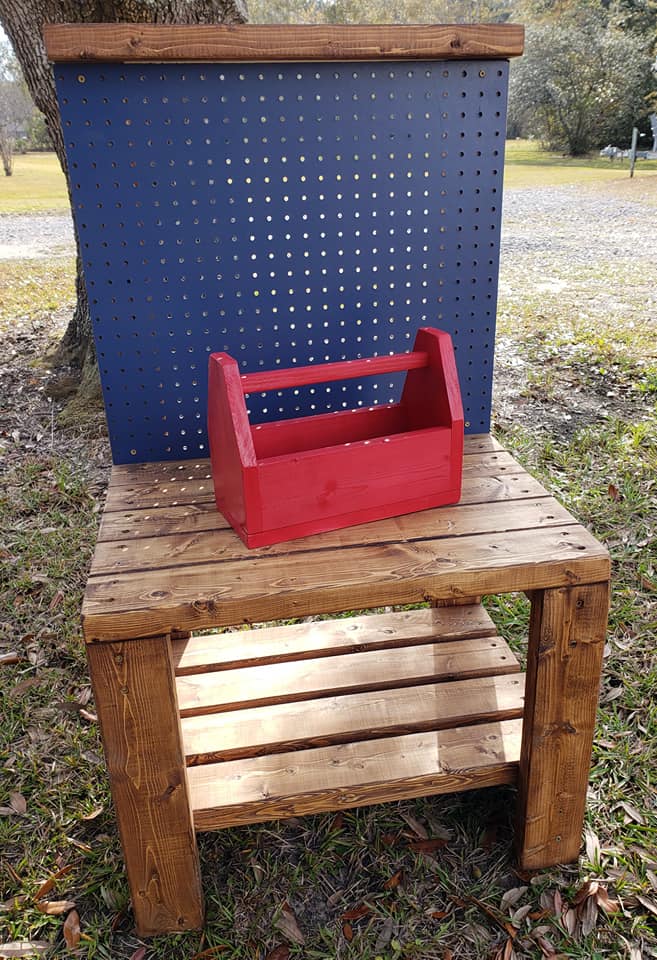
KIDS WORK BENCH
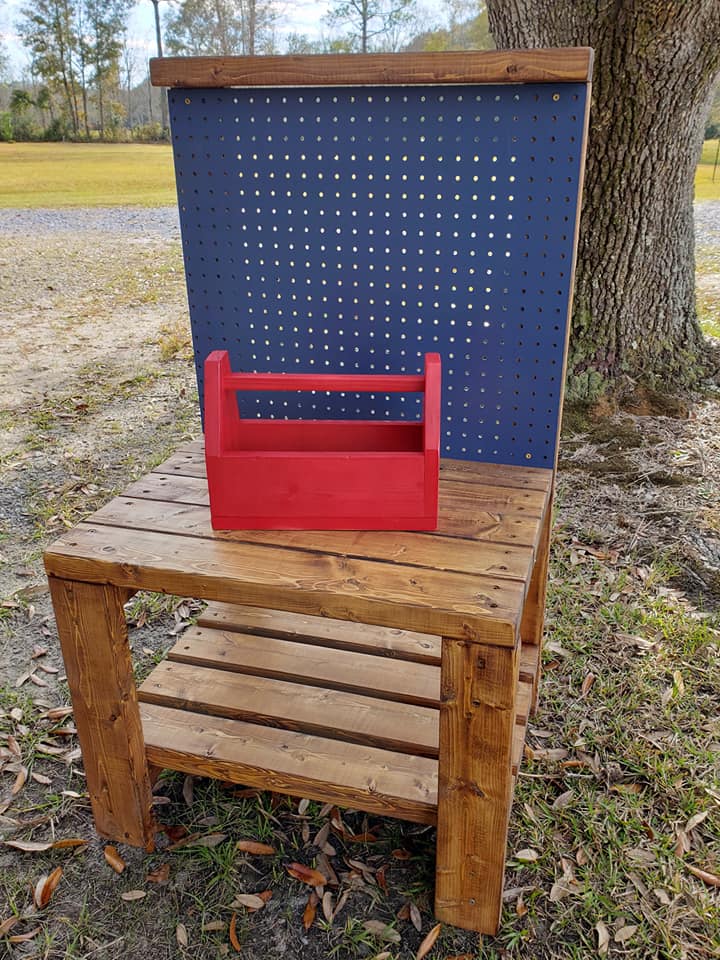
This is a kids work bench that I saw on pinterest. I couldn't find plans anywhere so I just winged it. If anyone knows who I should give credit to, I would be happy to do that.
This is made from pine studs. The dimensions are 24" wide x 42.5" back height, 19.75 bench height, 19" deep. The peg board is 24" x 18".
I used Early American stain with dark wax finish. I painted the peg board with Rustoleum Navy spray paint.
I used a plan from Jen WoodHouse for the red tool box.
Estimated Cost
$50
Estimated Time Investment
Afternoon Project (3-6 Hours)
Finish Used
I used Minwax Early American Stain with Minwax Dark Wax.
Recommended Skill Level
Beginner