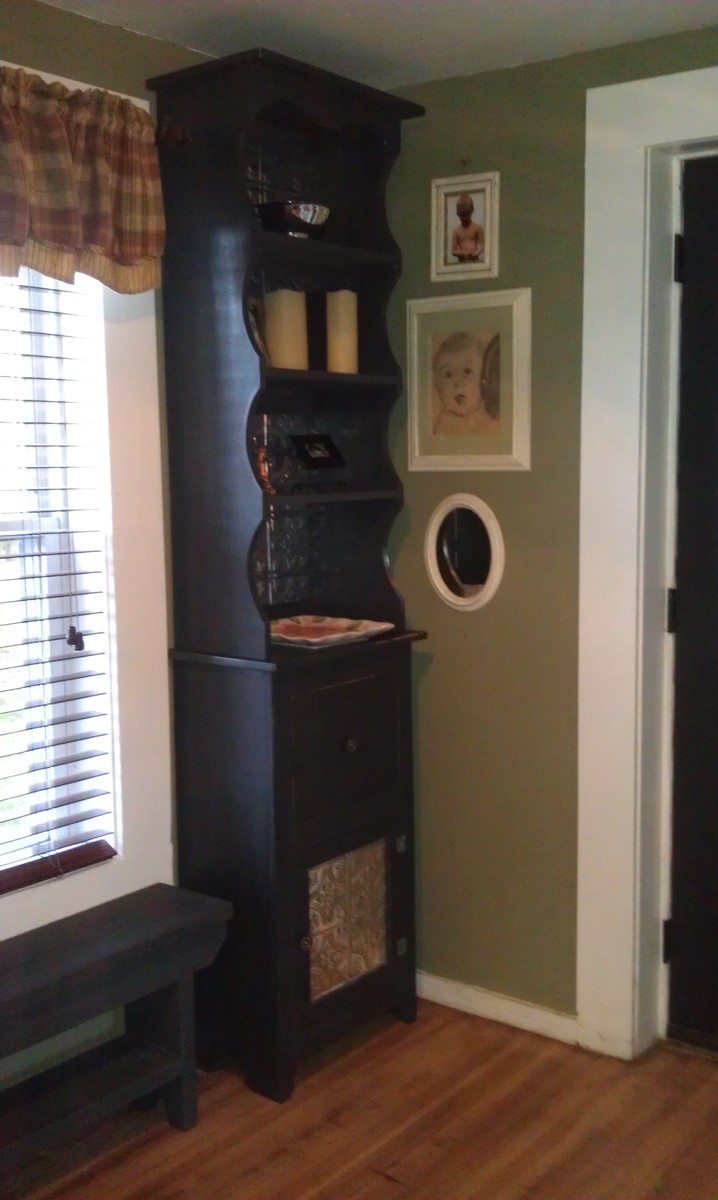
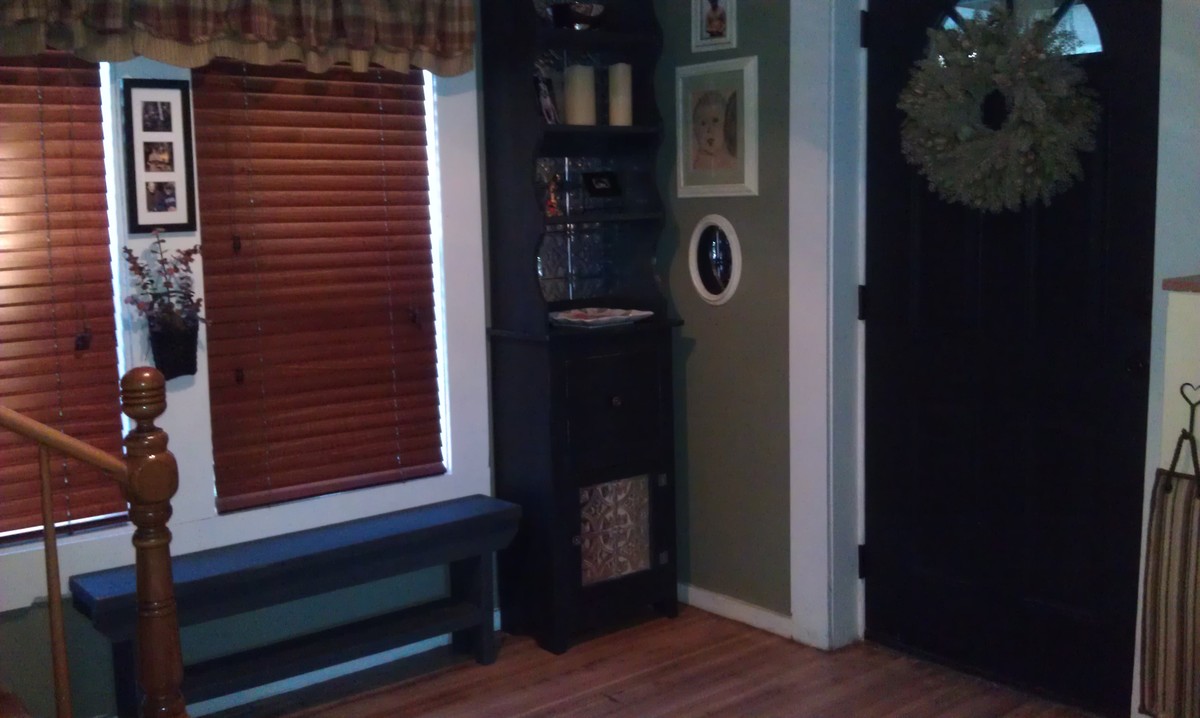
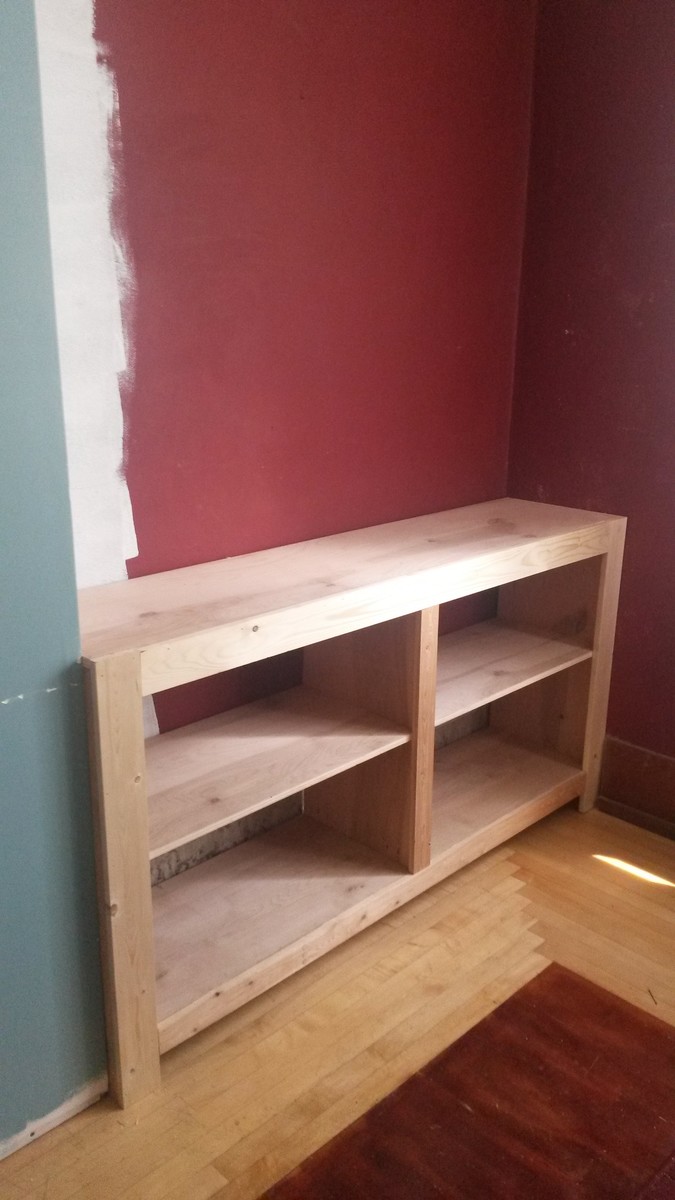
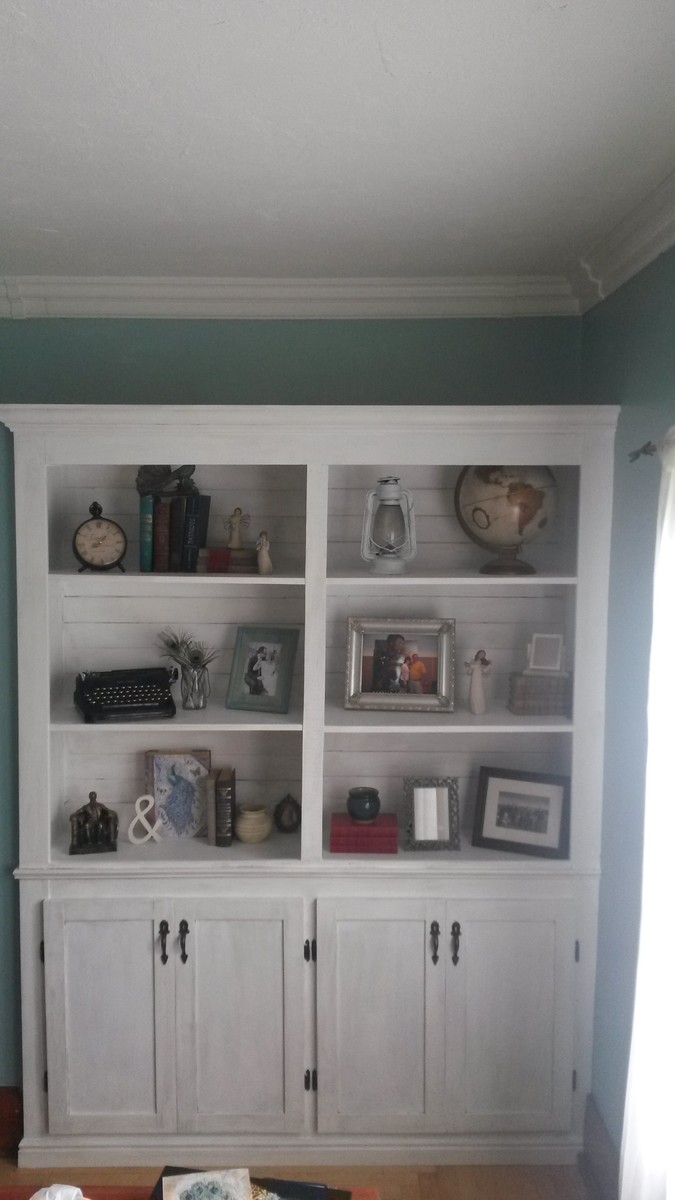
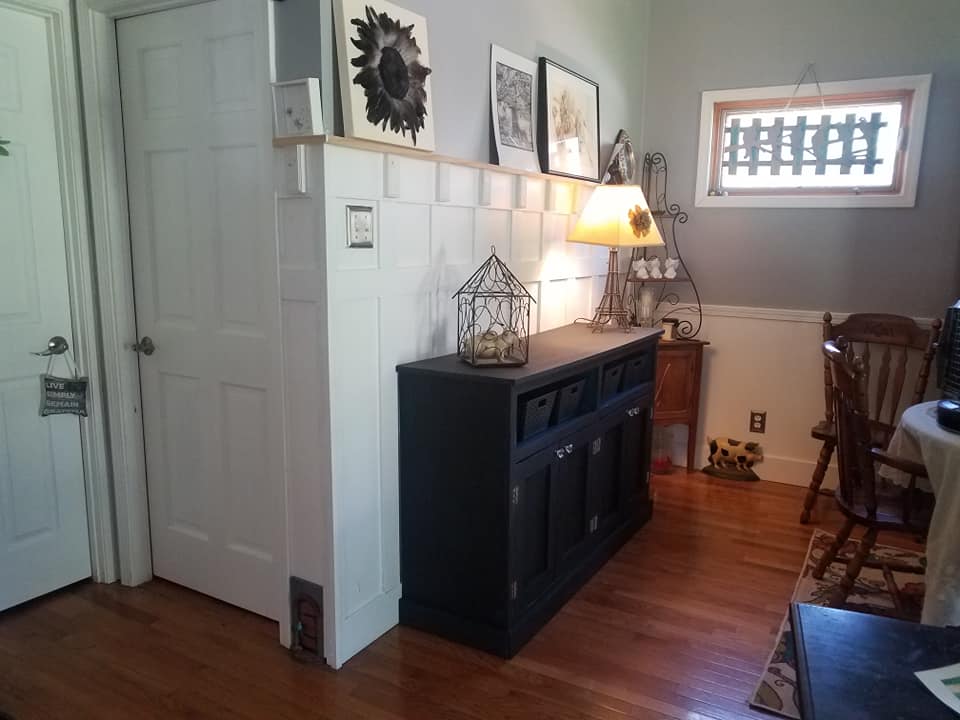
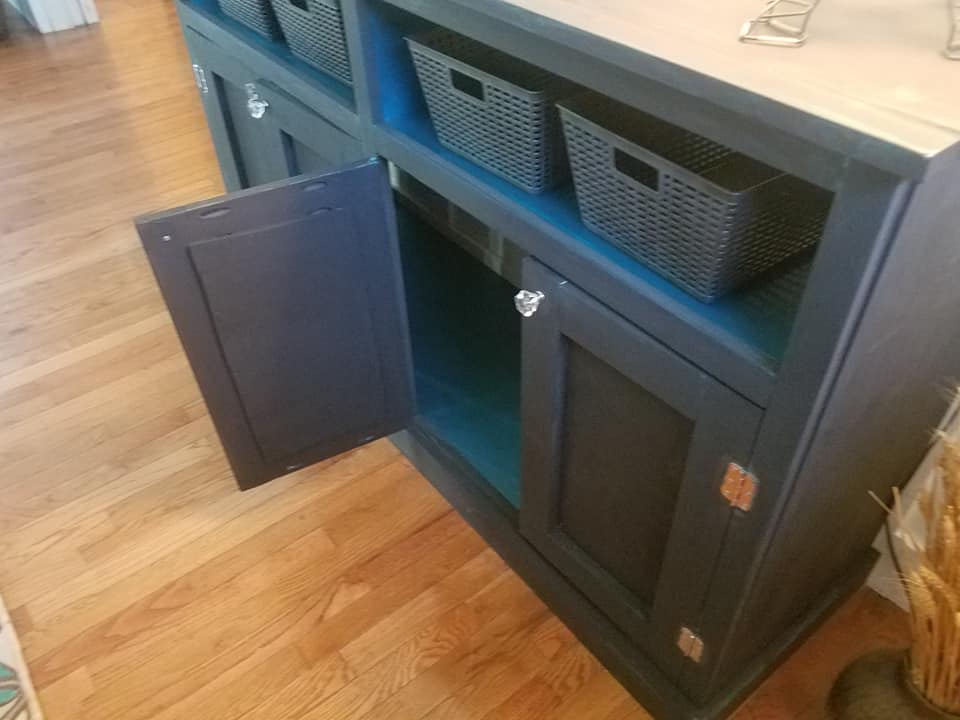
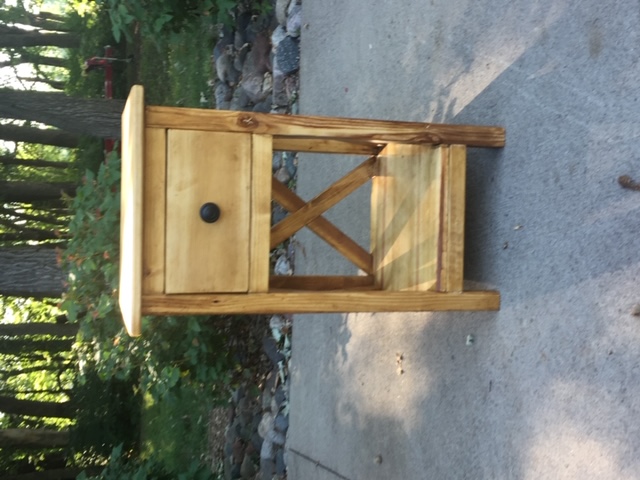
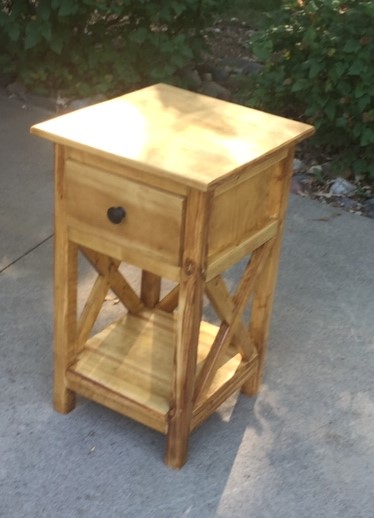
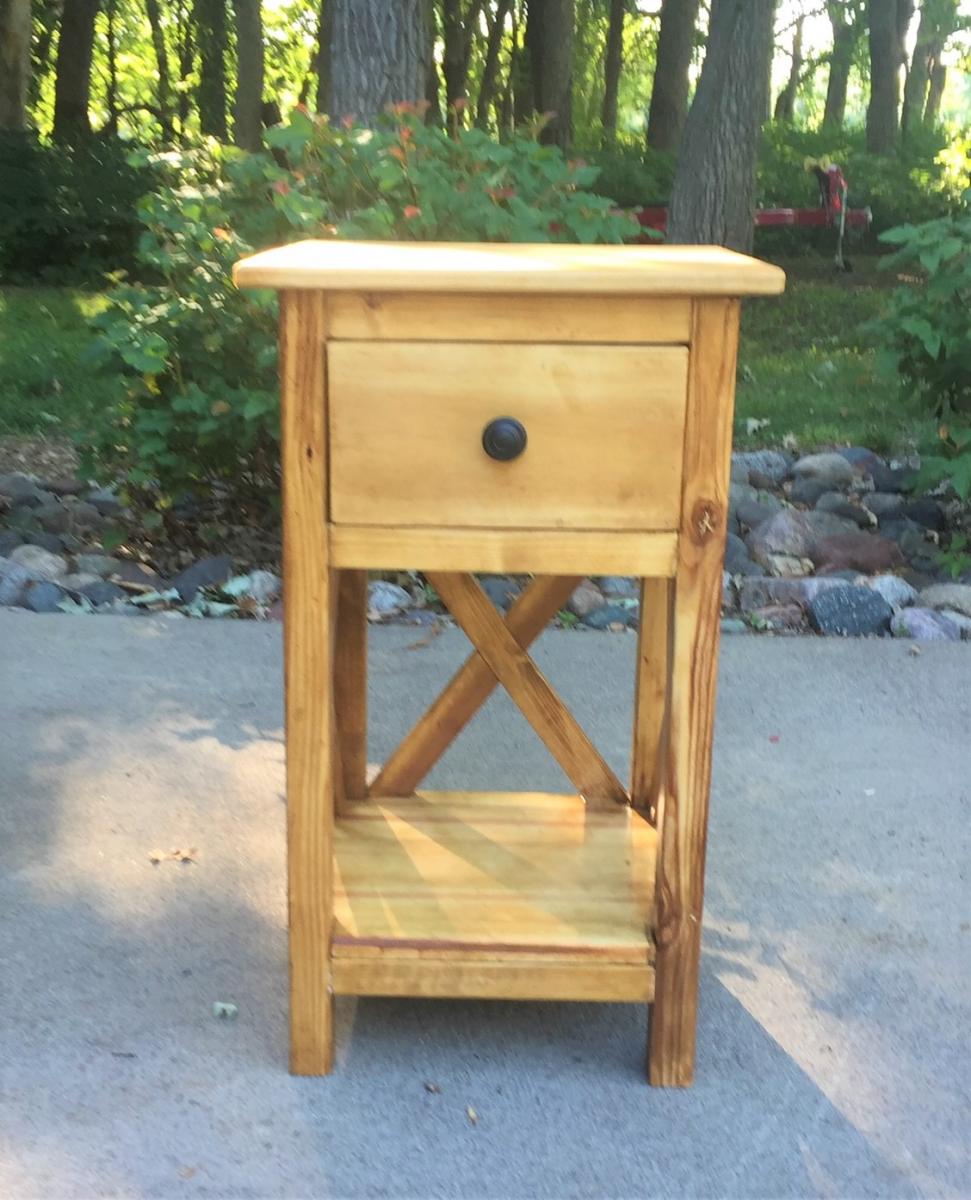
Community Brag Posts

Tall Hutch

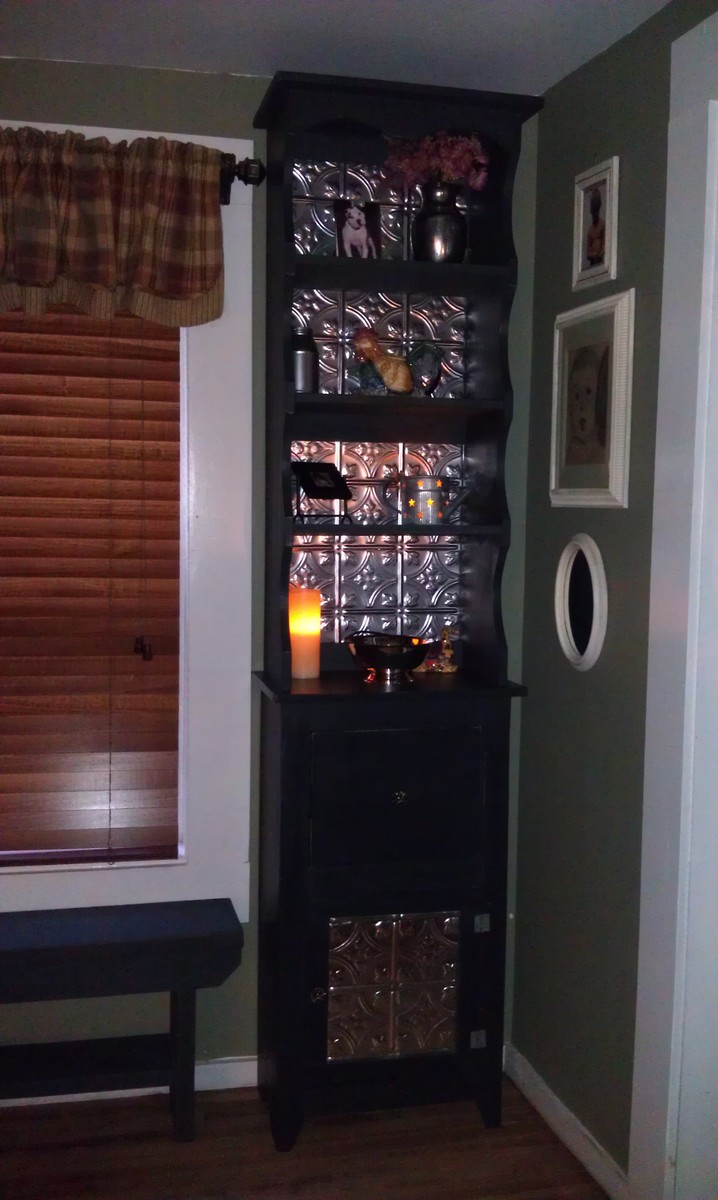
Even though this project is not made from a specific plan, I'm posting it because it is made with the knowledge I gained from reading hundreds of plans from this site. I actually saw this at a shop and loved it, but they wanted almost $400.00 for it! Using all the skills Ana and the rest of you on this blog taught me, I went home and wrote up my own plans. Note the weird giant drawer....custom build for my purse.
The door is wonky, can't seem to get the hang of doors, but I'm proud of it and for my house, this is good enough!!
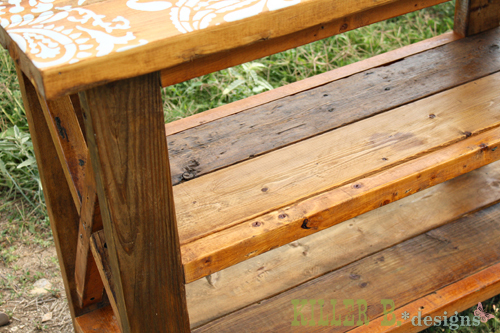
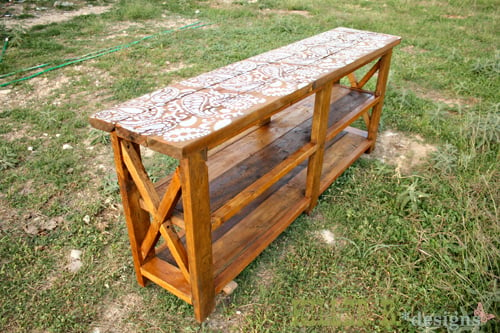
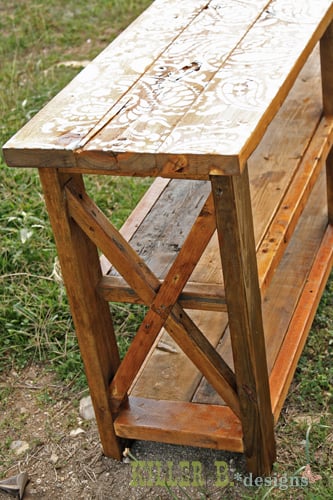
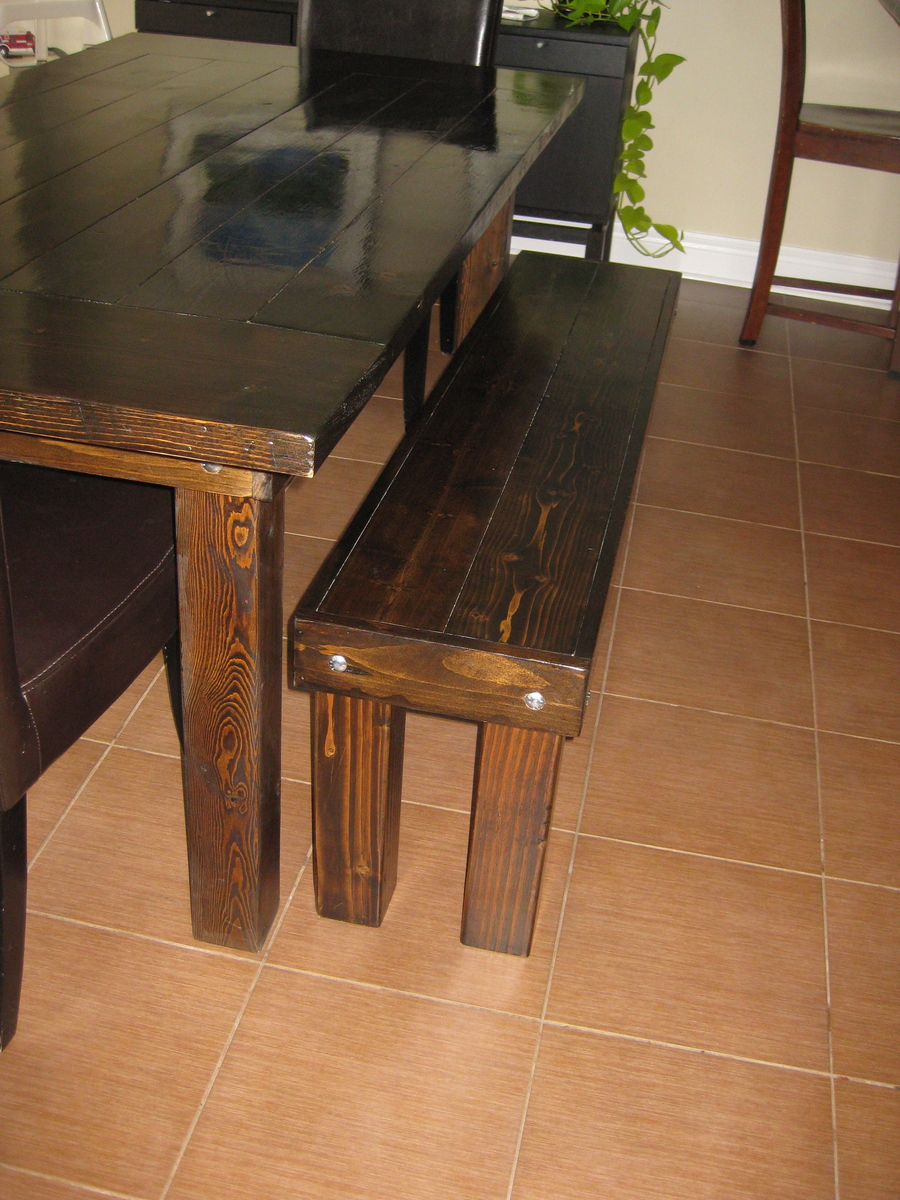
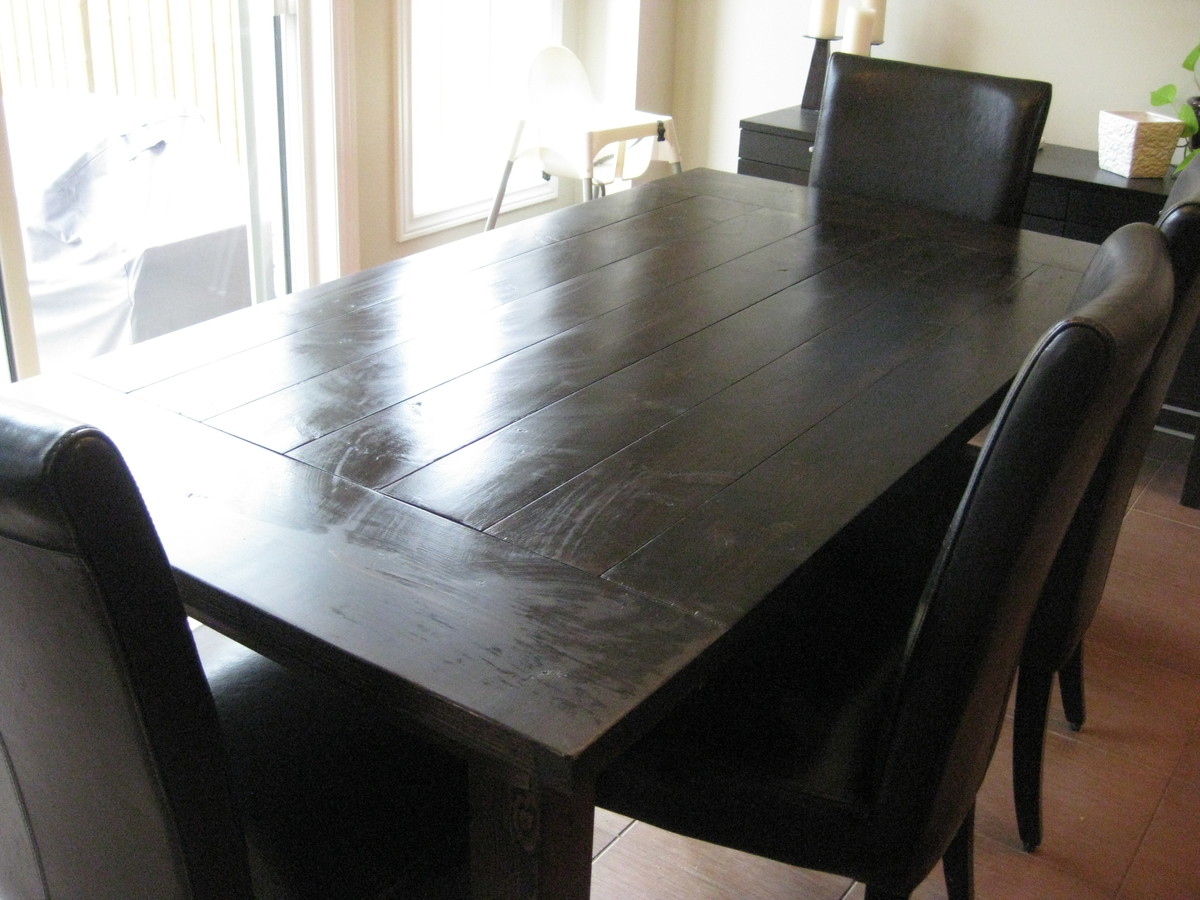
BTW, the farm bench next to it is from Ana's farm bench plans, just used 2xs instead of 1xs and added a shelf.
Thanks Ana for teaching me the skills I needed to build this fun tall hutch!

Estimated Time Investment
Weekend Project (10-20 Hours)
Finish Used
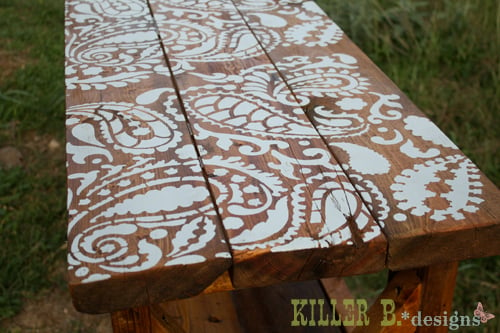
Home made chalk paint.
Recommended Skill Level
Beginner

Comments

BrennaLiz

Tue, 10/23/2012 - 05:10

I am so impressed that you designed and built this all on your own! I love how you used the sheets of metal, I see those in the store and love them but have never had a place to use them. Great work!

Shanty Sideboard and Hutch Built-in

Submitted by tpeacock on Sat, 08/09/2014 - 20:47

I made this a built-in cabinet instead of freestanding. I am so in love with how it turned out. My 15 year old daughter helped me build it, and we couldn't be happier. The total cost for this was around $300. The wood itself was only $200, but my drill died on me, so I had to get a new one. (Poor me, right?)

This new built-in has changed the whole look of my dining room. I just wish I had done this a year ago!

Built from Plan(s)
Estimated Cost
$300.00
Estimated Time Investment
Weekend Project (10-20 Hours)
Finish Used
I used Behr Pure Ultra White for the paint which I then glazed with Valspar Asphaltum glaze from Lowe's. I glazed more heavily in the areas I wanted to stand out, like between the tongue and groove planks on the back of the upper cabinet.
Recommended Skill Level
Intermediate

vegetable produce bin

Submitted by Anonymous (not verified) on Fri, 11/25/2016 - 00:54

The plans seemed ok for me. I used all scrap lumber I had laying around. I bought a kreg jig in the middle of this project, after watching one of Ana's vidoes's about pocket holes. That is one reason why I built the 3 doors all twice, but also swapped out the top piece of the bin 3x's before I finally settled. In other words, I really struggled with this, but I was so excited to perservere and have this completed!  

I haven't wanted to make one of these for a long time. Thank you so much for the site and all the plans! I love all your work and your style. 

Built from Plan(s)
Estimated Cost
used all scrap wood, bought hinged so maybe $10
Estimated Time Investment
Weekend Project (10-20 Hours)
Finish Used
chalk paint-seafoam and chocolate
Recommended Skill Level
Beginner

Reclaimed Stenciled Rustic X Console

I've been dying to build this Rustic X Console since Ana posted the plans. I raided my dad's stash of lumber in his barn (does that make it "barn wood"?) and built it out of 2x4's and 2x6's. I subbed the 1x12 for two 2x6's and love the planked look on the shelves. I also ripped the 2x2's from 2x4's on my table saw. After sanding and staining, I decided it needed a little something extra. So I stenciled it! I used a grey sample Valspar from Lowes and used a small roller over the stencil. It was so easy! Afterwards I coated the piece in furniture wax, though I plan to coat the top with polyurethane. Latex paint over oil-based stain doesn't stick very well, so an oil topcoat will help seal it on. I love this table and can't wait to fill it up with goodies!

Built from Plan(s)
Estimated Cost
free, from scraps
Estimated Time Investment
Weekend Project (10-20 Hours)
Finish Used
one coat Minwax golden oak, grey latex paint for stencil, topcoat of wax on base and polyurethane on top
Recommended Skill Level
Intermediate

Comments

dananryan

Wed, 10/24/2012 - 18:52

What a great idea! I would have never thought to stencil a rustic piece of furniture. I totally have to steal that idea if you don't mind...

dananryan

Wed, 10/24/2012 - 18:52

What a great idea! I would have never thought to stencil a rustic piece of furniture. I totally have to steal that idea if you don't mind...

Walnut Dining Table

This table was a lot of fun to make it wasn't too hard. The hardest part was cutting the dados. If you have a table saw, it's not as hard. I hope you watch the video of how it was made.
http://youtu.be/ymz3Zim79Lo?list=PLRGcaQeW9svX5lRtTc9w2LrOzEFoez3j0

Estimated Time Investment
Weekend Project (10-20 Hours)
Finish Used
Shellac and Polyurethane
Recommended Skill Level
Intermediate

Castle bed! :)

Submitted by Anonymous (not verified) on Mon, 11/28/2016 - 18:44

Great plans!!  We modified just a little. Thank you!

Estimated Cost
$300
Estimated Time Investment
Weekend Project (10-20 Hours)
Recommended Skill Level
Beginner

Doll Crib and High Chair, Modified

Submitted by Linda7 on Mon, 10/29/2012 - 13:17

This is actually the third doll crib and high chair set that I've built for a grandniece. It is inspired by the one Gina from Lady Goats built. She just used 1 x 2's for all of the rails. And since I am trying to make each bed a little different, this was a great option. Again, I used the vintage lamb theme on the crib and high chair from my first two sets.

Built from Plan(s)
Estimated Cost
About $20 in lumber for the set for two. I already had the paint and pocket hole screws.
Estimated Time Investment
Day Project (6-9 Hours)
Finish Used
I used Kilz primer, then Olympia brand bright white semi-gloss interior wall paint. I spray painted them with my Graco sprayer, two coats. To protect the decals, I used several thin coats of Modge Podge.
Recommended Skill Level
Beginner

Solar Birdhouse

Submitted by mtairymd on Sun, 08/17/2014 - 13:40

Simple/Fun project

Build Instructions:
http://www.instructables.com/id/Solar-Birdhouse/

Video of the build:
https://www.youtube.com/watch?v=SU5ffvweSjQ

Estimated Time Investment
Afternoon Project (3-6 Hours)
Finish Used
Stain
Recommended Skill Level
Beginner

Comments

Entry Way Console Turned Bar/Buffet

Submitted by 3rdpigkid on Mon, 08/17/2020 - 15:23

As the news of COVID was getting scarier and scarier in early March, I knew that I would need something to do to keep myself busy since I live alone and wasn't going to be able to get out and do anything. I had been wanting something different in my dining area so I headed to the local Home Depot and picked up the supplies. I learned a lot on this build as it was filled with many firsts but mainly just building something like this by myself! My husband built things for us on occasion over the years and I learned a few things from watching him but I had never done it myself. He passed away 5 years ago (too young, just before he would have turned 50) and I needed a confidences booster. As I built it, I shared my accomplishments on Facebook (also building my confidence) and now it's pretty much done - just a couple things left: put a sealer on it to protect it, find the right baskets and attach the back. I have had trouble finding the right baskets and made do with painted, plastic baskets from the local DollarTree. I wanted to wait until I was done sealing it before I attached the back. Anyway, I could not be more proud of myself - although my sister-in-law said I'd make a great husband some day LOL! Thank you Ana for sharing all your know-how and helping boost my confidence! I can't wait to try the next project!

Comments

jdmartin

Thu, 02/11/2021 - 14:38

Is there a plan that you used? Or that you based it off of? What are the measurements? I want to build something that looks pretty much the same for my house!

King size Farmhouse bed

We love our farmhouse bed! Thanks Ana! We made a few modifications. We wanted the legs to look a tiny bit more substantial, so we used 1x6 boards for the headboard and footboard. We made our 4x4 legs longer and placed them on the outside to make it a poster bed. I also wanted the end caps on my legs. I glued and nailed 1x6 scraps to 2x6 scraps and then cut a square to size at a 15 degree angle with my miter saw.

Estimated Time Investment
Weekend Project (10-20 Hours)
Finish Used
Early American stain and satin poly
Recommended Skill Level
Beginner

Comments

Janell Gardner (not verified)

Fri, 11/02/2012 - 18:59

This bed is ABSOLUTELY beautiful! I am going to make it, why not, right?! Anyway, the ridiculously expensive mattress we purchased (per Dr's. orders) is a queen & reasonably new. I am wondering if you have a plan for this bed in that size? That would be perfect. I will be anxiously waiting for your reply. Thanks so much & keep up the BEAUTIFUL WORK, You have found your gift & have put it to good use thus far! WTG. Make your weekend a fabulous one!

Take care,

JG

In reply to by Janell Gardner (not verified)

little stuf

Mon, 11/05/2012 - 08:32

I don't have the plans for the queen size version. I would suggest using Ana's plans for the queen size farmhouse bed. Then, instead of your 4x4s being part of the headboard and footboard, attach them on the outside. In other words, the top panels will be cut to fit the headboard and footboard minus the legs. My 4x4 legs are 34" on the footboard and 60" on the headboard. I also opted out for the top 2x6. I hope I didn't confuse you too much. Please don't hesitate if you have more questions.
btw...thank you so much for your compliments!

Courtlh

Mon, 03/18/2013 - 21:25

I noticed your side table is the same color/style as the bed did you use this site for plans on that also? I LOVE your modifications for this bed!!

CaraRene13

Wed, 03/27/2013 - 22:56

I love the modifications you made.This bed is absolutely beautiful. It was my inspiration to build my own...hopefully I'll get some pix posted soon...

Kendal Dresser

My cousin is having a baby boy and needed a dresser for the little guy. I made this for her as a shower present. I love that it was made to fit her needs and that it is made out of solid wood. Not at all like the cheaply made dressers costing much, much more in the retail stores.
The blog from Katie and John from Sew Woodsy was not only helpful but very cute. Kudos to Katie for attempting a large project while prego. It couldn't have been easy.
The only change I made other than the color was covering the space under the dresser. She didn't want to have to collect toys from underneath the dresser or clean dust.
The plans were awesome and I would recommend reading the blog from Sew Woodsy. Their comments were helpful and so were the pictures.

Built from Plan(s)
Estimated Cost
300.00
Estimated Time Investment
Weekend Project (10-20 Hours)
Finish Used
ZAR Wood Stain in Moorish Teak and ZAR clear stain finish
Recommended Skill Level
Intermediate

Comments

DIY everything

Wed, 08/20/2014 - 20:49

My cousin likes dark stain but after I finished the dresser I became a fan of the color too. I'm thinking of making myself one since it went together so well.

dhendy13

Sat, 01/03/2015 - 19:38

Congrats, your piece is a beauty. Please, can you tell me what type of wood you used for the drawer fronts.
They seem so clear. AKA Knot Free. I have done a work up on material costs and have not come close to the estimated 300.00. So I was thinking that maybe you splurged on "Clear" Pine boards for the front facing elements. Thanks in advance for your answers.... Happy New Year!

tylerrencher

Tue, 01/06/2015 - 12:44

$300 is the number I'm coming up with for #2 or better S4S pine boards plus stain and clear coat. #2 graded pine is definitely not clear. I'd like to know what kind of wood you planning to use and where you are getting it because this is the cheapest I can find in the Pacific Northwest.

DIY everything

Sun, 07/12/2015 - 20:00

I've checked out Frost Hardwood and I love their products.  They have clear wood that they can mill down to size but it is very pricey.  I'm saving up for a really nice dresser but until then I'm gonna stick to the birch plywood at home depot and birch boards that I get from my local specialized lumber houses.  Thank you for your comment and I hope your turns out to your liking.  I think what really makes this dresser is the stain and finish I used.  That was recommended by a professional painter friend who does this kind of thing everyday.  The info for that is on my post. 

DIY everything

Sun, 07/12/2015 - 19:54

I'm so sorry I didn't know there were questions on this post.  The dresser did cost me a little over $300.00.  The whole thing was made out of birch which I got at a local lumber house that specializes in furniture grade wood.  This probably doesn't help you anymore since I'm sure you've already made your dresser. 

john2090073

Fri, 09/11/2015 - 09:59

This looks really nice. Could you please let me know what wood you used for the frame and the outside of the dresser? 

Built-In Bed with Trundle Drawers

Submitted by Anonymous (not verified) on Tue, 12/06/2016 - 18:05

My oldest son's room is only 97 square feet. We needed to add the maximum amount of storage in the small, awkwardly-shaped room. My husband and I decided to make a built-in bed using a couple of stock cabinets to flank the bed. Using Ana White's plans, we made 3 rolling trundle drawers to go underneath. 

Estimated Cost
Cost for the trundle drawers, themselves, with the hardware was $14.00 per drawer. The total cost for the built-in bed, trundle drawers, and 2 cabinets that flank the bed was $480.
Estimated Time Investment
Weekend Project (10-20 Hours)
Finish Used
Painted
Recommended Skill Level
Intermediate

Comments

MIni Rustic

Submitted by project101 on Wed, 08/19/2020 - 19:37

This was a fun project.
took me total 7 days and spent 1-2 hours each day.
It's perfect size for our room
I love Ana's plans. simple and easy to follow. Thanks Ana for all the inspiration.
I used Varathane golden oak stain and finished it with polyurethane

Built from Plan(s)
Finish Used
golden oak stain
polyurethane
Recommended Skill Level
Beginner

Bench

Submitted by Shellipsm on Sun, 11/04/2012 - 19:22

I chose to make the simple bench 2" shorter, and upholster it, using 4" foam and fabric.

Finish Used
black paint
Recommended Skill Level
Intermediate

Comments

Ana-White's Modern Park Bench

I told my husband that I wanted to try a project since he was getting to have all the fun building around the farm. So we bought the materials and started this bench. It was so easy. The only things he helped me with were some of the measurements and to speed things along :) some of the cutting. The project took us about 2 days. I had some paint I was going to use on another project so I just used it. I have the bench under some trees by my grandkids' swing. Thank you Ana for all the plans you graciously share. I have made a point to visit your sponsors' websites and actually visit their stores when I am able. Go for it ladies. You can do it!!!

Estimated Cost
$72
Estimated Time Investment
Day Project (6-9 Hours)
Finish Used
We used Kilz first since I only had a pint of each color and I wanted to be sure I had enough. We still used 2 coats of each color. We bought the Valspar paint at Lowes which by the way, has the worst website ever.
Recommended Skill Level
Intermediate

Rustic X Console with a twist

Submitted by Rifka on Sat, 12/10/2016 - 17:23

I just love this plan of the rustic X Console.  You can create so meny versions from this one plan.

This one I made is 42" long, with two X in the back.  The finish, is vinger and steal wool with a dash of black tea.

Thank you, 

Rebecca

Built from Plan(s)
Estimated Cost
$30.00
Estimated Time Investment
Weekend Project (10-20 Hours)
Finish Used
Vinger and fine steal wool
Recommended Skill Level
Beginner

Truss Table Bench

Submitted by Joella C on Sun, 08/23/2020 - 11:40

To go along with the 2 outdoor tables for our COVID-19 birthday celebration “ all together but socially distant” party for my hubby and his twin. I used the Happier Homemaker Bench plan x 3, for a bench in between the tables to create more seating with social distancing....this is the 2nd plan of Ana’s I used after the Truss Table...finished with the same outdoor deck stain and poly! I am so new to this....I’m a nurse never been around power tools but it was I,Portland for me to create a happy birthday for my husband and his twin during this pandemic!! Thank you Ana for making this possible!

Estimated Cost
$30
Estimated Time Investment
Afternoon Project (3-6 Hours)

Farmhouse Table with Bench

Submitted by Mdcary on Tue, 11/06/2012 - 12:11

This was my first project inspired by Pottery Barn and while shopping in a local furniture store we realized the cost to have something very similar would cost $1500-$2000. This table was cut and prepped in my garage and then transported to my daughters house in my car and assembled and finished there. The bench is constructed from left over boards. I choose not to use 2X4 legs but rather opted for 4x4's. The length was shortened to 5' for a cross bar was not neccessary. I used carriage bolts to attach the legs to the shirt in case they ever needed to be disassembled. The top is not glued on, only PH screws used. This has been a very satisfying first project, thanks Ana for showing me the way to having lovely homemade furniture that really impresses, is very well made and for a fraction of the cost.

Estimated Cost
$150 includes bench
Estimated Time Investment
Weekend Project (10-20 Hours)
Finish Used
minwax stain and polycoat.
Recommended Skill Level
Beginner

Comments

Jake

Fri, 11/09/2012 - 19:11

You did a wonderful job on the table and bench. I like the idea of using the carriage bolts and not gluing on the top. I have done the same for a couple of projects especially if you need to take a table apart or if the top should need repair.

Coffee Table

Submitted by naomi on Fri, 08/29/2014 - 03:06

My eldest son and his girlfriend just recently moved into their own home together and seeing as I like to build things I decided that as a house warming gift I would build them something.

I decided that a coffee table would be perfect!

I like the character in old timber instead of new timber so I went out and gathered some pallets and I got to work.

I wanted to use hairpin legs for the coffee table but soon discovered that they are crazy expensive to buy. Solution: make them myself. So I purchased a cheap welder, steel rods and some L brackets all to make the hairpin legs.

When staining the table top I used the same stain colour for the entire top but I used a extra coats to get different colour depths.

Estimated Time Investment
Weekend Project (10-20 Hours)
Recommended Skill Level
Beginner

Comments

naomi

Fri, 08/29/2014 - 07:34

Thank you. They do love it. The hairpin legs worked great and if I take out the cost of the welder the legs worked out really cheap - less than $30 for four legs.