Community Brag Posts
Kid storage chairs
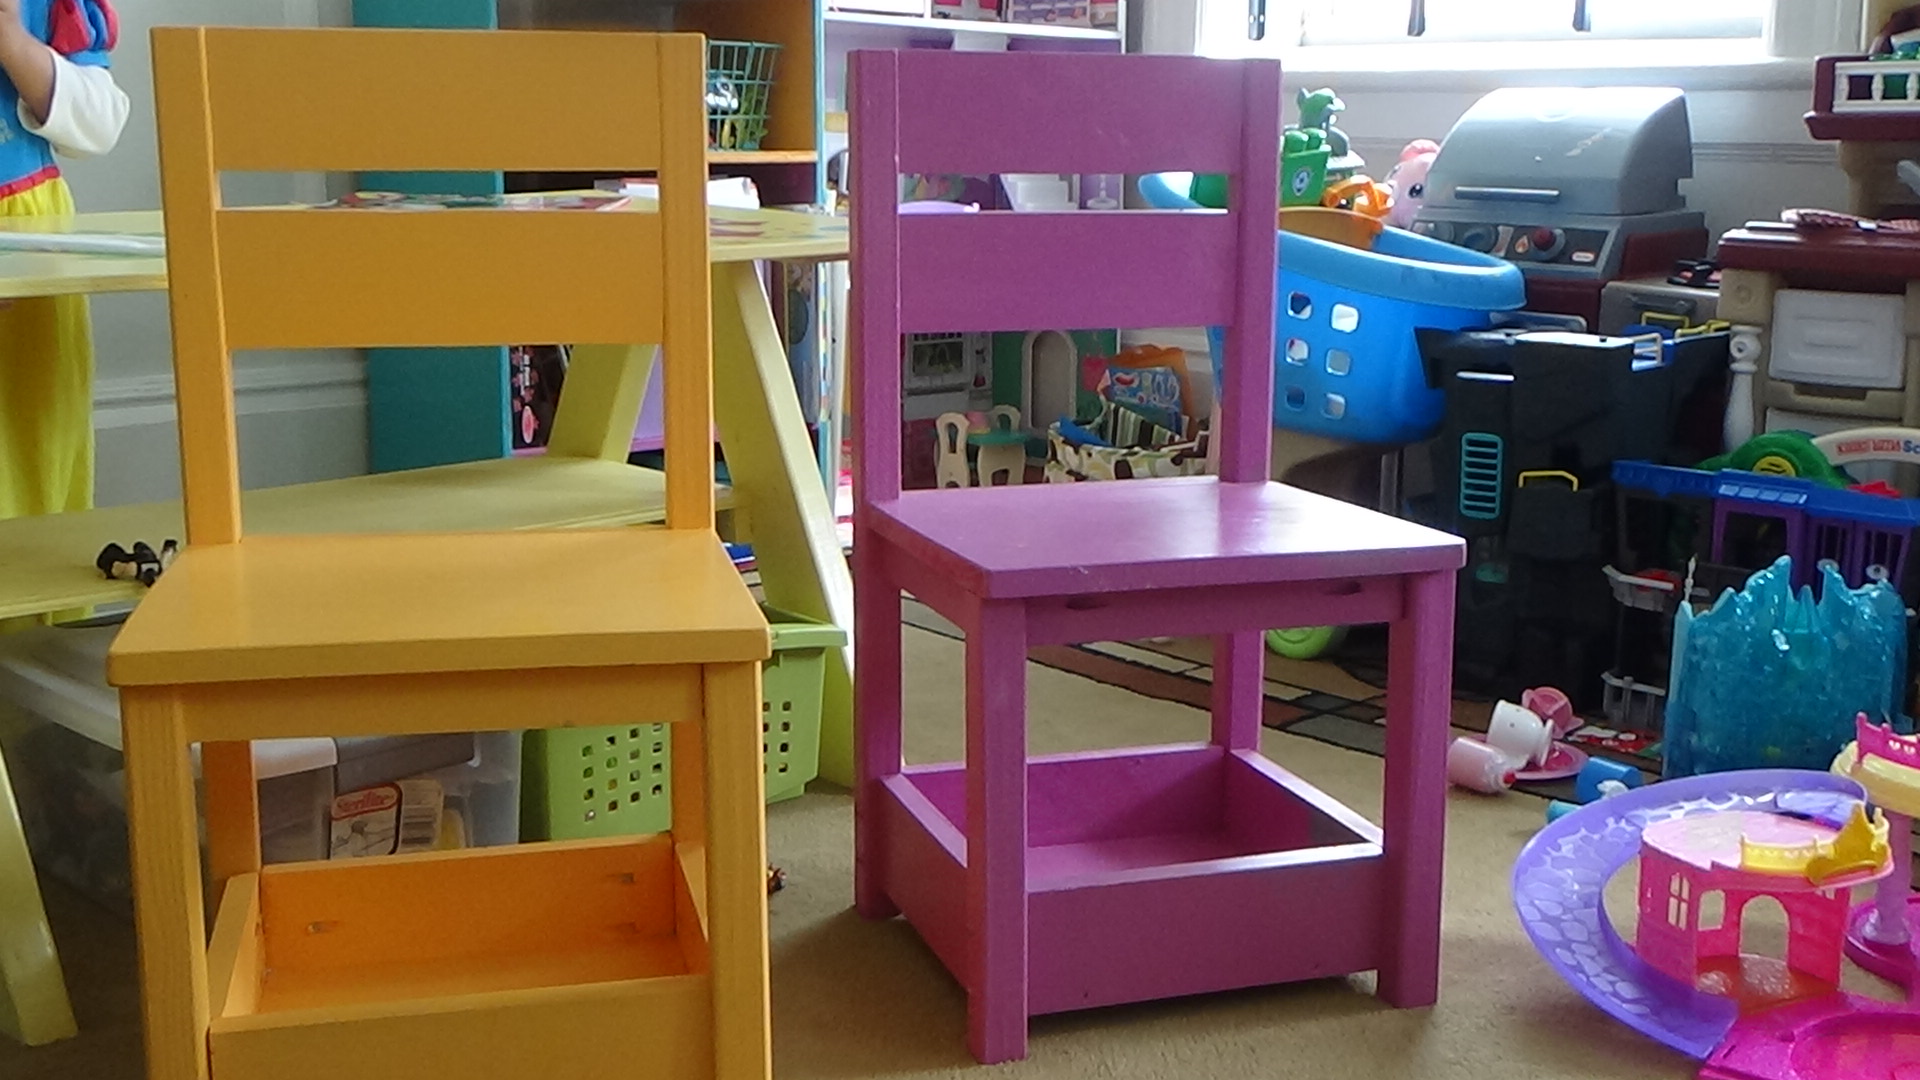
I followed Anna White's plan to build this chairs. My kids love them. Thanks for the free plan. It took me a while to finished it because they were my first project.
Built from Plan(s)
Estimated Cost
about 30 to 40 for two chairs.
Estimated Time Investment
Weekend Project (10-20 Hours)
Finish Used
simi gross paint self primer.
Recommended Skill Level
Beginner
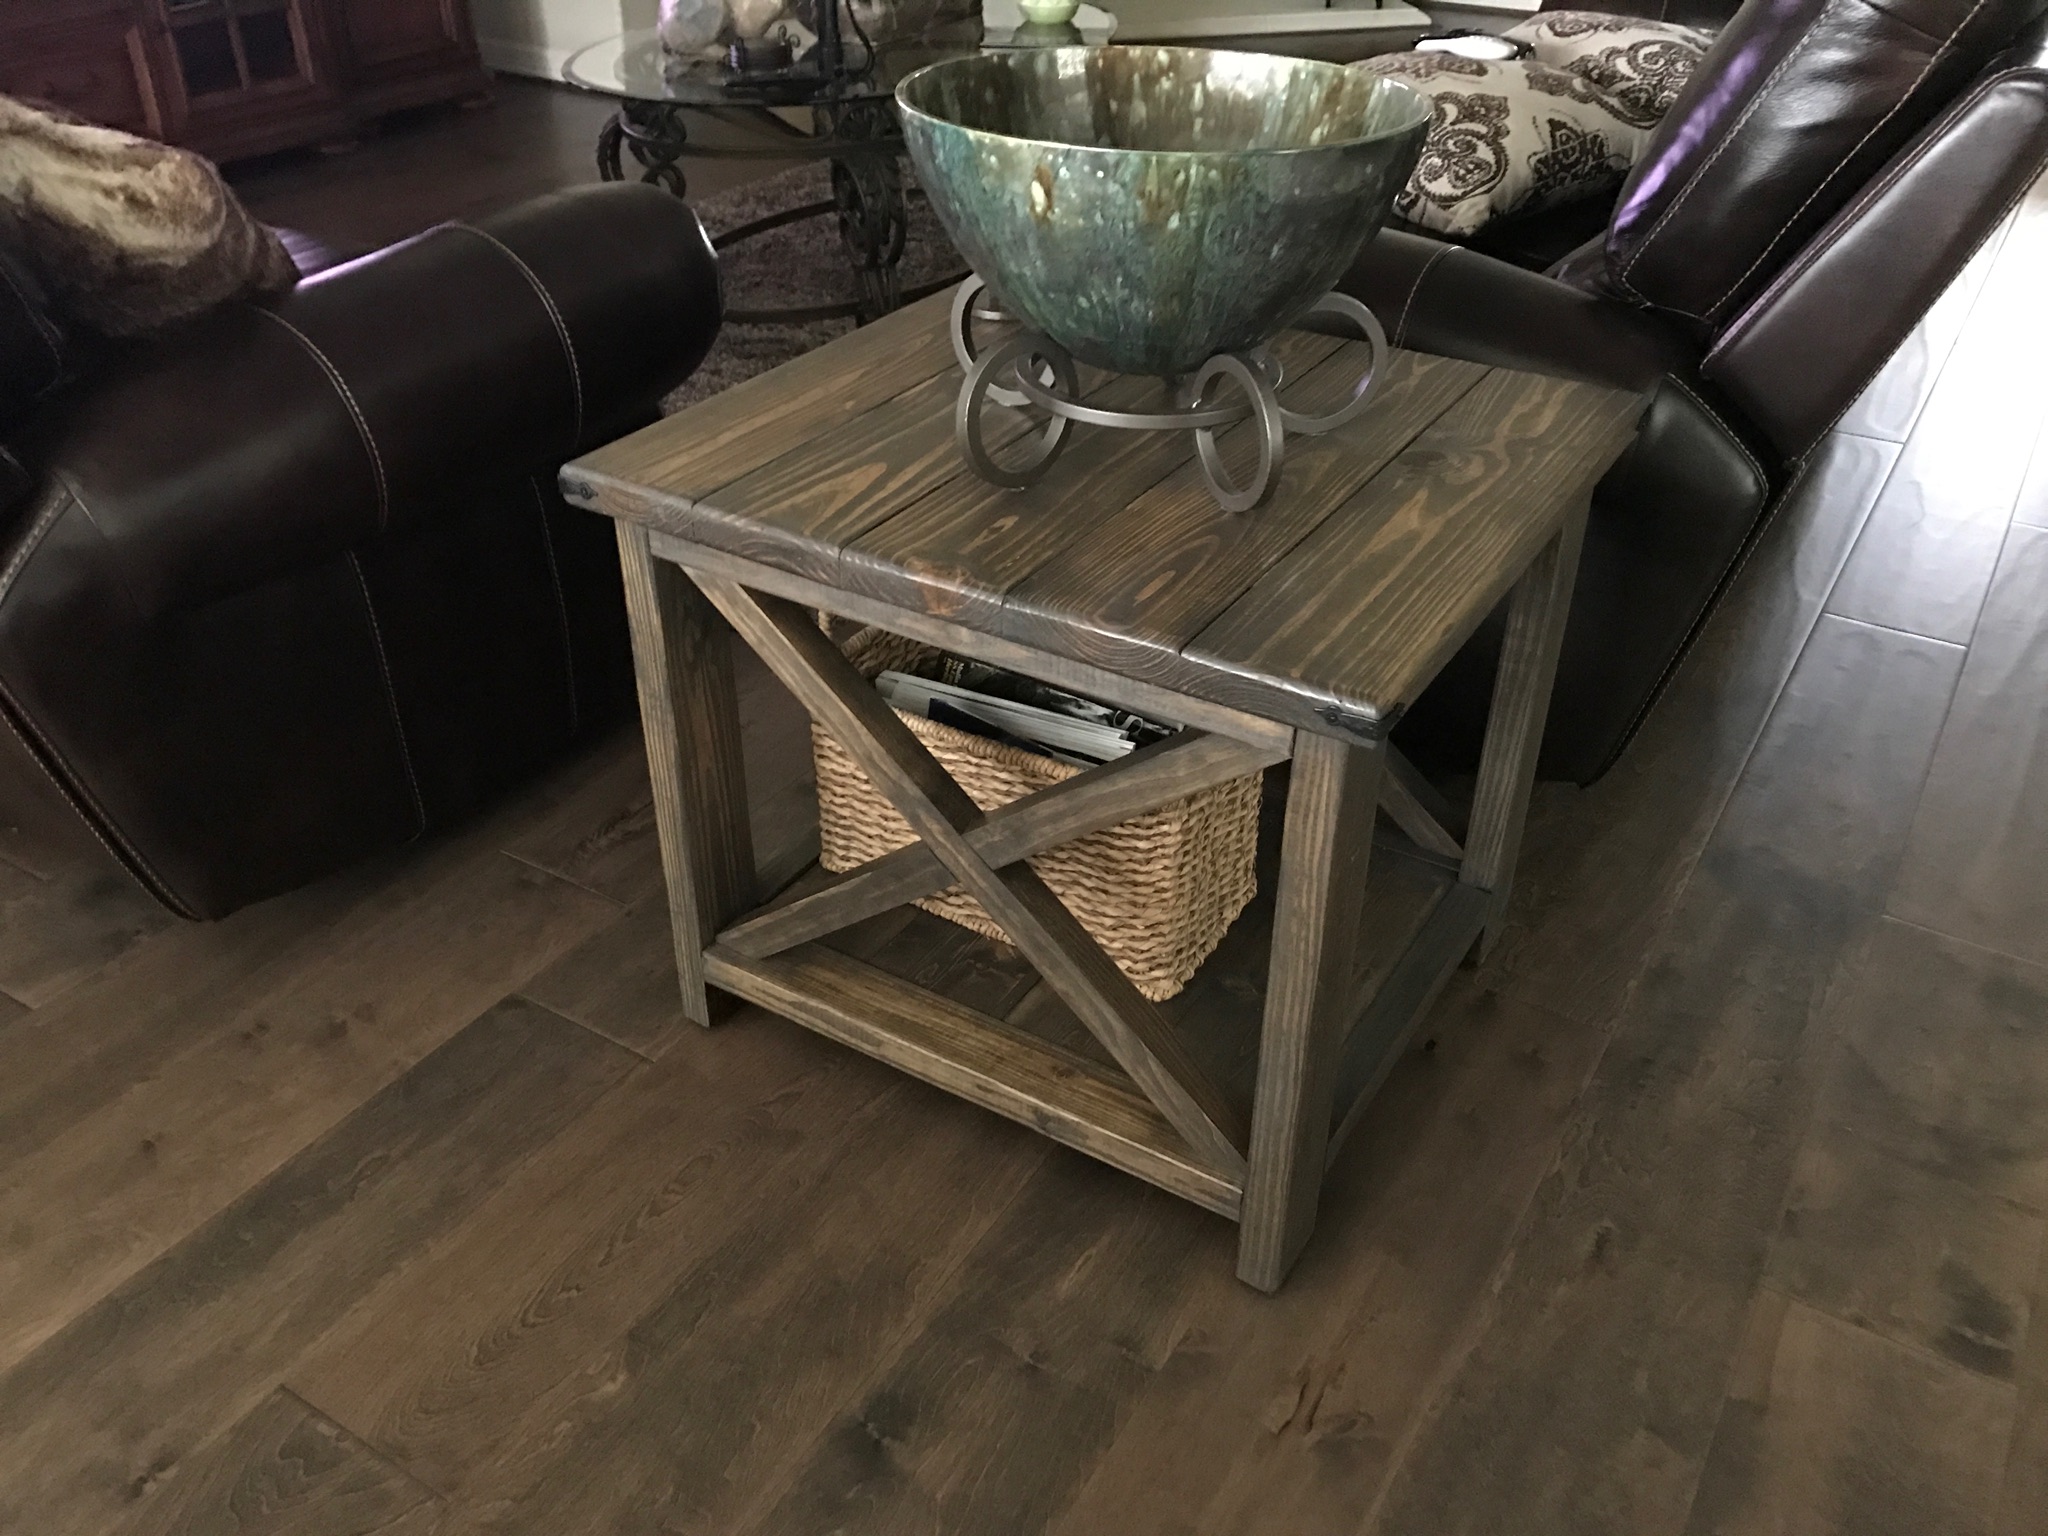
Pot holder
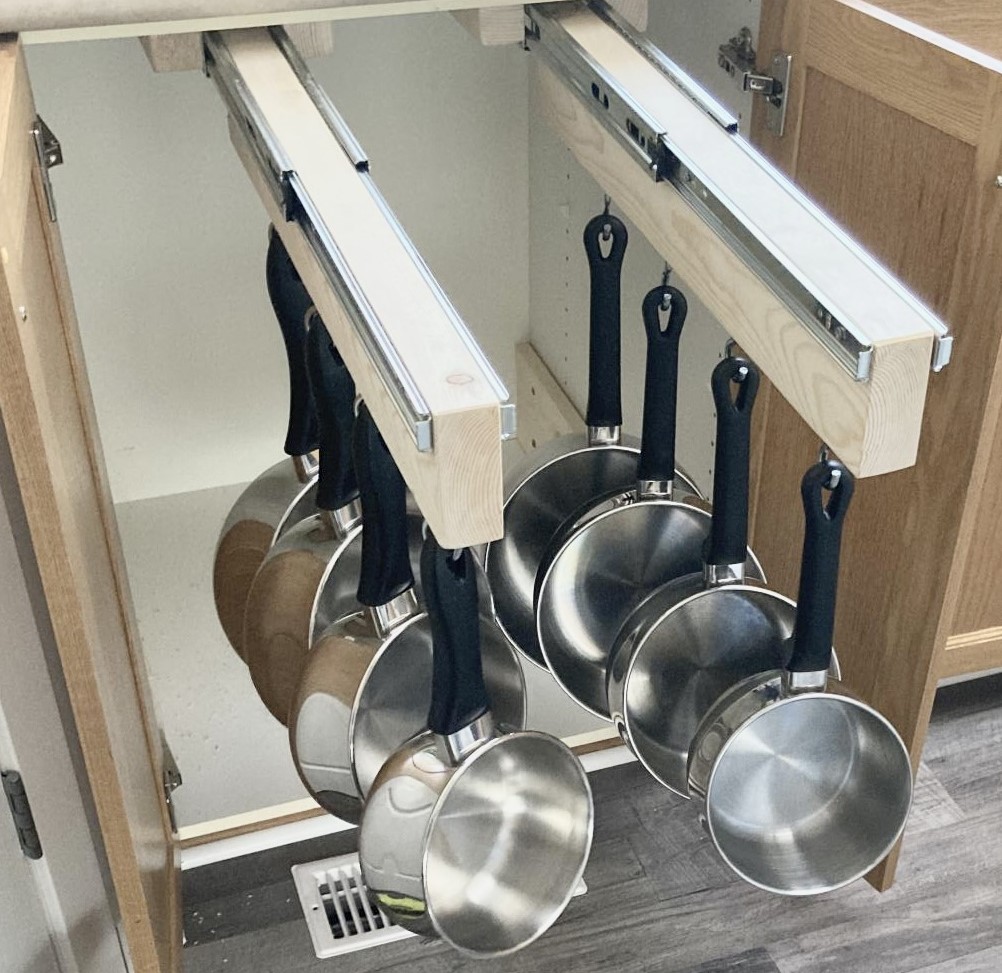
Working off your idea. Added another holder. There will be a bottom drawer for bigger stuff.
Built from Plan(s)
Finish Used
Will be painted
Recommended Skill Level
Starter Project
Farmhouse Dining Table
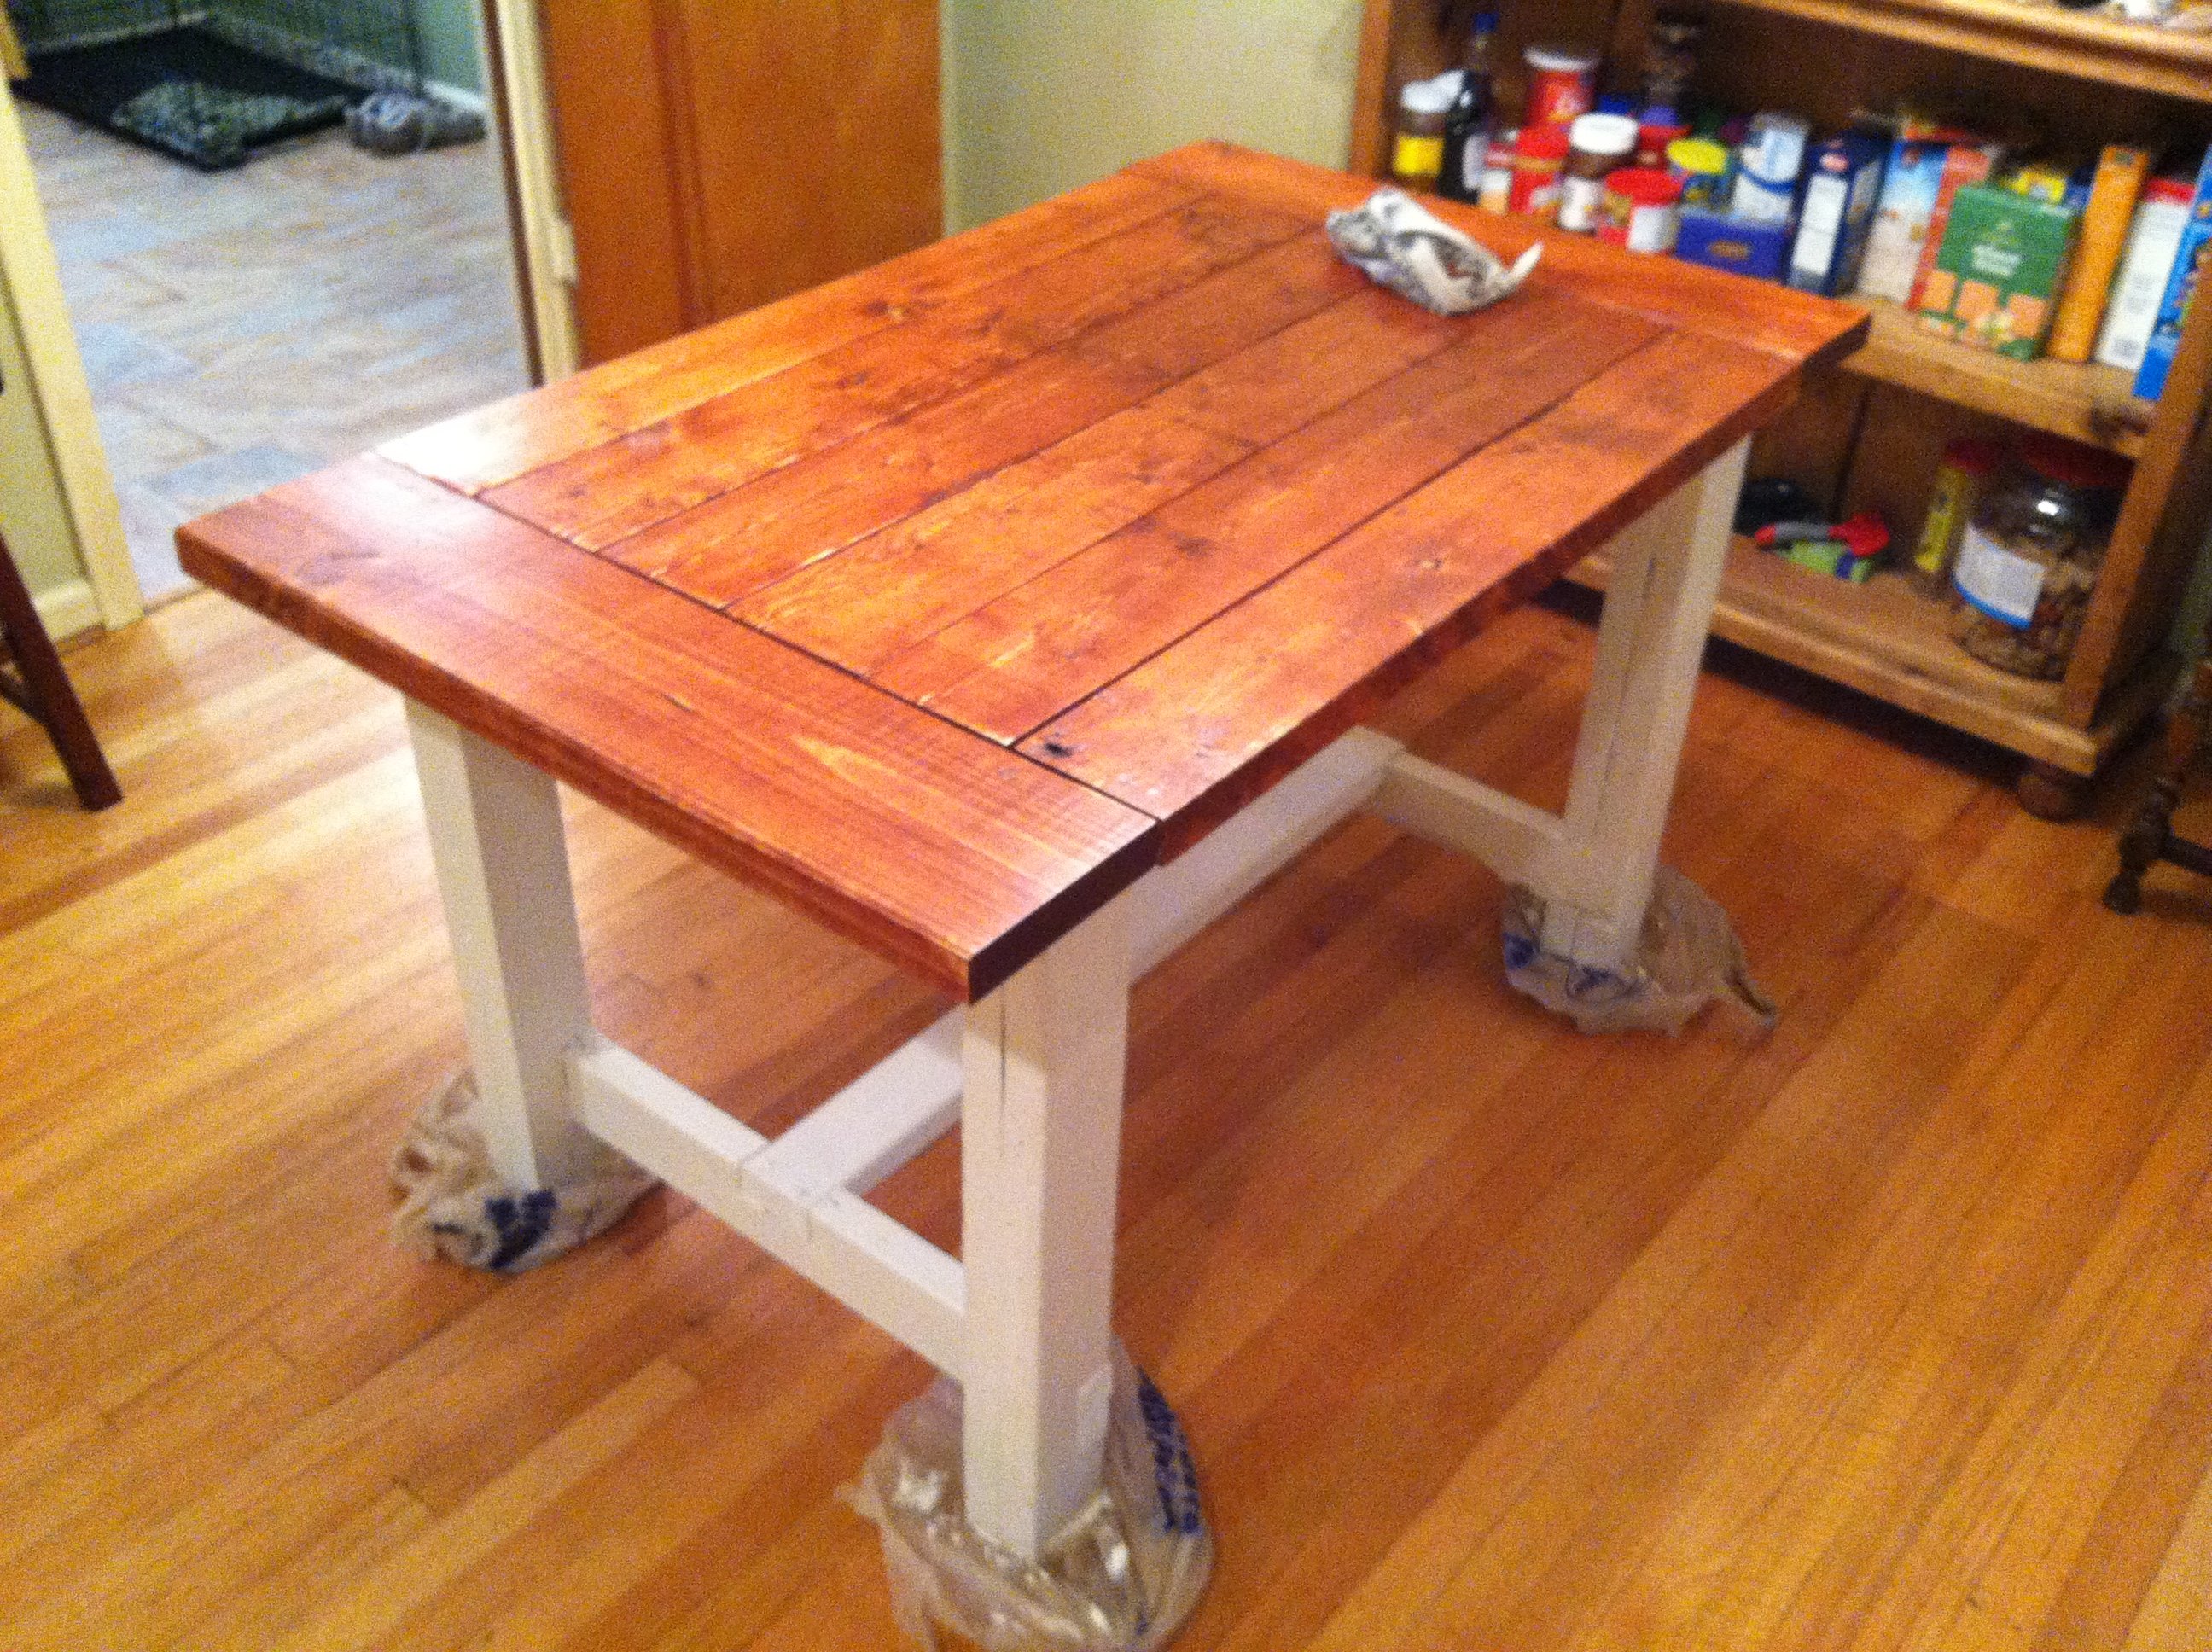
Using the plans provide, I simply changed the measurements needed for my dining room. A really fun build and a great looking end product!
Built from Plan(s)
Estimated Time Investment
Weekend Project (10-20 Hours)
Finish Used
Gunstock Stain with Minwax Satin Polyurethane finish; Behr paint (Bone Folder) on legs
Recommended Skill Level
Intermediate
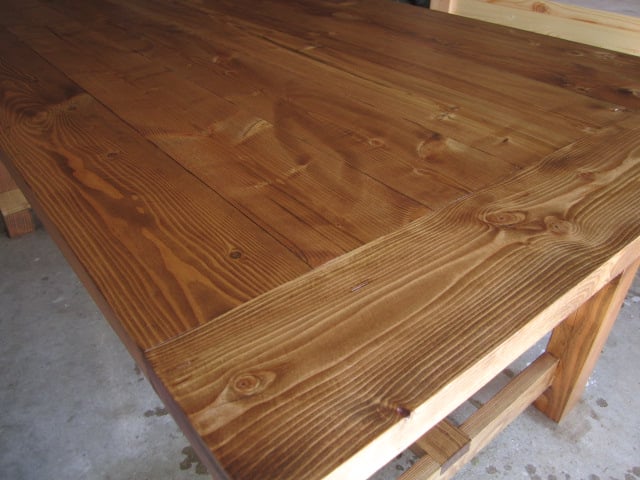
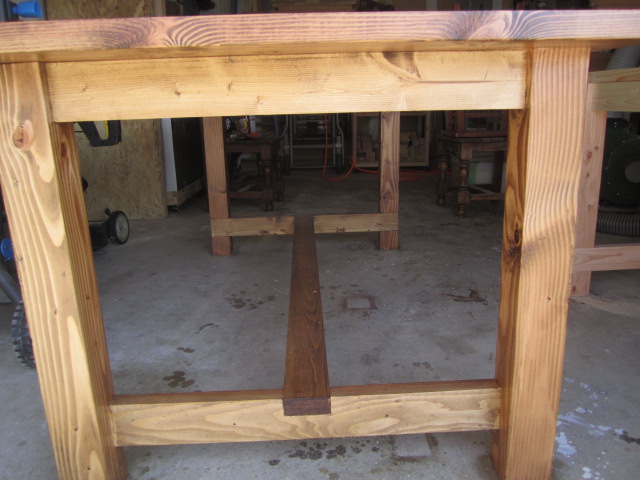
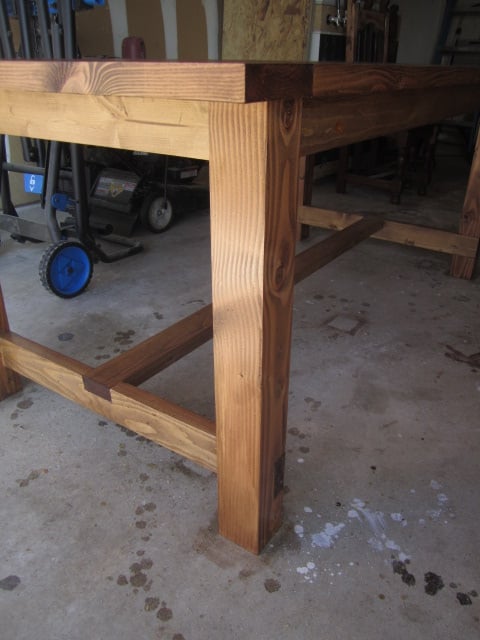
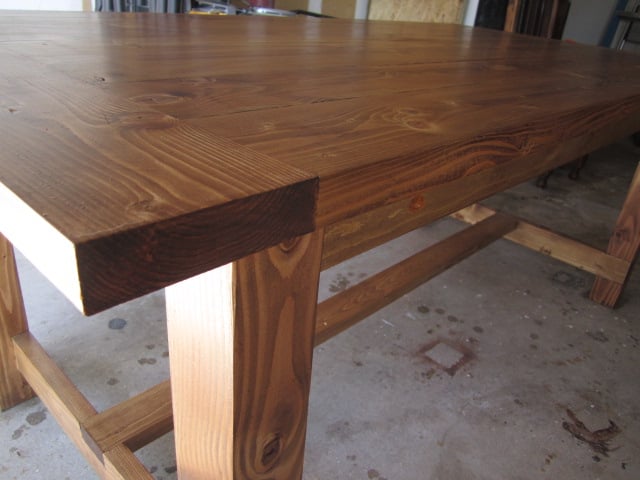
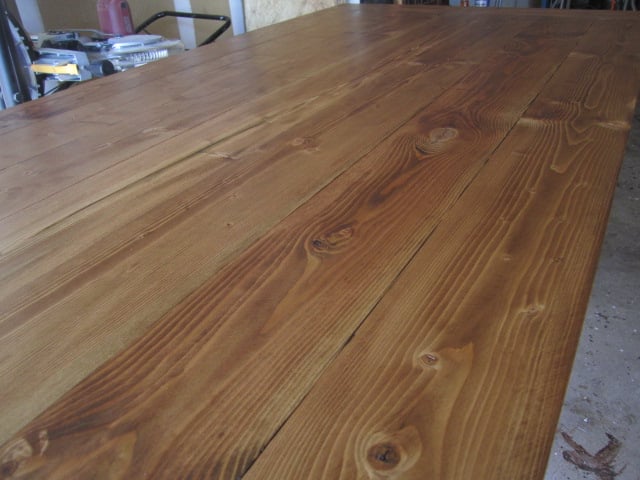
FARMHOUSE TABLE
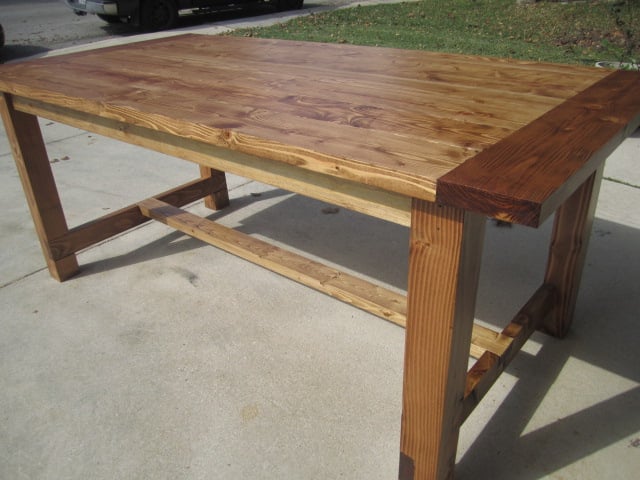
All the boards are ran through a jointer and planer making each board squared.
No rounded ends.
Stain conditioner used.
Finish - Minwax Early American
Built from Plan(s)
Estimated Cost
$85
Estimated Time Investment
Weekend Project (10-20 Hours)
Recommended Skill Level
Beginner
Cedar Toy Box
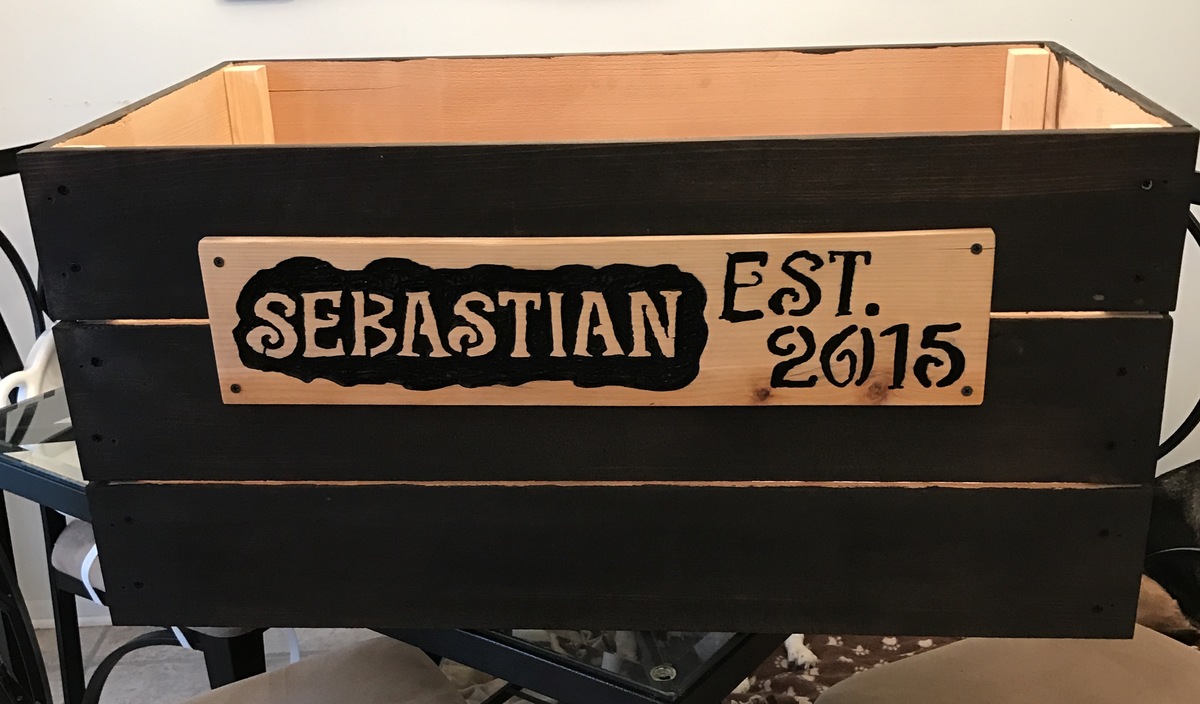
I wanted an easy toy box made from pallets. I came across the plans for the Simple Cedar Wooden Toy Box and decided it would be easier to but a few lengths of cedar fencing than to tear apart a bunch of pallets.
I omitted the feet and rope handles and opted for a carved wooden sign for personalization. I thought it was going to be too small, but soon realized it is a decent sized box.
I used Minwax Jacobean stain and am very happy with the end result.
Built from Plan(s)
Estimated Cost
$30
Estimated Time Investment
Afternoon Project (3-6 Hours)
Finish Used
Minwax Jacobean
Recommended Skill Level
Starter Project
Hemnes Linen Cabinet
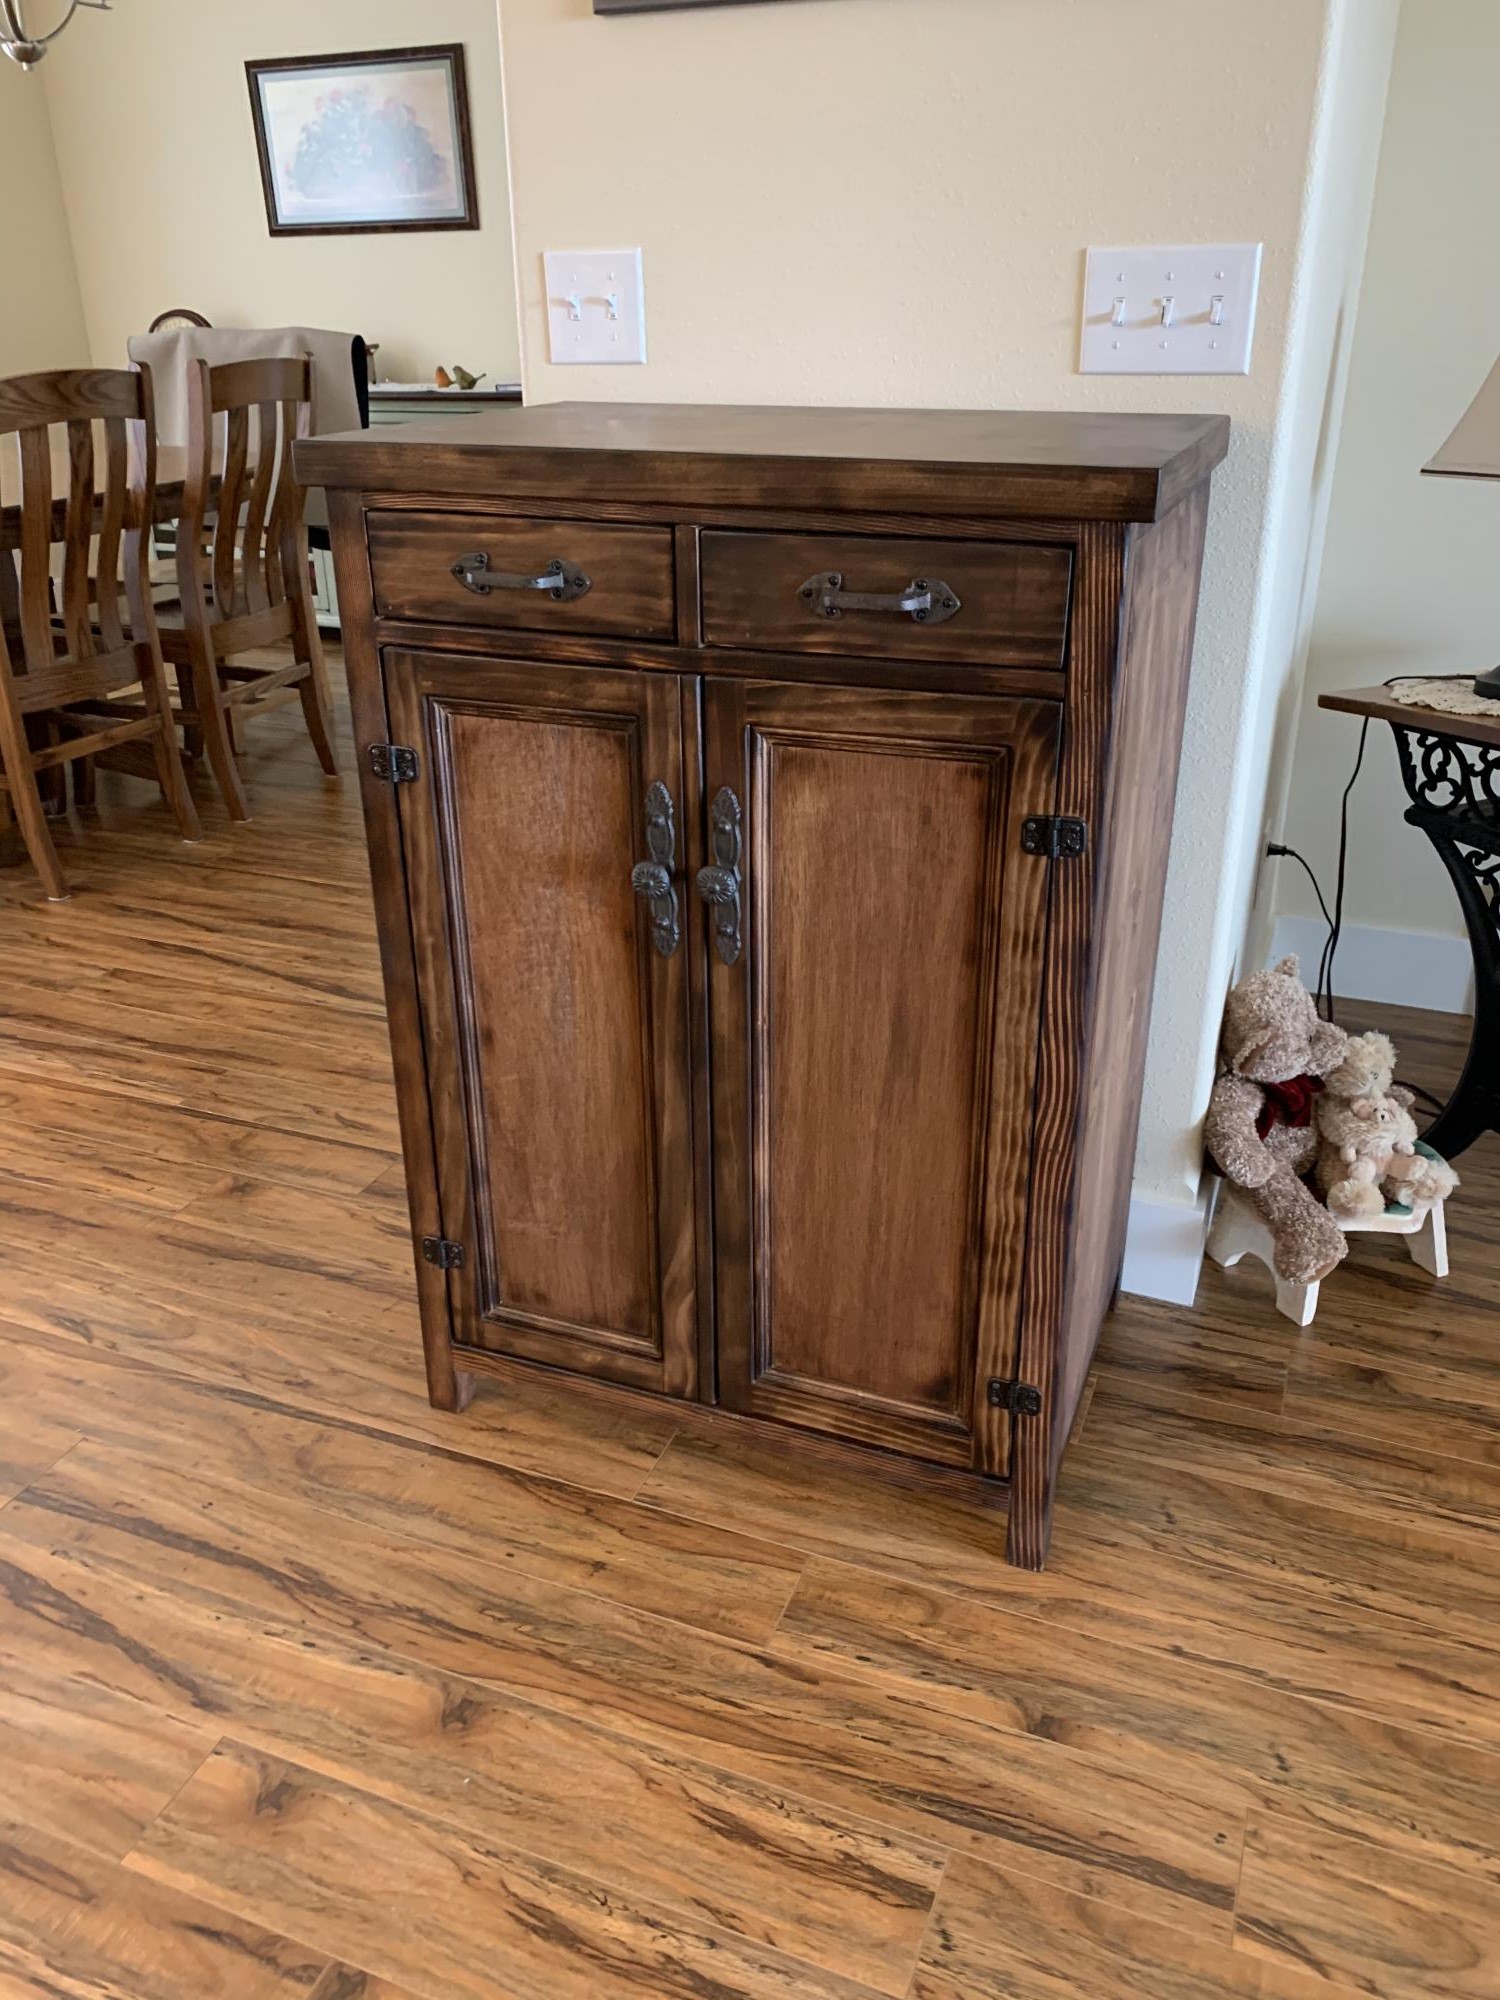
I modified the Hemnes Linen Cabinet plans to fit this space. Instead of painting, I burned and stained the cabinet before applying polyurethane.
Estimated Cost
$300
Estimated Time Investment
Weekend Project (10-20 Hours)
Finish Used
Burned and stained wood with polyurethane. I used a blow torch on the edges for the burned look.
Recommended Skill Level
Advanced
Comments
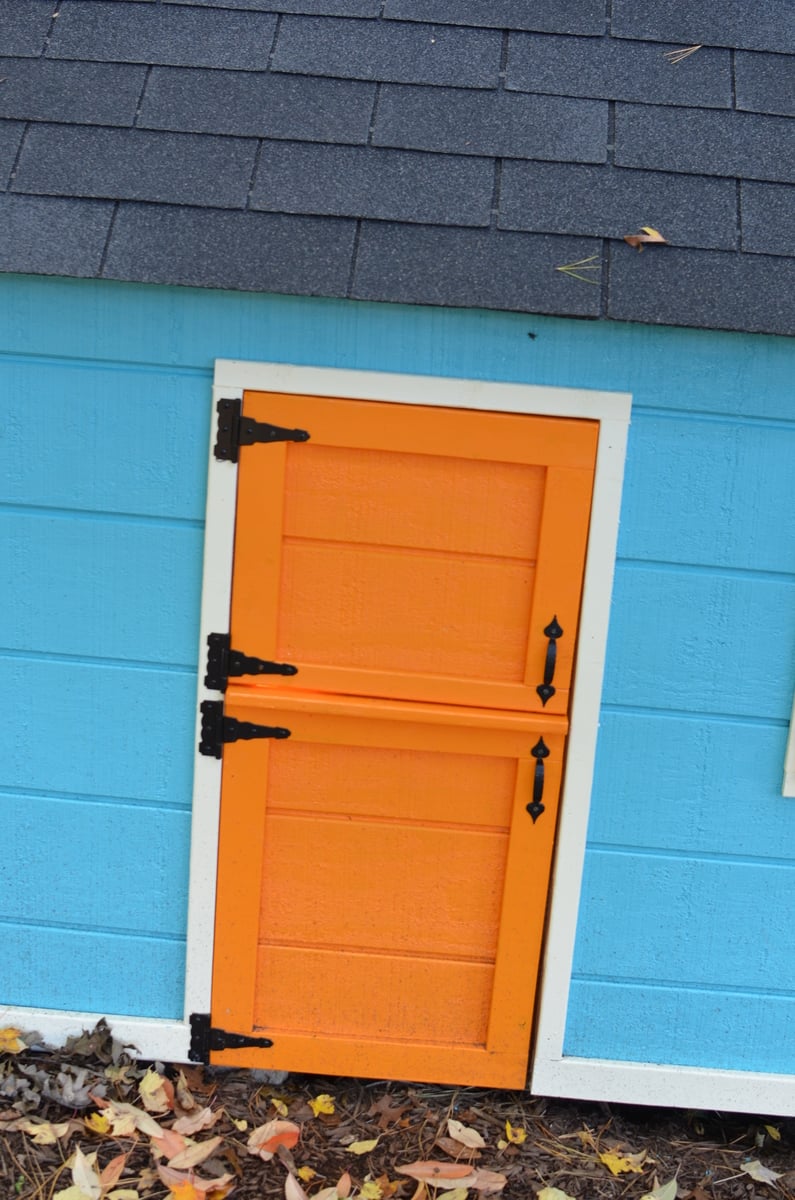
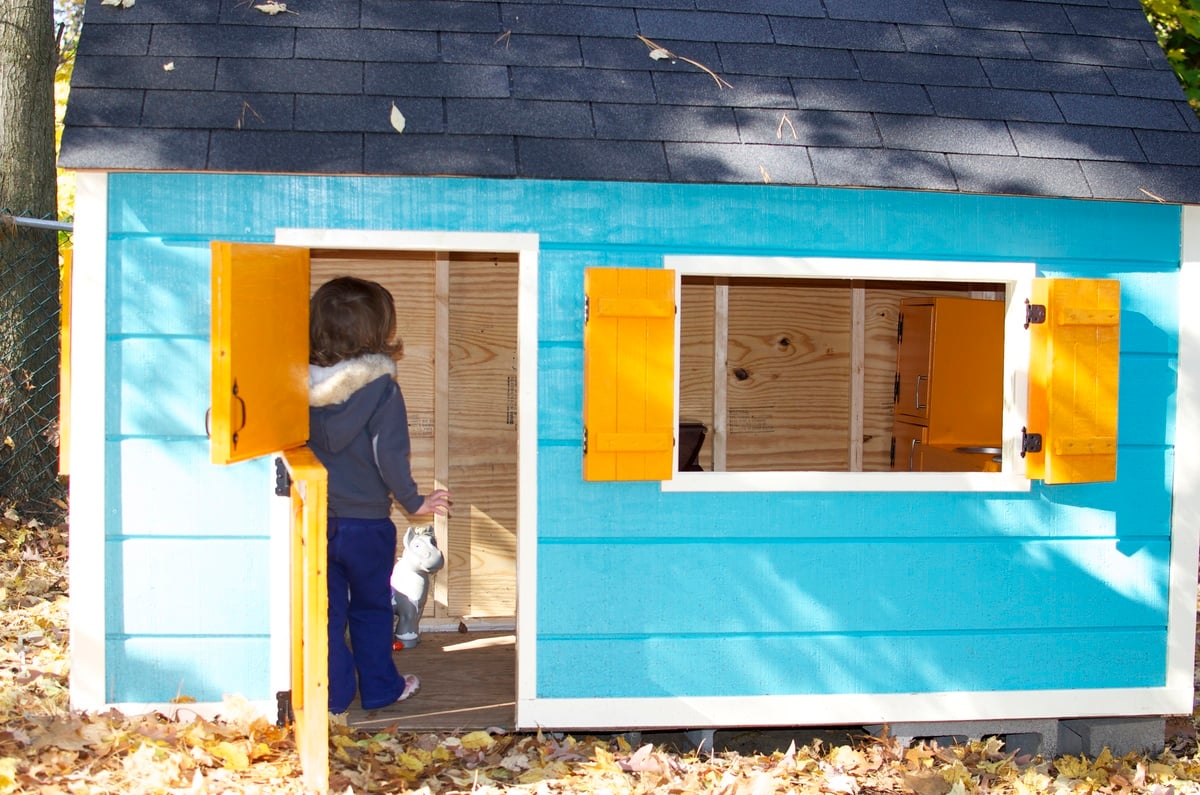
Playhouse
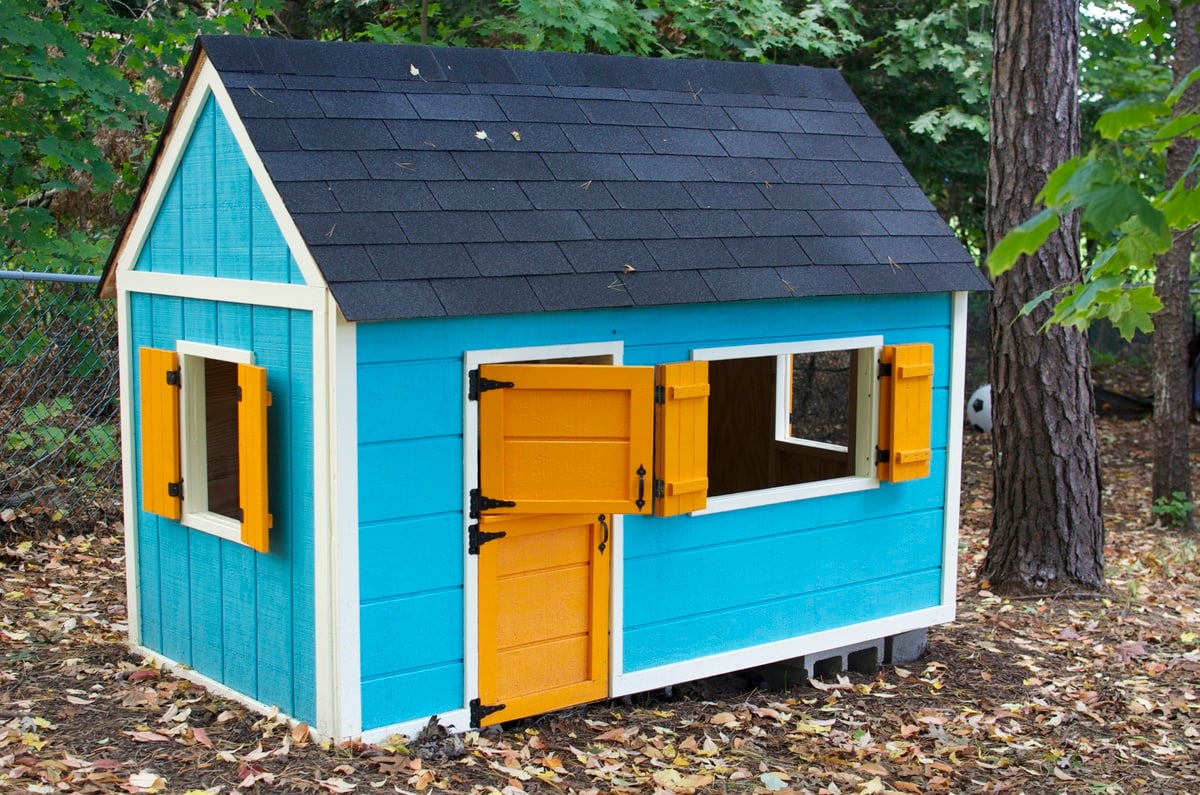
Olivia's Playhouse, built by mommy and daddy, though she did "help." Super-thankful to Ana for her awesome plans and making all this possible for our Little One. Modified the door to make it "barn style" which opens top/bottom. In the spring, plan on adding a small front porch/deck and railing.
Built from Plan(s)
Estimated Time Investment
Weekend Project (10-20 Hours)
Recommended Skill Level
Beginner
Comments

Mon, 03/23/2015 - 13:15
Super Cute Details!
Loving all the little details! Great job, thanks for sharing!
Sat, 05/14/2016 - 08:02
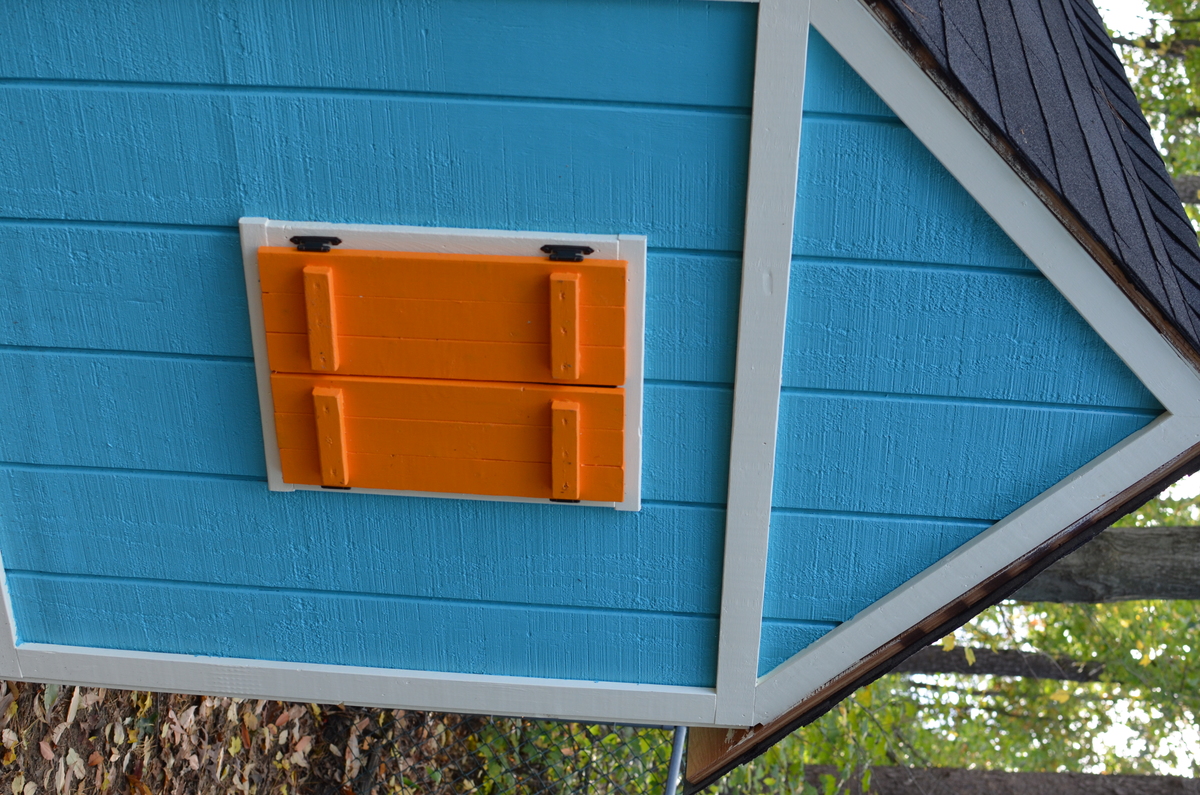
Shutters for playhouse
I love your playhouse. Would you happen to have the dimensions for the shutters? They look amazing! [email protected]
Sat, 05/14/2016 - 08:02
Shutters for playhouse
I love your playhouse. Would you happen to have the dimensions for the shutters? They look amazing! [email protected]
Sat, 05/14/2016 - 08:02
Shutters for playhouse
I love your playhouse. Would you happen to have the dimensions for the shutters? They look amazing! [email protected]
Sat, 05/14/2016 - 08:02
Shutters for playhouse
I love your playhouse. Would you happen to have the dimensions for the shutters? They look amazing! [email protected]
Sat, 05/14/2016 - 08:03
Shutters for playhouse
I love your playhouse. Would you happen to have the dimensions for the shutters? They look amazing! [email protected]
Camp Loft Bed

I had a friend who needed a bed for two energetic boys for a small bedroom. I saw these plans and thought this would be perfect for them. They absolutely loved it and now have plenty of room for their toys in their bedroom.


Built from Plan(s)
Estimated Cost
about $50 for screws stain and polyurethane. I already had all the wood otherwise I would presume it would cost another $50-$75.
Estimated Time Investment
Week Long Project (20 Hours or More)
Finish Used
Minwax Early American
Recommended Skill Level
Beginner
Comments

Fri, 12/19/2014 - 17:35
Great job! This looks super
Great job! This looks super awesome. I think I'll have to add this to the to-build list when my little boy is older. I bet he'll love it too.
Tue, 05/19/2015 - 11:00
few questions
Hi, This bed is awesome. I have few question and would appreciate if you could help me.
Did you use any connector bolts to be able to take it apart easily?
How did you connect the slats of the platform to the frame? with PH screws?
would appreciate any details you can give me.
Thanks
Mily:-)
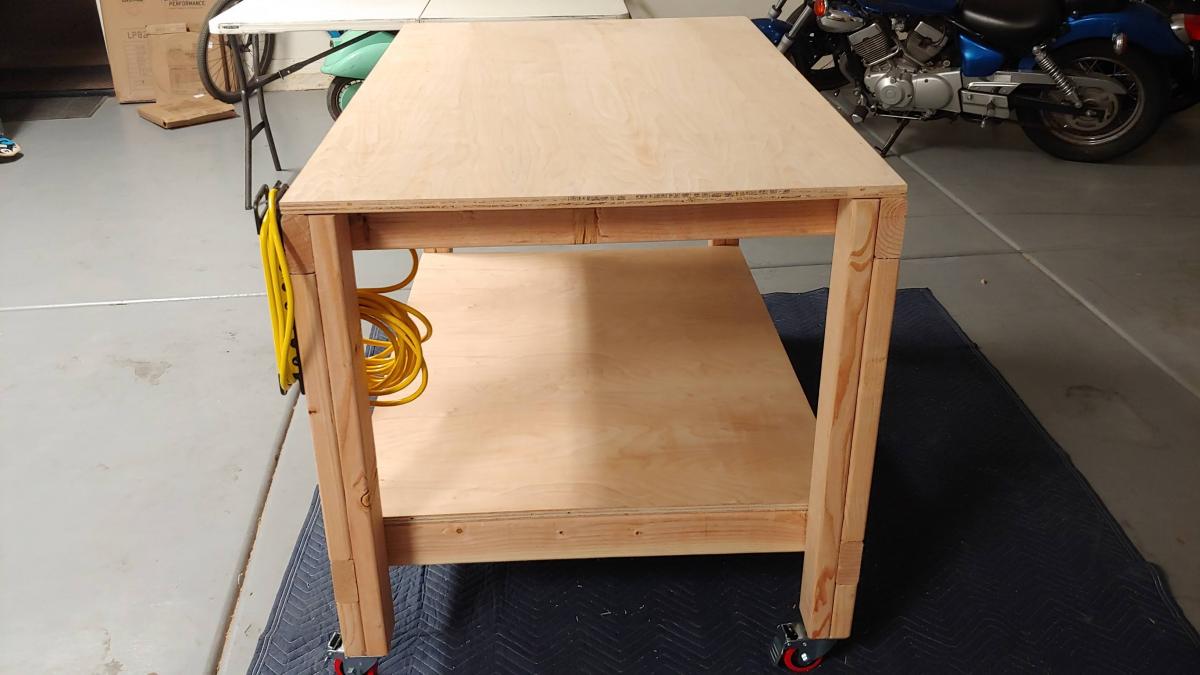
First Project: Workbench with casters
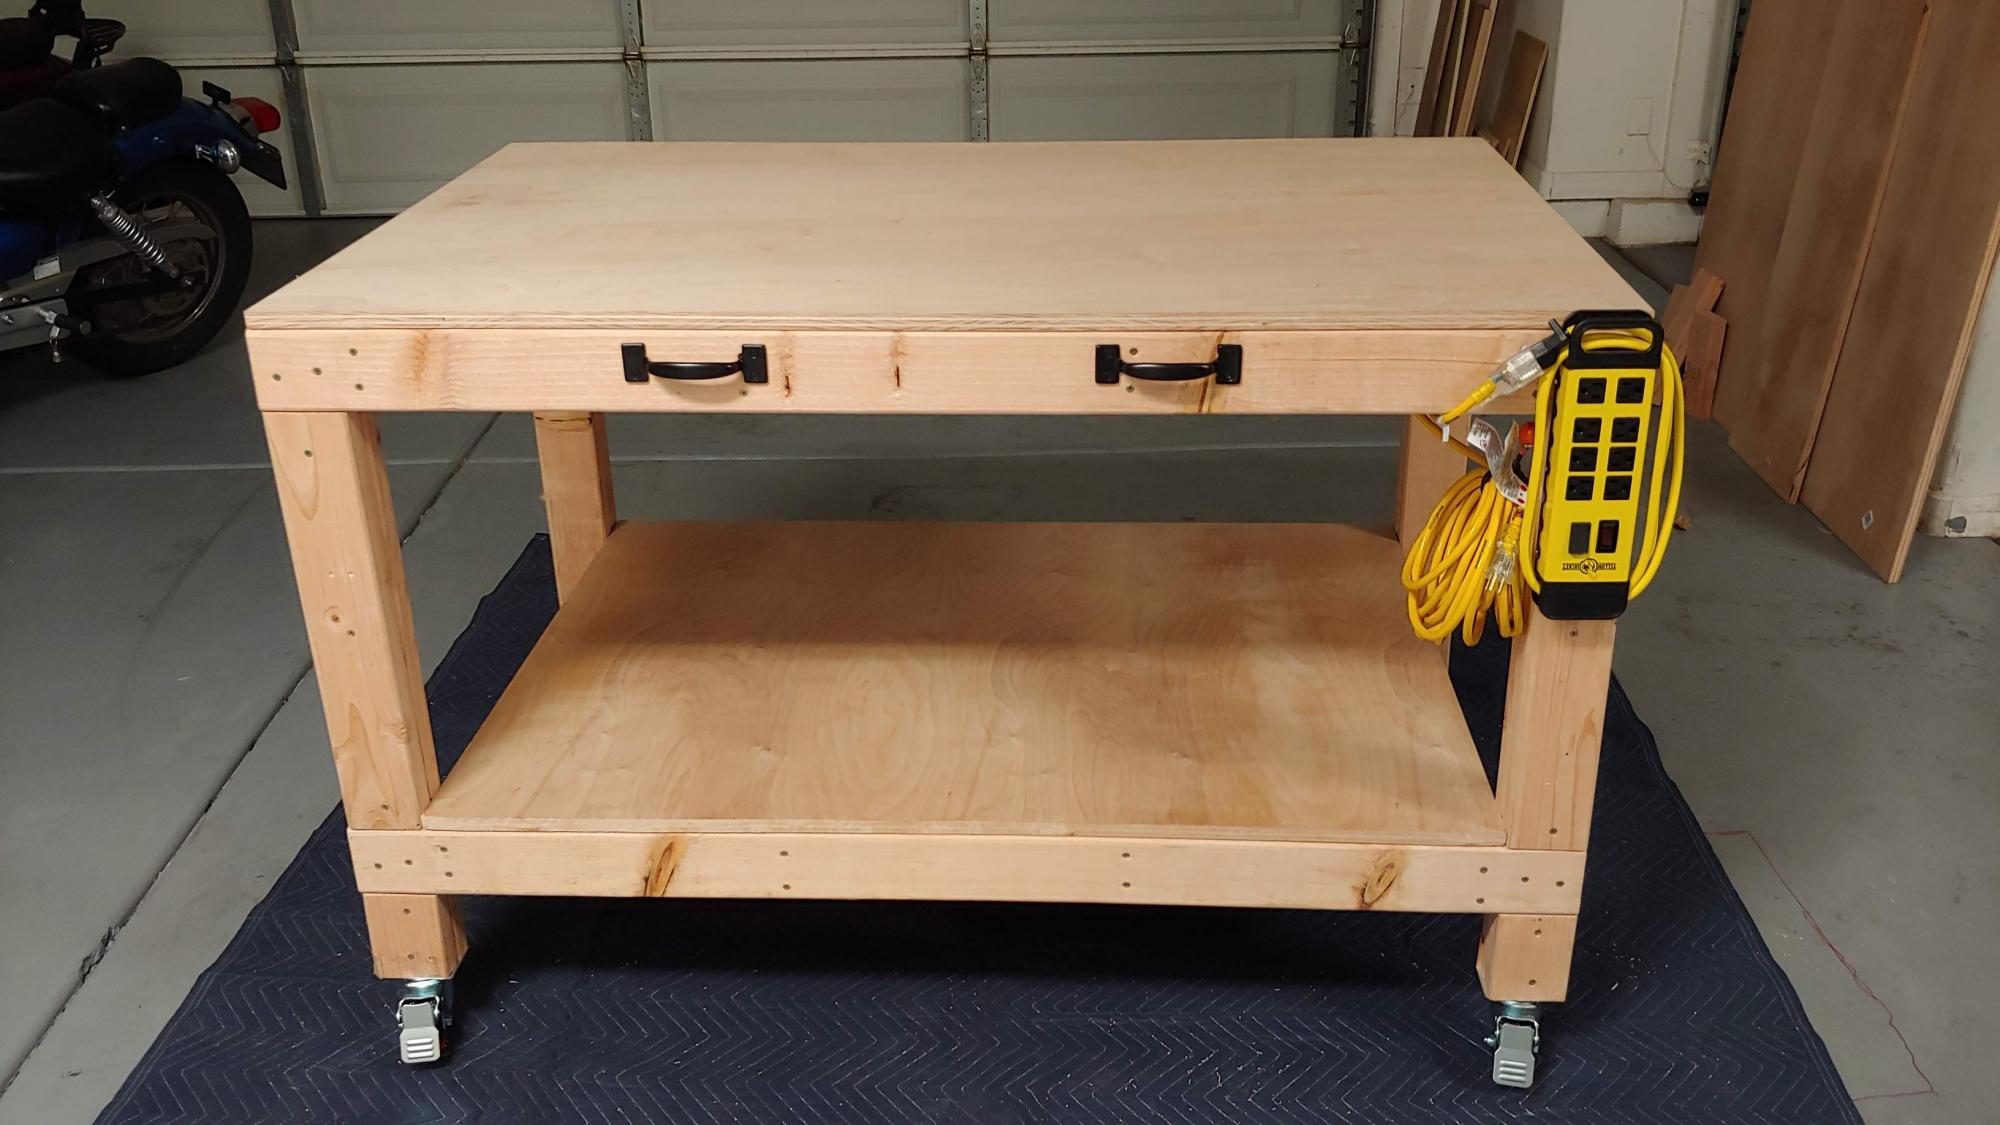
Success with first project, I am very happy with it.... although I need to find a better way to square things.
Estimated Cost
$175
Estimated Time Investment
Day Project (6-9 Hours)
Recommended Skill Level
Beginner
Comments
Providence Table & Bench
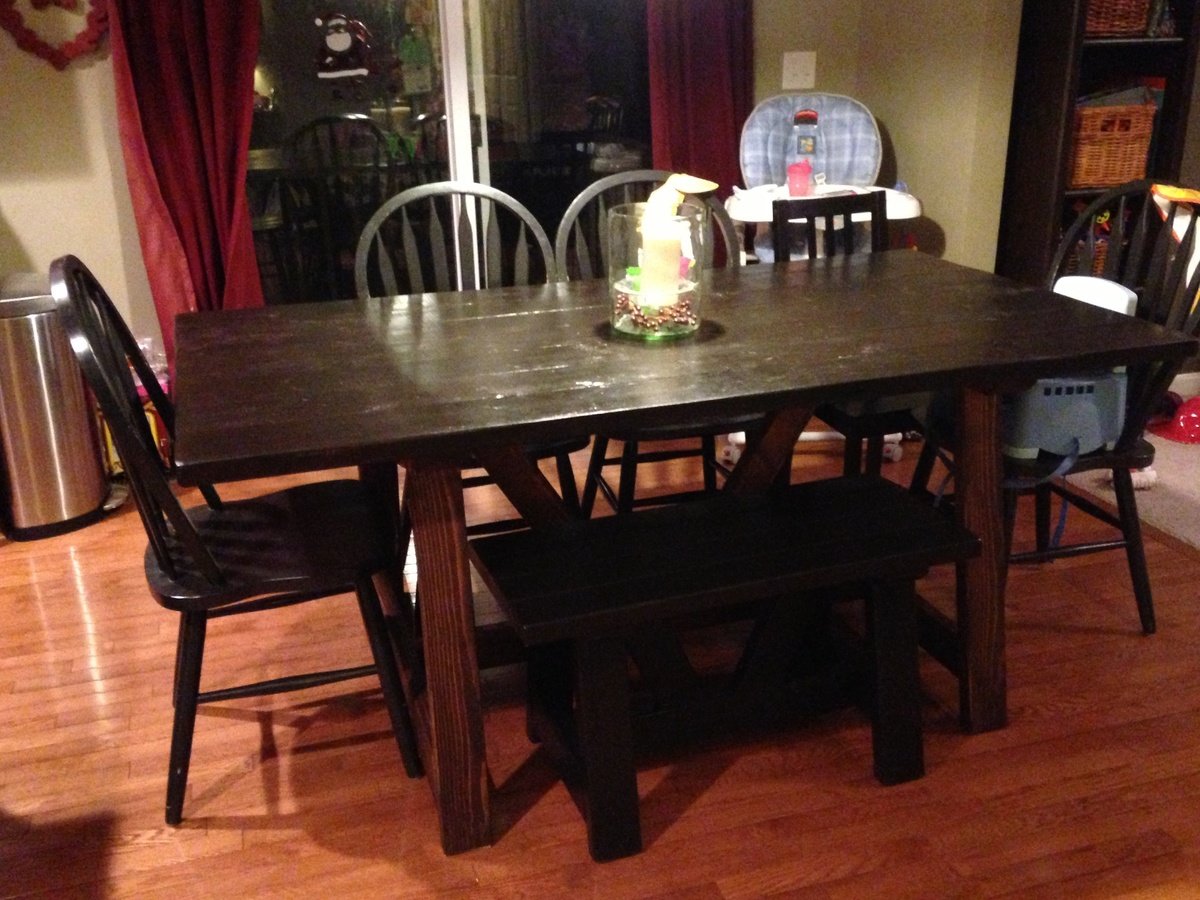
We needed a new table for our growing family but didn't want to spend a fortune.
Found this website, explored some plans & fell in love with the Providence table & bench.
It is great!!
We used the Rustoleum stain in Kona as well & did 3 coats of polyurethane. Unfortunately, the table is VERY rough to the touch. And I can see it becoming a problem. We can't wipe it with a damp paper towel as the roughness shreds the paper towel. Any help here would be greatly appreciated!!!
We think sawdust & debris settled on the table when we stained & sealed with the polyurethane. We did not sand in between polyurethane coats either.
If there's an easy fix (or do over) here, please let us know!
Otherwise, it is such a great piece & has already received many compliments!
We'll be sure to refer to Ana White's site!
Thanks so much!!
Built from Plan(s)
Estimated Cost
$160
Estimated Time Investment
Day Project (6-9 Hours)
Finish Used
Rustoleum in Kona
Recommended Skill Level
Intermediate
Comments
Sat, 02/16/2013 - 15:02
from what I understand, the
from what I understand, the water in the polyurethane raises the wood, so it needs to be sanded after the first coat (at minimum). I'd sand it down, if I were you. Maybe with a high-grit paper, so you don't damage the stain. Then coat, sand again, and coat.
Sun, 02/17/2013 - 16:18
I have had problems with
I have had problems with polyurethane all my own fault mind ya. I do not know how smooth of a surface you had after the stain, but if the surface is now so rough that it rips up paper towels. I would venture to say it started there. Also the coats of polyurethane are so thin it would be very hard to just sand down to the stain without scaring the stain finish. I would try either 0000 steel wool or 220 grit sand paper and do it by hand not sander. The picture I see shows it to be a dark stain so if you do scare it you might be able to touch it up, but my experience with that is just bite the bullet and sand down to bare wood and start over. If you do have to do it over I use 0000 steel wool lightly after I stain and wipe it down good and do your thin coats of poly ( with steel wool between coats ) until you reach the look you are wanting

Mon, 02/18/2013 - 11:22
I learned my lesson about
I learned my lesson about sanding between coats of poly the hard way too! I was able to smooth out the surface of my desk by sanding it lightly with the finest grit sandpaper. If that doesn't smooth it out enough then you are going to have to sand it down further and re-do the poly.
Easy, cheap garage shelving
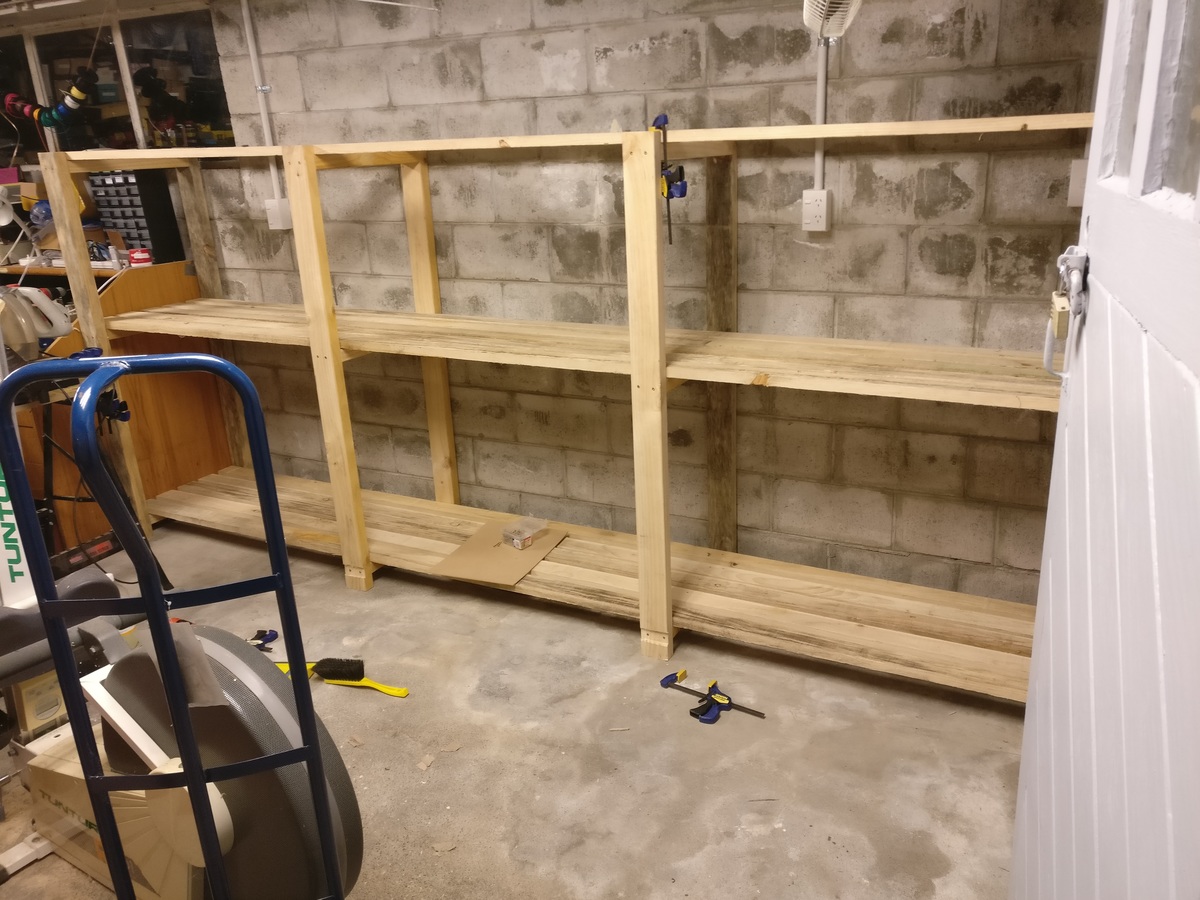
I used 1x3 box pine instead of 2x4's for the bits that things sit on, and everything fits perfectly.
Originally I was planning on a 3.6m long x 0.6m deep X 1.8m high shelf. At the lumberyard I found out that 2x4's came in 6m lengths as standard, so I adjusted this to 1.5m high instead, which worked out fine as I think 1.8m would have been a bit tall to get heavy things on top of. Luckily for me my power points and light switches were just under this, which I didn't think about at the time!
Originally I was going to try and cut grooves for the 'rungs' of the ladder frames to slot into, hence the insets at the bottoms of the legs. I think that the glue-and-screw construction will be plenty strong enough, though.
This took me about 4 hours to put together, and cost about NZD$170 all up, which is about USD$120.
I've got the bug. Making things is awesome.
Built from Plan(s)
Estimated Cost
USD$120
Estimated Time Investment
Afternoon Project (3-6 Hours)
Recommended Skill Level
Beginner
Cal King Scrap Wood Bed Frame
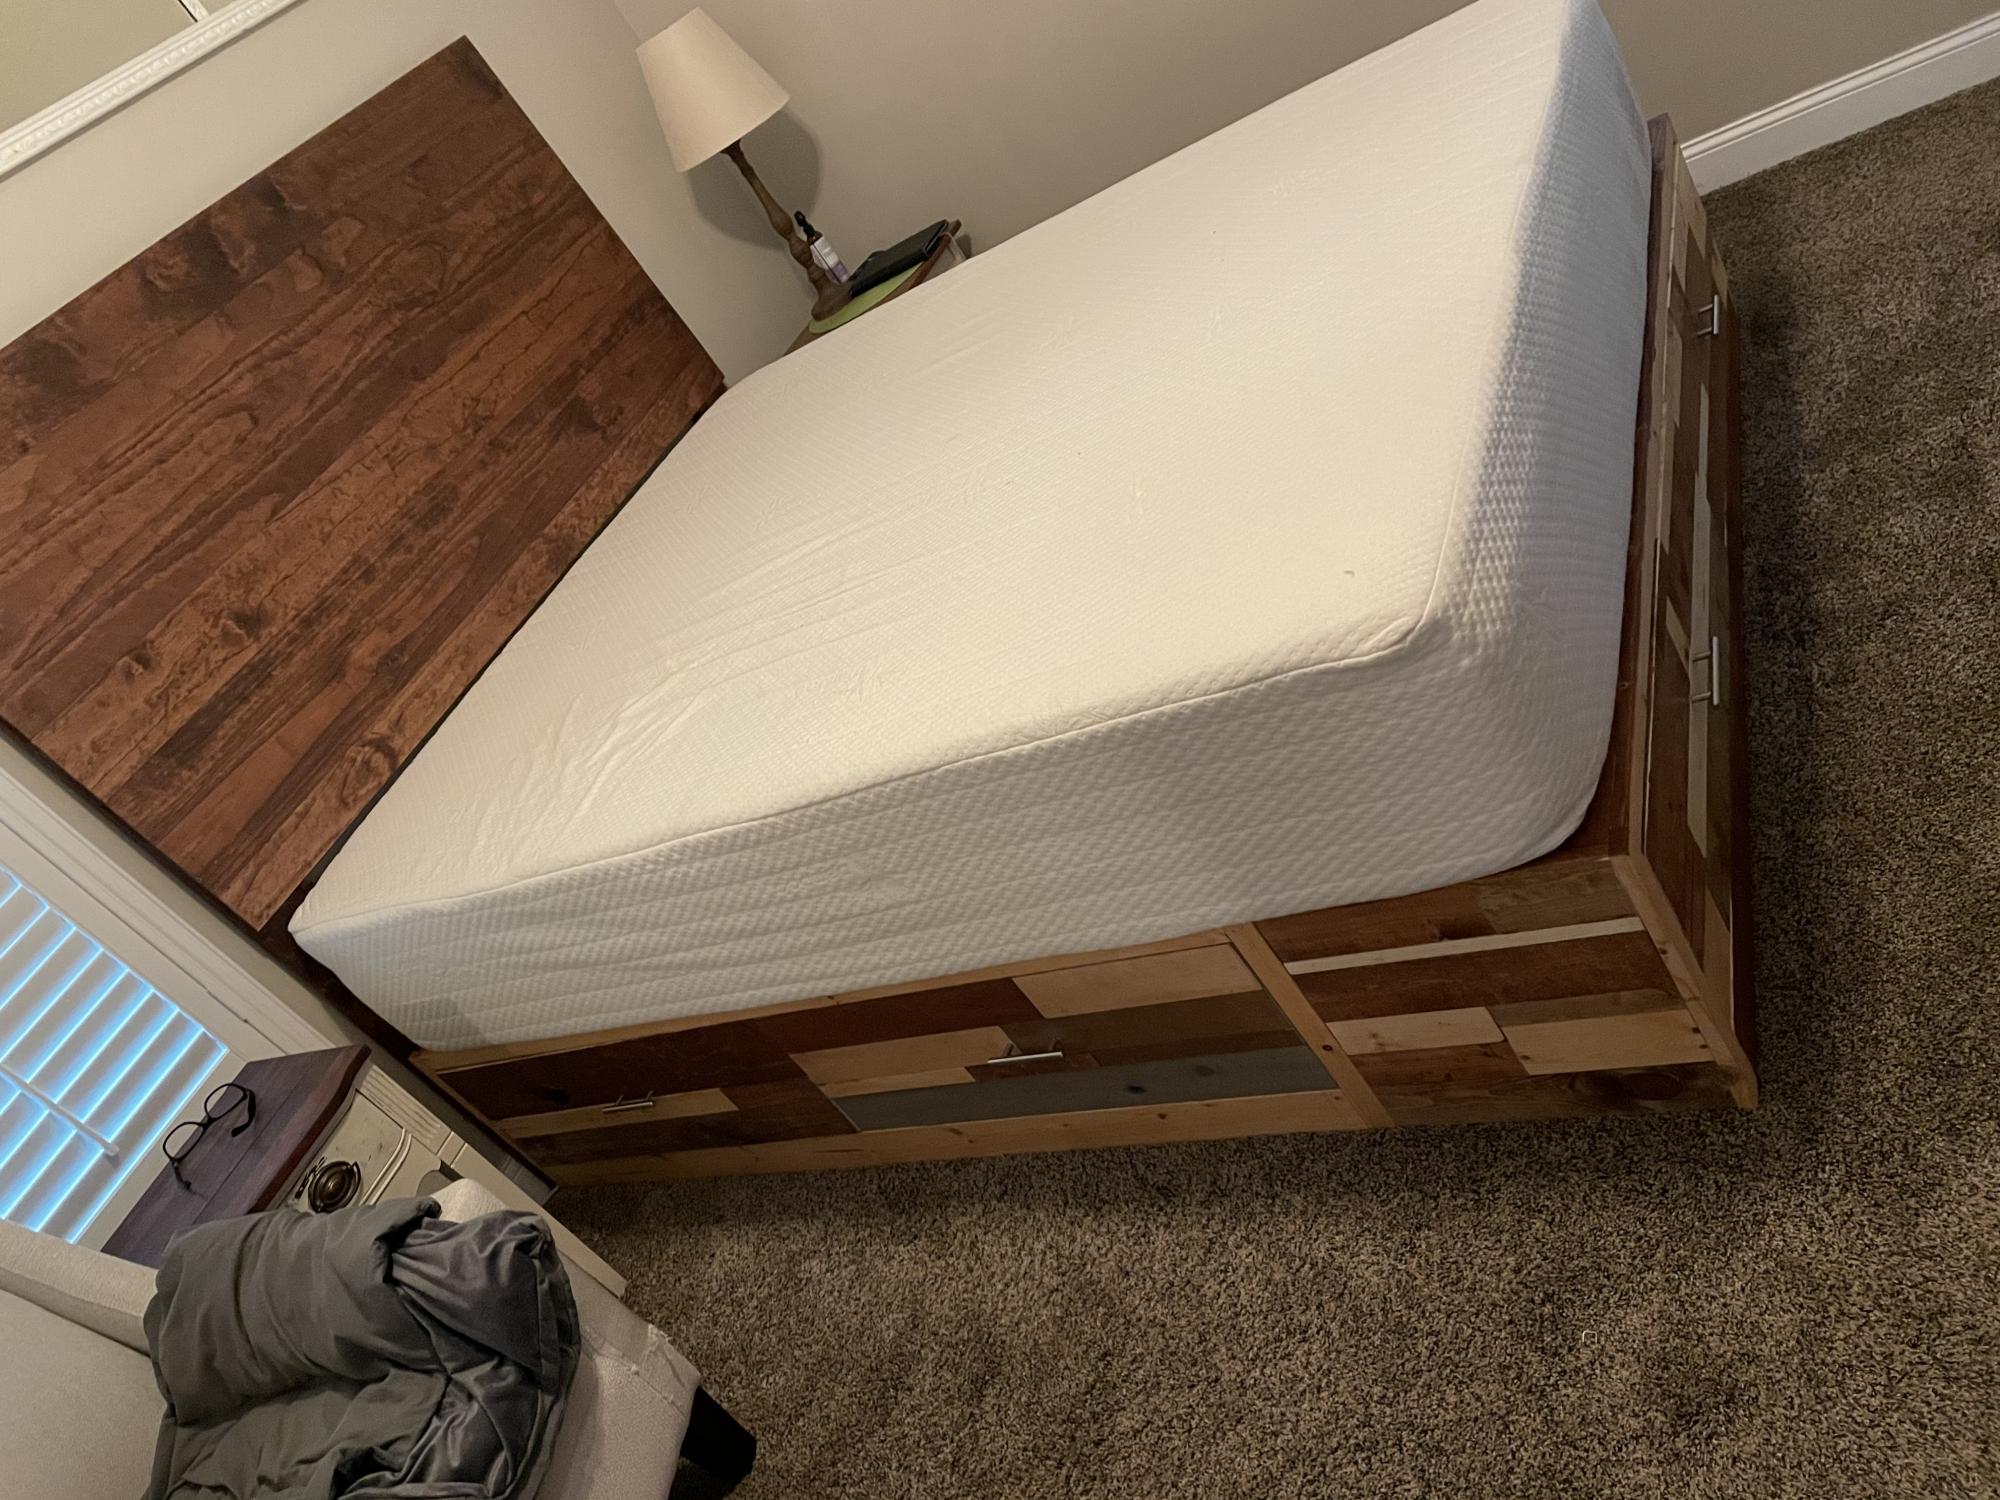
My first project from Ana’s plans. Loved having the material and cut list available!! I adjusted my measurements to fit a Cal King just as Ana suggested.
Built from Plan(s)
Estimated Cost
$400
Estimated Time Investment
Week Long Project (20 Hours or More)
Recommended Skill Level
Intermediate
Comments
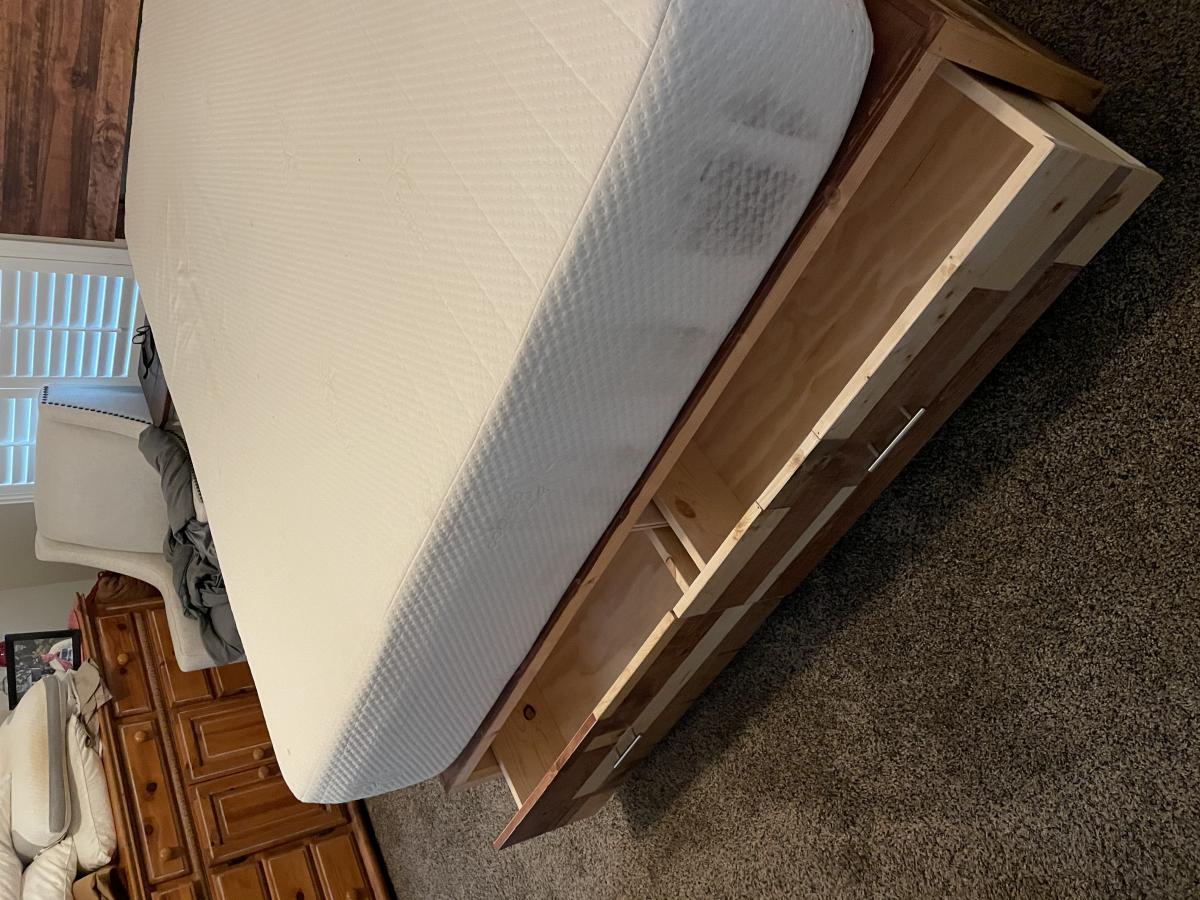
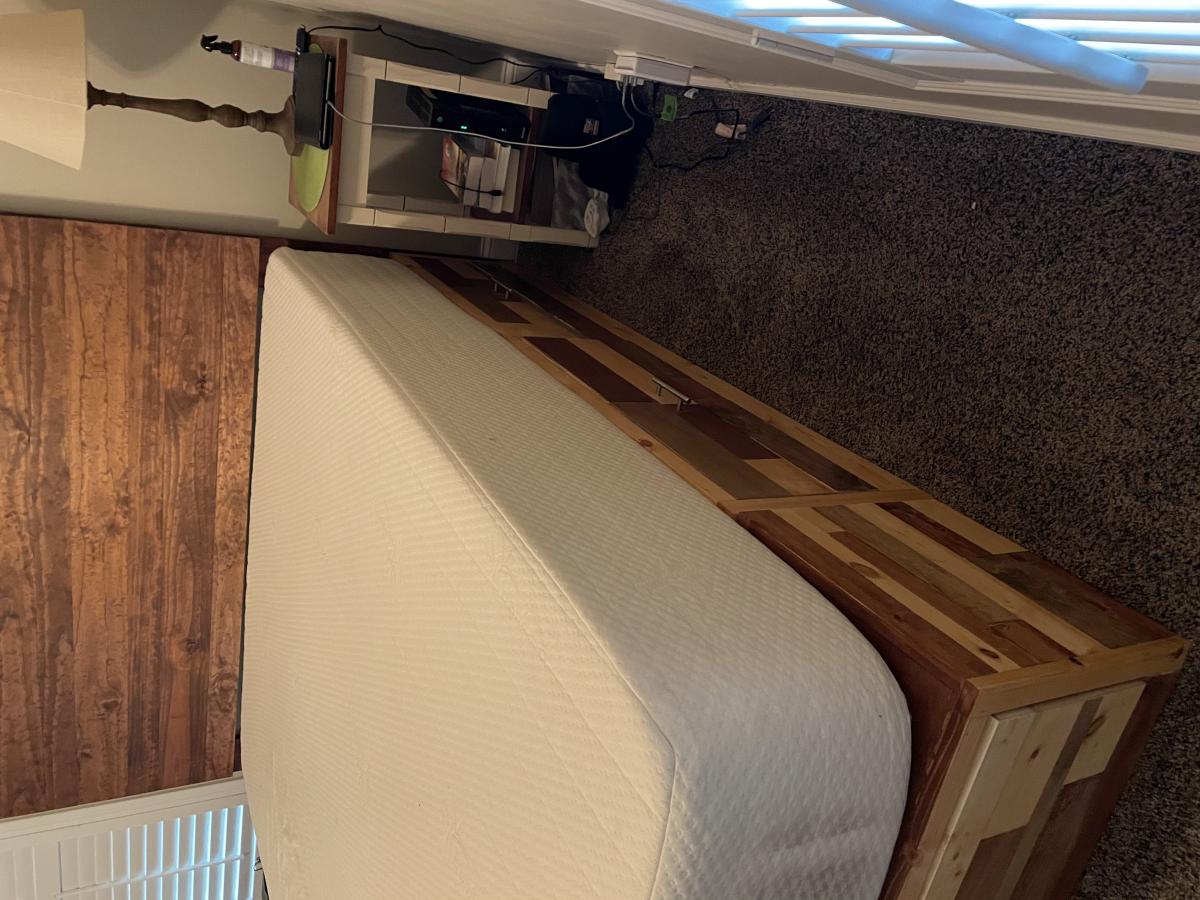
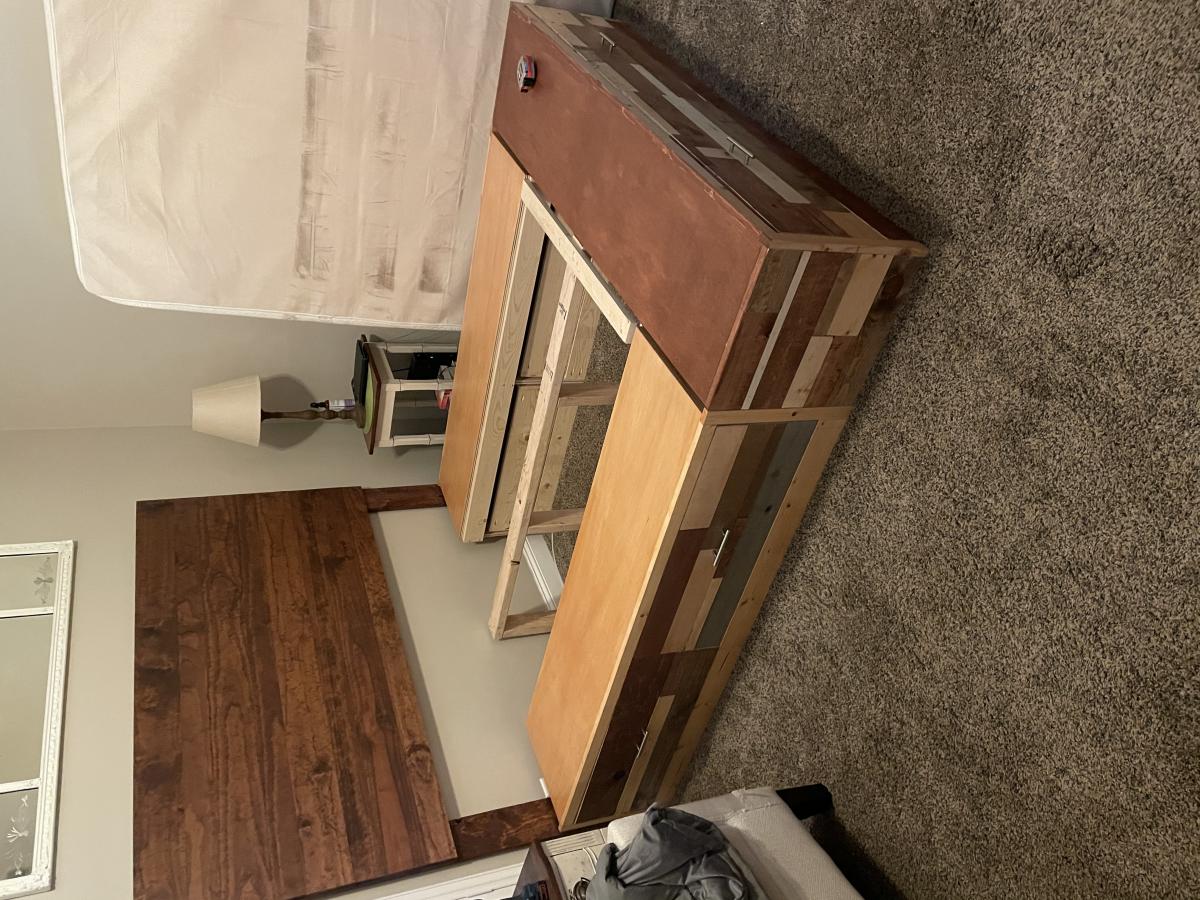
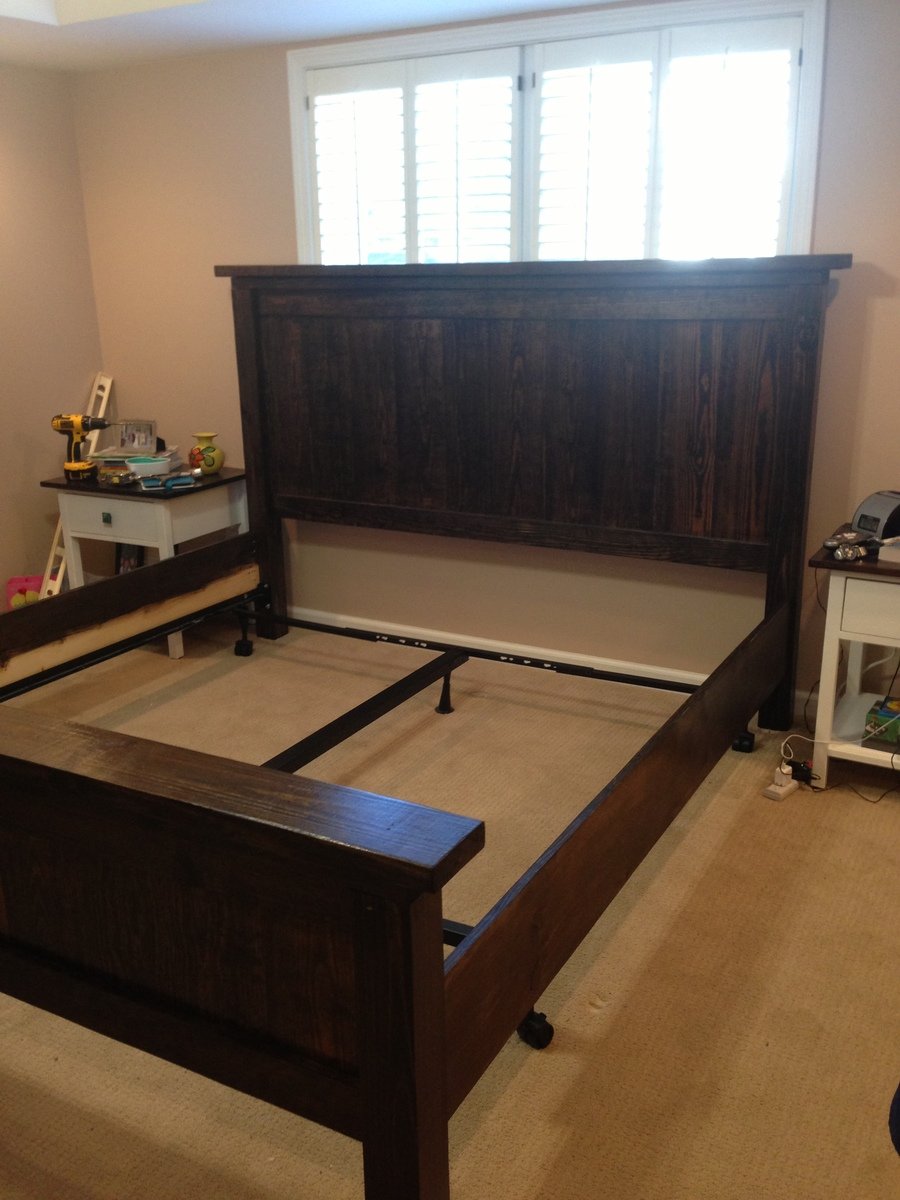
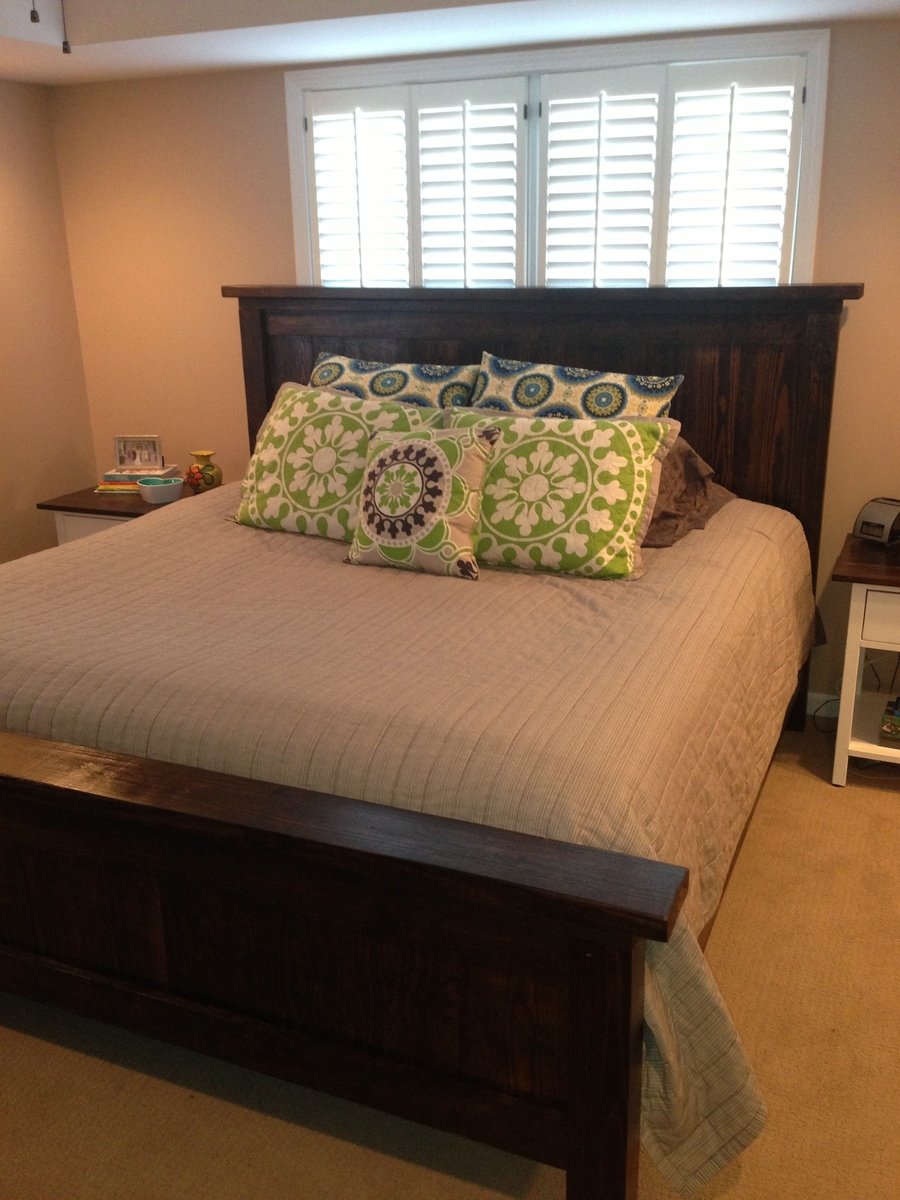
King Size Farm House Bed
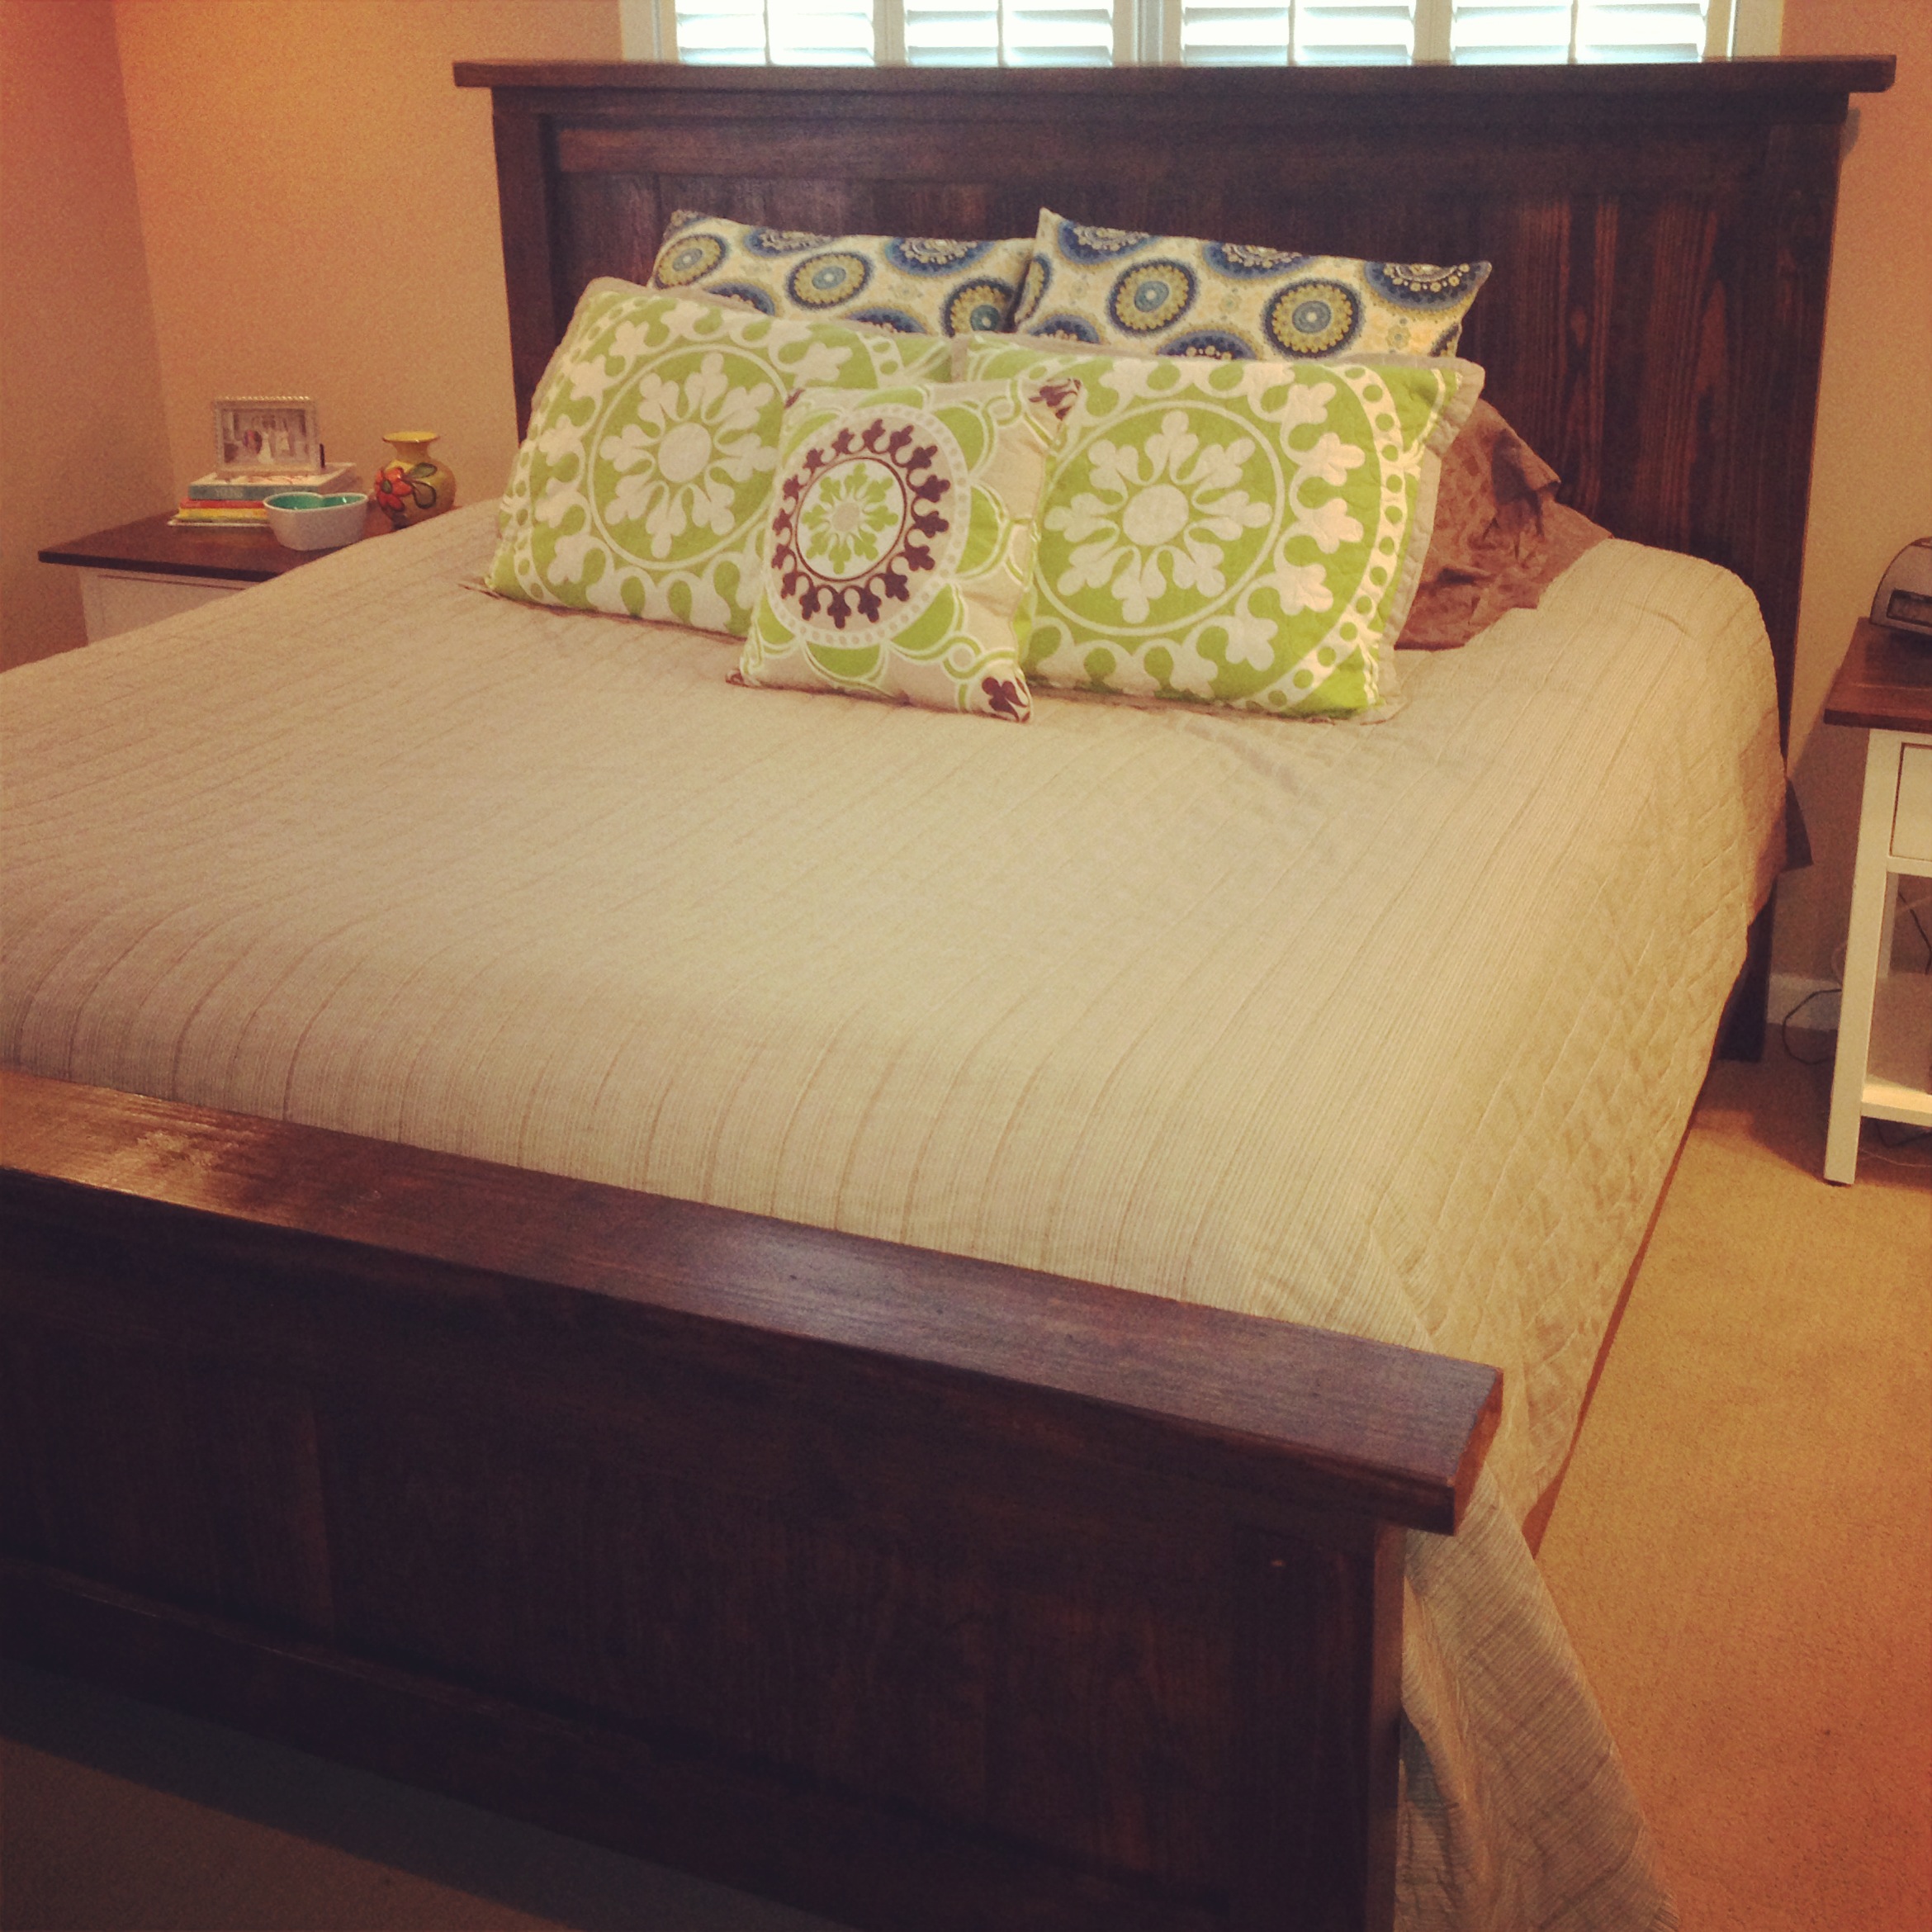
We made this bed after making the farmhouse bedside tables. So now we have a whole new bedroom set for probably less than $600. We love how it all turned out, and the plans were so easy to follow. We built both projects from Ana's book and plan to build a lot more from it too!
**In the book the plans are for a queen size bed, we modified it to fit our King size**
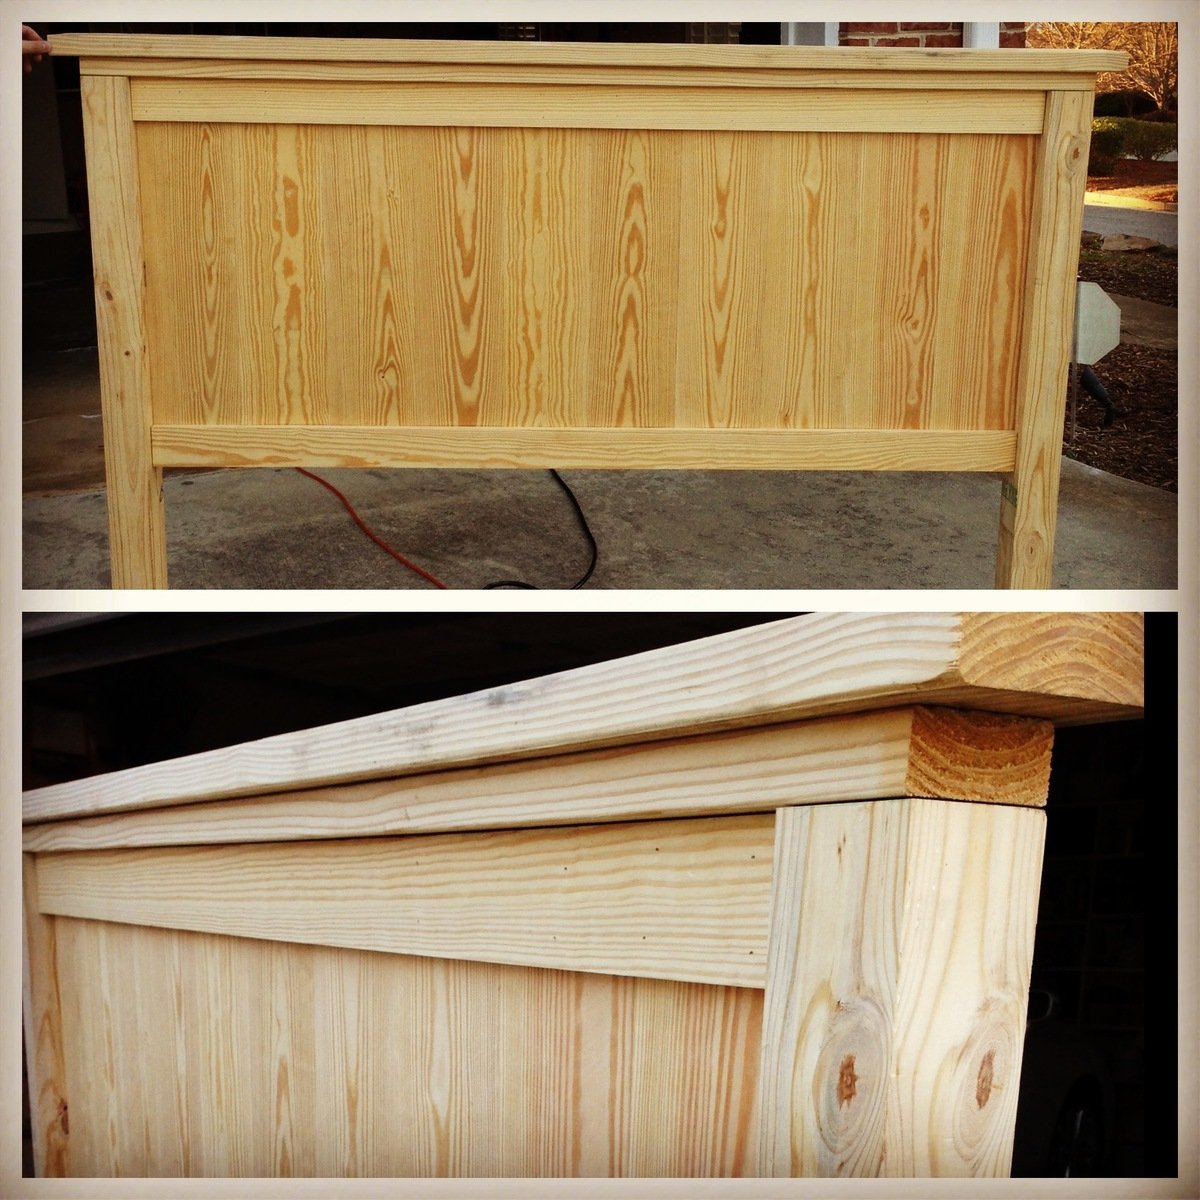
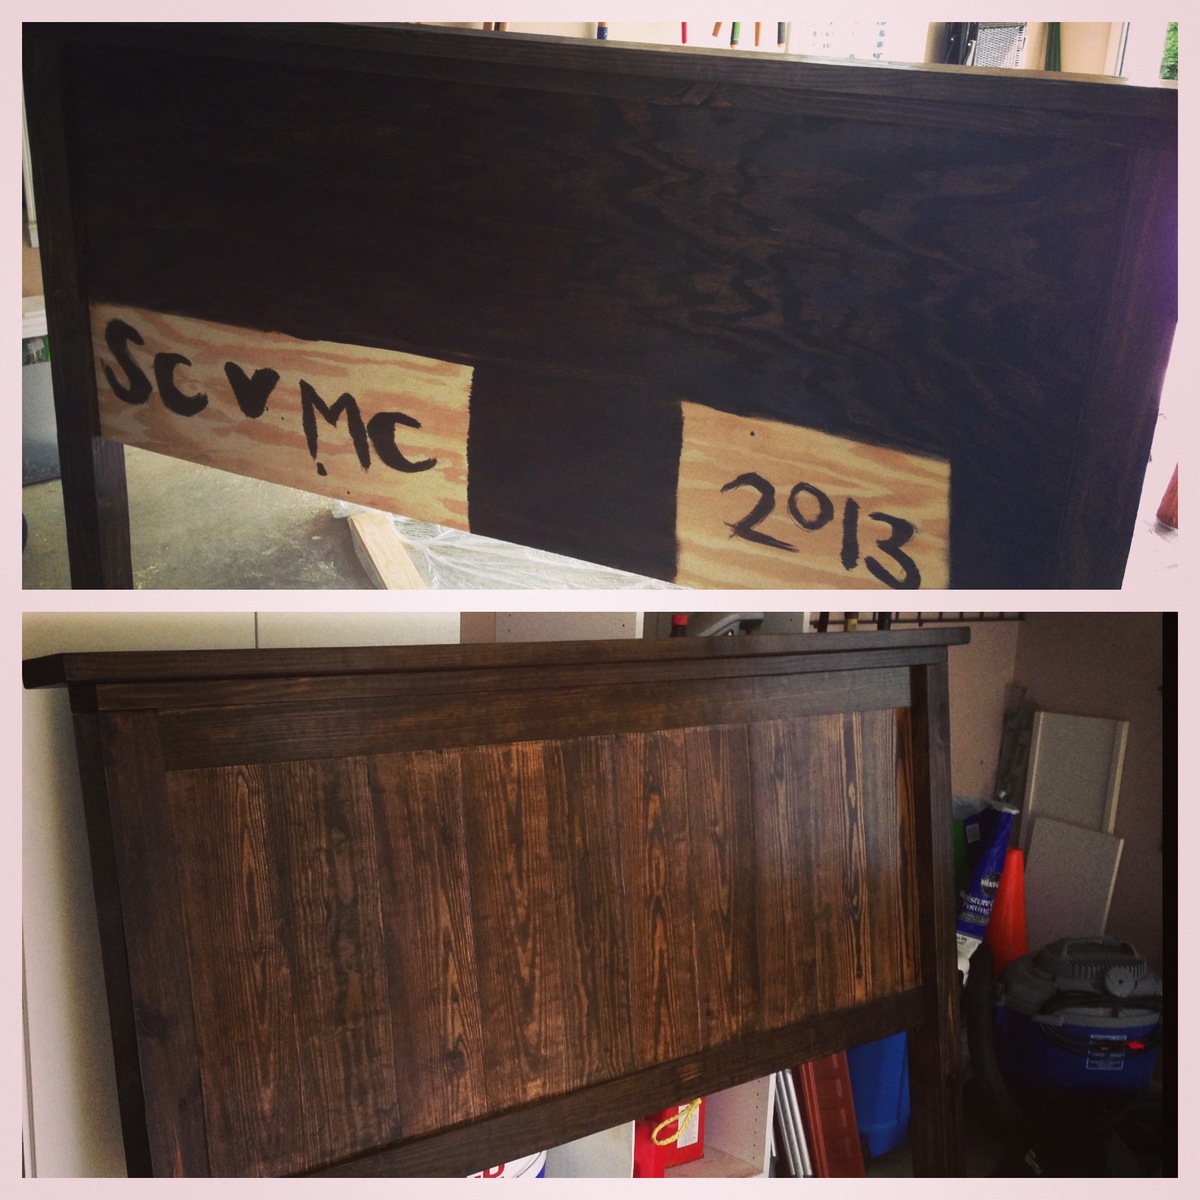
We added a piece of plywood to the back of the headboard and footboard and stained them so that it would cover all the pocket holes. Also, we extended the very top piece of wood that is on both the head and foot boards so there was a two inch overhang instead of just one.
This bed is so sturdy! I think if a tornado ever blows through we could just hang onto the bed and we wouldn't go anywhere! The side rails also give it a nice finished look even though they just essentially cover the box spring and bed rails. The bed still sits on the metal frame that is bolted into the headboard.
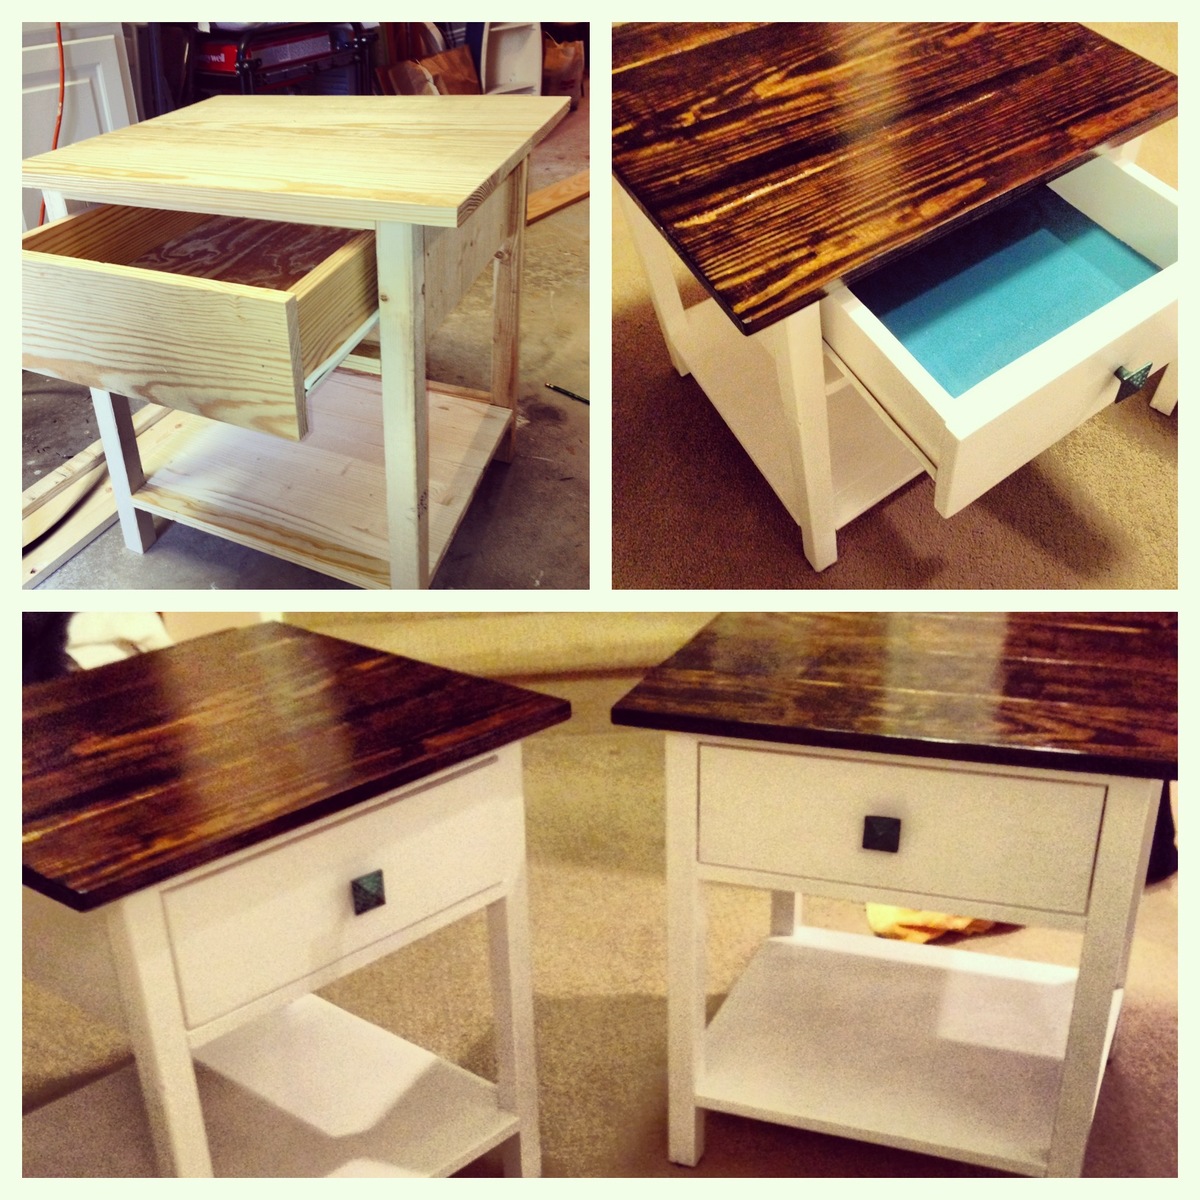
Check out the bedside tables we made to go along with it!
http://ana-white.com/2013/02/farmhouse-bedside-tables-2-toned
Built from Plan(s)
Estimated Cost
$400
Estimated Time Investment
Weekend Project (10-20 Hours)
Finish Used
Minwax Dark Walnut- one coat that sat for about 20 minutes before being wiped down
Minwax Water Based Polycrylic- Clear gloss- 2 coats on top of the stain
Minwax Water Based Polycrylic- Clear gloss- 2 coats on top of the stain
Recommended Skill Level
Beginner
Comments
Mon, 09/14/2015 - 10:05
no dimensions?
is there a link that gives the dimensions? When I click on the print friendly or PDF version it doesn't have much on there
Fancy Jewelry Box

My first real wood project with no help from my father. I wanted to make this for my mother for christmas and I got it done 2 hours before church. I recently purchased a kreg jig r 3 and put it to good use. I made a few changes to the plan that helped me achieve the look that I desired. First, through trial and error I adjusted the kreg jig to be able to drill pocket holes to secure the shelves without the need to go back and wood putty the scrww heads that normal would have been exposed on the outer walls. There is a picture of this set up that I uploaded. Also, when byielding the drawers I made two changes. From what I could tell, the plans called for 1/4 inch plywood for the bottoms of the shelves and that is the way I made them at the beginning. However I was not happy with the appearance of the plywood on the nice face boards I was using for the drawers. So I decided to rip down the two side pieces and the back piece of the drawers ( should be 1 - 5 1/2 inch back piece and 2 - 5 3/4 inch pieces ) but I left the face Plate the full inch and a half that way the plywood wous not show from the front. The last change I made on the drawers was I made 2 pocket holes on each side piece to attach the face to the drawers that way the nail holes would not be showing from the front view. While these steps might not have be necessary , it worked for me. Thank
you very much for the plan my mom cried when she opened the box for the first time.


Built from Plan(s)
Finish Used
Minwax early American
Recommended Skill Level
Intermediate
Comments

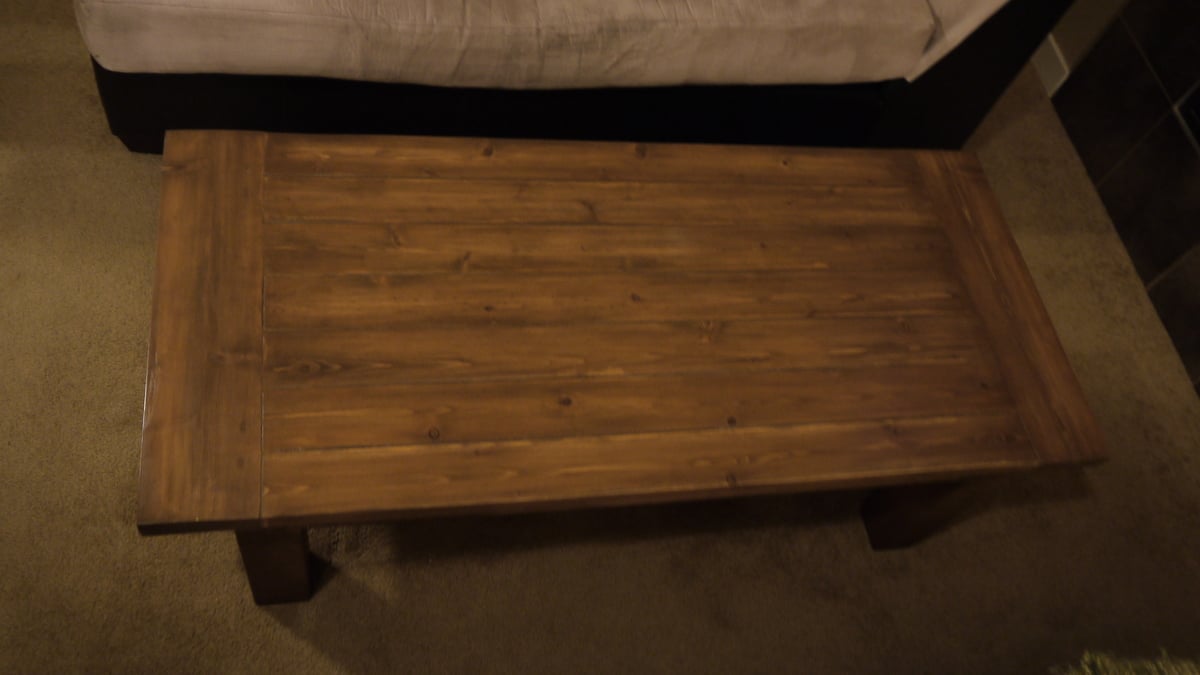
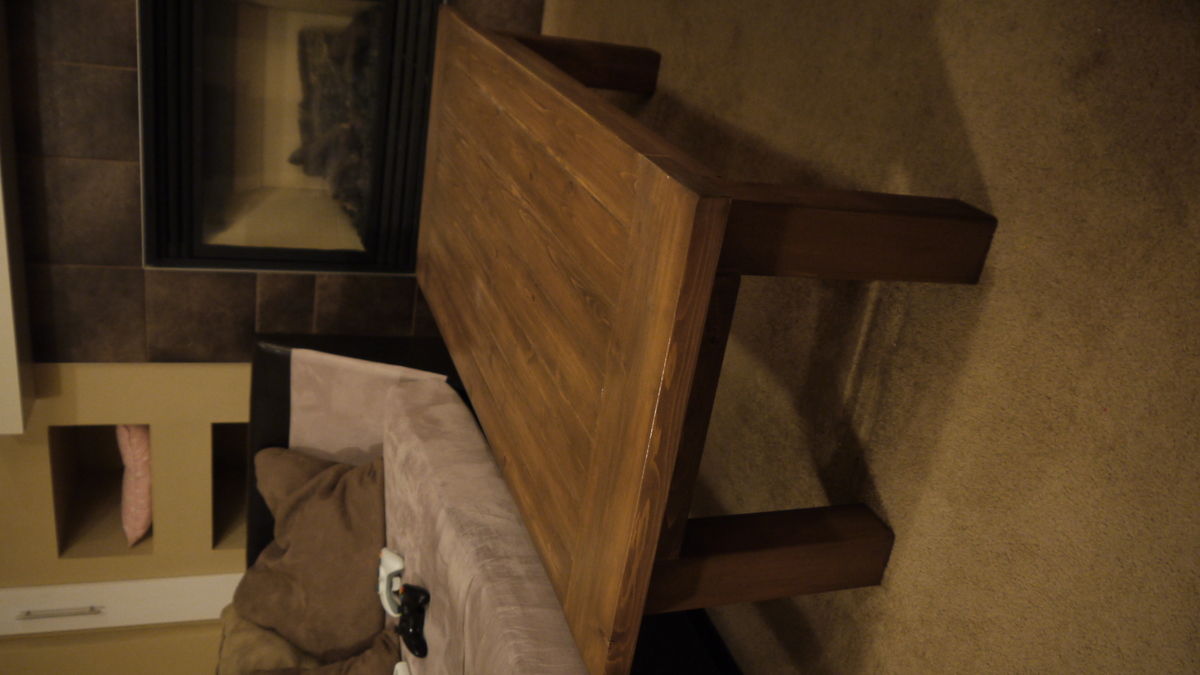
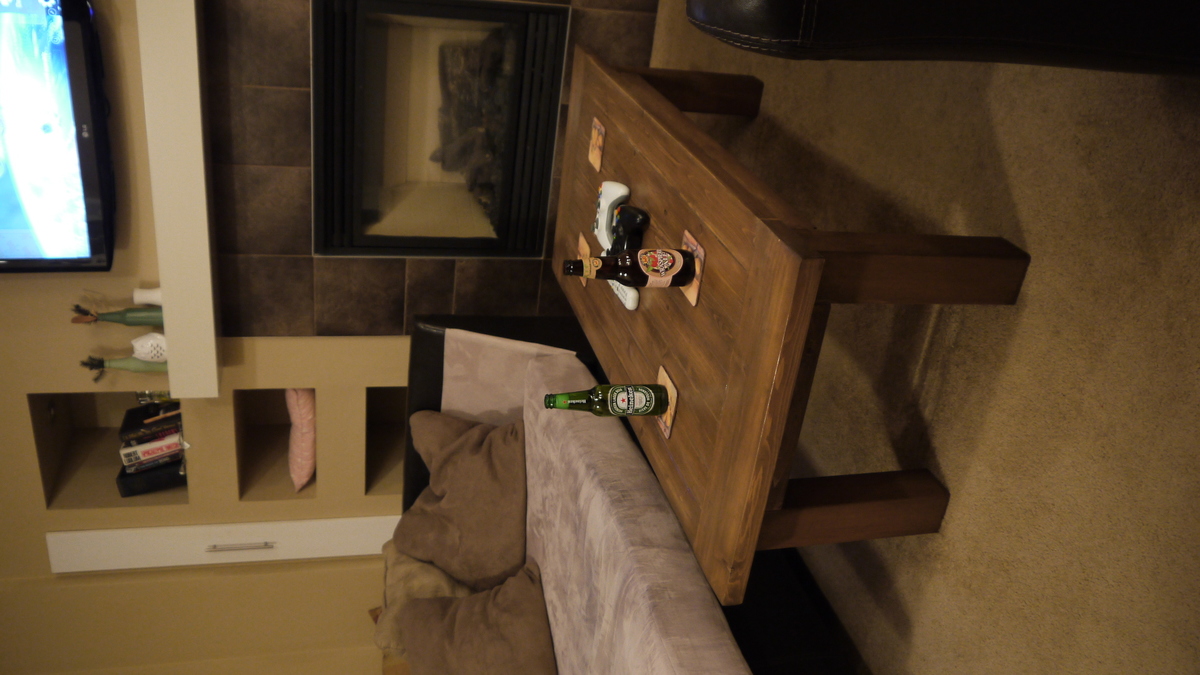
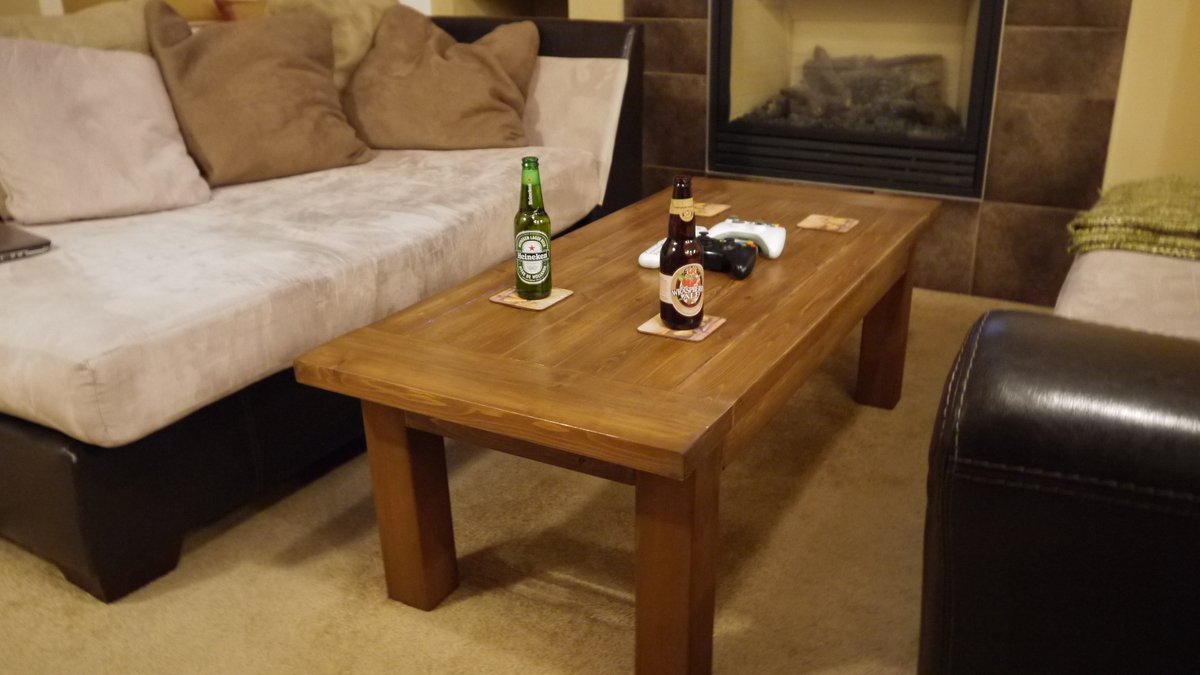
Tryde Coffee Table

This is our very first Ana White project! We are so happy with how it turned out and have definitely been inspired to continue to create. Plans are already in the works for matching end tables, a dining table, and a bookshelf! We used cedar for this table. The stain was MinWax American Walnut, the slight red hue is from the wood only. We finished it with polycrylic because we didn't want any ambering. I think we probably spent about 6 hours doing the actual building A lot of that was spent trying to get the table top boards flush against each other. Any tips for picking straight pieces would be very helpful!! I would suggest cutting and screwing together on the same day do boards don't start to dry out. The rest of the time was really about doing test staining, waiting for coats to dry, etc. We did this in our basement so having water base stains was really key.
Built from Plan(s)
Estimated Time Investment
Weekend Project (10-20 Hours)
Finish Used
MinWax water based conditioner (pre-stain) (applied with cloth)
MinWax water based American Walnut (applied with cloth)
MinWax polyryclic finish (applied with brush)
MinWax water based American Walnut (applied with cloth)
MinWax polyryclic finish (applied with brush)
Recommended Skill Level
Beginner
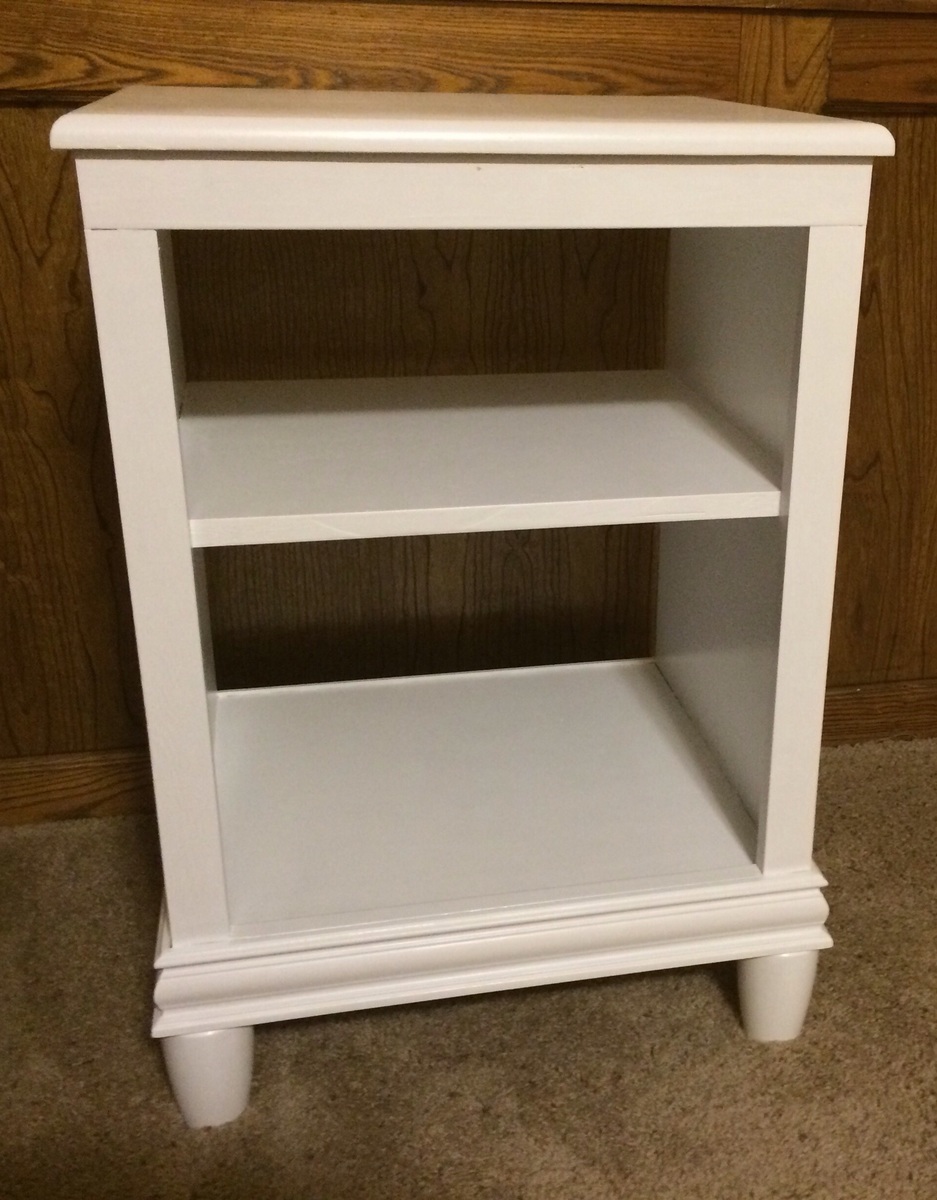
Modified Beach Cottage Dresser
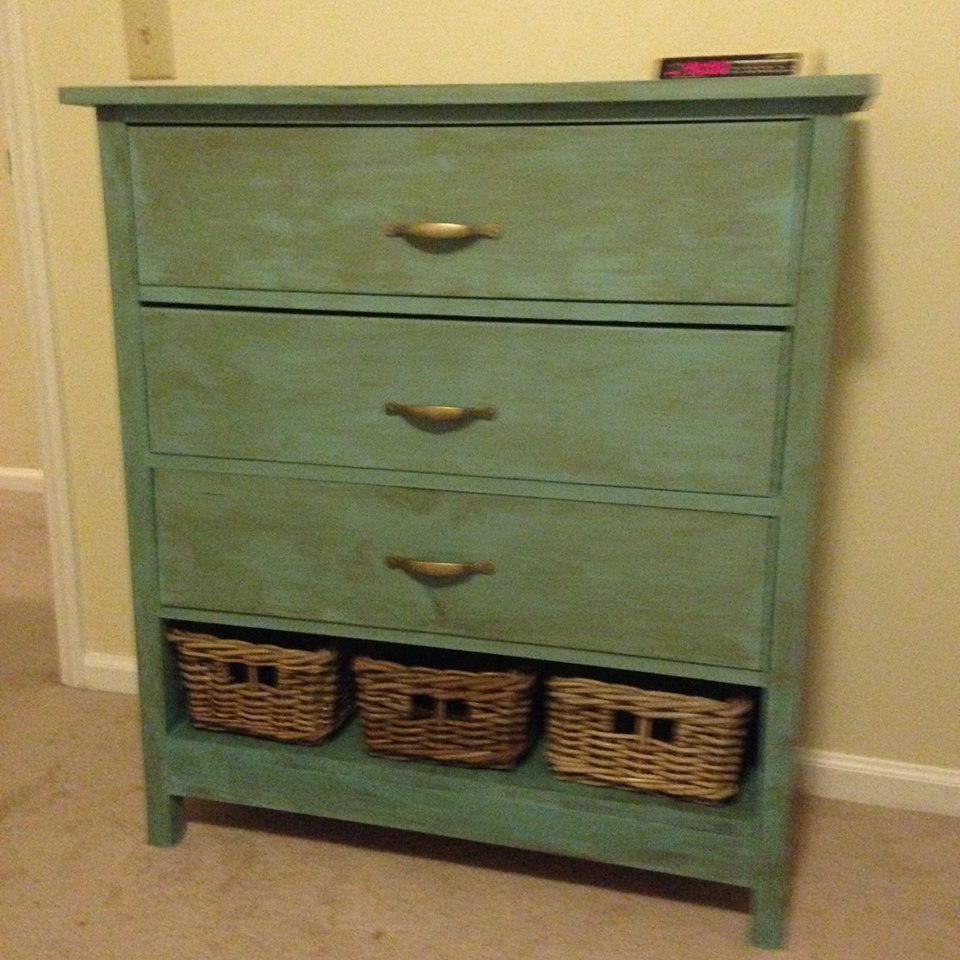
This is a modified version of Patrick's beach cottage dresser with a shelf at the bottom instead of a fourth drawer. The dresser was painted with Americana Decor chalky paint and distressed with Americana Decor wax. Thanks for this excellent plan, Ana and Patrick!
Built from Plan(s)
Estimated Cost
Under $100.
Estimated Time Investment
Week Long Project (20 Hours or More)
Finish Used
Americana Decor Chalky Paint, 2 containers of 'Primitive' and 1 container of 'Treasure'
Americana Decor Creme Wax, Deep Brown
Americana Decor Soft Touch Varnish
Americana Decor Creme Wax, Deep Brown
Americana Decor Soft Touch Varnish
Recommended Skill Level
Intermediate
Patio sectional
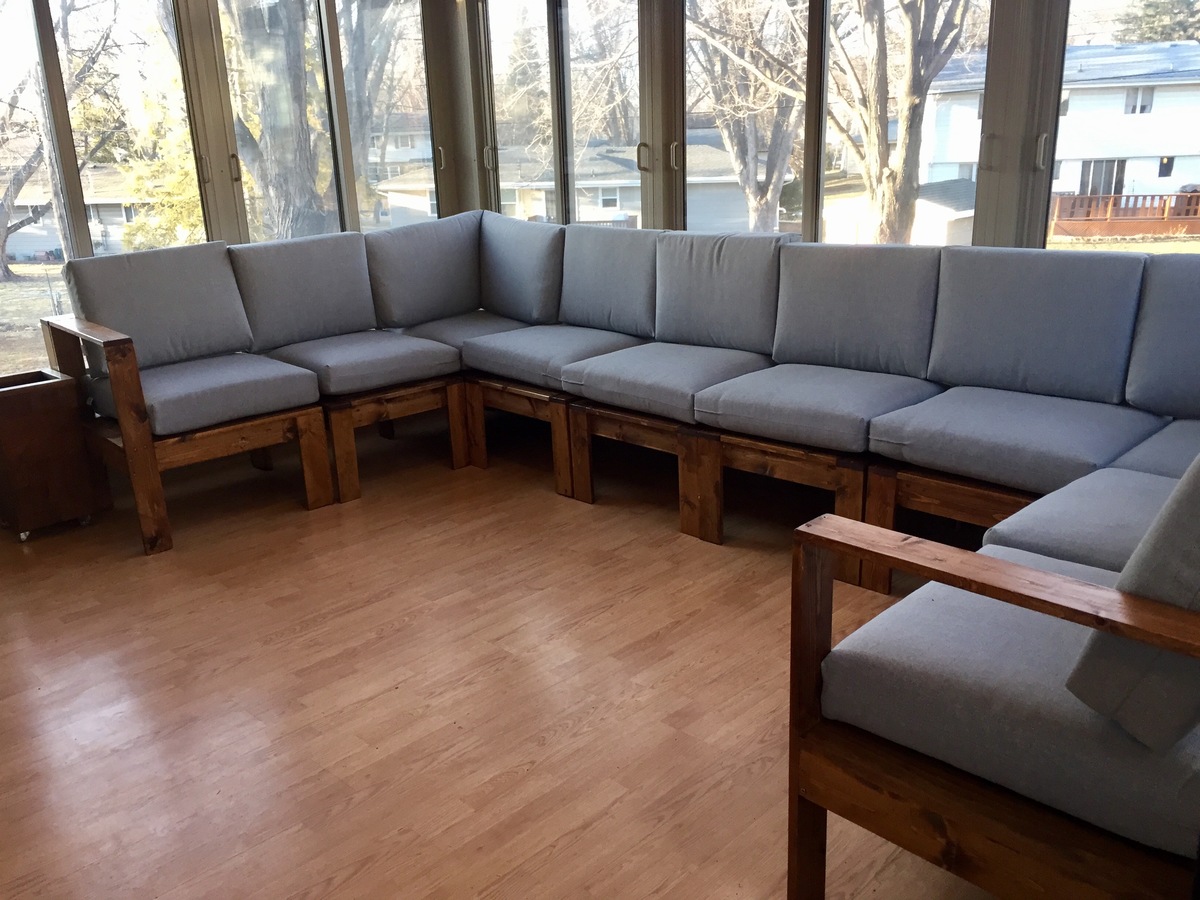
This was exactly what I was looking for! I was able to make a sectional that fit our 4-season patio perfectly, and saved thousands of $$ in the process.
Cushion details
Fullerton Outdoor Deep Seating Cushion Set - Threshold - http://www.target.com/p/fullerton-outdoor-deep-seating-cushion-set-threshold/-/A-52019240
Watch for sales on patio furniture, we were able to save 35% on the cushions (30% off sale + 5% Target REDCard discount)
Estimated Cost(s):
- Lumber = $200
- Cushions = $500
- Screws, stain, miscellaneous supplies = $100
- Total = $800
Finish Used:
- Minwax Pre-Stain Wood Conditioner
- Minwax English Chestnut Oil-Based Stain
- Minway Fast Drying Polyurethane
Built from Plan(s)
Estimated Time Investment
Week Long Project (20 Hours or More)
Recommended Skill Level
Beginner
Lighted hall tree

A lighted hall tree.
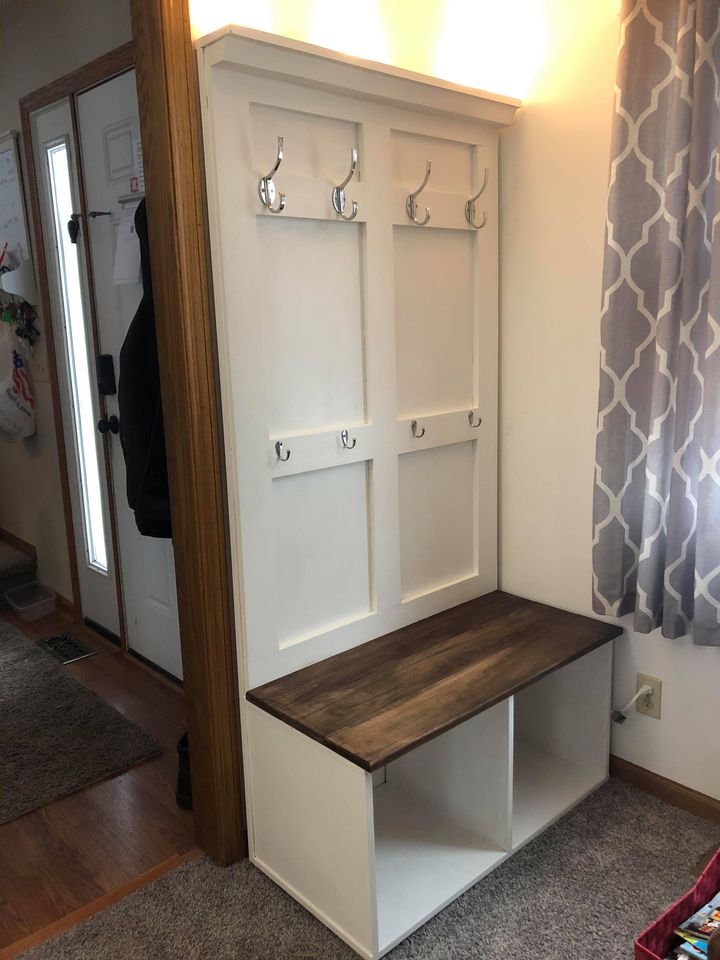
Estimated Cost
200
Estimated Time Investment
Afternoon Project (3-6 Hours)
Recommended Skill Level
Beginner
Comments
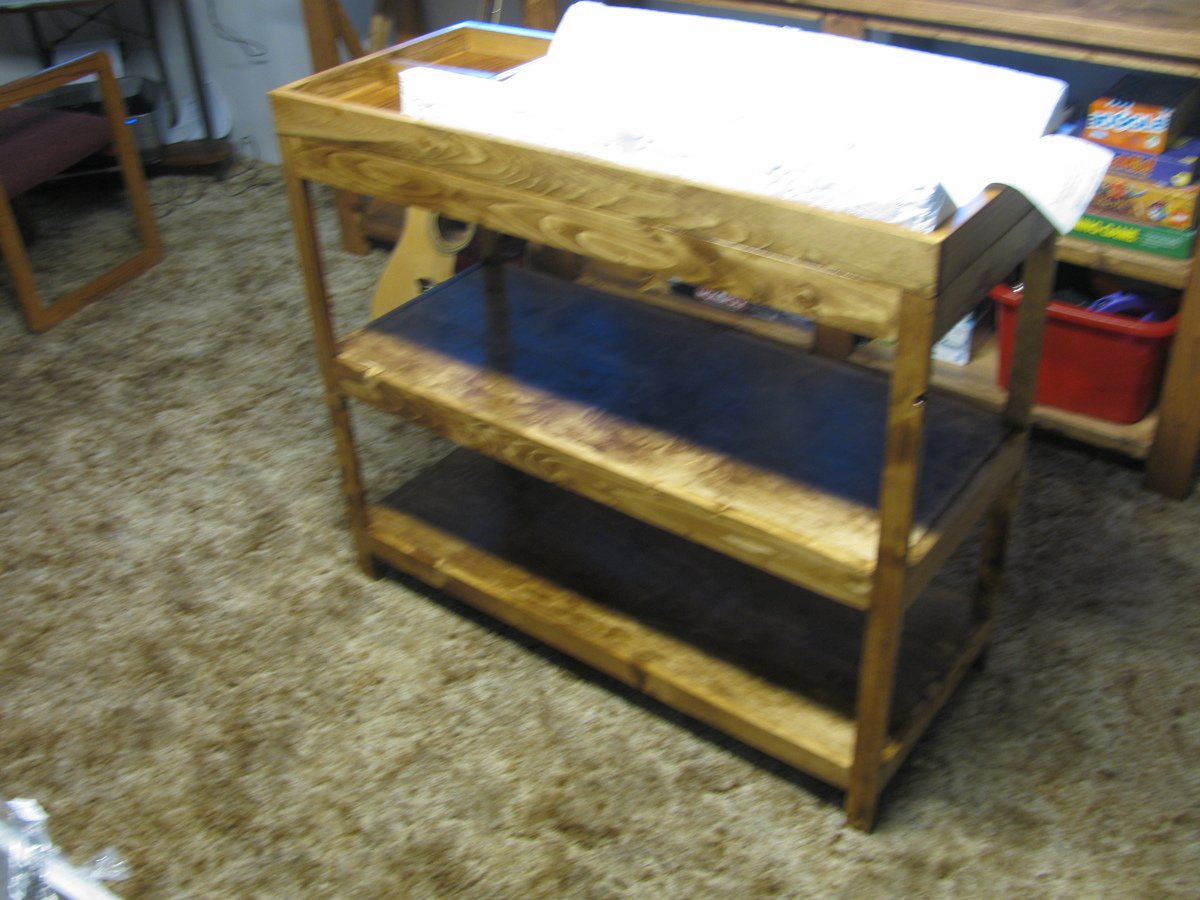
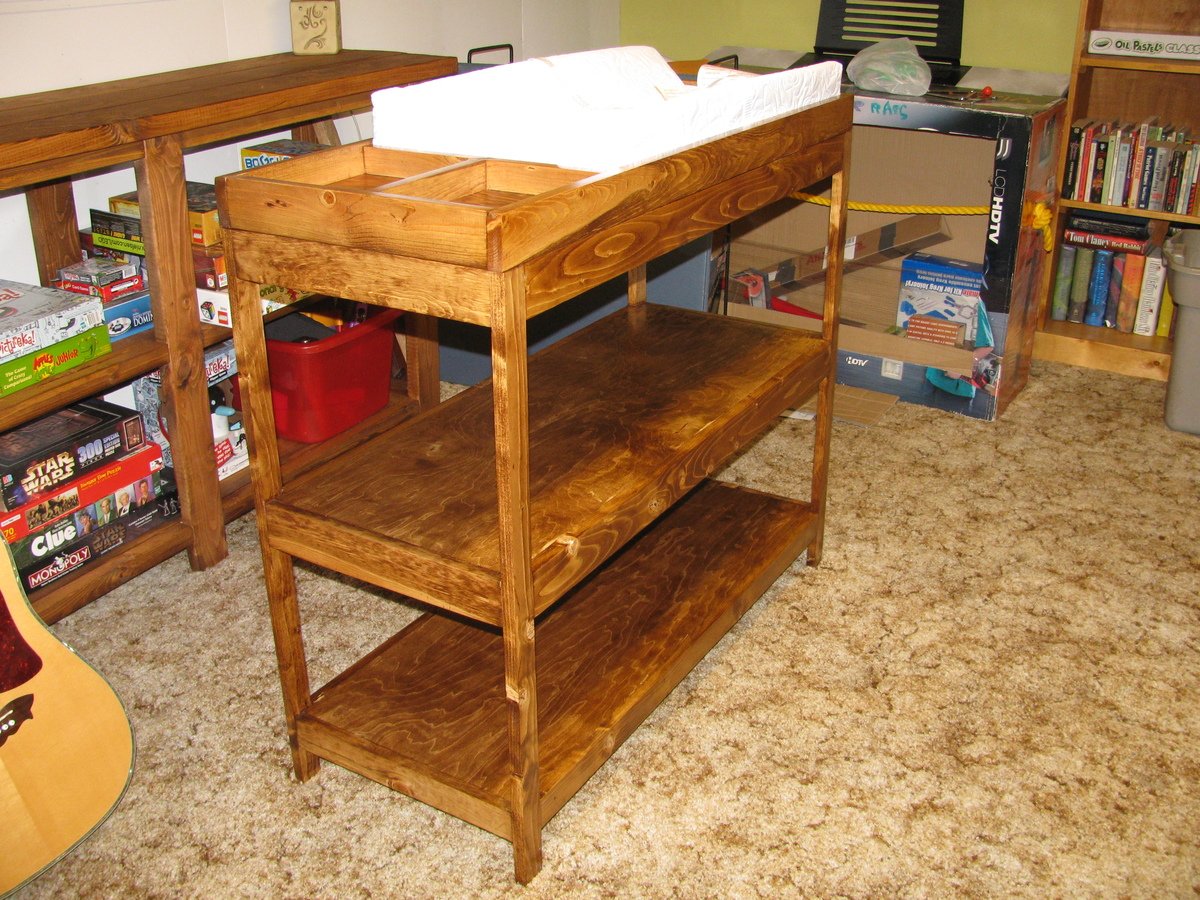
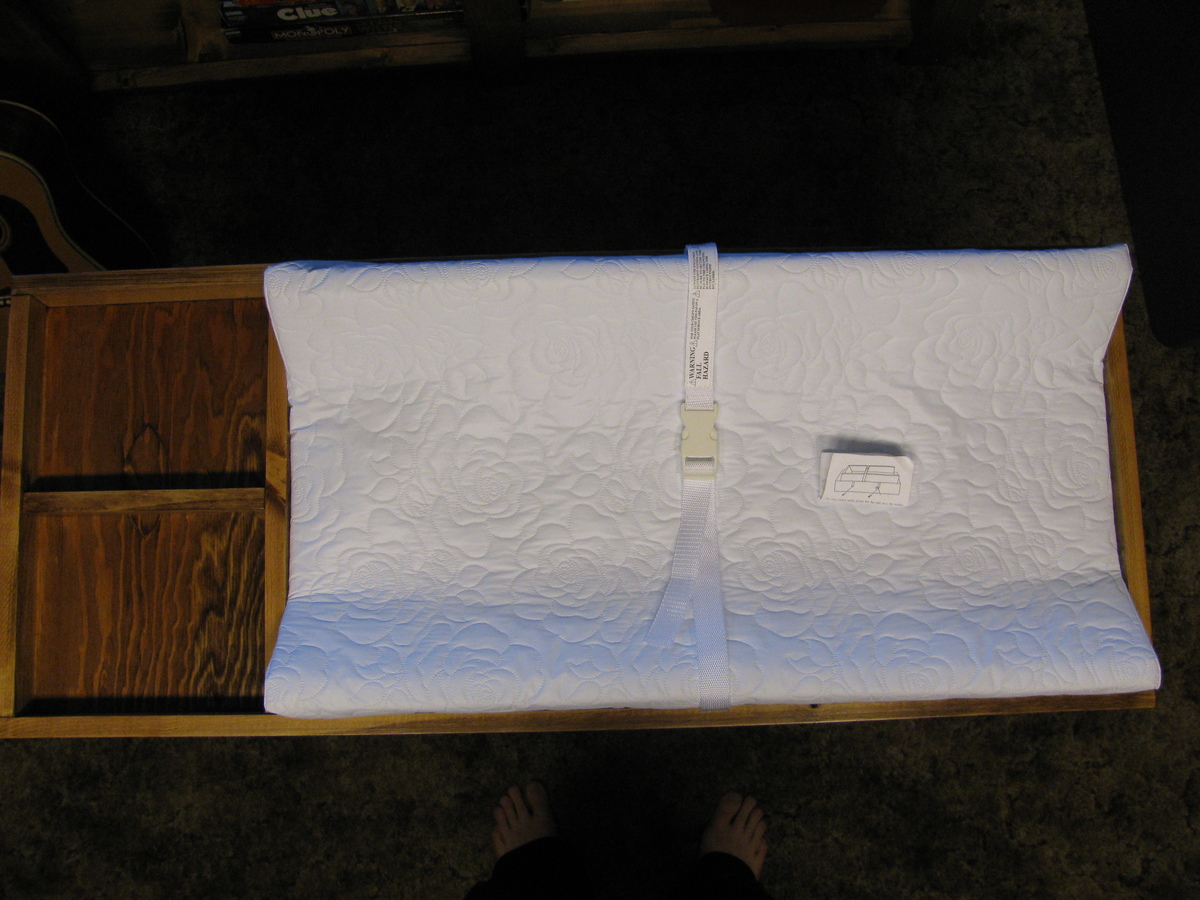
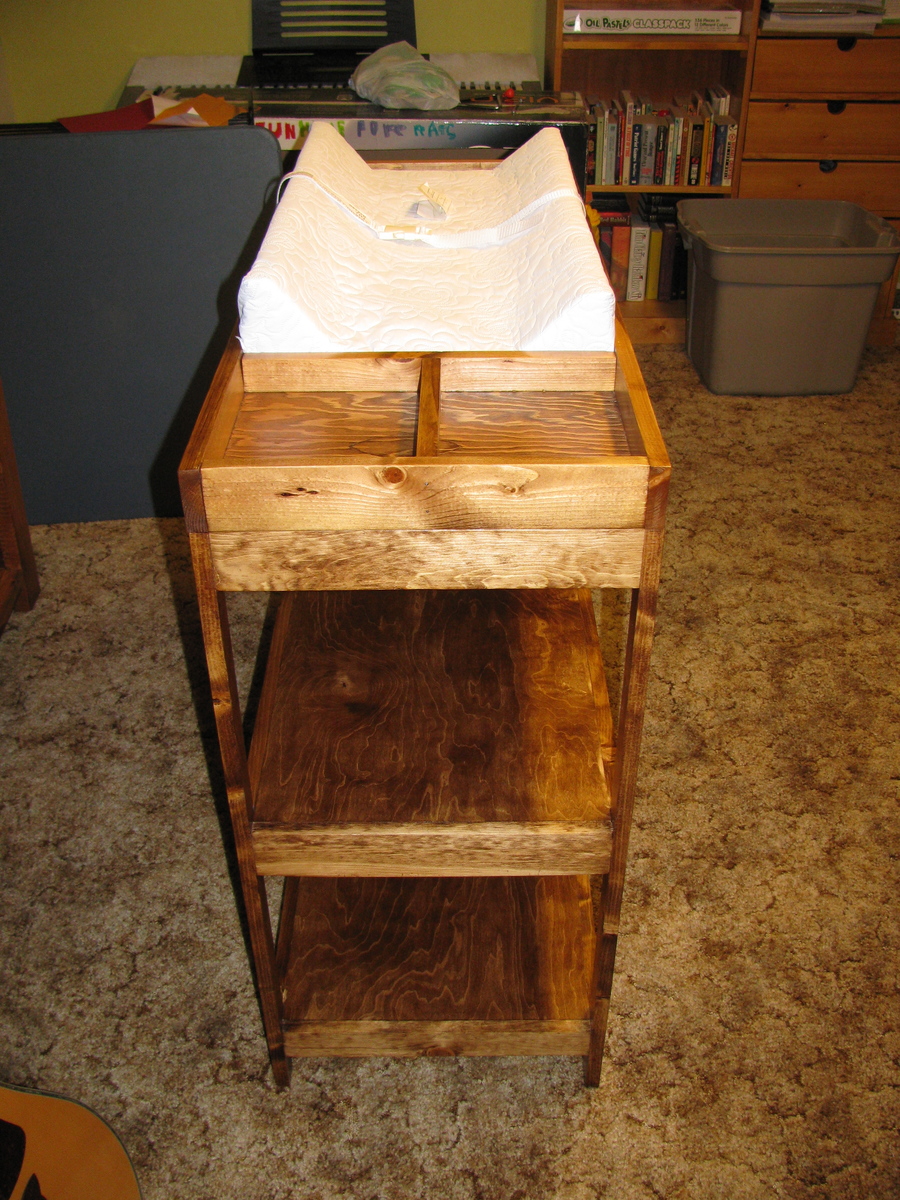
Simple Changing Table
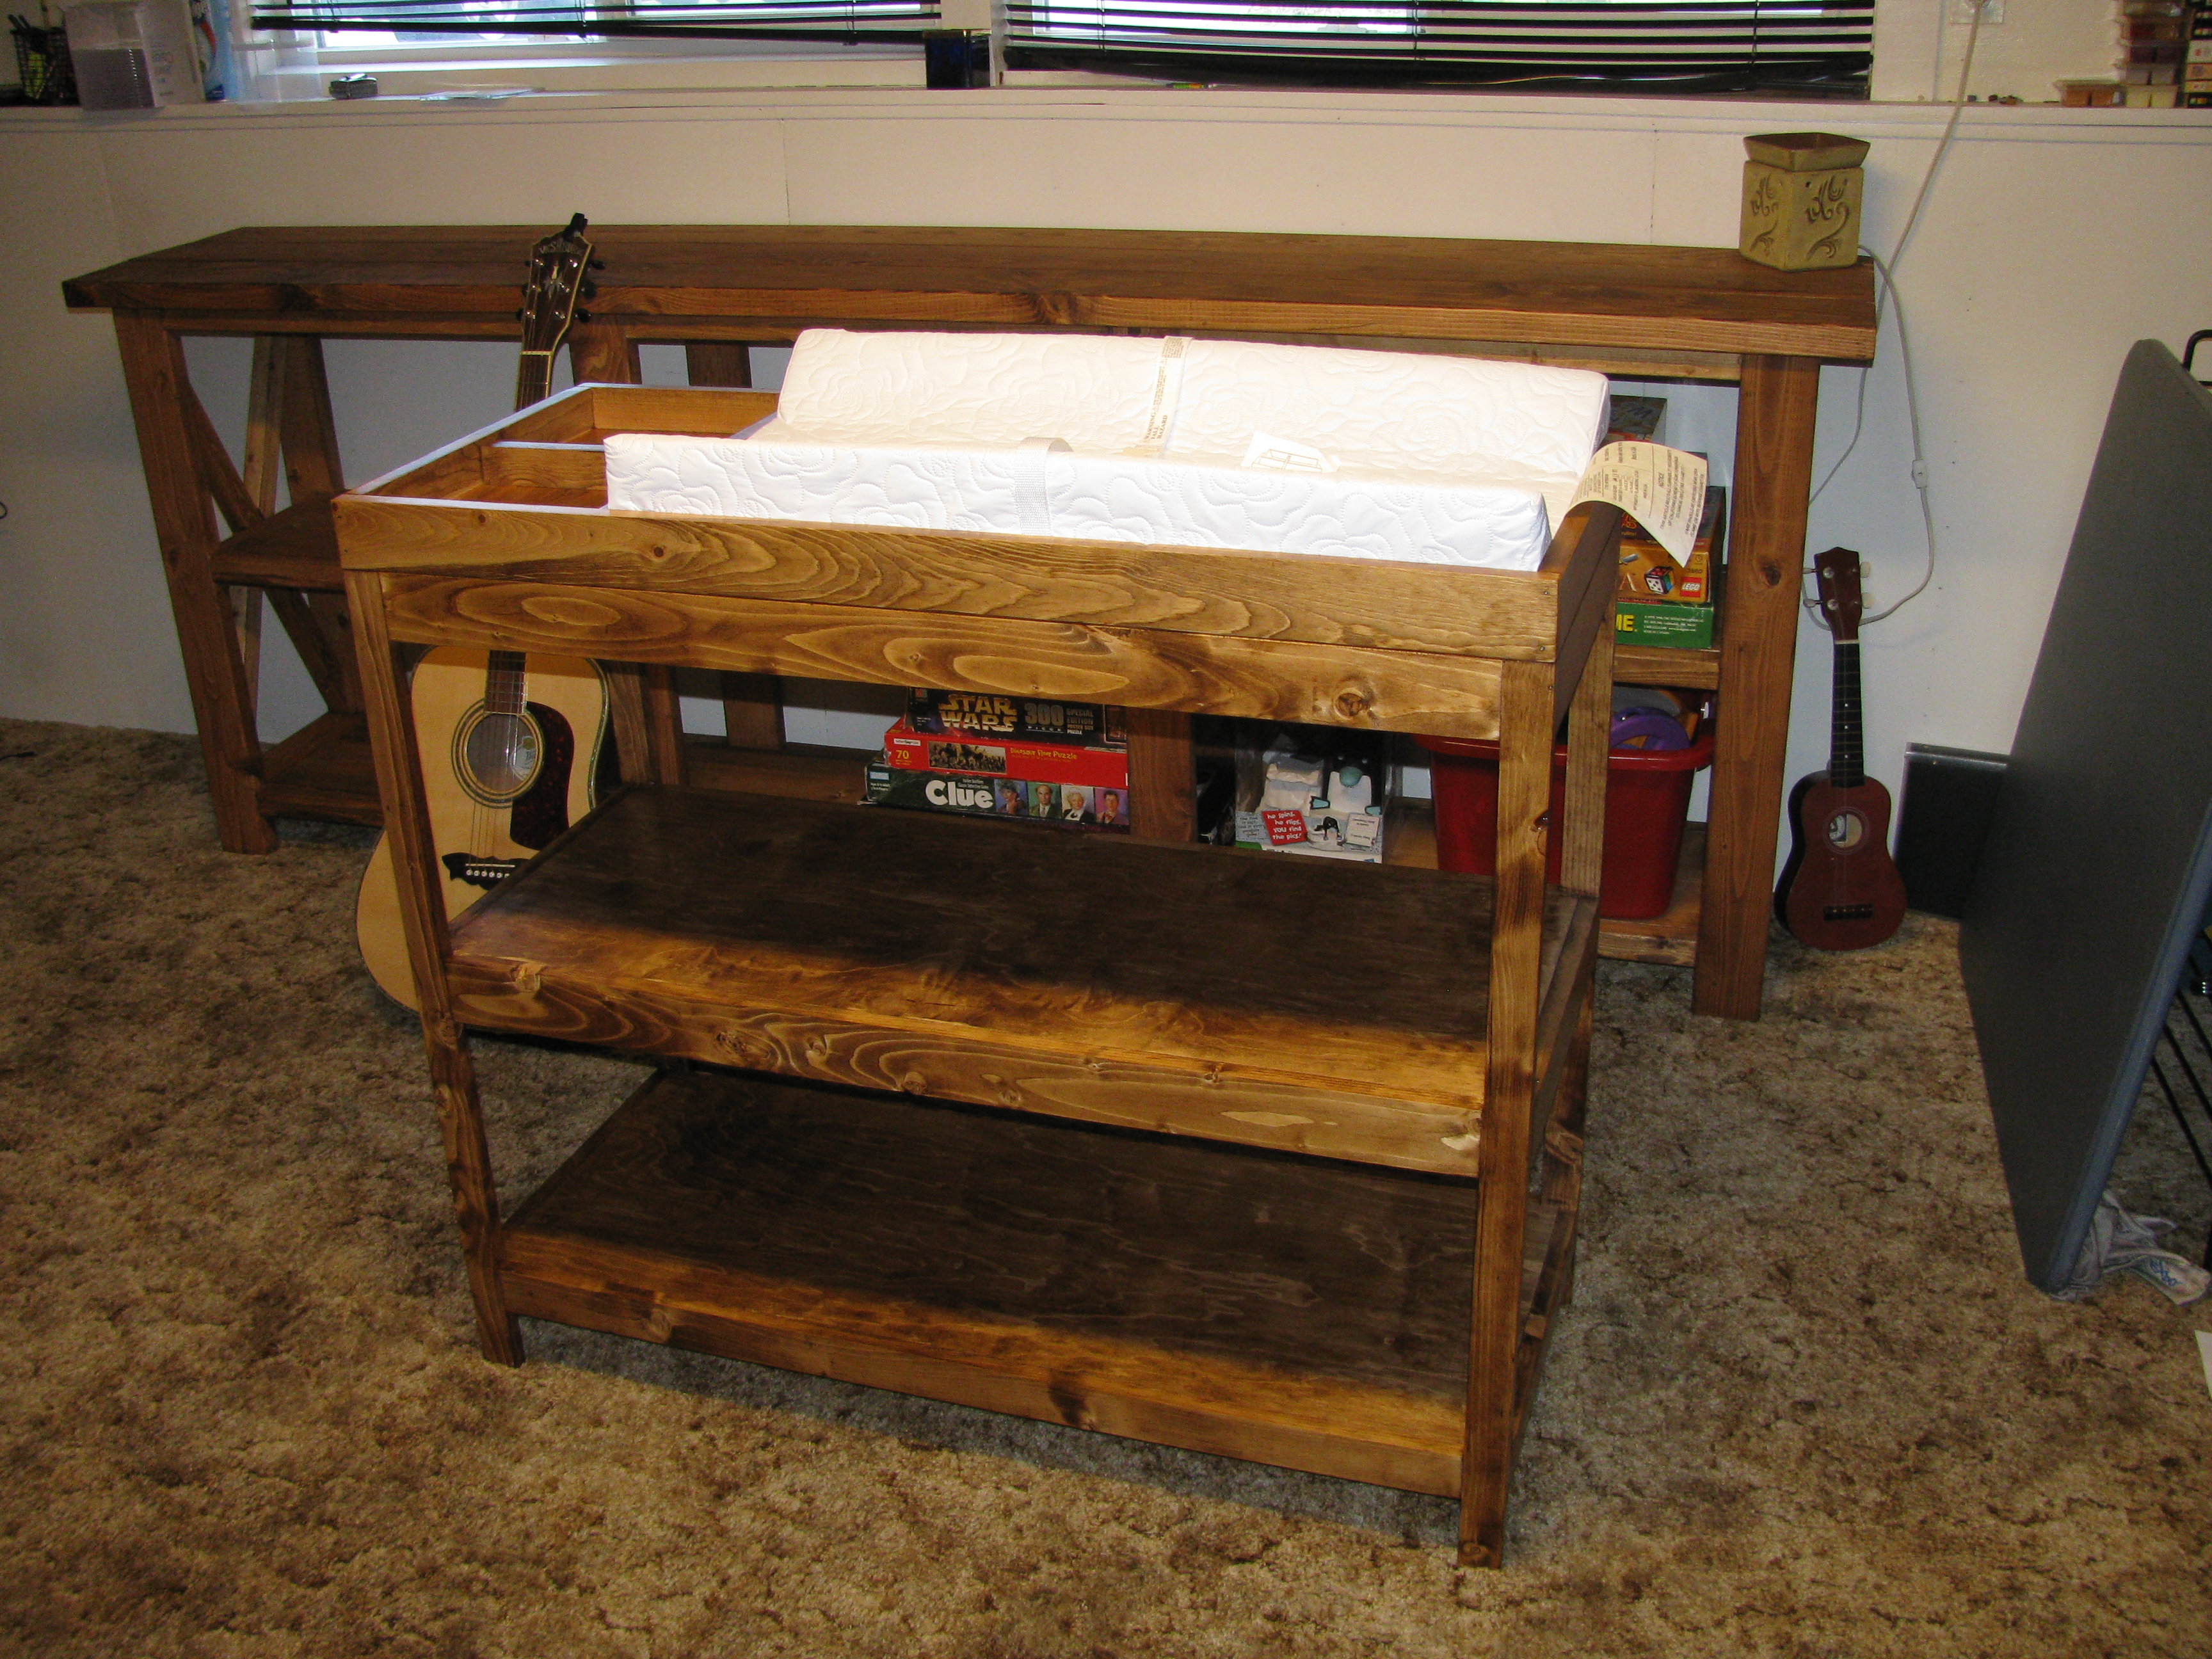
Wanted to make our friends who were expecting a nice gift that would serve them for many years to come. Used a Kreg Jig (greatest tool ever for amateur carpenter or wood worker!!) for most of the joinery. Wanted it to have a bit of an older look to it.
Built from Plan(s)
Estimated Cost
$75
Estimated Time Investment
Weekend Project (10-20 Hours)
Finish Used
Minwax Early American 230 stain and Fast Drying Polyurethane Clear Satin (2 coats)
Recommended Skill Level
Beginner