Community Brag Posts

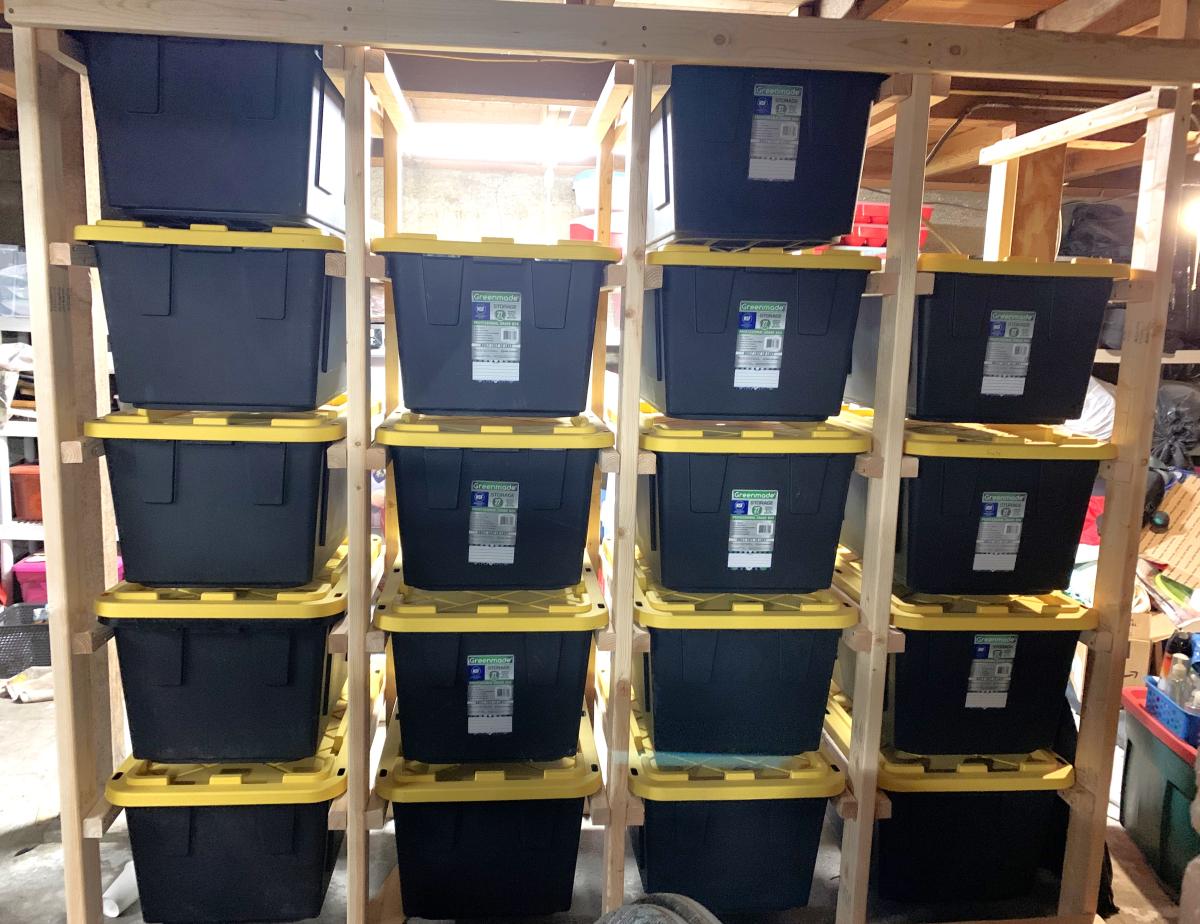
Ladder Tote Storage
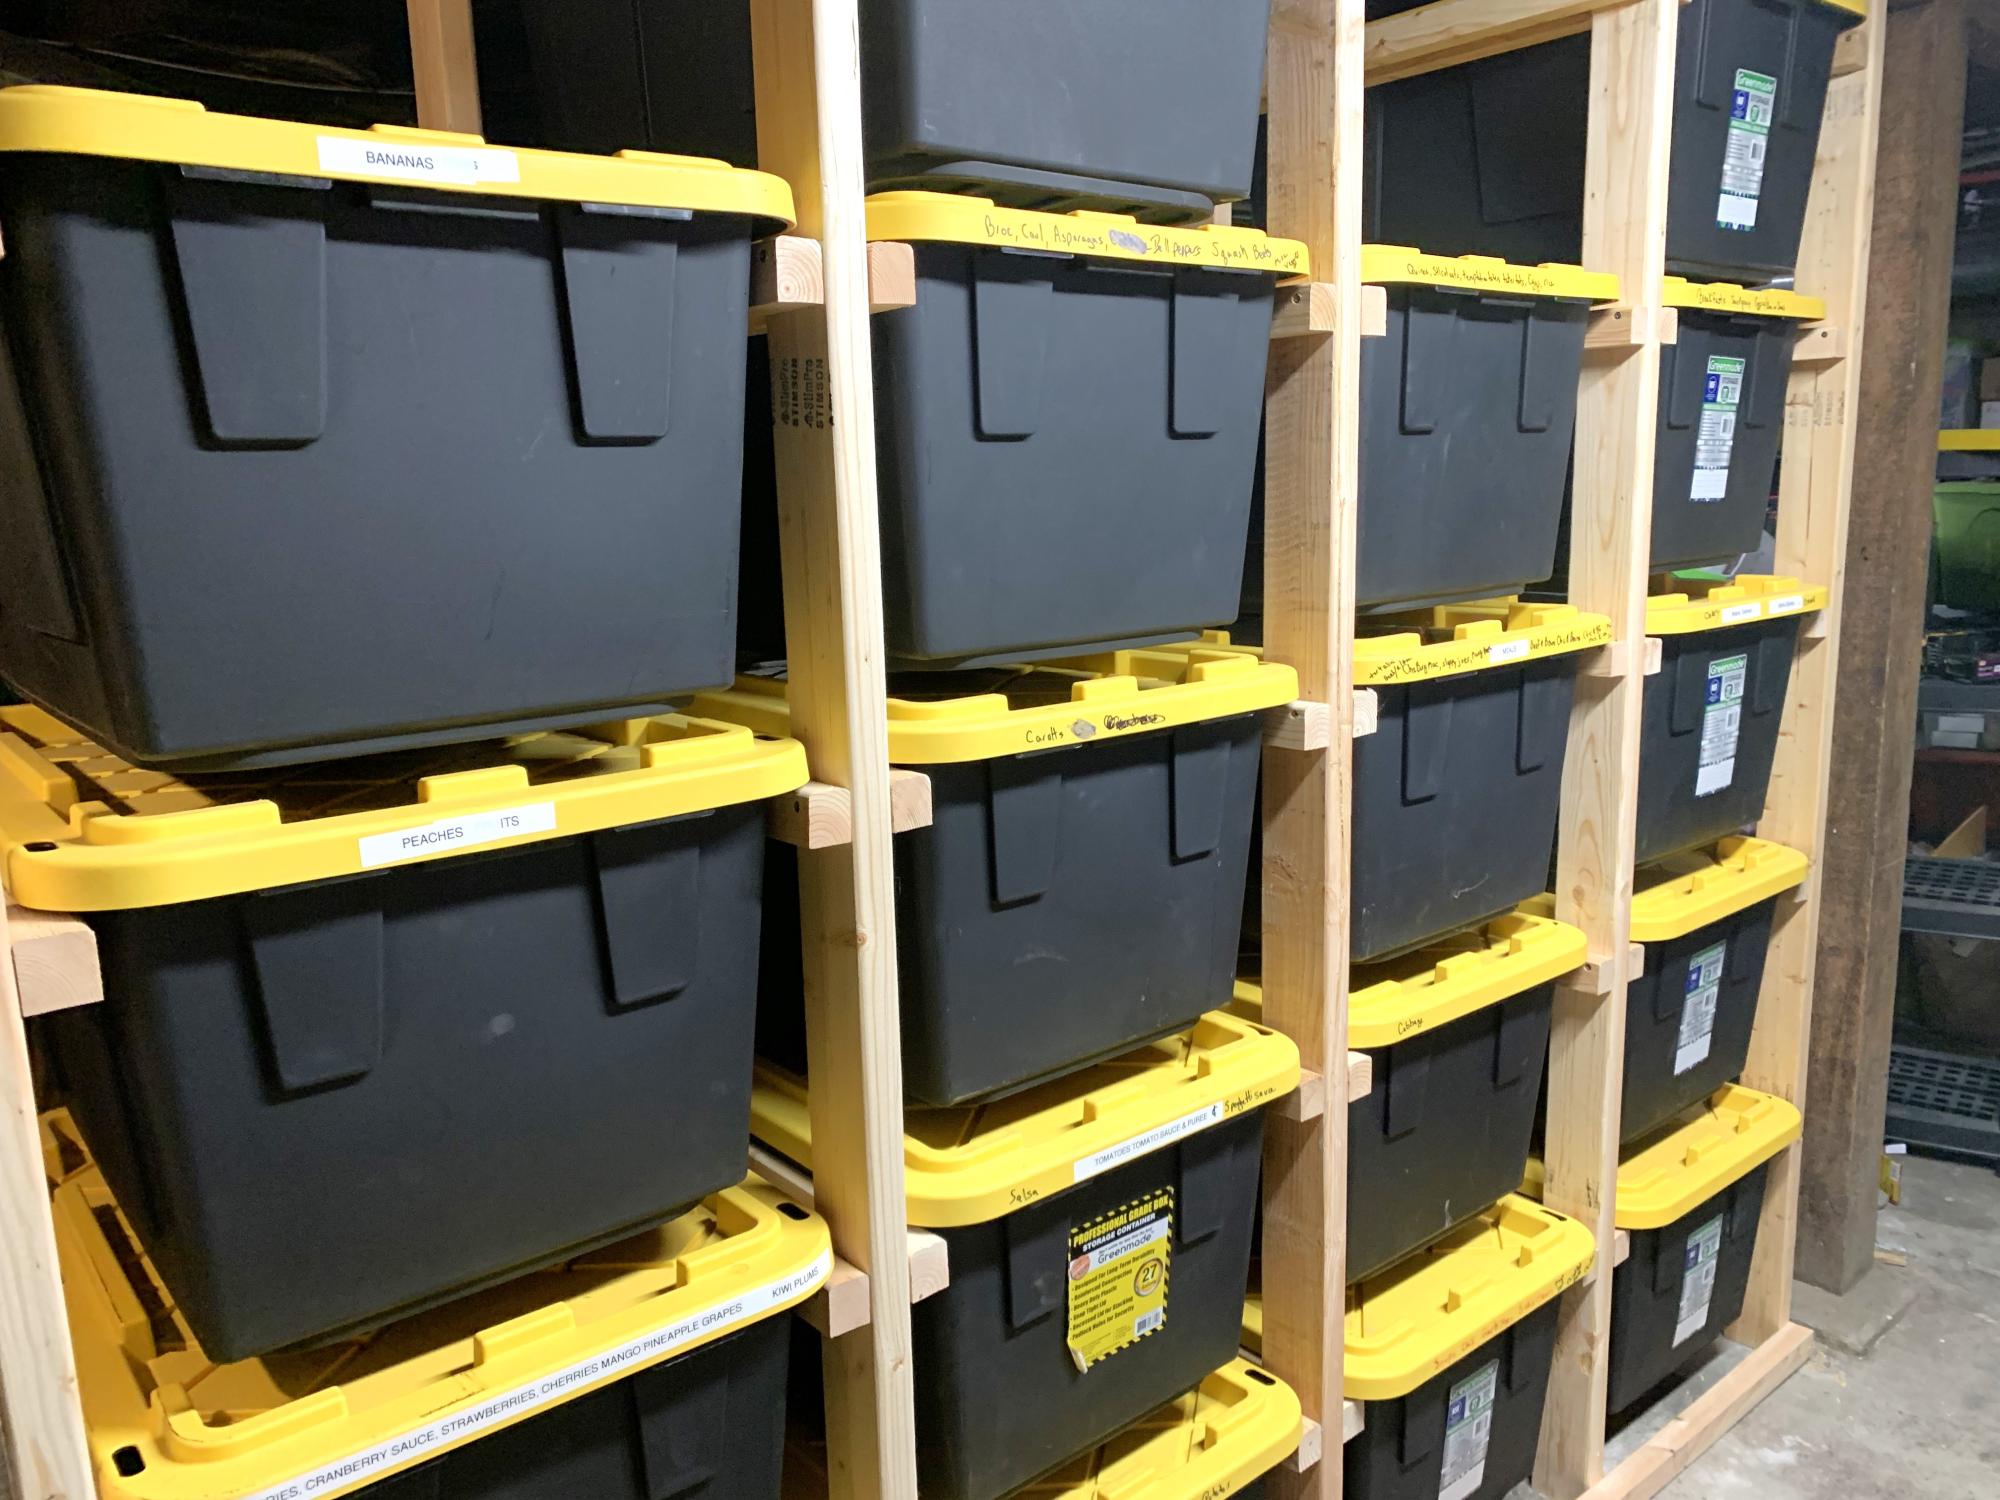
storage for totes - can be made to accommodate any size totes - just adjust the measurements basically it is "ladders " 2x4s for legs 2x2s for "runs" 2x4s across the bottom & top this is in a basement with short ceilings so if you have a taller space you can go taller or you can go shorter.
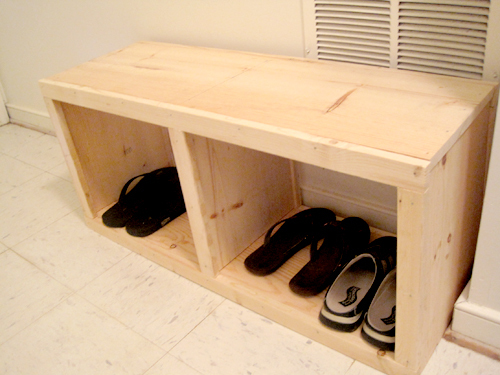
West Elm Knockoff Rolling Cubby
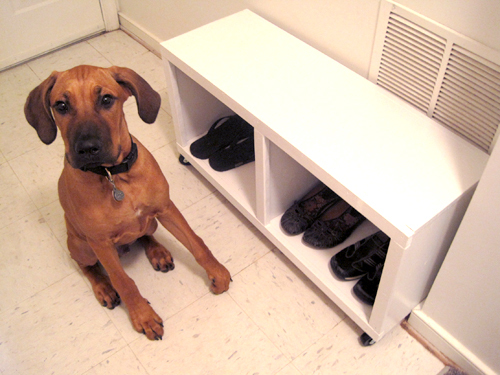
This was my very first build! I didn't even have a saw, so I had the lumber guys at Lowes cut my boards for me. Also, I altered the dimensions to fit my space.
Check out my blog link for more info!
Built from Plan(s)
Estimated Cost
$64.00
Estimated Time Investment
Day Project (6-9 Hours)
Finish Used
Primed and painted with white glossy paint.
Recommended Skill Level
Starter Project
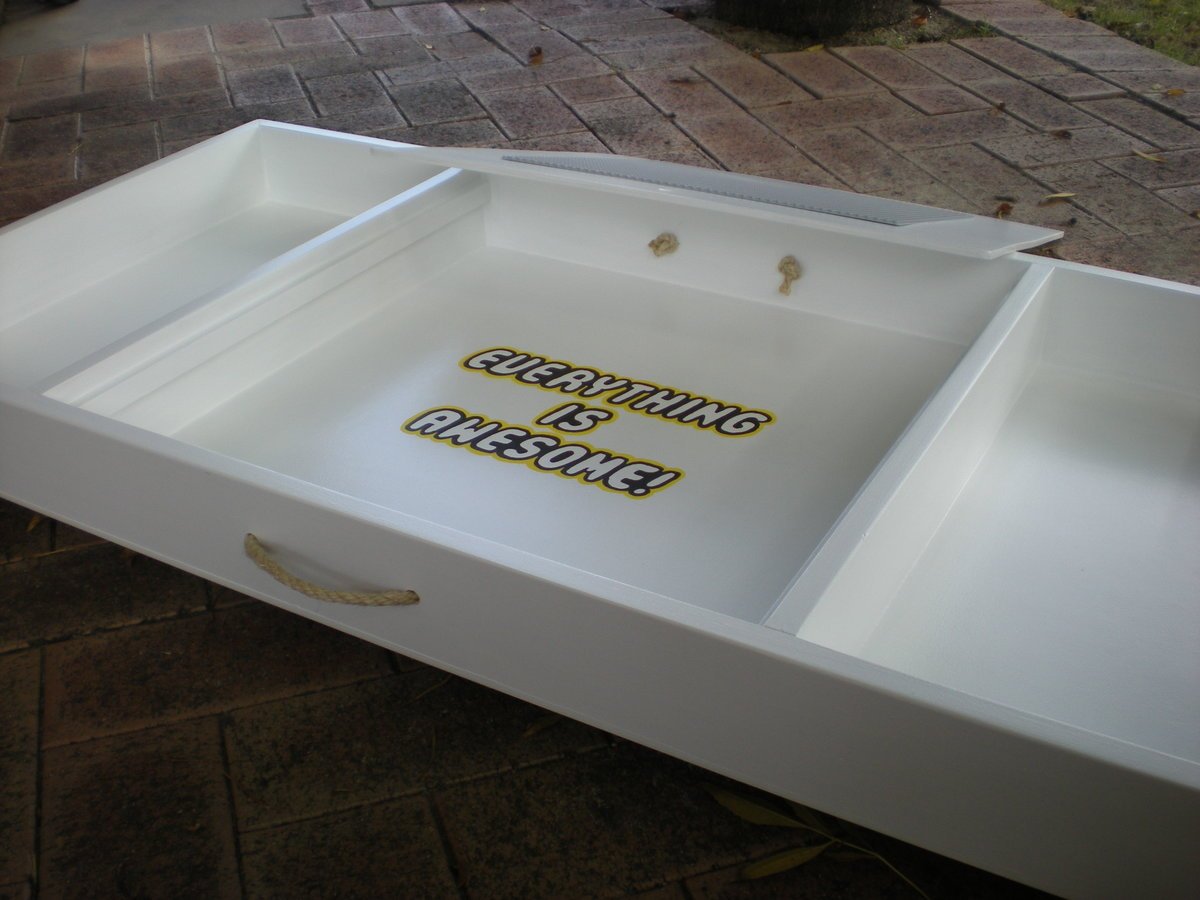
Underbed Lego Storage
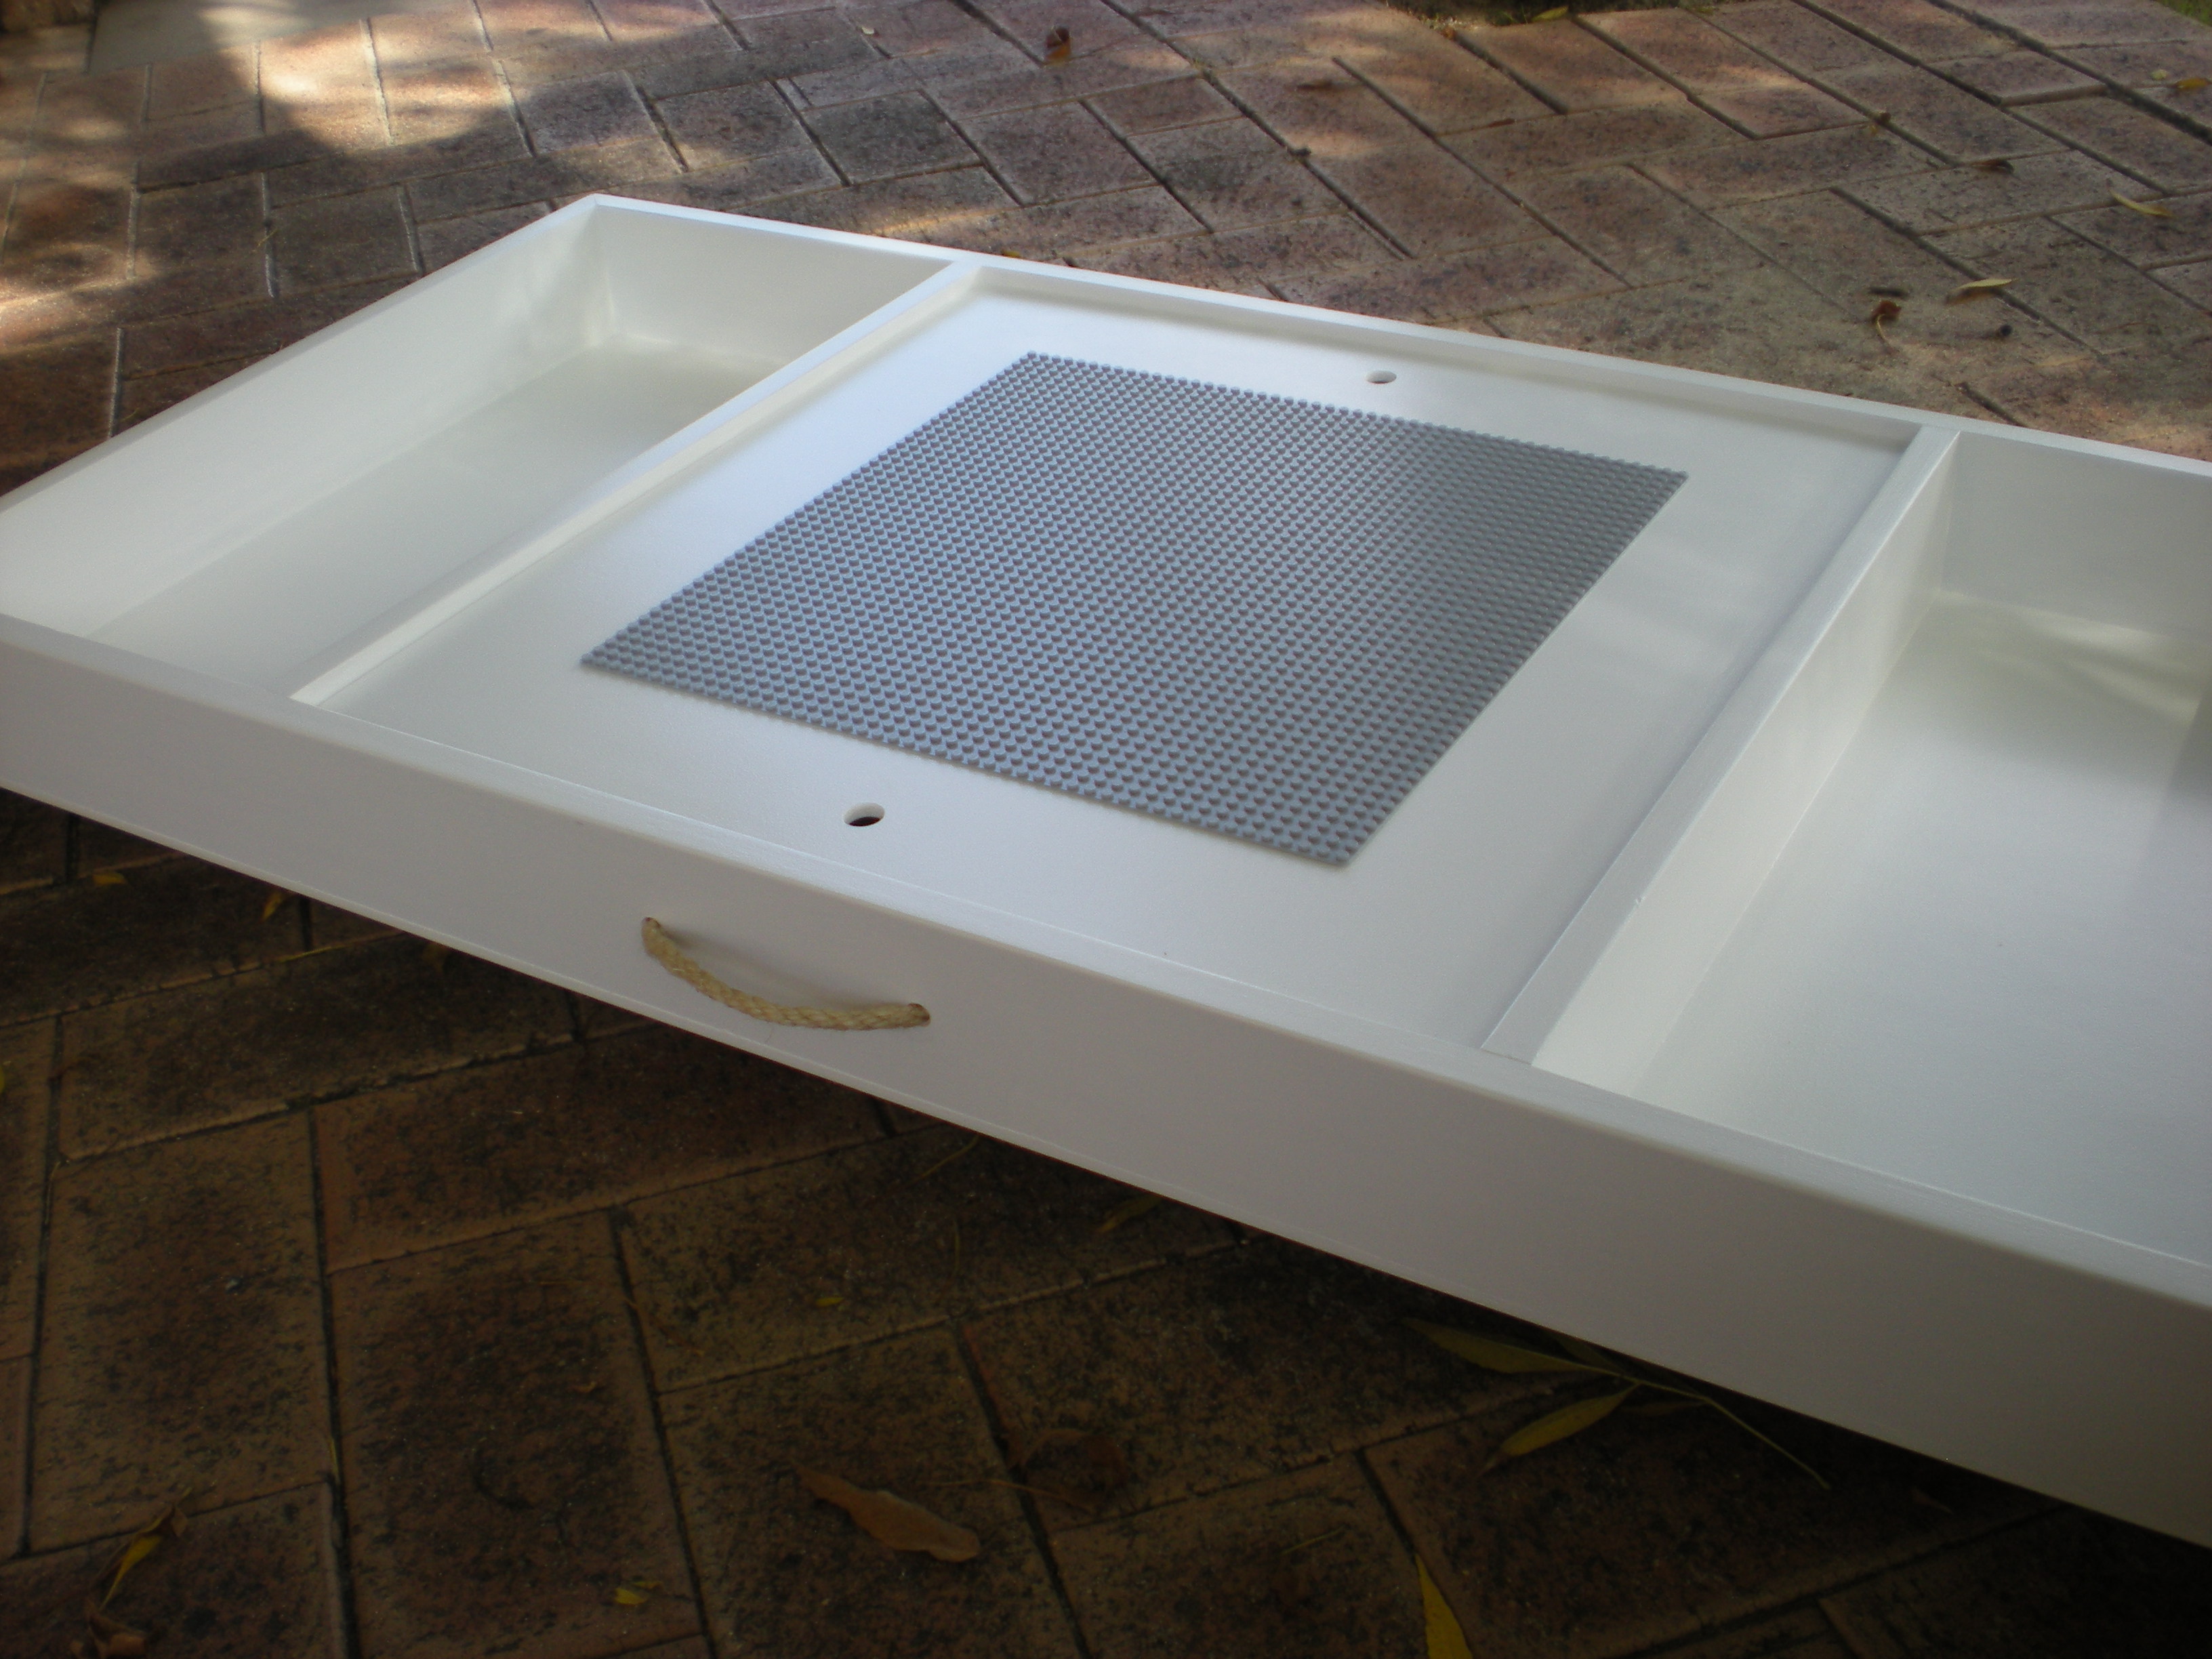
We were in desperate need of a lego storage solution for our son's small bedroom. I made this for his 7th birthday. I saw a photo of a similar one as a result of a google or pinterest search and decided to draw up some plans.
I recessed the top slightly so that pieces won't fall off. I just glued thin cleats to the inside of the box to hold the lid, (using spacers to get it at the height I wanted) Ideally the top would be reversible however I didn't quite get one of the dividers square so it only fits one way. I used Posca water-based markers to do the text. Make sure you wait until the text is really dry before you try to seal it (don't ask me how I know that...) Turns out that the markers don't react well with the brush on poly so I just left the text unsealed.
I was just going to have one handle on the front but then I made a stupid mistake and wrote the text so it would be upside down when pulled out (I know, dumb right!) So I added another handle on the other side. I used a water-based enamel for the whole box. Not sure if that was worth it of if I should have just used flat and given it a top coat of poly. I used a brush on the inside corners and found it really hard to get an even finish because I rolled the flat surfaces. Painting the pieces before assembly would probably fix this.
Added some castors so it can be pushed under the bed.

Estimated Cost
AUD$39 (plus lego baseplate and paint markers)
Estimated Time Investment
Weekend Project (10-20 Hours)
Finish Used
dulux aquanamel - vivid white, posca water-based poster markers
Recommended Skill Level
Beginner
Comments

Sun, 02/05/2017 - 08:48
Dimensions
This is so awesome. Do you think you could share a more detailed account of build. Dimensions? Supplies? I am a newbie at this! I would greatly appreciate!
2x10 Step Stools

My kids needed a step stool and I had some scrap wood (2x10) left over from a previous project
Built from Plan(s)
Estimated Cost
20 dollars
Estimated Time Investment
Weekend Project (10-20 Hours)
Finish Used
Minwax (weathered oak stain)
Minwax polycrylic protective finish
Minwax polycrylic protective finish
Recommended Skill Level
Starter Project
Comments

Thu, 08/18/2016 - 20:12
Thank you! The dimensions are
Thank you! The dimensions are the same as the Ana White "Simple 1x10 Single Step Stool" except I used 2x10's instead of 1x10's like the plans called for. I also used some scrap pallet wood to make a design on the top of the stool.
- Stool height: 7 1/2" for legs, 1 1/2" for top, and 1/2" for scrap pallet wood; which gives a total height of 9"
- Stool width: 9 1/4" x 16"
- 5 degree angle cuts were made on the legs
Wed, 04/17/2024 - 09:21
Are the rails a 2x10 cut in…
Are the rails a 2x10 cut in half.? Or is it pallet wood?
Family Project
Great family project, thanks Ana!
Built from Plan(s)
Finish Used
Walnut Timber Oil
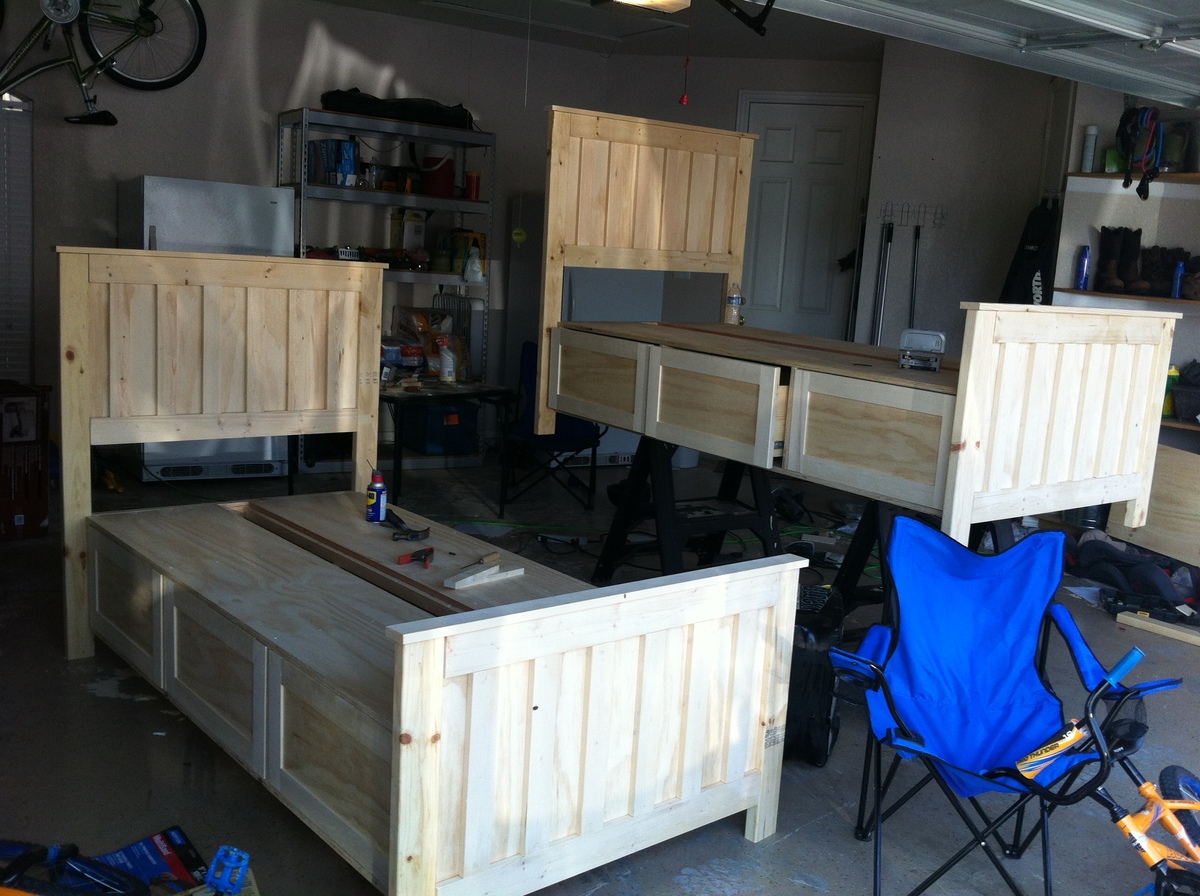
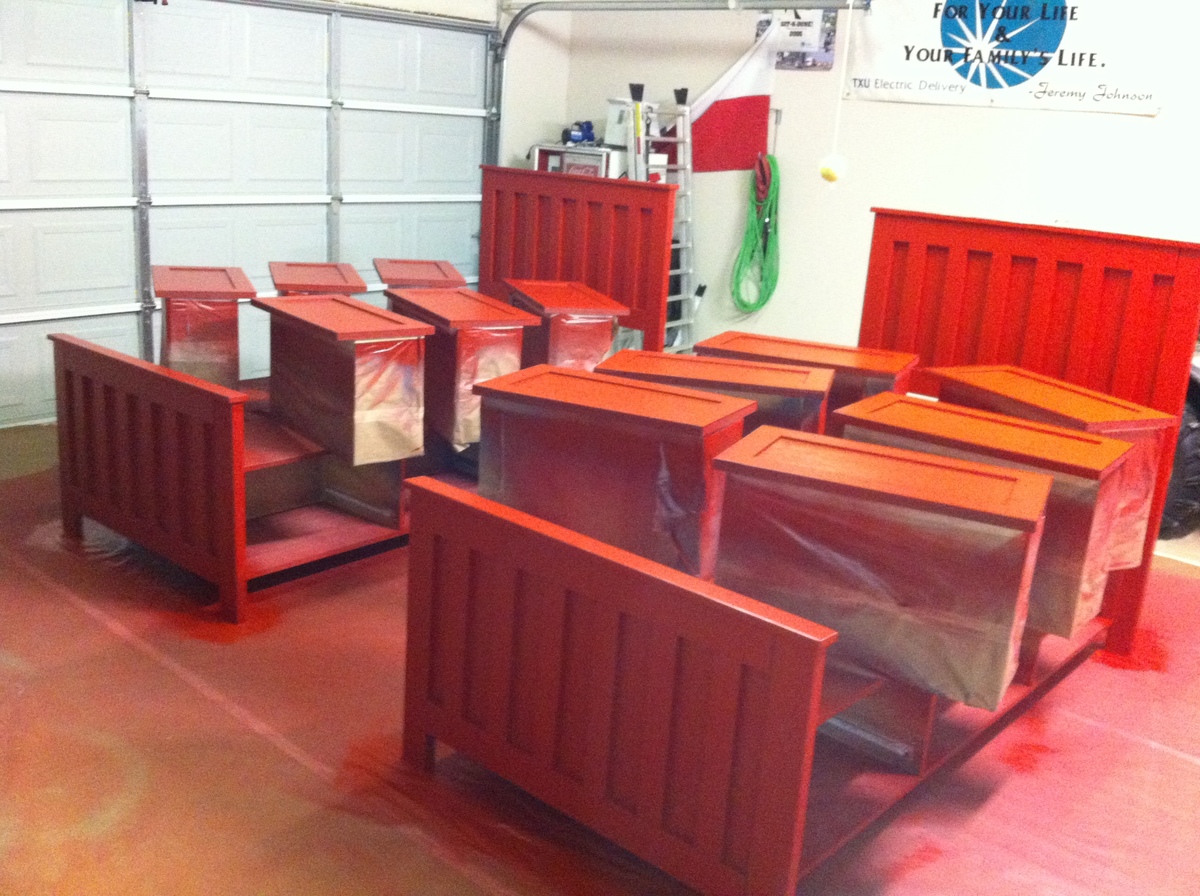
Combined the Kentwood and Farmhouse Beds!!!
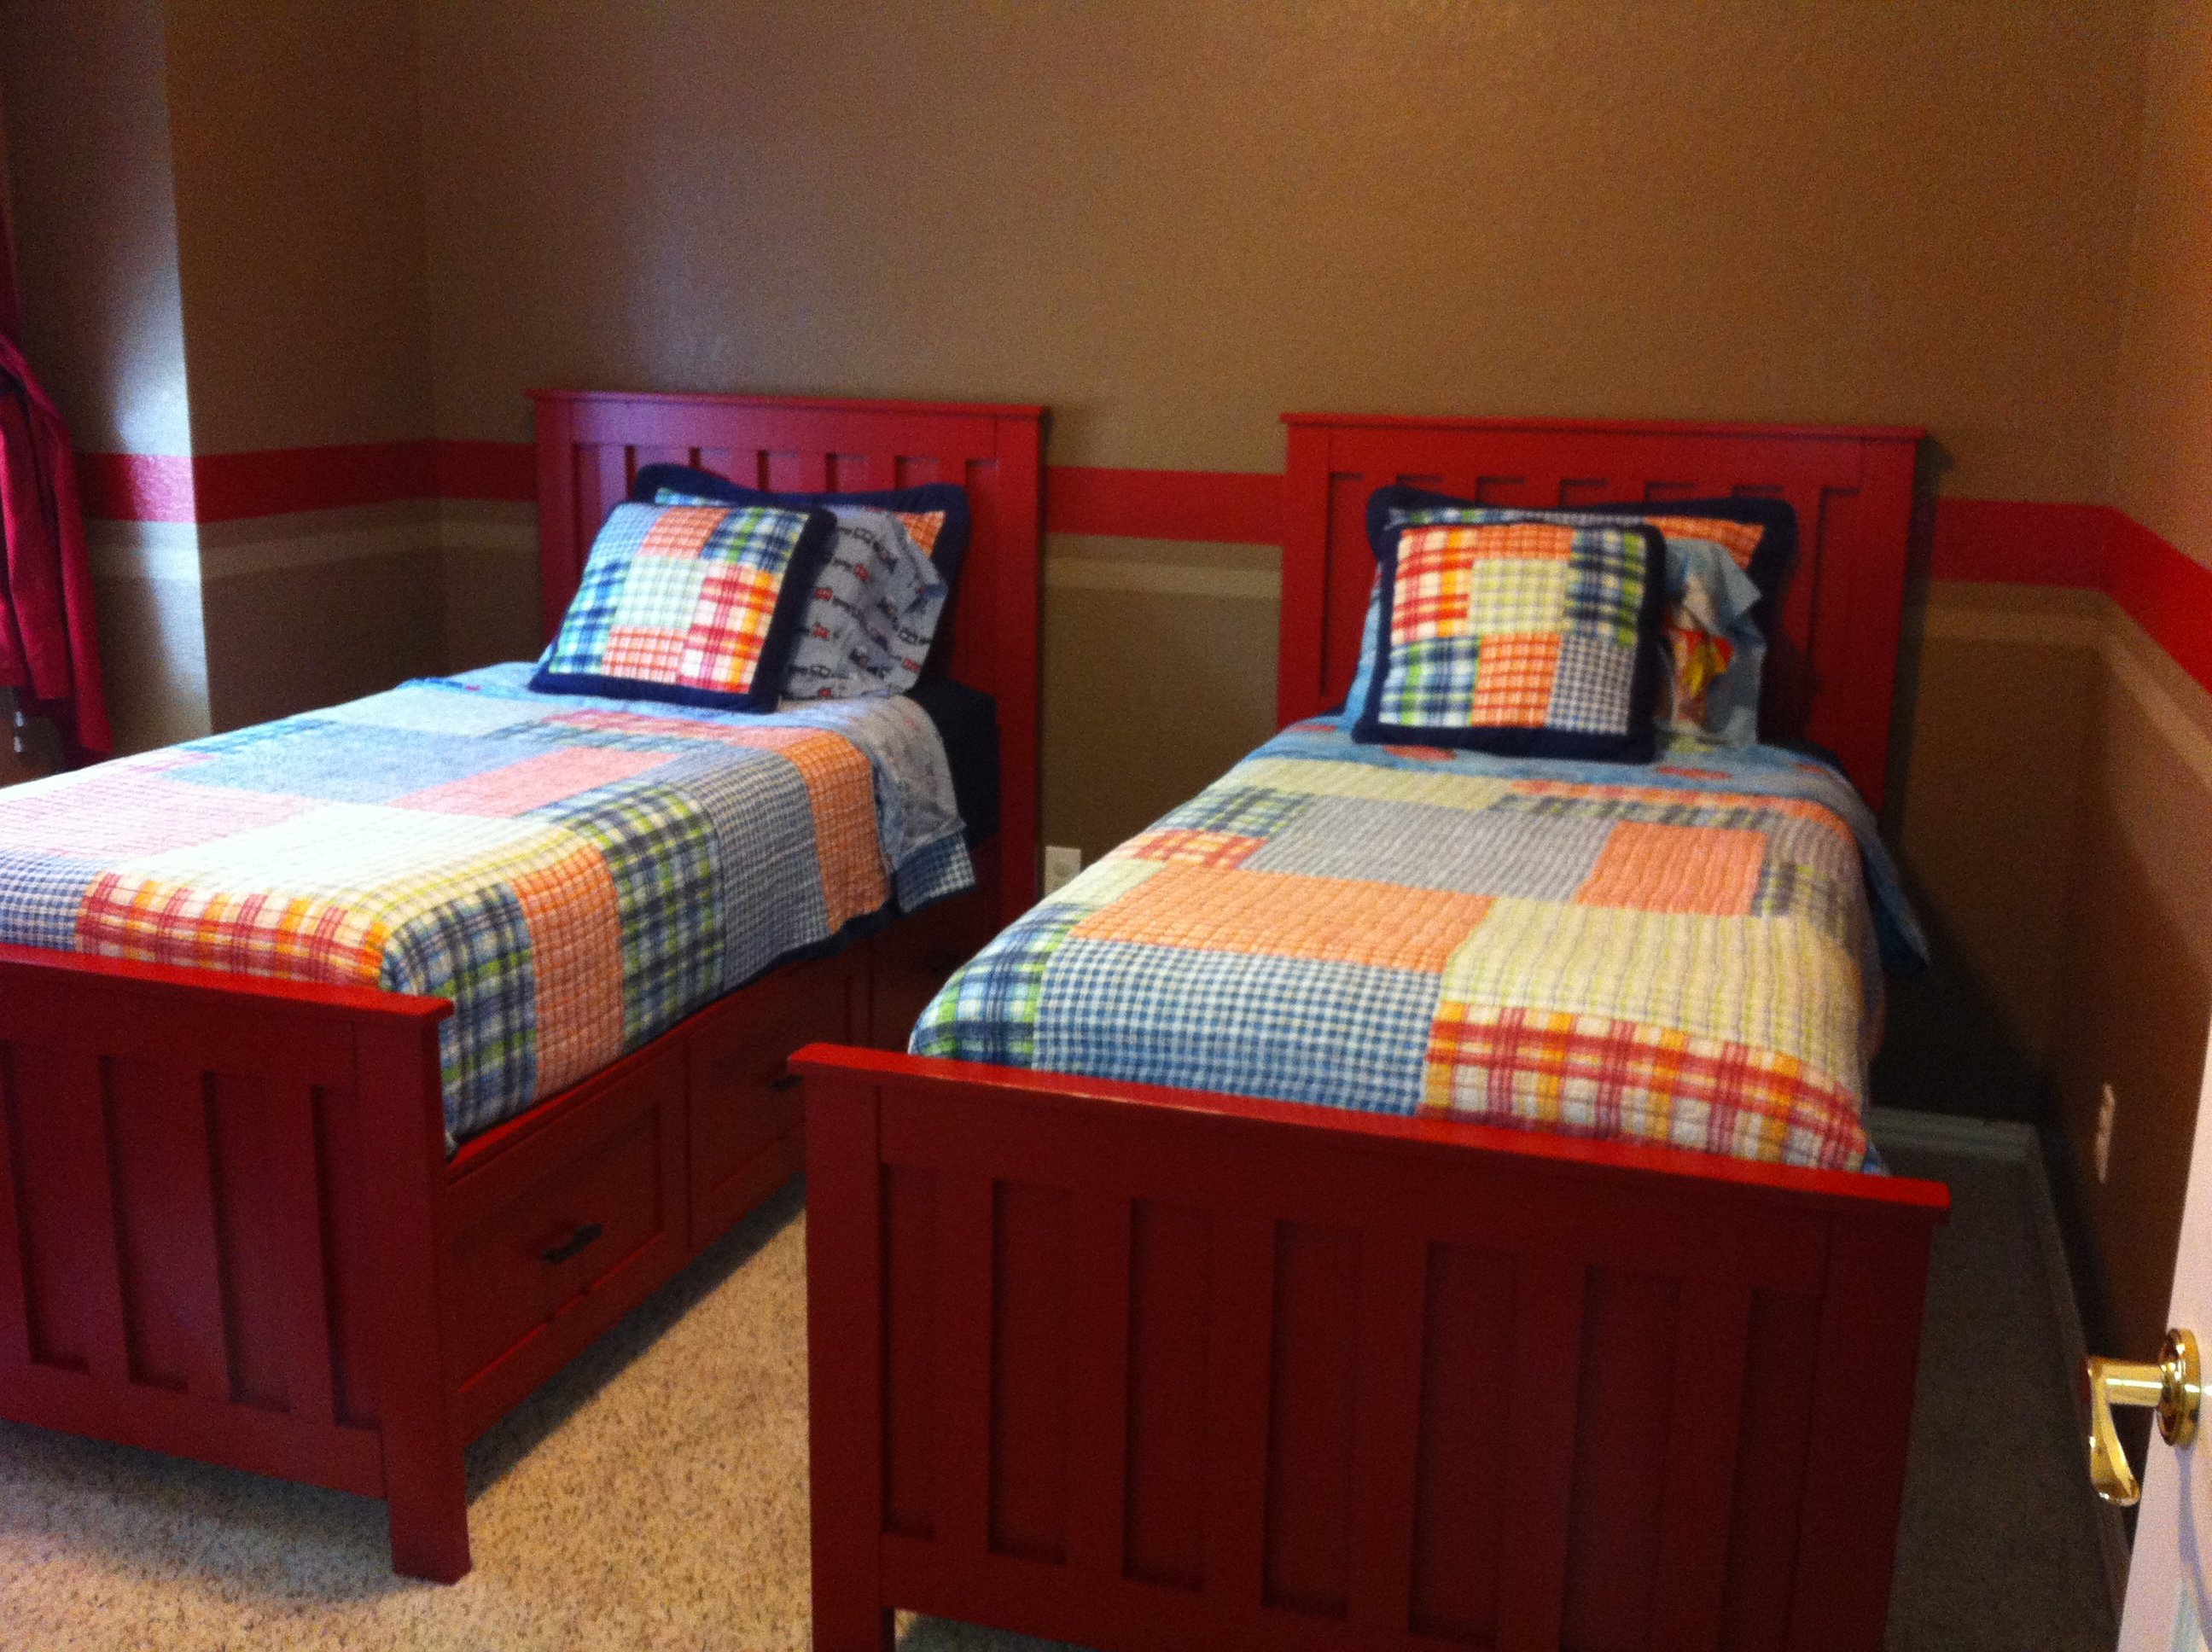
We loved the storage of the Farmhouse bed, but loved the headboard and foot board of the Kentwood. We also wanted a twin size bed. Instead of trying to figure out the measurements to make the farmhouse to a twin size (which is shorter in length), we made it at the full size length and just bought XL twin size mattresses, which were not hard to find and now we can keep the beds even after our boys become teenagers :-)
We basically built the headboards and foot boards from the kentwood exactly as Ana's plans state. Then we built the Farmhouse storage drawers. We love them!!! Thank you so much Ana for MORE great bed plans (this is our second set of bed plans we have made!
Estimated Cost
$350 per bed
Estimated Time Investment
Week Long Project (20 Hours or More)
Finish Used
Primed and painted
Recommended Skill Level
Advanced
Comments
Tue, 07/24/2012 - 20:48
Fantastic!
These look great. I'm sure your kids are thrilled with their beds, and how amazing that you made these for them. They'll probably take them with them when they move out - years from now!
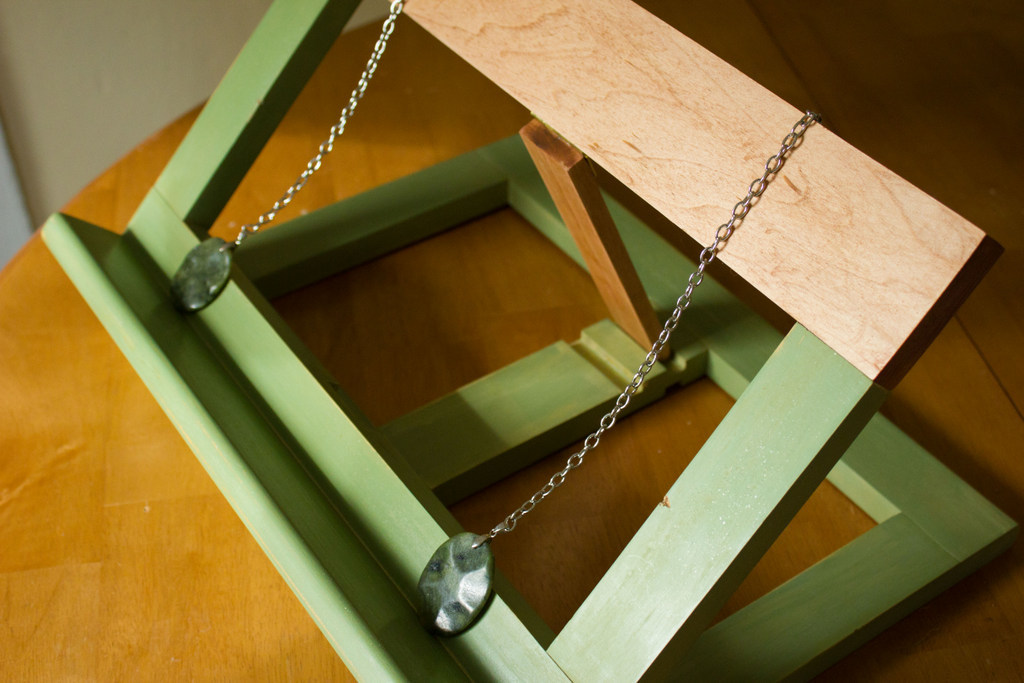
Book Stand

This was a project undertaken to facilitate my current pursuit of learning how to cook, but I think it will serve me well as I study, too, holding my textbooks up. It also let me experiment a little with staining and with using milk paint (which has NO VOCs but is kinda weird to work with). And it let me put to use some scrap wood that I think I was unconsciously saving for something special.
Because I had a scrap pile, screws, a few hinges, and the finishing products, this project was Almost free...I had to buy a narrow hinge ($1.50? I think?), and I chose to buy some pretty page weights ($3 including both pendants and the chain). So...not too bad, right? For a solid book stand that has meaningful beauty to me?
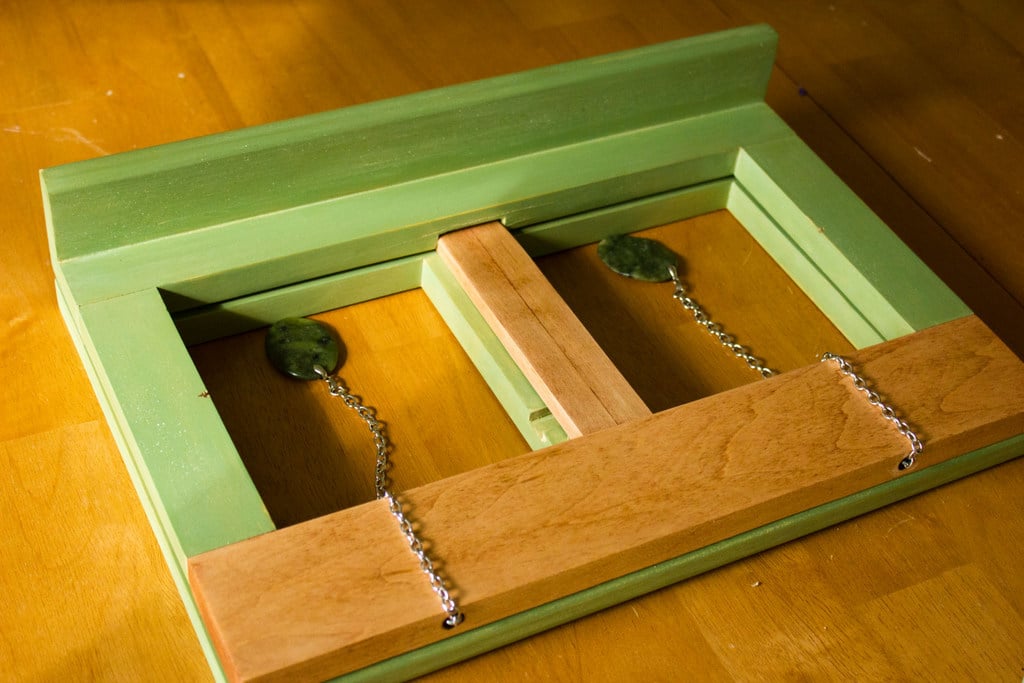
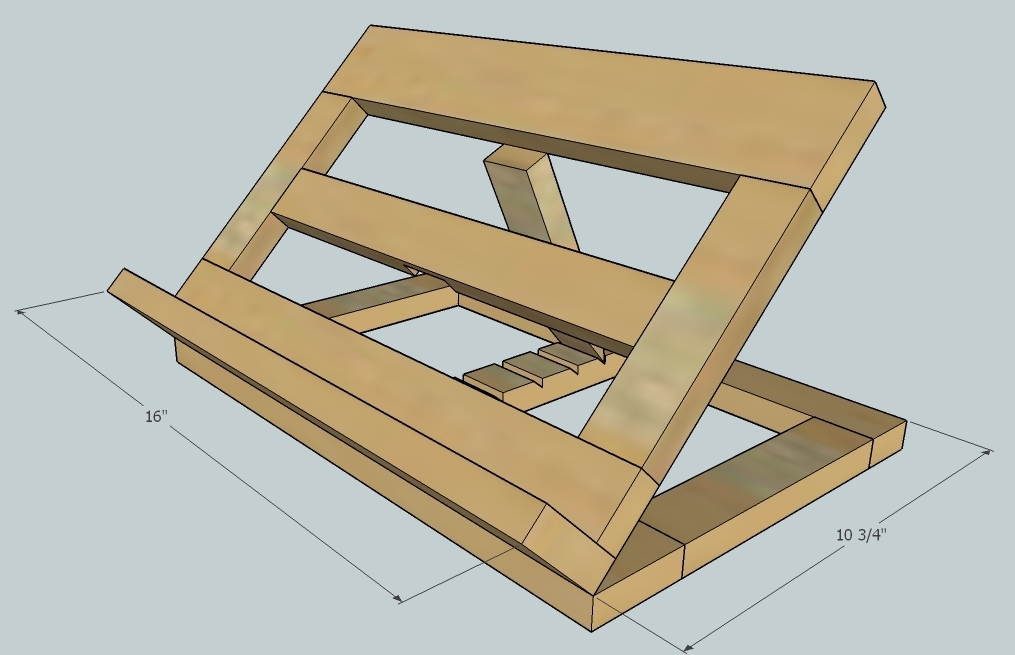
Ok, so this is all scrap wood. The stained pieces are maple leftovers from my cabinet project, and the rest is a mix of pine and poplar. See the dimensions in the last photo. The paint is Miss Mustard Seed Milk Paint in Lucketts Green, and the stain is Red Chestnut oil-based stain by Minwax. I finished the whole thing with one coat of wax buffed to a soft sheen (my new favorite finish).
I used a miter saw for my cuts and a router for the kickstand grooves, but really a regular circular saw would've worked just as well (or better, for the grooves). It took me several days to finish this project, but there's no reason it should take (someone other than me) more than an afternoon.


Estimated Cost
$5
Estimated Time Investment
Day Project (6-9 Hours)
Finish Used
Milk paint, Miss Mustard Seed in Lucketts Green in a 1 to 1 ratio, single coat
Minwax oil-based stain in Red Chestnut (I applied mineral oil first as a conditioner, then the stain for a few seconds, then wiped off - it still turned a little blotchy, though)
Regular furniture paste wax, one coat
Minwax oil-based stain in Red Chestnut (I applied mineral oil first as a conditioner, then the stain for a few seconds, then wiped off - it still turned a little blotchy, though)
Regular furniture paste wax, one coat
Recommended Skill Level
Starter Project
leaning bathroom shelf
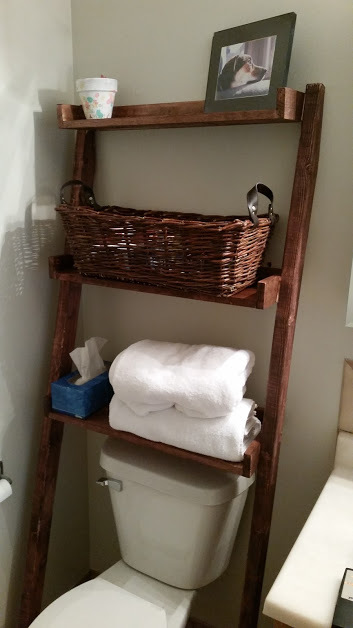
This was a pretty easy build, always a plus when you're looking for more storage. I'm not sure about the darkness of the stain though; I usually go with a walnut to match the rest of the house and wanted to try something different. This seems like a bit much. Might be easier to build an entire second set vs re-doing the stain though...
Built from Plan(s)
Estimated Cost
$25
Estimated Time Investment
Afternoon Project (3-6 Hours)
Finish Used
Minwax red mahogany
Recommended Skill Level
Beginner
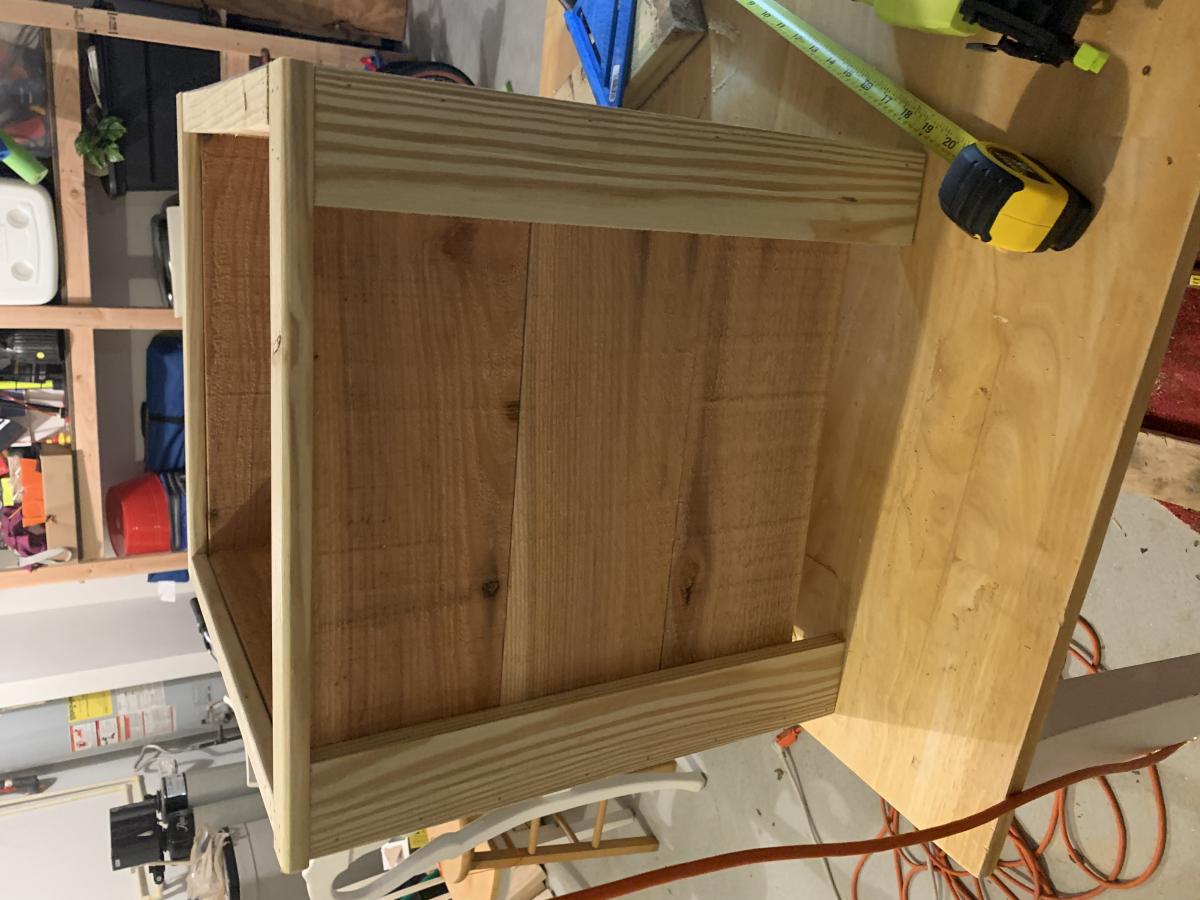
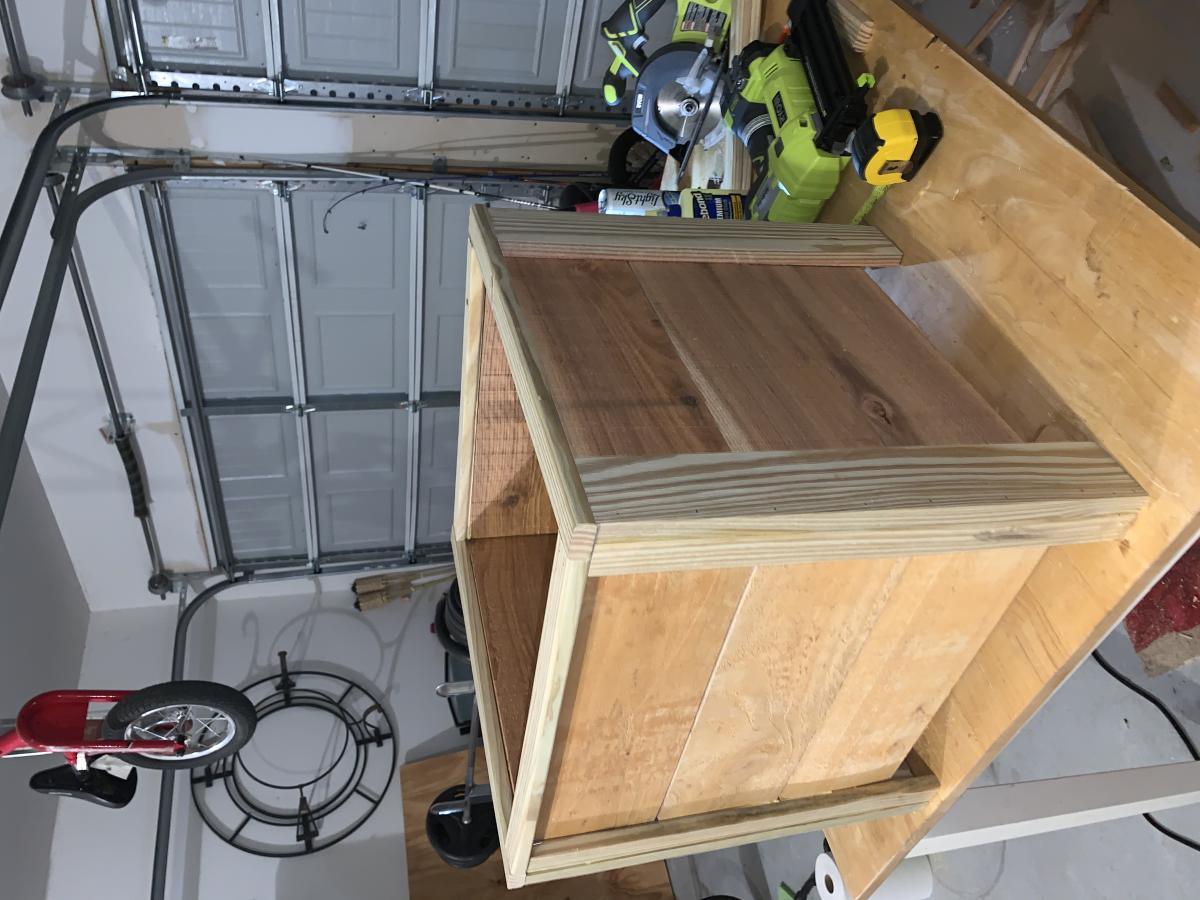
Easy Build DIY Planter
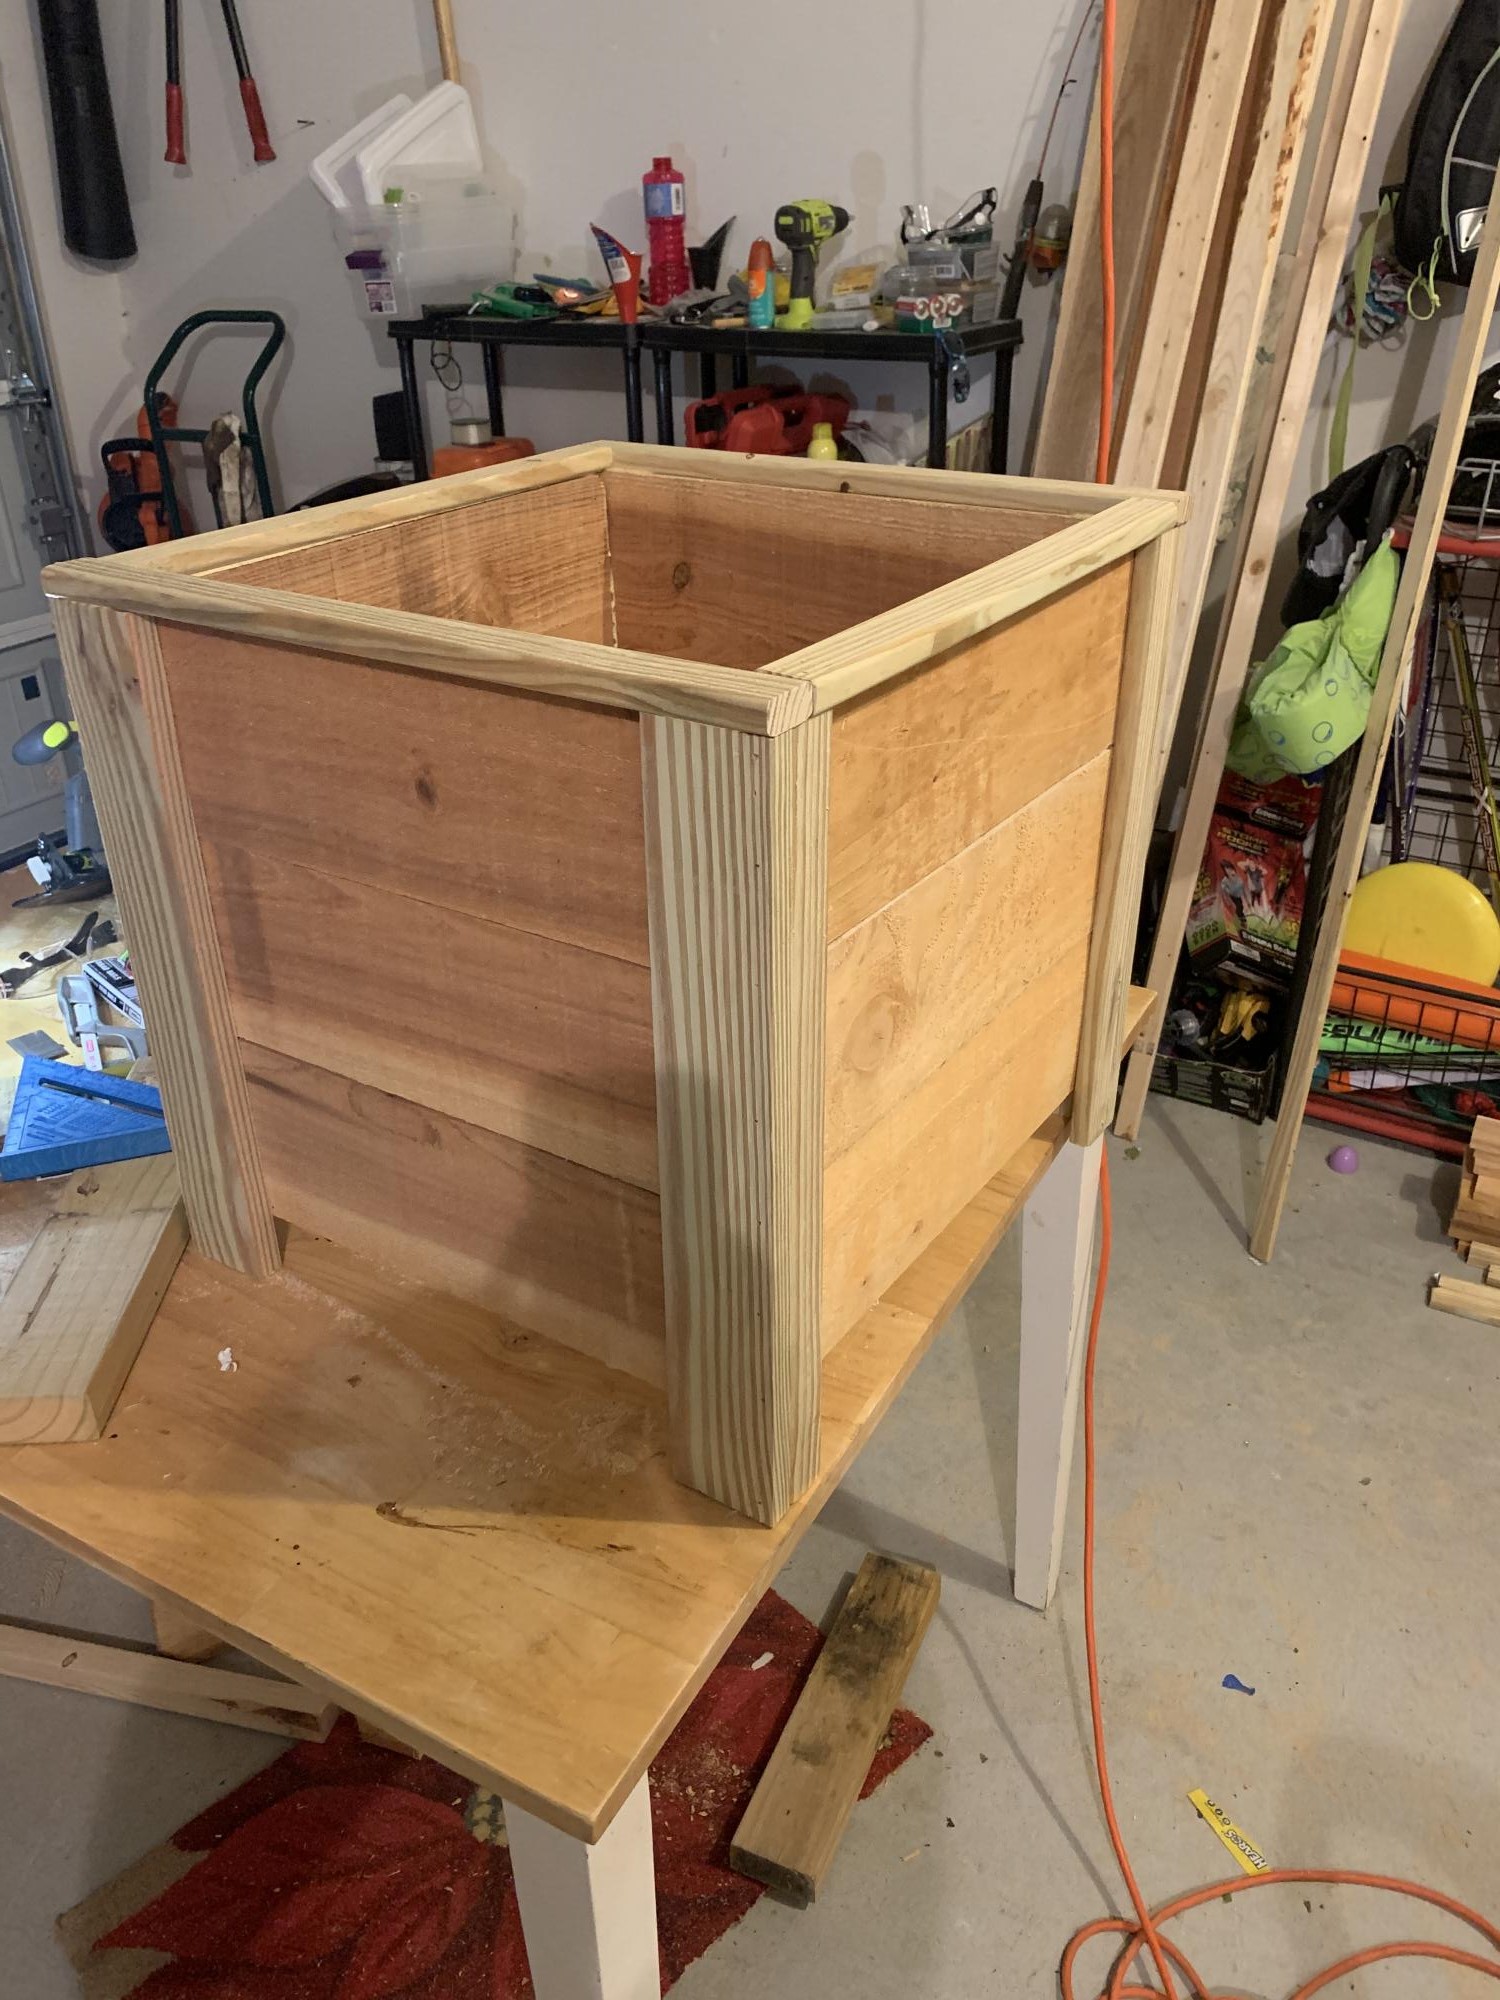
Directions were perfect! This is my 3rd project and I really enjoyed it! Fast and easy.
Built from Plan(s)
Estimated Time Investment
Afternoon Project (3-6 Hours)
Recommended Skill Level
Beginner
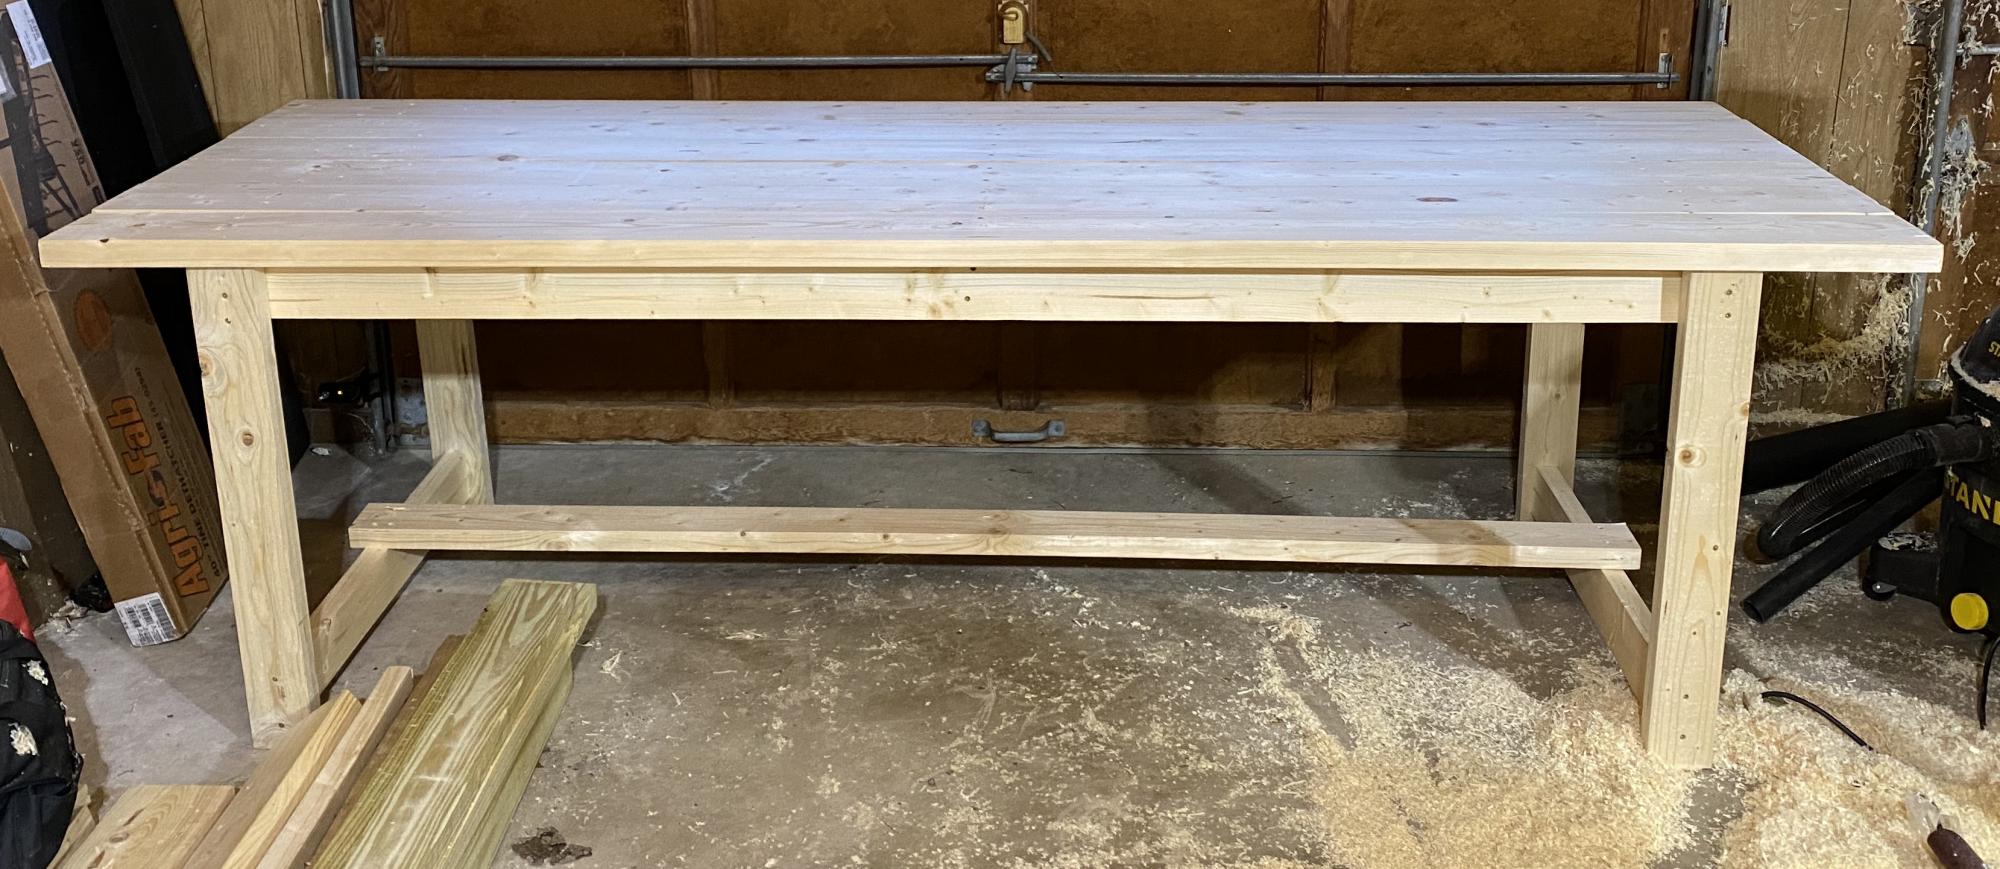
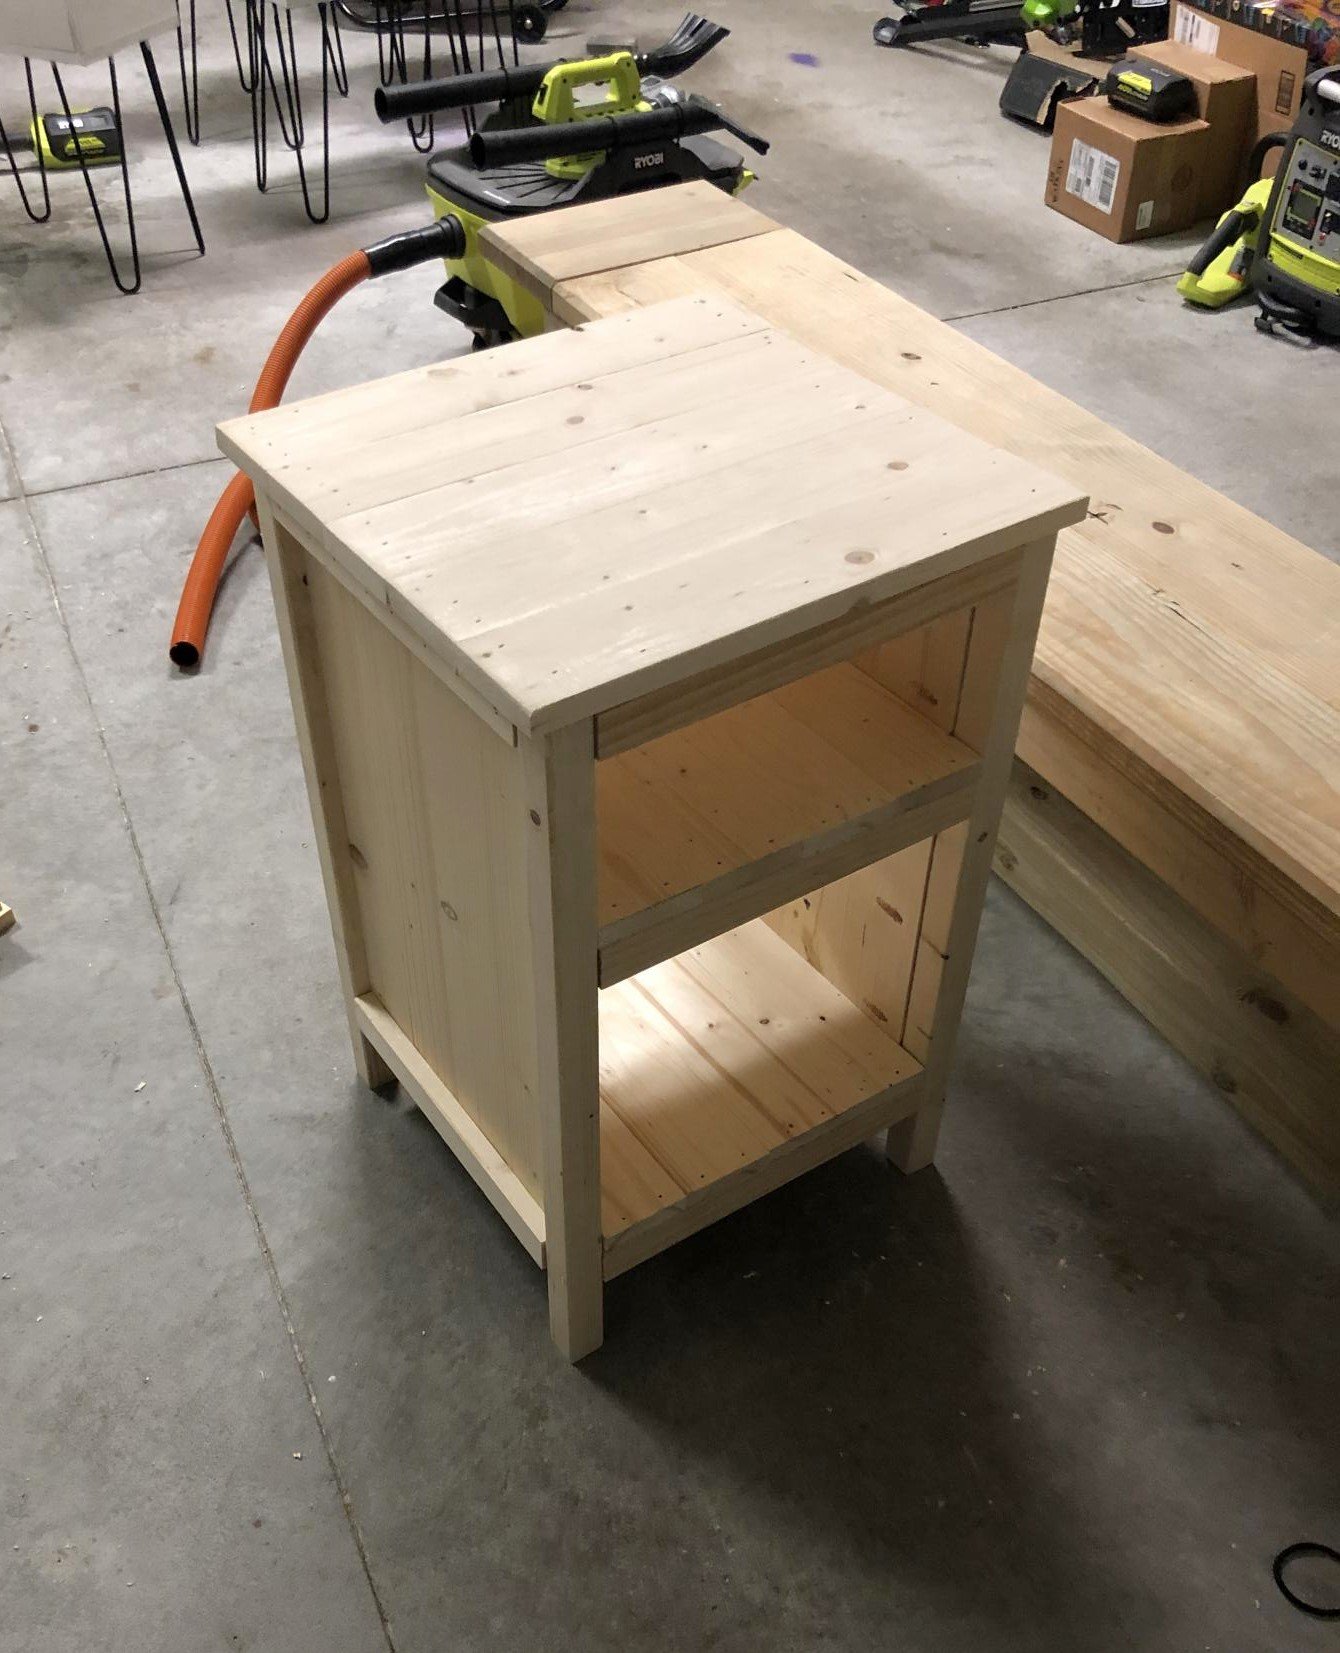
Wood Accent Table
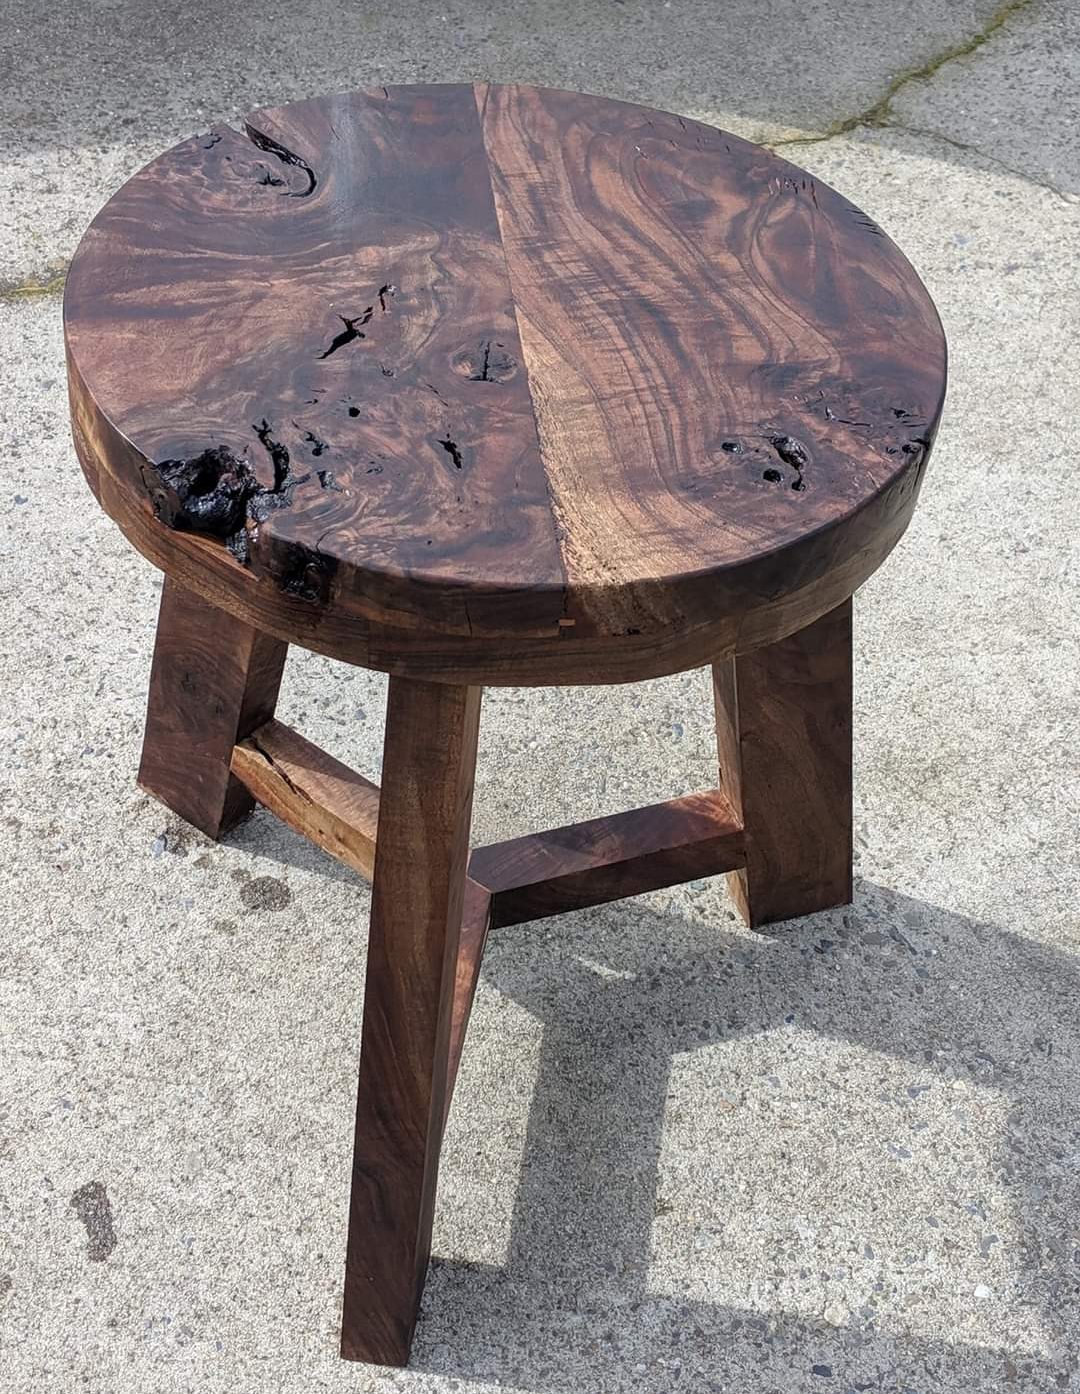
This thing is a beast ! I made the top way thicker than I should have but I love it.
Built from Plan(s)
Rustic Table
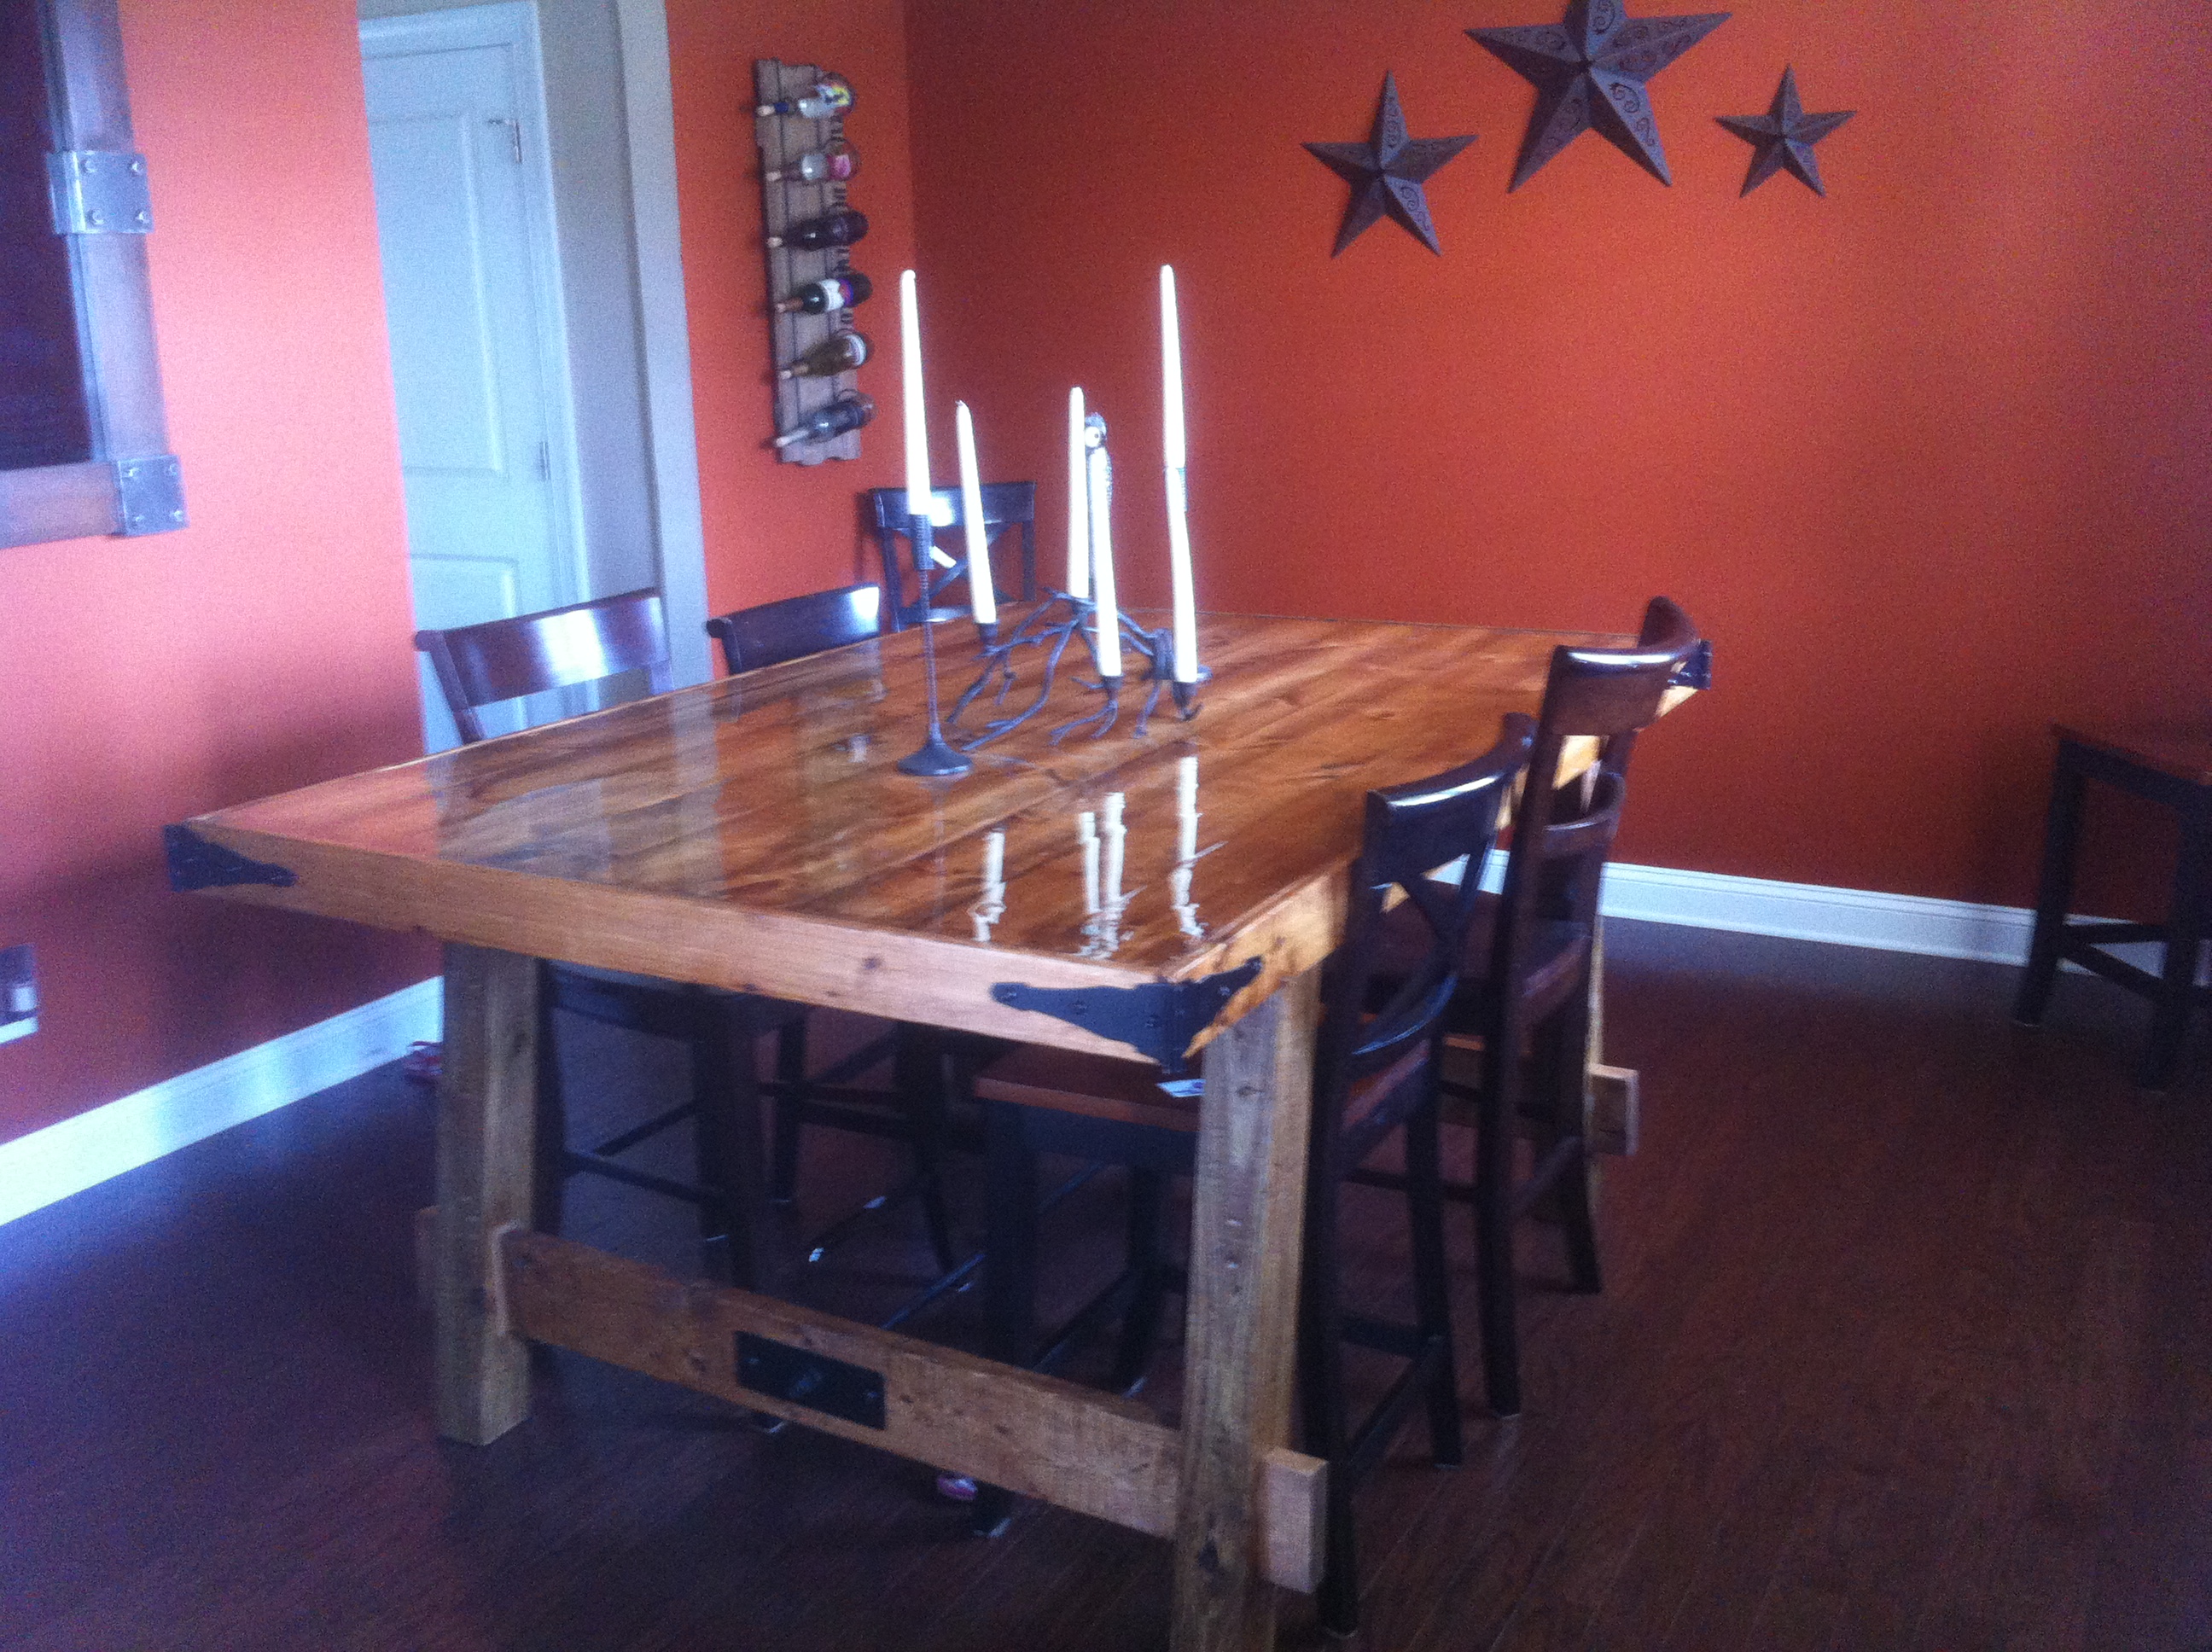
I made this table before the PB plans came out on the this site. I used gate hinges on the corners and 3/4" piece of all thread on the bottom. The top was poured with the High Gloss glaze from Lowes. It fits 8 all around and you could squeeze in 12 if you really needed to. All together this only cost $350.
Built from Plan(s)
Estimated Cost
$350
Estimated Time Investment
Weekend Project (10-20 Hours)
Recommended Skill Level
Intermediate
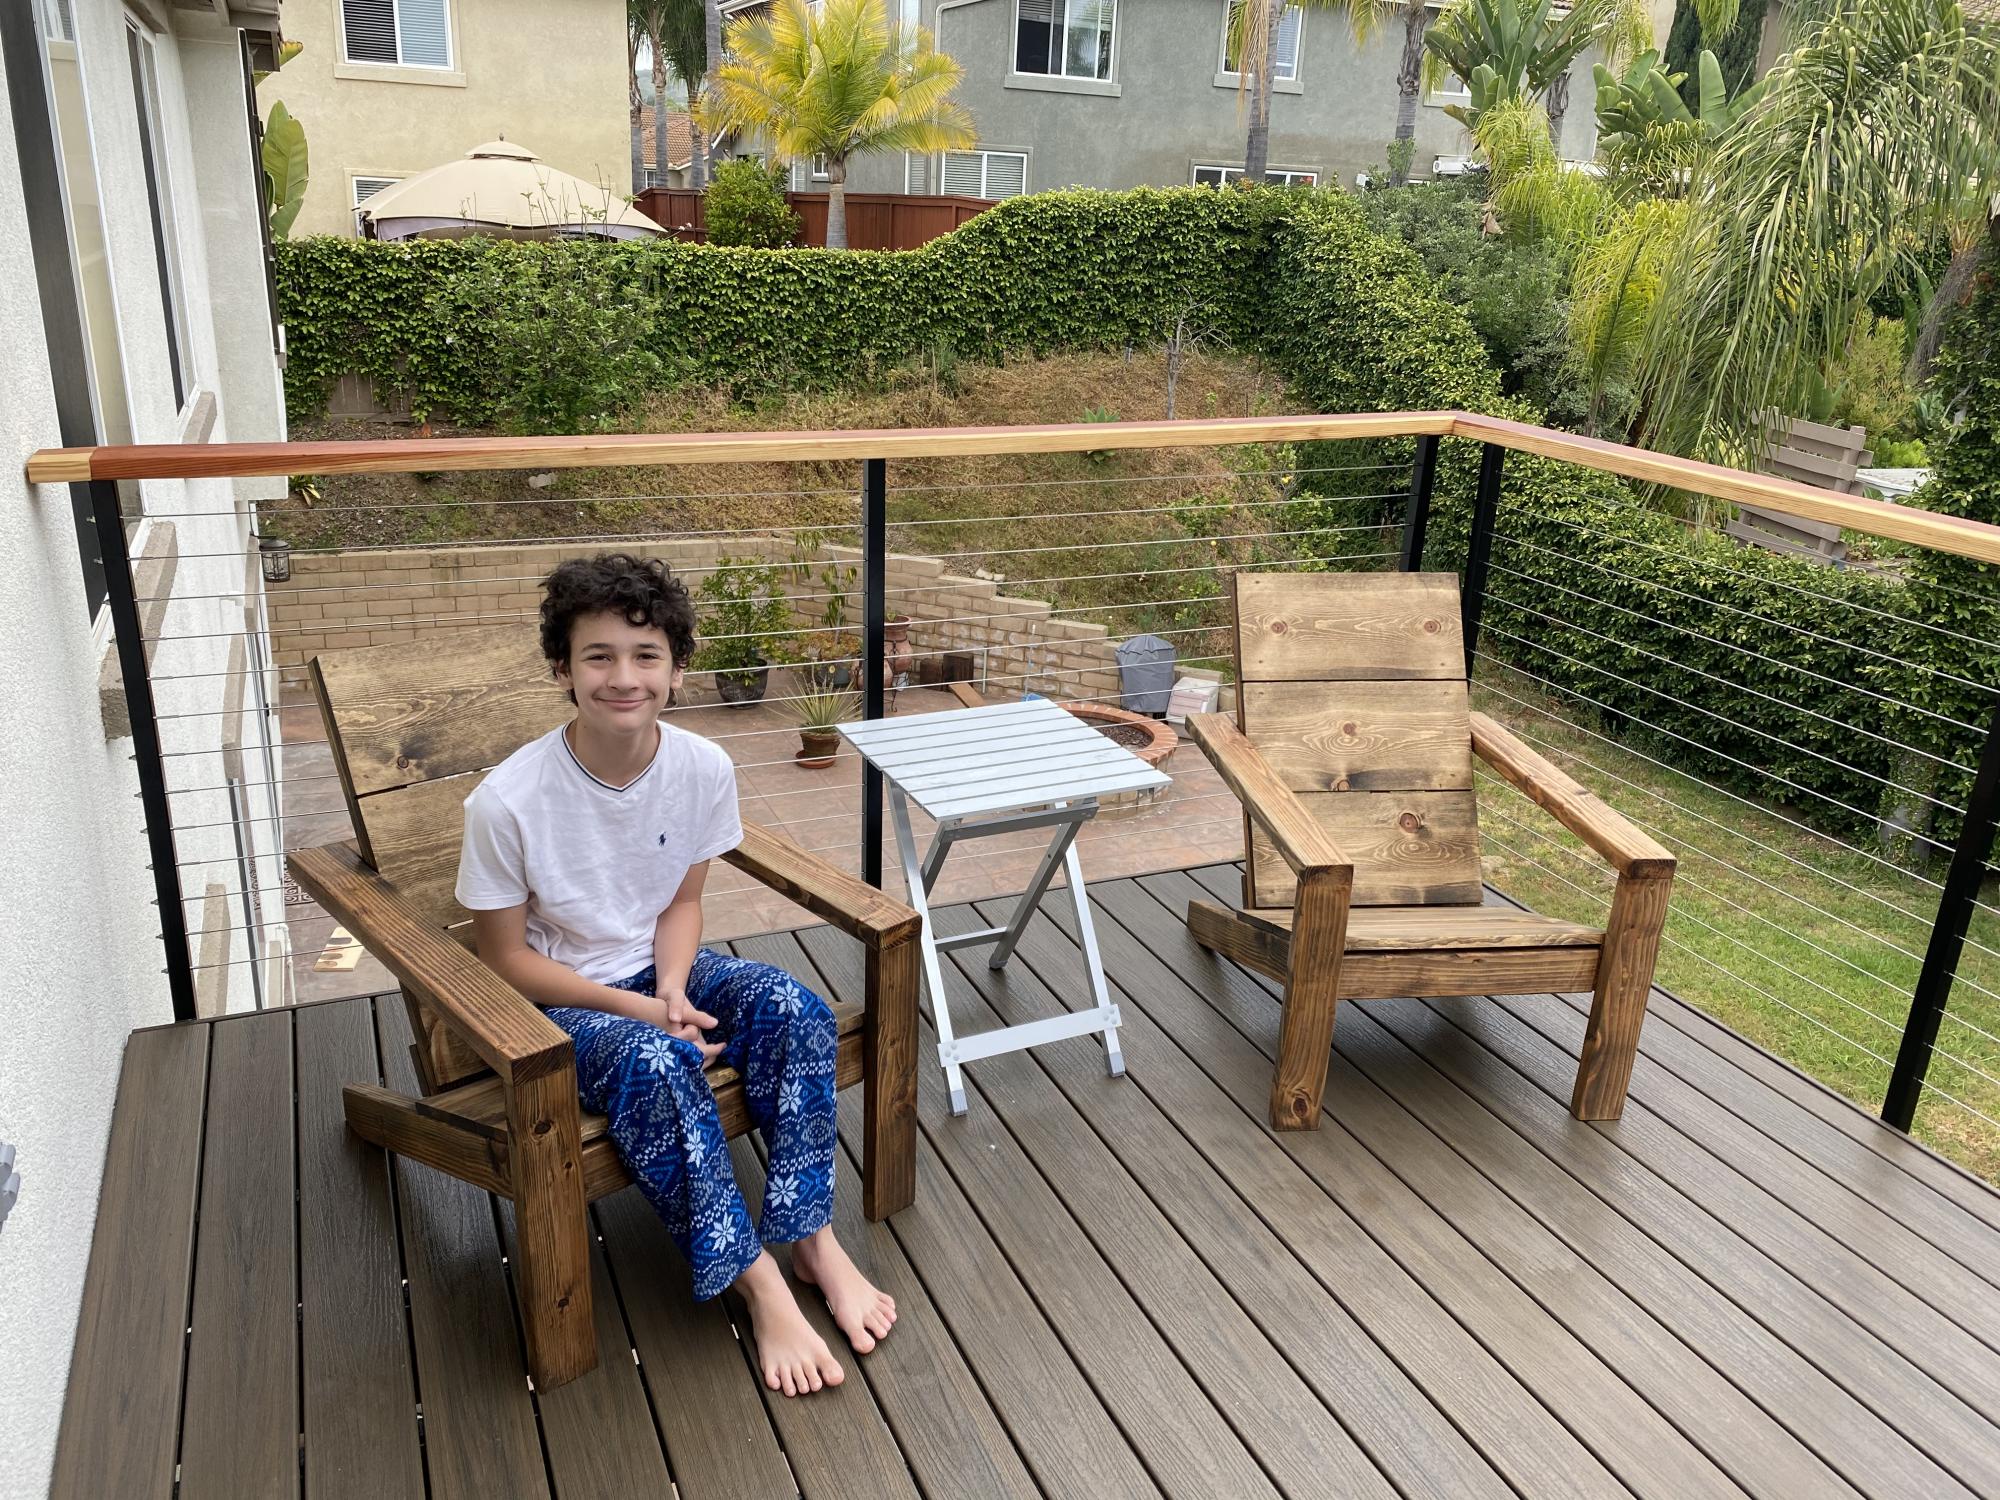
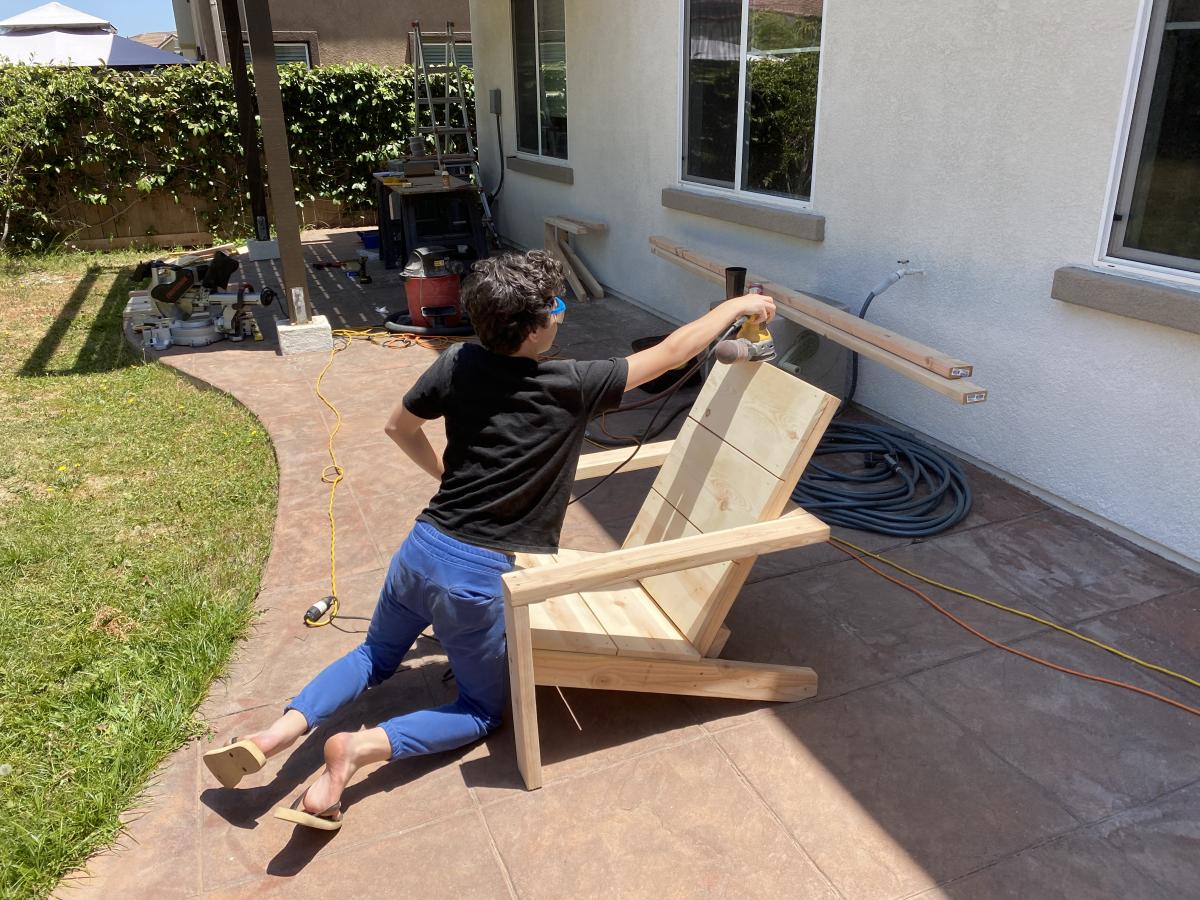
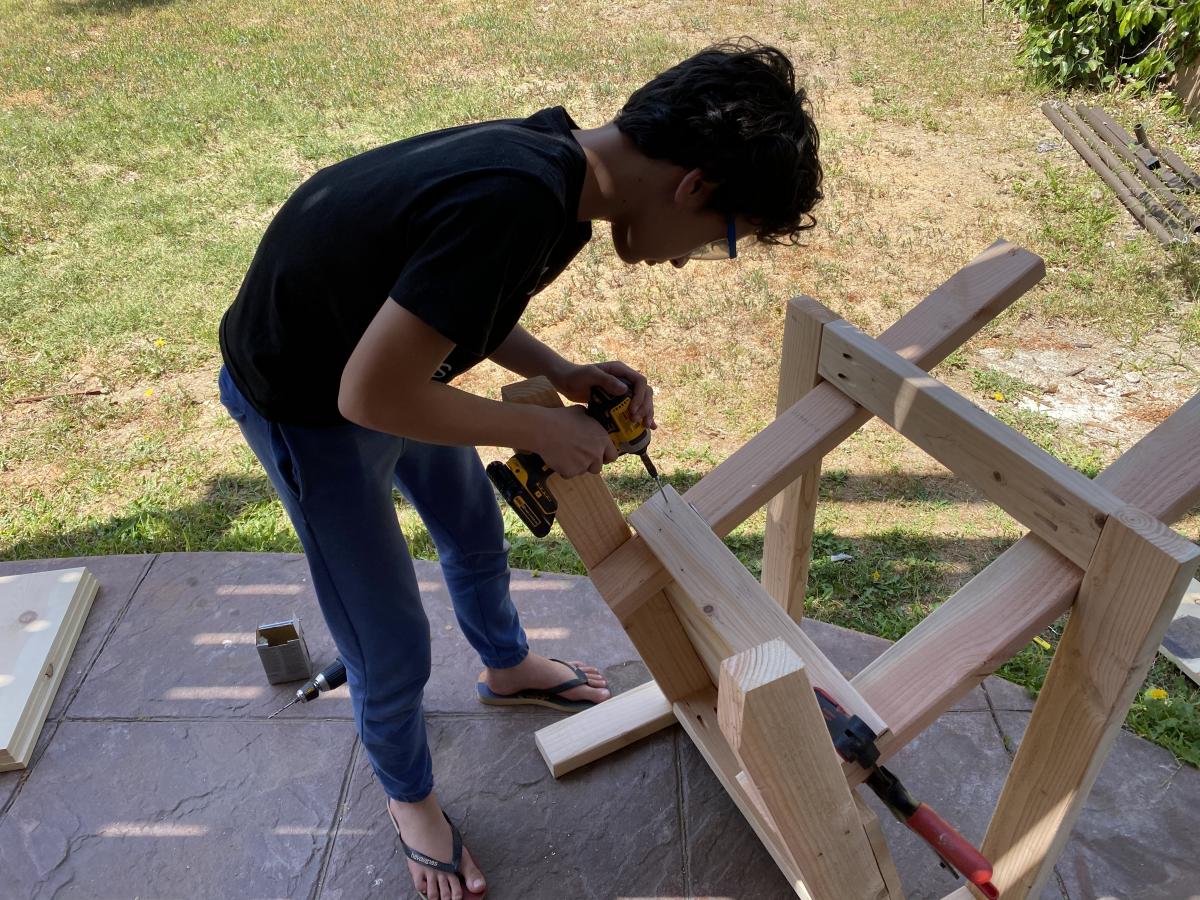
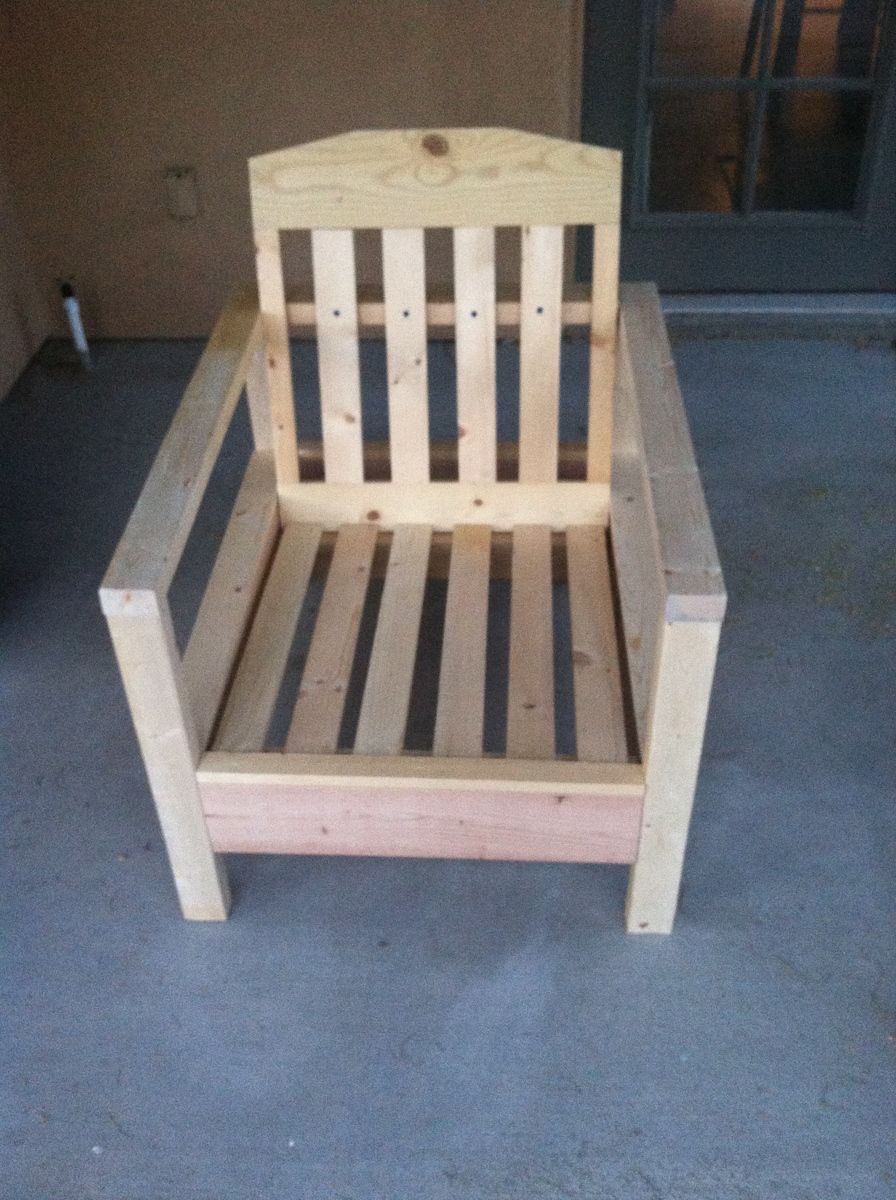
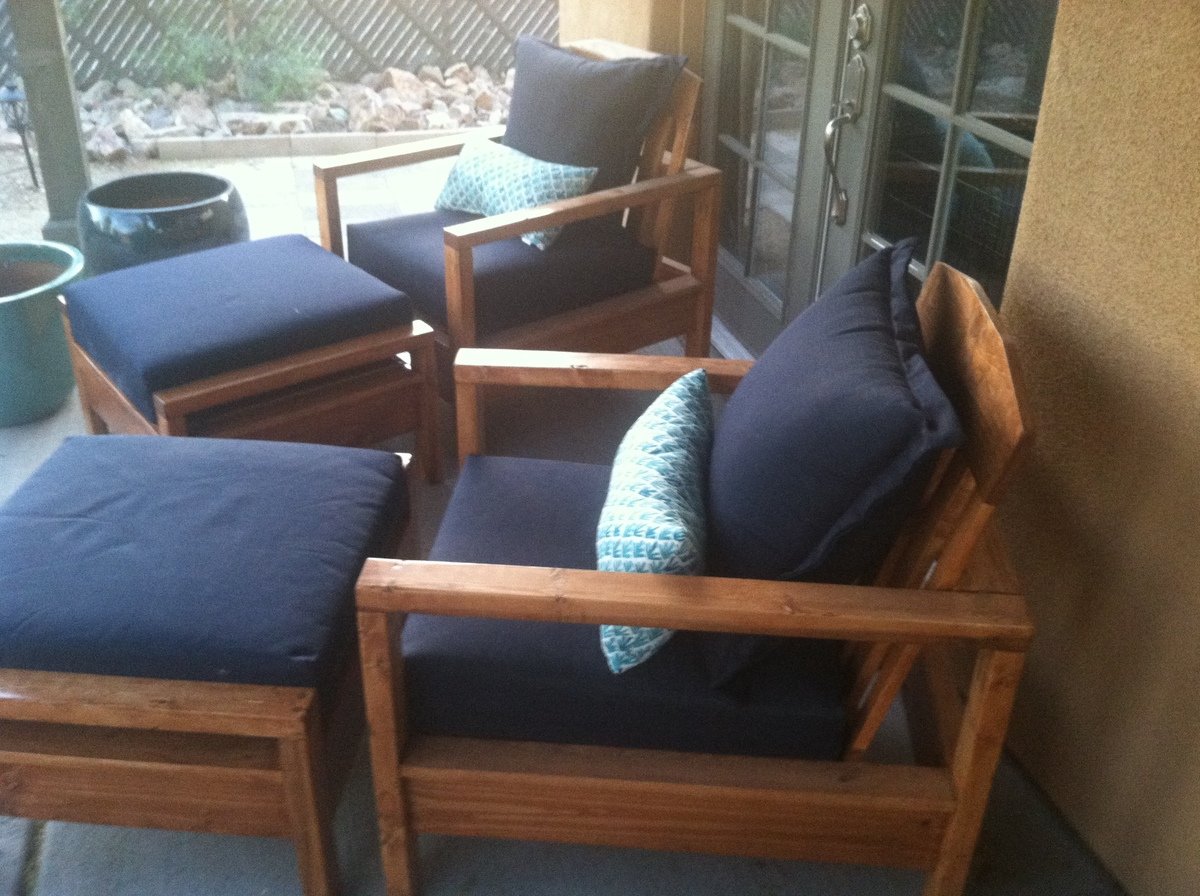
Simple White Outdoor Chair
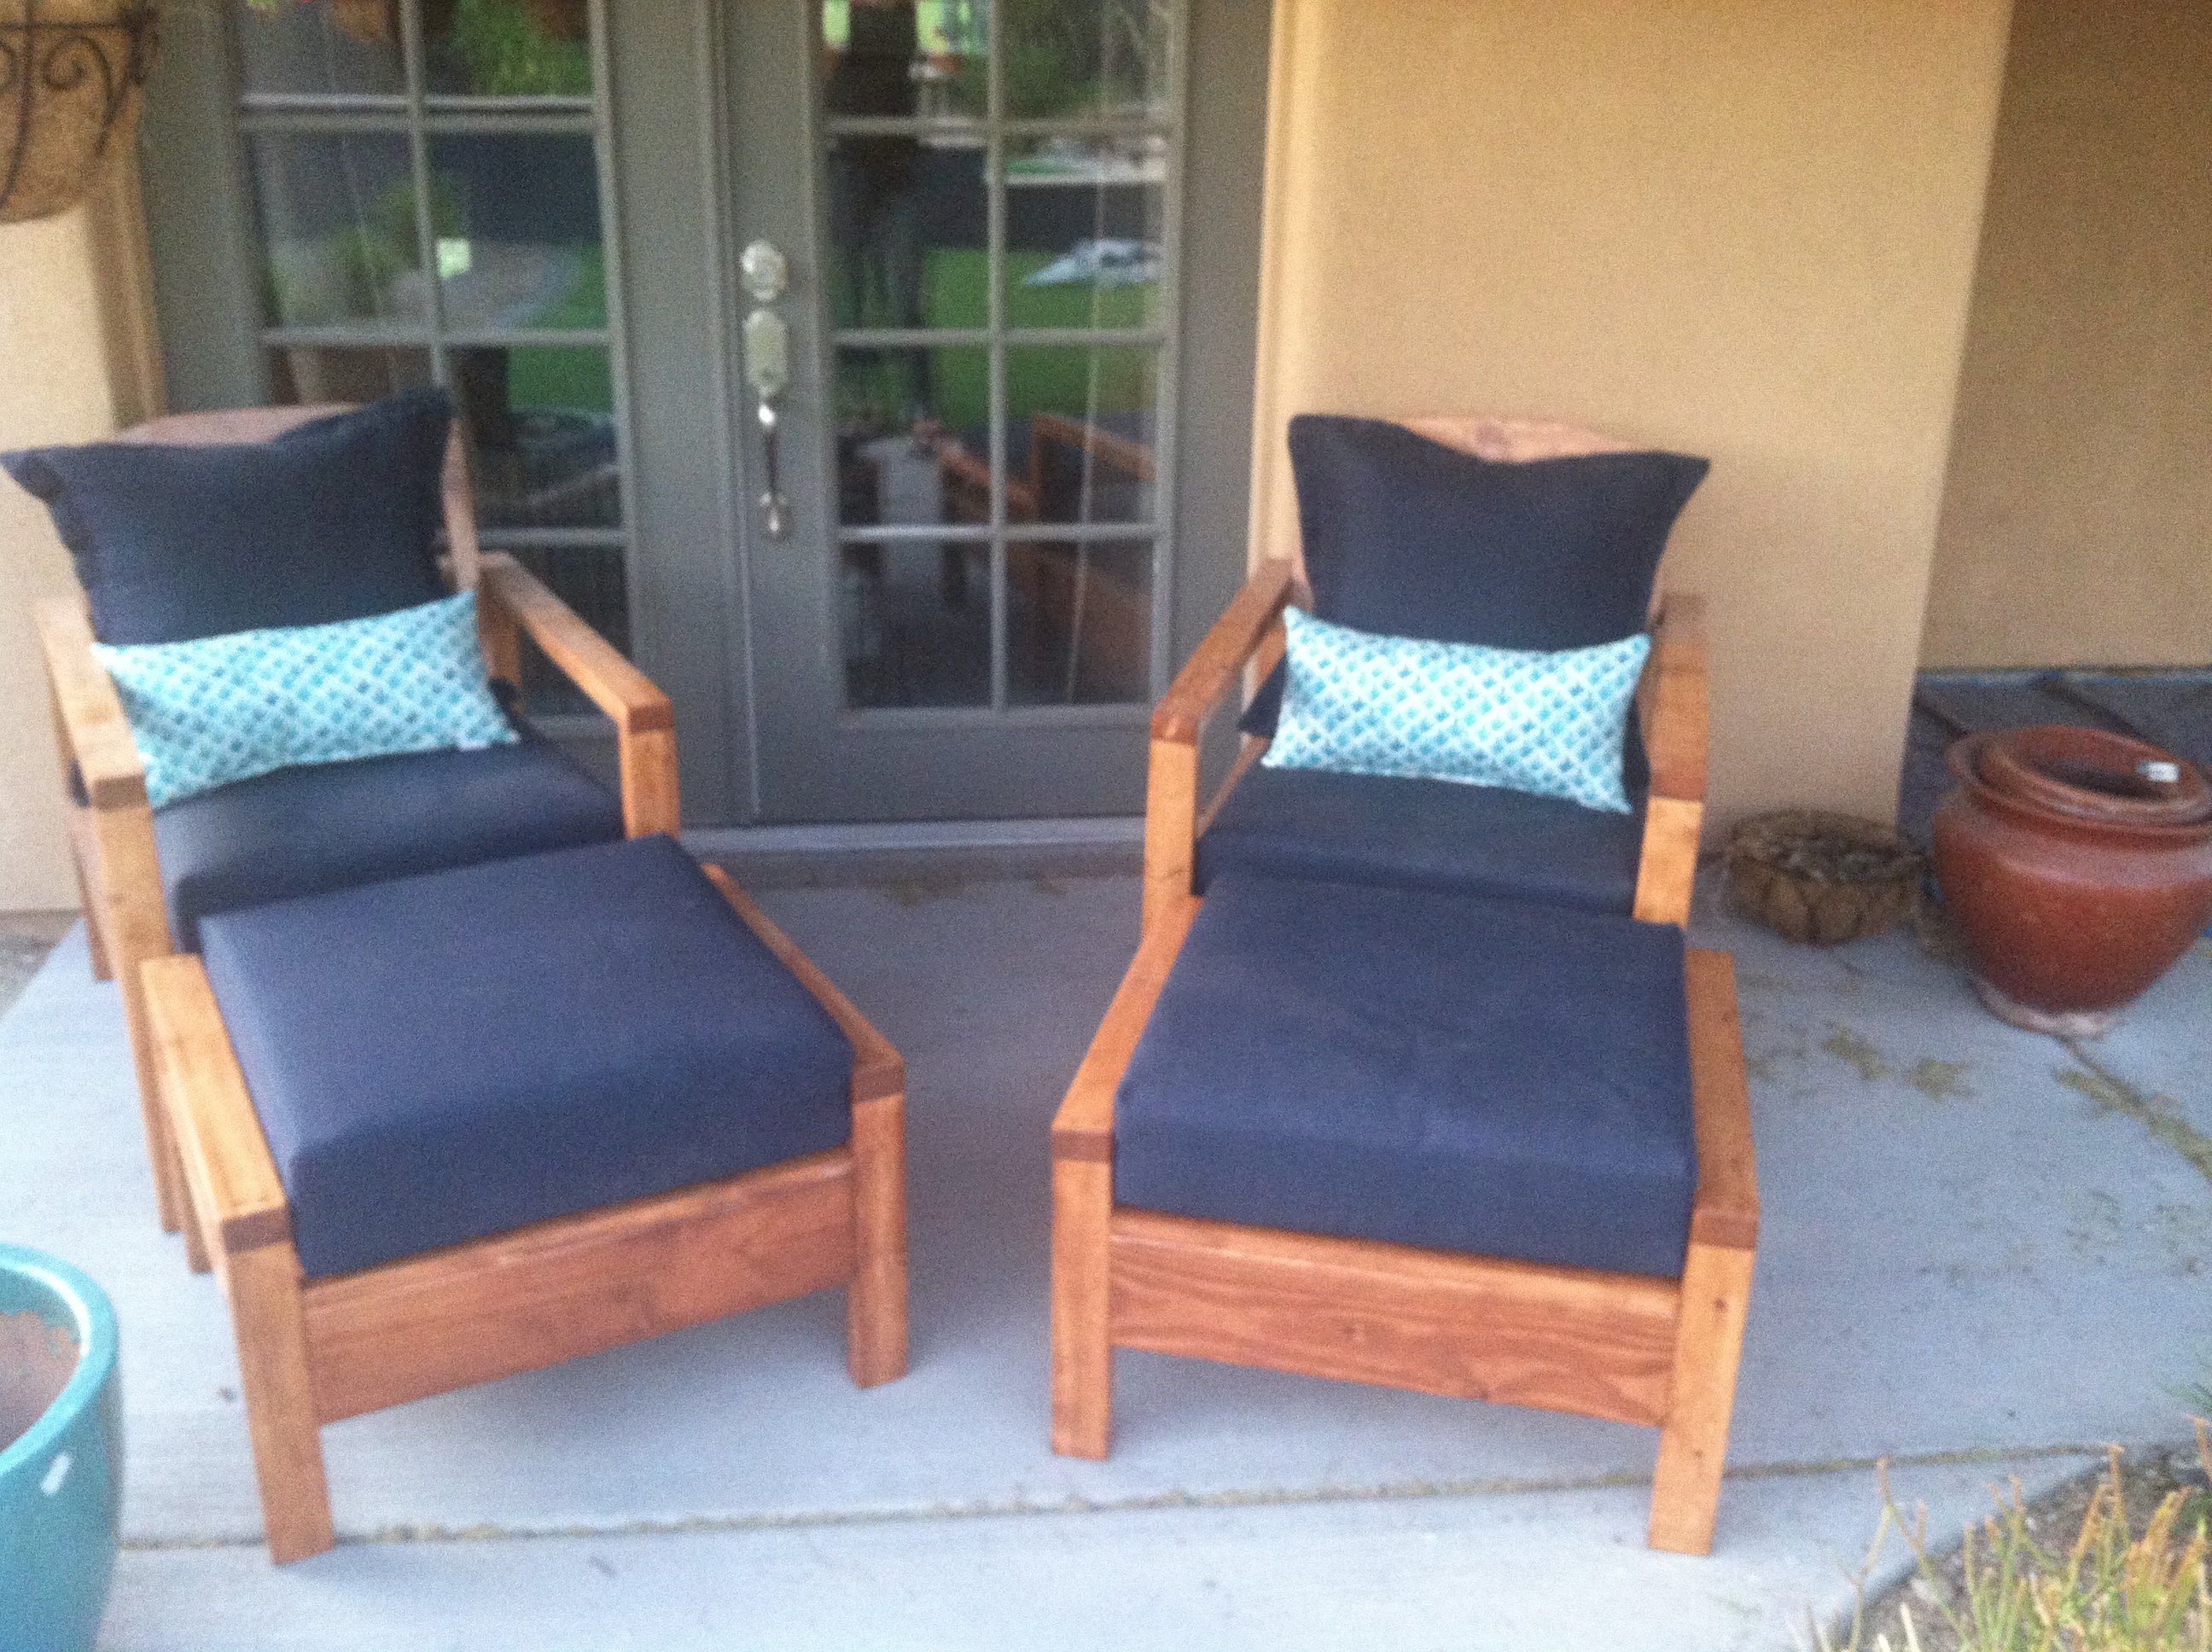
These chairs followed the simple white outdoor chair instructions. There were a few adaptations. I used 2x3s instead of 2x2s for the legs, like in the simple white outdoor loveseat instructions. I purchased my cushions from Target, and their dimensions are different than the cushions used in the instructions, so I changed some of the chair dimensions. I created the pattern for the ottomans, but it is very much based on the simple white outdoor chair instructions.
Fun project and happy with the results. Staining instead of painting probably made the project take twice as long.


Built from Plan(s)
Finish Used
Minwax Ipswich Pine - 2 coats,
Deft Exterior Polyurethane semi-gloss- 3 coats
Deft Exterior Polyurethane semi-gloss- 3 coats
Recommended Skill Level
Beginner
Comments

Thu, 05/22/2014 - 13:37
Beautiful!
Your chairs are gorgeous - I feel compelled to go copy your handiwork immediately. :)
Would you mind sharing a link to the Target cushions you used? They look great on your chairs.
Sat, 05/24/2014 - 10:56
Thanks! Threshold Outdoor
Thanks!
Threshold Outdoor Deep Seating Cushion:
http://www.target.com/p/threshold-outdoor-deep-seating-cushion/-/A-1508…
Threshold Outdoor Deep Seating Back Cushion:
http://www.target.com/p/threshold-outdoor-deep-seating-back-cushion/-/A…
Just a note on the cushions, they are beautiful and highly economical, but that also means they likely aren't as supportive as cushions 2 or 3 times their price and the covers do not have a zipper, so you can't wash them. That being said, I am happy with cushions.
Fri, 05/23/2014 - 07:44
Love the ottomans!
I built these chairs and love seat last summer and have sat on them wishing I had ottomans! You inspired me to build the ottomans. I have the same Theshold cushions from Target and they are great! Good job!
Sat, 05/24/2014 - 11:09
Ottoman notes
Thanks!
The only tricksy part about the ottomans for me was attaching the "armrests". There isn't enough room to use the pocket hole screws after attaching the side aprons. I tried screwing the "armrests" to the legs before the aprons, but that just caused problems. In the end I screwed the side aprons and legs together and then screwed the "armrests" down from the top. I used wood filler to fill in the holes above the screw heads. So it isn't quite as clean looking, but worked for me.
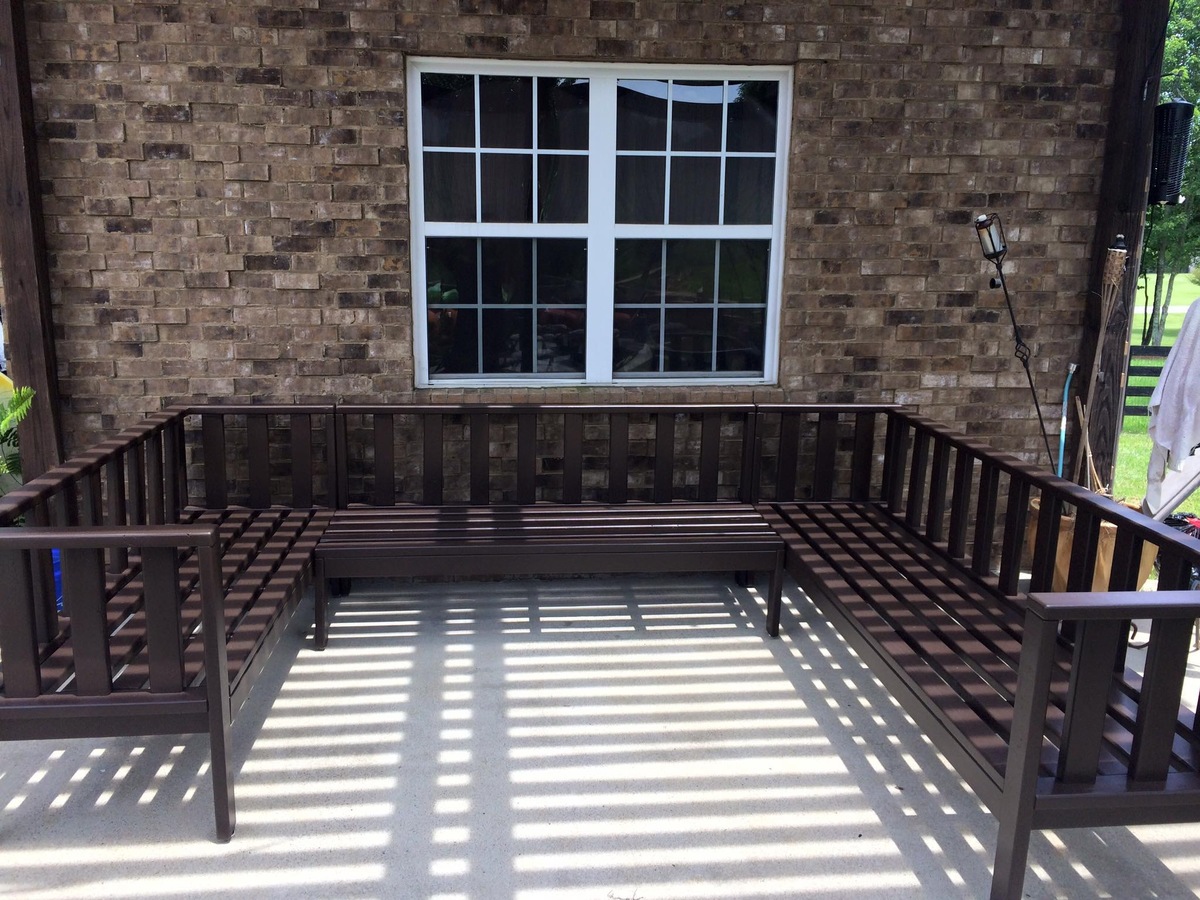
My Outdoor Sectional Couch
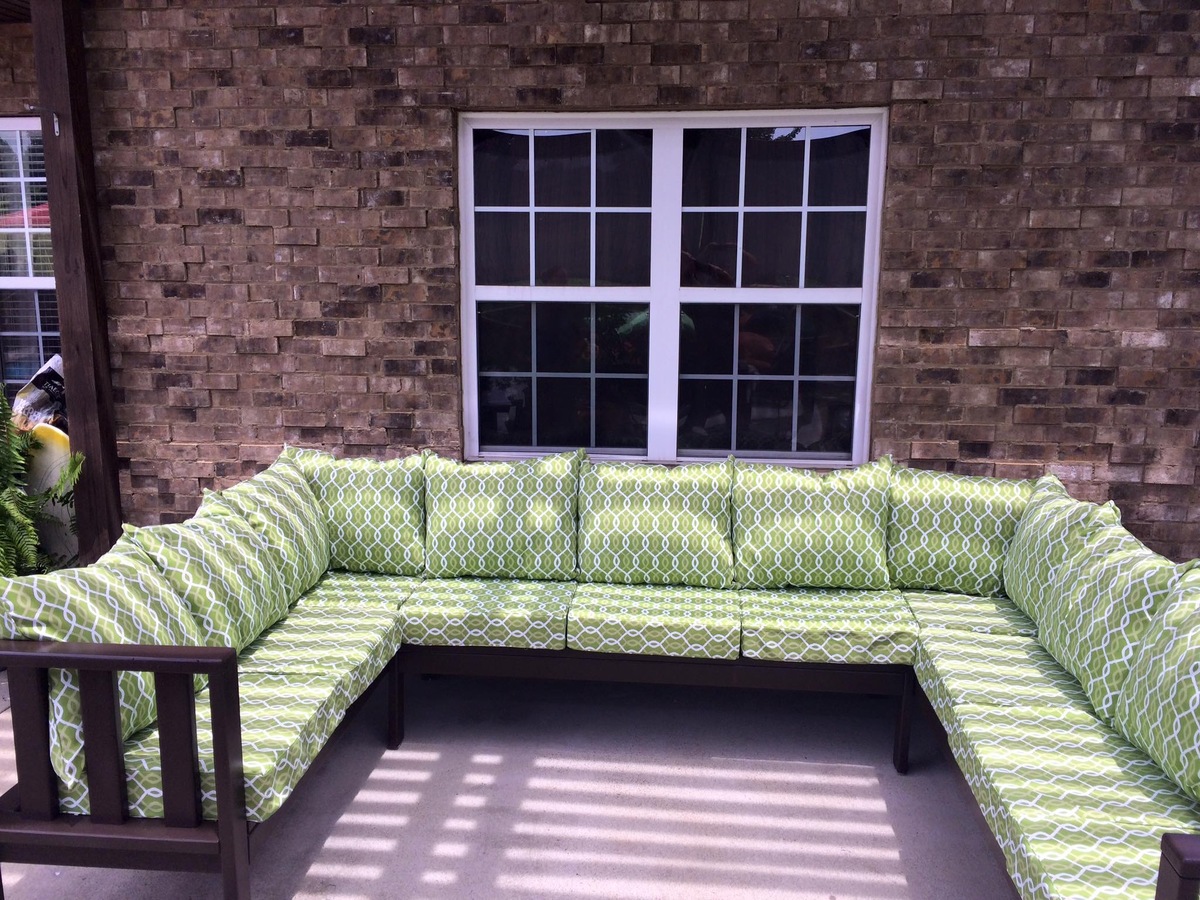
This was built off Ana's Outdoor Couch plans. I just made some additional things to it and made it larger.
I added the vertical back supports so the cushions don't slip out the back. I raised the seat height to 17".
Estimated Cost
$600-$800 including the cushions.
Estimated Time Investment
Week Long Project (20 Hours or More)
Finish Used
Oil primer and Latex Paint.
Recommended Skill Level
Intermediate
Comments

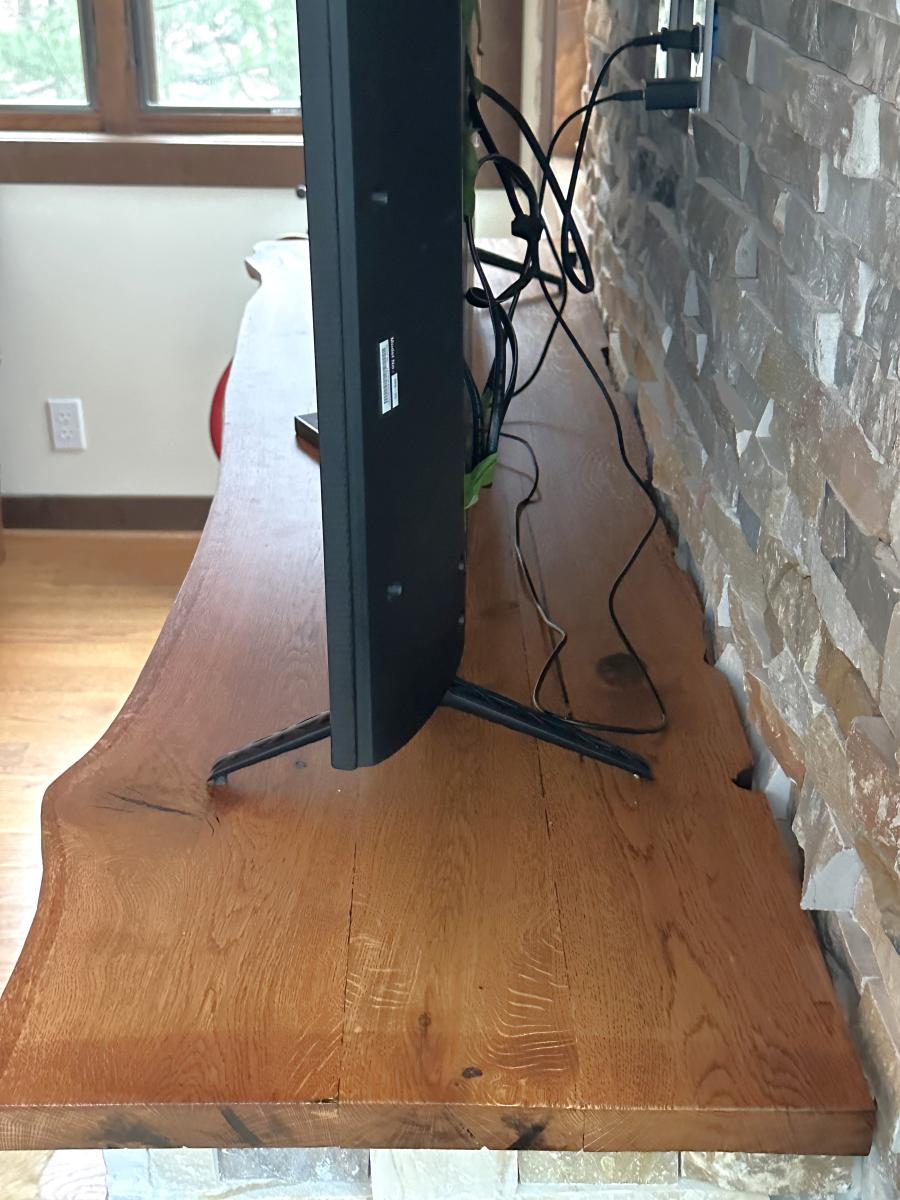
Stone Fireplace Entertainment Center
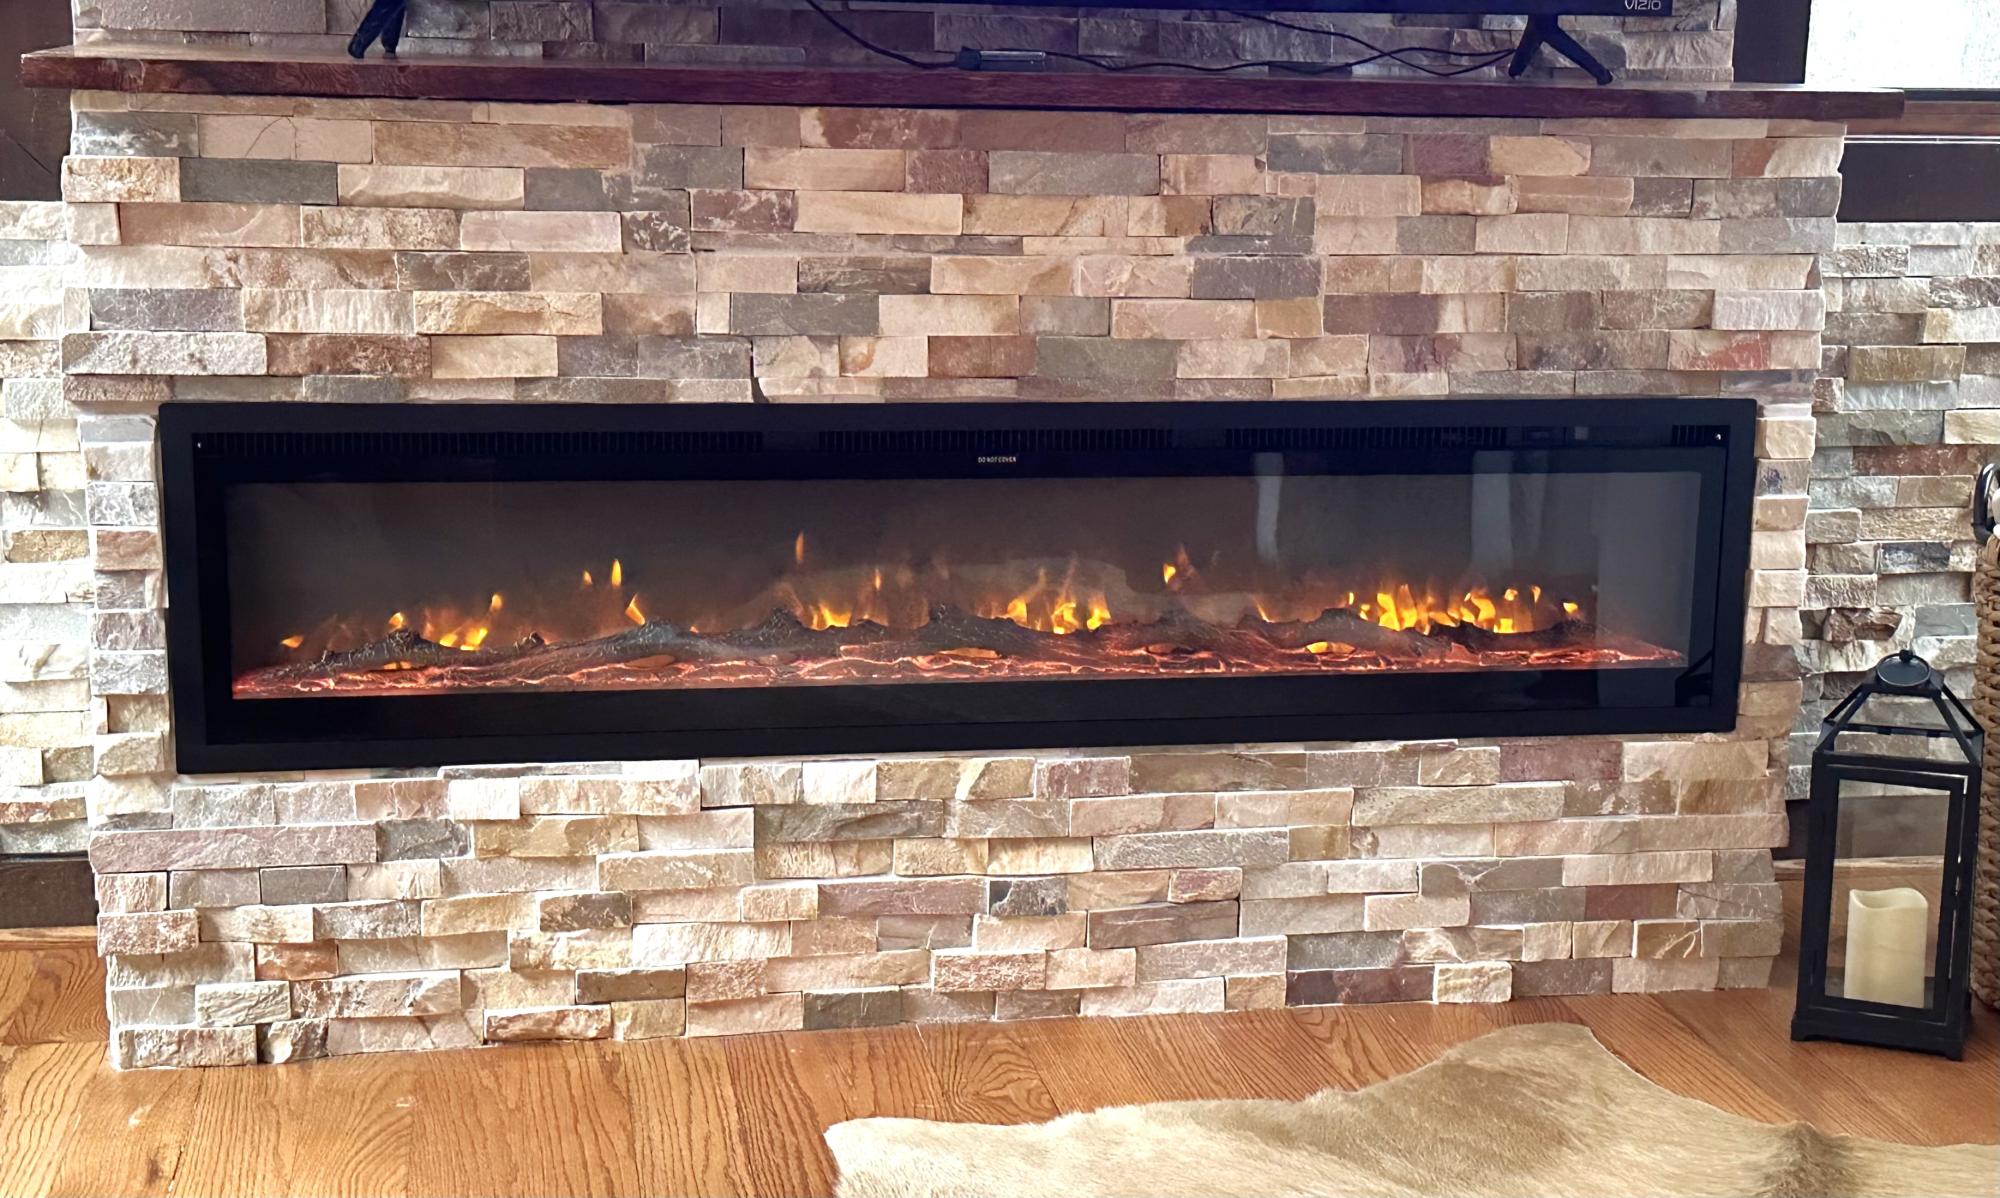
We took out the tv entertainment cabinet and built a frame for a 60” electric fireplace. We found the ledger rock to match the wall I completed two years ago and then I tiled the rock over the backer board and installed the fireplace. The wood on top of the fireplace came from an oak tree that was growing through our deck. I milled the wood and joined three boards to give me the depth I needed, sanded, stained and put a poly finish on it. Love the final result and we gained 6” of space in the room.
Wes Silvey
Garage shelves
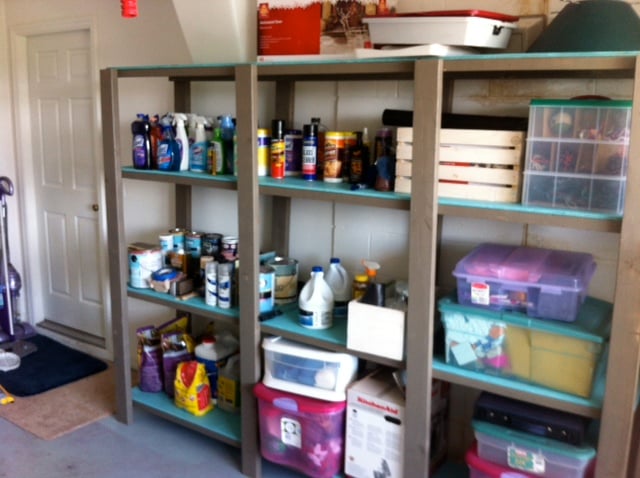
Shelves in garage
Estimated Time Investment
Day Project (6-9 Hours)
Finish Used
Glidden paint. Martha Stewart colors.
Recommended Skill Level
Beginner
Comments
Wed, 08/22/2012 - 22:07
You are a genius! lol I have
You are a genius! lol I have been complaining about my garage and how I need to organize the clutter so I can build more. All along I just needed to build this. Could you tell me an estimate of what it cost you?
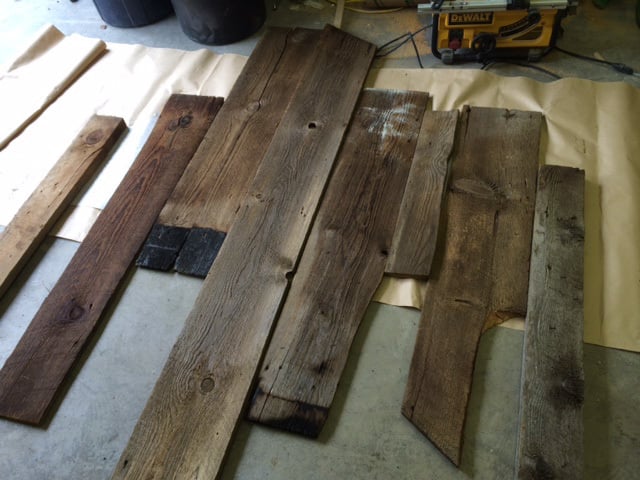
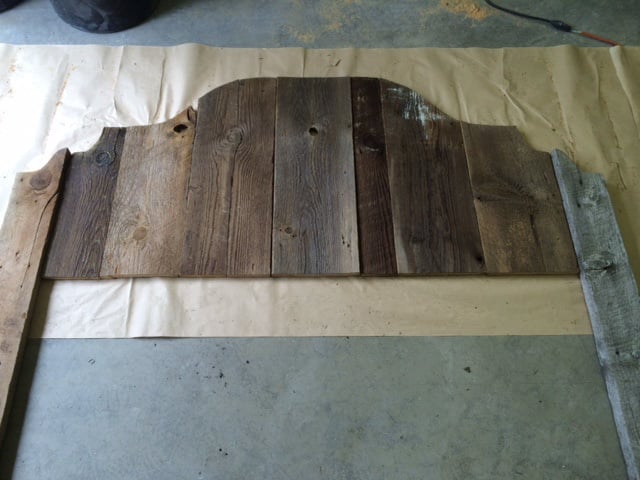
Traditionally rustic reclaimed barn wood headboard
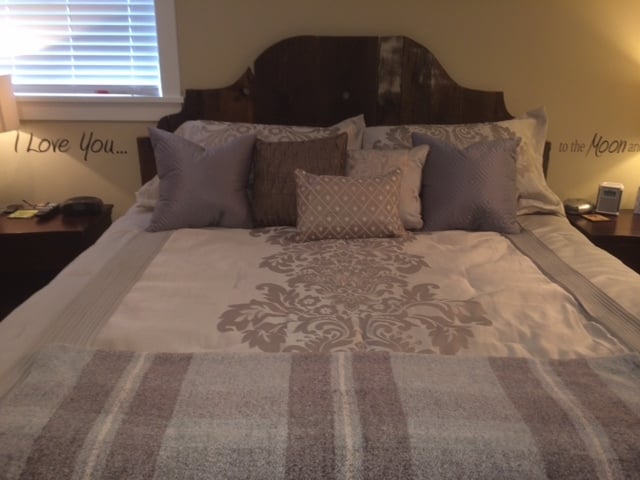
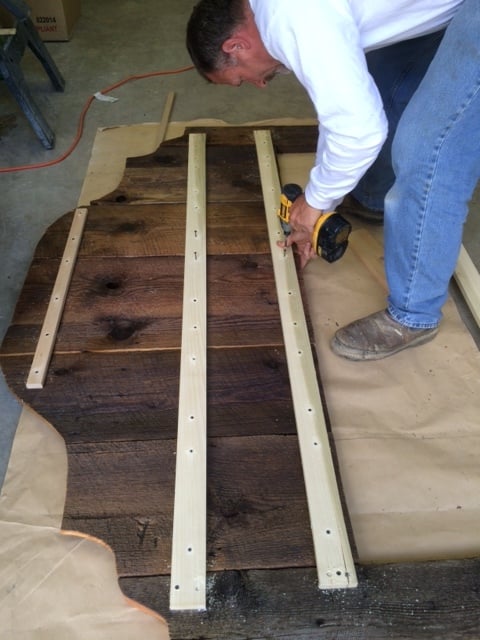
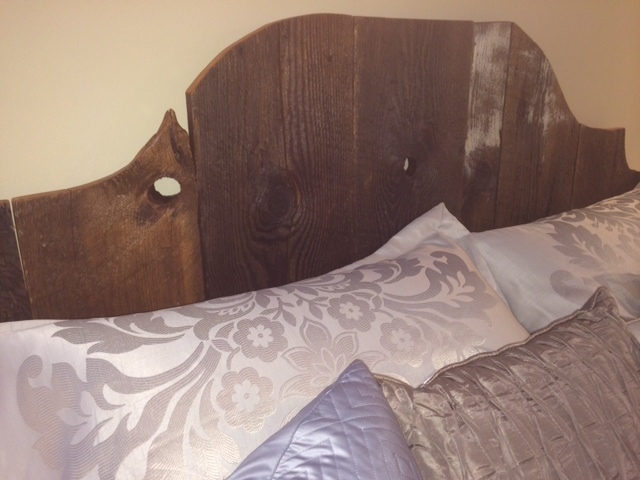
I have to admit...I'm an Ana White and Pintrest addict. I was visiting my cousins farm and saw a pile of beautiful old & weathered barn wood. She let me take a big pile home. I washed and scrubbed the wood with a soft brush to get the years of dirt off. After dried, I layed down all the wood and picked out all the neat character pieces. I freehanded a template of the headboard on butcher paper and traced it on the boards. I cut the boards and lightly sanded the edges. I brushed on two coats of clear coat. When dried my hunky hubby helped me put it all together with 1x2"s and screws. We attached it to the bed frame and there ya have it! A gorgeous traditional-rustic headboard!

Built from Plan(s)
Estimated Cost
$10
Estimated Time Investment
Weekend Project (10-20 Hours)
Finish Used
Deft satin clear polyurethane
Recommended Skill Level
Intermediate
Much needed for our bathroom!
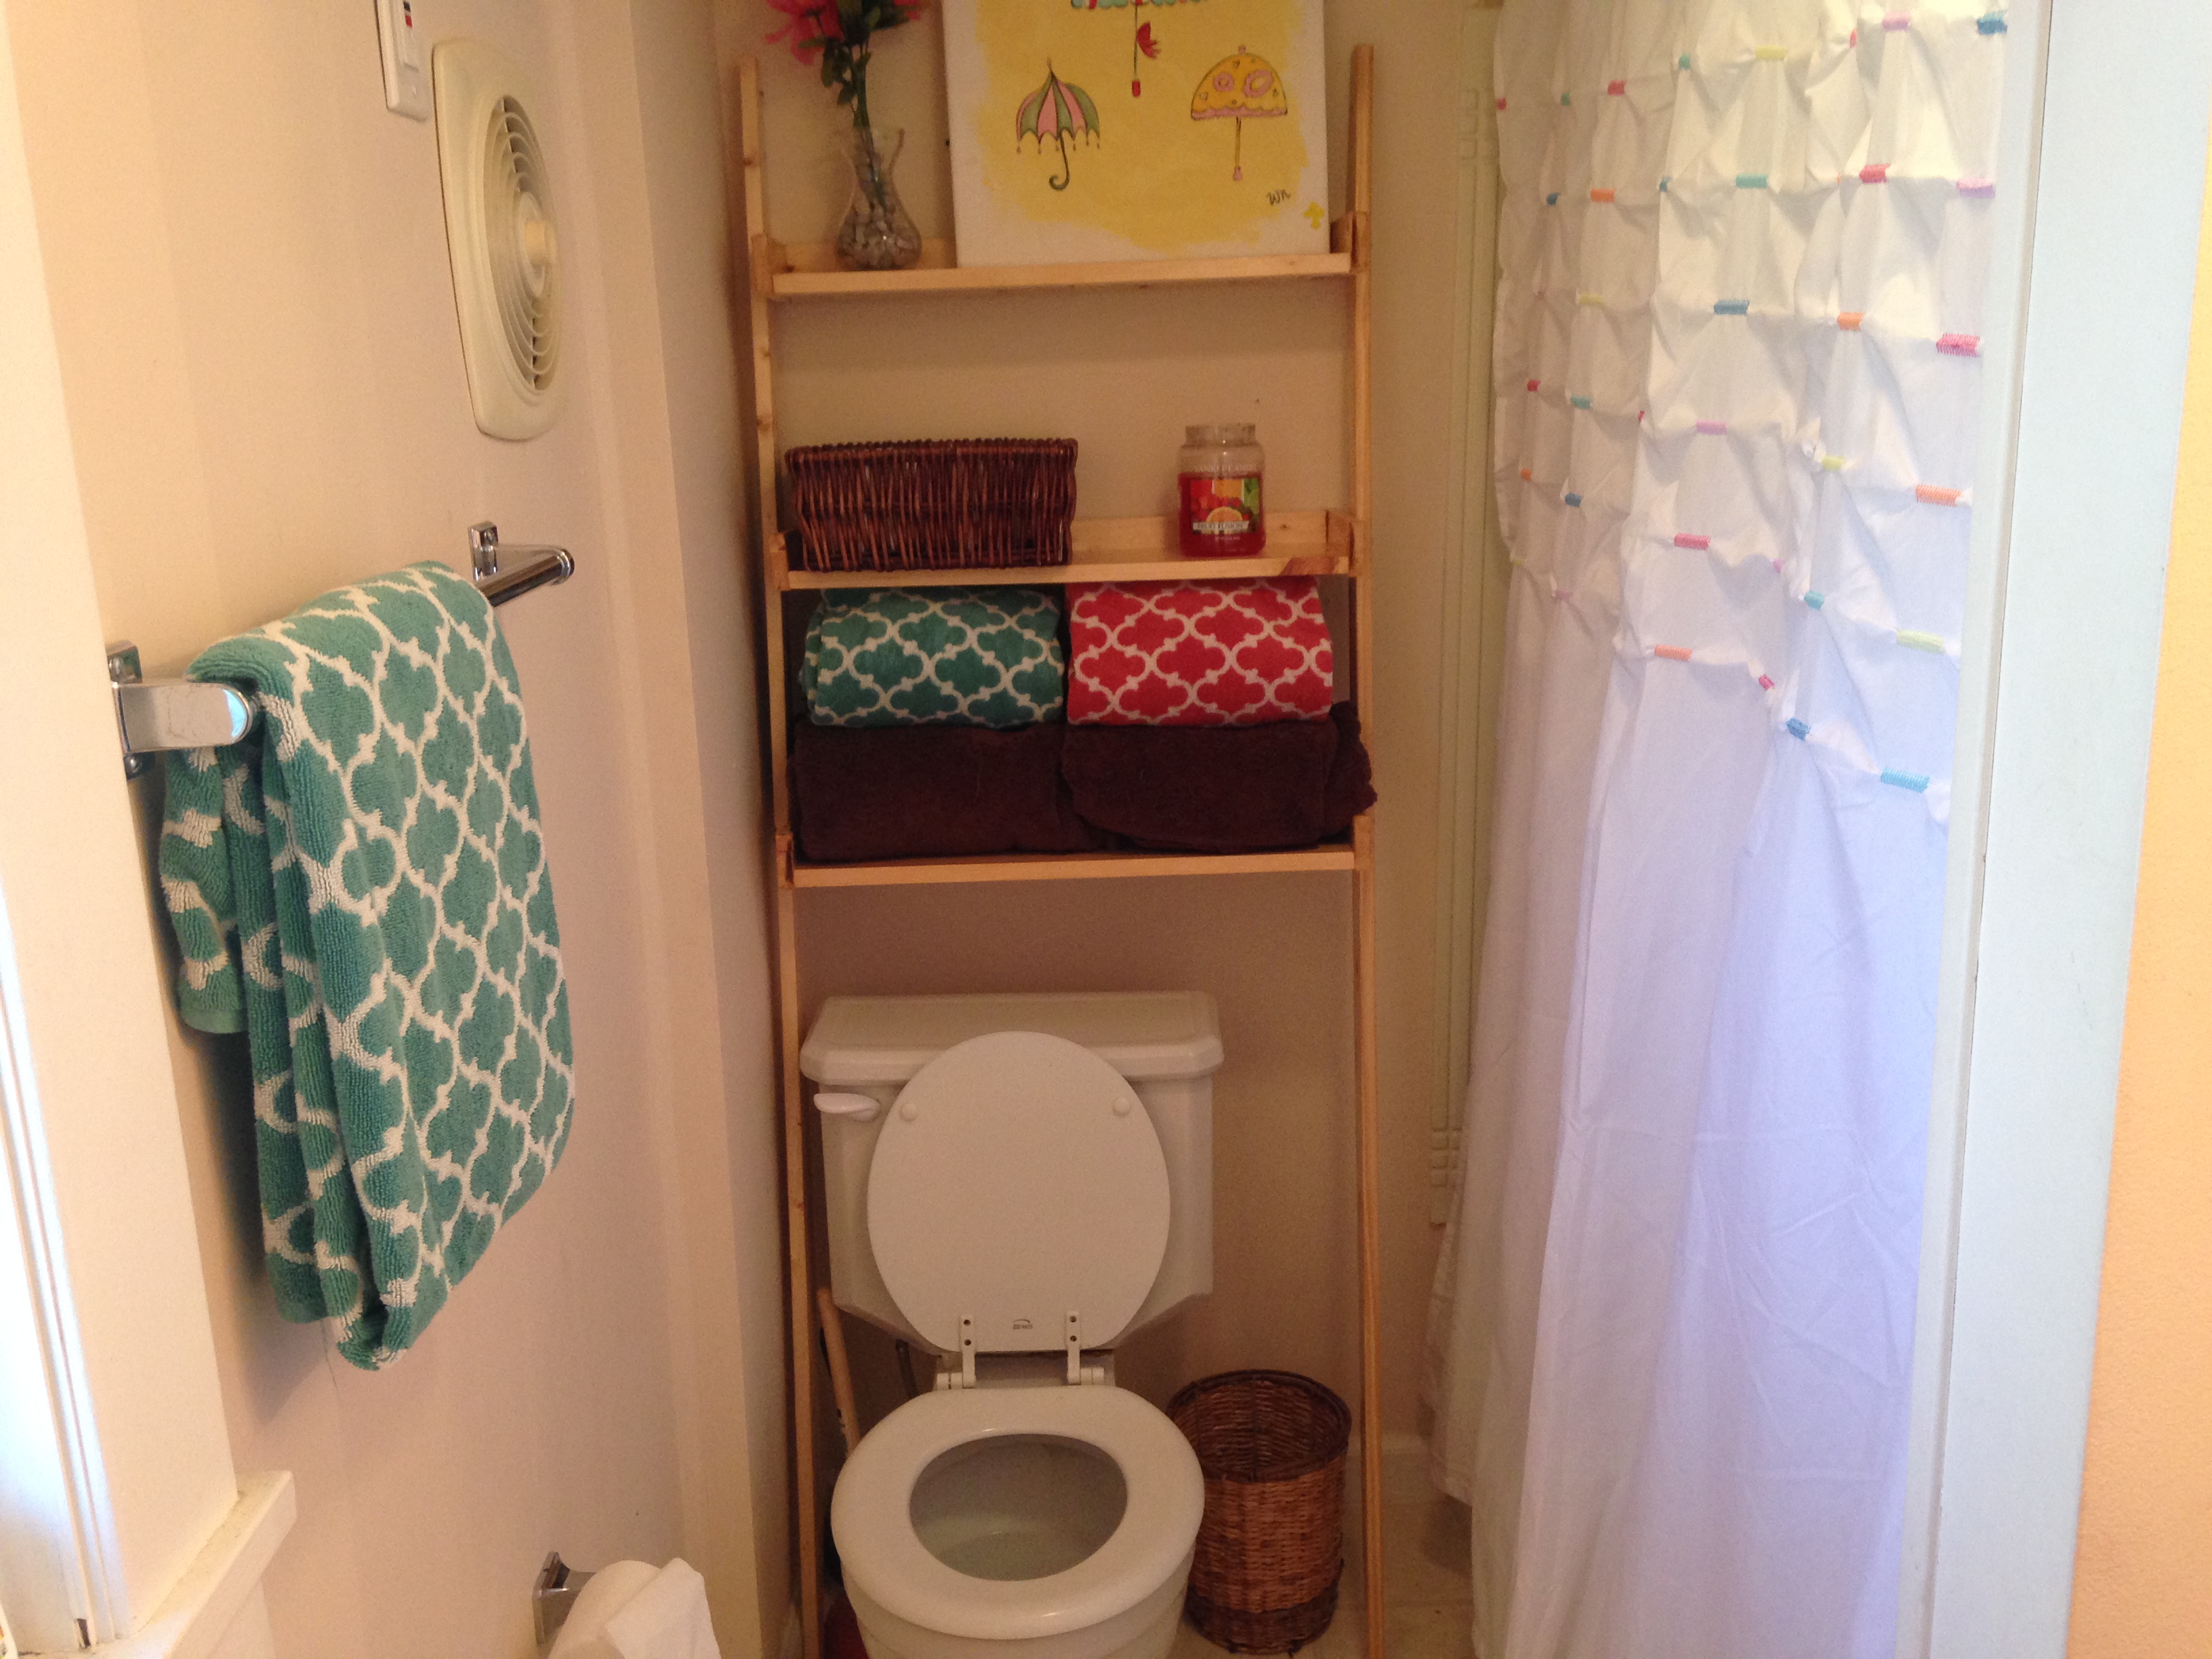
I am a really beginning builder (read: this is about my fifth project ever), but it works perfectly for our really tiny, narrow bathroom. I finished it with some stain we already had on hand. Thank you so much for the building plans!
Estimated Time Investment
Day Project (6-9 Hours)
Recommended Skill Level
Beginner
Easy planter
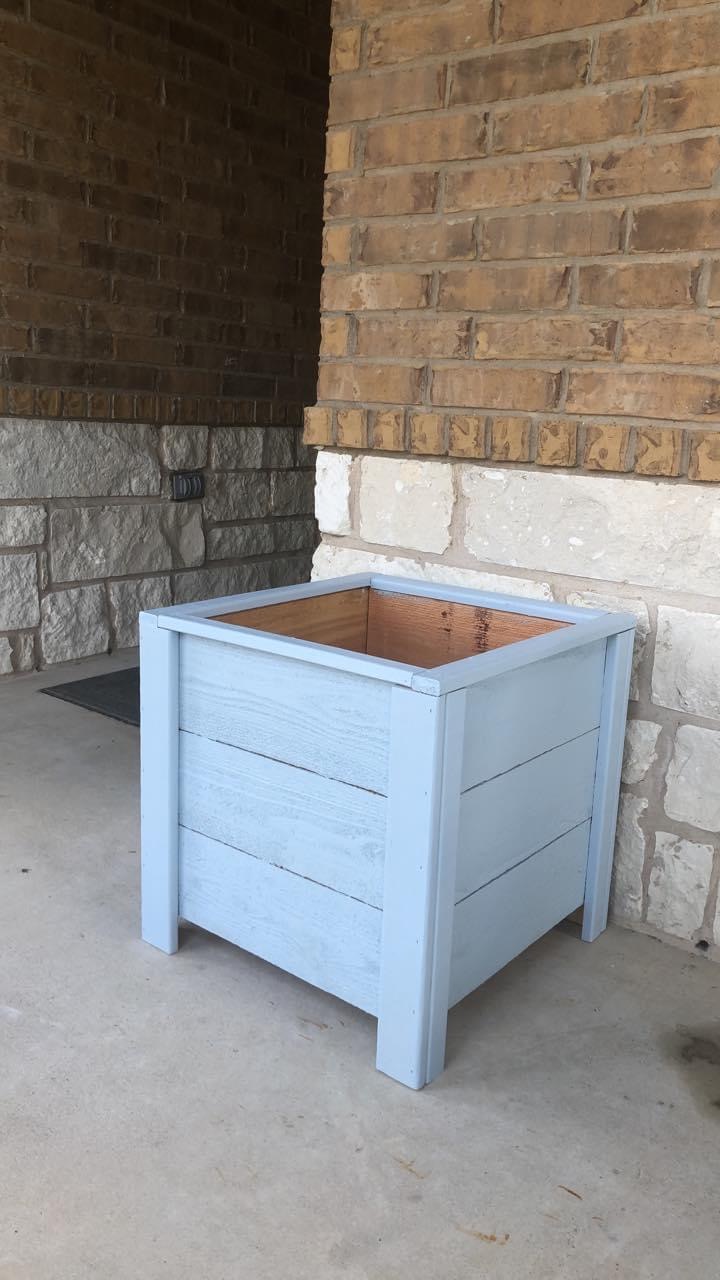
Love this little planter. Already have ideas for anew version. Need to work that out, but that’s another brag. Thanks for the easy planter plans.
Built from Plan(s)