Community Brag Posts

Corner Cupboard

Submitted by Anonymous (not verified) on Tue, 01/08/2019 - 15:11

Made this corner cupboard in an afternoon. It was easier than expected especially with the sliding compound miter saw, and the kreg jig haha!

Built from Plan(s)
Estimated Cost
$130
Estimated Time Investment
Day Project (6-9 Hours)
Finish Used
Varathane vintage aqua wood stain for the shelves, Behr "power grey" for the colors. I used weathered grey plank MDF paneling from Home Depot for the backing and doors.
Recommended Skill Level
Beginner

Custom made easy. Thank you!

Submitted by Anonymous (not verified) on Mon, 10/17/2022 - 12:59

Wanted something that could accommodate two foot stools so I made a couple of changes to the bottom construction and added casters. My version is a bit rough and ready (first time building a piece of furniture) but your plan was easy to follow and it's perfect for our space. Thank you for making these plans available and your comprehensive videos! My husband wants to know when I'm starting my next project.

Comments

Custom Farmhouse Bench

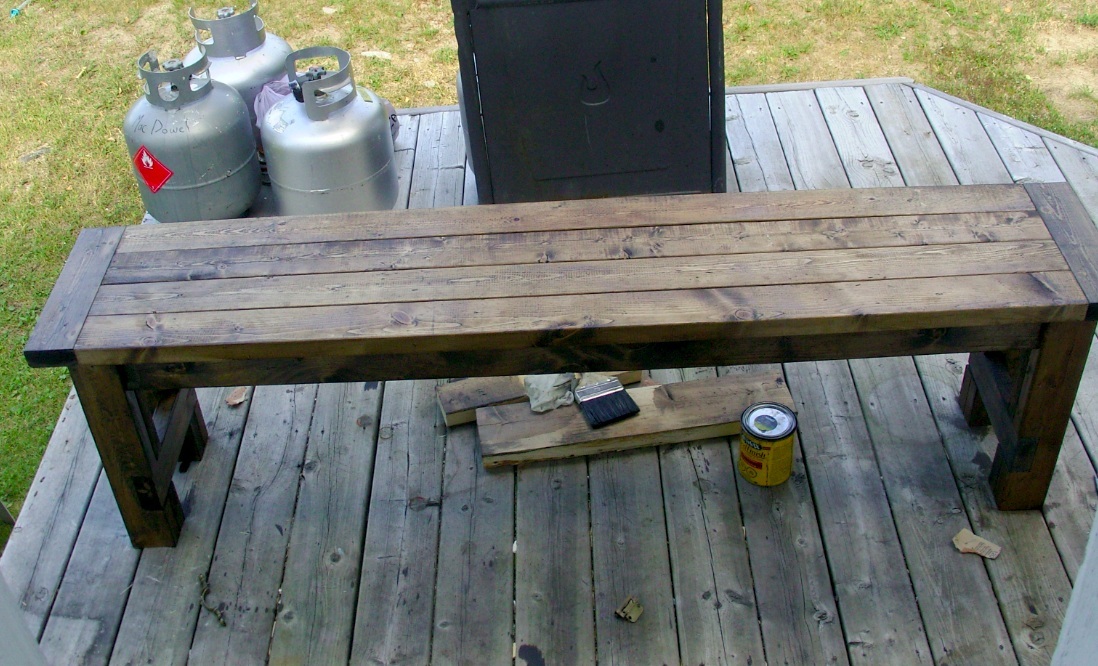
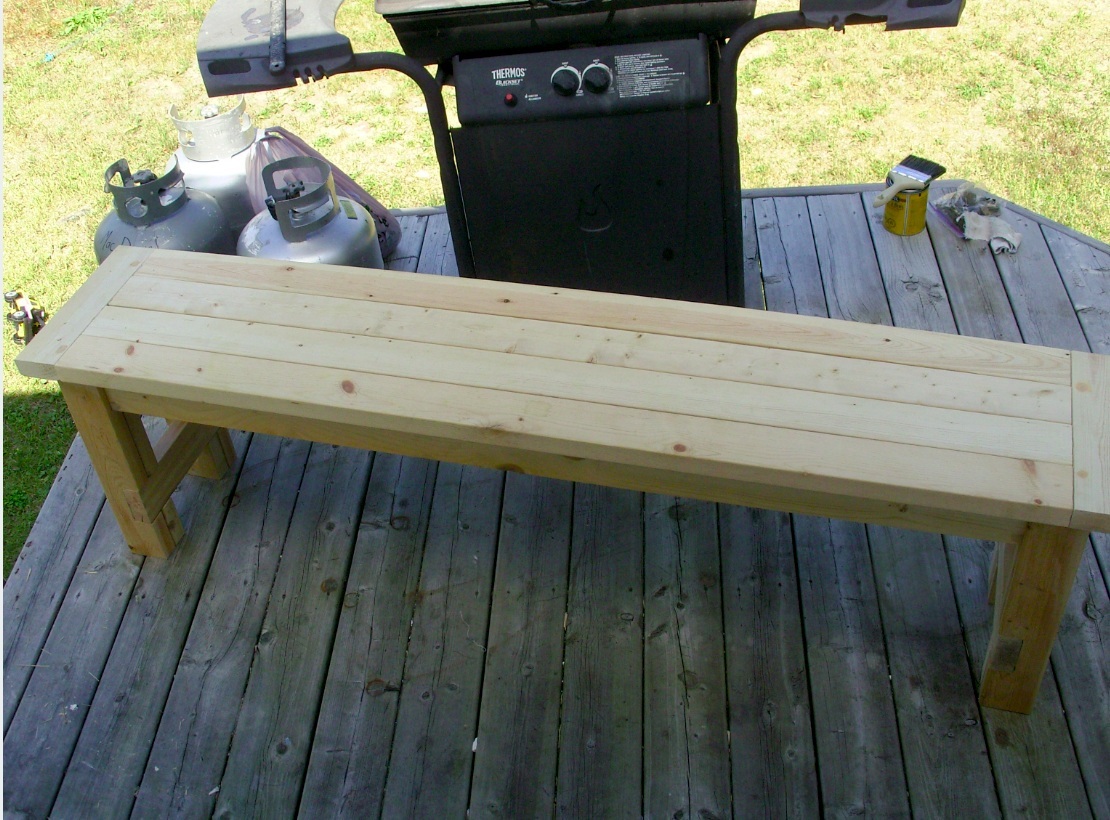
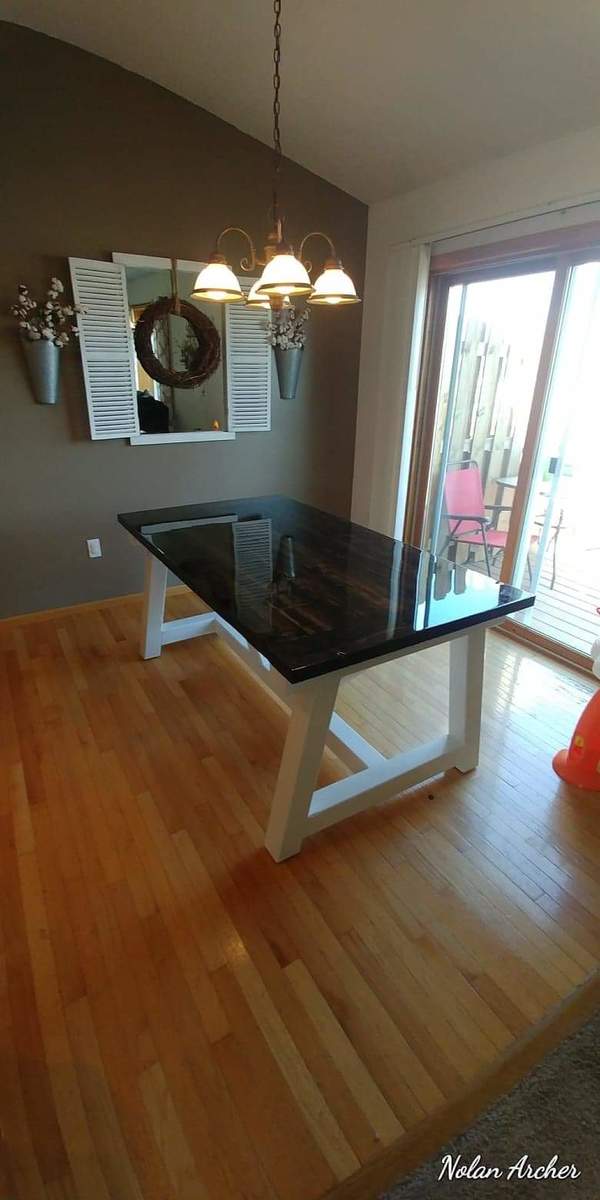
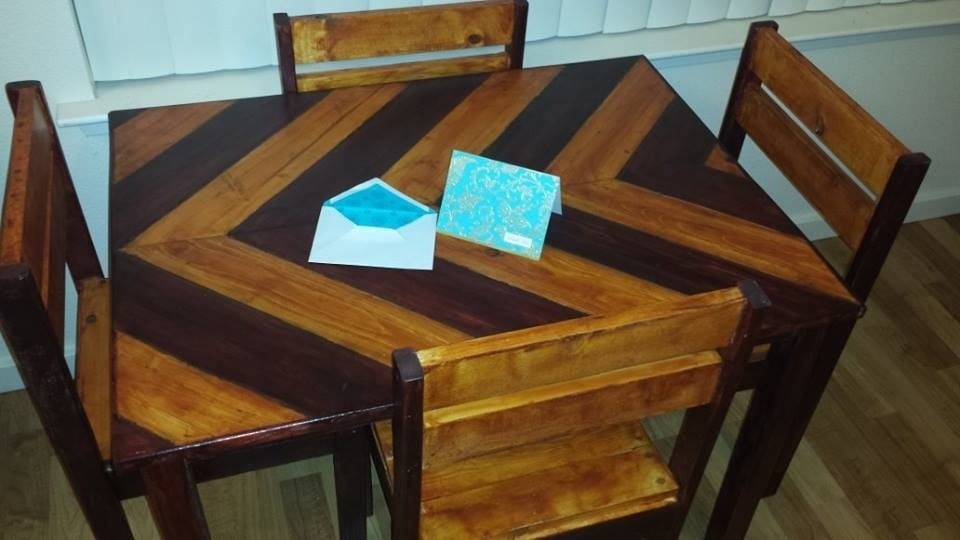
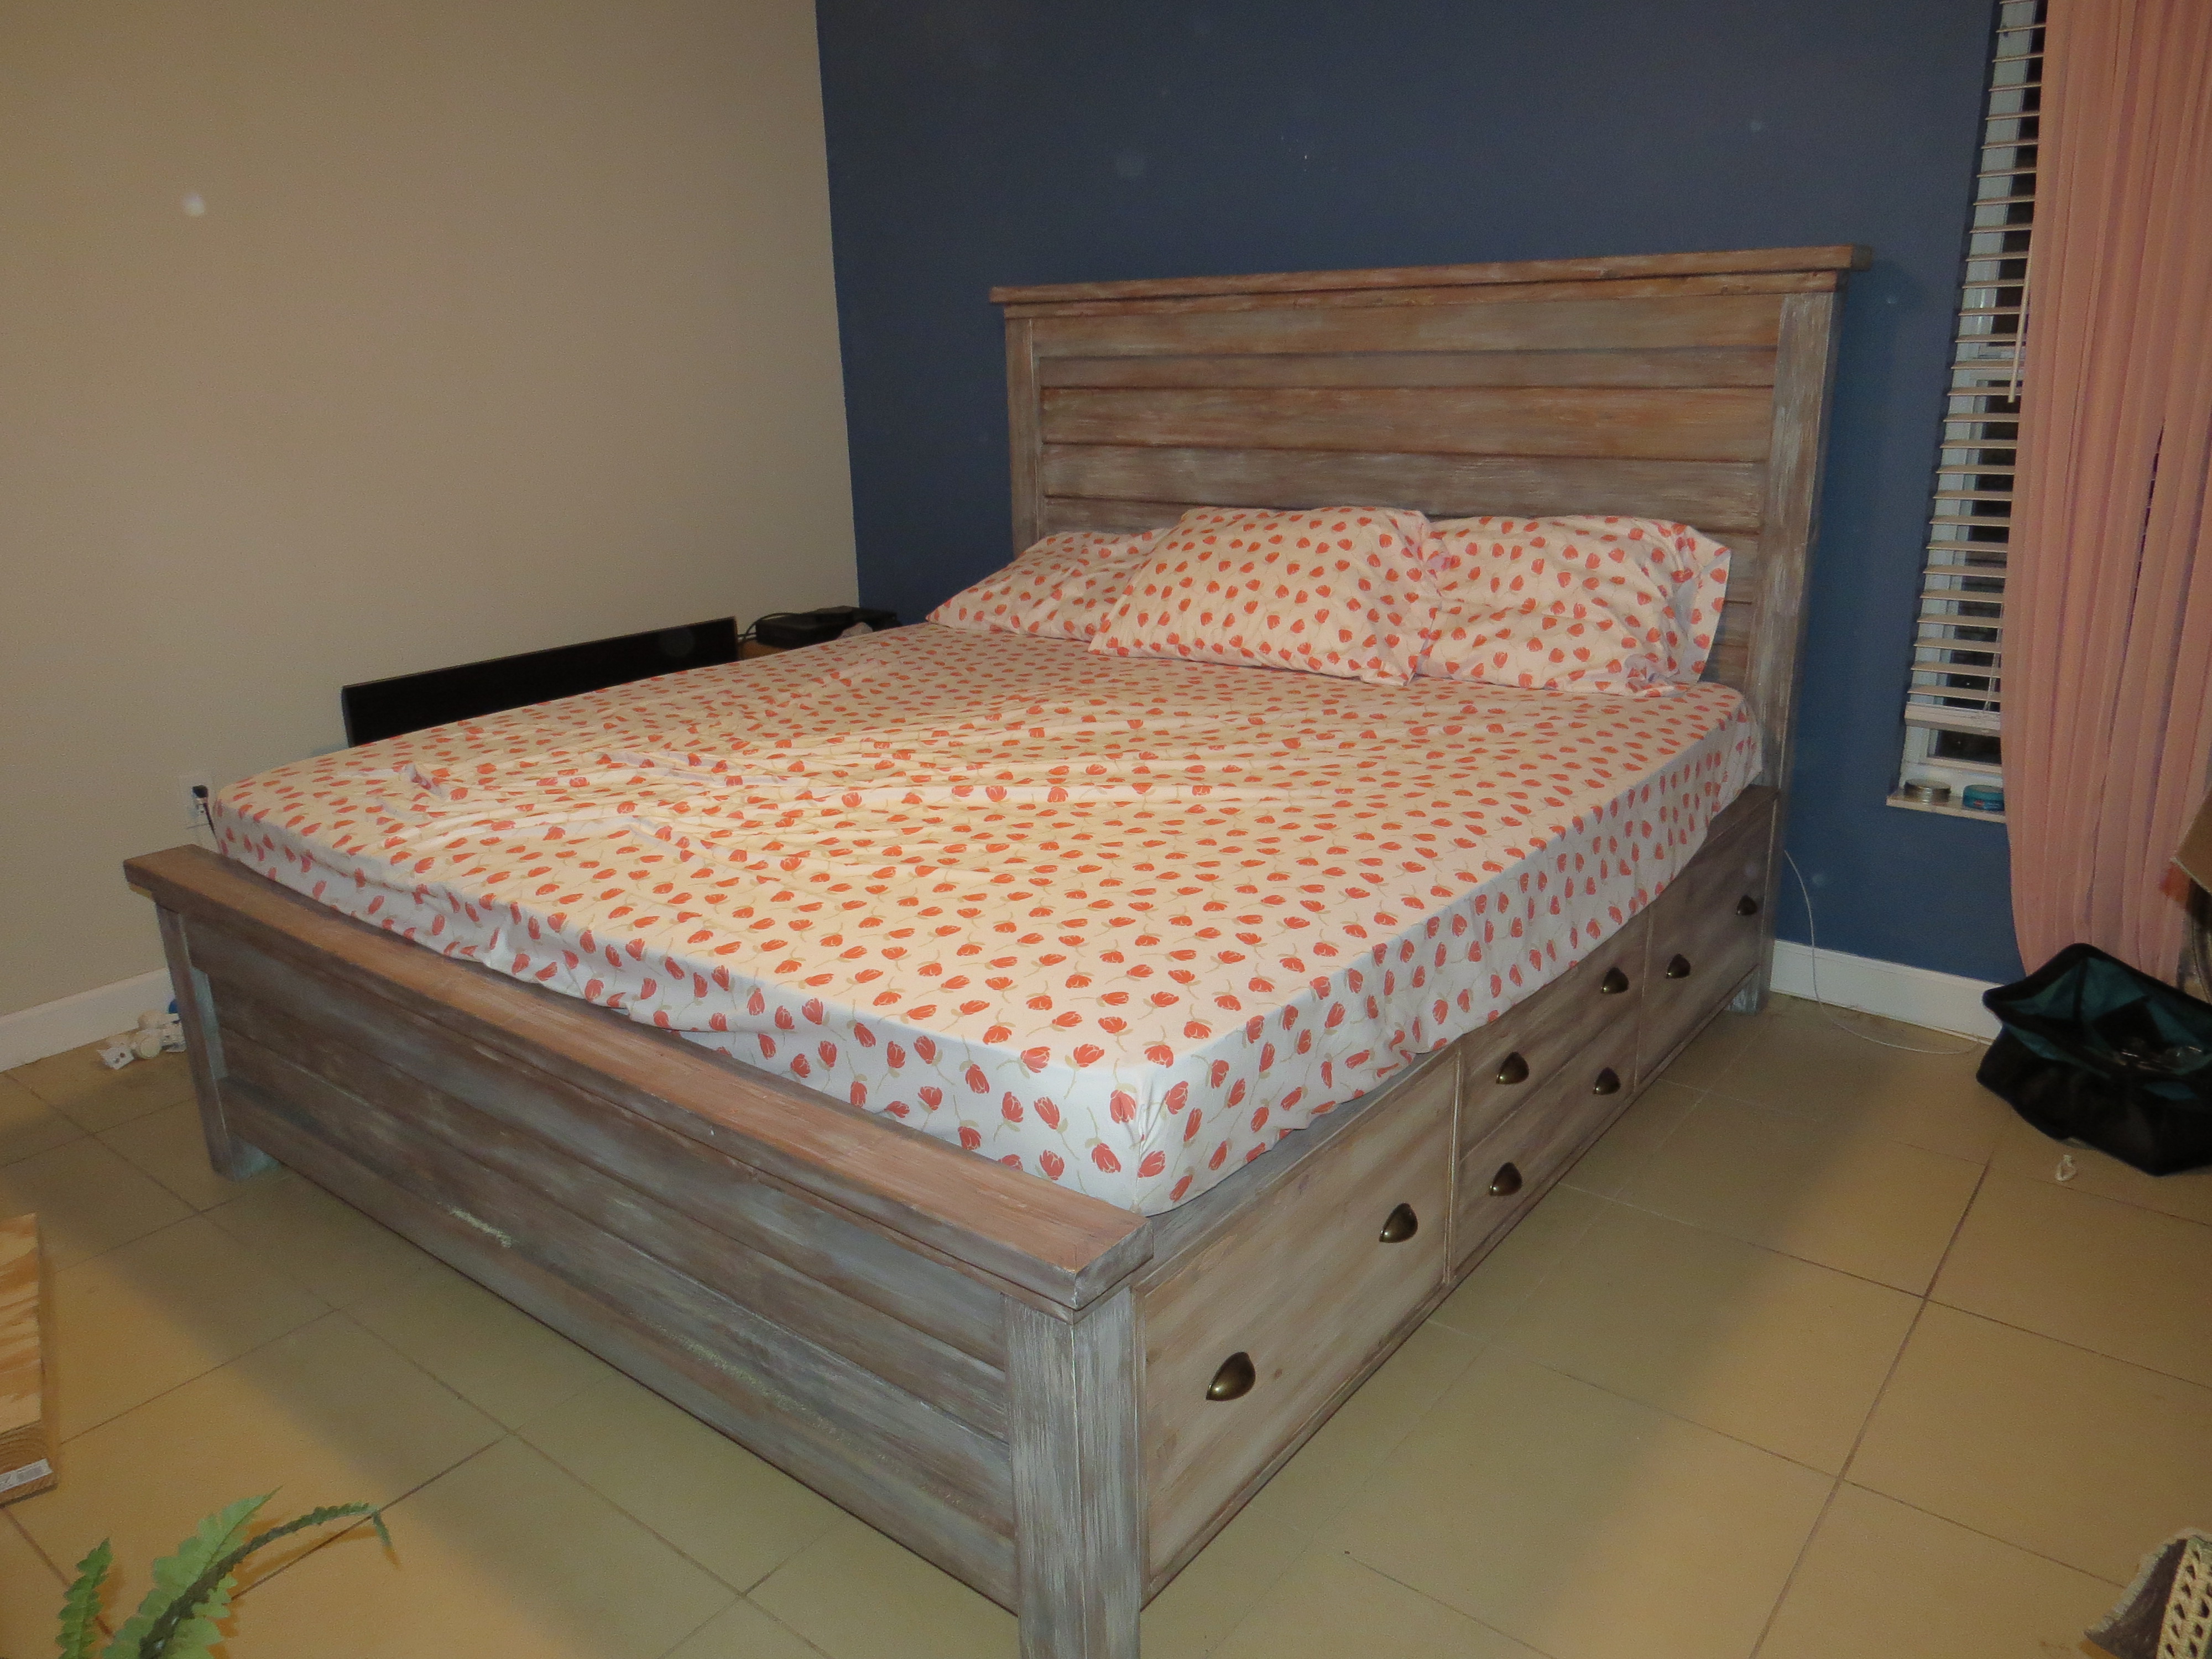
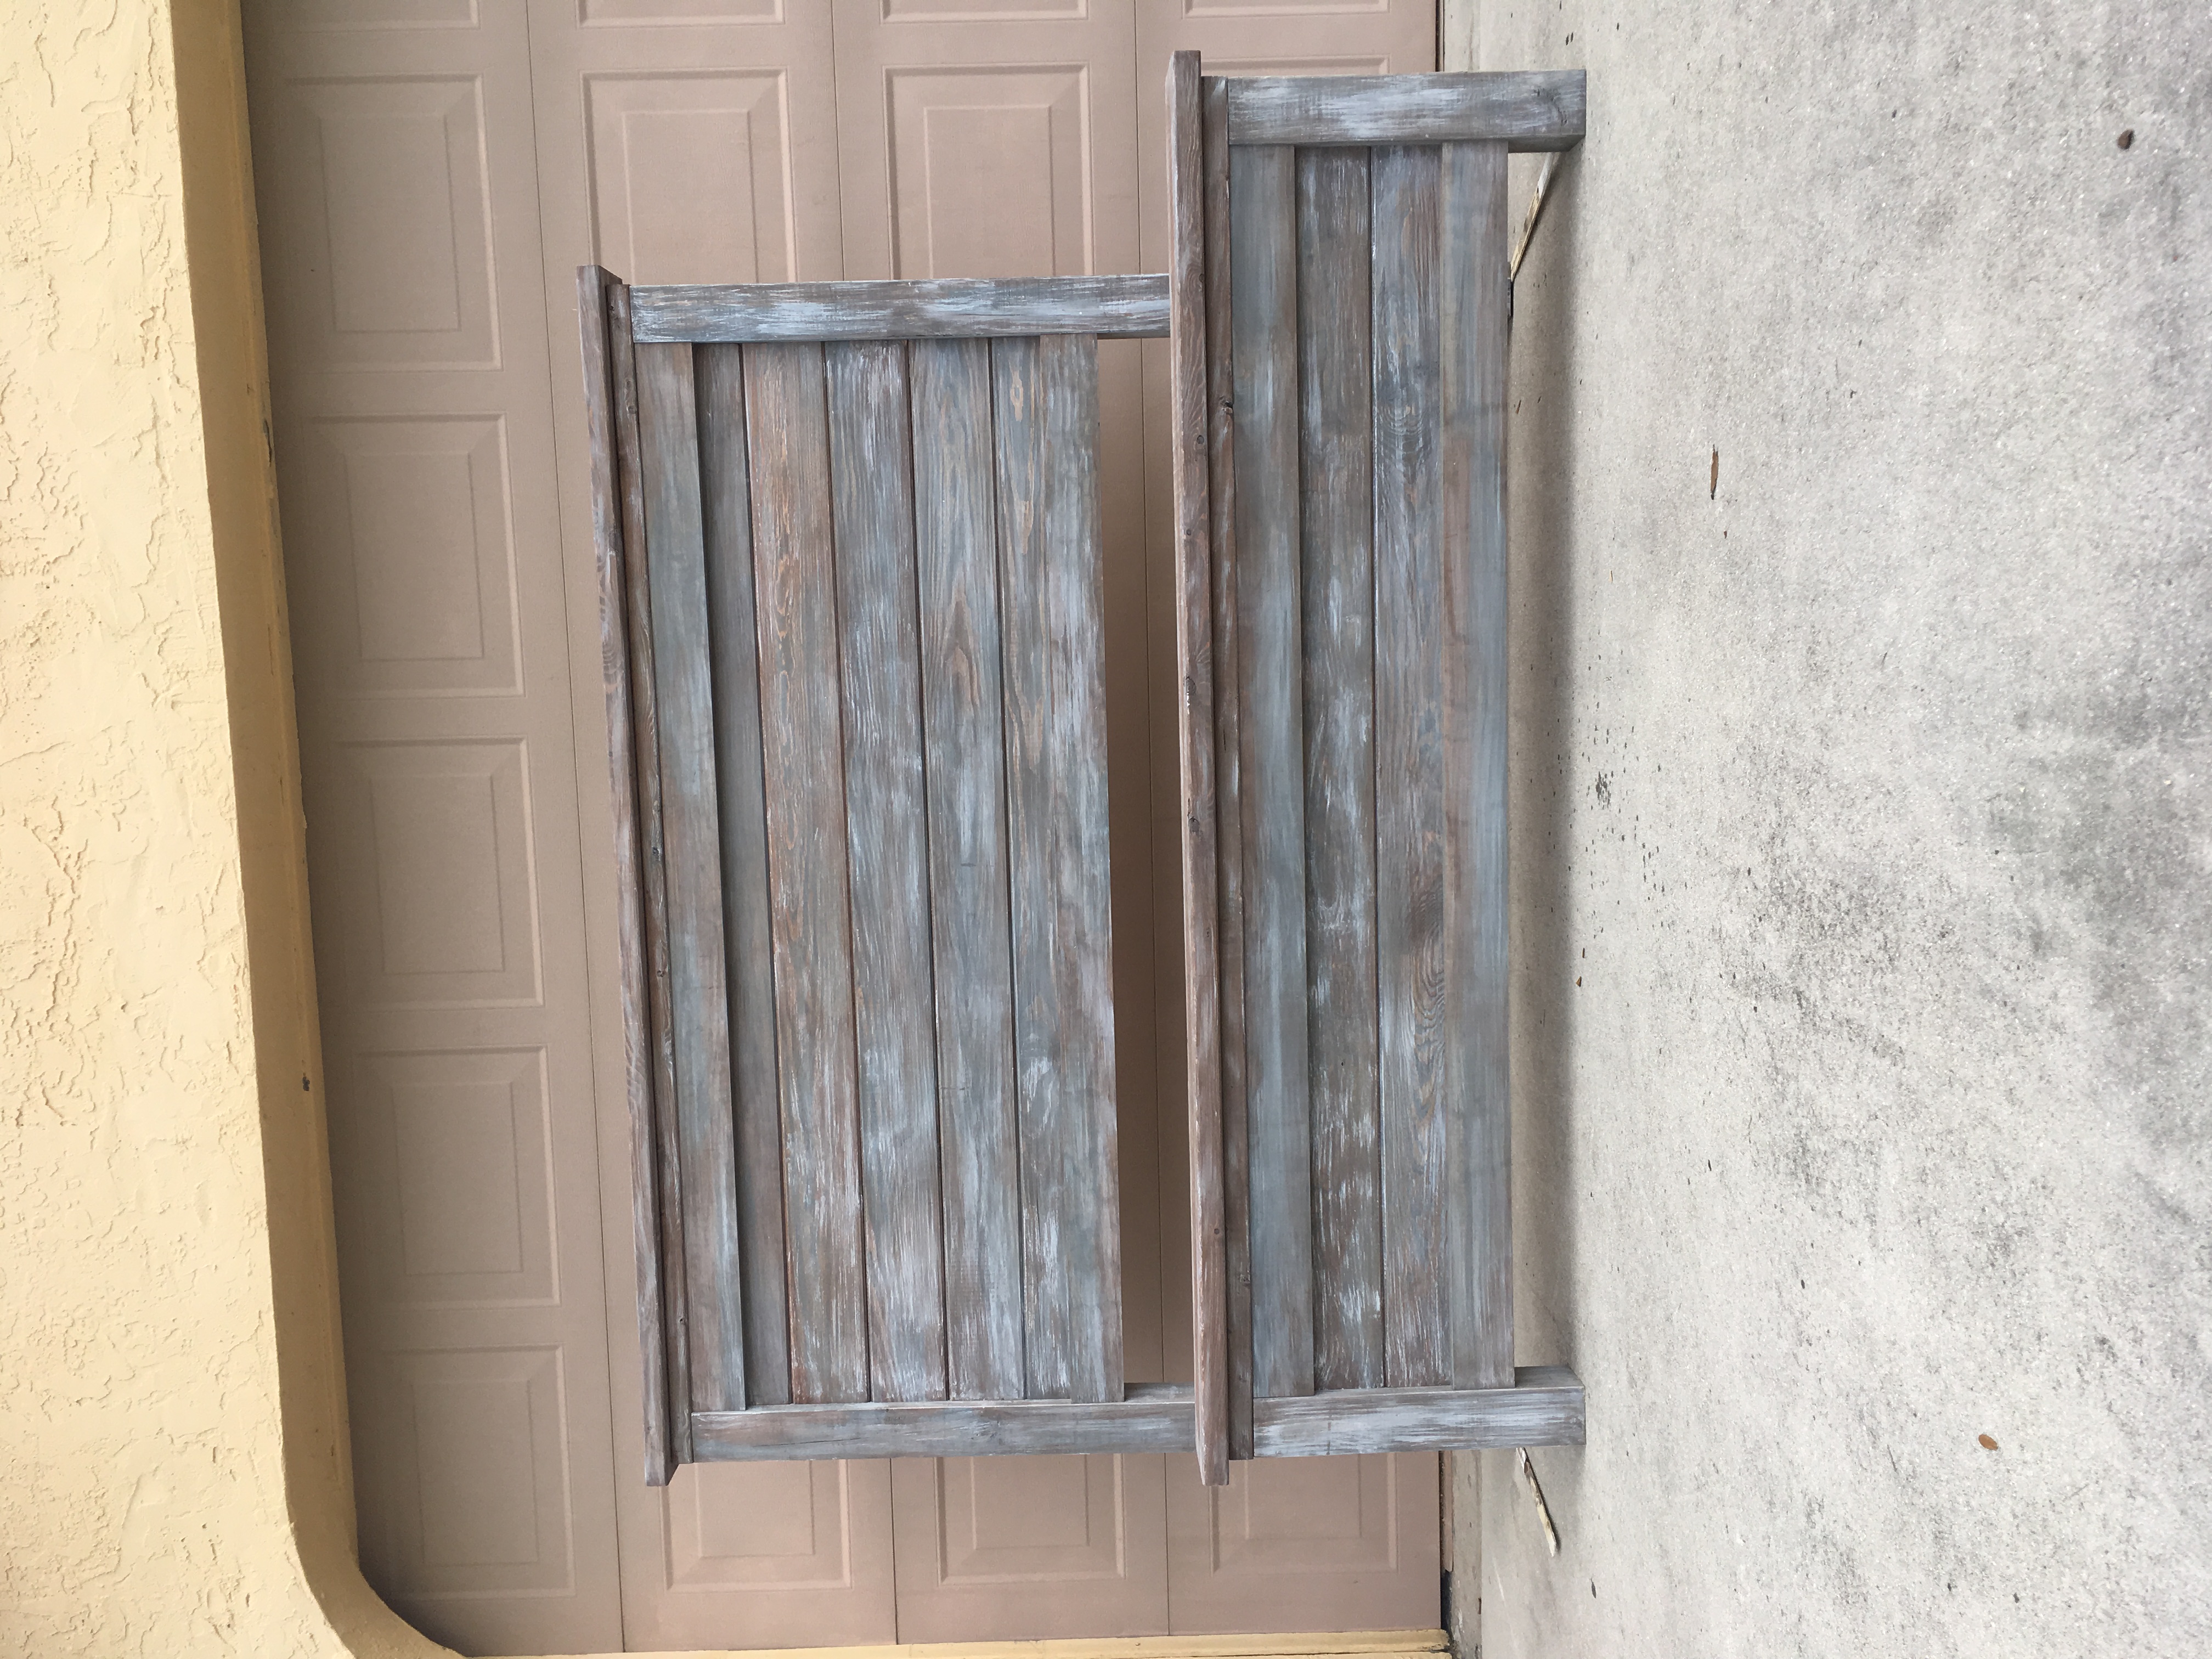
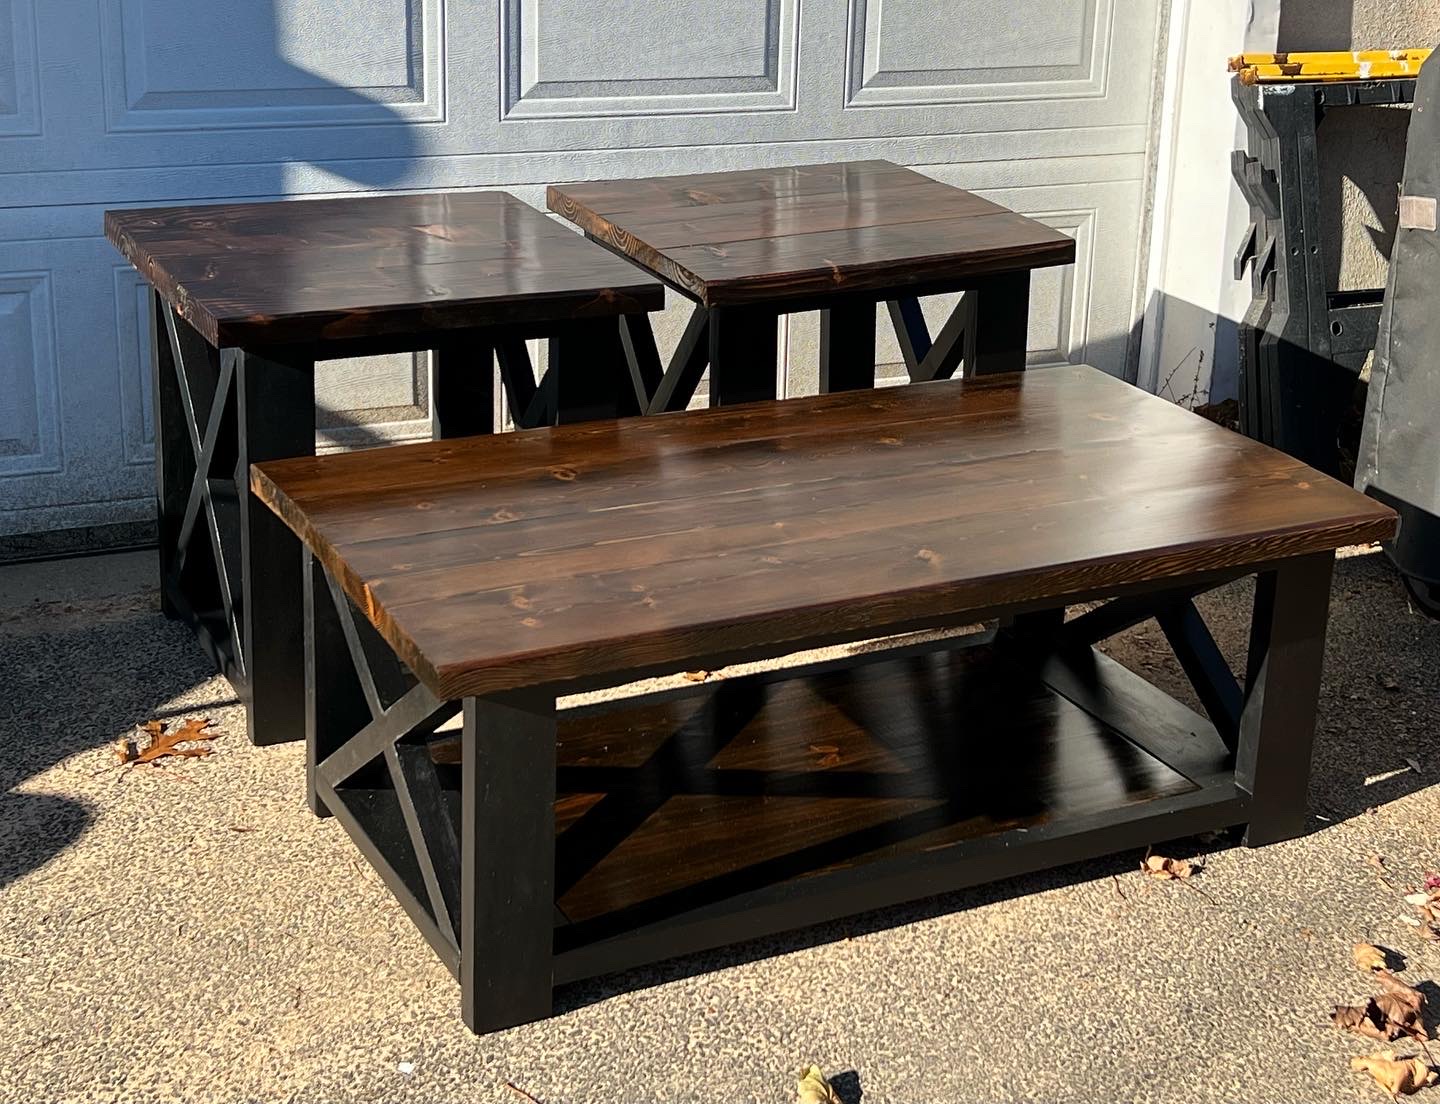
After building a custom sized farmhouse table by combining and tweaking the two plans here, we knew we wanted another piece of dining furniture as substantial as the table and in the same style. The farmhouse bench was the logical choice!

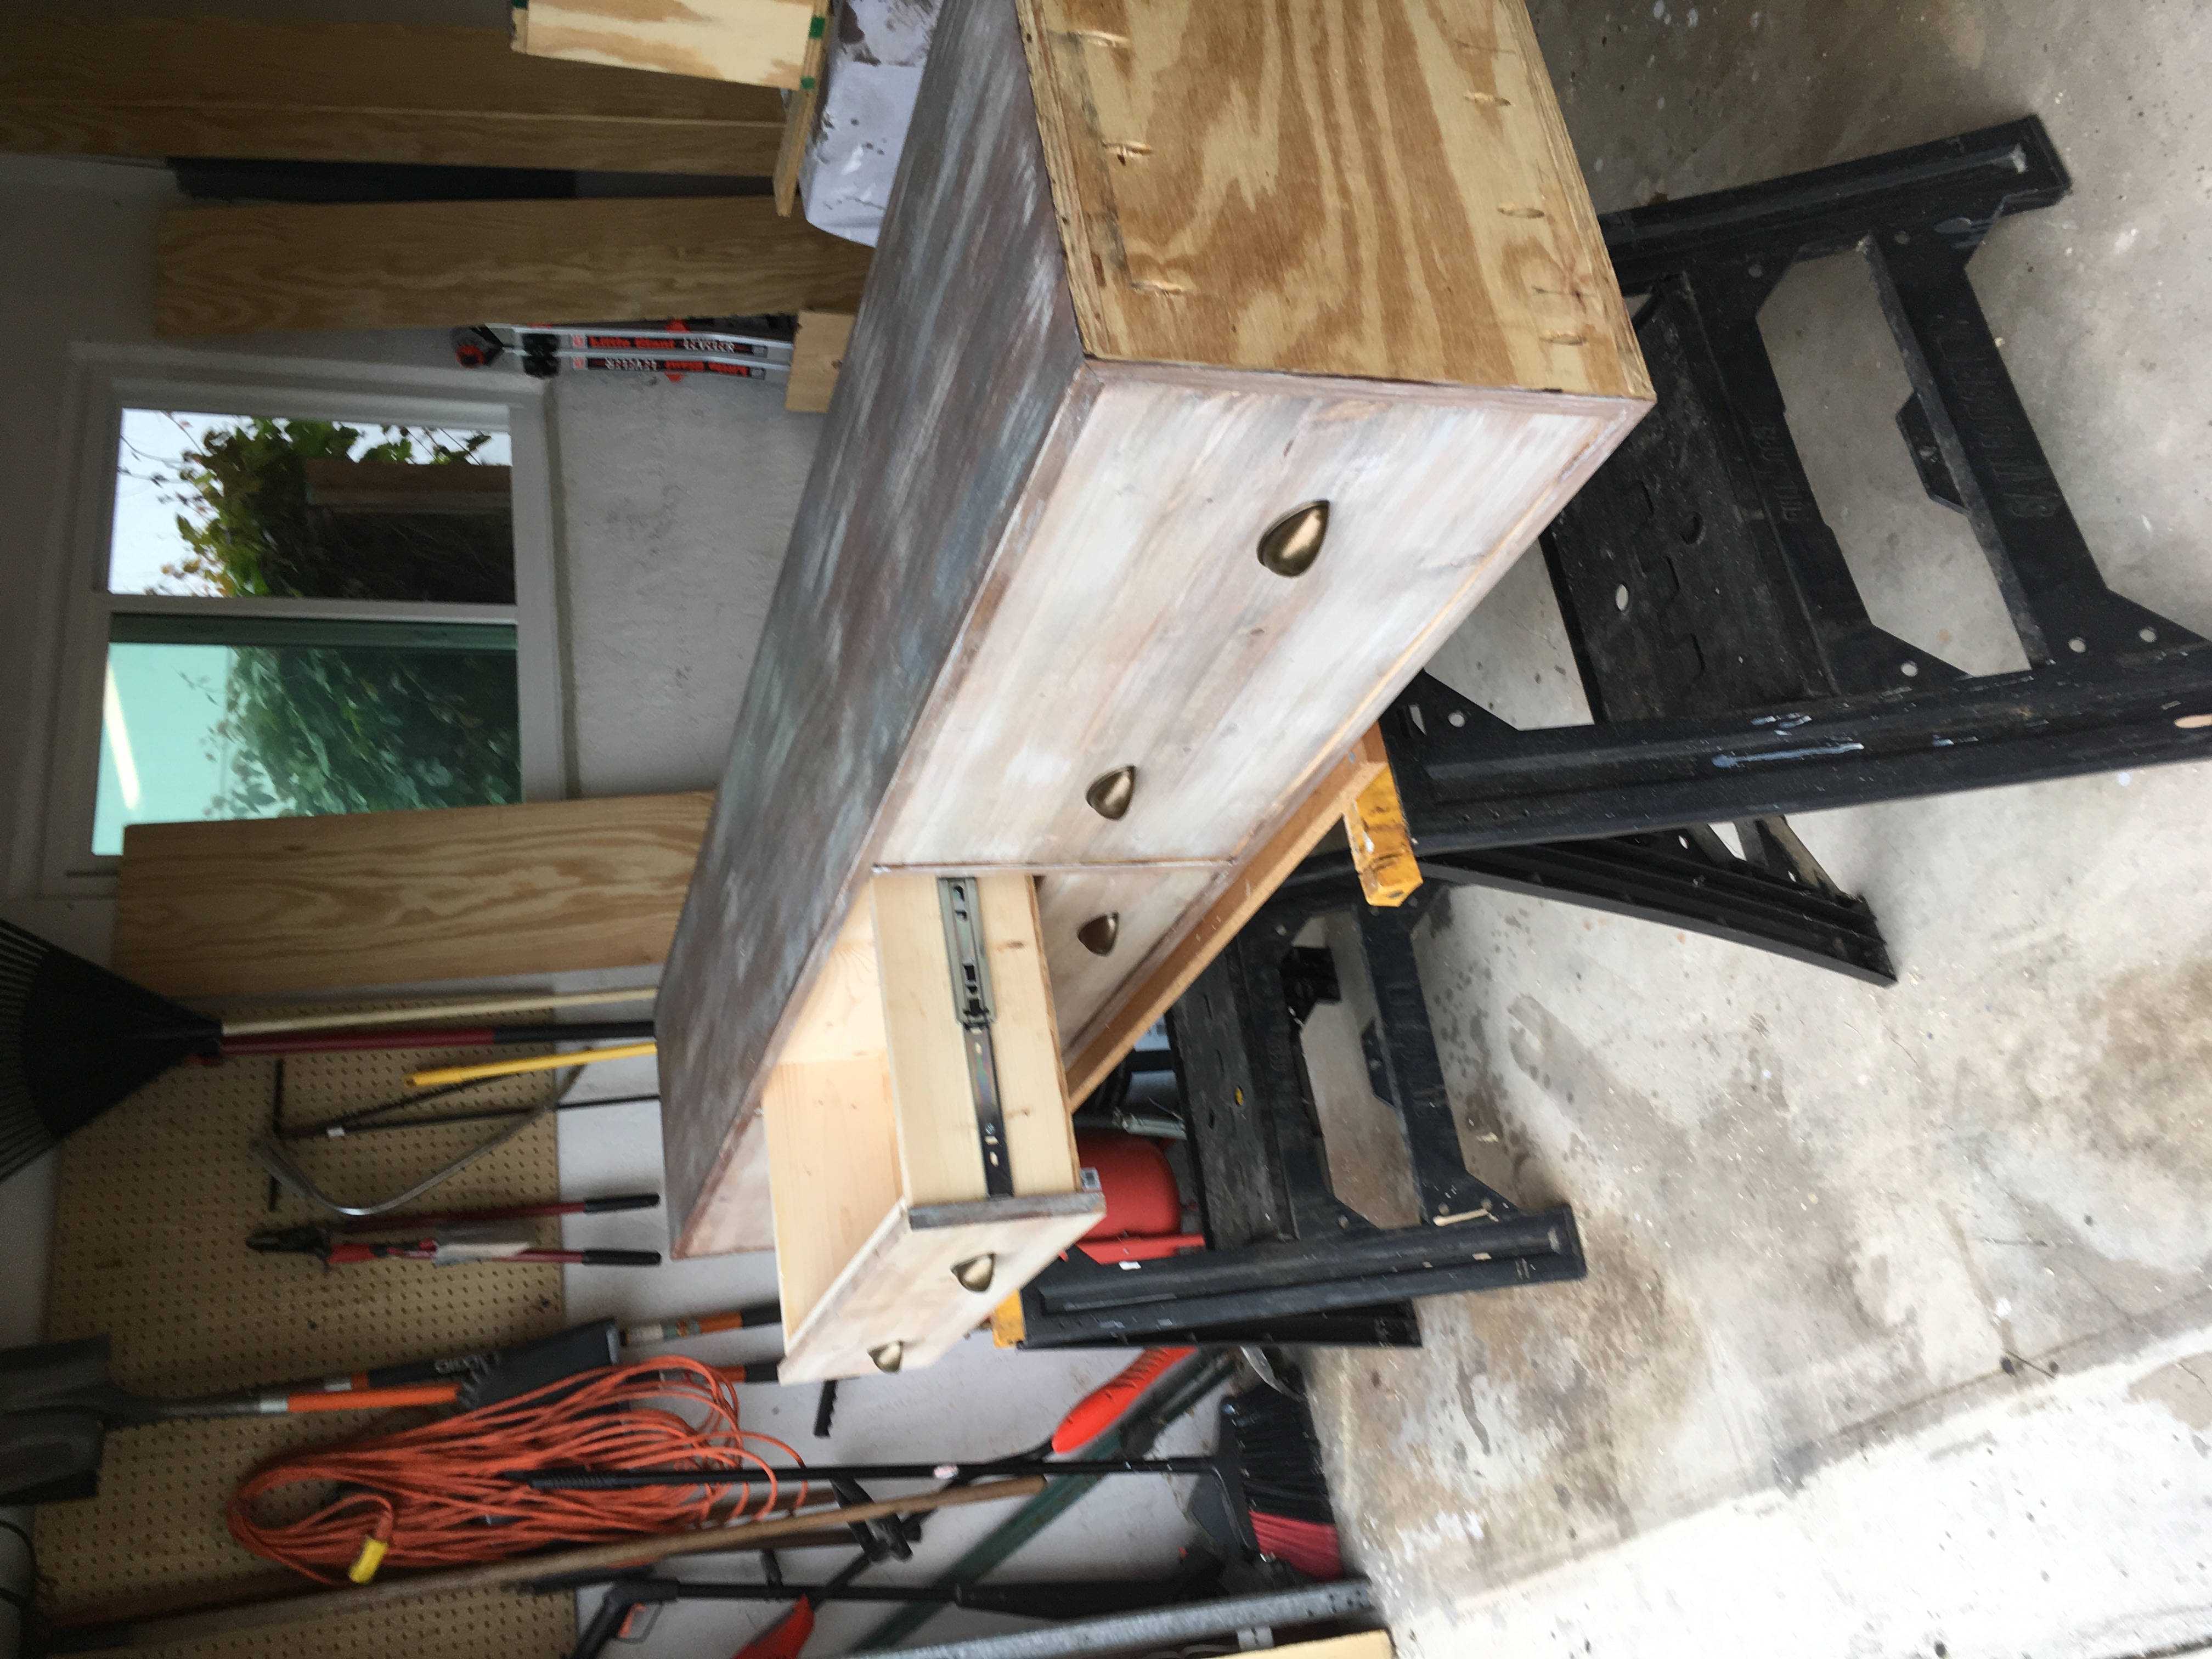
After calculating our desired height and length (our table is taller, but not a long as Ana's) we jumped right into building. Other than waiting for the glue to set and the stain to dry the building itself took less than two hours.

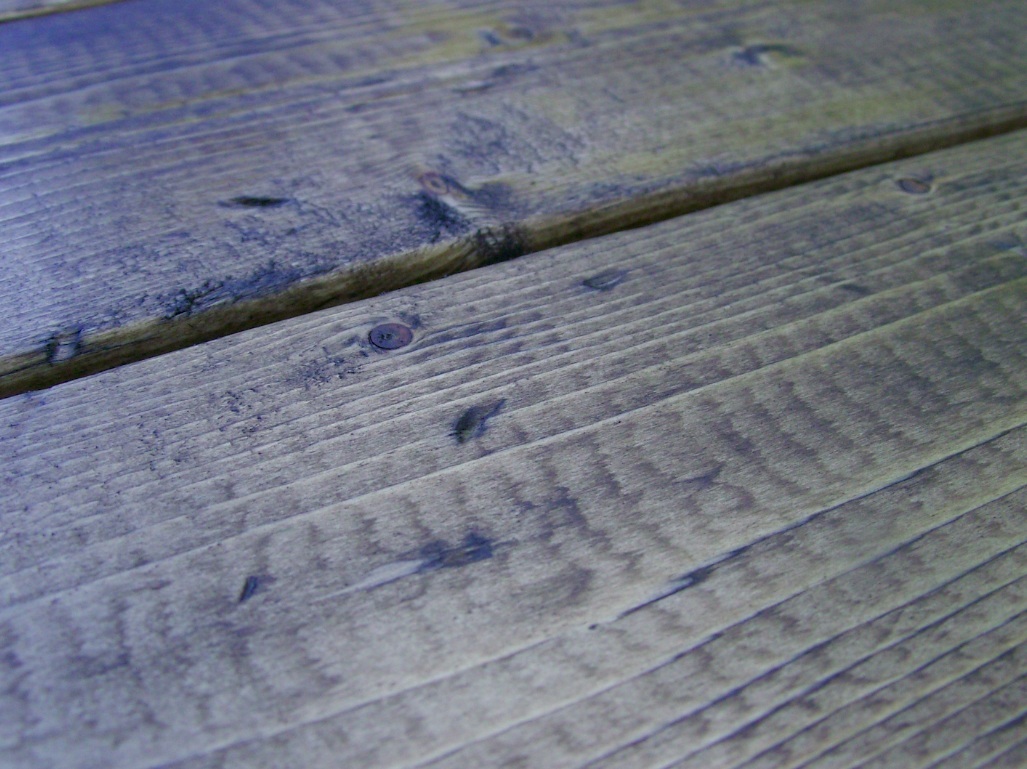
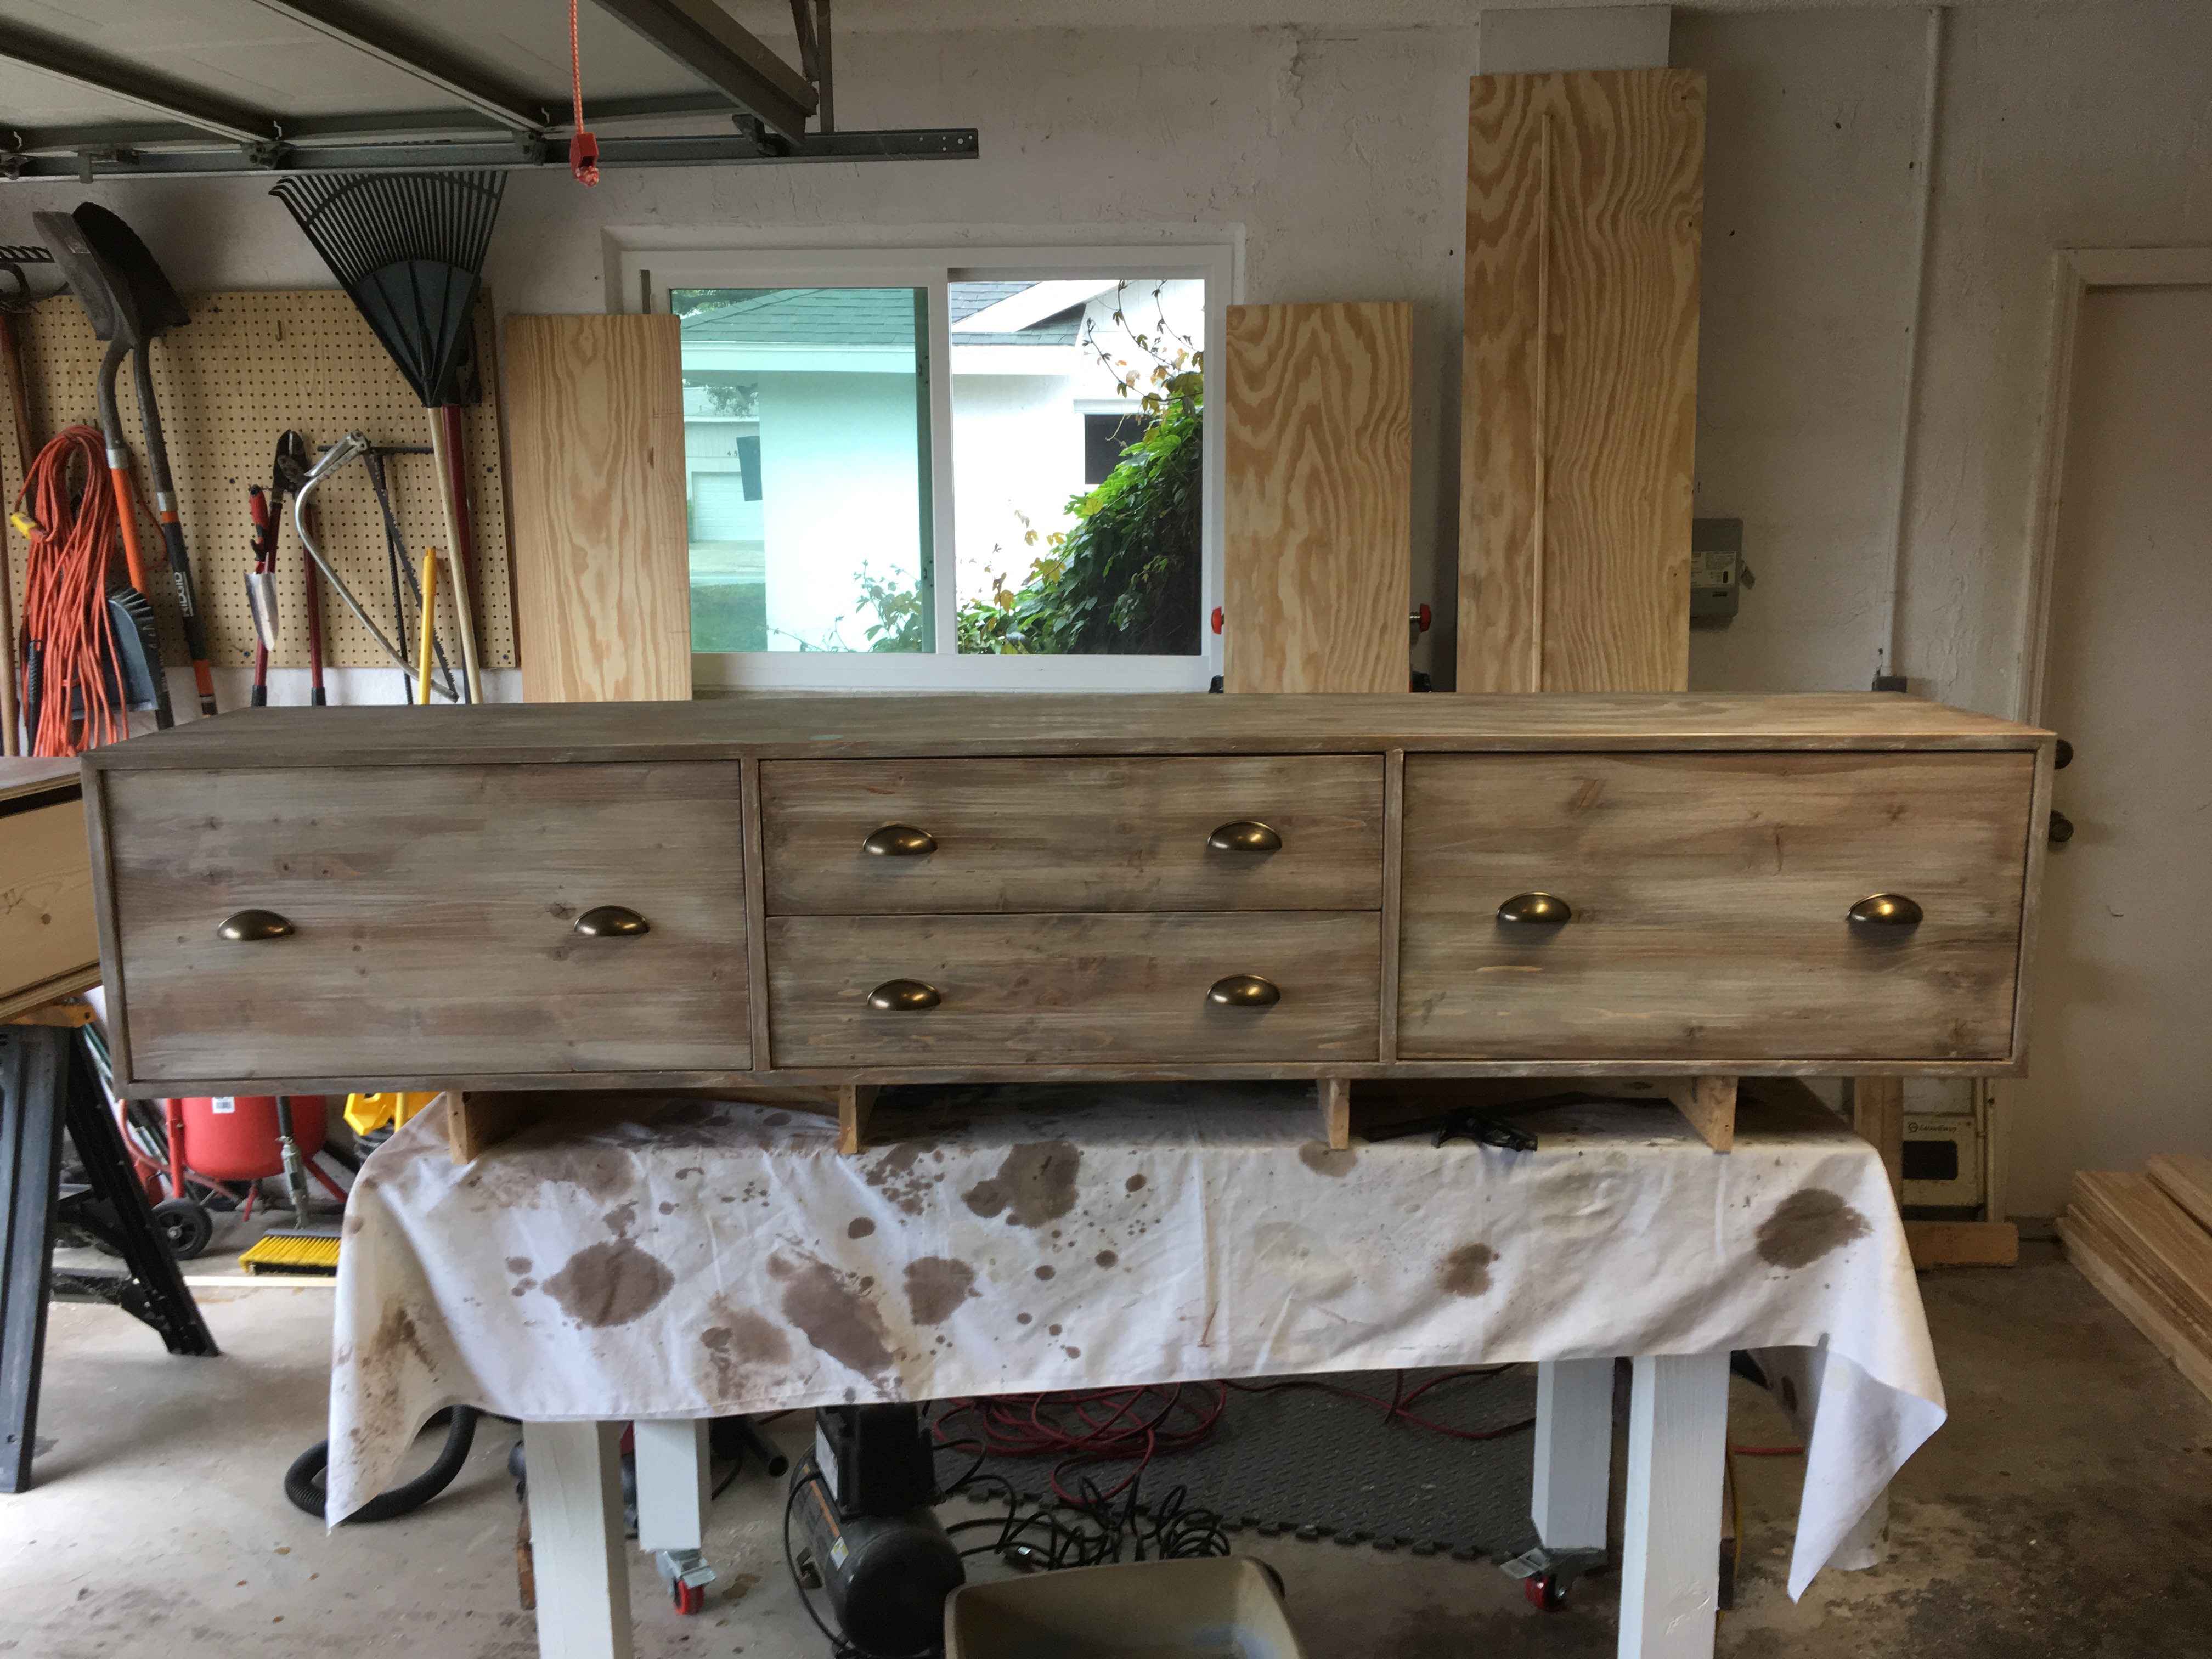
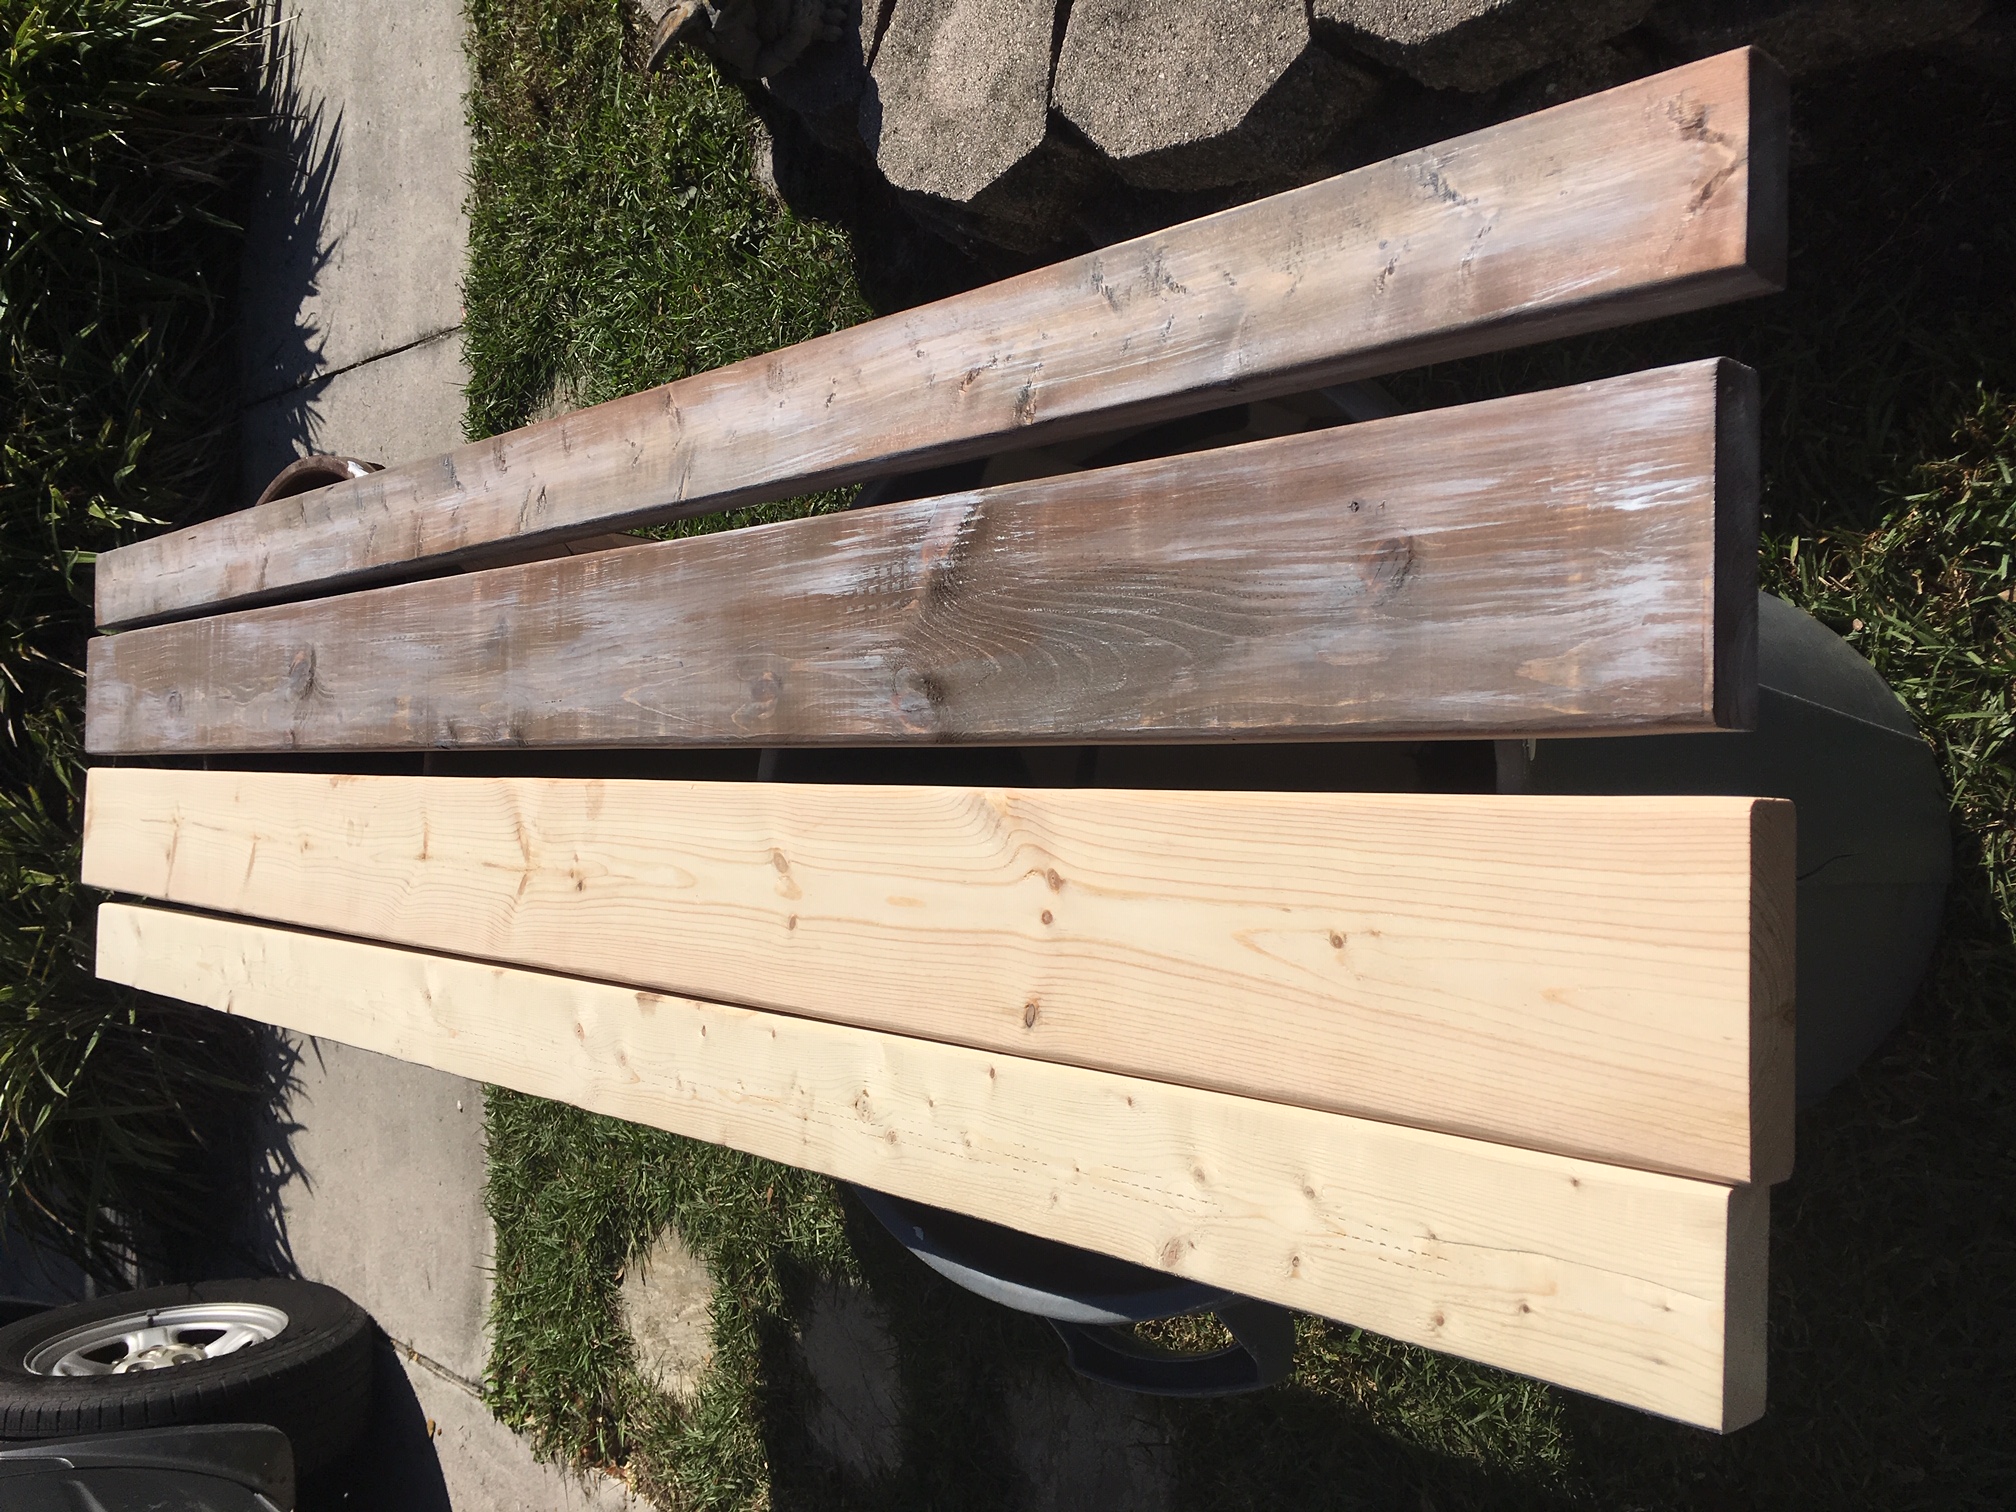
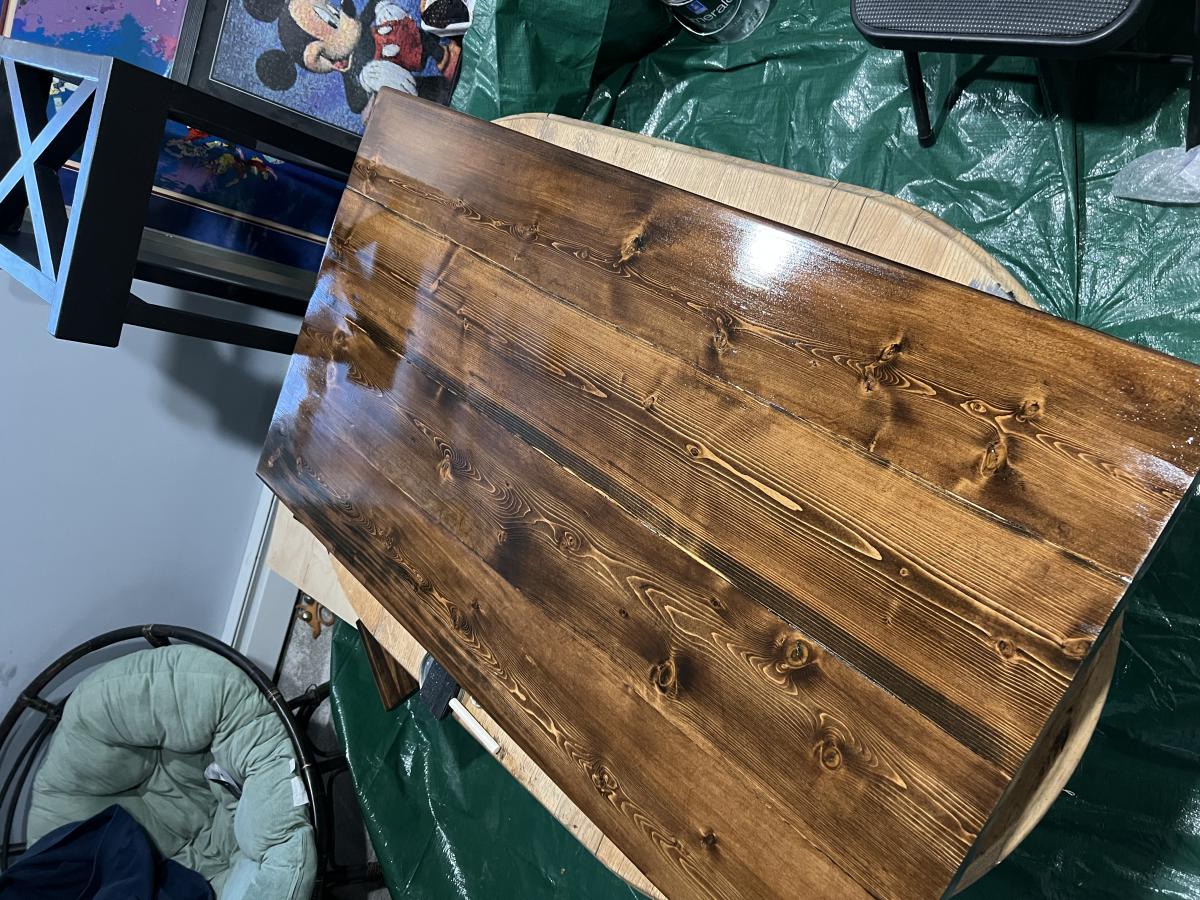
Before we stained the table we distressed the wood by tossing a bag of screws, nails & miscellaneous cabinet hardware against the bench top, followed by random scatterings of hammer blows and a few fuax-nail punch holes to make it seem more time-worn and aged (we used the same process on our table before finishing it). The key was to not go over-board and keep it random to make it seem as if the marks had been acquired over many years.

We love how both pieces turned out, from the cost to the look to the peace of mind knowing that it won't break our hearts to see the furniture get a little scratched or banged here & there as well as the substance given by having a solid wood dining set. This is one bench that won't flip over willy nilly. :)

Estimated Cost
$60
Estimated Time Investment
Day Project (6-9 Hours)
Finish Used
Miniwax 'Special Walnut' stain.
Recommended Skill Level
Beginner

Comments

Mar_co (not verified)

Wed, 05/02/2012 - 15:39

Beautiful!
I am debating on using spruce or pine. how was your exeprience with spruce? did it split any?

In reply to by Mar_co (not verified)

AdventuresInBu…

Thu, 05/03/2012 - 05:54

We haven't had any issues with the spruce splitting thus far, but we did pre-drill every screw and nail used as well as check the wood piece by piece at the lumber yard to look for deviances, warping, cracks and excessive knots (rule of thumb: the more knots in the wood, the more likely it will crack or split over time).

Another thing we do to condition the wood (even though it has been stained and poly'd) is to give it a good buff with [wood] oil every 6months or so; we're under the impression that this helps maintain the natural humidity of the wood.

Pine would likely have a better longevity and would probably be less apt to dry as quickly as spruce, but it depends on your price points too.

The greatest thing about the design of this bench is that any board can be replaced at any time (with a little elbow grease), including the legs--though the benchtop itself gets the most abuse. We're not gentle with our bench and so far the only 'damage' is a small chip on one corner from tools being dropped on it.

Hope that helps, happy building!

Chest of Drawers

my second Projects))))
Estimated Time Investment
Week Long Project (20 Hours or More)
Recommended Skill Level
Beginner

Comments

Classic bunk bed for our boys

Submitted by Anonymous (not verified) on Sat, 01/12/2019 - 21:22

My husband and I enjoyed building this for our boys. Our wood supply store didn't have enough 1x4's so we purchased 1x6's and ripped them down to an even 4" instead of 3.5 as with a 1x4. We also increased the height by 5.5 inches. That gives us a little extra room to do nightly reading at the bottom bunk. The slats (2 sets) in the bottom are just from IKEA and at the time we just threw them down there and I forgot to set them up in place for a true final photo. Oh well. They've enjoyed the bed for over a month already 

Estimated Cost
$140
Finish Used
Varathane ultimate one coat stain in Kona
Recommended Skill Level
Beginner

Beadboard Cabinet

Submitted by jamie_C on Sun, 08/28/2011 - 20:26

Since we don't have a garage or any really good place to keep our tools, they end up all over the house while we're working on a project. So, we decided to build a cabinet that would look nice in our house, and also house our tools. We chose the armoire plan because it has plenty of space.

This project took us forever, so it's hard to really estimate the actual working time. We began working on it back in June, then we were evacuated because of a forest fire.... By the time we got back into our house and we were organized again it was the end of July.... and now finally the end of August it's finished. It took us a while, but it's a great addition to our house!

We modified this cabinet by using 1/4 inch beadboard backed with 1/4 plywood for the doors. We also modified the size of the armoire to make it deeper.

Built from Plan(s)
Estimated Cost
$125 approximately?
Estimated Time Investment
Weekend Project (10-20 Hours)
Finish Used
Sanded, then painted the outside with a quart of "creamed coffee" oops paint, and painted the inside with a sage green paint from Habitat for Humanity Restore.
Recommended Skill Level
Beginner

Comments

Pirate Treasure Trunk

Happy International Talk Like a Pirate Day!

Thank you, Joanne, for designing this fun to build trunk. It enabled me to use pieces of odd scrap wood and a weathered old belt and make something fun and functional of them!

Built from Plan(s)
Estimated Time Investment
Day Project (6-9 Hours)
Finish Used
Gray paint wash (5 parts water : 1 part gray paint) + Golden Oak mixed with Red Oak stain layered on.
Recommended Skill Level
Starter Project

Comments

JoanneS

Thu, 09/19/2013 - 18:11

As the pirates would say: Ye did a fabulous ship on 'tis trunk, it looks full 'o awe!

You did a great job on this, looks awesome! Love the details and finishes you used! :)

Classic Bunk Beds for our boys!

Submitted by TheLufkins on Wed, 11/25/2015 - 13:13

We found the plans for the Classic Bunk Bed look and we loved it.  Since our boys share a room this bunk bed design was the perfect match for us.  We used Red Mahogany stain with a polyurethane clear coat to give it a good shine.  I made a little revision to the slats but adding a 1X6 crossbea, across the bottom and top bunk to give added support for the boys as they get older but other than that the beds are directly from the plans.  Now onto the same design for our girls!

Built from Plan(s)
Estimated Time Investment
Week Long Project (20 Hours or More)
Finish Used
Red Mahogany and Polyurethane Clear Coat
Recommended Skill Level
Beginner

Black and White Beam Table

Submitted by Landers15 on Tue, 01/15/2019 - 12:38

I have to shorten the design up a bit to fit my dinning room. I also did Epoxy Resin on top to give it the glass like appearance.


So ebony stain on white pedistole with an Epoxy Resin finish.


Built from Plan(s)
Estimated Cost
Lumber $80
Stain/paint/aprasives $30
1 gal Epoxy Resin $80
Estimated Time Investment
Week Long Project (20 Hours or More)
Finish Used
White paint, ebony stain,and an Epoxy Resin Finish, which took 5 days alone.
Recommended Skill Level
Intermediate

Greenhouse

Submitted by Anonymous (not verified) on Tue, 11/15/2022 - 10:12

The plans from Ana White were excellent! I worked on this greenhouse through last winter and finished this past March. It worked perfectly for my needs through the entire growing season. I highly recommend this plan for a cost effective greenhouse, even if you have no prior building construction experience (I didn't before I built this). It only cost me $1,100 or so when all was said and done. The cheapest I could find a comparable greenhouse of this size to purchase was $2,500.

Built from Plan(s)

Comments

entry locker

Entryway locker cubbies, top portion constructed in custom width and shelf height. Two sets.

Built from Plan(s)
Estimated Cost
$75
Estimated Time Investment
Day Project (6-9 Hours)
Finish Used
1. Primed
2. Two coats semi gloss white
Recommended Skill Level
Beginner

Comments

Chevron kids table

Chevron kids table

Estimated Time Investment
Afternoon Project (3-6 Hours)
Finish Used
Cabot red oak and golden
Recommended Skill Level
Beginner

Comments

spiceylg

Mon, 09/23/2013 - 08:25

This came out really nice: it's unique! However, you should put the picture in the beginning of the post instead of under additional pictures so it's nice and big.

Hall tree

We had a great time building this
We did the bottom half one weekday, and the top piece another day. Primer, painting, and sanding in all took us 6 days.
It look fantastic

Recommended Skill Level
Intermediate

Comments

Farm House Bed w/Drawers

Used the farm house bed plans from here with a few modifications.  Instead of plywood for the headboard and footboard, I used tongue and grove 1x6 planks.  I used edge glued spruce planks from Lowes for the drawer fronts and I invested a bit more on the drawer slides and opted for the full opening type.  Also, rather than 3 large drawers on either side, I opted to put 2 smaller drawers in the center.  I felt the shallower drawers would be more useful for smaller items (socks and underwear).  I also used a 3/4" molding to hid the ends of the plywood drawer boxes.  The weathered finish was created using a video I found on YouTube (https://www.youtube.com/watch?v=k7Via9Lz4Pw).  My upgrades increased the overall price, but it was still under $600 and should last a lifetime.

Estimated Cost
$600
Estimated Time Investment
Week Long Project (20 Hours or More)
Finish Used
Multiple products - follow YouTube tutorial. https://www.youtube.com/watch?v=k7Via9Lz4Pw
Recommended Skill Level
Intermediate

Farmhouse Coffee & Side Tables

Submitted by MacandFab on Sat, 11/26/2022 - 12:50

Milled all prices of wood from 2x8 Douglas Fir, Esresso Minwax stain, and Sherwin Williams Emerald Tricorn Black paint. Used mostly Kreg pocket hole screws and GRK #9 - 2 1/2” screws to secure the top to the base.

Built from Plan(s)

Comments

Outdoor Sectional- The Great Outdoors

I can't thank Ana enough for her plans on this project. We recently purchased a big project house that was going to need a lot of work (and a lot of money.) That's why I was thrilled to find Ana's plans for the exact West Elm Wood Slat Sectional I was eying for my screened in porch. The exact configuration at West Elm would have cost $2130, but I built it and sewed all the cushions for just $288! Ana's sewing plan was really helpful too, but I altered mine to include zippers in the back to remove the fabric for washing, and ties to hold the cushions securely to the sectional. We finished the sectional with super easy india ink and poly for a deep black finish that still shows the wood grain. The screened in porch is now our favorite room in the house! Thanks Ana!

Estimated Cost
$288 with all cushions and pillows
Estimated Time Investment
Week Long Project (20 Hours or More)
Finish Used
India Ink- Found in art supplies stores this thin, watery ink goes on with a sponge brush and soaks completely into the wood leaving a deep, dark wood finish that still shows the wood grain. No need to worry about drips or evenness, this finish goes on in one coat and is super easy, especially on a tricky, large piece like this. Topped with 3 coats of water based poly.
Recommended Skill Level
Intermediate

Comments

JES

Mon, 09/05/2011 - 11:05

This looks really super! I clicked on your blog link and read a few entries (funny!) You did a great job! Love the fabric for the cushions too. How much India ink did it take to stain a piece this big? Did it take a long time to dry? cheers!
J

Chair

I built this chair for about $12. I used 6 four foot landscaping timbers. The legs are 12''
and i used 1/4'' cedar or you could use pallets. The ends are Dog Cut . The chair is sealed and finished with Helsmans Clear. E mail me if you have any questions

Estimated Time Investment
Afternoon Project (3-6 Hours)
Finish Used
Semi clear Spar.
Recommended Skill Level
Beginner

Comments

Craft Table

Submitted by Jenga on Sun, 12/06/2015 - 13:08

Project was rather simple. Just wanted to create a space that my wife could work her projects rather than always working on our dinning room table. Took the concept of the plans and made the table work for the space we had available.

Built from Plan(s)
Estimated Cost
$150
Estimated Time Investment
Weekend Project (10-20 Hours)
Finish Used
White Paint and Dark Maple Finish
Recommended Skill Level
Beginner

Coffee table

Submitted by Anonymous (not verified) on Sat, 01/26/2019 - 15:39

Sister asked me to make her a table. Since I am out or work right now I said yes and got this thing done in about 3 days! 

Built from Plan(s)
Estimated Cost
130.00
Estimated Time Investment
Weekend Project (10-20 Hours)
Finish Used
White chalk paint for the bottom and a combo high gloss poly/stain for the top
Recommended Skill Level
Beginner