Community Brag Posts
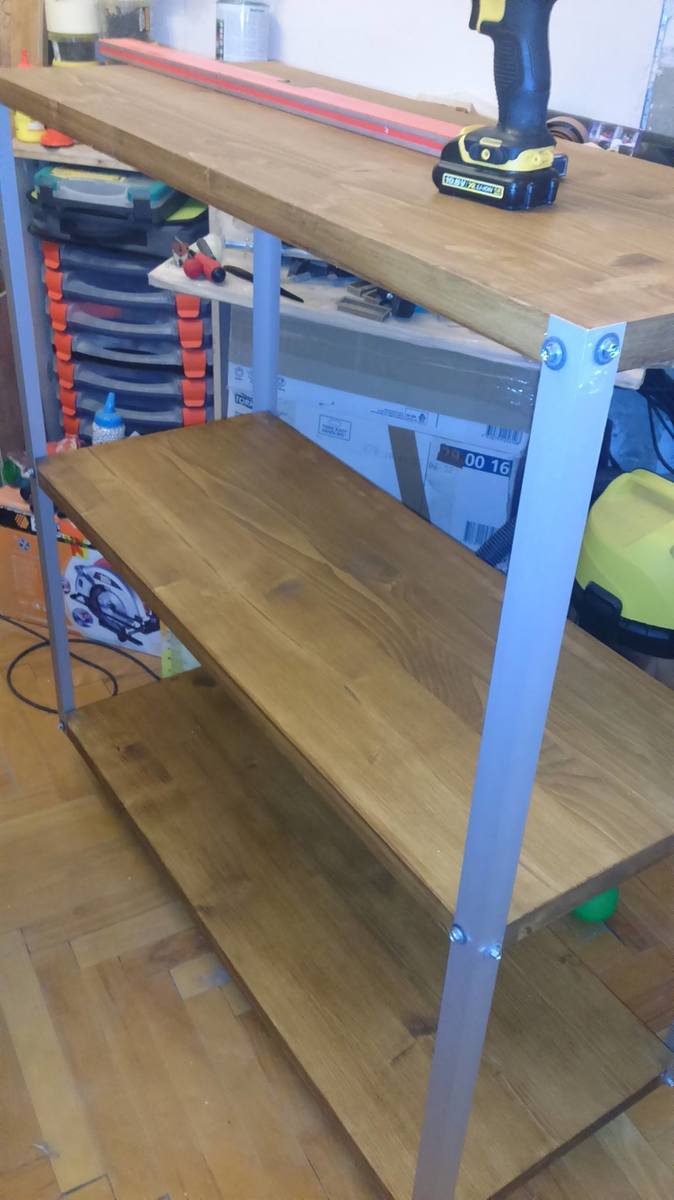
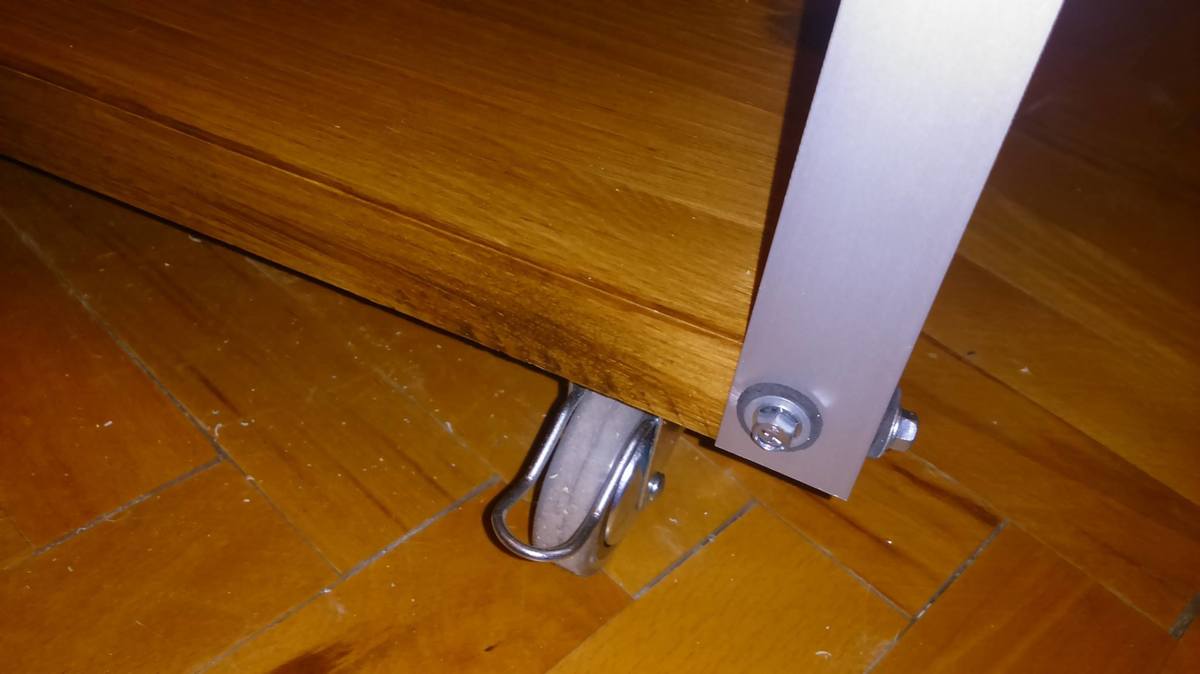
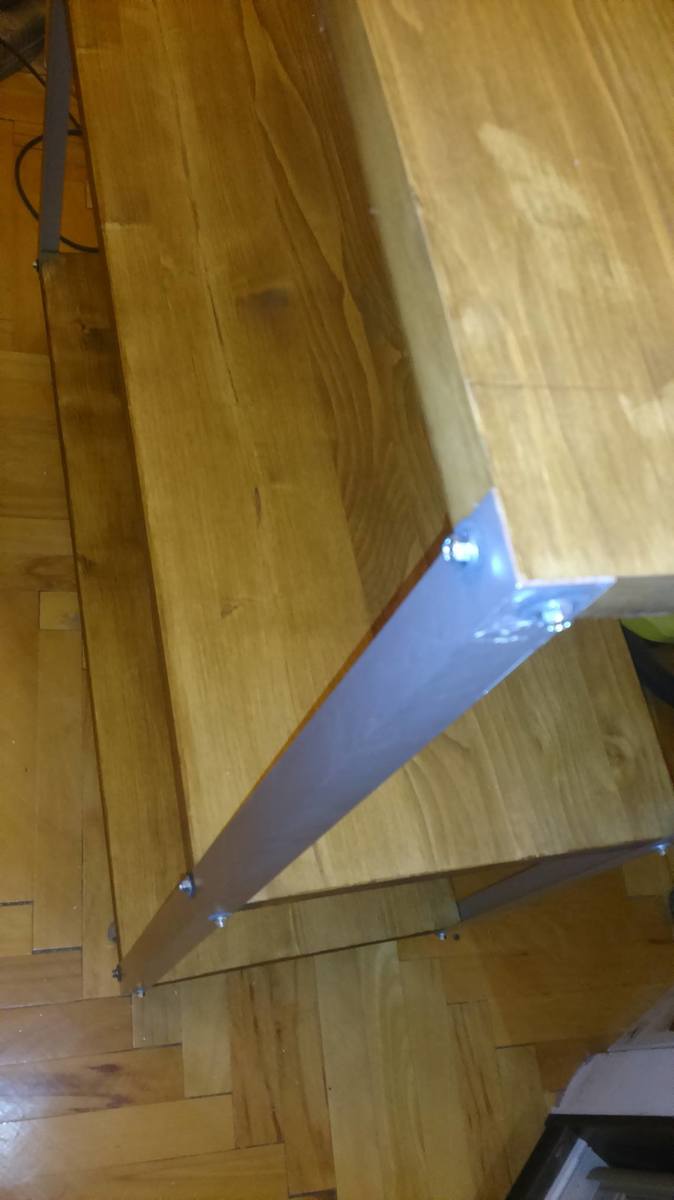
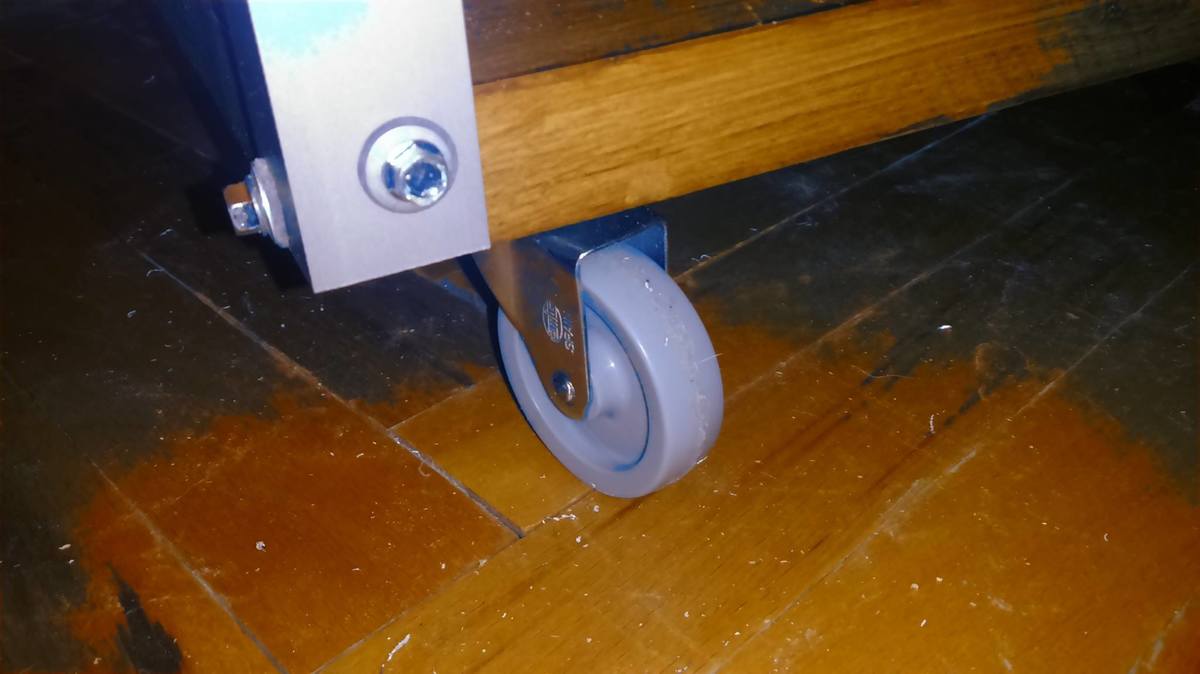
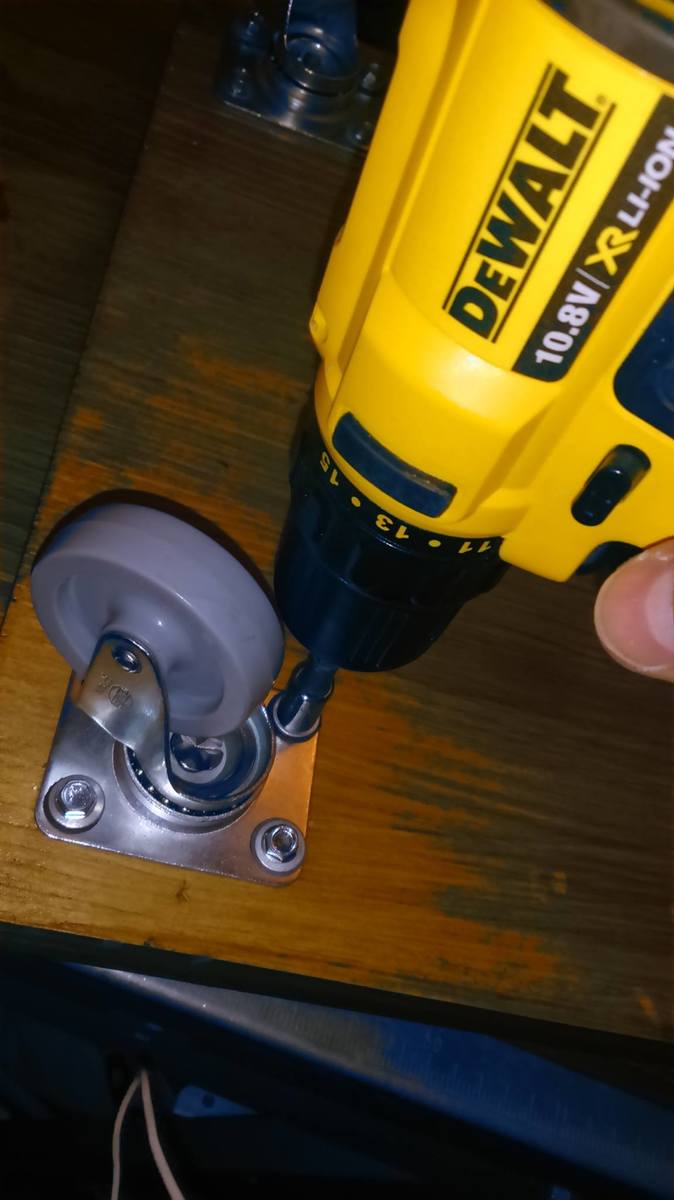
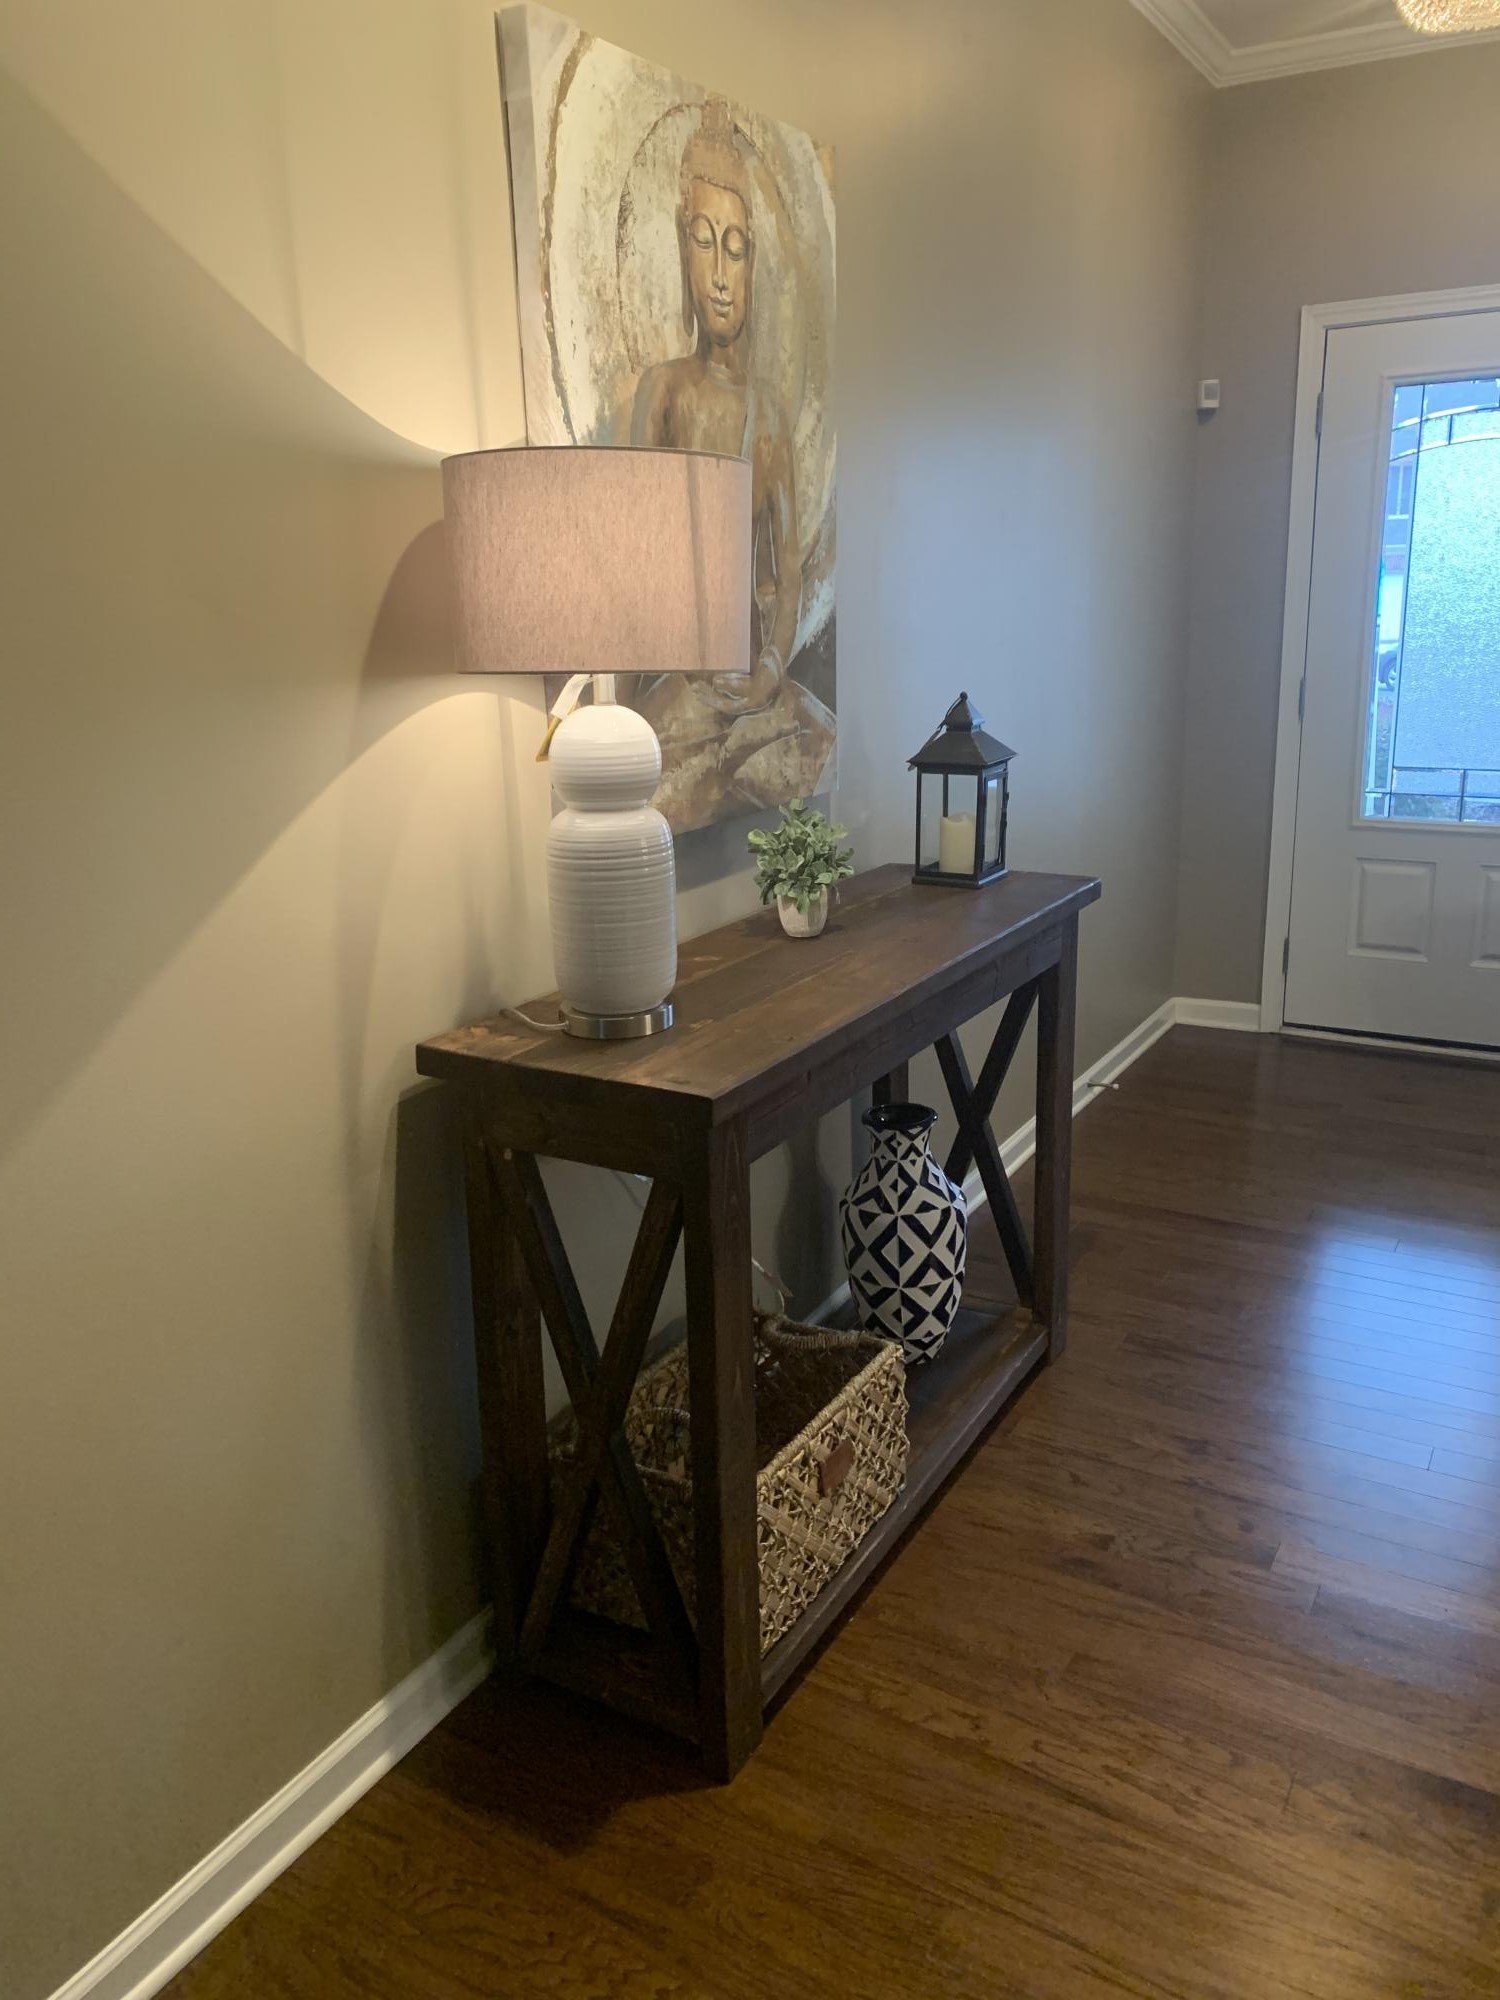
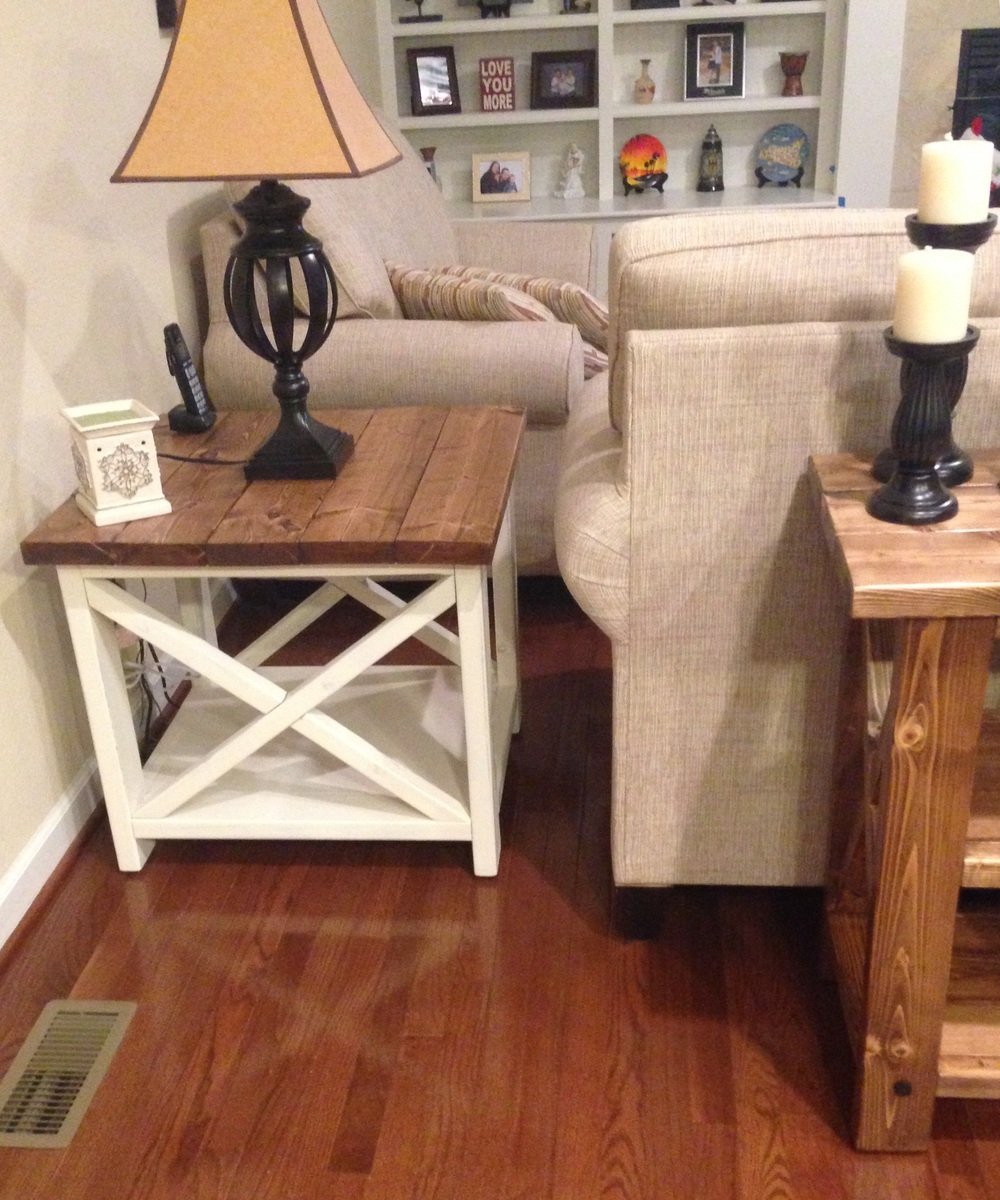
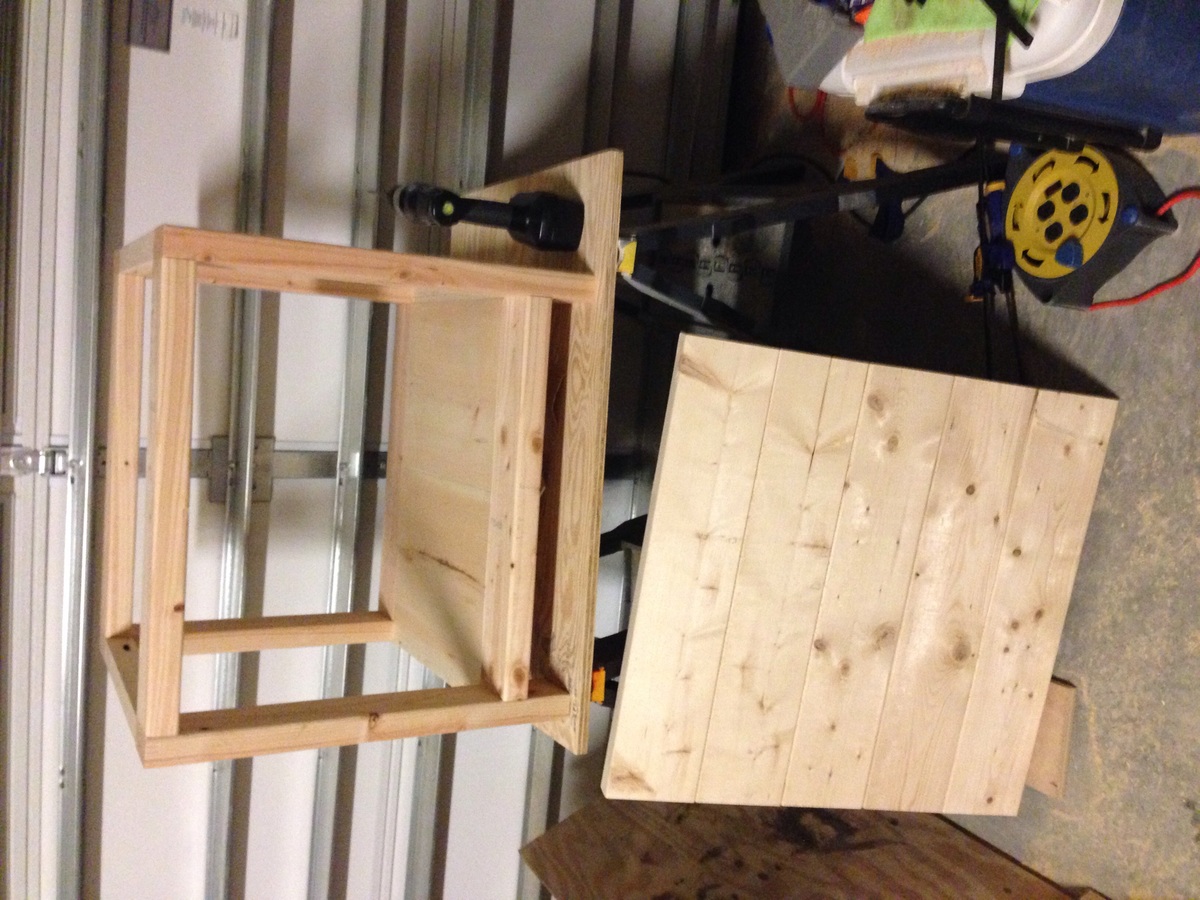
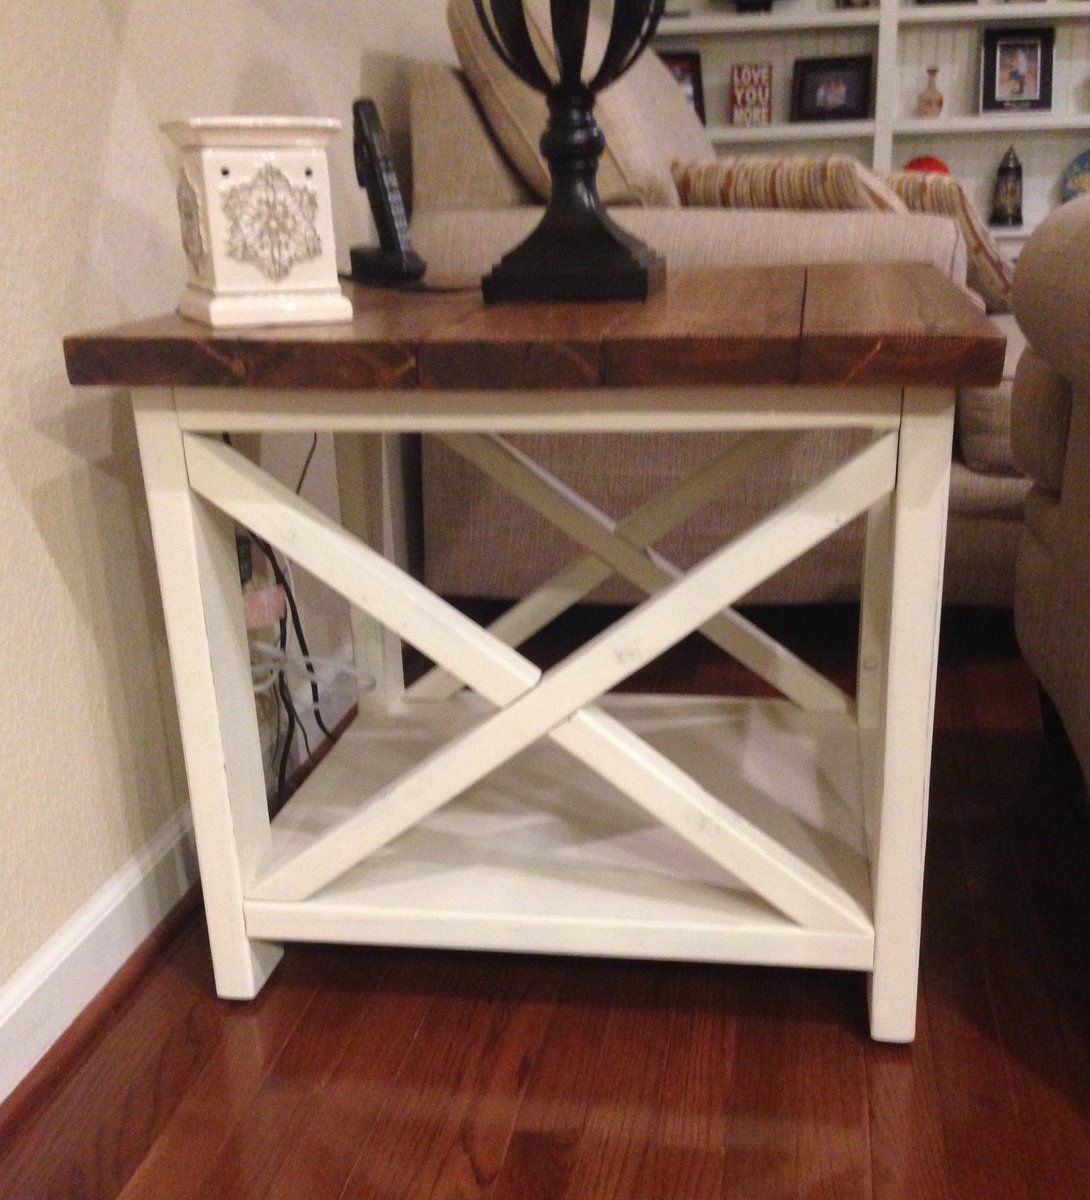
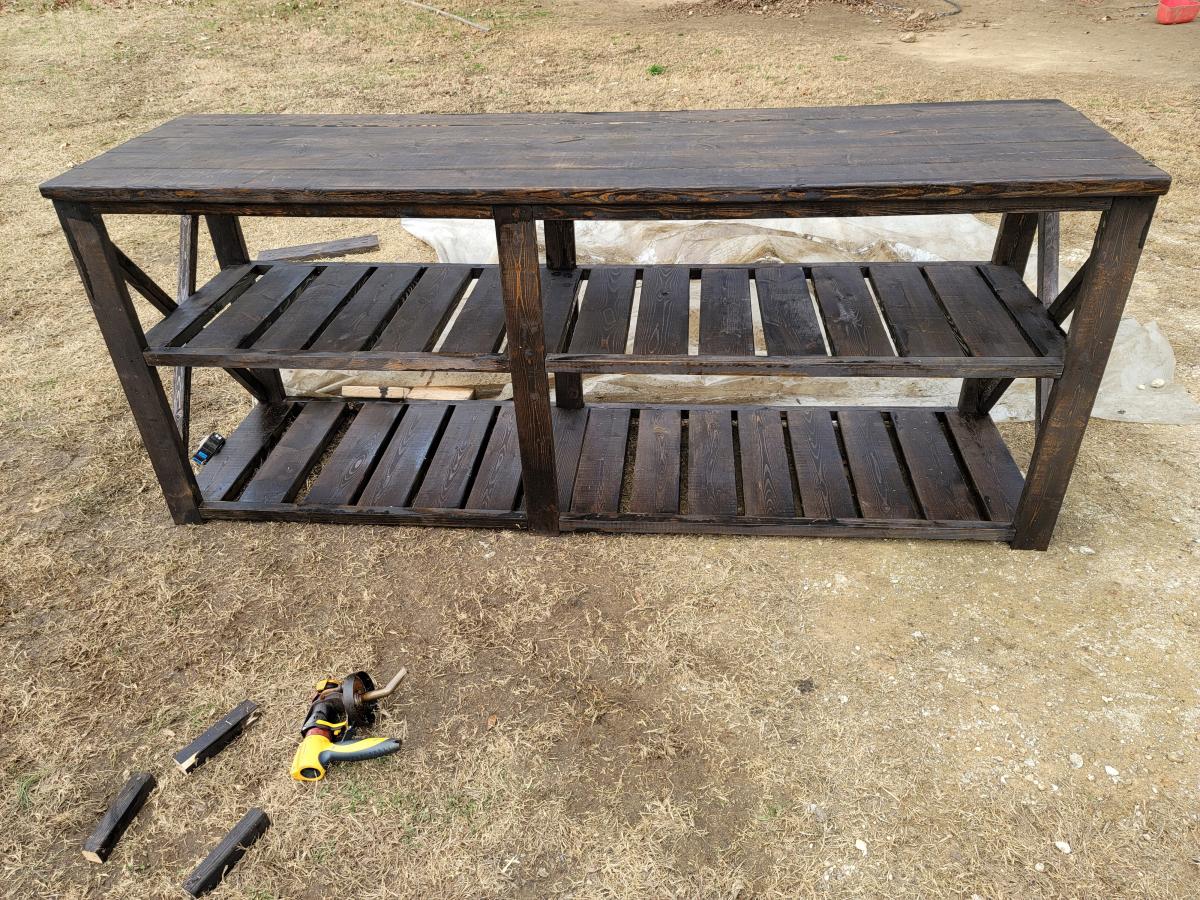
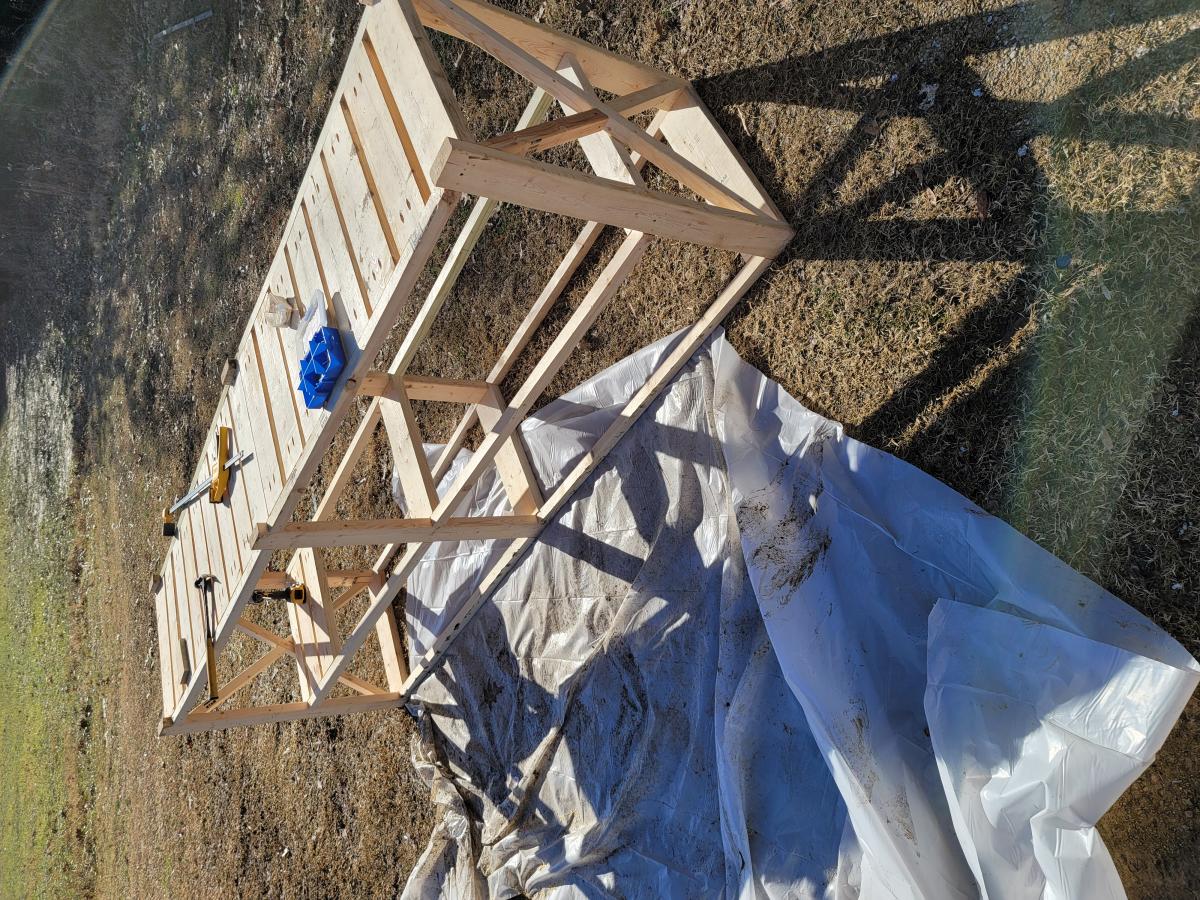
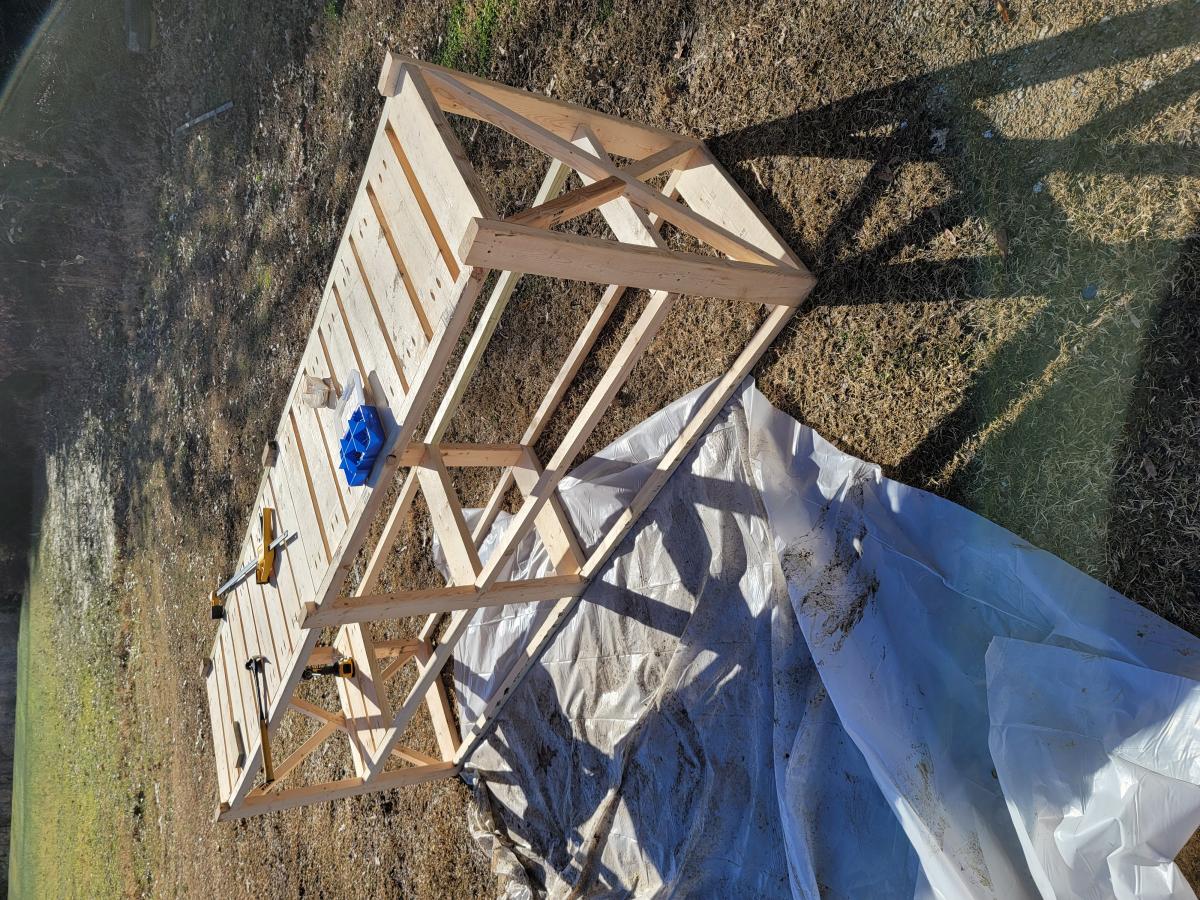
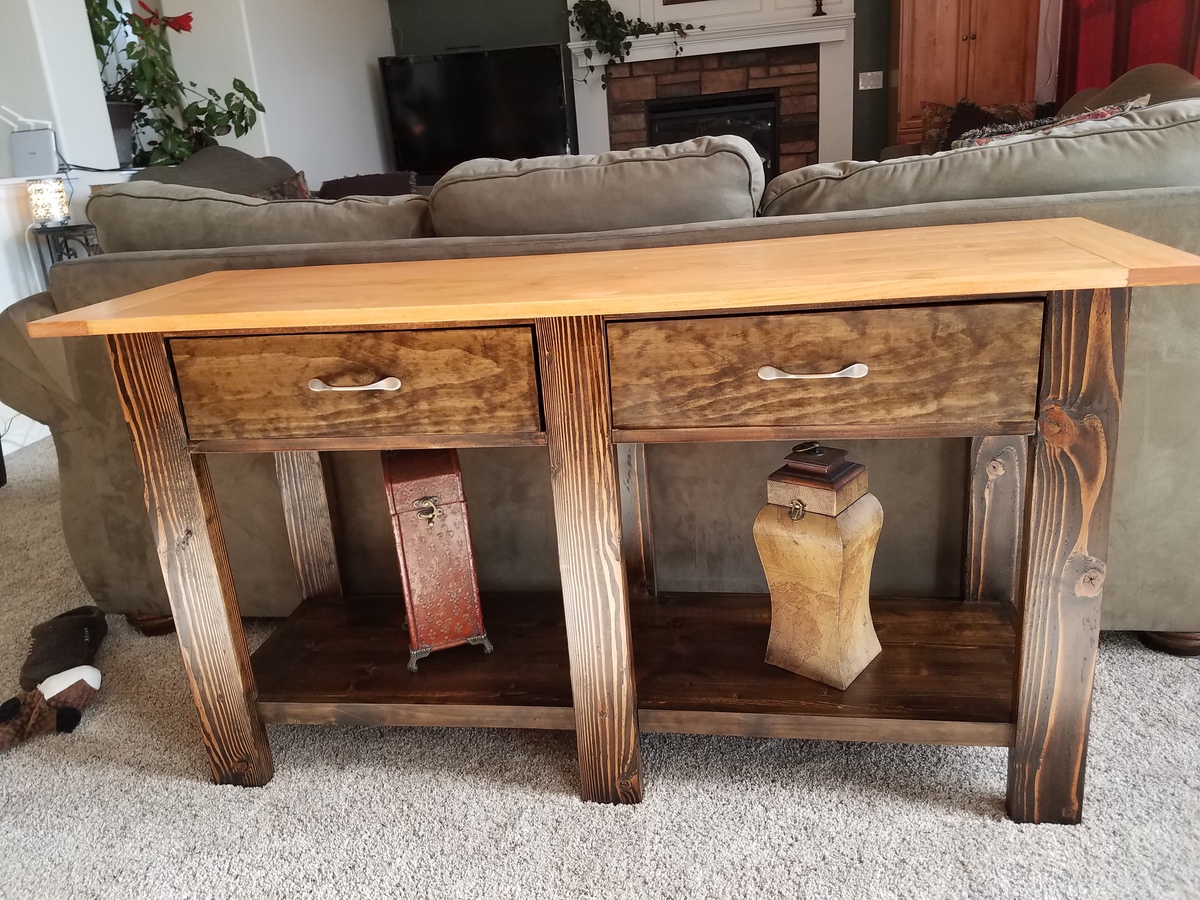
Console table
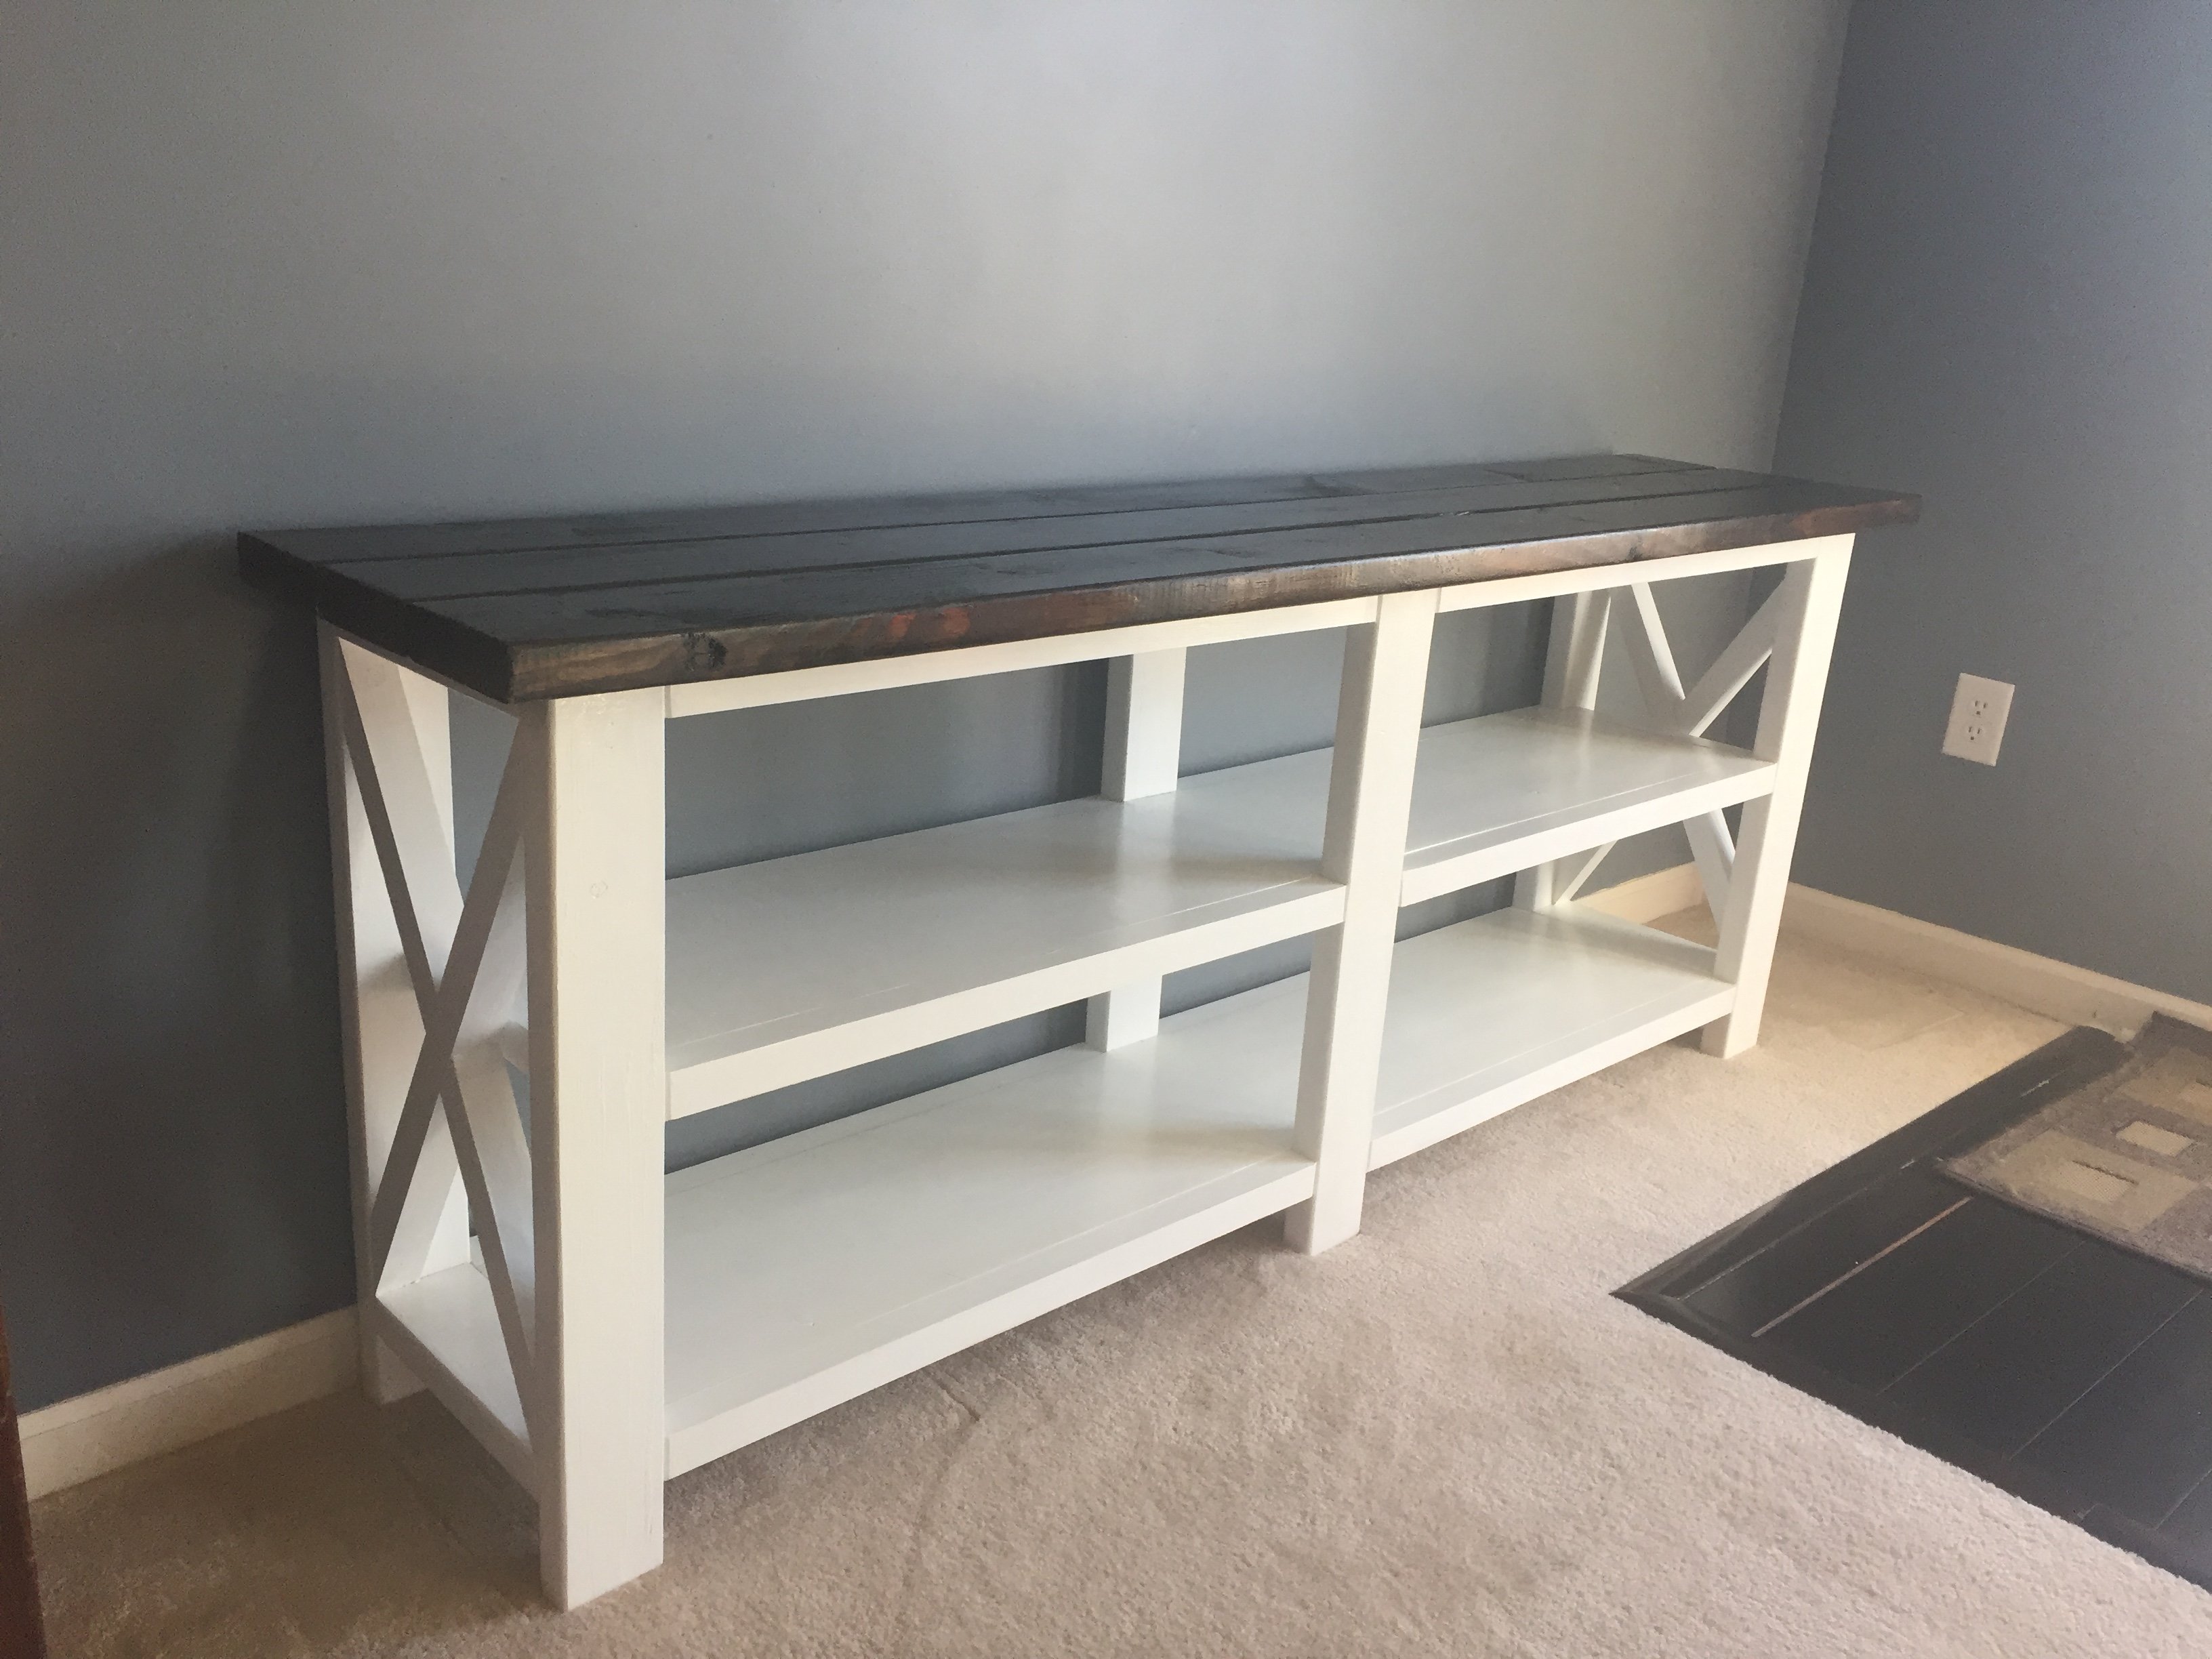
we made this for our friends for a housewarming gift. Will definitely make again!
Built from Plan(s)
Estimated Cost
140
Estimated Time Investment
Week Long Project (20 Hours or More)
Finish Used
Kona
Recommended Skill Level
Beginner
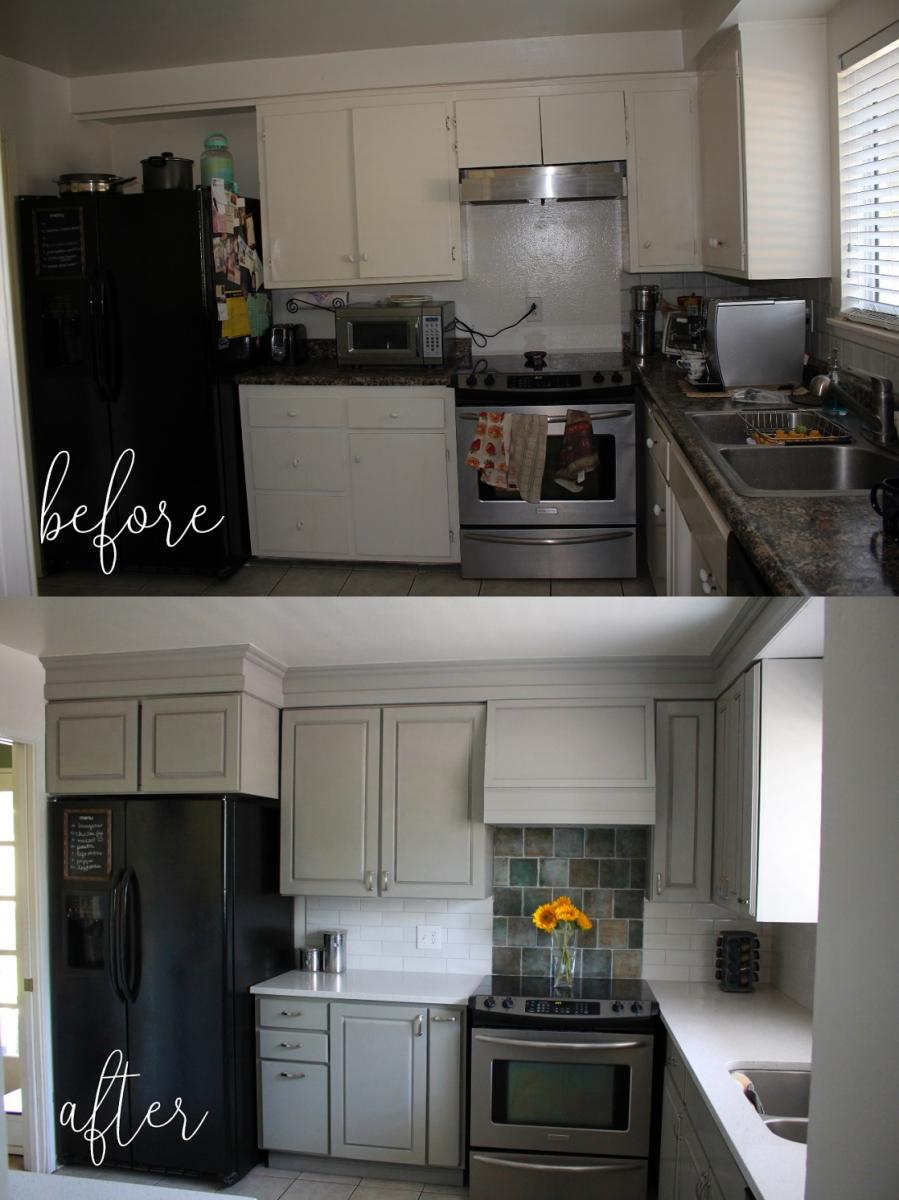
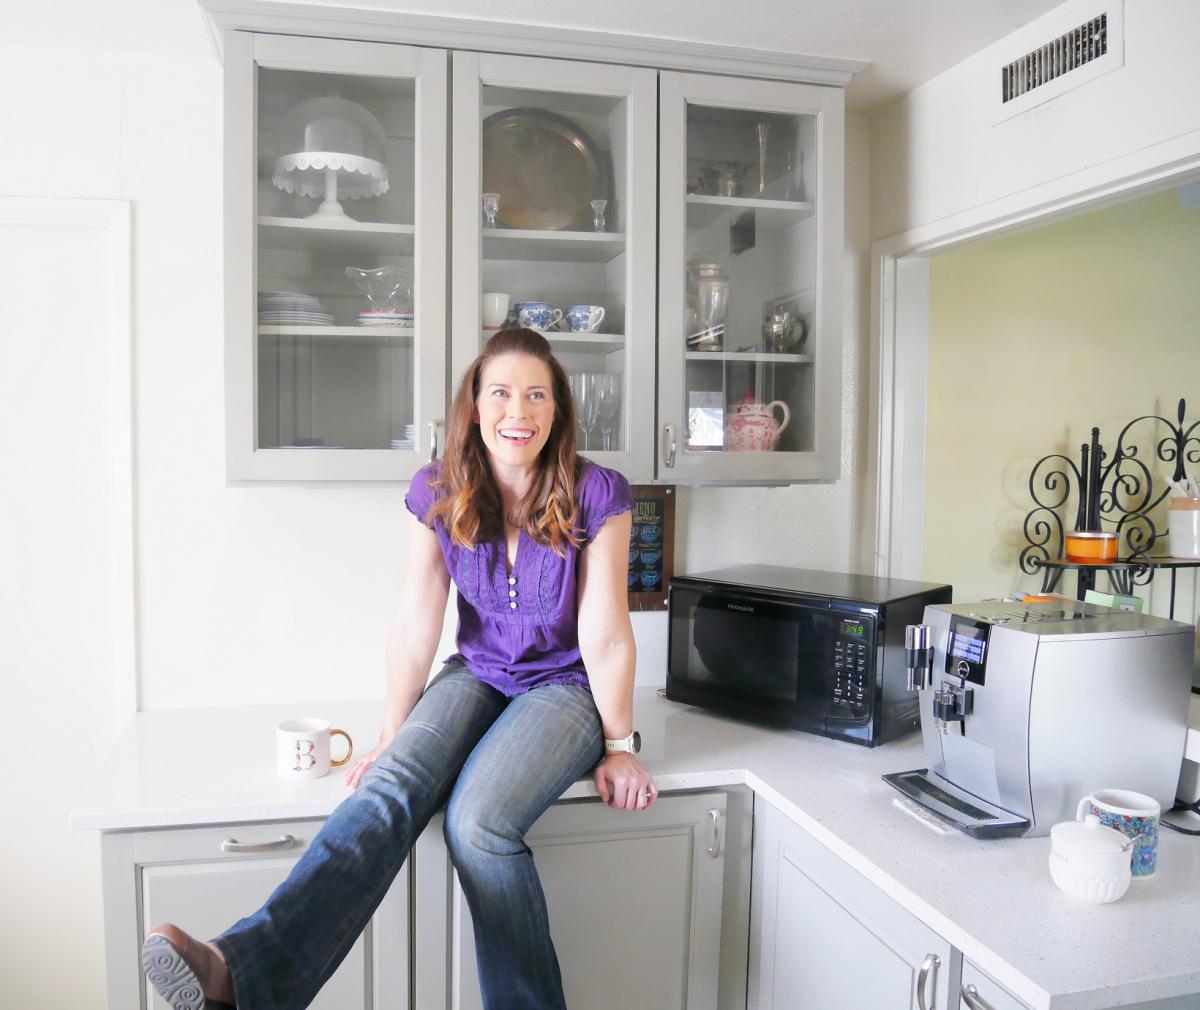
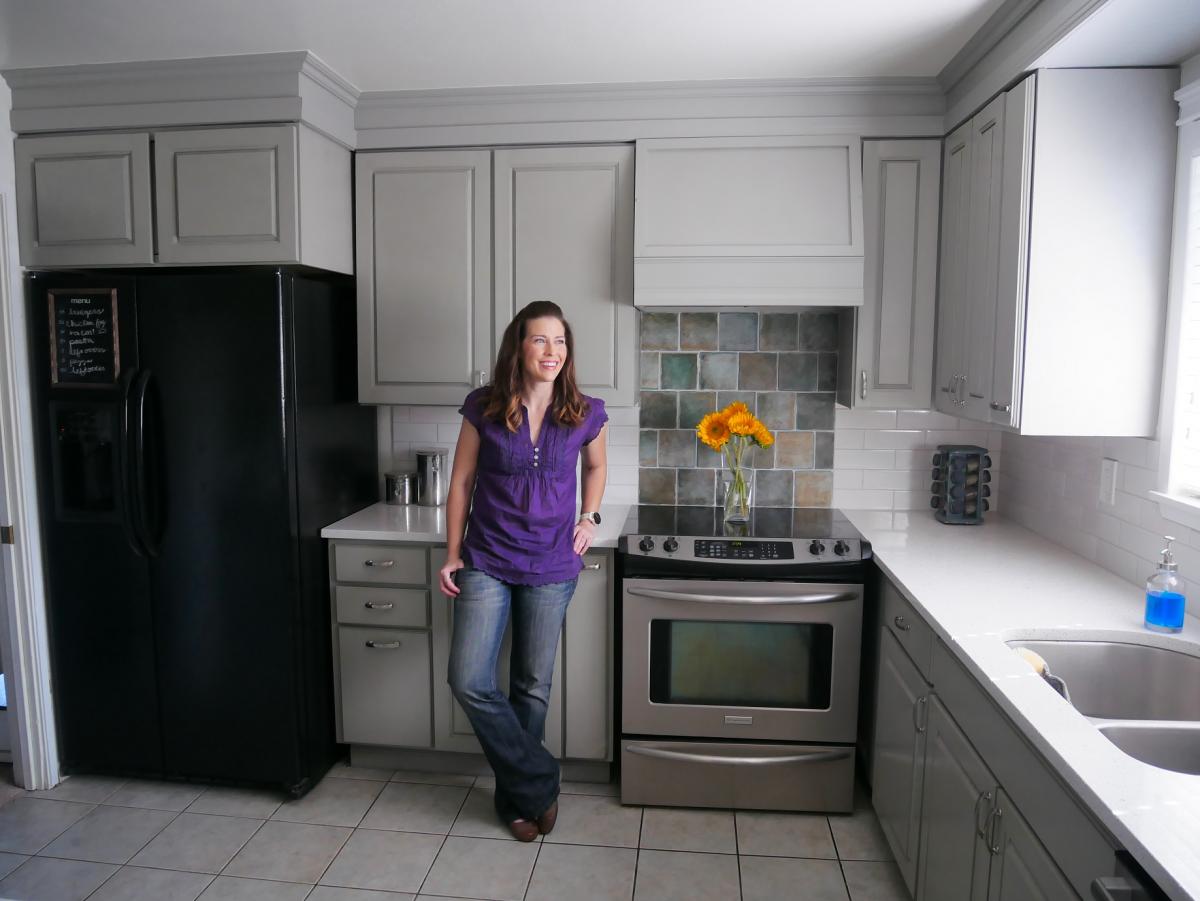
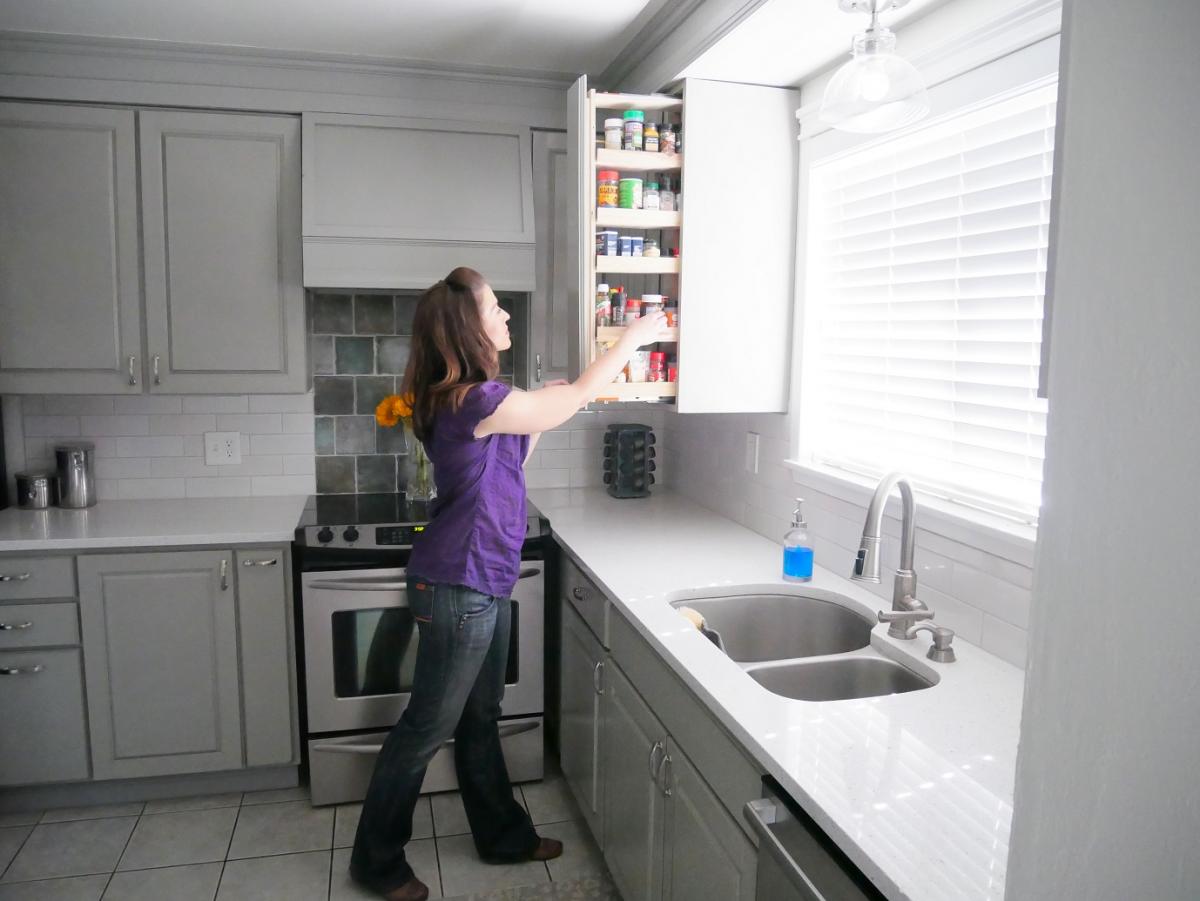
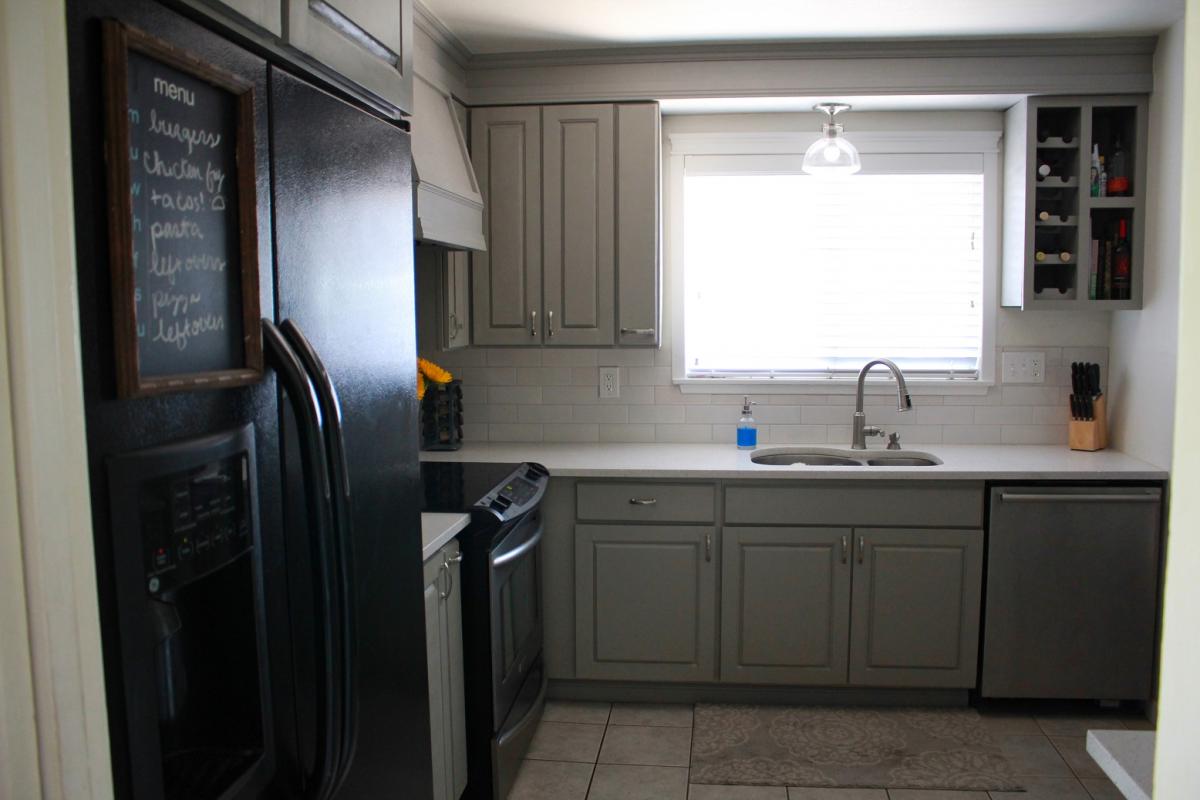
Final Kitchen Rebuild Reveal!
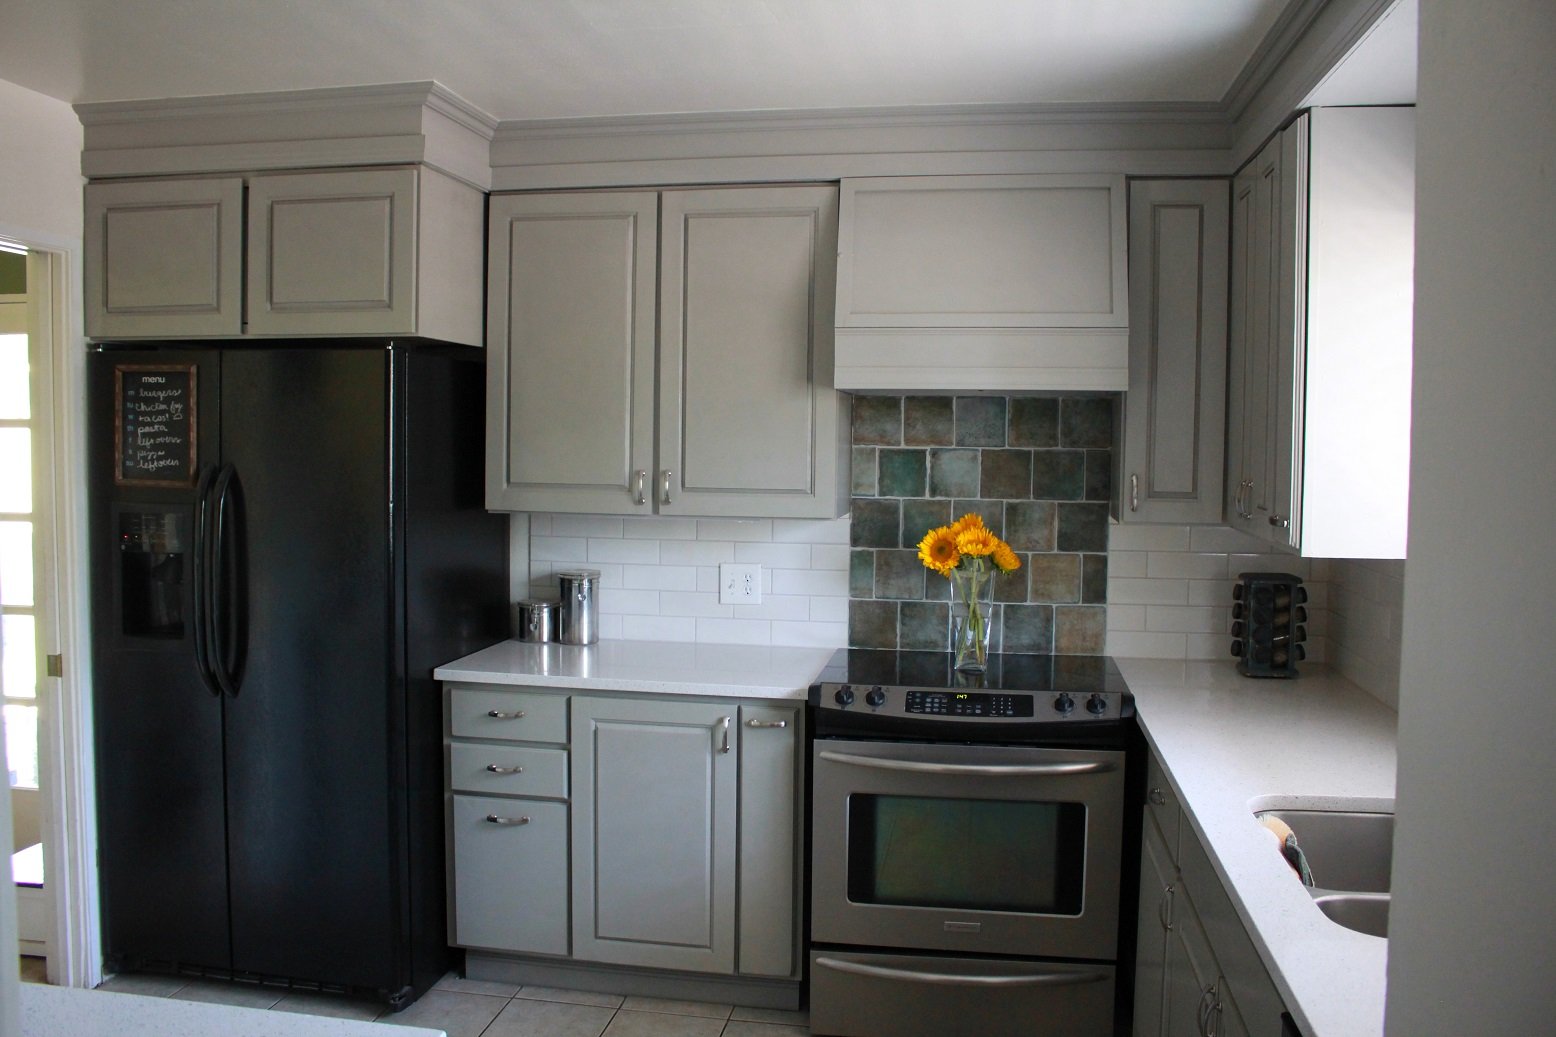
5 years. Y'all. FIVE YEARS.
5 years after starting this complete kitchen renovation, I have finished!
Very cool write-up and video featured on Family Handyman recently about my one woman build here:
https://www.familyhandyman.com/article/kitchen-remodel-five-years/?jwso…
This project included designing and building all new cabinets and doors from scratch, creating unique pullouts for our specific kitchen needs, and tiling the backsplash.
I couldn't be happier with my kitchen and every time I walk in there, it feels like I'm stepping into a magazine!
It may have taken me 5 years, but the wealth of woodworking skills and knowledge I gained from this project are priceless. As is a brand new kitchen for less than 5k.
I used many of Ana's plans, and honestly, I never would've taken on this huge challenge if I hadn't found this site. I specifically remember the day I saw her posting about the momplex kitchens and a spark hitting that I could ACTUALLY do this. Thank you Ana! I love my kitchen and it's even cooler that I built every last bit of it.
Through the years of learning and building both the kitchen and many other projects (don't ask me what's next because the list is a mile long) I feel very confident in the shop and count building time as "me-time". I've even started teaching a beginners woodworking class on skillshare, and have over 2,000 students so far. I love that people are getting empowered to build, just like I was. https://skl.sh/34FSP5A
Long live DIY!
Built from Plan(s)
Estimated Cost
>$5,000
Estimated Time Investment
Week Long Project (20 Hours or More)
Finish Used
Sherwin Williams Alkyd Enamel in Dorian Gray
Recommended Skill Level
Intermediate
Comments
Sat, 12/12/2020 - 13:03
Amazing and empowering!
I am so happy for you, what a transformation! Thank you for sharing a bit of your story!
2×4 Scrap Wood ~ Shower Organizer
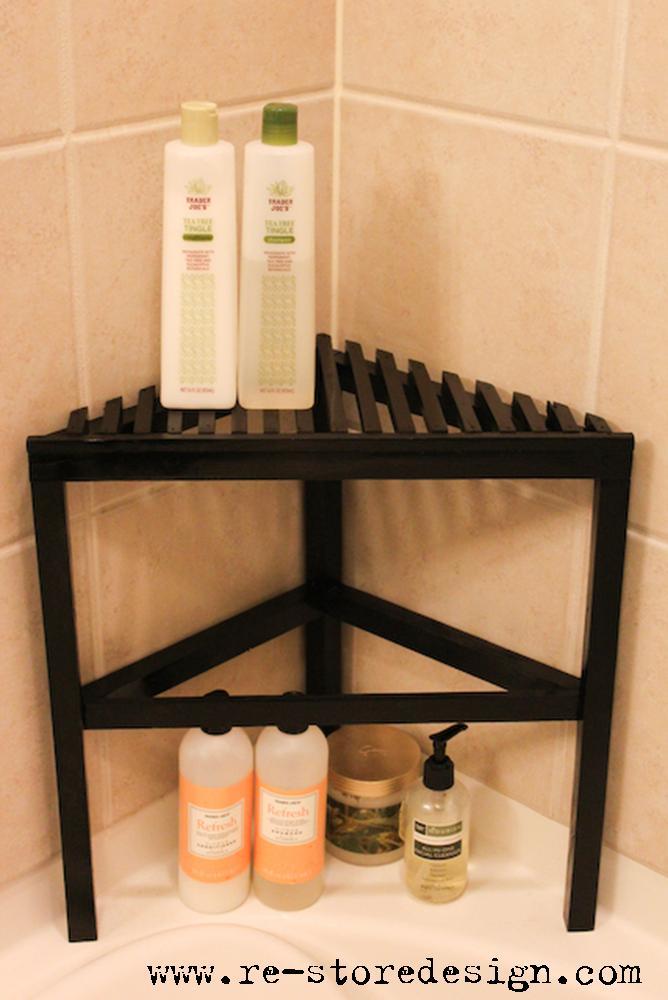
I was in the shop on Thursday and decided to build something with the endless supply of 2×4 wood scraps I had collecting in the corner. We had been looking for a wood shower organizer since we moved into our new apartment, so decided that would be a good project to tackle. I few weeks ago I found a teak shelf that would have been perfect for our bathroom, but was not willing to pay $119. I designed a shelf in the style of the teak shelf I liked. Untreated pine is not suited for a wet environment, so I went to Home Depot and bought a can of waterproof epoxy for the finish. The end result is a very simple and functional shelf.
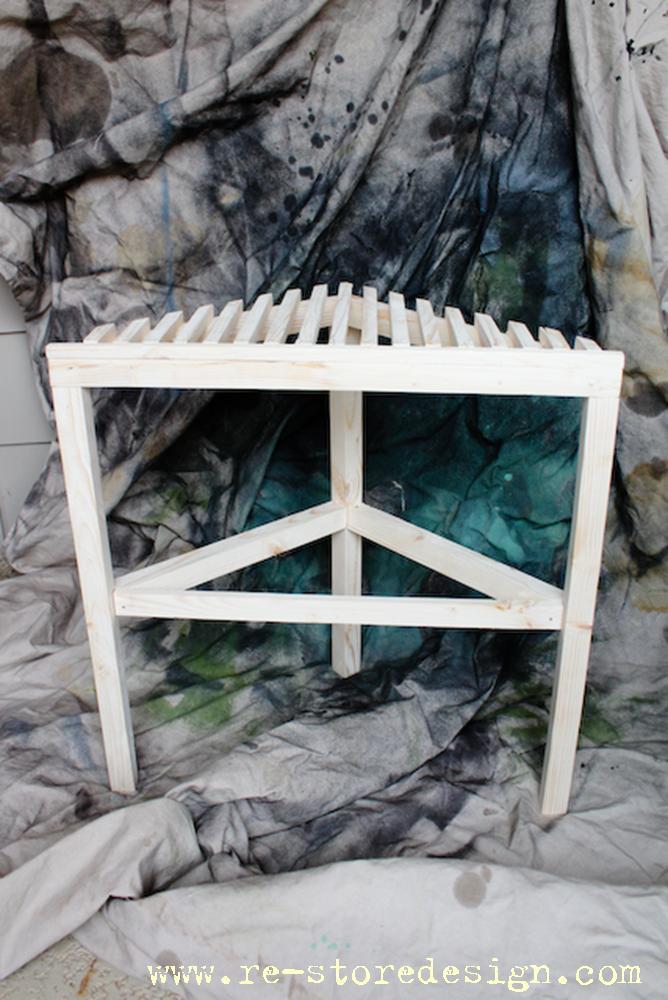
Estimated Cost
$5
Estimated Time Investment
An Hour or Two (0-2 Hours)
Finish Used
Rustoleum Black Epoxy
Recommended Skill Level
Starter Project
Joy Marquee
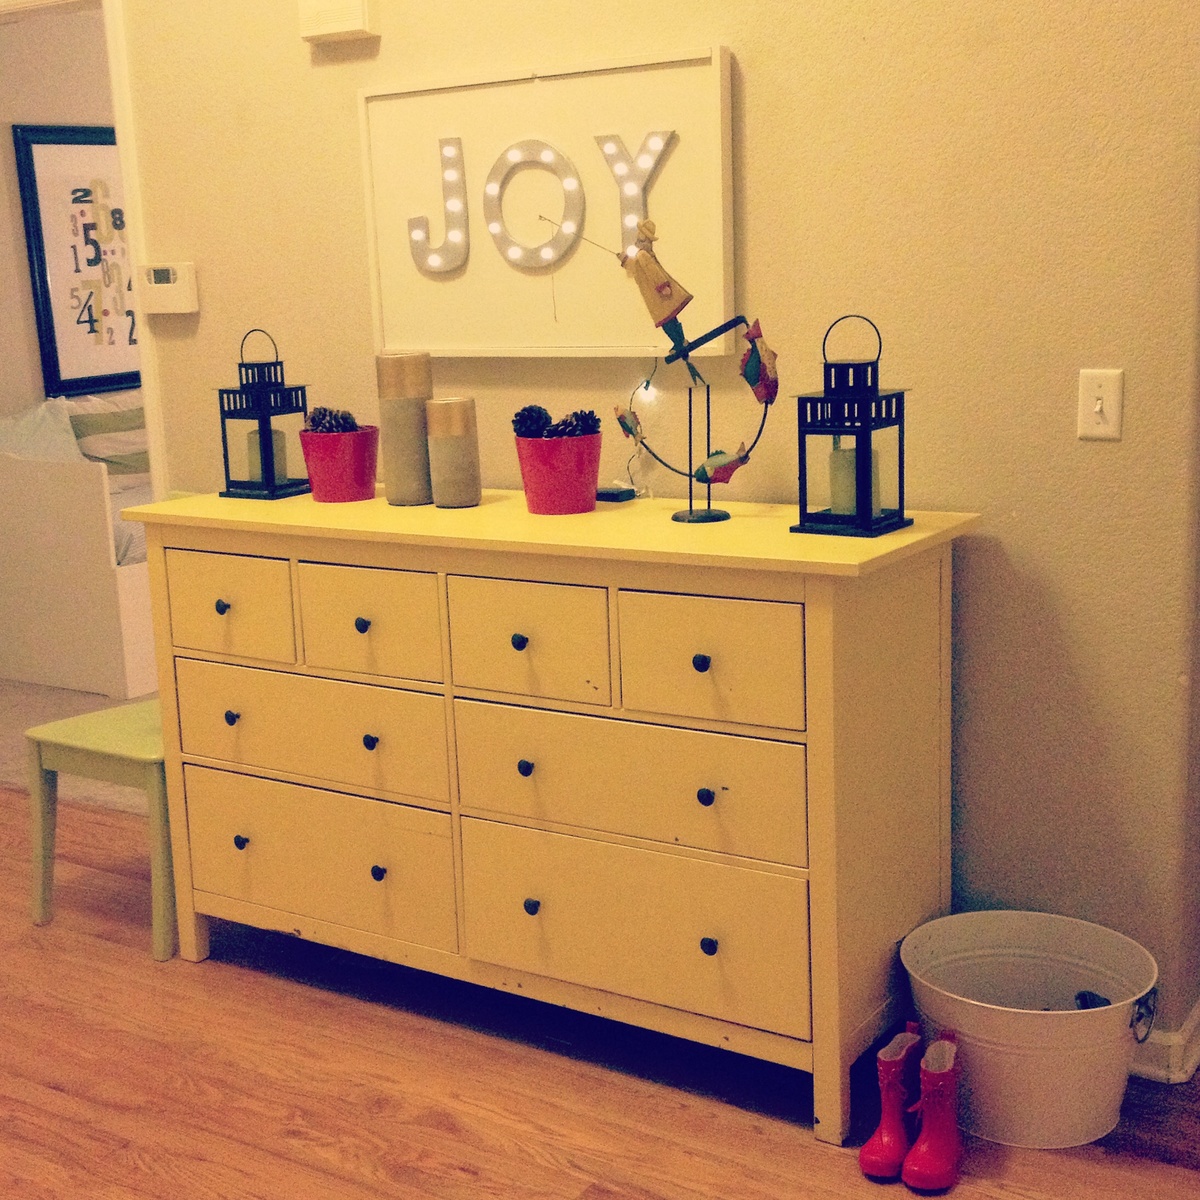
Joy Marquee from Home Depot builders' workshop.
Built from Plan(s)
Estimated Time Investment
Afternoon Project (3-6 Hours)
Recommended Skill Level
Starter Project
Comments

Wed, 11/26/2014 - 12:17
Yay!! I had so much fun
Yay!! I had so much fun making this sign at the woorkshop! Thanks for coming! Yours looks great!
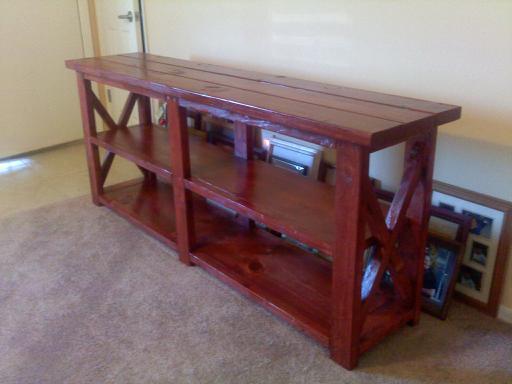
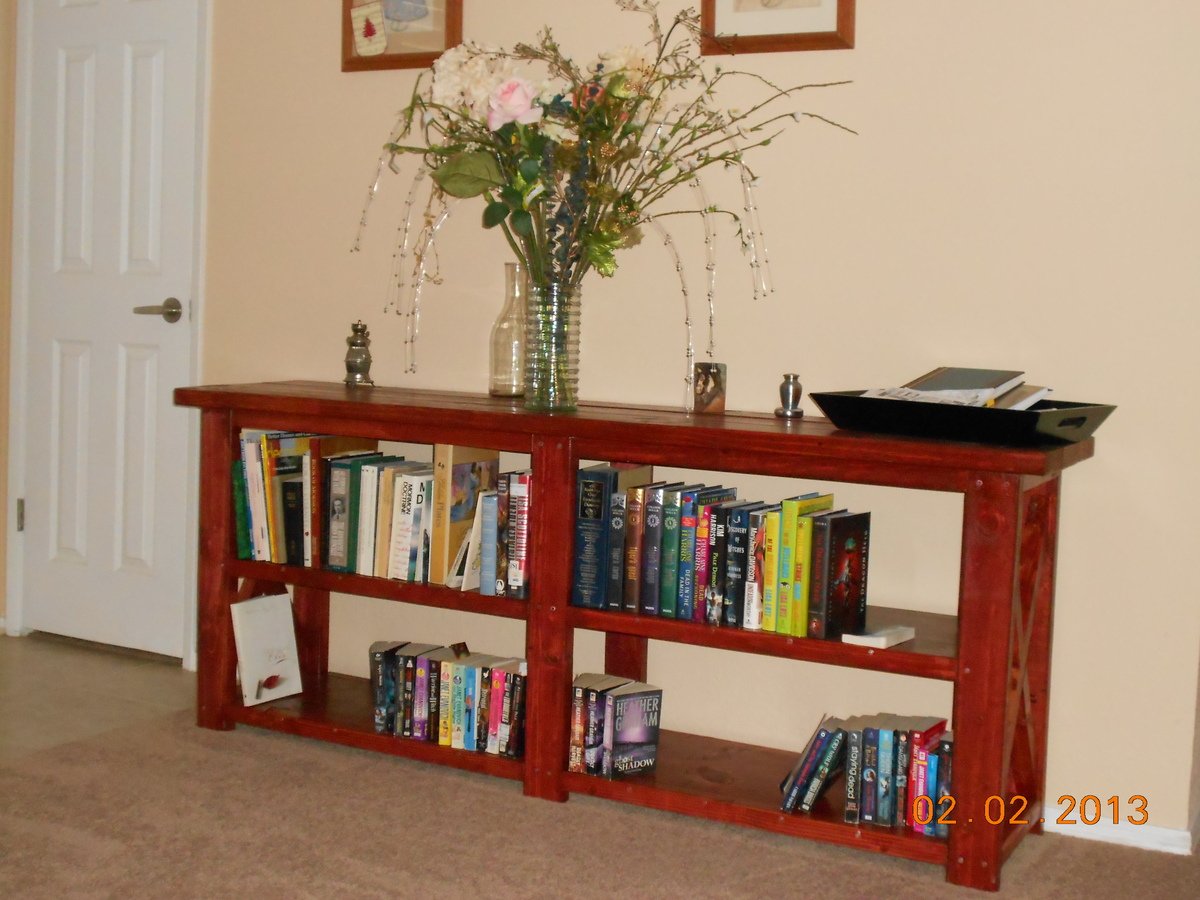
Rustic console/entry table
First diy project, thank you for sharing such easy to make plans,

Built from Plan(s)
Estimated Cost
100
Estimated Time Investment
Weekend Project (10-20 Hours)
Finish Used
Varathene Walnut Stain
Recommended Skill Level
Beginner
Comments
Tractor crates
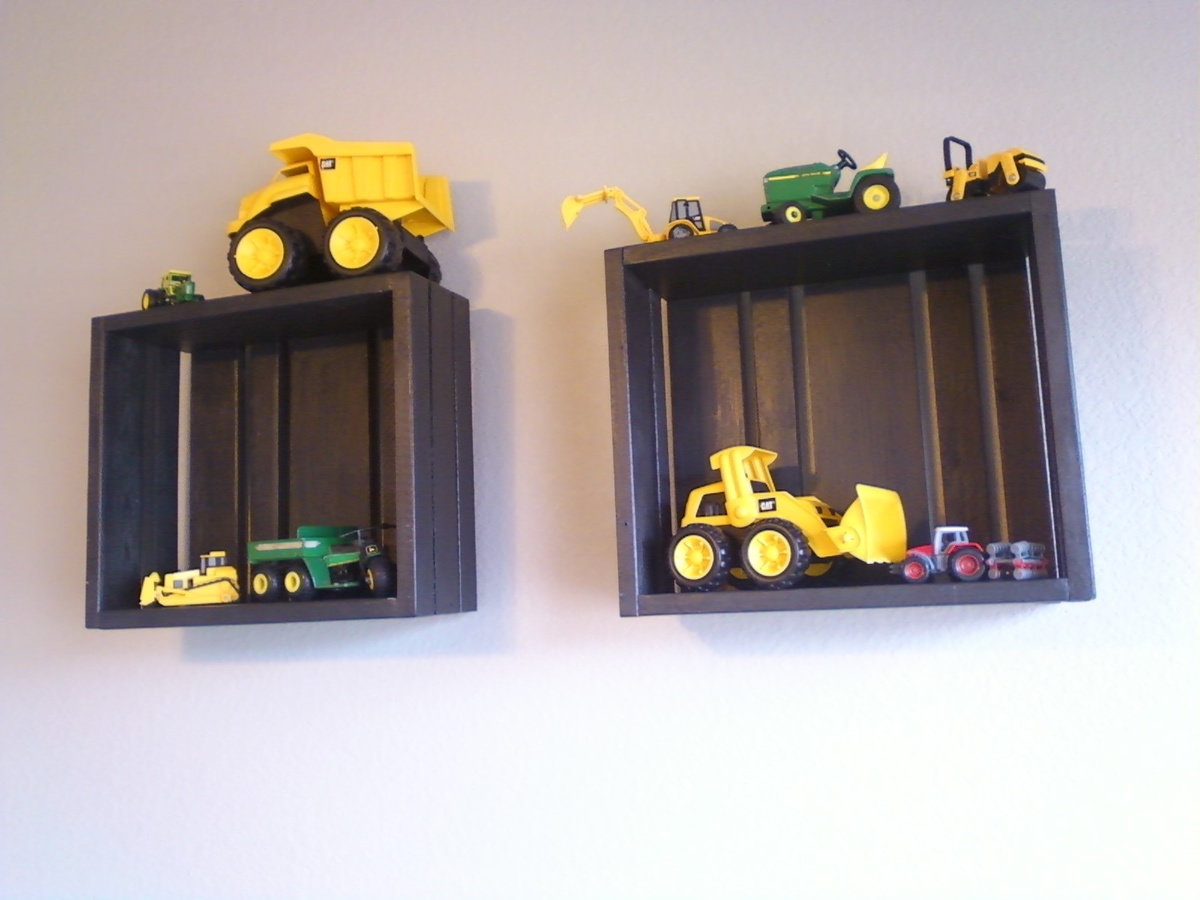
Made from following these plans, and using scraps I already had.
Recommended Skill Level
Starter Project
Comments

Tue, 01/29/2013 - 12:02
Great idea! I've been looking
Great idea! I've been looking for a way to display my John Deere collection and I've got lots of scraps.
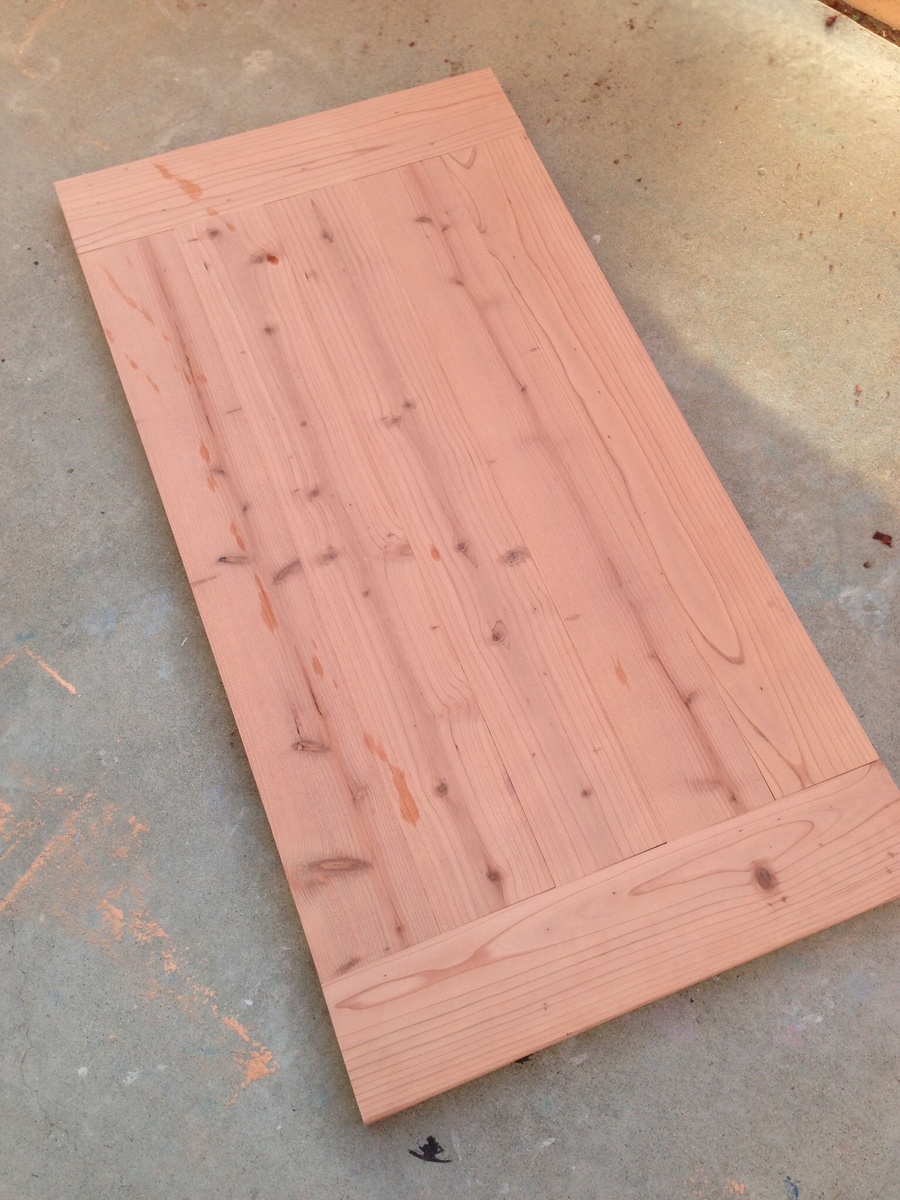
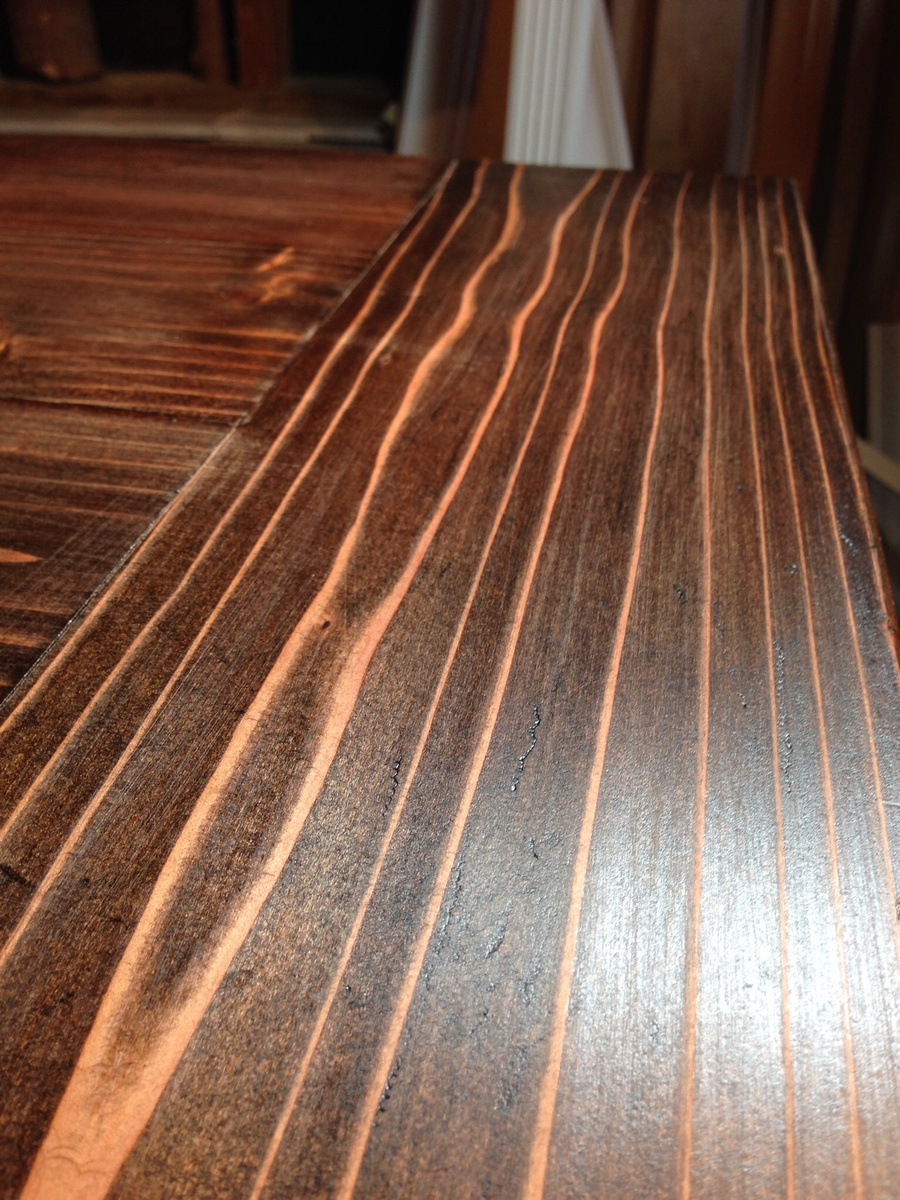
Tryde Coffee Table
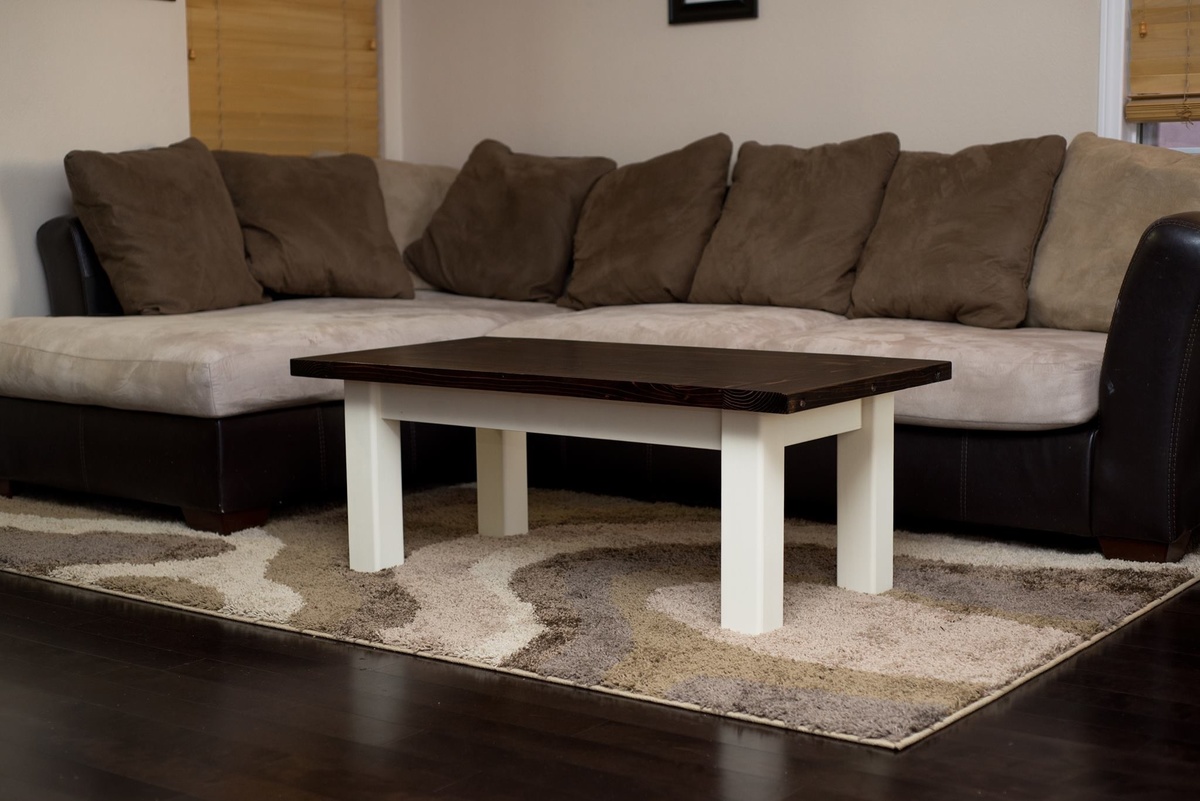
This was built using redwood 2x6 planks trimmed on the edges to square them off and get them to 5" each. I used kiln dried redwood 4x4's as well. The redwood was a bit more pricey BUT it is far lighter than pine and the boards and grain are of a higher quality. The planks were put together with 6 dowels on either side along with glue and big cabinet clamps. The top was also attached to the base with a dowel every 12". I sanded to expose/raise the grain on purpose and give it a hand scraped look. I went two tone on the piece to match my dining set I did. The top is Jacobean and the bottom is Annie Sloan old white chalk paint. The piece is designed to getter better with age ;)

Estimated Cost
$60
Estimated Time Investment
Weekend Project (10-20 Hours)
Finish Used
Minwax Jacobean and rustoleum satin clear poly
Recommended Skill Level
Beginner
Comments
Cabinet style farmhouse nightstands
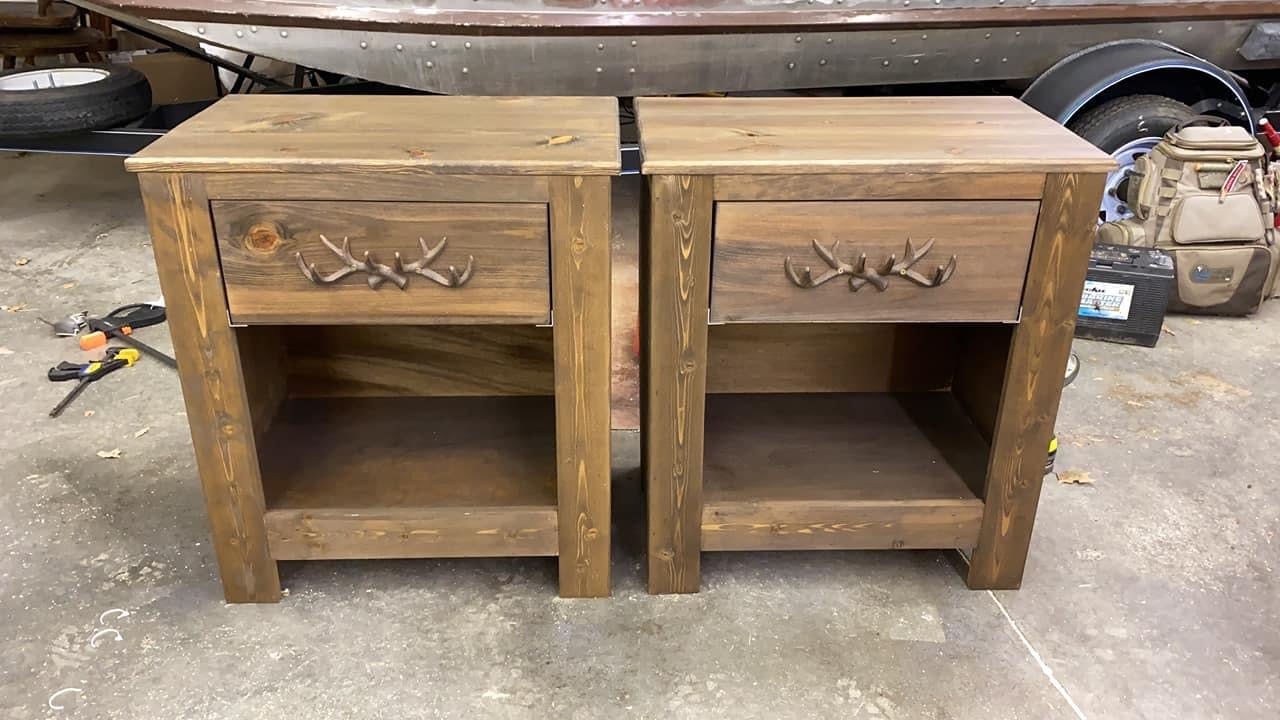
Beautiful plans, thank you Anna! I can’t wait to build the king bed to match!
Built from Plan(s)
Estimated Cost
100
Estimated Time Investment
Weekend Project (10-20 Hours)
Finish Used
Varathane weathered wood accelerator first coat then the rustic accelerator for the second coat. Apply with a foam brush. Then sprayed on 4 coats of semi gloss clear and it’s done!
Recommended Skill Level
Intermediate
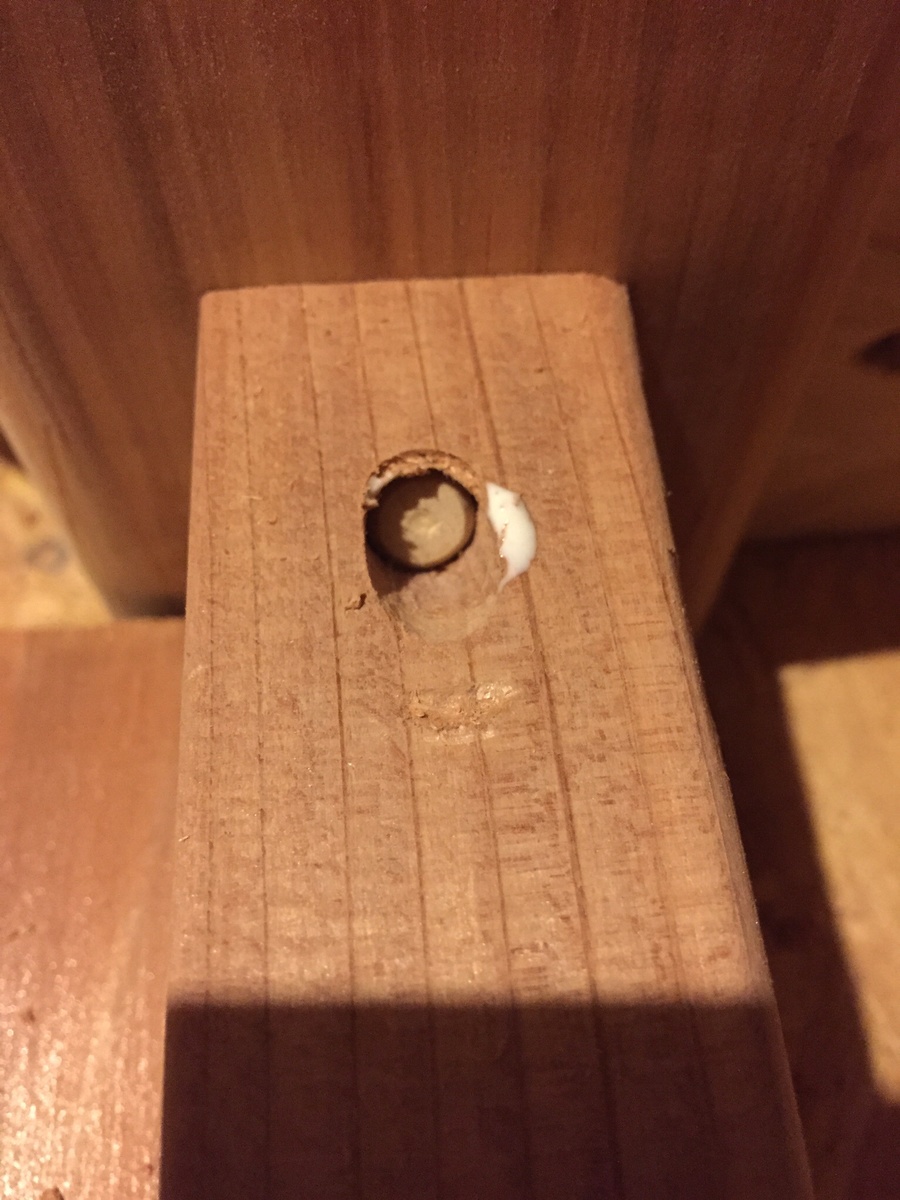
Sling Chair birthday present
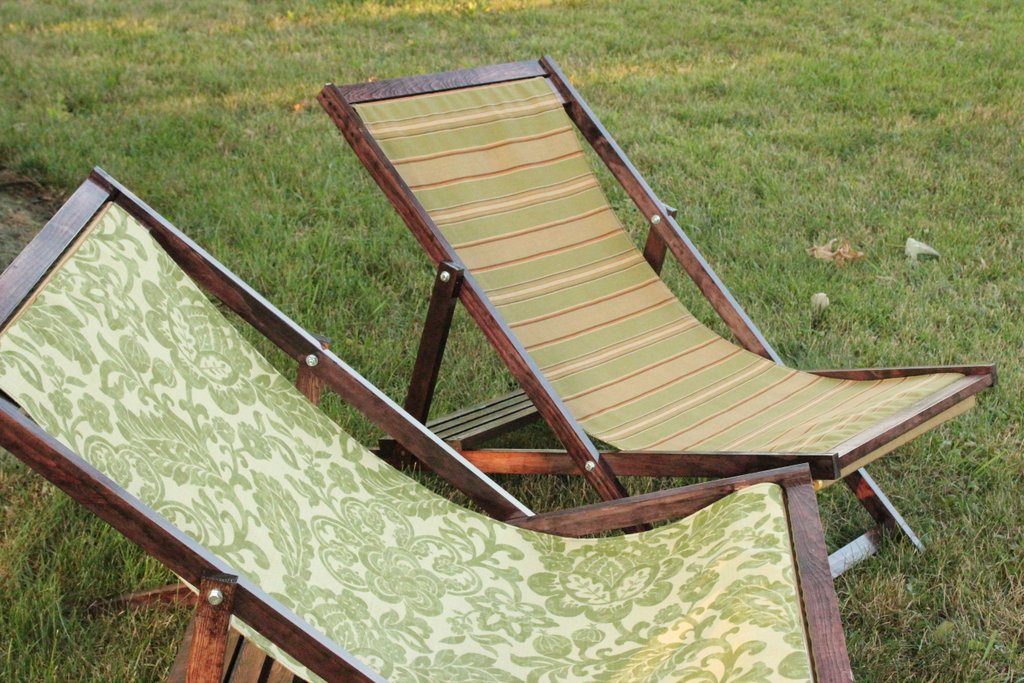
I did these as a birthday present for my husband. He is very picky about seating, but he said these were very comfortable! I used 1x4 oak for the headers and pine for the rest. After reading others' concerns about the support dowel, I decided to do the following:
1. Drill a 3/4" hole halfway through each 1x2 support with a 1/4" hole continuing the rest of the way through to the outward facing side of each
2. I glued a 1/4" dowel into one 1x2, pushing the dowel as flush as possible to the outer edge of the 1x2. I then slid a 3/4" hollow steel tube onto the wood dowel, and into the 3/4" hole in the 1x2.
3. Finally glued the other end of the wooden dowel into the other 1x2 (which forces the steel tube to nest into the 3/4" hole in the 1x2) and trimmed the excess dowel flush. The steel tube acts as the support, and the 1/4" wood dowel simply holds it all together. Did that make any sense?
If you can possibly avoid paying full price on the fabric, DO! That alone accounts for 70% of this project's total cost!
Built from Plan(s)
Estimated Cost
$25-30 each
Finish Used
Stained with Rustoleum dark cherry and sealed with a marine spar varnish. I wouldn't stain again, however...the red oak took it very differently than the pine (of course!), and I think paint would have looked better in the end. The varnish held up very well over a summer of high heat and moderate usage.
Recommended Skill Level
Beginner
Rustic X end table
This project was similar to the Rustic X Console. Recommend building the lower shelf halves before installing so that it's easier to make the bottom flush. The X's were somewhat tricky....just take your time. It's easier to cut the piece too big and trim than to add wood to a piece too short. I stained the top with miniwax special walnut and used a satin poly. For the bottom, I used the same stain and then painted over it with rustoleum heirloom white. I lightly distressed it with 150 grit sandpaper so some of the stain would show through. All in all I am very happy with it!
Built from Plan(s)
Estimated Cost
Approximately $50
Estimated Time Investment
Afternoon Project (3-6 Hours)
Finish Used
Top: special walnut stain and satin polyurethane. Bottom: same stain and painted over it with rustoleum heirloom white. Lightly distressed.
Recommended Skill Level
Beginner
Comments
My Laundry Station
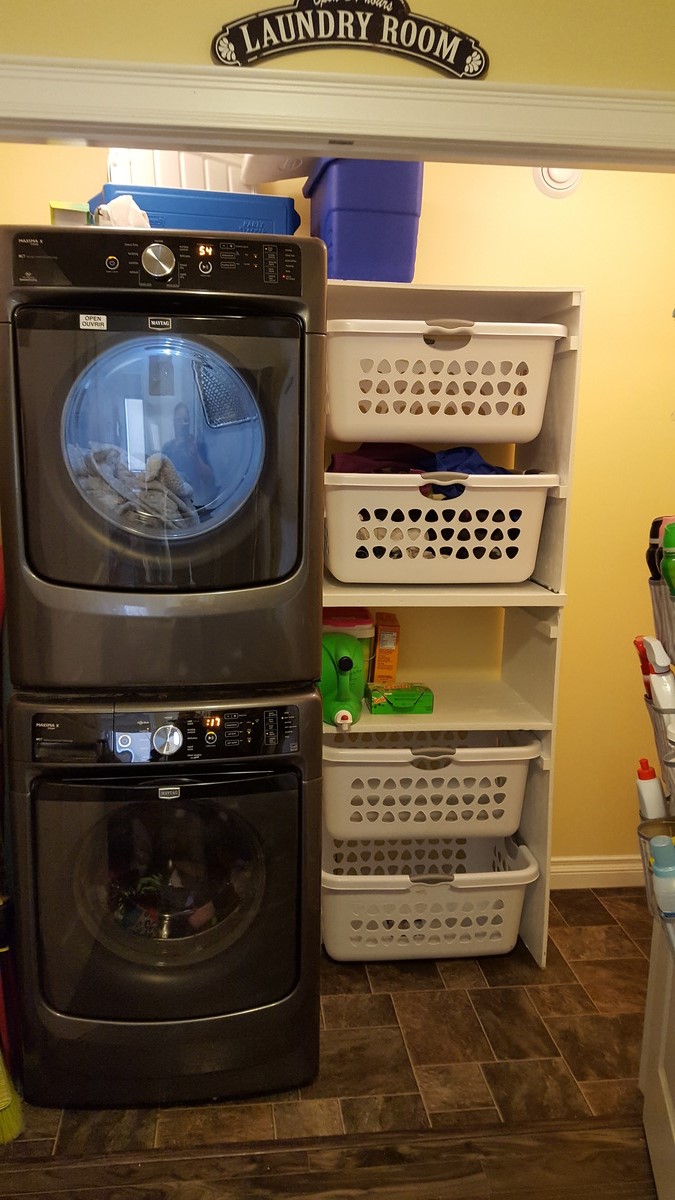
I love Ana's original design and it was a great inspiration. I needed to add more baskets so I adjusted it a little. I had some drawer slides sitting around so I added a pull out shelf to fold on as well.
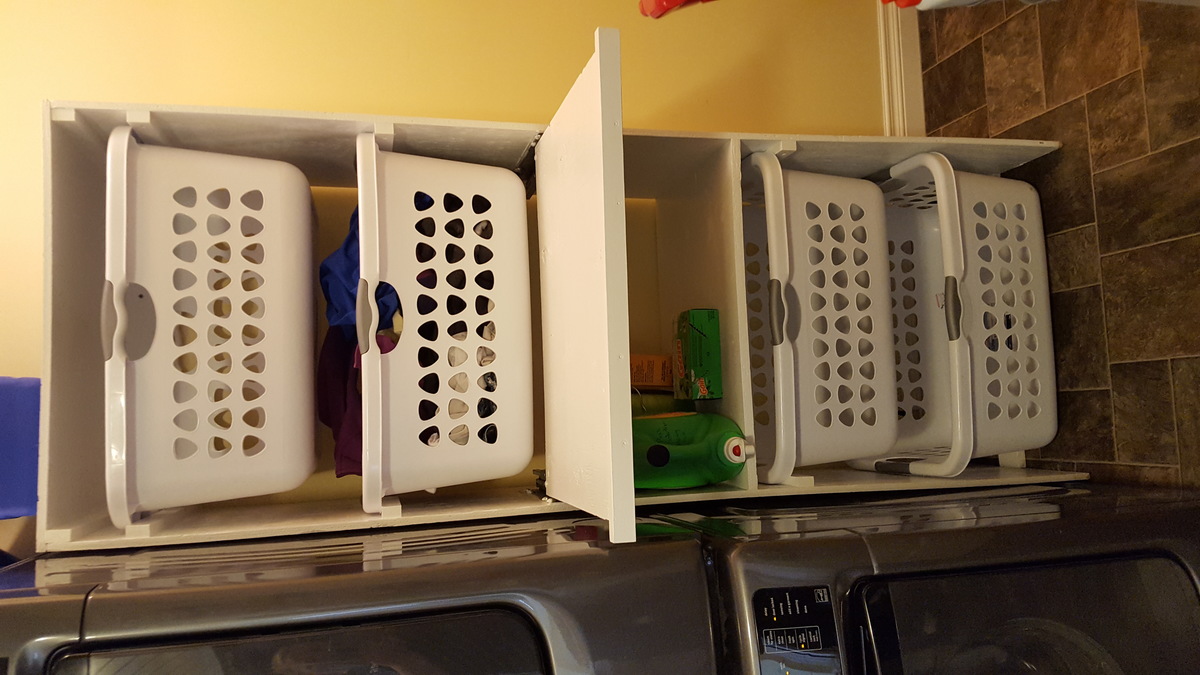
Built from Plan(s)
Estimated Time Investment
Afternoon Project (3-6 Hours)
Finish Used
Primer and paint
Recommended Skill Level
Beginner
Farmhouse console table

Thanks you Mrs. Anna white for the plans and my project turned out great...
Built from Plan(s)
Estimated Cost
160.00
Estimated Time Investment
Day Project (6-9 Hours)
Finish Used
Finished stain used dark walnut
Recommended Skill Level
Advanced
Console table
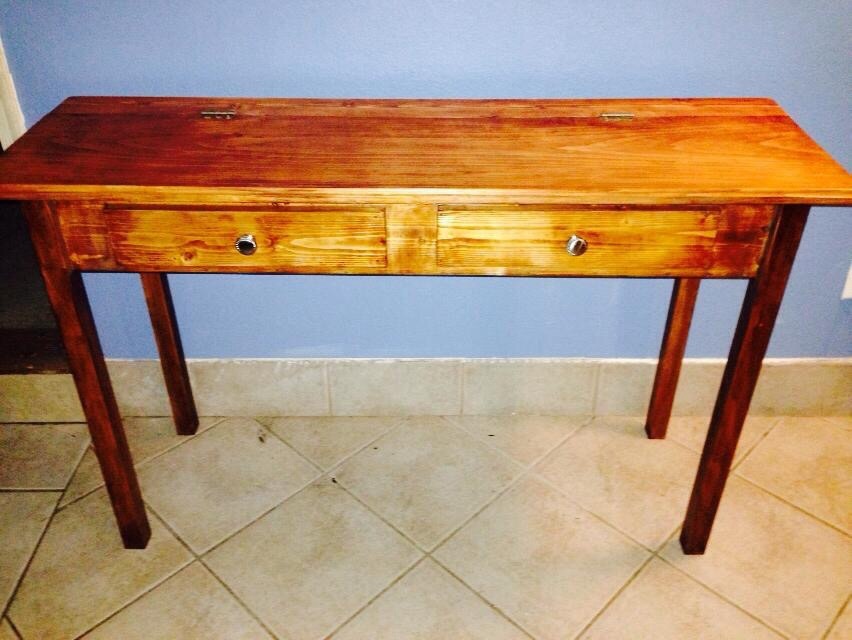
This was my first woodworking project since high school. Initial build I messed up the legs and almost gave up, but recut, got some other wood and got through it all pretty nice. I added an edge with my router I got when I was almost complete with this piece. Added bought molding around the top and used a stain I got from a local woodworking store. My wife loves. I still need to get some felt for the drawer, but I brought it in this week from my shop.

Built from Plan(s)
Estimated Time Investment
Afternoon Project (3-6 Hours)
Finish Used
Candlelight stain, satin finish.
Recommended Skill Level
Starter Project
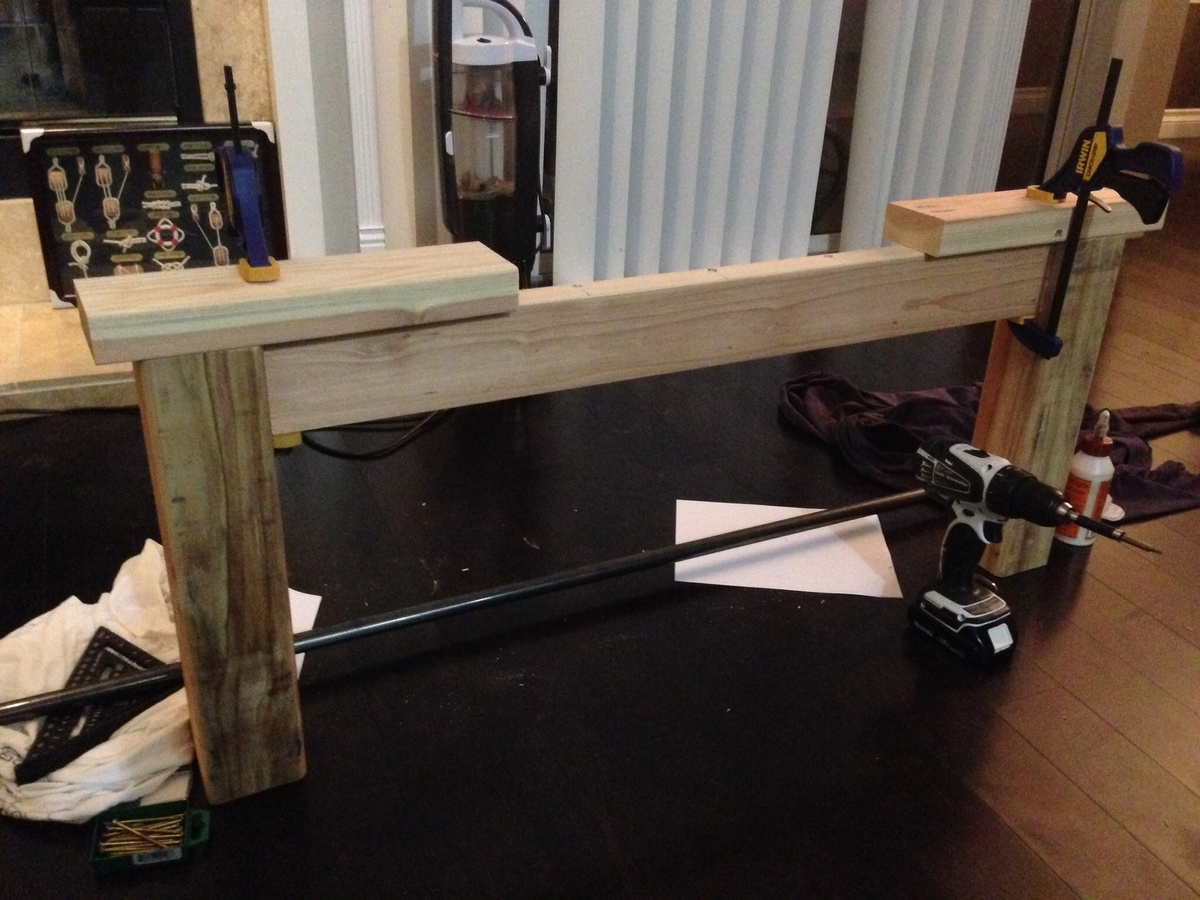
My take on the benchwright console table
I chose to add an extra plank on the top to have it extend out a couple of inches on the front. This was my second furniture build and I'm still learning. This didn't take me very long and I was able to do it on the sly to surprise my husband. First project from Ana White and won't be my last.
Built from Plan(s)
Estimated Cost
$110 including stain
Estimated Time Investment
Weekend Project (10-20 Hours)
Finish Used
Both stains are Minwax - top is Colonial Maple and the lower is Espresso. Needed two applications of the maple to get it dark enough for my taste. I forgot to use pre-conditioner on the legs which were plain 2x4 studs, so the grain really showed through, but I'm pleased at how it looks like a combination of the maple and espresso
Recommended Skill Level
Beginner
Herringbone Rustic X Bench

Built using the base plans from Ana's Rustic X Bench but added a herringbone top to it.
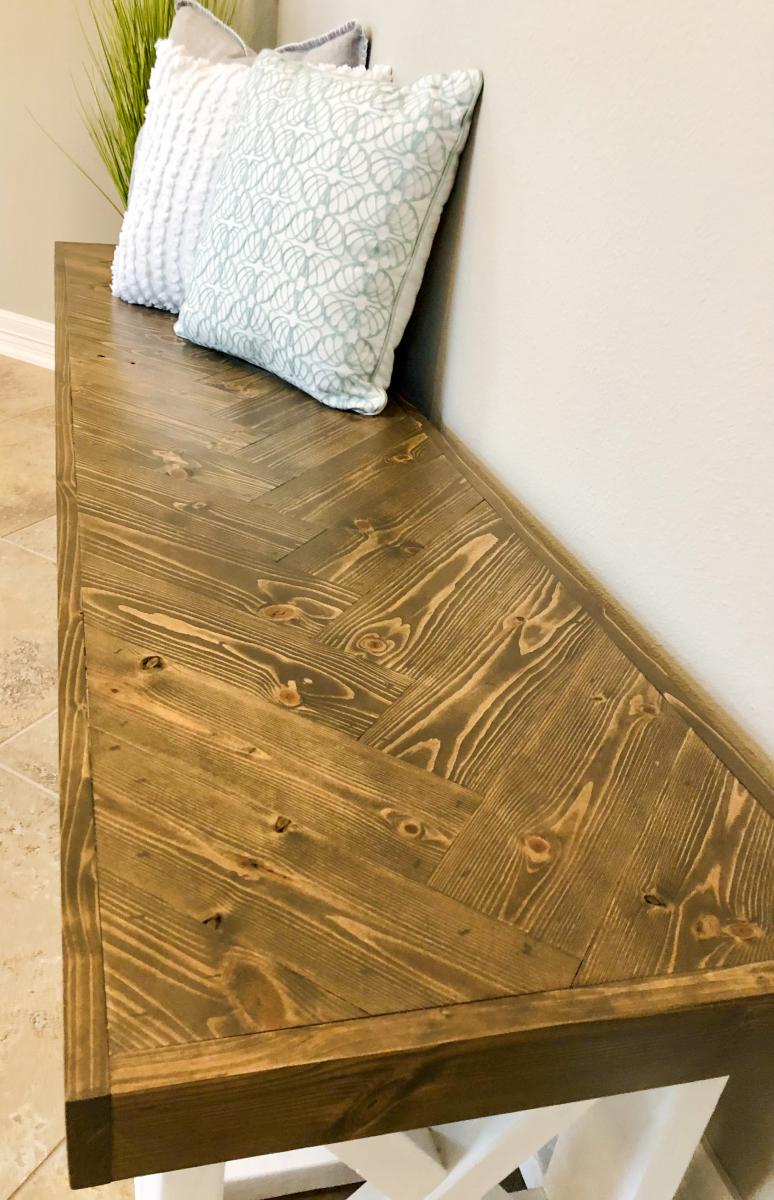
Built from Plan(s)
Finish Used
Used Varathane "Brairsmoke" for the bench top and satin white paint for the base.
Doll High Chairs
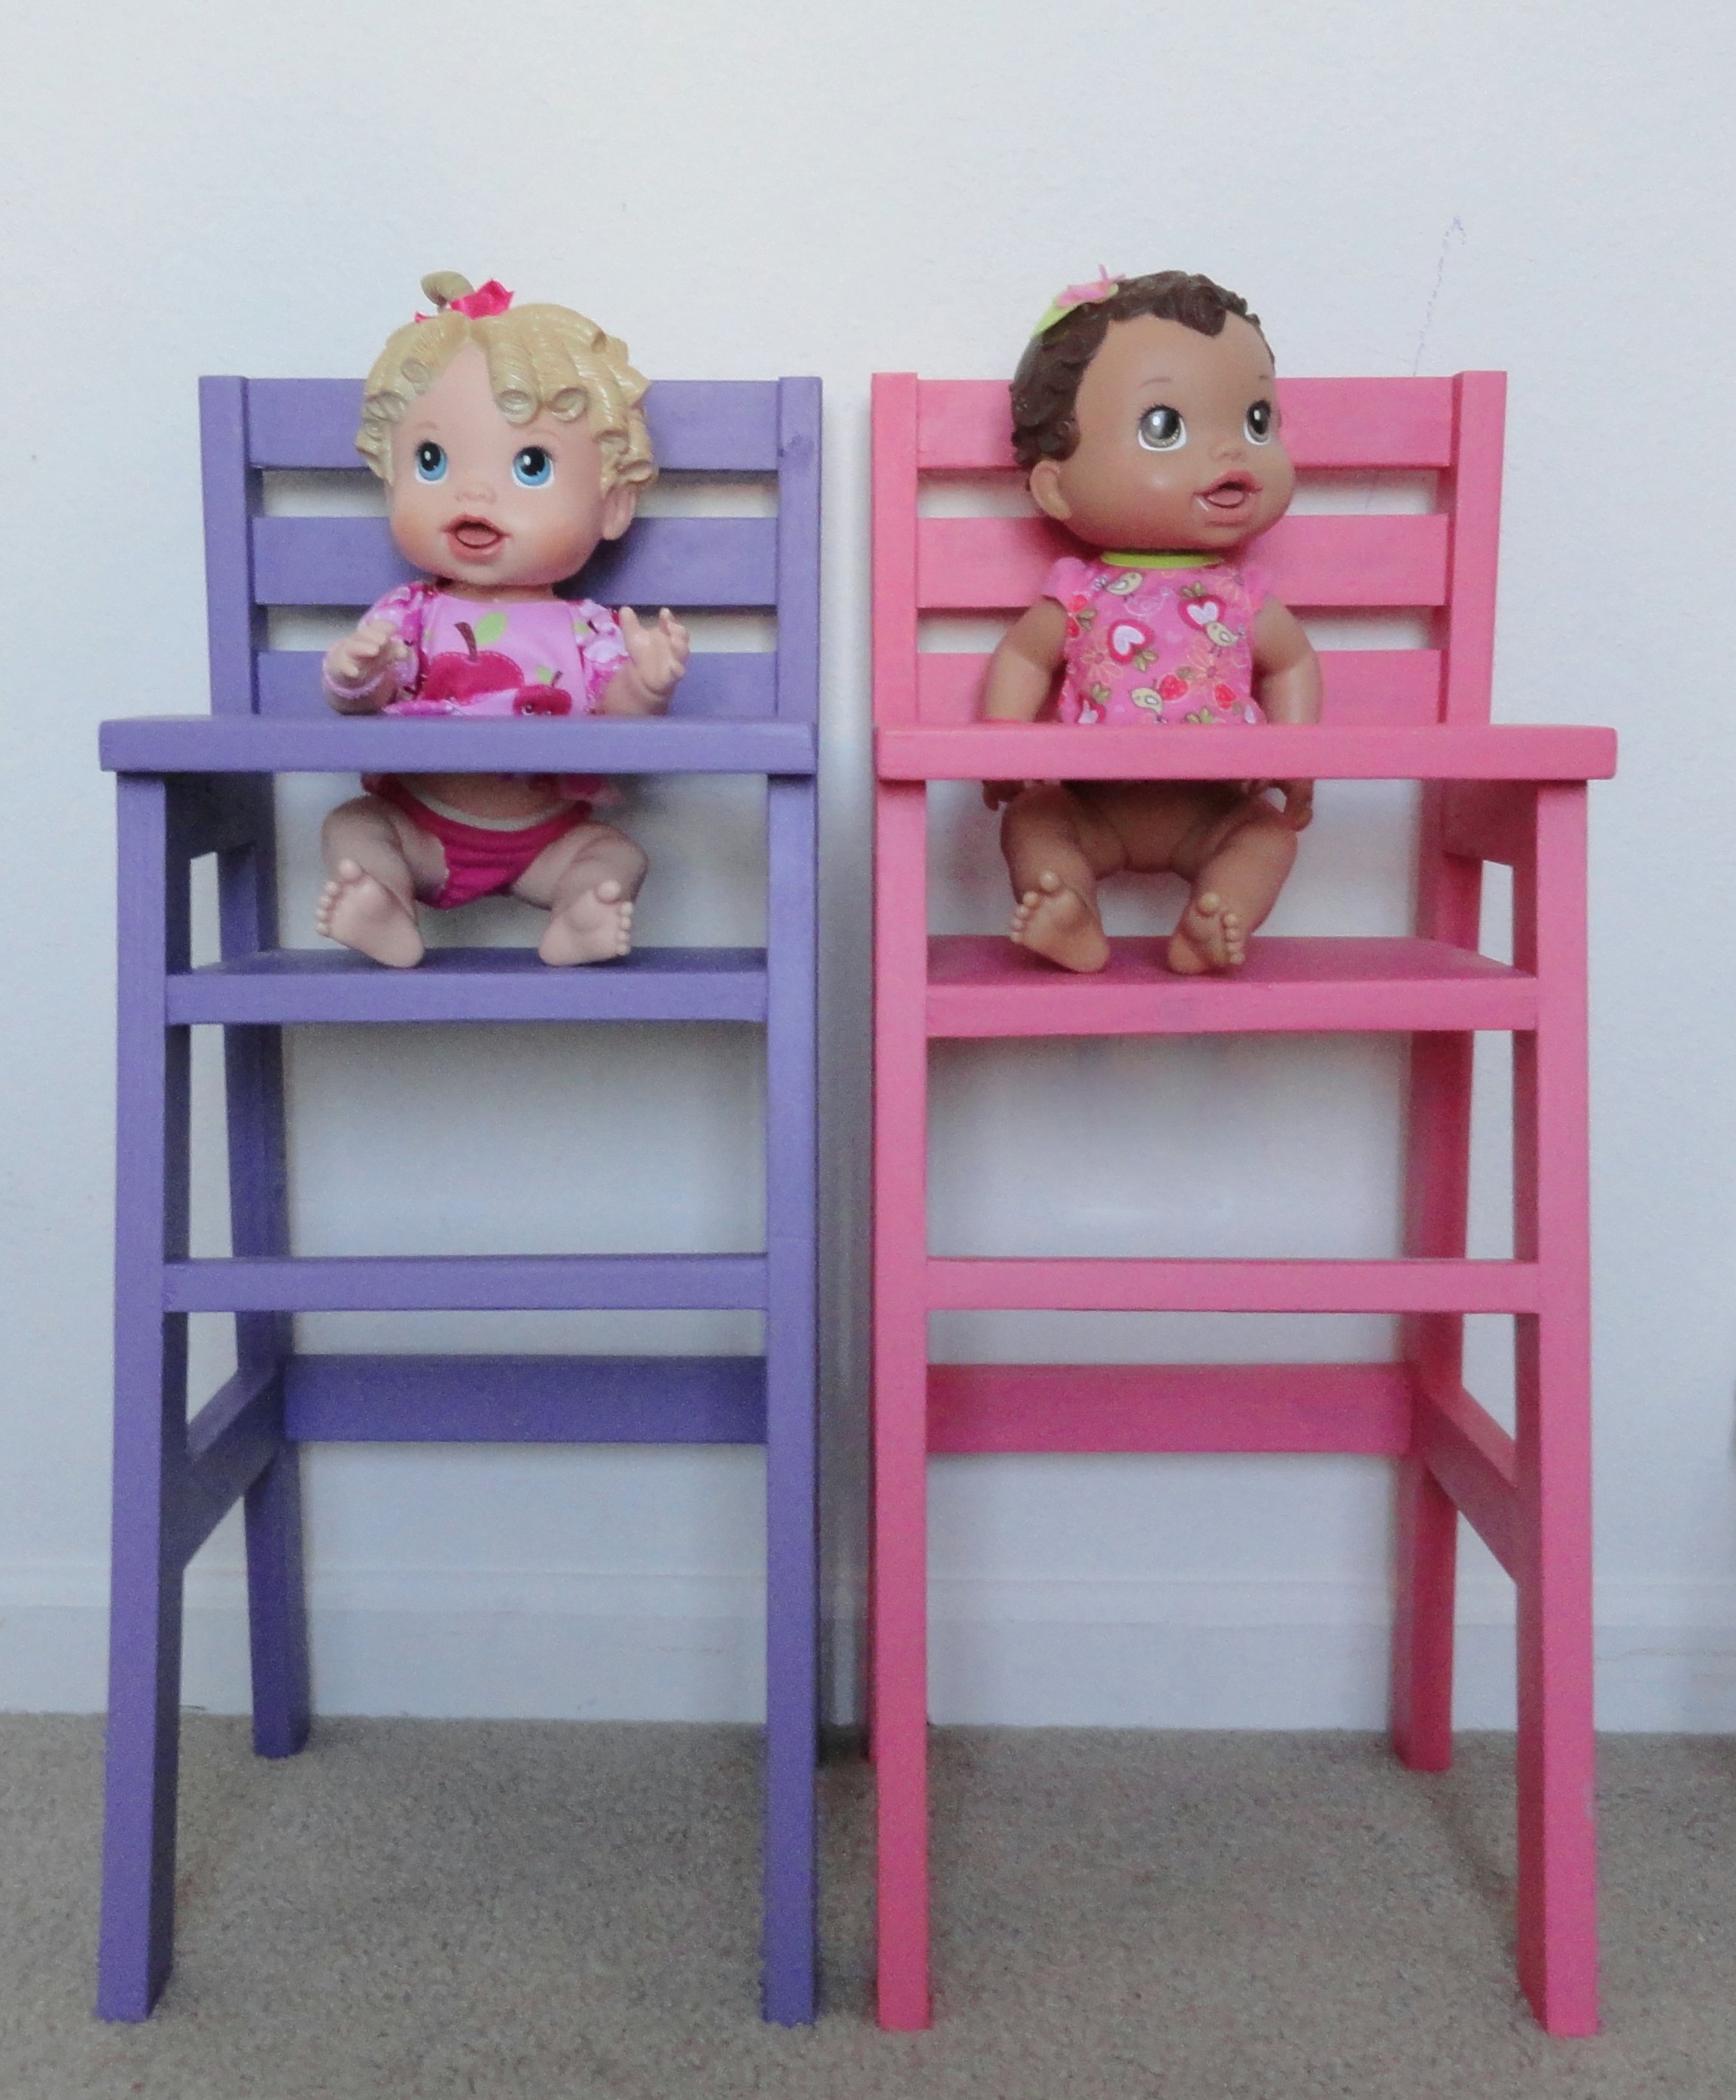
Built these for my daughters for Christmas. They are super easy and fun to make!
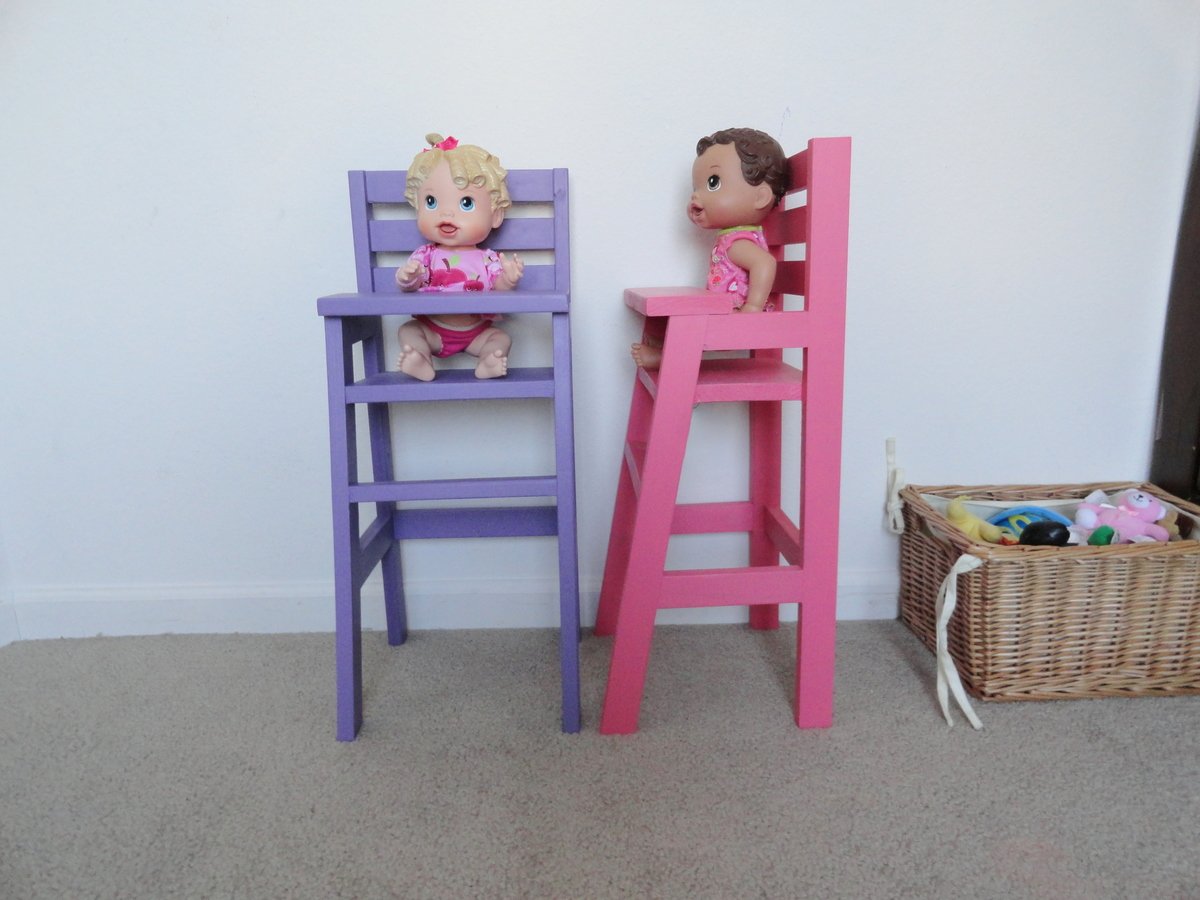
Built from Plan(s)
Estimated Time Investment
Afternoon Project (3-6 Hours)
Recommended Skill Level
Beginner
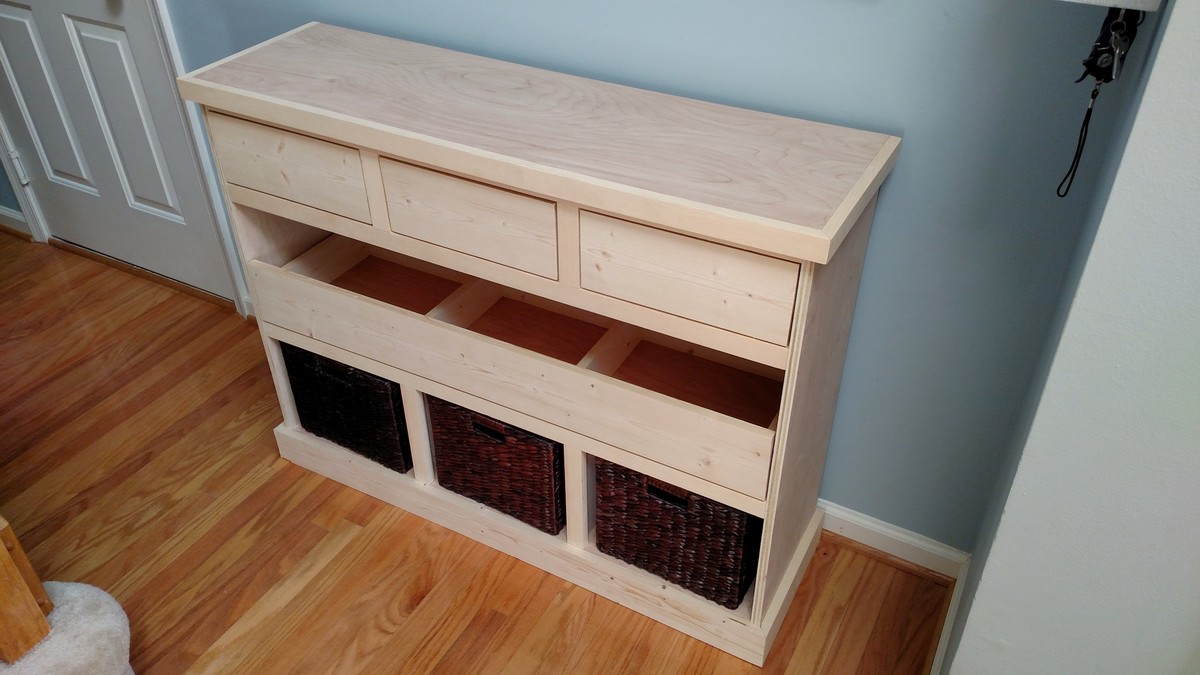
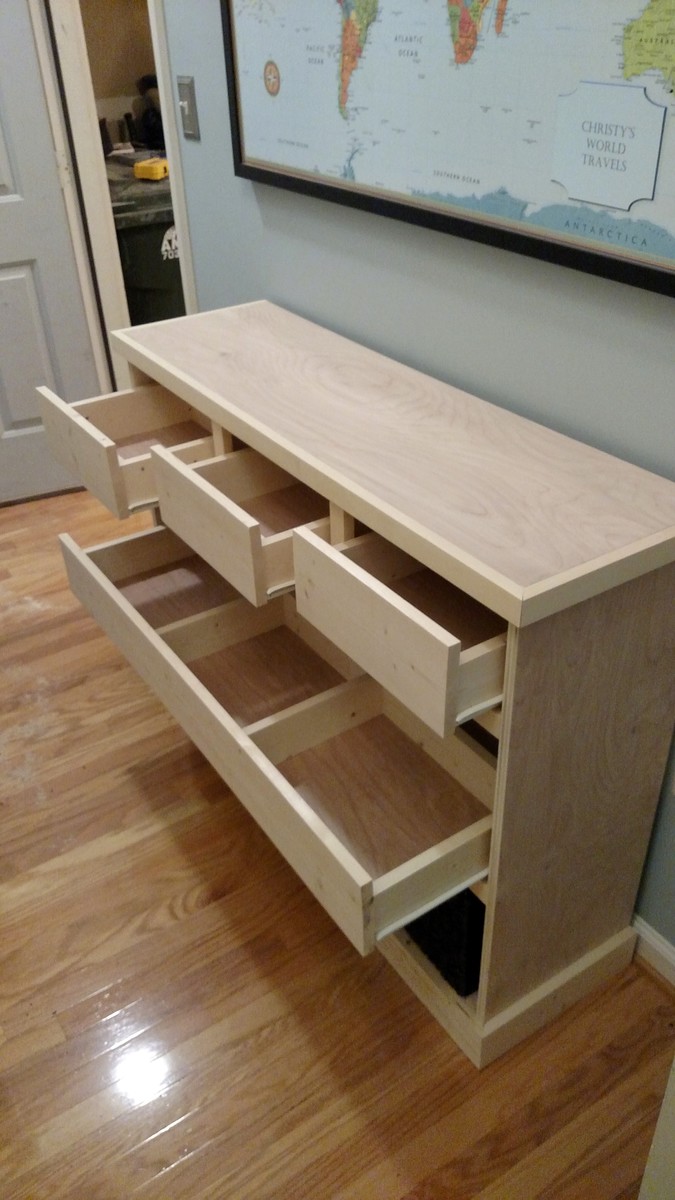
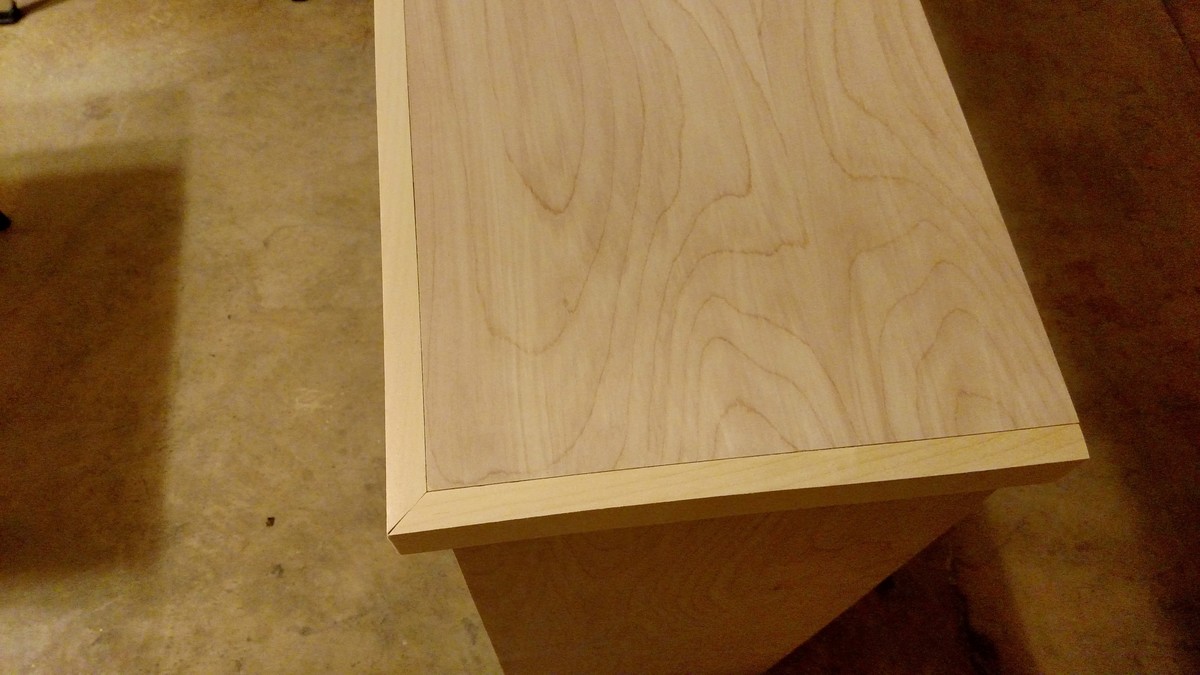
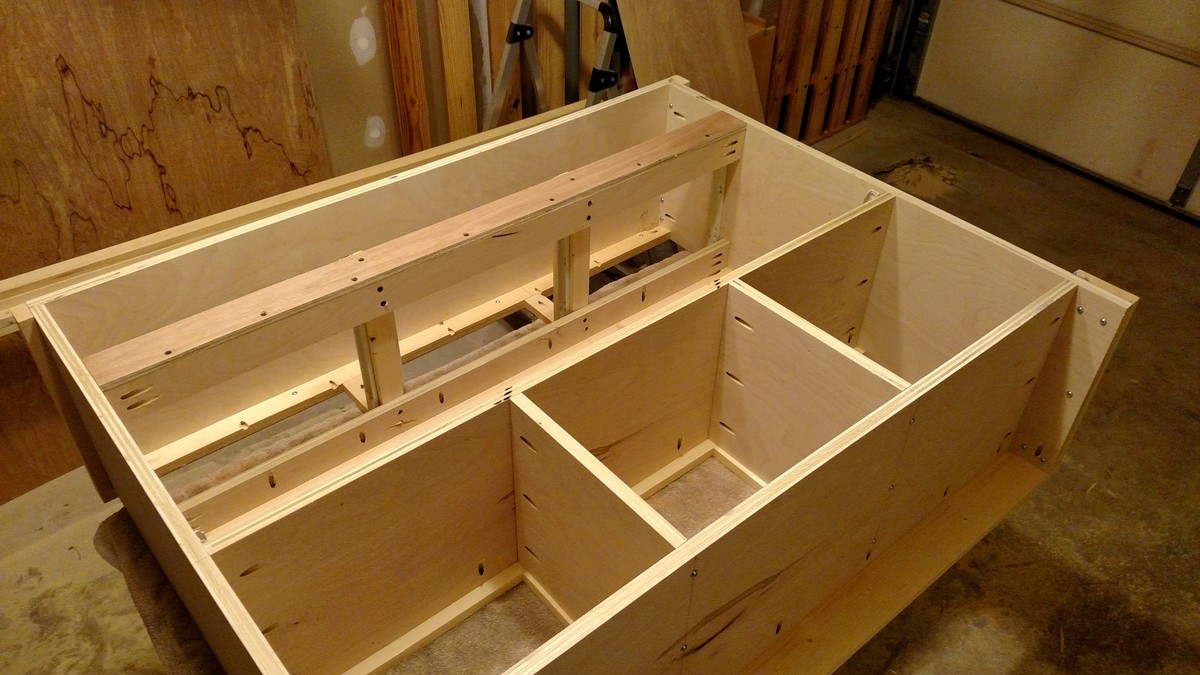
Entry/Foyer Table

We built this for our entry way to store hats, gloves, and other goodies. I modifed the depth to be narrower to leave more walking space. We live in a three level townhouse and any space much less storage space is premium. I liked the idea of the long pull out drawer in one of the earlier postings as well as the basket idea so we included both into our design. I also used conventional drawer slides instead of the center mount. We havent decided on the finish or the drawer pull hardware yet but I love the look of natural wood so i wanted to post it without a finish.
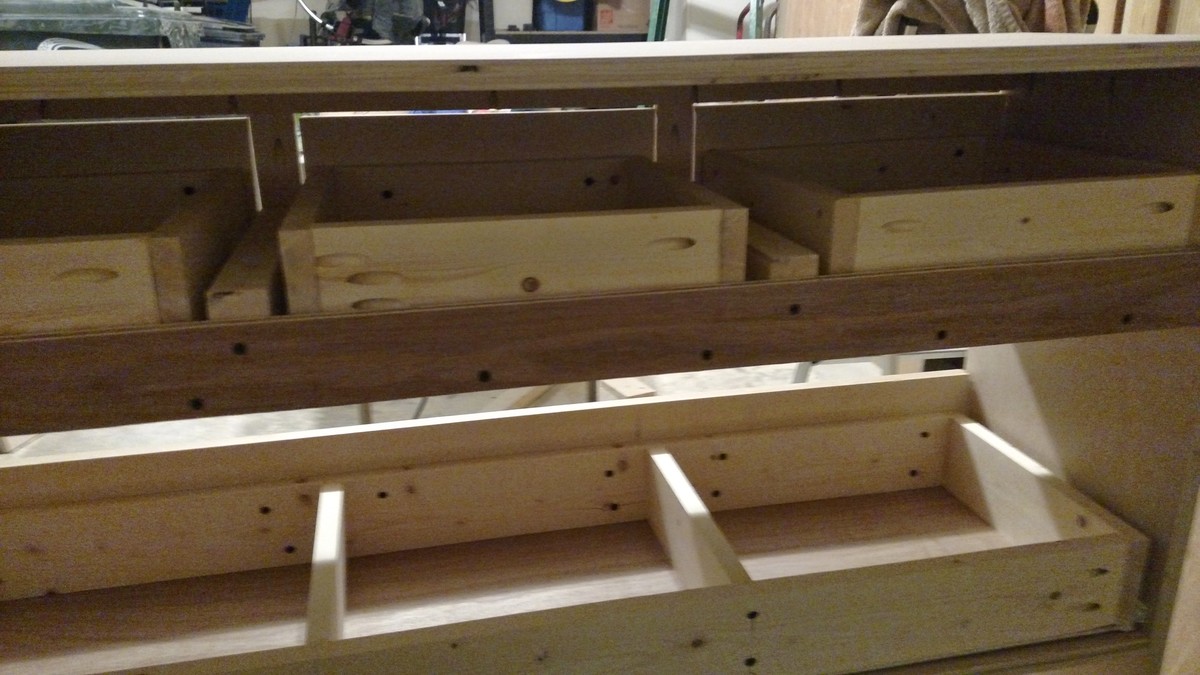
Built from Plan(s)
Estimated Cost
$150
Estimated Time Investment
Weekend Project (10-20 Hours)
Finish Used
Unfinished
Recommended Skill Level
Beginner
Comments
Olivia's Toybox Bench
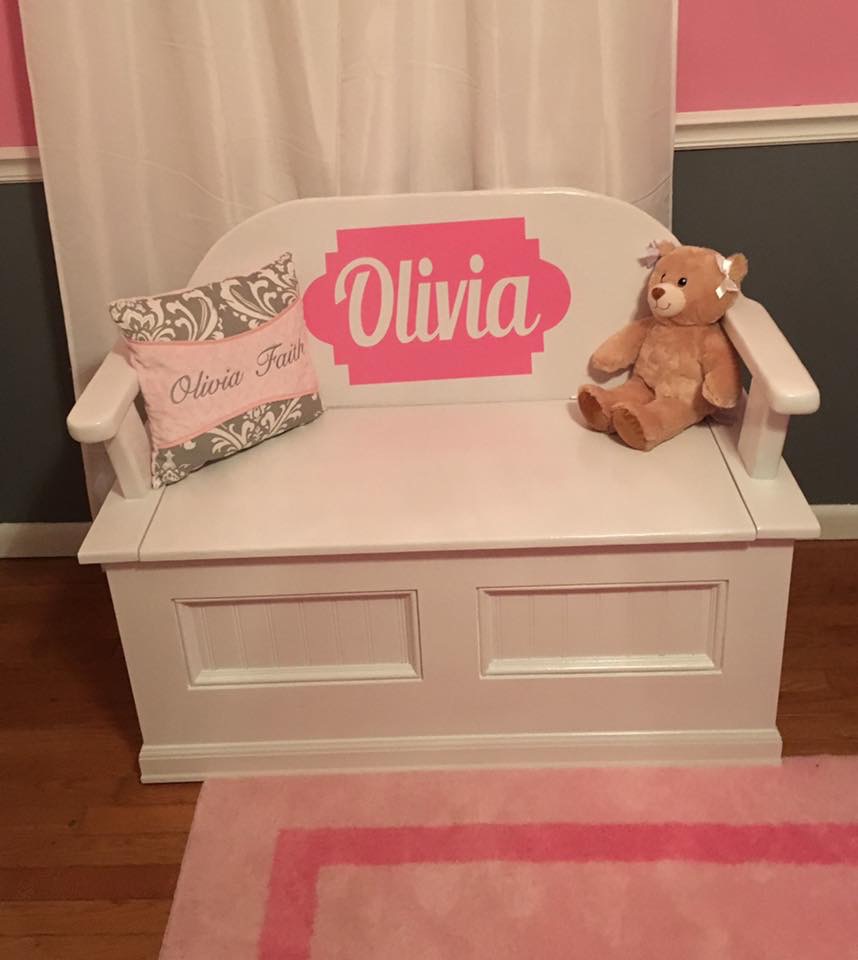
The box is pretty similar to Mimi's bench with a few dimensions changed. I also fully framed out the inside to make sure adults could sit on it if need be. The arms and backrest took a lot of just staring and "pondering". I like it and everyone else seems to love it. Thanks Ana and Mimi.
Built from Plan(s)
Estimated Time Investment
Week Long Project (20 Hours or More)
Finish Used
White prime, latex, finally aerosol. I need to learn more about the paint process because I was completely unsatisfied with the latex.
Recommended Skill Level
Intermediate