Community Brag Posts

Rustic X Console Table

Submitted by jwerne2 on Wed, 03/05/2014 - 12:55

My husband built this Rustic X Console table to plan. We love it so much he is now building the coffee table and end tables to match (and I may convince him to build the bookcase too!)

Estimated Time Investment
Day Project (6-9 Hours)
Finish Used
Rustoleum Dark Walnut, wipe on satin polyurethane, furniture wax
Recommended Skill Level
Intermediate

Alexia Bench modified

Submitted by rkyount on Sat, 06/04/2016 - 15:35

This was a very quick and easy build that was completely finished in an afternoon. My Kreg jig was loaned out, so I have exposed fasteners, but I prefer to let them show instead of filling the holes. I built this with 20" legs to make it a little taller and more comfortable for my height. I also prefer straight lines and angles, so I changed the trim pieces a bit to suit my style. The hardest part was getting the drawer slides lined up. The finish is Rustoleum Heirloom White with a coffee colored glaze. The picture makes one drawer look darker, but it's really just a shadow. I'm in love with this project!

Built from Plan(s)
Estimated Cost
$65
Estimated Time Investment
Afternoon Project (3-6 Hours)
Finish Used
Rustoleum Heirloom White with a coffee colored glaze
Recommended Skill Level
Beginner

Adirondack from Deck leftovers

Submitted by Anonymous (not verified) on Thu, 03/26/2020 - 09:58

We are stuck at home for the Shelter-In-Place due to COVID-19 so we decided to use the scrap wood left over from our new deck. Because we didn't have the materials exactly meeting the specifications in the directions, we had to adapt the design significantly but we're really pleased with how it turned out. My 16-year-old daughter made it with me so it was a great to get her involved in building

Built from Plan(s)
Estimated Cost
$0
Estimated Time Investment
Day Project (6-9 Hours)
Recommended Skill Level
Intermediate

Coffe Bar Cabinet

Submitted by Anonymous (not verified) on Thu, 11/09/2023 - 11:45

Barn door console I turned into a coffee bar. Great storage space. Love the way it turned out.

Dee

Comments

Wardrobe

Submitted by dustimausi on Thu, 05/24/2012 - 14:57

Since I had little space in my floor I took to logs from the field.
I first polished them with sandpaper and steelwool. 1st time dry, 2nd time wet. After drying I paintetd one with white stain. The other one with nutchest stain and clear coat.

The white log was once more polished with steelwool after painting.
Therefore it has an used/bleached look.

I added warderobe hooks to each log and screwed them to the wall.

Price 30 €

About 10 € for 20 € for the hooks and screws.

Sorry, my english is not so good - I'm not a native speaker.

Estimated Cost
30
Estimated Time Investment
Afternoon Project (3-6 Hours)
Recommended Skill Level
Starter Project

Kendra Side Table

Thanks for the GREAT plans. Slightly modified to allow more space on the top shelf.

Estimated Cost
40.00
Estimated Time Investment
Day Project (6-9 Hours)
Recommended Skill Level
Beginner

Comments

Linda7

Sun, 03/09/2014 - 15:23

Lauren,
They are found on this site called the "Kendra Storage Console". Click on "plans" in the tool bar above, type in that title, then hit "apply." The original plans will pull right up.

JoJo Lynn

Thu, 01/29/2015 - 20:01

I too was looking for the plans on this and i clicked on plans but when i entered Kendra Side Table it came up as no results found. Is this not the name listed above? Am i doing it wrong?

Jodi

Queen size farmhouse bed with storage

Submitted by fdfp84 on Wed, 06/08/2016 - 17:11

I made the bed  from the plans on this site, I made the drawers using a dovetail joint.Took a little longer because of that. 

Estimated Cost
cost was around 350.00
Estimated Time Investment
Weekend Project (10-20 Hours)
Recommended Skill Level
Beginner

Comments

Fireplace Mantle

Submitted by advanlente on Sat, 03/28/2020 - 11:37

I really wanted a mantle to hang our stockings and to have some decorations. When we moved in there was just a shelf above the fireplace which was fine but I wanted to make more of a statement. This was a pretty easy project after all of the math was calculated. I made to follow guidelines for the fireplace as well. Thanks dad for that :)

Simple Outdoor Dining

I am enamored by the Simple Outdoor Table that is usually featured on the homepage. This was my second project, and in hindsight, I it took several weeks to finish working at night because I made several mistakes that required some problem solving. Naively, though, I studied the plans, borrowed a saw and got to work.

I opted for two benches to save space on the patio when not in use. As you can see in the picture of the bench tops, I opted for a smaller spacer (1/16")because it improved the looks dramatically, but that left me with a gap. There will be a skinny slat in the middle of each bench.

I also opted for 3/16" spacers on the tabletop which required one more board than was scripted. That is much easier to account for on the table then the benches.

You can see from the stacks of lumber in the garage, assembling is the easy part! I hope to never see the words, sand, stain, and seal in sequence again. I also learned a few difficult lessons when it came to using the Kreg Jig, which was new to me.

Now that it's done, though, I am very proud of the outcome.

Estimated Cost
$150
Recommended Skill Level
Beginner

Comments

Andrew Spearns (not verified)

Thu, 07/26/2012 - 13:24

Hi - Table looks great. What did you use to stain and seal?

Thx
Andrew

Farmhouse Table for house

Submitted by N8Heinrich on Thu, 03/13/2014 - 08:52

My wife wanted a new table for our dining room in our new house. I have been eyeing this project for a couple of years and finally convinced my wife that I could do it since we had the space. The plans on this site were easy to follow and I was able to really put it together. As far as the color of the stain, that is all my wife as she has the eye for colors and matching. Overall, this was a fun project and I can't wait to put the bench together next.

Estimated Cost
$150
Estimated Time Investment
Week Long Project (20 Hours or More)
Finish Used
Minwax Jacobean Stain; then 3 coats of Poly all brush applied
Recommended Skill Level
Beginner

Salsa Console

Submitted by paineda on Mon, 06/13/2016 - 08:59

There is 1x10 on the shopping list! This was the first cut to make and I realized no where does it say to grab a 1x10 board.  Other than that, the plans were great.  Definitely made some mistakes along the way but overall I am very pleased.  Thanks for the plans!

Built from Plan(s)
Estimated Cost
$350-400.
Estimated Time Investment
Week Long Project (20 Hours or More)
Finish Used
Painted two colors, brown then blue. Sanded to give it antique look and finished with polycrilic.
Recommended Skill Level
Intermediate

Sofa Table

Submitted by B.W.Martin on Thu, 04/16/2020 - 21:10

I created a sofa table and also one for the loveseat but I don't have it pictured. I used a 2" x 10" for the top and 2" x 6" boards for the legs as well as braces. Added a two outlet and two USB port socket to the table top which was wired to plug into the outlet that would be covered up. Made it so that the legs we're up against the wall allowing for the top to extend just over the back of the couch, and it allowed the two legs to keep the pets from going behind the couch.

Estimated Cost
Roughly $25 it was one 2 by 10 8ft long, one 2 by 6 8 ft long for the legs and 45 degree braces. One wall socket box, a plug, an extension cord, and then necessary items to properly wire it together.
Estimated Time Investment
Afternoon Project (3-6 Hours)
Finish Used
Eggshell antique white was used for the paint. Minwax pre stain, minwax honey stain, and minwax polyurethane.
Recommended Skill Level
Beginner

Modern Farmhouse Entryway Console

Submitted by Anonymous (not verified) on Sat, 11/18/2023 - 12:28

Built 2. Stained one Briarsmoke the other to be determined. Thank you Ana for the inspiration and plans!

Tim Basoco

Comments

My New Couch

Submitted by PriscaW on Thu, 05/31/2012 - 02:30

This is my new couch ,that I built with my husbands help,I could not find a one piece cushion in my area but, I did manage to find individual cushion.I am no expert , but I am learning as I go.

Estimated Cost
about 100 dollars
Estimated Time Investment
Weekend Project (10-20 Hours)
Recommended Skill Level
Starter Project

Comments

Play Kitchen

My Dad and I built this for my daughter's third birthday. It's been a big hit! I'm really happy with how it turned out.

Estimated Cost
$250
Estimated Time Investment
Week Long Project (20 Hours or More)
Recommended Skill Level
Intermediate

Comments

A Little Longer

I followed plan but added 20 extra inches and an extra woven insert plus an extra brace in center of seat.

Built from Plan(s)
Estimated Cost
Roughly $60
Estimated Time Investment
Week Long Project (20 Hours or More)
Finish Used
Coloured wood stain
Recommended Skill Level
Intermediate

Hall Tree minus rustic X

I followed the Rustic X Hall Tree plans almost entirely. I chose to replace the “X” with vertical posts, though I may use the X in a future project. The bench top is two 1” thick oak boards milled at my farm. Love the contrast of the white and stained oak. The plans were perfect!

Built from Plan(s)
Estimated Time Investment
Weekend Project (10-20 Hours)
Recommended Skill Level
Intermediate

Comments

Modern Farm Table

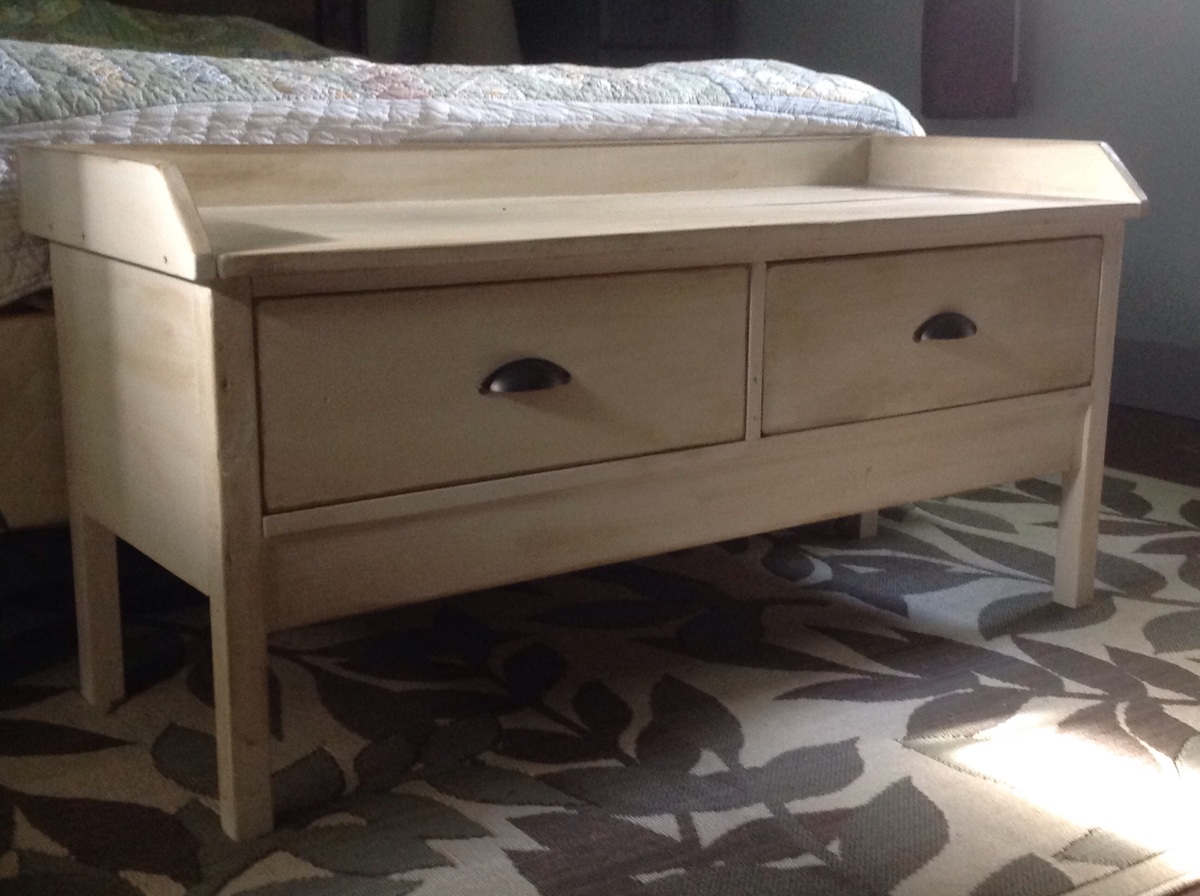
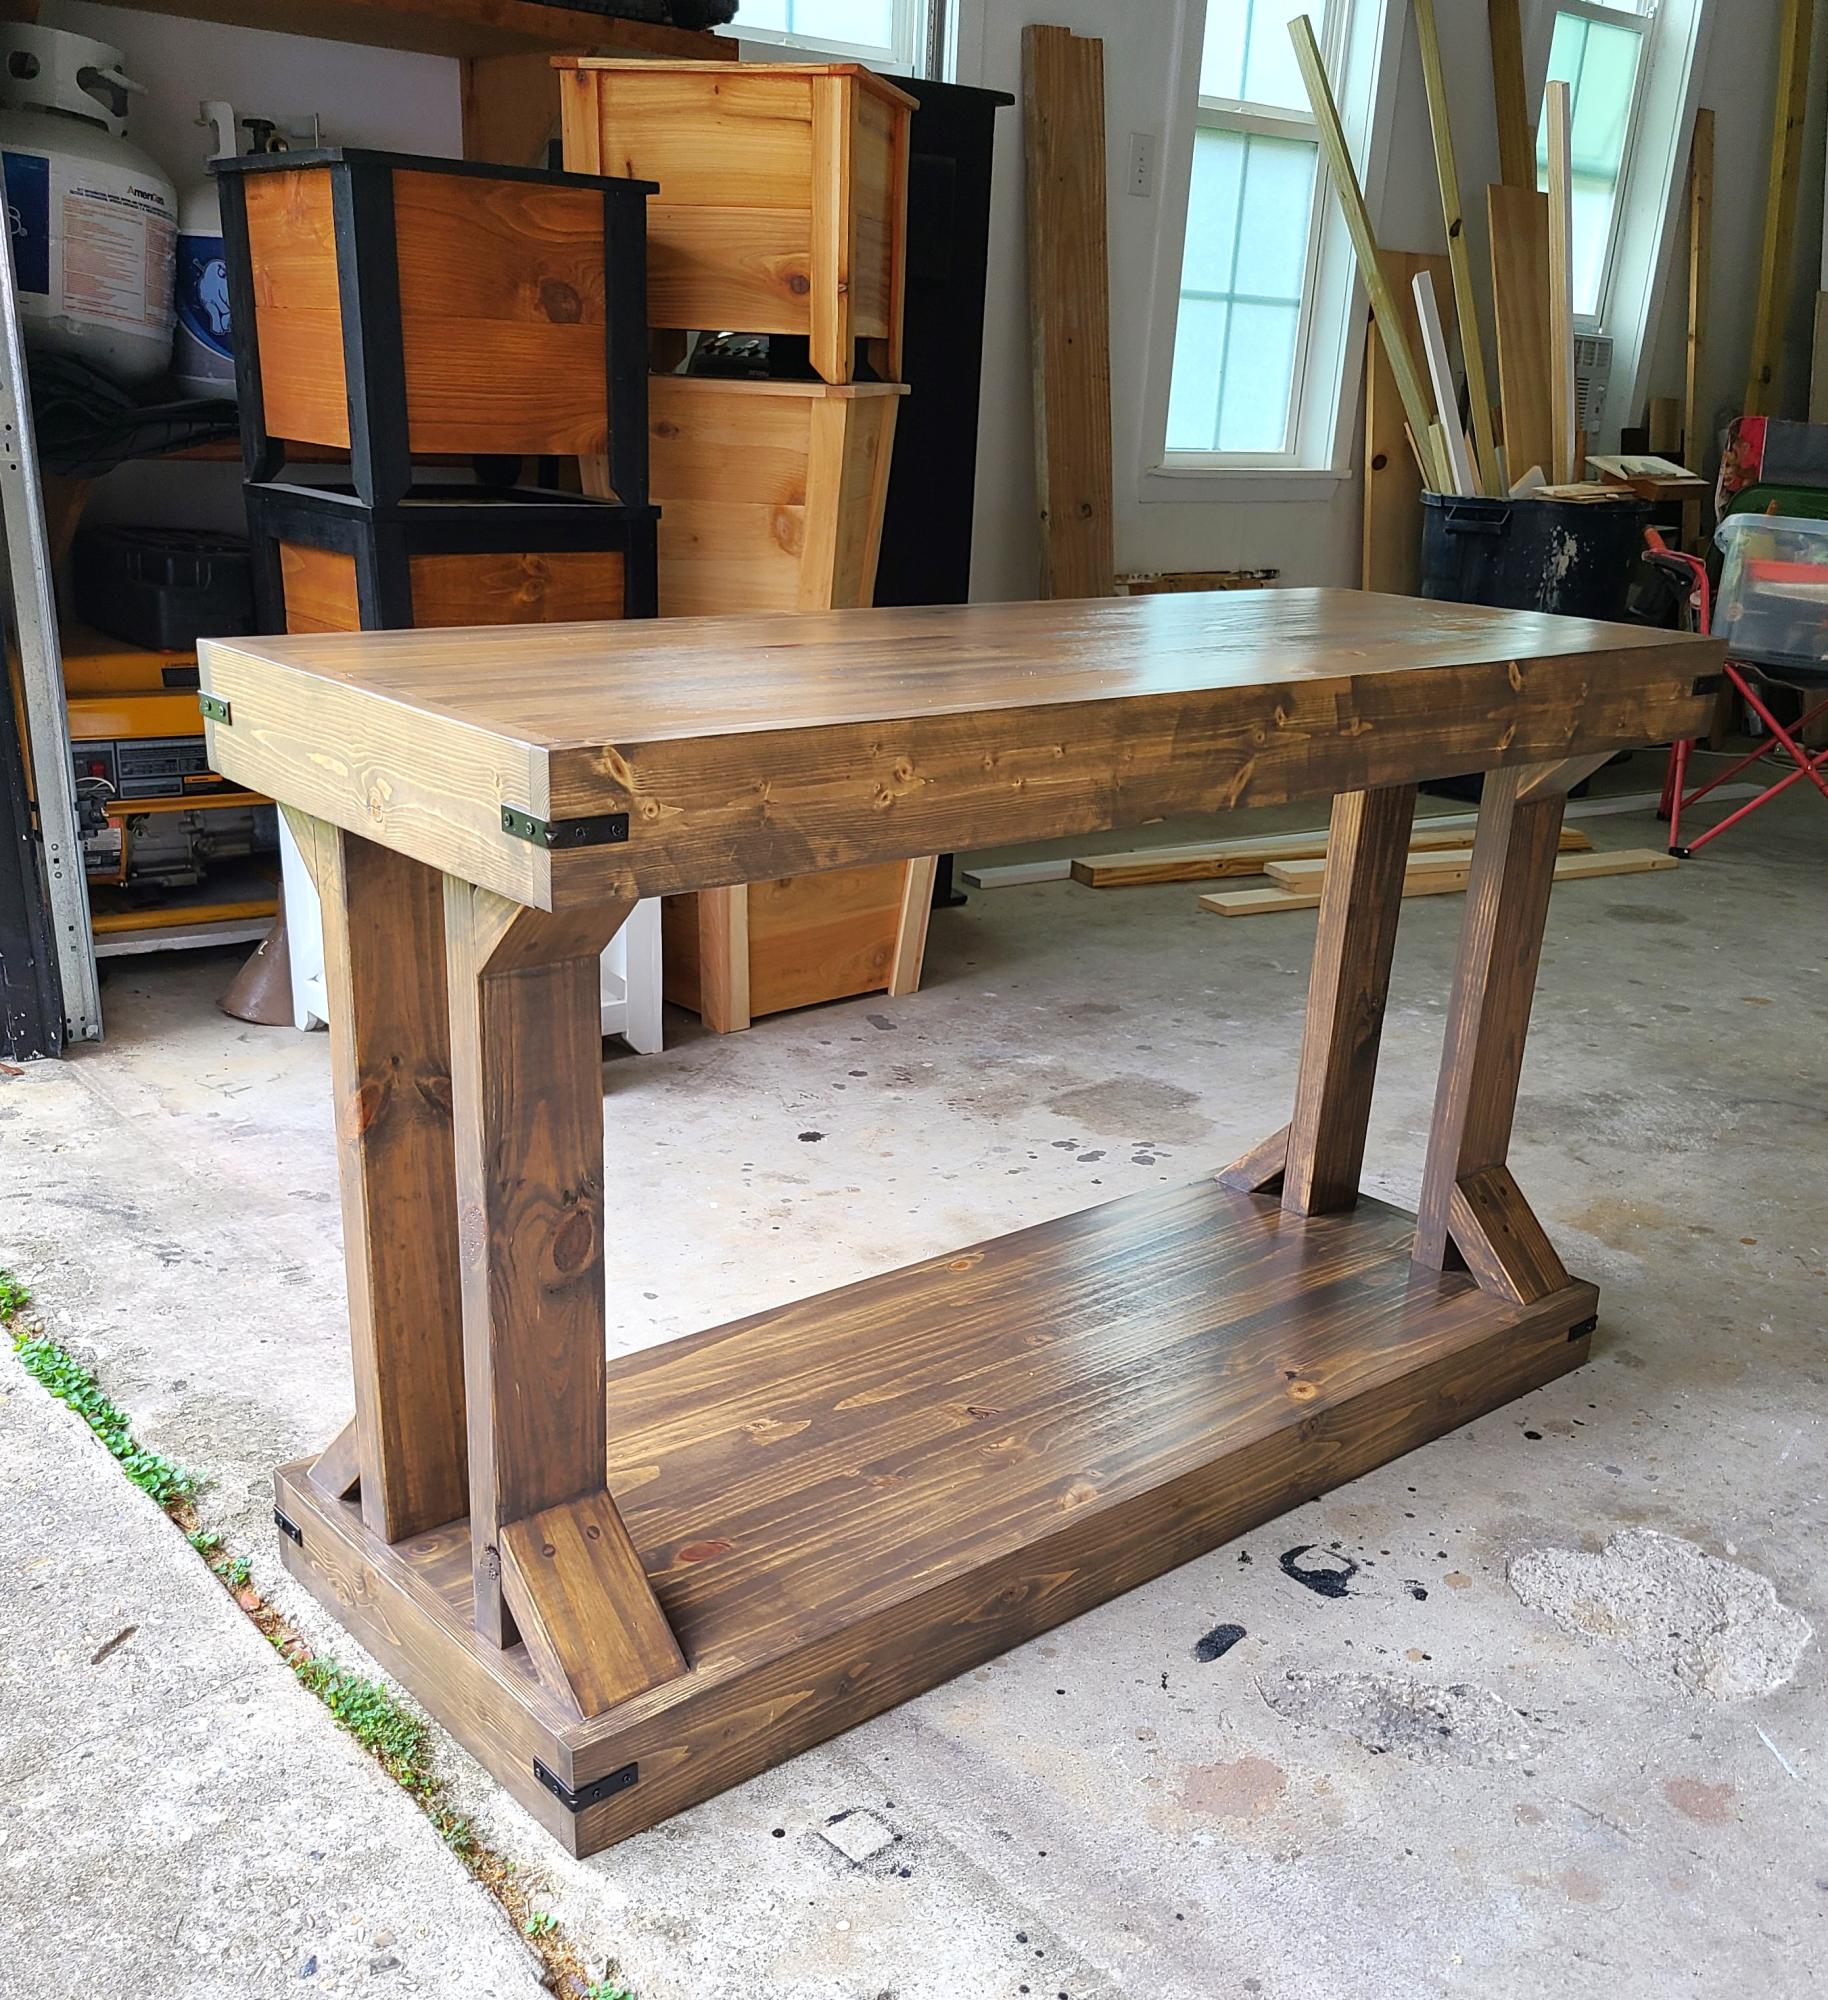
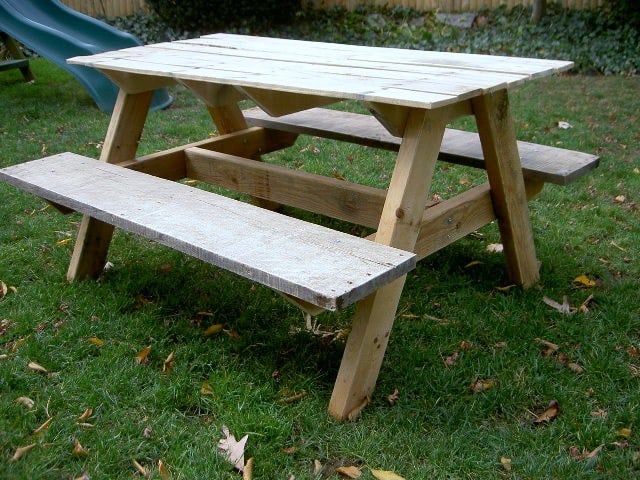
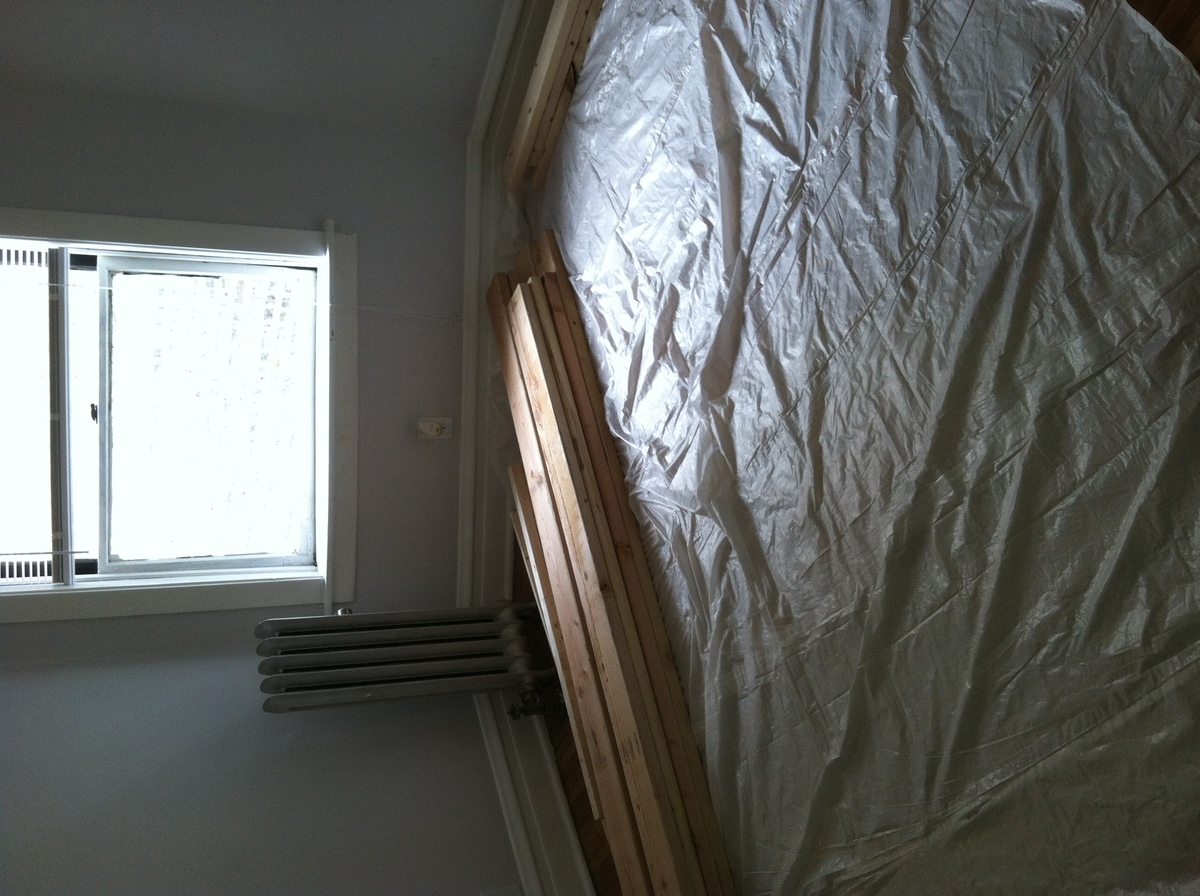
After spending weeks lurking on the site, I decided to go for it. I have no real experience doing this sort of thing, so everything was a learning experience. I had to invest in a lot of tools but the materials only cost about $100 ($50 in pine from local home store + ~$50 in other materials).

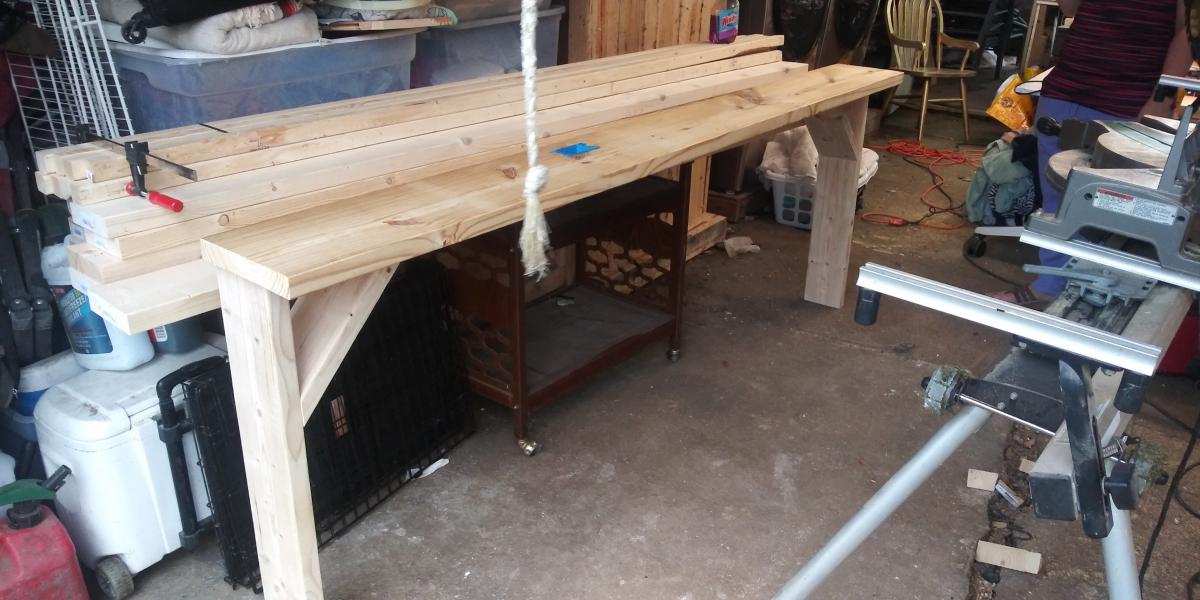
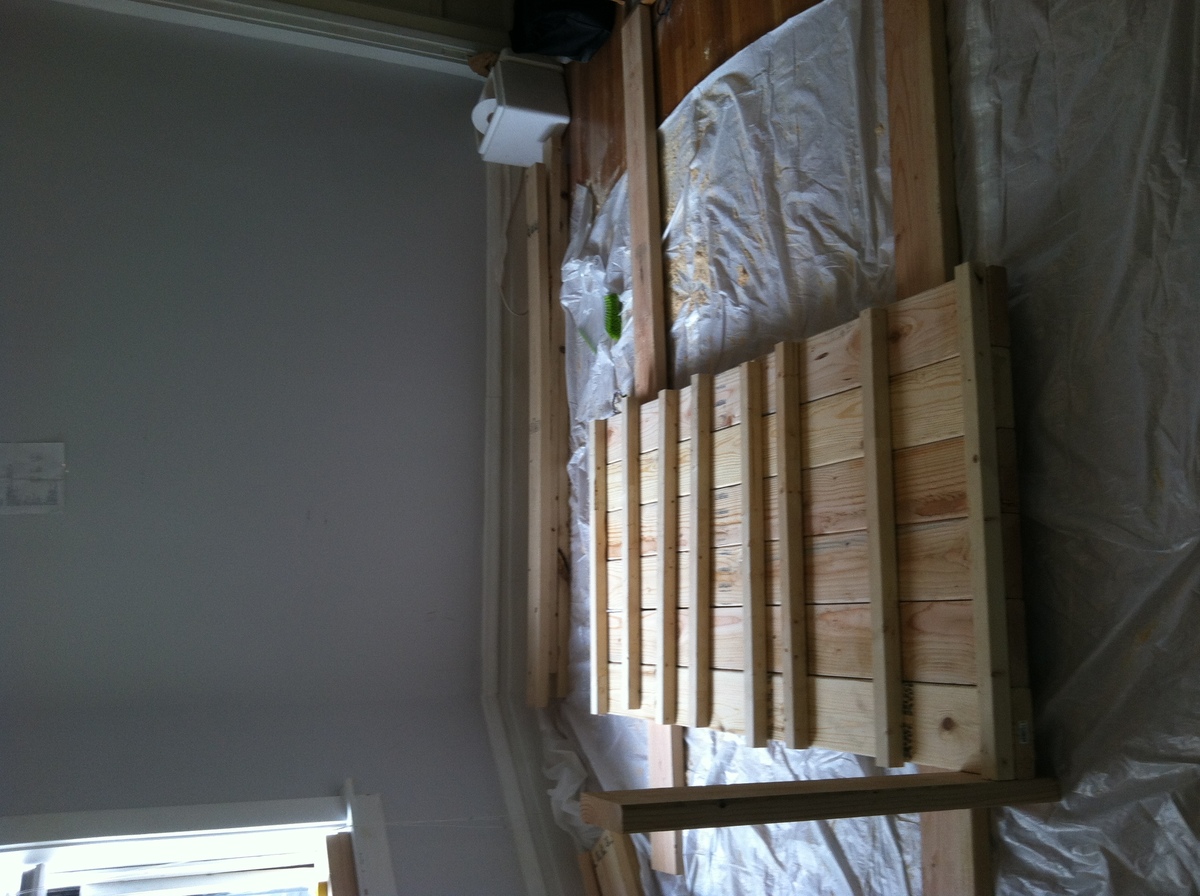
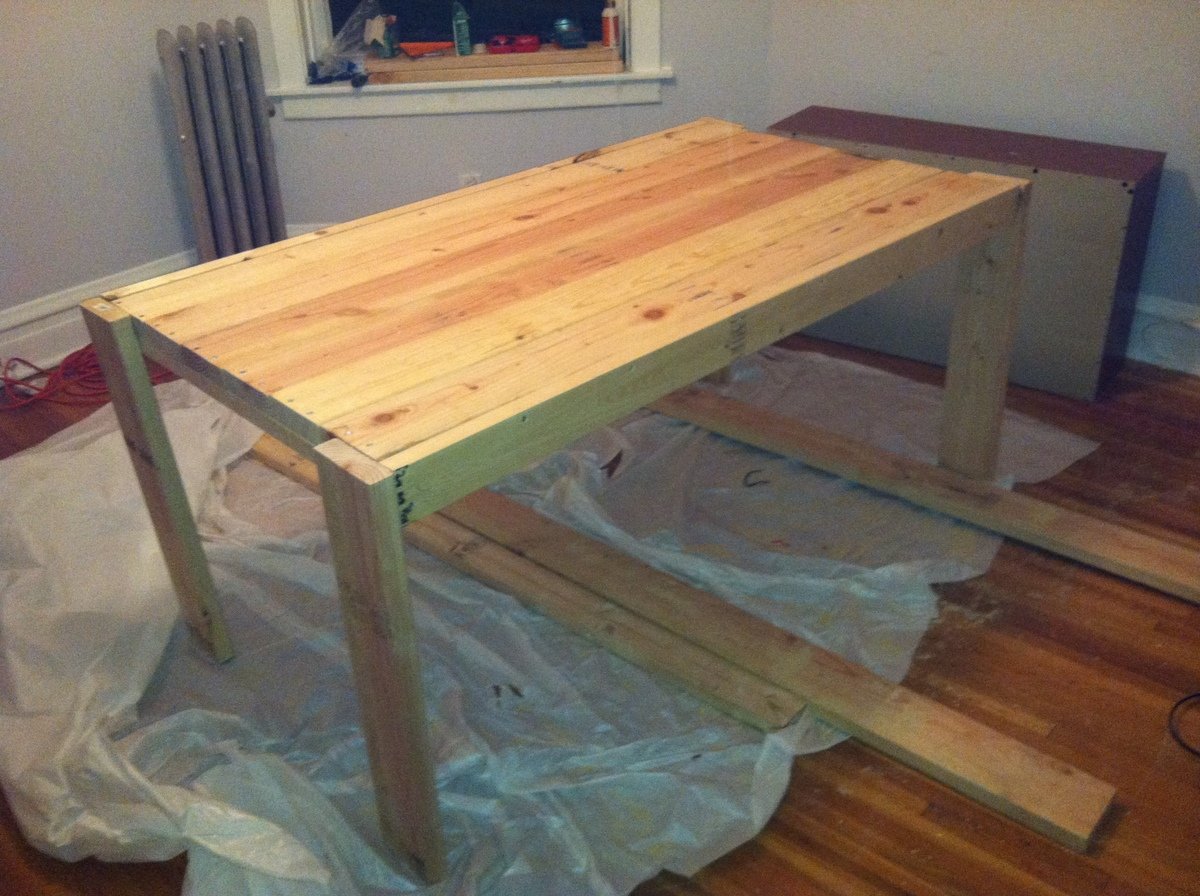
I live in a small apartment, so my workplace was less than ideal. I did a lot of sawing and sanding in the space you see so I made a HUGE mess, but I didn't really have any other choice.

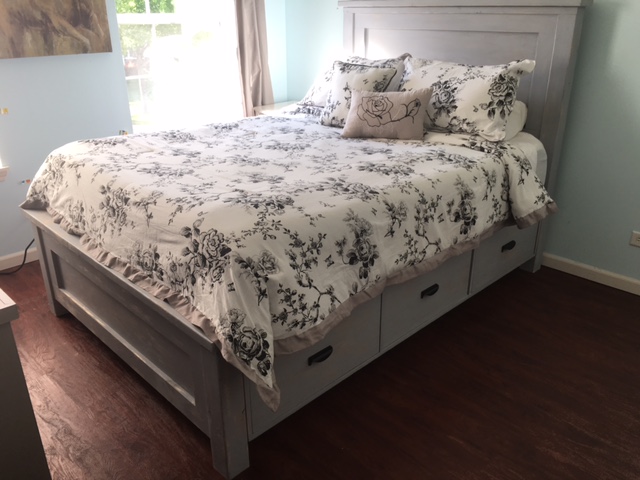
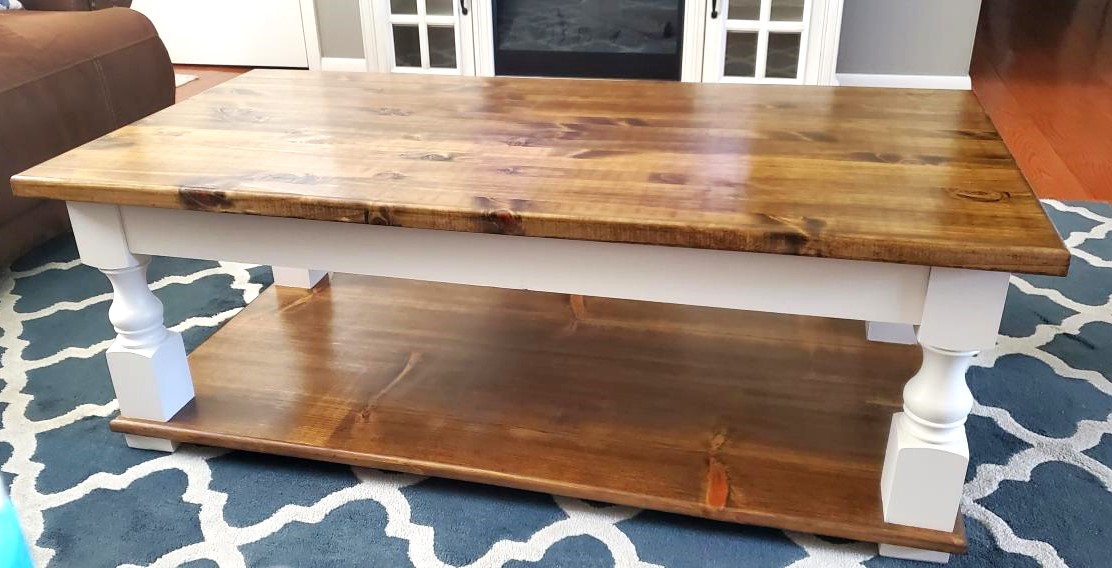
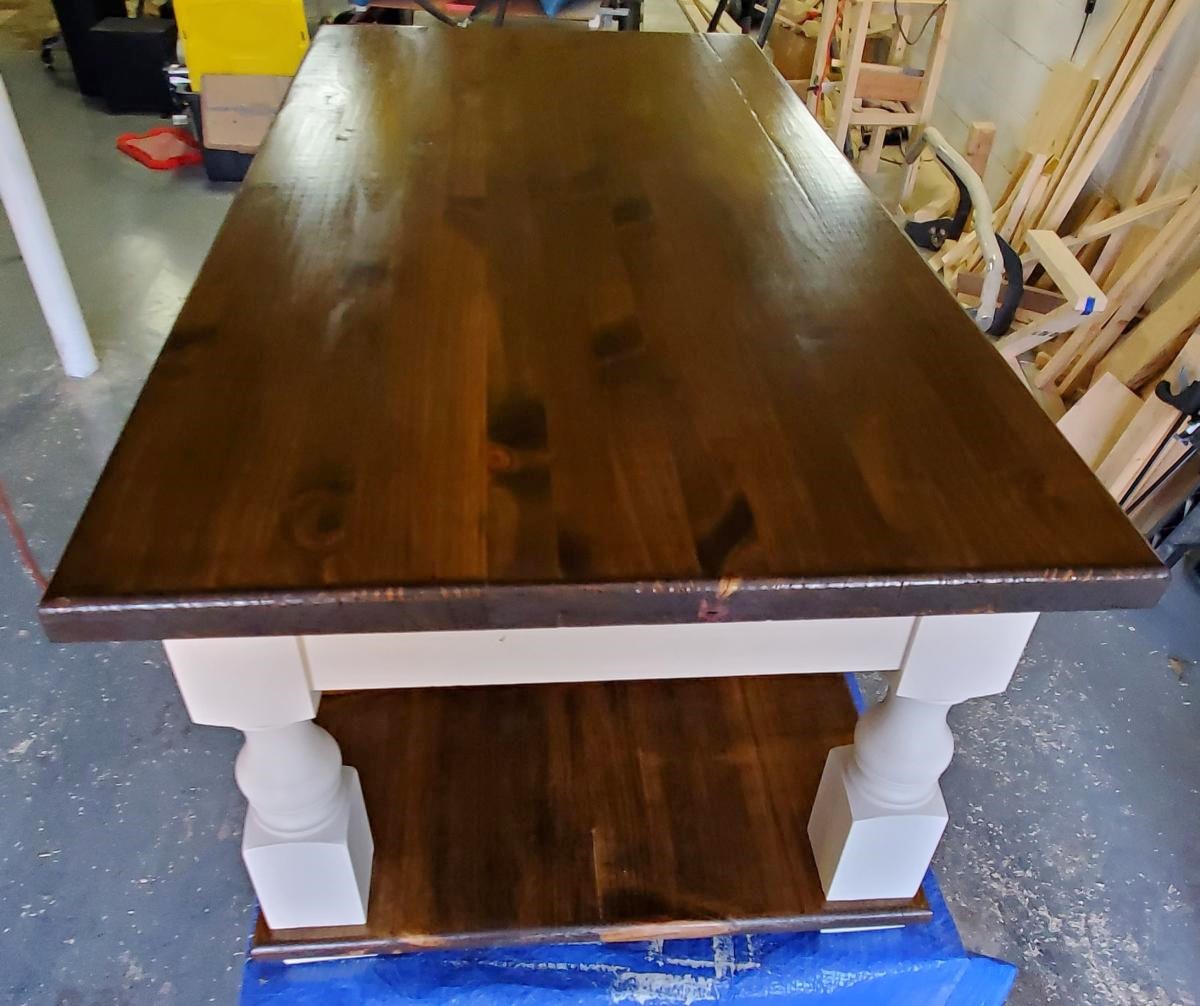
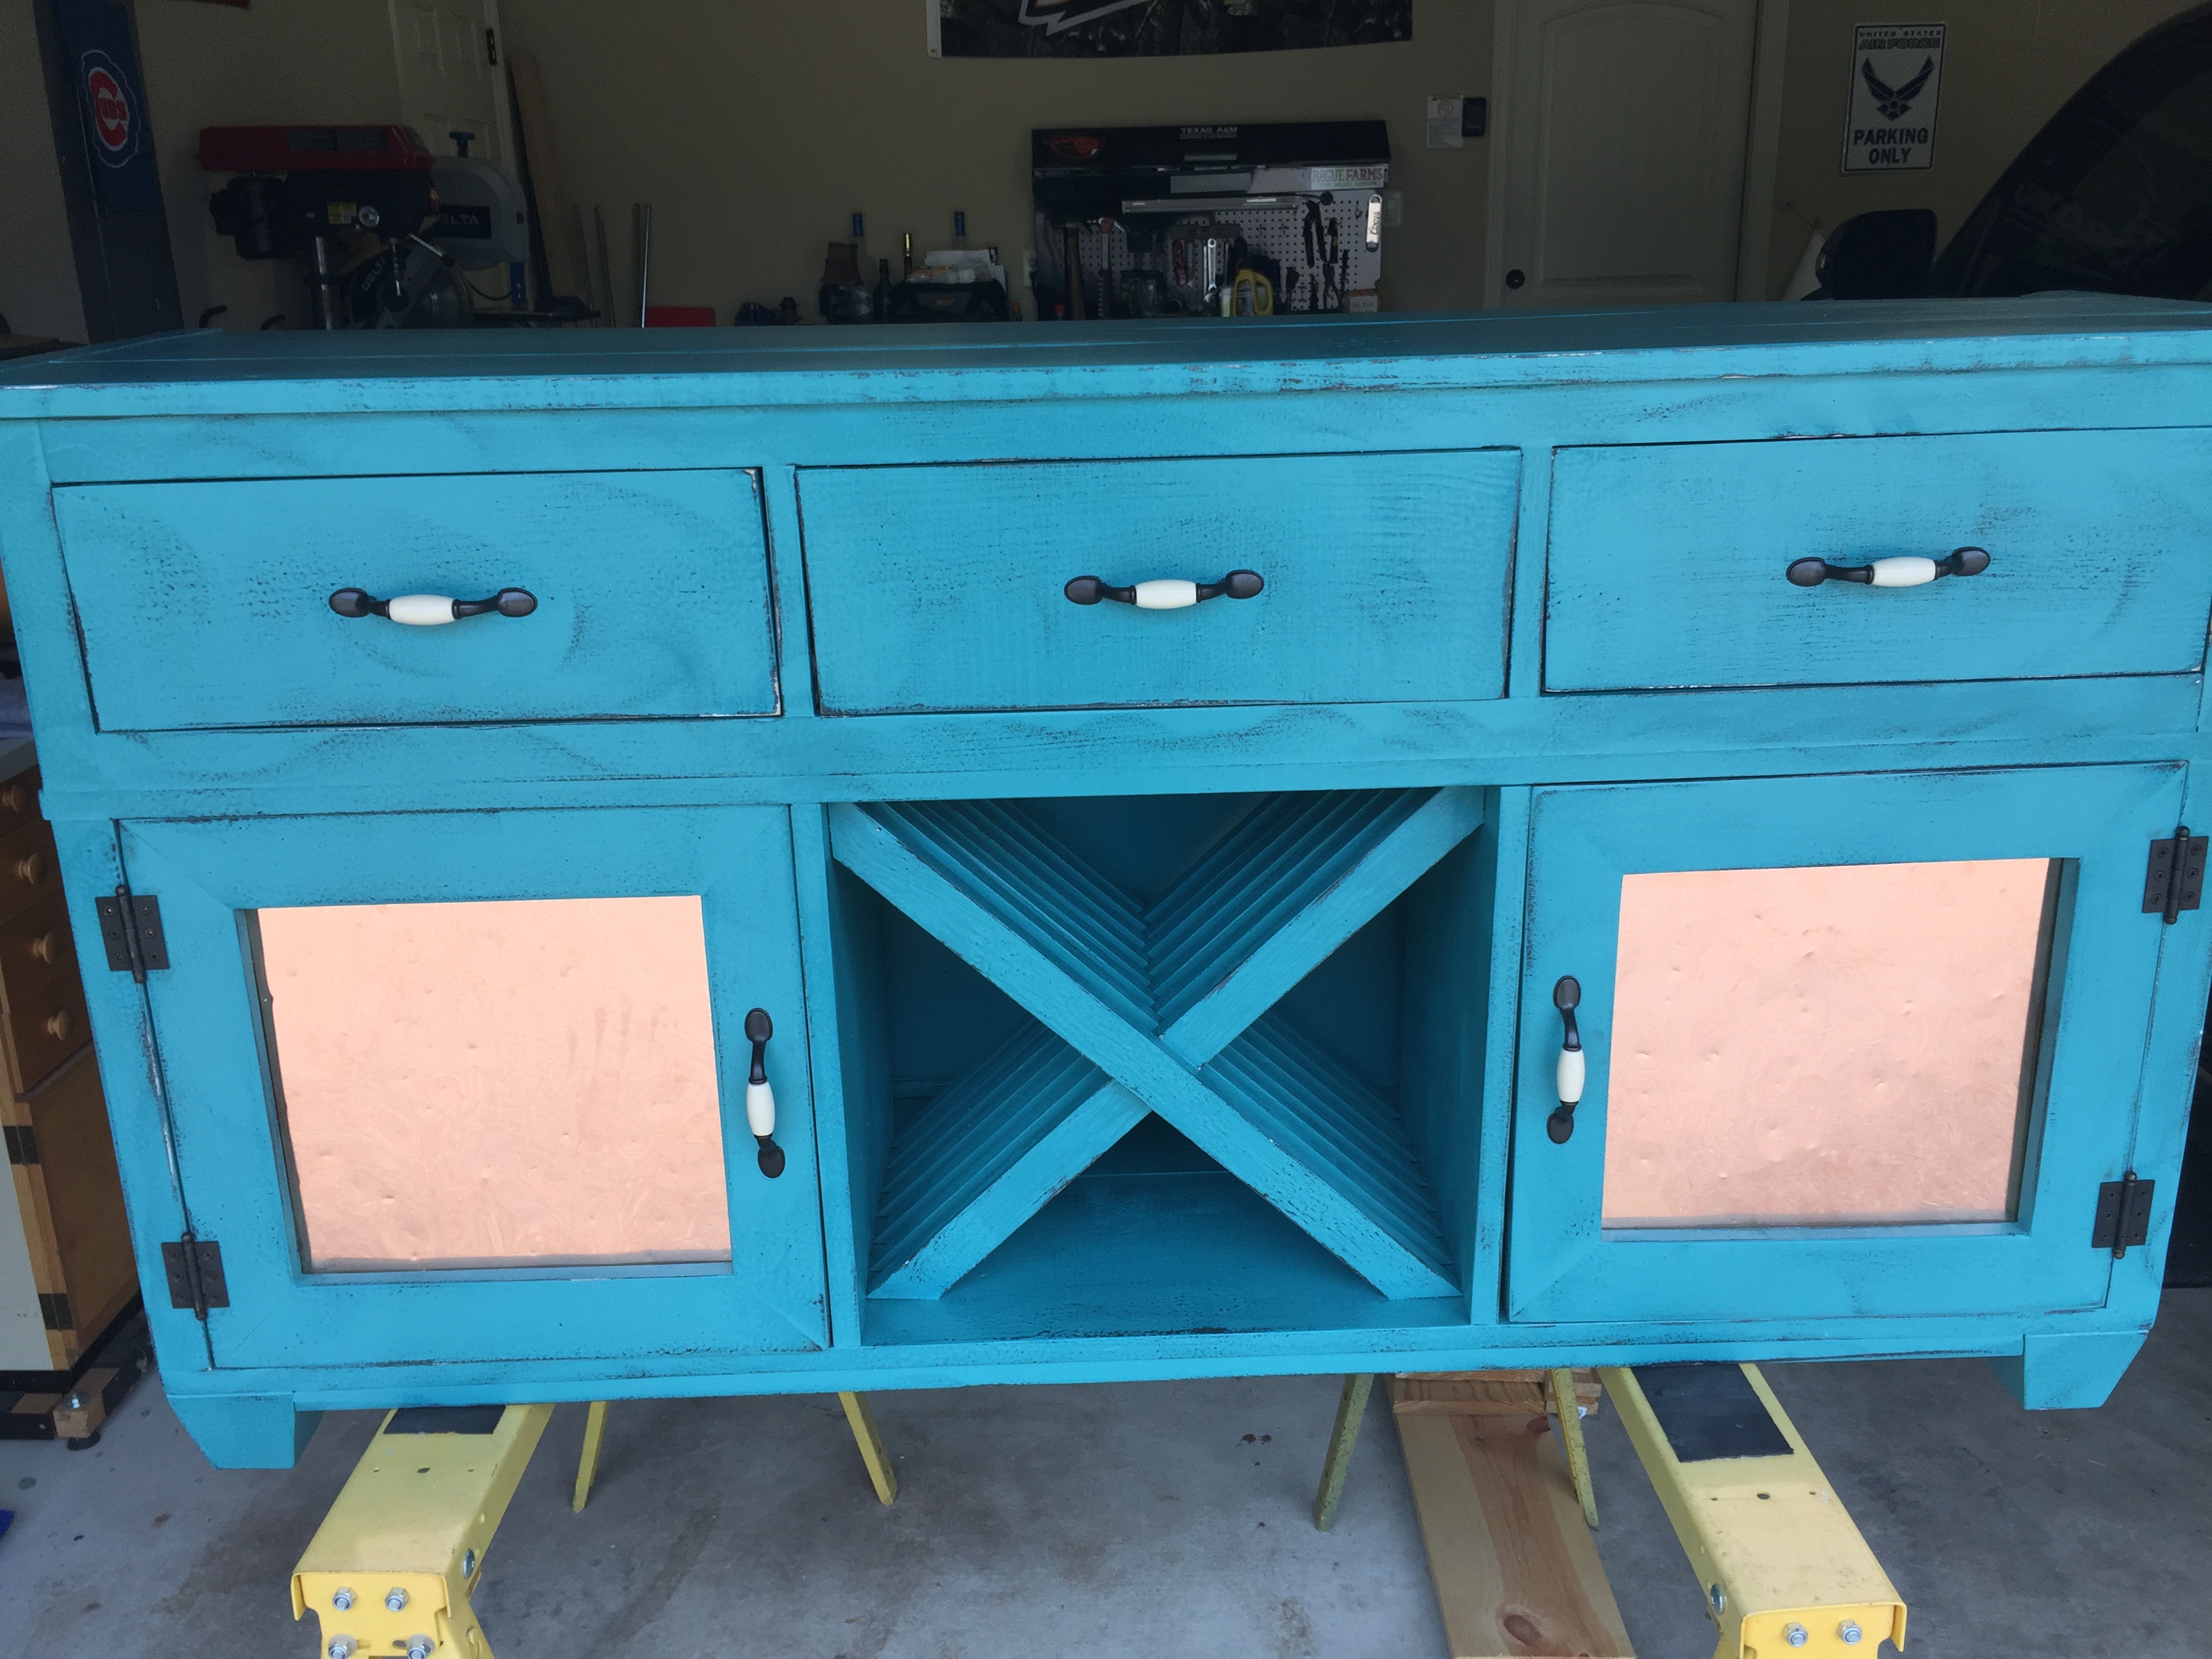
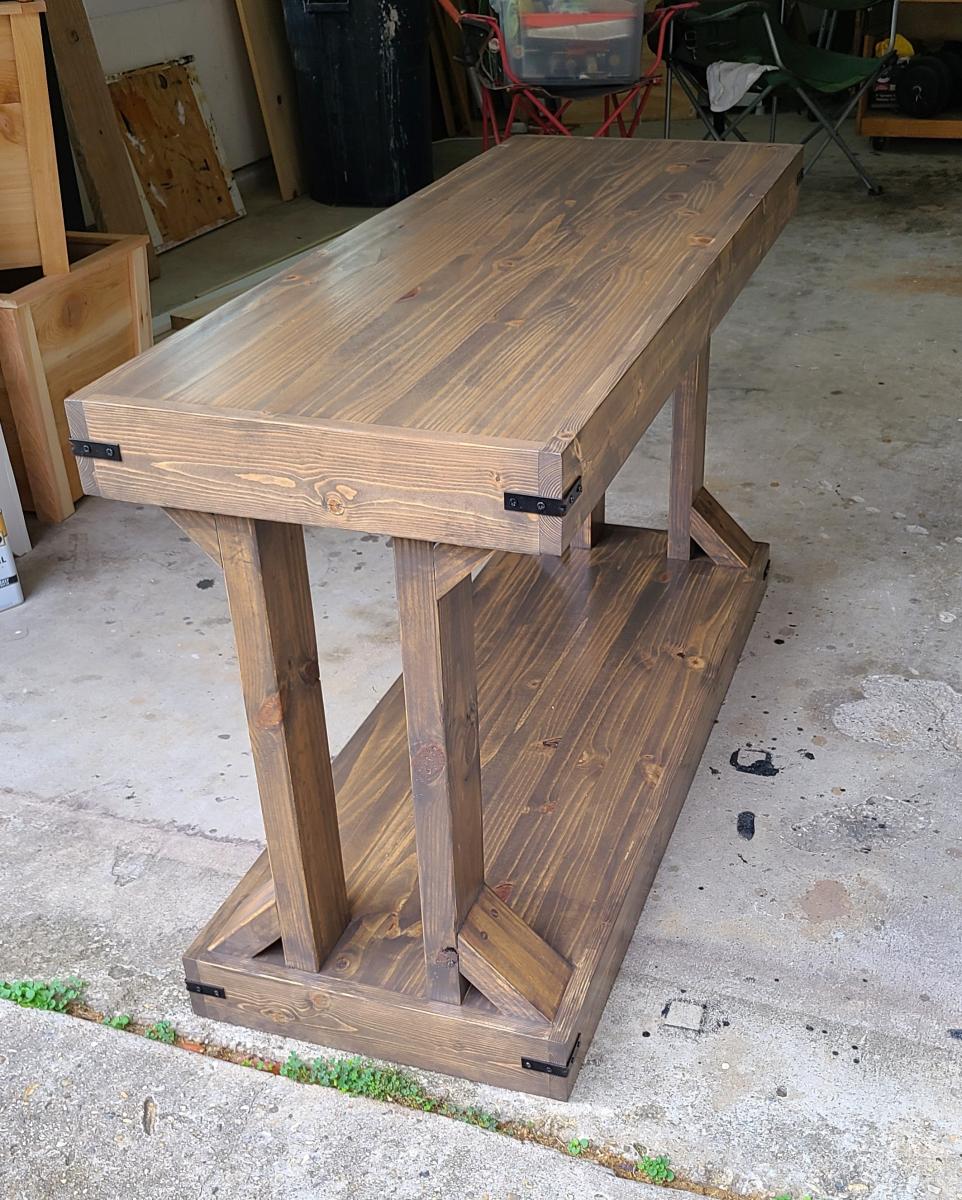
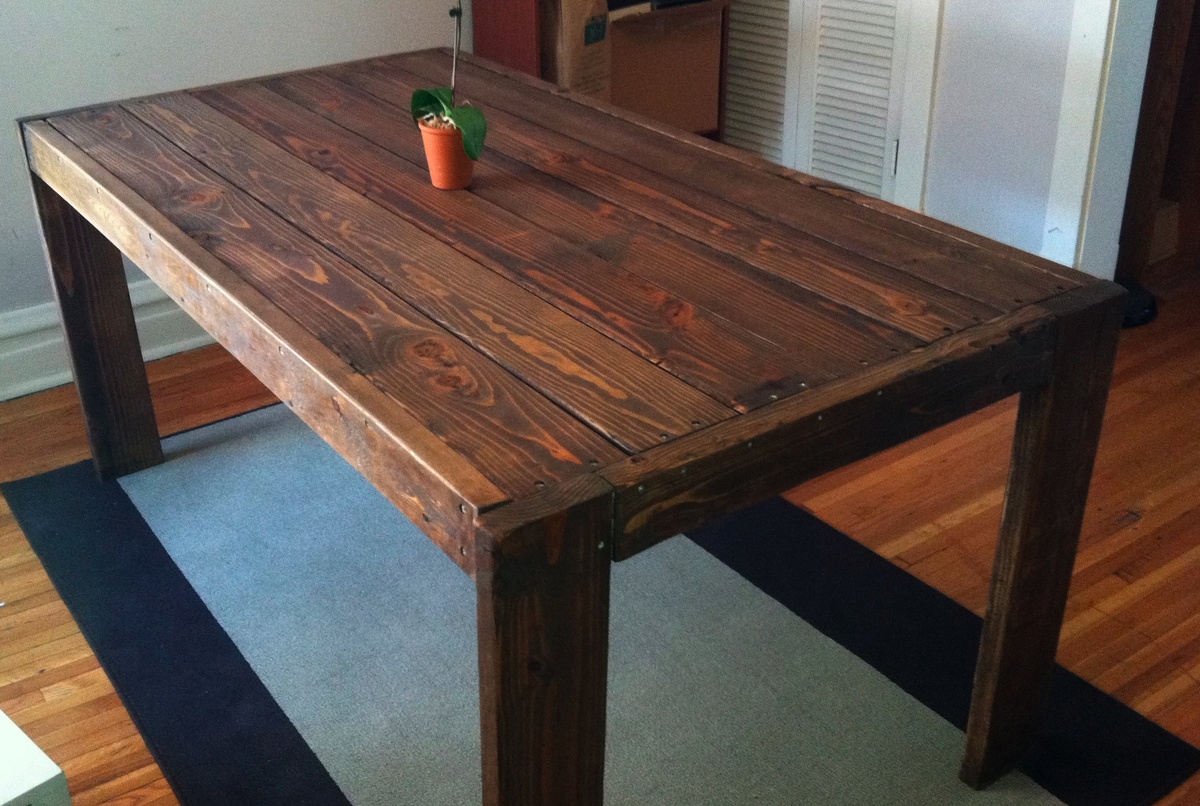
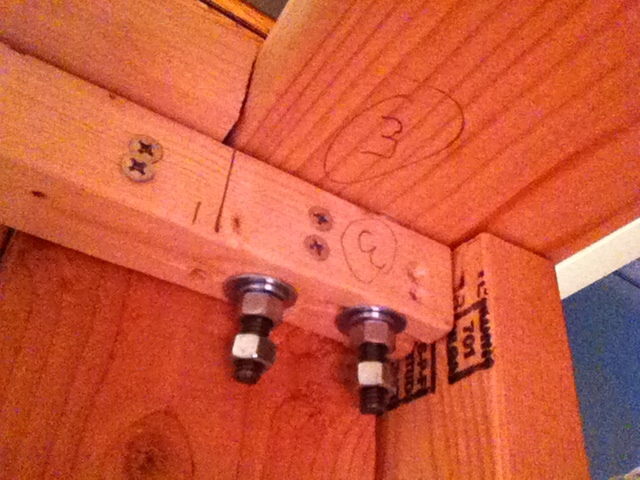
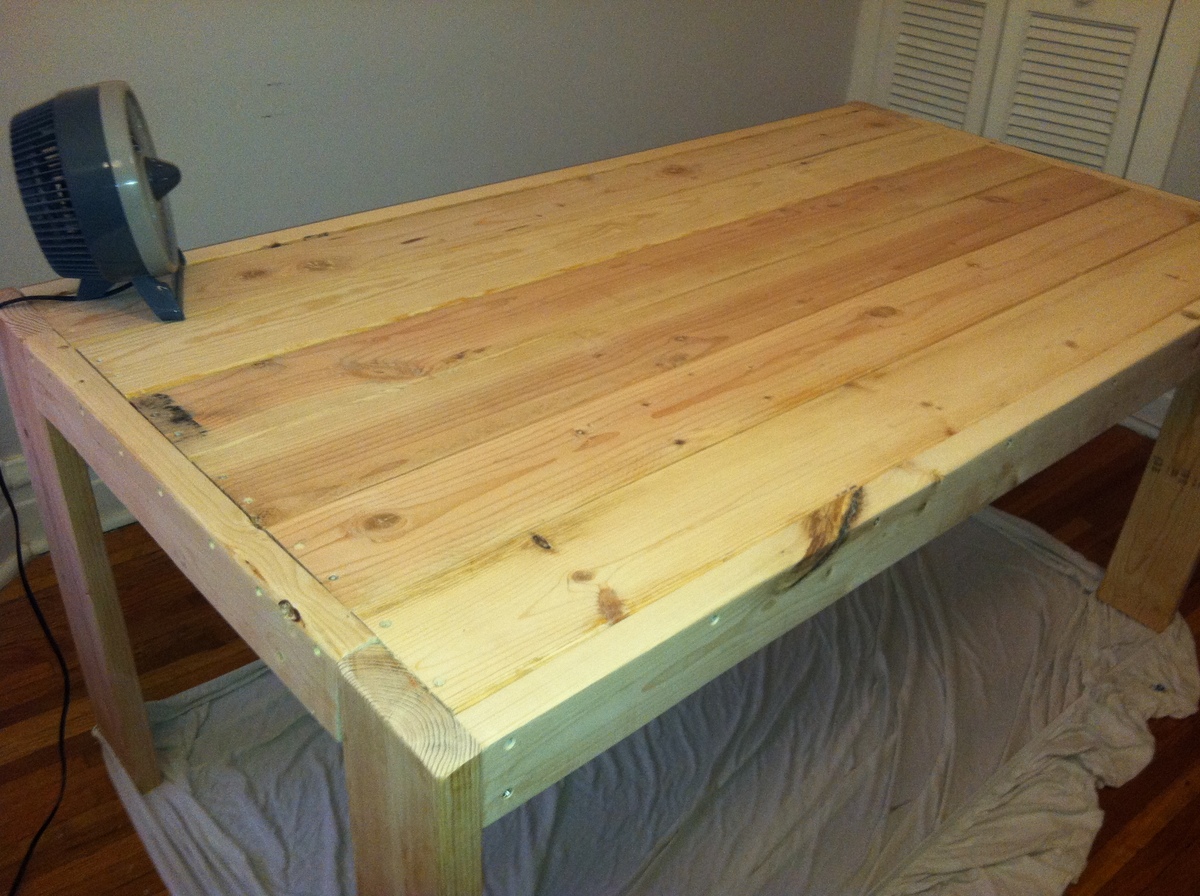
I'm really pleased with the outcome. It isn't perfect, but it doesn't have to be. There are gaps in the planks on the table top, but I can live with it. I didn't follow the plans exactly in order. I built the table top first which allowed me to add removable legs for when it comes time to move. Instead of screwing the legs, I hung hanger bolts and did a nut/bolt setup (as I type this, I realize this was not a necessary step - I could have bolted the legs instead of screwing them in per the stepwise instructions, which would have been easier. Alas, what's done is done!). The picture shows two sets of nuts per bolt, but this is only because I had extra bolts and this ensure that I don't lose them.

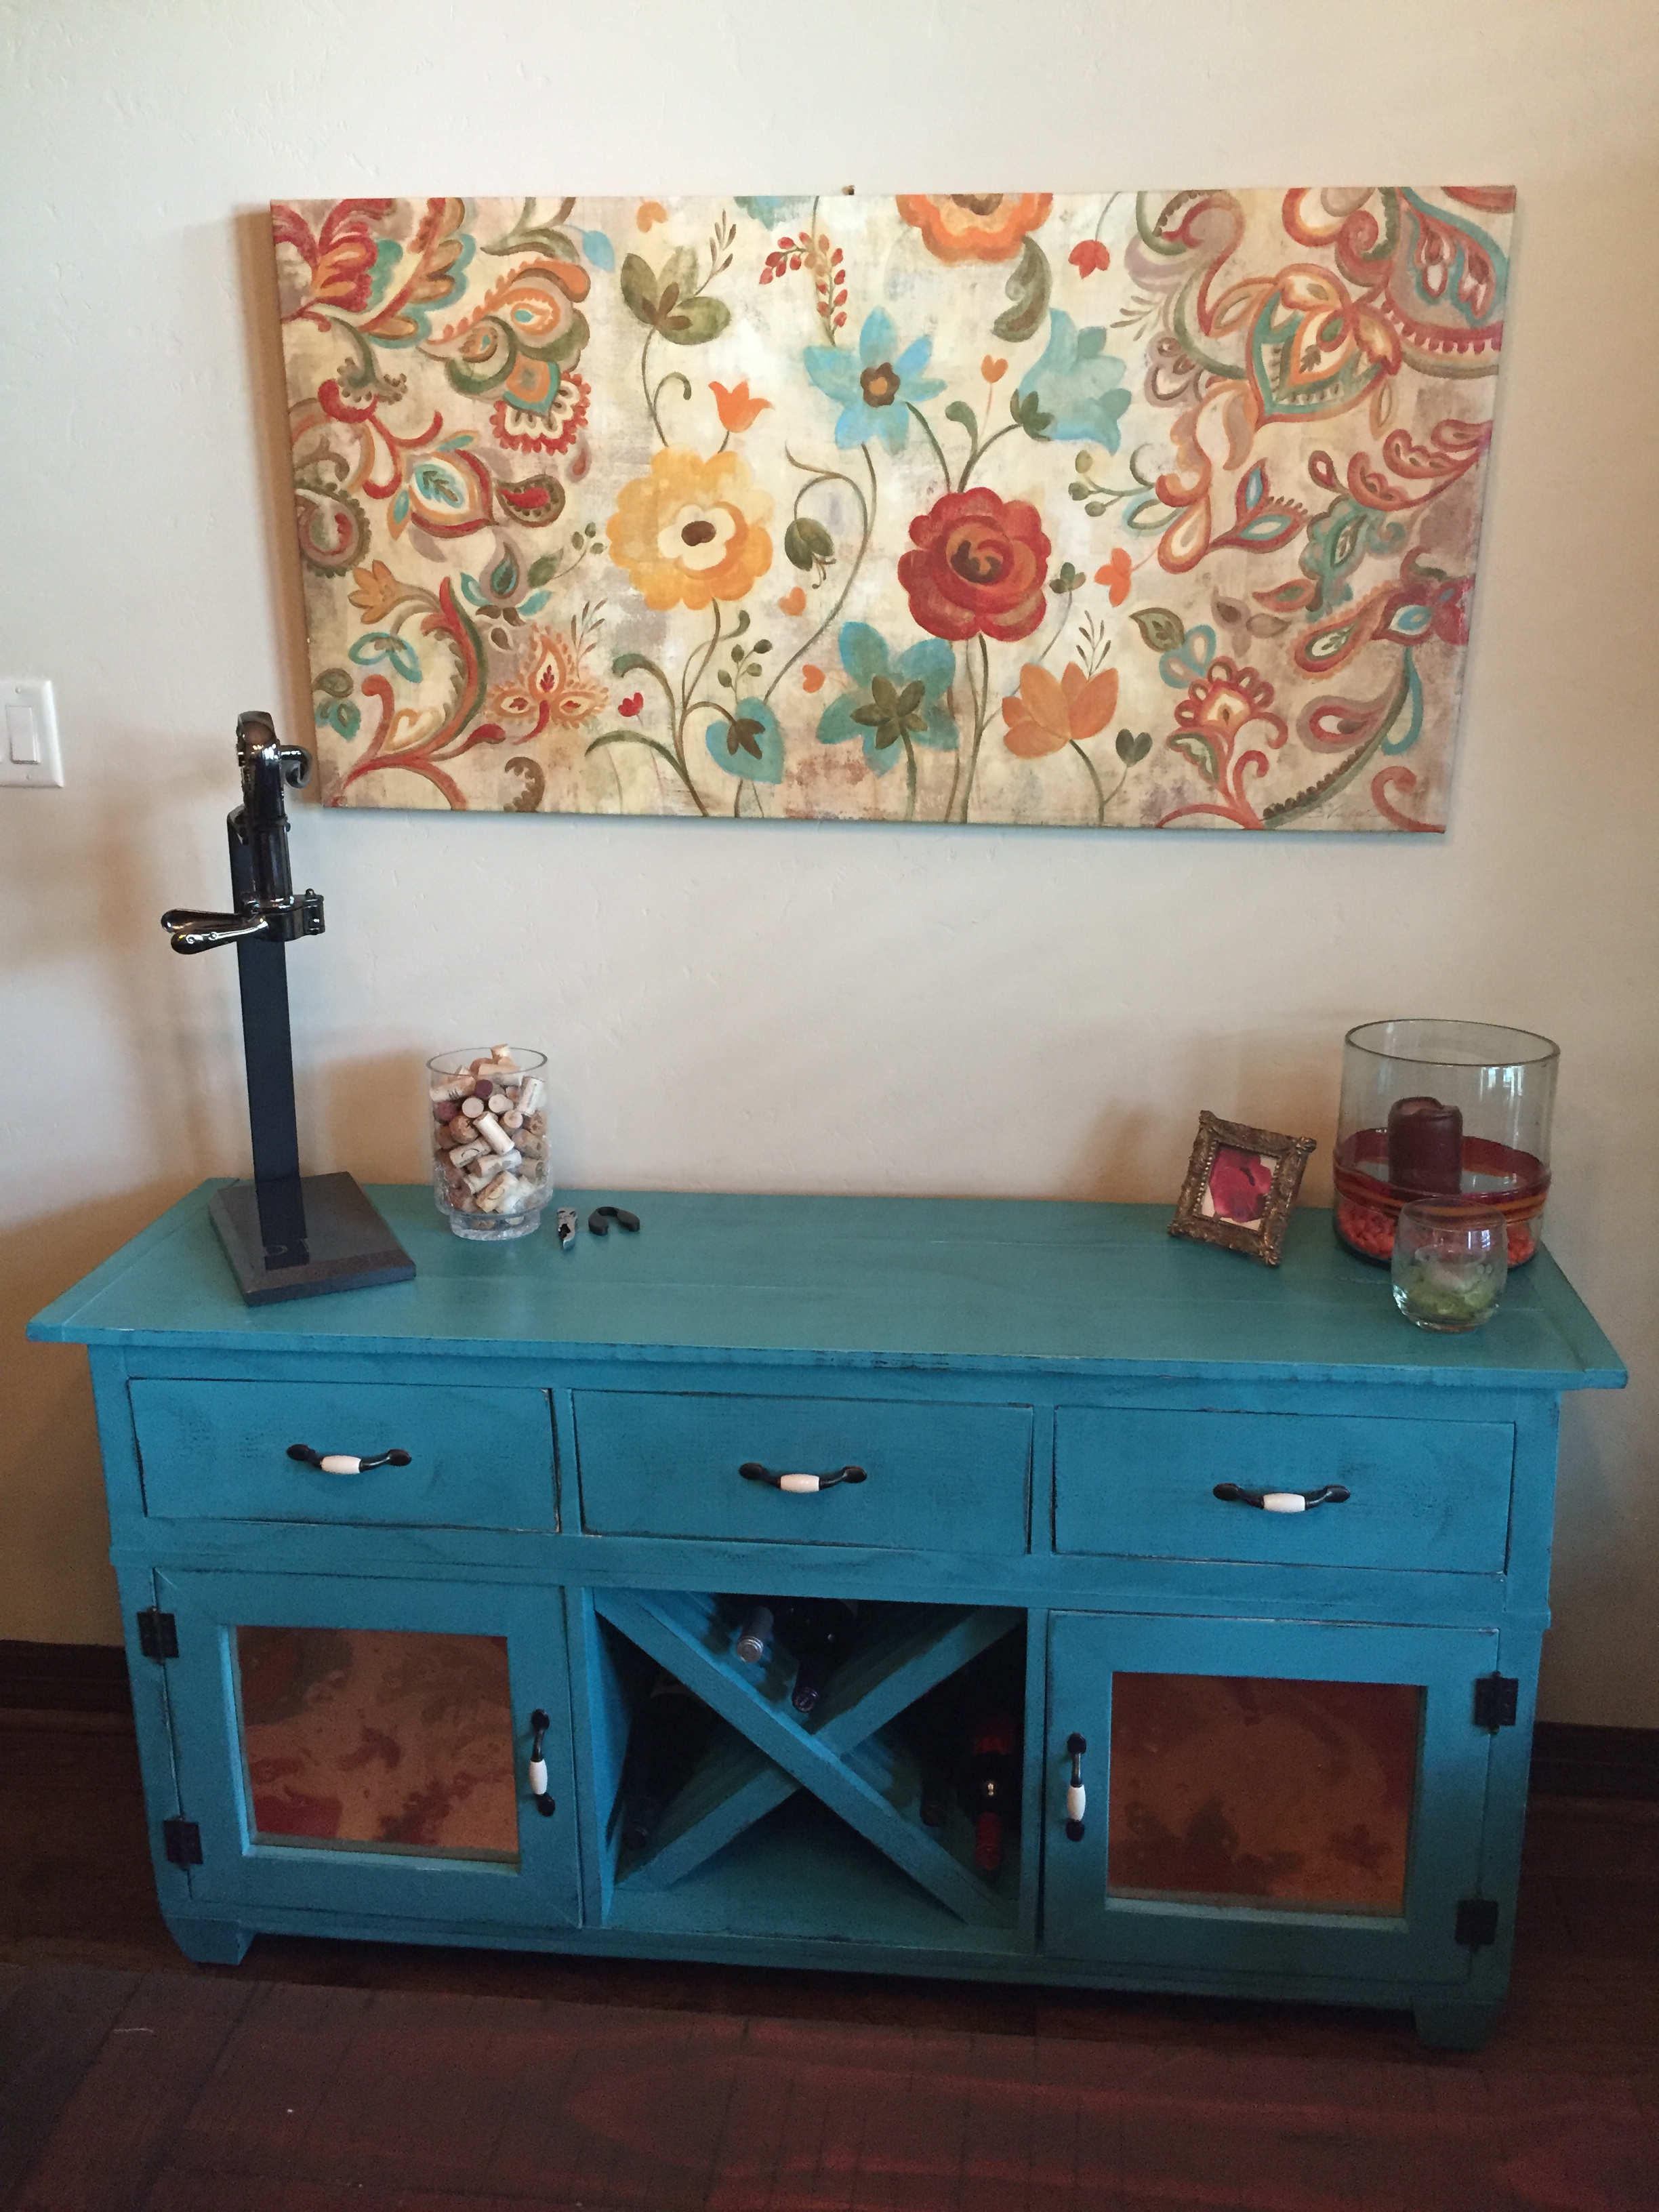
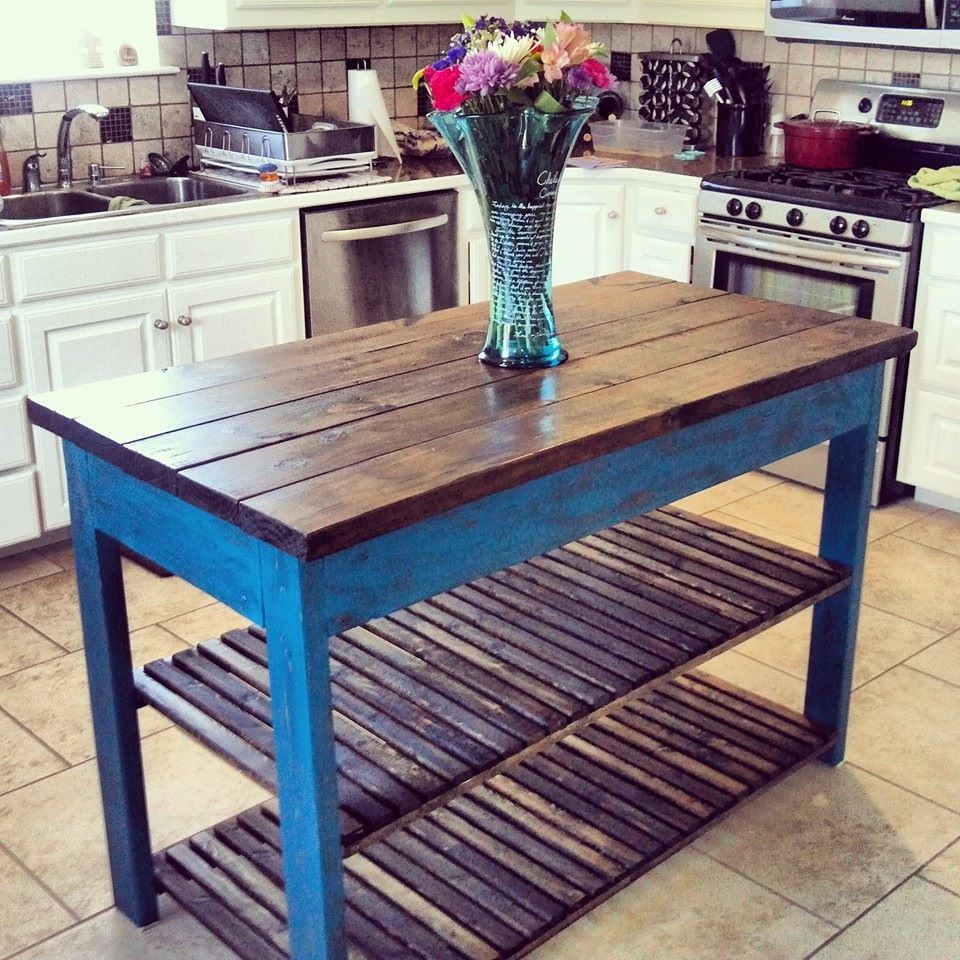
I plan on finishing with a polyurethane and building the benches but that will be in the future. My advice to anyone on the fence is to just do it. It's easier than you think and if it doesn't turn out exactly perfect, no big deal. My project goes to show that even with a tiny Chicago apartment, as long as you're willing to make a mess, it can be done. Good luck, thanks for reading!

*sorry my photos are aren't right-side-up - just tilit your head :)

Built from Plan(s)
Estimated Time Investment
Weekend Project (10-20 Hours)
Finish Used
Mnwx Golden Oak + Dark Walnut
Recommended Skill Level
Beginner

Comments

Distressed Paint Kitchen Island

Submitted by JD Corey on Thu, 03/20/2014 - 12:52

This is the Kitchen Island I built for my wife. I painted it in my wife's favorite color and gave it a distressed look that matched the stained wood counter top. This was also my very first Ana White project... The plans were easy to follow and I had a lot of fun building it.

Built from Plan(s)
Estimated Cost
110
Estimated Time Investment
Weekend Project (10-20 Hours)
Finish Used
American Walnut Stain
Recommended Skill Level
Starter Project

Comments

michigulla

Fri, 11/21/2014 - 23:38

Hi there! This kitchen island is beautiful!! Can you tell me what paint and color you used, as well as what finish and how you distressed it?? I love it!!

Back