Community Brag Posts

Wedding Panel

Submitted by brittanyj on Wed, 06/10/2015 - 08:40

So glad to finally make this beautiful panel wall art for a friend for her wedding. The last name is Iverson, so the tree stood in for the I. I made it on cedar pickets ripped in half and sanded, kona stain, then designed my tree/lettering/birds in Cricut, cut it out, and painted. Can't wait to give it to her!

Built from Plan(s)
Estimated Cost
$2
Estimated Time Investment
Afternoon Project (3-6 Hours)
Finish Used
varathane kona, spray clear top coat, acrylic paint and markers
Recommended Skill Level
Beginner

Farm Table w/ Pocket Holes

I did a few thing different than the plan calles for. I used kiln dried douglas fir 2x8's and ripped them to remove the rounded mill edge. For the stretcher I used 4x4 rather than the 2x4. Where the bread board is attached I put a very small bevel at the joining edges of the bread board and table to create a visual distinction.

Estimated Time Investment
Week Long Project (20 Hours or More)
Finish Used
Minwax Espresso stain and Minwax Helmsman Spar Urethane
Recommended Skill Level
Intermediate

Outdoor Pine Canopy Daybed

Submitted by evilmom on Sun, 05/01/2011 - 14:01

This is my first venture into woodworking/carpentry. Since I did not want to shell out too much money for lumber, I used untreated pine (worst wood they say to use) for the daybed and used an exterior wood stain (with uv protection) to seal the wood. I also did not invest in power tools and used a hammer and wood saw to cut and nail everything together. As I cannot sew, I waterproofed the mattress by sandwiching it between two plastic mattress covers (dollar store) and duct taping the seams. It's not elegant but no one is going to see it. I used a cotton fitted twin sheet (old one) for the cover and found some outdoor pillows for $16 a pair ($8 per pillow and made with solarium fabric). Also as this is placed outside (deck), I'm looking into getting a mosquito net to use over the daybed instead of the bed tent I have on right now.

In hindsight, I should have used pressure treated wood for the posts and canopy beams to prevent bending/twisting (I had to re-do 2 posts). If I get 3 years of use for this furniture. I'm a happy camper. Ana, thank you so much for the plan. Kathy thanks for the advice on painting the lumber first.

You guys can do this!

Estimated Cost
$70 for the lumber, $ 40 for stain, sand paper, nails, wood glue, $4 for mattress cover, duct tape
Estimated Time Investment
Week Long Project (20 Hours or More)
Finish Used
Olympic exterior wood stain with UV protection (oil based).
Recommended Skill Level
Intermediate

Rustic X End Tables

Submitted by BeauKSU on Mon, 06/15/2015 - 09:46

I made one table following your original plans and it turned out great! The top is American Walnut Polyshades from Minwax (stain and poly in one), topped off with paste wax. The bottom is just regular white paint that we had lying around the house. The plans were easy to follow and introduced me to the Kregg Jig. How did I ever live without it?! Thanks for posting them for everyone to see, we're so happy with how they turned out!

Built from Plan(s)
Estimated Cost
$70 per table
Estimated Time Investment
Weekend Project (10-20 Hours)
Finish Used
White pain on bottom and Minwax Polyshades - American Walnut on top, finished with paste wax.
Recommended Skill Level
Intermediate

Book shelf with reading nook

Submitted by Knathu121 on Fri, 01/05/2018 - 20:24

I made this book shelf with a reading nook for my daughters nursery. I found one you can buy online for $250 and decided I could make it for much less. I used 1 x12’s and the cushions were made by my mother and grandmother. All together it cost about $65 to make. 

Estimated Cost
$65.00
Estimated Time Investment
Afternoon Project (3-6 Hours)
Recommended Skill Level
Beginner

Comments

Ana White

Sat, 01/06/2018 - 11:41

This is adorable!  I love the entire room!

We've had a couple of people ask for plans.  If there aren't any available, would you be willing to let us draw some plans up from your photos?  Thanks! Ana

Knathu121

Sun, 01/07/2018 - 09:11

I don’t have my cut list anymore but rough dimensions are as follows;

height - 23.5” 

width 44.5

depth- 12”

I tried accounting for the width of the wood in order to make each square on the bottom 10x10 and the 2 middle shelves to be 12 inches high and the bottom on the middle shelves to be 10” wide. I wanted to have at least 20” for the seat while also having 2 wide enough shelves at the top to be able to put things. Sorry but I don’t have the angles of the 2 side walls for the sitting area. I know that’s a pretty rough explanation but with the things I’ve seen you make I’m sure you can make do!


Knathu121

Sun, 01/07/2018 - 15:43

I don’t have my cut list anymore but rough dimensions are as follows;


Height - 23.5”

width 43.75”

Depth - 12”


I tried making dimensions to account for each box on the lower level to be 10x10 and the boxes in the middle to be 12” high and 10 inches wide. I wanted the seat to be at least 20” but I miss calculated the angle cut length and my seat is less then 20”. I can’t remeber the angle I used for the walls (sorry!) but I wanted to make sure that the top shelf was wide enough to put stuff on it. I know this is a rough explanation but based on the incredible stuff you make I’m sure you can work it out and make some pretty awesome plans!

Farmhouse Bed- Queen Sized - Self milled wood.

Submitted by Anonymous (not verified) on Sun, 12/26/2021 - 19:46

All of the wood used in the project was milled in our yard, from trees on our land. The 4x4 uprights are poplar, and the rest is spruce, all originating within 500m of our house. The wood was sticker stacked for 2 years prior to planing down to the required size( last picture shows a not yet planed 1X6.)

Was a great project we have had many compliments on as it is the bed in our guest bedroom and has been used plenty during the Christmas season.

My only change up was using 1x6 for the side rails instead of 1x10 due to availability. Turned out amazing!

Built from Plan(s)

Comments

Little helper

Submitted by dijo284 on Sun, 06/30/2013 - 14:01

We used ana's plans and they were great!
We did not do the curved pieces we made it square all the way around. We did the modification and used hinges.
We have all the pieces for the anti-tip and will be adding that later.
We added on extra side pieces for safety using industrial strength velcro so they can be removed in the future when our 15 mo old gets big.
We do not own a kreg jig....so we just did screws and wood glue...making sure to pre-drill holes since the wood is thin and could split...

Estimated Cost
$40
Estimated Time Investment
Afternoon Project (3-6 Hours)
Finish Used
We will be painting or staining in the future.
Recommended Skill Level
Beginner

Baby changing table

It seemed as though this project started out as a nightmare. I didn't think it was going to happen. Working with 2x2 and soft doug fir is no fun. I bought a kreg jig and was super siked to use it but really couldn't figure it out yet so I just pre drilled and blasted screws in from the sides. Luckily I took some time to wood fill and do clean up work and you have no clue. I am so proud and excited about how this came out. It brought tears to my wife's eyes and maybe even a little to mine. Added some dipped blue legs and a simple blue band molding to pop off some color. Went to babies r us and purchased some canvas cubes and crazily enough the blue matched exactly!!! That was not planned.
All in all this will be in use for years to come.

Estimated Cost
120
Estimated Time Investment
Weekend Project (10-20 Hours)
Finish Used
No voc paint
Recommended Skill Level
Intermediate

Sweet T's Entry Way

Submitted by Sweet T on Sat, 05/07/2011 - 20:23

Finally had some nice weather and finished this entry way and shelf project! Did have to change the side cuts to 11 1/4" because 1 x 12's are not 11 1/2 " wide. But other than that this project went very smoothly. The building only takes several hours. However the finishing does take hours to days depending on the weather.
I also used the leftover plywood to upholster the bench cushion.

Estimated Cost
$110 includes 3 hooks and the hardware to hang the shelf
Estimated Time Investment
Afternoon Project (3-6 Hours)
Finish Used
Primer, Ralph Lauren Tribal Pottery and Satin Nickel Tri-hooks
Recommended Skill Level
Beginner

Parsons dining table (with extension leaves)

Here we have a Parsons style dining table built out of solid Alder wood. The table length is 72" but can extend up to 110" with two drop in leaves on either end. The table was clear coated with a satin poly.

Estimated Cost
$400.00
Estimated Time Investment
Week Long Project (20 Hours or More)
Finish Used
Clear coat of water based poly
Recommended Skill Level
Advanced

Comments

Disentanglement Puzzle

Submitted by mtairymd on Fri, 01/12/2018 - 05:46

This is my take on a classic rope and ring disentanglement puzzle. The goal is to separate the ring (the light colored one) from the puzzle strings. As with most disentanglement puzzles, the solution isn’t intuitive. Can you figure it out from the pictures? If not, refer to the video for the solution.

Build Instructions: https://www.instructables.com/id/Disentanglement-Puzzle/
Solution: https://youtu.be/cwdpTndAEw8

Estimated Cost
$5
Estimated Time Investment
Afternoon Project (3-6 Hours)
Finish Used
Oil
Recommended Skill Level
Beginner

Lawn Chairs

Submitted by Anonymous (not verified) on Tue, 12/28/2021 - 12:06

Built these for my daughters new home

Built from Plan(s)

Comments

Our First Project!

Submitted by gabbiegal on Tue, 05/10/2011 - 20:02

We have built things before, but this is our first from Ana's Site. We just finished this over a month ago... Was so much fun to do and I just love how it turned out! I decided not to paint just yet, so the buyer can decide. I have just primed it. I learned how to use a kreg jig, and bought a very cheap one... Best tool ever. There are no screws visible at all. I think if I did it again I would do something different with the handle.. not sure what though. It was difficult to make it look right. Thank goodness for the patience of my husband.

Built from Plan(s)
Estimated Cost
$40
Estimated Time Investment
Afternoon Project (3-6 Hours)
Finish Used
Primer Only
Recommended Skill Level
Beginner

Medickep's simple console table

Submitted by Medickep on Sun, 07/07/2013 - 07:24

I made this entry table to go by our front door. It's a spin off from the "console table" posted by Anna. I read some of the comments from people who had problems with her plans as a result of different standards in lumber and decided to alter this some!

I cut the side braces short enough so when I included the measurements of the legs the actual table top extended approx. 3/4" further past the legs and apron of the table. I also went with one sheet of wood on the table top and finished it up with some trim around the edge of the table top.

Estimated Cost
80-100
Estimated Time Investment
Afternoon Project (3-6 Hours)
Finish Used
Finish Used: I wanted to paint the table to matched a near bye coat rack I made. I primed the table first and painted it with three coats of Behr premium paint. I also used a polyacrylic to protect it a little from my boys. I did three coats on all of it and two additional coats on the front of the legs, apron, table top and bottom brace. Make sure you sand with 300-400 grit between coats!
Recommended Skill Level
Starter Project

Comments

Leaning wall desk

Submitted by nanpannapa on Mon, 01/15/2018 - 09:56

Thank you Ana for the plan my husband loves it. So functional yet requires very little space. I made it a littlest wider- 38 inches overall width and 83 inches overall height.

Built from Plan(s)
Estimated Cost
$50
Estimated Time Investment
Afternoon Project (3-6 Hours)
Finish Used
Painters touch Expresso
Recommended Skill Level
Beginner

Hall Tree with Drawers using a combination of 2 plans

Submitted by Anonymous (not verified) on Fri, 12/31/2021 - 19:40

We had an empty area at the bottom of our stairs that was just calling for a hall tree. I love watching and learning from Anna's videos. I really liked 2 of her plans: the Farmhouse Hall Tree and the Mudroom Bench with Easy Drawers. I decided to combine them to make my own unique hall tree. Our teenage daughter used the "window panes" in the back to paint a Japanese Maple tree. I think it turned out beautifully. This is the first of Anna's plans that I've used, but I plan to use many more! Thank you, Anna for your amazing videos and desire to share your knowledge. We appreciate it so much!

Comments

Reclaimed Wood Headboard

The hubbs helped me build this during a day off from work. We spent an hour after work the following few nights working on the finish. Tons of compliments on this headboard...a few coworkers have even built their own after seeing ours!

Estimated Cost
$80
Estimated Time Investment
Afternoon Project (3-6 Hours)
Finish Used
Dark Oak Polystain - distressed using hammers, nails, screwdrivers, chains, and even a blow torch
Recommended Skill Level
Starter Project
Seasonal And Holiday

Rustic x coffee table

Submitted by PNWbuilder on Wed, 07/01/2015 - 09:44

This is my second project. I used all pine. The top is stained special walnut then added poly acrylic sealer and the bottom I sprayed with Rustoleums heirloom white. This one was a lot of fun and I love the result. Since this picture, I added corner brackets sprayed with Rustoleums oil rubbed bronze (my fav-so good!).

Built from Plan(s)
Estimated Cost
100-125
Estimated Time Investment
Weekend Project (10-20 Hours)
Finish Used
Rustoleums heirloom white (spray can) and special walnut for the stain. Sealed with satin poly acrylic
Recommended Skill Level
Beginner

Comments

Farmhouse Table - Tips for absolute beginners

Submitted by diozsa on Thu, 01/18/2018 - 19:23

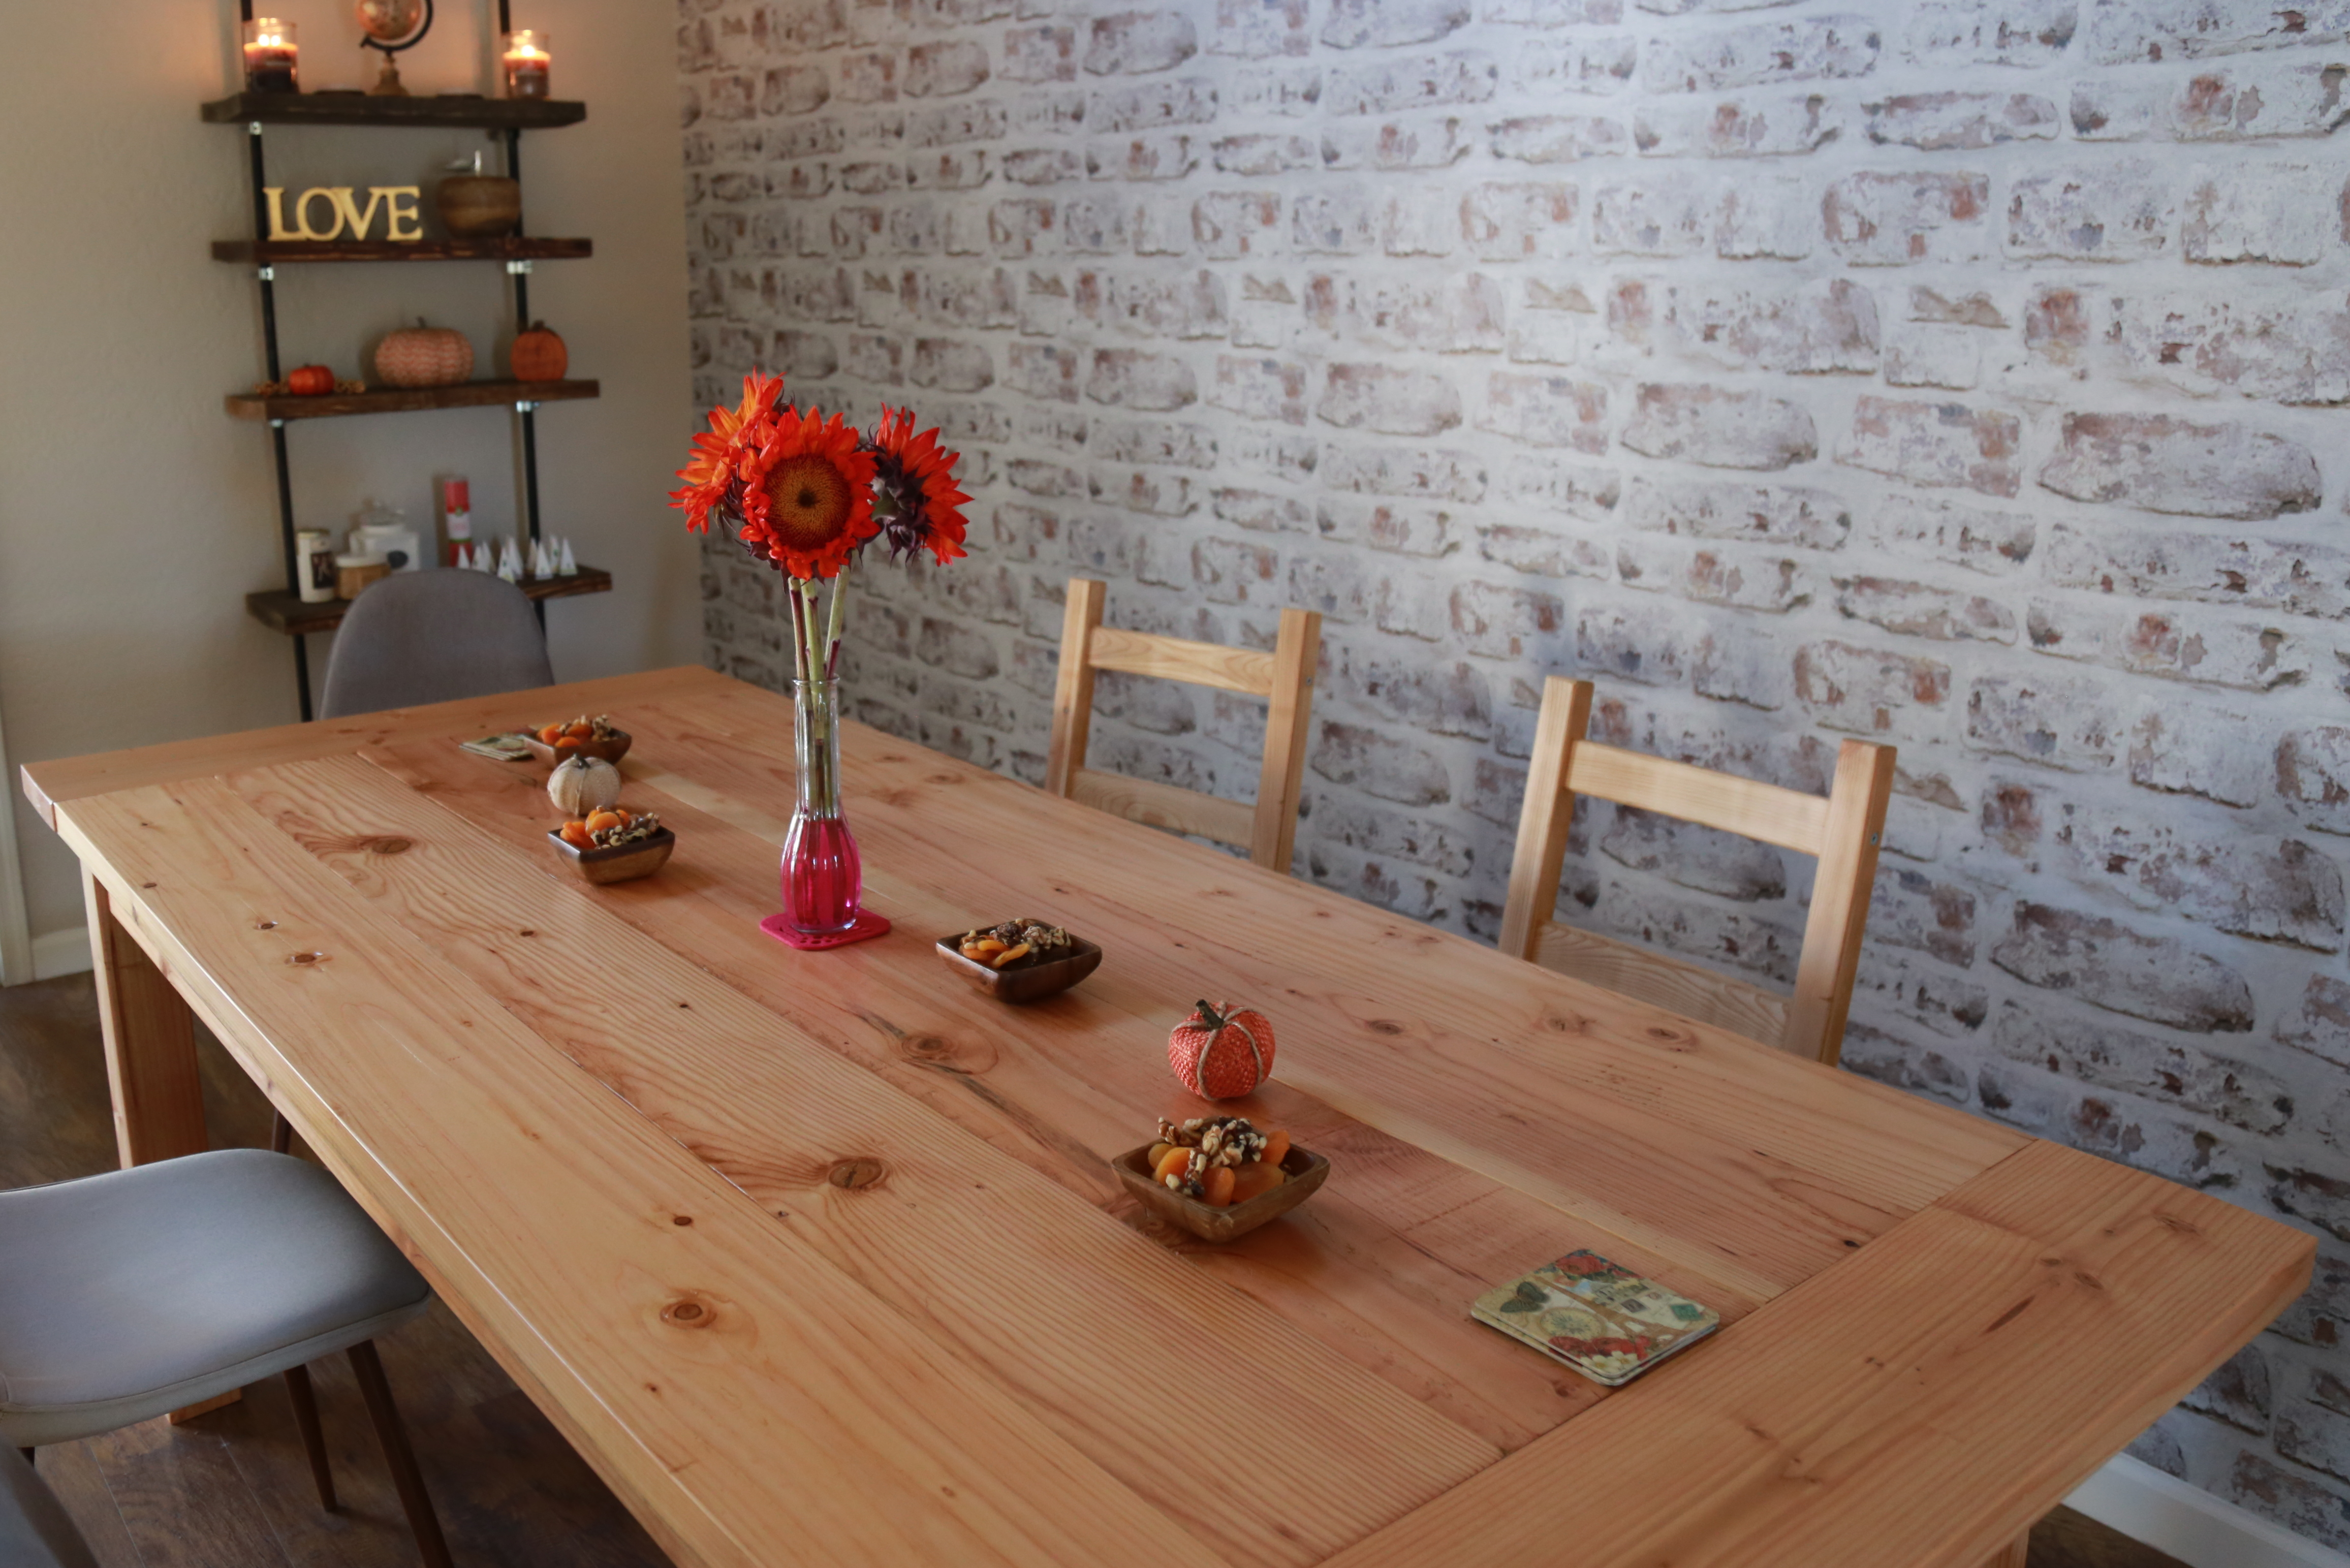
This was my first wood project ever. No prior experience and no tools. I started really from scratch. Thanks to Ana's website I mustered the currage to take on this project. Thank you! 

I just want to leave a few tips for anybody that is an absolute beginner with wood working - things that I have learned along the way.


- First mistake. Practice your cuts with the circular saw before you get to used it. The offset of the blade thickness will puzzle you initially. Maybe I should also mention.. there is a certain way to hold a chisel. You got 50% chances of doing it right the first time :))


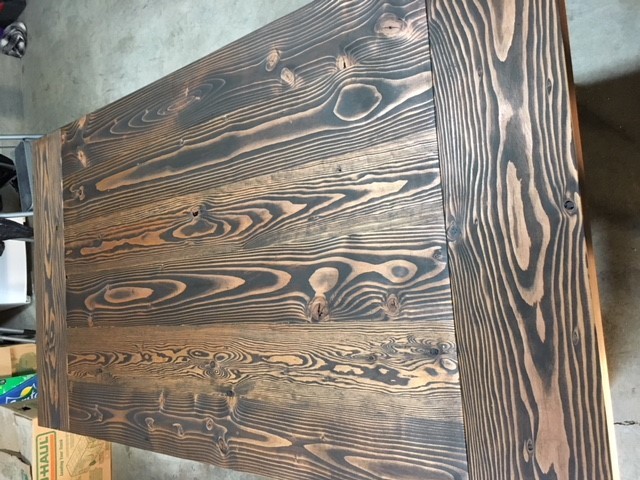
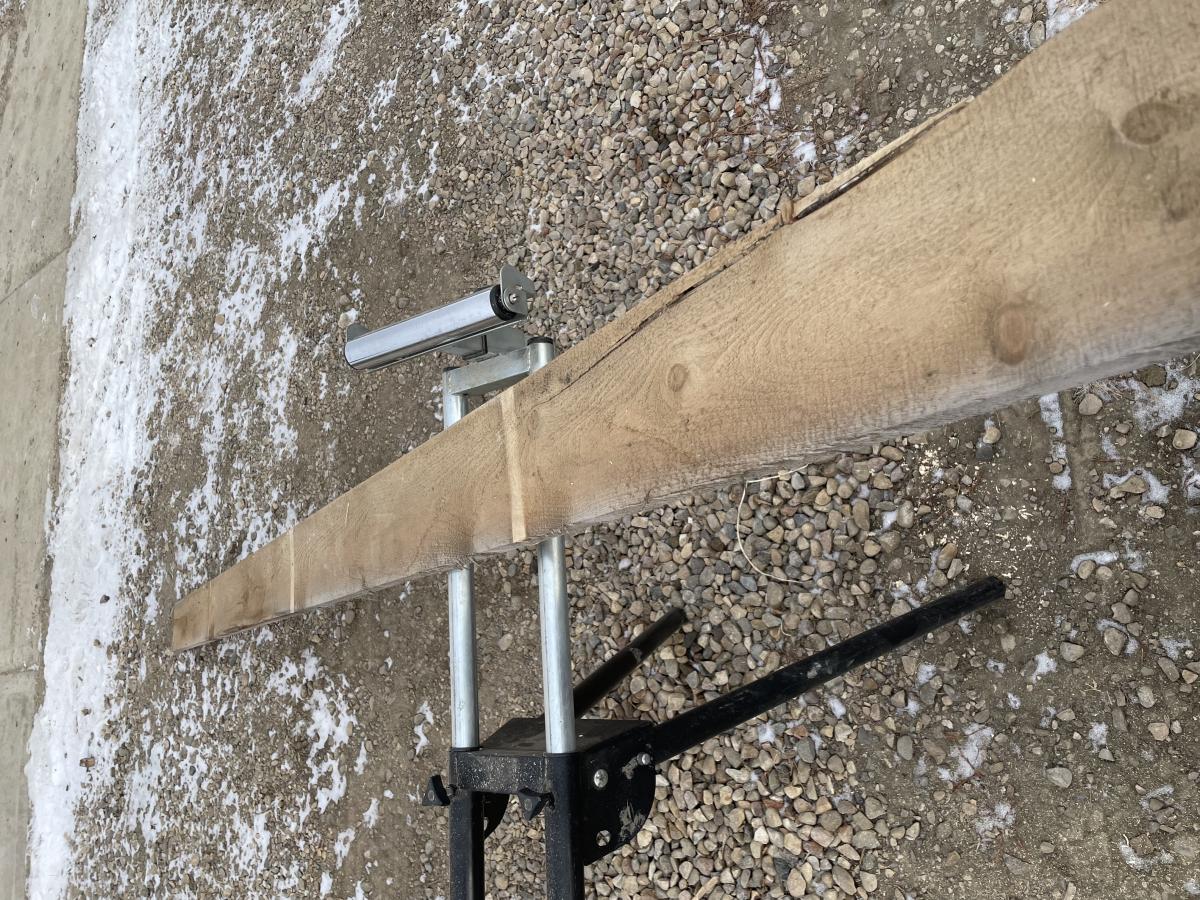
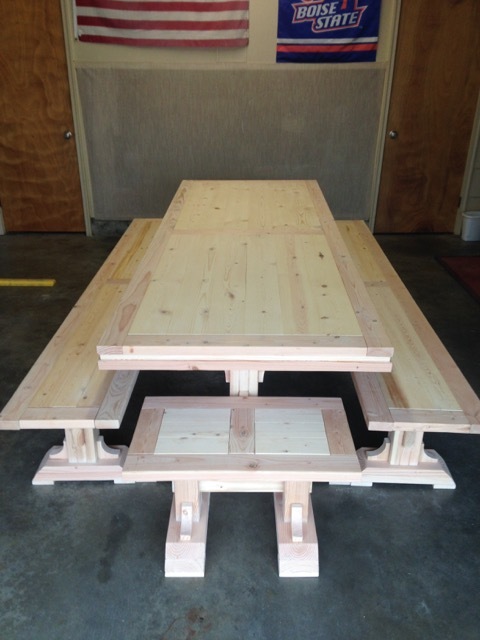
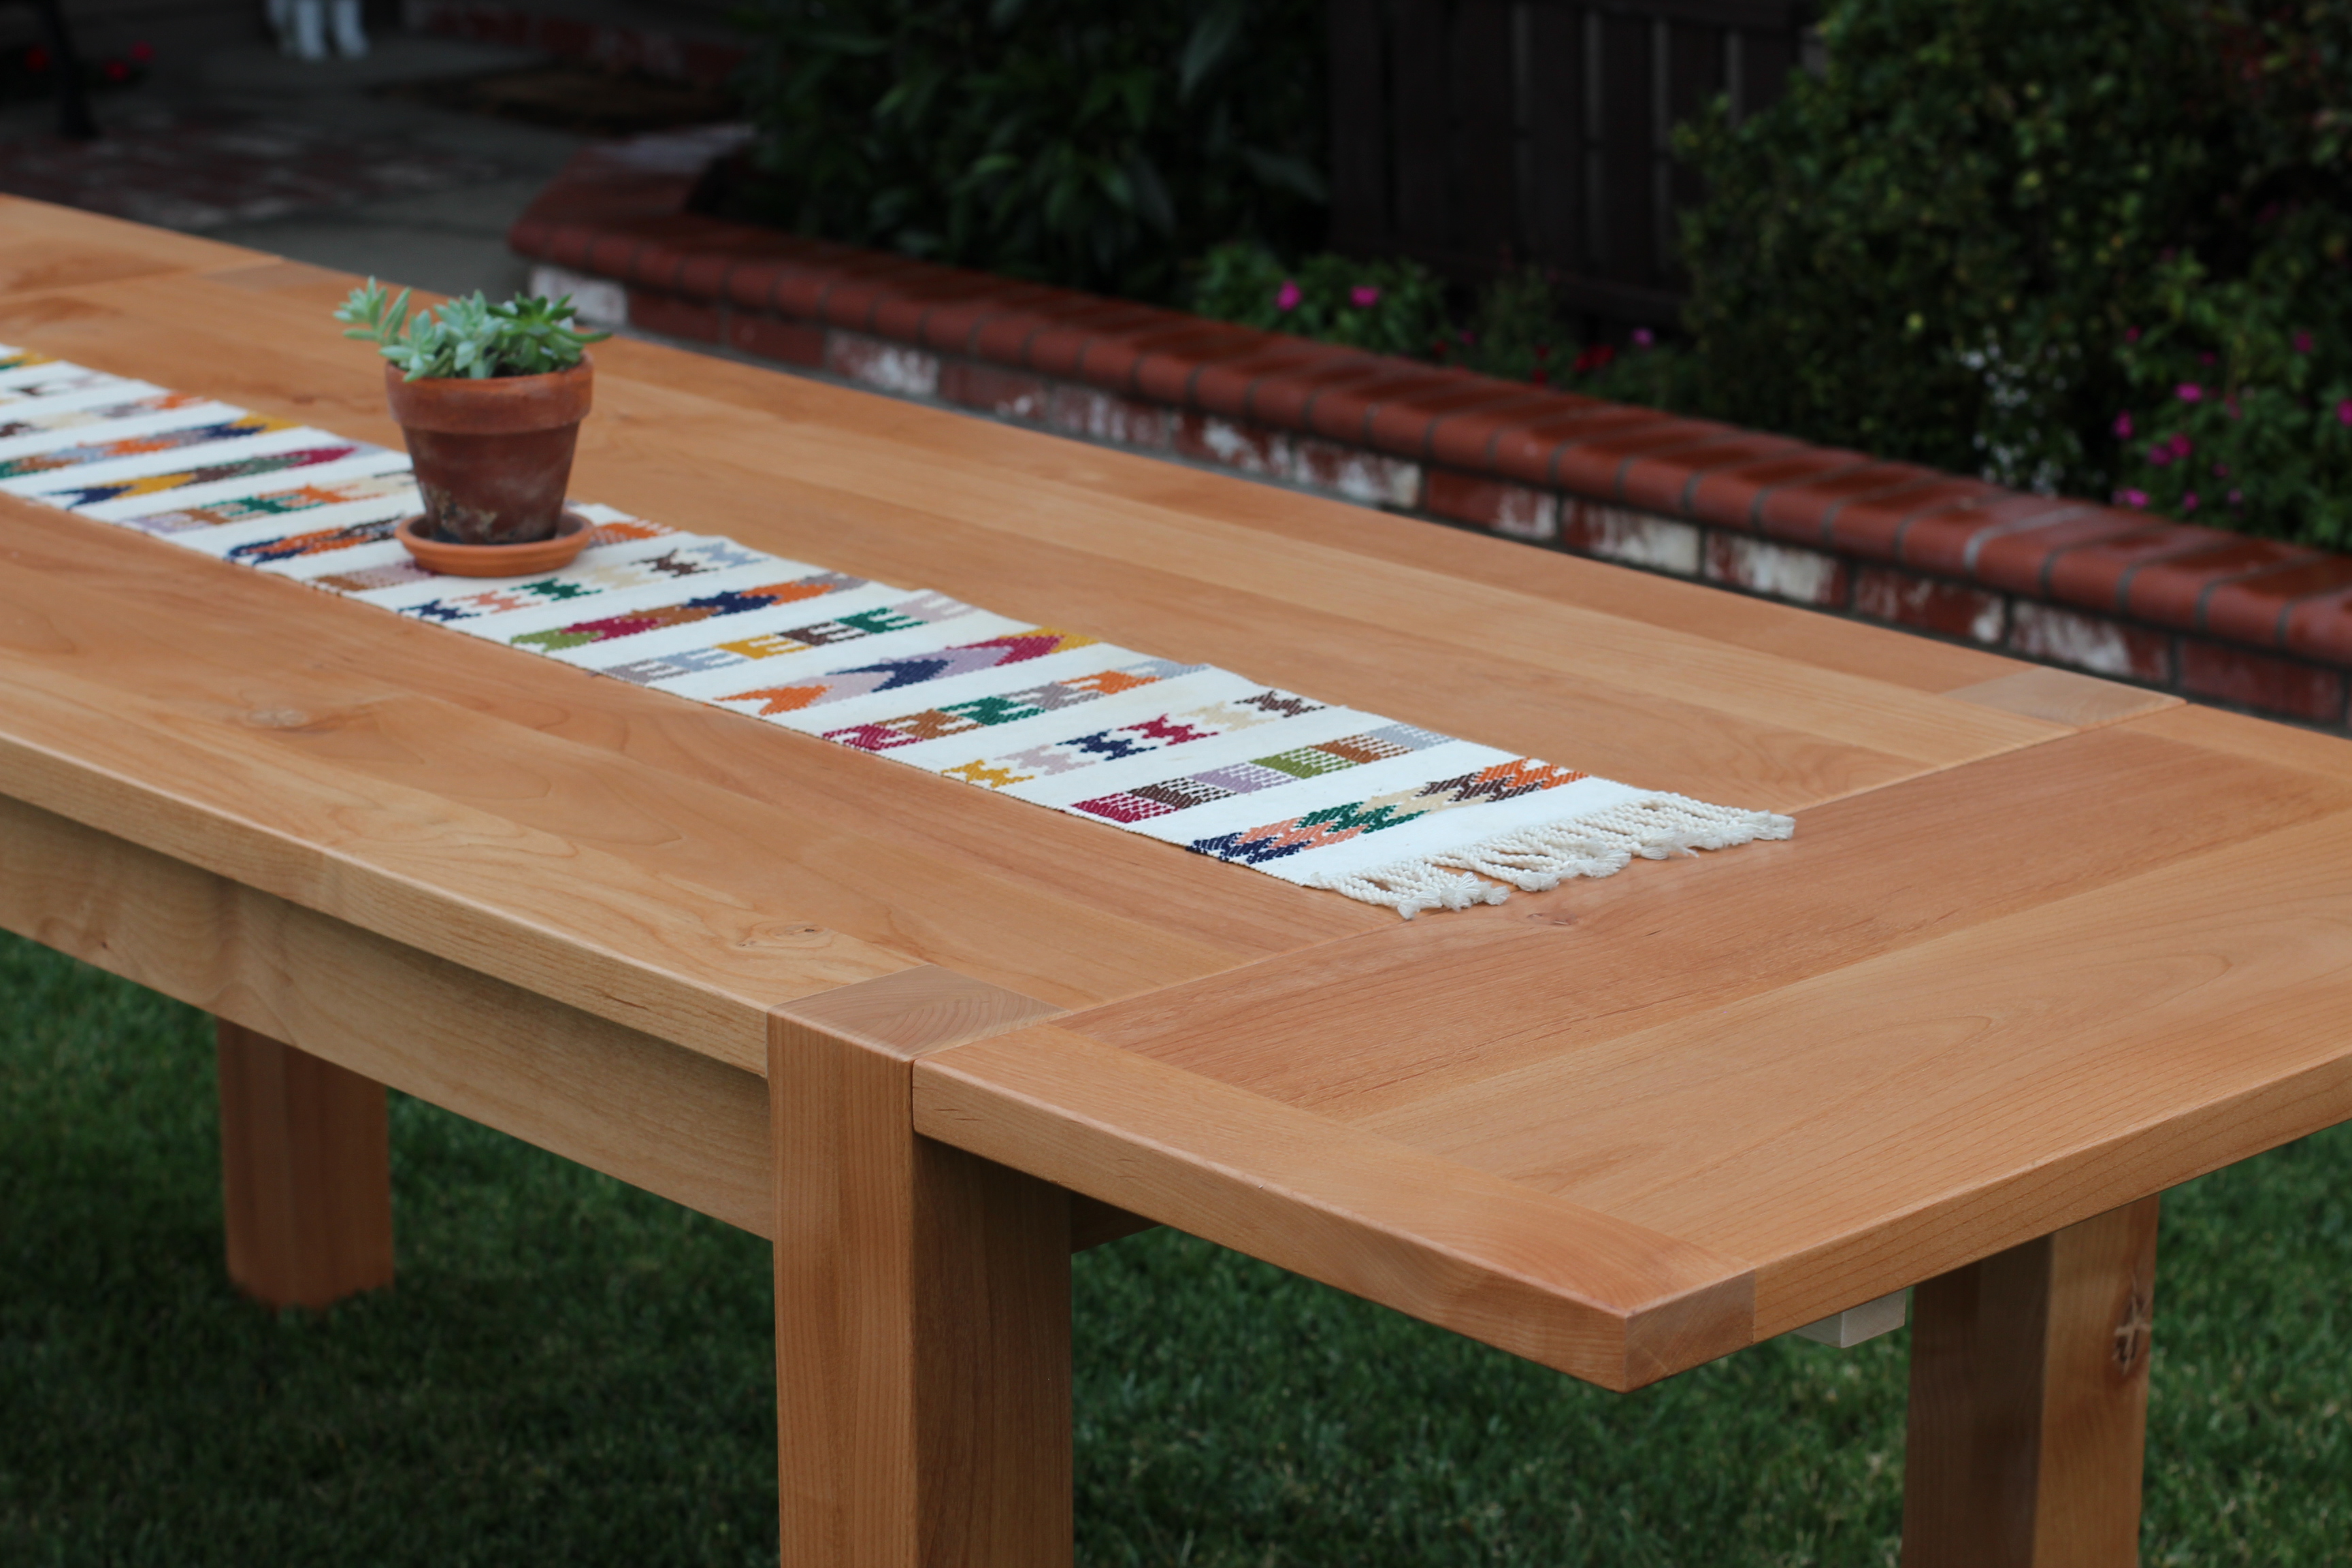
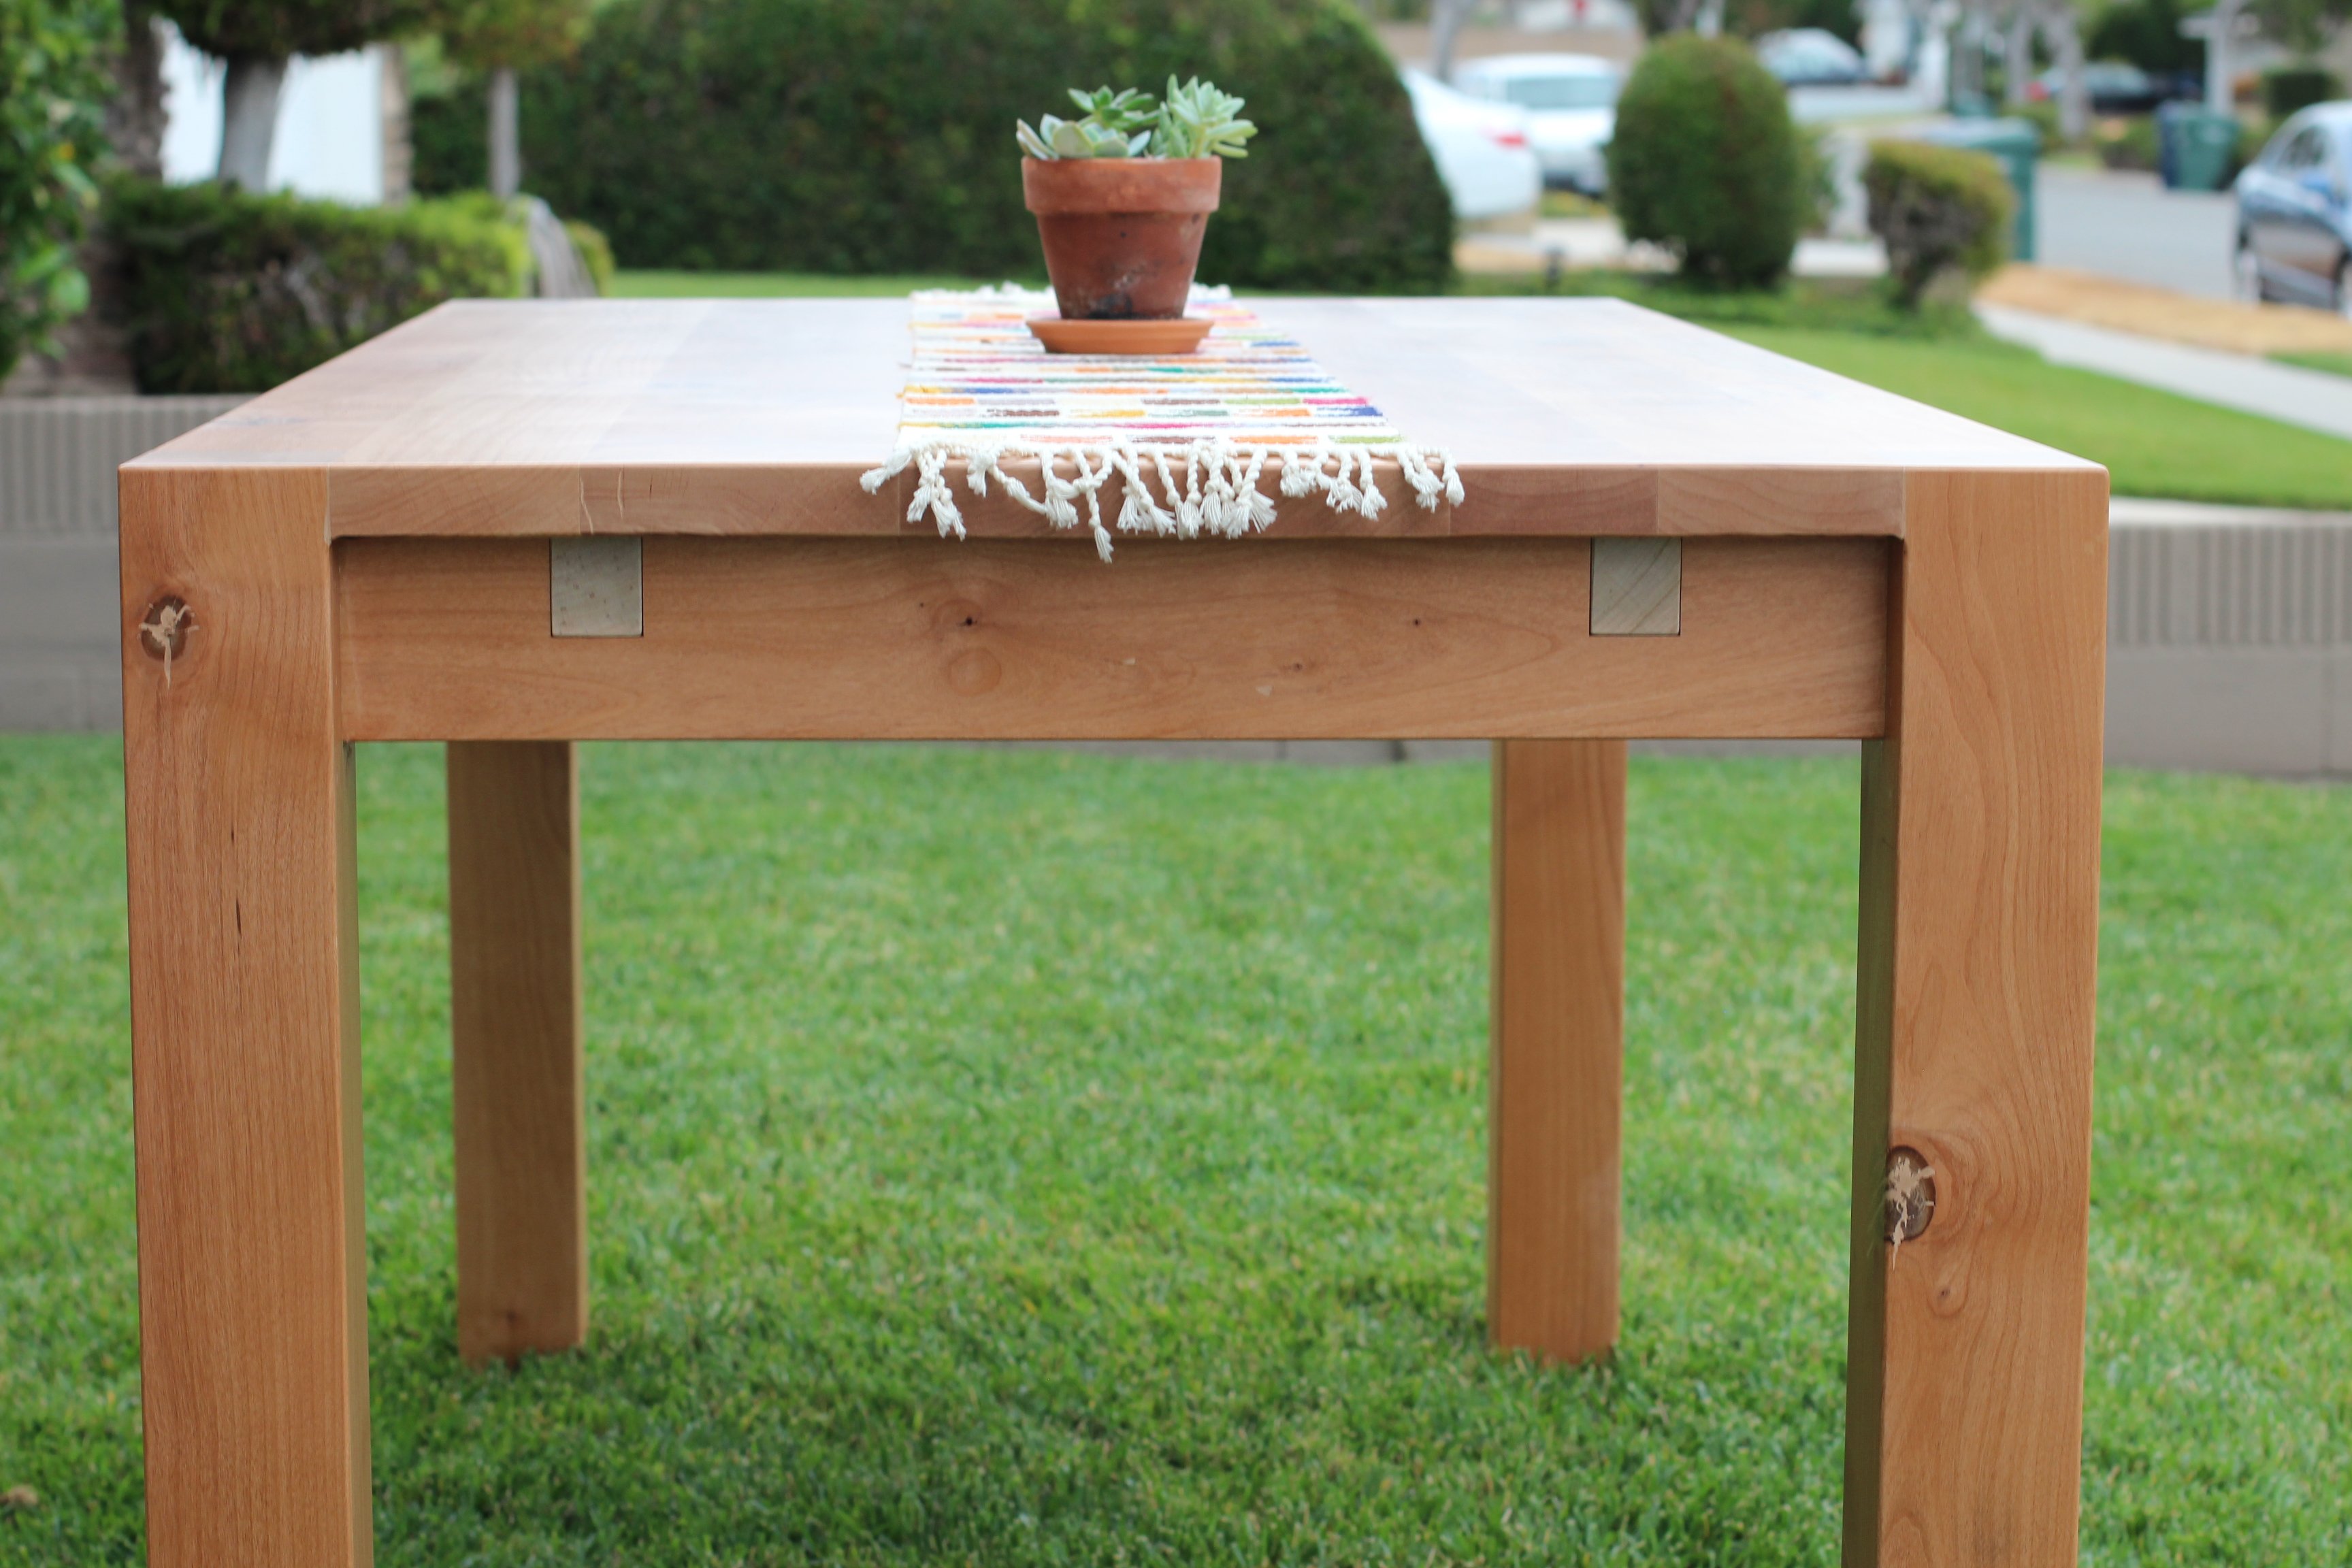
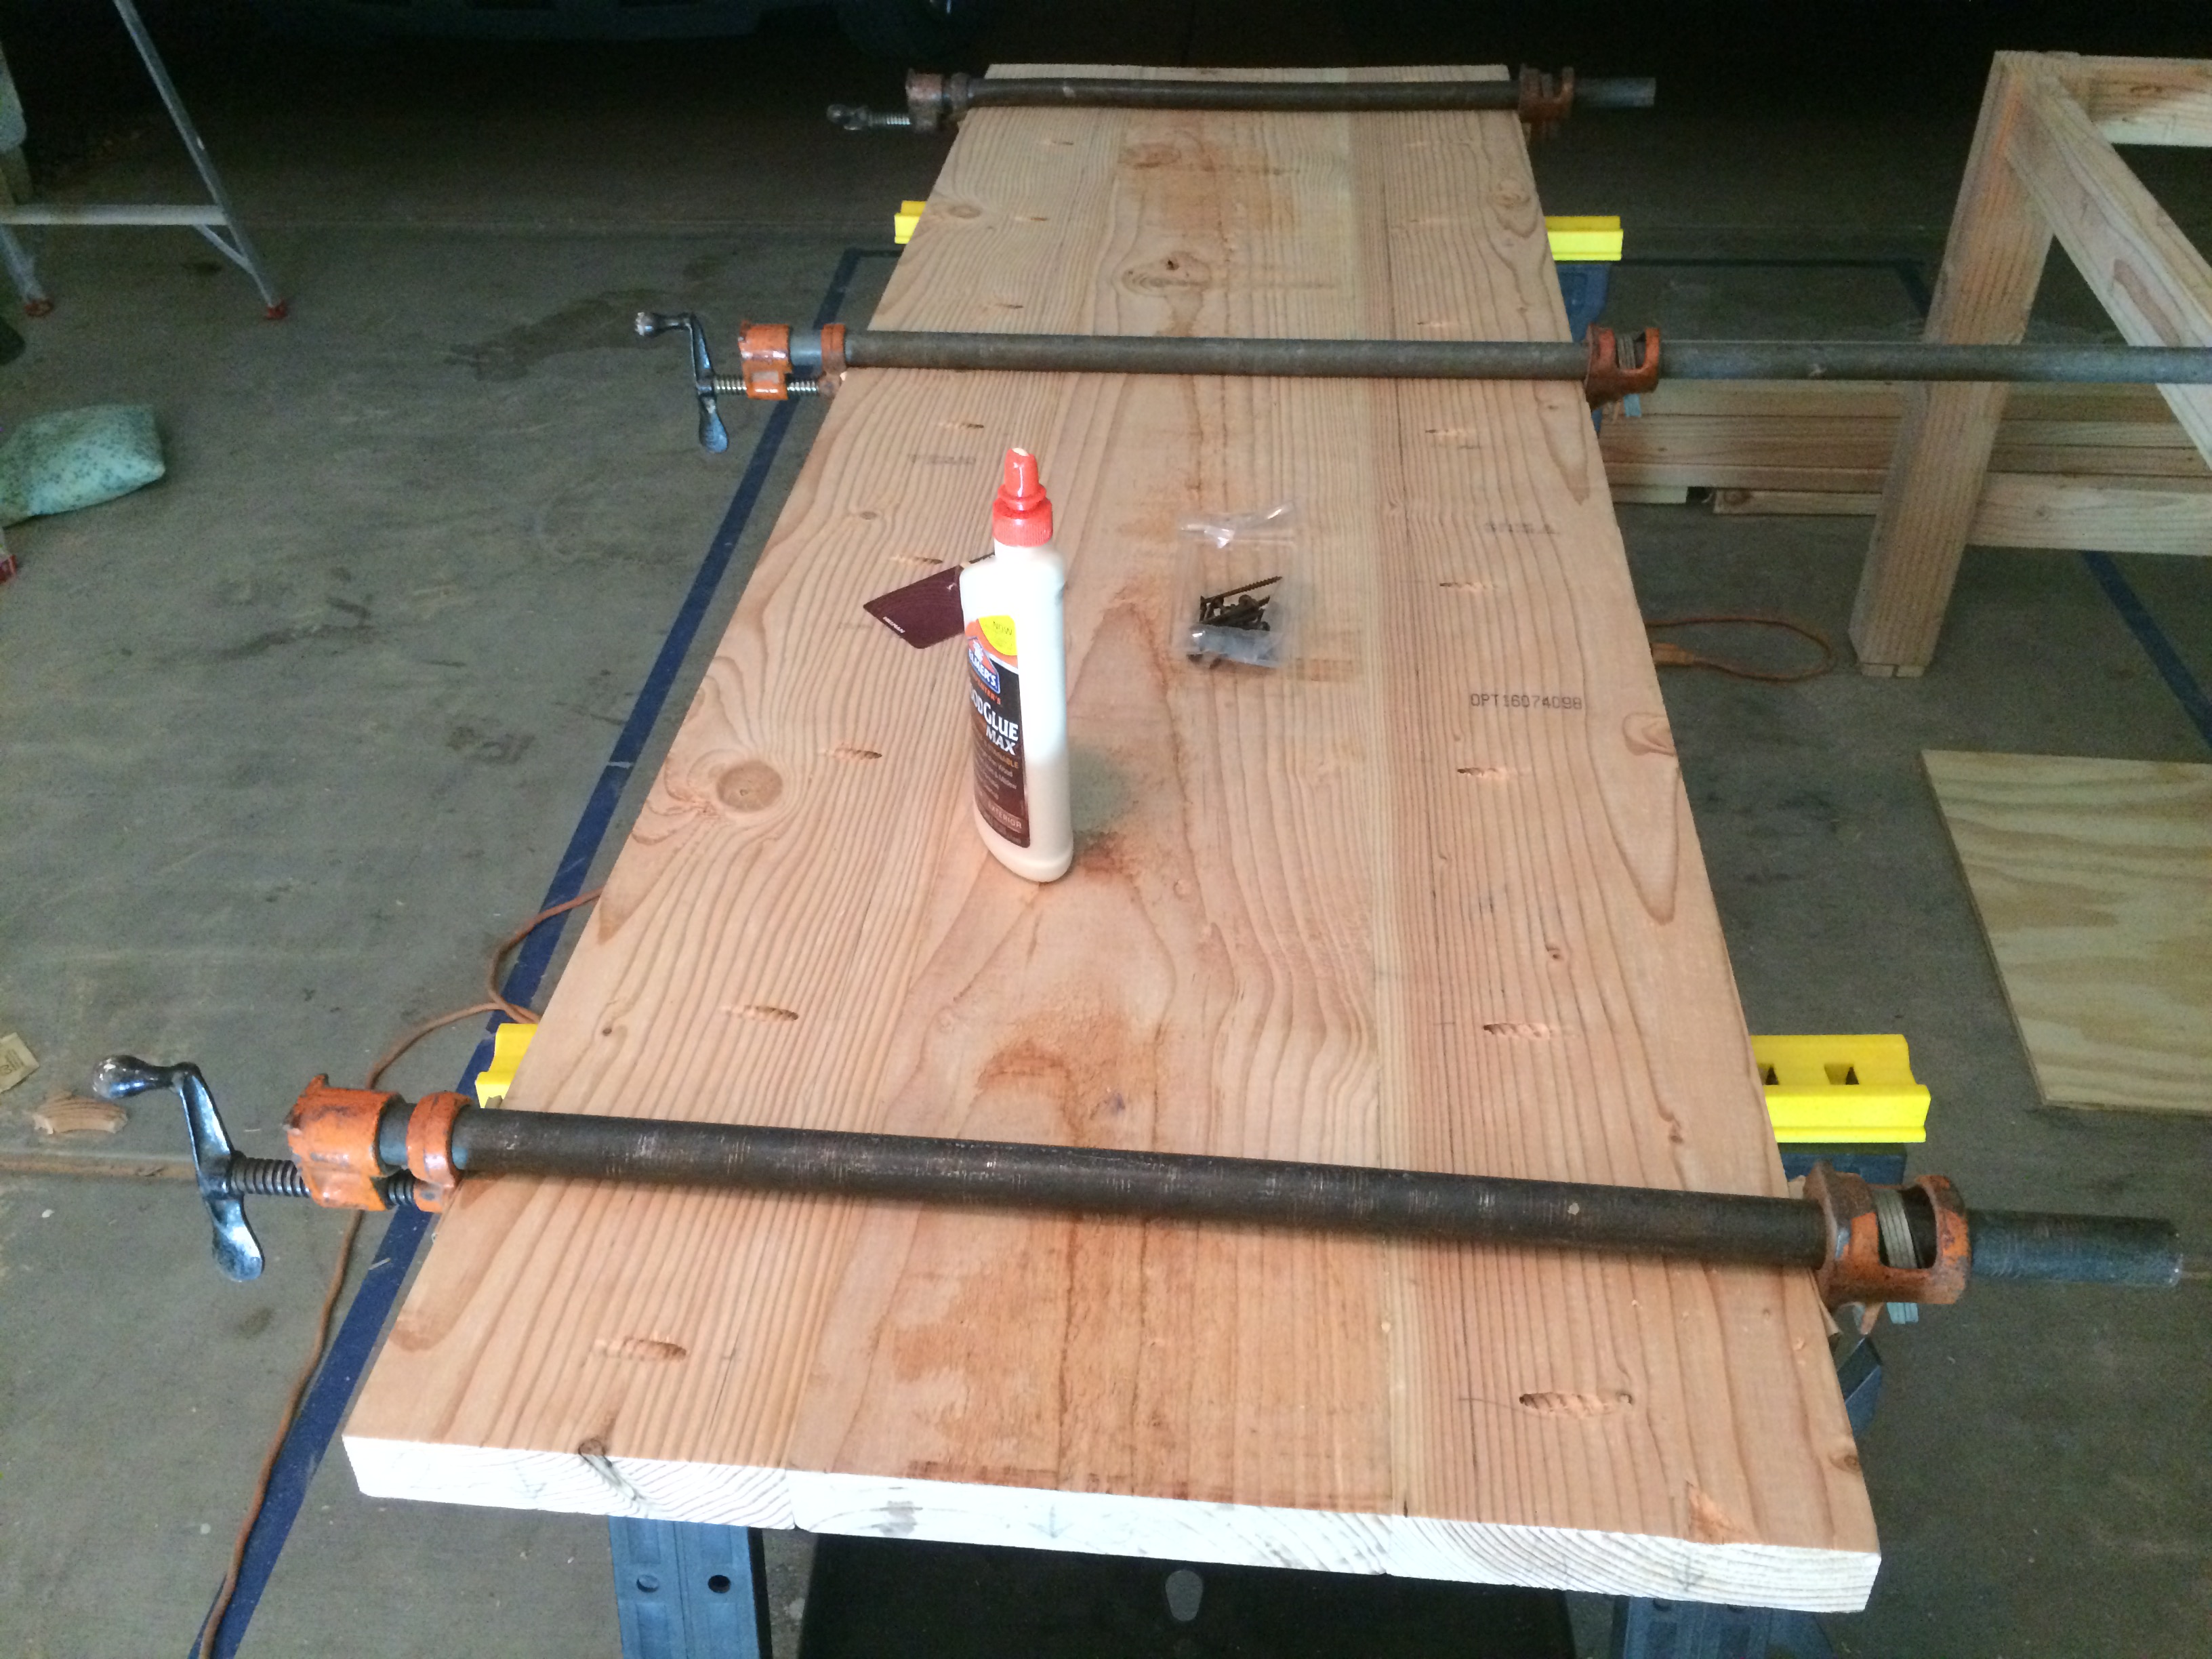
- The hardest thing for me was to find lumber that was in decent condition, not too wet, fairly straight and at low cost. I spent many hours in the big stores searching trough their stock. In the end one single board was a little too wet and soon after I was done is started to warp a bit. I did expect that and I used it as breadboards to prevent bowing along the tabletop.

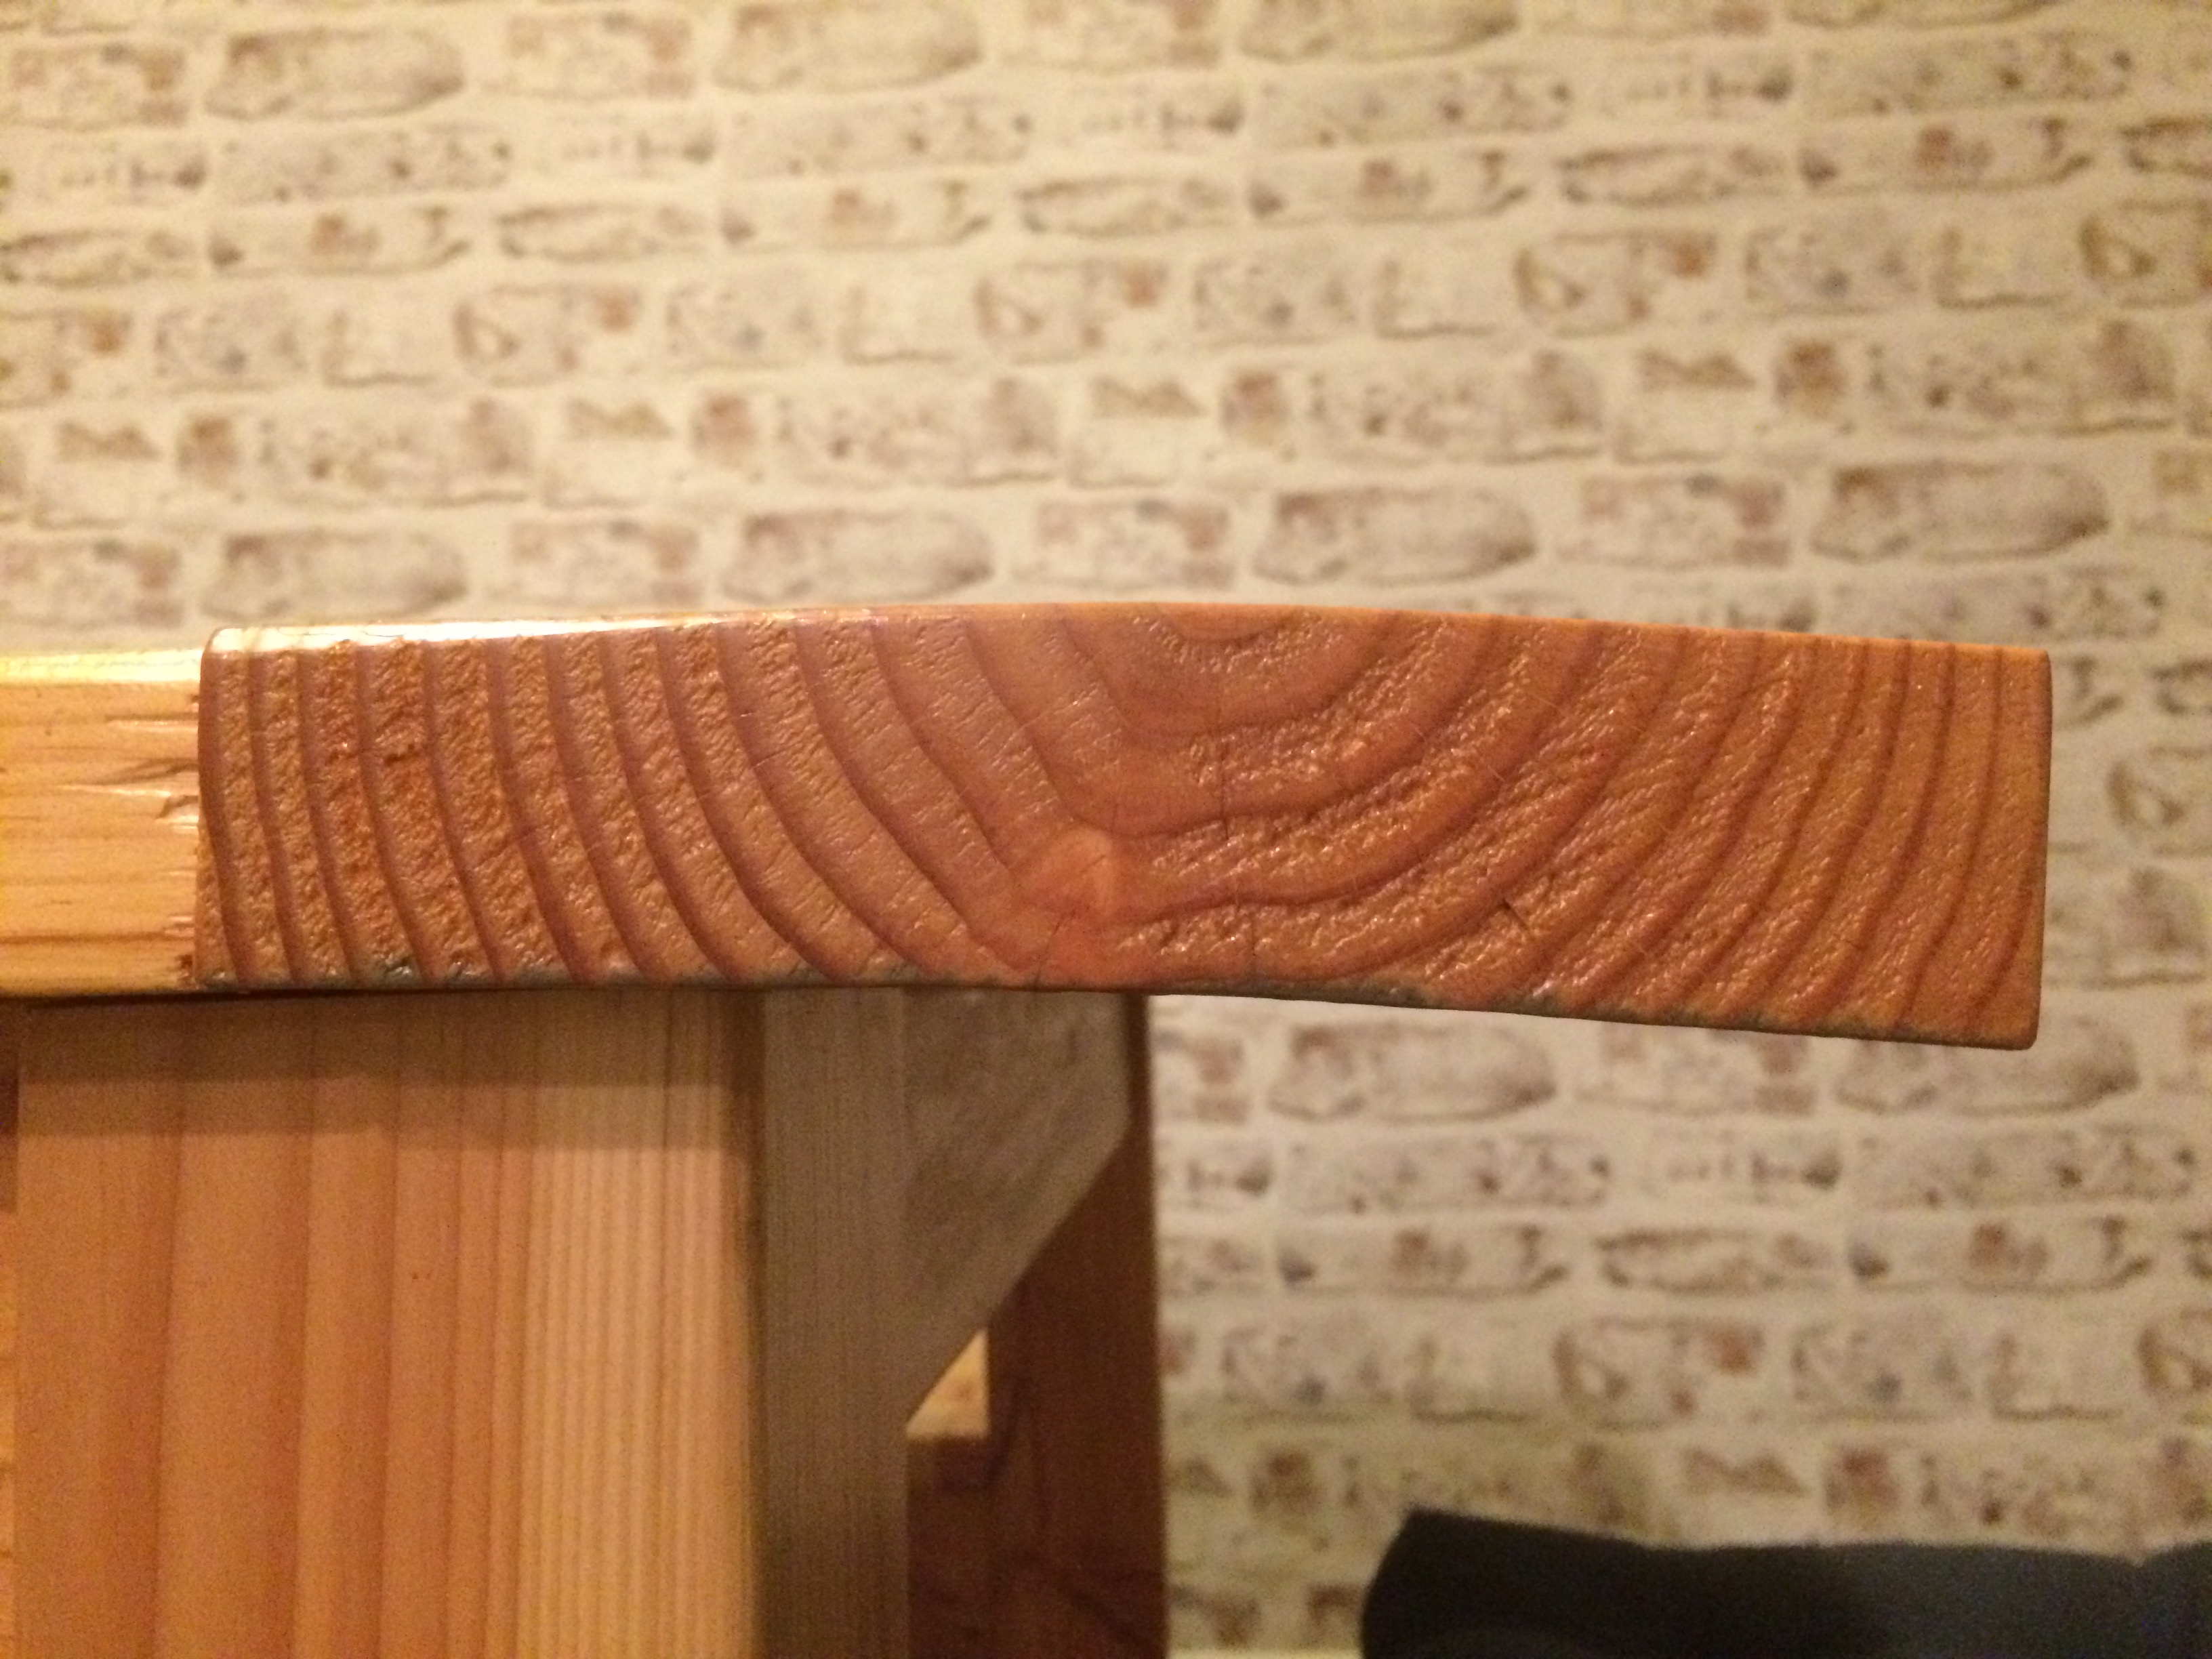
Be aware that if your board is wet, most likely it will curve across width, especially if the section is cut through near the center of the tree. Looking through the section of the board, the outer rings are going to shrink more that the inner rings creating a bow that will push the center outward. See picture.


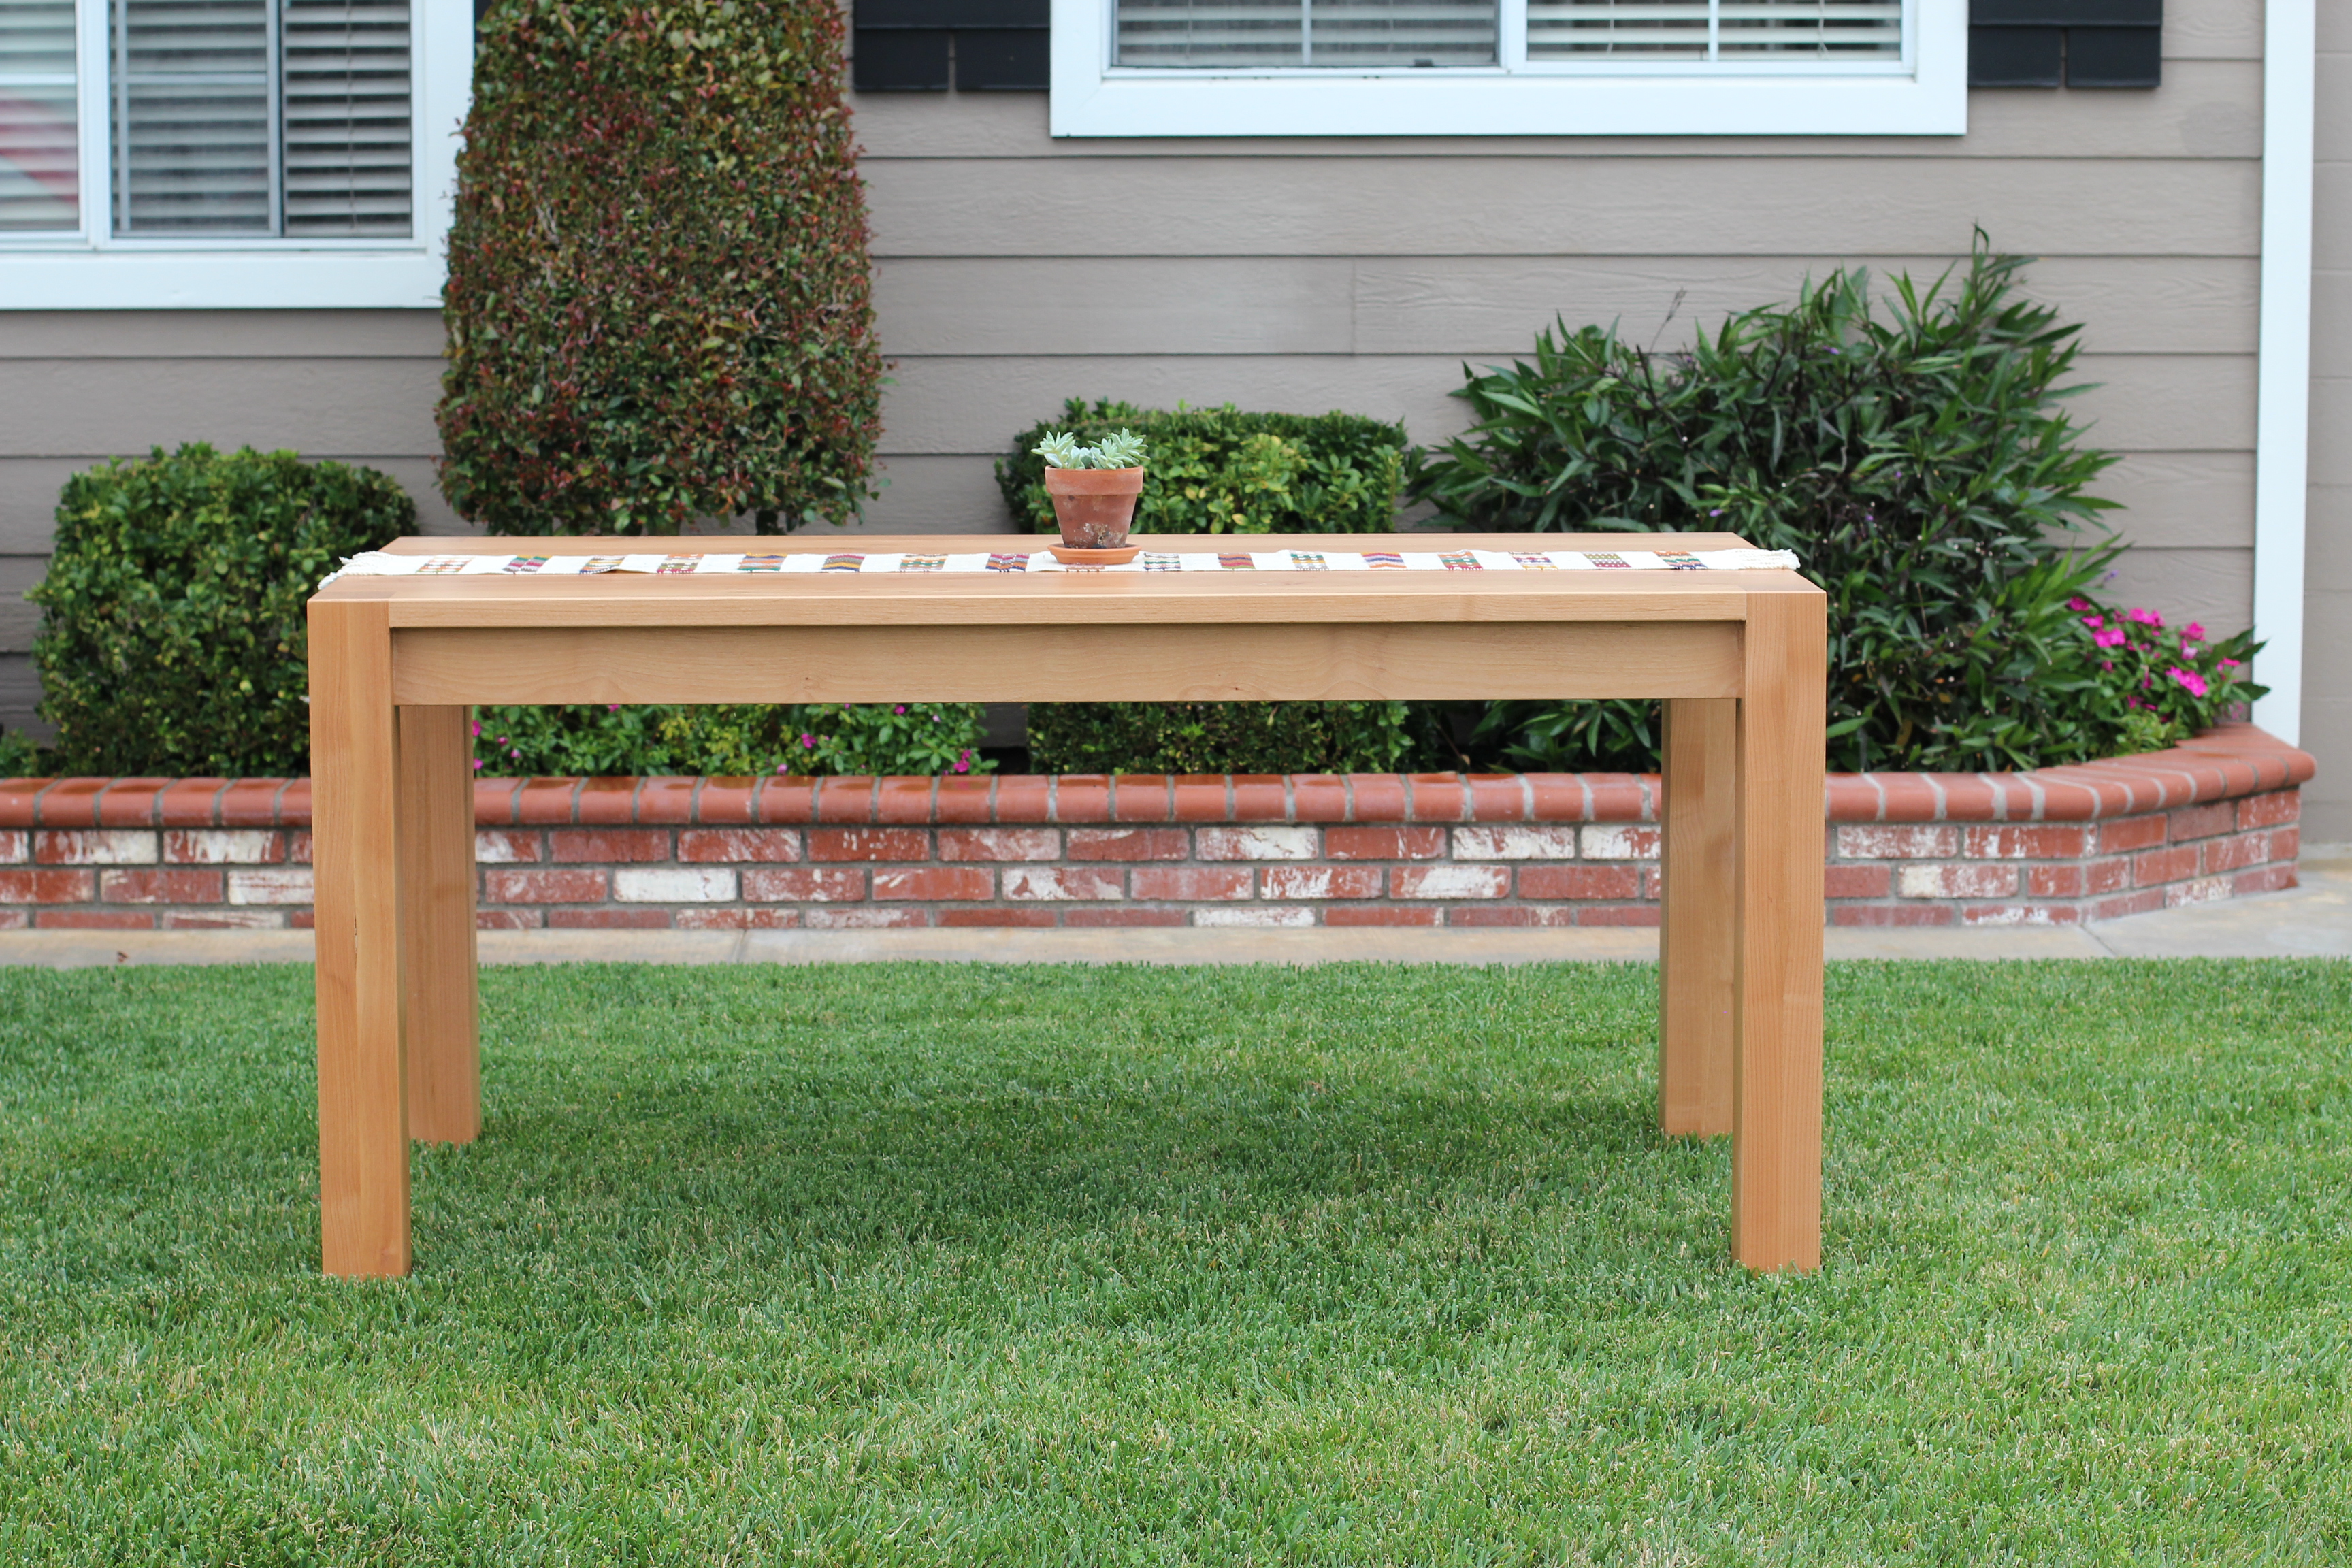
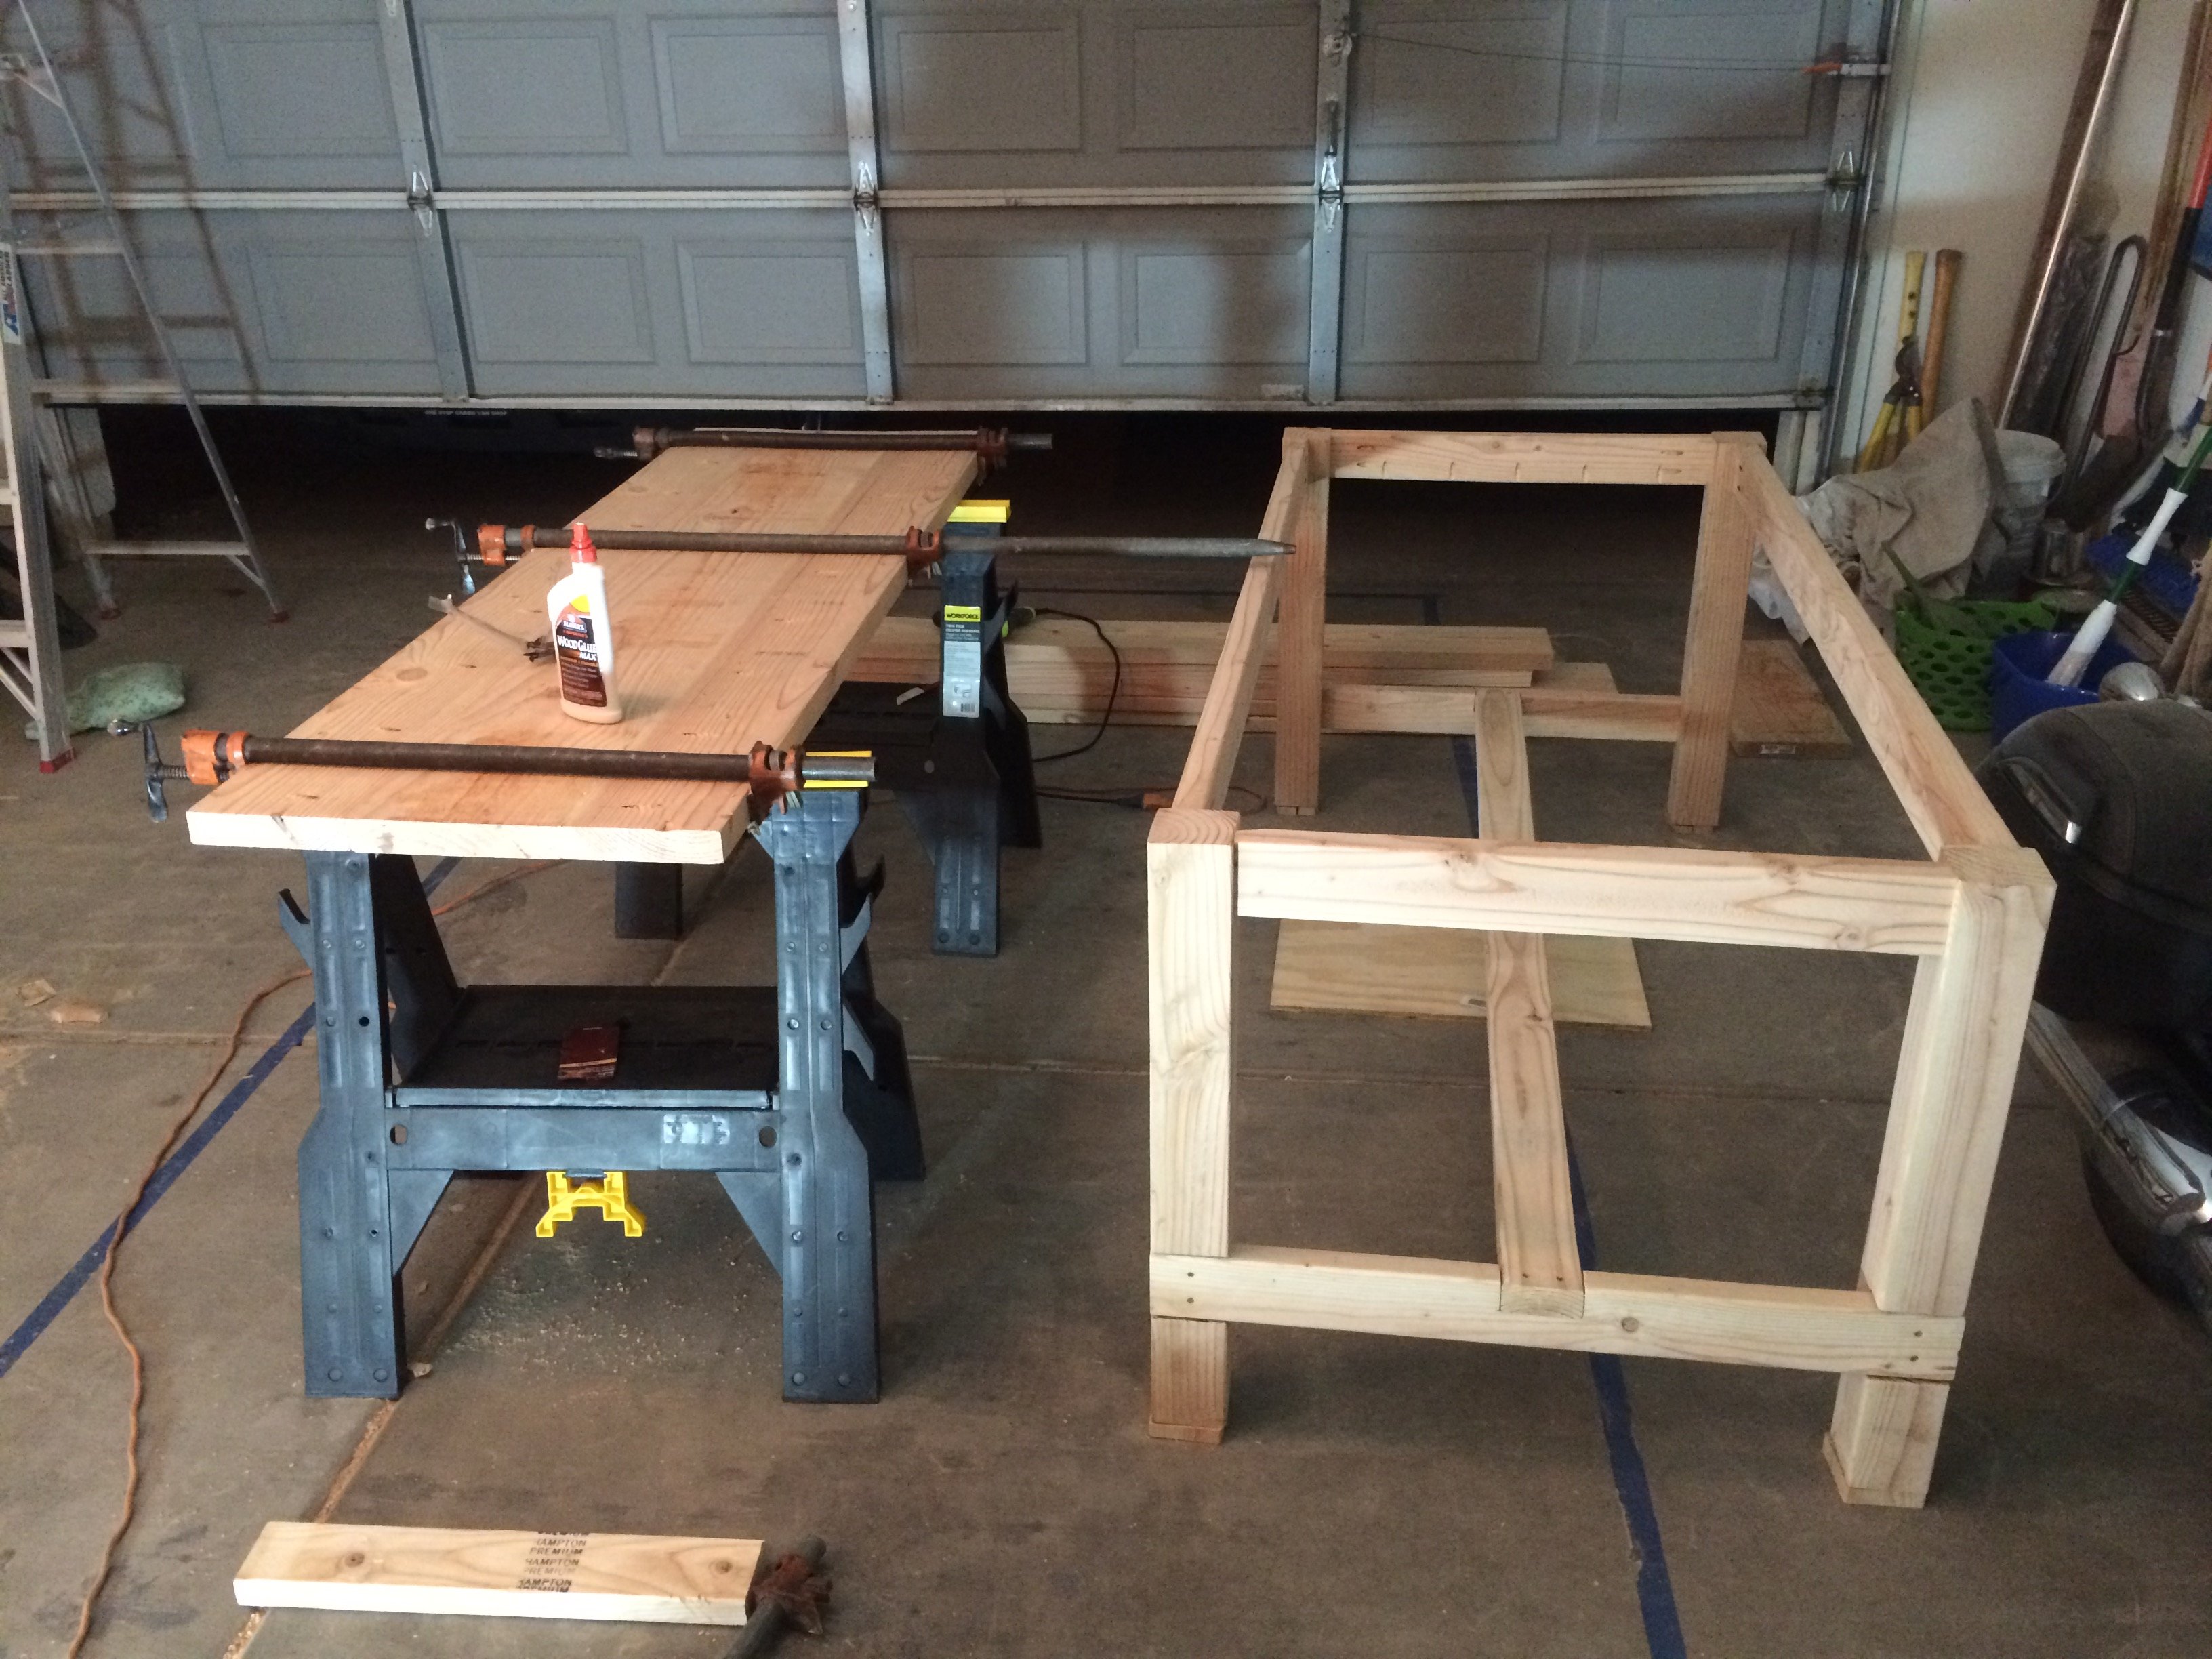
- If you want your boards to join perfectly you sould take them to a wood shop and get the sides straighten. Doing it by hand it will not get them right and it will take to much of your time.

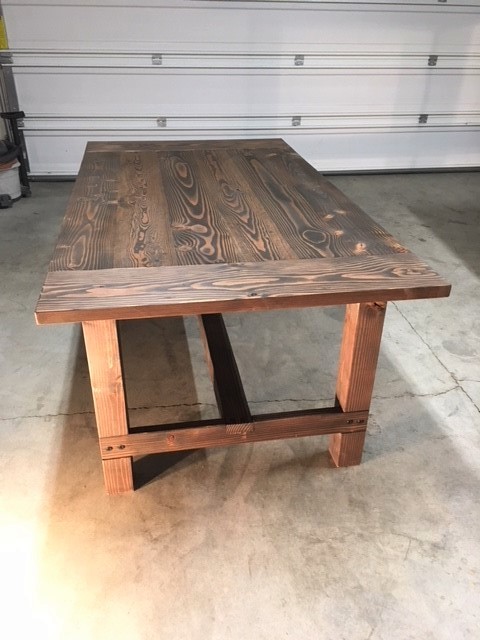
At the shop you could also plane them and get them at the same thickness. I preferred to leave the imperfections on the surface of the boards but I wanted the same relative heigth along the edges, so the tabletop would be smooth across but not perfectly planed. If you are planning on taking some of the thickness off with a palm sander it will take you a week of sanding; the better solution is either using a belt sander or even a cheaper way is to get a Sanding disk that you use with a drill machine. See Diablo Sanding Disk Kit. It worked really fast for me removing material in the desired areas.


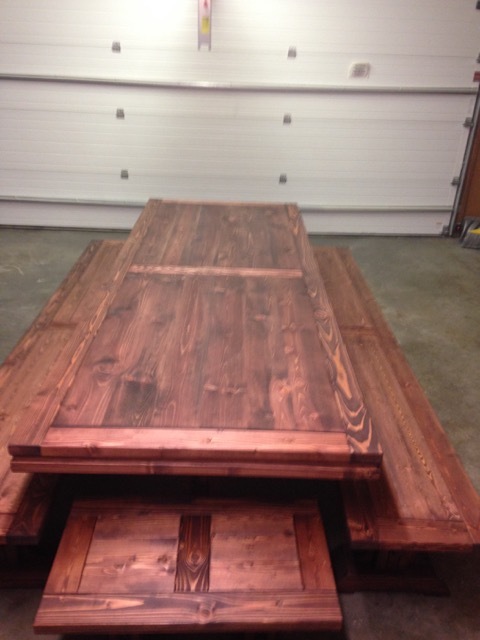
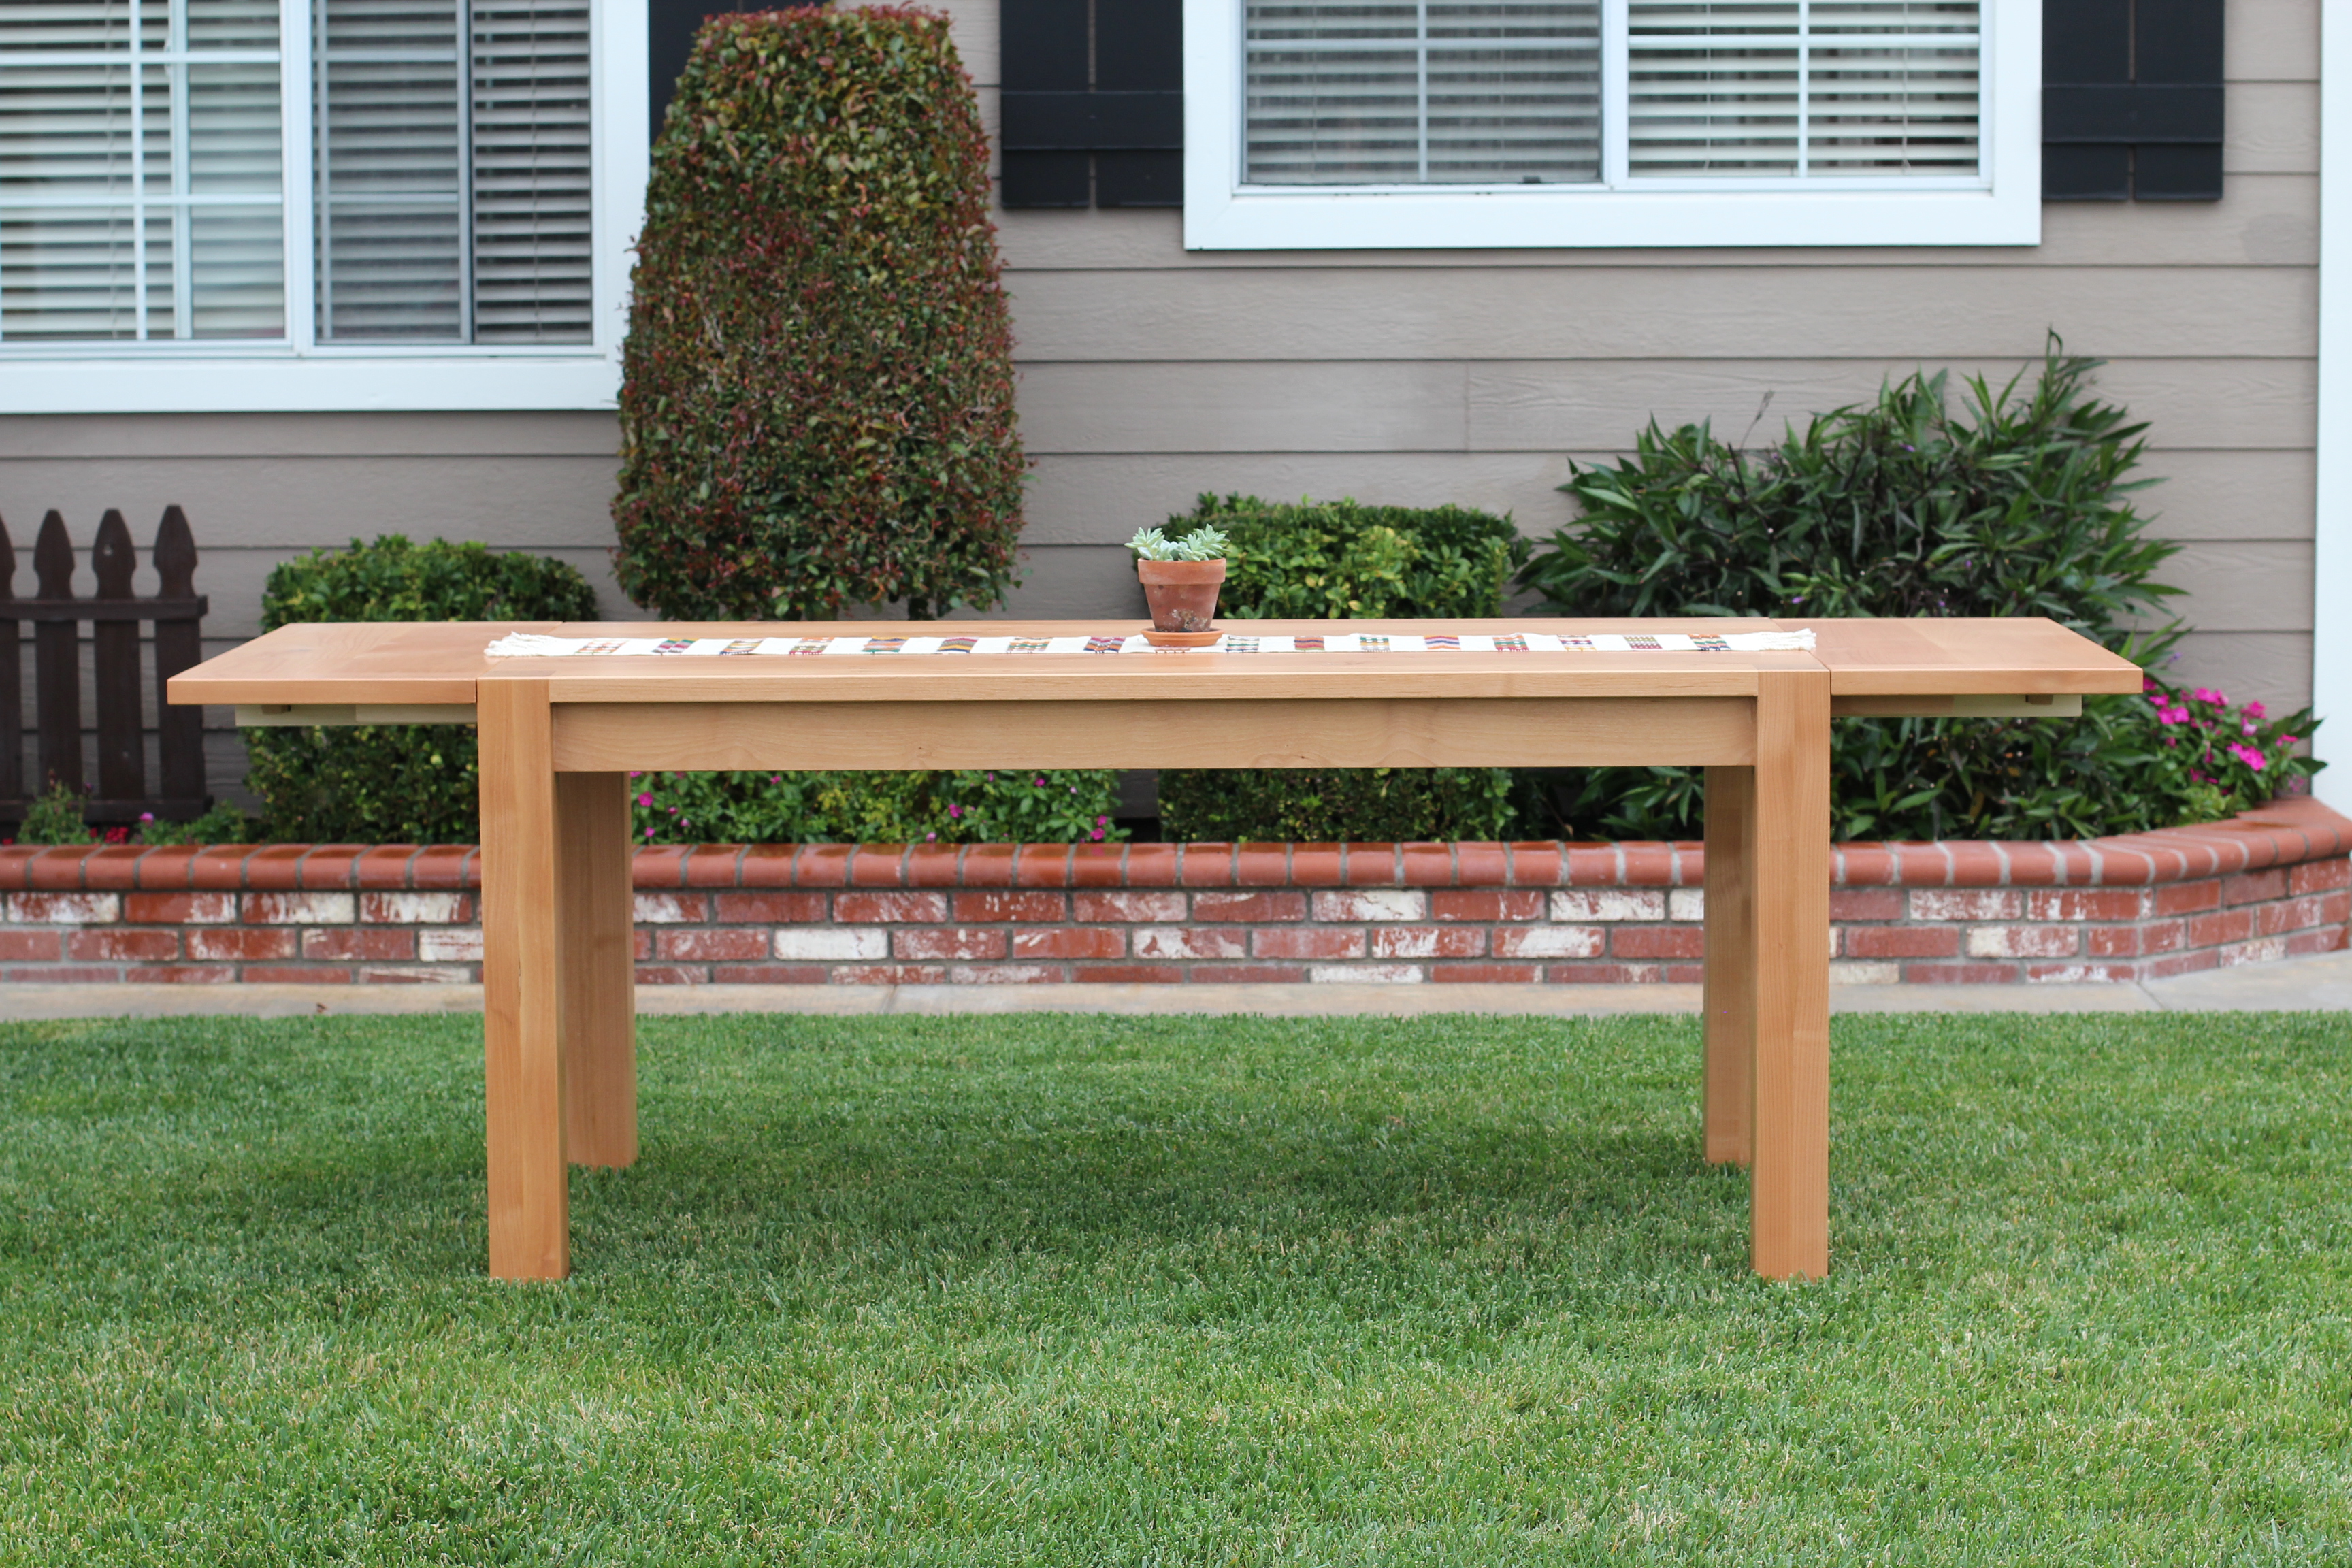
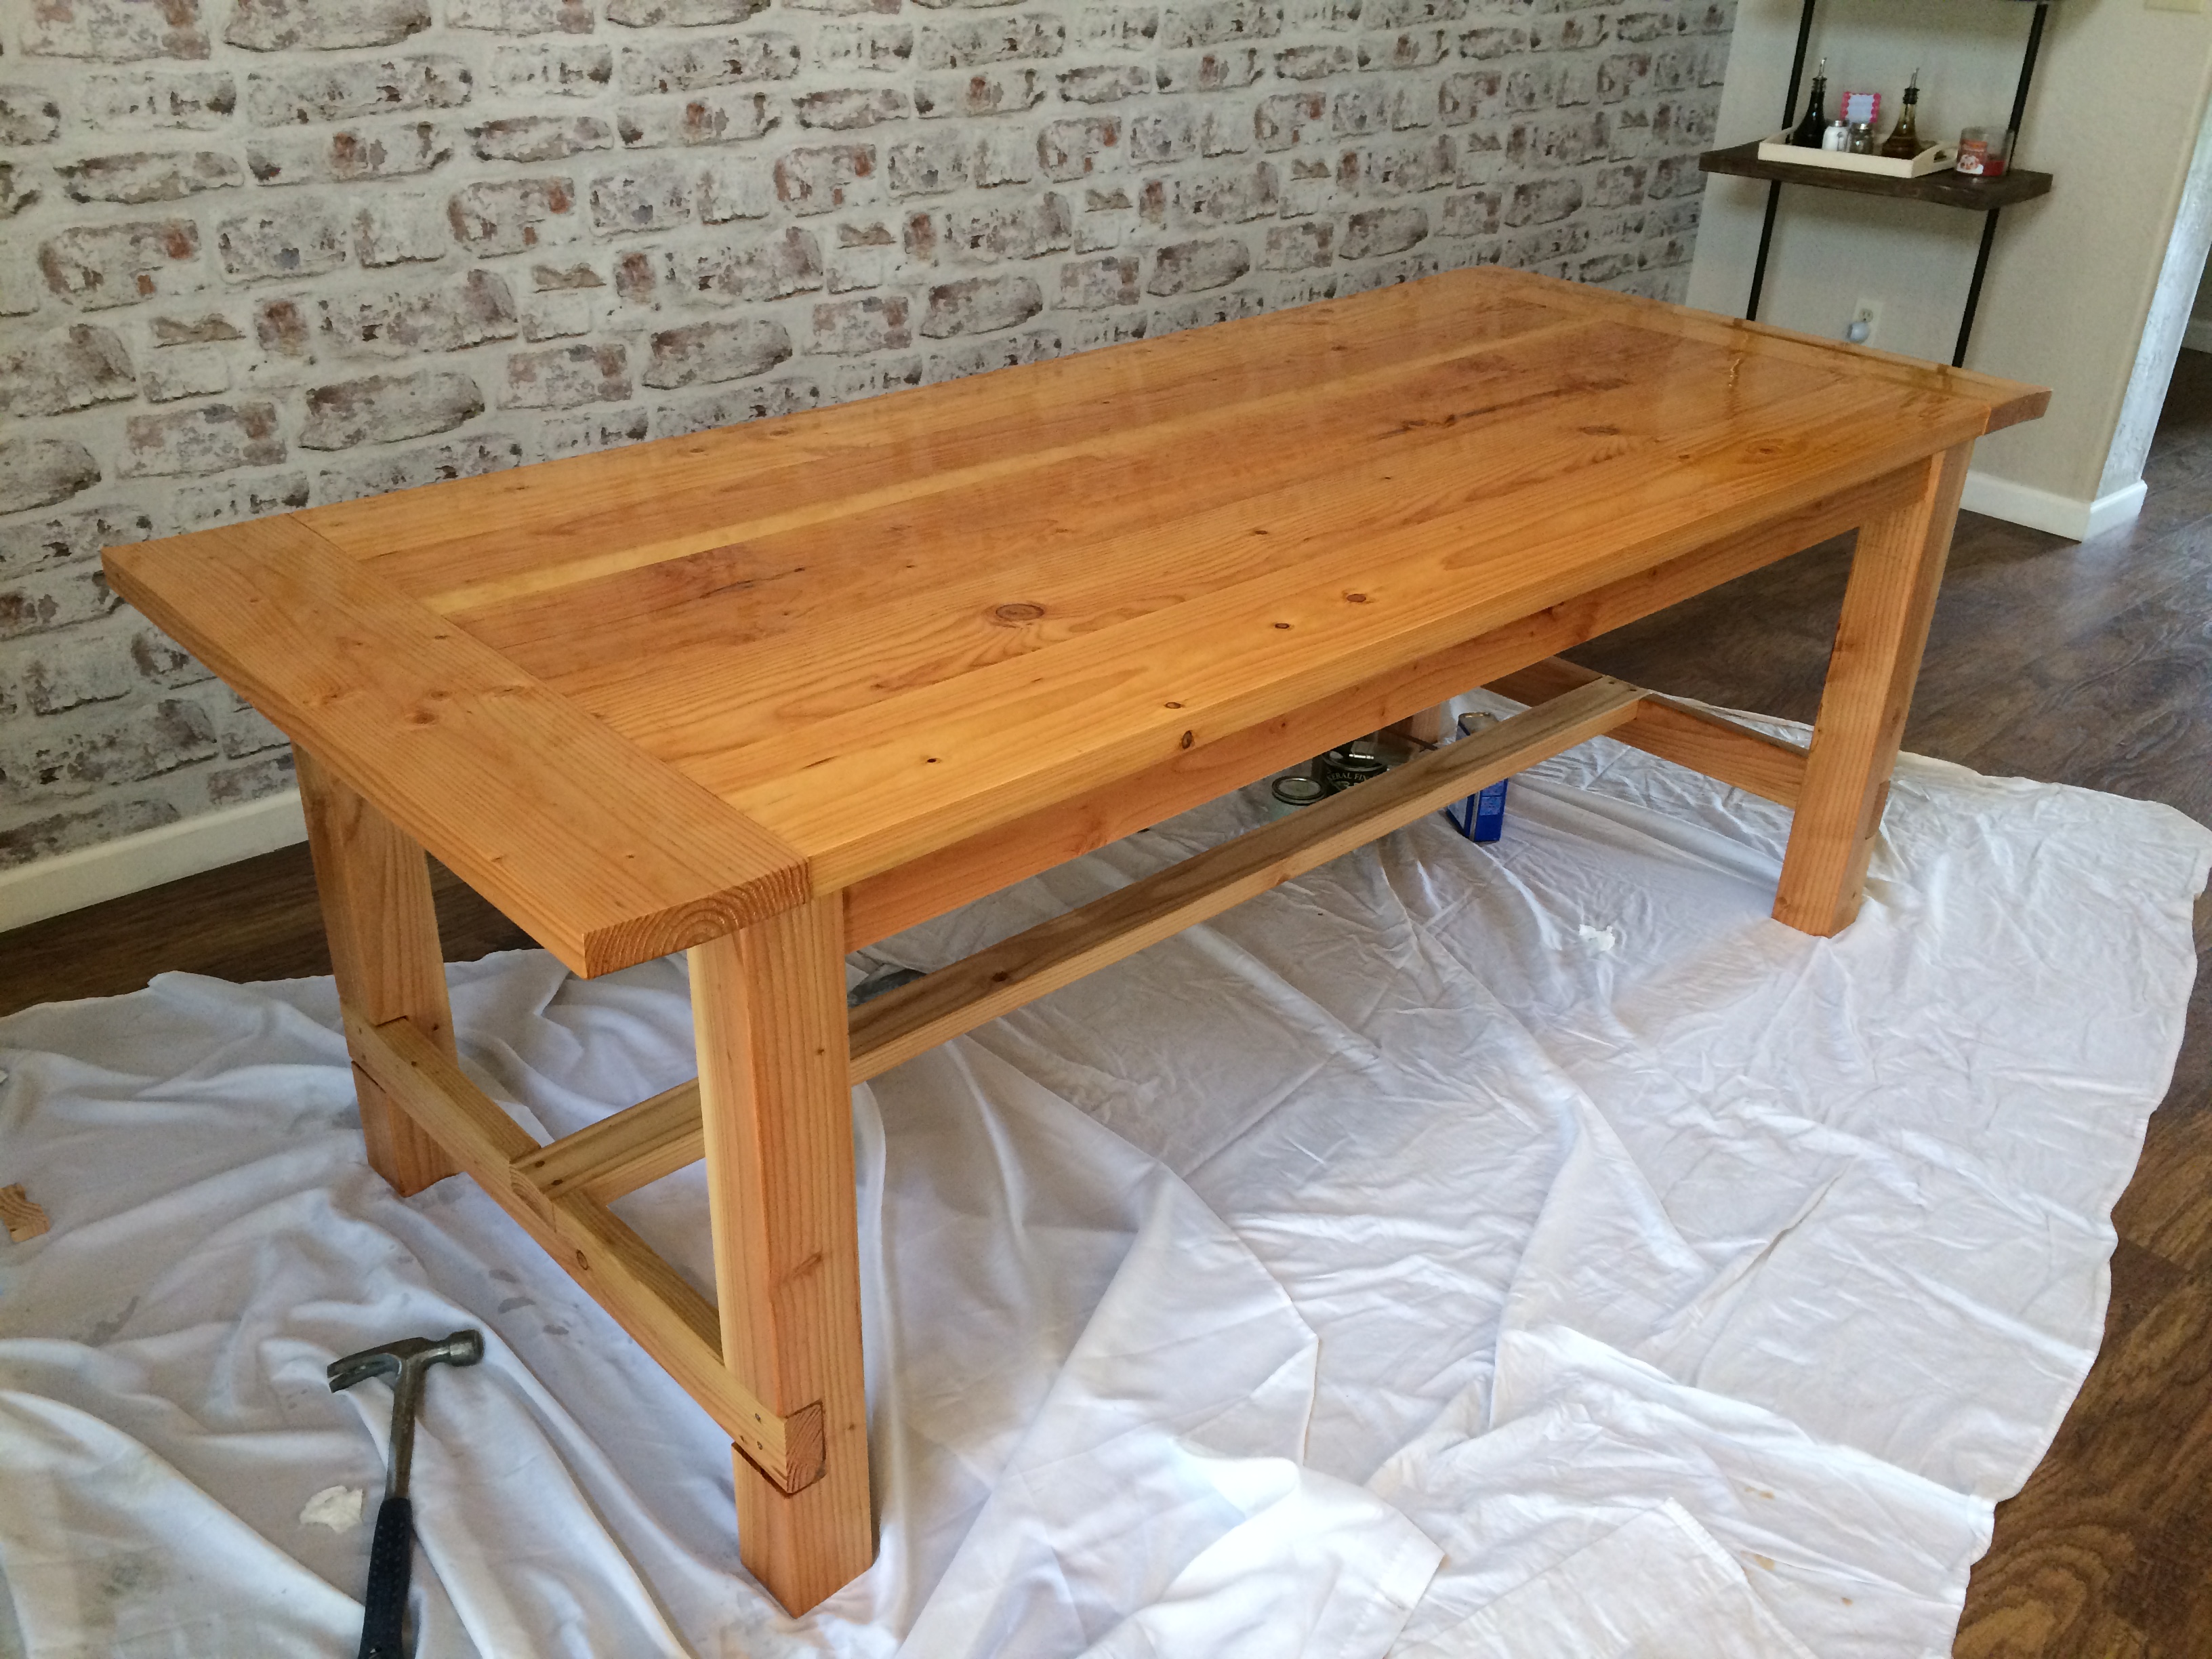
- Get some good quality Poly. It will give a professional look to your tabletop.

I tried the wood conditioner and then I stained the under tabletop with the Weathered Oak finish but I did not like the result. I let it dry and I was still not happy with it. I decided to leave the natural color of the wood and use only Poly.  Some of the better brands are Arm-R-Seal or Old Masters. I applied 5 coats of General Finishes Poly with slight sanding in between.


I hope this helps.

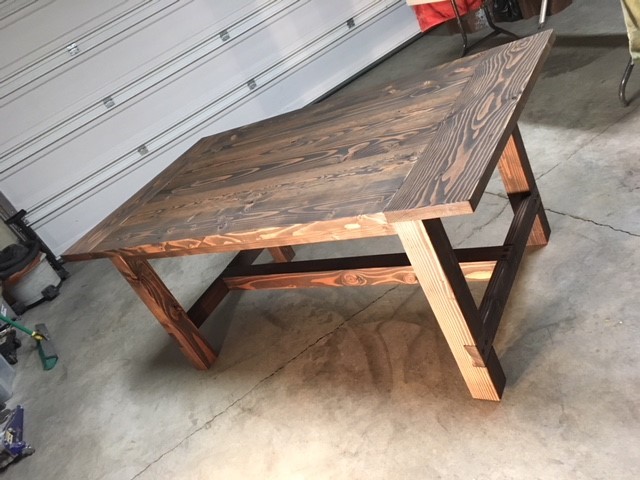
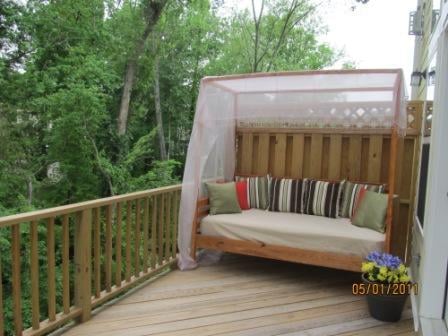
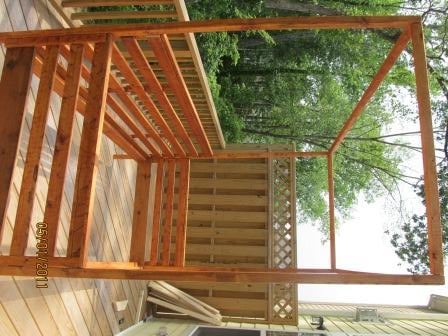
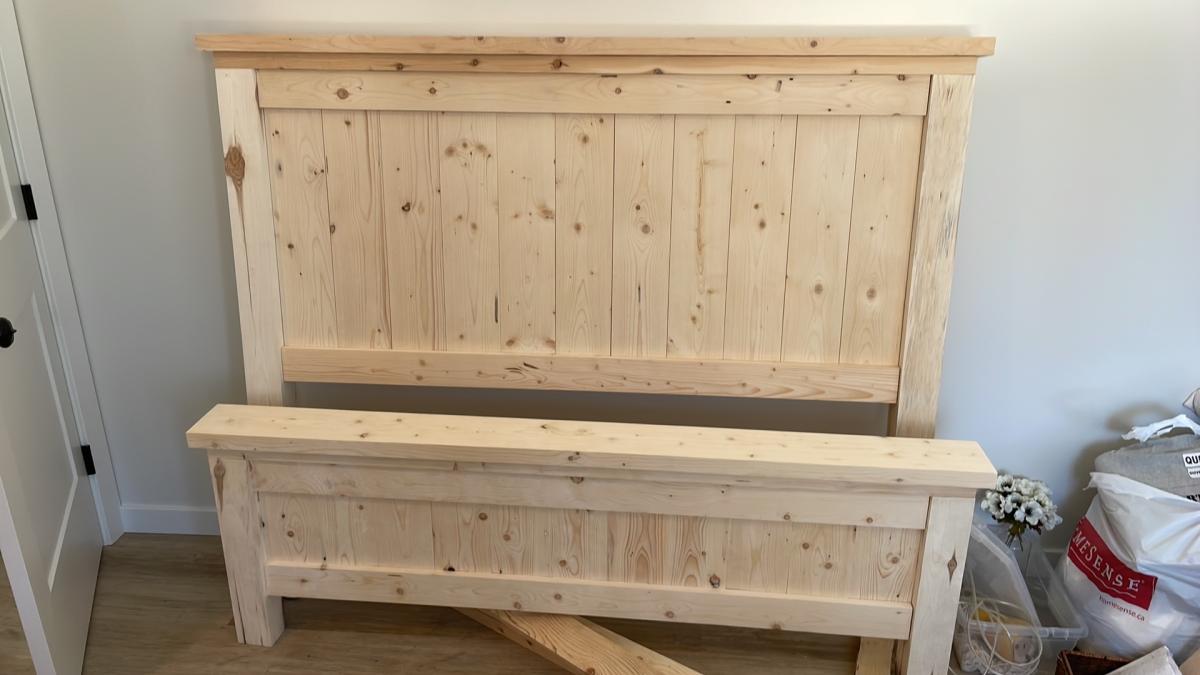
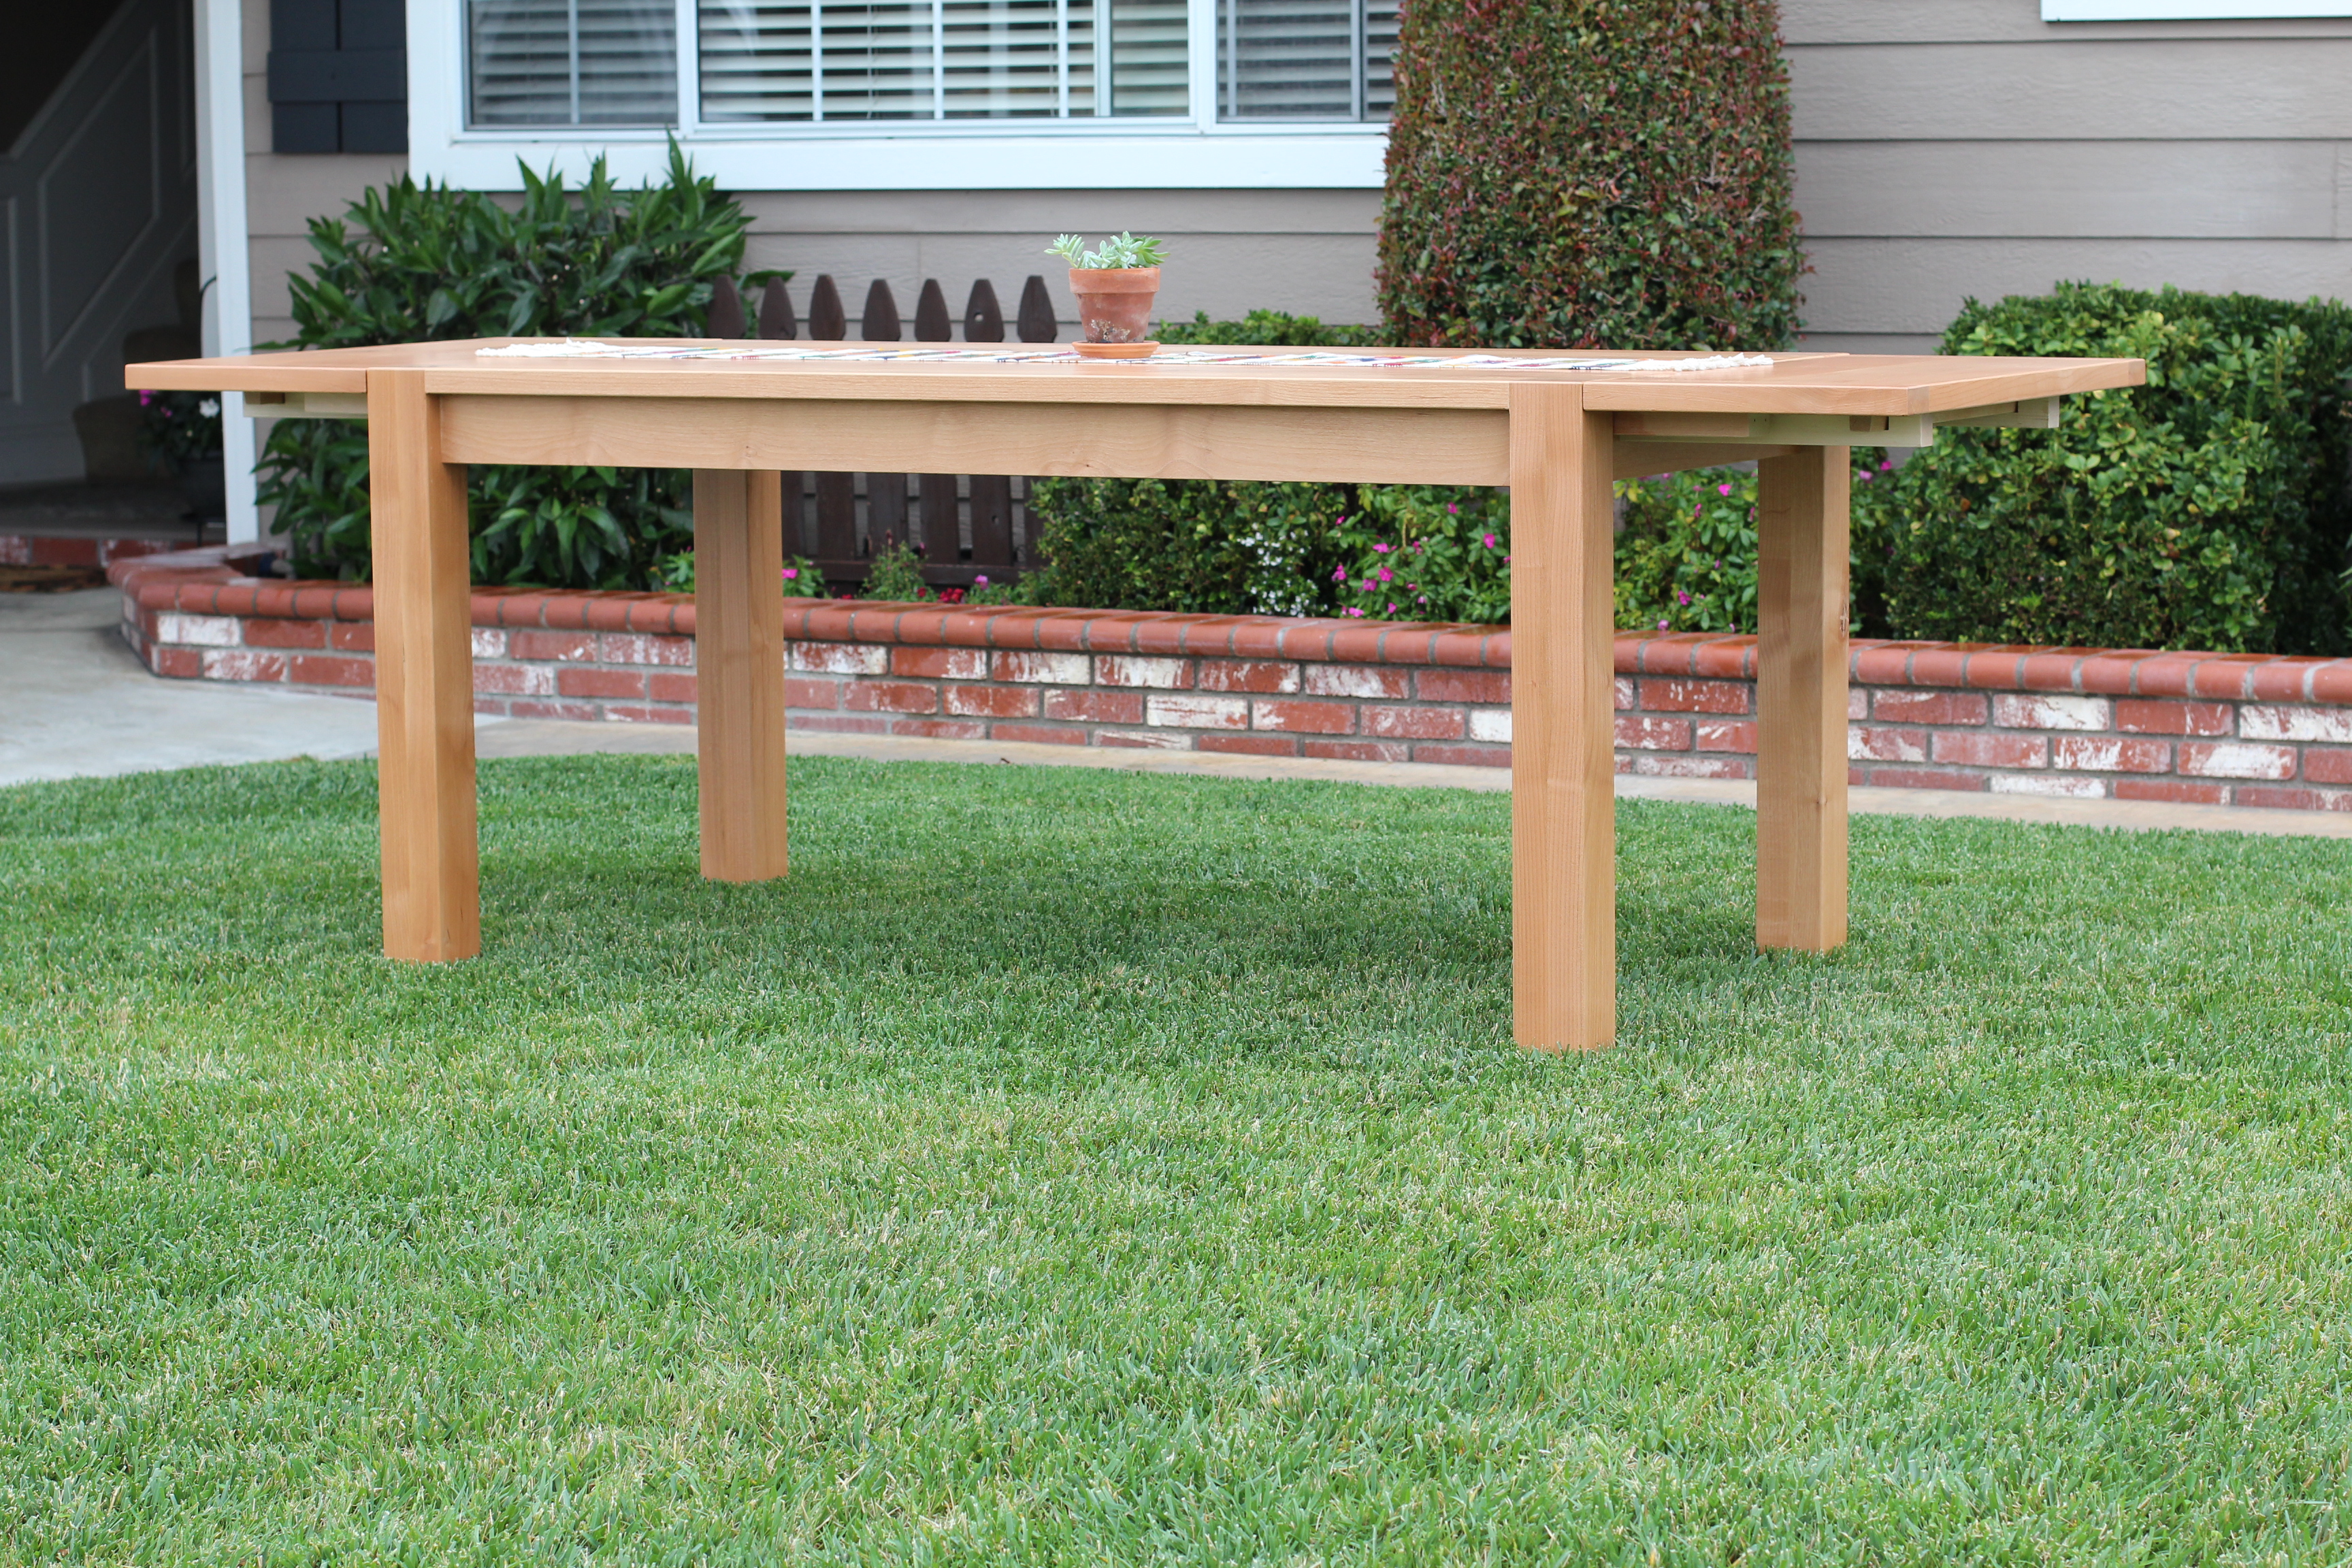
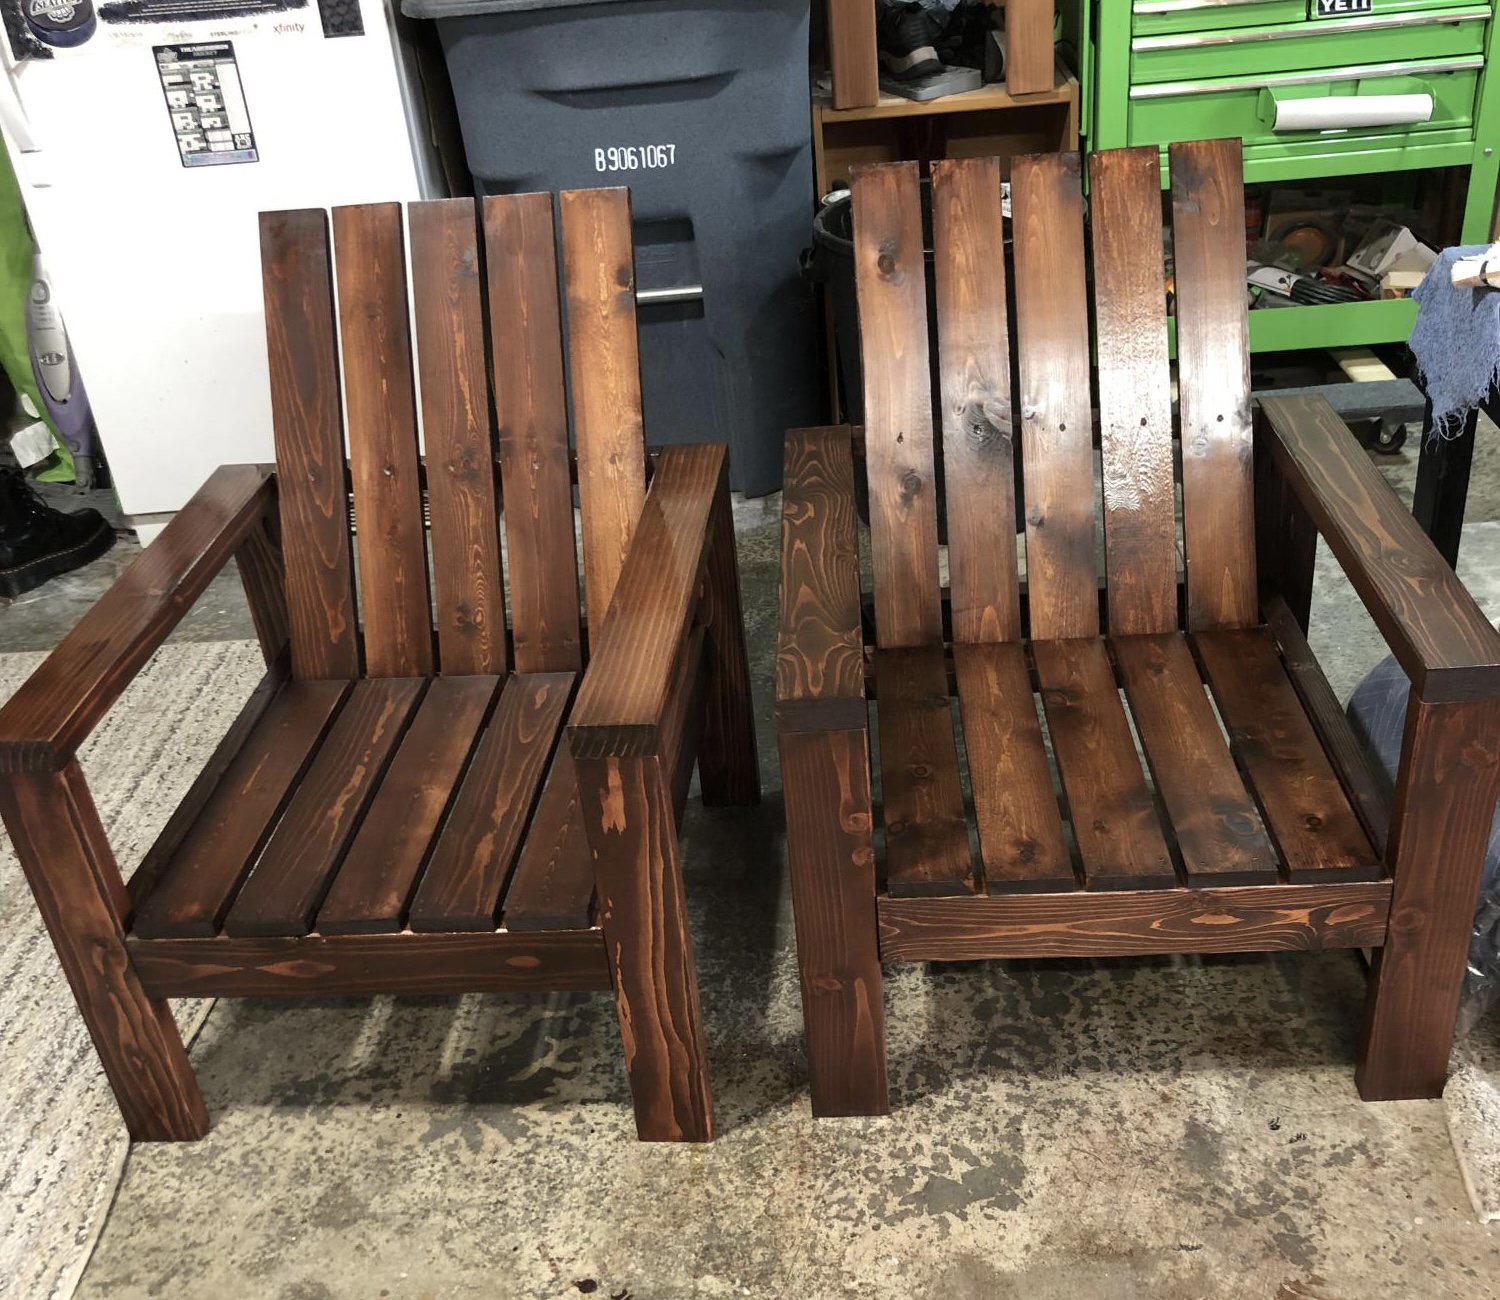
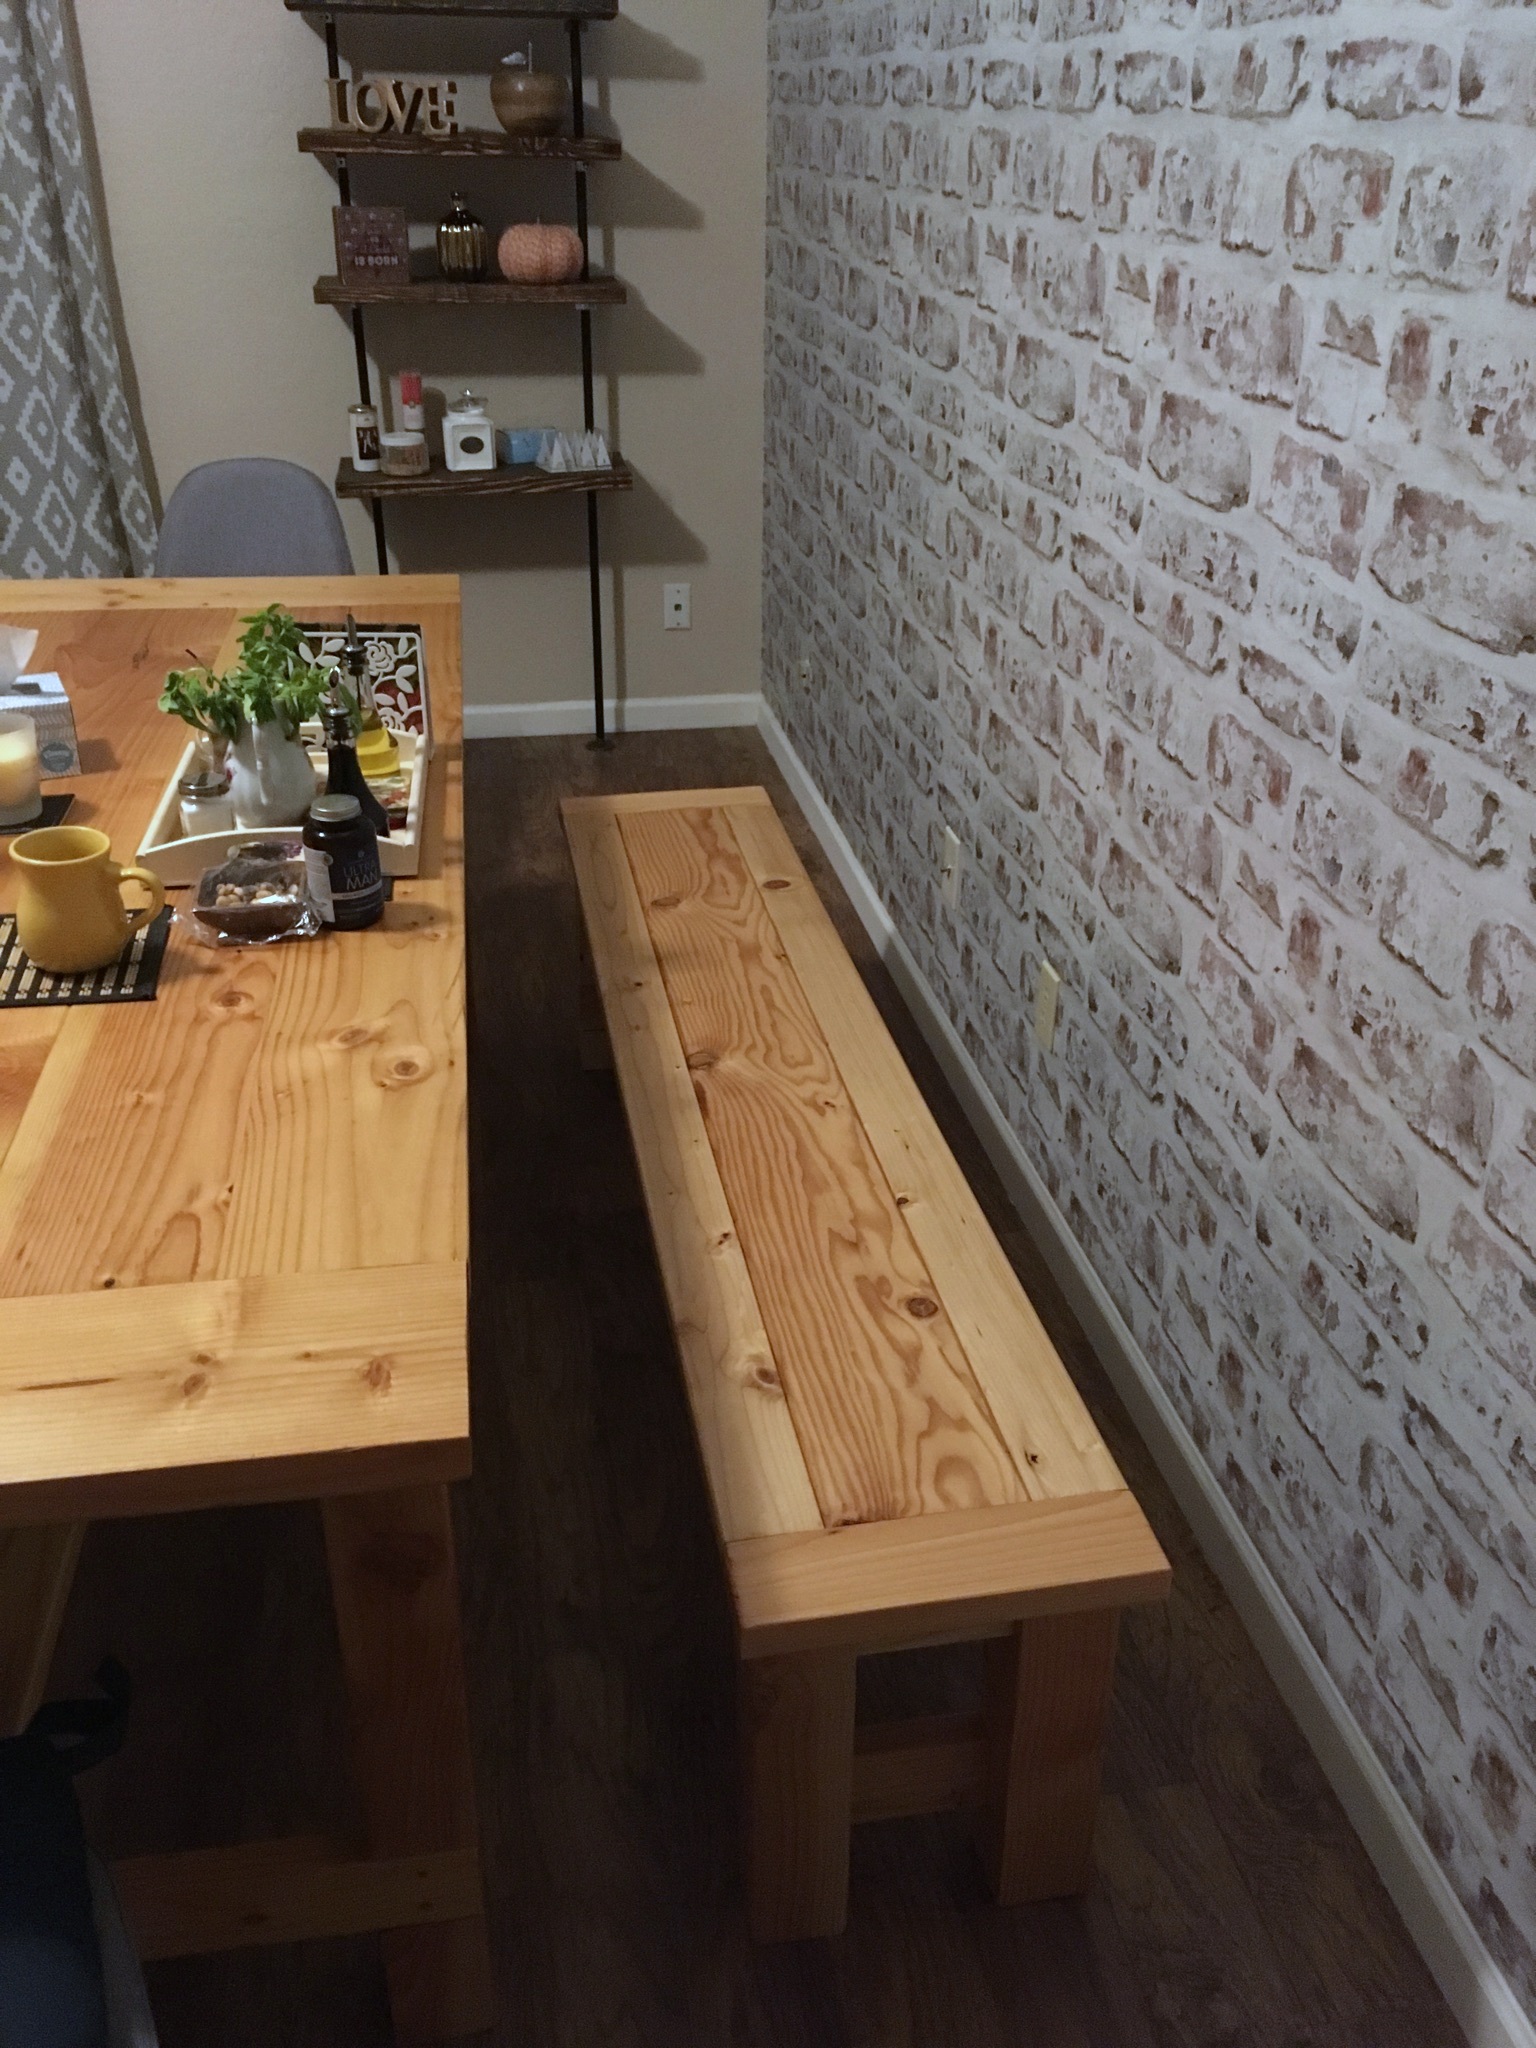
I also finished the bench that comes with the table and they look incredible.

The cuts/assembly takes about 30-40 hrs in total (for a beginner). The finished product was done in about a month after starting lumber hunt and tool gathering. Worked on it whenever I could and some weekends.


Dan


Estimated Cost
Aprox $80-100 lumber and about $200 in tools, Poly, supplies.
Estimated Time Investment
Week Long Project (20 Hours or More)
Finish Used
General Finishes Arm-R-Seal Oil & Urethane Topcoat Satin, 5 coats
Recommended Skill Level
Starter Project