Community Brag Posts

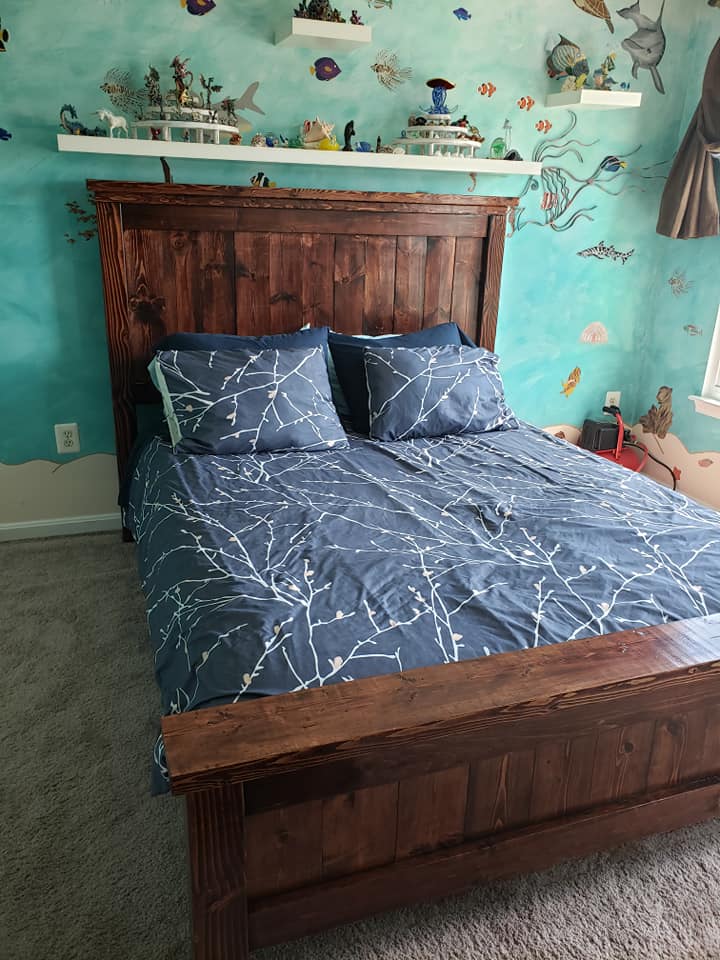
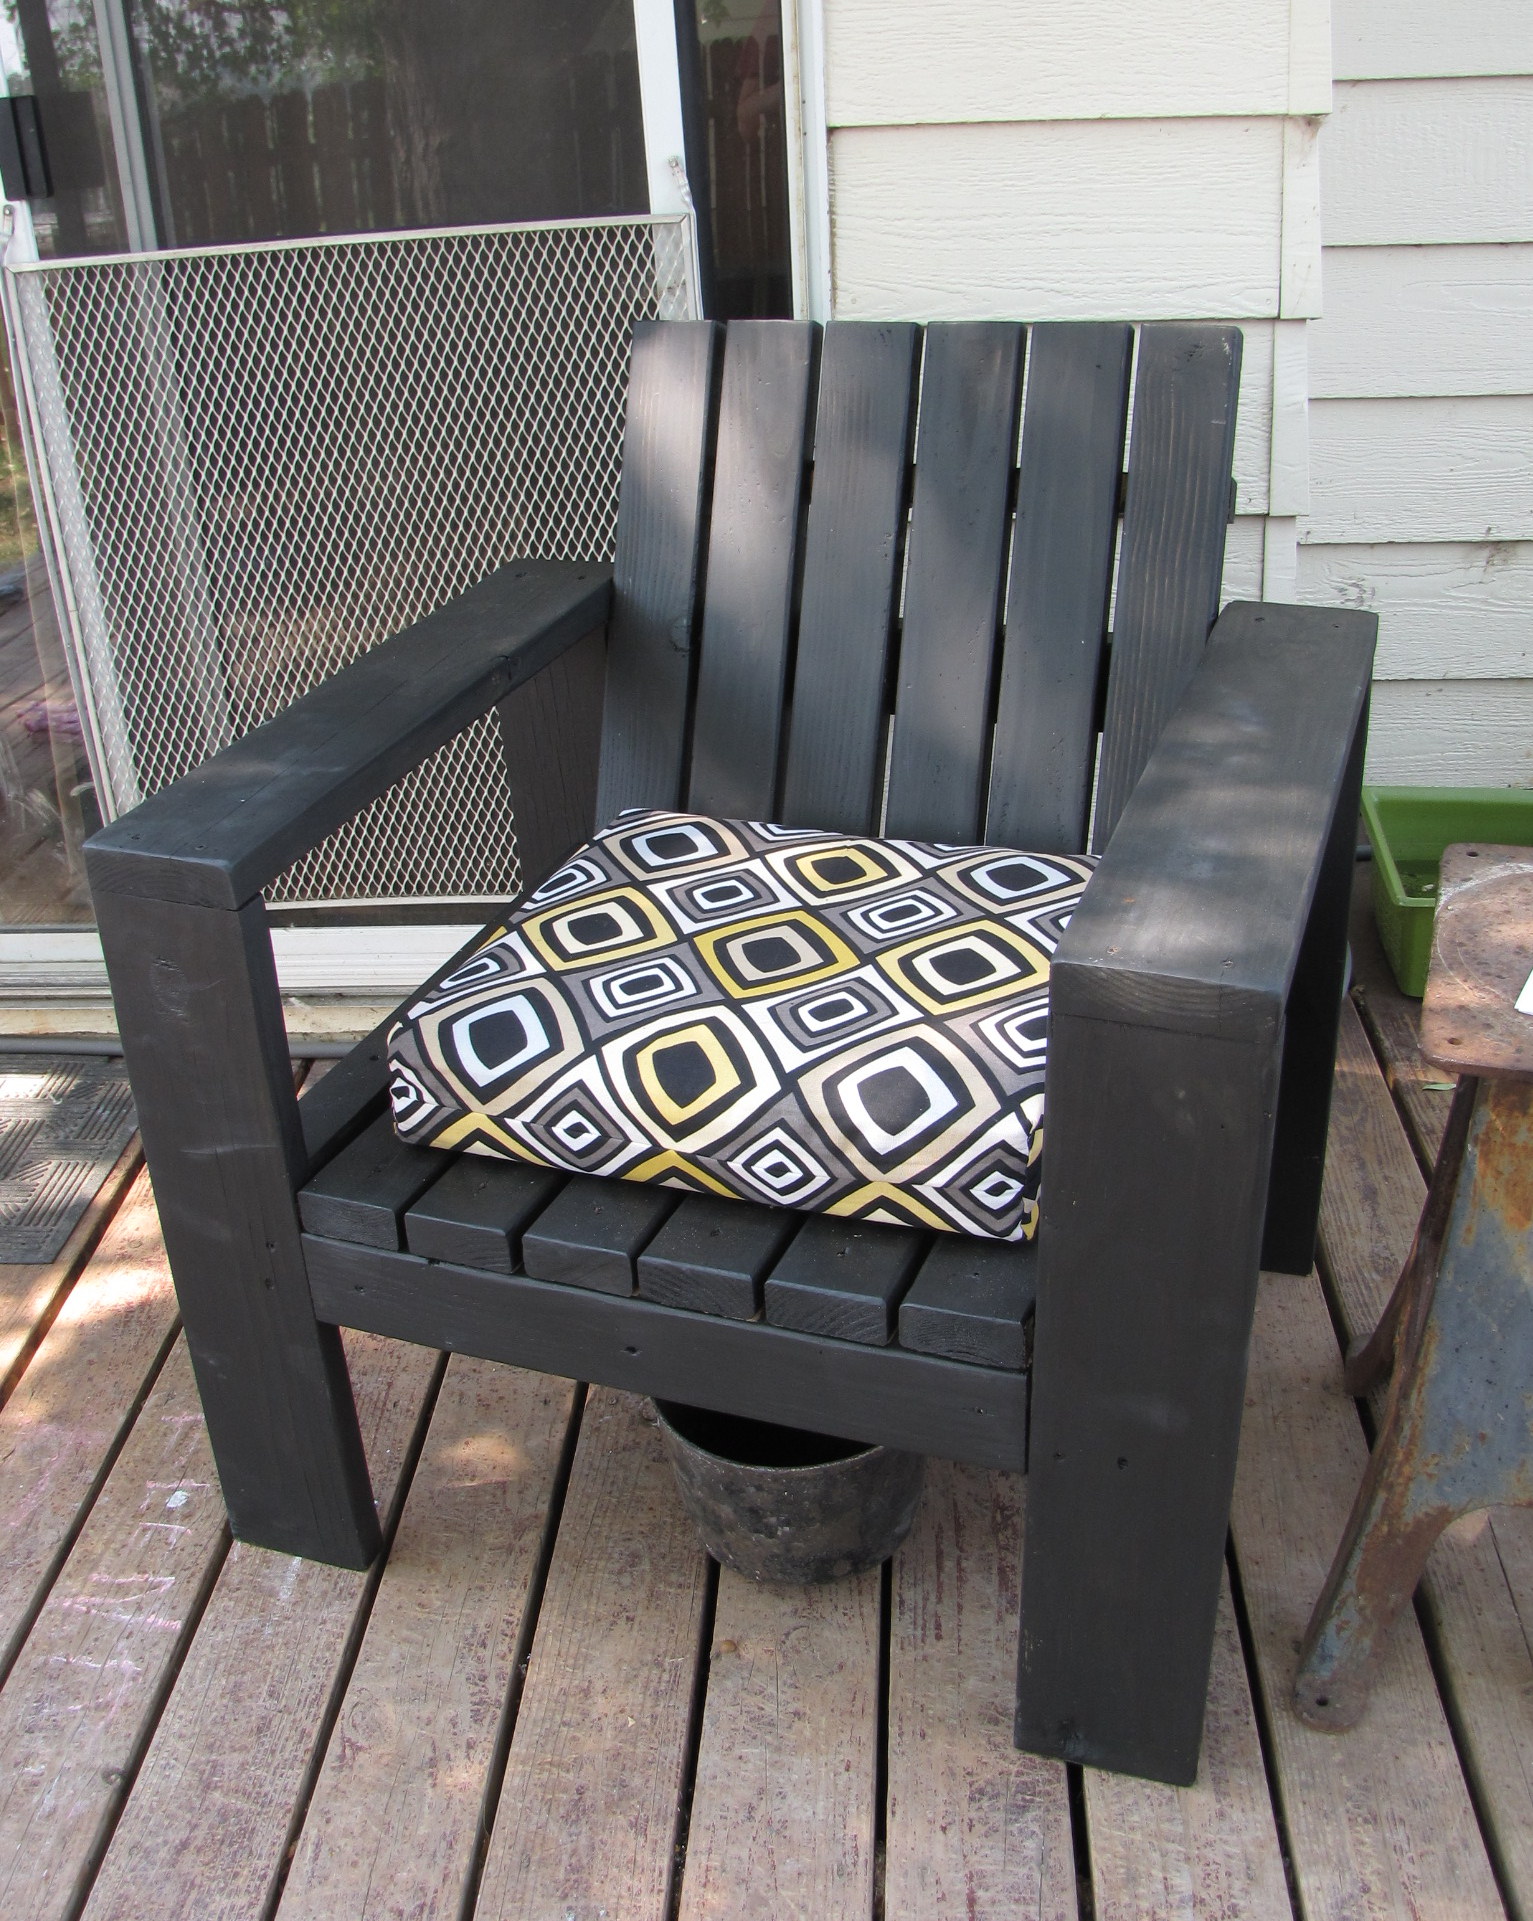
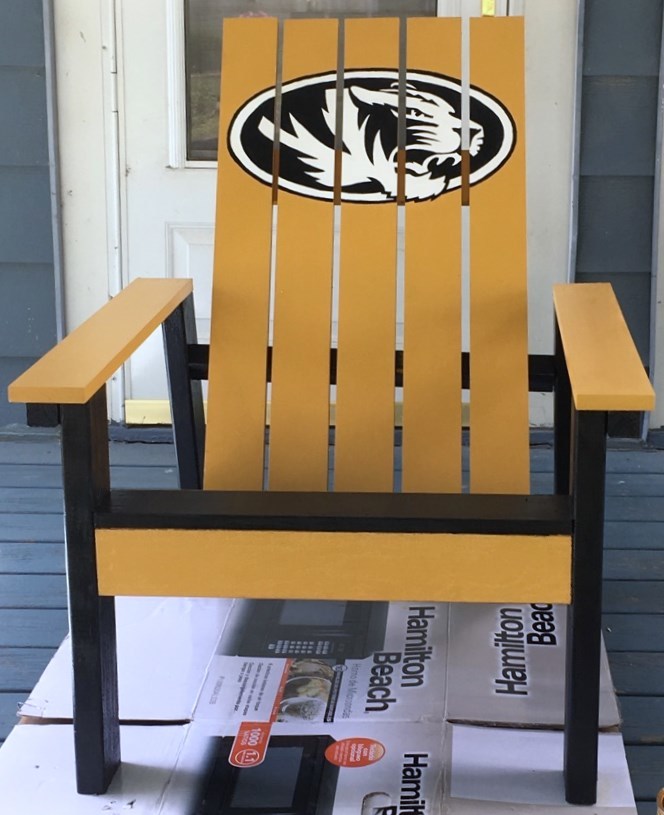
Sports theme Adirondack Chairs

Submitted by Anonymous (not verified) on Tue, 06/28/2016 - 11:20

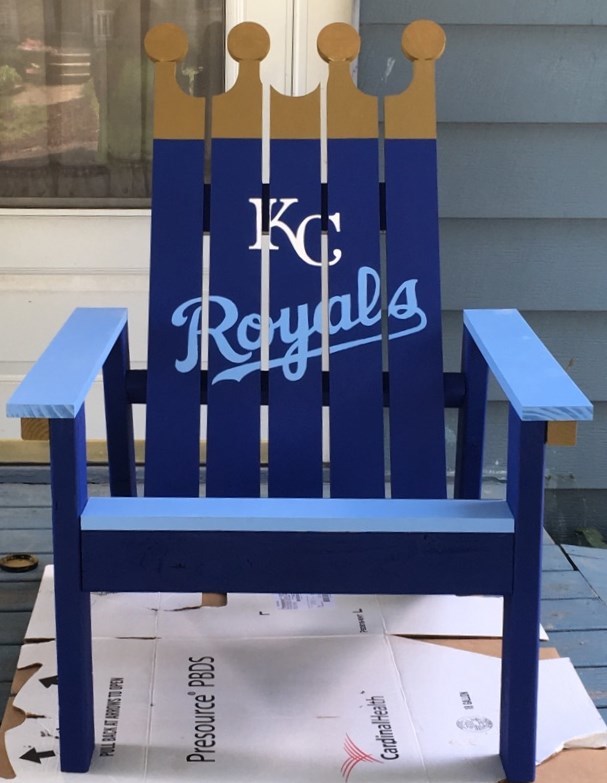
 These chairs turned out awesome!!! Go Royals! Go Tigers! The step-by-step directions were great and easy to follow. We went with a fun twist on the Royals chair by cutting out the top with the scroll saw to look like the crown. Turned out great, couldn't be happier with the outcome and will definitely be making more!

Estimated Cost
$50 per chair
Estimated Time Investment
Day Project (6-9 Hours)
Finish Used
decals are all hand painted which took the longest, the chairs themselves were easy to make and assemble. Great step-by-step plans! I went with the actual team colors that I found info on at our local Home Depot (the sample size paint worked great, no reason to get quart or gallon size) and applied a couple thick (but not runny) coats of polyurethane.
Recommended Skill Level
Intermediate

Queen sized farmhouse bed

Submitted by SAKR on Fri, 04/24/2020 - 13:31

I needed a new bed for my son and could not fin anything we liked for a reasonable price. In searching online for bed plans came across this site. The plans were really easy to follow and it came out great. The only change I made was adding an extra support leg and I reused the bed slats from his old bed rather then make new ones. The bed came out great. Although my husband and I are both quite handy I never imagined building my own furniture. But now we are both looking for new things to build.

Built from Plan(s)
Estimated Cost
$300
Estimated Time Investment
Weekend Project (10-20 Hours)
Finish Used
Minwax Red Mahogany Stain and Miwax Satin Polyurathane
Recommended Skill Level
Beginner

Pallet Frames

For my sons airplane/helicopter Birthday I painted murals on 2inch thick cardboard. three mnths later they are still in the back yard, the cardboard has been rained on as well as the sprinklers have watered them almost daily and as you see they're still intact. so i decided to build them a frame out of pallet boards and hang them on the wall in the backyard. Since I used pallet boards, nails i already had, and remaining spray paint I have from my tractor tire project. This project cost me practically nothing, had to by anchor screws to hang..

Estimated Cost
4.
Estimated Time Investment
An Hour or Two (0-2 Hours)
Finish Used
spray paint
Recommended Skill Level
Starter Project

First Project - Closet Makeover with Laundry Basket Dresser

I altered this plan to make a short and wide version of the dresser. It is also one whole piece as shown in the picture. I am remodeling my office closet and plan to use it for storing bulky items like cables, gift boxes, etc. I must say for my first project, I think it came out pretty good.

I then moved the existing shelf in the closet up, added shelf bracket rails, and spackled & painted the wall. I added a few shelves, dollar store bins and then labeled everything. I also screwed some small metal baskets with removable handles to the wall, I think it turned out terrific.

Thanks for the inspiration, Ana!

Estimated Cost
$30.00
Estimated Time Investment
Afternoon Project (3-6 Hours)
Finish Used
White glossy paint.
Recommended Skill Level
Starter Project

DIY Farmhouse Table For Under $40!

Submitted by Anonymous (not verified) on Sat, 07/02/2016 - 16:39

This is my sqaure farmhouse style dining table. It is so easy to make! An important tip is to get good pieces of wood. You don't want any bowing or else it won't be perfectly level. To see more photos and tips, go to SweetTeal.com/diy-farmhouse-table.

Estimated Cost
$40
Estimated Time Investment
Afternoon Project (3-6 Hours)
Finish Used
For the color combination, go to SweetTeal.com. For whatever color you do though, remember to put a finish on top. It will help protect your table and seal the wood. I used DecoArt's Soft Touch Varnish.
Recommended Skill Level
Beginner

Red Chicken Coop

Submitted by Anonymous (not verified) on Tue, 12/19/2023 - 16:59

Ana, I want to say how inspirational you have been to me over some years. I think my first project found on your website was a chicken coop. More recently I have built the large garage workbench system with 2 rollout workbench/storage units (still in progress). In the past few weeks I have built the Adirondack chairs. The Adirondack chairs spurred me to continue building a “park like” setting in my small backyard. This includes a park bench (to match the Adirondack chairs), a park style grill, and a water fall. The waterfall is fairly simple (now that I have done it once - ha).

Ken Moody - Babcock Ranch, Florida

Twin Farmhouse Bed - Green w/ Envy

Submitted by tameanaka on Thu, 06/14/2012 - 05:25

Modified the Twin Farmhouse Bed slightly to meet the needs I felt were necessary for my 2 year old daughter.

I put the side rail cleats as low as possible to minimize height. I totally left out the Rail Supports for Footboard/Headboard (Part M), as they are unnecessary. I also added three center supports using 2x4 joist hangers. On the headboard posts I added two blocks to make assembly easy and uniform. The bed comes apart in 4 pieces and is easily put together by one person using screws. I will take more pictures if anyone has questions about anything.

Building the different pieces took roughly 6 hrs as I'm a little OCD. Finishing took a ton of time. I only have a palm finishing sander so I first sanded with 60 grit, then 120, then a final 220 (220 was recommended by Minwax). Finishing was time consuming as I had to finish one side of each piece at a time due to space limitations.

Minwax water-based stuff is a little tricky with pine as it causes "grain reversal" which is fine for me because I like the look. I think it was really designed for oak or other denser woods.

Tip: Use a low-profile box spring.

Built from Plan(s)
Estimated Cost
$75
Estimated Time Investment
Week Long Project (20 Hours or More)
Finish Used
Minwax Water Based Finishes:
Started with Pre-stain
Stain was Green Tea
Two coats Polycrylic
Recommended Skill Level
Beginner

Comments

RachelLButler

Wed, 08/29/2012 - 12:34

I would love to see more pictures, especially of how you built it to allow for disassembly. Soon I plan to build this for my almost 2-year old son. When you get a chance.

Thanks!

Spring Entry Update - DIY Storage Bench

The entryway in my mom’s house was the perfect candidate for a spring update. Home to a broken, non-functioning storage bench and constantly cluttered with shoes, we decided it was time for an upgrade. It took us a weekend, some PARA paint & stain, a little fabric and lots of elbow grease, but we were able to take the entry way from boring to beautiful.

Estimated Cost
$100-125
Estimated Time Investment
Weekend Project (10-20 Hours)
Finish Used
Bench - PARA TimberCare Solid Stain tinted in Runway (P5191-85D) topped with PARA WoodCare urethane varnish in glossy

Bench seat - Landsmere fabric in 'Current' from Tonic Living.

Storage boxes - Primed & painted in PARA Too Hot To Handle (P5078-85)
Recommended Skill Level
Intermediate

Bedside Tables

Submitted by Anonymous (not verified) on Tue, 07/05/2016 - 18:33

Went together well, a few things modified. 

I get my wood from a sawmill and plane it myself, so the legs are 2x2's instead of the commercial sized 1.5's x 1.5's and to make them go with my Ana White Farmhouse bed I built a few weeks back I made the legs 30" long to compinsate for the height of the bed

Winwax Polyshades Mission oak

Built from Plan(s)
Estimated Cost
40 dollars before stain
Estimated Time Investment
Day Project (6-9 Hours)
Finish Used
Minwax Polyshades Mission Oak x2 coats
Recommended Skill Level
Intermediate

DIY Nativity

Submitted by Anonymous (not verified) on Tue, 12/26/2023 - 12:18

Well, it's not a barnyard play set, but there are farm animals in it. This is my wife's nativity set that her late sister made. Never had a barn till yesterday. All scraps from my shop. Keep the plans coming!

mccabechristopher


Built from Plan(s)
Seasonal And Holiday

The Kentwood Bed, Mario Style

Submitted by Sieryn on Mon, 06/18/2012 - 06:18

This one started out in a lovely whitewash...then Kids happened.

Very easy plan to put together, my little client loves it!

Built from Plan(s)
Estimated Cost
80
Estimated Time Investment
Weekend Project (10-20 Hours)
Finish Used
Whitewash...then paint.
Recommended Skill Level
Beginner

Comments

Pottery Barn Harper Style Coffee Table

My wife saw the Harper Style coffee table by Pottery barn and loved it so as a gift to her i set out to recreate this table in a white wash look that is not available and after a week of creating plans and a weekend of work here it is with fully functional drawers that are accessible from both sides

Estimated Cost
$150-$200
Estimated Time Investment
Weekend Project (10-20 Hours)
Finish Used
combination of Minwax Honey and Ebony for the top and an underlying of random Ebony strokes and a few coats of Minwax Pickling White wash for the body of the table
Recommended Skill Level
Intermediate

Comments

Easy 2x4 potting bench

Submitted by Randall on Mon, 05/04/2020 - 11:20

Great easy to follow plans, I cut both front and back legs from one 2x4x8’ by having the back leg 1” shorter than plan. Also bought 1x4x39” slats at less cost than buying the 8’ ones.
Great unit would be perfect for near the BBQ and any place needing storage and work bench

Estimated Cost
$80
Estimated Time Investment
Afternoon Project (3-6 Hours)
Finish Used
Olympia Outdoor wood sealer
Recommended Skill Level
Beginner

Simple Outdoor Lounge Chair - Beefed Up

Submitted by Radcrafter on Sun, 06/24/2012 - 10:55

Loved building this chair. Super simple to put together and very sturdy once everything came together.

I modified it to create a larger and taller chair, using 2x6 and 2x4 lumber. Because of this change I felt like my math challenged brain was completing some sort of quiz, but to keep things simple I cut the pieces step by step recalculating lengths as I went.

I marked up the plan as I went, so if anyone is interested just let me know & I'll add the changes.

http://radcrafter.com/2012/06/simple-outdoor-chair-beefed-up/

Built from Plan(s)
Estimated Cost
$20-30
Estimated Time Investment
Afternoon Project (3-6 Hours)
Finish Used
outdoor stain in solid slate
Recommended Skill Level
Beginner

Comments

spiceylg

Sun, 06/24/2012 - 18:18

I thought it looked beefier and I prefer that look. I'm curious, what size cushion is that?

J (not verified)

Sun, 08/19/2012 - 08:29

I would love to see your changes and build the beefier version! Please share!

Tammyctr

Thu, 07/26/2018 - 07:05

I have a large (400+) family member who I need to make chairs for.  This plan looks perfect (even though I will have to probably adjust width and add additional support)  Can you please send me your plans?

Platform Bed for 1st Apartment

Submitted by Sutton615 on Mon, 04/14/2014 - 08:48

My dad and I made this in a queen size to match a mattress it already had. We changed the plans a little, making the legs from two boards to make it more stable. We used a nail gun to put together the lip of the frame and used wood screws for the rest. The headboard was made from the left over slats and attached with a 2x4 on the back of the frame. We also bought square sliders and screwed them to the bottom of the legs so that they don't scratch our wood floors.

Estimated Cost
100
Estimated Time Investment
Afternoon Project (3-6 Hours)
Finish Used
I chose to leave the wood unfinished (which saved some time) because I liked the natural look. Just sanded it and left it. I may let it weather a little and then do something for staining it.
Recommended Skill Level
Beginner

Rustic X Console

Submitted by Anonymous (not verified) on Mon, 07/11/2016 - 14:15

My wife and I loved the look of this plan, so I decided to make it happen! I built this same console, only half the length for our dining room, and then made this full size version for the living room area. I used this plan for both designs. I used a table saw to cut dado channels from the intersecting pieces of material for the "X" design on each side of the table which was considerably easier for me. It can get a little tight when trying to secure the 11.25 inch pieces of 2x4 and 2x2 with pocket holes so I opted to secure through the outer frame with 2.5 inch screws. Countersinks, wood filler, and some sanding made for a clean alternative to the pocket-hole approach. Stained and chalk painted frame and shelves separately before assembling. We love this table and promise you will not be disappointed either.

Built from Plan(s)
Estimated Cost
80-100
Estimated Time Investment
Weekend Project (10-20 Hours)
Finish Used
Sea Foam Green Chalk Paint
Minwax Espresso Stain
Minwax Polycrylic
Recommended Skill Level
Beginner

Porch bed swing

Submitted by janamason on Tue, 05/05/2020 - 18:30

My 15 year old son built this for me!

Estimated Time Investment
Day Project (6-9 Hours)
Finish Used
Minwax ebony
Recommended Skill Level
Beginner

Comments

Big Kids' Picnic Table

This ended up being a very easy project to complete; Ana's instructions were very straightforward. I probably spent four hours altogether on the project, although that was spread over the course of several days. We had several 2x4s left over from other projects, and I was able to use a quart of exterior Behr Premium Plus Ultra (with primer included) that didn't get used for its intended project. So altogether, we spent about $20. You can't even buy a plastic kids' picnic table for that price! As for advice, I found that the best way to avoid wobbling was to firmly attach three of the legs while leaving the fourth leg somewhat lose. Upon flipping the table, you should be able to move that fourth leg into a place that prevents wobbles before firmly screwing it in as well. I painted all the boards before assembling the table, and I feel like that is the best approach, as the space in between boards is slim.

Built from Plan(s)
Estimated Cost
$20
Estimated Time Investment
Afternoon Project (3-6 Hours)
Finish Used
Behr Premium Plus Ultra, exterior, custom color
Recommended Skill Level
Intermediate

Modern Bench Turns Shoe shelf

Submitted by Veronica P on Wed, 04/16/2014 - 17:02

For our first project, my boys and I decided we wanted to build a shoe shelf for our front foyer. We loved the design of the modern slat top bench so adapted it slightly to fit our needs. Here's how it turned out.

Estimated Cost
$12.00
Estimated Time Investment
Afternoon Project (3-6 Hours)
Finish Used
Paint
Recommended Skill Level
Starter Project
Back