Search Results
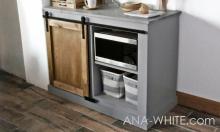
… Measure and cut the front. Nail and glue the front piece on. … The door should be built to fit the barn door hardware. This is the dimensions that we used for our door with our homeade hardware (tutorial coming soon!) … Barn Door Cabinet with Mini Fridge and Microwave …
Read More
Project Plan
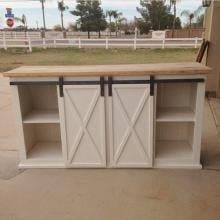
… glue to attach. Can have a gap in the middle. … Place shelf inside console and attach from outsides to secure in place. … To get the … the doors (love the reclaimed wood!) Nikki makes her own sliding door hardware too. Jaime from That's My Letter provides a good … her sliding door hardware if you want to check that out. … Grandy Barn Door Console …
Read More
Project Plan
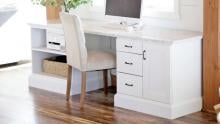
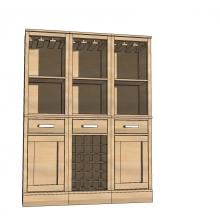
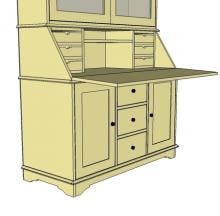
… Order additional shelves for the open shelf base or the cabinet door base if more shelving is desired … Carcass Assembly I recommend … purpose of the 1x6 is to bring the base moulding out 3/4" so door and drawer faces don't stick out past the base moulding. Base … of my modular desk pieces. I attached with 1" brad nails. … Cabinet Door Addition You can add a door to the base. I recommend ordering …
Read More
Project Plan
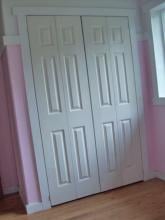
… that I have in my home. When closed, the bookshelves sit in the door frame, taking up what used to be completely wasted space. And in a … estate. These are super easy to install. Simply remove the bifold door hardware and attach the bifold doors with standard hinges as shown … doors rests on wheels, so you can load the doors up. In one closet door, I was able to store ALL of Grace's books. That's alot of books! …
Read More
Project Plan
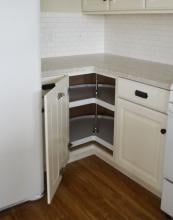
… Corner Hinges and mounting plates (0mm mounting plate for 3/4" thick door) Don't forget screws if they don't come with the hinges, as well as … the bore distance, or how close you bore the holes to the edge of the door. The pie cut hinge can then be installed in the bored hole. The other door is attached to the pie cut hinge with the mounting plate. Now …
Read More
Blog Post
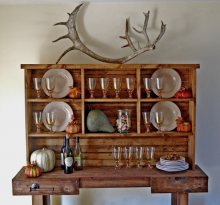
… when Amanda totally outbuilt me with her stunning Antique Workbench Console? I was so excited! But then some of our readers commented that … right here. And you can also find plans for the Antique Workbench Console Bar right here. But first, we've got to admire Chris G's amazing … this hutch, HGTV has them published for free here. And the workbench console plans are located here. Enjoy. … Rustic Hutch for the Workbench …
Read More
Project Plan
… you add shelves, leave the front trim off to give room for the inset door. Measure the opening, confirming it is 1/4" wider and taller than the overall dimensions of door in this plan. … Build the door with 3/4" pocket holes and 1 1/4" pocket hole screws. … Cut plywood …
Read More
Project Plan
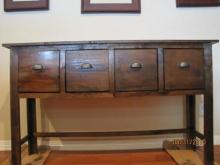
… The drawer guides will sit flush with the legs on the front of the console table. … Fasten the vertical trim, J, as shown above. Nail … If your measurements are off, you will need to adjust each door to fit. I give an 1/8″ gap around my doors, or 1/4″ overall. Then, … the end edges of the bottom, O, and back, P, pieces. Then fit each door in the console table without the front in nailed on. When you are …
Read More
Project Plan
… 1 – 1×4 @ 46 1/2″ 1 – 1/4″ plywood @ 48″ x 29″ (Back) Moulding, Door and Drawer cuts are located within the instructions as you should … 3/4″ plywood leftover, why not use it up on this project? Measure the door opening and cut a piece of the 1×20 3/4″ stock to fit the door opening, leaving approximately 1/8″ to 1/16″ gap around the door …
Read More
Project Plan

… have fun, and ask for help if you need it. Good luck! … Assemble both barn ends. Secure together using one 2x4 along the bottom and one at the … rest of the bed frame later. See step 3 picture to see. … Cut out the barn angles … Middle rail will become part of the bed frame … Assemble … either end to hold it closed. … Attach trim to make a decorative barn door and window. … Sand and Paint in classic barn colors … Classic Red …
Read More
Project Plan